HTML & CSS 101
Website Building
Welcome!
We'd Like to Thank

Girl Develop It is here to provide affordable and accessible programs to learn software through mentorship and hands-on instruction.
A Few Rules...
- We are here for YOU!
- Every question is important
- Help each other
- Have fun!

Tell Us...
- Your name
- What you do
- Why you want to learn HTML & CSS
- Is this your first GDI class?
Meet the Instructor
Meet Tessa
- Agency & Community Engineer at Pantheon
- Married with 2 boys, a baby girl and a step son
- Loves dogs!
- Enjoys coding and teaching people to code


Meet the TA's
TA's...
Please introduce yourselves!
Social Goodies
#gdimplshtml101
@gdimpls
@tessak22
My Fave Book!

Download Materials
Code Examples
Let's Dig In
How People Access the Web
Browsers
Web Browsers allow people to access the world wide web.
Notable Web Browsers:
- Chrome
- Firefox
- Safari
- Internet Explorer
- Opera
Web Servers
Web Servers host the website files.
It is most common to use a web hosting company who charge a fee to host your site such as Digital Ocean or Host Gator.
Devices
People access the web from all sorts of devices in all kinds of shapes and sizes.
Examples of Devices:
- Phone
- Tablet
- Laptop
- Computer
Screen Readers
These are programs or devices that will read the contents of the website. (usually for the Visually Impaired)
How Websites Are Created
What You See
When viewing a website, the browser is likely rendering the HTML & CSS.
Other Notable Coding Languages:
- PHP
- ASP.Net
- Java
- Ruby
How It Is Created
Some are written in just HTML & CSS, while others are written in other languages or utilize a CMS, content management system.
Anyone know what HTML & CSS stand for?
How the Web Works
In order for your browser to find the web host, it must connect to the Domain Name System (DNS) server.
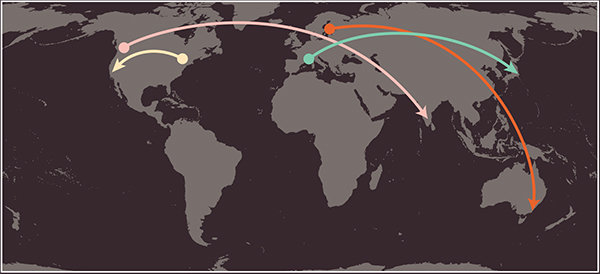
A user in Barcelona visits sony.jp in Tokyo
A user in New York visits google.com in San Francisco.
A user in Stockholm visits qantas.com.au in Sydney
A user in Vancouver visits airindia.in in Bangalore.
Connecting to the Web
1. You connect via your ISP (Internet Service Provider)
2. Computer contacts DNS servers - they tell your computer the IP address to the host.
3. The IP address allows your browser to reach the web host.
4. Web server sends back the website files in your browser.

Structure

Our Lives are Filled With Documents
- Newspapers
- Reports
- Forms
- Catalogs
- and more!

It's important that you understand how to structure information in a way that get's your message across to your readers.
HTML Structure
HTML for the image on the right is written below. Notice the pink showing the HTML elements breaking up the content.

<html>
    <body>
        <h1>This is the Main Heading</h1>
        <p>This text might be an introduction to the rest of the page.
        And if the page is a long one it might be split up into several
        sub-headings.</p>
        <h2>This is a Sub-Heading</h2>
        <p>Many long articles have sub-headings to help you follow the
        structure of what is being written. There may even be sub-sub-
        headings (or lower-level headings).</p>
        <h2>Another Sub-Heading</h2>
        <p>Here you can see another sub-heading.</p>
    </body>
</html>
Elements
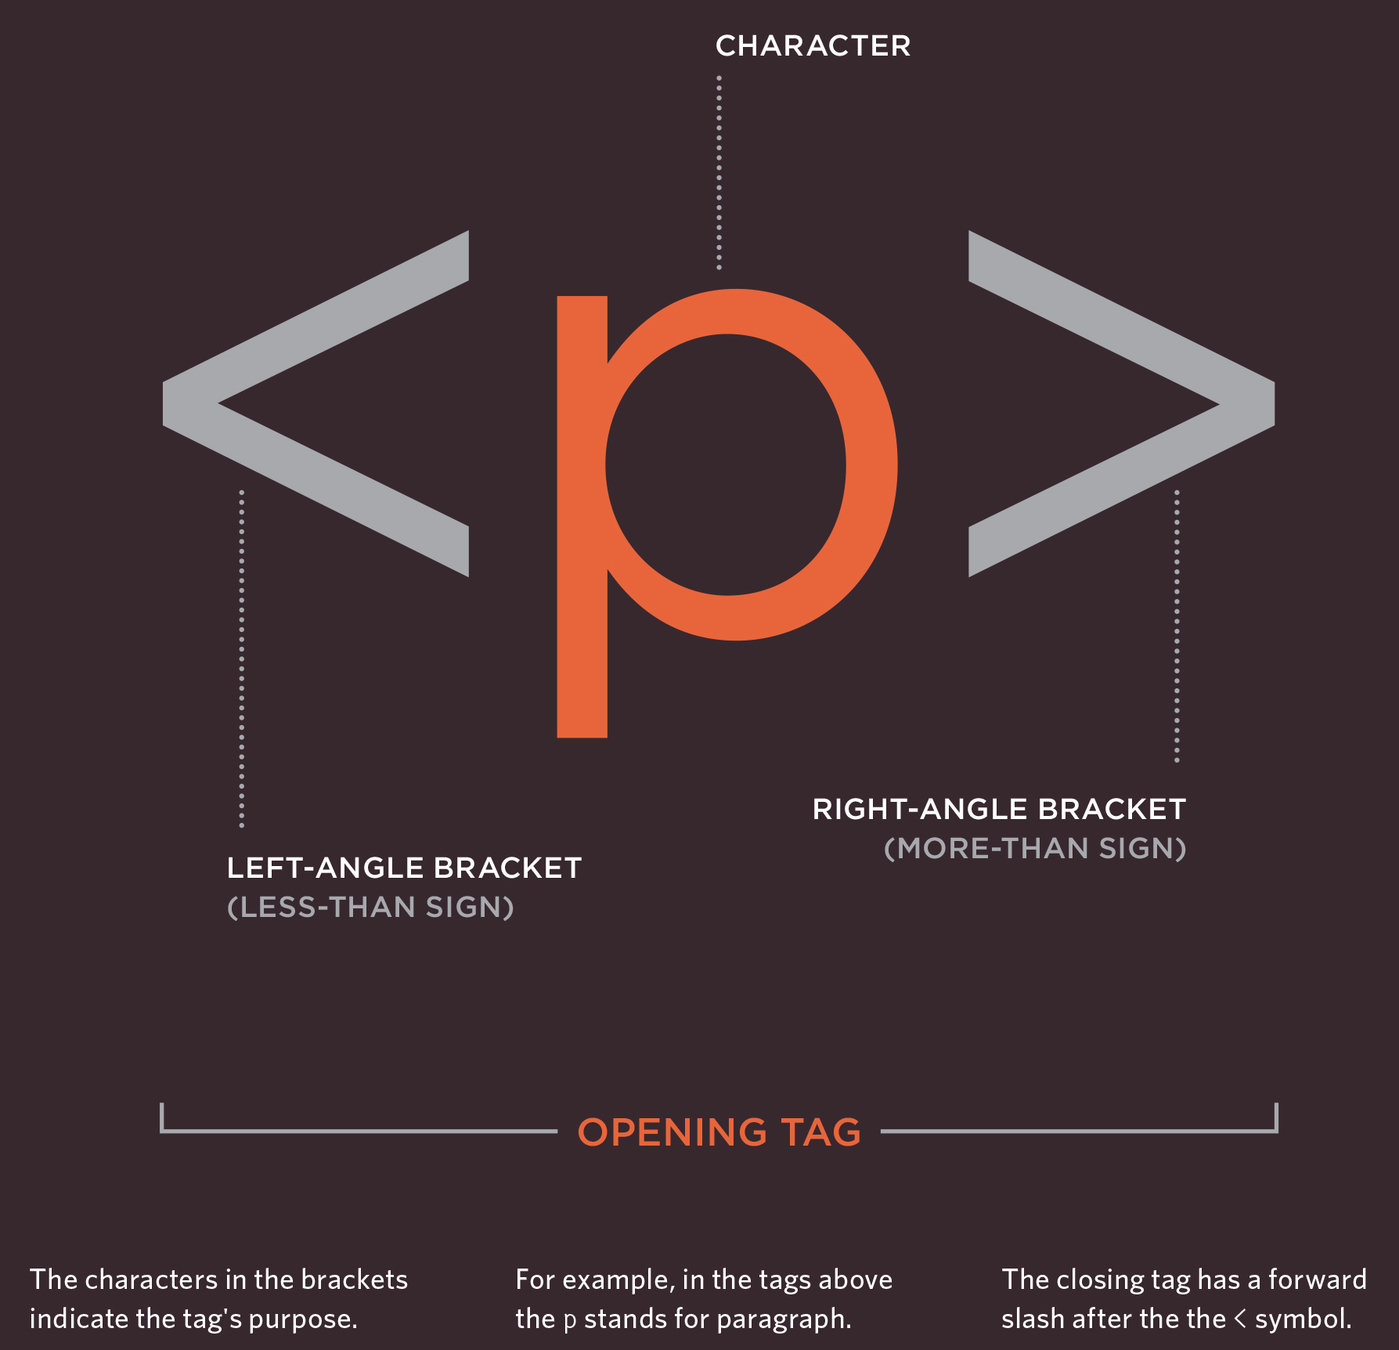
Elements are usually made up of content and two tags.
<h1>Page Title</h1>
Tags
are the opening and closing tags inside of the elements.
<h1> </h1>
Closer look at Tags

Body
Head
Title
<body>
Everything inside the body is what appears in your browser window.
<html>
    <head>
        <title>This is the Title of the Page</title>
    </head>
    <body>
        <h1>This is the Body of the Page</h1>
        <p>Anything within the body of a web page is
        displayed in the main browser window.</p>
    </body>
</html>
<head>
The head element contains information about the page but does not appear in the body of the browser.
<html>
    <head>
        <title>This is the Title of the Page</title>
    </head>
    <body>
        <h1>This is the Body of the Page</h1>
        <p>Anything within the body of a web page is
        displayed in the main browser window.</p>
    </body>
</html>
<title>
The title appears in the very top of your browser or on the tab if you have multiple tabs open.
<html>
    <head>
        <title>This is the Title of the Page</title>
    </head>
    <body>
        <h1>This is the Body of the Page</h1>
        <p>Anything within the body of a web page is
        displayed in the main browser window.</p>
    </body>
</html>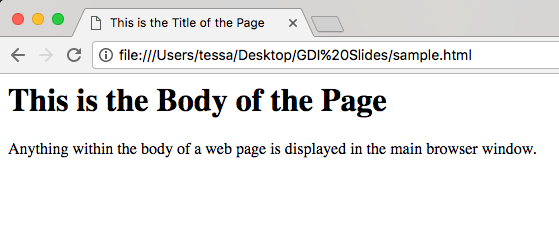
Create Our First Webpage!
1. Open Sublime or Atom
2. Type the following code:
3. Go to File > Save As
Create a new folder on your desktop, titled "New Site" and save this as index.html in that folder.
4. Open your new file
Navigate to your New Site folder on your desktop and double click on index.html to open in a browser.
<html>
    <head>
        <title>First Web Page</title>
    </head>
    <body>
        <h1>Page Title</h1>
        <p>This is my first sentence
        in my website!</p>
    </body>
</html>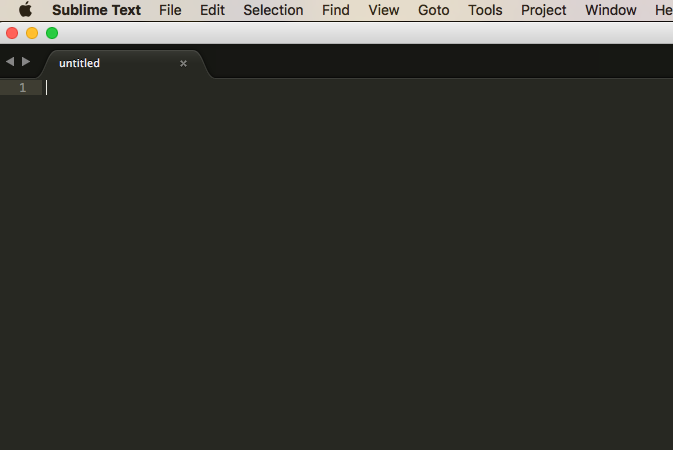
How do others build their sites?
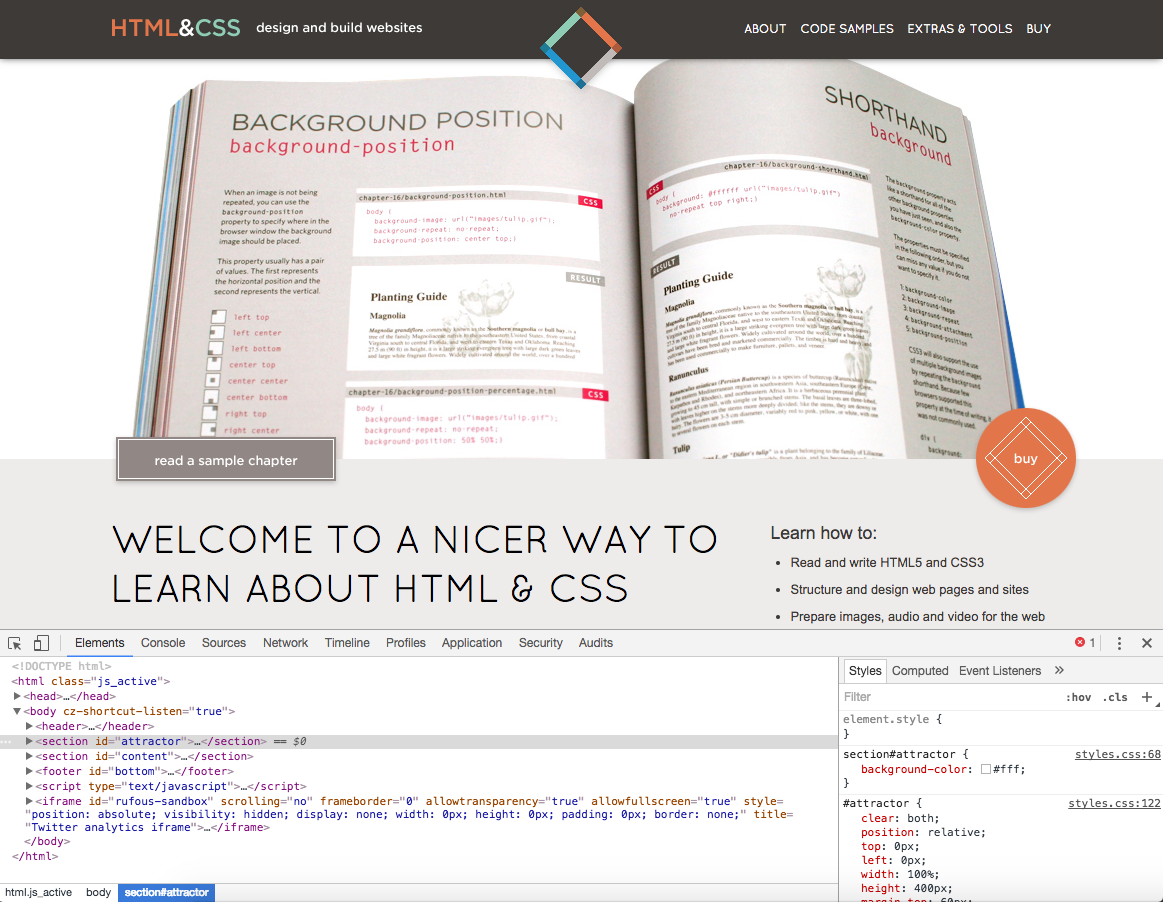
Developer Tools Rock
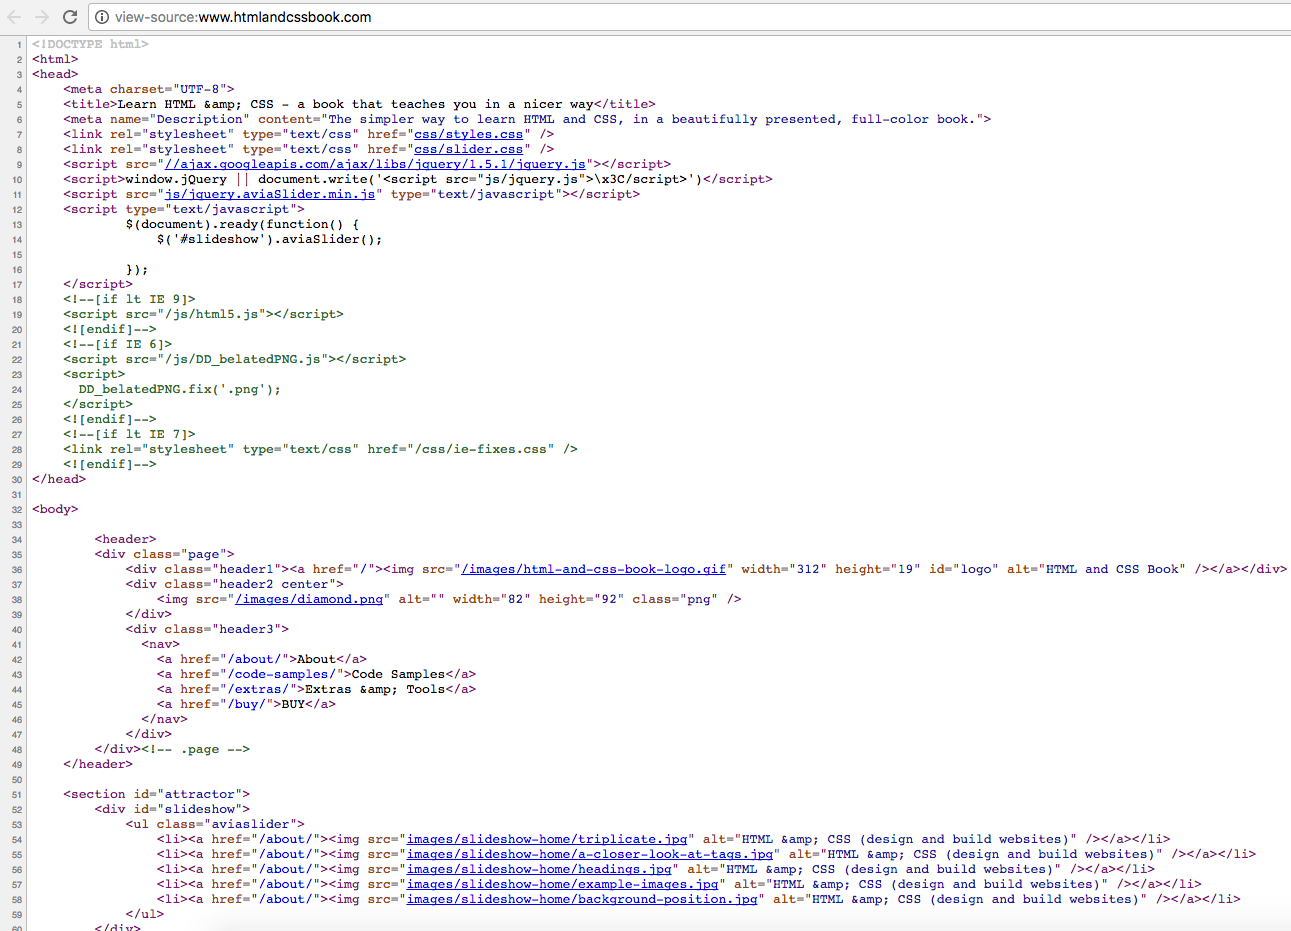
View Page Source
Pop Quiz!
- What is an element?
- What is a tag?
- What does the head do?
- Where does the page title go?
Exercise
In order to understand structure & how to build webpages, we are going to start by creating a Google doc.
Click here to navigate to Google Docs
If you do not have a Google account, Word or any other word processing program will do.
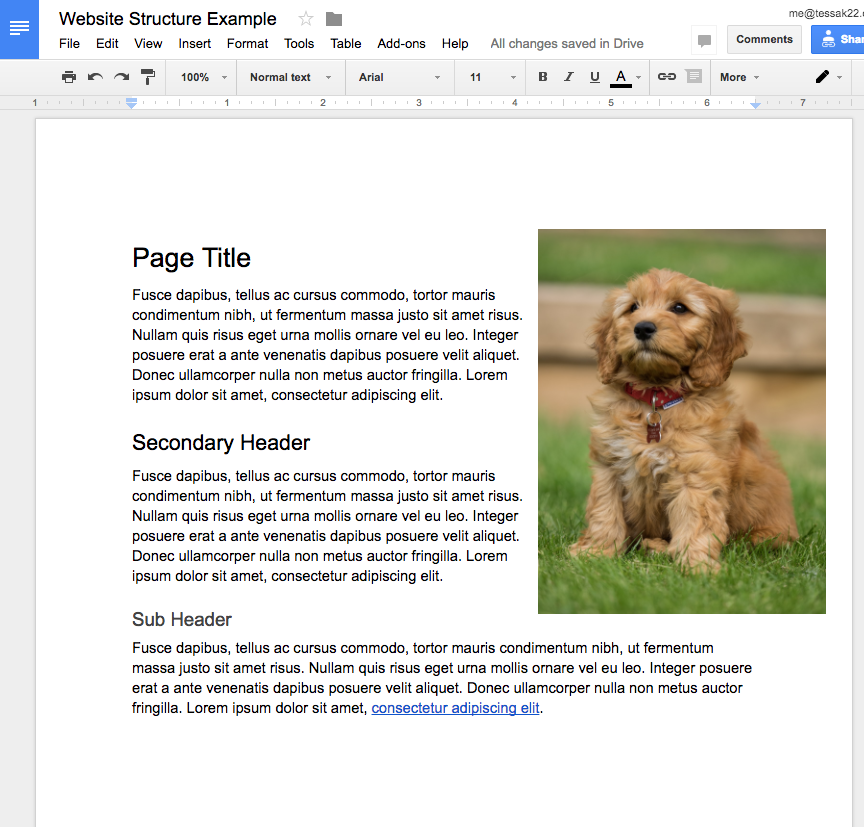
Ideas for things to include:
- Headers
- Paragraphs
- Bulleted Lists
- Images
- Links to Websites
- Tables of Data
Text

Headings
<h1> Page Title Important!
<h2> Subheading
<h3>
<h4>
<h5>
<h6>
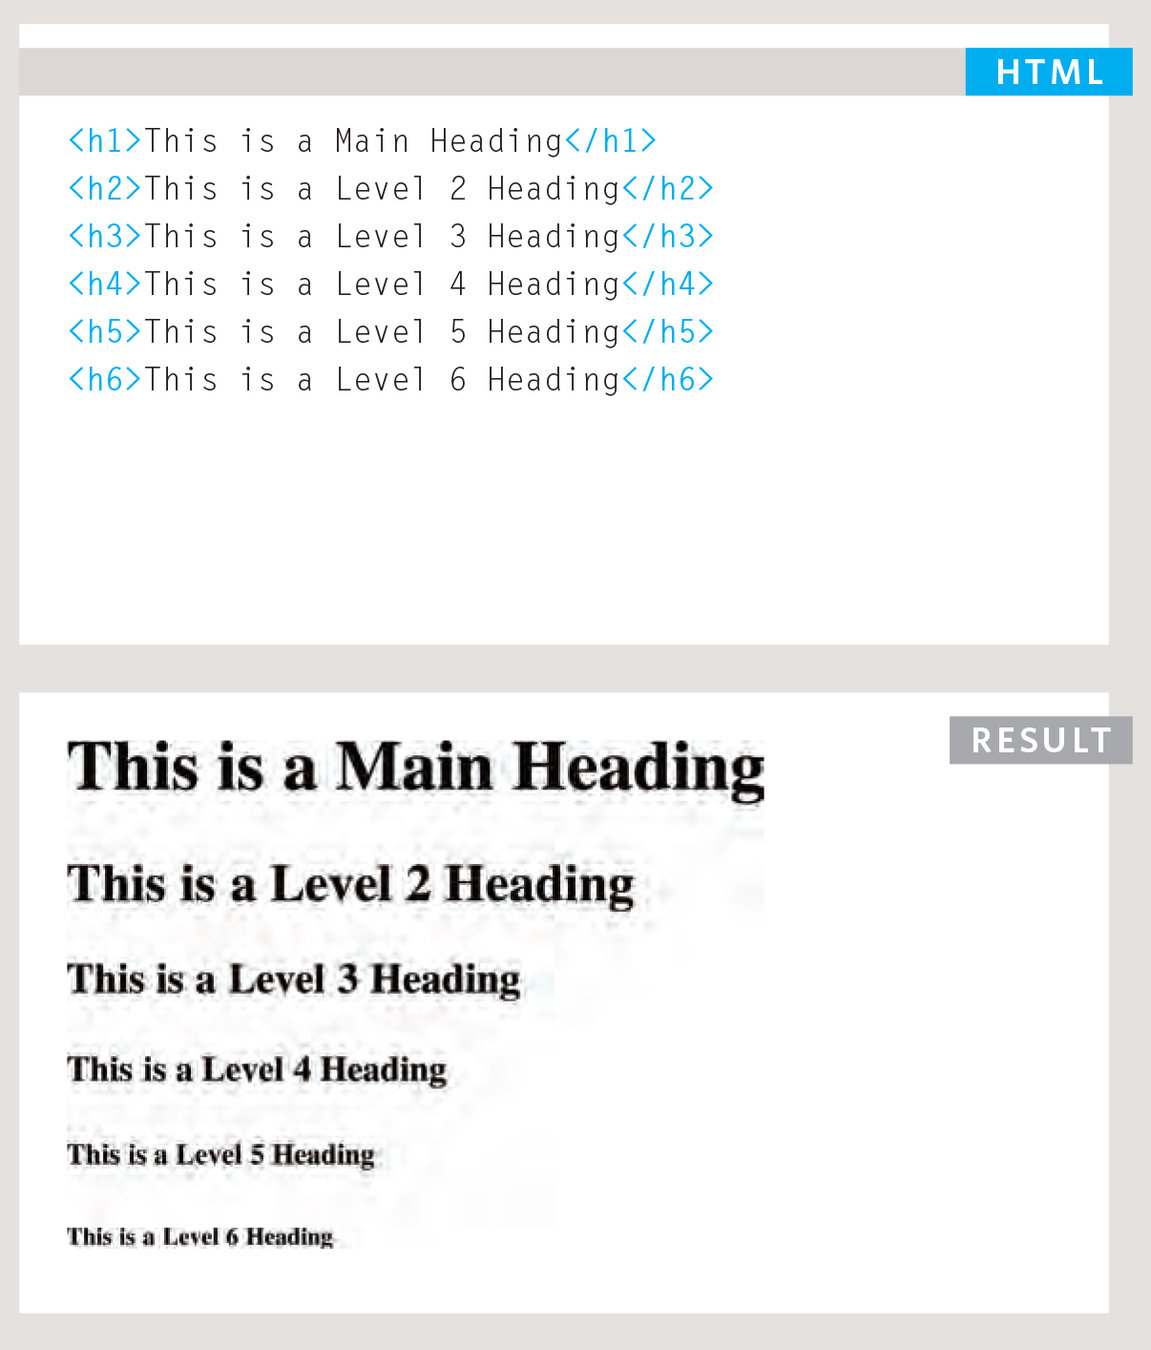
Don't forget the closing tags!
BLOCK ELEMENT
EXERCISE
Convert the headings from your Google doc to HTML in index.html file within "New Site" folder.
Paragraphs
To create a new paragraph, surround the text with <p> and </p> tags.
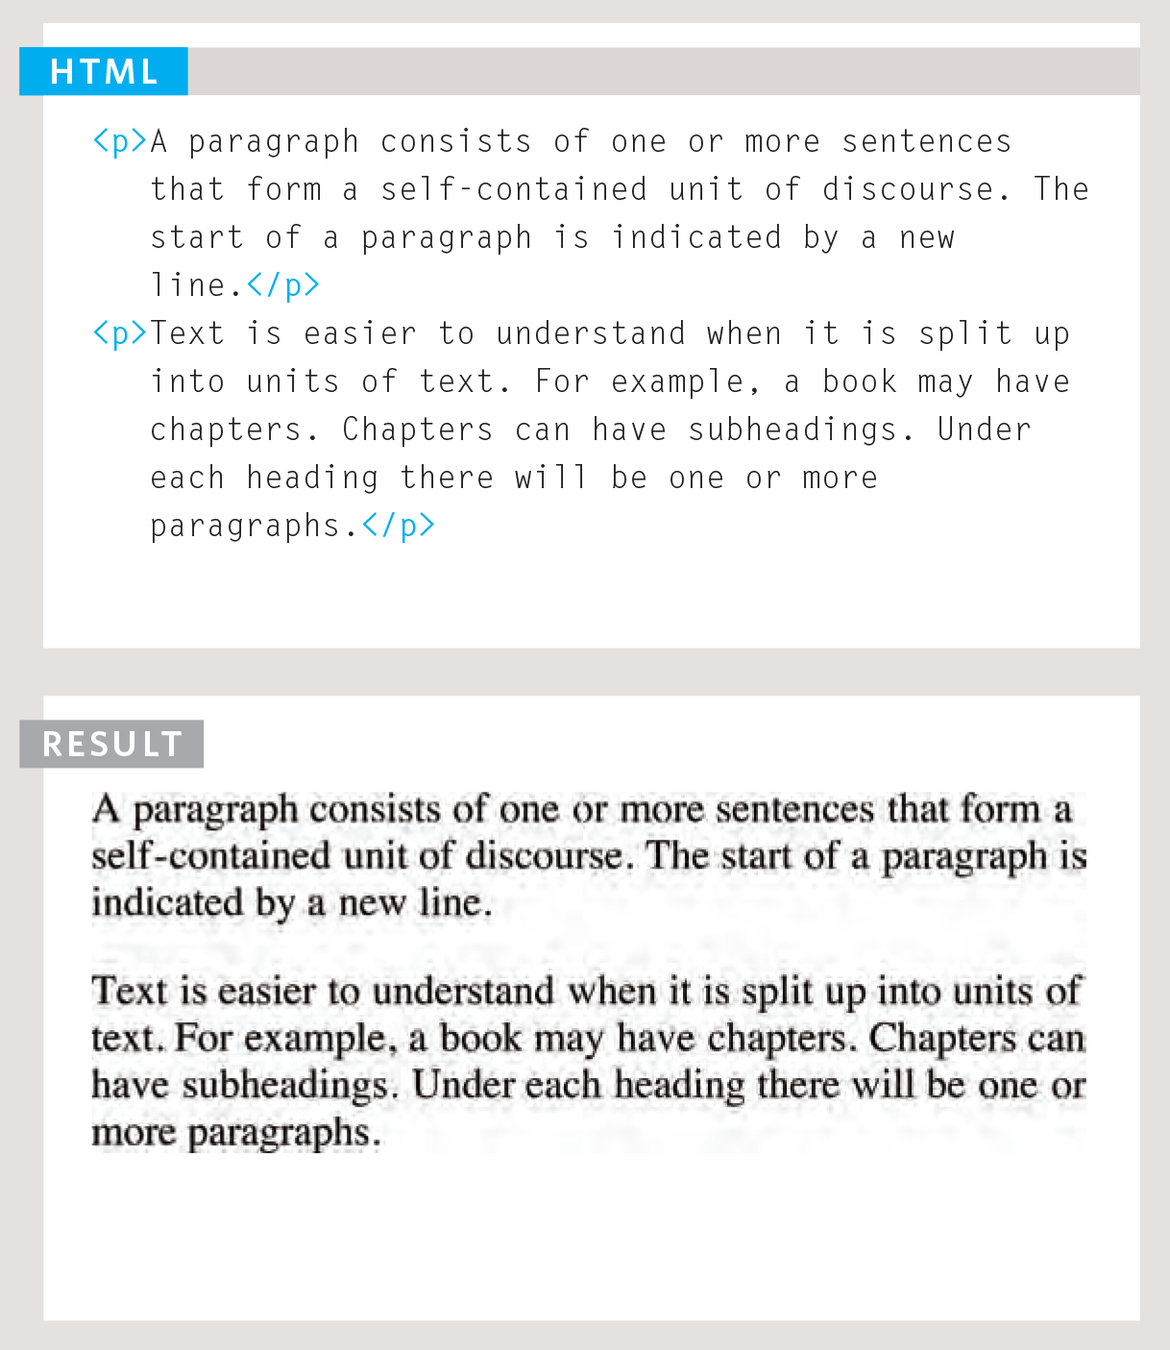
BLOCK ELEMENT
EXERCISE
Convert the paragraphs from your Google doc to HTML in index.html file within "New Site" folder.
Paragraph Styles
<b> Bold tags
<i> Italic tags
<sup> Superscript tags
<sub> Subscript
INLINE ELEMENTS
<p>This paragraph contains <b>bold</b> words
and it also contains <i>italic</i> words.</p>

<p>In this paragraph, you can find
<sup>Superscript</sup> and
<sub>Subscript</sub> tags.</p>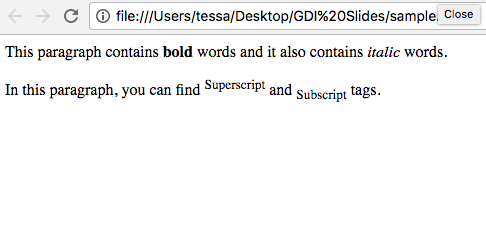
White Space doesn't
matter in HTML!
EXERCISE
Add each of these styles to your HTML in index.html file within "New Site" folder.
More Paragraph Styles
<strong> Important
<em> Emphasis
<blockquote> Quotes
INLINE ELEMENTS
<p>This paragraph contains <strong>bold</strong>
words and it also contains <em>italic</em>
words.</p>

<blockquote>
    <p>Did you ever stop to think and
    forget to start again?</p>
</blockquote>
EXERCISE
Replace <b> and <i> with <strong> and <em> and add a blockquote in your HTML in index.html file within "New Site" folder.

strong & em can be styled using CSS and doesn't always have to be bold and italicized!
Line Breaks
<br /> Line Break
Line breaks allow you to add a new line mid-paragraph.
INLINE ELEMENT
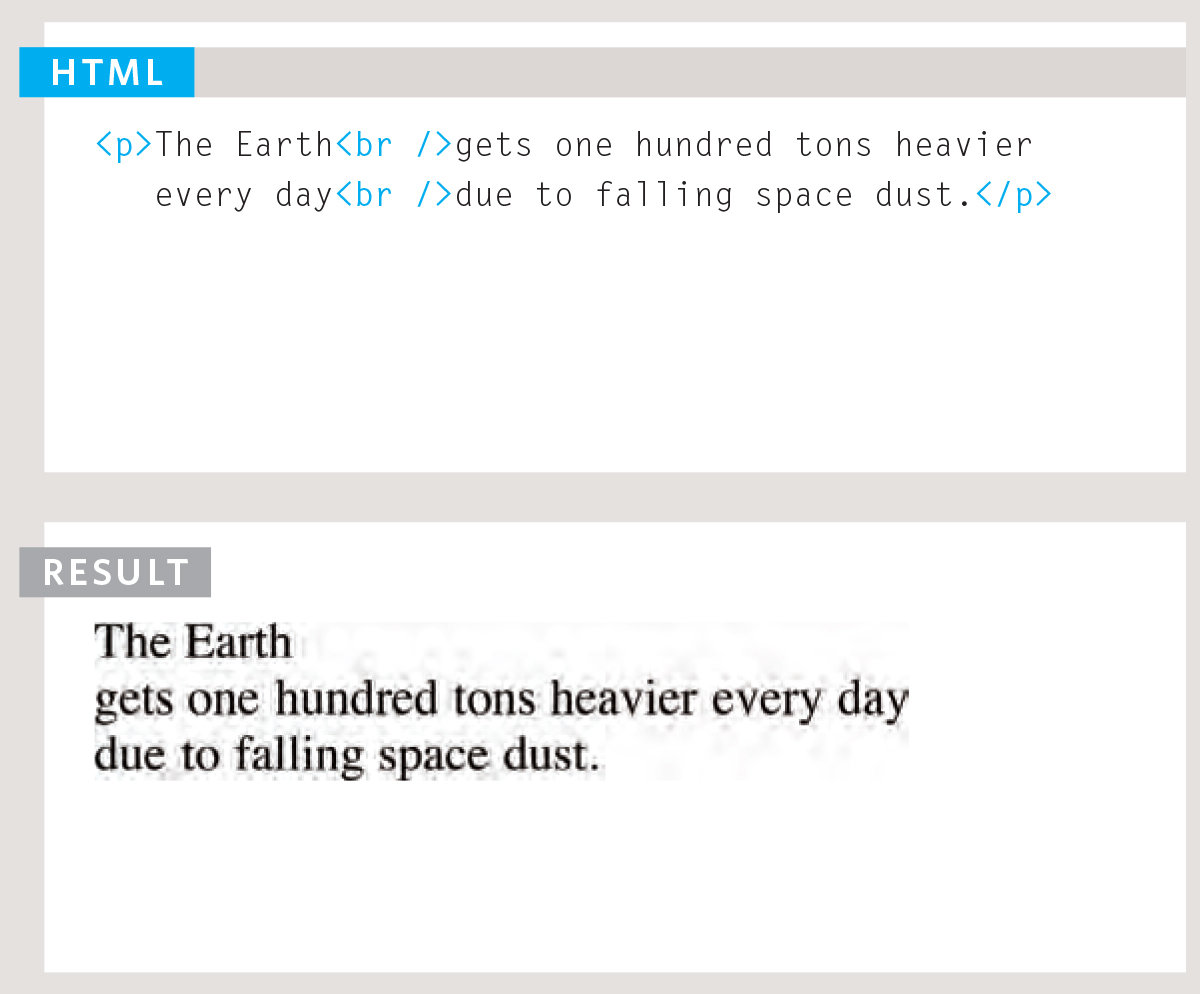
EXERCISE
Create a couple line breaks in one of your paragraphs in index.html file within "New Site" folder.
Horizontal Ruler
<hr> Horizontal Ruler
Allows your to add a line to divide content.
BLOCK ELEMENT
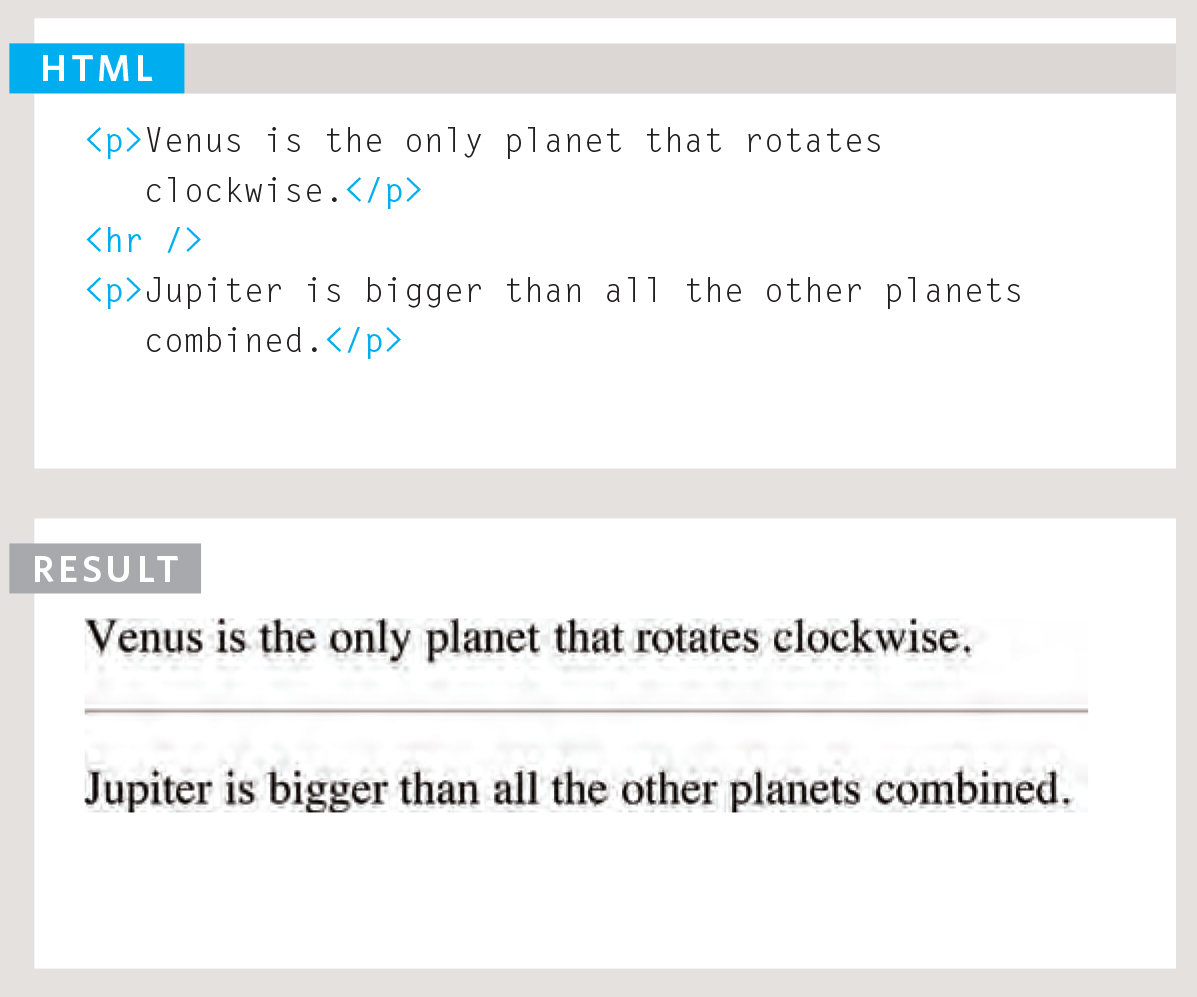
EXERCISE
Place a horizontal ruler somewhere in your index.html file within "New Site" folder.
Editors
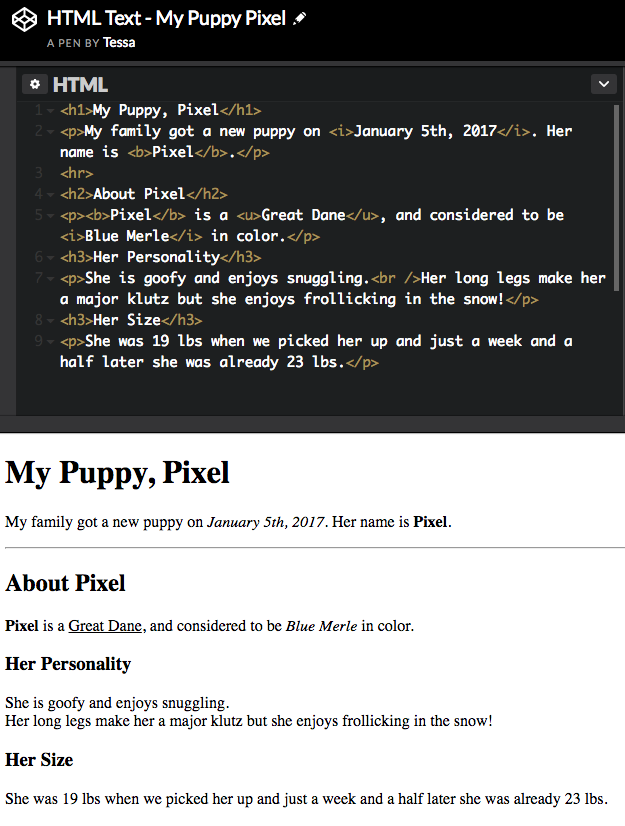
Let's check out my CodePen that I created including the things we have learned thus far.
http://codepen.io/tessak22/pen/jyMMYa
Other Online Editors
- jsfiddle.net
- codeshare.io
- gist.github.com
- codeply.com
Pop Quiz!
- How many headers are there?
- What are the open and close tags to create
a paragraph? - Is it okay to have blank lines in your HTML?
- What tag will make your text bold?
- How about italicized?
- How do you add a line dividing content?
- What does <br> do?
- How do you quote an author?
Exercise
Convert the text in your Google document into HTML in a new HTML file titled site.html file inside "New Site" on your desktop.*
*Ignore images, lists and other elements we haven't learned yet.
Lists
Ordered
Unordered
Definition
Ordered List
<ol> Ordered List
<li> Line Item

Ordered lists will appear similar to this:
- This
- Is
- An
- Ordered
- List
BLOCK ELEMENT
<ol>
    <li>Here</li>
    <li>Is</li>
    <li>An</li>
    <li>Ordered</li>
    <li>List</li>
</ol>
EXERCISE
Add an ordered list to your HTML in index.html file within "New Site" folder.
Unordered List
<ul> Unordered List
<li> Line Item

Unordered lists will appear similar to this:
- This
- Is
- An
- Unordered
- List
BLOCK ELEMENT
<ul>
    <li>Here</li>
    <li>Is</li>
    <li>An</li>
    <li>Unordered</li>
    <li>List</li>
</ul>
EXERCISE
Add an unordered list to your HTML in index.html file within "New Site" folder.
Definition List
<dl> Definition List
<dt> Definition Term
<dd> Definition

BLOCK ELEMENT
<dl>
	<dt>Sashimi</dt>
	<dd>Sliced raw fish that is served with
        condiments such as shredded daikon radish
        or ginger root, wasabi and soy sauce</dd>
	<dt>Scale</dt>
	<dd>A device used to accurately measure
        the weight of ingredients</dd>
	<dd>A technique by which the scales are
        removed from the skin of a fish</dd>
	<dt>Scamorze</dt>
	<dt>Scamorzo</dt>
	<dd>An Italian cheese usually made from
        whole cow's milk (although it was
        traditionally made from buffalo milk)</dd>
</dl>
EXERCISE
Add a definition list to your HTML in index.html file within "New Site" folder.
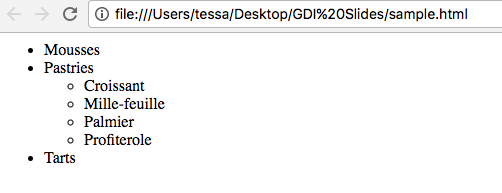
Nested List
<ol> Ordered List
<ul> Unordered List
<li> Line Item
<dl> Definition List
<dt> Definition Term
<dd> Definition
BLOCK ELEMENT
<ul>
    <li>Mousses</li>
    <li>Pastries
	<ul>
            <li>Croissant</li>
	    <li>Mille-feuille</li>
	    <li>Palmier</li>
	    <li>Profiterole</li>
	</ul>
    </li>
    <li>Tarts</li>
</ul>
EXERCISE
Convert one of your lists to a nested list in your HTML in index.html file within "New Site" folder.
Pop Quiz!
- What does UL stand for?
- How about OL?
- What is a <li>?
- What are the 3 definition tags?
Exercise
Convert the lists in your Google document into HTML in your site.html file inside "New Site" on your desktop.*
*Ignore images and other elements we haven't learned yet.
Links
Absolute
Relative
Mail to
Link Structure
<a> Anchor tag
href Link Location/Address (attribute)
INLINE ELEMENT
EXERCISE
Create 2-3 links in your HTML in index.html file within "New Site" folder.

Link Target
<a> Anchor tag
href Link Location/Address (attribute)
target Designates where the link will open in
INLINE ELEMENT
EXERCISE
Add target="_blank" to the 2-3 links that you previously created in index.html file within "New Site" folder.
<a href="http://facebook.com" target="_blank">Facebook</a>_blank will open the url in a new window
Directory Structure
Structure
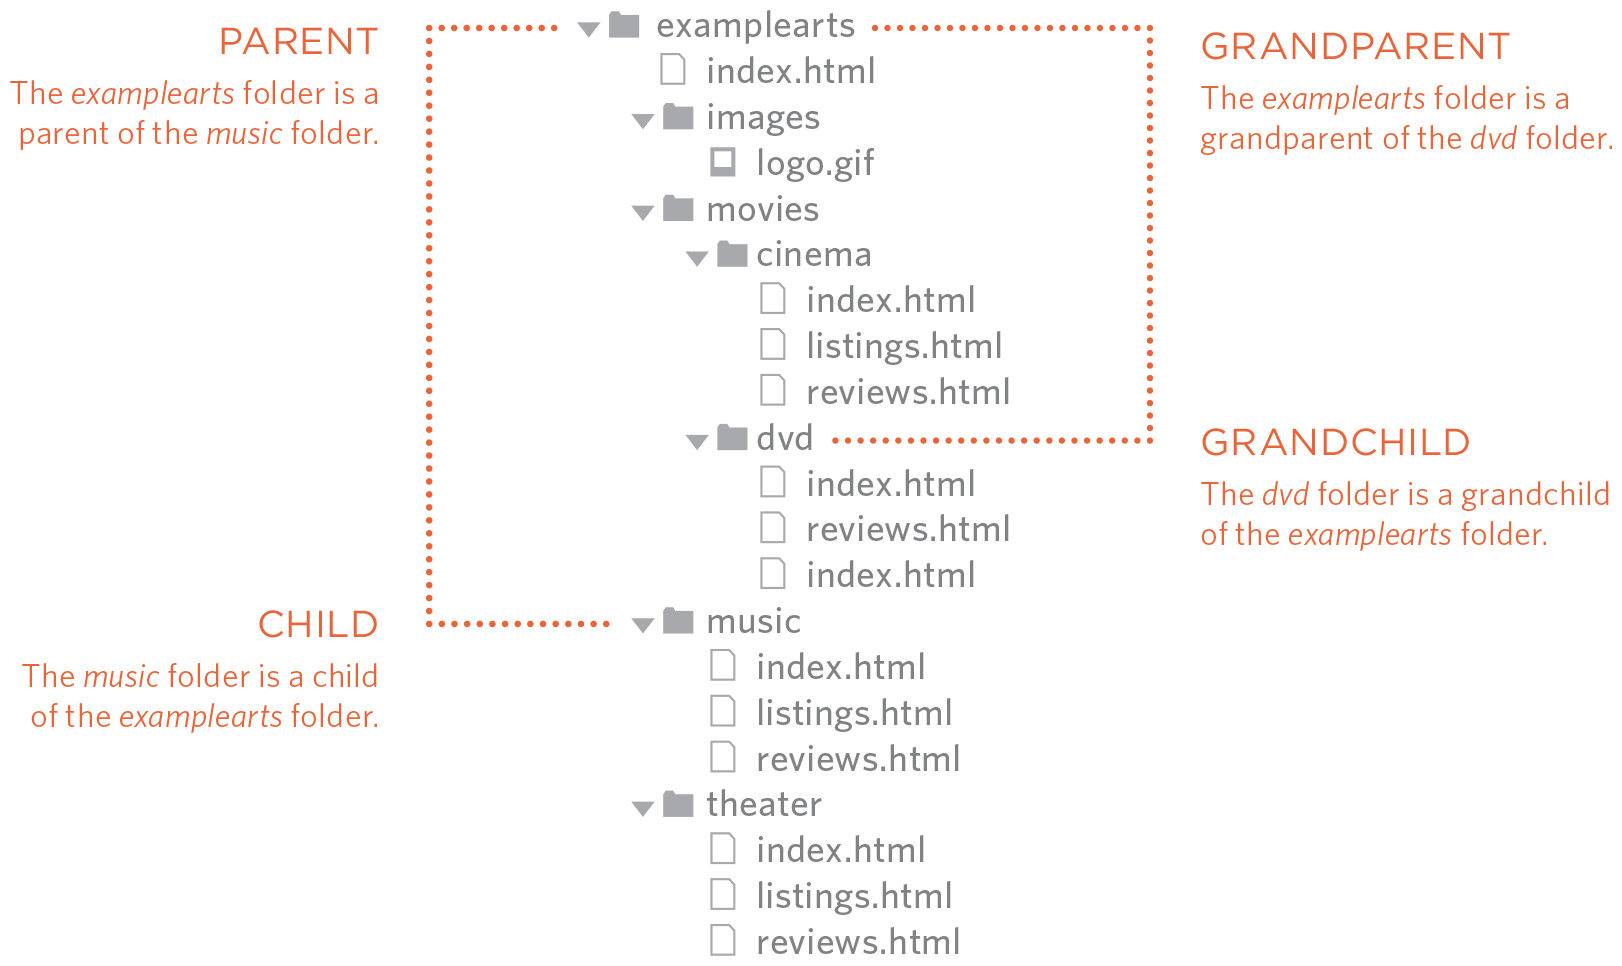
Top level folder, examplearts, is known as the root folder.
Relationship
Relationships between folders are described similar to family trees.

Homepages
Each section has it's own homepage (index.html).
When accessing www.domain.com/music it would load www.domain.com/music/index.html

Link Types
Absolute Links
Links that direct you to a different website, and must include the domain name.
<ul>
    <li><a href="http://facebook.com">Facebook</a></li>
    <li><a href="http://twitter.com">Twitter</a></li>
    <li><a href="http://instagram.com">Instagram</a></li>
</ul>
Notice we used an unordered list to create this "menu"
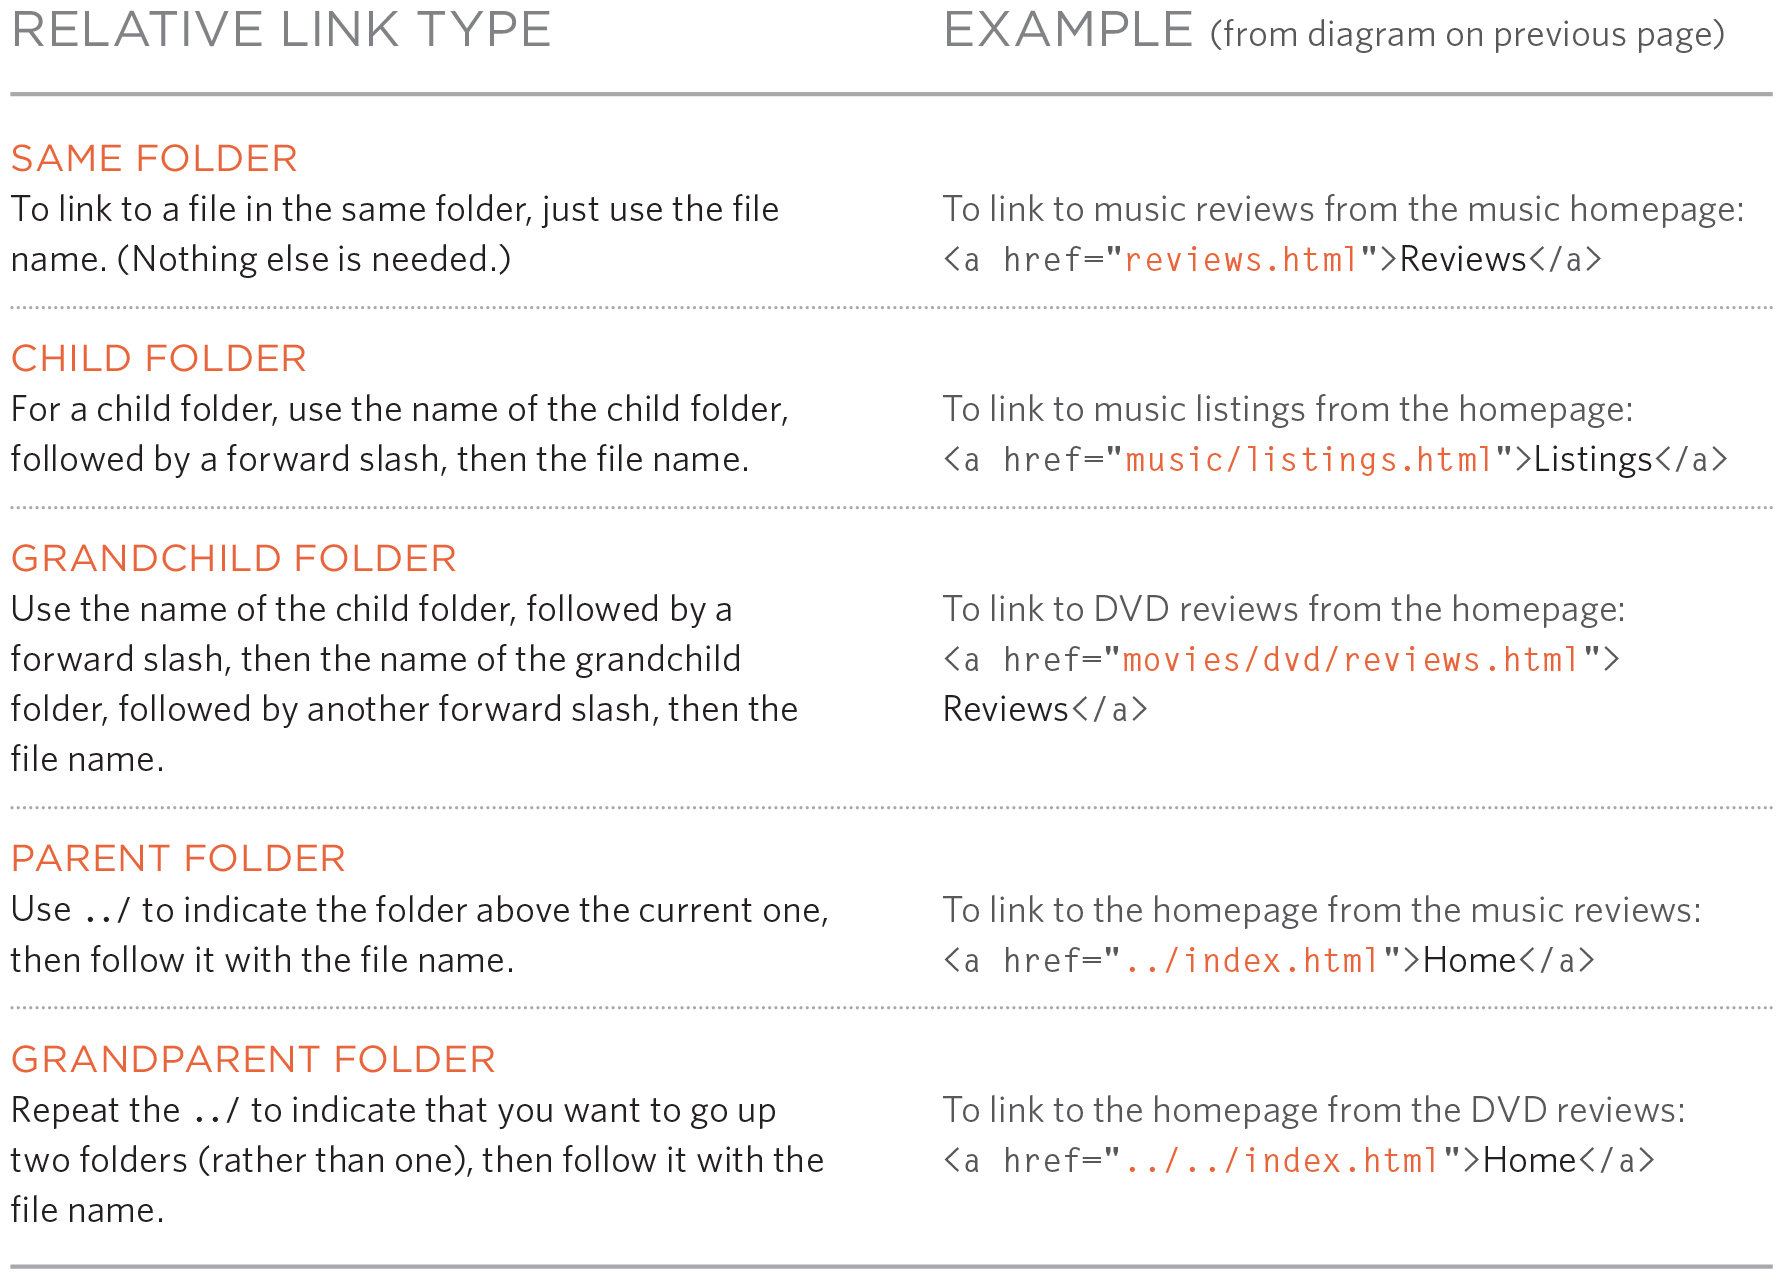
Relative Links
Are links that direct users to somewhere else on the same website and do not require the domain name to be included.
EXERCISE
Create a new page titled about.html (don't forget head, title, body).
Open index.html and create a link to the new page, about.html
Email Links
<a> Anchor tag
href Link location/address
mailto Prompt new email
When a user clicks this link it will open their default mail client on their computer and start a message to the assigned email address.

INLINE ELEMENT
<a href="mailto:me@tessak22.com">
    Email Tessa
</a>
EXERCISE
Add a link to email you in HTML in index.html file within "New Site" folder.
Linking to Somewhere on the Same Page
<a> Anchor tag
href Link location/address
id Assigns an ID
INLINE ELEMENT
<h1>My Research Paper</h1>

<ul>
    <li><a href="#introduction">Introduction</a></li>
    <li><a href="#content">Content</a></li>
    <li><a href="#conclusion">Conclusion</a></li>
</ul>

<h2 id="introduction">Introduction</h2>
<p>Lorem ipsum dolor sit amet, consectetur adipiscing
elit. Maecenas sed diam eget risus varius blandit sit
amet non magna.</p>

<h2 id="content">Content</h2>
<p>Lorem ipsum dolor sit amet, consectetur adipiscing
elit. Maecenas sed diam eget risus varius blandit sit
amet non magna.</p>

<h2 id="conclusion">Conclusion</h2>
<p>Lorem ipsum dolor sit amet, consectetur adipiscing
elit. Maecenas sed diam eget risus varius blandit sit
amet non magna.</p>
EXERCISE
Open new.html and create a "table of contents" at the top of your page for your page content.
Let's check out this Codepen to see how it works!
Pop Quiz!
- What does a stand for in <a>?
- What does the href attribute do?
- What does the target attribute do?
- How do you link to an ID?
- How do you declare an ID?
- BONUS: If you wanted to link to a
certain spot on a different page,
how do you think you could do that?
Images
Choosing Images
Images should:
- Be relevant
- Convey information
- Convey the right mood
- Be instantly recognizable
- Fit the color palette

Places to Purchase Images:
- istockphoto.com
- gettyimages.com
- veer.com
- fotolia.com
- pexels.com (free images)
Storing Images on Your Site
It's good practice to create an images folder for your images.
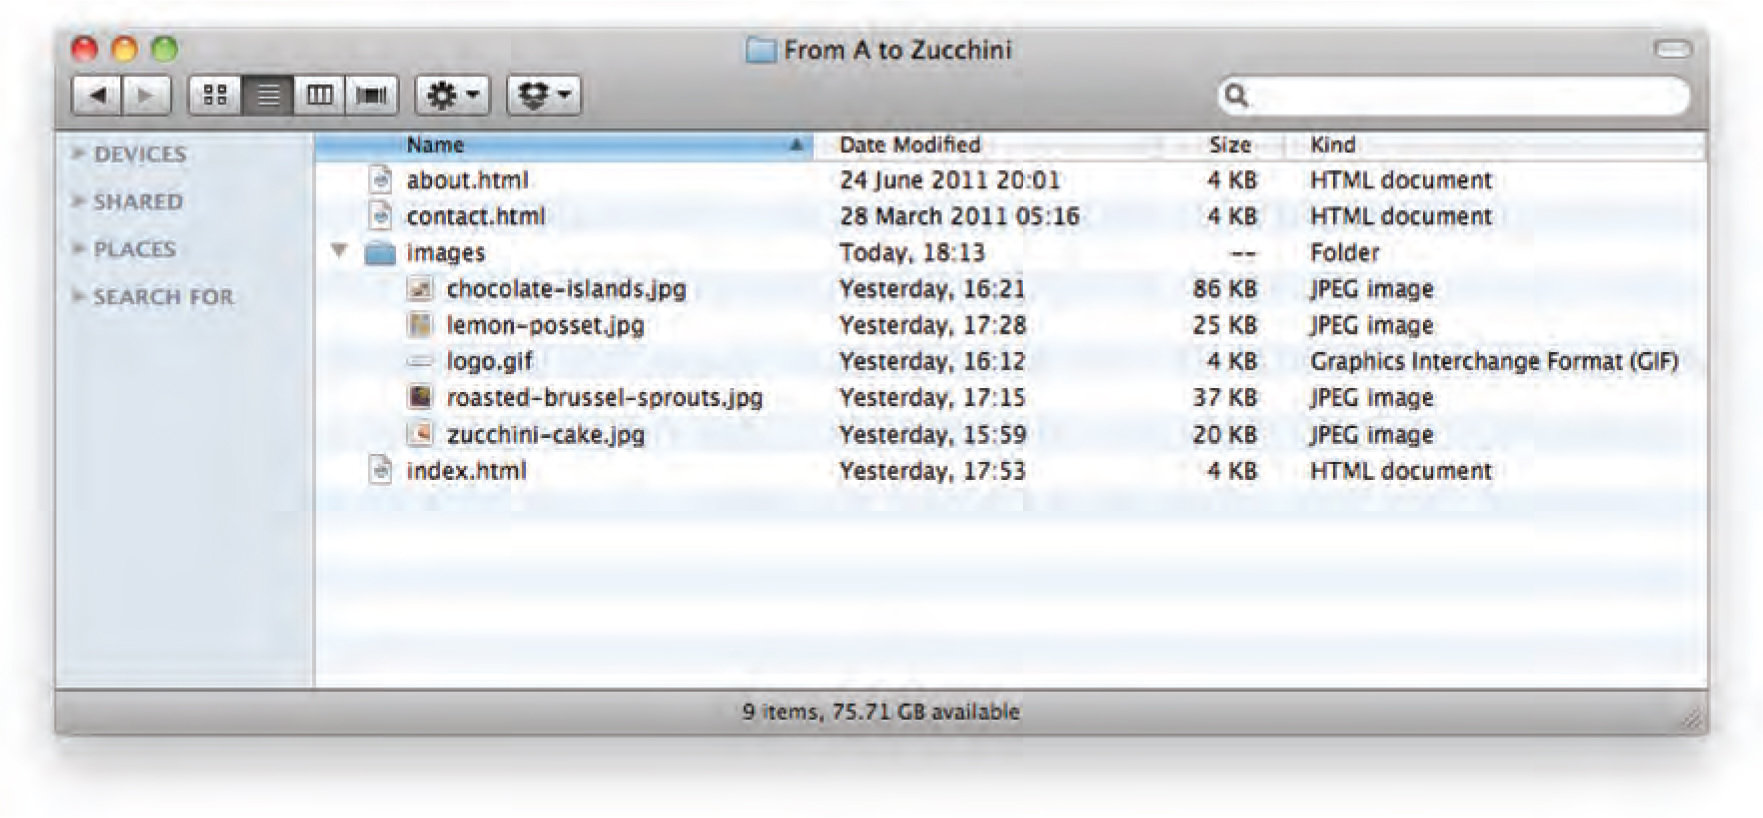
EXERCISE
Create a new folder titled "images" in your New Site folder on your desktop.
Adding Images
<img Image tag
src Path to the image
alt Text description of image
title Title (appears in tooltip)
INLINE ELEMENT
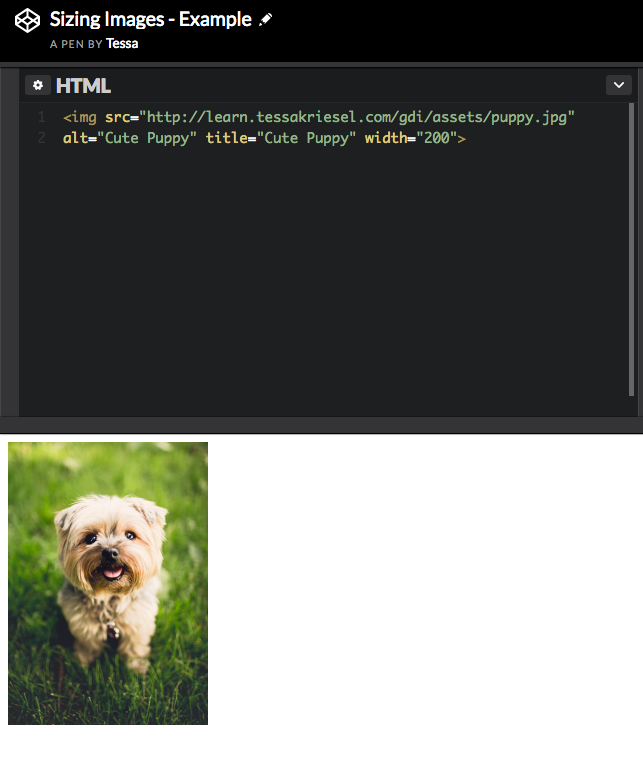
<img src="http://learn.tessakriesel.com/gdi/assets/puppy.jpg"
alt="Cute Puppy" title="Cute Puppy">
EXERCISE
Find a few images online to include in index.html. Be sure to put them in the images folder.

<img src="images/puppy.jpg" alt="Cute Puppy" title="Cute Puppy">Sizing Images (in HTML)
INLINE ELEMENT
EXERCISE
Assign a height or width to your images to change their sizes.
You can set the width of the image in your code - however, I would recommend using CSS for this!
3 Rules for Creating Images
-
Save Images in the Right Format
-
Save Images at the Right Size
-
Measure Images in Pixels
Tools to Edit Images
-
Photoshop
-
Gimp
-
pixlr.com
-
splashup.com
-
ipiccy.com
Web-friendly Image Formats
-
JPG
-
PNG
-
GIF
-
SVG (new!*)
*Only Vector based image format
Viewing Images on the Web
You can right click (ctrl + click) on an image and either save or view an image on a website.
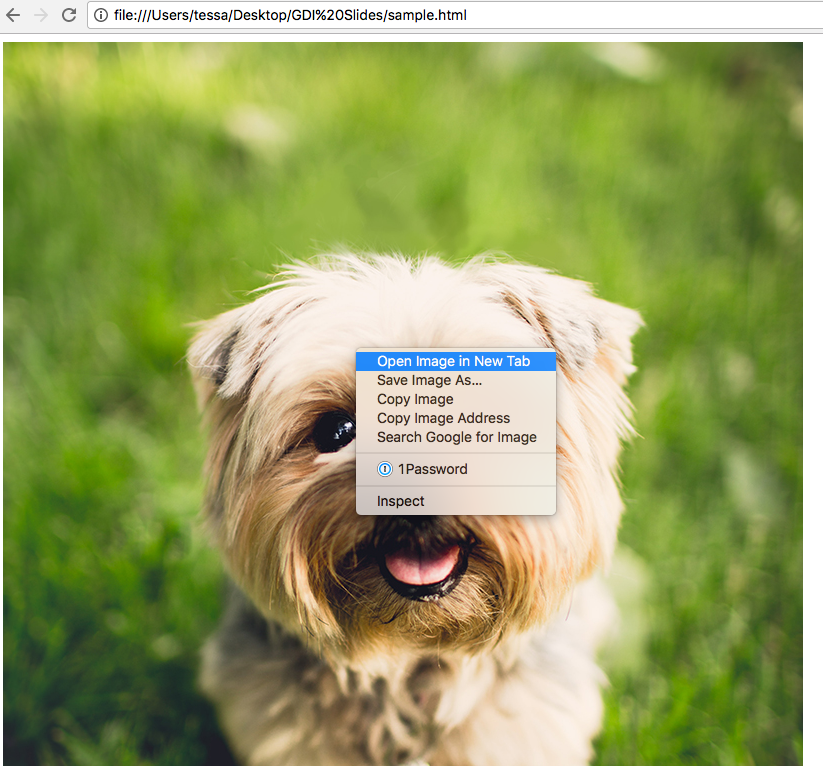
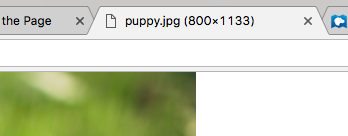
You can check the dimensions of an image by opening the image in a new tab.
Figure & Figure Caption
You can easily add captions to your images with an HTML5 technique called Figure!
<figure> Declare the figure area
<figcaption> Set the Caption Content
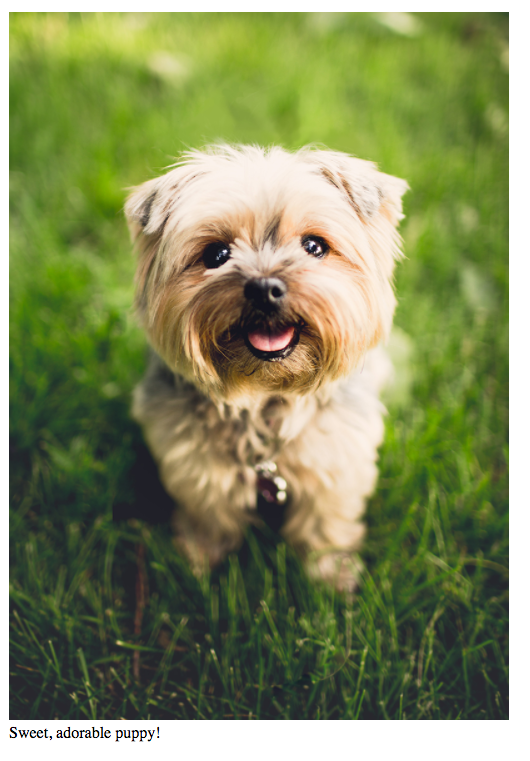
<figure>
    <img src="images/puppy.jpg" width="500">
    <br />
    <figcaption>Sweet, adorable puppy!</figcaption>
</figure>
EXERCISE
Convert your images to figures so you can add captions to your images in index.html
Pop Quiz!
- What image format can be animated?
- What image format can be transparent?
- Which image format is Vector based?
- How do you add a caption to your images?
- Why should you resize your images?
- Name a program you can use to resize
your images.
Exercise
Convert the images in your Google document into HTML in your new.html file inside "New Site" on your desktop.*
*Be sure to put your images in a folder!
Tables
Tables Represent Information in a Grid Format
Table Structure
<table> Table element
<tr> Table Row
<td> Table Data
<th> Table Headings

BLOCK ELEMENT
<table>
    <tr>
        <th></th>
	<th>ABC</th>
	<th>BBC</th>
	<th>CNN</th>
    </tr>
    <tr>
    	<th>6pm - 7pm</th>
        <td>Movie</td>
        <td>Comedy</td>
        <td>News</td>
    </tr>
    <tr>
        <th>7pm - 8pm</th>
        <td>Movie</td>
        <td>Sport</td>
        <td>Current Affairs</td>
    </tr>
</table>
EXERCISE
Create a table with a few rows and columns to display data in index.html
Forms
Form Controls
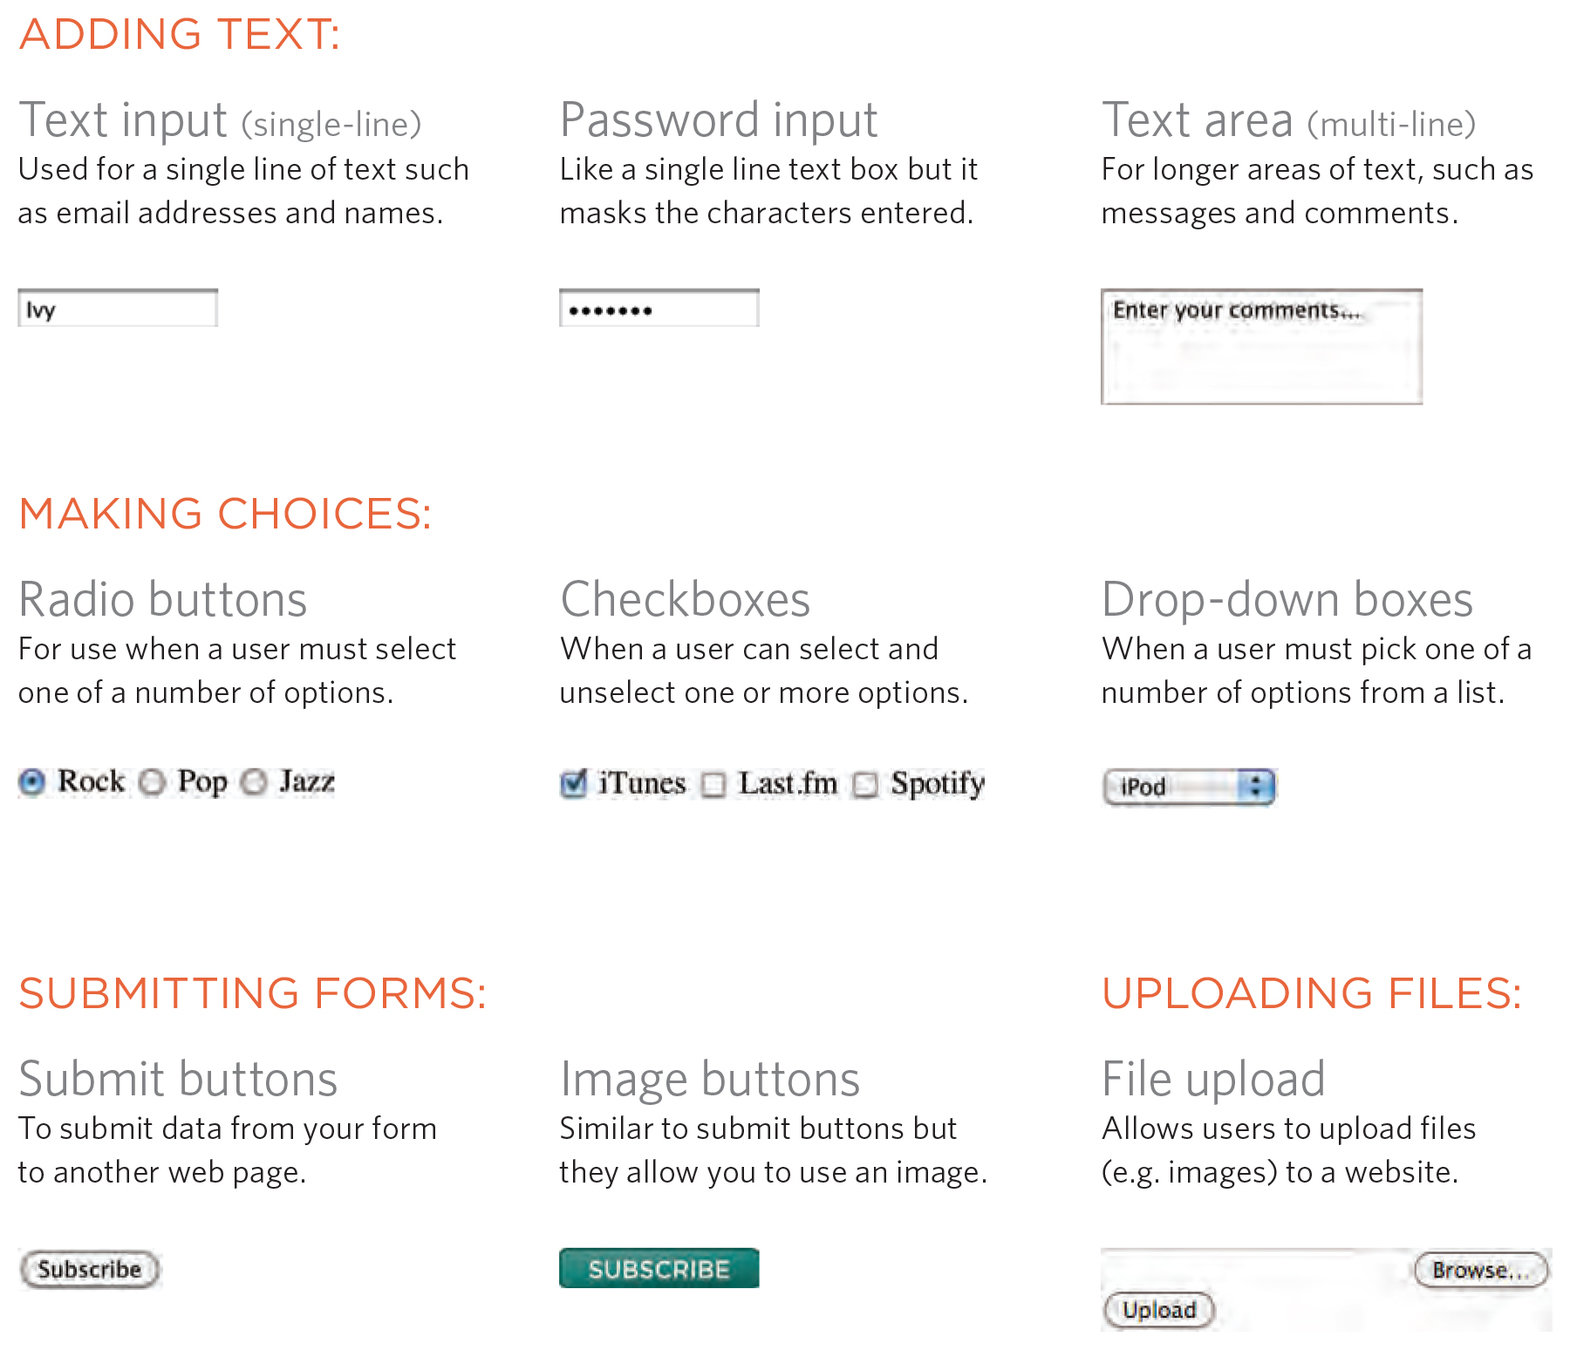
How Forms Work
- A user fills in a form then presses a submit button
- The name of each form control along with the entered values are sent to the server.
- The server processes the information using a programming language like PHP.
- The server then returns the user to a thank you page
Unfortunately, we will not be learning how to process forms in this class.
Form Structure
<form> Hold all form contents
action URL with processing instructions
method Get (search) or Post (saving)
id Used to identify the form
<form action="http://www.example.com/subscribe.php" method="post">
    Contents of form here
</form>
Because it requires programming language knowledge to process forms, we are only going to lightly touch on how to set these up in HTML.
Text Input
<input> Input element
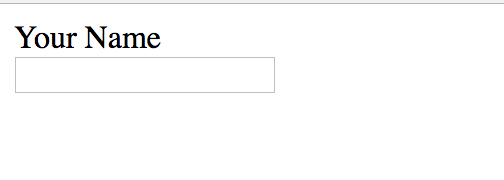
INLINE ELEMENT
<form action="#">
    <p>Your Name
        <input type="text" name="yourname" />
    </p>
</form>
EXERCISE
Create a form with 1 text field in index.html file within "New Site" folder.
Password Input
<input> Input element

INLINE ELEMENT
<form action="#">
    <p>Username
        <input type="text" name="username" />
    </p>
    <p>Password
        <input type="password" name="password" />
    </p>
</form>
Textarea
<textarea> Input element
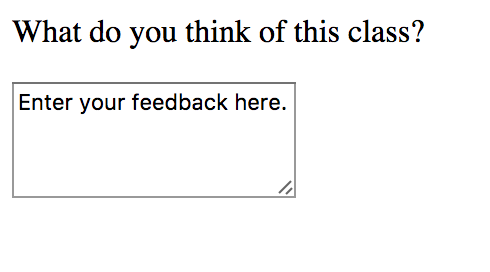
INLINE ELEMENT
<form action="#">
    <p>What do you think of this class?</p>
    <textarea name="opinion" cols="20" rows="4">Enter your feedback here.</textarea>
</form>
Choice Inputs
<input> Input element

INLINE ELEMENT
<form action="#">
    <p>What is your favorite food?</p>
    <input type="radio" name="fave" value="pizza" />Pizza
    <input type="radio" name="fave" value="burger" />Burger
    <input type="radio" name="fave" value="tacos" />Taco
    <input type="radio" name="fave" value="maccheese" />Mac & Cheese
</form>
<form action="#">
<p>What foods do you enjoy?</p>
<input type="checkbox" name="enjoy" value="pizza" />Pizza
<input type="checkbox" name="enjoy" value="burger" />Burger
<input type="checkbox" name="enjoy" value="tacos" />Taco
<input type="checkbox" name="enjoy" value="maccheese" />Mac & Cheese
</form>
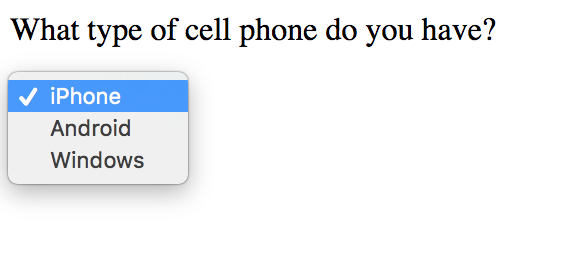
Drop Down List
<select> Drop down list
<option> Specify options
INLINE ELEMENT
<form action="#">
    <p>What type of cell phone do you have?</p>
    <select name="phone">
        <option value="iphone">iPhone</option>
        <option value="android">Android</option>
        <option value="windows">Windows</option>
    </select>
</form>
<form action="#">
<p>What type of cell phone have you had in the past? Select all that apply.</p>
<select name="phonepast" multiple="multiple">
<option value="iphone">iPhone</option>
<option value="android">Android</option>
<option value="windows">Windows</option>
</select>
</form>
Submit Button
<input> Input element

INLINE ELEMENT
<form action="#">
    <p>What is your name?
    <input type="text" name="name">
   	</p>
   	<input type="submit" name="submit" value="Send">
</form>
Exercise
Create a form with at least 3 text fields, 1 text area, 1 radio button set, 1 checkbox set and one drop down list including a submit button in index.html
Extra Markup
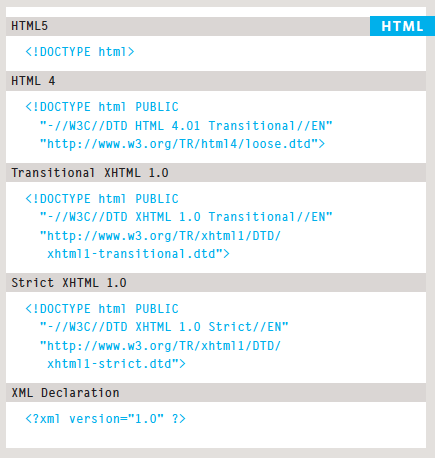
Doctypes
Doctypes and HTML versions have evolved, like any language naturally does.
Doctypes set the version in which you are writing your code in.
Comments
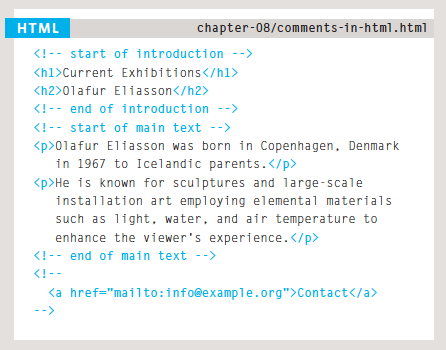
<!-- Comment Here -->
<!-- This is the page title -->
<h1>Life with Dogs</h1>

ID vs Classes
<id="value"> ID
<class="value"> Class
These allow us to identify an element to target for various reasons, one if which being for CSS (cascading style sheets). They are also used a lot in Javascript.
In the example on the right, they wrote CSS to make the element all caps.
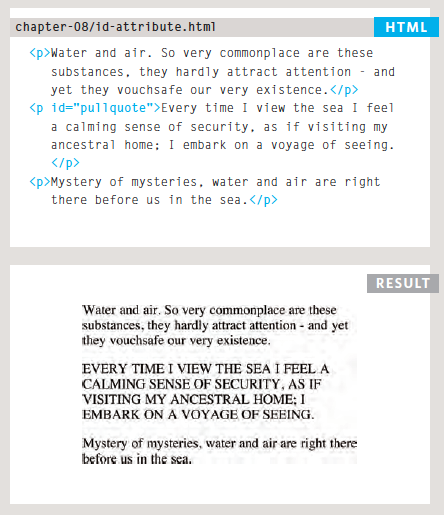
Difference: ID's should only be once, where classes can be used multiple times.
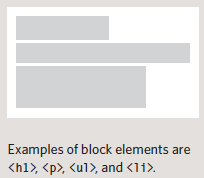
Block
Block elements will always appear to start on a new line (unless otherwise altered in CSS) More Info >
Inline
Where inline elements will appear in the same line as their neighboring elements. More Info >

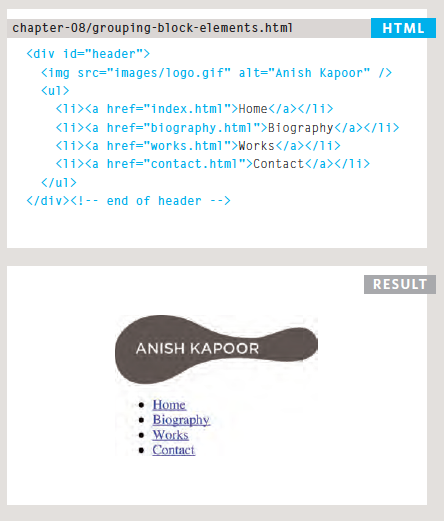
<div>
An element that allows you to group elements together.
You can apply classes or id's to these elements to later target them with CSS or Javascript.
BLOCK ELEMENT
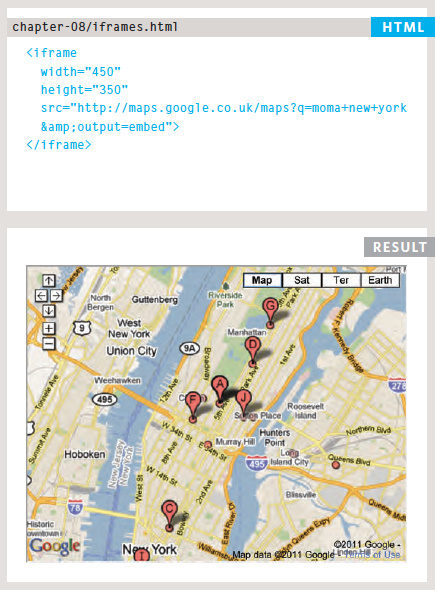
<iframe>
iframes allow you to bring another and load it inside of your website.
Most commonly used example would be Google Maps.
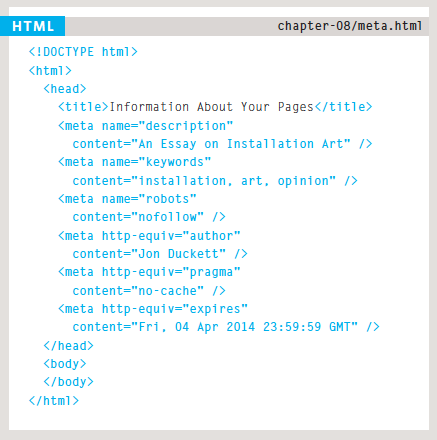
<meta>
<meta> lives inside of <head> and contains information about your website.
Instances:
description
keywords
robots
viewport
and more!
Pop Quiz!
- What do doctypes do?
- What is wrong with this comment?
<!-- Hey, I'm a comment -> - What is the difference between ID & Class?
- What is the purpose of a div?
- Why use meta tags?
HTML5 Layouts
HTML5
HTML5 introduced a new set of elements that help define structure of web pages.
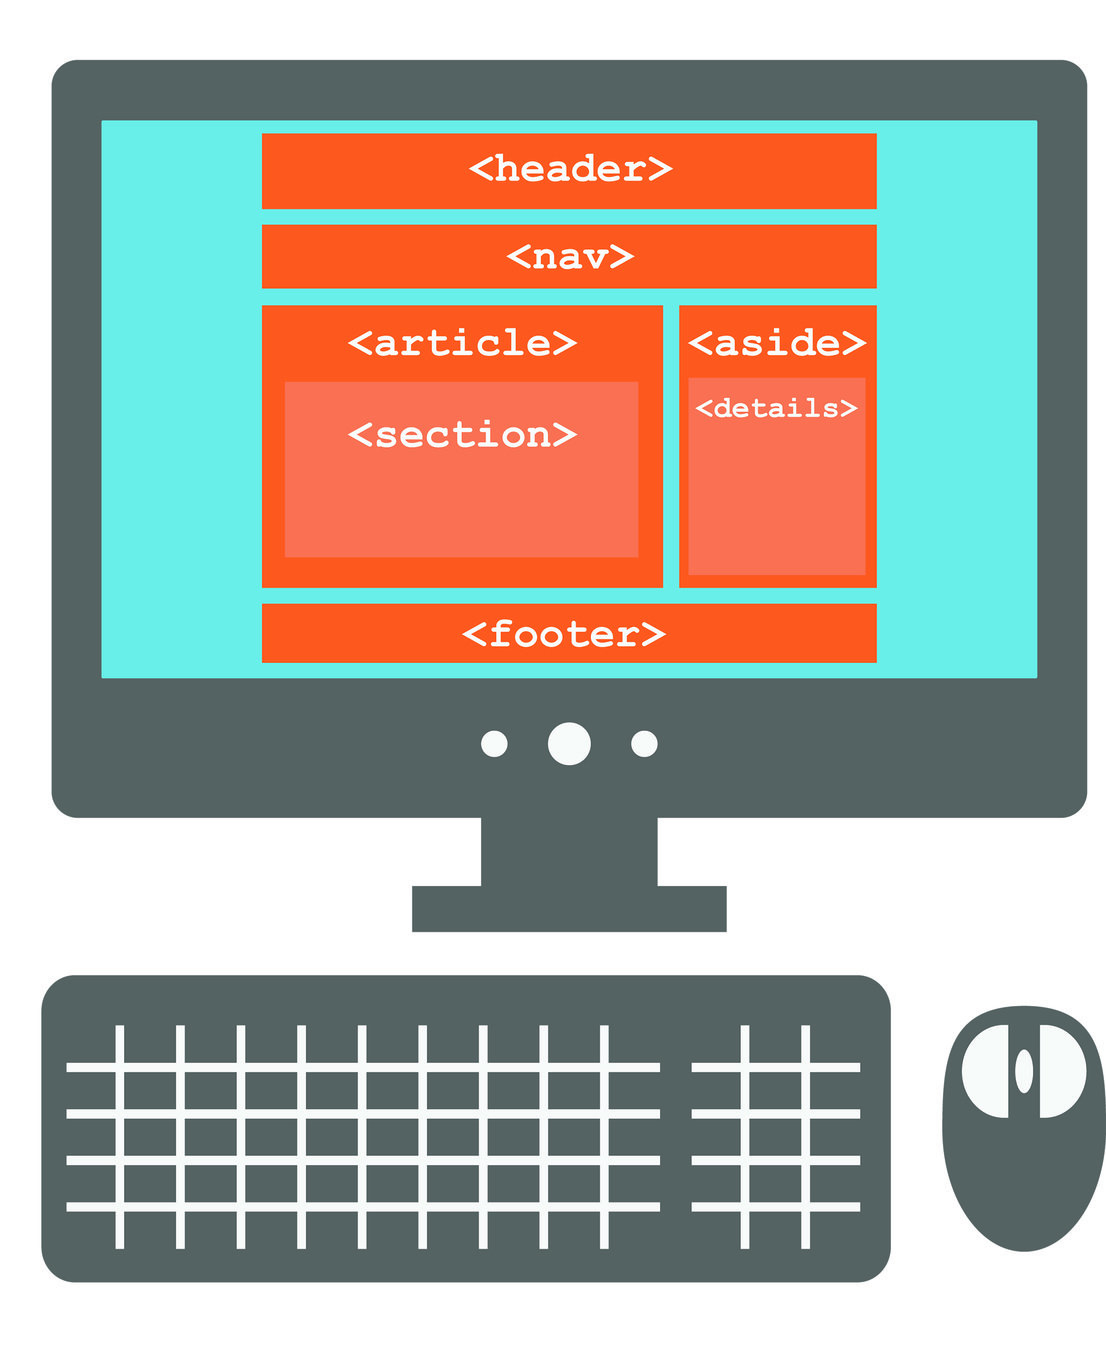
Layout Example
Header
Nav
Article
Aside
Footer
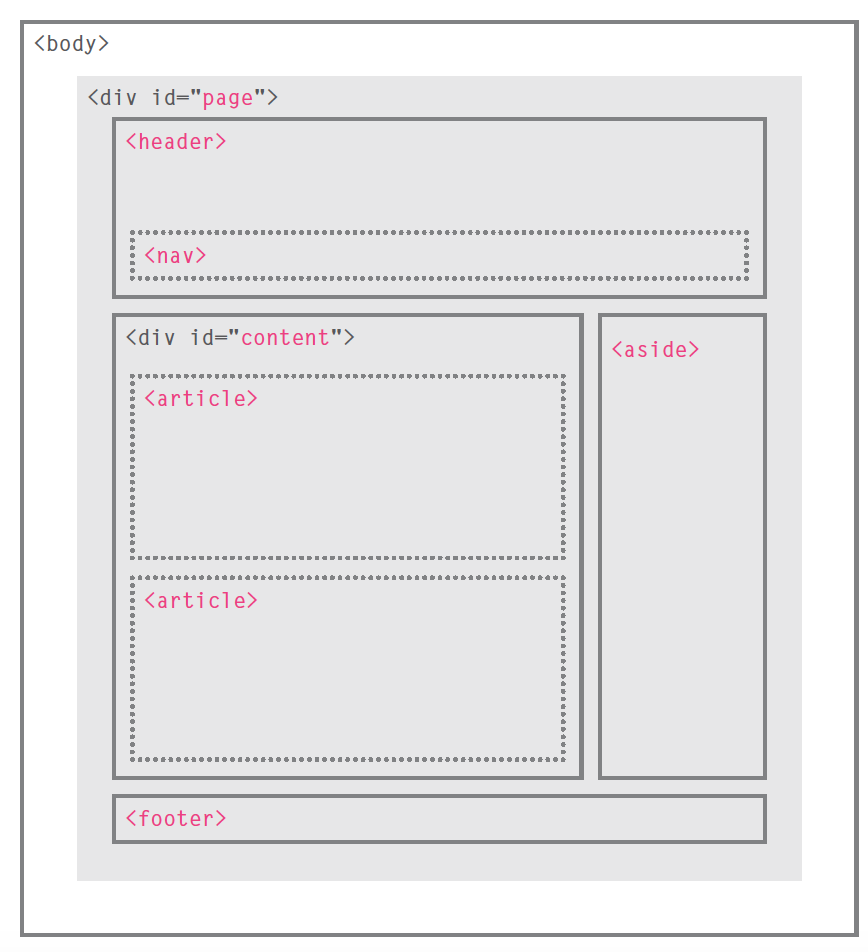
<header> & <footer>
These elements can be used for the entire header and footer elements as well as article headers & footers.
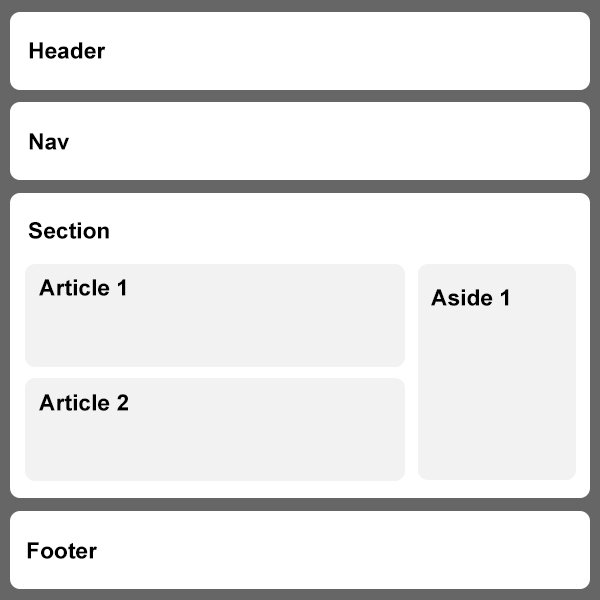
<nav>
Nav element is used to contain the major navigation such as main menu.

<article>
Section of page that could stand alone and possibly be syndicated. Such as blog posts or even normal webpage content.

<aside>
Used for two purposes - when within an article, it can contain more information for that article.
When inside of a page it is used for additional information about that page.

<section>
Section elements group related information together, like shown on the right.
You can have several sections when necessary.

<div>
Although we learned about a lot of great layout elements, the div element still remains an important element!

Pop Quiz!
- What element can be used to include additional information?
- When should you use the article element?
- What element could be at the start of your page?
- How about the end of your page?
- What other element did we learn?
Exercise
Re-structure your index.html file inside "New Site" on your desktop to use HTML5 elements.
Client Labs
To learn is to do.
We are going to break up into 3 groups.
In these groups you will collaborate about the project together, but build your websites individually.
Group Work
Use the concepts you have learned to discuss the project and ideas with your client.
Each team member should help the client overall with new ideas and suggestions.
Independent Work
You should write the code for your specific website mostly by yourself.
Please seek advice from your team or the TA's if you need help with code or how to do something.
If you have project questions - reach out to your client.
Let's break into groups!
- I'm comfortable
- Give me a challenge
- I'd like a little more help
Remember, use the TA's - they are here to help! Also, feel free to utilize the instructor during this time too!
Deadline
You will have until 3:30pm to complete your project.
You will present your final project to your client for feedback.
*Depending on time, feedback may be delivered later on, via email.
Before you go...
Please provide us feedback!
Also be sure to register for