Fun with
Views & Controllers
How the Pieces Fit Together

Like a Boss

Controller - The Boss
A controller is a middle man between models and views. Its job is to parse requests, interact with models, and create view outputs.
View Master
View - The Presentation
The presentation is handled by views. It's the surface layer that is encountered by users. Views are basically page templates. Ruby and html are combined to make them dynamic.

Travel App
$ rails new travelLet's generate a brand spankin' new Rails application called travel
$ cd travelWe'll change directories into the travel folder, start our server and browse our localhost.
$ rails s
$ rails g controller Welcome index aboutCreate a Controller
In terminal let's leave our server running in one tab and open another to run some commands. We'll generate a controller: Welcome which contains two actions: index and about.
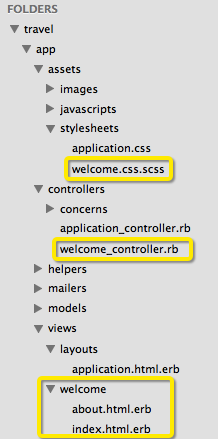
Notice all the files that were generated after running this command. Open up Sublime and let's take a look at some of them.
Welcome Controller
You now have a controller called WelcomeController.rb
app/controllers/welcome_controller.rb
class WelcomeController < ApplicationController
  def index
  end

  def about
  end
end
WelcomeController inherits all the properties of the ApplicationController and provides two actions to work with. These actions correspond to two views: index.html.erb and about.html.erb.
Enjoy the View(s)
Rails generated a few views in the form of combined html & embedded ruby files. It's up to you to modify the code to make it more presentable.
<h1>Welcome#index</h1>
<p>Find me in app/views/welcome/index.html.erb</p>
<h1>Welcome#about</h1>
<p>Find me in app/views/welcome/about.html.erb</p>
app/views/welcome/index.html.erb
app/views/welcome/about.html.erb
<h1>Welcome to my Travel Site</h1>
<p>Here's a list of countries I'd love to visit.</p>
Home + Root Route
Let's add some meaningful tags to our home (index) page.
root 'welcome#index'config/routes.rb
And route this page to be our root.
class WelcomeController < ApplicationController
  def index
    @countries = ['Norway','Sweden','Peru']
  end

  def about
  end
end
Passing Data
Let's store an array in an instance variable in the index action of our Welcome Controller.
app/controllers/welcome_controller.rb
ERB
Embedded Ruby
<% ... %><%= ... %>Run the code but do not return anything. Used for conditions, loops or blocks.
Run the code and print the return value.
WRONG! No more "puts"!
Hi there <% puts "Jaime" %>
Hi there <%= @name %>CORRECT
<h1>Welcome to my Travel Site</h1>
<p>Here are some countries I'd love to visit.</p>

<ul>
  <% @countries.each do |country| %>
    <li><%= country %></li>
  <% end %>
</ul>
We can now display this data using erb tags and an each loop. (Remember Ruby?) We'll weave in list tags and voila! We have a dynamically generated list.
Passing Data
From Controller to View
app/views/welcome/index.html.erb
Linking to Images
The image_tag helper builds an HTML <img /> tag to the specified file. By default, files are loaded from assets/images so no folder path is required.
<%= image_tag "peru.png" %><%= image_tag "peru.png", alt: "Machu Picchu",
id: "peru",
class: "country" %>Alt tag and css selectors may be specified like so:
<%= image_tag "assets/images/peru.png" %>Right:
Wrong:
Image Activity
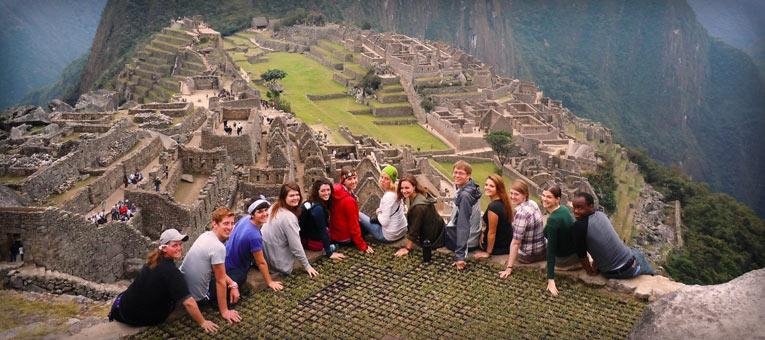
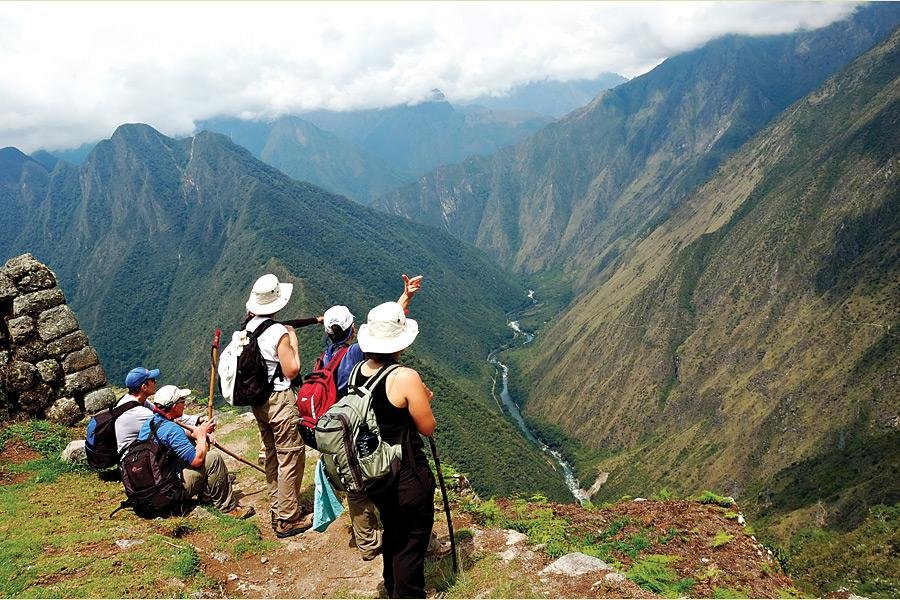
Add 4 images to your homepage using erb tags.


Understanding Yield
Within the context of a layout, yield identifies a section where content from the view should be inserted.
app/views/layouts/application.html.erb
<html>
<head>
  <title>Travel</title>
  <%= stylesheet_link_tag    'application', media: 'all', 'data-turbolinks-track' => true %>
  <%= javascript_include_tag 'application', 'data-turbolinks-track' => true %>
  <%= csrf_meta_tags %>
</head>
<body>
    <%= yield %>
</body>
</html>
Add Bootstrap
<html>
<head>
  <title>Travel</title>
  <%= stylesheet_link_tag    'application', media: 'all', 'data-turbolinks-track' => true %>
  <%= javascript_include_tag 'application', 'data-turbolinks-track' => true %>
  <link rel="stylesheet" href="https://maxcdn.bootstrapcdn.com/bootstrap/3.3.0/css/bootstrap.min.css">
  <script src="https://maxcdn.bootstrapcdn.com/bootstrap/3.3.0/js/bootstrap.min.js"></script>
  <%= csrf_meta_tags %>
</head>
<body>
  <div class="container">
    <%= yield %>
  </div>
</body>
</html>
We'll add the CDN Bootstrap references to the head the exact same way we did in our HTML sites. Let's also add a container that wraps all our content.
Add Navigation
Let's add a navbar friend so we can navigate through our app.
<a href="about">About</a><%= link_to "About", about_path %>HTML way to link:
Ruby way to link:
<a class="navbar-brand" href="/">Travel</a><%= link_to "Travel", root_path, class: "navbar-brand" %>
Add a Contact Page
Add another page called contact to the Welcome Controller. Remember this means we have to add a corresponding view, and route.
*= require_tree .The Boss Stylesheet
Let's open up app/assets/stylesheets/application.css. The styles we write here will be applied to the entire site.
ensures that all CSS files in the app/assets/stylesheets directory are included into the application CSS
*= require_selfensures that the application.css file itself gets included
Background Images
Now let's get to stylin'! How would we style a background image for the entire site? Let's save an image into our app/assets/images folder and reference it in our stylesheet.
body {
  background: url(<%= asset_path "bg.png" %>) no-repeat;
  background-size: cover;
}
body {
background: url("assets/images/bg.jpg") no-repeat;
background-size: cover;
}CSS way - does it work?
Ruby way - must rename to application.css.erb
Container
Let's style our container to have a background color of white with a bit of opacity. This way we can see a hint of our sweet background image and still read the text on our pages.
.container {
  background: rgba(255,255,255,0.8);
}
Break?
$ rails g scaffold Destination city:string country:string description:textScaffold
Ok, let's scaffold a resource called "Destination" with 3 attributes: city, country and description.
$ rake db:migrate
Then run the rake command to migrate the data columns.
Destinations
Notice that the scaffold command generated many more views this time. We have a set of files that allow us to create, read, update and delete (CRUD).
Where do we browse this page live? localhost/destinations of course!
It also created a model (which we'll get to later in the course) and some assets. Let's open up the scaffolds.css.scss file and delete it's contents so they don't interfere with the styles we'll be writing.

Update the Nav
Let's go back to layouts/application.html.erb and add a link to our destinations index to the navbar.
Remember how to do that using erb?
<ul class="nav navbar-nav">
  <li class="active">
    <%= link_to 'About', about_path %>
  </li>
  <li>
     <%= link_to 'Destinations', destinations_path %>
  </li>
...
Add some data
What are a few cities/ countries you'd like to visit?

Fancier Forms
Bootstrap lets us fancy up the boring forms and buttons that Rails generated.
  <div class="field form-group">
    <%= f.label :city %><br>
    <%= f.text_field :city, class: "form-control" %>
  </div>
  <div class="field form-group">
    <%= f.label :country %><br>
    <%= f.text_field :country, class: "form-control" %>
  </div>
  <div class="field form-group">
    <%= f.label :description %><br>
    <%= f.text_area :description, class: "form-control", rows: "5" %>
  </div>
  <div class="actions form-group">
    <%= f.submit class: "btn btn-primary" %>
  </div>
app/destinations/_form.html.erb
<h1>My Destination Wish List</h1>

  <div class="row">
    <% @destinations.each do |destination| %>
      <div class="col-md-4">
       <div class="panel panel-default">
        <div class="panel-body">
         <h2><%= destination.city %>, <%= destination.country %> </h2>

         <p><%= destination.description %></p>

         <div class="btn-group">
          <%= link_to 'Show', destination, class: "btn btn-default" %>
          <%= link_to 'Edit', edit_destination_path(destination), class: "btn btn-default" %>
          <%= link_to 'Destroy', destination, method: :delete, data: { confirm: 'Are you sure?' }, class: "btn btn-default" %>
         </div>
        </div>
      </div>
    </div>
  <% end %>
</div>

<%= link_to 'New Destination', new_destination_path, class: "btn btn-primary" %>
Further Fancification
Let's give a facelift to our destinations index page. We'll update the h1, remove the table, add a 3 column grid, panels, and button groups.
app/views/destinations/index.html.erb
And even more...
We can even make our show page a little nicer.
app/views/destinations/show.html.erb
<h1><%= @destination.city %>, <%= @destination.country %></h1>

<p> <%= @destination.description %></p>

<div class="btn-group">
  <%= link_to 'Edit', edit_destination_path(@destination), class: "btn btn-default" %>
  <%= link_to 'Back', destinations_path, class: "btn btn-default" %>
</div>
Alert Challenge
http://getbootstrap.com/components/#alerts
Let's style up our "notice" text with a Bootstrap alert "success" style. Note that this text only appears when we do something awesome like create a new destination.
It will say:
"Destination was successfully created."
Click back to the destinations index page and notice that the green box is still appearing. How would we get it to ONLY appear when there's text inside?
Alert Solution
<% if notice != nil %>
  <p id="notice" class="alert alert-success" role="alert">
    <%= notice %>
  </p>
<% end %>
This is really simple Ruby, right? Well, embedded Ruby. If notice isn't nil, or empty then display the paragraph tag. This logic can be added to the top of both the index and show pages.
<p id="notice"><%= notice %></p>Before:
After:
  def index
    @destinations = Destination.all
  end
Pull from the Db
Let's update our homepage to be more dynamic. Let's pull city and country names from our local database instead of our hard-coded array.
<ul>
  <% @destinations.each do |destination| %>
      <li><%= destination.city %>, <%= destination.country %> </li>
  <% end %>
</ul>
app/controllers/welcome_controller.rb
app/views/welcome/index.html.erb
A gem called Paperclip
Let's install a gem that helps us store images in our database. Instructions are here:
Homework:
Get Paperclip working so you're able to add, update, remove and show images associated with each destination. Then add some logic so images only display if they exist in the database. (read: do not display broken images)
More Homework
Add Bootstrap and Paperclip to your Blog app (if you don't have one, create one!)
Rip out those tables and play with using 3 or 4 column grids to display content. Add styles like we did in class today and get creative!
Add an appropriate (read: not too busy) background image, container and styles in your application.css file.
Don't forget to add a navbar, or try out the other nav styles in the Bootstrap documentation.