Python Tkinter
製作GUI簡單教學
UR
20191006


大綱
- 基本介紹
- 基本架構
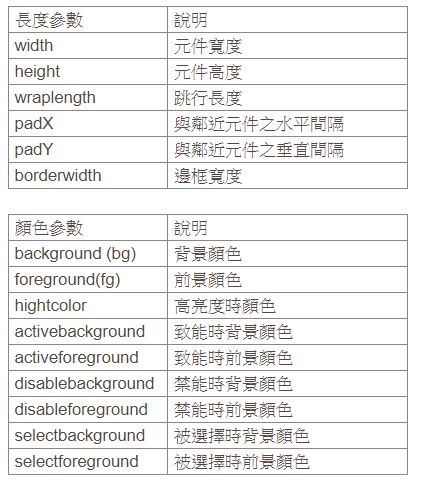
- 元件、常見參數
- 顯示放置方式
- 參考資料
什麼是GUI?
- 圖形使用者介面(Graphical User Interface)
- 用圖形顯示的電腦操作介面
- 簡單來說,桌面、視窗、選單、按鈕...都是

什麼是Tkinter?
- python 內建函式庫中的模組
- 呼叫Tcl/Tk的介面,它是一個跨平台的指令碼圖形介面
- 非唯一python圖形介面的模組

來嘗試動手做看看吧
Hello world
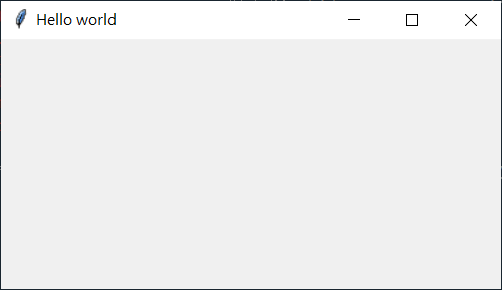
建立視窗
from tkinter import *

root = Tk()
root.title('Hello world') #視窗標題
root.geometry('400x200') #視窗大小

root.mainloop() #視窗加入事件監視迴圈
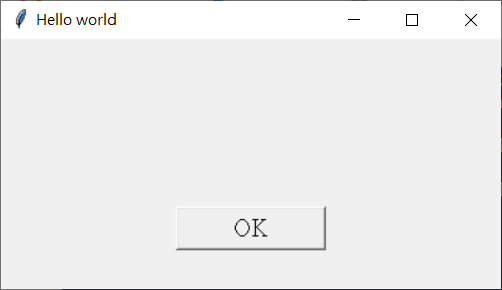
新增標籤、按鈕
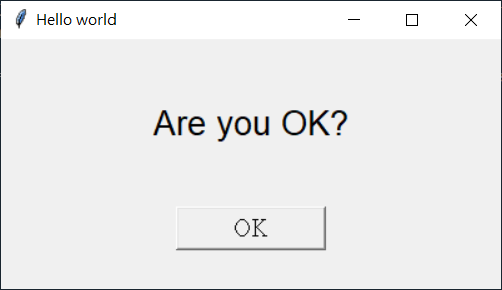
label = Label(text = 'Are you OK?')

button = Button(text = 'OK')

label.pack() #顯示
button.pack()


root.mainloop() #視窗加入事件監視迴圈
來加點樣式吧
#from tkinter import *

#root = Tk()
#root.title('Hello world') #視窗標題
#root.geometry('400x200') #視窗大小

label = Label(text = 'Are you OK?', height = 4, font = ('Arial',20))

button = Button(text = 'OK', width = 10, font = ('bold',15))
#設定font, height, width

#label.pack()
#button.pack()

#root.mainloop() #視窗加入事件監視迴圈
新增函式
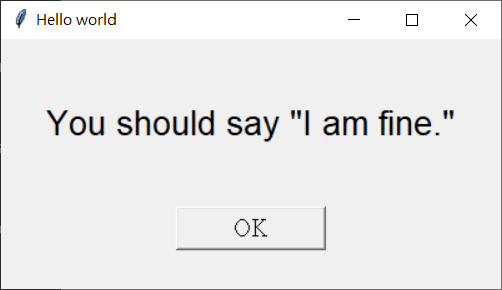
新增command
...

def clickOK():
    label.config(text='You should say "I am fine."')

button = Button(text = 'OK', width = 10, font = ('bold',15), command = clickOK) #新增command

...
Tkinter 提供了下列 21 種 GUI 元件
-
Label
-
Button
-
Radiobutton
-
Checkbutton
-
Entry
-
Frame
-
LabelFrame
-
Listbox
-
Text
-
Message
-
PanedWindow
-
Scrollbar
-
Scale
-
Spinbox
-
Menu
-
OptionMenu
-
Menubutton
-
Canvas
-
Image
-
Bitmap
-
Toplevel
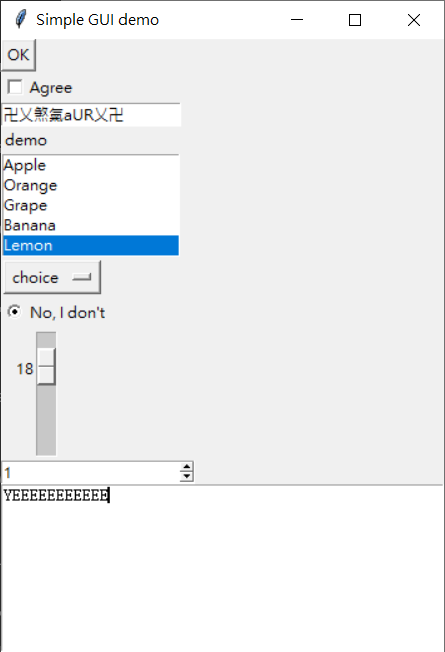
視窗元件瀏覽
- Button
- CheckButton
- Entry
- Label
- Listbox
- OptionMenu
- Radiobutton
- Scale
- Spinbox
- Text
顯示放置方式grid/pack/place
- grid
- pack
- place

1.Grid
The Grid Geometry Manager
grid 是方格, 所以的內容會被放在這些規律的方格中。例如:
for i in range(3):
    for j in range(3):
        tk.Label(window, text=1).grid(row=i, column=j, padx=10, pady=10, ipadx=10, ipady=10)
2. Pack
The Pack Geometry Manager
我們常用的pack(), 他會按照上下左右的方式排列.例如:
tk.Label(window, text='P', fg='red').pack(side='top')    # 上
tk.Label(window, text='P', fg='red').pack(side='bottom') # 下
tk.Label(window, text='P', fg='red').pack(side='left')   # 左
tk.Label(window, text='P', fg='red').pack(side='right')  # 右
3. Place
The Place Geometry Manager
給精確的座標來定位, anchor='nw'是錨定點是西北角。例如:
tk.Label(window, text='Pl', font=('Arial', 20), ).place(x=50, y=100, anchor='nw')
參考資料
