A Very Basic Introduction to Axure RP
Clinton McKay
Developed for the
Indiana University ASIS&T Student Workshop Series
Indiana University ASIS&T Student Workshop Series
Fall 2013
What is Axure RP?
Axure RP is Rapid Prototyping software (hence the RP).
It lets you create high (or low) fidelity interactive prototypes for websites and mobile apps without programming anything.

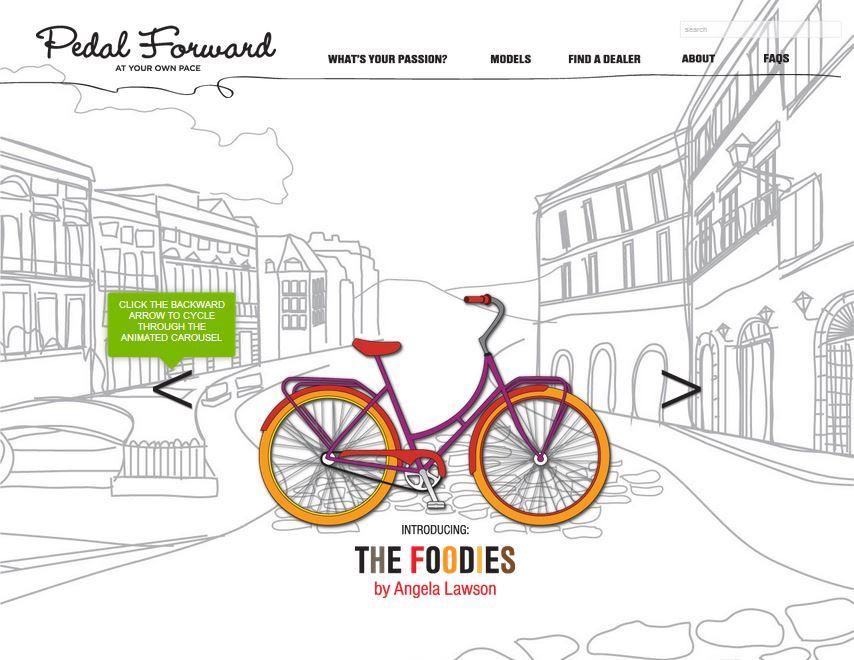
Examples of Axure RP Prototypes
Web
Mobile

What is a Rapid Prototype?
A prototype is like a working wireframe. A good prototype should have most or all of the functionality of the following:
A good prototype should help you tell the story of how your proposed design would look and function.
-
Wireframe
-
Annotations
-
Site structure (or sitemap)
-
Interactivity (at least navigation)
What isn't a Prototype?
Don't get too carried away when creating prototypes, they're a lot of fun but some things don't belong in prototypes:
- Actual content (use placeholder text and images where possible)
- Database connectivity (this would just be silly--but if you want to make this work, feel free)
- Unnecessary fidelity (the more fidelity you have, the harder it will be to come up with better ideas than the ones you have right now.)
Downloading Axure RP
1) Download the 30 day free trial version of
Axure RP 6.5 here
Axure RP 6.5 here
2) If you want to keep Axure RP after the 30 day trial,
request a free student license here
request a free student license here
(You'll need a first name, last name, IU email address, unofficial transcript, and a few sentences explaining why you need Axure)
Before You Start a New Axure Project
Make sure you have some idea of what you want to build! You're going to want to have some idea of the following before you begin:
1) Sitemap - the navigation organization of the site complete with labels for navigation links
2) Wireframes - these can develop as you're working in Axure, but you probably don't want to jump into prototyping without at least some idea of what you'll be doing
3) Site Features - Again, these will change over time, but it's best to start with some idea of what features the site will have and what interactions will be possible.
Create a New Axure RP Project
File > New
View > Reset View
If you know your site structure (sitemap), now is a good time to add it to the project. To do this, slow double click on the items in the sitemap area to change names, then add children or siblings by right clicking on page names.
(Use the down arrow to see a walk through of this step)

Create a New Axure Project
Step 1
Open Axure RP
On a mac, it may seem like the program isn't responding--there is no splash screen. Start a new project by selecting
File > New
OR ⌘N on Mac
OR control + N on PC
Create a New Axure Project
Step 2
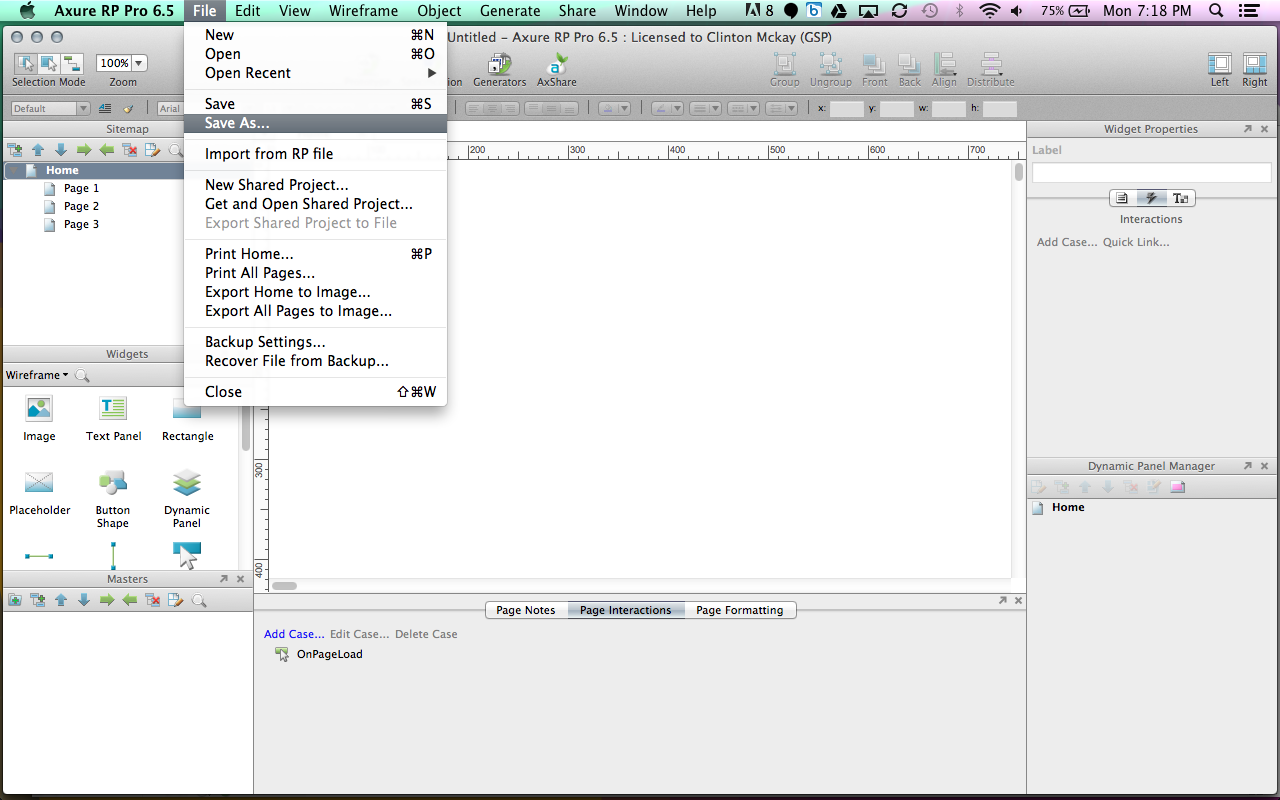
Save the new project
File > Save As...
OR ⌘S on Mac
OR control + S on PC
Elements
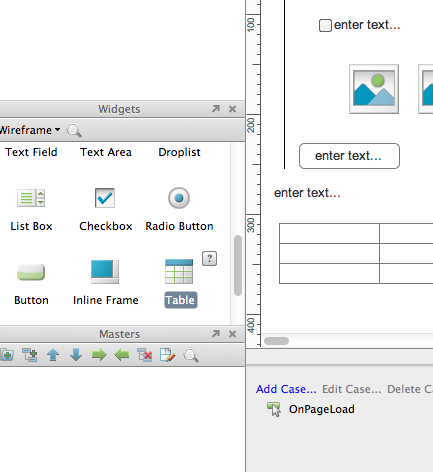
To add elements to a page, just drag them from the "Widgets" panel (on the left) into the active tab.
When you drag an "image" element into your project, just double click on the icon to replace it with an actual image from your hard drive (See step 2 below).
If you can't find the element you need, try the "download libraries" option (See step 7 below).
(Use the down arrow to see a walk through of this step)
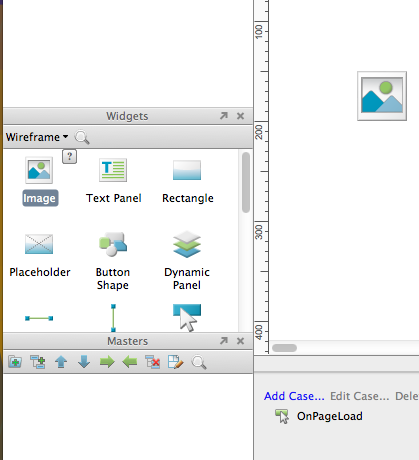
Elements
Step 1
Drag elements onto the active page from the "Widgets" pane on the left hand side of the screen.
Elements
Step 2
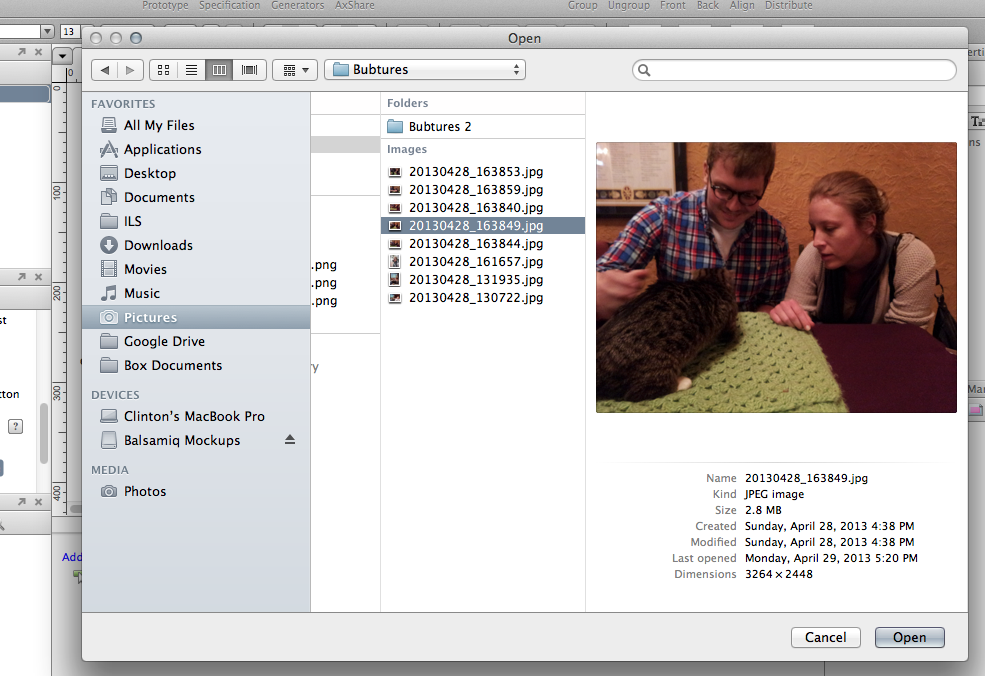
To upload an image file, simply double click an image widget and choose the file on your hard drive.
Elements
Step 3
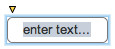
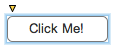
Some elements contain text (buttons, button shapes, text fields, text areas, checkboxes, radio buttons... lots of elements)
To change this text, just double click on the sample text (usually this reads "enter text..."
Elements
Step 4
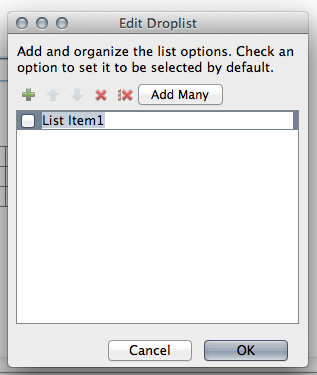
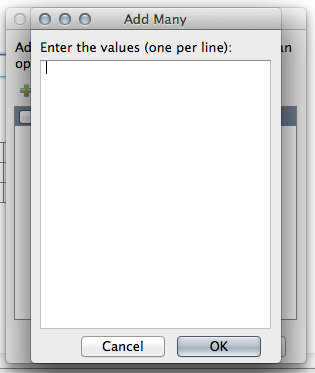
Other elements need a little more work (namely, droplists and list boxes). To work with these kinds of elements, just double click the element and add the options either one by one, or with the "Add Many" button.
Elements
Step 5
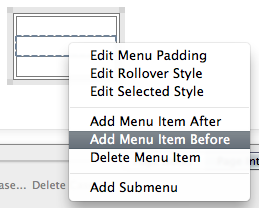
Menus are special too. Just drag over the appropriate menu, then double click the boxes to add content to them. You can right click to add menu items before or after or add submenus.
Elements
Step 6
The exceptions to these rules are even more fun, and I'm not going to go into them in too much detail, but here are their basic uses:
iFrame: allows you to show another website in an area on your prototype
Dynamic Panel: allows you to set up interaction areas that can respond to different things the user does (click, mouse over, etc.)
Image Map Region: allows you to break an image into different parts that the user can click to cause various results
Elements
Step 7
If the element you want to add to your page isn't available in the "Widget" pane, you have some options:
1: Try to find the widget in another library (Click the "Wireframe" dropdown at the top of the widget panel and select "Download libraries...")
2: Create your own widget library! (This option is in the same place as "Download libraries..." above)
3: Find a workaround. This is probably the easiest option.
Elements
Continued
For more information about elements (or widgets, as Axure calls them), just head over to the Axure lesson on widgets and masters.
It's located here.
Masters
Masters are collections of elements that are used on multiple pages (or all pages)
Masters are great for headers and footers. You can make masters out of any elements.
Masters are like containers to keep reusable elements in. When you change an element like a link or text area in the master, it will change on all of the pages the master is applied to.
(Use the down arrow to see a walk through of this step)
Masters
Step 1
First, you need to figure out what exactly needs to be in your master. The answer to this question is different for each site. Basically:
Try to decide what elements will be on multiple pages and make them masters
Group elements together logically. If there are 8 things that will be on EVERY page in the same location, put those 8 in on master and name it something like "AllPagesMaster". If there are 3 items that are on half of the pages, consider making a second master for those.
Masters
Step 2
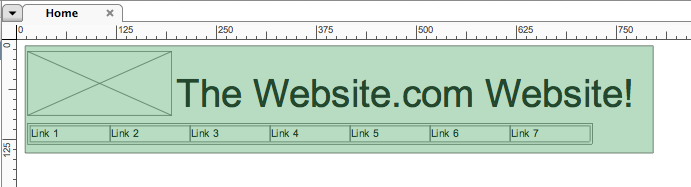
You can make a master from any set of elements on any page! Just throw the elements you need into your active page to begin.
Masters
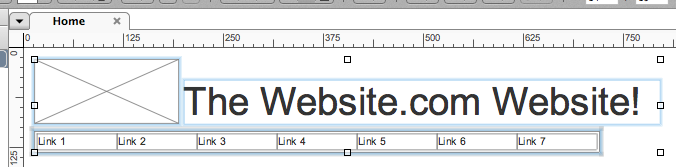
Step 3
Select the master elements by clicking and dragging a rectangle over the elements. Everything that is even partially contained in your rectangle will be selected.
Masters
Step 4
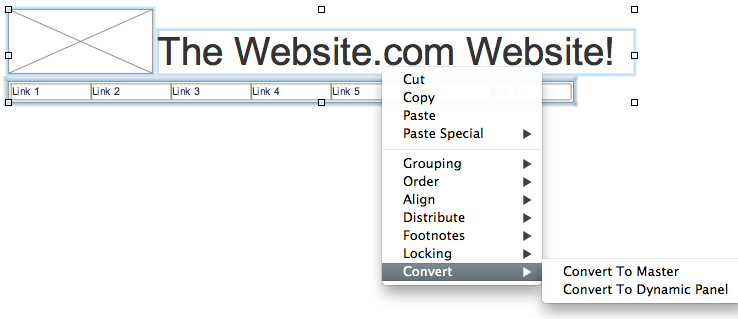
Right click on any of the selected elements and select
Convert > Convert to Master (then enter an appropriate name)
Convert > Convert to Master (then enter an appropriate name)
Masters
Step 5
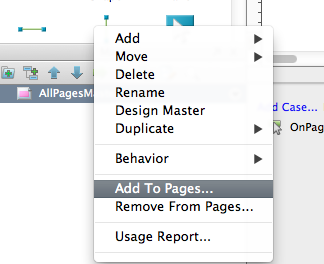
Add your master to all of the necessary pages by right clicking on its name in the "Masters" panel, then selecting "Add to pages..."
Masters
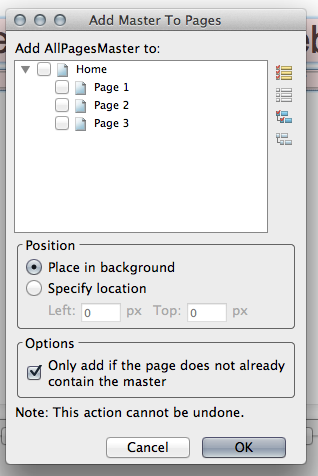
Step 6
Select all of the pages you want to add your master to, enter the placement you'd like on each page, and be sure to keep the bottom checkbox selected so you don't end up with the same master showing up multiple times on a single page.
More about Masters
If you need to make changes to something in a master, just double click on the name of the master in the "Masters" panel and it will open in a new tab. Changes you make to the master will apply everywhere the master is used which is awesome.
Go ahead, try it. It's awesome.
Create the Site Structure
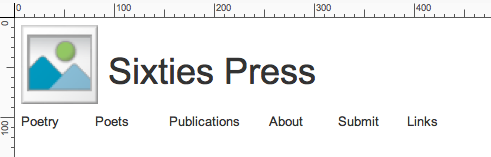
The structure of the Sixties Press redesign is:
Home
Poetry
Poetry
Poets
Publications
Print Publications
Electronic Publications
Links
About
Submit
Local Resources
Resources for Poets
(Use the down arrow to see a walk through of this step)
Creating the Site Structure
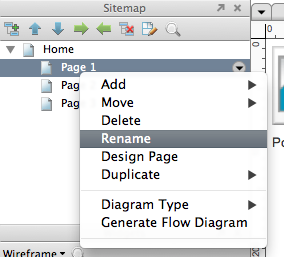
Step 1
Right click each of the pages that are automatically supplied in the "Sitemap" panel, then select "Rename" and type first "Poetry", then "Poets", then "Publications".

Create the Site Structure
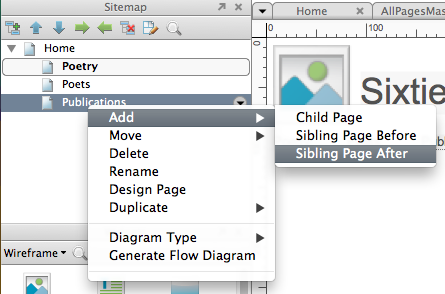
Step 2
Right click "Publications" and select Add > Sibling Page After to create a blank page for "About". Repeat for "Submit" and "Links". This completes the top level navigation.
Create the Site Structure
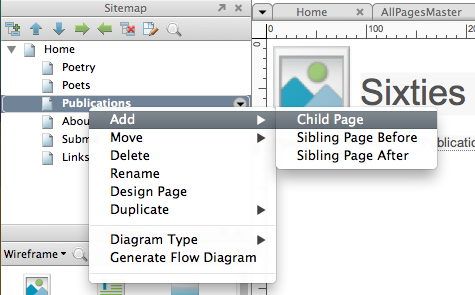
Step 3
Repeat step 2 for "Publications" and "Links", but select Add > Child Page (you need two children under "Publications" and two children under "Links"). Name the four second level navigation links.
Build a Master
Decide which elements belong on every page of the site
These elements need to be grouped together into a reusable master.
(Use the down arrow to see a walk through of this step)
Building the All Pages Master
Step 1
Decide which elements belong on every page of the site
Drag and drop the necessary elements into any pane and convert to a master called "AllPagesMaster"
(See the next step before undertaking this)
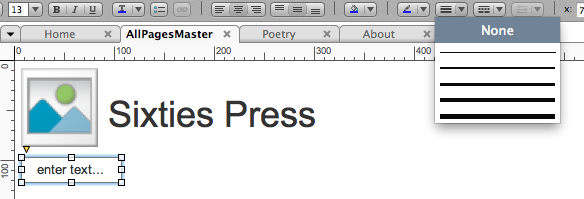
Building the All Pages Master
Step 2
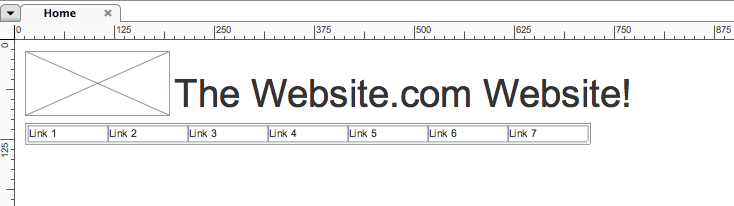
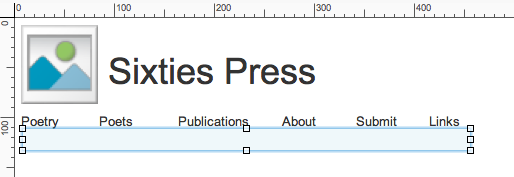
It's tempting to add text panels because that's what the links look like--but don't. Add the navigation links as button shapes. To make this process easy, drag one button shape into the "Poetry" navigation position, then click the button and change its stroke to "None". Copy and paste this button for the other 5 links.
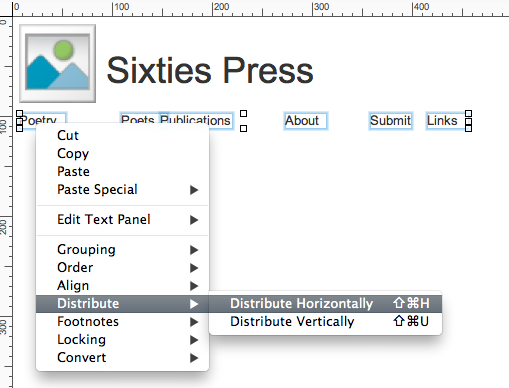
Building the All Pages Master
Step 3
Once you have all of the links made and labeled, place them all in a row straight across the page (with the first link and last link where you want them to be. Select all of the links, then right click on them, and select Distribute > Distribute Horizontally to add automatic padding.
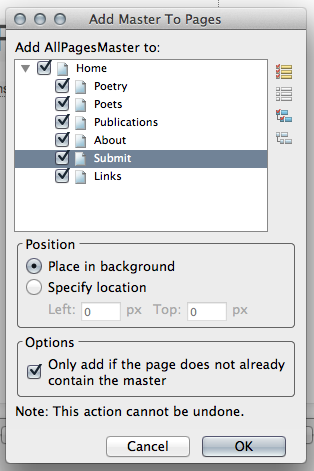
Building the All Pages Master
Step 4
Add the "AllPagesMaster" master to all pages by right clicking its name in the "Masters" panel and selecting "Add to Pages...", then selecting all pages and placing the master in the background.
Dynamic Panels
Dynamic panels change based on different cases.
You can set dynamic panels to one case or another based on different actions.
Let's create a dynamic panel underneath the global navigation links on our prototype.
(Use the down arrow to see a walk through of this step)
Dynamic Panels
Step 1
Make sure you're on the AllPagesMaster pane, the dynamic panel needs to be on the master.

Drag a dynamic panel from the "Widgets" panel into the master and re-size it.
Dynamic Panels
Step 2
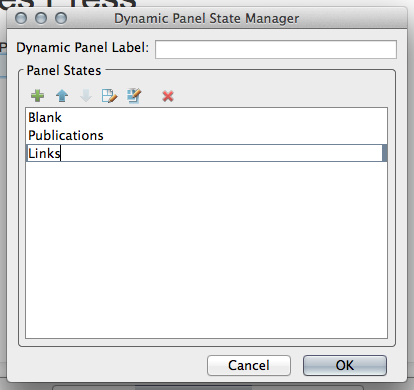
Double click on the panel and add two more panel states. Name the three states "Blank", "Publications", and "Links" (double right click a state to change its name)
Dynamic Panels
Step 3
From that menu, double click on the "Publications" state to edit the state. Add button shapes for "Print Publications" and "Electronic Publications"

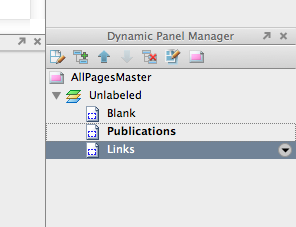
Navigate to the "Links" state in the "Dynamic Panel Manager" panel. Repeat above for links.
Dynamic Panels
Step 4
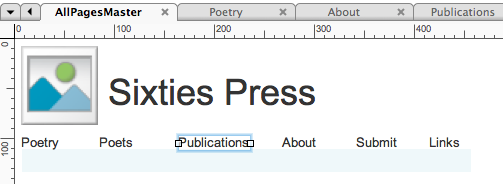
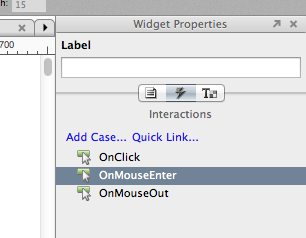
Your dynamic panel is now in the AllPagesMaster master as well as on every page. Open the AllPagesMaster to add some events to its links. Select the "Publications" button.
Dynamic Panels
Step 5
Select "OnMouseEnter" in the "Widget Properties" panel on the right side of the screen.
Dynamic Panels
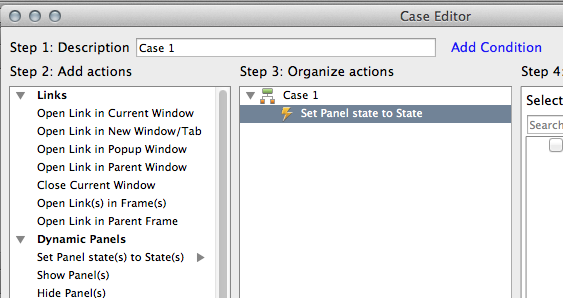
Step 6
Select "Set Panel state to State" from the "Add Actions" column
Dynamic Panels
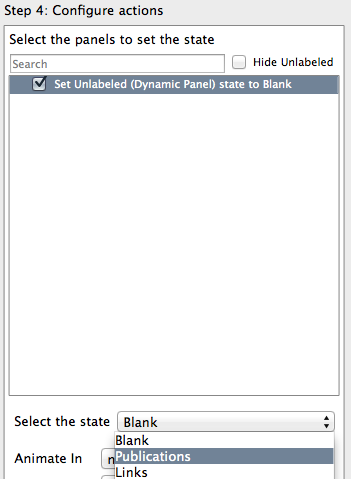
Step 7
Select your dynamic panel (the only one in the list), then set the state to "Publications" in the "Select the state" dropdown. Animations are optional, but do not add an "Animate Out" animation (this will make the state change undo itself!).
Dynamic Panels
Step 8
Add the OnMouseEnter event to the "Links" button as well.

You will have two notes now--these indicate that the elements they're on have events associated with them.
Link Pages
Add "OnClick" events to all of the navigation links (both in the AllPagesMaster master AND in the dynamic panel). This time, instead of setting a panel state, you'll be opening a link.
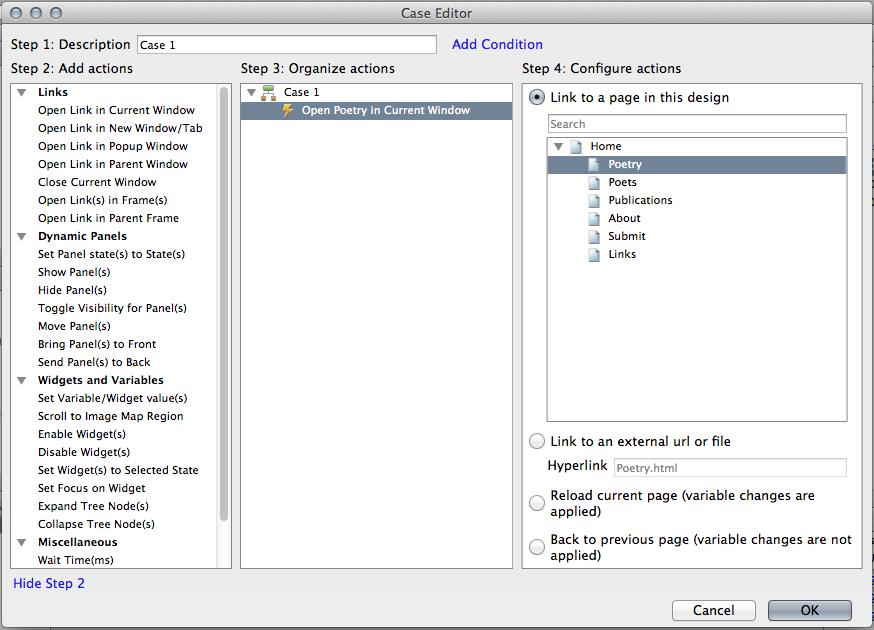
Notice that you can link to external pages or reload/go back.
Generating the Prototype
At various points in this process, you'll probably be curious what your prototype actually looks like. Good news, generating a live prototype is ridiculously simple in Axure RP.
(Use the down arrow to see a walk through of this step)
Generating the Prototype
Step 1
Simply click the "Prototype" button, select a file location, tell Axure which browser to open the prototype in, and go!

Google Chrome is the best browser, but for some reason, Axure requires you to install a plugin to view prototypes there. If you don't want to bother with this, open in Firefox or Safari.
Generating the Prototype
Continued

If your prototype doesn't work, try watching the prototyping video at Axure.com
Element Styles
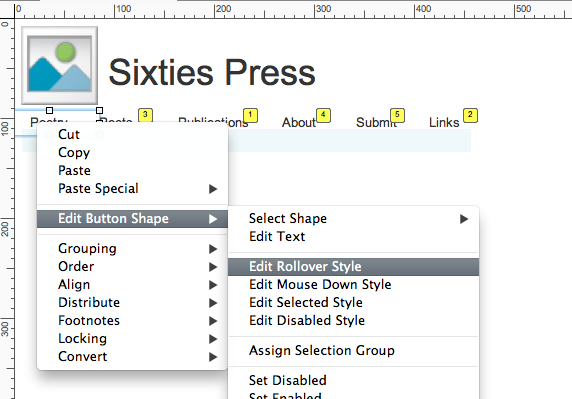
Just like Dynamic Panels, you can set up states for elements like buttons or images. This lets you change the way things look when they're clicked or rolled over.
Just right click on any element, then select "Edit [[element]]".
Try assigning a rollover style to a button.
(Use the down arrow to see a walk through of this step)
Element Styles
Step 1
Select an element (try a navigation button). Right click the element and choose "Edit [[element]]"
Element Styles
Step 2
Select the styles you want to apply, then click "OK"

Content
Add content to your prototype by creating single instances of elements OR by creating other masters so you can reuse groups of elements on multiple pages.
For more information, take a look at the Axure Training Videos.
Page Formatting
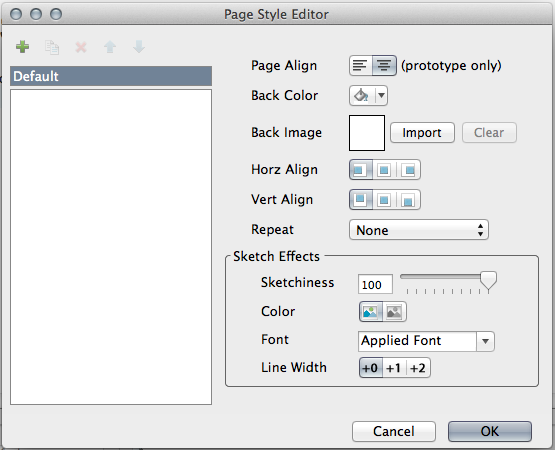
You may want to add a background image behind your prototype, change sketchiness, make your prototype black and white, or change how it is aligned in the browser window.
To make these changes, you'll need to edit the page formatting
in the Page Style Editor window.
in the Page Style Editor window.
(Use the down arrow to see a walk through of this step)
Page Formatting
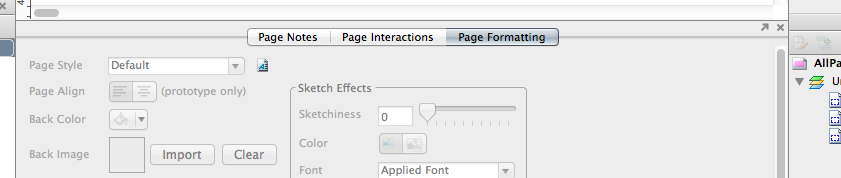
Step 1
Open the "Page Formatting" pane in the center panel at the bottom of the screen, then click on the icon.

Page Formatting
Step 2
To center your prototype in the browser window, click the centered icon next to "Page Align".

Adding Notes
Notes will make your prototype more useful for users. Keep in mind who will be looking at your prototype when adding notes. Things like
"This panel was added because Chris wouldn't shut up about it being here; personally, I don't think this element should actually be built into the final project"
probably aren't very good notes.
(Use the down arrow to see a walk through of this step)
Adding Notes
Step 1
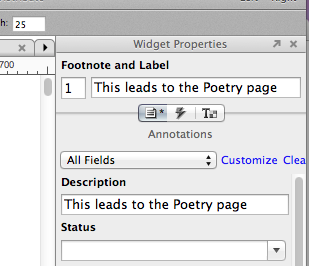
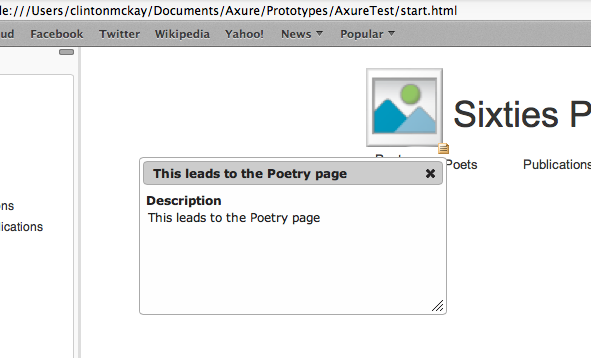
To add a note, select the element you want to annotate. Select the note (next to the lightening bolt) in the "Widget Properties" panel on the right of the screen. Add a footnote number and label, then fill in whatever other information you want.
Adding Notes
Step 2
Generate your prototype to check the notes
Hosting the Prototype on a Server
Navigate to the location of your prototype's root folder. Look at the URL for your generated prototype for help finding this folder. On a mac, this will likely be
Users/yourname/Documents/Axure/Prototypes/ProjectName/
on a PC:
C:\Users\yourname\Documents\Axure\ProjectName\
This folder contains all of the components of your Axure prototype. Place it on your server to host the prototype.
Tips for Sharing the Prototype
From your generated prototype (whether your local copy or the live site), try changing the url from ..../start.html to ..../home.html
This link bypasses the Sitemap view and goes straight to your prototype's home page.
If you want to always bypass the Sitemap view, consider naming your home page "index" in Axure.
More About Prototyping
Keep in mind that Axure may not be the best idea for every project.
Many development scenarios call for other types of prototypes, like paper prototypes or simpler interactive prototypes (like what you can accomplish in Powerpoint).
Other development scenarios call for a full development cycle--for these situations, consider a framework like Twitter Bootstrap for rapid development.
Even More About Prototyping
You may not be able to afford Axure when you're on the job; here are some cheaper alternatives that also work well:
Balsamiq (Free for Students or Single User $79)
LucidChart (Free for Students or plans at
$0/year, $40/year, or $100/year)
$0/year, $40/year, or $100/year)
For more advanced users (Free/Open Source):
Twitter Bootstrap Responsive Design Framework
(desktop and mobile)
(desktop and mobile)
Ratchet iPhone Design Framework (mobile)
Additional Resources
Free UI Design tools (for application interfaces and websites)
Slid.es (reveal.js builder)
You can contact me with any questions!
clintonmckay@gmail.com
Axure Presentation
By Clinton Daniel McKay
Axure Presentation
This presentation offers an introduction to the basic functions of Axure RP rapid prototyping software. Please contact me at clintonmckay@gmail.com if you have any questions about this presentation.

