AngularJS 실전
UI-Router 정복하기
tkddnjs88@gmail.com / lswswswl@naver.com 이상원
developer@applicat.co.kr
http://slides.com/lsw/ui-router/live

tkddnjs88@gmail.com lswswswl@naver.com 이상원
I ❤︎


ui-router 란?
The de-facto solution to flexible routing
with nested views in AngularJS
nested views를 가진 유연한 라우팅을 위한 ,
AngularJS 사실 상의 솔루션

NgRoute
vs
UI-Router
ngRoute(angular-route)
- 원래는 코어였지만 Angular 1.2 부터는 별도의 분리된 모듈
- 이제는 거의 선택받지 못하는 비운의 모듈
- 왜 그런지 알아봅시다.
ui-router(angular-ui-router)가 없던 시절...
공통점
url 설정
*(ui-router에서는 optional)
template or templateUrl 설정
view에 필요 시 controller 할당
when()일때 redirect하고
invalid url을 otherwise()로 한꺼번에 핸들링
url parameter를 사용
ref : http://slides.com/timkindberg/ui-router#/
짧은 코드로 비교해 보면 이런 모양입니다.
$routeProvider
  .when('/shopDetail/:productId', {
    templateUrl: 'shop-detail.html',
    controller: 'shopDetailController'})
$stateProvider
  .state('shop.detail', {
    url: '/shopDetail/:productId',
    templateUrl: 'shop-detail.html',
    controller: 'shopDetailController'})
routes
states
url을 설정한다.
state를 설정한다.
오로지 url로 이동한다.
state와 url을 모두 사용한다.
ng-view는 오로지
하나의 view를 가질 수 있다.
ui-view는 필요한 만큼
여러개의 view를 가질 수 있다.
따라서 flat한 hierarchy를 가진다.
따라서 nested hierarchy를 가질 수 있다.
ref : http://slides.com/timkindberg/ui-router#/
차이점
index.html
ng-view
Content
Header
ng-include
ref : http://www.slideshare.net/alexebogdan/angular-promisesandadvancedrouting?related=1
ng-switch
ng-show
/hide
index.html
ui-view
List
Header
ui-view
ui-view
Detail
Sub Detail
ui-router
ngRoute
ui-router 기본적인 사용법
1. 의존성 주입(dependency injection)
2. config block에서 $stateProvider 설정
3. template 에서 ui-view 설정
동물 선택 : 고양이▼
지역 선택: 서울 ▼

[고양이 / 서울] 나비
[서울] 지역의
[고양이] 입양률
Filters
Animals
Graph
[고양이 / 서울] 길동이
[고양이 / 서울] 얼룩이
unnamed view / named view
<!-- index.html -->
<body ng-app>
<div ui-view></div>
</body>
<!-- index.html -->
<body ng-app>
<div ui-view="filters"></div>
</body>
unnamed view
named view
$stateProvider 의
state 메소드가 ui-router의 핵심
$stateProvider.state('name', {stateConfig})
state name
nesting views
stateConfig options
해당 state의 configuration
state name으로 view nesting 하기
$stateProvider
  .state('main', { //template, controller})
  .state('main.filters', { // ...})
$stateProvider
  .state('main', { //template, controller})
  .state('filters'), {
    parent: 'main'
  })
각 template/templateUrl은 parent state의
template 속 ui-view directive에 insert됩니다.
<!-- main.html -->
<body ng-app>
<div ui-view></div>
</body>
<!-- filters.html -->
<div ui-view></div>
<!-- animals.html -->
<div>list content</div>
하나의 state에 여러개의 view를 nesting 하거나
보다 명시적으로 적고 싶을 때 views를 config 합니다
(template의 ui-view 지시자와 이름과 같아야 합니다.)
$stateProvider
  .state('main.filters.animals', {
    url: '/animals',
    views: {
      filters: {
        templateUrl: 'animals.html'
      }
    }
  })
$stateProvider
  .state('main', {
    url: '/',
    views: {
      filters: {
        templateUrl: 'filters.html'
      },
      animals: {
        templateUrl: 'animals.html'
      },
      graph: {
        templateUrl: 'graph.html'
      }
    }
  })
하나의 state가 여러개의 view를 가진 경우, view의 이름은
중복될 수 없습니다
$stateProvider
  .state('main', {
    url: '/',
    views: {
      'filters@main': {
        templateUrl: 'filters.html'
      },
      'animals@main': {
        templateUrl: 'animals.html'
      },
      'graph@main': {
        templateUrl: 'graph.html'
      }
    }
  })
ex) viewName@stateName,
route 구조를 잡을 때, 정말 하나의 state template에
multiple named views가 필요한지
먼저 생각해 볼 필요가 있습니다.
대부분의 경우 view를 하나씩
nesting 해도 해결되기 때문입니다.
예를 들어 이런 multiple named views 구조...
main.html
ui-view="filters"
filters
Header
ref : http://slides.com/timkindberg/ui-router#/11/8
ui-view = "animals"
ui-view="graph"
List
Graph
ui-router founding team개발자의 조언에 따르면...
main.html
ui-view="filters"
filters
Header
ui-view = "animals"
ui-view="graph"
List
Graph
ref : http://slides.com/timkindberg/ui-router#/11/10
or
main.html
ui-view="filters"
filters
Header
ui-view = "dataDisplay"
List and Graph
ref : http://slides.com/timkindberg/ui-router#/11/10
이유는 ...
filters의 조건에 list와 graph가 동일하게 영향을 받을 때,
list와 graph는 filters에 의존적/종속적입니다.
즉, list와 graph는 filters를 parent로 가질 수 있습니다.
만일 list와 graph가 seperated scope이 필요하다면, 두개의 별도의 named view가 될 필요가 있고, 아니라면 하나의 view로 표현할 수 있습니다.
결론적으로 routing을 구성하기 전,
'각 view들이 별도의 scope으로 분리가 필요한가',
'각 view들이 서로 어떻게 의존적인가' 가 핵심입니다.
2. stateConfig options
기본적으로 { key: value }로 config 합니다.
자주 쓰는 option들은 정해져 있습니다.
예를들어 url, controller, template/templateUrl, views...
사실 그렇게 많진 않지만,
시간 관계 상 몇 가지만 다루어 보겠습니다.
2. stateConfig options - url
url은 state의 hierarchy 에 따릅니다.
만일 부모 state에 url이 존재한다면, 자식 state의 url에 prepend 됩니다.
.state('main.mypage', {
    url: '/mypage',
    templateUrl: 'mypage.html'
  })
  .state('main.mypage.settings', {
    url: '/settings',
    templateUrl: 'settings.html'
  })
projectname/#/mypage/settings
2. stateConfig options - url
state가 반드시 url을 포함할 필요는 없습니다.
단독적으로 view 에 보여질 필요가 없이
자식 state와 언제나 함께 activate되는 state라면,
그래서 url로 이동할 필요가 없다면 사용하지 않아도 무방합니다.
.state('main.filters', {
    url: '/filters', //꼭 필요하지는 않다.
    templateUrl: 'mypage.html'
  })
  .state('main.filters.table', {
    url: '/table',
    templateUrl: 'table.html'
  })
2. stateConfig options - url / params
named param, search param 등을 url에 포함시킬 수 있습니다.
.state('main.surveyList.surveyDetail', {
    url: '/surveyDetail/:surveyId',
    templateUrl: 'survey-detail.html'
  })
  .state('main.mypage.settings', {
    url: '/settings',
    templateUrl: 'settings.html'
  })
/surveyDetail/507f1f77bcf86cd799439011
그런데 mongoDB ObjectId라고 가정하면...좀 길다?
또 이런경우는 ???
.state('main.surveyList.surveyDetail', {
    url: '/surveyDetail/:selectedDate',
    templateUrl: 'survey-detail.html'
  })
/surveyDetail/Sat Nov 28 2015 00:00:00 GMT+0900 (KST)
...???
params에 정의하면 url에는 보이지 않지만, 해당 scope에 param이 전달됩니다.
.state('main.surveyList.surveyDetail', {
    params: {
      selectedDate: ''
    },
    url: '/surveyDetail',
    templateUrl: 'survey-detail.html'
  })
preference로, 디버깅이 편하도록
url에 명시적으로 보이게 작성하는 편입니다만,
필요시 params를 정의해서 쓰고있습니다.
항상 content영역의 상단에 붙어있는 search condition filter의 예처럼 url을 설정해 줄 필요가 없거나,
실제로 단독적으로 activate은 되지 않으면서
controller를 통해 common properties 를
자식 states 에게 제공하는 역할의 abstract state,
controller 없이 특정 function을 resolve하거나 data를 scope로 전달하는 등...
목적에 따라 여러가지 타입의,
다양한 특징을 가진 state를 정의할수 있습니다.
state를 activate시키는 방법
state의 life-cycle과 event
ref : http://www.slideshare.net/nirkaufman/angular-js-routing-options
state
Requested
$stateChangeStart
$stateChangeError
$stateNotFound
$stateChangeSuccess
ui-view
kicks-in
$viewContentLoaded
onload function
all done!
state를 activate시키는 방법
1. state가 가진 url로 직접 이동
2. ui-sref directive 안의 link를 클릭
3. $state.go()
$state.go() 를 사용해
여러가지 필요한 연산 후에 이동 가능
<ul>
  <li ng-repeat="item in animalList"
  ui-sref="animal.detail({animalId: item.id})">상세보기
  </li>
<ul>
<ul>
  <li ng-repeat="item in animalList"
  ui-sref="animal.detail({animalId: item.id})"
  href="#/animalDetail/1357">상세보기
  </li>
<ul>
ui-sref directive
url="/animalDetail/:animalId"
<ul>
  <li ng-repeat="item in animalList"
  ng-click="vm.getAnimalDetail({item.id})">
  상세보기</li>
<ul>
state.go()
function getAnimalDetail(itemId) {
  animalService.getAnimals({id:itemId}).$promise
  .then(function(result){
    //필요한 작업 수행
    //필요한 작업 수행
    $state.go('animal.detail',{animalId: result.id})
  })
  .catch(function(error){
  })
}
ex) controller(vm)에서 필요한 작업을 수행 후 $state.go()로 이동
stylewise..
꿀팁 1

navbar active
<a class="item active">
/home
클라이언트 혹은 디자이너의 요구사항으로
좀 복잡한 커스텀 탭이라던지 내브바라던지 컴포넌트를 만들어야 할 때...
커스텀 클래스들 하나하나
ng-class로 사용하고 계신다면...
아니면 간단한거라도 좀 더 편하게 하고 싶을 때...
ui-sref-active
<nav>
  <ul>
    <li ui-sref-active="custom-active"
    ui-sref="place.office">오피스</li>
    <li ui-sref-active="custom-active"
    ui-sref="place.house">주택</li>
    <li ui-sref-active="custom-active"
    ui-sref="place.apartment">아파트</li>
  </ul>
</nav>
ui-sref-active="class1 class2 class3"
얼마든지 여러개의 클래스를 간단히 적용할 수 있습니다.
접근 권한 관리
꿀팁2
token based든...
session based든... 뭘로든
유저의 권한 체크 하고계시죠?
ui-router로 auth를 관리하기 전..
view 마다 접근 가능한 유저가 다르고
각 view에 mapping 된 각기 다른 controller에서
매번 auth를 체크하는 방법을 사용했습니다.
결론적으로
중복된 코드 발생..
state의 life-cycle과 event
ref : http://www.slideshare.net/nirkaufman/angular-js-routing-options
state
Requested
$stateChangeStart
$stateChangeError
$stateNotFound
$stateChangeSuccess
ui-view
kicks-in
$viewContentLoaded
onload function
all done!
mypage 접근, post 쓰기 등...
.state('main.board.writePost', {
    url: '/writePost',
    templateUrl: '/writePost.html',
    authenticate: true
  })
.state('main.mypage', {
    url: '/mypage',
    templateUrl: '/mypage.html',
    authenticate: true
  })
$stateChangeStart 이벤트가 발생할 때
authenticate와 myAuth를 체크
angular.module('appName', [module1, module2..])
.run(['$rootScope', '$state', 'myAuth',
  function($rootScope, $state, myAuth) {
    $rootScope.$on('$stateChangeStart',
    function(event, toState, toParams) {
      if(toState.authenticate && !myAuth) {
        event.preventDefault();
        $state.go('login');
      }
    })

  }
])
modal을 넣는 식으로 변경할 수도 있습니다.
$rootScope가 아니라 별도의 모달서비스를 주입해서 사용할 수도 있습니다.
angular.module('appName', [module1, module2..])
.run(['$rootScope', '$state', 'myAuth',
  function($rootScope, $state, myAuth) {
    $rootScope.$on('$stateChangeStart',
    function(event, toState, toParams) {
      if(toState.authenticate && !myAuth) {
        event.preventDefault();
        $rootScope.loginModal.show();
      }
    })

  }
])
다 아는 얘기뿐이야
정복이라며 새로운것은 없어?
그래서 +a를 준비했습니다.
이것도 알고계실 분들에게는 미리 심심한 사과의 말씀을...
ui-router-extras
+a같은 녀석
-
Sticky State
-
DSR (Deep State Redirect)
-
Future States
-
Previous State
DSR (Deep State Redirect)
가장 최근에 activate 된 substate를 기억
다른 state에 다녀와도 (즉 이전 state가 exit되어도)
가장 최근의 subtree 로 접근할 수 있다.
개발상의 큰 노력을 들이지 않고도,
더 나은 UX를 제공할 수 있다.
angular-breadcrumb
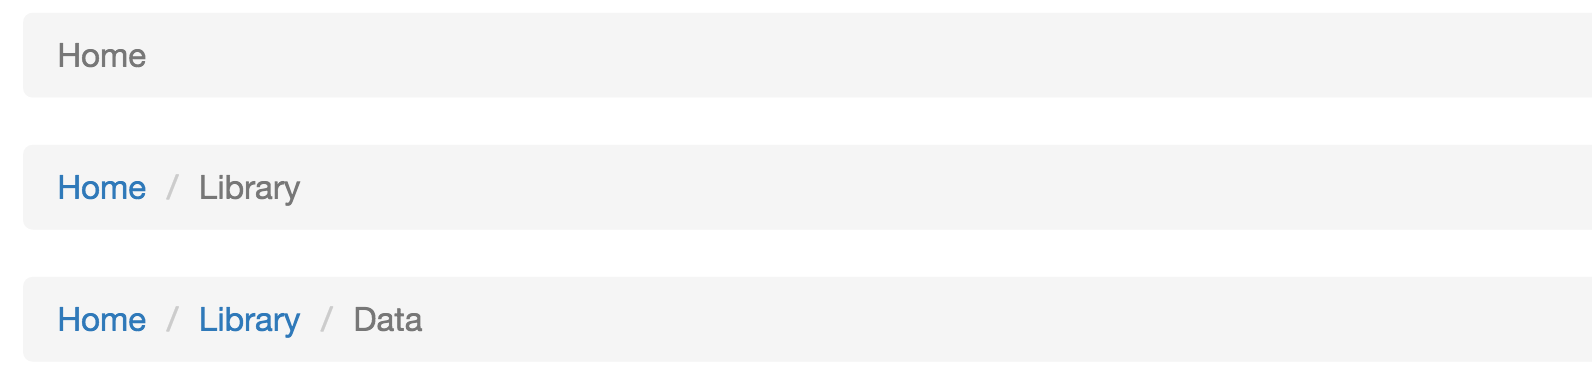

angular-breadcrumb
ui-router의 hierarchical tree of states에 기반을 둔 breadcrumb을 만들어주는 모듈!
Shop > Women > Accessories > Watches
통계관리 / 회원통계 / 유료회원통계
e.g.

AngularJS 실전: UI-Router 정복하기
By lsw