React Native
From init to the application stores
Maciej Stasiełuk, 16.04.19
Agenda
- Creating a project from scratch
- What is what in React Native
- Development best practices
- Delivering app to end users
With full CI/CD process!
Without Expo / CRNA!
Target audience
- You know React and basic concepts of React Native
- You can develop JS parts of React Native app
- You have problems to grasp the concepts around: native code, building process, etc.
Creating a new project from scratch
Install dependencies
(for your development environment, not the project itself)
What you're going to need:
- Node.js
- React Native CLI
iOS:
- MacOS X
- Xcode
- Homebrew
- CocoaPods
Android:
- JDK 8
- Android Studio
- Android SDK
The full process is described pretty well at
https://facebook.github.io/react-native/docs/getting-started
(the non-expo path)
Create a new project
$ react-native init MyProjectDon't use expo or create-react-native-app CLI, instead use pure react-native CLI.
Project structure
- android/
- ios/
- app/
- index.js
- package.json
Building the app
(for local development)
React Native app usually consists of three things:
- JS bundle
- Android native app
- iOS native app
Metro bundler
Used to assemble the JS bundle, keep it running in the background during development.
$ react-native start
Android build process
Gradle is used to assemble the app.
Most of the build configuration process is defined in:
- android/build.gradle
- android/app/build.gradle
You can execute Gradle commands in a few ways:
- RN CLI, e.g., react-native run-android
- Android Studio IDE
- Directly using Gradle: cd android && ./gradlew tasks
Android - running on a device
- Enable developer mode and debugging on the Android phone
- Connect via a USB cable
- Check connection with adb devices
- Run Gradle task to build and install the app on the phone
iOS build process
Xcode is responsible for assembling the iOS app.
The app can be built using:
- RN CLI, e.g., react-native run-ios
- Xcode IDE
iOS - running on a device
- Make sure that the iPhone is connected and visible to your Mac
- Choose the target device in Xcode
- Run build process in the IDE
Managing project dependencies
- Native dependencies
- Non-native dependencies
Non-native (JavaScript only) dependencies
- Usually are React specific, not React Native specific.
- Plain regular npm packages that you would also use in node/web.
- Lives only in JS code so can be updated only by creating new JS bundle without the need to re-build the app.
- Only kind of dependencies that can be added to Expo without ejecting.
Native dependencies
- Any dependency that adds/modifies the native code or configuration files - anything outside our JS bundle directory.
- Most React Native specific packages are this type of dependencies.
- Native dependencies are platform-specific and managed differently for iOS and Android.
- You need to re-build the app after making any change in native code, including adding/updating a dependency.
Installing native dependencies:
Android
You need to modify Gradle's build scripts, sometimes also Java files.

Installing native dependencies:
iOS
You need to add package files to libraries in your Xcode project.

Installing native dependencies:
iOS with CocoaPods
CocoaPods is a dependency manager for Objective-C and Swift, written in Ruby (you can think of it as npm for obj-c)
Before you can use it, you should also modify the project so that React Native itself uses CocoaPods for module resolution.

Installing native dependencies:
React Native Link
The easiest and recommended way.
Under the hood, link command is running for you steps mentioned above.
$ react-native link react-native-device-infoDebugging
Good writeup in official docs: https://facebook.github.io/react-native/docs/debugging
However, missing the most interesting and convenient way to debug RN apps.
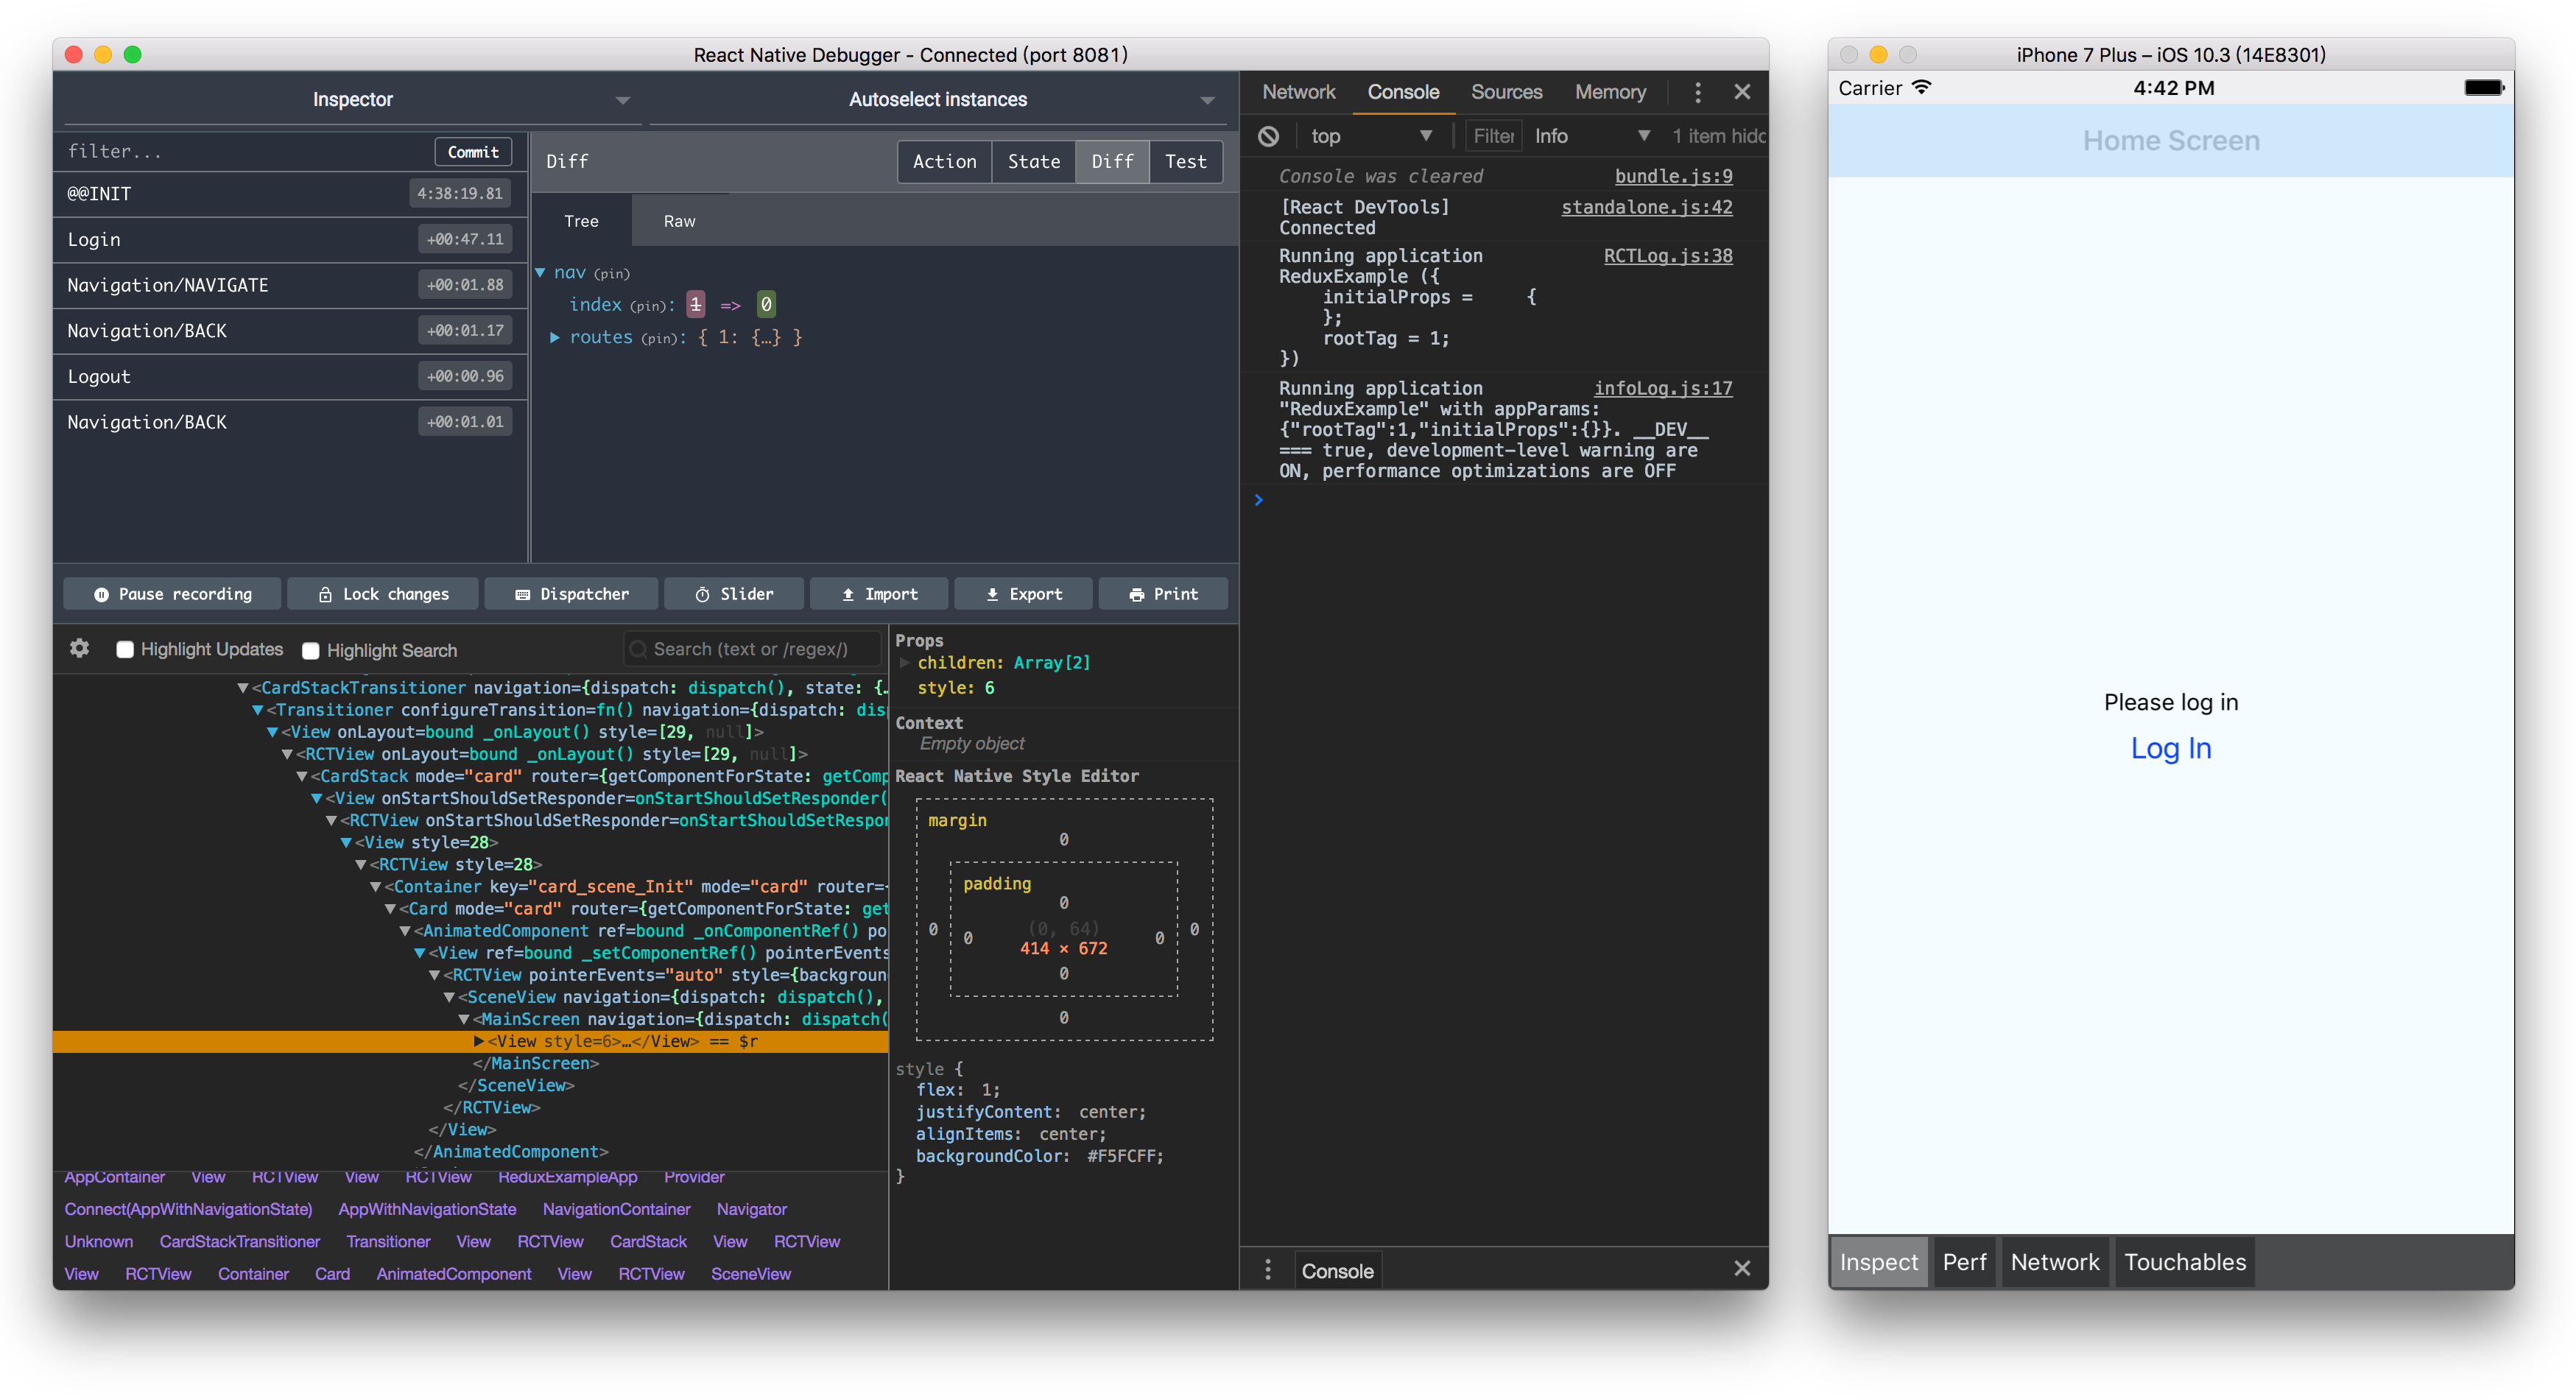
React Native Debugger
A standalone app that is a mix of regular React Native remote debugger, React Inspector, Redux DevTools and Apollo DevTools.

Signing the app
Signing apps may be a very complicated and intimidating process in the beginning.
It requires a different approach to Android and iOS.
Signing Android app
- Signing APK files is based on RSA keys, generated by a keytool, kept in a keystore.
- You can generate them manually, or let Google Play Store manage them.
- Once available, the Gradle build process may be modified to sign during the build.
- More at https://facebook.github.io/react-native/docs/signed-apk-android
Signing iOS app
-
Requires a paid Apple Developer Program subscription.
-
Then all you have to do is to set up Certificate Signing Requests, iOS Development certificates, iOS Distribution certificates, correct iOS App IDs, iOS Development and Distribution Provisioning Profiles and mix everything to get a p12 signing cert.
-
Of course only if you don't need any special privileges for your app, then you are going to need extra certificates for everything...
-
Moreover, you need different certificates for each of your developers.
-
Xcode helps to manage certificates to some extent, especially for the Development part.
Match to the rescue!
Continuous Integration
Can be done in different ways,
but must be done on OS X to support iOS.
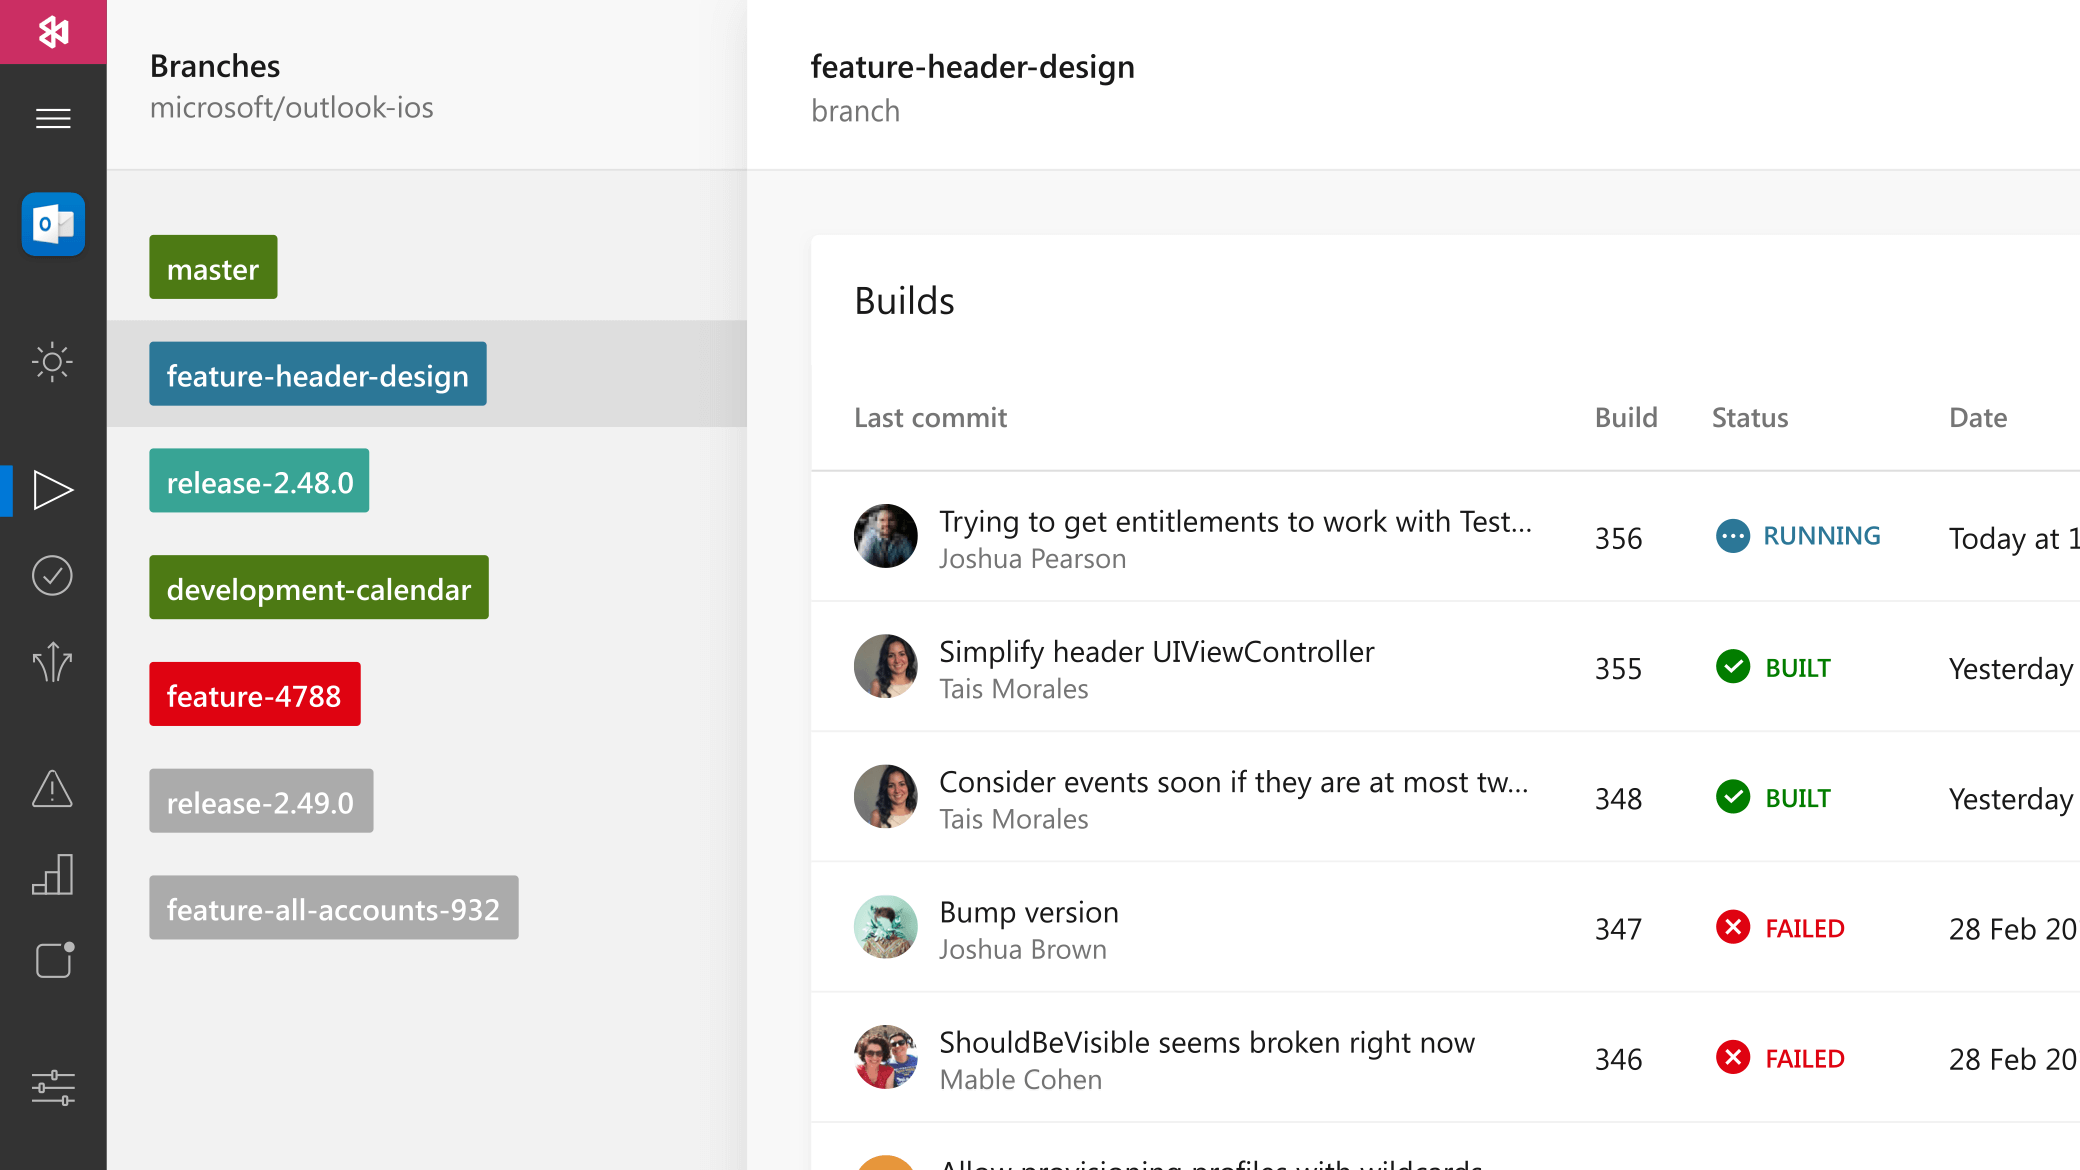
AppCenter.ms
- First class citizen support for React Native
- Generous free tier and very competitive pricing
- Mac OS X based servers
- Build triggered by git push or manually
- Included diagnostics (crash reports) and analytics
- Option to run tests on actual devices
- Backed by Microsoft


Fastlane
- Fastlane is an open source platform designed to simplify and automate every aspect of Android and iOS development and release workflow.
- Officially supported only on OS X, and no special support for React Native.
- More at https://fastlane.tools
Continuous Delivery
Once the app is built and signed, it must be delivered somehow to testers and end users.
Delivering test releases on Android
- Built artifact is a .apk file, so you can send it to some Android phone and install directly.
- AppCenter has a Distribution Groups feature to simplify the process.
- You can also use alpha/beta tracks in Google Play Store.
Delivering production releases on Android
Once the application is configured in the Google Play Store, you can push new releases that will be delivered to your users.
Delivering test releases on iOS
- There are a few alternatives, but TestFlight seems the best approach, as it's an official Apple product.
- You can pick up to 25 internal or 10k external testers.
- Requires a special TestFlight app to be installed on tester devices.
- The built result is a signed .ipa file that you can publish to TestFlight using Application Loader (part of Xcode) or directly from CI.
Delivering production releases on iOS
Apple App Store is the only way to distribute iOS apps.
You can upload builds the same way as in TestFlight, but they must go through a rigorous review process by Apple employees, before being approved and available in the App Store.
Bonus: OTA updates
- Native code is fixed, and any change in it requires to go through the full process mentioned above once again.
- However, the JS bundle is different.
It's only a small, replaceable part of the app,
and this opens a possibility for Over The Air updates.
- The application itself can check for updates, and download new JS bundle over the air.
Once the new bundle is ready, it can be swapped with the current one, completely bypassing store review and update processes.
Bonus: OTA updates
- Because most of the code, features and business logic is stored in JS code, this opens new possibilities for React Native apps that regular Android and iOS apps don't have.
- OTA updates with AppCenter and CodePush:
You can use AppCenter CLI to prepare new bundle, upload to CodePush servers and notify clients that new release is available.
Wrapup
- We have installed a robust development environment
- Our app can use any native packages, or we can even write native code directly if we want.
- We have our app available in the Google Play Store and Apple App Store.
- We can always deliver new versions with a simple git push: CI will build, sign and push a new release to stores for review.
- We can update the JS-only app code on the fly, at any time.
Right now we just need to write the app and features :)
Thanks!
Questions?
React Native: From init to the application stores
By Maciej
React Native: From init to the application stores
Including: - Creating a project from scratch - What is what in React Native - Development best practices - Delivering app to end users - With full CI/CD process! - Without Expo / CRNA!
- 647


