newbie
world best newbie of newbie
5분만에


FROM meoooh/ubuntu14.04
MAINTAINER hgk617@naver.com
RUN apt-get install -qq -y software-properties-common pwgen
RUN apt-key adv --recv-keys --keyserver hkp://keyserver.ubuntu.com:80 0xcbcb082a1bb943db
RUN add-apt-repository -y 'deb http://ftp.kaist.ac.kr/mariadb/repo/10.0/ubuntu trusty main'
RUN apt-get install -qq -y mariadb-server
RUN sed -i 's/^\(bind-address\s.*\)/# \1/' /etc/mysql/my.cnf CMD /usr/bin/mysqld_safe
EXPOSE ["3306"]
PASS=${MARIADB_PASS:-$(pwgen -s 12 1)}
mysql -uroot -e "CREATE USER 'admin'@'%' IDENTIFIED BY '$PASS'"
mysql -uroot -e "GRANT ALL PRIVILEGES ON *.* TO 'admin'@'%' WITH GRANT OPTION" #!/bin/bash
/usr/bin/mysqld_safe &
ID=${MARIADB_ID:-admin}
PASS=${MARIADB_PASS:-$(pwgen -n 70)}
mysql -uroot -e "CREATE USER '$ID'@'%' IDENTIFIED BY '$PASS'"
mysql -uroot -e "GRANT ALL PRIVILEGES ON *.* TO '$ID'@'%' WITH GRANT OPTION"


$ docker run -it db /create_account.sh ======================================================================== You can now connect to this MariaDB Server using: mysql -uadmin -pod0oong7meis -h<host>-P<port> Please remember to change the above password as soon as possible! MariaDB user 'root' has no password but only allows local connections ======================================================================== $ docker ps -a
CONTAINER ID IMAGE COMMAND CREATED STATUS PORTS STATUS PORTS NAMES
5ee7f86cf454 db:latest /create_account.sh 2 minutes ago Exited (0) 2 minutes ago goofy_brown Exited (0) 2 minutes ago goofy_brown
$ docker start 5ee7f86cf454
5ee7f86cf454
$ docker ps -a
CONTAINER ID        IMAGE               COMMAND                NAEED        CREATED             STATUS                     PORTS                 NAMES
5ee7f86cf454        db:latest           /create_account.sh     gof_rw       5 minutes ago       Exited (0) 3 seconds ago                         goofy_brown
$ curl https://raw.githubusercontent.com/creationix/nvm/v0.12.2/install.sh | bash
  % Total    % Received % Xferd  Average Speed   Time    Time     Time  Current
                                 Dload  Upload   Total   Spent    Left  Speed
100  3442  100  3442    0     0   3532      0 --:--:-- --:--:-- --:--:--  3530
=> Downloading nvm as script to '//.nvm'
=> Profile not found. Tried ~/.bash_profile, ~/.zshrc, and ~/.profile.
=> Create one of them and run this script again
   OR
=> Append the following lines to the correct file yourself:
export NVM_DIR="//.nvm"
[ -s "$NVM_DIR/nvm.sh" ] && . "$NVM_DIR/nvm.sh"  # This loads nvm
=> Close and reopen your terminal to start using nvm
$ source ~/.bashrcStep 4 : RUN source ~/.profile
---> Running in 8f8136481619
/bin/sh: 1: source: not found 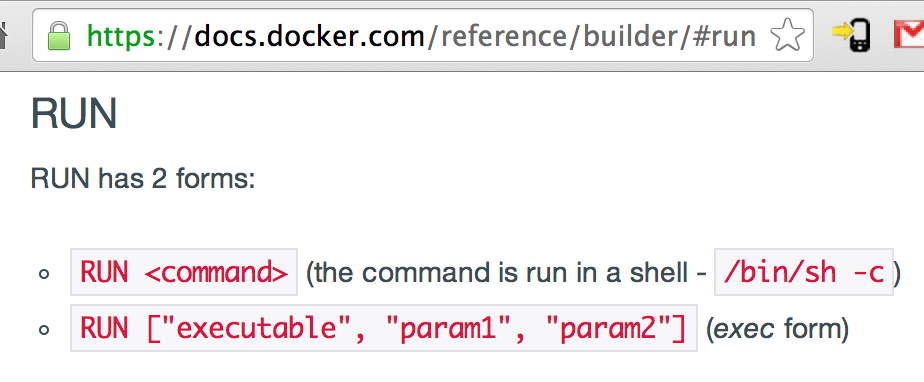
Step 4 : RUN /bin/bash -c ". ~/.profile"
 ---> Running in eecb294ab27f
stdin: is not a tty
 ---> d50002e9385d
Removing intermediate container eecb294ab27f Step 5 : RUN nvm install 0.10
---> Running in 6779083f257e
/bin/sh: 1: nvm: not found
2014/08/02 03:10:12 The command [/bin/sh -c nvm install 0.10] returned a non-zero code: 127 Step 4 : RUN /bin/bash -l -c "nvm install 0.10"
---> Running in 162b22b9db84
stdin: is not a tty
######################################################################## 100.0%
/root/.nvm/nvm.sh: line 581: manpath: command not found
Now using node v0.10.30
---> 8bd3d35b5823
Removing intermediate container 162b22b9db84 Step 5 : RUN node -v
---> Running in a4e5e77958c7
/bin/sh: 1: node: not found
2014/08/02 03:44:08 The command [/bin/sh -c node -v] returned a non-zero code: 127 Step 5 : RUN /root/.nvm/current/bin/node -v
---> Running in 67d9cf01440c
v0.10.30
---> 61c97cbb4515
Removing intermediate container 67d9cf01440c
Step 6 : RUN /root/.nvm/current/bin/npm -v
---> Running in 39669dfb8e62
1.4.21
---> fb6f86173a12
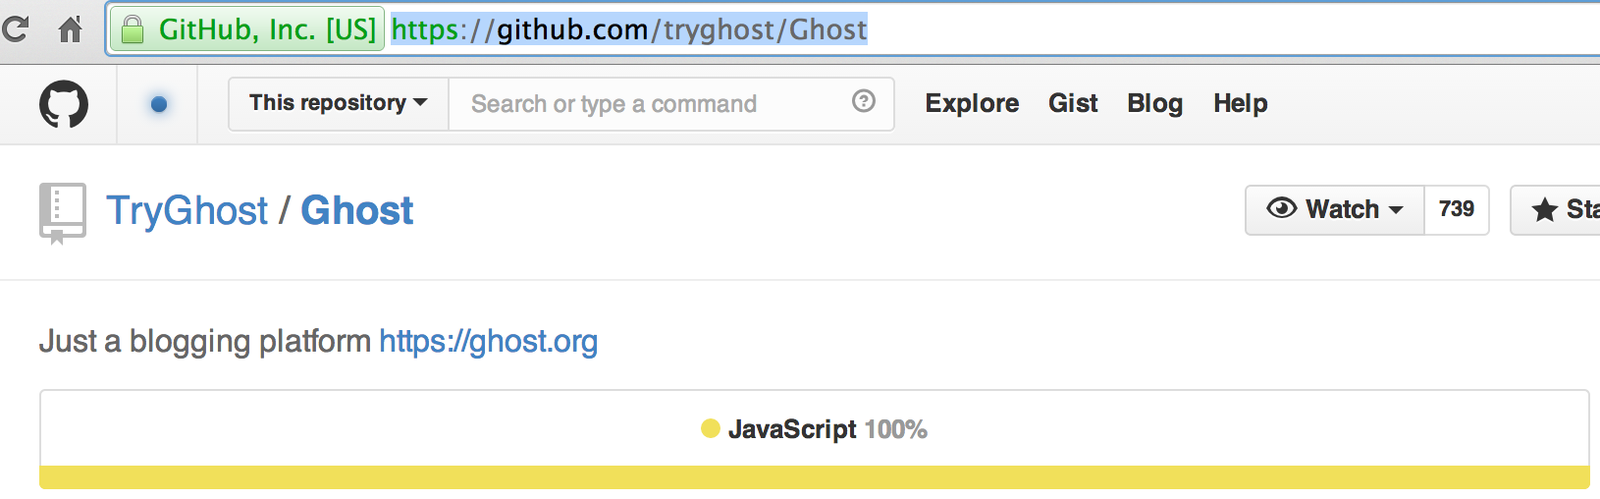
Removing intermediate container 39669dfb8e62 https://ghost.org/zip/ghost-0.4.2.zip
무난하게
curl을 사용하여 받기로...
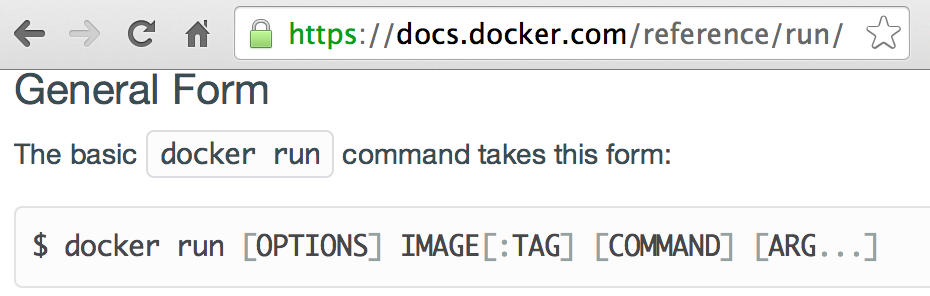
Step 8 : RUN curl https://ghost.org/zip/ghost-0.4.2.zip -o /ghost.zip
 ---> Running in fde017abcc2a
  % Total    % Received % Xferd  Average Speed   Time    Time     Time  Current
                                 Dload  Upload   Total   Spent    Left  Speed
100   127    0   127    0     0    210      0 --:--:-- --:--:-- --:--:--   210
 ---> 7b3857a87817
Removing intermediate container fde017abcc2a
Step 9 : RUN unzip -uo ghost.zip -d ghost
 ---> Running in c81c99c6b7cc
Archive:  ghost.zip
  End-of-central-directory signature not found.  Either this file is not
  a zipfile, or it constitutes one disk of a multi-part archive.  In the
  latter case the central directory and zipfile comment will be found on
  the last disk(s) of this archive.
unzip:  cannot find zipfile directory in one of ghost.zip or
        ghost.zip.zip, and cannot find ghost.zip.ZIP, period.
2014/08/02 04:00:21 The command [/bin/sh -c unzip -uo ghost.zip -d ghost] returned a non-zero code: 9 # cat ghost.zip
<html><body>You are being <a href="http://d36u7lo2kegj1p.cloudfront.net/archives/ghost-0.4.2.zip">redirected</a>.</body></html>
RUN curl -L https://ghost.org/zip/ghost-0.4.2.zip -o /ghost.zip WORKDIR /ghost
CMD /bin/bash -c "npm start --production" ADD https://ghost.org/zip/ghost-0.4.2.zip /ghost.zip By newbie
도커로 고스트 블로그 플랫폼 5분만에 설치하기