
Text

Why Krita!?
BECAUSE I LOVE ART!
I Love Looking at Art!
I Love Doing Art!
Even though it's hard...

I Still Love to Encourage Others to Try Art!!

History
- Originally a proof of concept Qt GUI wrapper for GIMP that really cheesed people off at the 1998 Linux Kongress
- Developed as KImageShop under KDE, they ran into licensing issues and renamed to Krayon, which also had copyright issues.
- Finally the name Krita was chosen in 2002.
History
- In 2004 the first public release was included with KOffice
- Prior to 2009 the focus was image manipulation similar to GIMP and Photoshop. In 2009 the focus was changed to illustration and concept art.
- In 2013 the Krita Foundation was created to provide support for development.
- There are now several versions of Krita including Krita Gemini (available on Steam) which was created for tablet use. There is also a commercial version (originally Krita Studio) that offers paid support.
How do I Krita!?
https://krita.org/download/krita-desktop/
Ubuntu / Mint
- Official Repos often lag behind, the Krita team creates and maintains development packages that can be installed from the Krita Lime repo.
# sudo add-apt-repository ppa:dimula73/krita
# sudo apt-get update
# sudo sudo apt-get install krita-2.9 krita-2.9-dbg
How do I Krita!?
https://krita.org/download/krita-desktop/
Fedora
- Available in the stable repos for Fedora 20 and 21 under "calligra-krita"
Also Available For:
* Debian ( older version )
* OpenSUSE
* Gentoo
* Chakra
* Arch
* FreeBSD
How do I Krita!?
https://krita.org/download/krita-desktop/
Windows
- Stable and works well with the latest version
Mac
- Really more of a technical proof of concept, very unreliable and runs like a three legged turtle
Source Code
- Source code and documentation for building it yourself is also available
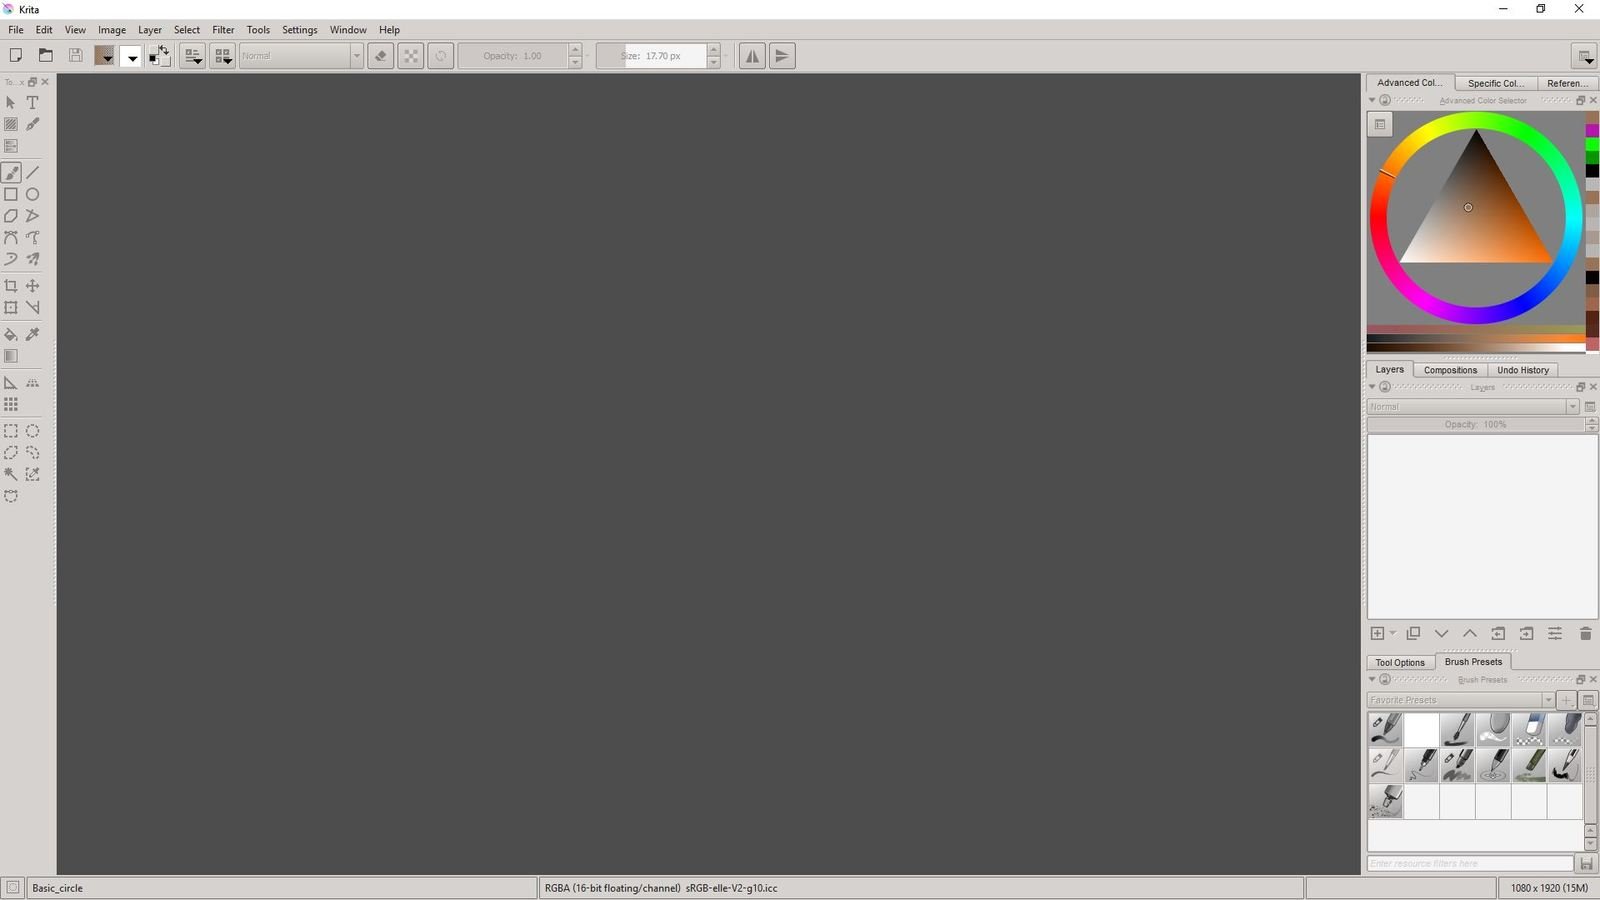
Krita User Interface
The Basics
-Window
-Image (Canvas)
-Dockers
-File / Brush / FX
-Menu
-Mask / Stat / View
Recap
-Window
-Image (Canvas)
-Dockers
-File / Brush / FX
-Menu
-Mask / Stat / View
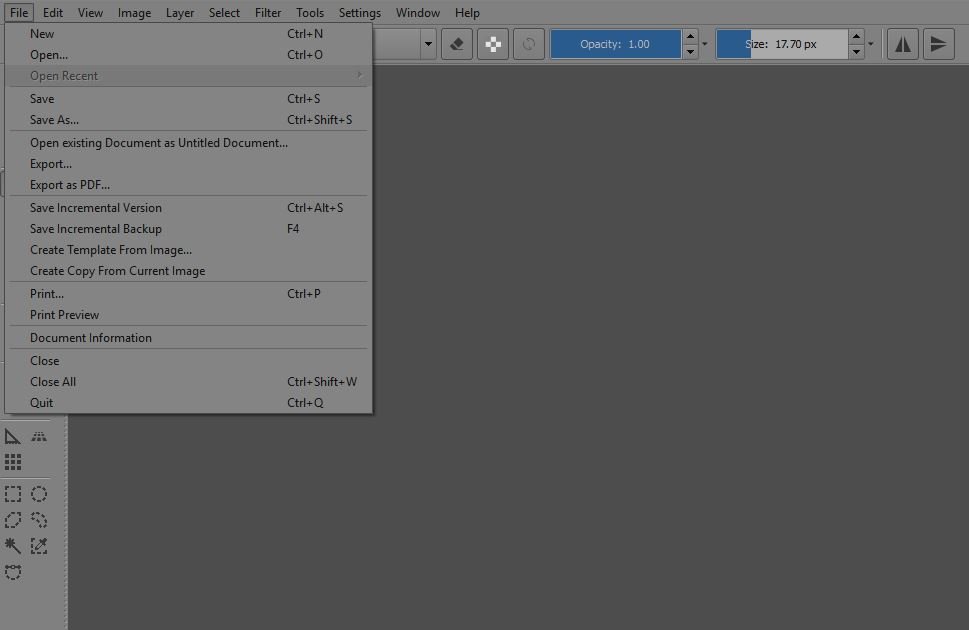
Das Menu
Incremental Version
- Ctrl + Alt + S -
"Saves the current image as 'filename'_XXX.kra and switches the current document to it."
Incremental Backup
- F4 -
"Exports the current image as 'filename'_XXX.kra."
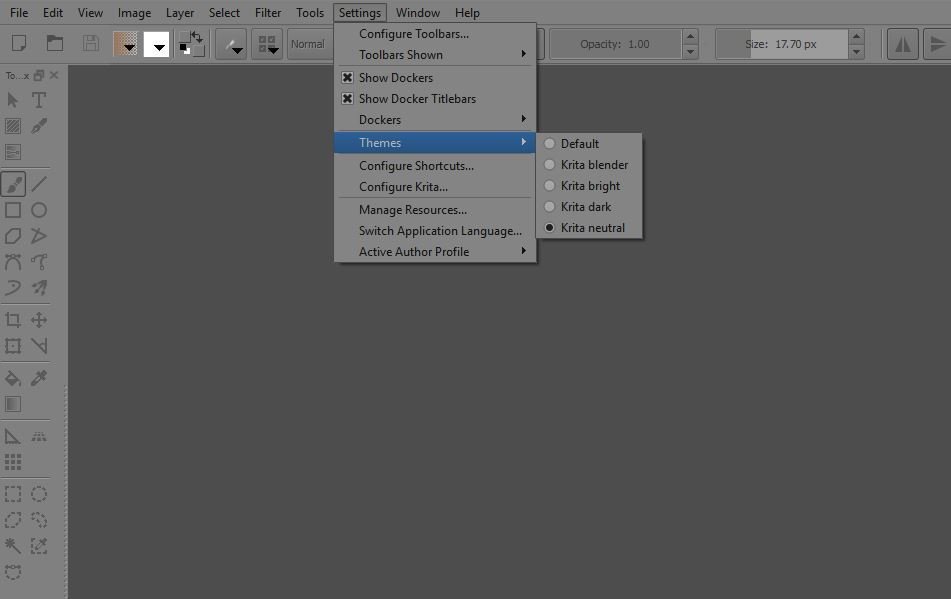
Das Menu
- Settings > Configure Krita... -
This is the main program configuration file.
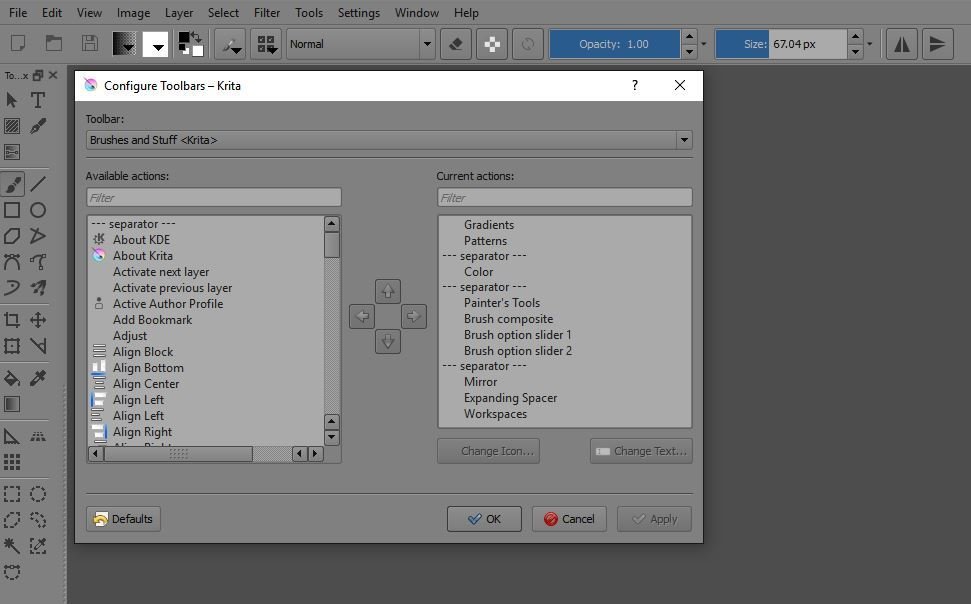
- Settings > Configure Toolbars... -
Well... it's used to configure the toolbars....
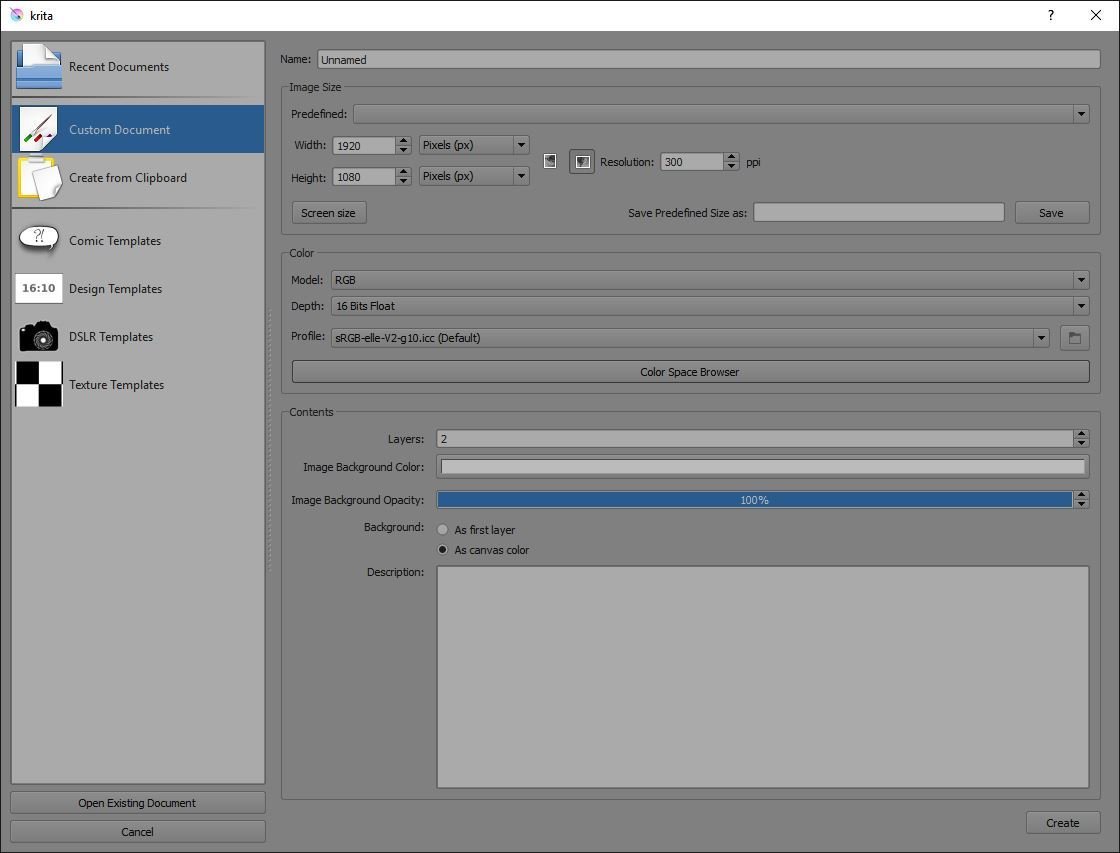
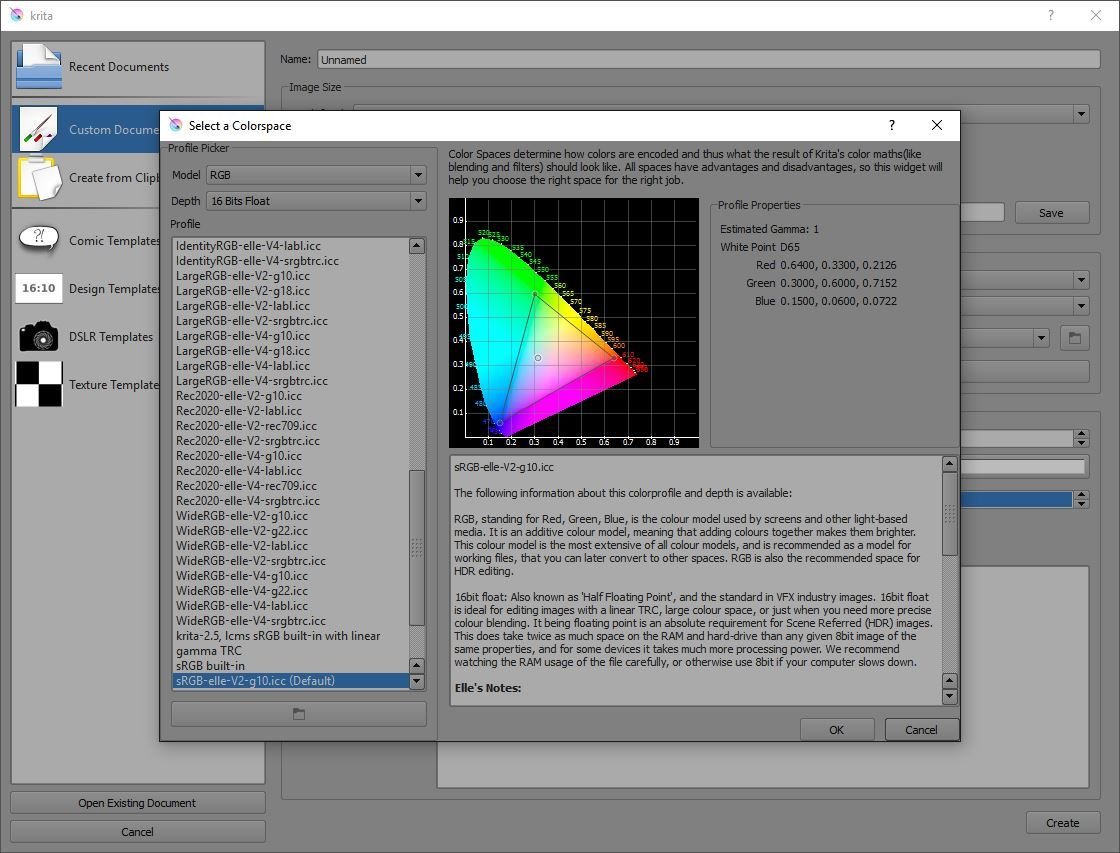
New File
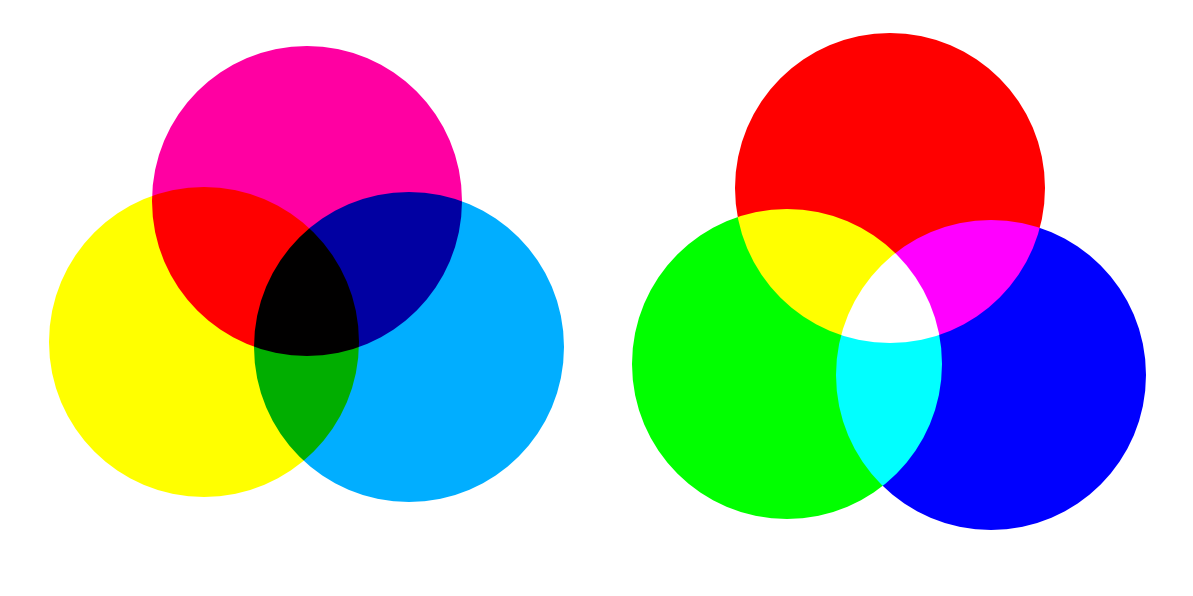
Subtractive
-CMYK-
Additive
-RGB-
Ze Toolbar
Left to Right:
-New
-Open
-Save
Left to Right:
-Gradients
-Patterns
Left to Right:
-Foreground and Background Colors
-Brush Settings
-Brush Presets
-Blending Modes
-Eraser (Mode)
-Preserve Alpha
-Reset Brush Settings
Left to Right:
-Opacity
-Size
- Hold Shift -
Flow can be accessed with this drop down and replaced on the bar.
Left to Right:
-Mirror Brush Vertically
-Mirror Brush Horizontally
We will circle back to workspaces.
Dockers!
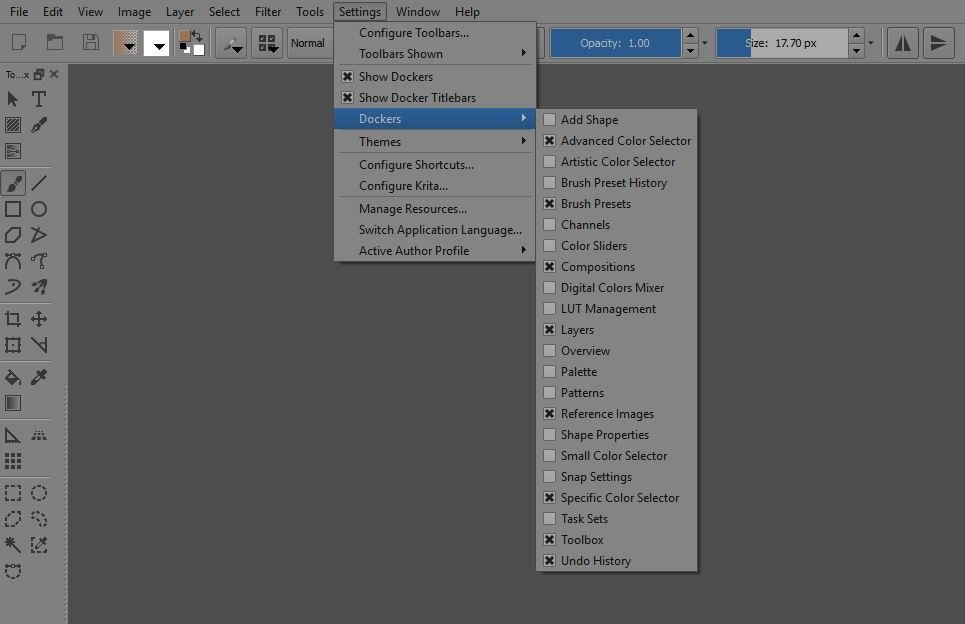
- Settings > Dockers -
This is where you can view all the dockers and toggle their visibility!
Dockers!

- Scalable! -
- Stackable! -
- Dock'em or Set'em Free! -
Dockers!
- Collapse! -
- Lock/ Unlock! -
- Move Freely! -
- Dock/ Free! -
- Hide! -
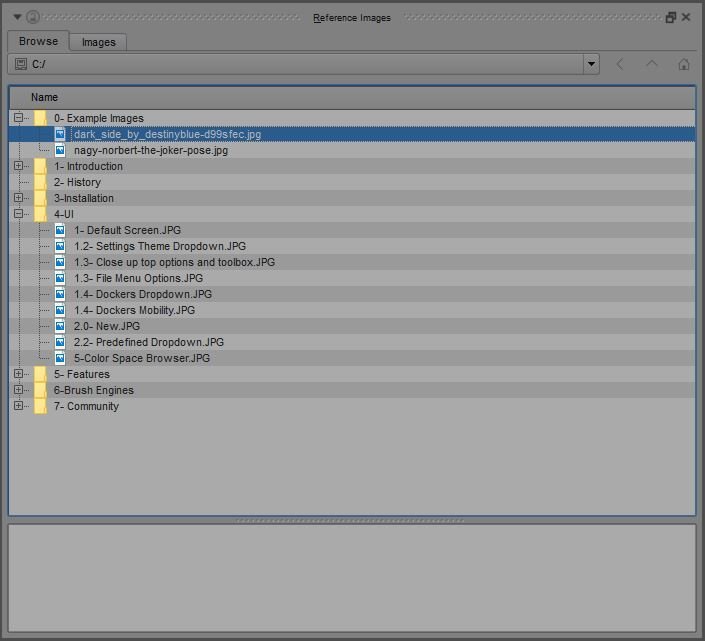
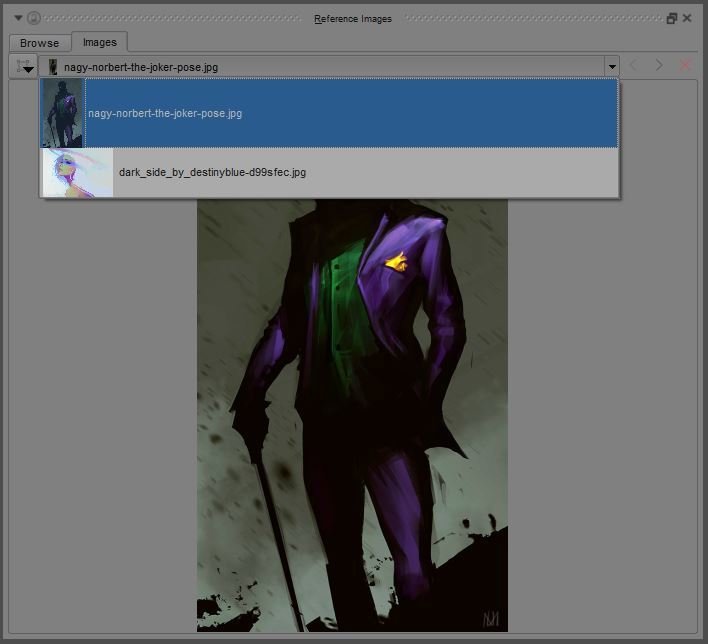
Reference Images!
-Clicking and dragging on the image will maximize the selection in the view!
-Colors can be selected directly from the docker preview!
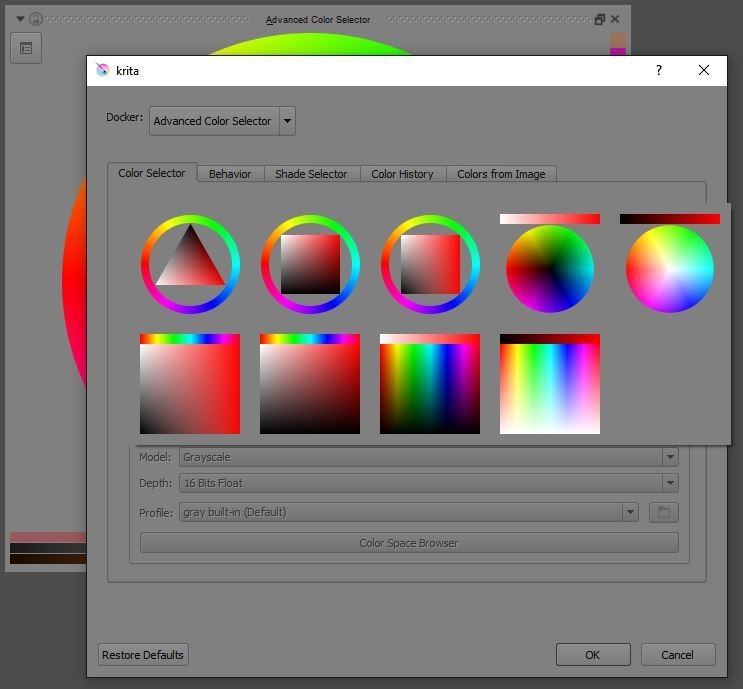
Advanced Color Selector!
-Clicking on this icon opens the Advanced Color Selector options!
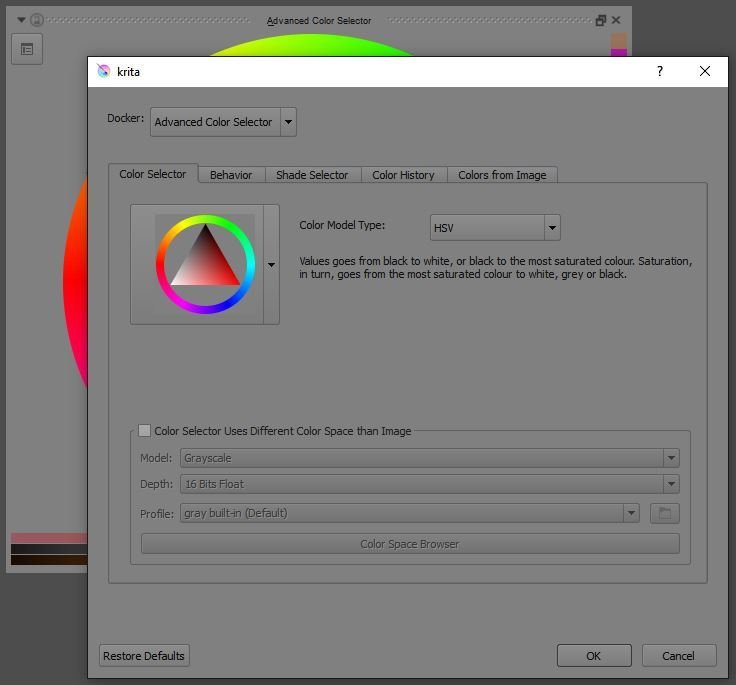
-Clicking here allows you to change the interface for the color picker!
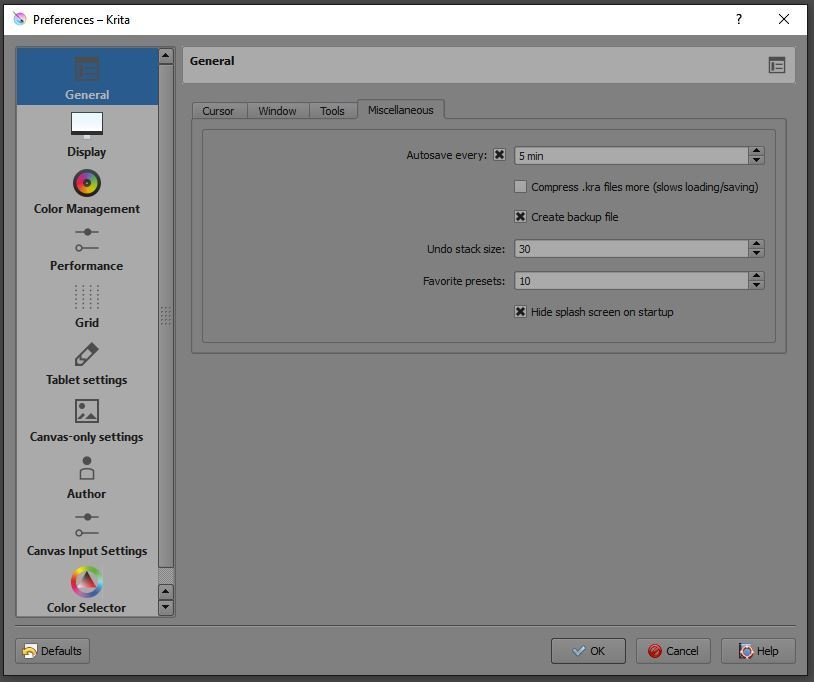
Undo History!
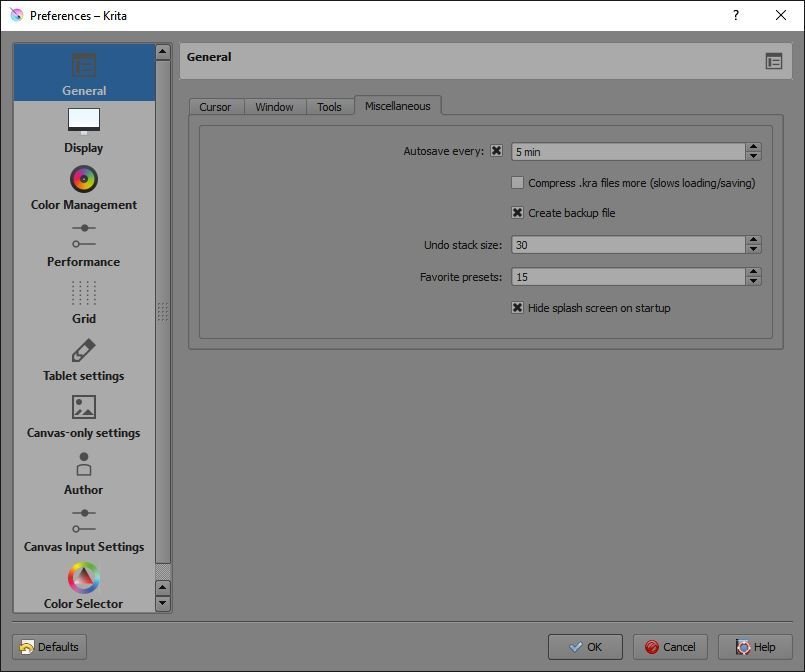
-Can be memory intensive! Cumulative Undo will combine actions taken within a certain amount of time into a single event!
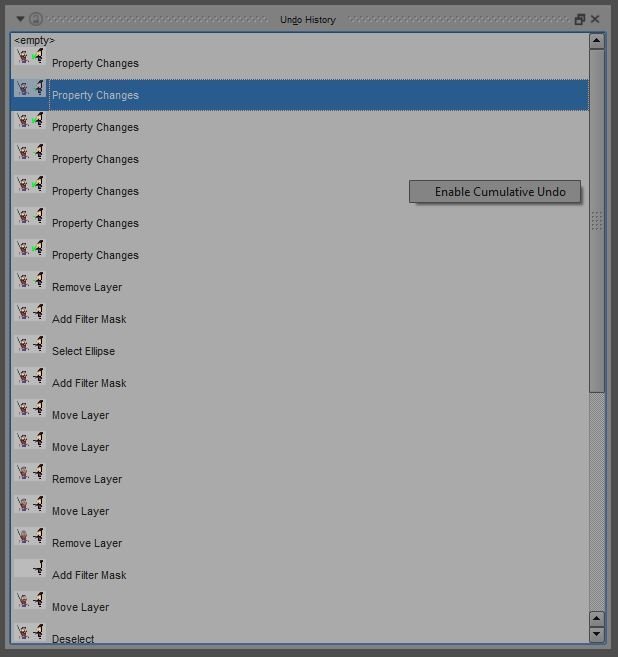
-You can increase the memory allowance!
- Settings > Configure Krita... -
Toolbox!

Shape Handling Tool ->
Text Tool ->
Gradient Editing Tool ->
Calligraphy Tool ->
Pattern Editing Tool ->
Freehand Brush ->
Line Tool ->
Rectangle Tool ->
Ellipse Tool ->
Polygon Tool ->
Polyline Tool ->
Bézier Curve Tool ->
Freehand Path Tool ->
Dynamic Brush Tool ->
Multibrush Tool ->
<- Crop Tool
<- Move Tool
<- Transform Tool
<- Measure Tool
<- Fill Tool
<- Color Selector Tool
<- Gradient Tool
<- Assistant Tool
<- Perspective Grid Tool
<- Grid Tool
<- Rectangular Selection Tool
<- Elliptical Selection Tool
<- Polygonal Selection Tool
<- Outline Selection Tool
<- Contiguous Selection Tool
<- Similar Color Selection Tool
<- Bézier Curve Selection Tool
Specialty
Drawing
Transform / Edit
Color / Fill
Assistants
Selection
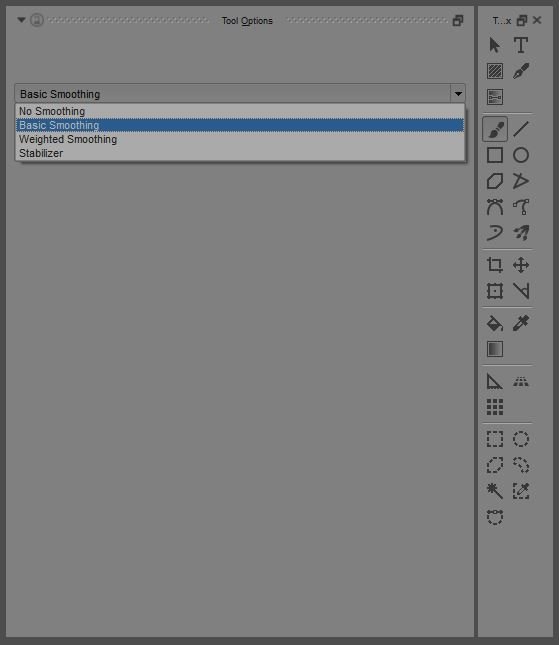
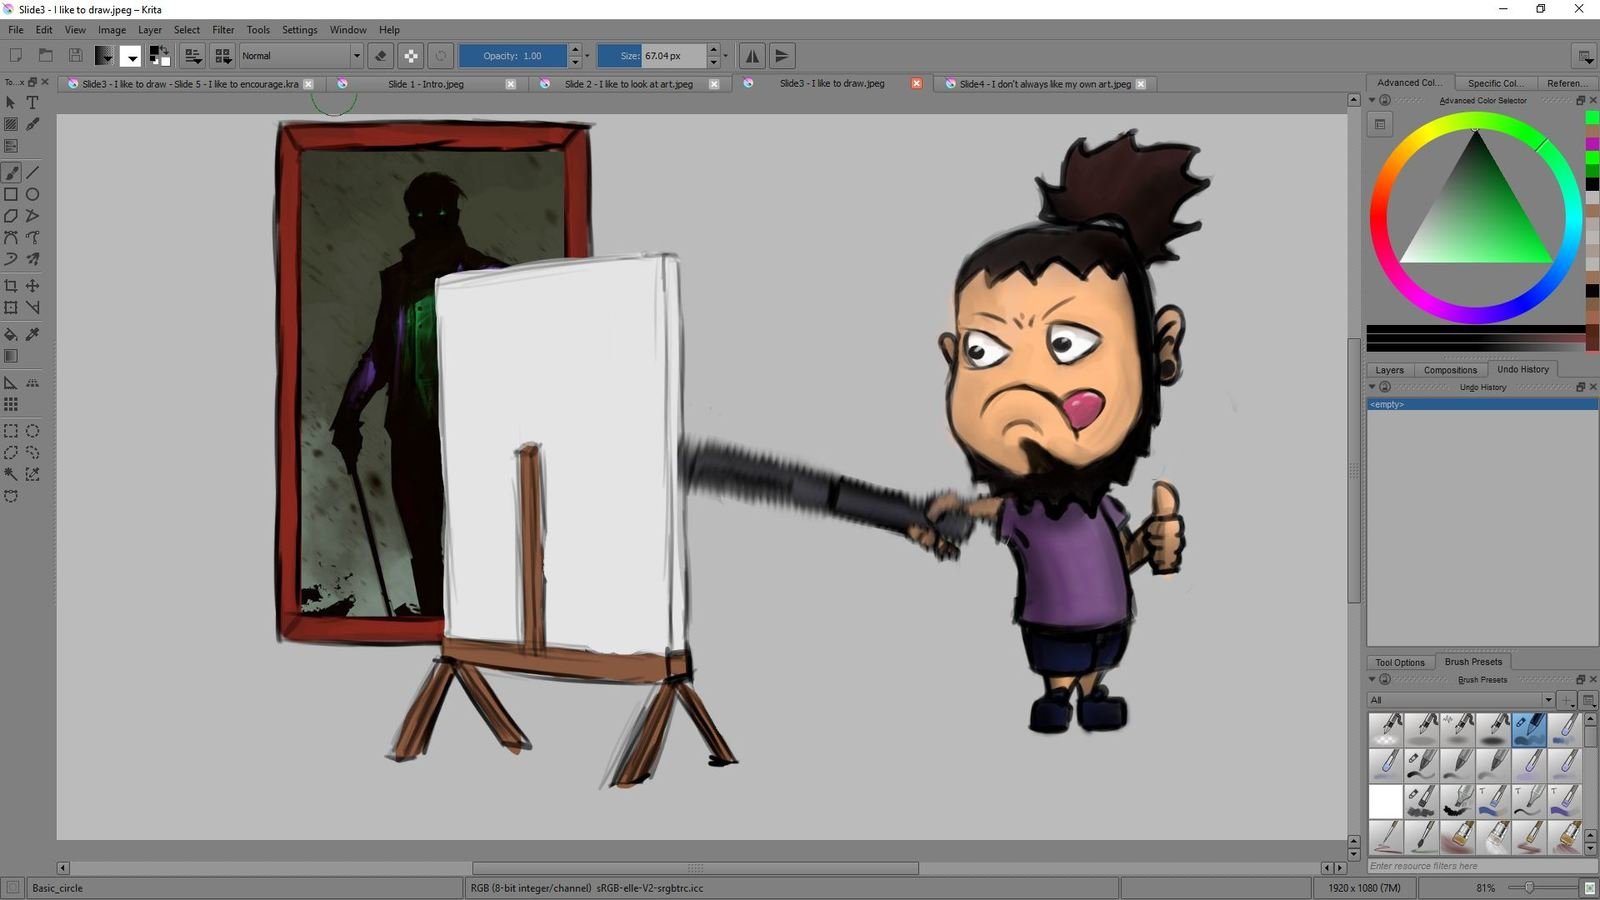
Tool Options!
-This one is so important it can't be hidden, only minimized
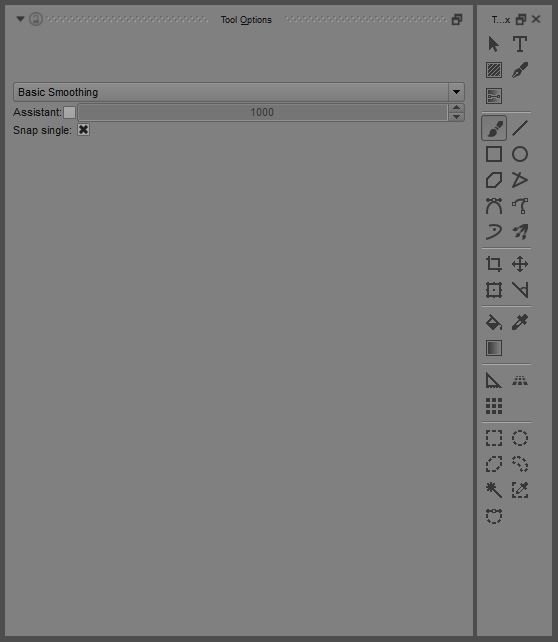
-Each tool has various options that can be modified to change it's behavior
-The brush has various auto smoothing options
Brush Presets!
-Krita comes with a sweet assortment of premade brushes!

-In order to keep things tidy, we separate the brushes with "tags"
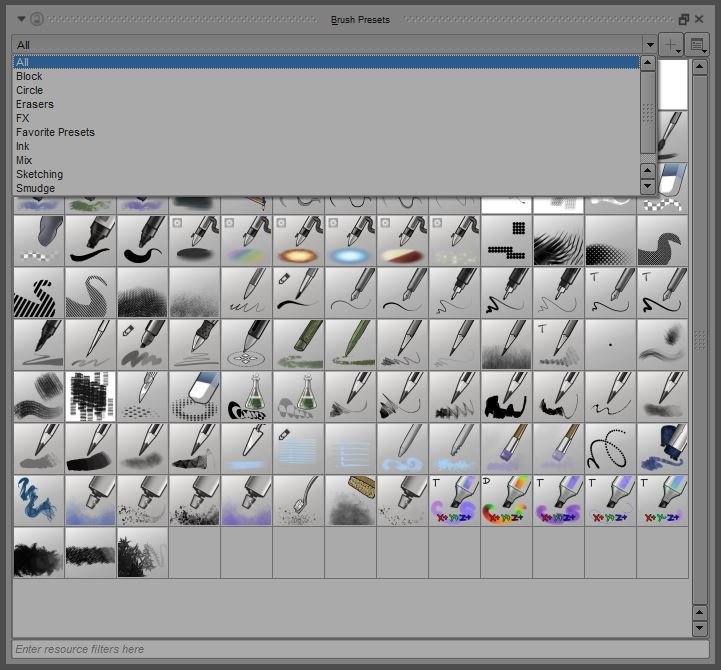
Brush Presets!
-By right clicking on a brush we can edit the tags.

-Tags can be created via the menu, but they can also be deleted or renamed by using the plus at the top.
The Pop Up Pallet!
-Right clicking anywhere in the image window will bring up the pop up pallet!
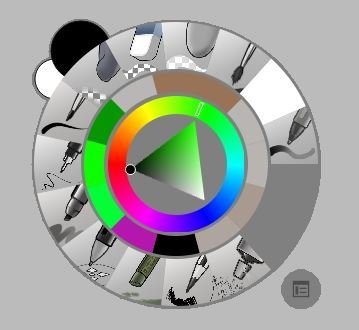
-Brushes by Tag
-Recent Colors
-Color Selector
-Tag Select
-Fore / Back Color

The Pop Up Pallet!
- Settings > Configure Krita... -
-The max number of brushes in the pallet can be increased, but the pallet never gets bigger, so real estate is limited.
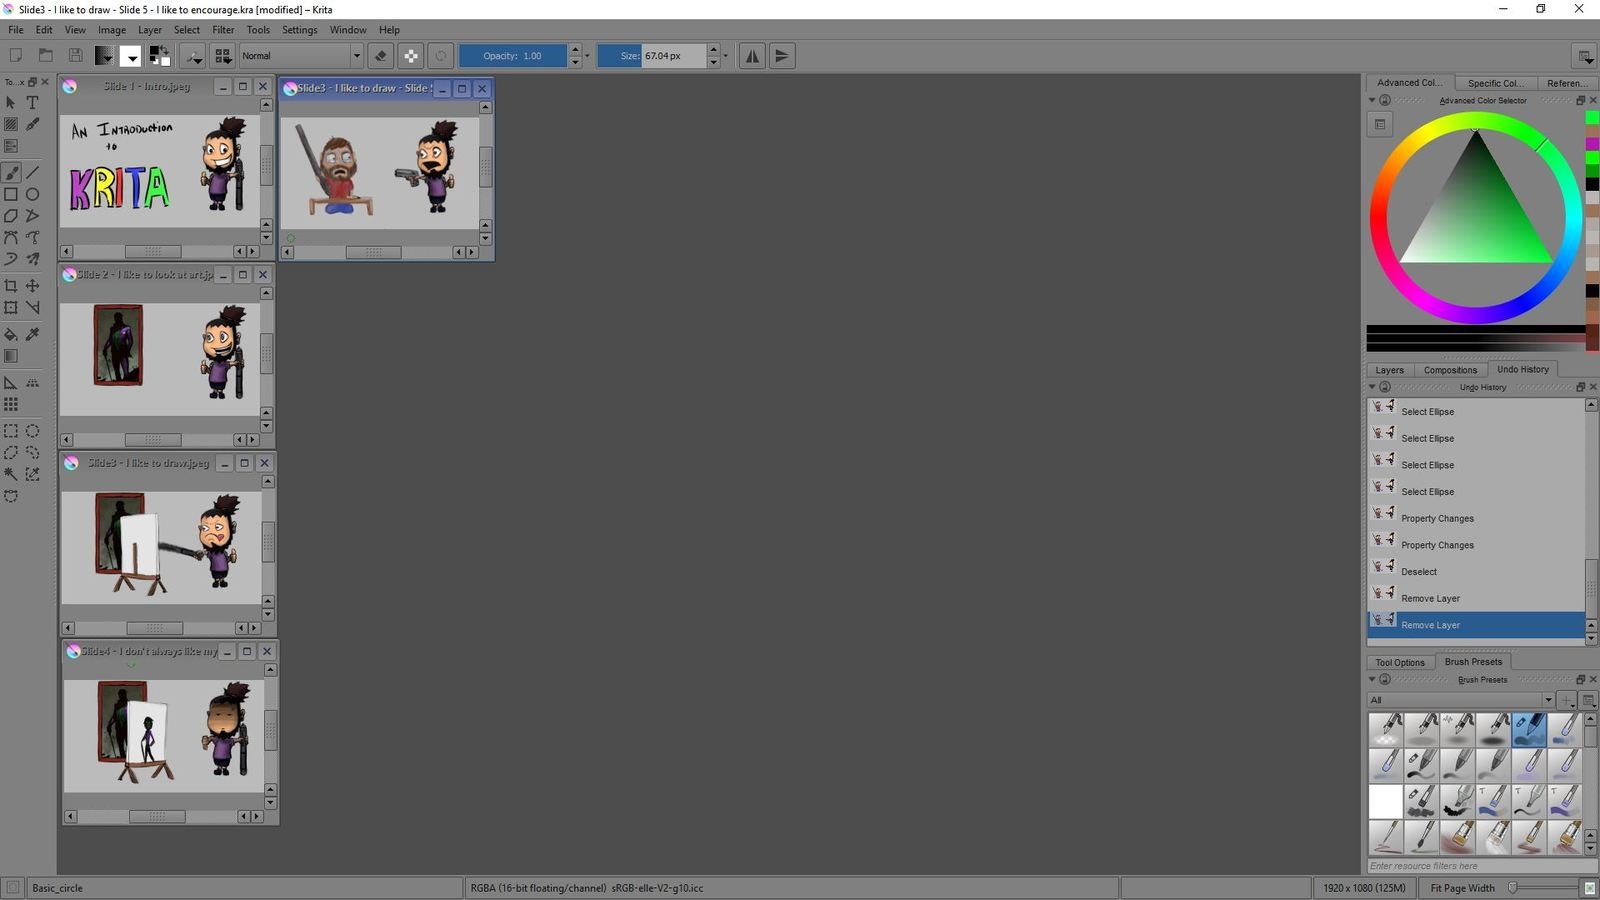
Images
- Tabs are the default view for multiple images -

- Settings > Configure Krita... -
-Subwindows can be set from the main config panel
Subwindow controls for full screen are in the top right
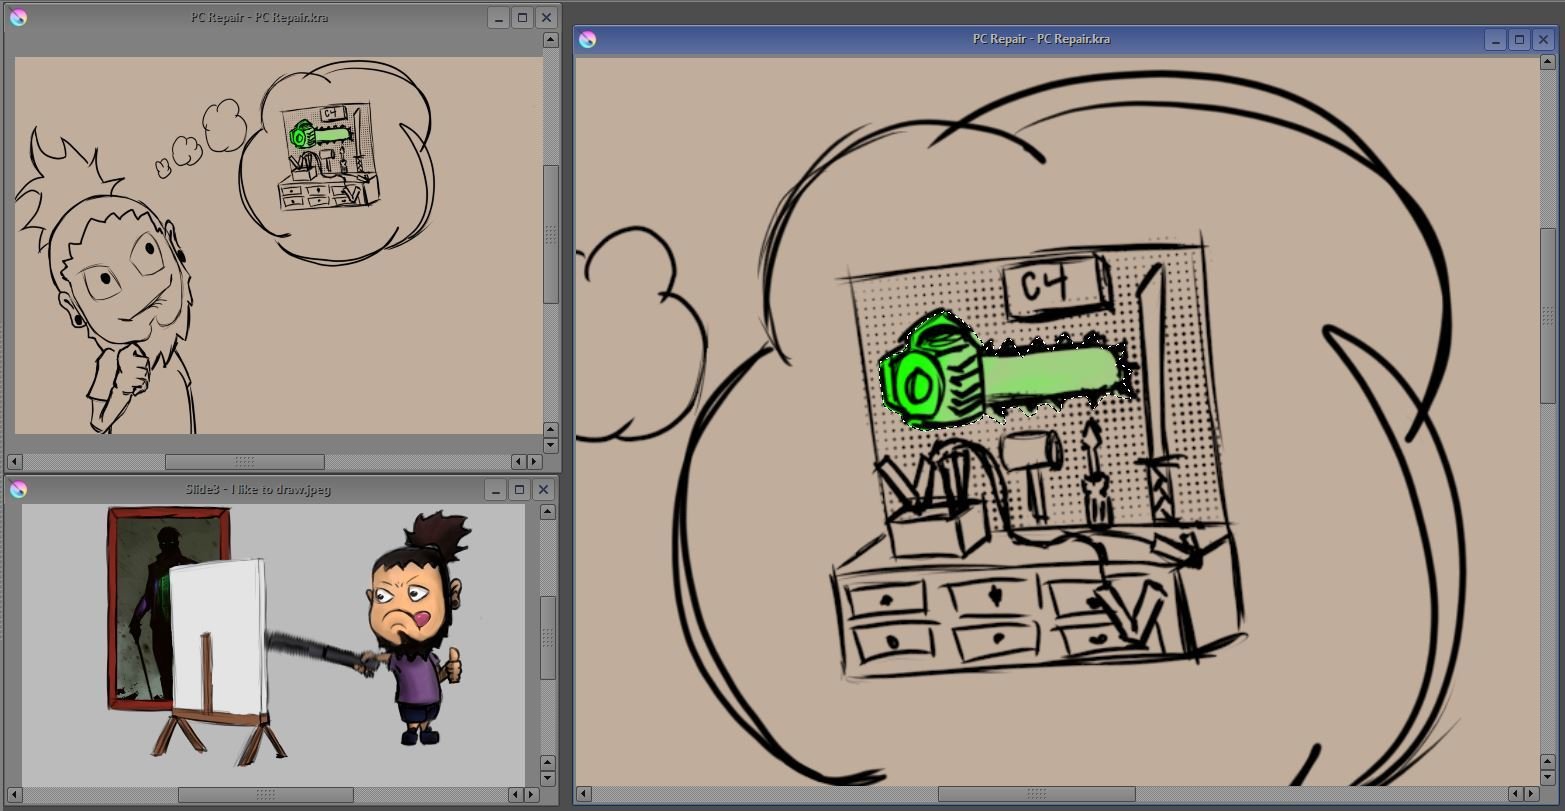
Multiple Views
This is great for adding small details and seeing the overall impact on the image at the same time.
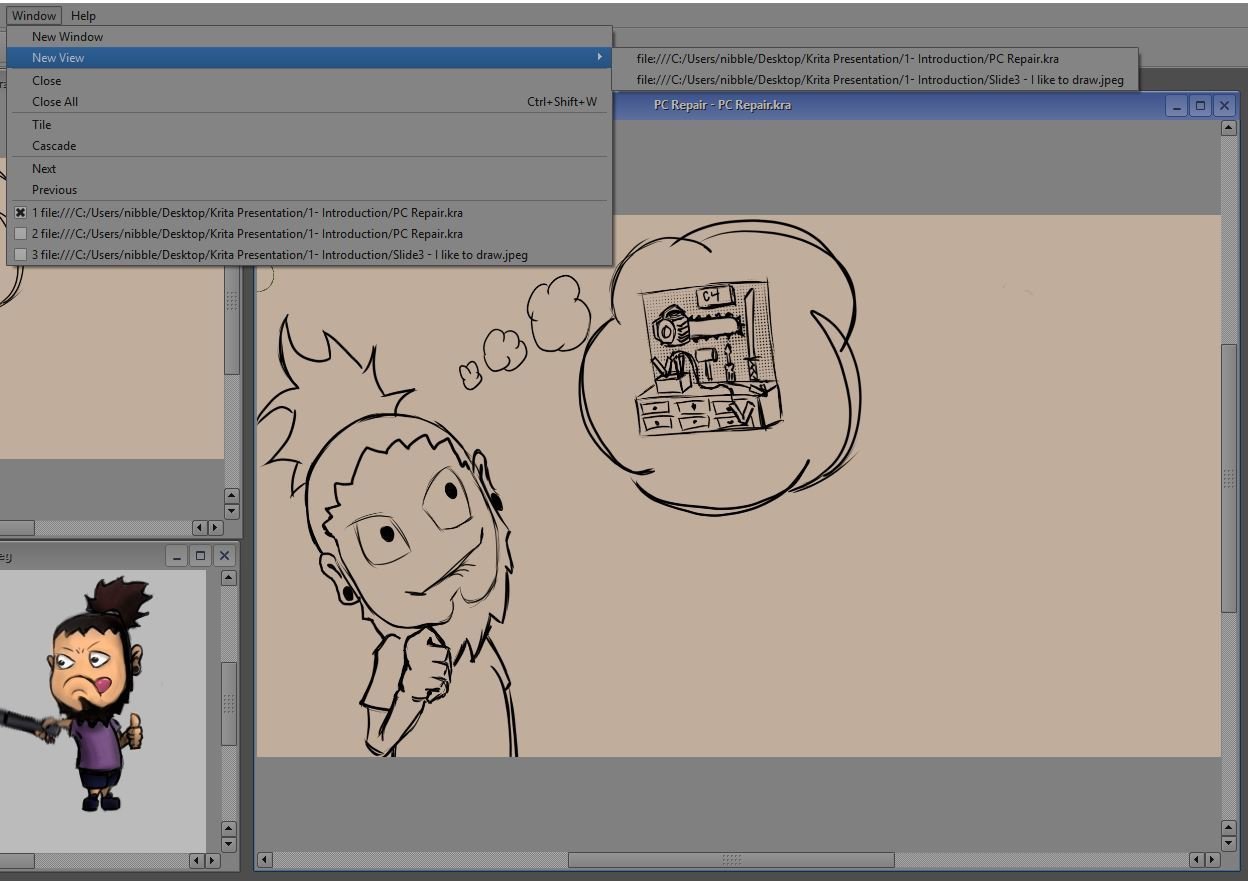
- Multiple views of the same image can be opened in the Window Menu
The Never Ending Canvas
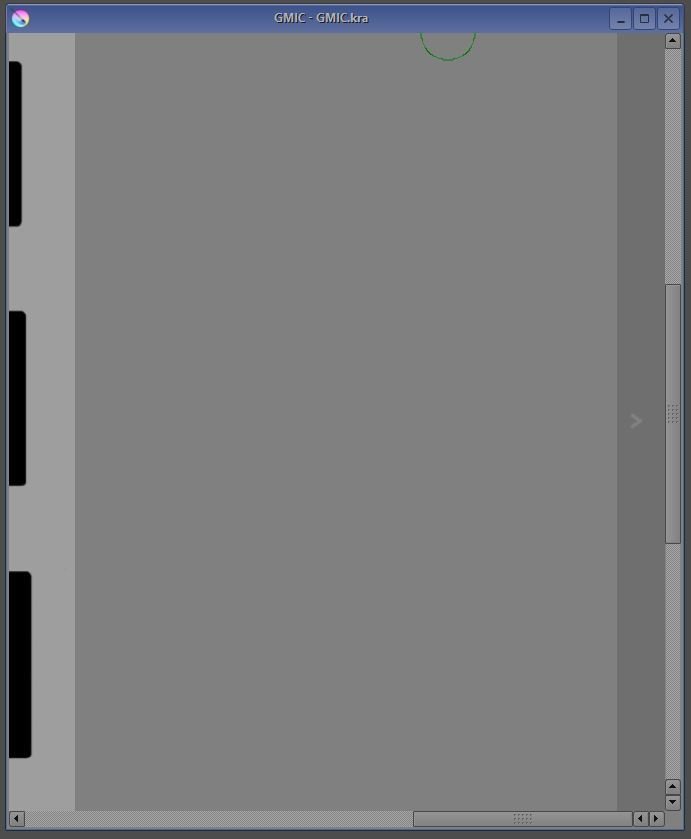
- Can be accessed by scrolling to the edge in any direction
- Clicking the arrow will extend the pixel dimensions in that direction
Ze Toolbar: Workspaces
-Workspaces save the location of your dockers and all the UI configuration changes you've made.
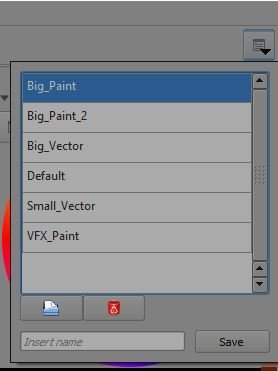
-Located in the far upper right corner, you can save custom workspaces or remove them.
-If you ever get completely lost, you can select "Big_Paint" to reset the to the default UI.
Misc: Stat Bar
-Current brush being used only works with tools from "drawing".


-Masking Mode toggles between marching ants and color indicator for selections
-Current color model, bit depth, and color profile.
-Pixel dimensions of the image.
-Memory usage of the image.
-Zoom level, can click to select or define zoom level.
-Cycle preset zoom levels
Layers: The Docker
- Visibility
- Lock
- Alpha Lock (clipping mask)
- Lock Transparency
- Blending Modes
- Opacity
- View
Layers: The Docker
- New Layer
- Copy Selected Layer
- Move Layer (up or down)
- Add or Remove Layer from Group
- Layer Properties
- Delete Layer
Layers: Visibility
- Turning off the visibility of a layer will also prevent it from being modified, it can also improve performance since less calculations are needed.
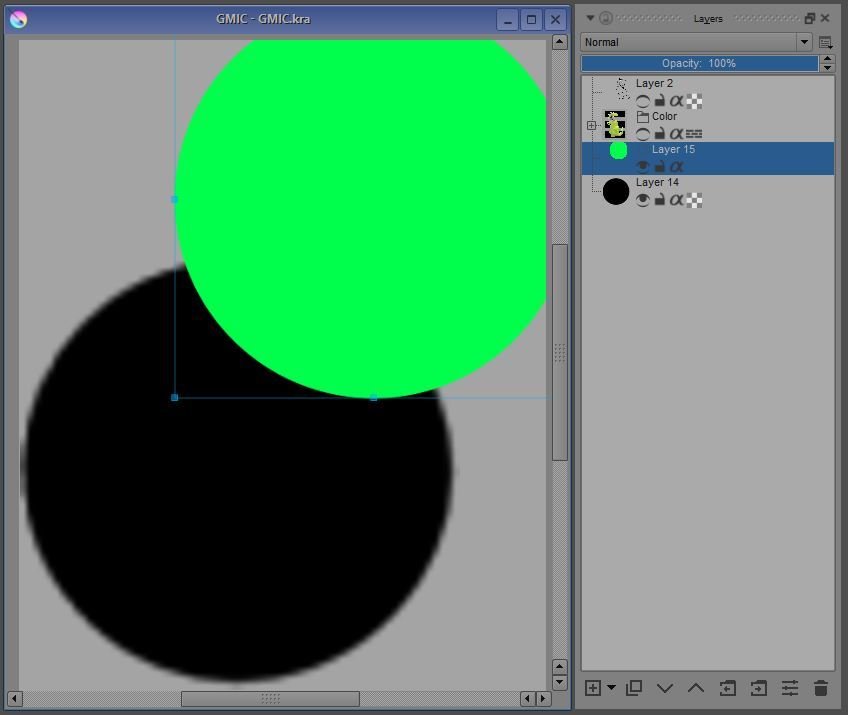
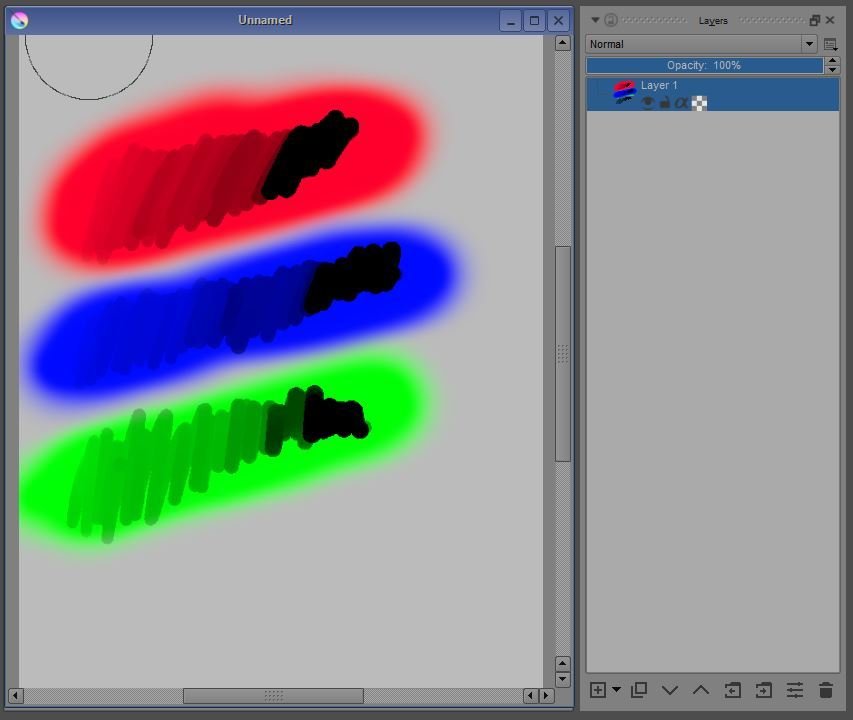
Layers: Inherit Alpha

- The layer lock can be used to prevent any changes to the layer itself.
- No clipping masks. Instead the Alpha Lock can be used to only display changes to non-transparent pixels in the parent layer.
- Changes made with the Alpha Lock on are only hidden, disabling the lock will show the child layer unaltered.
Layers: Alpha Locks
- The Alpha Lock completely prevents changes to any transparent pixel on the current layer
- Since no changes are allowed, disabling the Alpha Lock does not show additional painted areas.
- Similarly, enabling the lock will not effect any previously painted pixels
Layers: Properties
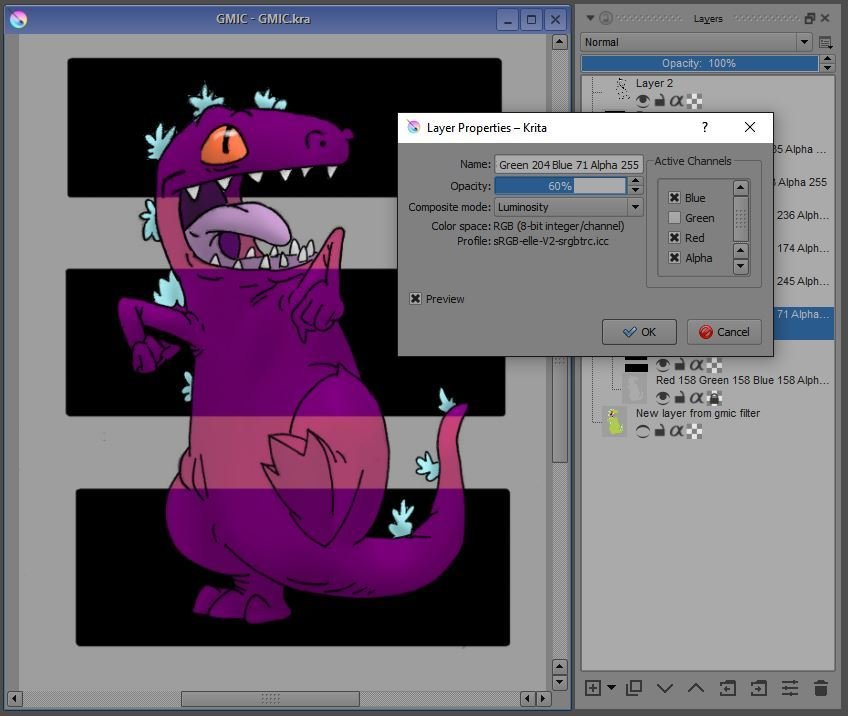
- By disabling color channels in the preferences we can improve performance or make sweeping color changes
Layers: Types
- Group Layers
- Fill Layer

- Fill layers with varying opacity can be used to give your canvas a traditional medium feel.
Layers: Types
- Paint (Rastor)
- Vector Layer
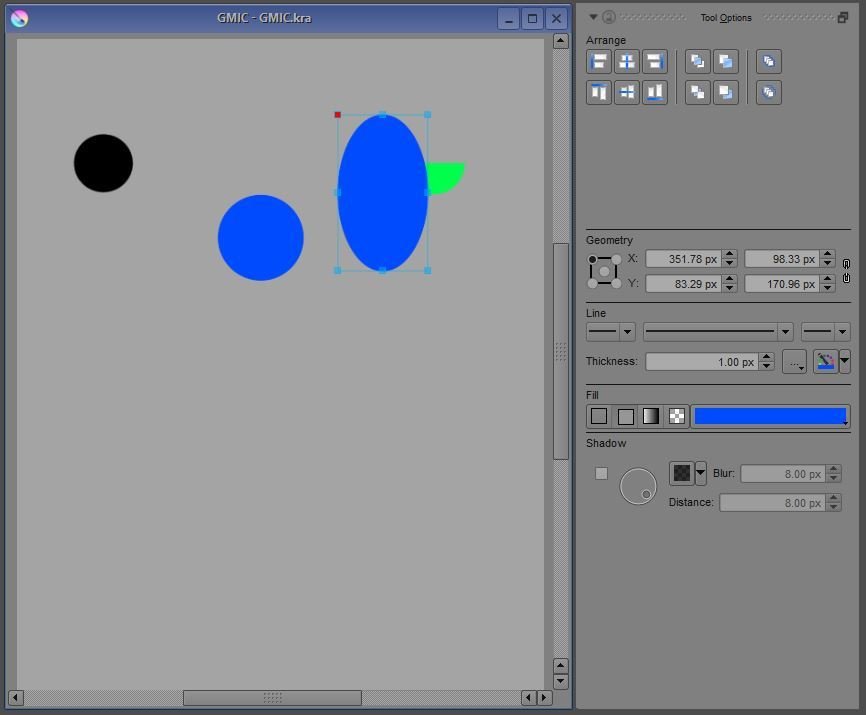
Layers: Rastor Vs Vector
- Paint (Rastor)
- Vector Layer

- Shape handling tool can be used to edit vector curves
- Vector objects can be resized without any resolution loss. Great for logo's and graphic design.
- Multiple Vector Objects can be housed individually on the same layer.
Layers: File Layer
- File layers load in an image from a file.
- Making changes to the file will magically update all file layers
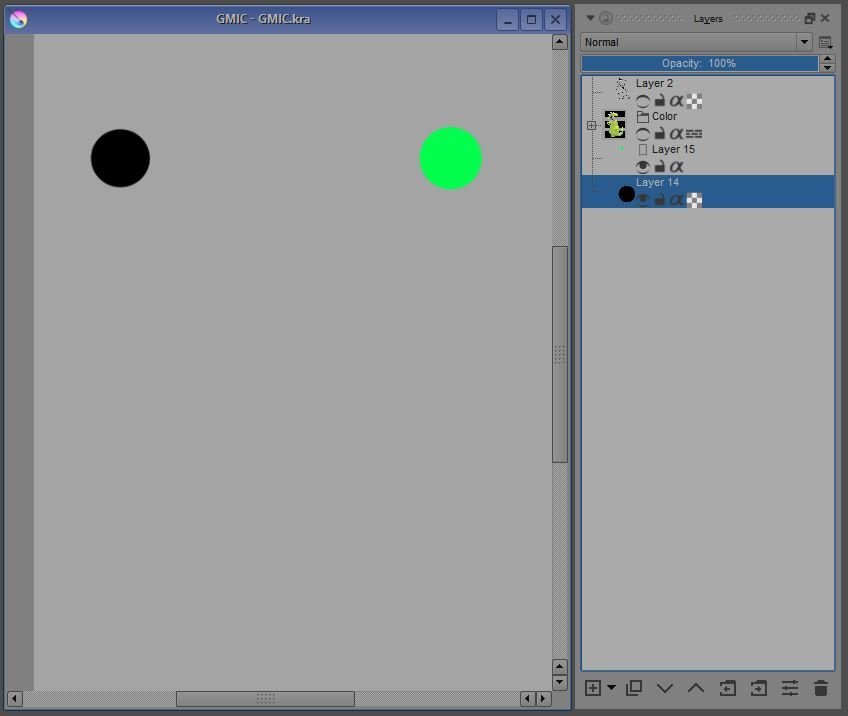
Masks: Transparency and Local
- Masks are a way to isolate a selected area

- Transparency masks can be used to reveal only the masked area
DOES NOT STOP EDITING HIDDEN AREA

- Local selection masks will remember your selection even if you clear your layer selection
Layers: Filter
- Filter layers can be used to make non-destructive edits to your image

- The "Color to Alpha" filter can be used to remove the white from your scanned line work

- There are tons of different filters to play with, this one can be found under "Colors"

- Since we want to make this change permanent we would "right click" the layer and merge it down

- Since working on transparency is no fun, the background color can be added from the images menu
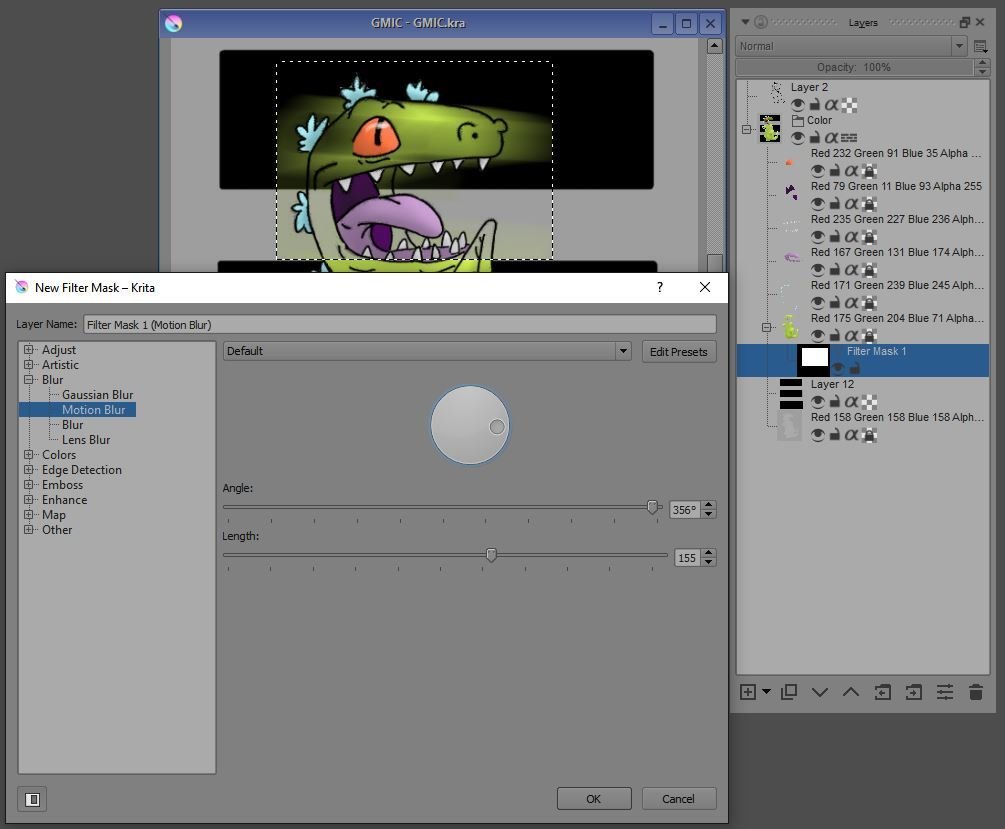
Masks: Filter
- Filter masks can be used to add a filter to just the selected area
Layers: Clone Layer
- Clone layers are similar to file layers in that they cannot be edited directly
- Changes must come from the original layer... mostly....
Masks: Transform
- The transform mask can be used to make non-destructive warps to your image
- When used with the a clone layer, it allows changes to that layer
- The transformation will always be relative to the parent layer
- Moving the original layer will hide the clone layer
Transform
- The transform tools is one of the most useful
- Free transform will let you resize, rotate, or scale around the target in the center
- Using "Ctrl" with transform in perspective.
Transform
- The warp option will create a grid on the selection that allows weighted manipulation on each node
- The cage transform allows you to set your own nodes that can then be manipulated
- The liquify setting allows you to move pixels freely with a brush like tool
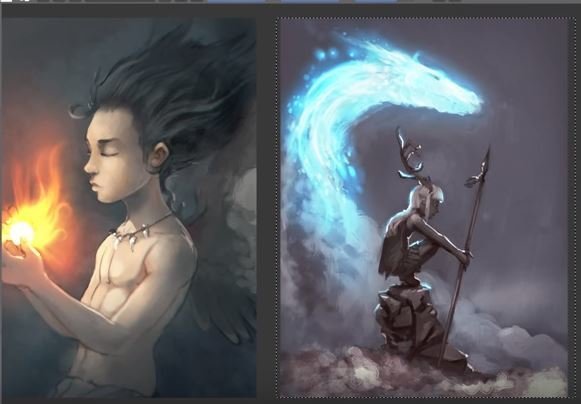
Blending Modes
- Blending Modes change the way that colors are blended by changing the math used
- The "Color Dodge" mode inverts the color of the top layer then divides it by the lower layer
- The results are much brighter highlights, often used for magic or laser effects.
This image is from David Revoy's tutorial on modes
Blending Modes

- The color blending mode is perfect for colorizing greyscale as it will add color without changing the value
Blending Modes
- The overlay mode looks at the value of the chosen color, if the value is high it will paint highlights only, low values will paint shadows only

- Krita has at least 5 times the blending modes of Photoshop. Checking the box next to any mode will add it to favorites
Guides
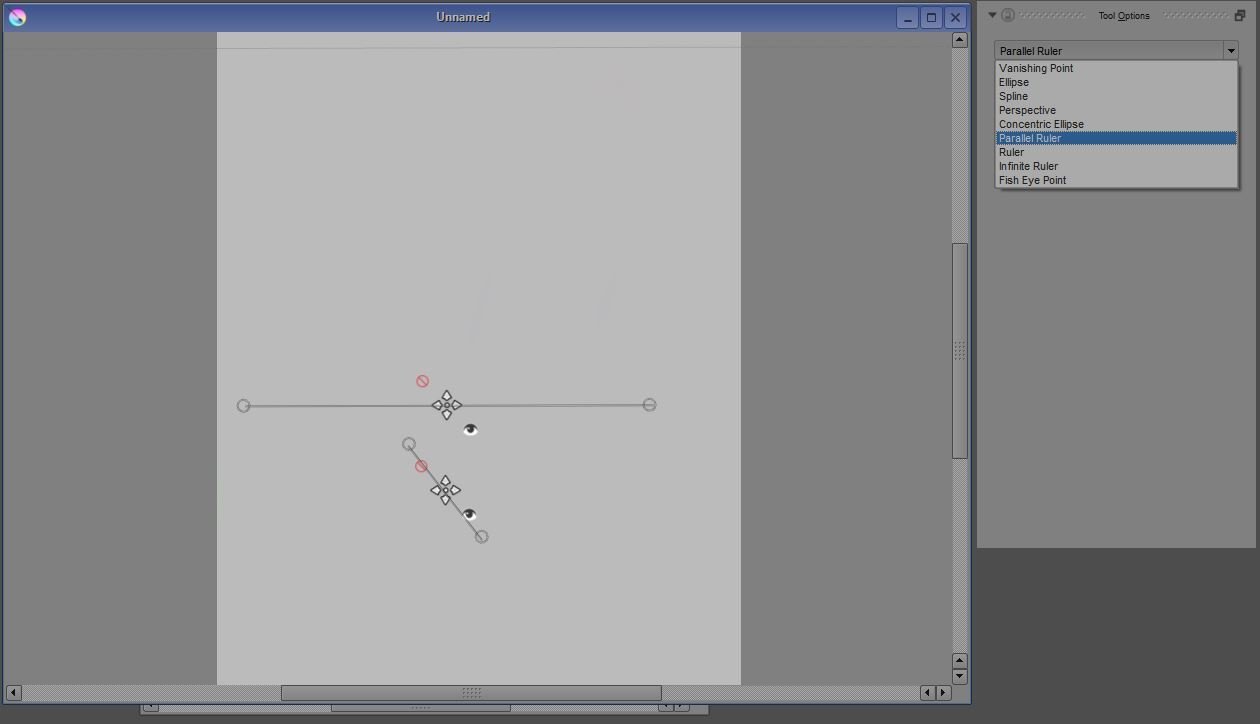
There are multiple types of guides to assist your workflow
They can be adjusted, moved, hidden or removed
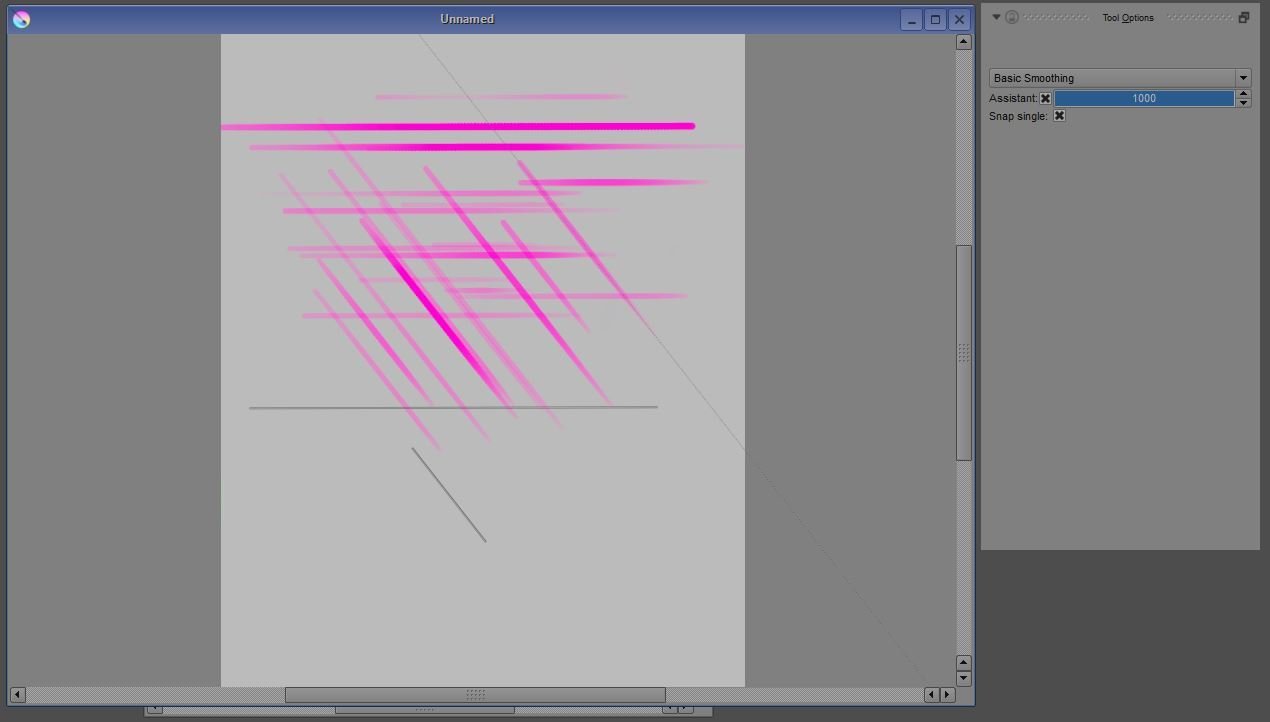
Set the assistant to 100% in brush options to constrain your lines to the guides
Guides
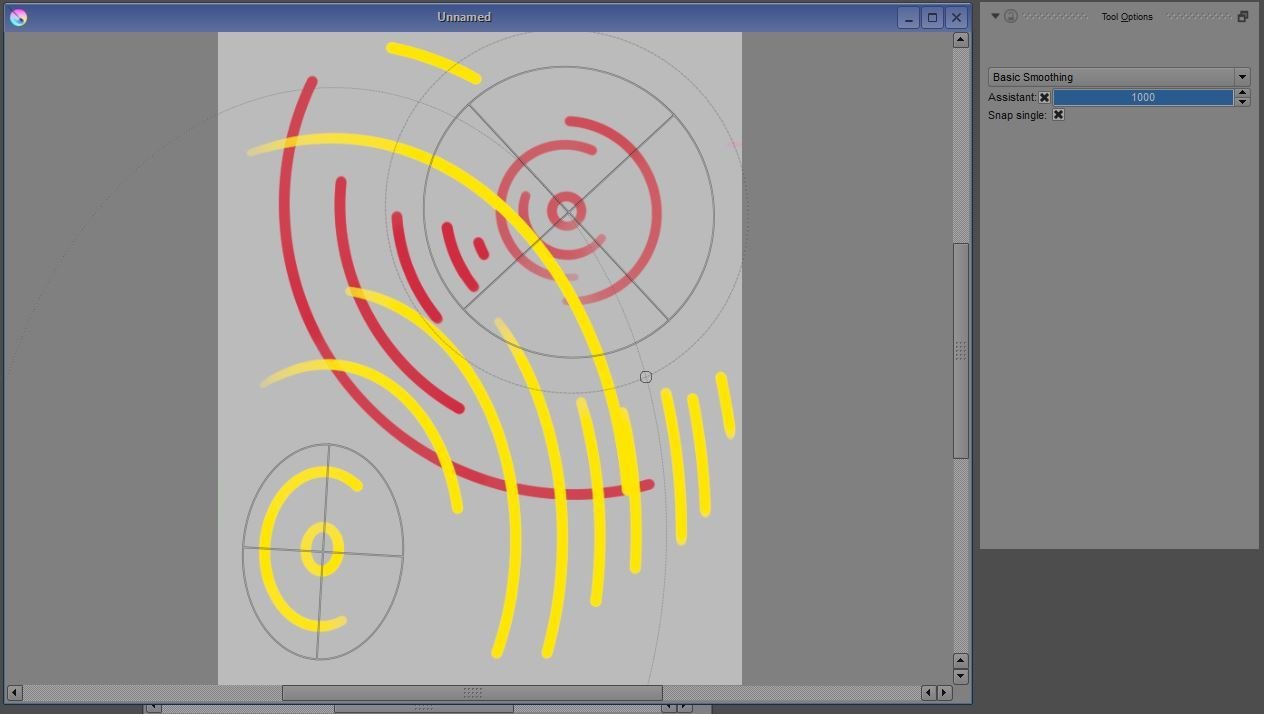
Multiple guides can be used at once, your brush strokes will be constrained to one or the other
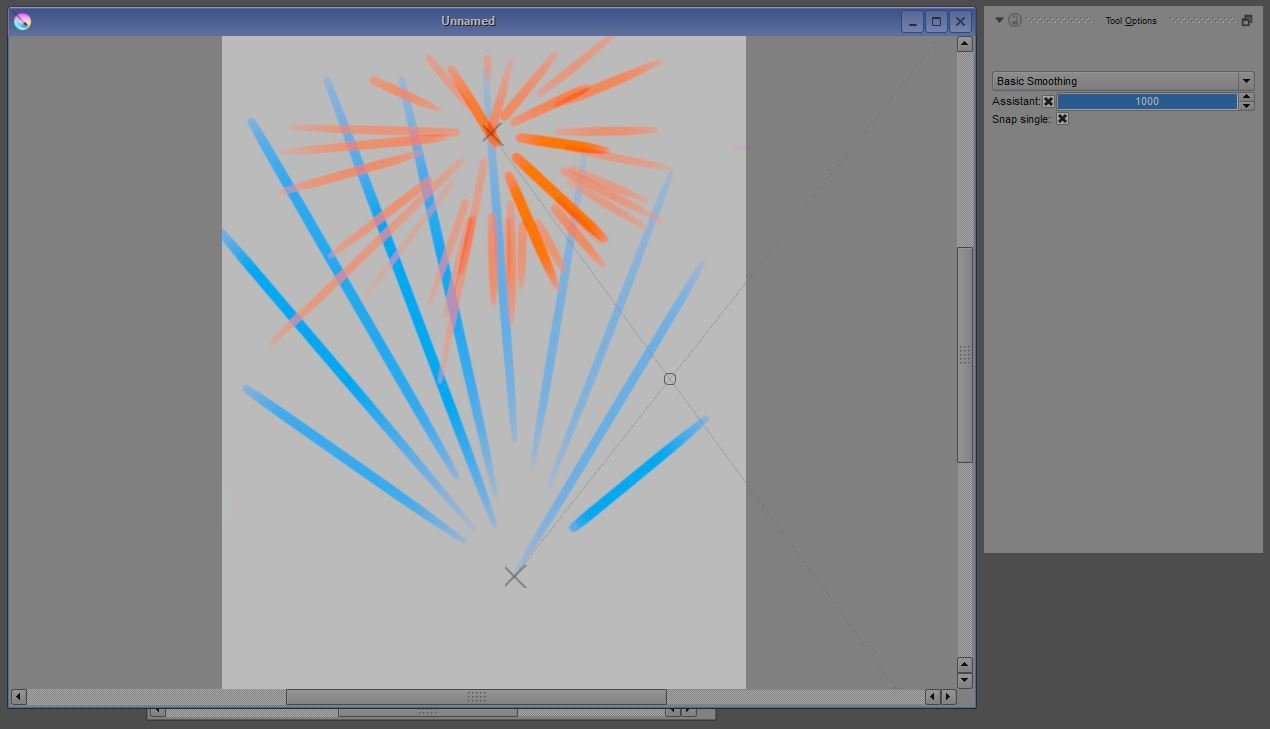
The perspective guides will push all lines toward the vanishing point
G'MIC Paint
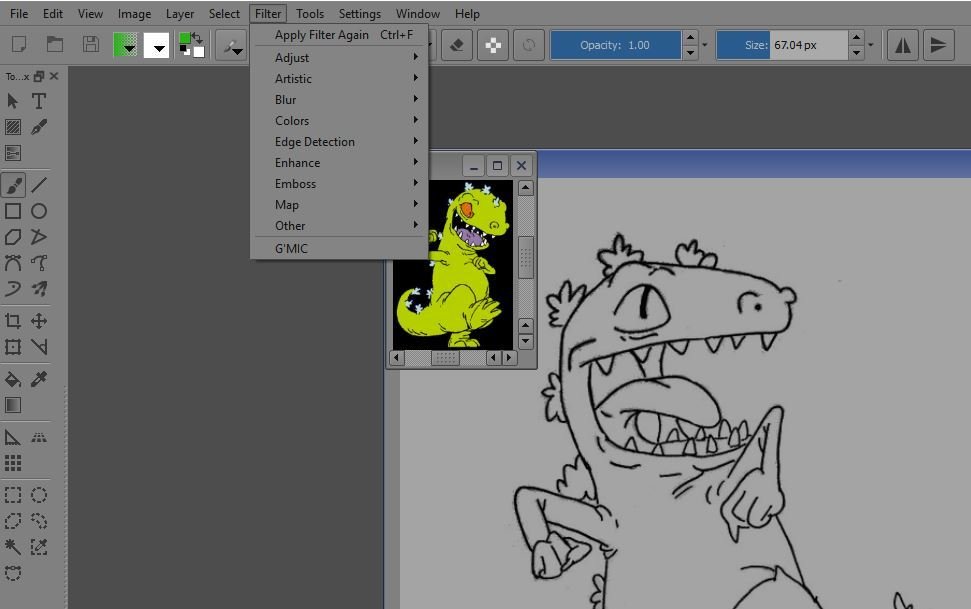
G'MIC is a plugin that allows for many more filters and options, found under the filter menu
-The "Colorize [interactive]" option with G'MIC is a great way to colorize your finished line work
Found under "Black & white" in the G'MIC menu
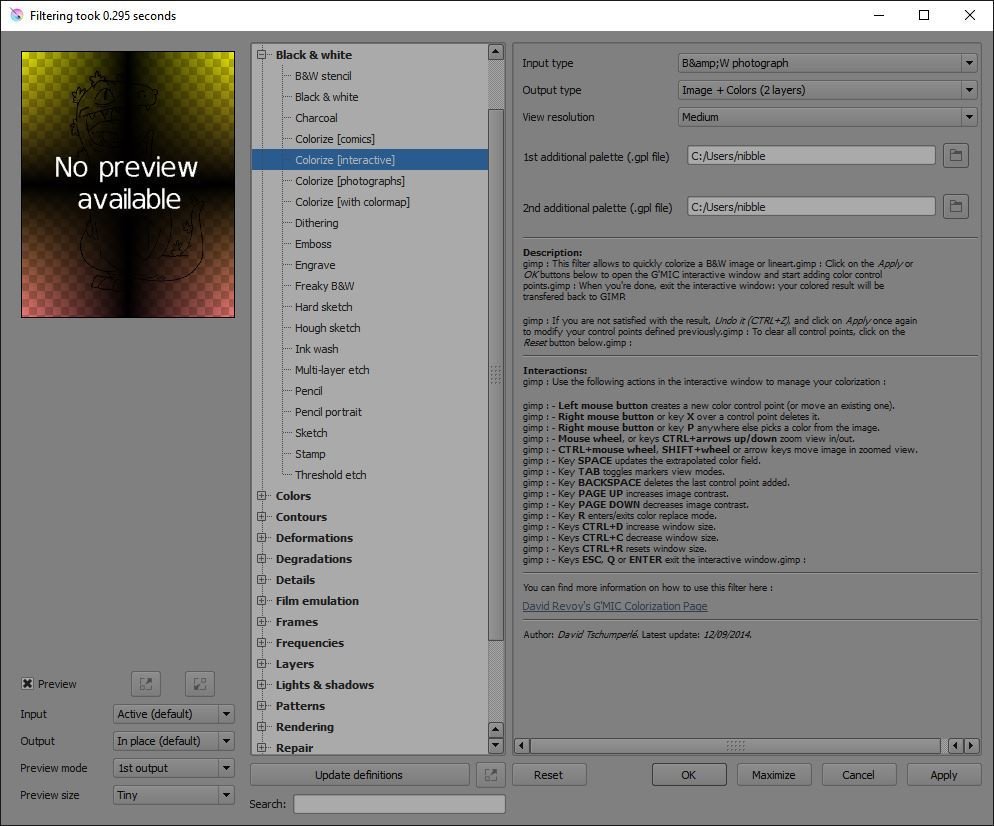
-Update "Input type" to "Lineart"
-Update "Output type" to "Image + Colors (2 layers)
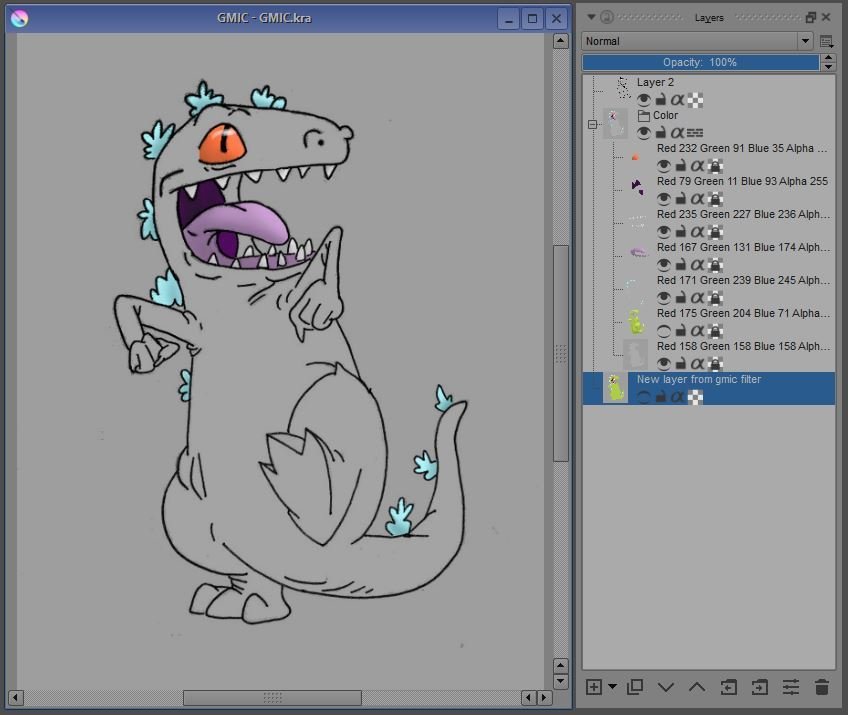
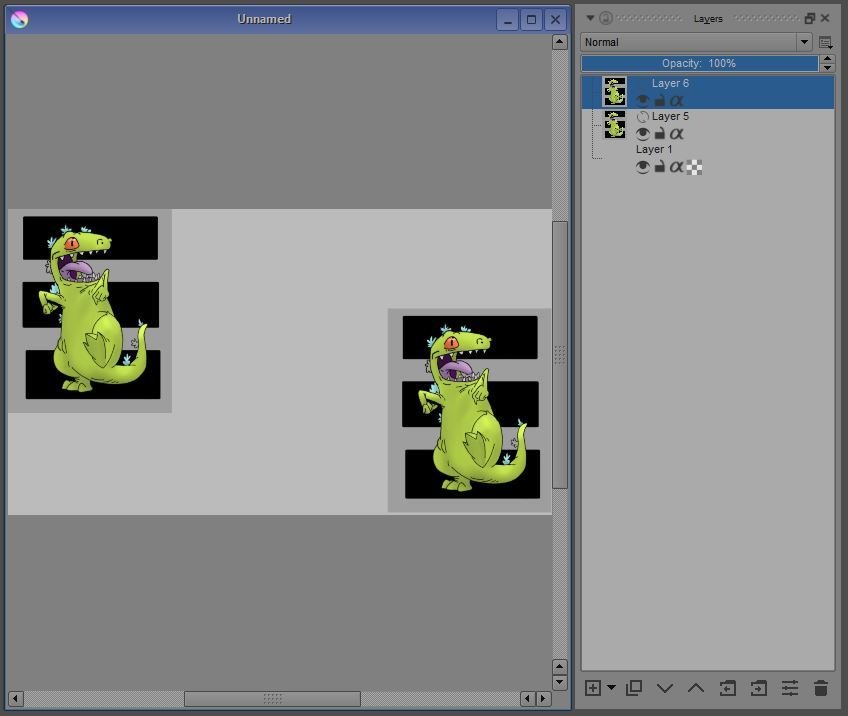
G'MIC: Colorize [interactive]
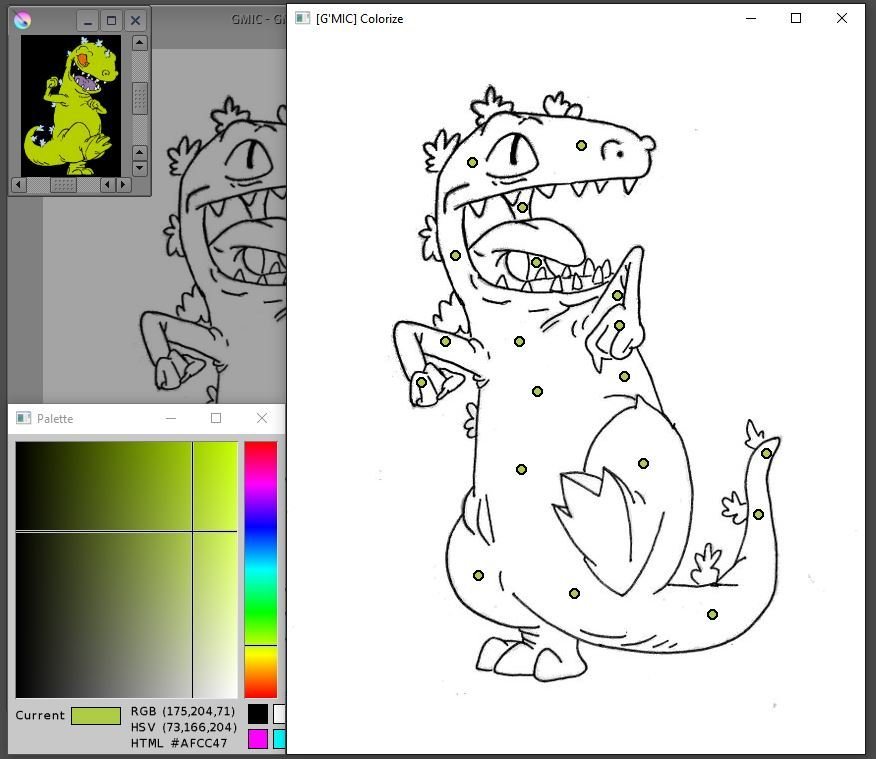
Once the interface opens, color nodes can be added my left clicking on the image
Pressing the space bar will preview the final render
If your color spills over your line work, add more nodes to correct the errors
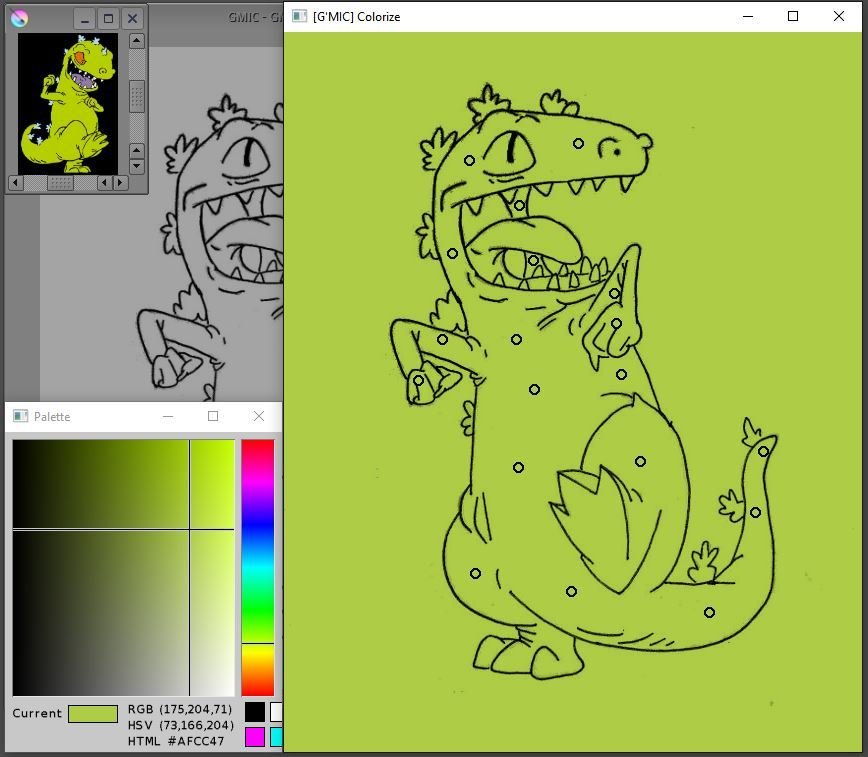
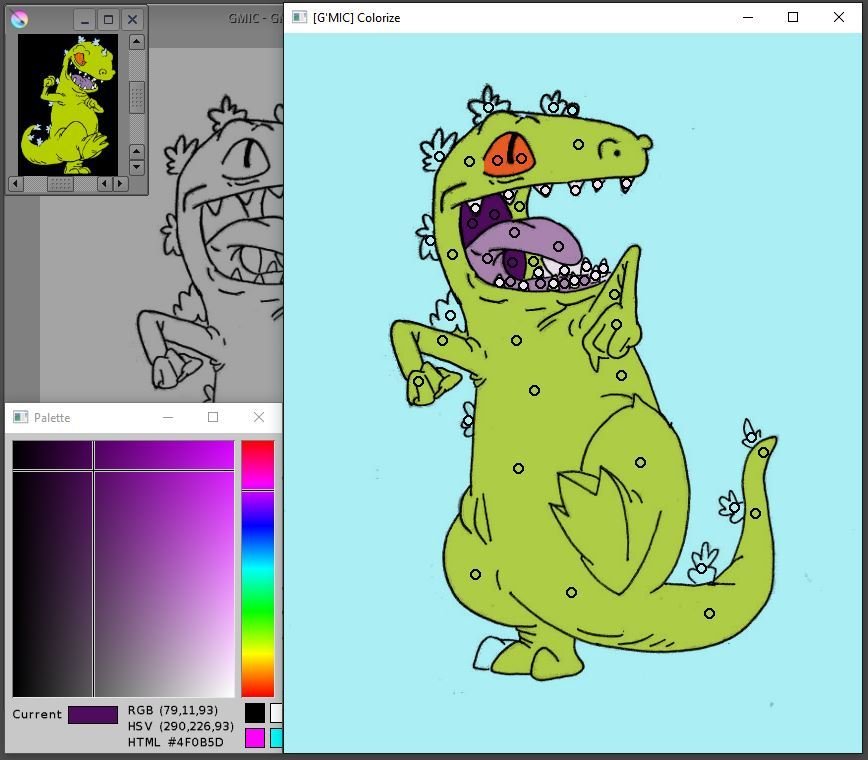
G'MIC: Colorize [interactive]
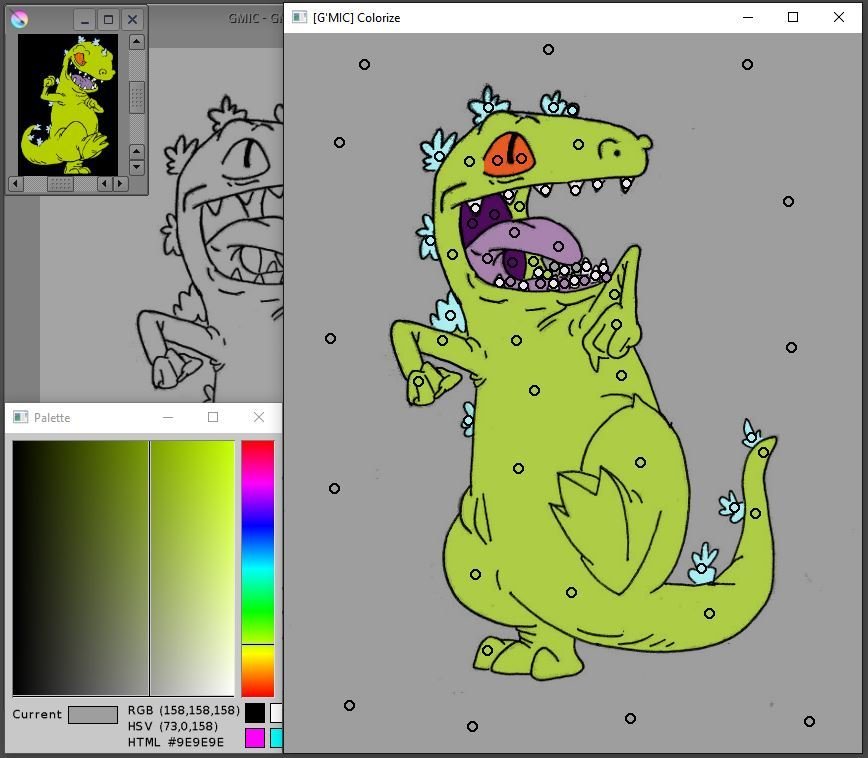
Right clicking on any colored area (not nodes) will choose that color for adding additional nodes
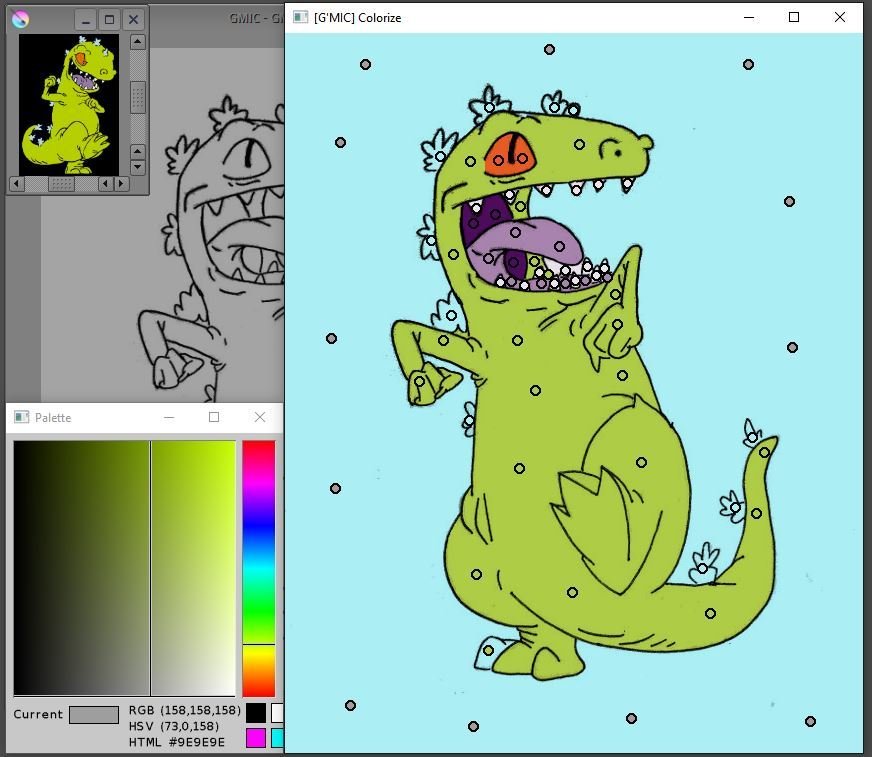
Don't forget to add a background color
The "color 2 alpha" filter can be used to remove it later
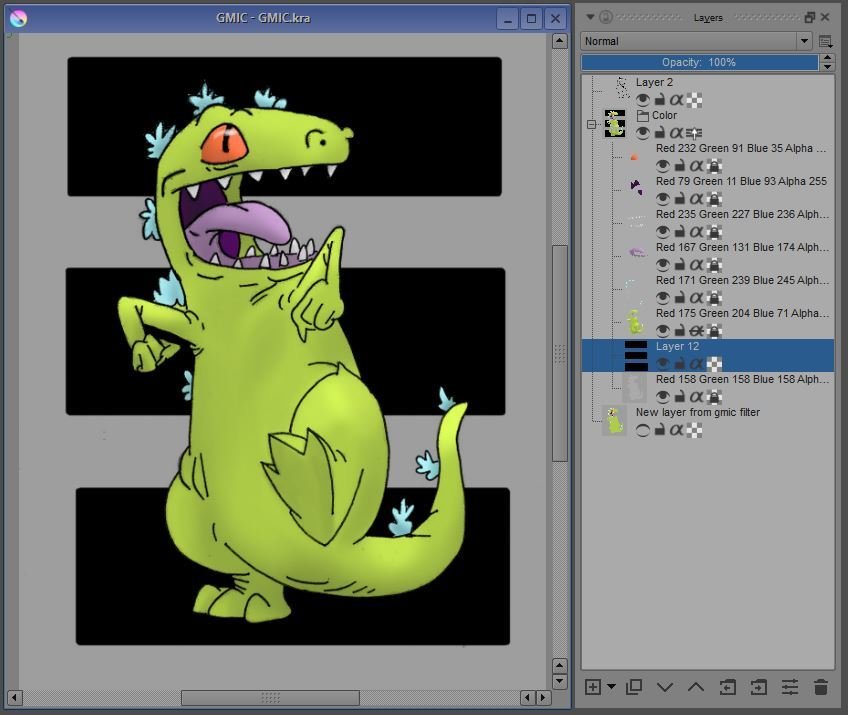
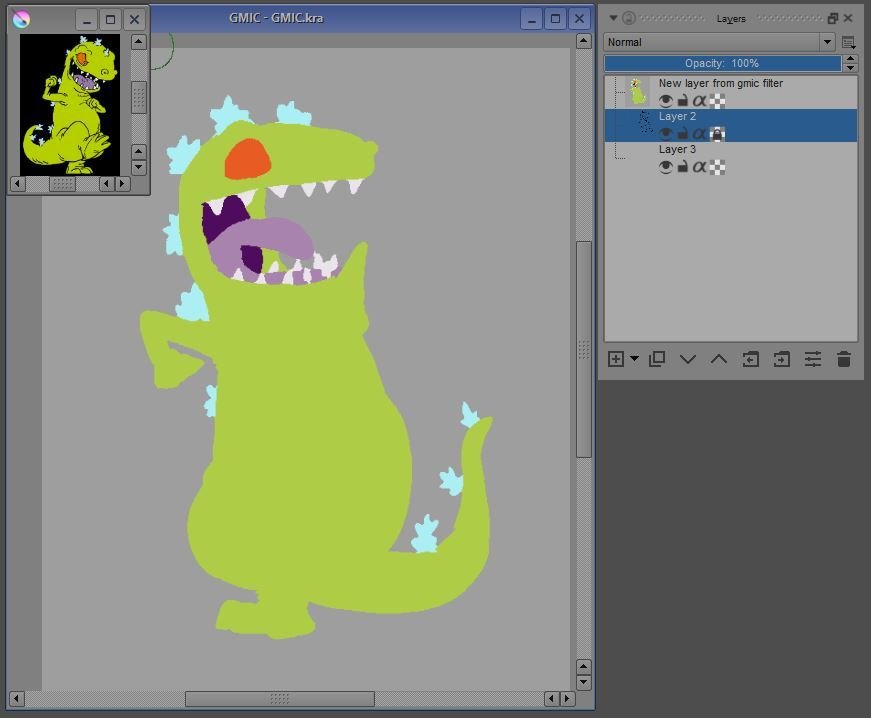
When done, press enter to generate your paint layer
You may need to rearrange your layer stack
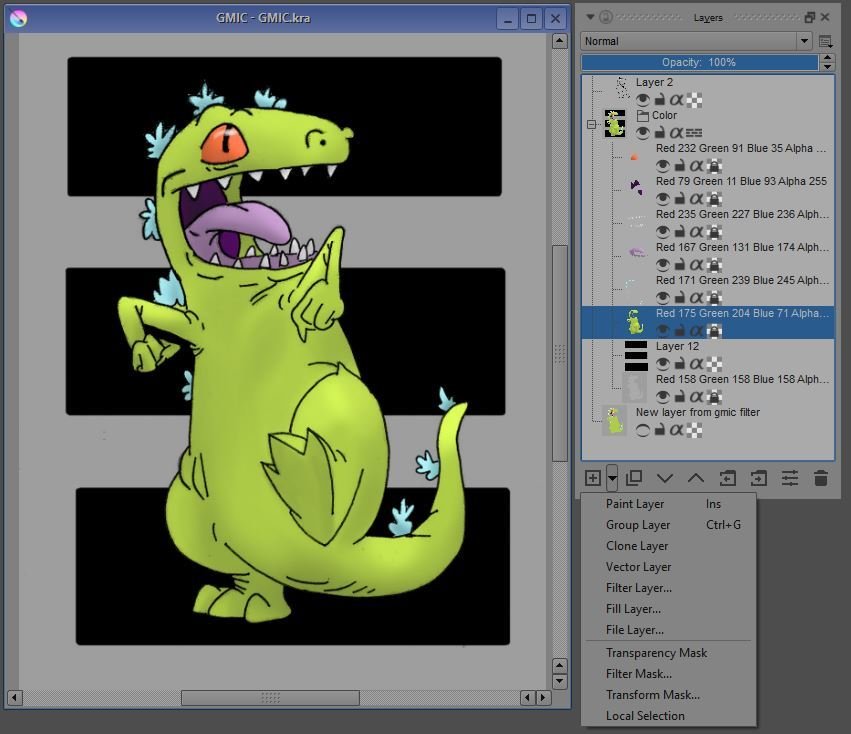
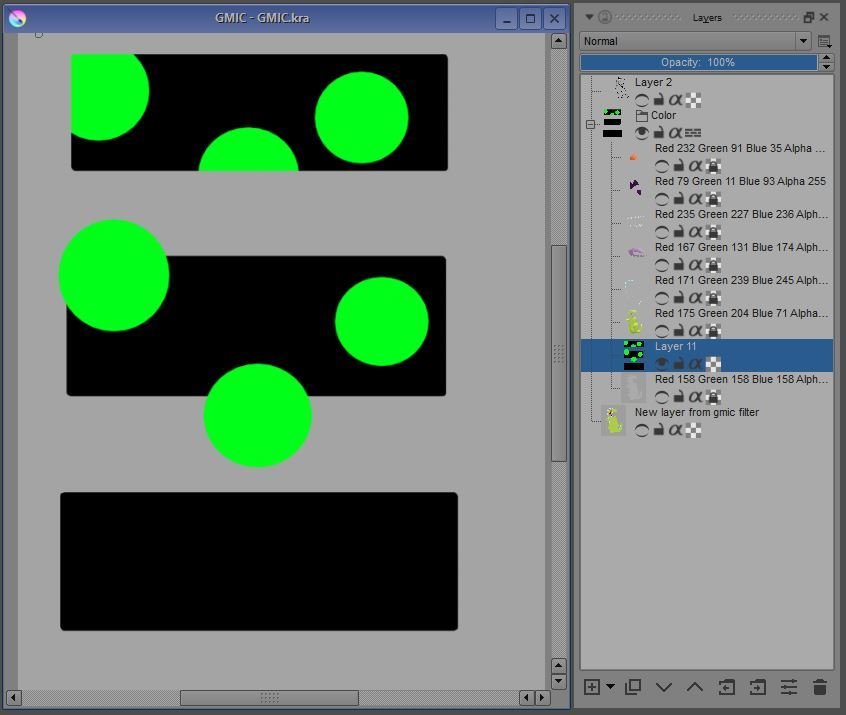
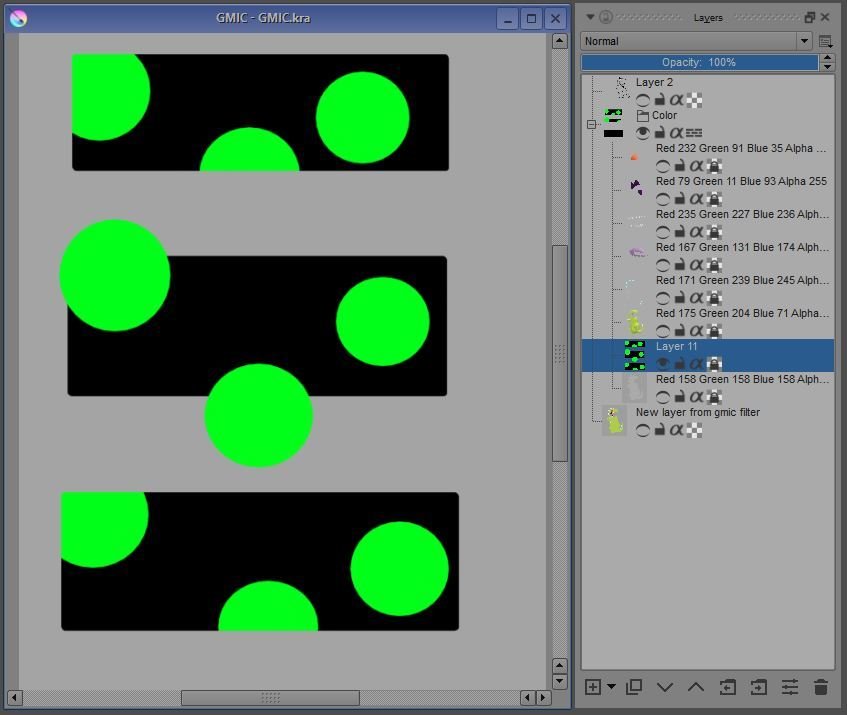
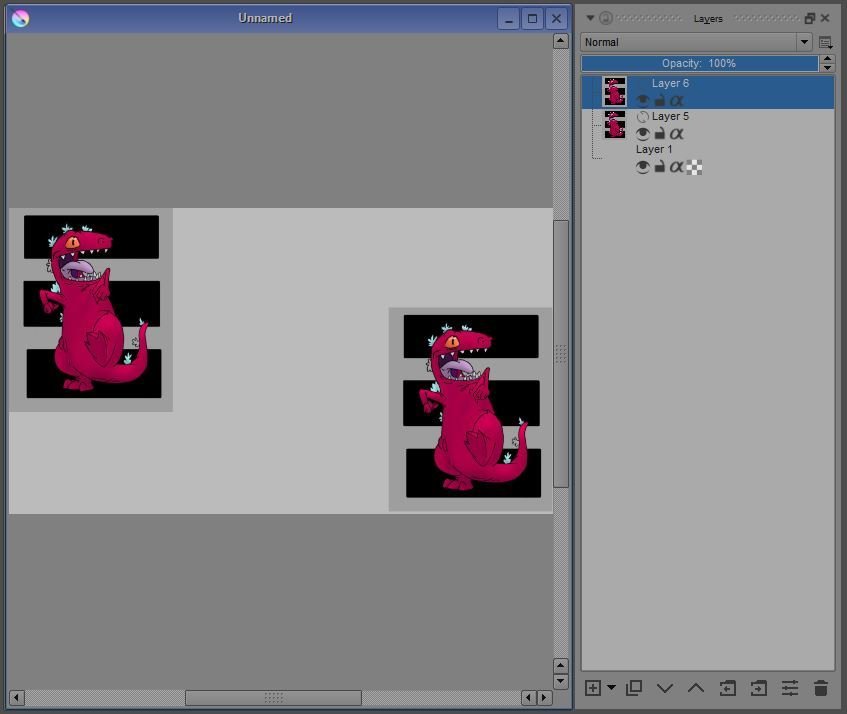
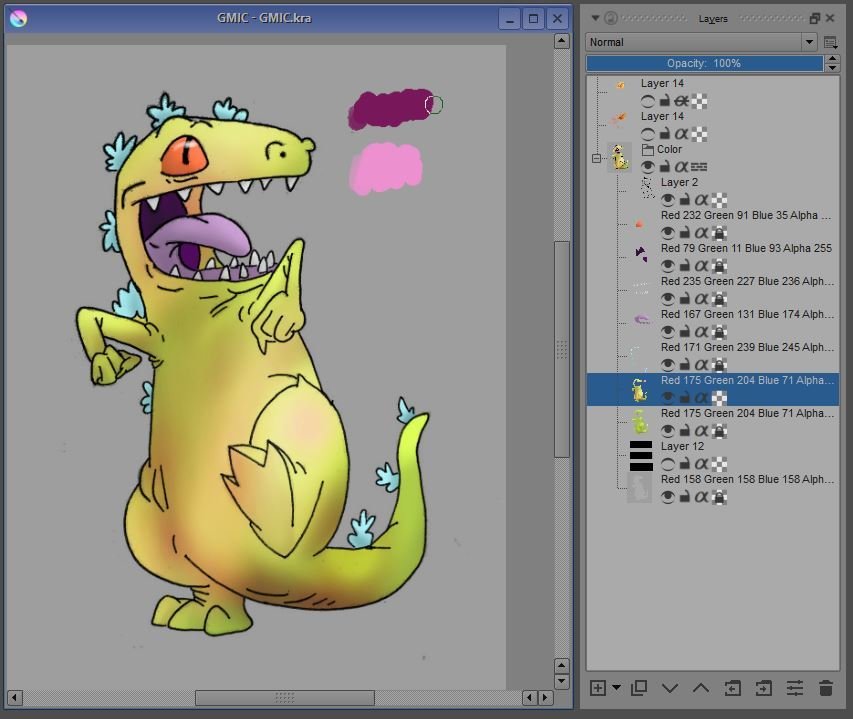
G'MIC: Colorize [interactive]
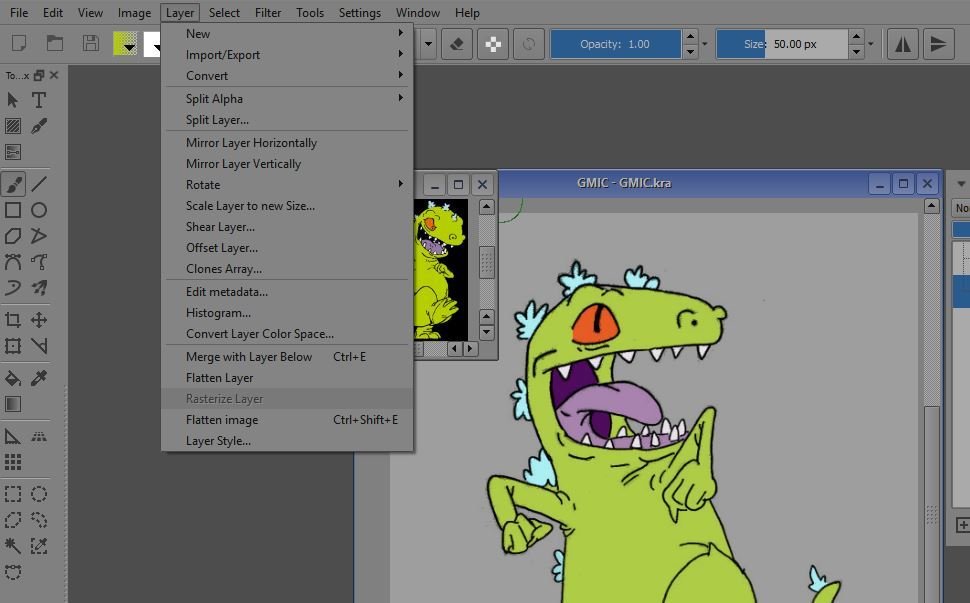

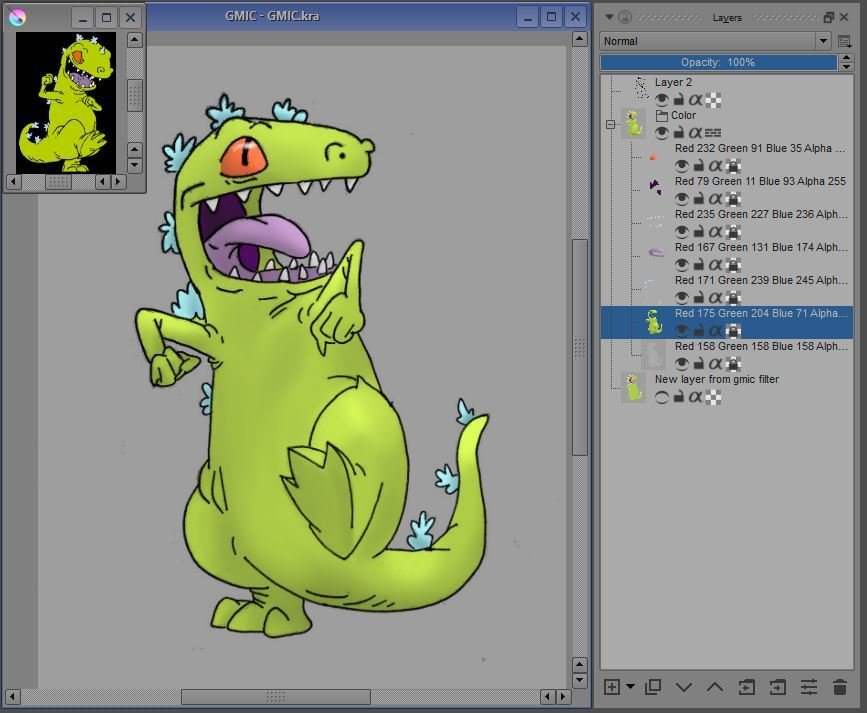
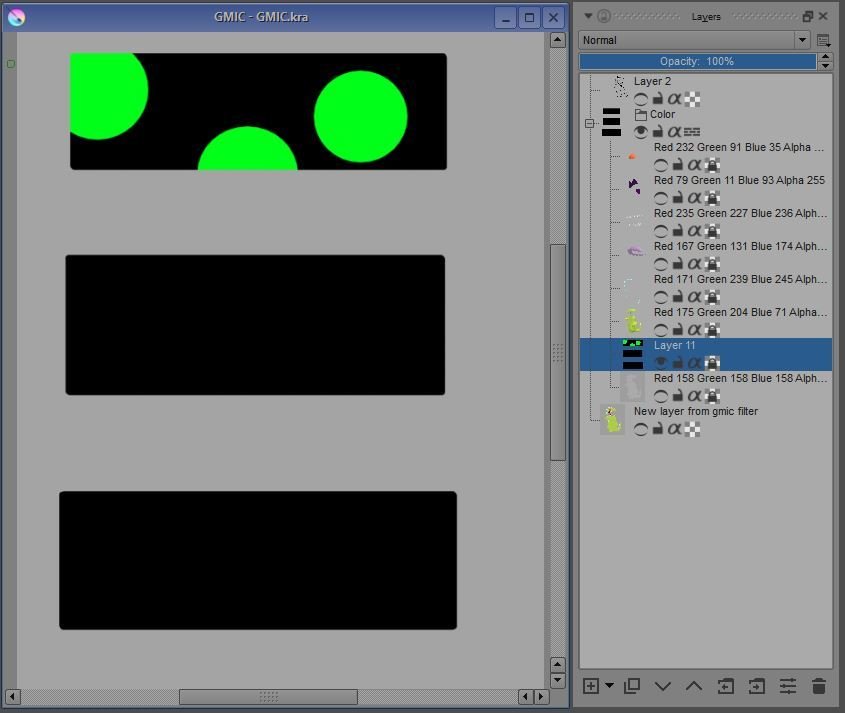
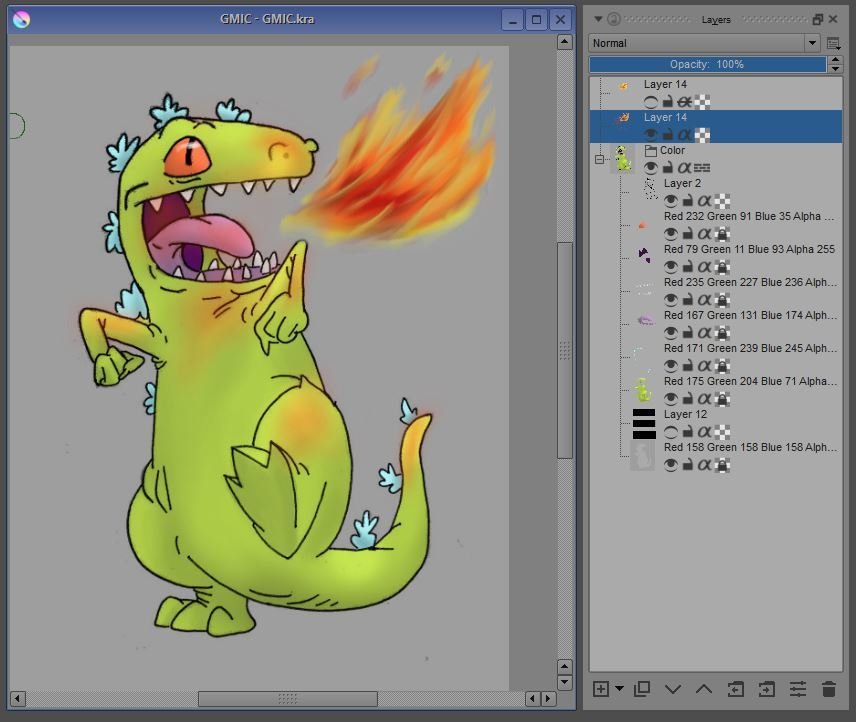
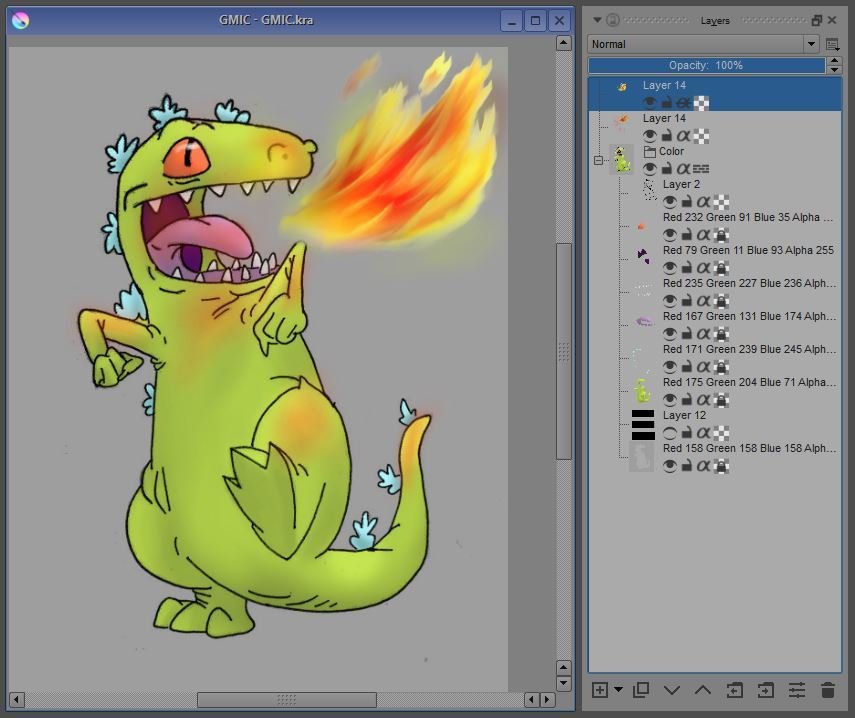
Select "Layer" from the menu to split each flat color into it's own layer
Ensure that the parameter for adding all layers to the same group is checked for housekeeping reasons
Ensuring Alpha-lock is checked will allow you to add detail to each layer while staying in the lines
Here I have added some highlights and shadowing to Reptar by working layer to layer in the stack
Start Your Engines!
Official Krita Mascot: Kiki the Cyber Squirrel by Tyson Tan
Pixel
Pixel
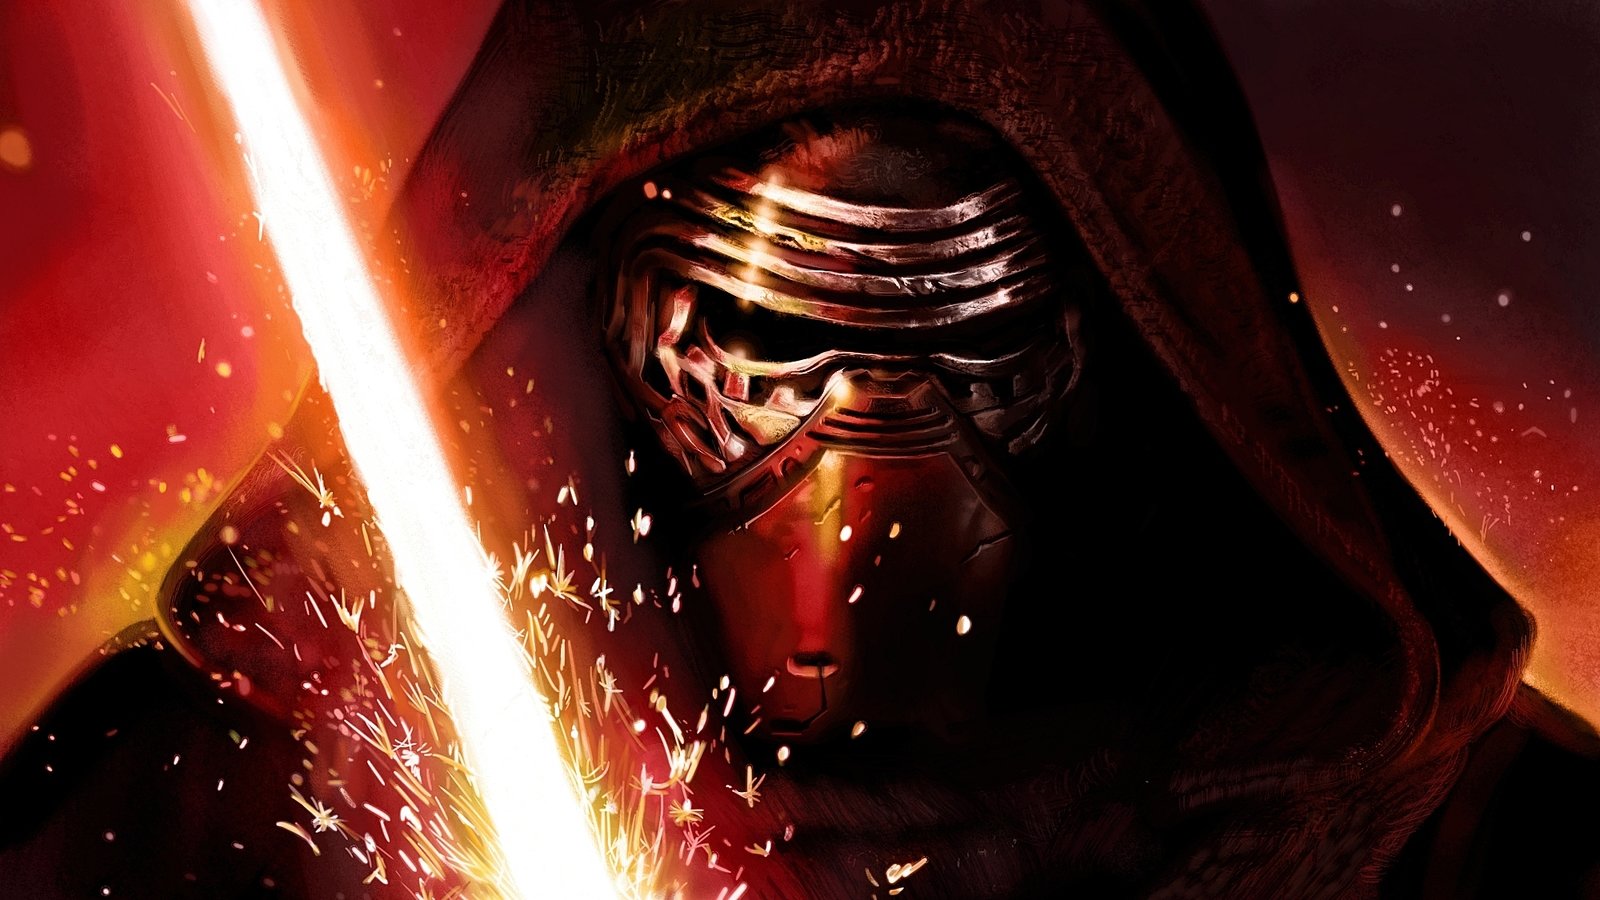
http://speedportraits.deviantart.com/art/Kylo-Ren-Digital-Portrait-587833777
https://www.youtube.com/watch?v=PaXWM7lmW04
Kylo Ren by Lisa Geissner
Color Smudge
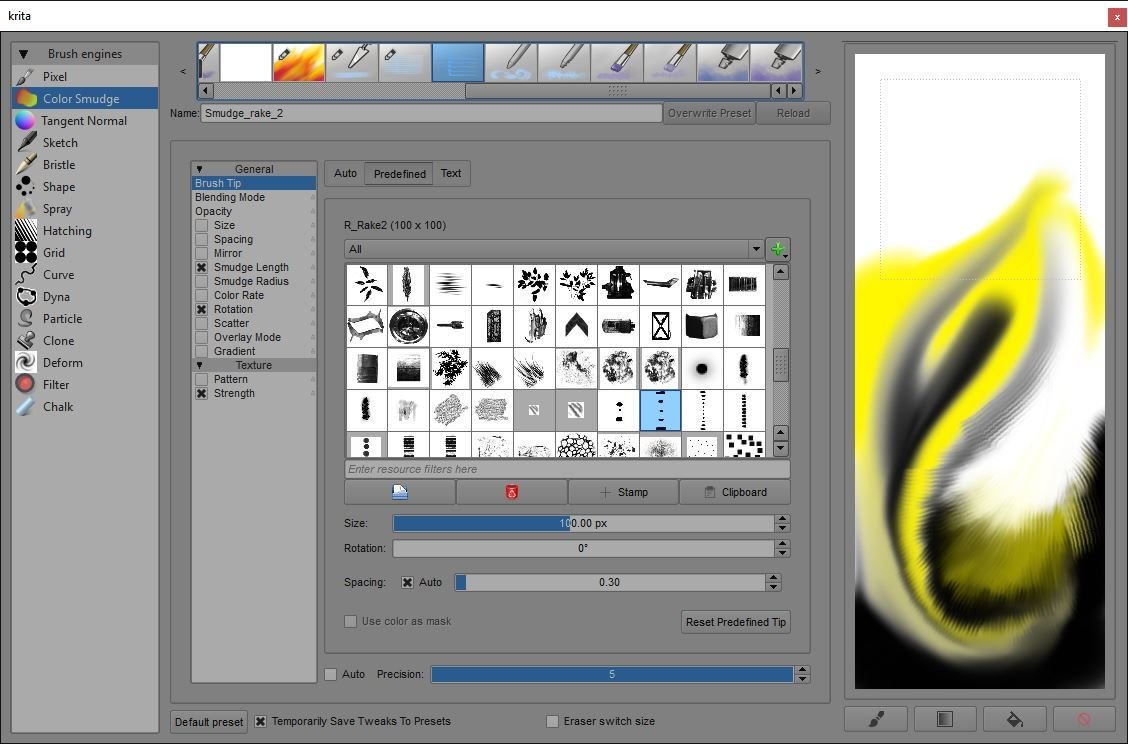
Color Smudge
Color Smudge
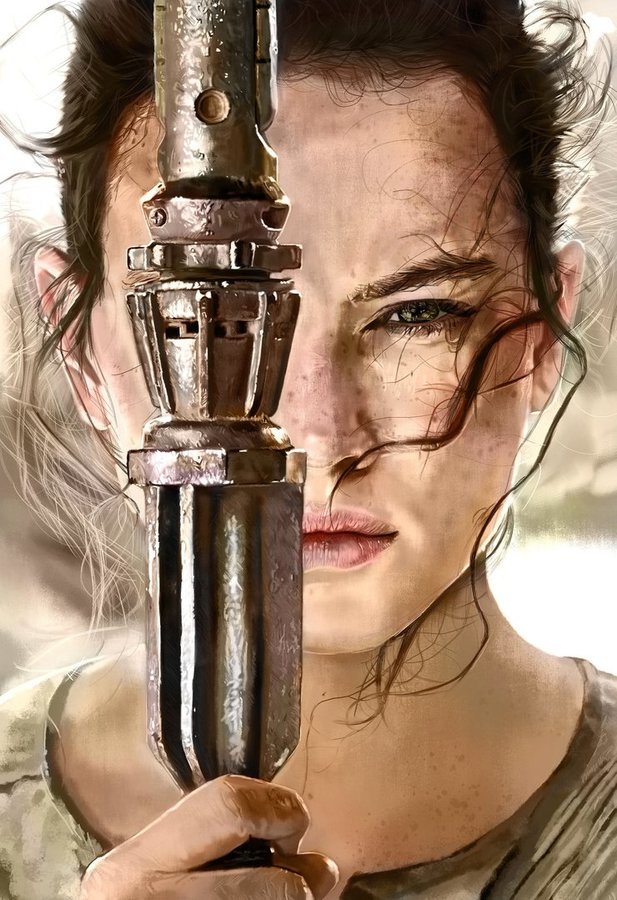
Rey by Lisa Geissner
https://www.instagram.com/speedportraits/
https://www.youtube.com/watch?v=raKHHFv4nN8
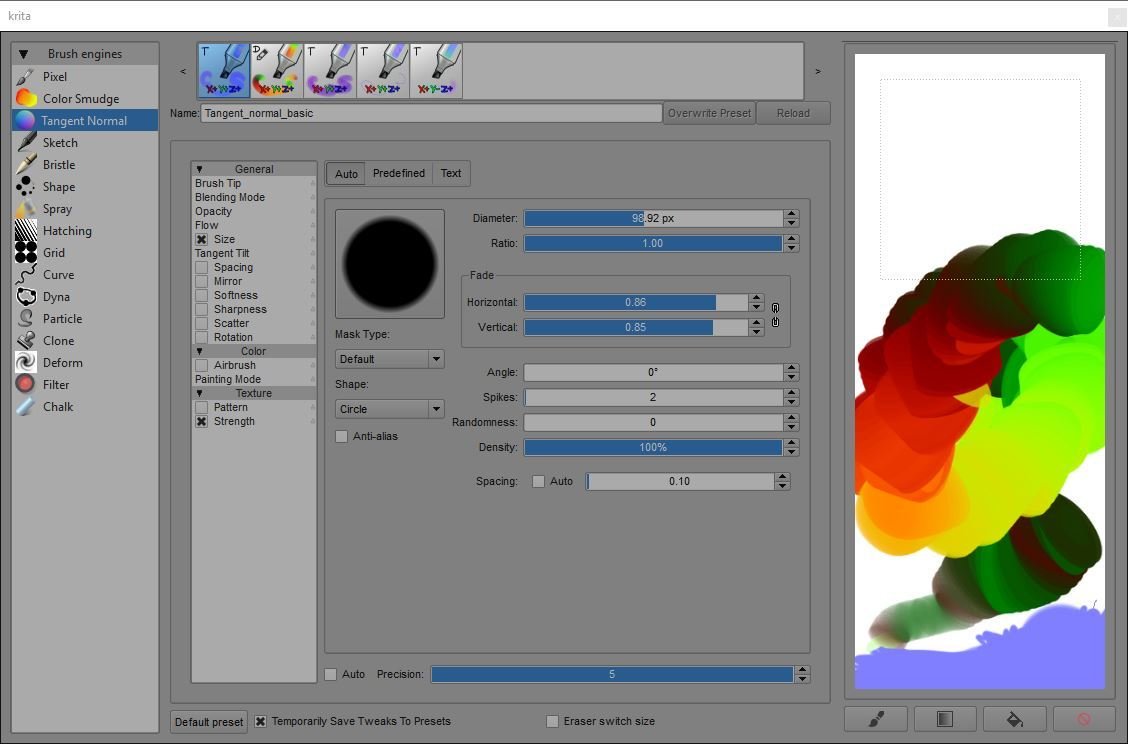
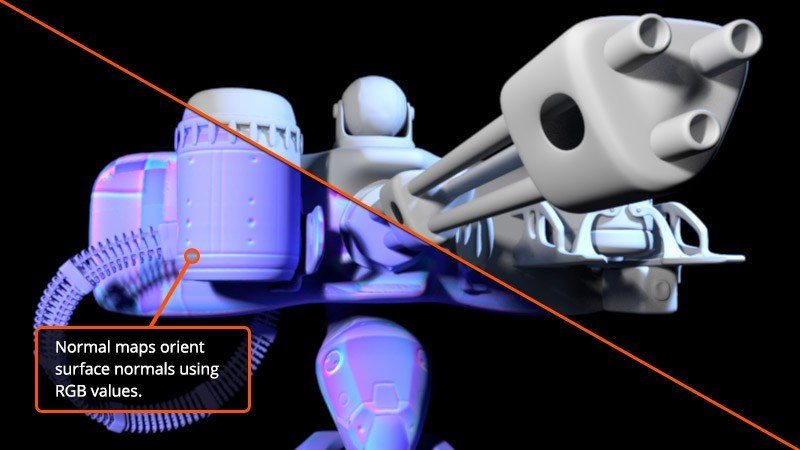
Tangent Normal
Sketch

Sketch
https://www.youtube.com/channel/UCOPGEzxDAVz0-QTyQhg9OTg/featured
Bristle
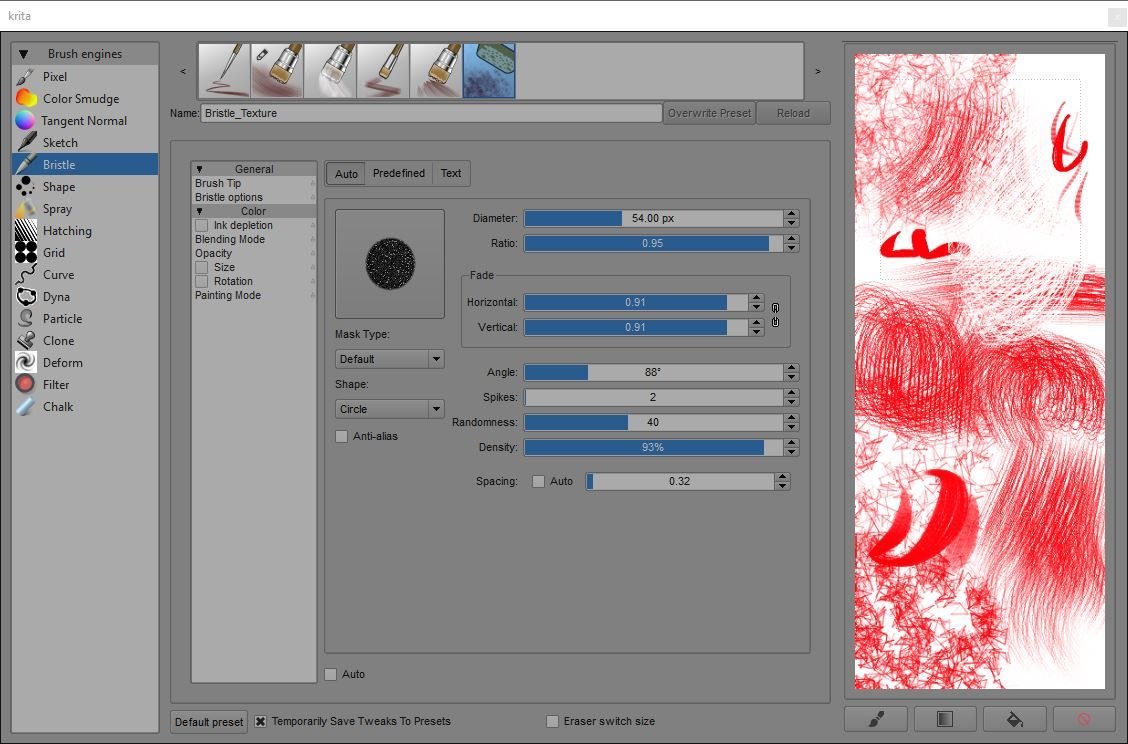
Bristle
Bristle
https://youtu.be/_m3oT_sbpxk
http://speedportraits.deviantart.com/art/Harley-Quinn-Digital-591966277
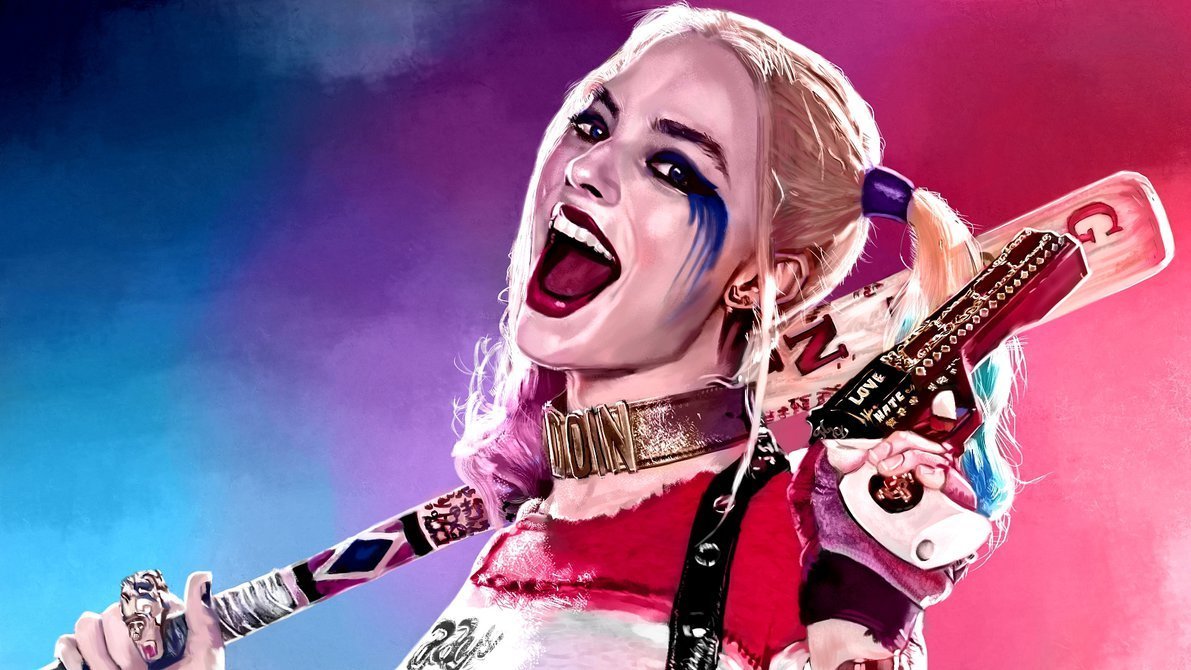
Harley Quinn by Lisa Geissner
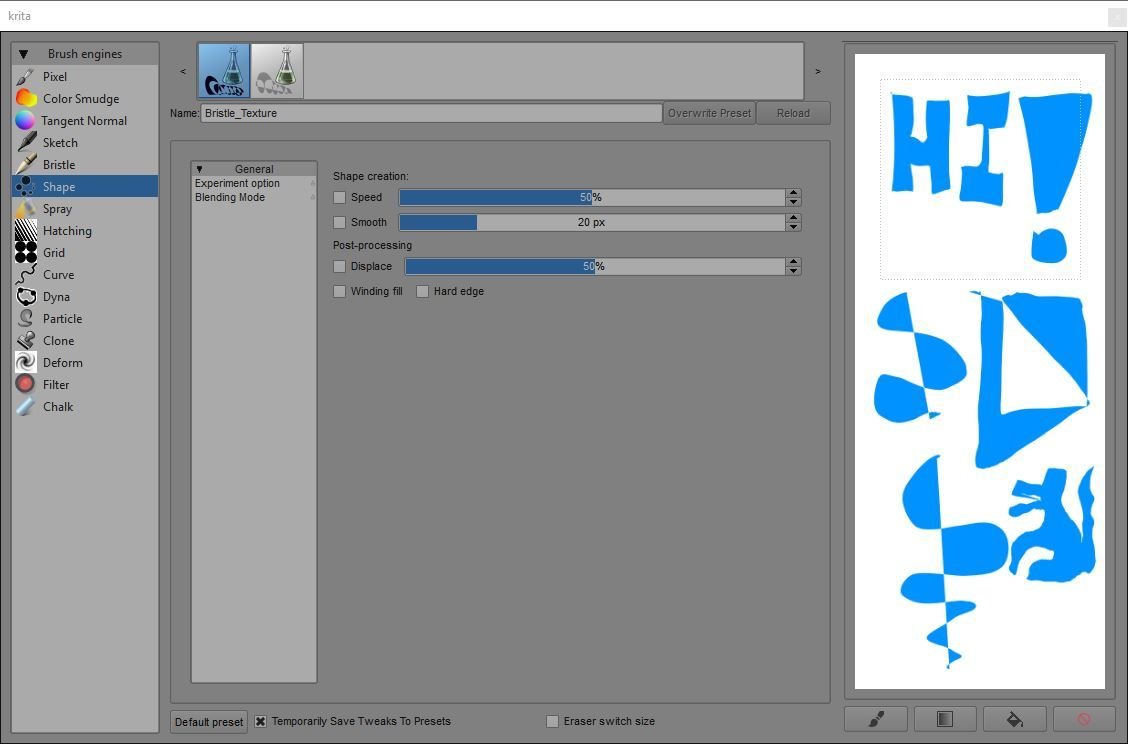
Shape
Spray

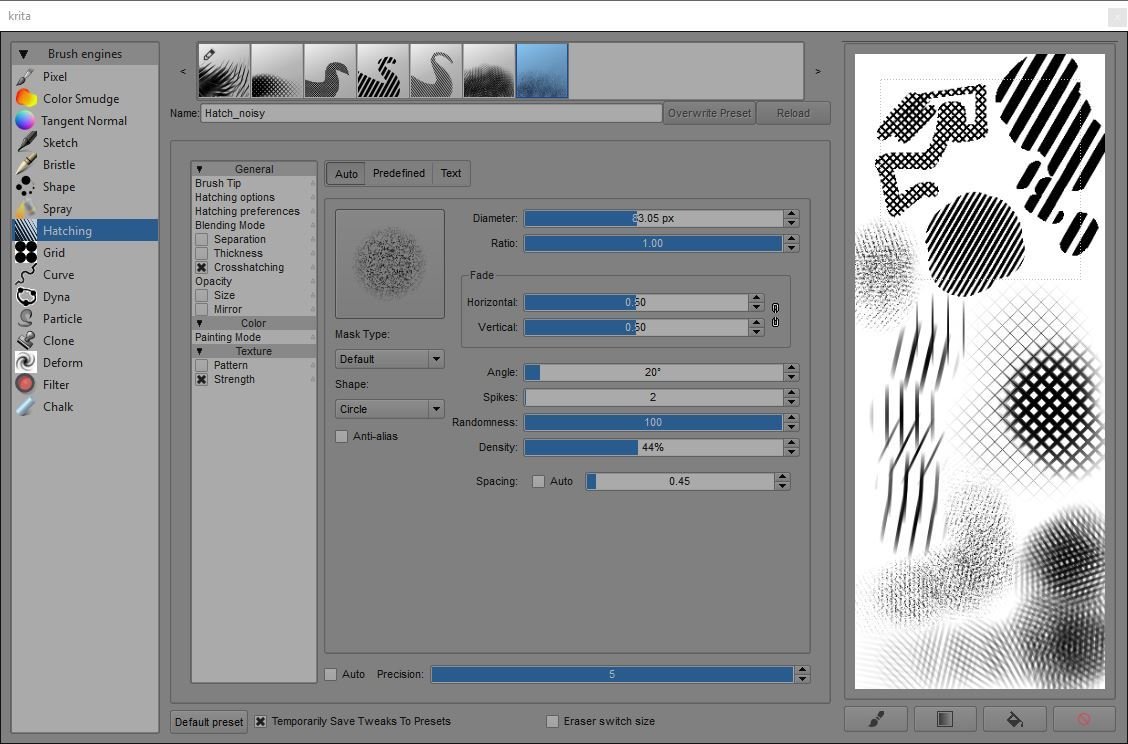
Hatching
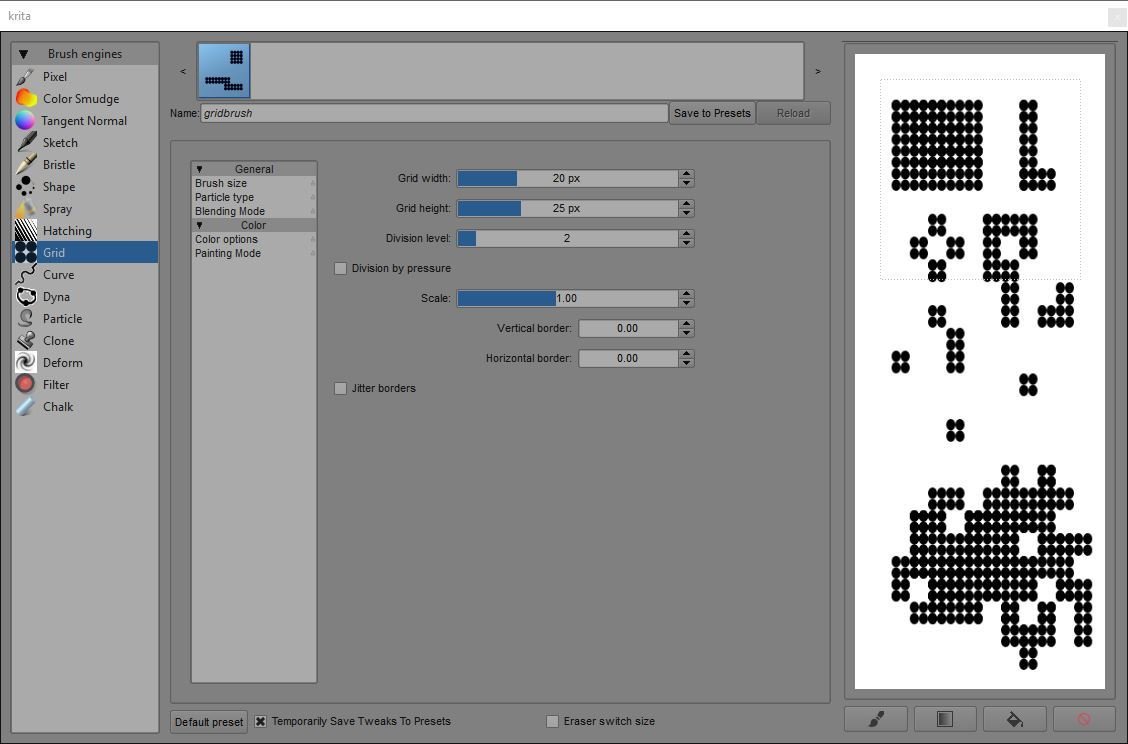
Grid
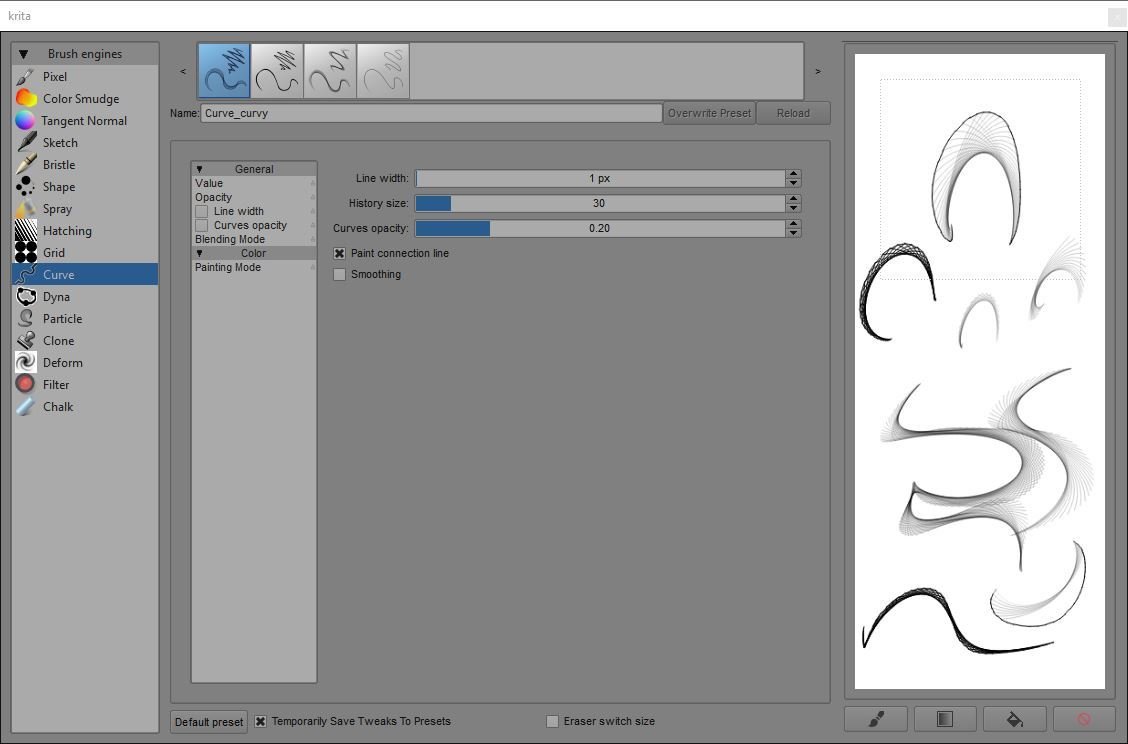
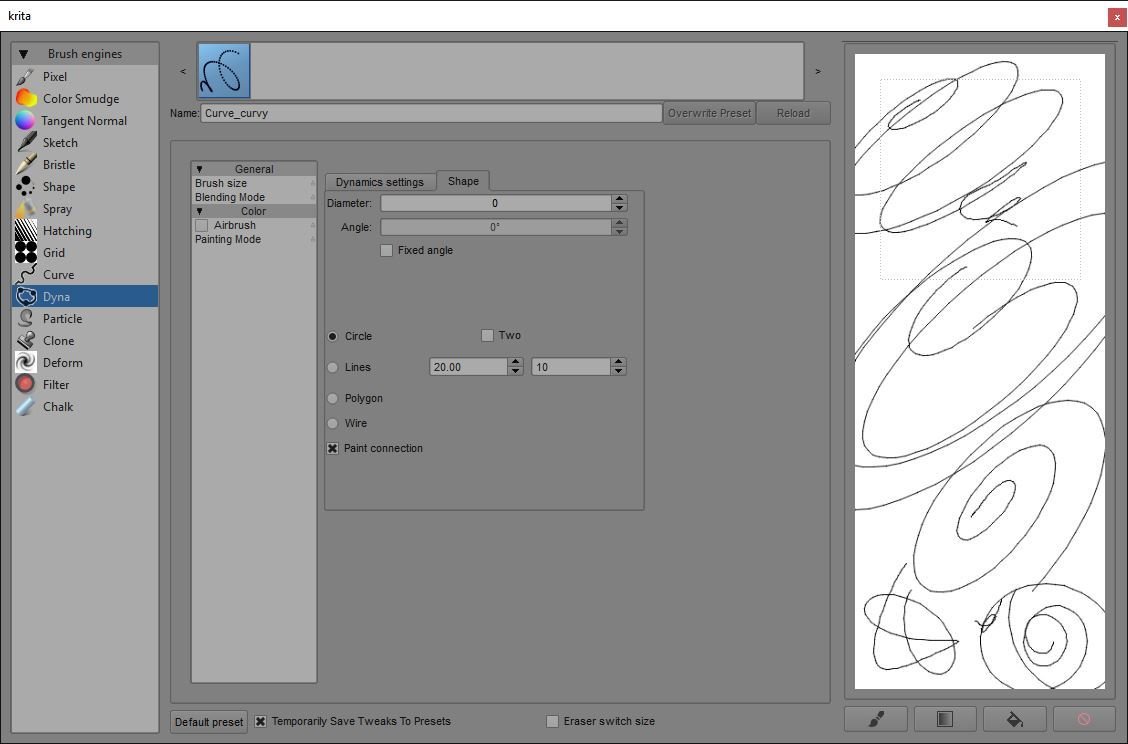
Curve
Dyna
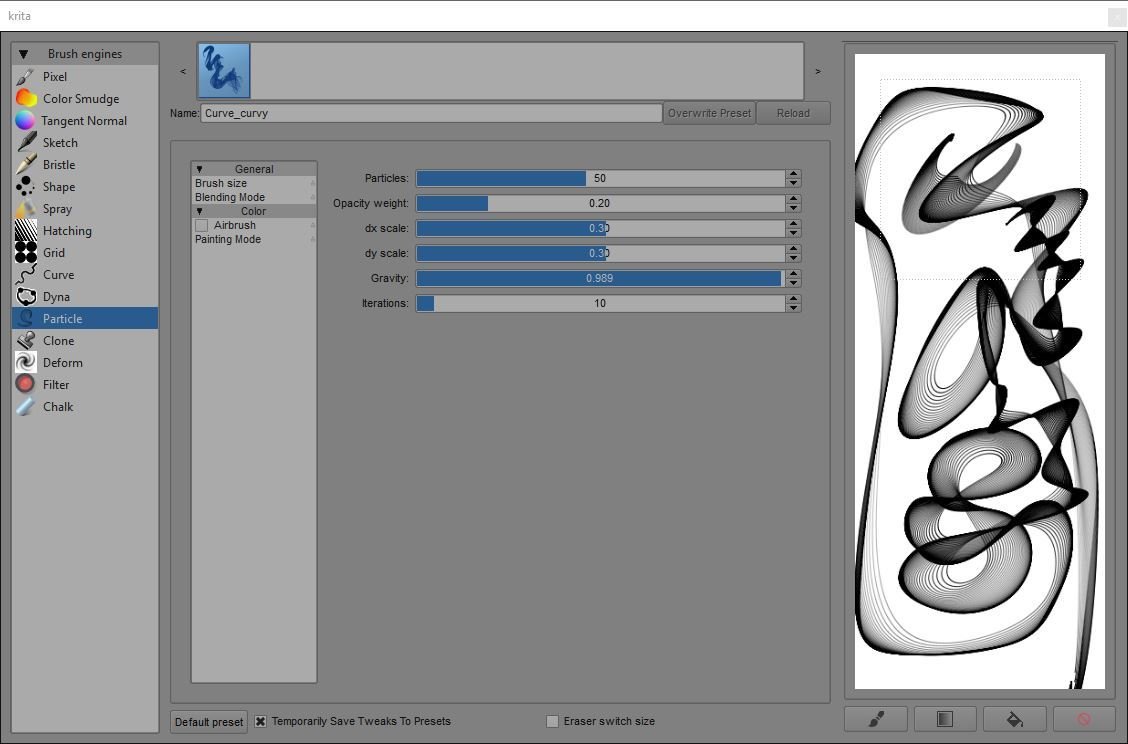
Particle
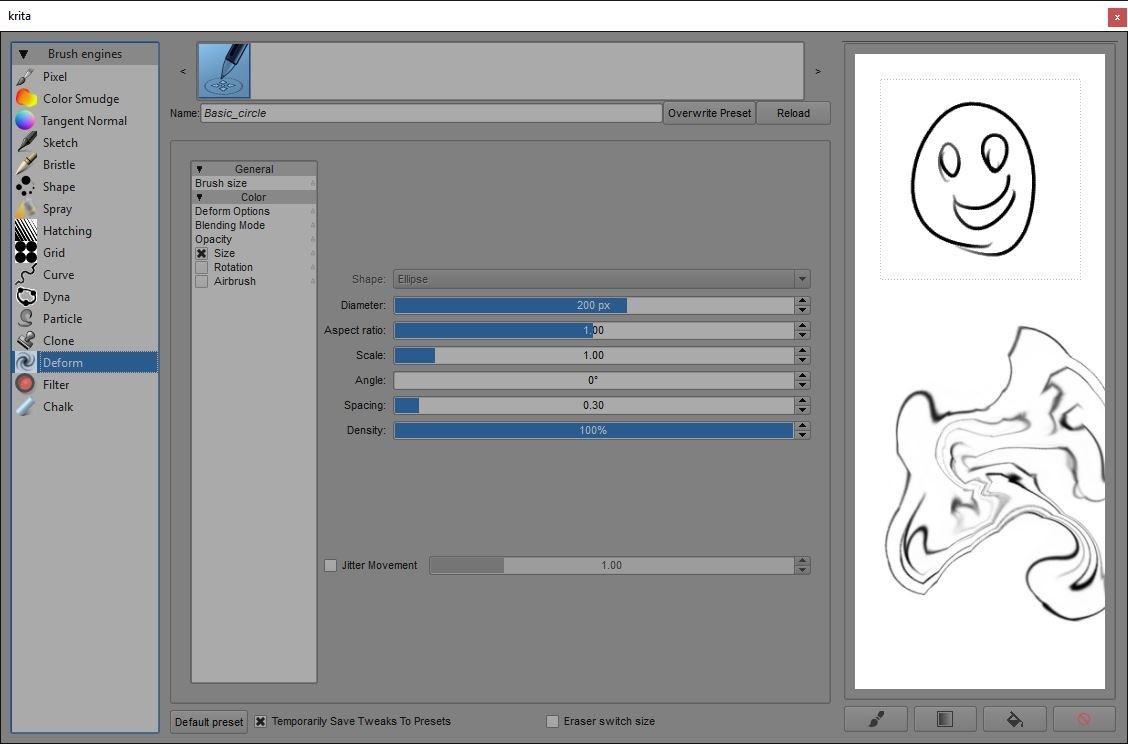
Deform
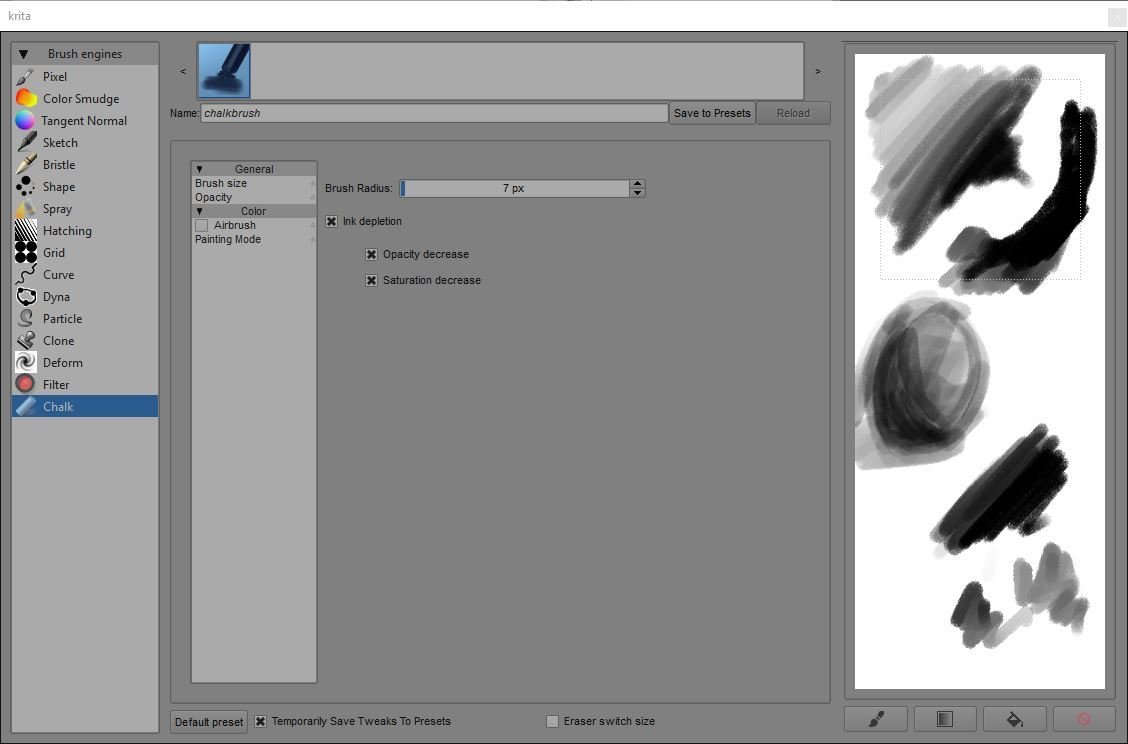
Chalk
Make it Yours!
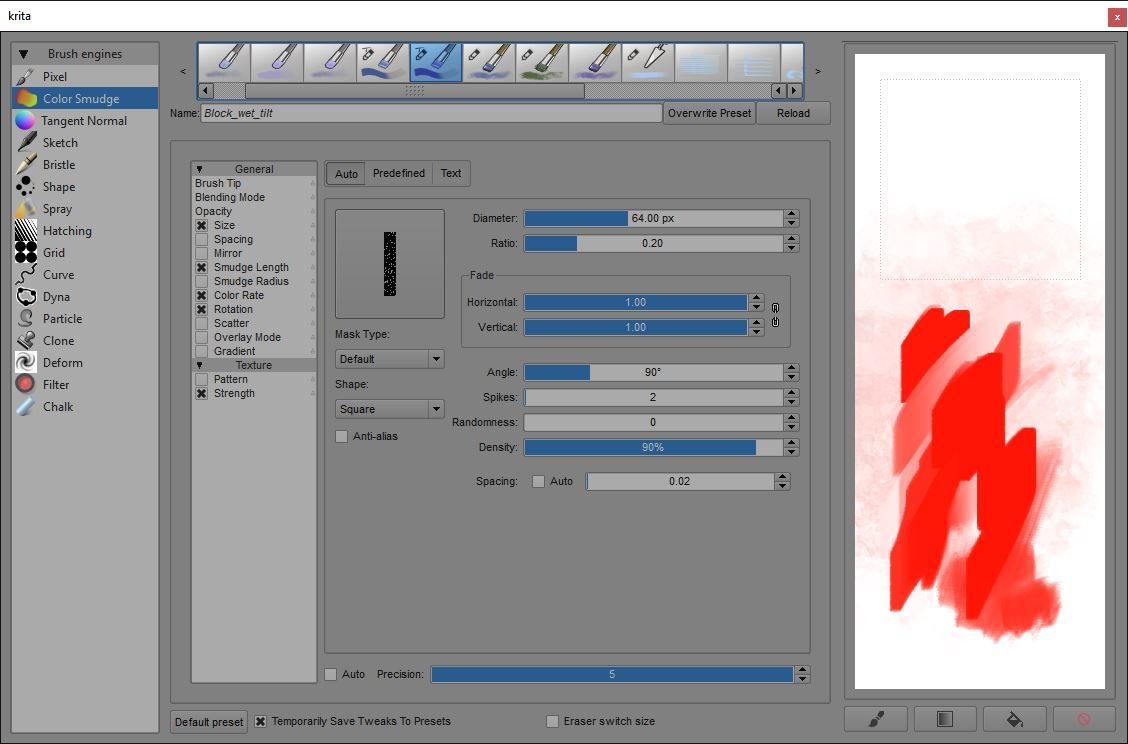
Make it Yours!
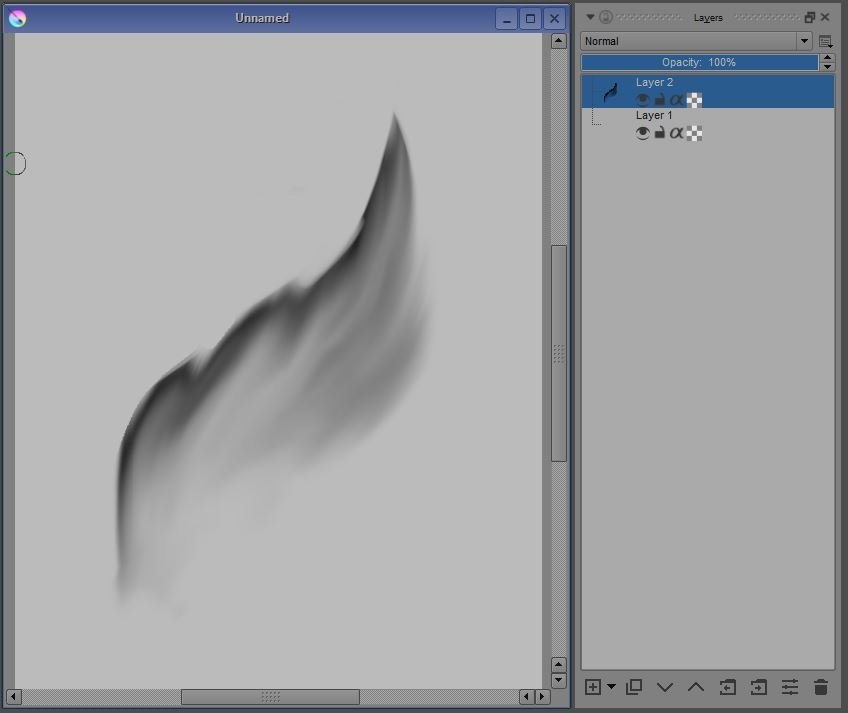
Custom brush tips work off greyscale, with the lighter areas being more transparent
Make it Yours!
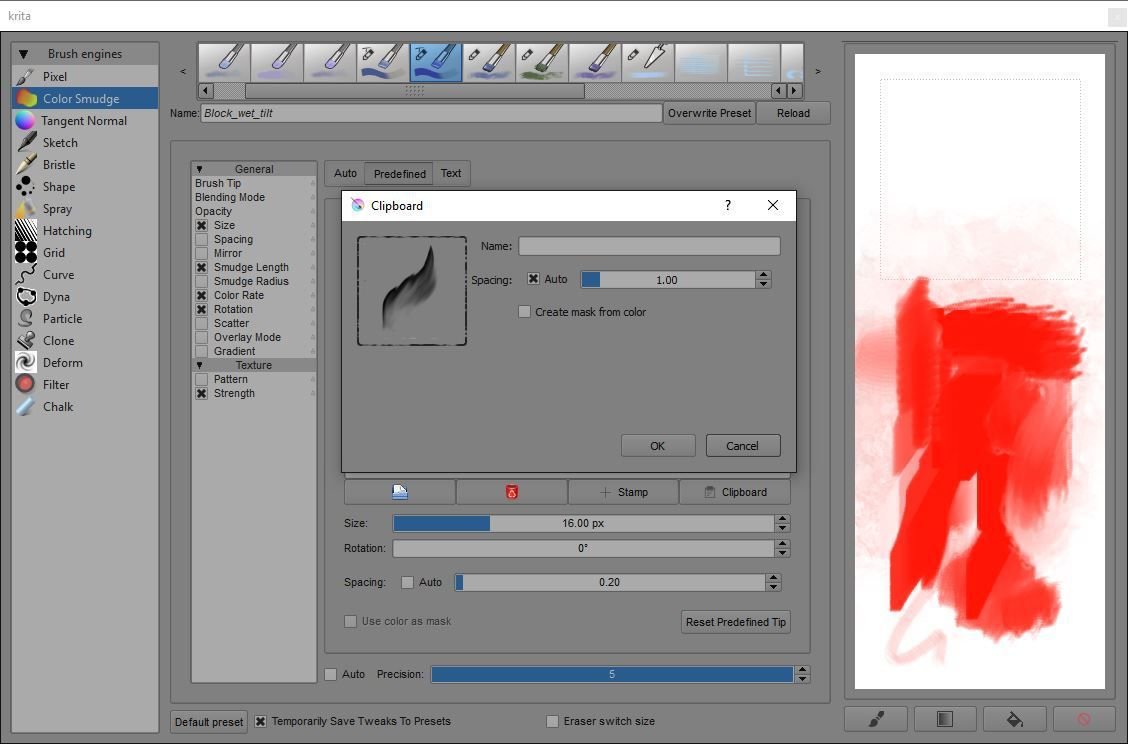
Make it Yours!
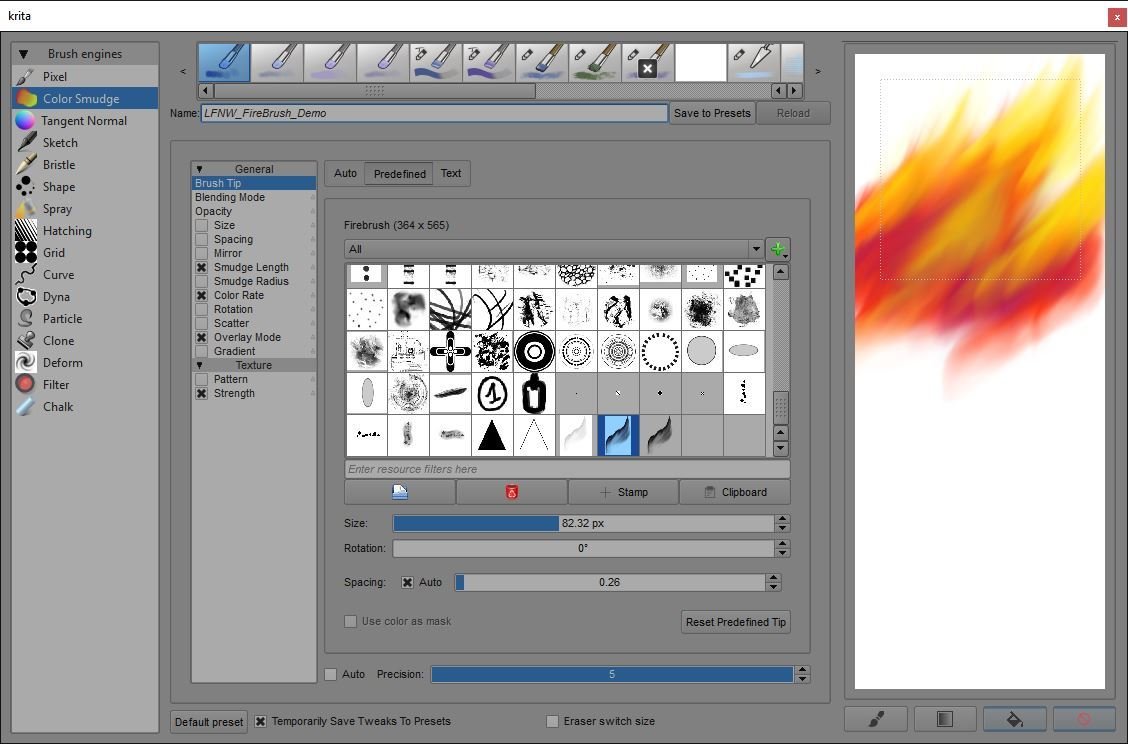
Make it Yours!

Add your new brush to a tag and make it accessible from the pop up pallet!
Krita Documentation is AWESOME!!!
https://docs.krita.org/Main_Page
Official Krita Site Docs
http://www.davidrevoy.com/categorie5/tutorials
David Revoy
https://www.youtube.com/user/DeevadRevoy/videos
https://krita.org/wp-content/uploads/2013/01/Basic_Usage-v4.pdf
Getting Started PDF
https://docs.krita.org/Resources
Additional Brushes and Resources
Always Lookin For Help!
Developers:
- C++ and Qt
- https://krita.org/get-involved/developers/
Developers:
- User Documentation
- Translation
- Tutorials, Brushes, Patterns and other resources
Questions!?
Get out there and paint something!!
Rackspace is Hiring!!
Nick Hamilton
https://www.rackspace.com/talent/

Krita-LFNW-2016
By Nick Hamilton


