Data Visualization workshop
Shirley Wu
(@sxywu)
You will learn:
SVG Paths
SVG Transforms
Selections
Data binding
Enter-append
Scales
Update & Exit
Transitions
Nesting elements
SVG Elements
rect
x: x-coordinate of top-left
y: y-coordinate of top-left
width
height
circle
cx: x-coordinate of center
cy: y-coordinate of center
r: radius
text
x: x-coordinate
y: y-coordinate
dx: x-coordinate offset
dy: y-coordinate offset
text-anchor: horizontal text alignment
Hi!
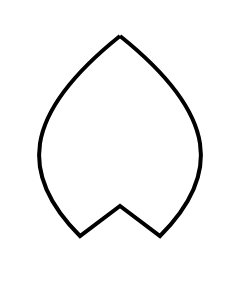
path
d: path to follow
Moveto, Lineto, Curveto, Arcto
SVG Paths

SVG Transforms
Exercise time
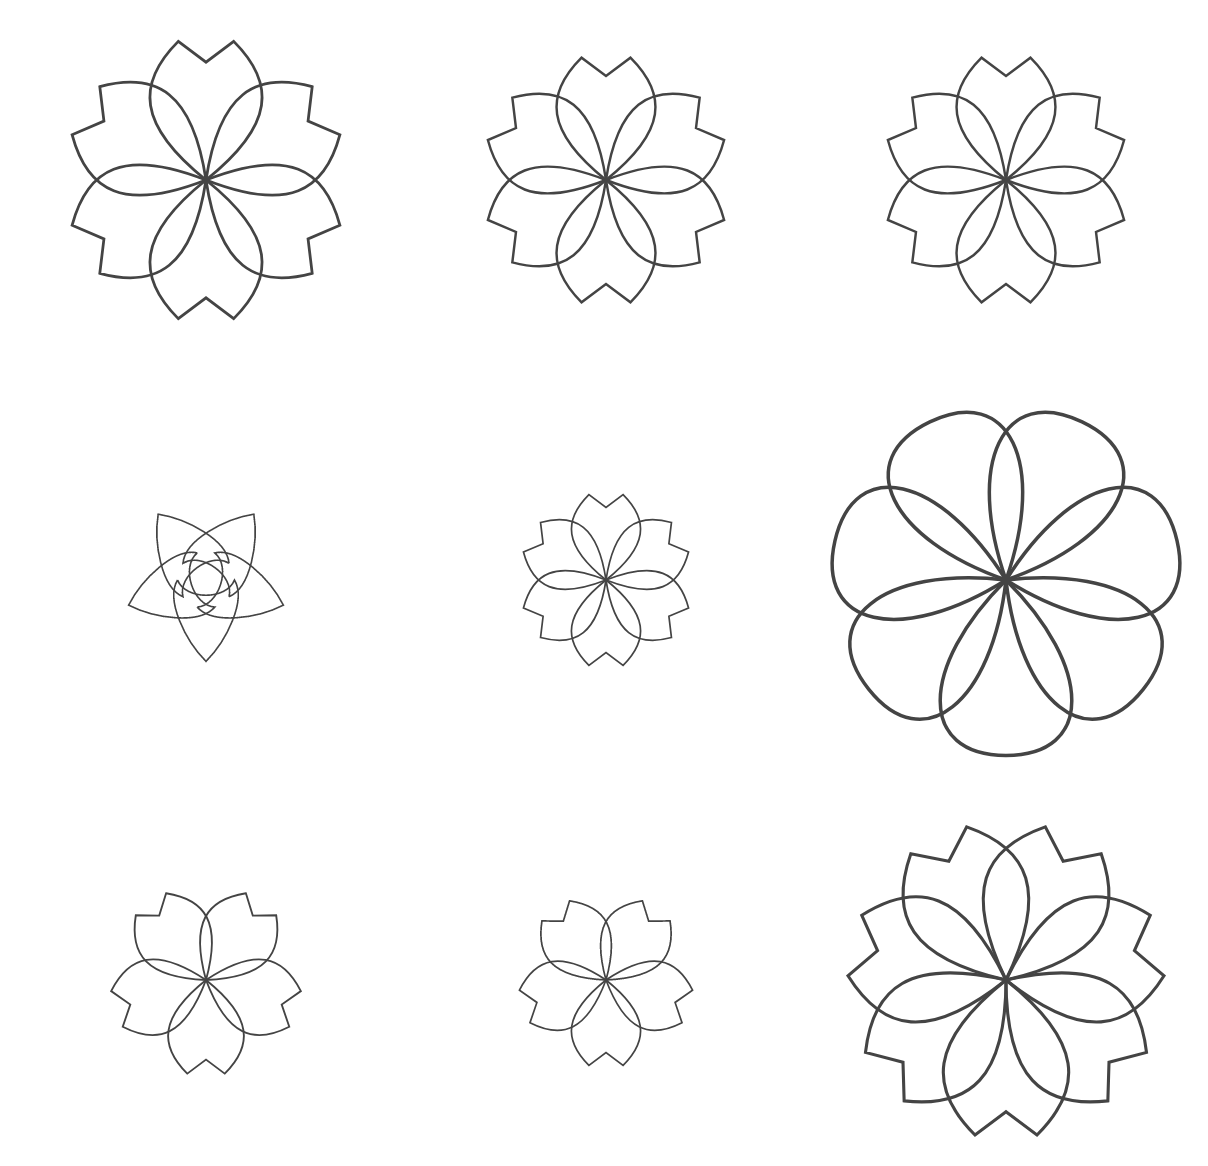
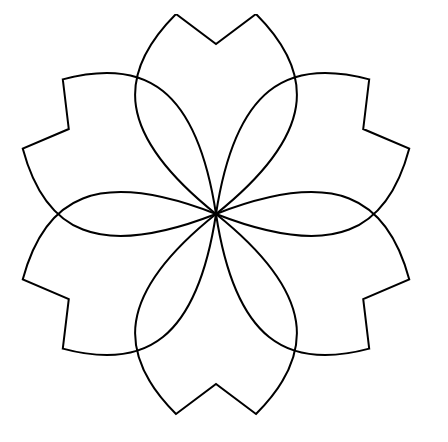
Create 3 unique petal shapes
Selection & Data
<svg>
<rect />
<rect />
<rect />
<rect />
<rect />
</svg>
<script>
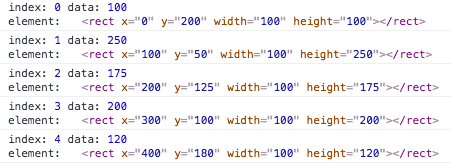
var data = [100, 250, 175, 200, 120];
d3.selectAll('rect')
.data(data)
.attr('x', (d, i) => i * rectWidth)
.attr('y', d => height - d)
.attr('width', rectWidth)
.attr('height', d => d)
.attr('fill', 'blue')
.attr('stroke', '#fff');
</script>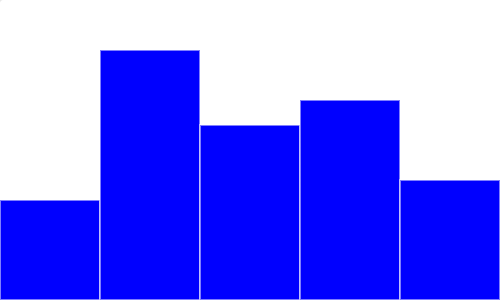
Selection & Data
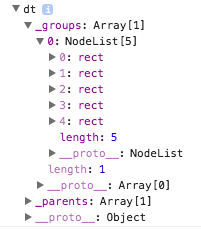
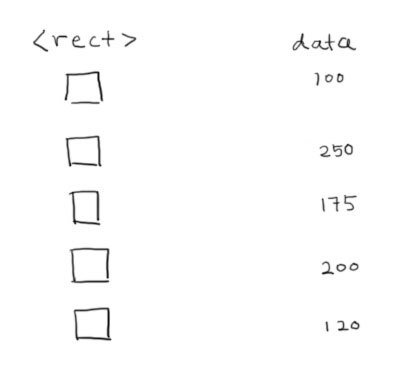
5 rectangle elements
Select all rectangle elements that exist
<svg>
<rect />
<rect />
<rect />
<rect />
<rect />
</svg>
<script>
var data = [100, 250, 175, 200, 120];
d3.selectAll('rect')
.data(data)
.attr('x', (d, i) => i * rectWidth)
.attr('y', d => height - d)
.attr('width', rectWidth)
.attr('height', d => d)
.attr('fill', 'blue')
.attr('stroke', '#fff');
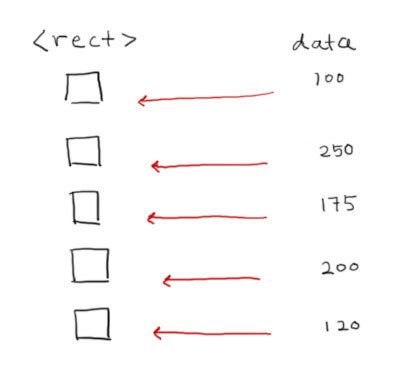
</script>"Bind" data to the selections
Selection & Data
  <svg>
    <rect />
    <rect />
    <rect />
    <rect />
    <rect />
  </svg>
  <script>
    var data = [100, 250, 175, 200, 120];

    d3.selectAll('rect')
    	.data(data)
    	.attr('x', (d, i) => i * rectWidth)
    	.attr('y', d => height - d)
    	.attr('width', rectWidth)
    	.attr('height', d => d)
    	.attr('fill', 'blue')
    	.attr('stroke', '#fff');

  </script>
Loop through each rectangle selection
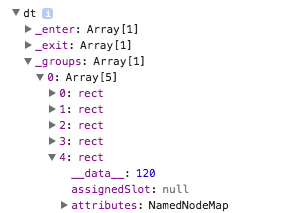
Get passed in (data, index)
Selection & Data
  <svg>
    <rect />
    <rect />
    <rect />
    <rect />
    <rect />
  </svg>
  <script>
    var data = [100, 250, 175, 200, 120];

    d3.selectAll('rect')
    	.data(data)
    	.attr('x', (d, i) => i * rectWidth)
    	.attr('y', d => height - d)
    	.attr('width', rectWidth)
    	.attr('height', d => d)
    	.attr('fill', 'blue')
    	.attr('stroke', '#fff');

  </script>
Selection & Data
Play with the code

(Change some numbers, add/remove a rect, console log all the things)
Enter-append
  <svg></svg>
  <script>
    var rectWidth = 100;
    var height = 300;
    var data = [100, 250, 175, 200, 120];

    var svg = d3.select('svg');
    svg.selectAll('rect')
    	.data(data)
    	.enter().append('rect')
    	.attr('x', (d, i) => i * rectWidth)
    	.attr('y', d => height - d)
    	.attr('width', rectWidth)
    	.attr('height', d => d)
    	.attr('fill', 'blue')
    	.attr('stroke', '#fff');

  </script>
Wut, no rectangle elements?!
So what are we even selecting?
A: an empty selection
So how are those bars appearing?
Enter-append
  <svg></svg>
  <script>
    var rectWidth = 100;
    var height = 300;
    var data = [100, 250, 175, 200, 120];

    var svg = d3.select('svg');
    svg.selectAll('rect')
    	.data(data)
    	.enter().append('rect')
    	.attr('x', (d, i) => i * rectWidth)
    	.attr('y', d => height - d)
    	.attr('width', rectWidth)
    	.attr('height', d => d)
    	.attr('fill', 'blue')
    	.attr('stroke', '#fff');

  </script>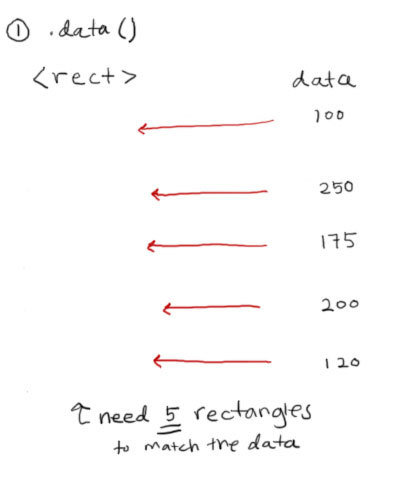
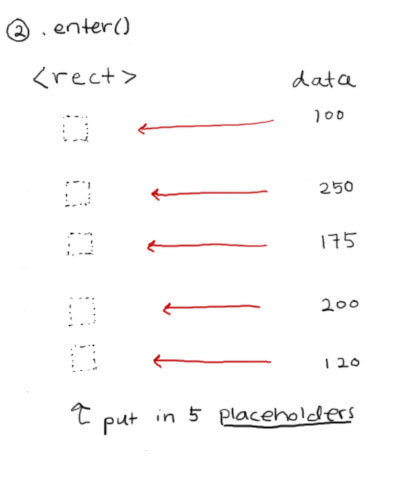

Magic ✨
Enter-append
  <svg></svg>
  <script>
    var rectWidth = 100;
    var height = 300;
    var data = [100, 250, 175, 200, 120];

    var svg = d3.select('svg');
    svg.selectAll('rect')
    	.data(data)
    	.enter().append('rect')
    	.attr('x', (d, i) => i * rectWidth)
    	.attr('y', d => height - d)
    	.attr('width', rectWidth)
    	.attr('height', d => d)
    	.attr('fill', 'blue')
    	.attr('stroke', '#fff');

  </script>
Enter-append
Play with the code
(Try adding/removing some numbers, and make sure to console log all the things)
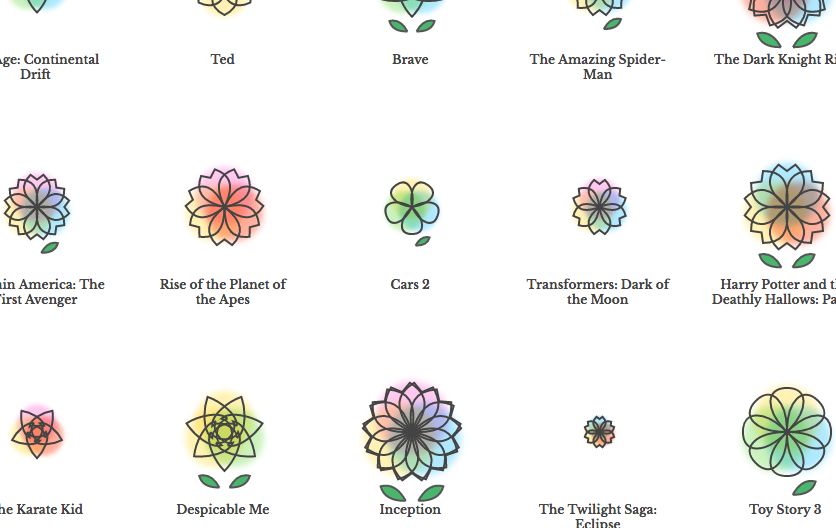
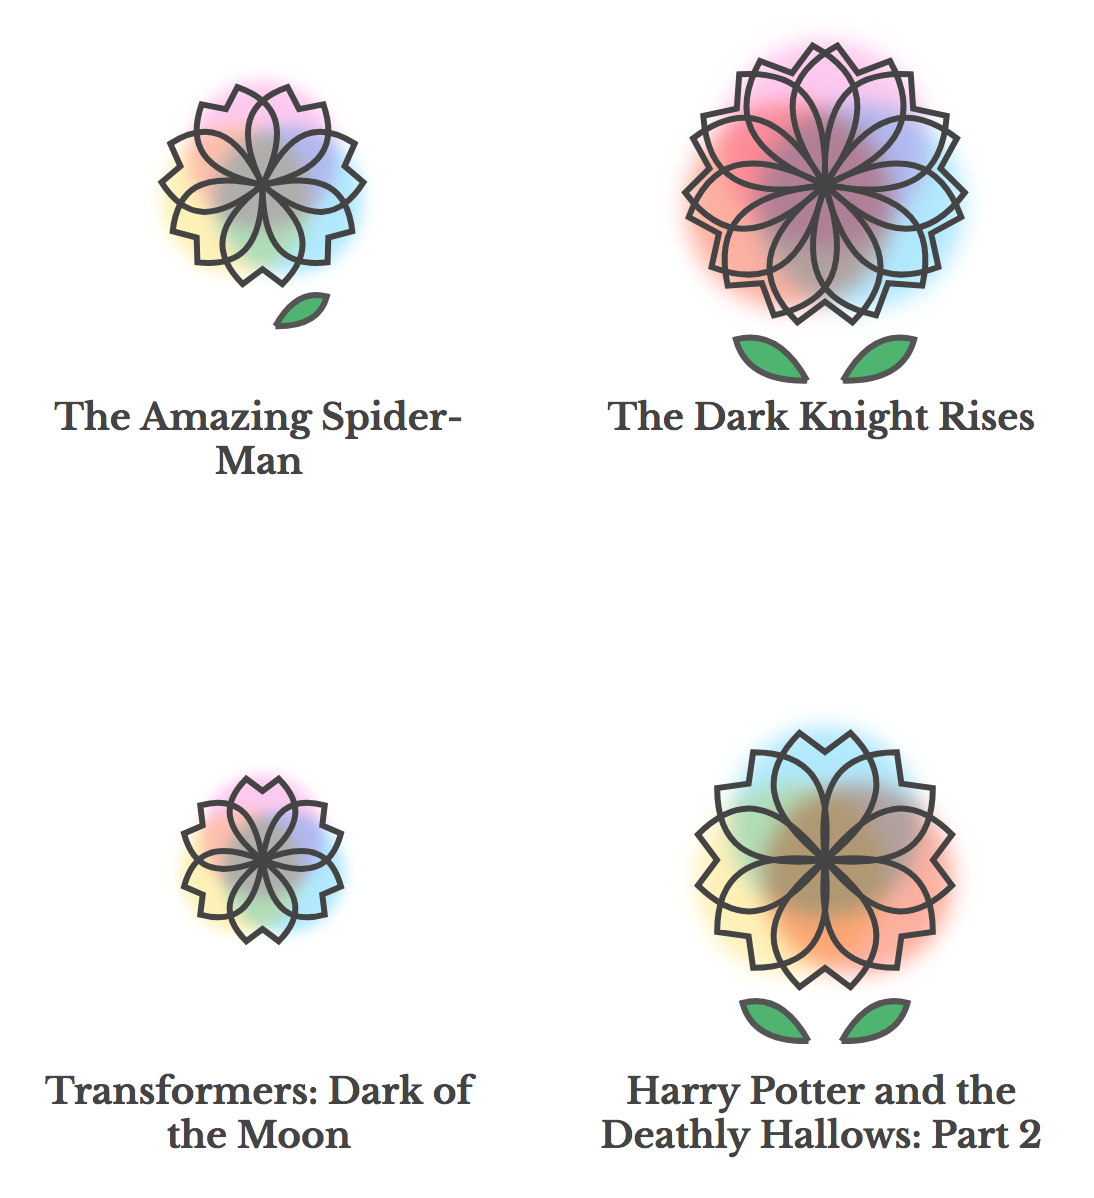
let's make a flower
- Get data ready, and use the first movie data
- Create 6 petals using previously created paths
- Translate and rotate the petals
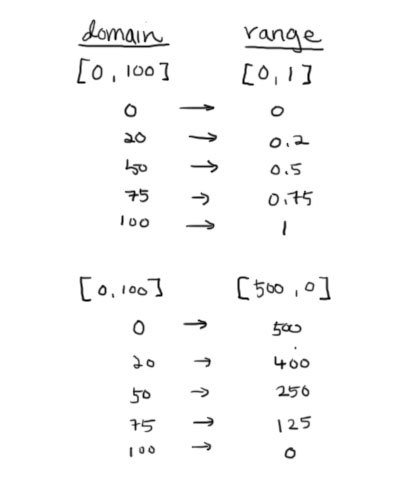
Scales & Axes
  d3.scaleLinear()
    .domain([min, max]) // input
    .range([min, max]); // output
scale: mapping from
data attributes (domain)
to display (range)
date → x-value
value → y-value
value → opacity
etc.
Scales
// get min/max
var height = 600;
var data = [
    {date: new Date('01-01-2015'), temp: 0},
    {date: new Date('01-01-2017'), temp: 3}
];

var min = d3.min(data, d => d.date);
var max = d3.max(data, d => d.date);

// or use extent, which gives back [min, max]
var extent = d3.extent(data, d => d.date);

var yScale = d3.scaleLinear()
  .domain([min, max])
  .range([height, 0]);
Scales
// continuous
d3.scaleLinear()
d3.scaleLog()
d3.scaleTime()

// ordinal
d3.scaleBand()
Scales I use often:
Let's make a flower
Type of petal: parental guidance rating
Size of flower: IMDb rating out of 10
Number of petals: number of IMDb votes
- Create scale (scaleLinear and scaleQuantize)
- Get data ready, and use the first movie data
- Create number of petals based on data
- Rotate and scale petals
Hint: use SVG transform's translate, rotate, and scale (in that order)
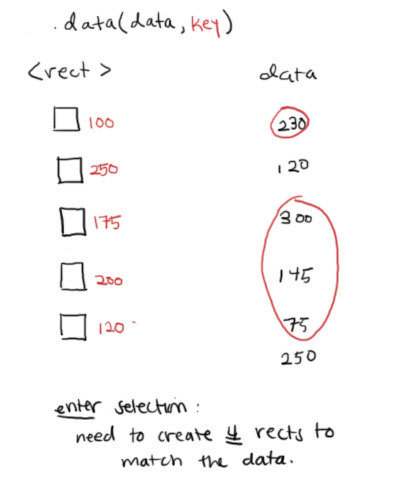
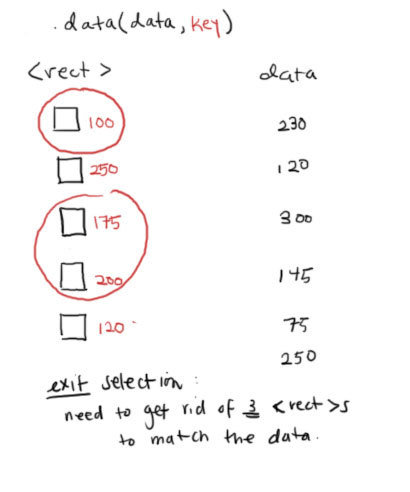
update & exit
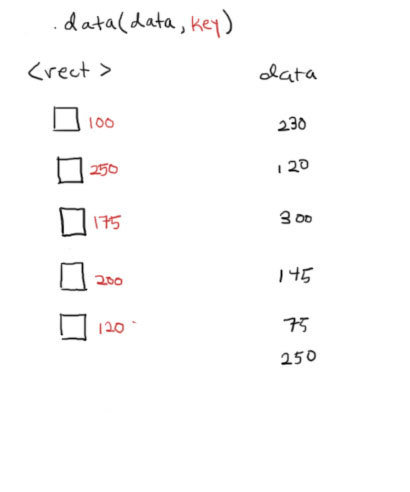
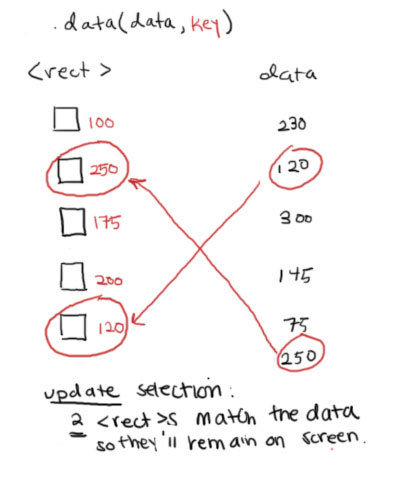
update & exit
  // bars includes update selection
  var bars = svg.selectAll('rect')
    .data(data, d => d);

  // exit
  bars.exit().remove();

  // enter
  var enter = bars.enter().append('rect')
    .attr('width', rectWidth)
    .attr('stroke', '#fff');

  // enter + update
  bars = enter.merge(bars)
    .attr('x', (d, i) => i * rectWidth)
    .attr('y', d => height - d)
    .attr('height', d => d)
    .attr('fill', d => colors(d));
key function: controls which datum is assigned to which element
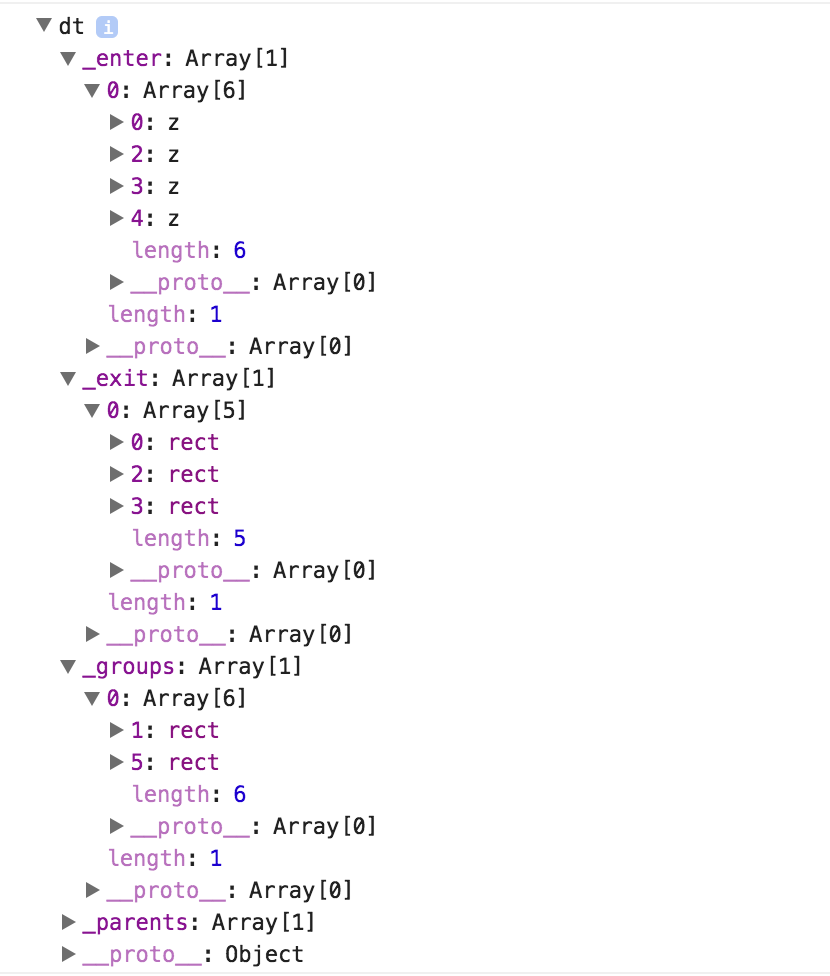
update & exit
  // bars includes update selection
  var bars = svg.selectAll('rect')
    .data(data, d => d);

  // exit
  bars.exit().remove();

  // enter
  var enter = bars.enter().append('rect')
    .attr('width', rectWidth)
    .attr('stroke', '#fff');

  // enter + update
  bars = enter.merge(bars)
    .attr('x', (d, i) => i * rectWidth)
    .attr('y', d => height - d)
    .attr('height', d => d)
    .attr('fill', d => colors(d));
Enter selection: chain attributes that don't depend on data
Combines 2 selections into one
Enter+update selection: chain attrs dependent on data
Exit selection
Play with the code
Update-exit
Let's update the flowers!
At every second, draw the next flower.
- Create function, within function:
- Calculate petal data for specific movie
- Bind data and draw flower with enter-update-exit pattern
Transitions
Emphasize changes in state
(object constancy)

Transitions
var t = d3.transition()
  .duration(1000);
var svg = d3.select('svg');

var bars = svg.selectAll('rect')
  .data(data, d => d);

// exit
bars.exit().transition(t)
  .attr('y', height)
  .attr('height', 0)
  .remove();

// enter
var enter = bars.enter().append('rect')
  .attr('width', rectWidth)
  .attr('stroke', '#fff')
  .attr('y', height);
// enter + update
bars = enter.merge(bars)
  .attr('x', (d, i) => i * rectWidth)
  .attr('fill', d => colors(d))
  .transition(t)
  .attr('y', d => height - d)
  .attr('height', d => d);
Define transition, syncs animation everywhere it's used
Animate height down to 0 before removing
Animate remaining <rect>'s height to their next state
Transitions
var t = d3.transition()
  .duration(1000);
var svg = d3.select('svg');

var bars = svg.selectAll('rect')
  .data(data, d => d);

// exit
bars.exit().transition(t)
  .attr('y', height)
  .attr('height', 0)
  .remove();

// enter
var enter = bars.enter().append('rect')
  .attr('width', rectWidth)
  .attr('stroke', '#fff')
  .attr('y', height);
// enter + update
bars = enter.merge(bars)
  .attr('x', (d, i) => i * rectWidth)
  .attr('fill', d => colors(d))
  .transition(t)
  .attr('y', d => height - d)
  .attr('height', d => d);
go from state A to state B
Everything after .transition(): state B to transition to
Same attributes set before .transition(): state A to transition from
If attributes not specified for A, d3 extrapolates from default
Transitions
Play with the code
nesting elements
Nest elements when you want to apply the same styles and transforms to a group of elements
<g> element that consist of petals and leaves, has translate and scale applied
<path> element for each petal with rotate applied
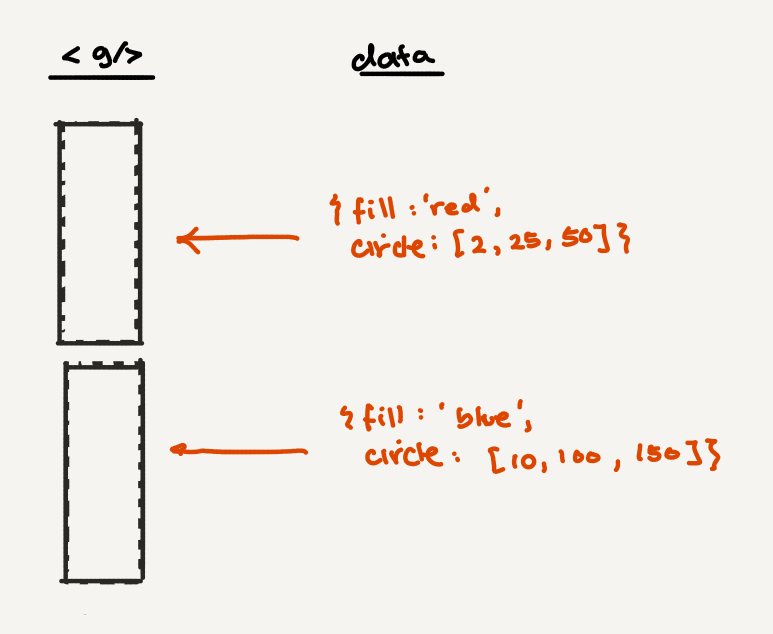
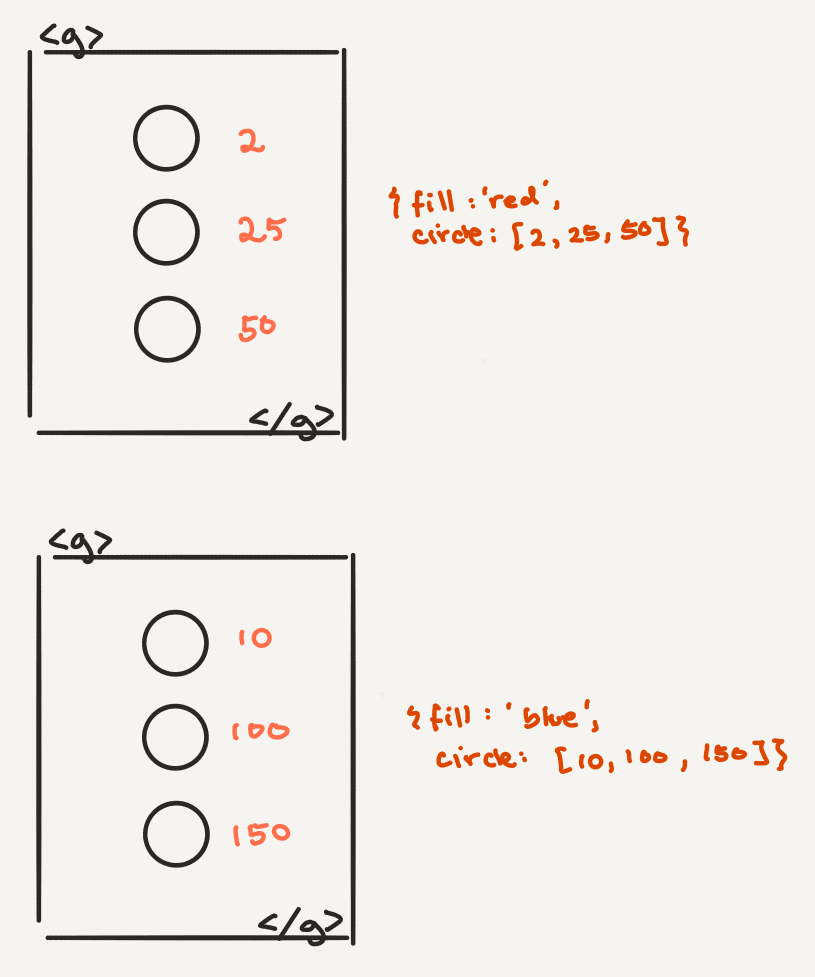
nesting elements
const data = [
  {fill: 'red', circle: [2, 25, 50]},
  {fill: 'blue', circle: [10, 100, 150]},
];

const svg = d3.select("body").append("svg")
  .attr("width", 960)
  .attr("height", 500)

const groups = svg.selectAll('g')
  .data(data).enter().append('g')
  .attr('fill', d => d.fill)
  .attr('transform', 'translate(10,10)');

const circles = groups.selectAll('circle')
  .data(d => d.circle).enter().append('circle')
  .attr('cx', d => d)
  .attr('r', 10);
Use <g> element to nest child elements *in SVG, only <g> elements can have children
nesting elements
const data = [
  {fill: 'red', circle: [2, 25, 50]},
  {fill: 'blue', circle: [10, 100, 150]},
];

const svg = d3.select("body").append("svg")
  .attr("width", 960)
  .attr("height", 500)

const groups = svg.selectAll('g')
  .data(data).enter().append('g')
  .attr('fill', d => d.fill)
  .attr('transform', 'translate(10,10)');

const circles = groups.selectAll('circle')
  .data(d => d.circle).enter().append('circle')
  .attr('cx', d => d)
  .attr('r', 10);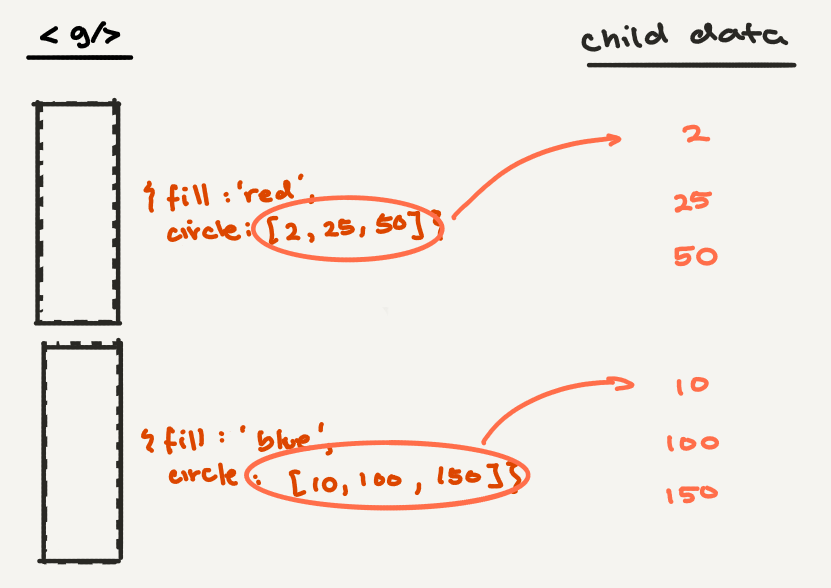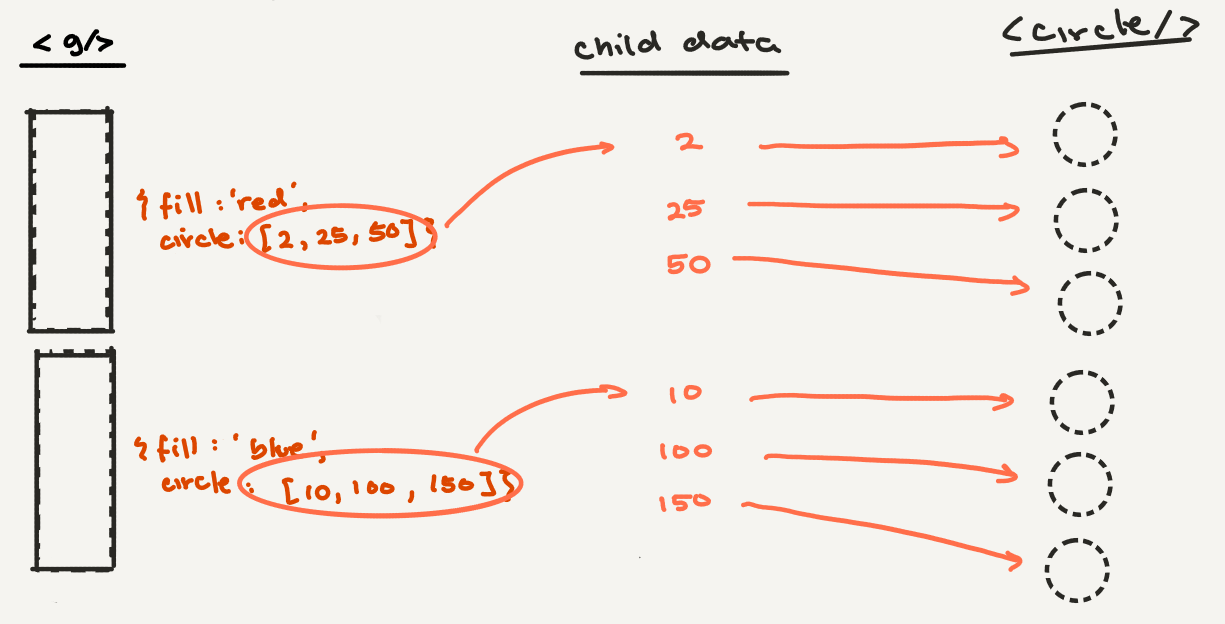
nesting elements
const data = [
  {fill: 'red', circle: [2, 25, 50]},
  {fill: 'blue', circle: [10, 100, 150]},
];

const svg = d3.select("body").append("svg")
  .attr("width", 960)
  .attr("height", 500)

const groups = svg.selectAll('g')
  .data(data).enter().append('g')
  .attr('fill', d => d.fill)
  .attr('transform', 'translate(10,10)');

const circles = groups.selectAll('circle')
  .data(d => d.circle).enter().append('circle')
  .attr('cx', d => d)
  .attr('r', 10);
nesting elements
Play with the code
Nesting elements
Let's make all the flowers!

Full-day creative data visualization workshop
By Shirley Wu