Advanced component & hooks design
Intro to Component Design
Introduction to Atomic Design in React Native
- Atomic Design: A methodology inspired by chemistry for building user interfaces in a modular manner.
- Atomic Design structures components into Atoms, Molecules, Organisms, Templates, and Pages.
Atoms in Atomic Design
- Definition: Atoms are the fundamental and smallest units in a project, like inputs, buttons, color palettes, and animations.
- Characteristics: Easily accessible, globally usable, and have many states (e.g., a button that can be enabled or disabled).
- Role in Project: Serve as basic building blocks for creating more complex components.
import React from 'react';
import { View, Text, Image, StyleSheet } from 'react-native';

const Product = ({ name, price, image }) => {
  return (
    <View style={styles.container}>
      <Image style={styles.tinyLogo} source={{ uri: image }} />
      <Text>{name}</Text>
      <Text>{price}</Text>
    </View>
  );
};

const styles = StyleSheet.create({ /* styles go here */ });

export default Product;
Molecules in Atomic Design
- Definition: Molecules are combinations of various atomic components to build a whole new component.
- Functionality: They offer new combined qualities by grouping together two or more atoms.
- Role in UI: Act as intermediate building blocks that are more complex than Atoms but simpler than Organisms.
import React from 'react';
import { FlatList, StyleSheet } from 'react-native';
import Product from './Product';

const ProductList = ({ products }) => {
  return (
    <FlatList
      data={products}
      renderItem={({ item }) => <Product name={item.name} price={item.price} image={item.image} />}
      keyExtractor={item => item.id}
      style={styles.list}
    />
  );
};

// Add appropriate styles here
const styles = StyleSheet.create({ /* styles for FlatList */ });

export default ProductList;
Organisms in Atomic Design
- Definition: Organisms are groups of molecules joined together to create a part of the interface.
- Functionality: They are independent and reusable on various parts of a project.
- Role in UI: Organisms form more complex components that still are not complete structures of the project.
Templates in Atomic Design
- Definition: Templates are high-level structures that define the layout of pages or sections.
- Functionality: They establish the overall visual hierarchy, grids, and placeholders.
- Role in UI: Templates serve as a blueprint for creating specific pages.
Pages in Atomic Design
- Definition: Pages represent specific instances or variations of Templates.
- Functionality: They contain actual content, data, and real user interactions.
- Role in UI: Pages are the final output seen by users, created by filling in the content defined in Templates.
Applying SOLID Principles in React Native
- Principles originated from Robert C. Martin's paper "Design Principles and Design Patterns" (2000).
Single Responsibility Principle (S)
- Definition: Each component should have a single responsibility.
- Example: A login screen component should handle UI rendering and user login interactions only.
Each component should have a single responsibility. This means that a component should only be responsible for one thing, such as rendering a specific UI element or handling a specific user interaction."
Open/Close Principle (O)
- Definition: Components should be open for extension but closed for modification.
Components should be open for extension but closed for modification. This means that you should be able to add new functionality to a component without having to modify its existing code.
// Original Menu Component
const Menu = () => {
  // Existing code for Menu layout
};

// Extension: CustomizedMenu
const CustomizedMenu = ({ additionalItems }) => {
  // Extend the Menu component to include new menu items
  return (
    <Menu>
      {/* Existing menu items */}
      {additionalItems.map((item, index) => (
        <MenuItem key={index}>{item}</MenuItem>
      ))}
    </Menu>
  );
};
Liskov Substitution Principle (L)
Components should be interchangeable with their subcomponents. This means that you should be able to replace a component with one of its subcomponents without affecting the behavior of the overall system.
If you have a component that renders a button, you should be able to replace it with a subcomponent that renders a different type of button without affecting the behavior of the overall system.
Interface Segregation Principle(I):
Components should not depend on interfaces they do not use. This means that you should only include the functionality that a component needs, rather than including everything in a single interface.
In a nutshell it means if let's say you have multiple buttons with different variants with additional functionalities rather than styles, better create different components vs passing unneeded props
Dependency Inversion Principle(D):
Components should depend on abstractions, not concrete implementations. This means that you should use interfaces or abstract classes to define dependencies, rather than relying on specific implementations.
// DataFetcher Interface
interface DataFetcher {
  fetchData: () => Promise<any>;
}

// ProductList Component
const ProductList: React.FC<{ dataFetcher: DataFetcher }> = ({ dataFetcher }) => {
  const [products, setProducts] = useState([]);

  useEffect(() => {
    dataFetcher.fetchData()
      .then(response => setProducts(response.data))
      .catch(error => console.log(error));
  }, []);

  return (
    <FlatList
      data={products}
      keyExtractor={(item) => item.id.toString()}
      renderItem={({ item }) => (
        <Text key={item.id}>{item.name}</Text>
      )}
    />
  );
};
Granularity in Components
-
The balance between small (granular) and large (monolithic) components.
-
Benefits of small components:
-
Enhanced reusability.
-
Easier testing and maintenance.
-
-
Considerations for large components:
-
Simplified state management.
-
Potential challenges in reusability and testing.
-
Granularity in Components
import React, { useState } from 'react';
import { View, TextInput, Button, Text, FlatList, ActivityIndicator } from 'react-native';

const LargeComponent = () => {
    const [userInput, setUserInput] = useState('');
    const [items, setItems] = useState([]);
    const [isLoading, setIsLoading] = useState(false);

    const fetchData = async () => {
        setIsLoading(true);
        // Fetching data logic
        setIsLoading(false);
    };

    const addItem = () => {
        setItems([...items, userInput]);
        setUserInput('');
    };

    return (
        <View>
            <TextInput
                value={userInput}
                onChangeText={setUserInput}
                placeholder="Enter item"
            />
            <Button title="Add Item" onPress={addItem} />
            <Button title="Load Data" onPress={fetchData} />
            {isLoading ? (
                <ActivityIndicator />
            ) : (
                <FlatList
                    data={items}
                    renderItem={({ item }) => <Text>{item}</Text>}
                    keyExtractor={(item, index) => index.toString()}
                />
            )}
        </View>
    );
};
import React, { useState } from 'react';
import { View, TextInput, Button, Text, FlatList, ActivityIndicator } from 'react-native';

const InputField = ({ onAdd }) => {
    const [userInput, setUserInput] = useState('');

    return (
        <View>
            <TextInput
                value={userInput}
                onChangeText={setUserInput}
                placeholder="Enter item"
            />
            <Button title="Add Item" onPress={() => { onAdd(userInput); setUserInput(''); }} />
        </View>
    );
};

const DataLoader = ({ onLoad }) => (
    <Button title="Load Data" onPress={onLoad} />
);

const ItemList = ({ items }) => (
    <FlatList
        data={items}
        renderItem={({ item }) => <Text>{item}</Text>}
        keyExtractor={(item, index) => index.toString()}
    />
);

const SmallComponents = () => {
    const [items, setItems] = useState([]);
    const [isLoading, setIsLoading] = useState(false);

    const fetchData = async () => {
        setIsLoading(true);
        // Fetching data logic
        setIsLoading(false);
    };

    const addItem = (item) => {
        setItems([...items, item]);
    };

    return (
        <View>
            <InputField onAdd={addItem} />
            <DataLoader onLoad={fetchData} />
            {isLoading ? (
                <ActivityIndicator />
            ) : (
                <ItemList items={items} />
            )}
        </View>
    );
};
Composition Techniques in React Native
-
Embracing composition over inheritance for building flexible UIs.
-
Key concepts:
-
Utilizing props and children for dynamic and reusable component design.
-
Enhancing component adaptability and maintainability through composition.
-
Composition Techniques in React Native
import React from 'react';
import { View, Text } from 'react-native';

const BaseComponent = () => (
    <View>
        <Text>Welcome to the base component</Text>
    </View>
);

const ExtendedComponent = ({ Base }) => (
    <View>
        <Base />
        <Text>Extended functionality</Text>
    </View>
);

// Usage
const App = () => (
    <ExtendedComponent Base={BaseComponent} />
);
Bad: Simulating inheritance
Composition Techniques in React Native
Bad: Simulating inheritance
-
Unnecessary Re-Renders: When the base component is passed as a prop, any state or prop changes in the parent component can lead to unnecessary re-renders
-
Prop Drilling: If the base component needs access to certain data or functions, these would need to be passed down through props, potentially leading to prop drilling.
-
Difficulty in Tracking Data Flow: By passing components as props, you obscure the normal flow of data within a component tree.
-
Increased Complexity: This pattern can lead to more complex component hierarchies
-
Loss of Component Isolation: Ideally, each component should be self-contained and operate independently. By passing components as props, you create tight coupling
-
Potential for Memory Leaks: In cases where components maintain subscriptions or listeners, passing components as props might increase the risk of memory leaks if not handled correctly.
Composition Techniques in React Native
Good: Prefer always component composition. If needed use layouts
import React from 'react';
import { View, Text } from 'react-native';

const BaseComponent = ({ children }) => (
    <View>
        <Text>Welcome to the base component</Text>
        {children}
    </View>
);

const ExtendedComponent = () => (
    <BaseComponent>
        <Text>Extended functionality</Text>
    </BaseComponent>
);
Pure Components and Avoiding Prop Drilling
-
Understanding pure components in React Native.
- A React component is considered pure if it renders the same output for the same state and props.
-
Benefits:
-
Minimized re-renders.
-
Improved performance
-
-
Caveats
-
will still re-render if consuming context
-
Pure Components
When you should not use memo?
components that receive object/functions as props will re-render regardless
Avoiding Prop Drilling
-
Problems caused by prop drilling:
- Maintainability Issues: Changes in the data structure or business logic can require updates across multiple components, making maintenance cumbersome.
- Reduced Component Reusability: Components become tightly coupled to their data sources and parent structure
- Complexity and Readability: As props are passed through multiple layers, the component hierarchy becomes more complex, impacting code readability.
Avoiding Prop Drilling
-
Strategies to avoid prop drilling:
-
Using Context API: Context API provides a way to share values like these between components without having to explicitly pass a prop through every level of the tree.
-
Caveats:
- Unnecessary Re-renders: All consumers of the context re-render whenever the context value changes
-
Caveats:
- Using Redux or other global state management
- Component Composition: Designing components in a way that they receive only the necessary data, avoiding deep prop passing.
-
Using Context API: Context API provides a way to share values like these between components without having to explicitly pass a prop through every level of the tree.
Avoiding Prop Drilling
function Parent({ userName }) {
    return <Child userName={userName} />;
}

function Child({ userName }) {
    return <GrandChild userName={userName} />;
}

function GrandChild({ userName }) {
    return <Text>Welcome, {userName}</Text>;
}
Bad: Prop drilling
const UserContext = createContext();

function Parent() {
    return <Child />;
}

function Child() {
    return <GrandChild />;
}

function GrandChild() {
    const userName = useContext(UserContext);
    return <Text>Welcome, {userName}</Text>;
}
Good: Using Context
Avoiding Prop Drilling
import React from 'react';
import { View, Text, StyleSheet } from 'react-native';

const Grandparent = () => (
    <Parent>
        <GrandChild message="Hello from the top!" />
    </Parent>
);

const Parent = ({ children }) => (
    <Child>{children}</Child>
);

const Child = ({ children }) => (
    <View style={styles.container}>{children}</View>
);

const GrandChild = ({ message }) => (
    <Text>{message}</Text>
);

const styles = StyleSheet.create({
    conta
Good: Composition
Bad
import React from 'react';
import { View, Text, StyleSheet } from 'react-native';

const Grandparent = ({ message }) => (
    <Parent message={message} />
);

const Parent = ({ message }) => (
    <Child message={message} />
);

const Child = ({ message }) => (
    <GrandChild message={message} />
);

const GrandChild = ({ message }) => (
    <View style={styles.container}>
        <Text>{message}</Text>
    </View>
);

const styles = StyleSheet.create({
    container: {
        padding: 10,
    },
});

// Usage
const App = () => (
    <Grandparent message="Hello from the top!" />
);
Advanced Hook Patterns: Custom Hooks for Complex Logic
-
Custom Hooks: Encapsulating and reusing complex logic.
-
Benefits:
-
Code reusability across components.
-
Clear separation of concerns.
-
Simplified testing and maintenance.
-
let's check this example:
import { useReducer, useCallback } from 'react';

enum ActionType {
  Undo = 'UNDO',
  Redo = 'REDO',
  Set = 'SET',
  Reset = 'RESET',
}

export interface Actions<T> {
  set: (newPresent: T, checkpoint?: boolean) => void;
  reset: (newPresent: T) => void;
  undo: () => void;
  redo: () => void;
  canUndo: boolean;
  canRedo: boolean;
}

interface Action<T> {
  type: ActionType;
  historyCheckpoint?: boolean;
  newPresent?: T;
}

export interface State<T> {
  past: T[];
  present: T;
  future: T[];
}

const initialState = {
  past: [],
  present: null,
  future: [],
};

type Options = {
  useCheckpoints?: boolean;
};

const useUndo = <T>(
  initialPresent: T,
  opts: Options = {}
): [State<T>, Actions<T>] => {
  const { useCheckpoints }: Options = {
    useCheckpoints: false,
    ...opts,
  };

  const reducer = <T>(state: State<T>, action: Action<T>) => {
    const { past, present, future } = state;

    switch (action.type) {
      case ActionType.Undo: {
        if (past.length === 0) {
          return state;
        }

        const previous = past[past.length - 1];
        const newPast = past.slice(0, past.length - 1);

        return {
          past: newPast,
          present: previous,
          future: [present, ...future],
        };
      }

      case ActionType.Redo: {
        if (future.length === 0) {
          return state;
        }
        const next = future[0];
        const newFuture = future.slice(1);

        return {
          past: [...past, present],
          present: next,
          future: newFuture,
        };
      }

      case ActionType.Set: {
        const isNewCheckpoint = useCheckpoints
          ? !!action.historyCheckpoint
          : true;
        const { newPresent } = action;

        if (newPresent === present) {
          return state;
        }

        return {
          past: isNewCheckpoint === false ? past : [...past, present],
          present: newPresent,
          future: [],
        };
      }

      case ActionType.Reset: {
        const { newPresent } = action;

        return {
          past: [],
          present: newPresent,
          future: [],
        };
      }
    }
  };

  const [state, dispatch] = useReducer(reducer, {
    ...initialState,
    present: initialPresent,
  }) as [State<T>, React.Dispatch<Action<T>>];

  const canUndo = state.past.length !== 0;
  const canRedo = state.future.length !== 0;
  const undo = useCallback(() => {
    if (canUndo) {
      dispatch({ type: ActionType.Undo });
    }
  }, [canUndo]);
  const redo = useCallback(() => {
    if (canRedo) {
      dispatch({ type: ActionType.Redo });
    }
  }, [canRedo]);
  const set = useCallback((newPresent: T, checkpoint = false) => {
    dispatch({
      type: ActionType.Set,
      newPresent,
      historyCheckpoint: checkpoint,
    });
  }, []);
  const reset = useCallback(
    (newPresent: T) => dispatch({ type: ActionType.Reset, newPresent }),
    []
  );

  return [state, { set, reset, undo, redo, canUndo, canRedo }];
};

export default useUndo;
useState
useReducer for Complex State Management
-
Understanding useReducer for advanced state management.
-
Benefits:
-
Structured state transition logic.
-
Better handling of complex state interactions.
-
More predictable state updates than useState.
-
useReducer API
In fact useState can be implemented as useReducer
const useStateReducer = (prevState, newState) =>
  typeof newState === 'function' ? newState(prevState) : newState

const useStateInitializer = initialValue =>
  typeof initialValue === 'function' ? initialValue() : initialValue

function useState(initialValue) {
  return React.useReducer(useStateReducer, initialValue, useStateInitializer)
}
useState() // no initial value
useState(initialValue) // a literal initial value
useState(() => initialValue) // initializer function
const [count, setCount] = useState(0)
setCount(previousCount => previousCount + 1)useReducer for Complex State Management
Consider this logic:
import React, { useState } from 'react';

function Form() {
    const [name, setName] = useState('');
    const [email, setEmail] = useState('');
    const [isSubmitted, setSubmitted] = useState(false);

    const handleSubmit = () => {
        // Complex validation and submission logic
        setSubmitted(true);
    };

    return (
        // Form UI
    );
}
- Problem:
- Managing each piece of the form state with a separate useState can become cumbersome.
- Complex state transitions and validations are harder to handle.
useReducer for Complex State Management
Rewrite with useReducer
import React, { useReducer } from 'react';

function formReducer(state, action) {
    switch (action.type) {
        case 'SET_FIELD':
            return { ...state, [action.field]: action.value };
        case 'SUBMIT':
            // Handle submission and validation
            return { ...state, isSubmitted: true };
        default:
            return state;
    }
}

function Form() {
    const [state, dispatch] = useReducer(formReducer, { name: '', email: '', isSubmitted: false });

    const handleSubmit = () => {
        dispatch({ type: 'SUBMIT' });
    };

    return (
        // Form UI
    );
}
useReducer for Complex State Management
Benefits:
- Consolidates state management logic, making the component cleaner and easier to understand.
- Easier to handle complex state transitions and side effects.
- Performance:
useReducerprovides a more efficient way to manage complex state, especially in larger components or applications, as it avoids the need for multipleuseStatecalls and re-renders.
useReducer Performance
Centralized State Updates (on component level)
-
useReduceris designed for managing more complex state logic thanuseState. It allows for centralized state updates in a single reducer function, which can improve performance in components with complex state interactions.
useReducer Performance
Reduced Callback Propagation:
- A significant performance benefit of
useReduceris the ability to avoid passing down callbacks through different component levels. By using a dispatch function provided byuseReducer, components can trigger updates without the need for prop drilling or lifting state up, which enhances performance, especially in large component trees.
useReducer Performance
Stable Dispatch Function:
- The dispatch method returned by
useReducerdoesn't change between re-renders. This stability can prevent unnecessary re-renders of components that use this dispatch function, as compared to passing down new instances of callback functions on each render.
useReducer Performance
Local State Management:
- Use
useReducerfor managing the state that is local to a specific compound component. This is particularly useful for complex state logic that is specific to a component or a group of closely related components.
useReducer
State Synchronization:
- Synchronize the local state with the global Redux store when necessary. This could involve dispatching Redux actions as part of the reducer logic or in response to certain events in the compound component.
import React, { useReducer, useEffect, useCallback } from 'react';
import { useSelector, useDispatch } from 'react-redux';
import { updateGlobalState } from './redux/actions';

const localReducer = (state, action) => {
    switch (action.type) {
        case 'UPDATE_FIELD':
            return { ...state, [action.field]: action.value };
        case 'SYNC_WITH_GLOBAL':
            // Only update relevant parts to avoid unnecessary overwrites
            return { ...state, email: action.payload.email };
        default:
            return state;
    }
};

const CompoundComponent = () => {
    const initialLocalState = { email: '', otherField: '' };
    const [localState, localDispatch] = useReducer(localReducer, initialLocalState);
    const globalEmail = useSelector(state => state.someGlobalState.email); // Selective global state
    const dispatch = useDispatch();

    const handleLocalChange = useCallback((field, newValue) => {
        localDispatch({ type: 'UPDATE_FIELD', field, value: newValue });

        // Only update the global state if a specific condition is met
        if (field === 'email' && shouldSyncWithGlobalState(newValue, globalEmail)) {
            dispatch(updateGlobalState({ email: newValue }));
        }
    }, [globalEmail, dispatch]);

    // Synchronize local state with global state changes
    useEffect(() => {
        localDispatch({ type: 'SYNC_WITH_GLOBAL', payload: { email: globalEmail } });
    }, [globalEmail]);

    // Render your compound component
    // ...
};

function shouldSyncWithGlobalState(newValue, globalValue) {
    // Define your condition for syncing
    return newValue !== globalValue;
}

export default CompoundComponent;
Memoization with useMemo and useCallback
-
Effective memoization techniques in React Native.
-
useMemo for memoizing expensive calculations.
-
useCallback for preventing unnecessary re-creation of functions.
-
Benefits:
-
Reduced computational cost.
-
Avoidance of unnecessary renders.
-
Enhanced performance in complex components.
-
Memoization with useMemo and useCallback
import React from 'react';
import { Text, TouchableOpacity } from 'react-native';

const ExpensiveComponent = ({ data }) => {
    const computeExpensiveValue = (inputData) => {
        // Expensive calculation
        return inputData.reduce((sum, value) => sum + value, 0);
    };

    const expensiveValue = computeExpensiveValue(data);

    const handleClick = () => {
        console.log('Button clicked');
    };

    return (
        <TouchableOpacity onPress={handleClick}>
            <Text>Expensive Value: {expensiveValue}</Text>
        </TouchableOpacity>
    );
};
Bad
Problems:
- The
computeExpensiveValuefunction is called on every render, even ifdatahasn't changed - The
handleClickfunction is recreated every render
import React, { useMemo, useCallback } from 'react';
import { Text, TouchableOpacity } from 'react-native';

const OptimizedComponent = ({ data }) => {
    const computeExpensiveValue = (inputData) => {
        // Expensive calculation
        return inputData.reduce((sum, value) => sum + value, 0);
    };

    const expensiveValue = useMemo(() => computeExpensiveValue(data), [data]);

    const handleClick = useCallback(() => {
        console.log('Button clicked');
    }, []); // No dependencies, the function never changes

    return (
        <TouchableOpacity onPress={handleClick}>
            <Text>Expensive Value: {expensiveValue}</Text>
        </TouchableOpacity>
    );
};
Good
Benefits:
useMemois used to memoize the expensive calculation. It only re-runs the calculation whendatachanges.useCallbackensures that thehandleClickfunction maintains its identity across renders, preventing unnecessary re-renders of components that rely on this callback.
What is Referential Equality?
When React compares the values used in a dependency array such as useEffect, useCallback, or props passed to a child component, it uses Object.is().
- Primitive values are equal (check the link above for the few exceptions).
- Non-primitive values refer to the same object in memory.
Object.is(25, 25); // true
Object.is("foo", "foo"); // true
Object.is("foo", "bar"); // false
Object.is(null, null); // true
Object.is(undefined, undefined); // true
Object.is(window, window); // true
Object.is([], []); // false
const foo = { a: 1 };
const bar = { a: 1 };
const sameFoo = foo;
Object.is(foo, foo); // true
Object.is(foo, bar); // false
Object.is(foo, sameFoo); // true

// Case 2: Signed zero
Object.is(0, -0); // false
Object.is(+0, -0); // false
Object.is(-0, -0); // true

// Case 3: NaN
Object.is(NaN, 0 / 0); // true
Object.is(NaN, Number.NaN); // true
How the useMemo Hook Works
It stores the result of a function and prevents it from being executed again until the dependencies change.
As it can store the result of a function and also prevent execution between renders of a component, you can use this hook in two situations.
Referential Equality
Comparing objects with Object.is are not the same because they are stored in different memory addresses. With useMemo you can save the same reference.
Expensive Calculation
Because you are storing a value and avoiding executing the function at all with useMemo, you can use this to avoid executing unnecessary expensive calculations and make your app more performant.
How the useMemo Hook Works
Cheat sheet
How the useCallback Hook Works
It stores the definition, not the execution itself, not the result. So, the function will be executed every time it is called.
To achieve true equality between renders, useCallback will store the function definition with the same reference to the object in memory.
Without this hook, the function will be recreated in each render and point to a different in-memory reference. Therefore, React will recognize it as different, even if you use React.memo in your child component.
// Simplified implementation (inside React)
function useCallback(fn, dependencies) {
  return useMemo(() => fn, dependencies);
}
How the useCallback Hook Works
CheatSheet
Component Design Patterns
Higher-Order Components (HOCs)
-
Exploring the use of Higher-Order Components (HOCs) in React Native.
-
Key aspects:
-
Enhancing components with additional functionality.
-
Reusing logic across different components.
-
Understanding the impact on component hierarchy and re-rendering.
-
Higher-Order Components (HOCs)
const newComponent = higherFunction(WrappedComponent);import React, { useState, useEffect } from 'react';
const withEnhancement = (BaseComponent) => {
// HOC logic using hooks
return function EnhancedComponent(props) {
// HOC-specific logic using hooks
return (
<BaseComponent {...props} enhancedProp="someValue" />
);
};
};HOCs are powerful, but can introduce performance problems
Higher-Order Components (HOCs)
Unnecessary Re-renders:
- HOCs can lead to unnecessary re-renders of the wrapped components. If the HOCs themselves manage state or props that change frequently, every change triggers a re-render of the HOC and all its child components, even if the child components don’t need to update.
const withFrequentUpdates = BaseComponent => props => {
    const [data, setData] = useState('Initial data');

    useEffect(() => {
        const interval = setInterval(() => {
            setData(`Updated at ${new Date().toLocaleTimeString()}`);
        }, 1000);
        return () => clearInterval(interval);
    }, []);

    return <BaseComponent {...props} data={data} />;
};

const MyComponent = ({ data }) => (<div>{data}</div>);
const EnhancedComponent = withFrequentUpdates(MyComponent);
Problem: The HOC withFrequentUpdates causes EnhancedComponent to re-render every second, even if these updates are not necessary for the component's functionality.
Higher-Order Components (HOCs)
Solution: Replace the HOC with a custom hook useDataWithInterval that provides the same functionality. This approach reduces unnecessary complexity and makes the component's behavior more predictable.
const useDataWithInterval = () => {
    const [data, setData] = useState('Initial data');

    useEffect(() => {
        const interval = setInterval(() => {
            setData(`Updated at ${new Date().toLocaleTimeString()}`);
        }, 1000);
        return () => clearInterval(interval);
    }, []);

    return data;
};

const MyComponent = () => {
    const data = useDataWithInterval();
    return <View>{data}</View>;
};
Higher-Order Components (HOCs)
Prop Drilling: Although HOCs are intended to reduce prop drilling by encapsulating logic, they can sometimes contribute to it. For instance, if you need to pass down a lot of props through multiple layers of HOCs, it can become difficult to track and manage these props, leading to performance issues and complexity.
const withExtraData = BaseComponent => props => {
    const extraData = "Extra data";

    return <BaseComponent {...props} extraData={extraData} />;
};

// Assume several layers of components between declaration and usage.
const MyComponent = ({ extraData }) => (<View>{extraData}</View>);
const EnhancedComponent = withExtraData(MyComponent);
Problem: The extraData prop must be passed through potentially multiple layers of components, leading to prop drilling.
Higher-Order Components (HOCs)
const ExtraDataContext = createContext(null);

const MyComponent = () => {
    const extraData = useContext(ExtraDataContext);
    return <View>{extraData}</View>;
};

const App = () => {
    const extraData = "Extra data";

    return (
        <ExtraDataContext.Provider value={extraData}>
            <MyComponent />
        </ExtraDataContext.Provider>
    );
};
Solution: Using the Context API to provide extraData directly to the components that need it, eliminating the need for prop drilling.
Higher-Order Components (HOCs)
Component Nesting: Excessive use of HOCs can lead to a deeply nested component tree. This not only makes the component hierarchy more complex but also can impact performance, as React needs to render each layer in the hierarchy.
const withLayerOne = BaseComponent => props => (<BaseComponent {...props} layer="one" />);
const withLayerTwo = BaseComponent => props => (<BaseComponent {...props} layer="two" />);
// ... more layers

const MyComponent = ({ layer }) => (<View>Layer: {layer}</View>);
const EnhancedComponent = withLayerOne(withLayerTwo(MyComponent));
Problem: Multiple HOCs create a deeply nested component structure, which is hard to debug and understand.
Solution: Replace nested HOCs with a custom hook that encapsulates the required logic, resulting in a flatter and more maintainable component structure.
const useLayer = () => {
    // Logic to determine the layer
    return "one"; // Example
};

const MyComponent = () => {
    const layer = useLayer();
    return <View>Layer: {layer}</View>;
};
Render Props and Performance
-
Exploring the render props pattern in React Native.
-
Key aspects:
-
Sharing logic between components via a render prop function.
-
Flexibility in managing component logic and UI rendering.
-
-
Performance considerations:
-
Understanding the impact on re-rendering.
-
Balancing flexibility with efficient rendering.
-
Render Props and Performance
function Toggle ({ children, onToggle }) {

  const [on, setOn] = useState(false)

  const toggle = () => setOn((prevOn) => !prevOn)

  useEffect(() => { // we do this so that the toggle the user passed in will be called anytime the state of on changes
    onToggle(on)
  }, [on, onToggle])]

  const giveState = () => ({ on, onSwitch: toggle })

  return children(giveState()) // we are returning the props we just created so our user can access them

}

// Usage
function Usage ({
  onToggle = (...args) => console.log('onToggle', ...args),
}) {

  return (
    <Toggle onToggle={onToggle}>
      {({ on, toggle }) => (
        <View>
          {on ? <Text>'The button is on'</Text> : <Text>'The button is off'</Text>}
          <Switch on={on} onClick={toggle} />
        </View>)}
    </Toggle>

  )
}
Render Props and Performance
The good, the bad and the ugly
The good
Render props are a powerful pattern in React that allows you to share code between components using a prop whose value is a function (usually children). They can make your components more flexible and promote code reuse, leading to a cleaner, more maintainable codebase.
The bad:
Render props can cause unnecessary re-rendering of components if the function passed as a prop changes on every render. To avoid this, you can use memoization techniques such as React.memo or useCallback hooks.
The ugly:
Render props can make the code harder to read and understand if the function passed as a prop is too long or complex. To avoid this, you can extract the function into a separate variable or component.
Transitioning to Hooks
-
Refactoring HOCs and render props patterns to modern hook-based implementations.
-
Benefits:
-
Modernized codebase.
-
Reduced complexity.
-
Enhanced power and flexibility of hooks.
-
-
Cons
-
Refactoring everything to custom hooks including render props may lead to unnecessary re-renders
-
Optimizing Side Effects with useEffect
-
Best practices for managing side effects using the useEffect hook.
-
Key takeaways:
-
Correct handling of dependencies in the dependency array.
-
Importance of cleanup functions to prevent memory leaks.
-
Efficient management of side effects in functional components.
-
Optimizing Side Effects with useEffect
With the "useEffect" hook, you can trigger side effects within functional components. This is a crucial concept to grasp in the era of React Hooks.
Several key concepts
Functions defined in the body of your function component are recreated on every render cycle.
import React, { useState, useEffect } from 'react';
import { Text, View } from 'react-native';

function MyComponent() {
    const [result, setResult] = useState(0);
    const data = [1, 2, 3, 4, 5];

    // This function is recreated on every render
    const calculateSum = () => {
        return data.reduce((sum, value) => sum + value, 0);
    };

    useEffect(() => {
        // Using calculateSum inside useEffect
        const sum = calculateSum();
        setResult(sum);
    }, []); // Empty dependency array means this runs once on mount

    return (
        <View>
            <Text>Sum: {result}</Text>
        </View>
    );
}
import React, { useState, useEffect } from 'react';
import { Text, View } from 'react-native';

// Hoisted function outside the component
const calculateFixedSum = (data) => {
    return data.reduce((sum, value) => sum + value, 0);
};

function MyComponent() {
    const [result, setResult] = useState(0);
    // This data could be props, state, or static data
    const data = [1, 2, 3, 4, 5];

    useEffect(() => {
        // Use the hoisted function
        const sum = calculateFixedSum(data);
        setResult(sum);
    }, [data]); // Dependency on data

    return (
        <View>
            <Text>Sum: {result}</Text>
        </View>
    );
}
import React, { useState, useEffect, useCallback } from 'react';
import { Text, View } from 'react-native';

function MyComponent() {
    const [result, setResult] = useState(0);
    const data = [1, 2, 3, 4, 5];

    // Memoizing the function with useCallback
    const calculateSum = useCallback(() => {
        return data.reduce((sum, value) => sum + value, 0);
    }, [data]);

    useEffect(() => {
        // Now the effect always has the latest version of calculateSum
        const sum = calculateSum();
        setResult(sum);
    }, [calculateSum]); // Dependency on calculateSum

    return (
        <View>
            <Text>Sum: {result}</Text>
        </View>
    );
}
- Hoist functions outside of the component.
- Use memoization techniques
- Define them in useEffect closure
import React, { useState, useEffect } from 'react';
import { Text, View } from 'react-native';

function MyComponent() {
    const [result, setResult] = useState(0);
    const data = [1, 2, 3, 4, 5];

    useEffect(() => {
        // Defining the function inside useEffect
        const calculateSum = () => {
            return data.reduce((sum, value) => sum + value, 0);
        };

        // Call the function and set the state
        const sum = calculateSum();
        setResult(sum);

    }, []); // Empty dependency array means this runs once on mount

    return (
        <View>
            <Text>Sum: {result}</Text>
        </View>
    );
}
Stale closures in JS
In JavaScript, a closure is a function that captures variables from its surrounding scope. When you define a function inside another function (like a React component), the inner function (closure) retains access to the variables in the outer function's scope, even after the outer function has completed execution.
A closure becomes "stale" when it captures and retains an outdated reference to a variable from its surrounding scope, leading to it referencing an old value of that variable.
Stale closures in JS
function createIncrement(incBy) {
  let value = 0;

  function increment() {
    value += incBy;
    console.log(value);
  }

  const message = `Current value is ${value}`;
  function log() {
    console.log(message);
  }

  return [increment, log];
}

const [increment, log] = createIncrement(1);
increment(); // logs 1
increment(); // logs 2
increment(); // logs 3
// Does not work!
log();       // logs "Current value is 0"
function MyComponent({ message }) {
const [count, setCount] = useState(0);
useEffect(() => {
setTimeout(() => {
console.log(count, message); // This might log an outdated value of `count` or `message`
}, 3000);
}, []); // Empty dependency array
// ...
}How to Avoid Stale Closures
- Correct Dependency Array
- Using Functional Updates
- Ref Hook
- useCallback
function MyComponent({ message }) {
    const [count, setCount] = useState(0);

    useEffect(() => {
        // This effect depends on `count` and `message`
        console.log('Count:', count, 'Message:', message);
    }, [count, message]); // Include count and message in the dependency array
}
function Counter() {
    const [count, setCount] = useState(0);

    const increment = () => {
        setCount(prevCount => prevCount + 1);
    };

    useEffect(() => {
        const interval = setInterval(increment, 1000);

        return () => clearInterval(interval);
    }, []); // The effect does not depend on `count` directly
}
function Timer({ message }) {
    const [count, setCount] = useState(0);
    const messageRef = useRef(message);

    useEffect(() => {
        messageRef.current = message; // Update the ref when message changes
    }, [message]);

    useEffect(() => {
        const id = setInterval(() => {
            console.log('Message:', messageRef.current, 'Count:', count);
        }, 1000);
        return () => clearInterval(id);
    }, [count]); // Depends only on `count`

    // ...
}
import React, { useCallback, useEffect } from 'react';
import { View, Text, BackHandler } from 'react-native';

function MyComponent({ onBackPress }) {
    // Memoize the event handler using useCallback
    const handleBackPress = useCallback(() => {
        // Execute the provided onBackPress function
        if (onBackPress) {
            onBackPress();
        }
        // Return true to indicate that the event is handled
        return true;
    }, [onBackPress]);

    useEffect(() => {
        // Add the event listener for the hardware back press
        BackHandler.addEventListener('hardwareBackPress', handleBackPress);

        // Cleanup function to remove the event listener
        return () => {
            BackHandler.removeEventListener('hardwareBackPress', handleBackPress);
        };
    }, [handleBackPress]); // Dependency on the memoized version of handleBackPress

    return (
        <View>
            <Text>Press Back to trigger the event.</Text>
        </View>
    );
}
Garbage collection
Garbage collection in JavaScript is an automatic memory management feature that deallocates memory that is no longer in use. This process helps free up resources and prevent memory leaks.
Best Practices for Ensuring Proper Garbage Collection in useEffect
- Cleanup in
useEffect - Avoid Memory Leaks in Asynchronous Operations
- Remove Event Listeners
- Dispose of Resources
import React, { useState, useEffect } from 'react';
import { Text, View } from 'react-native';

function MyComponent() {
    const [data, setData] = useState(null);

    useEffect(() => {
        let isMounted = true; // Flag to track mounted status

        const fetchData = async () => {
            try {
                const response = await fetch('https://api.example.com/data');
                const json = await response.json();
                if (isMounted) {
                    setData(json); // Update state only if component is mounted
                }
            } catch (error) {
                console.error(error);
                // Handle error appropriately
            }
        };

        fetchData();

        return () => {
            isMounted = false; // Set flag to false when component unmounts
        };
    }, []);

    return (
        <View>
            {data ? (
                <Text>Data fetched successfully!</Text>
                // Render your data here
            ) : (
                <Text>Loading...</Text>
            )}
        </View>
    );
}
When not to use useEffect
-
Transforming data for rendering
-
Handling User Events:
import React, { useState, useEffect } from 'react';
import { View, Text, FlatList } from 'react-native';

function UserList({ users }) {
    const [filteredUsers, setFilteredUsers] = useState([]);

    useEffect(() => {
        const activeUsers = users.filter(user => user.active);
        setFilteredUsers(activeUsers);
    }, [users]);

    const renderItem = ({ item }) => <Text>{item.name}</Text>;

    return (
        <FlatList
            data={filteredUsers}
            renderItem={renderItem}
            keyExtractor={item => item.id.toString()}
        />
    );
}
import React from 'react';
import { View, Text, FlatList } from 'react-native';

function UserList({ users }) {
    const filteredUsers = users.filter(user => user.active);

    const renderItem = ({ item }) => <Text>{item.name}</Text>;

    return (
        <FlatList
            data={filteredUsers}
            renderItem={renderItem}
            keyExtractor={item => item.id.toString()}
        />
    );
}
import React, { useState, useEffect } from 'react';
import { View, Button } from 'react-native';

function Form() {
    const [submitData, setSubmitData] = useState(null);

    useEffect(() => {
        if (submitData !== null) {
            // Assume submitForm is a function to submit the form data
            submitForm(submitData);
        }
    }, [submitData]);

    const handleSubmit = () => {
        const formData = { /* form data */ };
        setSubmitData(formData);
    };

    return (
        <View>
            <Button title="Submit" onPress={handleSubmit} />
        </View>
    );
}
import React from 'react';
import { View, Button } from 'react-native';

function Form() {
    const handleSubmit = () => {
        const formData = { /* form data */ };
        // Directly handle the form submission here
        submitForm(formData);
    };

    return (
        <View>
            <Button title="Submit" onPress={handleSubmit} />
        </View>
    );
}
useLayoutEffect
Hook that runs synchronously before the browser repaints the screen.
Pros:
- reduces flickers making sure visual changes are done before painting
Cons:
- Heavy computations in useLayoutEffect will cause performance problems
useLayoutEffect
useLayoutEffect
Managing Global State with Hooks
-
Strategies for global state management in React Native.
-
Approaches:
-
Using Context API with hooks for state sharing across components.
-
Combining useState and useReducer for complex state logic.
-
Ensuring scalability and maintainability in state management.
-
How to use Context API
import React, {createContext, useContext, useState, ReactNode} from 'react';

type UserType = {
  name: string;
};

type AuthContextType = {
  user: UserType | null;
  login: (userData: UserType) => void;
  logout: () => void;
};

const AuthContext = createContext<AuthContextType | undefined>(undefined);

export const useAuth = () => {
  const context = useContext(AuthContext);
  if (!context) {
    throw new Error('useAuth must be used within an AuthProvider');
  }
  return context;
};

export const AuthProvider = ({children}: {children: ReactNode}) => {
  const [user, setUser] = useState<UserType | null>(null);

  const login = (userData: UserType) => {
    setUser(userData);
  };

  const logout = () => {
    setUser(null);
  };

  return (
    <AuthContext.Provider value={{user, login, logout}}>
      {children}
    </AuthContext.Provider>
  );
};
Step 1: Create the Context
How to use Context API
// App.tsx
import React from 'react';
import { AuthProvider } from './AuthContext';

const App = () => {
    return (
        <AuthProvider>
            {/* other components */}
        </AuthProvider>
    );
};

export default App;
Step 2: Use the Custom Hook and Context in Components
import React from 'react';
import { View, Text, Button } from 'react-native';
import { useAuth } from './AuthContext';

const LoginComponent = () => {
    const { user, login, logout } = useAuth();

    return (
        <View>
            {user ? (
                <>
                    <Text>Welcome, {user.name}!</Text>
                    <Button title="Logout" onPress={logout} />
                </>
            ) : (
                <Button title="Login" onPress={() => login({ name: 'John Doe' })} />
            )}
        </View>
    );
};

export default LoginComponent;
Debugging State and Effects with Hooks
-
Effective techniques for debugging state and effects in React Native.
-
Key strategies:
-
Tracing state changes and effects with useReducer and useEffect.
-
Utilizing development tools for monitoring state and effect behavior.
-
Identifying and resolving common issues related to hooks.
-
useDebugValue hook
Profiling Components with React DevTools
-
Using the React DevTools Profiler for performance analysis.
-
Key practices:
-
Identifying slow renders and bottlenecks in component trees.
-
Analyzing the impact of props and state changes on performance.
-
Utilizing profiling data to guide optimization efforts.
-
useRenderTimeMeasurement
import { useRenderTimeMeasurement } from 'src/common/PerformanceDebug';

const MyComponent = () => {
  const renderTime = useRenderTimeMeasurement();

  console.log(`Render time: ${renderTime}ms`);
  return <View><Text>My Component</Text></View>;
};
Measure the render time of a simple component.
Measure and compare render times as component state changes.
import { useRenderTimeMeasurement } from 'src/common/PerformanceDebug';

const MyComponent = () => {
  const [count, setCount] = useState(0);
  const renderTime = useRenderTimeMeasurement();

  console.log(`Render time with count ${count}: ${renderTime}ms`);

  return (
    <View>
      <Button onPress={() => setCount((prevCount) => prevCount + 1)} title="Increment"/>
      <Text>{count}</Text>
    </View>
  );
};
useRenderCounter
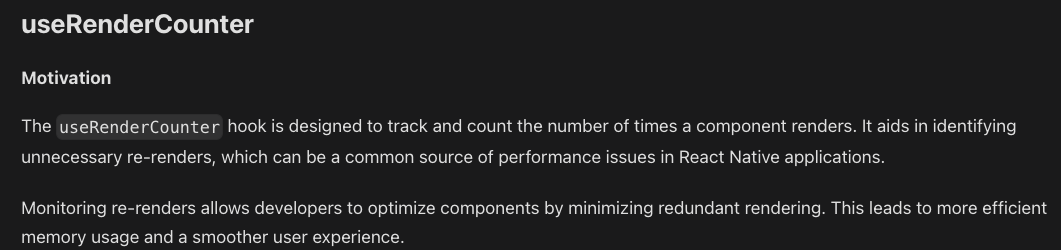
import { useRenderCounter } from 'src/common/Utils/PerformanceDebug';

const MyComponent = () => {
  const { renderCount, hookResults } = useRenderCounter(useMyHook, 'useMyHook', param1, param2);
  return <View/>;
};
useJSFPSMeasurement
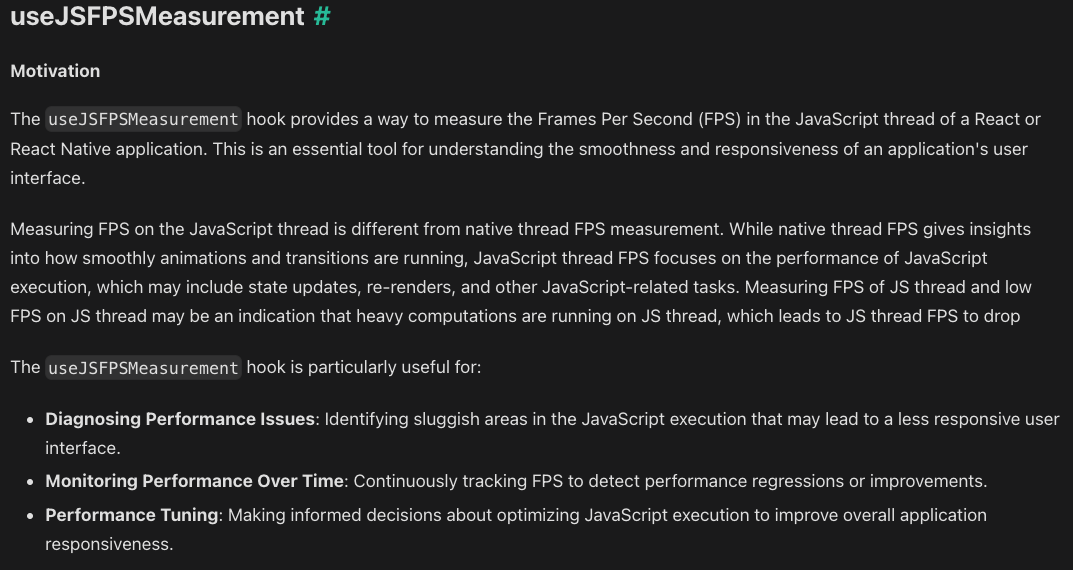
import { useJSFPSMeasurement } from 'src/common/PerformanceDebug';
const MyComponent = () => {
const fps = useJSFPSMeasurement();
console.log(`JavaScript thread FPS: ${fps}`);
return <View>{/* My Component */}</View>;
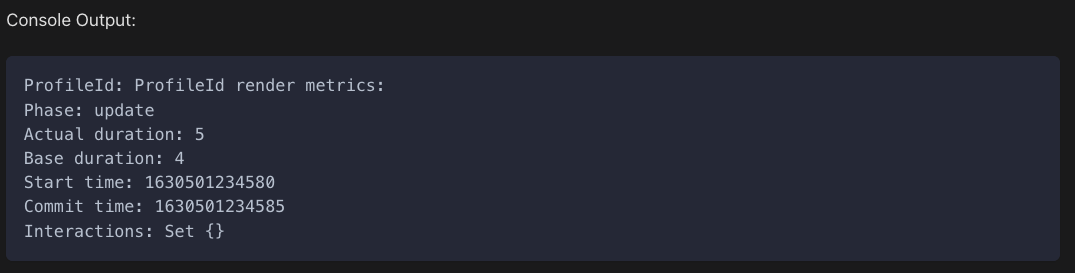
};withProfiler

import { withProfiler } from 'src/common/Utils/PerformanceDebug';

const ProfiledComponent = withProfiler(MyComponent, 'ProfileId');
Debugging Performance Issues in React Native
-
Effective strategies for debugging performance issues.
-
Focus areas:
-
Analyzing render cycles and component updates.
-
Investigating memory leaks and resource utilization.
-
Optimizing state management and side effects.
-
Wrap-up: Best Practices in Component Design
-
Best practices for designing React Native components:
-
Key takeaways:
-
Emphasize modularity and reusability.
-
Focus on efficient state and prop management.
-
Prioritize performance optimization in rendering and state updates.
-
Advanced component & hooks design & RN Best practices
By Vladimir Novick