Fuse Integration Service
Red Hat Middleware
Christina Lin
Before you begin...
Here are few things you will need to have:
- Installed JBoss Developer Studio with Integration plugins
- Download the following software
- CDK
- OSX - RHEL VirtualBox
- Linux - RHEL libvirt
- Windows - RHEL VMWare
-
OpenShift v3.1 Client
- All three platform
- CDK

Before you begin...
- Download and install the VirtualBox virtualization software.
- Download and install Vagrant.
- For Windows:
- The rsync and ssh command-line utilities need to be installed.
Install JBoss Developer Studio 8.x with JBoss Fuse Tool Development plugin installed!
Installing CDK
CDK is design for developers to easily setup OpenShift on their local environment
- Unzip the CDK downloaded, and change directory to
-
Install Vagrant plugins
-
-
Install Base Image to VagrantBox
- Start up Vagrant environment
-
vagrant plugin install vagrant-registration vagrant-service-manager vagrant-adbinfo vagrant-sshfscdk/components/rhel/rhel-ose/vagrant box add --name cdkv2 YOUR_DIR/rhel-cdk-kubernetes-7.2-21.x86_64.vagrant-virtualbox.boxvagrant upSetup CDK
- Run the “export” output:
vagrant provision> ~/.bash_profile
> source ~/.bash_profileexport DOCKER_HOST=tcp://10.1.2.2:2376
export DOCKER_CERT_PATH=xx
export DOCKER_TLS_VERIFY=1
export DOCKER_MACHINE_NAME=xxvagrant adbinfo- Set environment data by running
- Restart Vagrant
Installing OpenShift Client
Unzip or untar the openshift client, and point your class parg to the client
Start a new terminal, login with your client with user/pwd admin/admin
oc login -u admin -p admin/mnt/redhat/staging-cds/ose-clients-3.1.1.6/usr/share/atomic-openshift/OS_NAME/Create Project/NameSpace
There are two ways you can create, with OpenShift Client or using OpenShift console. Here we are going to use Openshift Console
- Attempt to login via the web browser: https://10.1.2.2:8443 using user: admin password:admin
- Create a project 'demo' in Openshift
-
or can simple create the project via OpenShift Client
-
oc new-project demoInstall and setup AMQ
In the terminal where you previously login in with OpenShift client, run the following command to install AMQ, this is to install the AMQ template inside your local openshift
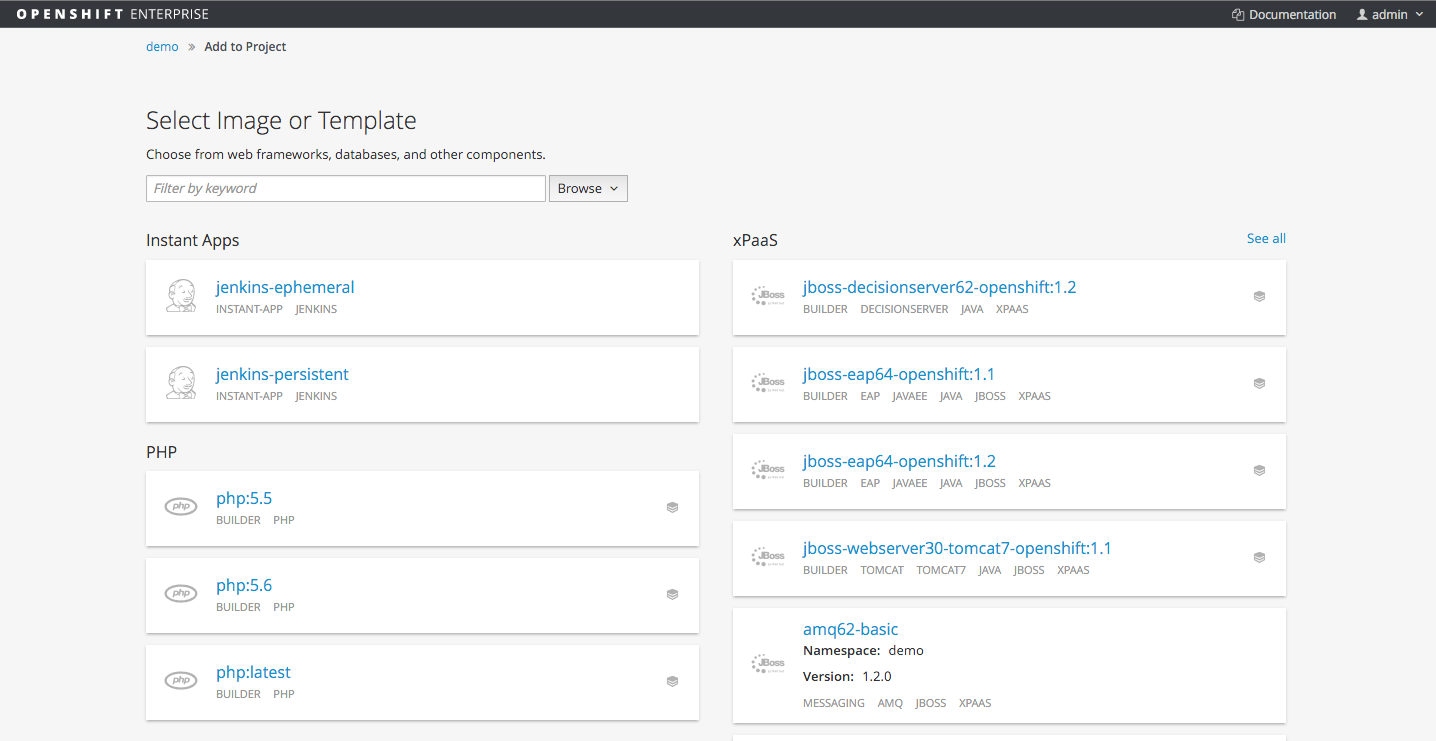
Now go back to the OpenShift console in your browser, and add a new application to you project by clicking on new project
> oc project demo
> oc create -f https://raw.githubusercontent.com/jboss-openshift/application-templates/master/amq/amq62-basic.jsonInstall and setup AMQ
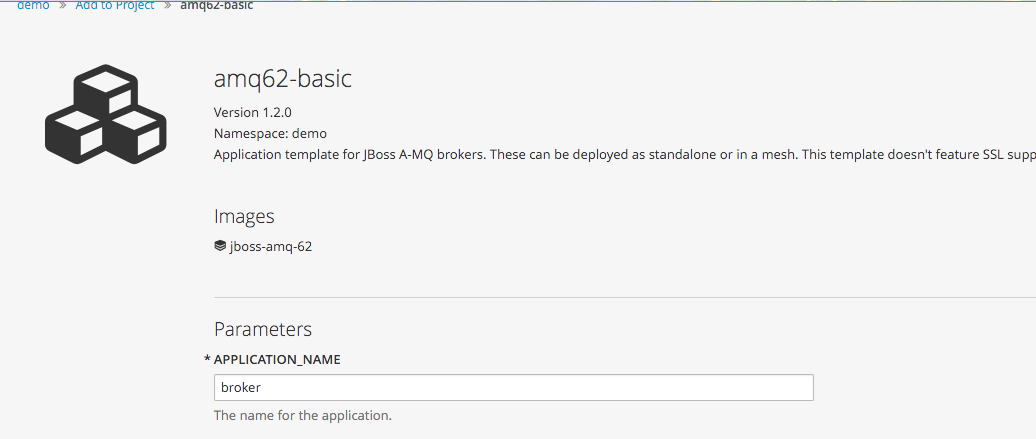
Inside project demo, create amq-basic pod, this will start up an message broker on the PaaS platform.
Install and setup AMQ
Inside project demo, create amq-basic pod, this will start up an message broker on the PaaS platform
You will be taken to a page to configure your broker. Name your broker name: broker with ID: admin Password:admin

A Taste of Camel
This lab is set out for people has previous experience of Camel, don't worry if you don't, because coding with Camel is a piece of cake! Let's try to create a simple application exposing an Restful interface. In JBoss Developer Studio, create a new project:
New -> Other -> Maven Project
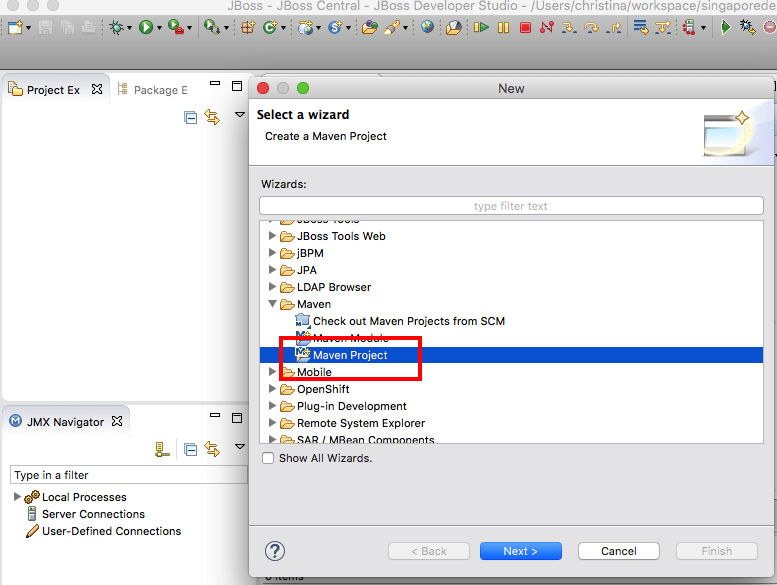
A Taste of Camel
select java-camel-spring as archetypes,
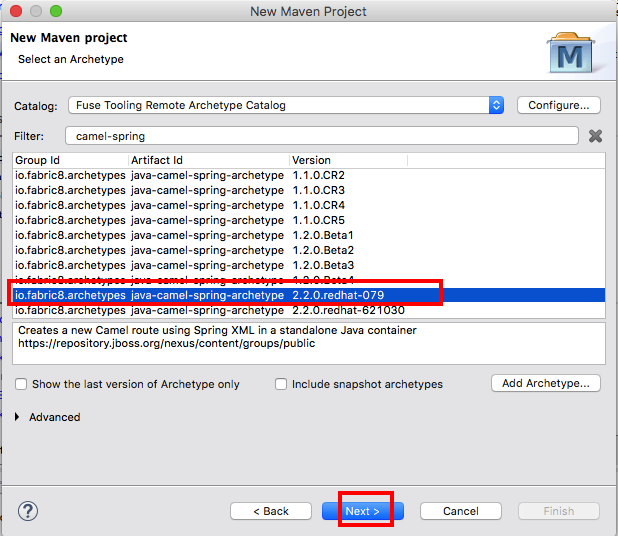
A Taste of Camel
Enter Group Id: com.redhat
and Artifact Id: cardealerdemo-sales to create the project.
Once the project has successfully built, under src/main/java create a new class:
Package: com.redhat.fis.dms.model
Class Name: Opportunity
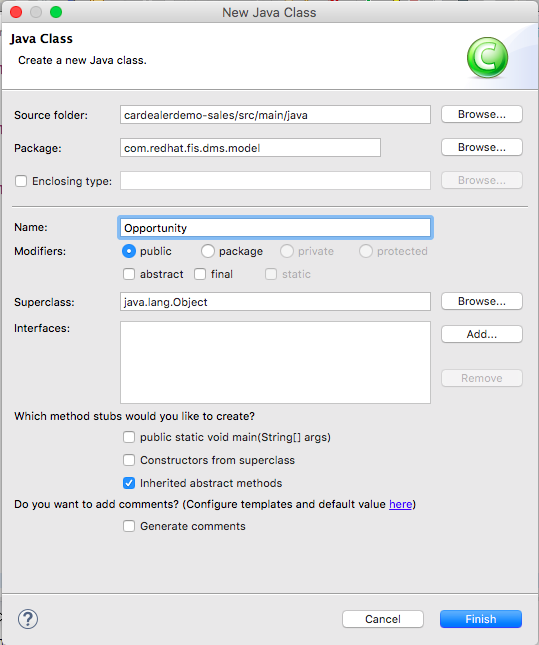
Copy the content from the URL and paste in the java bean :

A Taste of Camel
And Create another file:
Package: com.redhat.fis.dms.mockprocessor
Class Name: OpportunityGenerator
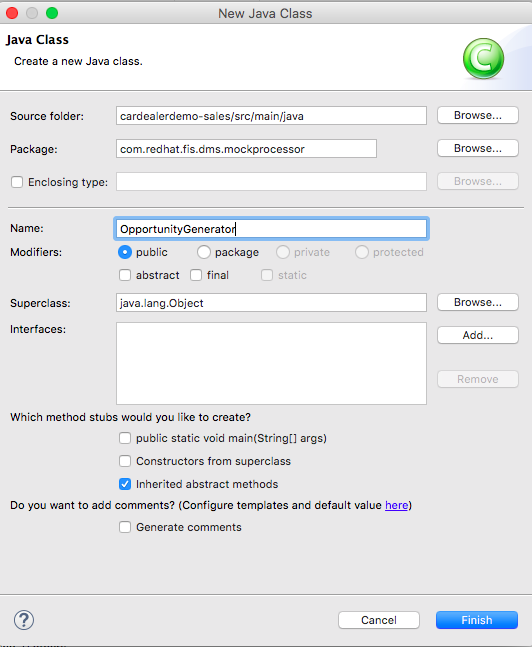
Copy the content from the URL and paste in the java bean :
A Taste of Camel
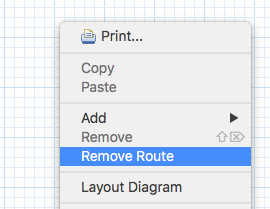
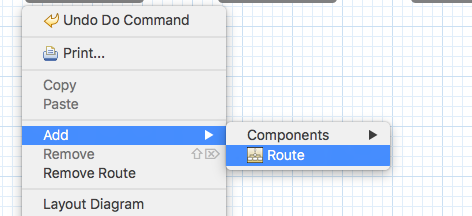
Go to camel-context.xml under src/main/resources/META-INF/spring
Right click on the canvas and remove route
Configure bean to inject your Camel context:
<bean id="opportunityGenerator"
class="com.redhat.fis.dms.mockprocessor.OpportunityGenerator"/>Back to design, create a route that retrieve input data and parse it with the processor we create!

A Taste of Camel
- Route ID: inputReport
- File Component:
- Directory Name: reportfolder
- Log Component:
- Message:${body}
- Split Component:
- Expression:/opportunities/oppo
- Language:xpath
- File Component:
A Taste of Camel
Create a folder called xml and place the xml schema in the project:
Go back to the route:
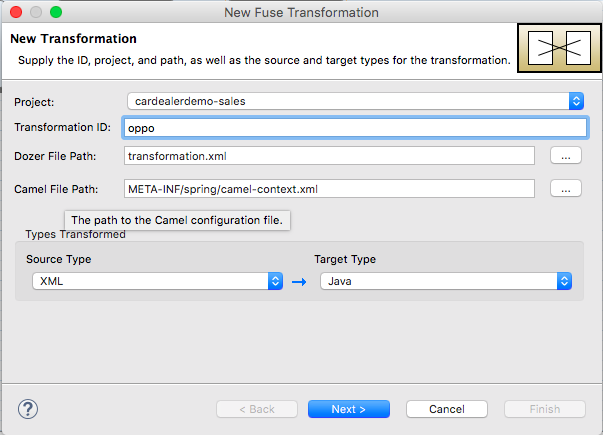
Data Transformation Component
Transformation ID: oppo
Source Type: XML
Target Type: Java
A Taste of Camel
Select xml/opp.xml.xsd to XML Schema
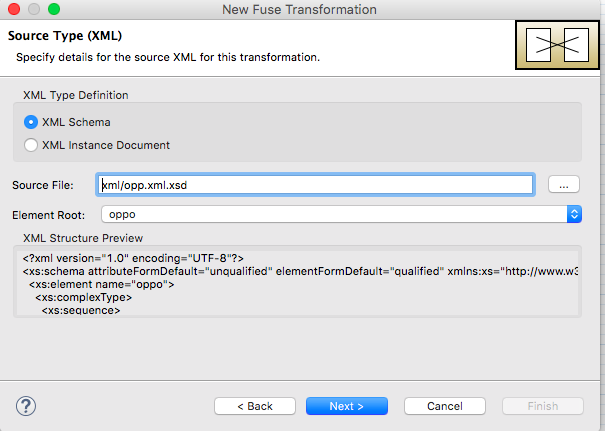
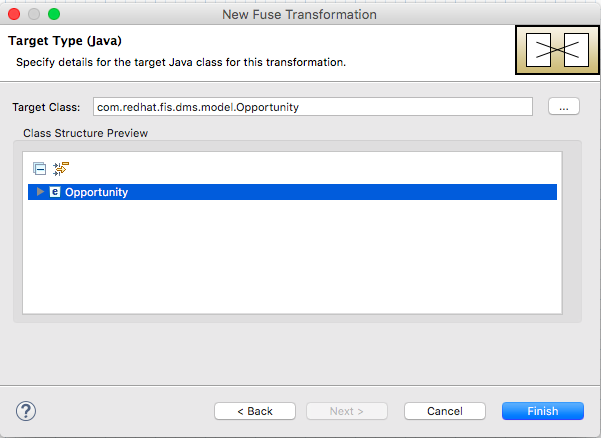
Select com.redhat.fis.dms.model.Opportunity
in Target Class
A Taste of Camel
Match variables between source and target
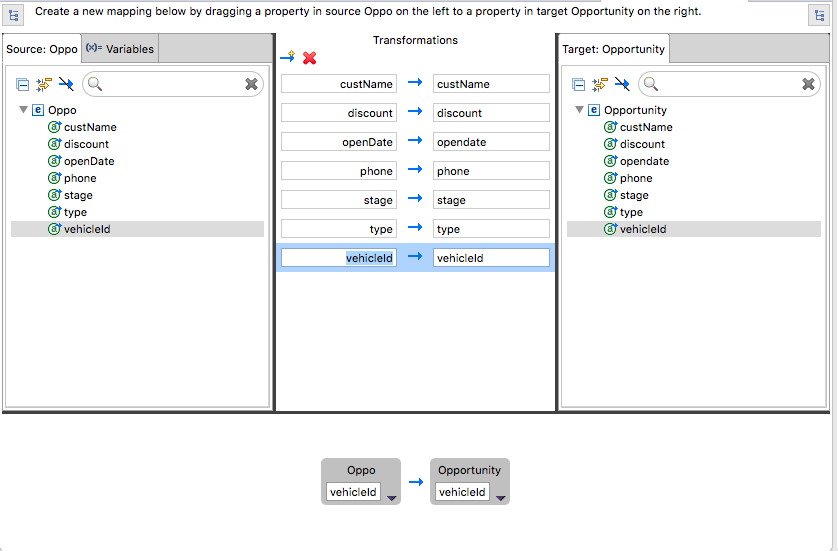
A Taste of Camel
This what your XML looks like.
<camelContext xmlns="http://camel.apache.org/schema/spring">
<endpoint uri="dozer:oppo?sourceModel=generated.Oppo&
targetModel=com.redhat.fis.dms.model.Opportunity&
unmarshalId=generated&mappingFile=transformation.xml" id="oppo"/>
<dataFormats>
<jaxb contextPath="generated" id="generated"/>
</dataFormats>
........
<route id="inputReport">
<from uri="file:reportfolder"/>
<log message="${body}"/>
<split>
<xpath>/opportunities/oppo</xpath>
<to ref="oppo"/>
</split>
</route>
</camelContext>A Taste of Camel
But Spring Context is different, please change to this:
<bean id="dozer" class="org.apache.camel.converter.dozer.DozerTypeConverterLoader" />
<camelContext xmlns="http://camel.apache.org/schema/spring">
<dataFormats>
<jaxb contextPath="generated" id="generated"/>
</dataFormats>
........
<route id="inputReport">
<from uri="file:reportfolder"/>
<log message="${body}"/>
<split>
<xpath>/opportunities/oppo</xpath>
<to uri="dozer:oppo?sourceModel=generated.Oppo&
targetModel=com.redhat.fis.dms.model.Opportunity&
unmarshalId=generated&mappingFile=transformation.xml"/>
</split>
</route>
</camelContext>A Taste of Camel
Add last component to the route:
Bean Component
- Bean Name: opportunityGenerator
- Bean Type: addOpportunity(${body})
Add route on Canvas:
A Taste of Camel
- Route ID: salesTracking
- Direct Component:
- Name: salesTracking
- Bean Component:
- Bean Name: opportunityGenerator
- Method: getAllList
- Marshal Component:
- select: json
-
Library: Jackson
-
Check prettyPrint
- Direct Component:
A Taste of Camel
<camelContext xmlns="http://camel.apache.org/schema/spring">
......
<restConfiguration component="jetty" port="9191"/>
<rest path="/AutoDMS">
<get uri="/salesTracking">
<to uri="direct:salesTracking"/>
</get>
</rest>
......
</camelContext>A Taste of Camel
Make sure all dependency are in the pom.xml
<dependency>
<groupId>org.apache.camel</groupId>
<artifactId>camel-jaxb</artifactId>
<version>2.15.1.redhat-621084</version>
</dependency>
<dependency>
<groupId>org.apache.camel</groupId>
<artifactId>camel-jackson</artifactId>
<version>2.15.1.redhat-621084</version>
</dependency>
<dependency>
<groupId>org.apache.camel</groupId>
<artifactId>camel-jetty</artifactId>
<version>2.15.1.redhat-621084</version>
</dependency>A Taste of Camel
Export ports for the maven plugin:
<plugin>
<groupId>org.jolokia</groupId>
<artifactId>docker-maven-plugin</artifactId>
<version>${docker.maven.plugin.version}</version>
<configuration>
<images>
<image>
<name>${docker.image}</name>
<build>
<from>${docker.from}</from>
<assembly>
<basedir>/deployments</basedir>
<descriptorRef>hawt-app</descriptorRef>
</assembly>
<env>
<JAVA_LIB_DIR>/deployments/lib</JAVA_LIB_DIR>
<JAVA_MAIN_CLASS>org.apache.camel.spring.Main</JAVA_MAIN_CLASS>
<HTTP_PORT>${http.port}</HTTP_PORT>
</env>
<ports>
<port>${http.port}</port>
</ports>
</build>
</image>
</images>
</configuration>
</plugin>A Taste of Camel
Set port under properties
<http.port>9191</http.port><fabric8.service.name>salesreportfile</fabric8.service.name>
<fabric8.service.port>80</fabric8.service.port>
<fabric8.service.containerPort>${http.port}</fabric8.service.containerPort>Configure service
A Taste of Camel
Go to the project url under terminal and run:
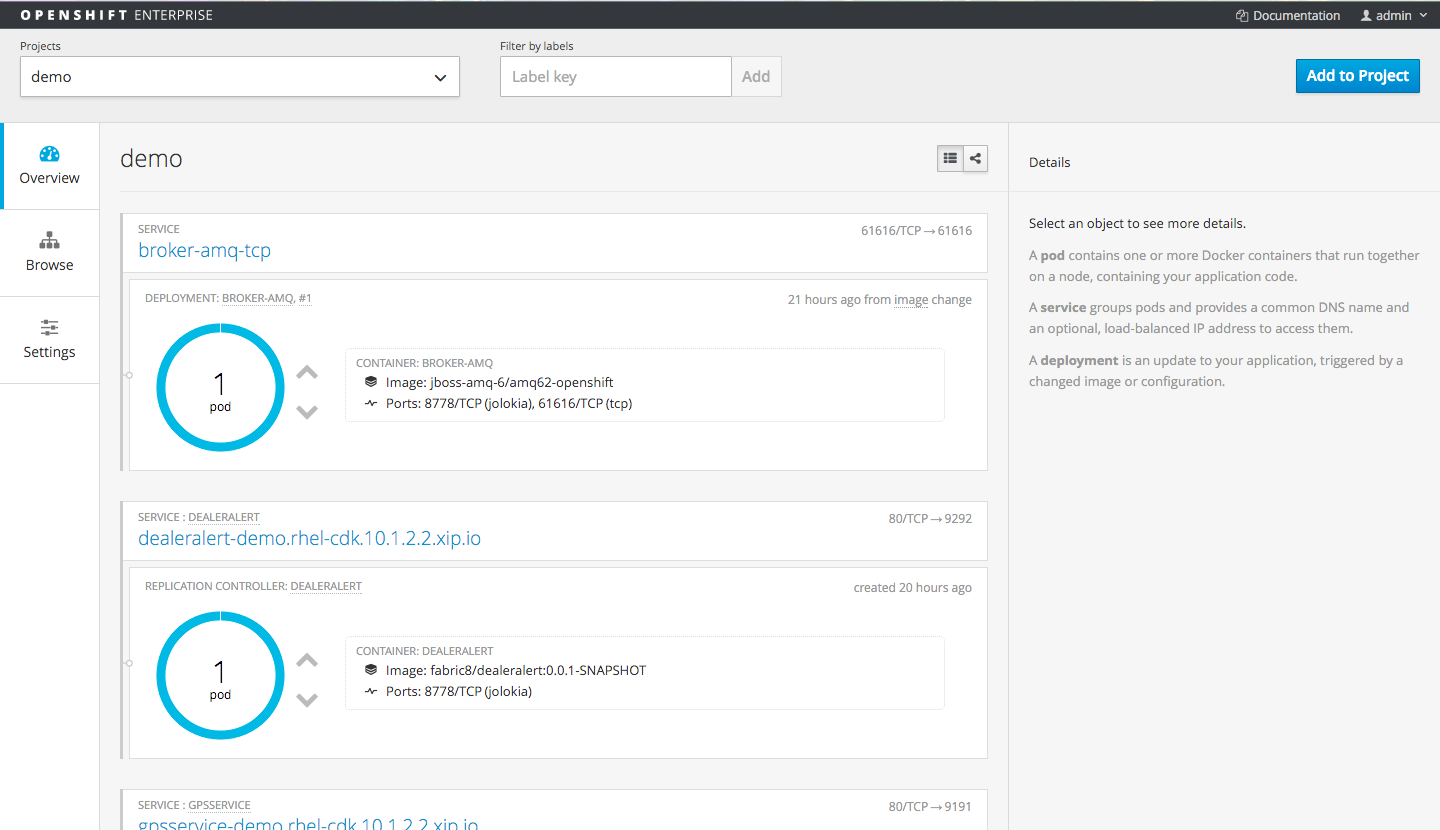
mvn -Pf8-local-deployYou should be able to see the deployed application on OpenShift
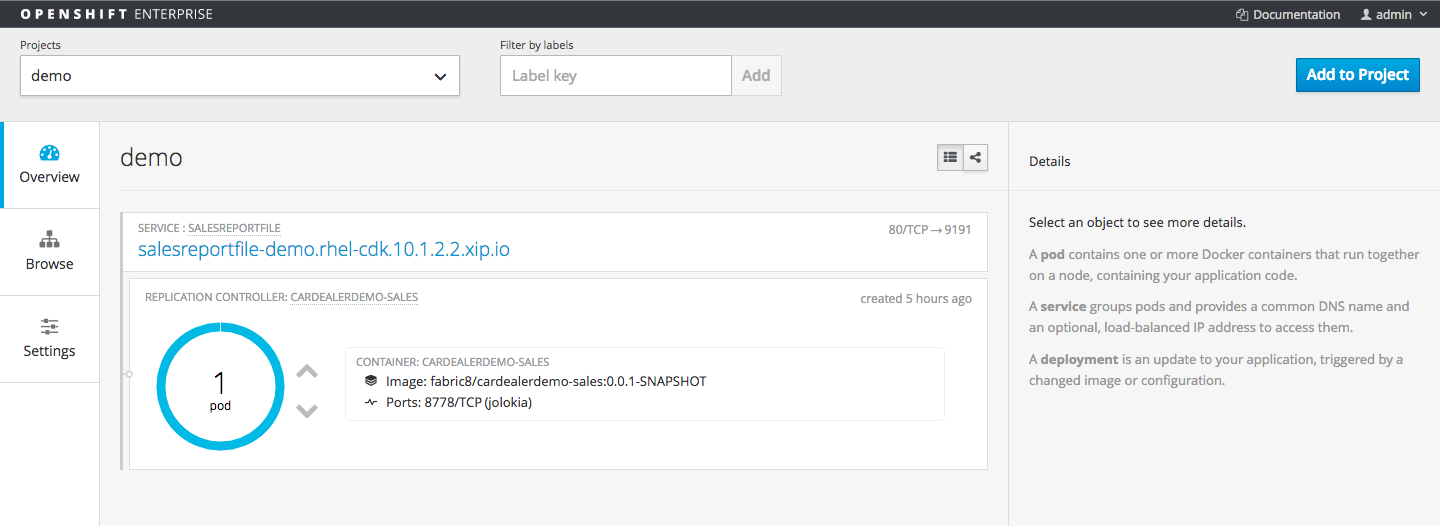
A Taste of Camel
Push the xml to the report directory in OpenShift Pod using:
oc rsync ./local/dir/ POD:/remote/dir
oc rsync /Desktop/reportfolder/ cardealerdemo-sales-uifn7:/deployments/reportfolder The XML can be download here:
A Taste of Camel
Go to following URL to see the output:
http://salesreportfile-demo.rhel-cdk.10.1.2.2.xip.io/AutoDMS/salesTracking

Installing Projects
Git clone the following repository into your IDE:
https://github.com/jbossdemocentral/jboss-fis-autodealer.git
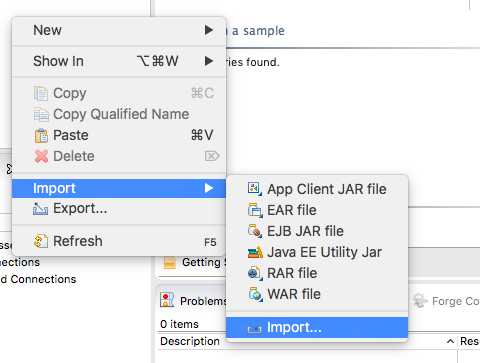
Right click on the project explorer page, select import to import the project
Select Project from Git

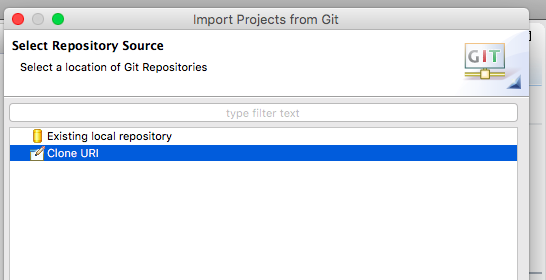
Installing Projects
Next, click on select clone URI
Paste the git URL into URL location, and enter yout github account
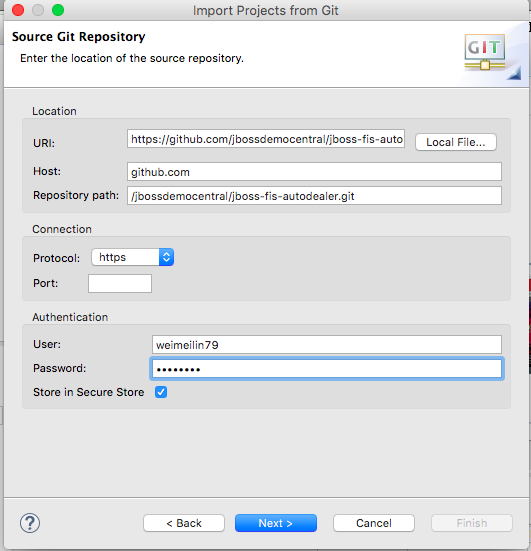
Installing Projects
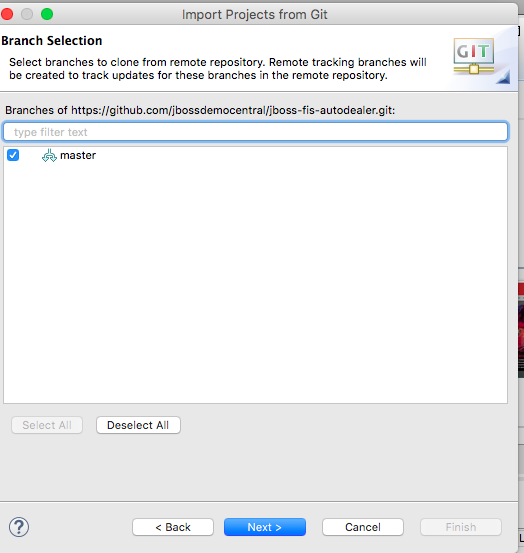
Select "Master" as branch and process to next step.
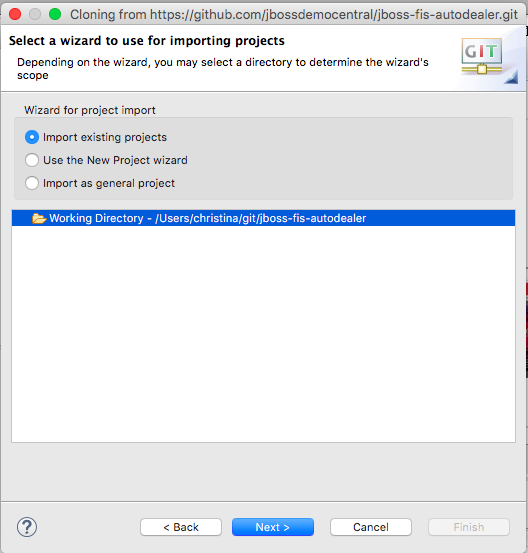
Click on import existing project, and also select the jboss-fis-autodealer working directory
Installing Projects
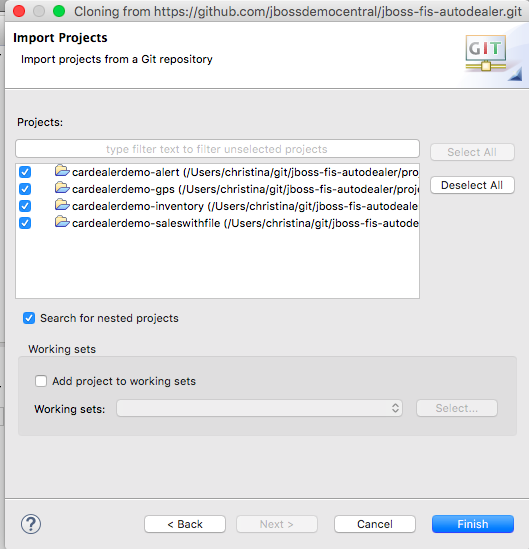
Select all four projects, and click Finished!
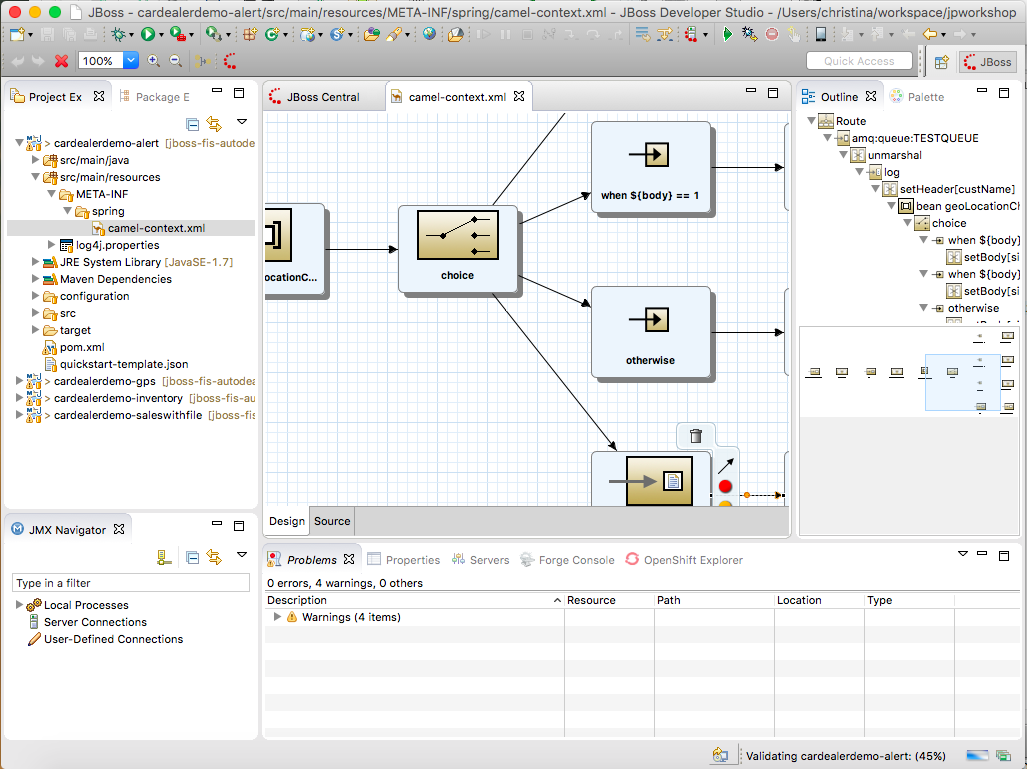
Browse through the projects
Building Projects
In a new terminal, go to where you have store your source code.Select THREE following application from source projects,
- cardealerdemo-alert
- cardealerdemo-gps
- cardealerdemo-inventory
In this terminal, make sure you have set the Docker settings if you have not set it to your system path
and login using OpenShift client again.
export DOCKER_HOST=tcp://10.1.2.2:2376
export DOCKER_CERT_PATH=xx
export DOCKER_TLS_VERIFY=1
export DOCKER_MACHINE_NAME=xxoc loginBuilding Projects
Fro each project,
- cardealerdemo-alert
- cardealerdemo-gps
- cardealerdemo-inventory
Run
mvn -Pf8-local-deployBuilding Projects
Login to OpenShift console , you should be able to see all services are up and running
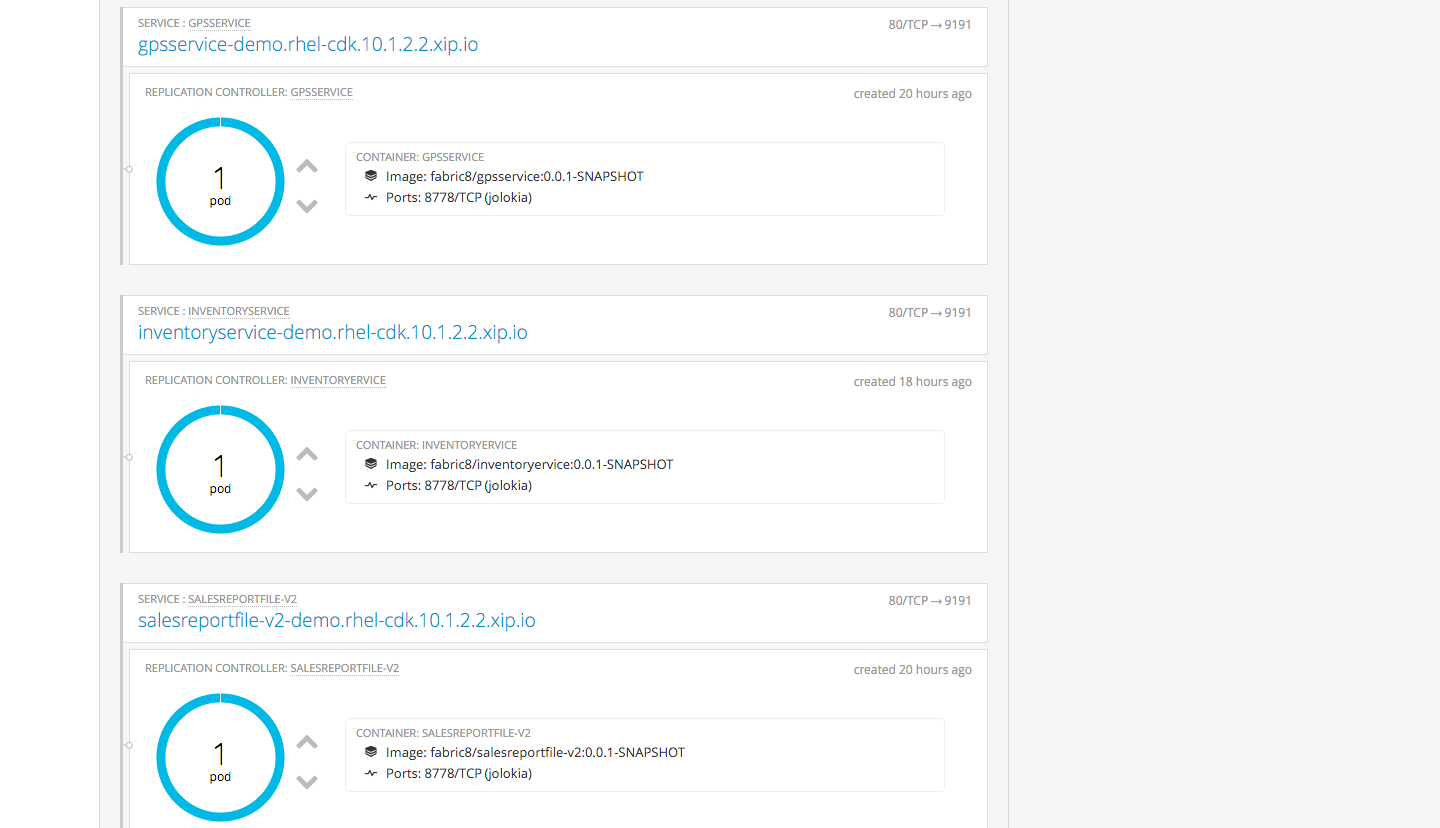
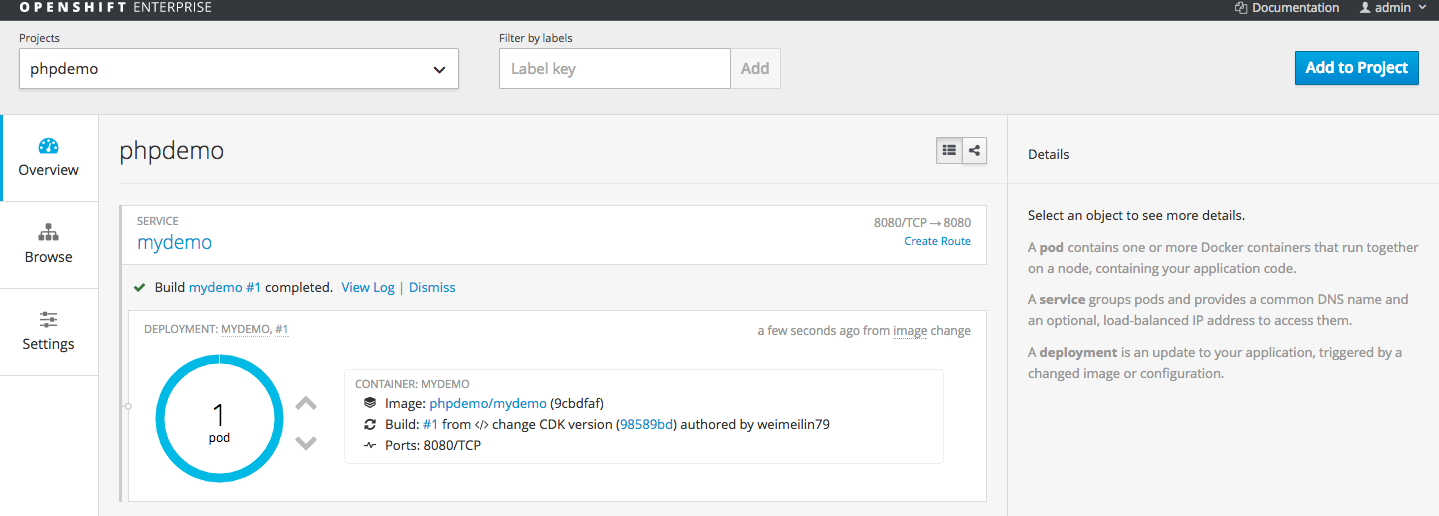
Installing web
We are going to use the source to image to build and deploy the web application on to OpenShift, in the terminal you are running the Openshift client , run
> oc new-project phpdemo
> oc project phpdemo
> oc new-app --image-stream=openshift/php:latest --name=mydemo --code=https://github.com/weimeilin79/jboss-fis-autodealerweb.git
Make sure the pod is up and running
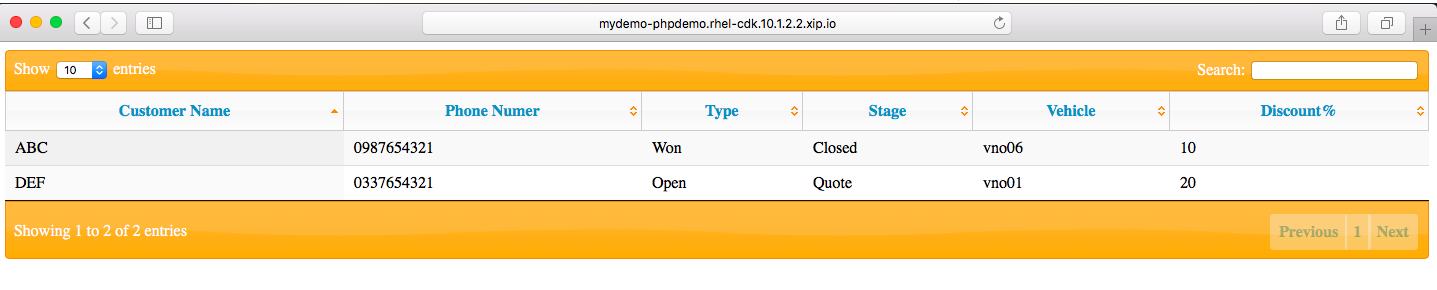
Running Tests
Let's see how the sales service with Client GUI connected to the exposed API
- Test with web application (installation instruction please visit:
Exposing the mydemo php service by entering following command:
> oc expose service mydemoText
Running Tests
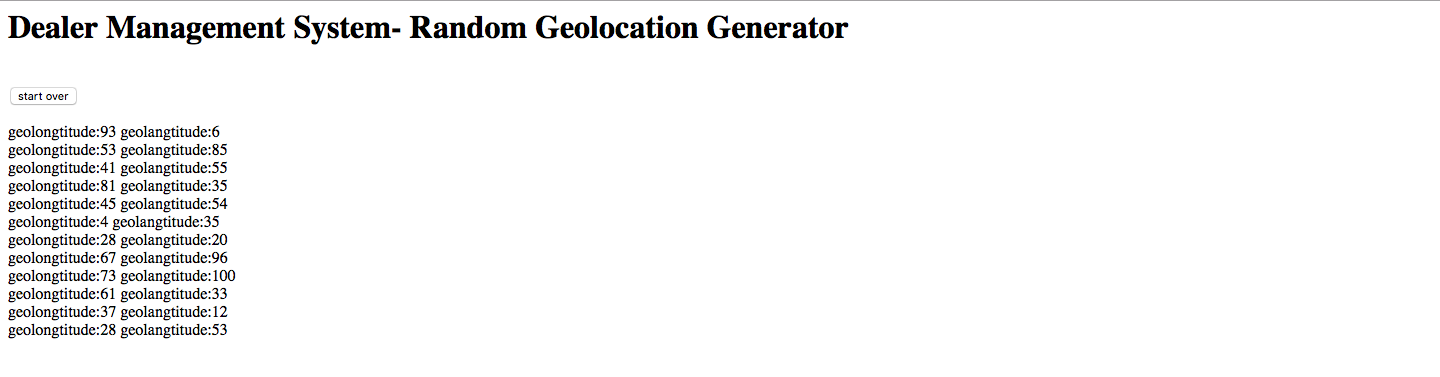
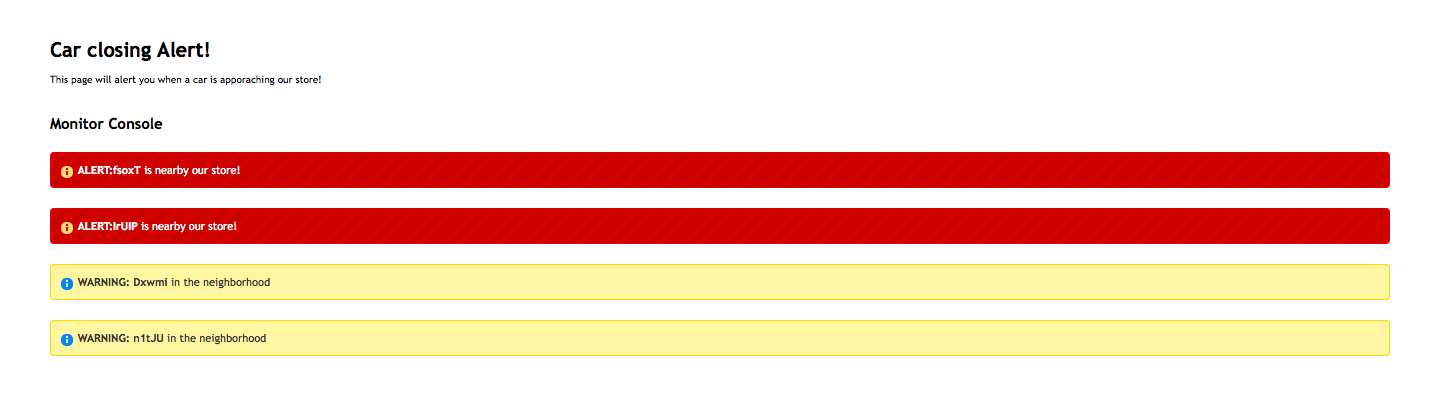
GPS service -Test with web application
- Open two pages, one that will feed GPS location data to our service,
- Then start receiving the alert from another console in the application,
Running Tests
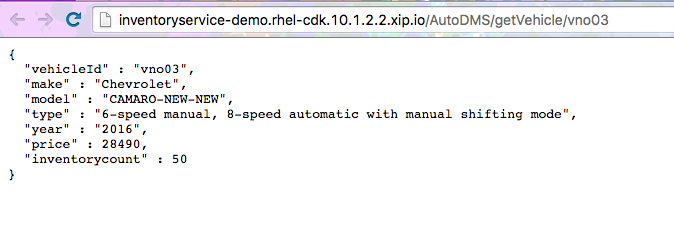
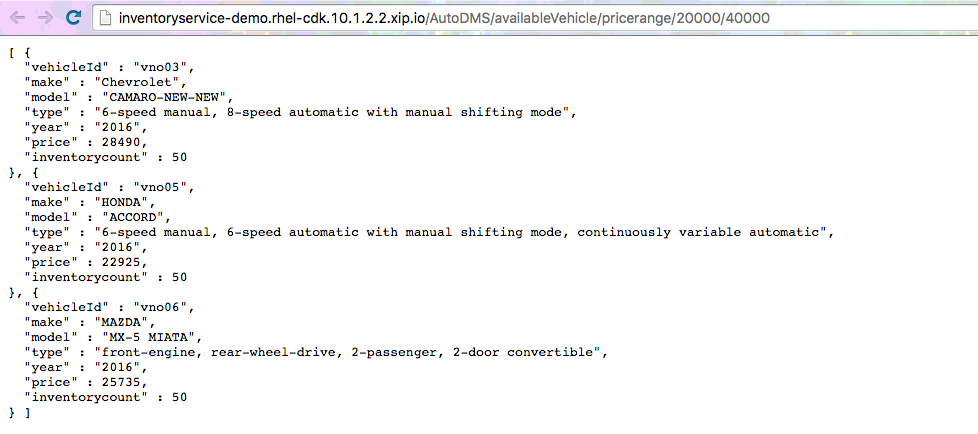
Inventory service, are expose as Restful endpoint, to test it, simply access via a browser with following url
- Provide inventory status of the vehicle
- Provide inventory status of all vehicle with the price range
Rolling upgrade
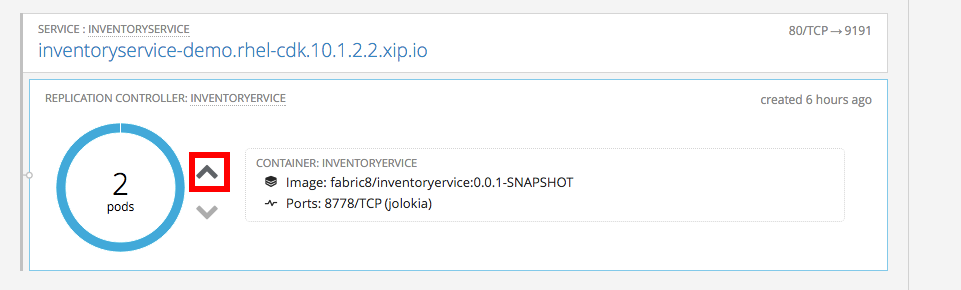
Let's start by adding more pods to one of your application, so in the OpenShift console overview tab, find the inventoryservice and add more pods.
In your browser, go to
http://inventoryservice-demo.rhel-cdk.10.1.2.2.xip.io/AutoDMS/getVehicle/vno03
multiple times and see how load was redirect to pods
Rolling upgrade
Pods:
If your load was not evenly spread out, that is maybe you are using the same session, try with another browser with new session
Rolling upgrade
Now, we want to mark all cars on sale in this API, by adding an ONSALE phrase infront of the vehicleId, so go to the inventory service project in your IDE, under src/main/java open com.redhat.fis.dms.mockprocessor.VehicleGenerator.java
Add
{car.setVehicleId("ONSALE-"+car.getVehicleId());
return car;}

Rolling upgrade
In the project pom.xml change the fabric8.replicas
from 2 to 5
<fabric8.replicas>5</fabric8.replicas>
Rolling upgrade
And go back to your project terminal under cardealerdemo-inventory project , run

> mvn install
> mvn docker:build
> mvn fabric8:json
> mvn fabric8:apply -Dfabric8.rolling=true
Rolling upgrade

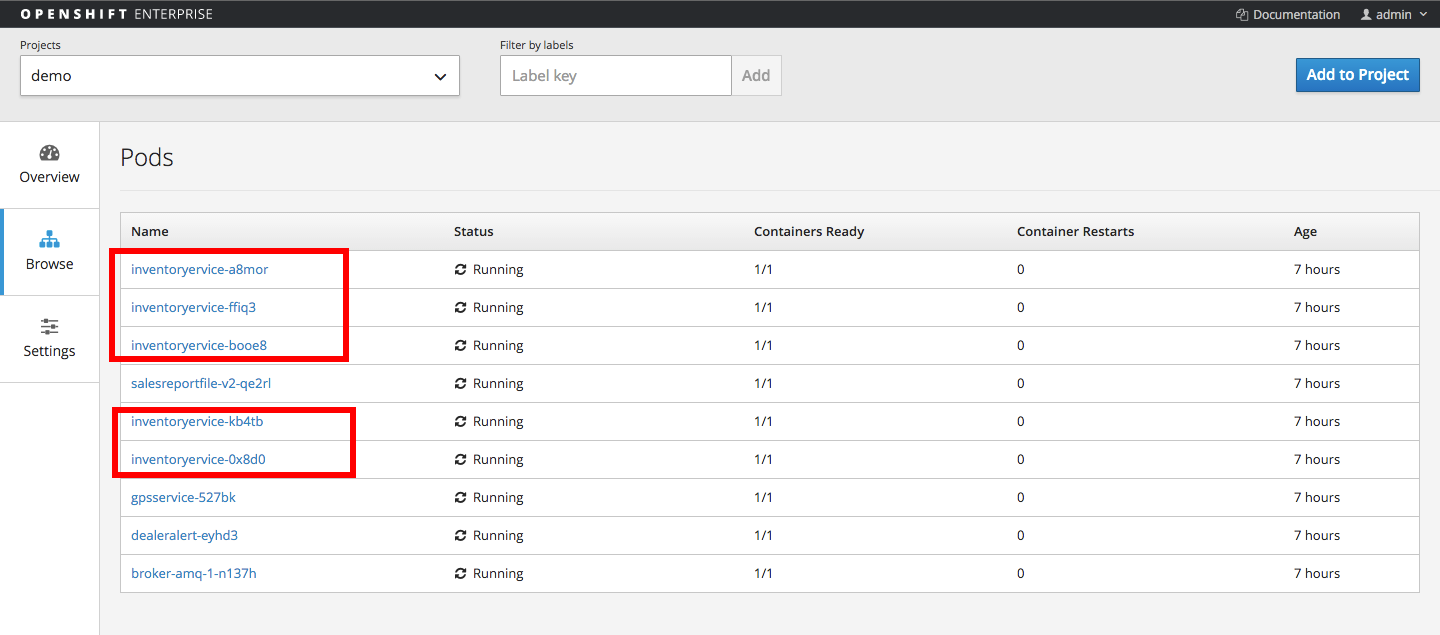
Rolling upgrade
Bring down the running pods to just one remaining

B/G Testing
From previous upgrade example, we want to have a more graceful way to move from one deployment to another, specially in production, we want to be able to have some time for a quick test before we launch to the users.
In the terminal where you previously installed OpenShift Client, run
or go to OpenShift Console, and select "Browse" -> "Routes"

> oc get routesB/G Testing
As you can see, the a route name inventoryservice is mapped to service inventoryservice
Go back to your IDE, this time, we are going to remove the "SALE" we added, but instead of publishing it directly, we are going to do something different.
First, in POM.xml add V2 in your service name
<fabric8.service.name>
 inventoryservicev2
</fabric8.service.name>
B/G Testing
And reduce the running pod to 1 by editing
<fabric8.replicas>1</fabric8.replicas>
B/G Testing
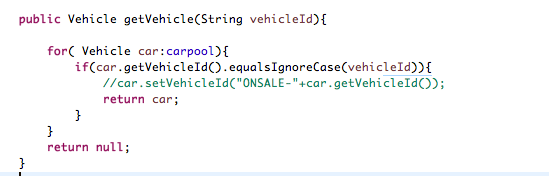
In the inventory project under src/main/java open com.redhat.fis.dms.mockprocessor.VehicleGenerator.java
remove or mark
car.setVehicleId("ONSALE-"+car.getVehicleId());
B/G Testing
And go back to your project terminal under cardealerdemo-inventory project , run

You will see two services with two route,
- inventoryservice
- inventoryservicev2
> mvn -Pf8-local-deployB/G Testing
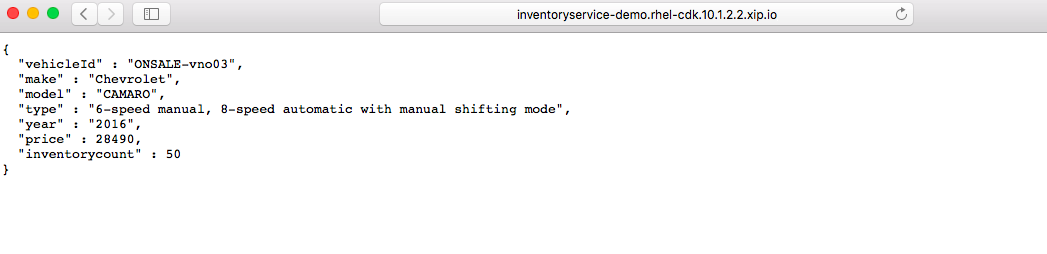
For B/G testing, in env A, call
http://inventoryservice-demo.rhel-cdk.10.1.2.2.xip.io/AutoDMS/getVehicle/vno03
it will have "SALE" infront of vehicle id,
In env B, call
http://inventoryservicev2-demo.rhel-cdk.10.1.2.2.xip.io/AutoDMS/getVehicle/vno03
it will NOT have "SALE" infront of vehicle id
B/G Testing
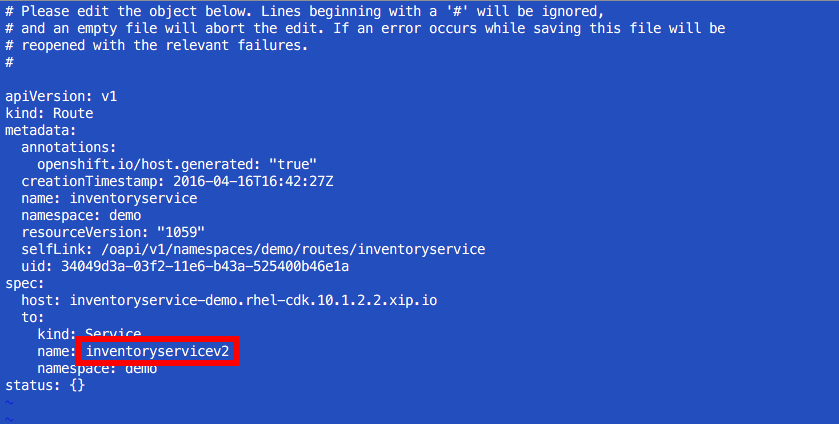
To point from A route to B service, go to your OpenShift client terminal, first run
and then start editing the route by typing
and it will take you to edit where the route pointed to.
> oc get routes > oc edit route inventoryserviceB/G Testing
Change the service name to inventoryservicev2
B/G Testing
Should be able to see now the route in env A returns the result without "SALE" in front of vehicle id
http://inventoryservice-demo.rhel-cdk.10.1.2.2.xip.io/AutoDMS/getVehicle/vno03
Fuse Integration Service
By weimeilin


