


Woongjae Lee
Daangn - Frontend Core Team ex) NHN Dooray - Frontend Team Leader ex) ProtoPie - Studio Team
2woongjae@gmail.com
const express = require('express');
const path = require('path');
const app = express();

app.use(express.static(path.join(__dirname, 'dist')));

// app.get('/', function (req, res) {
app.get('/*', function (req, res) {
  res.sendFile(path.join(__dirname, 'dist', 'index.html'));
});

app.listen(3000);location / {
try_files $uri $uri/ /index.html;
}Step 0 : Install dependencies
npm i @angular/platform-server @nguniversal/module-map-ngfactory-loader ts-loader @nguniversal/express-engine -S
@angular/platform-server
서버사이드 랜더링 용 컴포넌트 제공
@nguniversal/module-map-ngfactory-loader
lazy-loading 용
ts-loader
트랜스파일에 사용
Step 1: Prepare your App for Universal rendering
src/app/app.module.ts 수정
src/app/app.server.module.ts 작성
import { BrowserModule } from '@angular/platform-browser';
import { NgModule } from '@angular/core';


import { AppComponent } from './app.component';


@NgModule({
  declarations: [
    AppComponent
  ],
  imports: [
    BrowserModule.withServerTransition({ appId: 'serverApp' })
  ],
  providers: [],
  bootstrap: [AppComponent]
})
export class AppModule { }import {NgModule} from '@angular/core';
import {ServerModule} from '@angular/platform-server';
import {ModuleMapLoaderModule} from '@nguniversal/module-map-ngfactory-loader';
import {AppModule} from './app.module';
import {AppComponent} from './app.component';
@NgModule({
imports: [
// The AppServerModule should import your AppModule followed
// by the ServerModule from @angular/platform-server.
AppModule,
ServerModule,
ModuleMapLoaderModule // <-- *Important* to have lazy-loaded routes work
],
// Since the bootstrapped component is not inherited from your
// imported AppModule, it needs to be repeated here.
bootstrap: [AppComponent],
})
export class AppServerModule {}Step 2 : Create a server "main" file and tsconfig to build it
src/tsconfig.main.json 작성
src/main.server.ts 작성
{
  "extends": "../tsconfig.json",
  "compilerOptions": {
    "outDir": "../dist-server/",
    "baseUrl": "./",
    "module": "commonjs",
    "types": []
  },
  "exclude": [
    "test.ts",
    "**/*.spec.ts"
  ],
  "angularCompilerOptions": {
    "entryModule": "app/app.server.module#AppServerModule"
  }
}
export { AppServerModule } from './app/app.server.module';Step 3 : Create a new project in .angular-cli.json
.angular-cli.json 작성
browser peoject dist 수정
dist => dist/browser
수정 확인
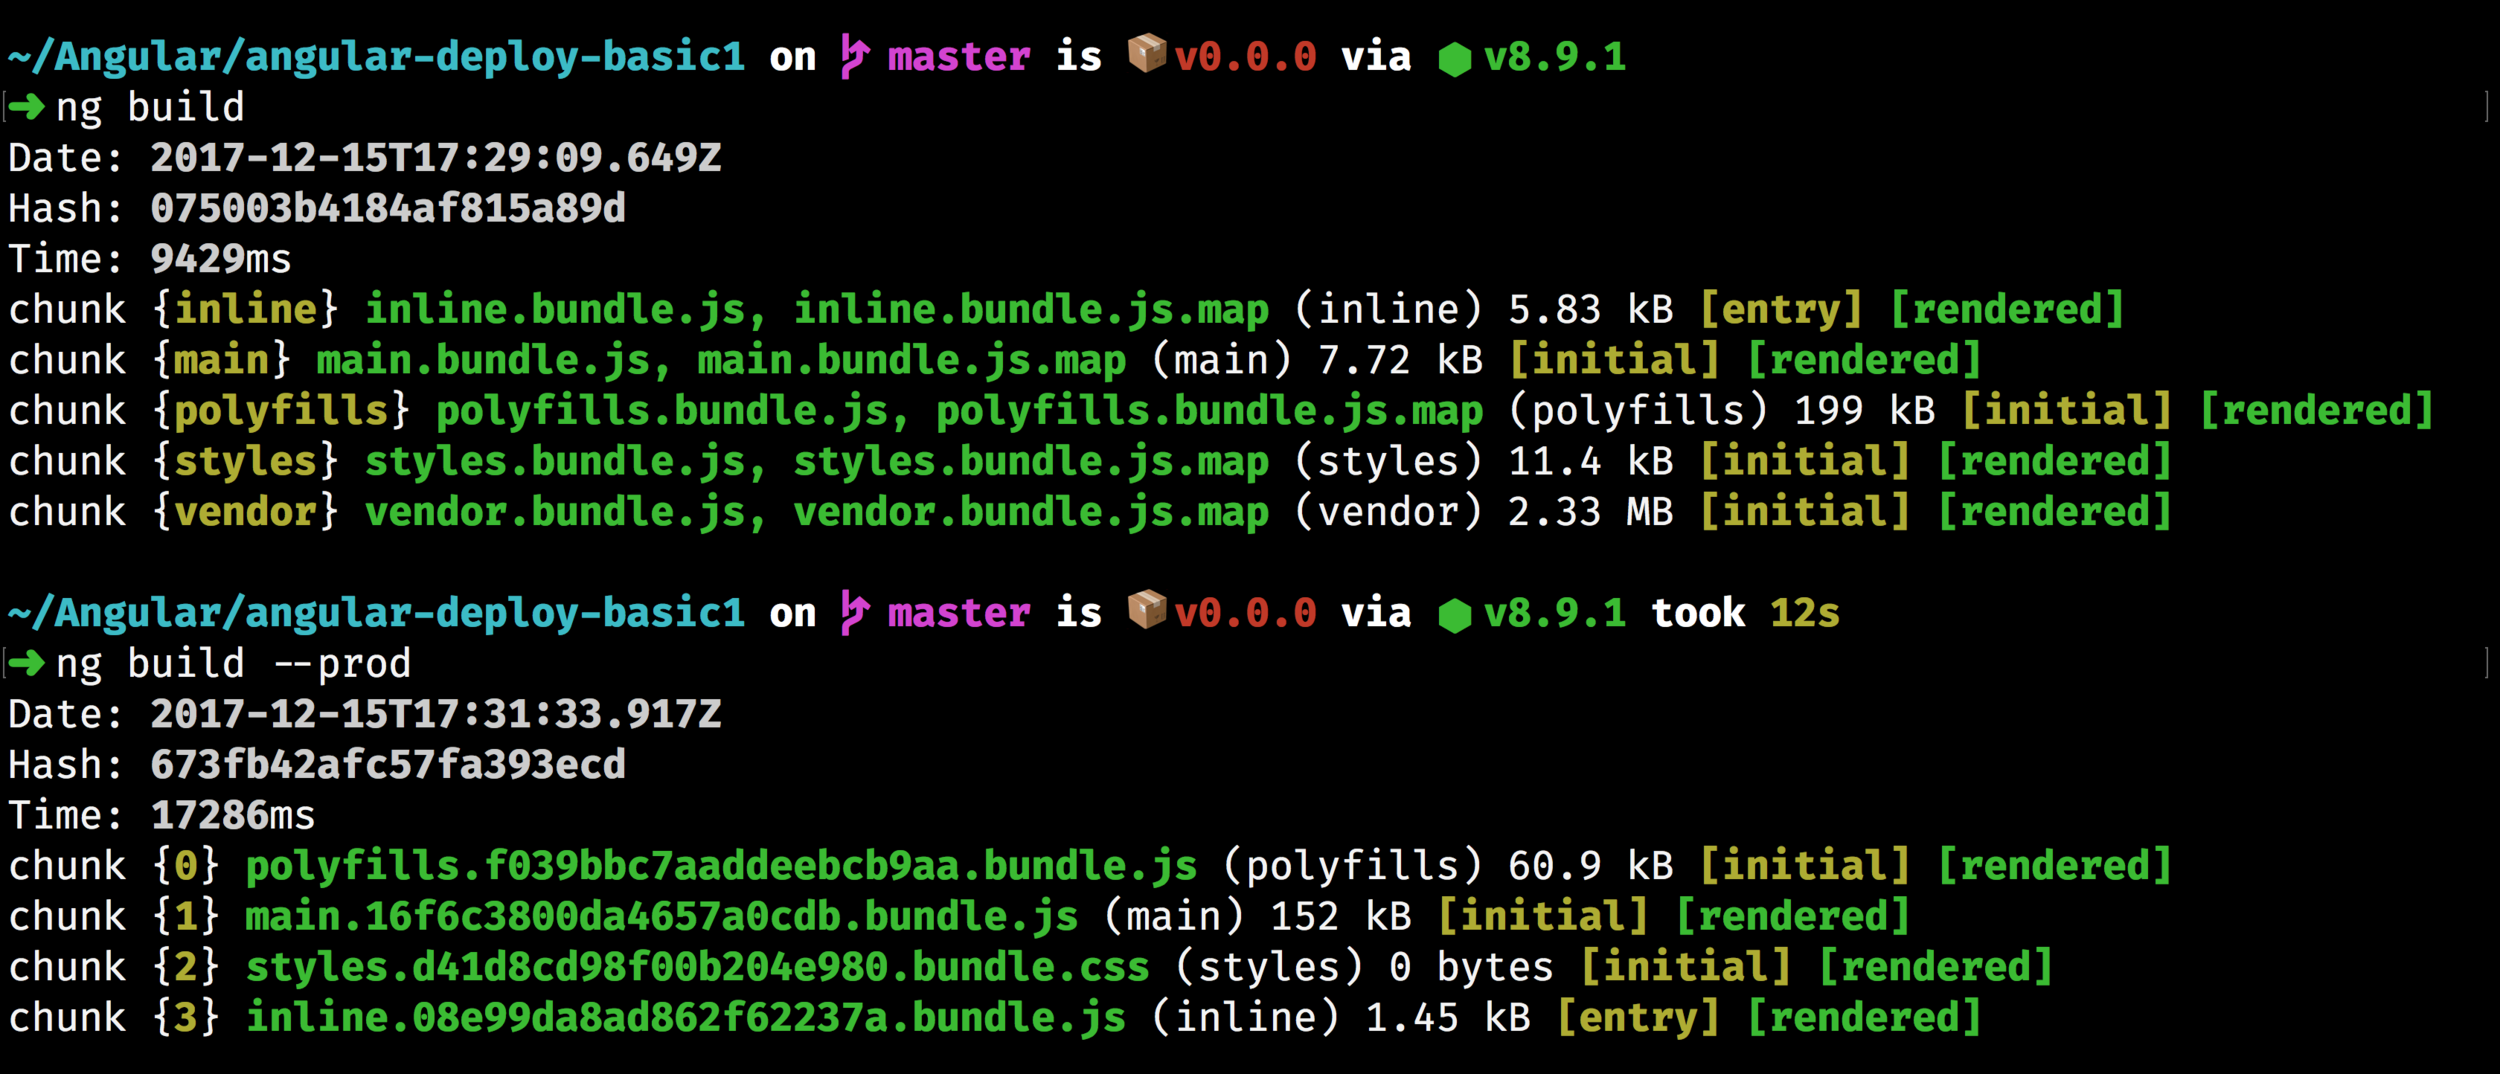
ng build --prod
ng build --prod --app 1 --output-hashing=false
{
...
"apps": [
{
// Keep your original application config intact here, this is app 0
// -EXCEPT- for outDir, update it to dist/browser
"outDir": "dist/browser" // <-- update this
},
{
// This is your server app. It is app 1.
"platform": "server",
"root": "src",
// Build to dist/server instead of dist. This prevents
// client and server builds from overwriting each other.
"outDir": "dist/server",
"assets": [
"assets",
"favicon.ico"
],
"index": "index.html",
// Change the main file to point to your server main.
"main": "main.server.ts",
// Remove polyfills.
// "polyfills": "polyfills.ts",
"test": "test.ts",
// Change the tsconfig to point to your server config.
"tsconfig": "tsconfig.server.json",
"testTsconfig": "tsconfig.spec.json",
"prefix": "app",
"styles": [
"styles.css"
],
"scripts": [],
"environmentSource": "environments/environment.ts",
"environments": {
"dev": "environments/environment.ts",
"prod": "environments/environment.prod.ts"
}
}
],
...
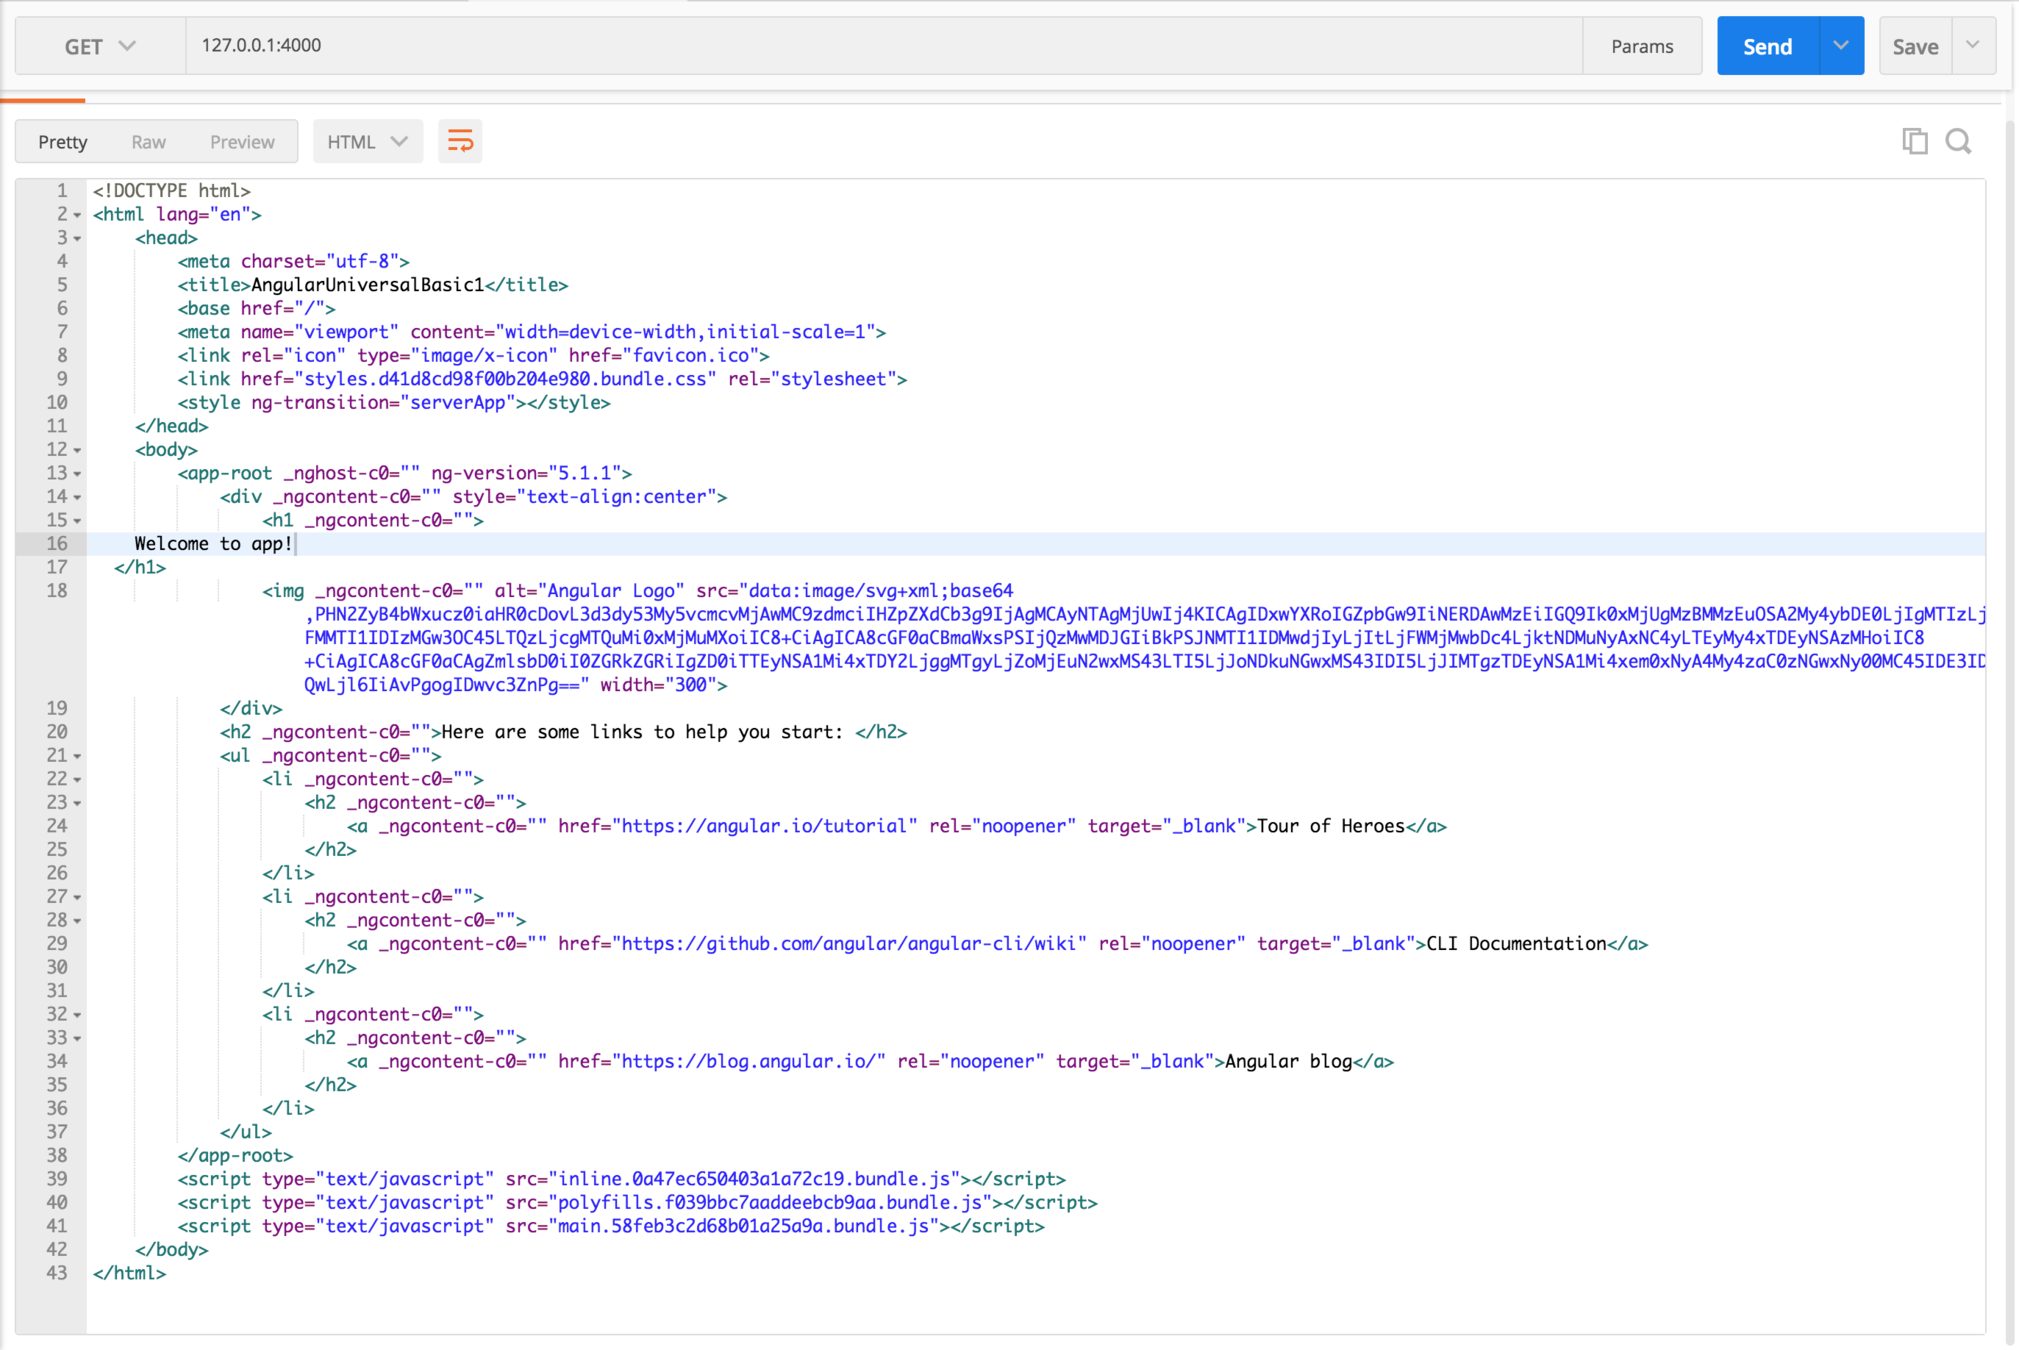
}Step 4 : Setting up an Express Server to run our Universal bundle
server.ts 작성
// These are important and needed before anything else
import 'zone.js/dist/zone-node';
import 'reflect-metadata';
import { renderModuleFactory } from '@angular/platform-server';
import { enableProdMode } from '@angular/core';
import * as express from 'express';
import { join } from 'path';
import { readFileSync } from 'fs';
// Faster server renders w/ Prod mode (dev mode never needed)
enableProdMode();
// Express server
const app = express();
const PORT = process.env.PORT || 4000;
const DIST_FOLDER = join(process.cwd(), 'dist');
// Our index.html we'll use as our template
const template = readFileSync(join(DIST_FOLDER, 'browser', 'index.html')).toString();
// * NOTE :: leave this as require() since this file is built Dynamically from webpack
const { AppServerModuleNgFactory, LAZY_MODULE_MAP } = require('./dist/server/main.bundle');
const { provideModuleMap } = require('@nguniversal/module-map-ngfactory-loader');
app.engine('html', (_, options, callback) => {
renderModuleFactory(AppServerModuleNgFactory, {
// Our index.html
document: template,
url: options.req.url,
// DI so that we can get lazy-loading to work differently (since we need it to just instantly render it)
extraProviders: [
provideModuleMap(LAZY_MODULE_MAP)
]
}).then(html => {
callback(null, html);
});
});
app.set('view engine', 'html');
app.set('views', join(DIST_FOLDER, 'browser'));
// Server static files from /browser
app.get('*.*', express.static(join(DIST_FOLDER, 'browser')));
// All regular routes use the Universal engine
app.get('*', (req, res) => {
res.render(join(DIST_FOLDER, 'browser', 'index.html'), { req });
});
// Start up the Node server
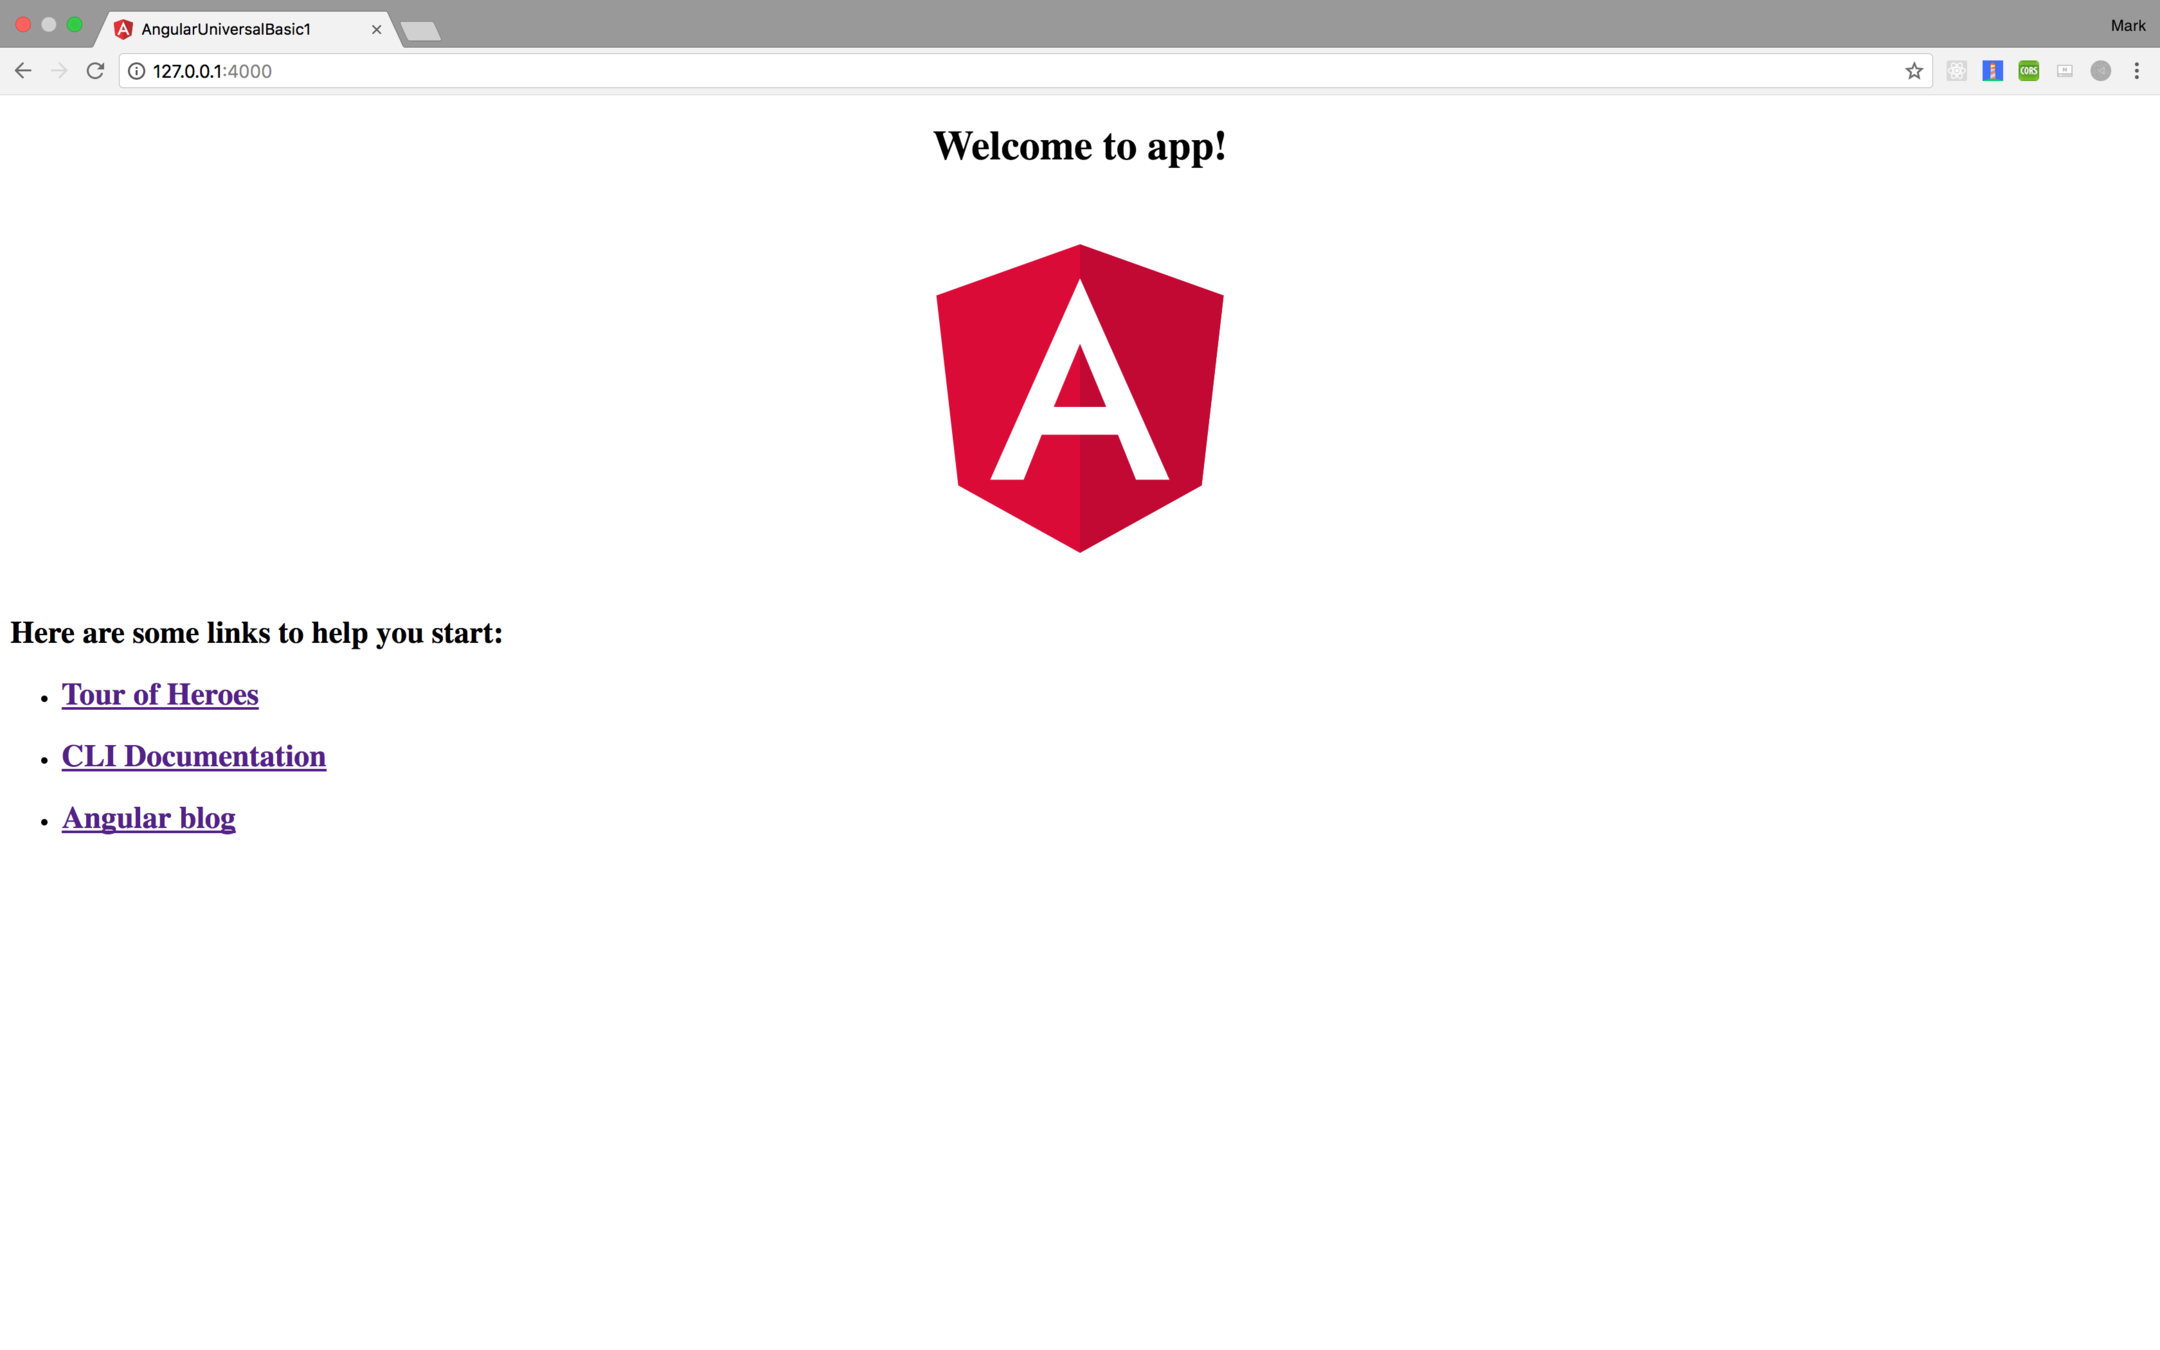
app.listen(PORT, () => {
console.log(`Node server listening on http://localhost:${PORT}`);
});
Step 5 : Setup a webpack config to handle this Node server.ts file and serve your application!
webpack.server.config.js 작성
const path = require('path');
const webpack = require('webpack');

module.exports = {
  entry: {  server: './server.ts' },
  resolve: { extensions: ['.js', '.ts'] },
  target: 'node',
  // this makes sure we include node_modules and other 3rd party libraries
  externals: [/(node_modules|main\..*\.js)/],
  output: {
    path: path.join(__dirname, 'dist'),
    filename: '[name].js'
  },
  module: {
    rules: [
      { test: /\.ts$/, loader: 'ts-loader' }
    ]
  },
  plugins: [
    // Temporary Fix for issue: https://github.com/angular/angular/issues/11580
    // for "WARNING Critical dependency: the request of a dependency is an expression"
    new webpack.ContextReplacementPlugin(
      /(.+)?angular(\\|\/)core(.+)?/,
      path.join(__dirname, 'src'), // location of your src
      {} // a map of your routes
    ),
    new webpack.ContextReplacementPlugin(
      /(.+)?express(\\|\/)(.+)?/,
      path.join(__dirname, 'src'),
      {}
    )
  ]
}
끗
package.json 에 스크립트 추가
"scripts": {
  "build:ssr": "npm run build:client-and-server-bundles && npm run webpack:server",
  "serve:ssr": "node dist/server.js",
  "build:client-and-server-bundles": "ng build --prod && ng build --prod --app 1 --output-hashing=false",
  "webpack:server": "webpack --config webpack.server.config.js --progress --colors"
}npm i @angular/material @angular/cdk -S
material
cdk
Angular Material Component Development Kit
https://stackoverflow.com/questions/42340649/what-is-cdk-in-angular-material-2-components
npm i @angular/animations -S
import
import {BrowserAnimationsModule} from '@angular/platform-browser/animations';
@NgModule({
  ...
  imports: [BrowserAnimationsModule],
  ...
})
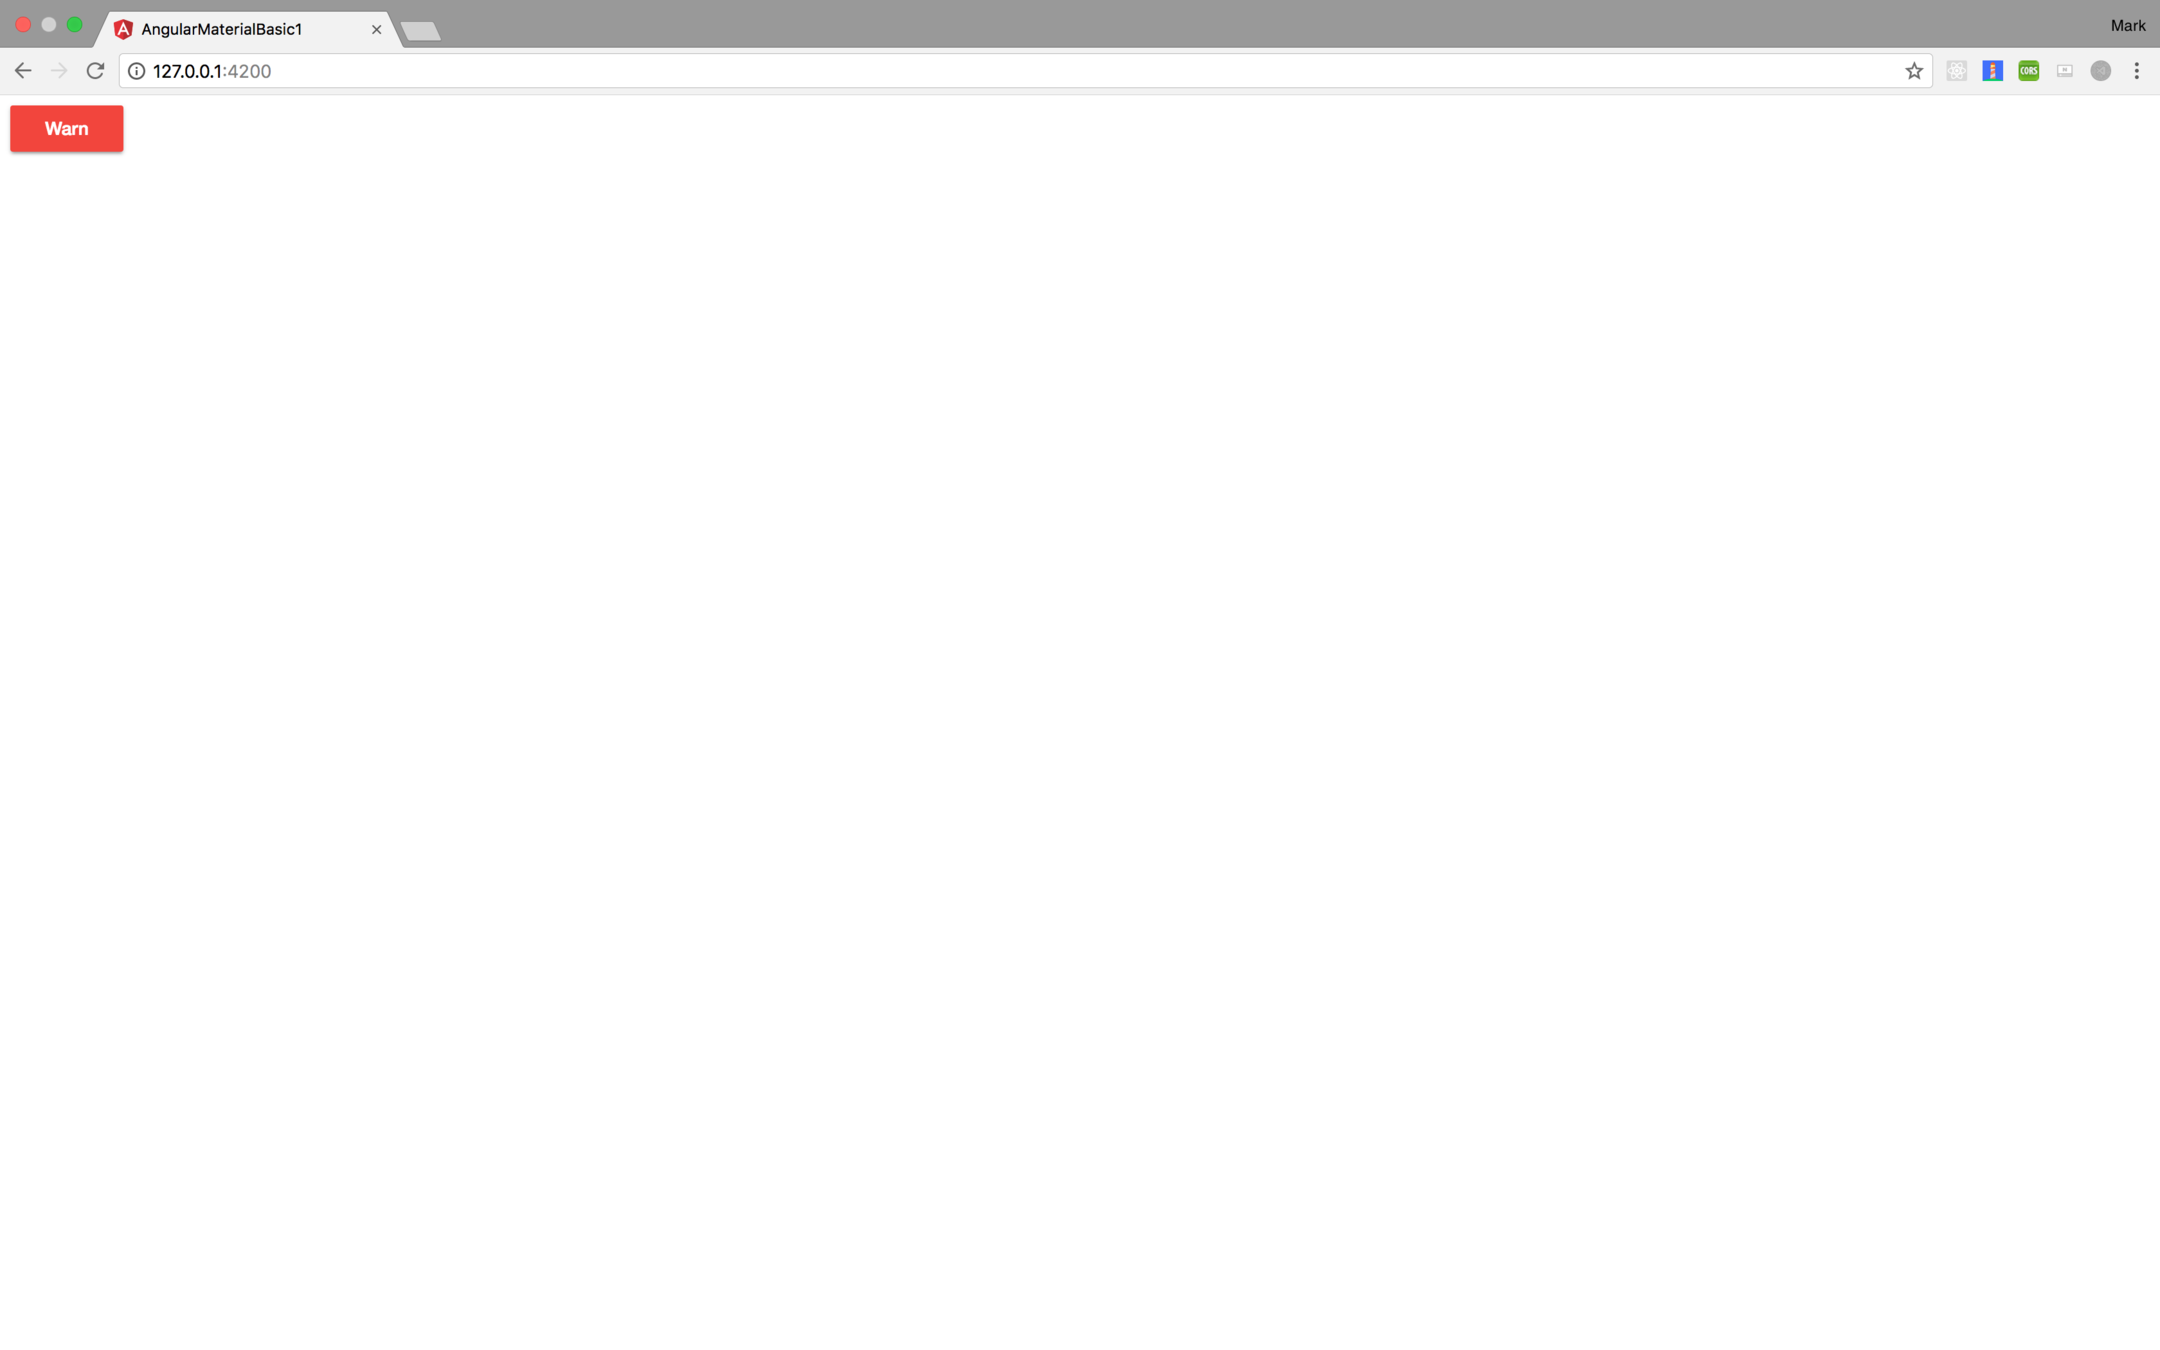
import material.css in styles.css
@import "~@angular/material/prebuilt-themes/indigo-pink.css";
사용할 컴포넌트를 확인후 @NgModule 에 imports 해서 사용
import
import { MatButtonModule } from '@angular/material';
@NgModule({
  ...
  imports: [MatButtonModule],
  ...
})
<button mat-raised-button color="warn">Warn</button>
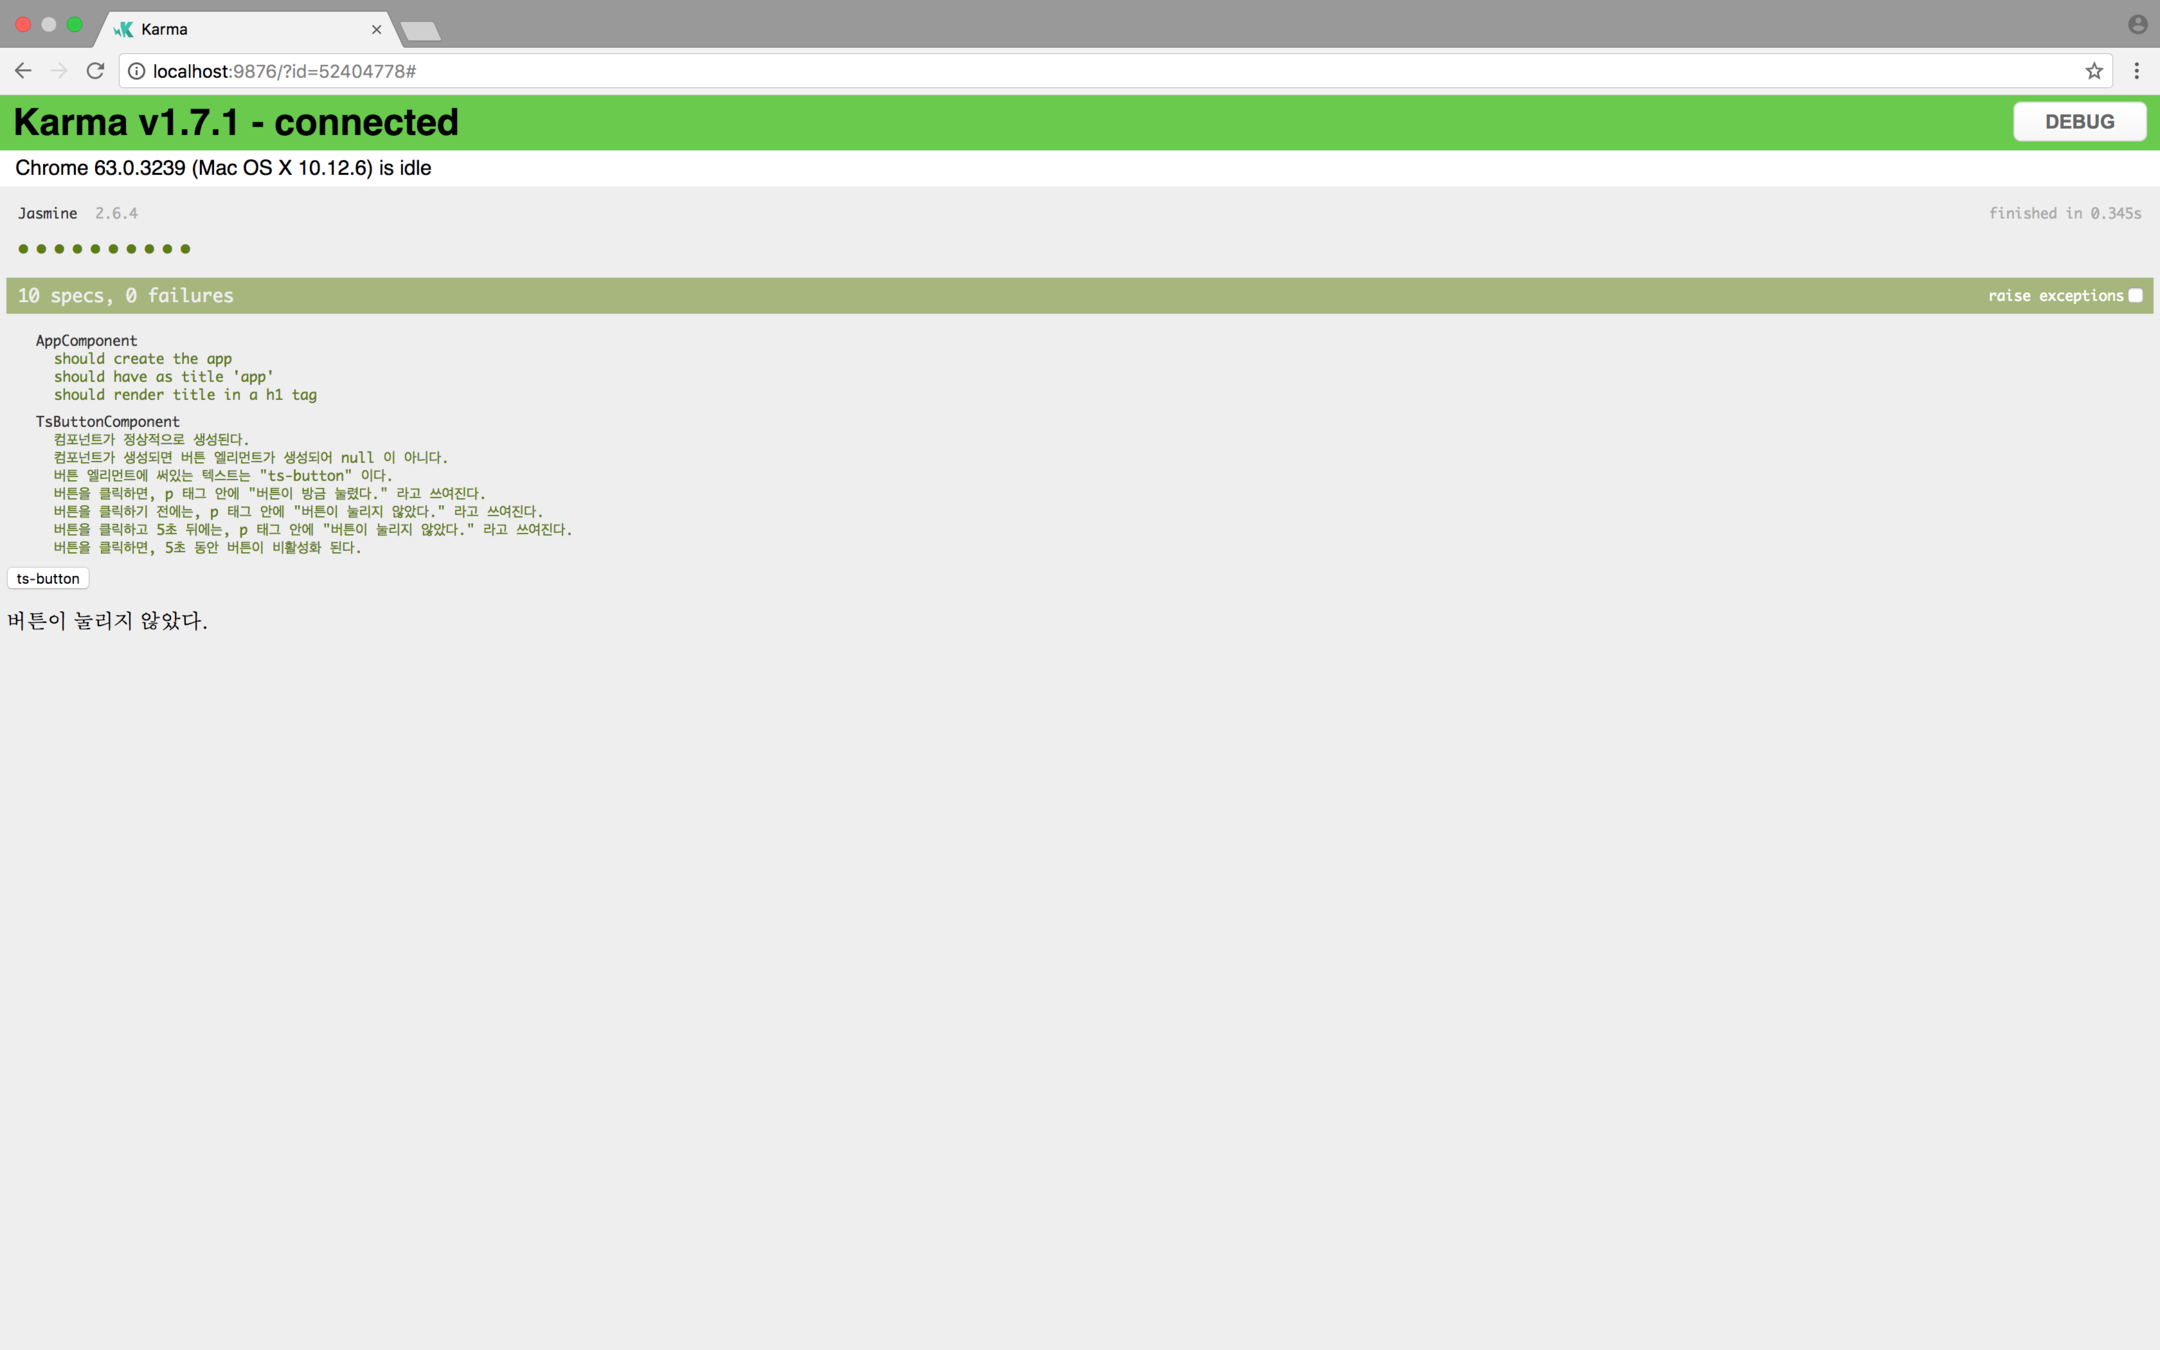
컴포넌트가 정상적으로 생성된다.
describe('TsButtonComponent', () => {
  beforeEach(async(() => {
    TestBed.configureTestingModule({
      declarations: [ TsButtonComponent ]
    })
    .compileComponents();
  }));

  it('컴포넌트가 정상적으로 생성된다.', () => {
    // Given
    const fixture = TestBed.createComponent(TsButtonComponent);
    const component = fixture.componentInstance;
    fixture.detectChanges();

    // When

    // Then
    expect(component).toBeTruthy();
  });
});
컴포넌트가 생성되면 버튼 엘리먼트가 생성되어 null 이 아니다.
describe('TsButtonComponent', () => {
  beforeEach(async(() => {
    TestBed.configureTestingModule({
      declarations: [ TsButtonComponent ]
    })
    .compileComponents();
  }));

  it('컴포넌트가 생성되면 버튼 엘리먼트가 생성되어 null 이 아니다.', () => {
    // Given
    const fixture = TestBed.createComponent(TsButtonComponent);
    const component = fixture.componentInstance;
    fixture.detectChanges();

    // When

    // Then
    expect(fixture.debugElement.nativeElement.querySelector('button')).not.toBeNull();
  });
});
버튼 엘리먼트에 써있는 텍스트는 "ts-button" 이다.
describe('TsButtonComponent', () => {
  beforeEach(async(() => {
    TestBed.configureTestingModule({
      declarations: [ TsButtonComponent ]
    })
    .compileComponents();
  }));

  it('버튼 엘리먼트에 써있는 텍스트는 "ts-button" 이다.', () => {
    // Given
    const fixture = TestBed.createComponent(TsButtonComponent);
    const component = fixture.componentInstance;
    fixture.detectChanges();

    // When

    // Then
    const button = fixture.debugElement.nativeElement.querySelector('button') as HTMLButtonElement;
    expect(button.textContent).toContain('ts-button');
  });
});
버튼을 클릭하면, p 태그 안에 "버튼이 방금 눌렸다." 라고 쓰여진다.
describe('TsButtonComponent', () => {
  beforeEach(async(() => {
    TestBed.configureTestingModule({
      declarations: [ TsButtonComponent ]
    })
    .compileComponents();
  }));

  it('버튼을 클릭하면, p 태그 안에 "버튼이 방금 눌렸다." 라고 쓰여진다.', () => {
    // Given
    const fixture = TestBed.createComponent(TsButtonComponent);
    const component = fixture.componentInstance;
    fixture.detectChanges();

    // When
    const button = fixture.debugElement.nativeElement.querySelector('button') as HTMLButtonElement;
    button.click();
    fixture.detectChanges();

    // Then
    const paragraph = fixture.debugElement.nativeElement.querySelector('p') as HTMLParagraphElement;
    expect(paragraph.textContent).toContain('버튼이 방금 눌렸다.');
  });
});
버튼을 클릭하기 전에는, p 태그 안에 "버튼이 눌리지 않았다." 라고 쓰여진다.
describe('TsButtonComponent', () => {
  beforeEach(async(() => {
    TestBed.configureTestingModule({
      declarations: [ TsButtonComponent ]
    })
    .compileComponents();
  }));

  it('버튼을 클릭하기 전에는, p 태그 안에 "버튼이 눌리지 않았다." 라고 쓰여진다.', () => {
    // Given
    const fixture = TestBed.createComponent(TsButtonComponent);
    const component = fixture.componentInstance;
    fixture.detectChanges();

    // When

    // Then
    const paragraph = fixture.debugElement.nativeElement.querySelector('p') as HTMLParagraphElement;
    expect(paragraph.textContent).toContain('버튼이 눌리지 않았다.');
  });
});
버튼을 클릭하고 5초 뒤에는, p 태그 안에 "버튼이 눌리지 않았다." 라고 쓰여진다.
describe('TsButtonComponent', () => {
  beforeEach(async(() => {
    TestBed.configureTestingModule({
      declarations: [ TsButtonComponent ]
    })
    .compileComponents();
  }));

  it('버튼을 클릭하고 5초 뒤에는, p 태그 안에 "버튼이 눌리지 않았다." 라고 쓰여진다.', fakeAsync(() => {
    // Given
    const fixture = TestBed.createComponent(TsButtonComponent);
    const component = fixture.componentInstance;
    fixture.detectChanges();

    // When
    const button = fixture.debugElement.nativeElement.querySelector('button') as HTMLButtonElement;
    button.click();
    fixture.detectChanges();
    tick(5000);
    fixture.detectChanges();

    // Then
    const paragraph = fixture.debugElement.nativeElement.querySelector('p') as HTMLParagraphElement;
    expect(paragraph.textContent).toContain('버튼이 눌리지 않았다.');
  }));
});
버튼을 클릭하면, 5초 동안 버튼이 비활성화 된다.
describe('TsButtonComponent', () => {
  beforeEach(async(() => {
    TestBed.configureTestingModule({
      declarations: [ TsButtonComponent ]
    })
    .compileComponents();
  }));

  it('버튼을 클릭하면, 5초 동안 버튼이 비활성화 된다.', fakeAsync(() => {
    // Given
    const fixture = TestBed.createComponent(TsButtonComponent);
    const component = fixture.componentInstance;
    fixture.detectChanges();

    // When
    const button = fixture.debugElement.nativeElement.querySelector('button') as HTMLButtonElement;
    button.click();
    fixture.detectChanges();
    const before = button.disabled;
    tick(5000);
    fixture.detectChanges();
    const after = button.disabled;

    // Then
    expect(before).toBeTruthy();
    expect(after).toBeFalsy();
  }));
});
By Woongjae Lee
코드버스킹 Angular 101 - 세번째


