Diving Into ios Development

Presented by Matt Piccolella and ADI

Who is this Talk Meant for?

  • Past Advanced Programming students (read: people who can program C)
  • Android or web application developers who are familiar with the Model-View-Controller framework
  • People interested in building awesome applications for iPhone and iPad (hopefully all of you!)

What you can expect to Learn

  • The major files and components involved in building an iOS application
  • How to use XCode and its ~amazing~ interface builder
  • Where to find the things you need to continue to level up your iOS

What You cannot Expect to Learn

  • Objective-C
    • It's a superset of C, so it's easy to learn if you know C
  • All of iOS Development
    • An hour is incredibly short, learning iOS takes time

Structure of the Talk

  • Big-picture concepts and code samples in the slides
  • Live-coding of a simple quiz application to show the concepts and how to use XCode
  • Do not code along!
    • Installation of XCode can be tricky
    • Highly commented code available on Github
    • Come to Cookies and Code after for help getting it set up on your computer!

Getting Started: New Project

  • File -> New Project
  • Select 'Single View Application'
  • Select 'iPhone' for device
  • Product Name is your app name
  • Bundle identifier helps to uniquely identify your app
  • Language is Objective-C but can also be ~Swift~

Things to Remember

Project Structure and Important Files

  • AppDelegate.m and AppDelegate.h
    • Master
  • ViewController.m and ViewController.h
    • Controller
  • Main.storyboard and LaunchScreen.xib
    • View
  • Supporting Files
    • Info.plist - information about the application (name, version number, etc.)
    • main.m - needed to run the C application, DON'T TOUCH THIS
  • Tests! Write these!

A Pattern: Model-View-Controller

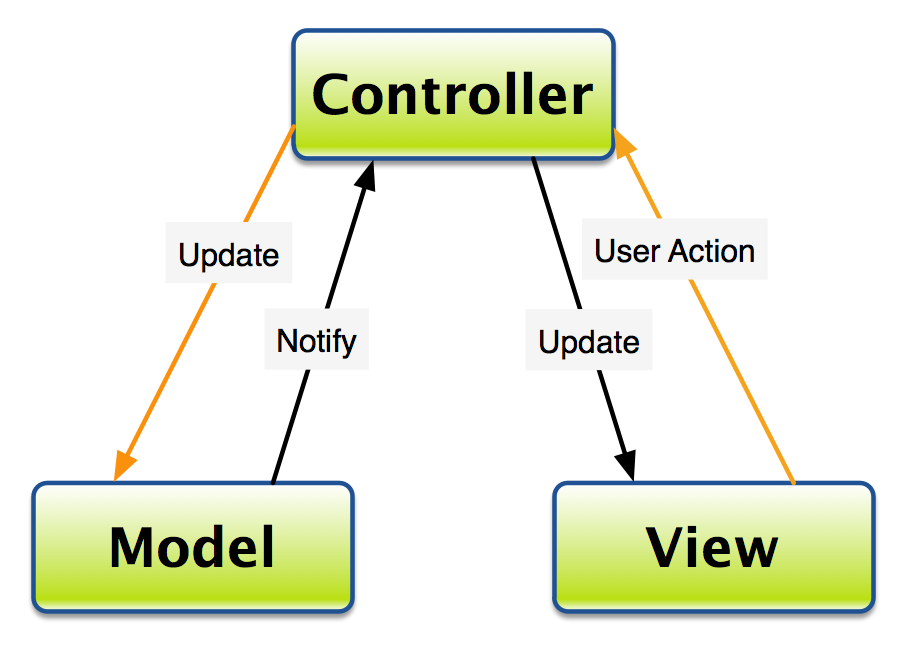
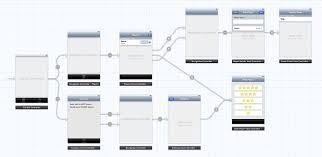
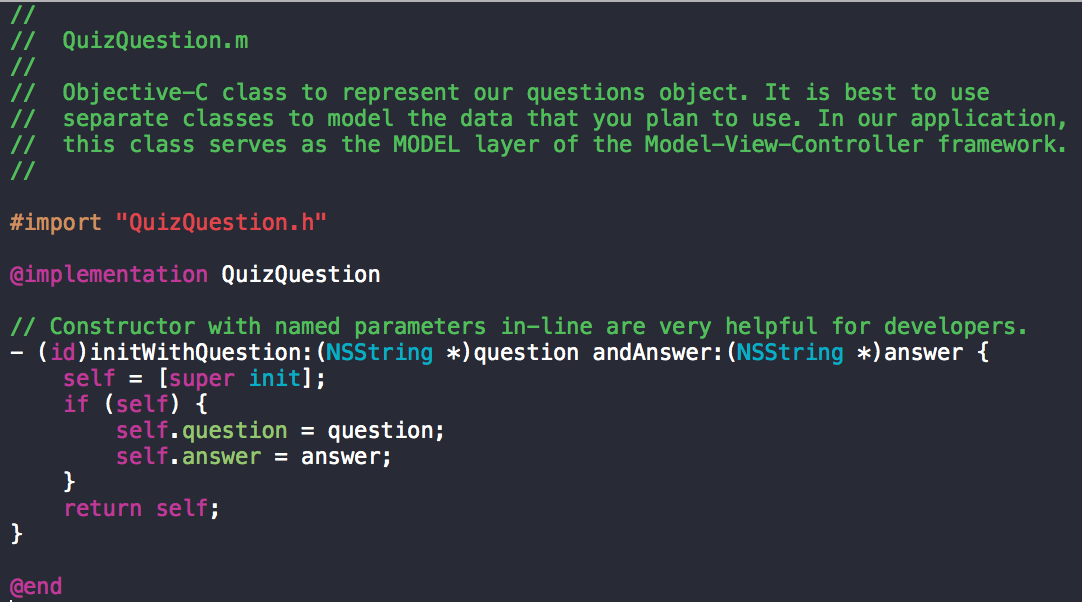
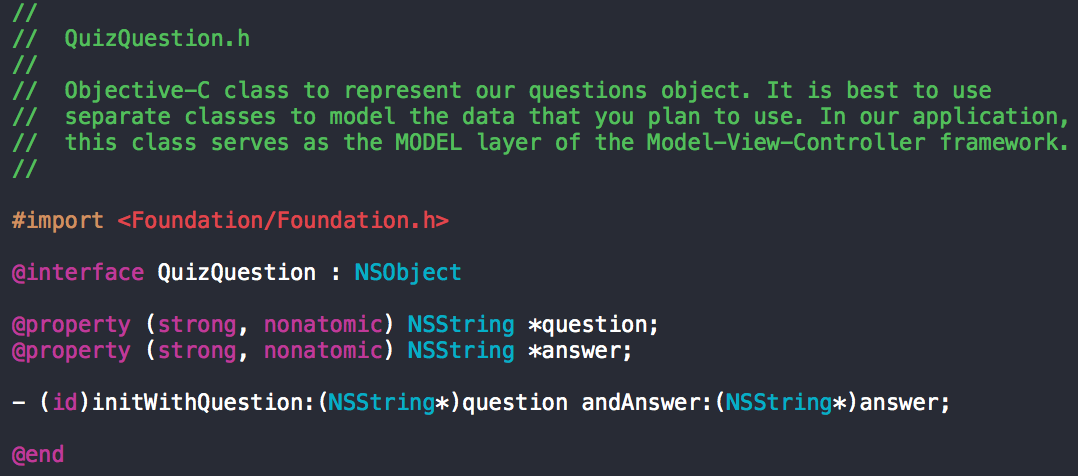
Idea: Split up the responsibilities of an application
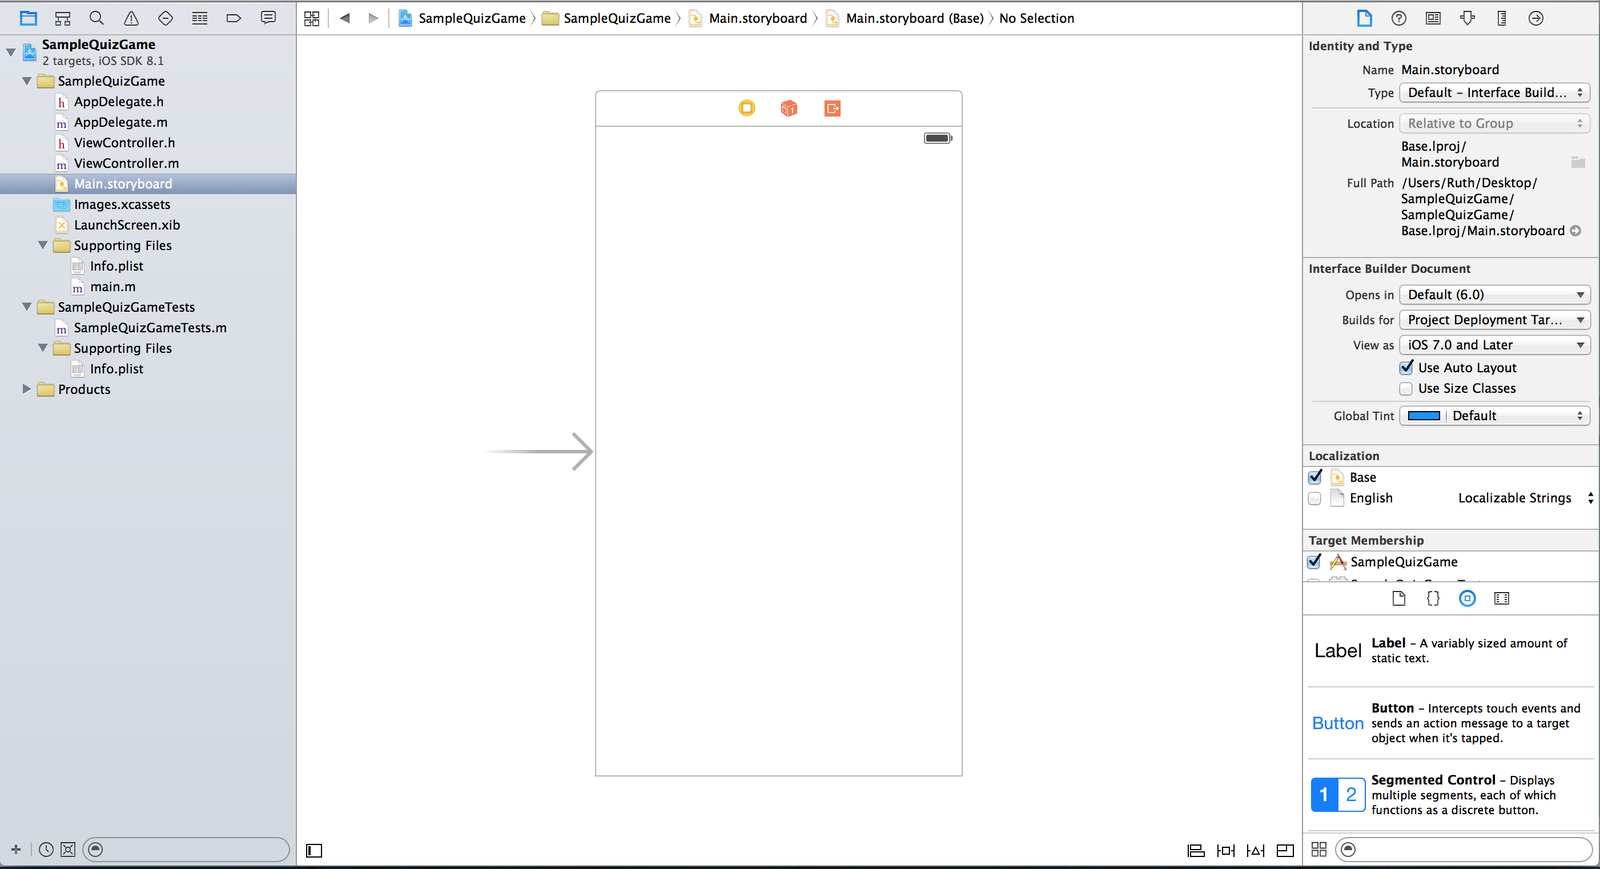
  • Model - an object representing data (think something that would be stored in a database)
  • View - some kind of a visualization of the data (what you see on the screen
  • Controller - handles interactions between the user and the view to change the state of the model

View: Main.storyboard

  • Storyboard essentially allows us to place all the views of our application in a single file
  • We place sub-views (text labels, buttons, etc.) inside of our view to define what the view will look like
  • Think of it as a roadmap for our application - how each screen interacts with another

Navigator

Editor

Utility

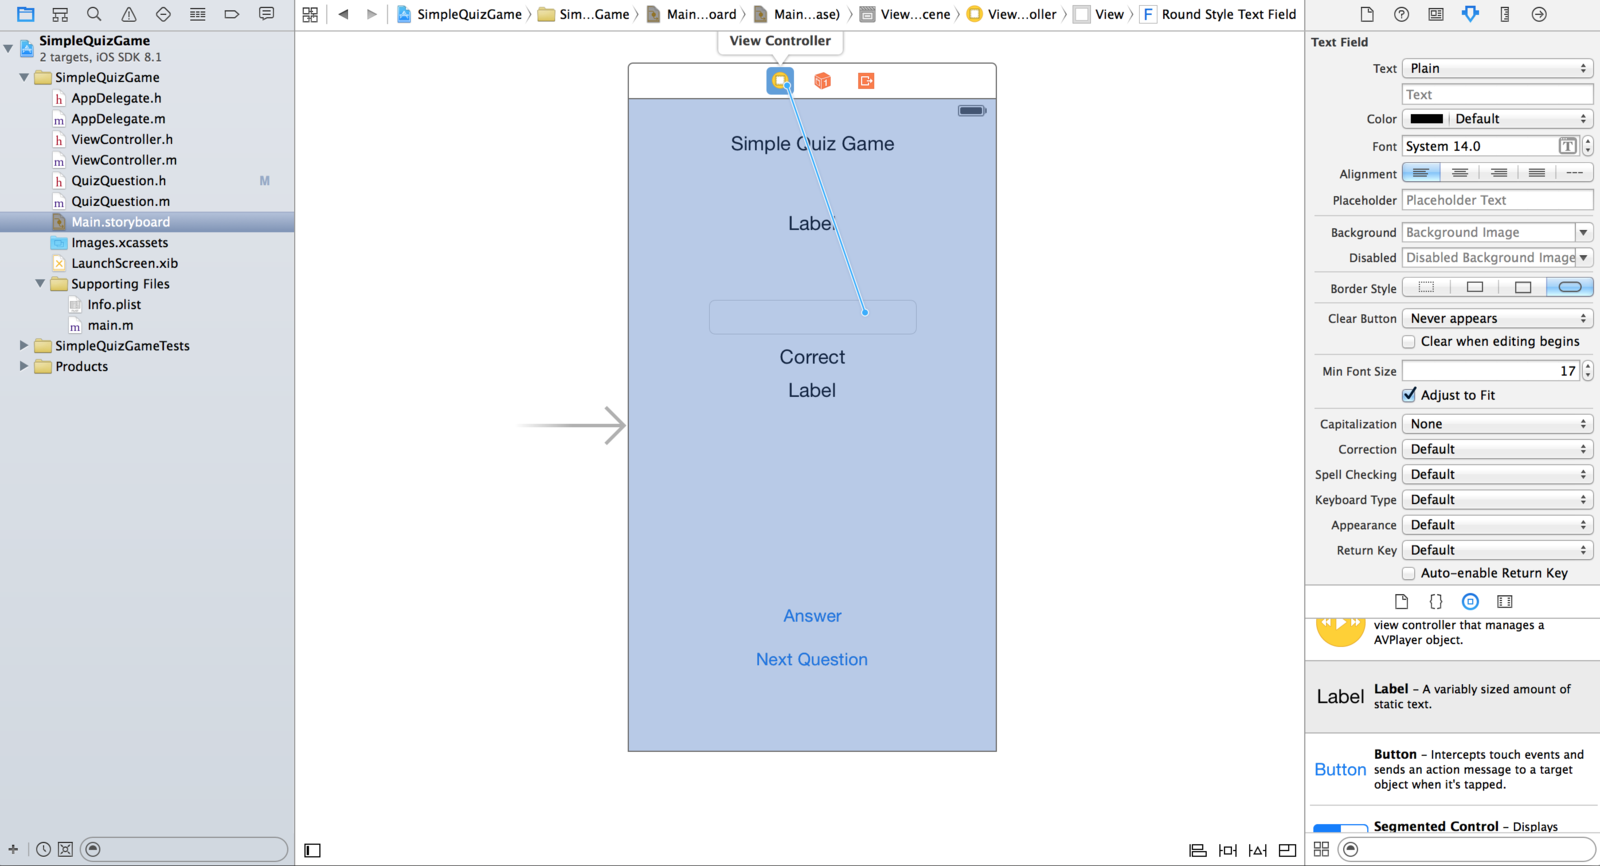
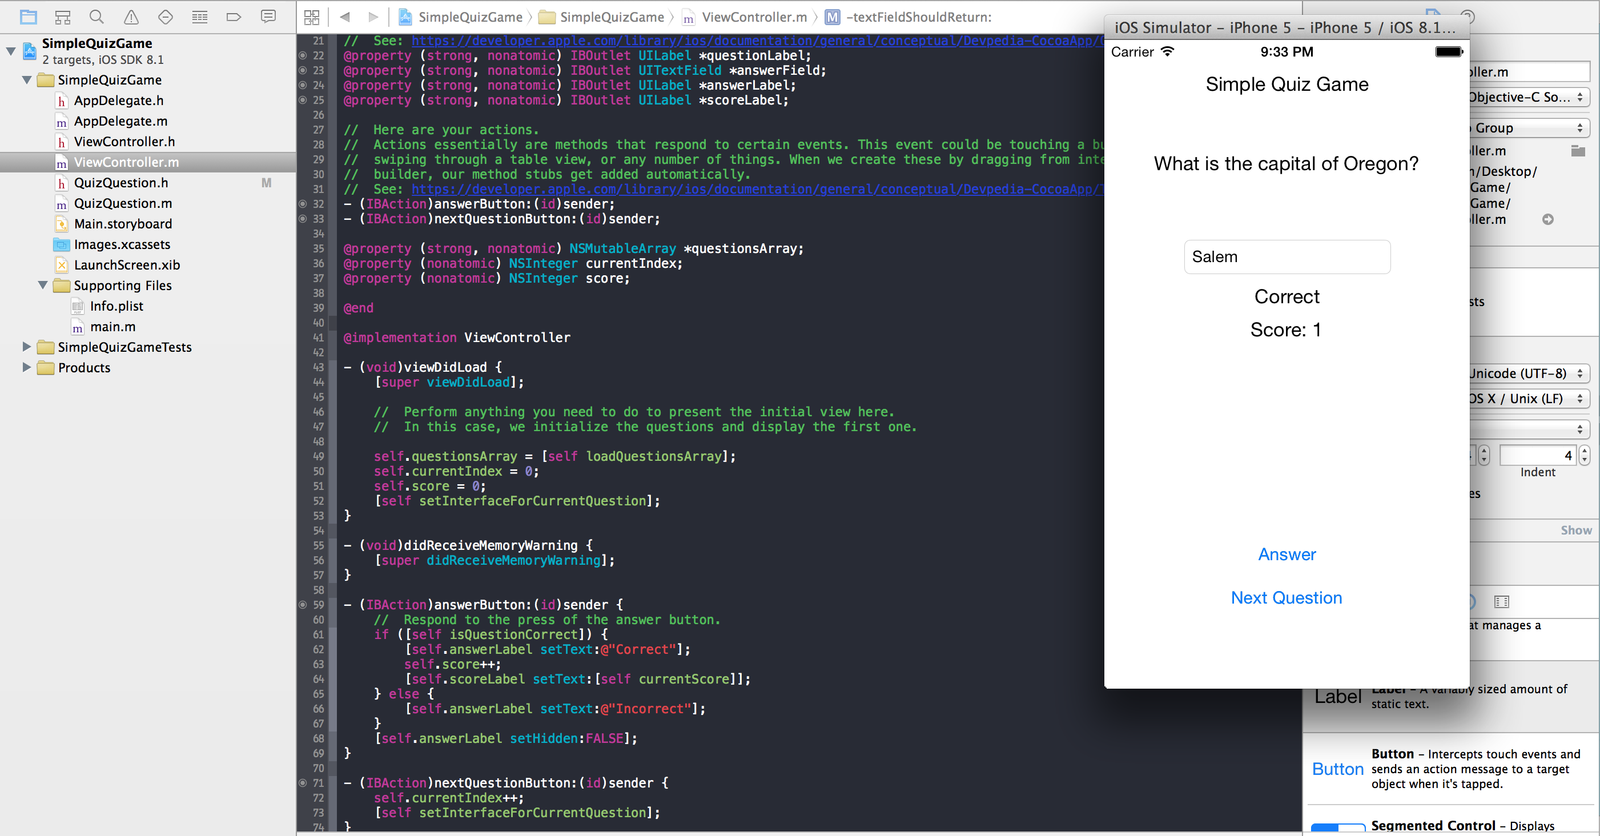
Make sure 'Use Size Classes' is not checked!

Adding Views: Drag and Drop

Formatting Views: Properties Selector

  • Format things like text size, color, alignment, etc., using the properties selector (the fourth option at the top of the utilities screen)
  • Super simple! Just like you would format things in Microsoft Word, etc.

Controller: ViewController.M

  • Now we've created our view with our text labels, text field, and buttons
  • We need to be able to respond to button presses by changing the text of the labels, but how do we do this?
  • Answer: OUTLETS
    • Outlets allow us to communicate with the views we've added and to intercept certain actions
  • We add outlets to our ViewController by using assistant editor and dragging from our view to the code

Adding Outlets: Actions and Outlets

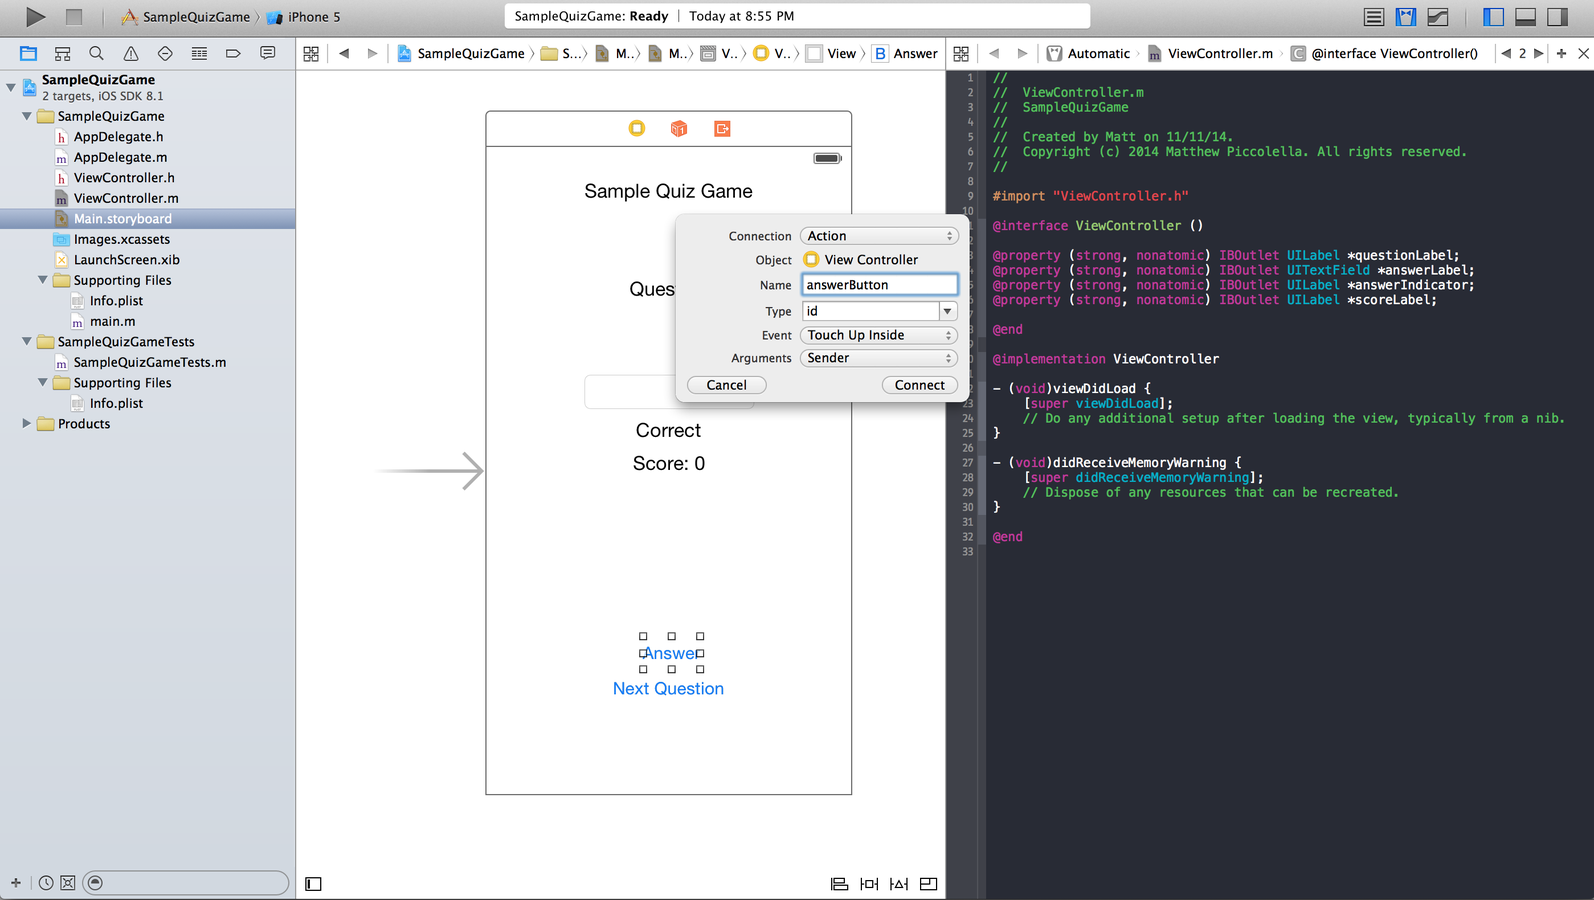
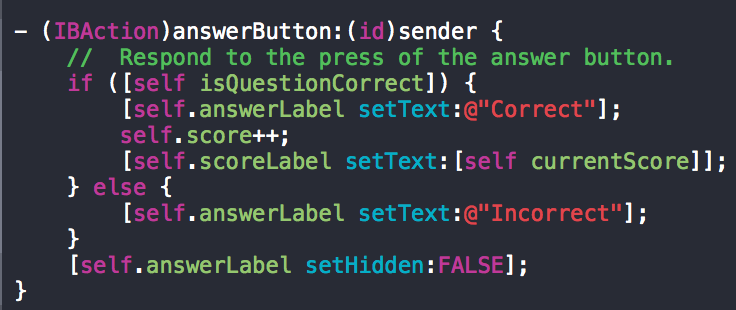
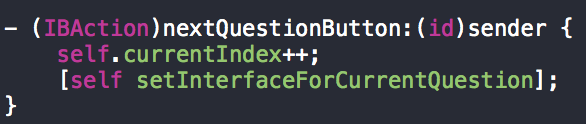
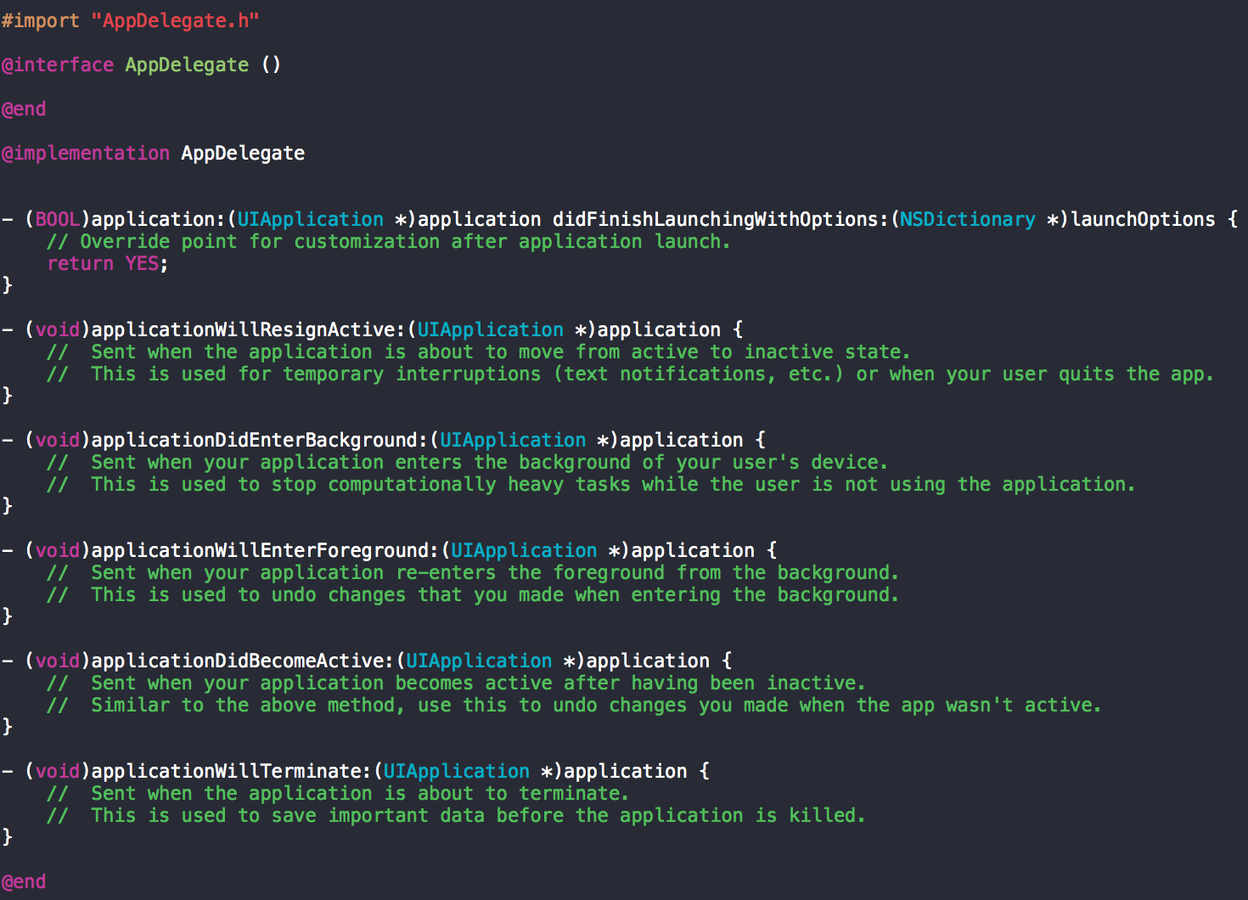
* For actions, the method signatures automatically get added! *

Model: QuizQuestion

  • Let's create an Objective-C class for our model to encapsulate a QuizQuestion
  • File -> New -> File -> Cocoa Touch Class
  • Easy! Like normal programming with properties and constructors

Wiring it All Together: Controller

  • We have all our outlets, let's write them together so our application works!
  • In ViewController, use the viewDidLoad function to set the initial state of the view
  • Use this method to instantiate instance variables and set the first user interface the user will see

Fill in your Actions: Respond to Button Presses

  • In our Action outlet methods, we can define what happens when a button is pressed.
  • In this case, we check whether a user's answer is correct and alert them, while also keeping track of their score.

One More Thing: First Responders

  • Our application works! But we can't exit the text box
  • We need to conform to the UITextFieldDelegate
    • Set of methods we need to define (i.e.Java interface)
  • Make ViewController first responder for Text Field by dragging and dropping in interface

Running our App: AppDelegate

  • AppDelegate is the master of our application, handling important events throughout its lifetime, involving the opening and closing of the application

Running our App: The Simulator

  • It costs money to run on our phones :( but use the simulator!
  • Choose either iPhone 5 or 5S (we didn't use Size Classes), press the play button, and play with your brand new app!

Next Steps

  • Install XCode and download the code from today
  • Check out "iOS Programming: The Big Nerd Ranch"
  • Use the iOS Dev Center on Apple's website to learn more about fundamental concepts and the SDK for iOS
  • Come to Cookies and Code for help installing XCode
  • Check out the ADI resources page

Now Go Build Awesome Apps!

Diving into iOS Development

By Matt Piccolella

Diving into iOS Development

A talk given for ADI on the beginnings of iOS development.

  • 2,165