DISTORTION
Week Four: Dynamic Effects
Introduction to Music Production
Nyk Cowham
Introduction

Hello, my name is Nyk Cowham and I am an English guitarist living in Thailand.
This is week four of the Introduction to Music Production coursera.org course by Berklee College of Music. I will be explaining the upper boundary of the dynamic range, the distortion phase, and discussing how it might be used musically, as well as how to avoid or eliminate unwanted distortion.
This is week four of the Introduction to Music Production coursera.org course by Berklee College of Music. I will be explaining the upper boundary of the dynamic range, the distortion phase, and discussing how it might be used musically, as well as how to avoid or eliminate unwanted distortion.
What you will learn
- What do we mean by distortion?
- Distortion in context of dynamic range
- What distortion looks like
- What distortion sounds like
- Musical uses of distortion
- Controlling non-musical distortion
What is distortion?

Distortion describes the range of sound levels in sound equipment where the sound begins to behave in unexpected non-linear ways. It is sometimes referred to as the non-linear range of the equipment. One of the most audible effects of distortion is how it converts volume variations into timbre variations, by introducing upper harmonics.
Distortion & dynamic range

The dynamic range is the linear range of levels that lies between the noise floor and the distortion range. We want to keep the levels within the dynamic range and out of the distortion range, unless we have good musical reasons to introduce controlled levels of distortion.
What does it look like?

When the level crosses over into the distortion range the shape of the signal waveform starts to change. The peaks & troughs of the signal are flattened (clipped), and the more extreme the signal is clipped, the more a sine wave starts to resemble a square wave.
Clipping creates partials

If we view a single frequency input through a frequency spectrum analyzer and push the level beyond the dynamic range into the distortion range the clipping we saw in the oscilloscope will appear as upper harmonics (partials) in the frequency spectrum.
What does it sound like?


When the level moves into the distortion range the apparent loudness of the sound increases. This can be seen visually in the level meter. The green bars represent the background or peak level, but the little green arrows (triangles) show the root mean square (RMS) which more accurately represents how the human ear processes sound levels.
On the left, the level is in the linear range and the apparent loudness (RMS) is lower than the peak level. However, on the right, the level has entered the distortion range and the gap between peak level and RMS has closed. It sounds louder to us.
On the left, the level is in the linear range and the apparent loudness (RMS) is lower than the peak level. However, on the right, the level has entered the distortion range and the gap between peak level and RMS has closed. It sounds louder to us.
What does it sound like?
Besides the increase in apparent loudness, the introduction of those upper harmonics adds a lot of high end to the sound, giving the sound a brighter timbre -- remember how we said that distortion converts variations of level into variations of timbre?
The upper harmonics make the sound brighter and grittier. In a vocal track, or recordings of acoustic instruments, that is usually not what we want. However, in certain electrical instruments, like electric guitars and basses, such distortion is often deliberately created in order to benefit from the increased high end and grittiness. However, in such cases distortion is being used in a controlled manner to produce a musical effect.
The upper harmonics make the sound brighter and grittier. In a vocal track, or recordings of acoustic instruments, that is usually not what we want. However, in certain electrical instruments, like electric guitars and basses, such distortion is often deliberately created in order to benefit from the increased high end and grittiness. However, in such cases distortion is being used in a controlled manner to produce a musical effect.
Musical Distortion
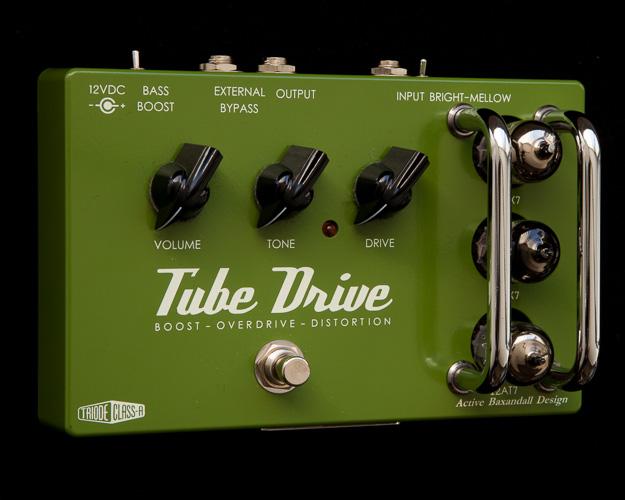
Guitarists often use "drive" to increase the high end of their sound and "overdrive" to give more grittiness or crunch to the guitar sound. Drive simply refers to driving the signal into the distortion range. It also helps to make your guitar VERY LOUD!
Non-musical Distortion
Non-musical distortion is usually not introduced within the DAW itself. It is usually introduced by audio recording equipment in your signal chain. However, you still have to be very careful.
A form of distortion can occur in the audio interface; that is digital distortion or clipping, and it happens during sampling (A/D conversion). However, distortion is very often created by a piece of kit before it gets to the audio interface and DAW. Every piece of kit has it's own dynamic range and if the gain is not carefully controlled at all stages then it is very easy to push some equipment beyond it's dynamic range and into a distortion phase.
Limiting Non-musical Distortion
Golden rule: avoid distortion at every point in your signal flow:
- Correctly position microphones
- Use pop filters on mics
- Careful gain staging
Correctly position
microphones
Experiment with the
placement of the
microphone in
relation to the
sound source.
Use a pop filter
Soften the loud transients
created by plosive sounds
(p's & b's), to avoid spikes
that can enter the
distortion range of
the microphone.
Careful gain staging
Watch the clipping indicators on all equipment that provides level meters. When the level goes from yellow to red then it provides warning that the sound signal is being clipped.
Keep the level meters in the green and yellow and
out of the red!
Summary
This week we have learned:
- What distortion is.
- How distortion is related to dynamic range
-
What distortion looks like in oscilloscope & spectrum analyzer
- What distortion sounds like
- Distortion increases the apparent loudness
- Distortion converts variations of level into variations of timbre
- How distortion can be used musically
- How to prevent non-musical distortion in the signal flow.
Thank you for your time and kind review! Good luck!
distortion
By nyk
distortion
Week Four: Dynamic Effects of the Introduction to Music Production course by Berklee College of Music (Coursera.org).


