Logic Pro X
The Mixer & The Channel Strip
Week Three: The Mixer
Introduction to Music Production - Coursera.org
Nyk Cowham
Introduction to Music Production - Coursera.org
Nyk Cowham
Introduction

Hello, my name is Nyk Cowham and I am an English guitarist living in Thailand.
This is week three of the Introduction to Music Production coursera.org course by Berklee College of Music. Today I will be teaching about the components of the channel strip on the mixer interface of Logic Pro X digital audio workstation (DAW).
This is week three of the Introduction to Music Production coursera.org course by Berklee College of Music. Today I will be teaching about the components of the channel strip on the mixer interface of Logic Pro X digital audio workstation (DAW).
WHAT you will Learn
- How to open up the mixer in Logic Pro X
- The anatomy of a mixer
- What we mean by the "channel strip"
- The anatomy of a channel strip
- The signal flow through a channel strip
The Mixer
To bring up the mixer you can use the menu or a hotkey:
-
Menu: View > Show Mixer
-
Hotkey: X
anatomy of the mixer

The mixer is composed of many strips of controls for each sound source and a fader to control the levels of each sound source. The source can be an audio or instrument (MIDI) track, an aux track or a bus. The other component is the master channel, which controls the master level and automations, but applies no effects or sends.
what is a channel strip?
When we talk about a channel strip we mean the column of controls that apply to each sound source or sound component that is represented in the mixer as a column of controls above and including the channel fader. Each channel strip has the same basic controls and so if you learn about one channel strip then what you have learned will apply to every other channel strip.
You do not have to do anything special to create a channel. Logic Pro X will create a new channel whenever you create a new track or a bus. In fact it will sometimes make more than one channel for a track. If you add a metronome click, then even that will have a channel assigned!
anatomy of a channel strip
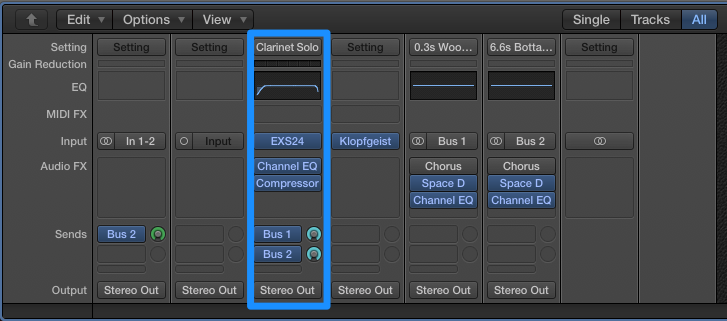
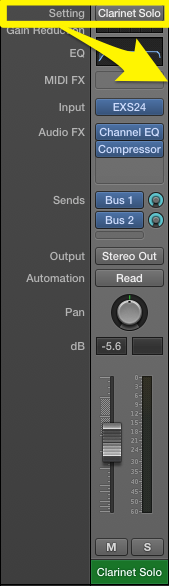
We are going to look in detail at the controls in a typical channel strip. In this case we have chosen a channel that represents one of our instrument tracks, that uses the Logic Pro X sampler for the sound source to a clarinet solo (MIDI).
Channel strip menu
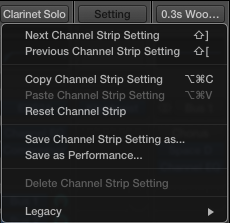
Click on the channel name at the top of the strip and you will get a popup menu with options for navigating the strip controls, copying, resetting and saving the settings of the channel strip.
Gain Reduction control
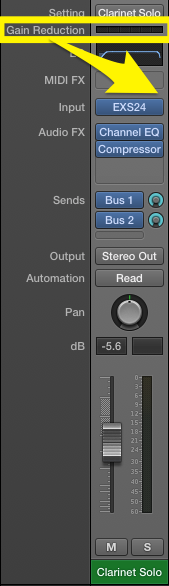
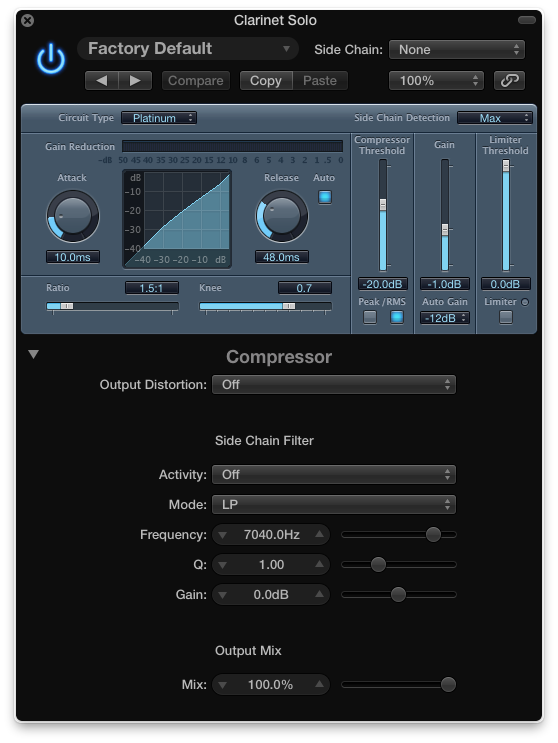
The compressor is added as an audio effect (insert). See "Compressor" in the Audio FX section of the channel strip. This gain reduction section is a quick way to access compressor / limiter settings.
EQ control
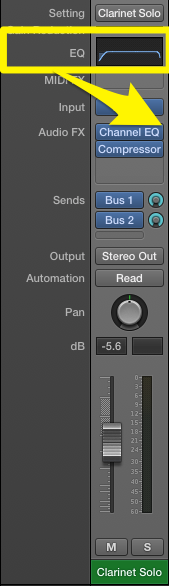

The EQ filter is added as an audio effect (insert). See "Channel EQ" in the audio FX section of the channel strip. This EQ section is a quick way to access the EQ filter.
MIDI FX control
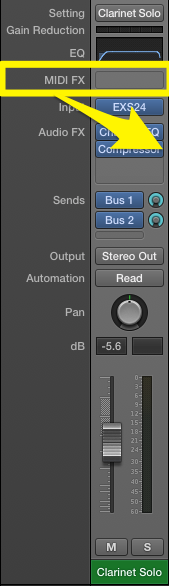
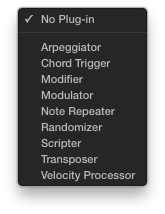
For instrument tracks that contain MIDI data, the Logic Pro X mixer provides for adding some in-built effects on the MIDI data stream.
Input control
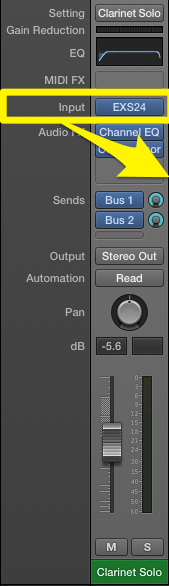

Click on the center of the control to bring up the source-specific interface to control the input. In the case of our clarinet instrument we get the interface for the EXS24 Sampler.
audio FX control
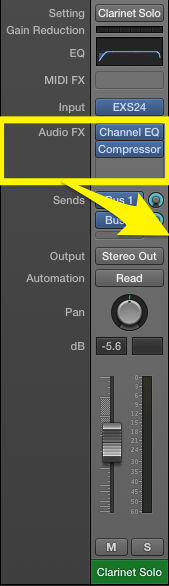
Audio FX (Inserts) are a way to insert 3rd Party effects (plugins) into the signal flow. In this example we have already inserted an EQ filter and compressor into the signal flow. The controls for them show up in the EQ and Gain Reduction controls at the top of the channel strip.
Send Control
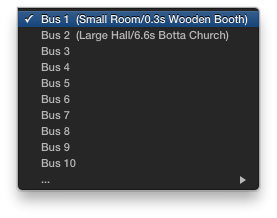
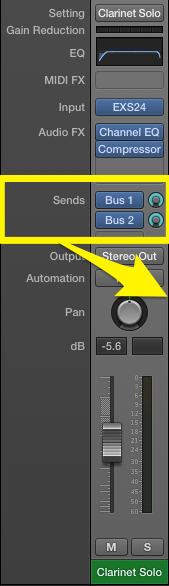
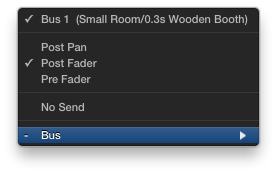
This channel is configured to send a copy of it's audio signal to two different buses: Bus 1 & Bus 2. When creating the sends we can specify where it should be applied in the signal flow: before the fader (pre-fader) or after the fader (post-fader). It also allows for the send to be sent after panning has been applied to the signal (post pan). The default is pre-pan.
Output control
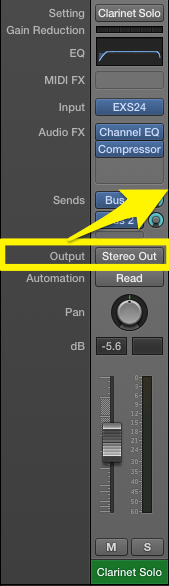
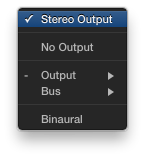
The audio can be output to L-R stereo streams or sent off to separate buses. The output control affects post-fader and post-pan in the signal flow. It comes after any sends though.
Automation control

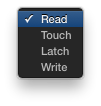
Set the automation settings:
- Read
- Touch
- Latch
- Write
Pan control
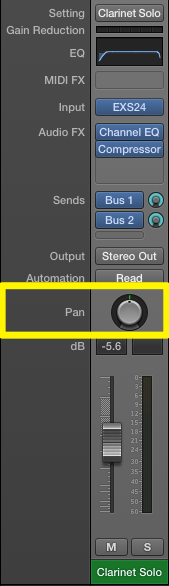
The pan knob is used to set the signal ratio across the Left and Right stereo outputs. It should be noted that audio level is never redistributed from one stereo output to the other. It is always a reductive operation where the levels are reduced in one channel rather than the other.
Turn the knob to the center line in order to balance the stereo output.
Fader: Level control
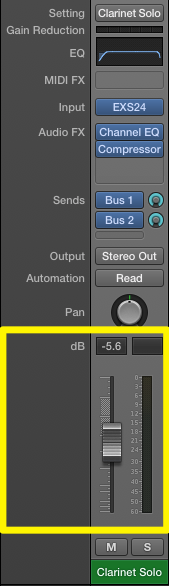
The fader is used to set the level (loudness) of the channel. The level can also be set in dB using the field provided
Mute/SolO control
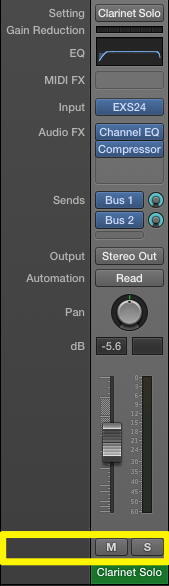
There can be a number of different toggle options added here. The most common are "M" for mute and "S" for solo. Mute will silence (level = 0) all sound from that channel. Solo makes the channel the only unmuted channel. That is the case in Logic Pro X, but may be different behaviour in other DAWs.
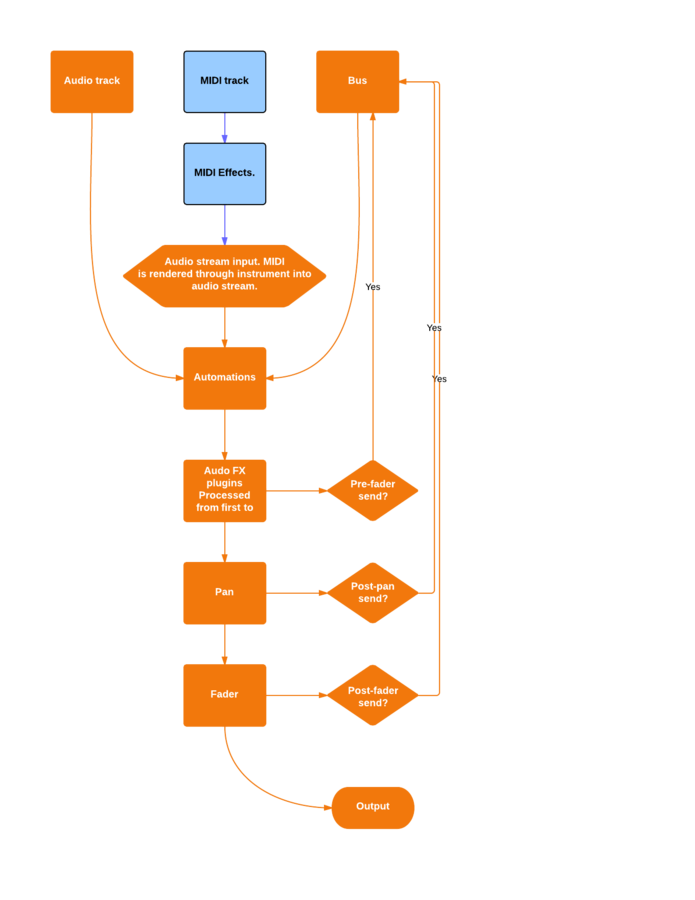
signal flow through channel strip
I can't read that! Please download the PDF of the signal flow. It is a little too complicated to put into slides.
Summary
In this lesson we learned how to bring up the mixer in Logic Pro X. We looked at the anatomy of the mixer and more deeply at the anatomy of the channel strip. Finally, we diagrammed the signal flow of the channel strip specifically to that implemented by Logic Pro X.
Thanks for you time and I hope you found this short tutorial easy to navigate and to understand. I am still working out the kinks of using slides.com for these presentations. Showing the diagram of the signal flow was rather challenging!
Logic Pro X: The Channel Strip
By nyk
Logic Pro X: The Channel Strip
Week Three of Introduction to Music Production, by Berklee College of Music for Coursera.org. This week we explore the channel strip on the mixer interface.


