Docker for Java Developers
What is docker ?
- Docker is an open platform for developing, shipping, and running applications.
- Docker enables you to separate your applications from your infrastructure so you can deliver software quickly.
- Docker provides the ability to package and run an application in a loosely isolated environment called a container.
What can I use Docker for ?
- Fast, consistent delivery of your applications
- Responsive deployment and scaling
- Running more workloads on the same hardware
Important Components of Docker
-
The Docker daemon
- The Docker daemon (dockerd) listens for Docker API requests and manages Docker objects such as images, containers, networks, and volumes. A daemon can also communicate with other daemons to manage Docker services.
-
The Docker client
- The Docker client (docker) is the primary way that many Docker users interact with Docker. When you use commands such as docker run, the client sends these commands to dockerd, which carries them out.
-
Docker registries
- A Docker registry stores Docker images. Docker Hub is a public registry that anyone can use, and Docker is configured to look for images on Docker Hub by default. You can even run your own private registry.
-
Docker objects
-
When you use Docker, you are creating and using images, containers, networks, volumes, plugins, and other objects.
- Images : An image is a read-only template with instructions for creating a Docker container. Often, an image is based on another image, with some additional customization.
-
When you use Docker, you are creating and using images, containers, networks, volumes, plugins, and other objects.
- Containers : A container is a runnable instance of an image. You can create, start, stop, move, or delete a container using the Docker API or CLI. You can connect a container to one or more networks, attach storage to it, or even create a new image based on its current state.
An image is the definition of a container. Container is the instance of an image
Containers Vs Virtual Machine
- Container Does not contain full operating system and therefore is much lighter and much more efficient than running virtual machine.
Getting an Image
docker image pull hello-world
Running Container from the image
docker container run hello-world
If you try to run an image which does not exists on your local then run command will pull that image for you and run it. Try to run the command below to test it.
docker container run virtualpairprogrammers/fleetman-webapp
mapping port
docker container run -dp 8080:8080 virtualpairprogrammers/fleetman-webapp
Listing the container
docker container ls
Stopping a container
docker container stop <initals of container Id>
Docker Hub
Docker Hub is a public registry that anyone can use, and Docker is configured to look for images on Docker Hub by default.
Go to https://hub.docker.com/
and create your docker hub account
Log in to your docker hub account and look for ubuntu image
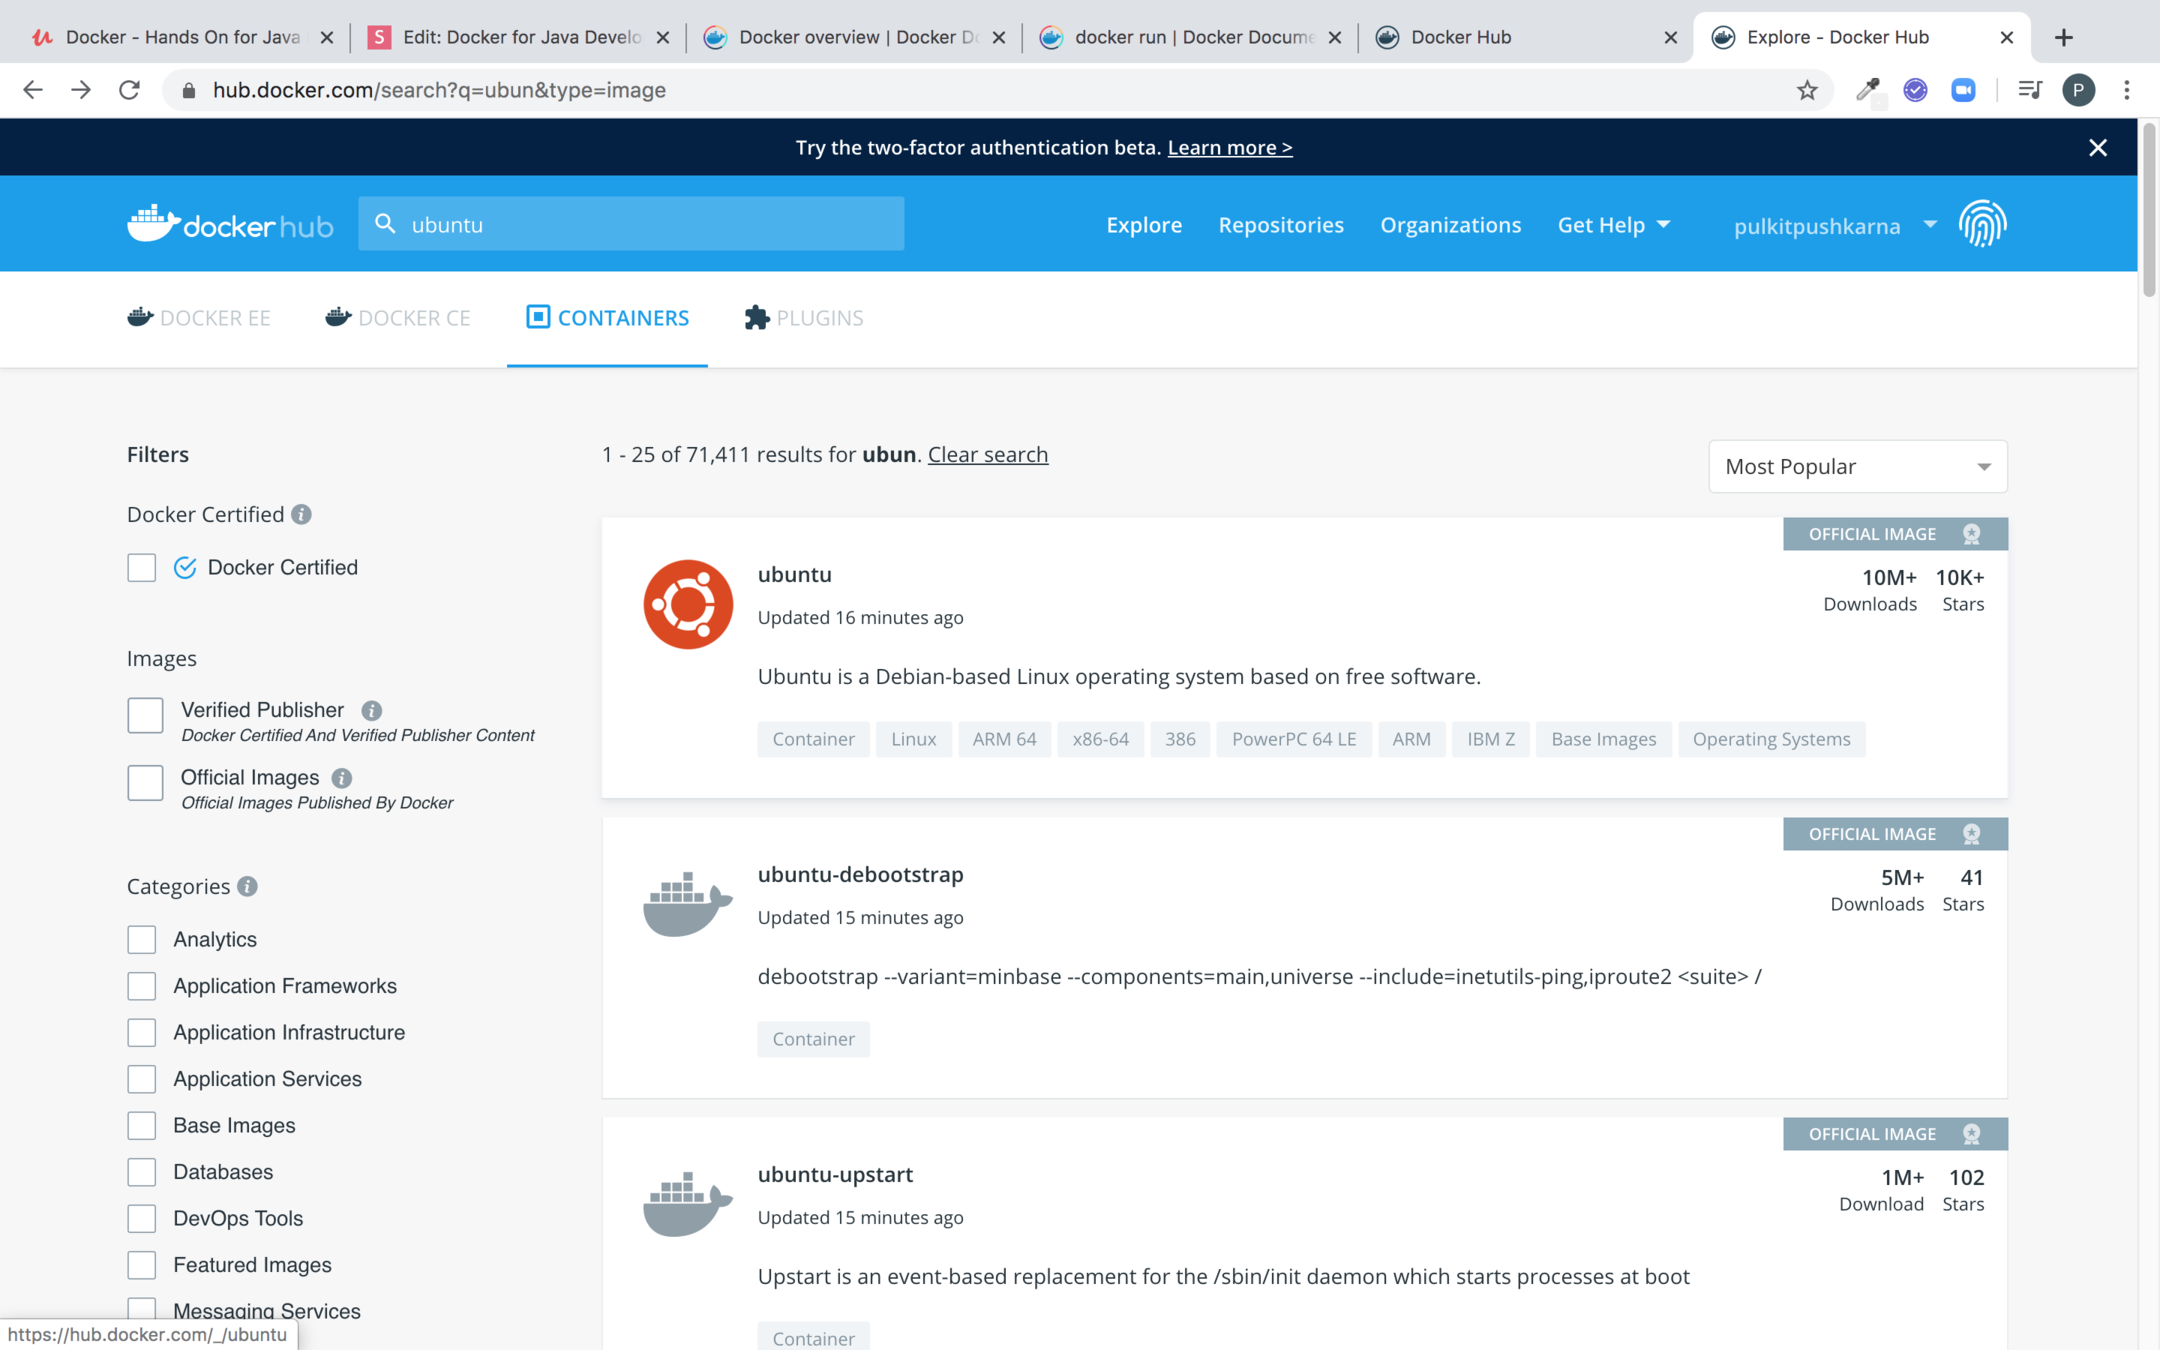
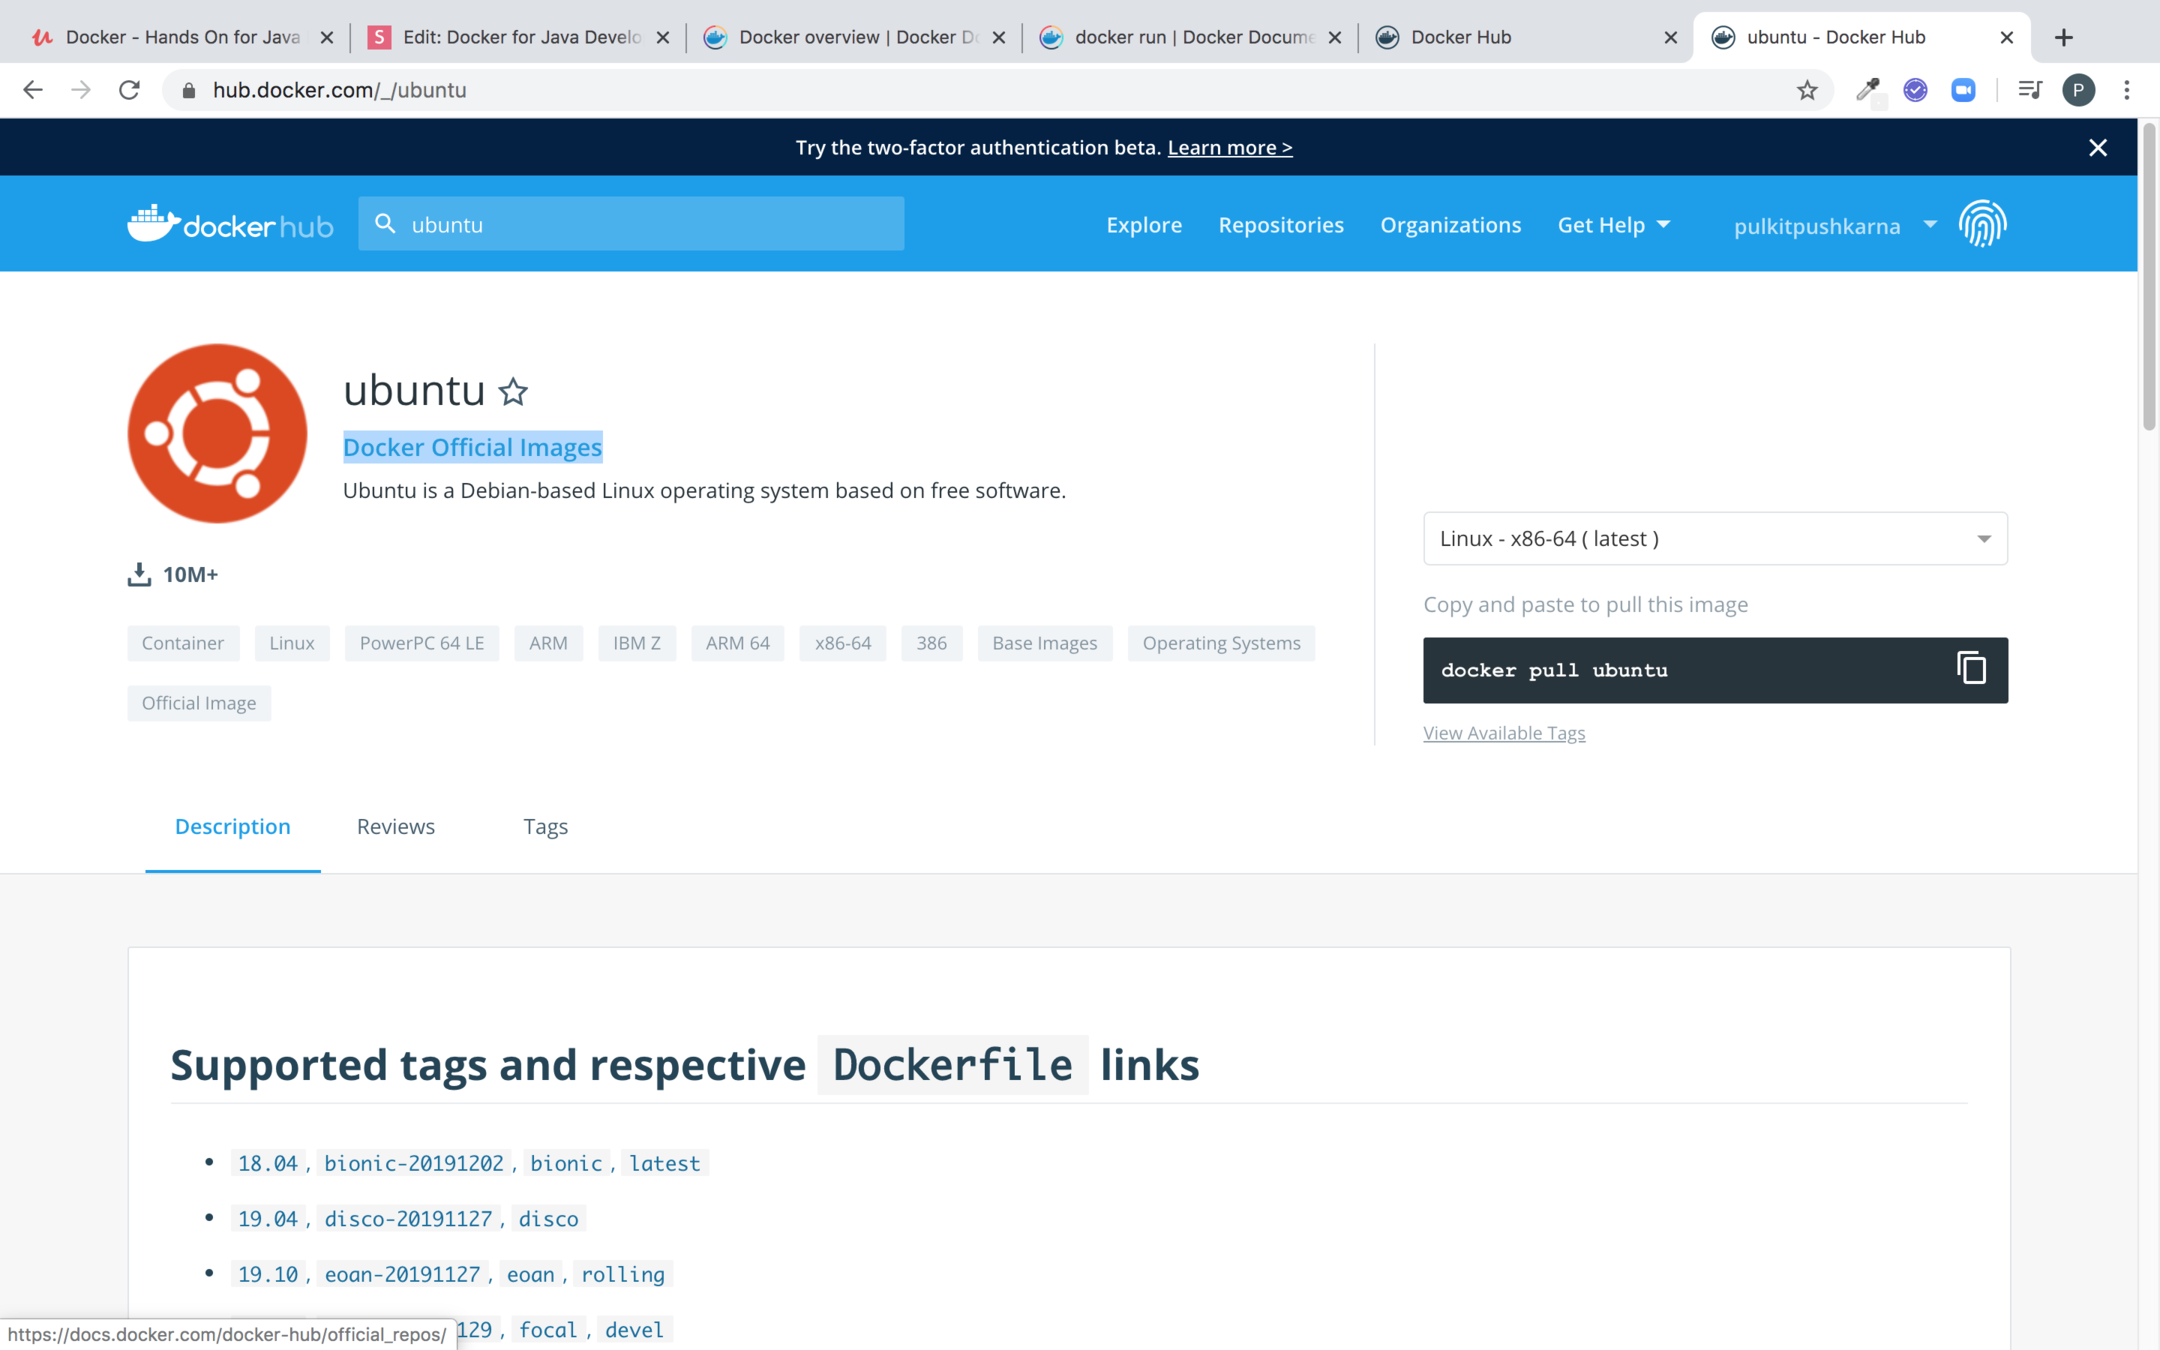
Look for the official images because they are well tested
classic vs modern command
docker pull ubuntu (Classic Command)
docker image pull ubuntu (Modern Command)
Use modern commands inspite of using classic command because they are more verbose
e.g
docker image ls
docker container ls
help command
docker --help
docker image --help : Image related commands
docker container --help : Container related commands
Try
docker container run ubuntu
to run container you will notice that it exits quickly.
This happens because ubuntu image uses the command "bin/bash" which expects to run a script.
In order to connect with the terminal use the command below:
docker container run -it ubuntu
Additional Commands for container
docker container ls -a : this command will show stop and running containers
docker container start <Initials-of-container-Id> : start a stopped container
docker container rm <Initials-of-container-Id> : Removing a stopped container. You cannot remove a running container. Stop the container before attempting remove it.
docker container prune : Remove all stopped containers
docker container logs <Initials-of-container-Id>
docker container logs -f <Initials-of-container-Id> : Follow the log further
docker container exec -it <Initials-of-container-Id> bash : connect to a running container's bash shell
Exercise
- Run a hello-world image using docker
- Run virtualpairprogrammers/fleetman-webapp on port 8090
- List the container and stop the container
- Run docker container for official ubuntu image in interactive mode
- Perform some linux operations on it
- exit from container
- Prune the stopped containers
Building images with commit
Step 1 : docker container run -it ubuntu
Step 2 : apt-get update
Step 3 : apt-get install -y openjdk-8-jdk
Step 4 : javac (To confirm the installation of jdk)
Step 5: exit (Exit the container)
Step 6 : docker container ls -a (List the containers to find out the one which you have create recently with Java installation)
Step 7 : docker container commit -a "<Author-name>" <Initials-of-container-Id> myjdkimage
Step 8 : docker image ls (To view your the newly created image)
Step 9: docker container run -it myjdkimage (Run the image which you have created previously and check if the Java is installed in it)
Docker File
- Committing is not thought to be a good way to create a docker image because after some time of creating image it might be hard for you to recall what is there in that image.
- Better way of creating docker image is by using a docker file.
Dockerfile to create the image
FROM ubuntu:latest

MAINTAINER Pulkit Pushkarna "pulkit.pushkarna@gmail.com"

RUN apt-get update && apt-get install -y openjdk-8-jdk

CMD ["/bin/bash"]
Line 1 : Specify the basic image we need extend
Line 2 : Specifies the maintainer of the image
Line 3 : Run the commands inside the base image. && allow us to chain multiple commands
Line 4 : Command to be executed when container is run from the image
Steps to Create image from the docker file
- Enter the instruction in a file and give it a name Dockerfile
- Execute the command :
docker image build -t jdk-image-from-docker-file <path-of-directory-which-contains-docker-file>
Copying files to images
FROM ubuntu:latest

MAINTAINER Pulkit Pushkarna "pulkit.pushkarna@gmail.com"

RUN apt-get update && apt-get install -y openjdk-8-jdk

WORKDIR /usr/local/bin

COPY test-program.jar .

CMD ["/bin/bash"]
Step 4 : Specified the Working Directory for the execution of any further commands
Step 5 : Copy the jar from the folder which contains Dockerfile to working directory
Please note that the files to be copied in the image should be present in working directory of Dockerfile or in its subfolders
FROM ubuntu:latest

MAINTAINER Pulkit Pushkarna "pulkit.pushkarna@gmail.com"

RUN apt-get update && apt-get install -y openjdk-8-jdk

WORKDIR /usr/local/bin

COPY test-program.jar .

CMD ["java","-jar","test-program.jar"]
Running the jar file
In step 6 you can see how to run jar file with the help of CMD command
Difference Between CMD and ENTRYPOINT
- CMD and ENTRYPOINT are used for the same purpose.
- The only difference is that instruction specified by CMD is default and can be overridden while running the container.
- Instruction mentioned in ENTRYPOINT cannot be overridden while running the container.
MAINTAINER vs LABEL
- MAITAINER is rigid.
- In order to have some flexibility you can use LABEL command in Dockerfile.
LABEL maintainer="pulkit.pushkarna@gmail.com"
FROM ubuntu:latest

LABEL maintainer="pulkit.pushkarna@gmail.com"
LABEL version="1.0"

RUN apt-get update && apt-get install -y openjdk-8-jdk

WORKDIR /usr/local/bin

COPY test-program.jar .

ENTRYPOINT ["java","-jar","test-program.jar"]
use docker image inspect <image-name> to get the details of docker image
Exercise 2
- Create a new image from ubuntu base image which contains the ping command.
- Commit this new image
- Run the container for newly created image
- With the help of Dockerfile Build and image which installs jdk and add a jar file
- Run the image create from docker file and run your jar.
Lets Create a Simple Spring boot Application and create its build
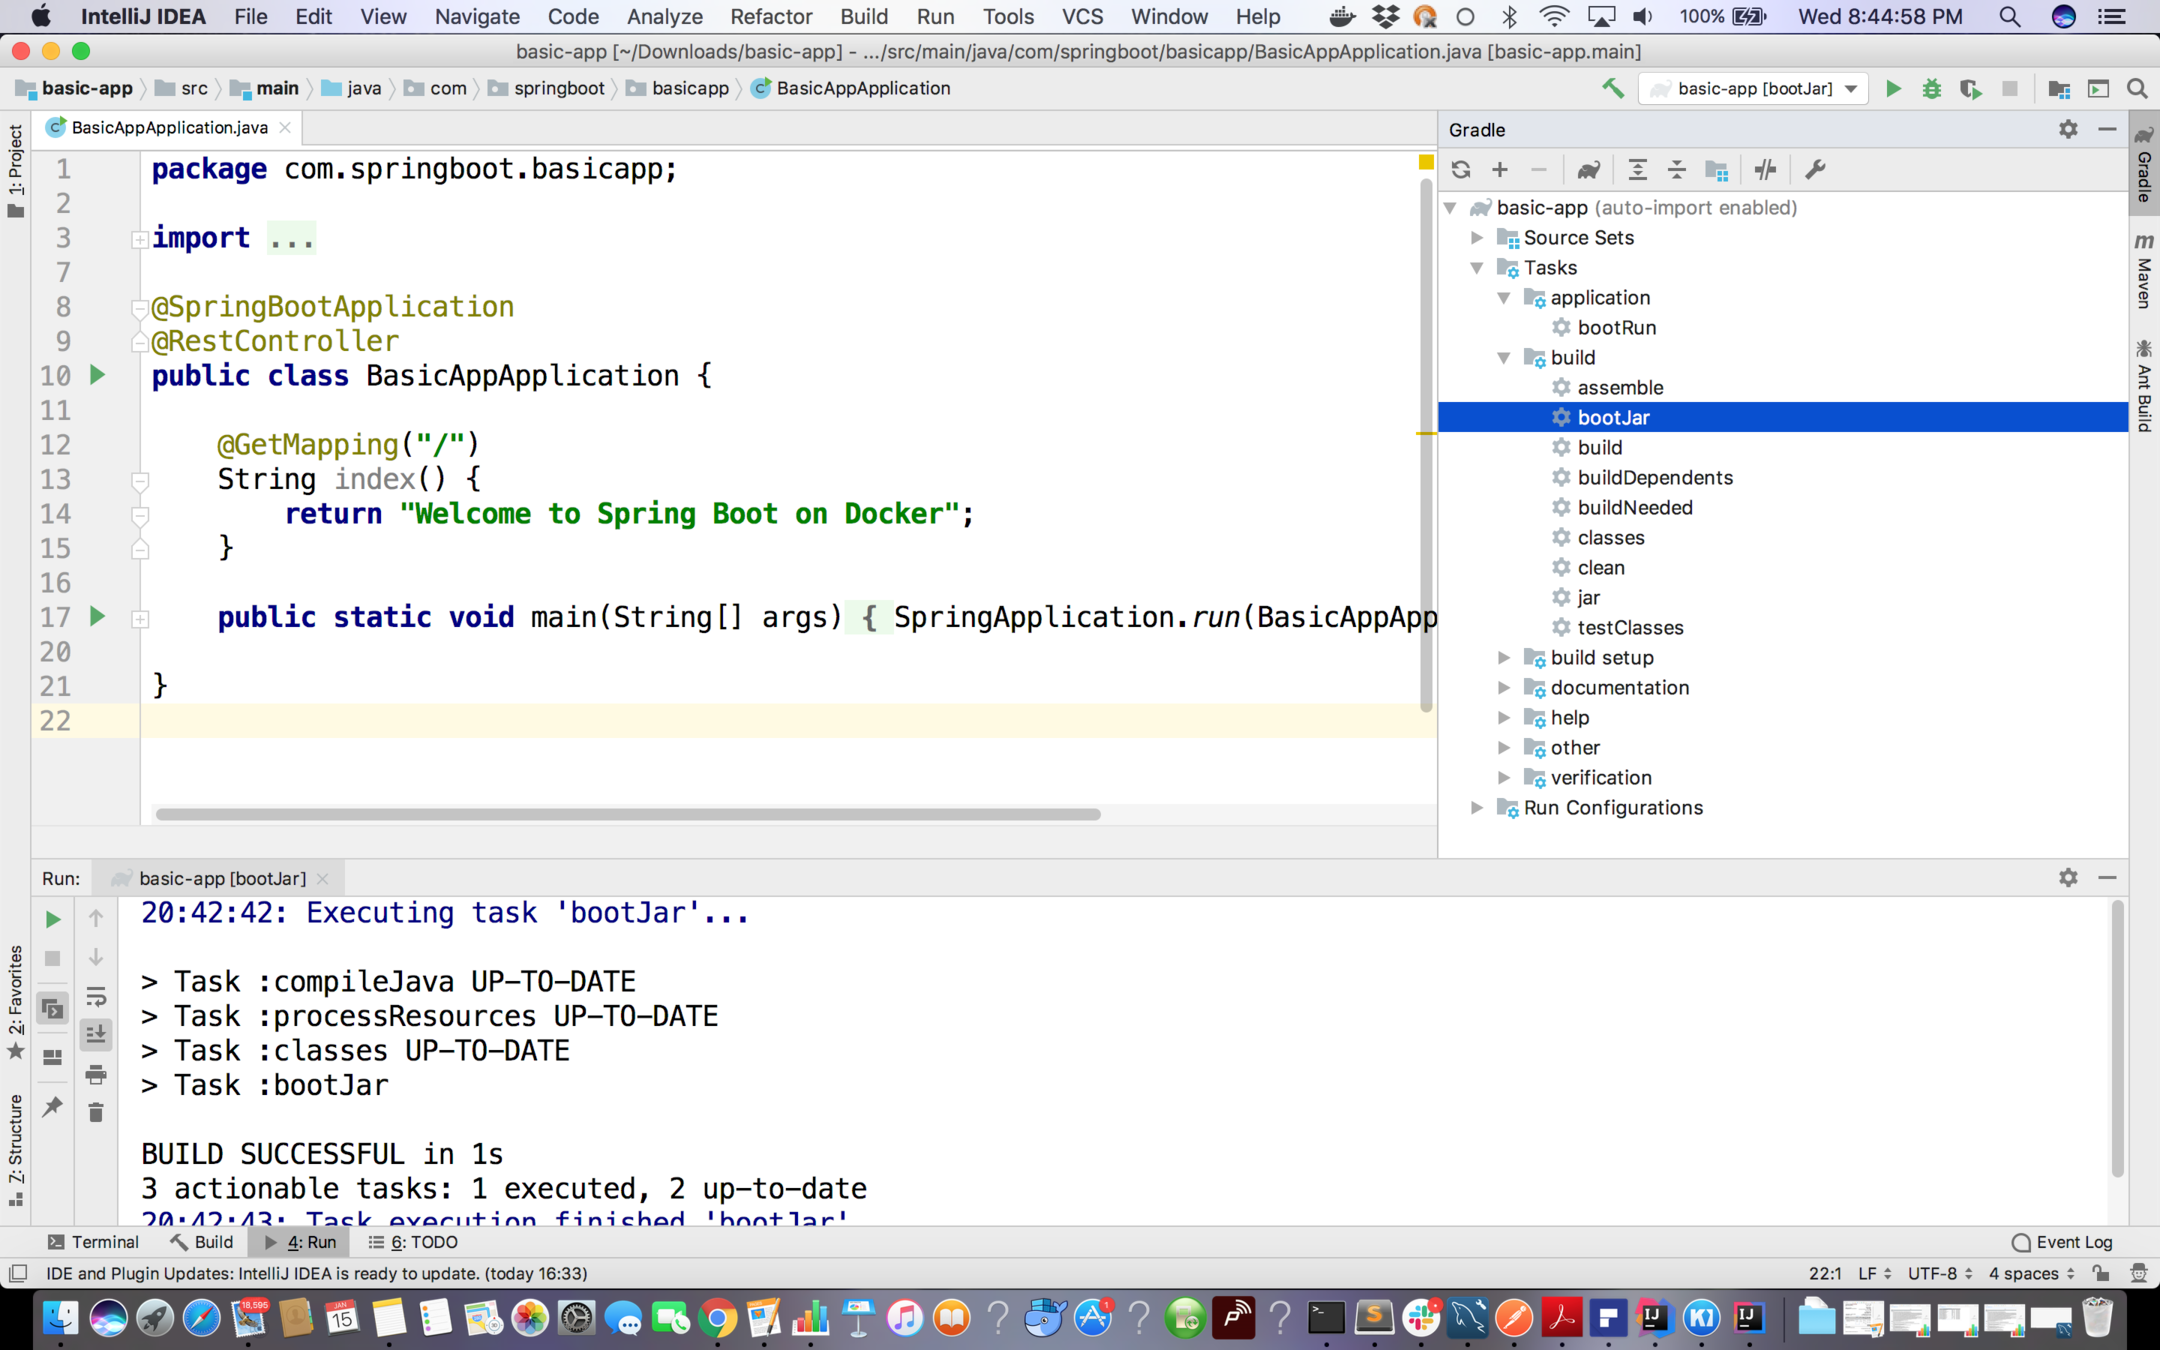
Introduce a docker file in the project

FROM tomcat:8.5.50-jdk8-openjdk

RUN apt-get update

WORKDIR /usr/local/bin

COPY ./build/libs/basic-app-0.0.1-SNAPSHOT.jar .

EXPOSE 8080

CMD ["java","-jar","basic-app-0.0.1-SNAPSHOT.jar"]
Docker file to be introduced in Spring Boot App
Build docker image for Spring Boot Application
docker image build -t spring-boot-on-docker .
Run docker container for Spring boot application
docker container run -p 8080:8080 spring-boot-on-docker
Publish image to docker hub
In order to push your image to first we need to
create a tag for our image spring-boot-on-docker by prepending it with your username otherwise dockerhub will not allow you to publish the image.
In our case we need to create the image with the following name:
docker image tag <container-id-initials>
pulkitpushkarna/spring-boot-on-docker
Login to docker with username and password
docker login -u <username> -p <password>
Now push the image to the docker
docker push pulkitpushkarna/spring-boot-on-docker:latest
Exercise 3
- Create a Dockerfile for spring boot application
- Run the Container for Dockerized Spring Boot
- Publish it to docker hub
Network
In order to connect containers from one another we need to use network.
We will now gonna create 2 containers.
- In one we will deploy spring boot app.
- In the another on we configure mysql.
- We will then gonna connect Spring boot app in one container with the mysql in another container
Search for Mysql official image
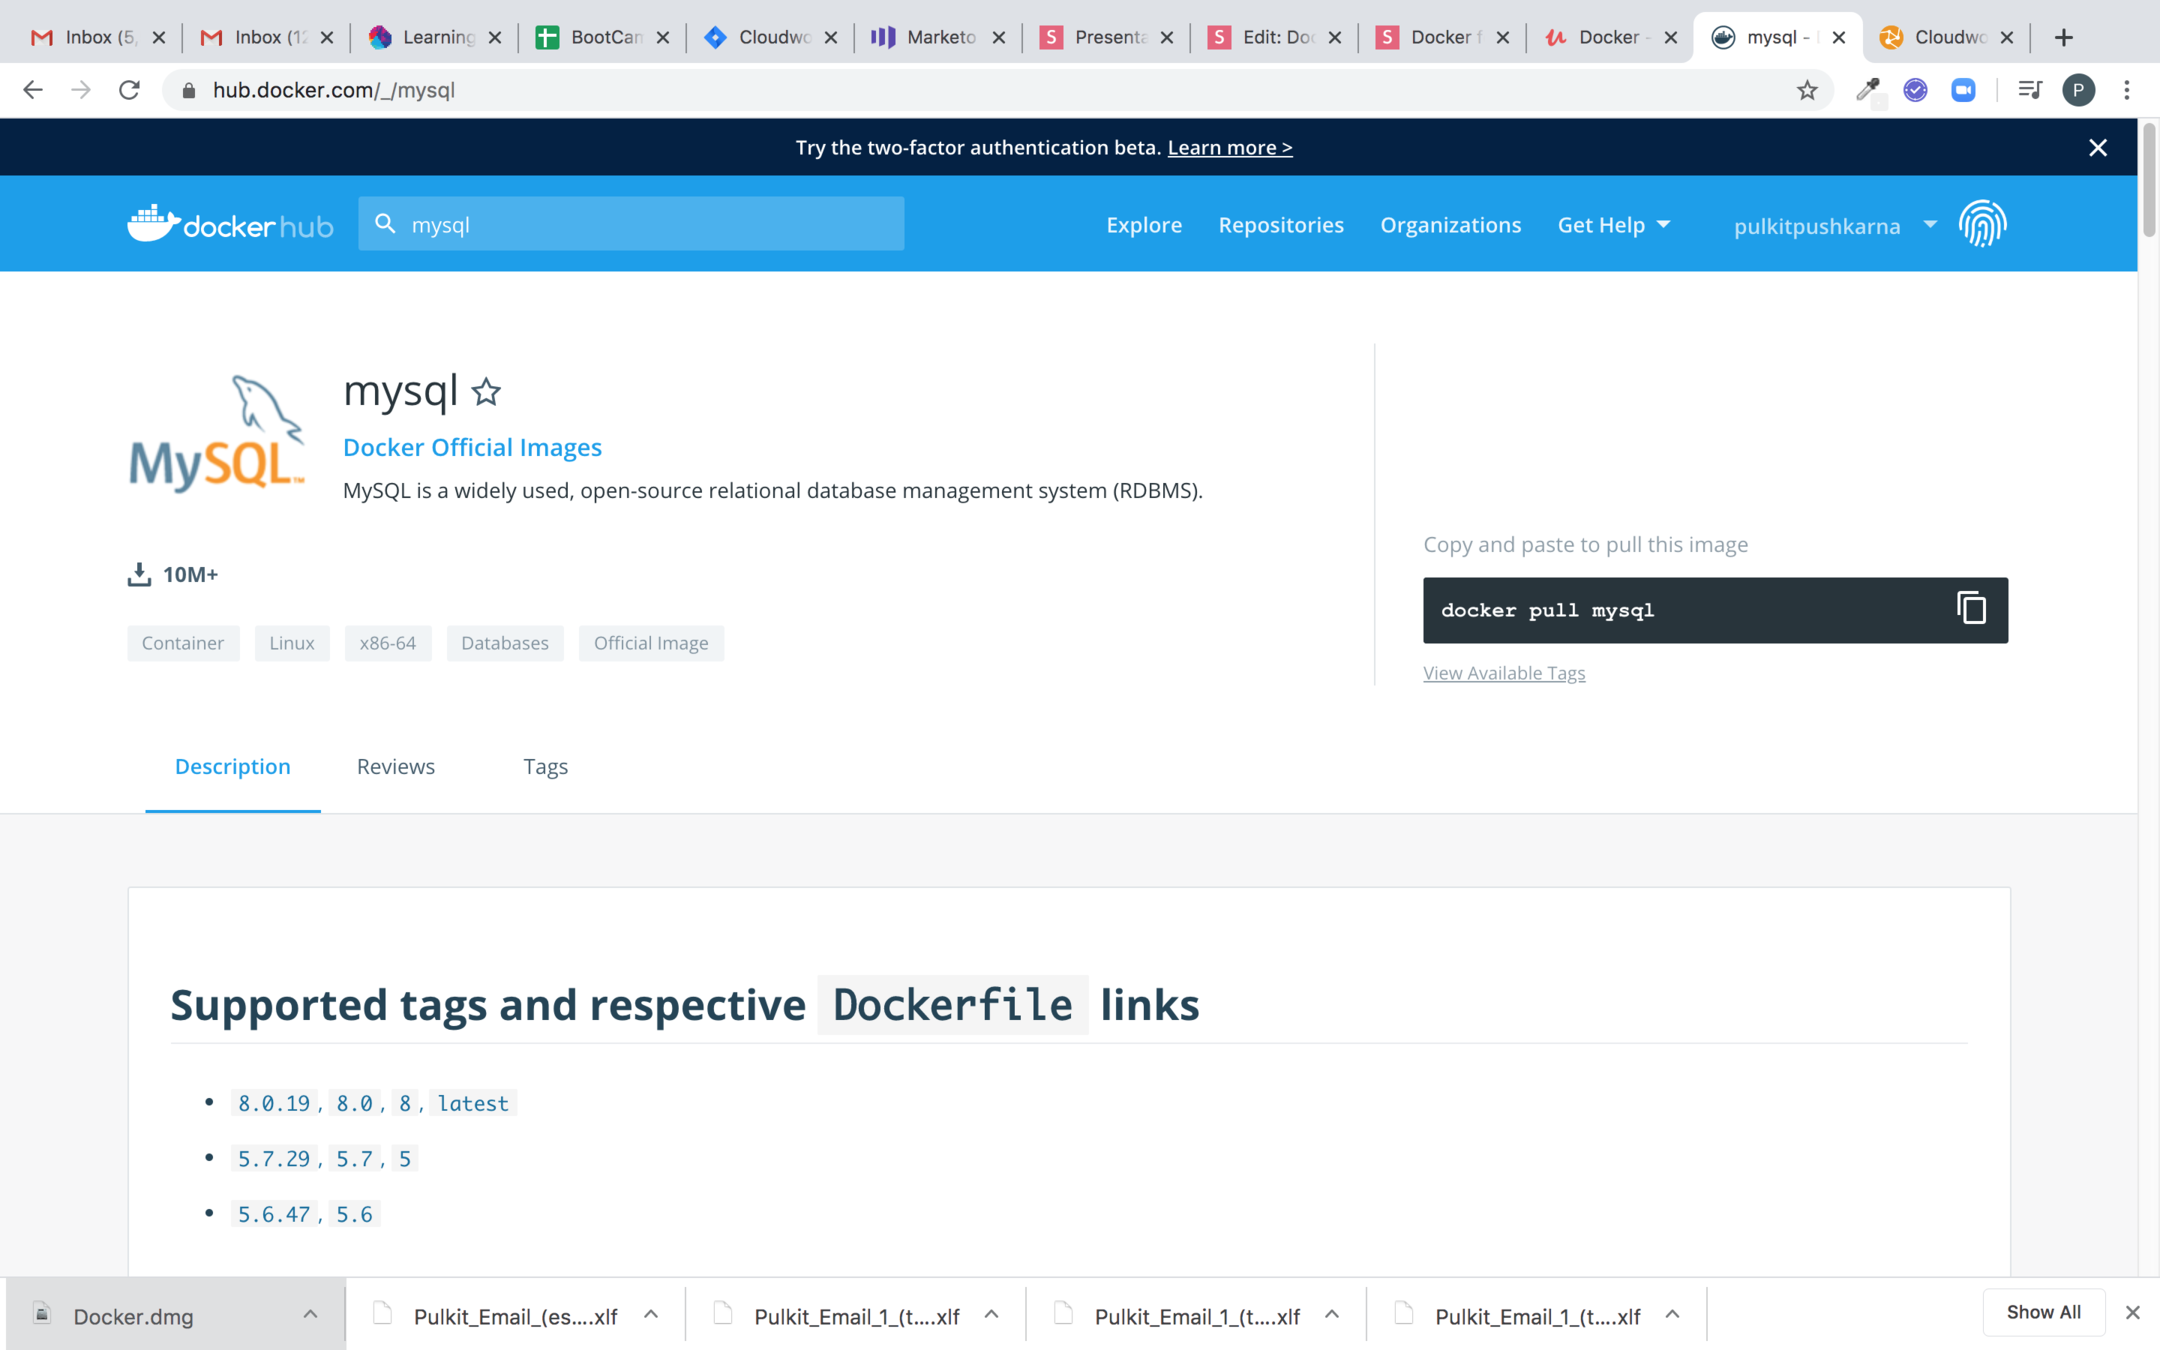
Configure mysql container
Step 1 : docker image pull mysql:5
Step 2 : docker container run --name mysql-5-demo -e MYSQL_ROOT_PASSWORD=password -d mysql
Step 3 : docker container exec -it mysql-5-demo bash
Step 4 : mysql -u root -p
Step 5 : show databases
- Stop the running mysql container.
- Prune the stop containers.
- launch the container with the database my the command below.
docker container run
--name mysql-5-demo
-e MYSQL_ROOT_PASSWORD=password -d
-e MYSQL_DATABASE=mydatabase mysql
Provide port mapping to mysql to connect with spring boot
docker container run --name mysql-5-demo
-e MYSQL_ROOT_PASSWORD=password -d -e MYSQL_DATABASE=mydatabase -p 3307:3306 mysql
Create a Spring boot app with mysql and JPA dependencies
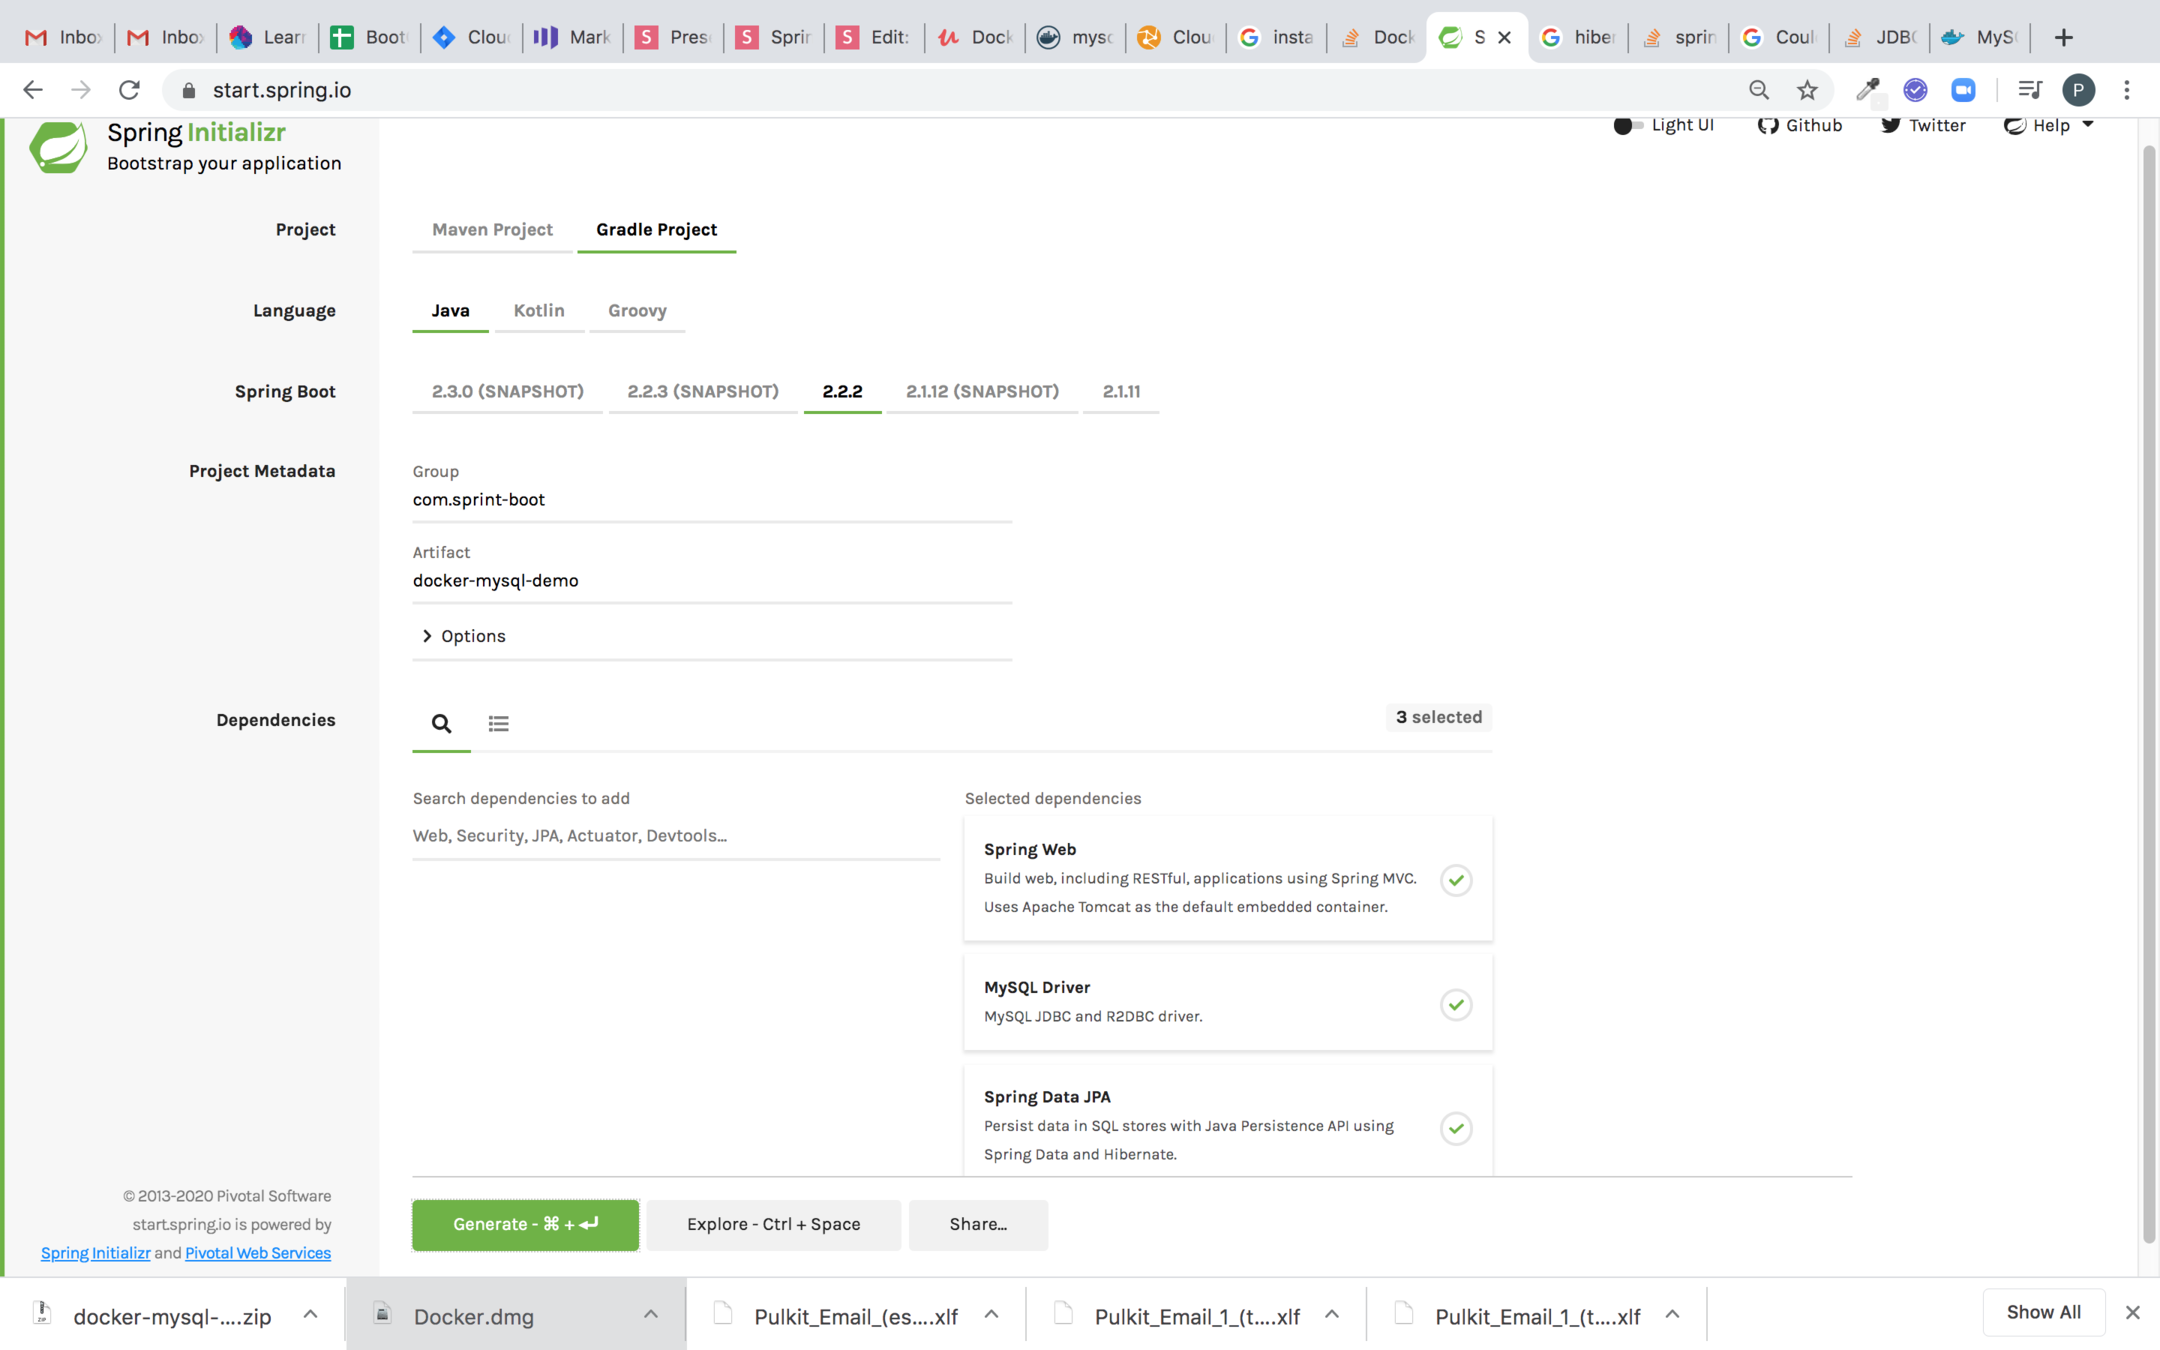
spring.datasource.url=jdbc:mysql://localhost:3307/mydatabase
spring.datasource.username=root
spring.datasource.password=password
spring.jpa.hibernate.ddl-auto=create
application.properties
application-docker.properties
spring.datasource.url=jdbc:mysql://mysql-5-demo-container:3306/mydatabase
spring.datasource.username=root
spring.datasource.password=password
spring.jpa.hibernate.ddl-auto=create
package com.sprintboot.dockermysqldemo;

import org.springframework.boot.SpringApplication;
import org.springframework.boot.autoconfigure.SpringBootApplication;
import org.springframework.context.ApplicationContext;

import javax.sql.DataSource;
import java.sql.DatabaseMetaData;
import java.sql.SQLException;

@SpringBootApplication
@RestController
public class DockerMysqlDemoApplication {

	@GetMapping("/")
	public String index(){
		return "Hello from Spring boot on Docker";
	}

	public static void main(String[] args) {

	ApplicationContext applicationContext = SpringApplication.run(DockerMysqlDemoApplication.class, args);
	DataSource dataSource = applicationContext.getBean(DataSource.class);
		try {
			DatabaseMetaData databaseMetaData = dataSource.getConnection().getMetaData();
			System.out.println(databaseMetaData.getURL());
			System.out.println(databaseMetaData.getUserName());
		} catch (SQLException e) {
			e.printStackTrace();
		}
	}

}
Main Class Code for Spring Boot
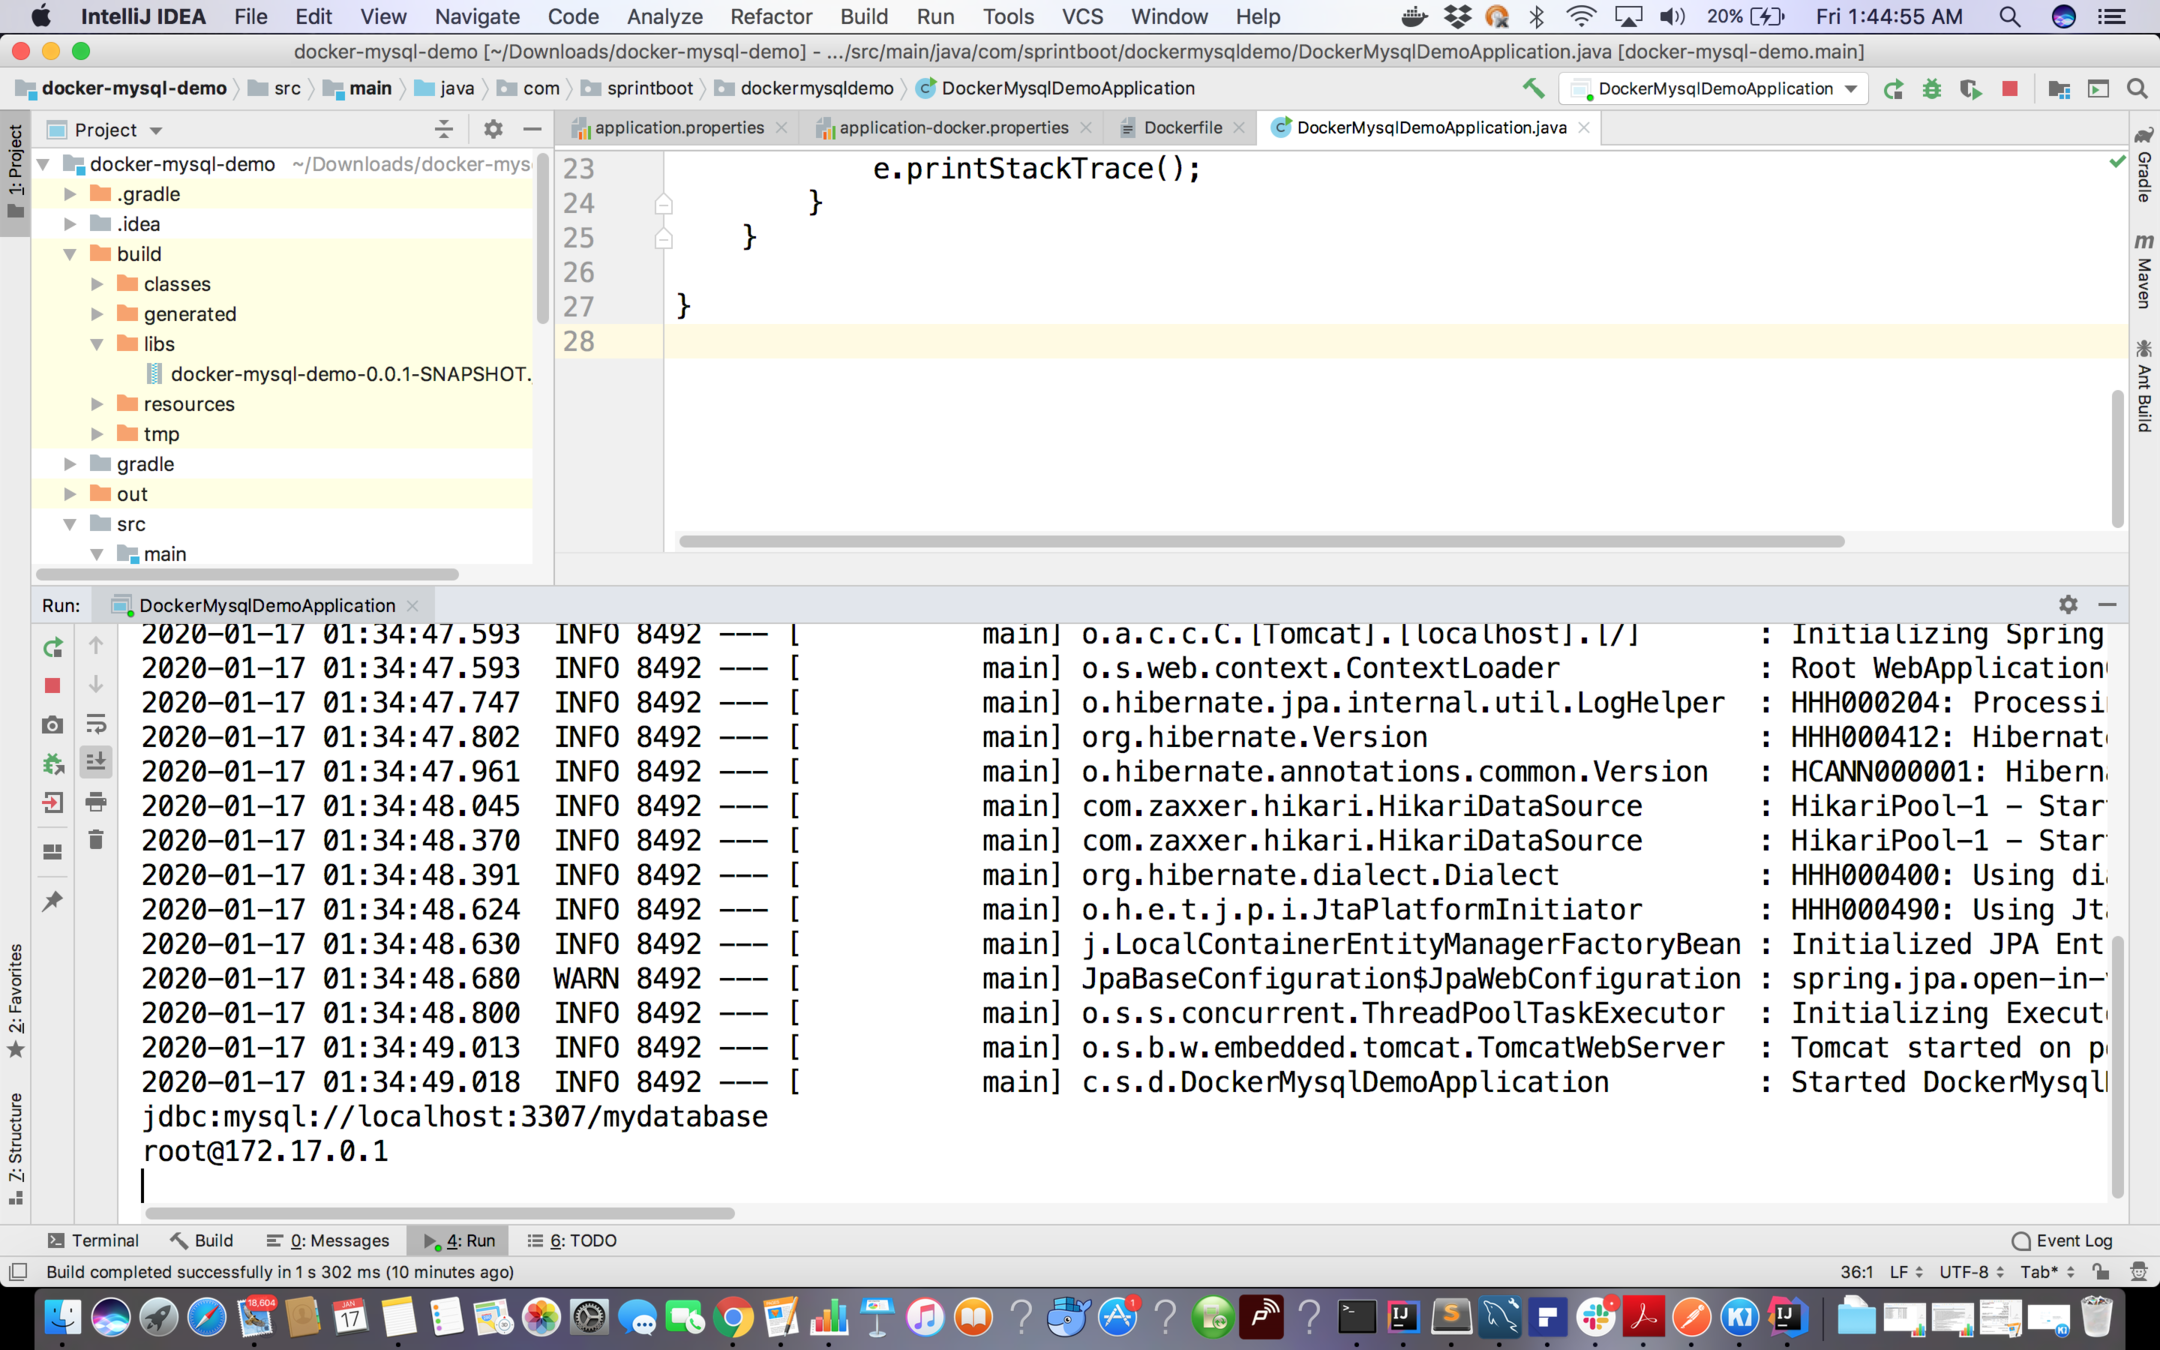
Appplication output
Creating network in docker
Step 1: docker network create my-network
Step 2 : docker container run --name mysql-5-demo-container -e MYSQL_ROOT_PASSWORD=password -d -e MYSQL_DATABASE=mydatabase --network my-network mysql
Step 3 : docker container exec -it mysql-5-demo-container
bash
Step 4 :
apt-get update
apt-get install iputils-ping
Build the project
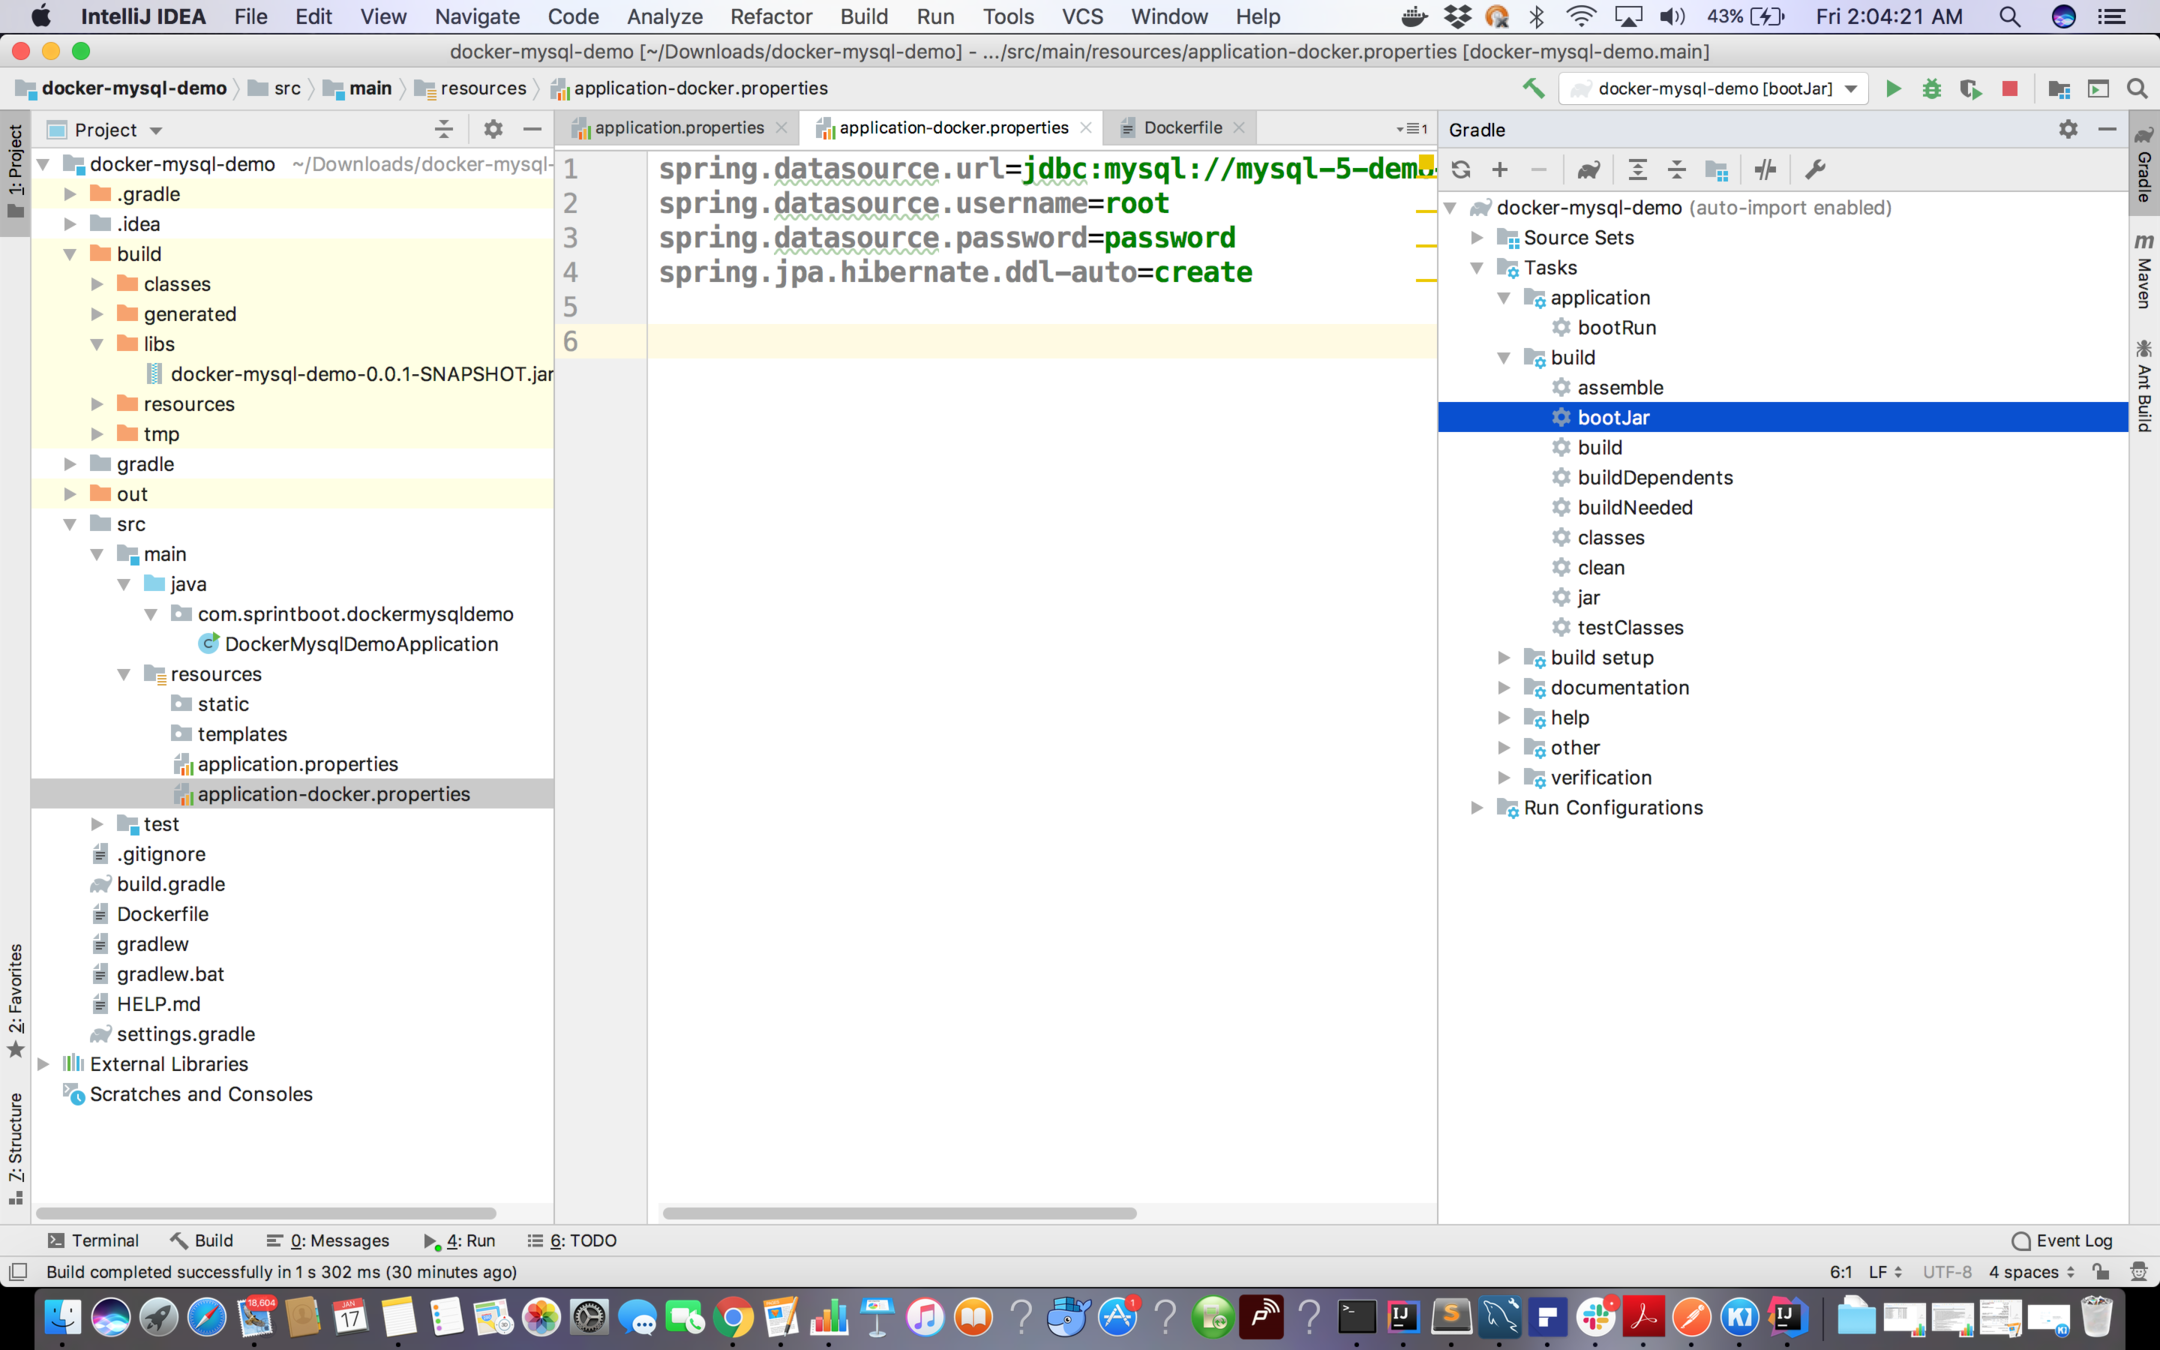
Dockerfile
FROM tomcat:8.5.50-jdk8-openjdk

RUN apt-get update

WORKDIR /usr/local/bin

COPY ./build/libs/docker-mysql-demo-0.0.1-SNAPSHOT.jar .

EXPOSE 8080

CMD ["java","-jar","docker-mysql-demo-0.0.1-SNAPSHOT.jar"]
Run Mysql Conatainer for Spring Boot App
docker container run --name mysql-5-demo-container -e MYSQL_ROOT_PASSWORD=password -d -e MYSQL_DATABASE=mydatabase --network my-network mysql
Build the image of the container
docker image build -t spring-boot-jpa-docker .
Run the Container for Spring Boot App
docker container run -it --network my-network -e "SPRING_PROFILES_ACTIVE=docker" --name spring-boot-jpa-docker spring-boot-jpa-docker
Exercise 4
- Run a Spring boot application on local and connect it with mysql container.
- Dockerize Spring Boot App and Connect the App in Spring Boot Container with Docker Container.
Volumes
- Up till now we are thinking of containers as disposable entity.
- When we get rid of a container the data inside it gets lost
- There may exist some use cases where we would like our data to exist even if the container is disposed.
- This is very common when we use Database within the containers as we want data to out live time of the container.
- Volume is used for this purpose
- In the docker file you can specify the volume in the following way:
- VOLUME /some/directory/somewhere
- e.g VOLUME /var/lib/mysql can be used for mysqlcontainer
- VOLUME /some/directory/somewhere
Check the volume persistense of mysql official image

We can see here that the volume is mounted to /var/lib/mysql
List all volumes
- docker volume ls
Run a container of mysql by running the command below :
docker container run
--name mysql-volume
-v mydata:/var/lib/mysql
-e MYSQL_ROOT_PASSWORD=password
-e MYSQL_DATABASE=dummy
-d
mysql:5
- Get into the bash of volume
docker container exec -it mysql-volume bash
- Create a database
- Create a table inside database
- exit
- Delete Container
- Run the container again using the previous command
- You will see that the database and table which you created earlier persist in the database.
Mount the volume
docker container run
--name mysql-volume1
-v /Users/pulkitpushkarna/mydata1:/var/lib/mysql
-e MYSQL_ROOT_PASSWORD=password
-e MYSQL_DATABASE=dummy
-d
mysql:5
By mounting volume to a particular location you can keep the track of volume data in your system
Exercise 5
- Run a mysql container with volume and make some changes in the database.
- Stop and Remove the mysql container
- Run the new Mysql Container with same volume and see if the changes you have done in previous container exits or not.
Docker Compose
- It is very tedious task to manage containers manually.
- Docker Compose allow us to write a fairly simple text file which saves us from the tedious tasks of writing docker command
- To check for docker compose check the command below
- docker-compose -v
- If the docker-compose is unknown by your system then refer to the link : https://docs.docker.com/compose/install/
version: "3"

services:

  spring-boot-app:
    image: spring-boot-jpa-docker
    networks:
      - another-network
    ports:
      - 8080:8080
    environment:
      - spring.profiles.active=docker
    depends_on:
      - mysql-5-demo-container


  mysql-5-demo-container:
    image: mysql:5
    networks:
      - another-network
    environment:
      - MYSQL_ROOT_PASSWORD=password
      - MYSQL_DATABASE=mydatabase


networks:
  another-network:
docker-compose.yaml
Running mysql and docker containers with docker compose:
Go to the folder which contains docker-compose.yaml and run the command
docker-compose up (If your application has some problems while resolving connection with each other due to race condition please run this command again)
To run the compose file in background
docker-compose up -d
Stopping the containers
docker-compose down
Running the services individually
docker-compose up -d mysql-5-demo-container
docker-compose up -d spring-boot-app
docker-compose up -d spring-boot-app
Exercise 6
- Use docker compose to connect Spring Boot App and Mysql services which reside in different containers.

Swarm
- Up till now we are managing containers locally
- To work on production we need to have an Orchestration System to work on manage our containers
- Swarm is the Orchestration which helps you manage containers on production
- swarm is build in docker Orchestration system
Play with docker
- In order to understand swarm lets try something which is close to production environment where you have multiple nodes.
- We will use https://labs.play-with-docker.com/ for it
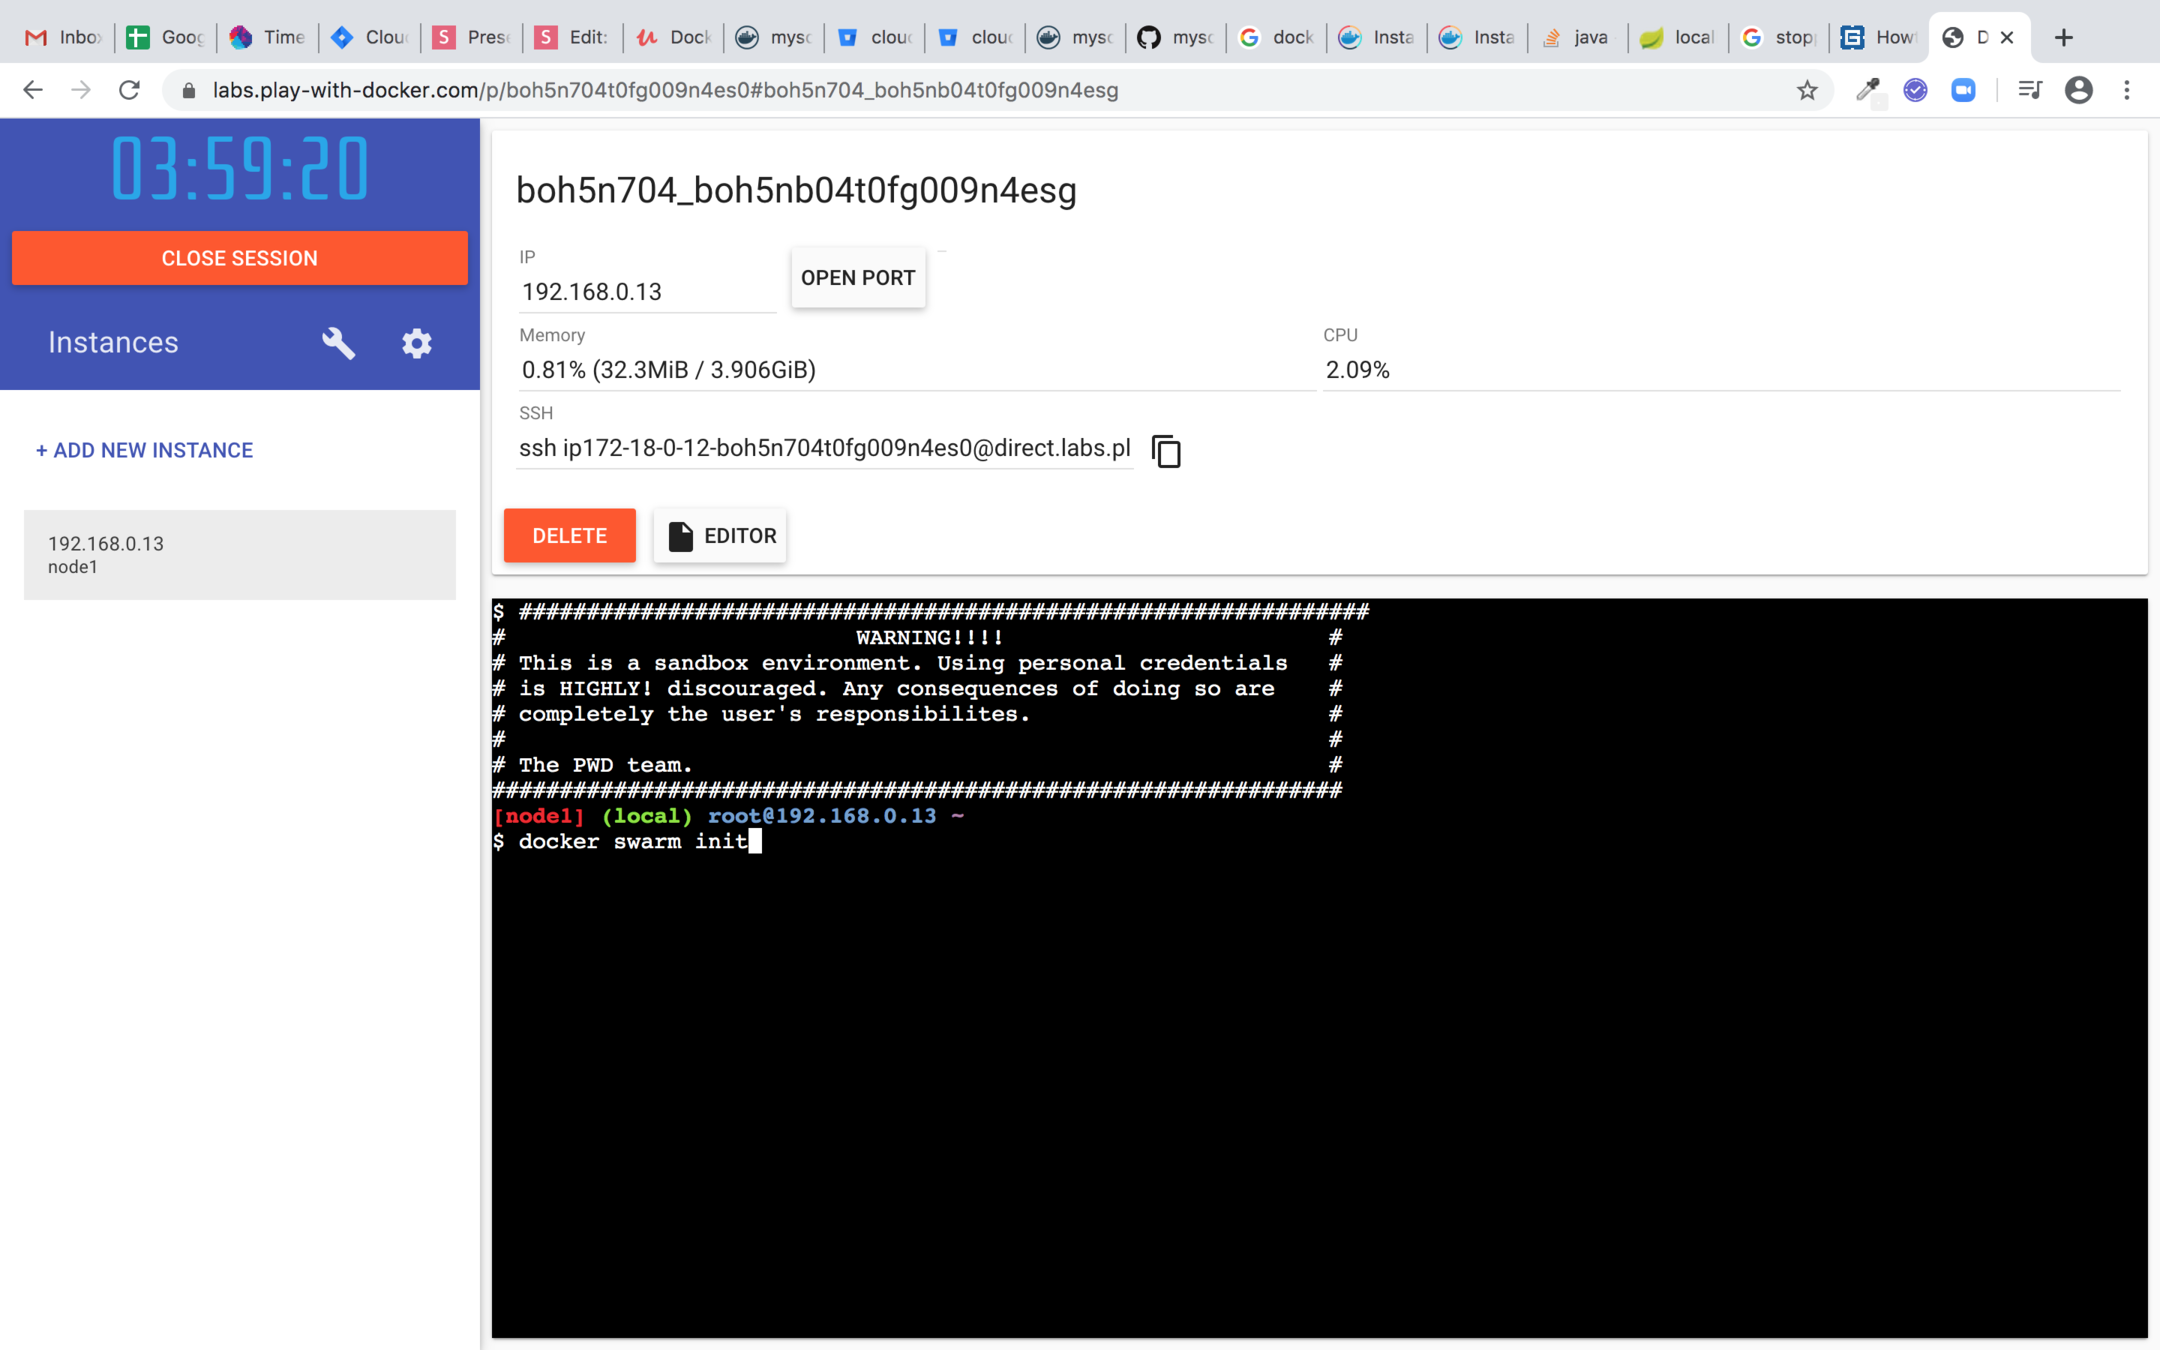
Start the new session and click on the add new instance
Run the node as Manager

Copy the docker swarm join command and paste it in another instance to make this instance manager and other worker
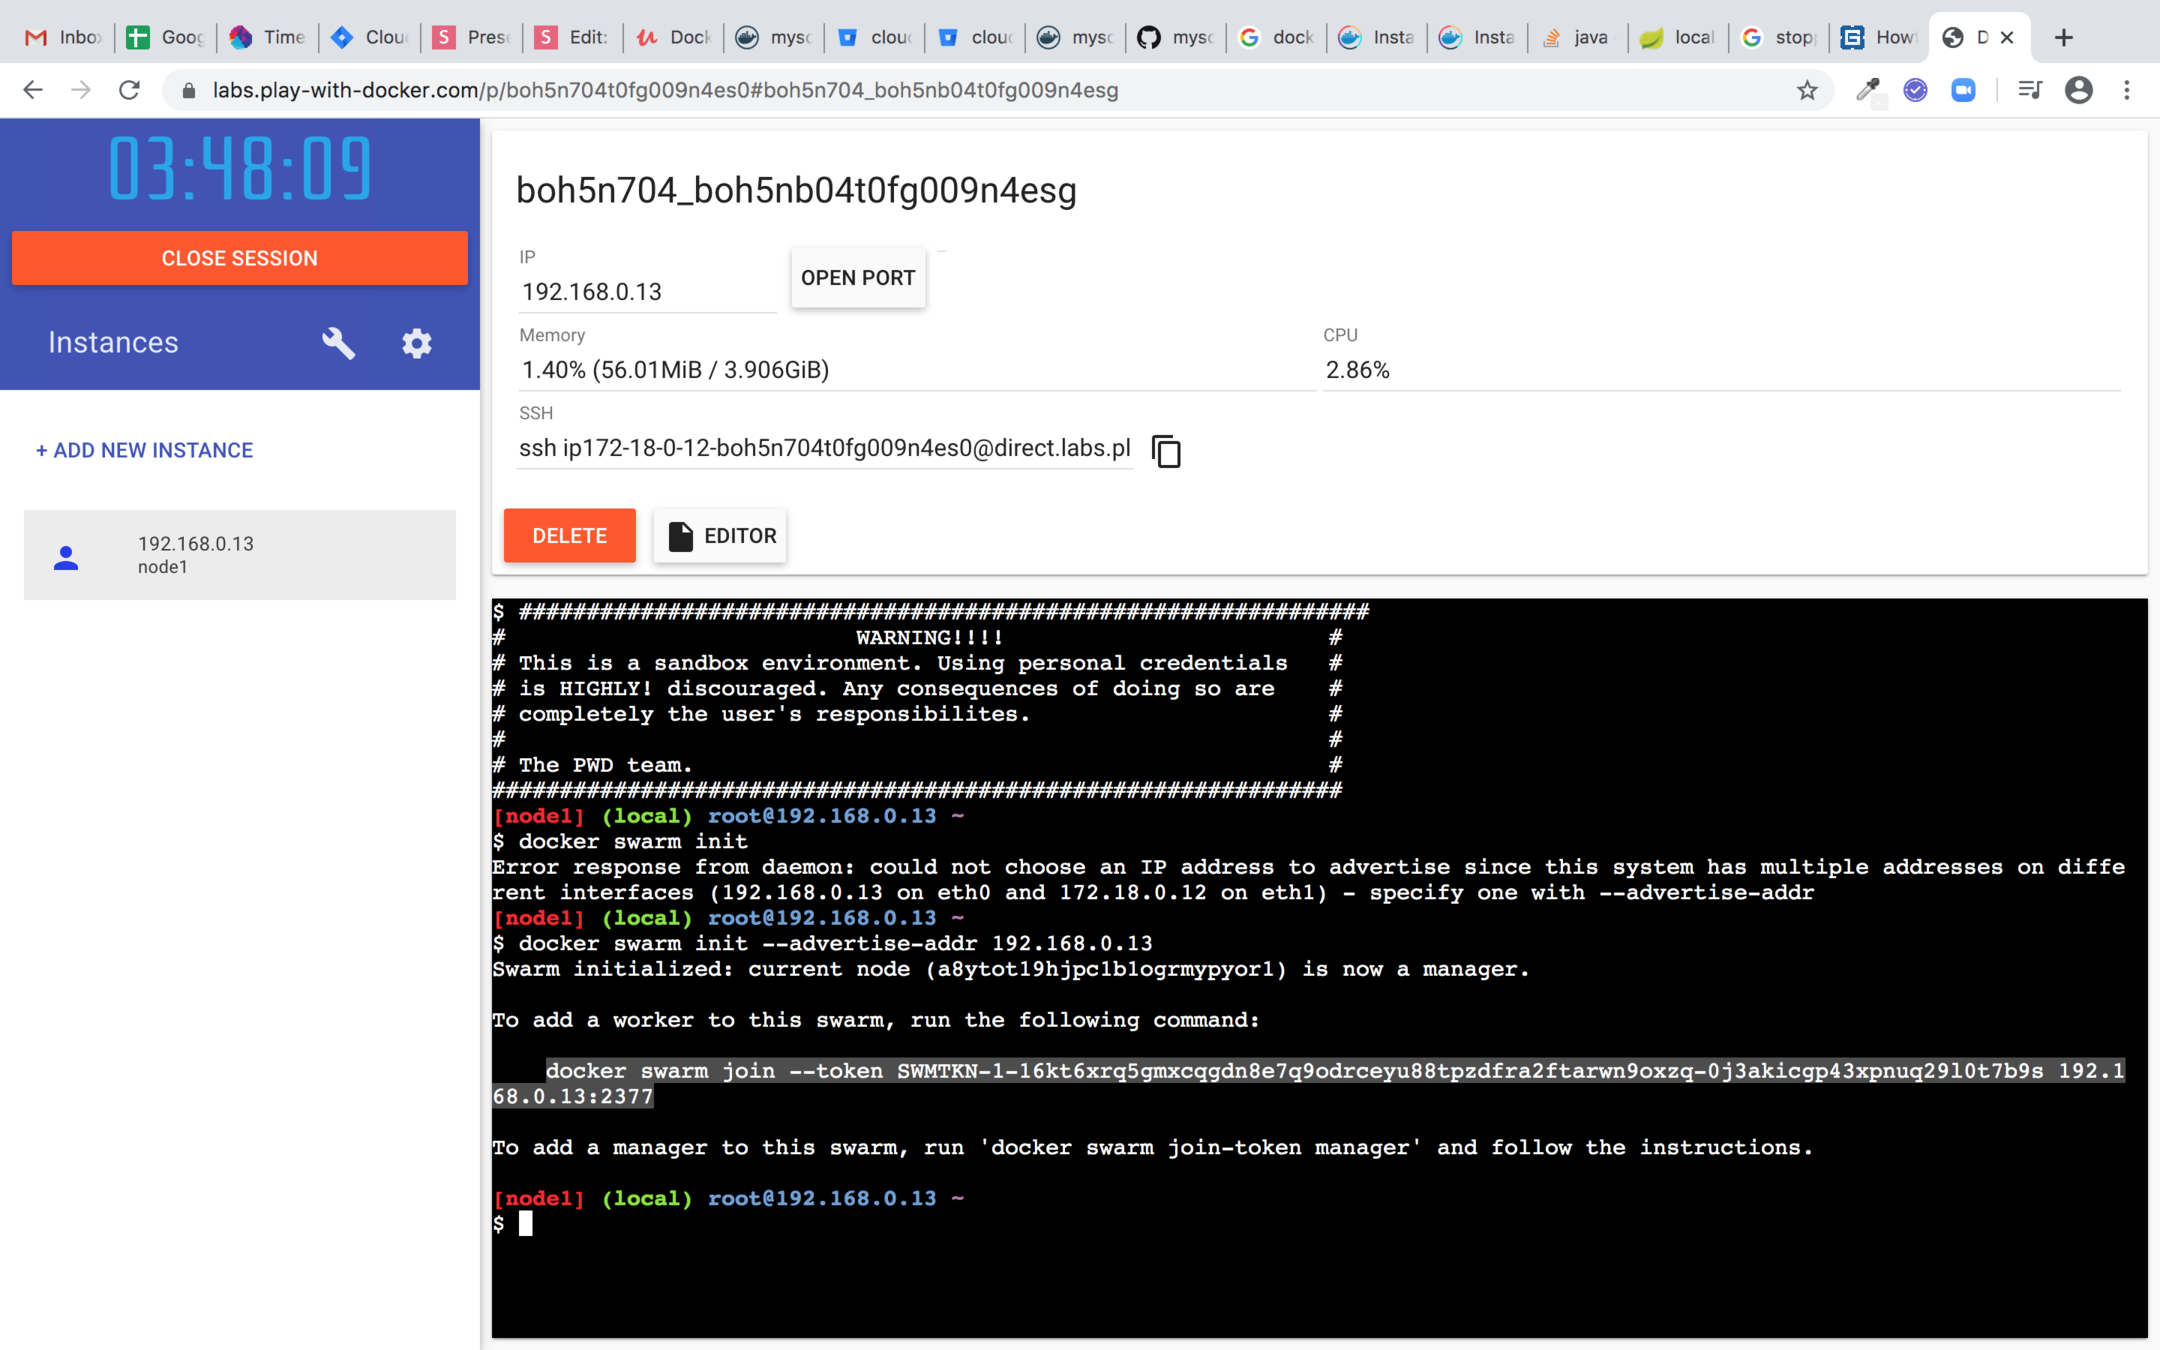
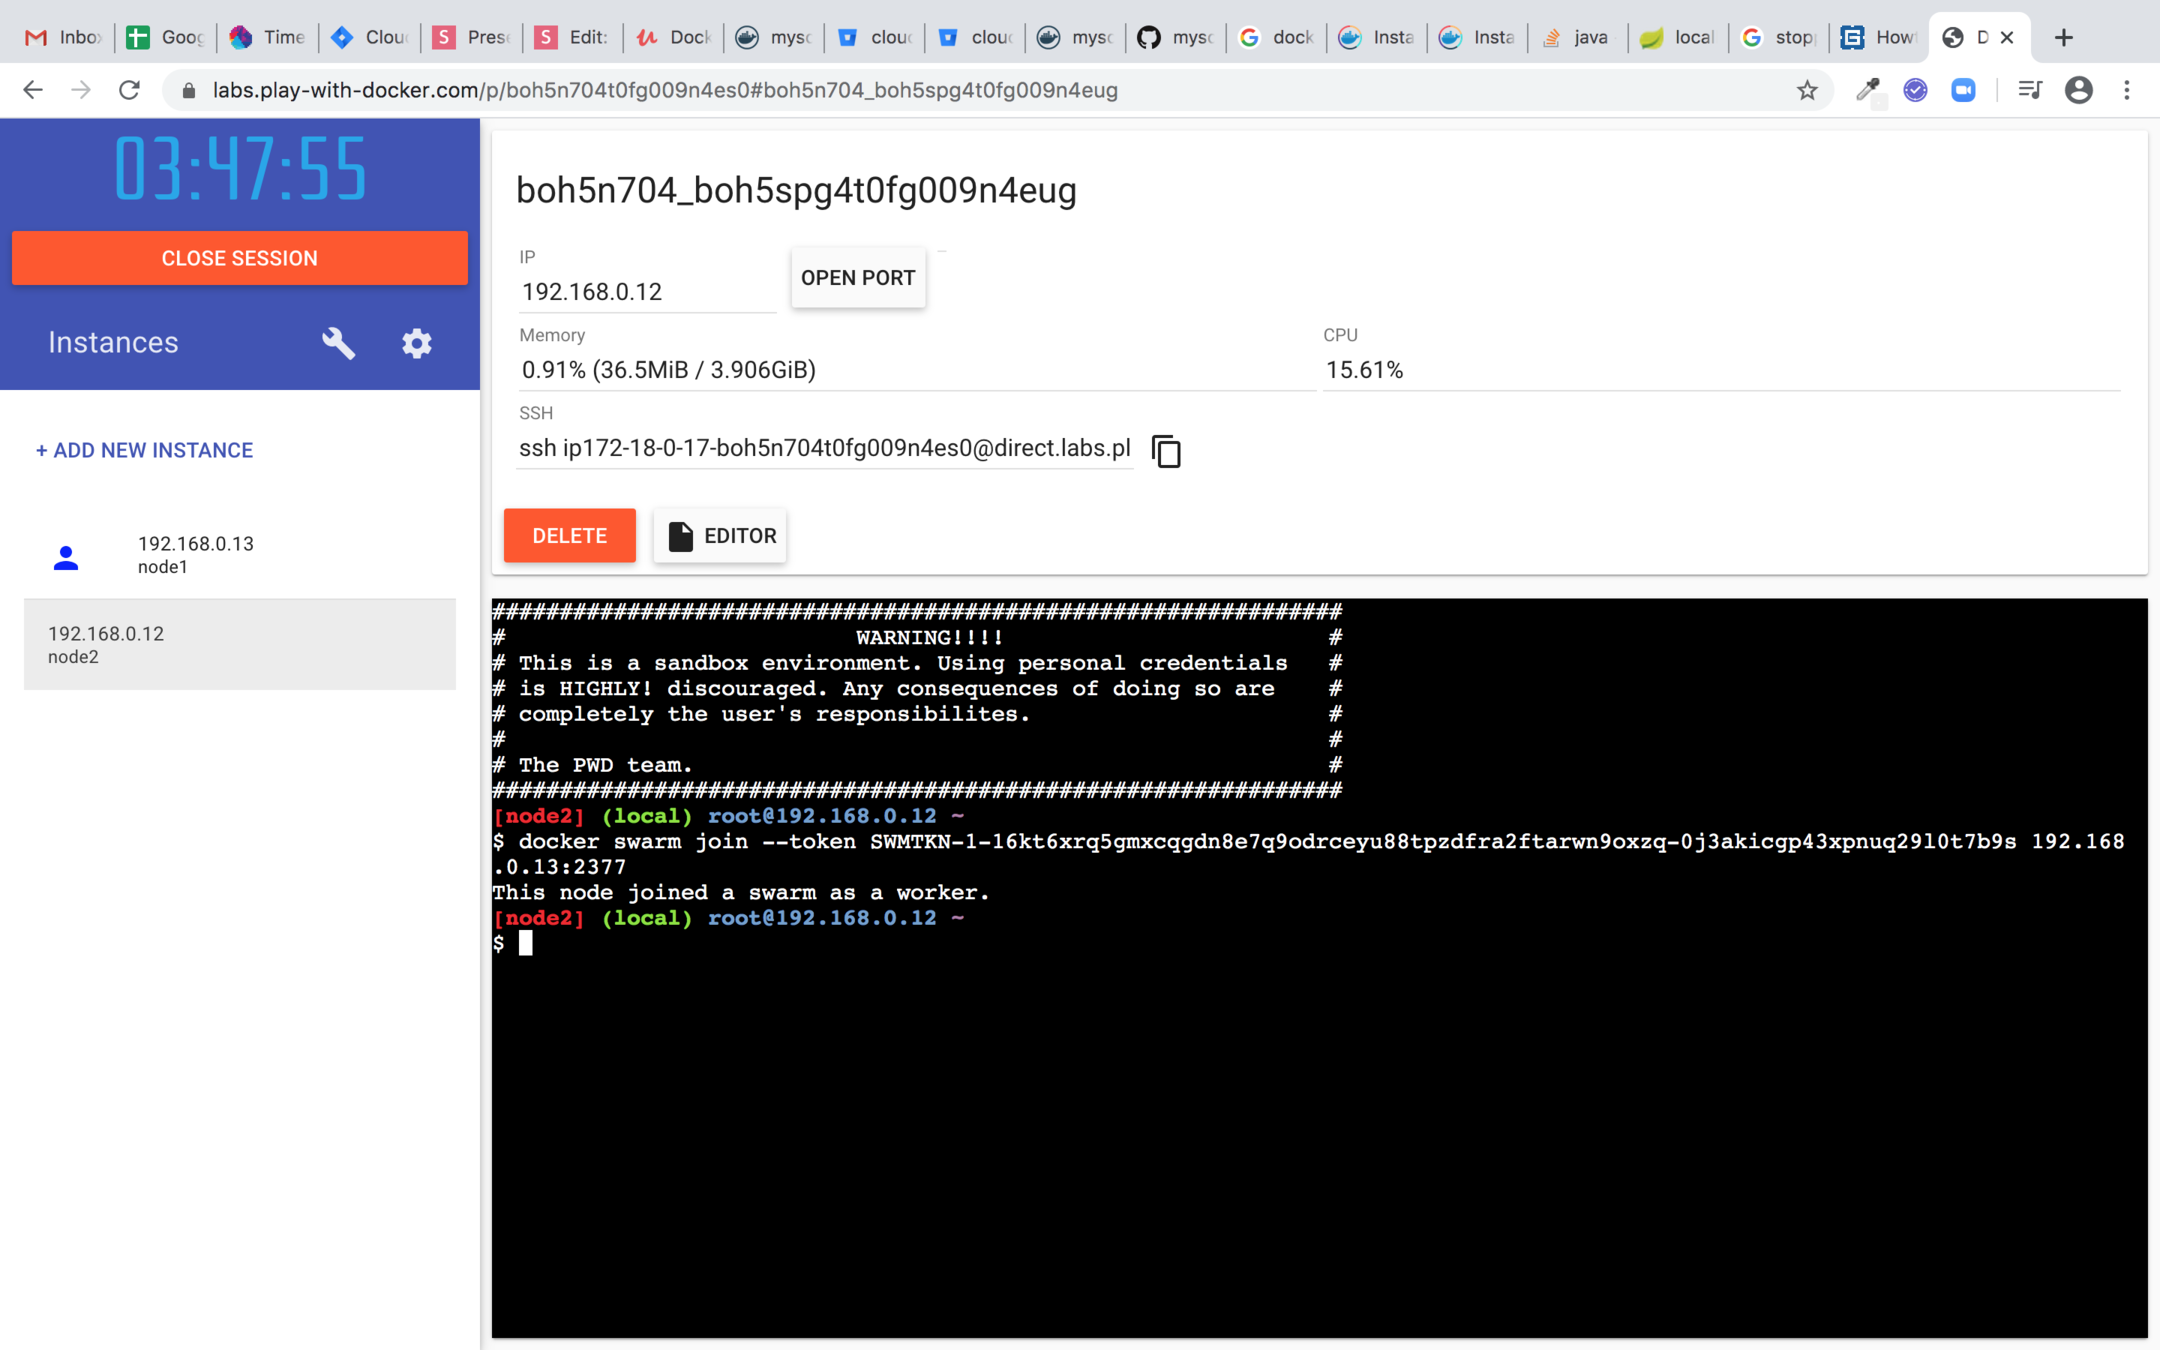
In the Manager node
- docker node ls : to get list of nodes
- docker network create --driver overlay my-network : create the overlay network to manage multiple nodes
- Creating database service :
- docker service create
- -d
- --network my-network
- -e DATABASE_ROOT_PASSWORD=password
- -e DATABASE_NAME=dummy
- --name database
- mysql:5
- docker service create
Run another service on Manager
- docker service create
- -d
- --network my-network
- -p 8080:8080
- virtualpairprogrammers/fleetman-webapp
- docker service ls : Listing the services
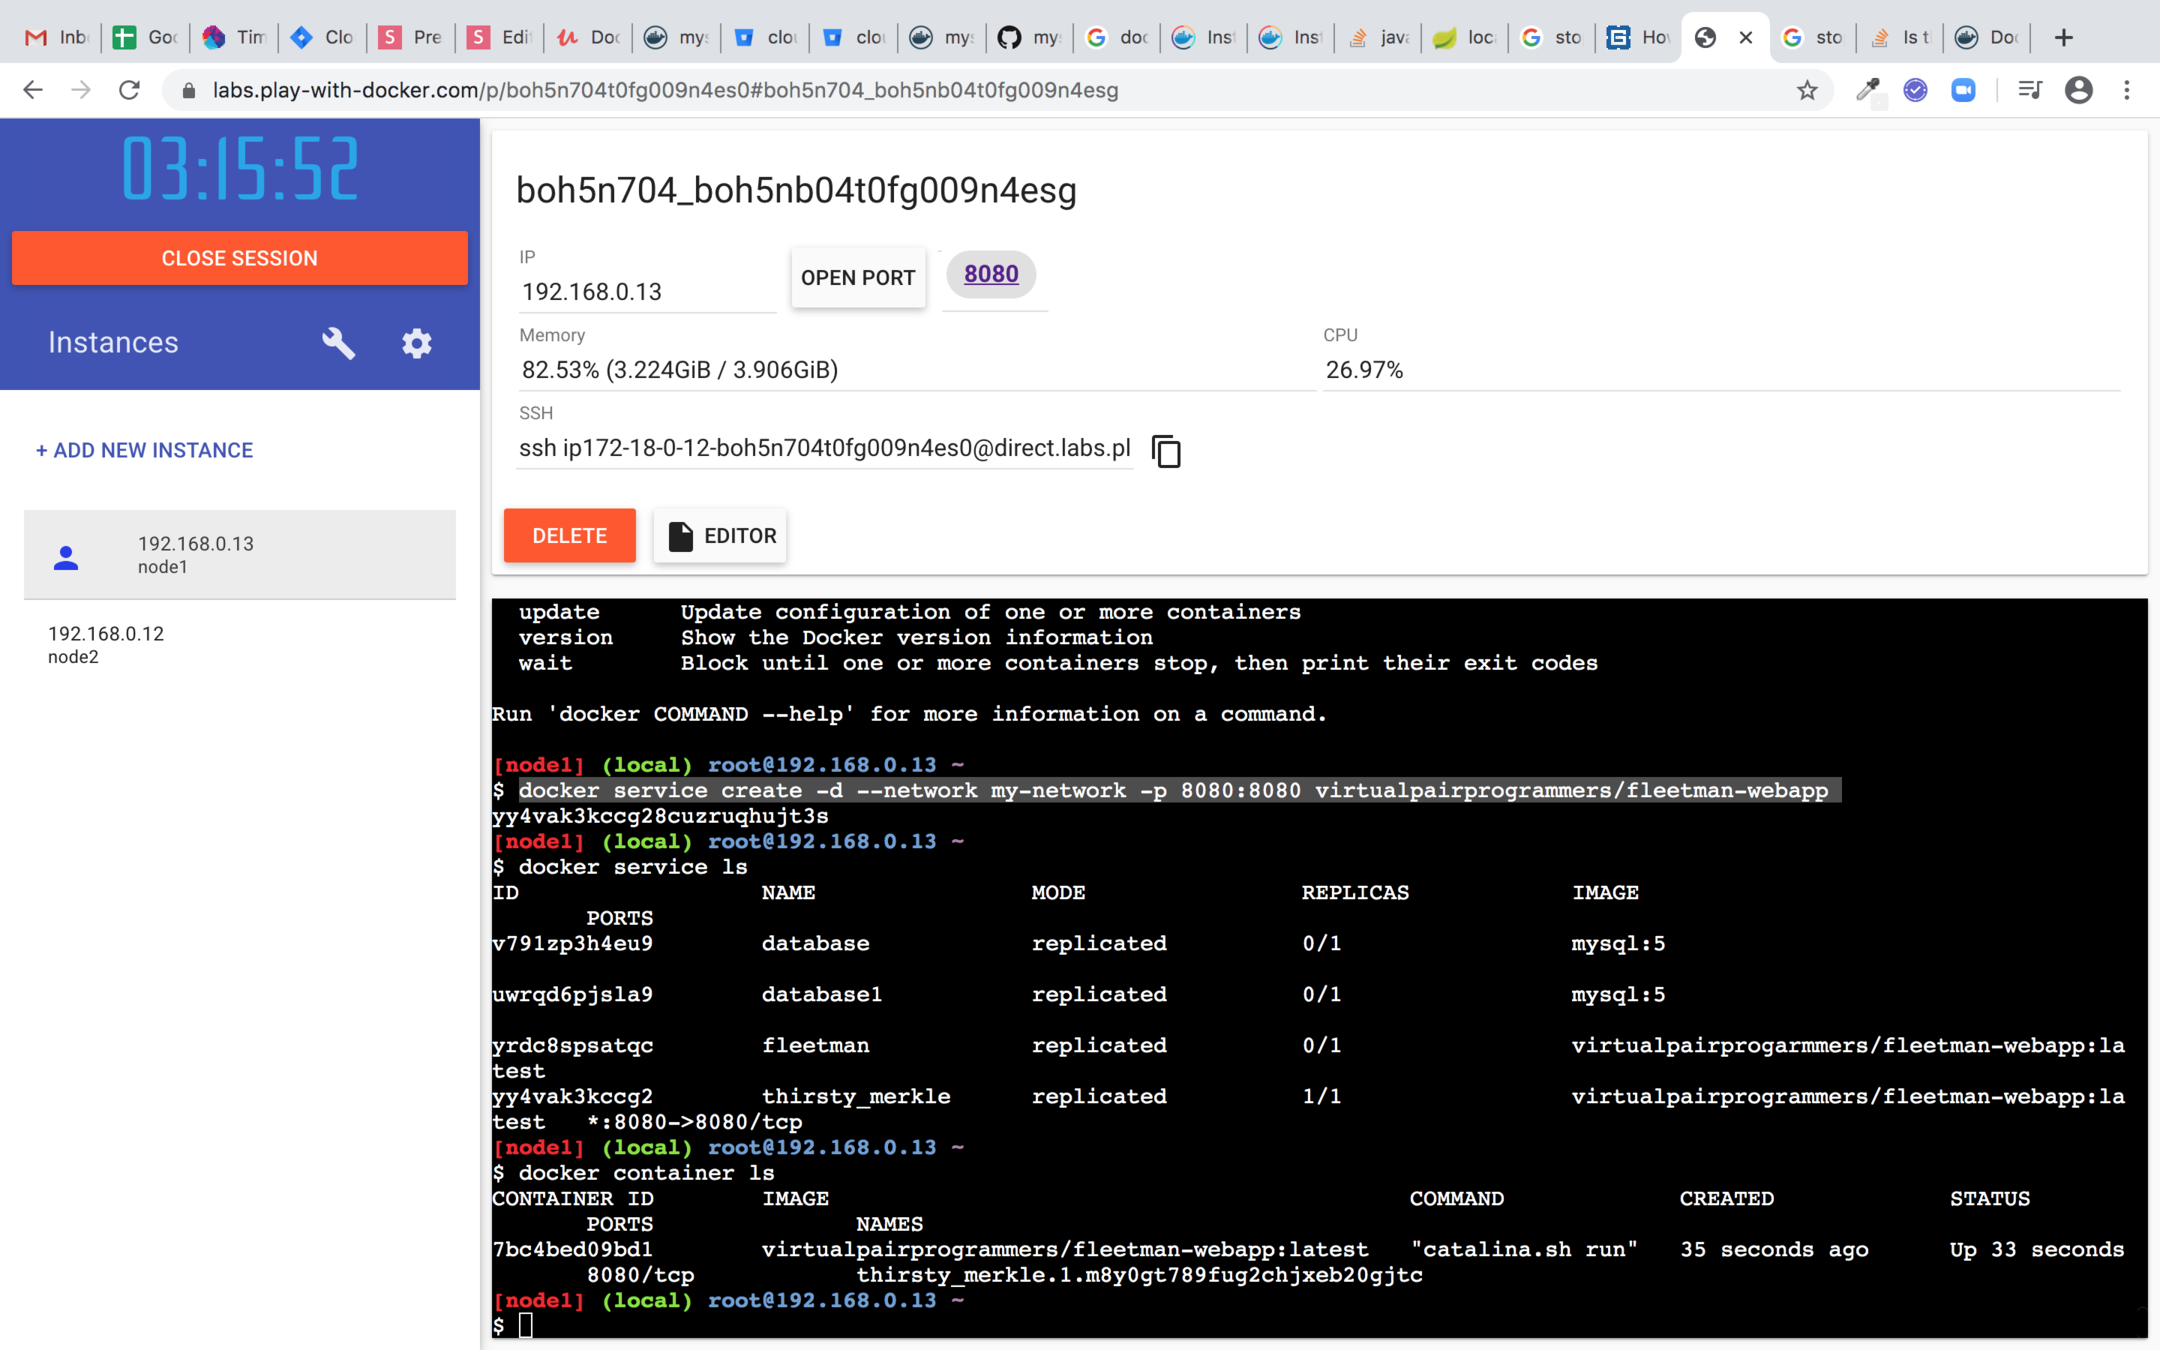
Click on 8080 link at the top to see your running app

Docker for Java Developers
By Pulkit Pushkarna
Docker for Java Developers
- 1,739


