


Content ITV PRO
This is Itvedant Content department
CartSure AI-Driven Testing & Optimization
Business Scenario
Welcome!
You are now performing AI-Driven Testing and Optimisation activities in the CartSure project as a Software Tester.
Before testing modern real-world applications, it is important to understand how Artificial Intelligence tools can improve testing efficiency, reduce manual effort, and enhance test coverage.
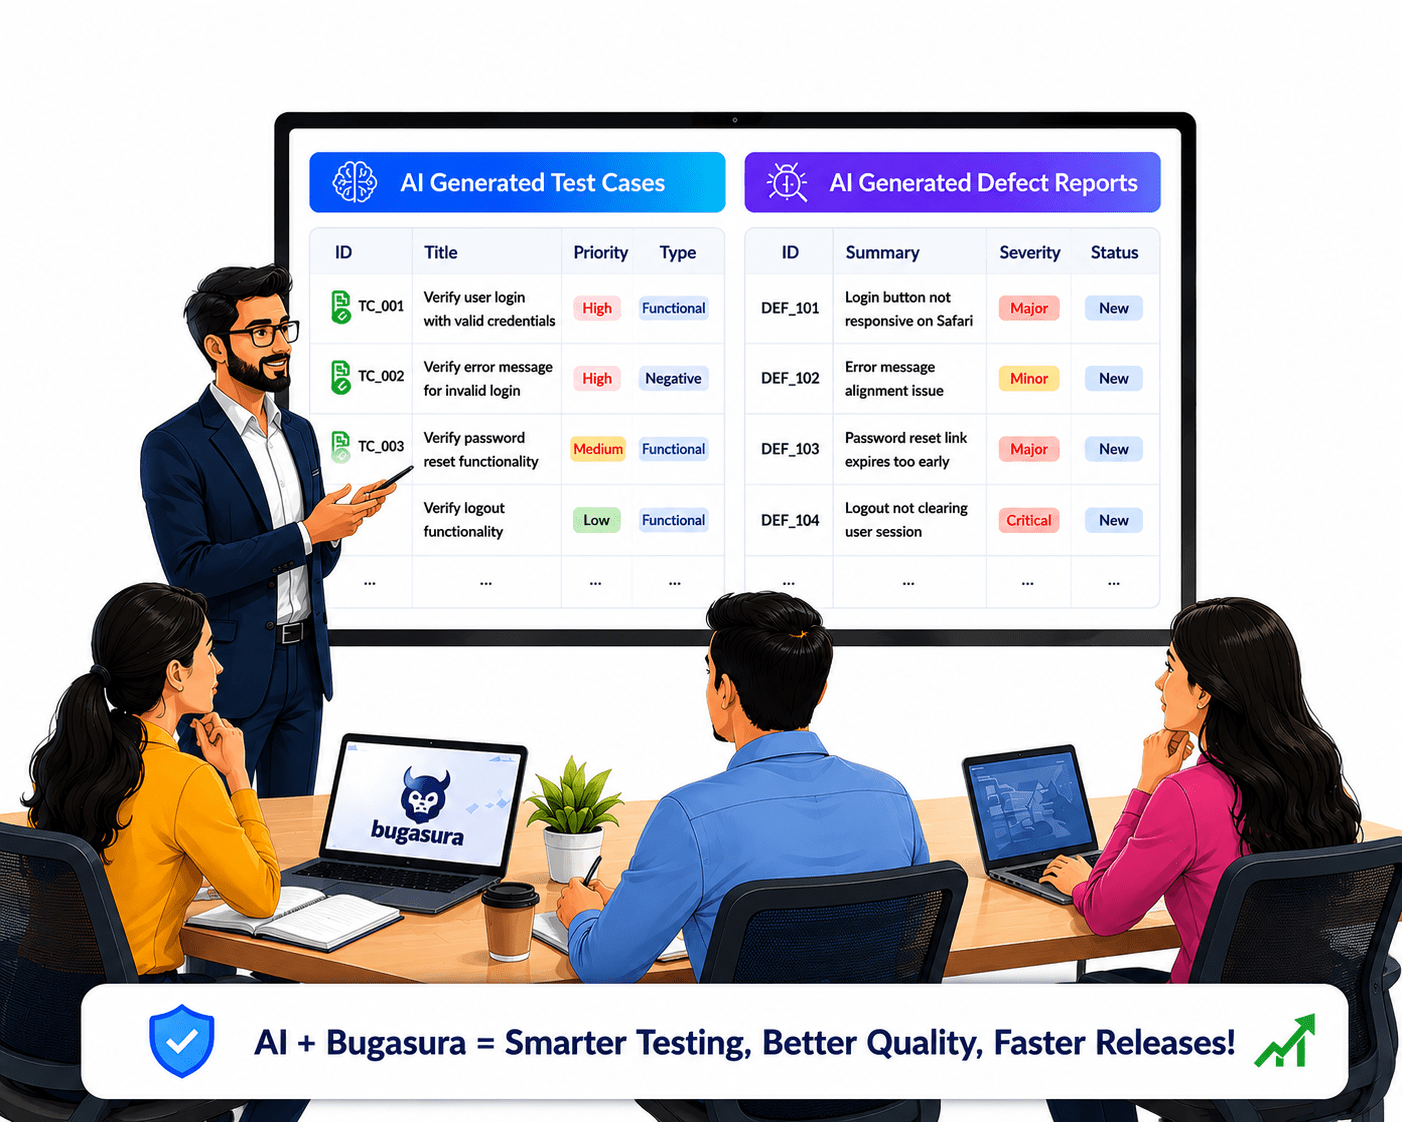
AI-powered testing helps testers identify defects faster, generate effective test cases, and analyse application behaviour more intelligently.So, today you will perform test case generation using ChatGPT, use AI Bugasura for defect reporting.
Pre-Lab Preparation
git pull origin branchNameGit Pull
Topic: Working with a Text and Listing HTML
Introduction to Bugasura and Test Case Management
1) Creating Requirements
2) Creating Test Cases
3) Executing Test Case
4) Defect Logging with Defect Management
Task 1: Use ChatGPT for test case generation
Identify Features to Test
1
1
Make a list of all critical features of your e-commerce site.
Example Features: 1. User Registration/Login
2. Product Search & Filtering
3. Shopping Cart Operations
4. Checkout & Payment
5. Order History & Tracking
6. Discounts & Promo Codes
Prepare Input for ChatGPT
1
2
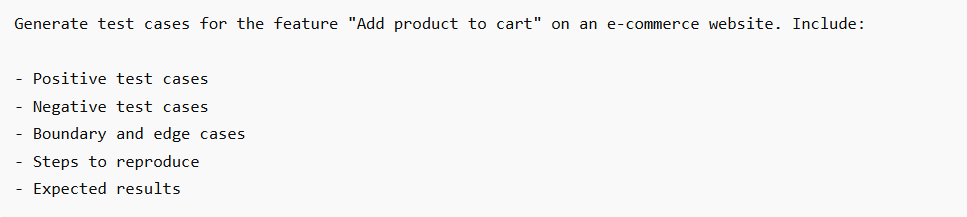
Provide clear instructions to ChatGPT with the feature description and testing requirements.
Example Prompt for “Add Product to Cart”:
Generate Test Cases
1
3
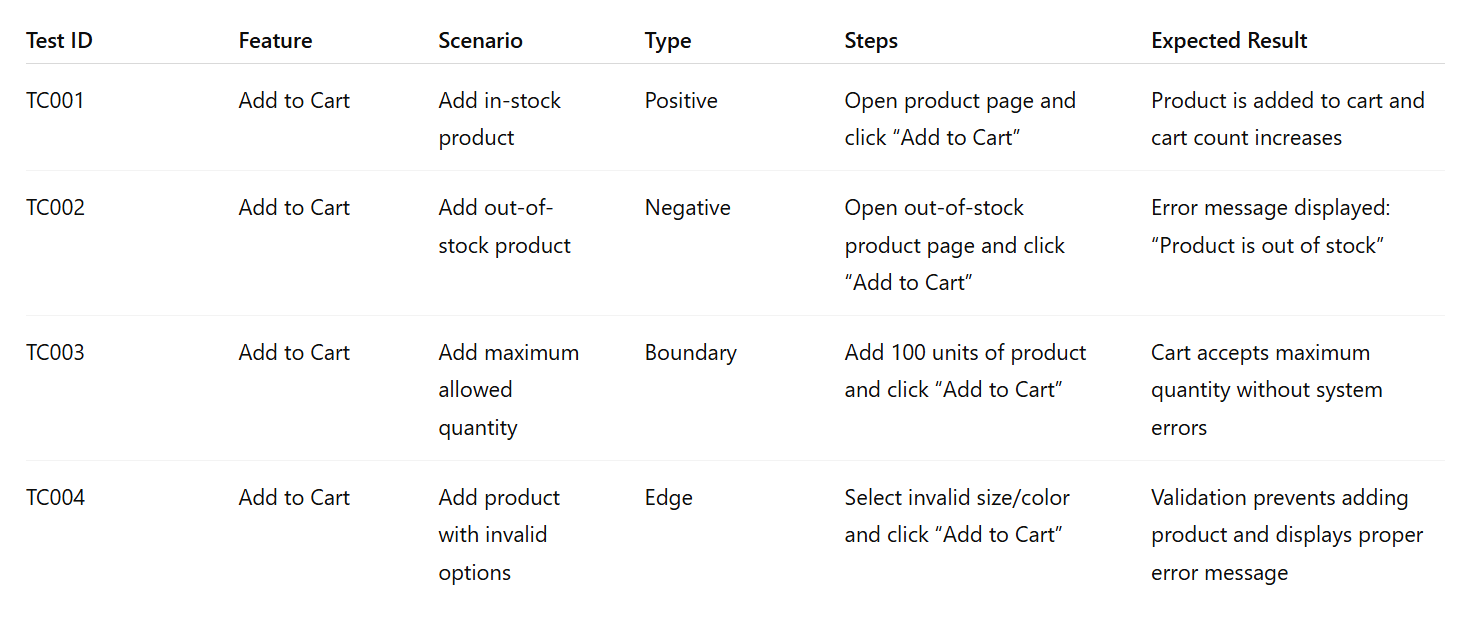
Feed the prepared prompt to ChatGPT.
Example Output from ChatGPT:
Organize Test Cases
1
4
- Excel/Google Sheets
- Test management tool (e.g., Jira, TestRail)
- Test ID
- Feature
- Scenario
- Type (Positive/Negative/Edge)
- Steps
- Expected Result
Review and Refine
1
5
Review AI-generated test cases for :
- Completeness
- Accuracy
- Redundancy
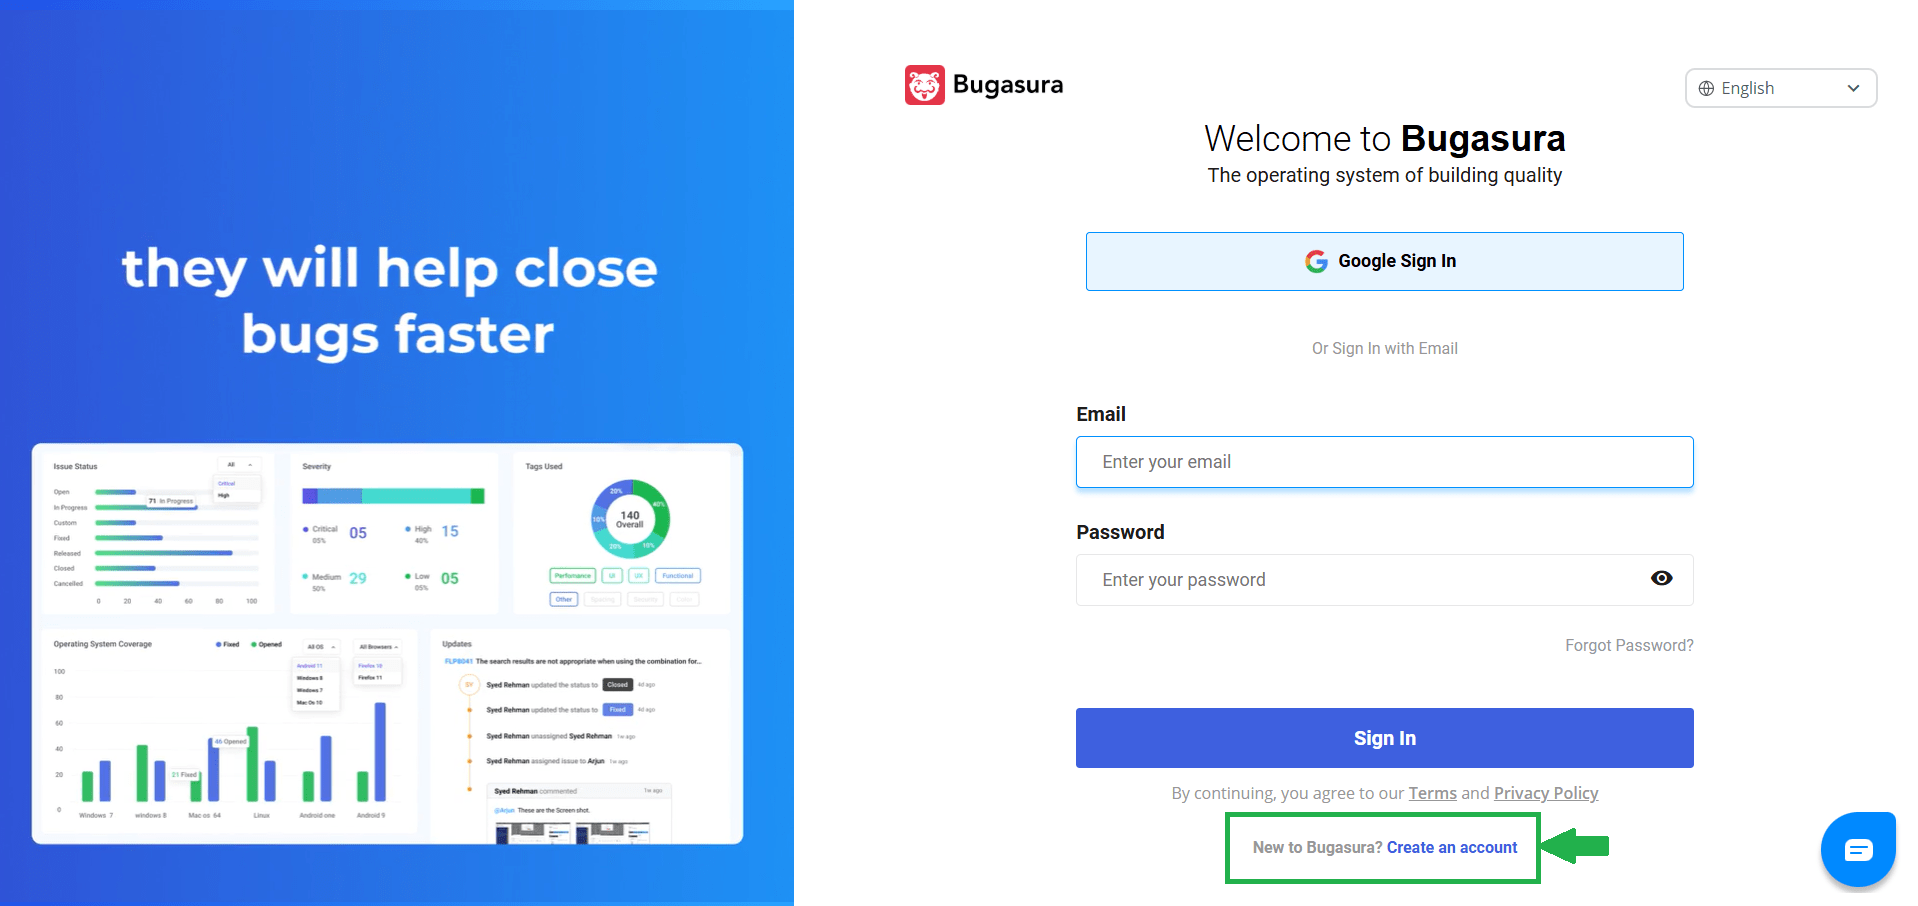
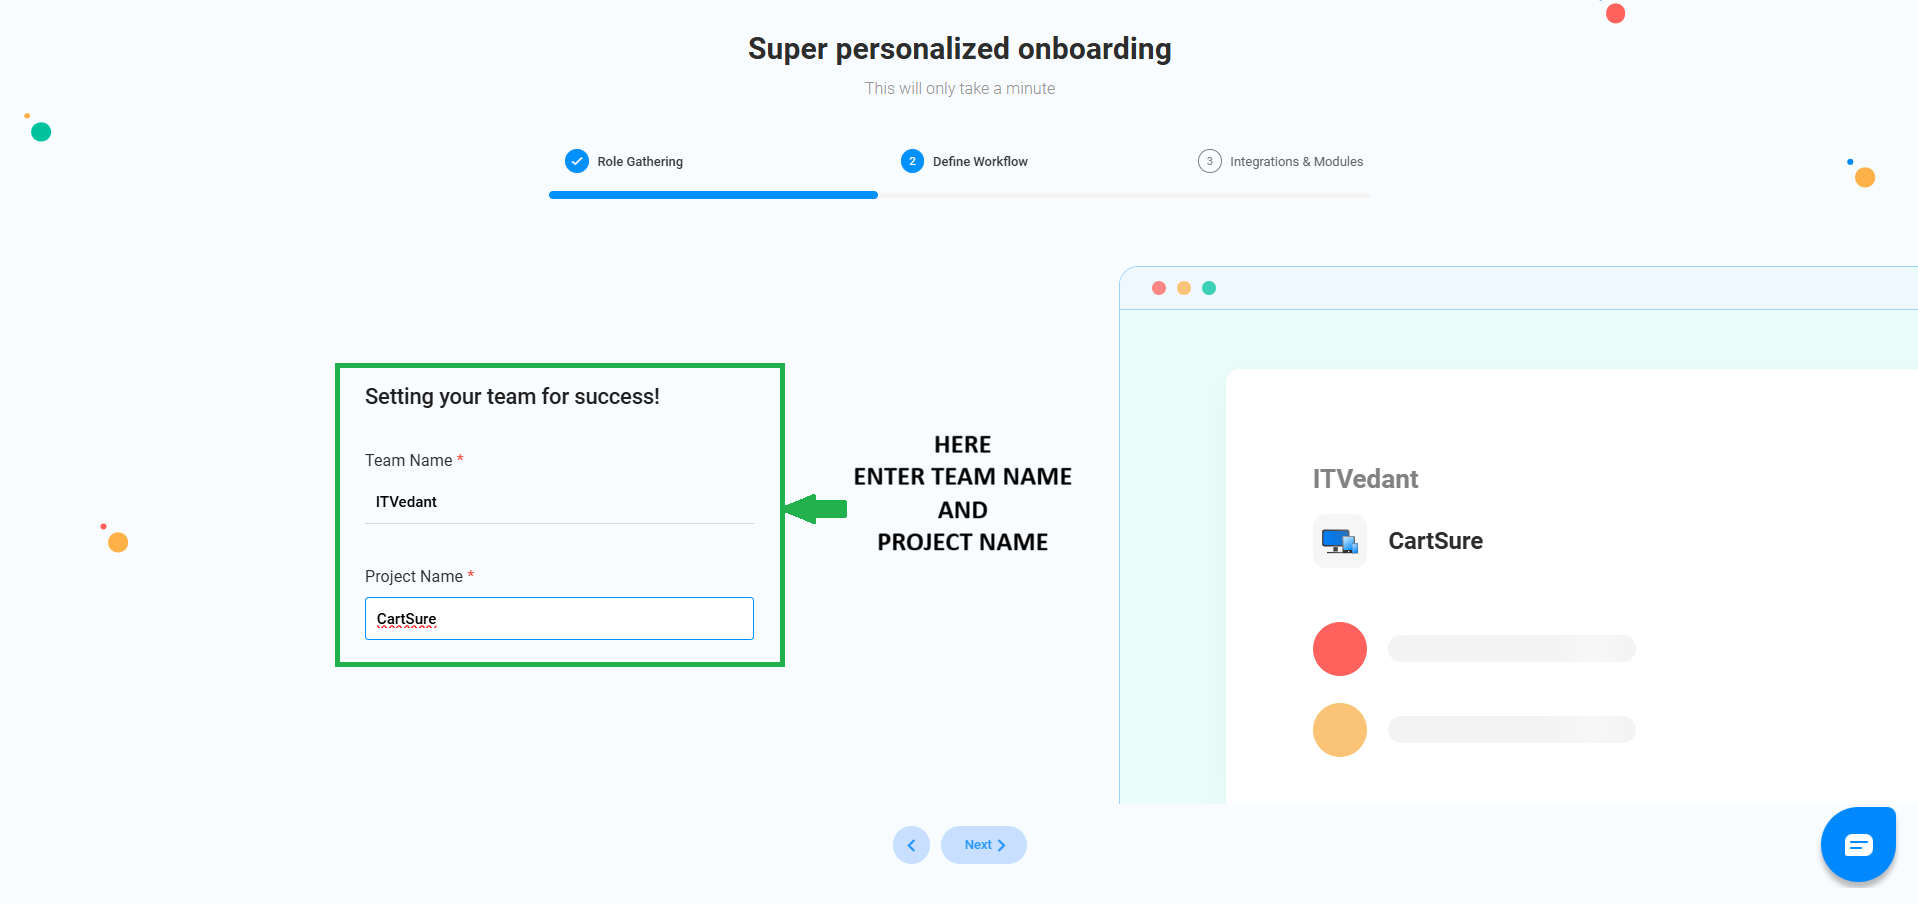
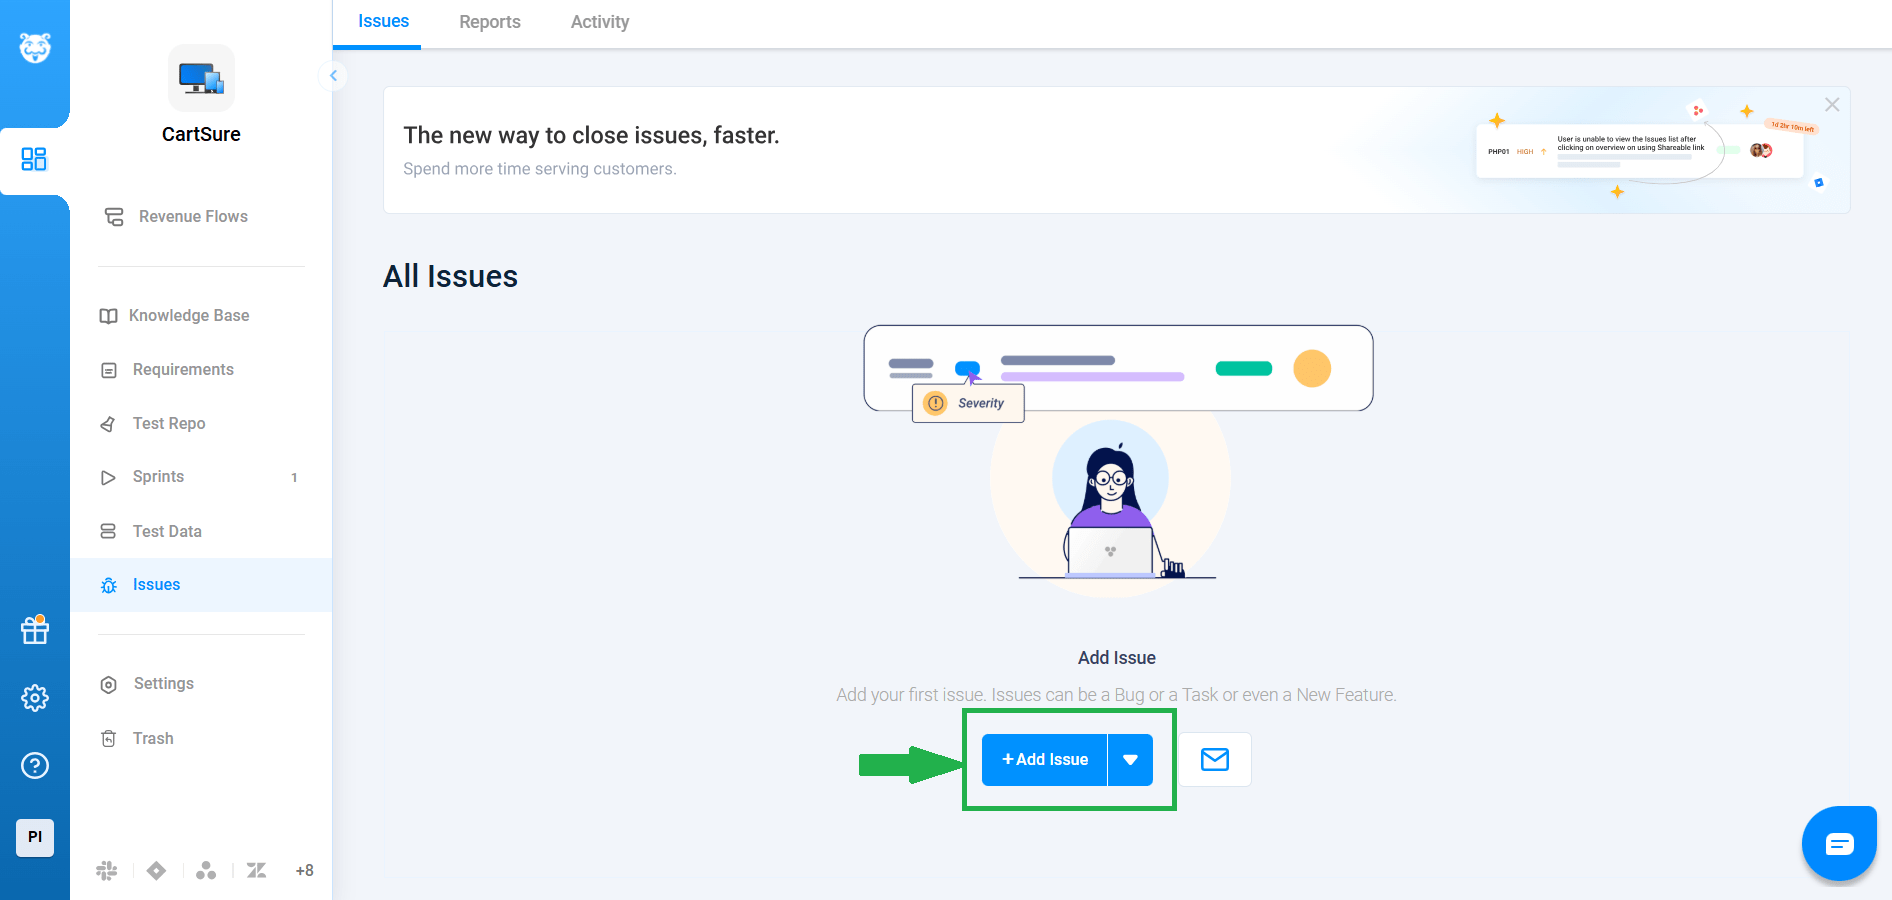
Task 2: Understanding Bugasura
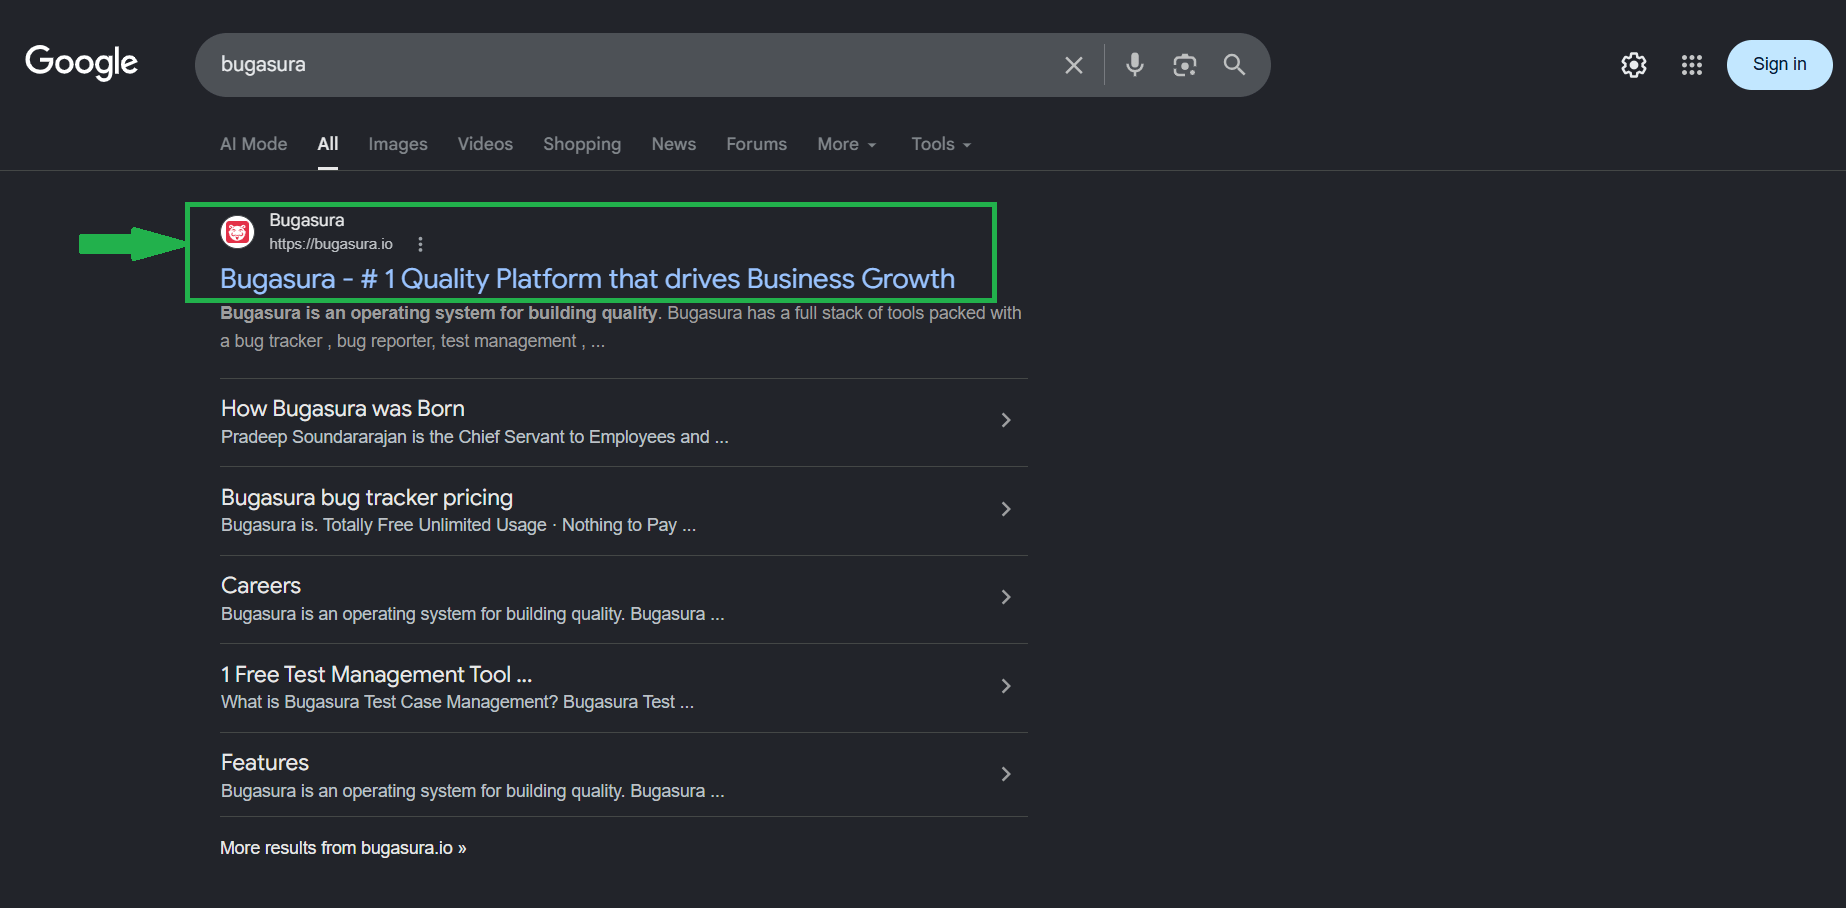
Visit the official Bugasura website and follow the process as shown in the image.
1
1
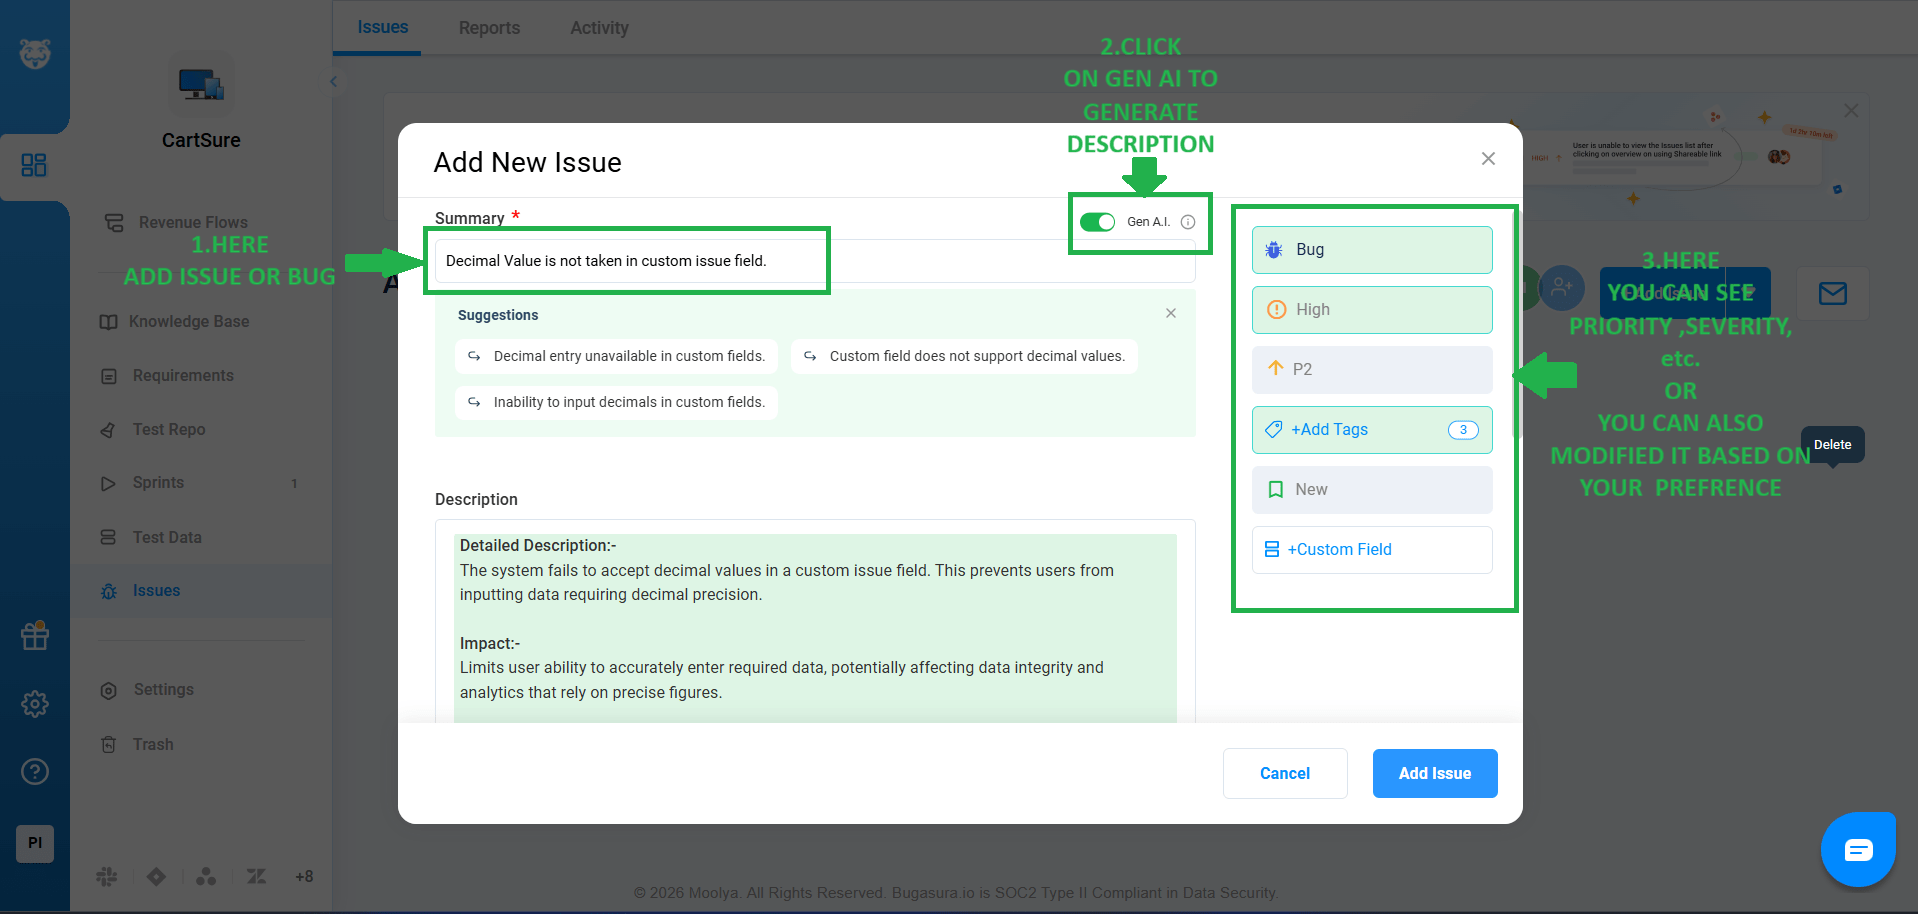
Select the option displayed in the image, then click Next
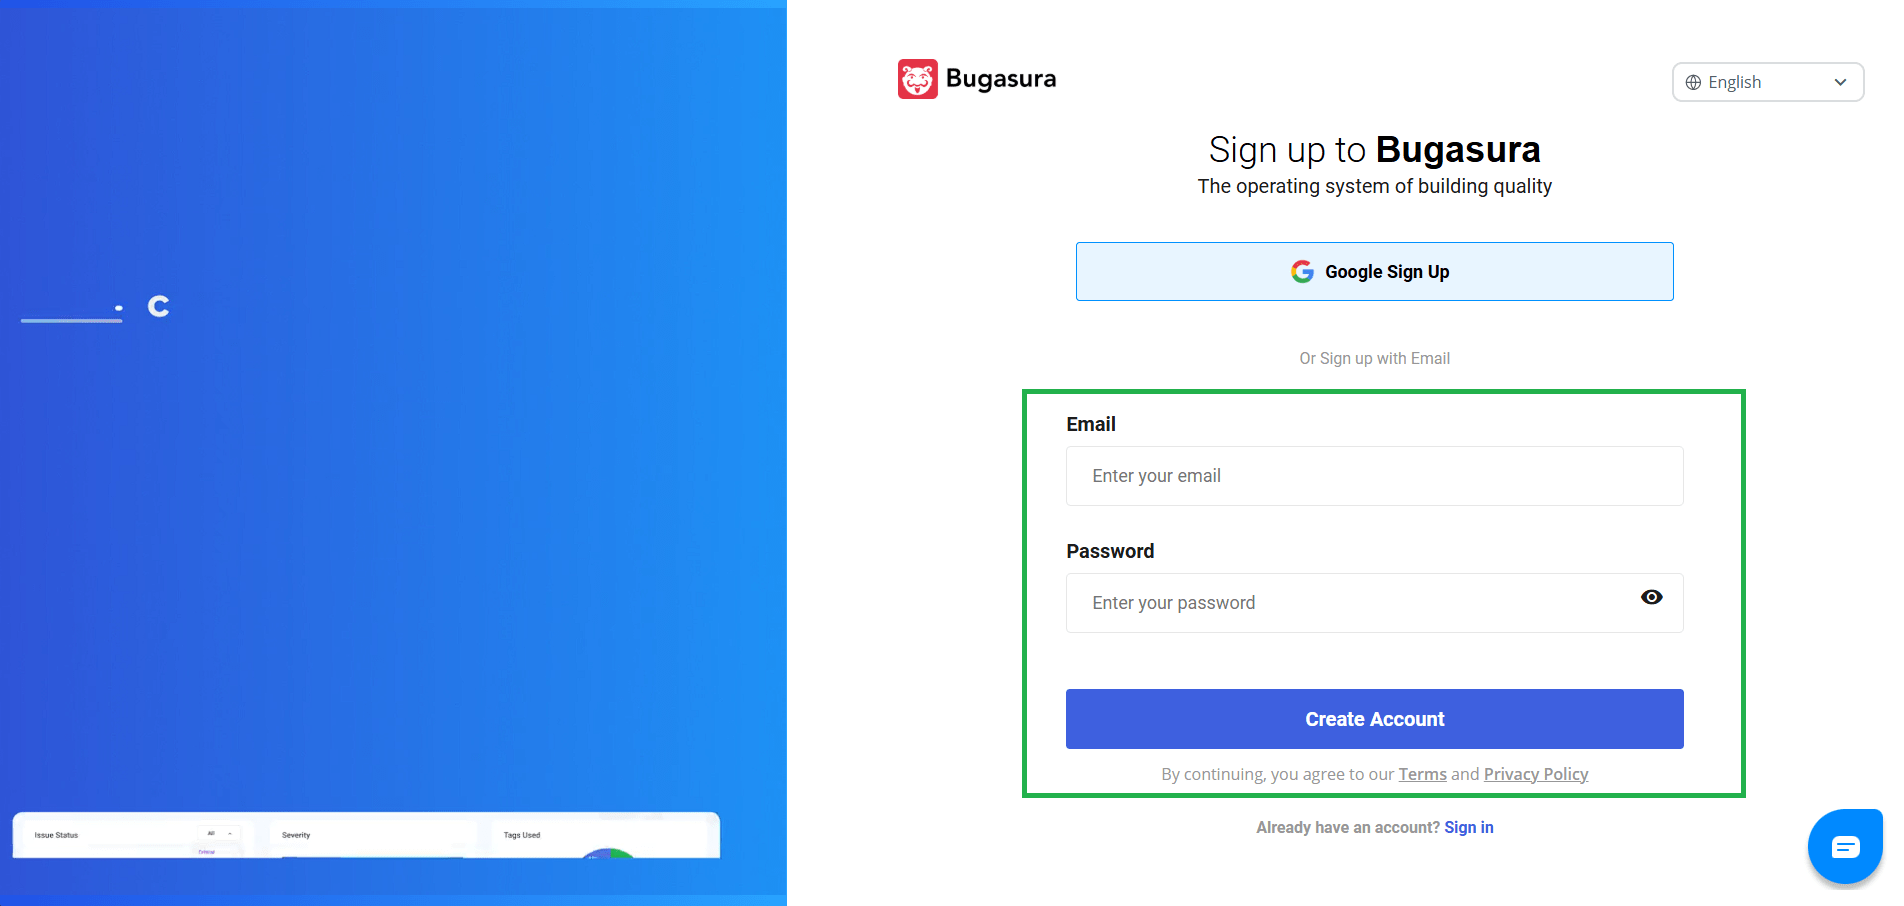
2
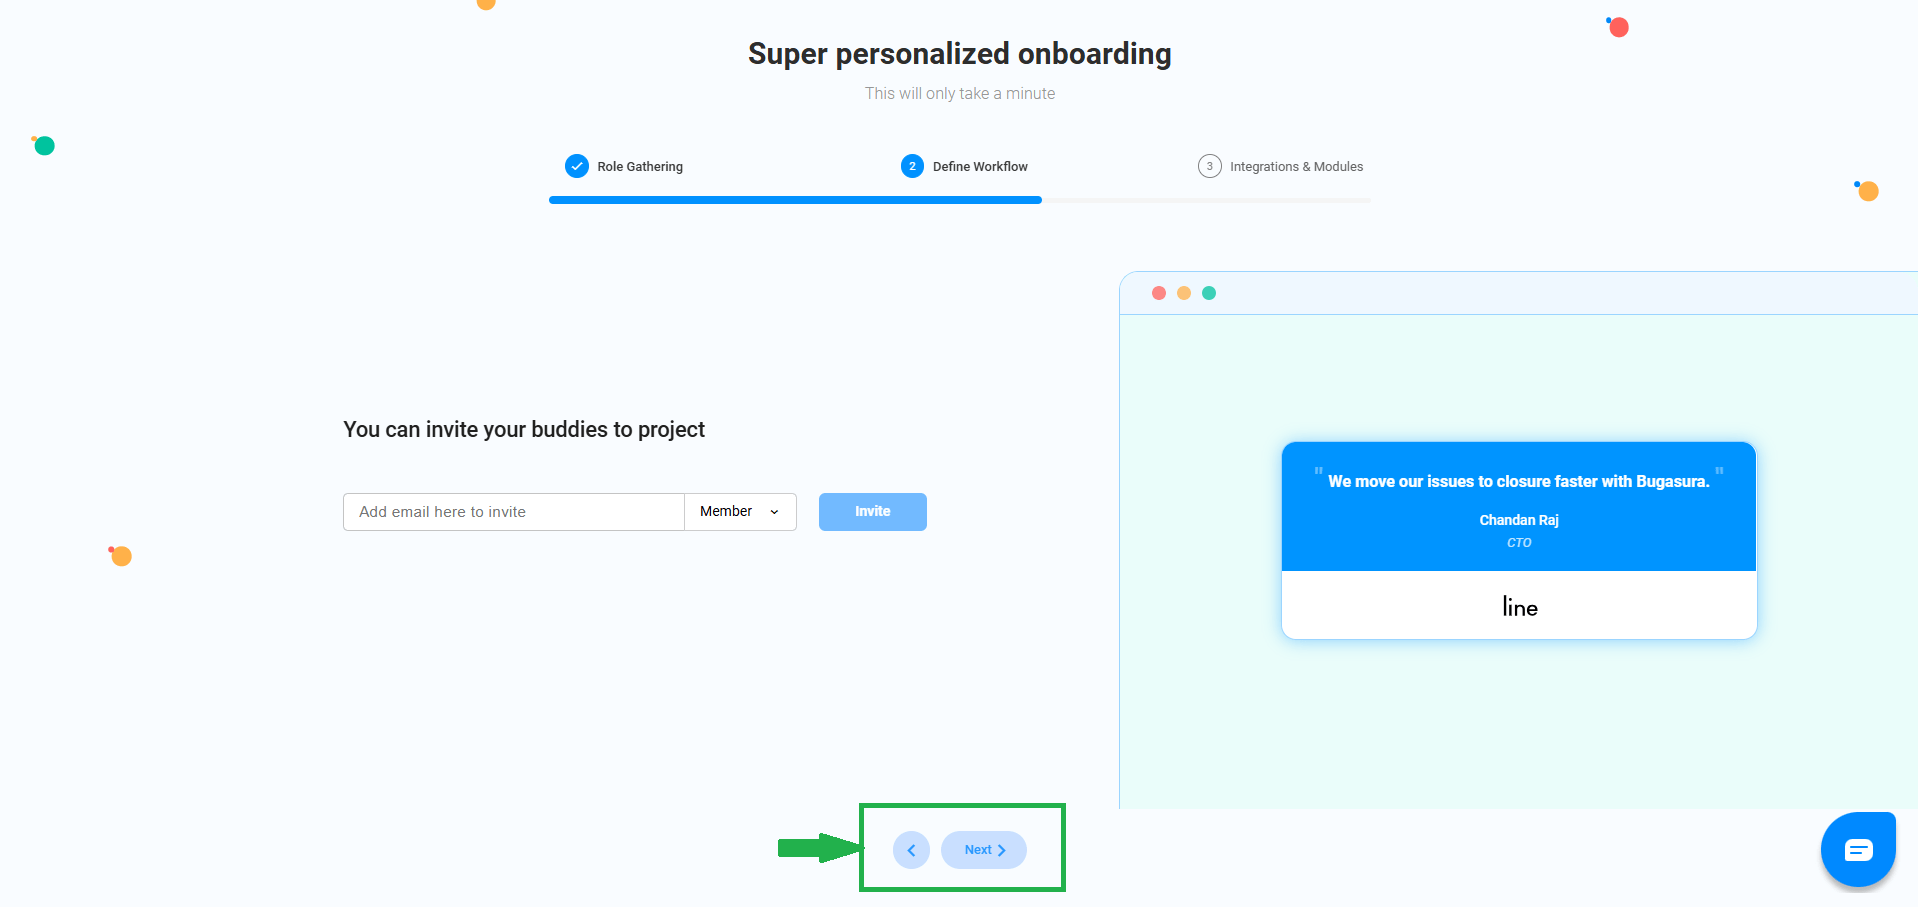
Select the option displayed in the image, then click Next
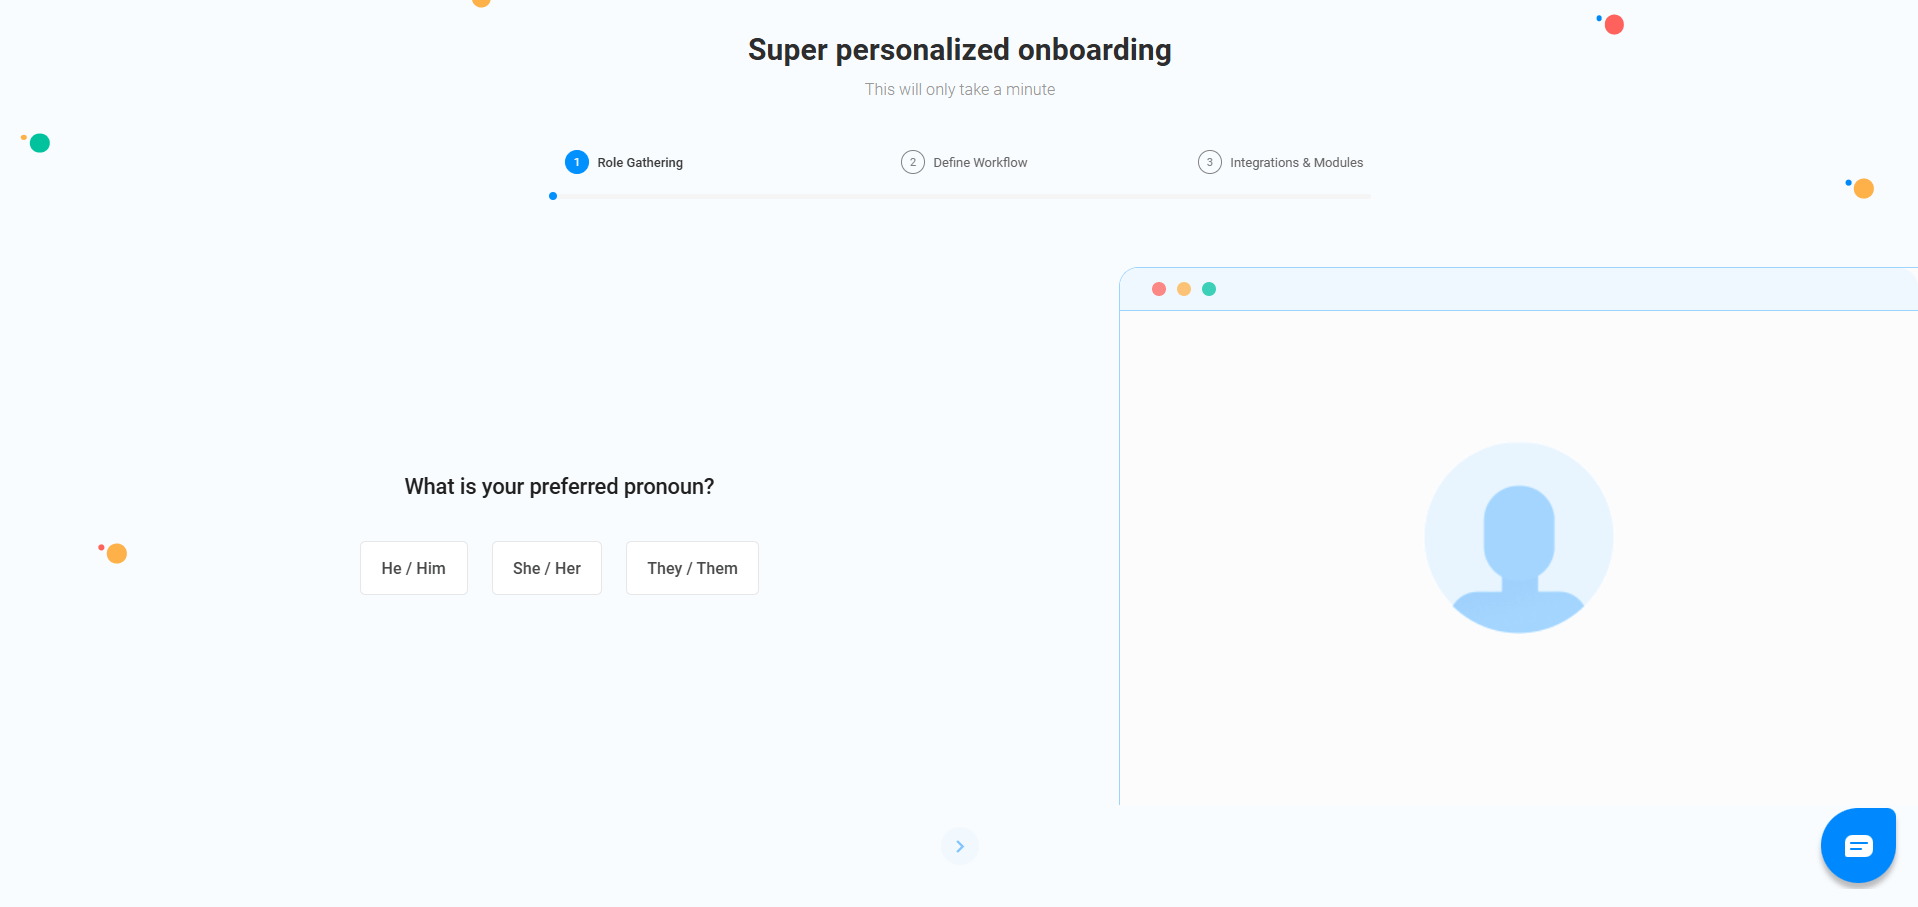
3
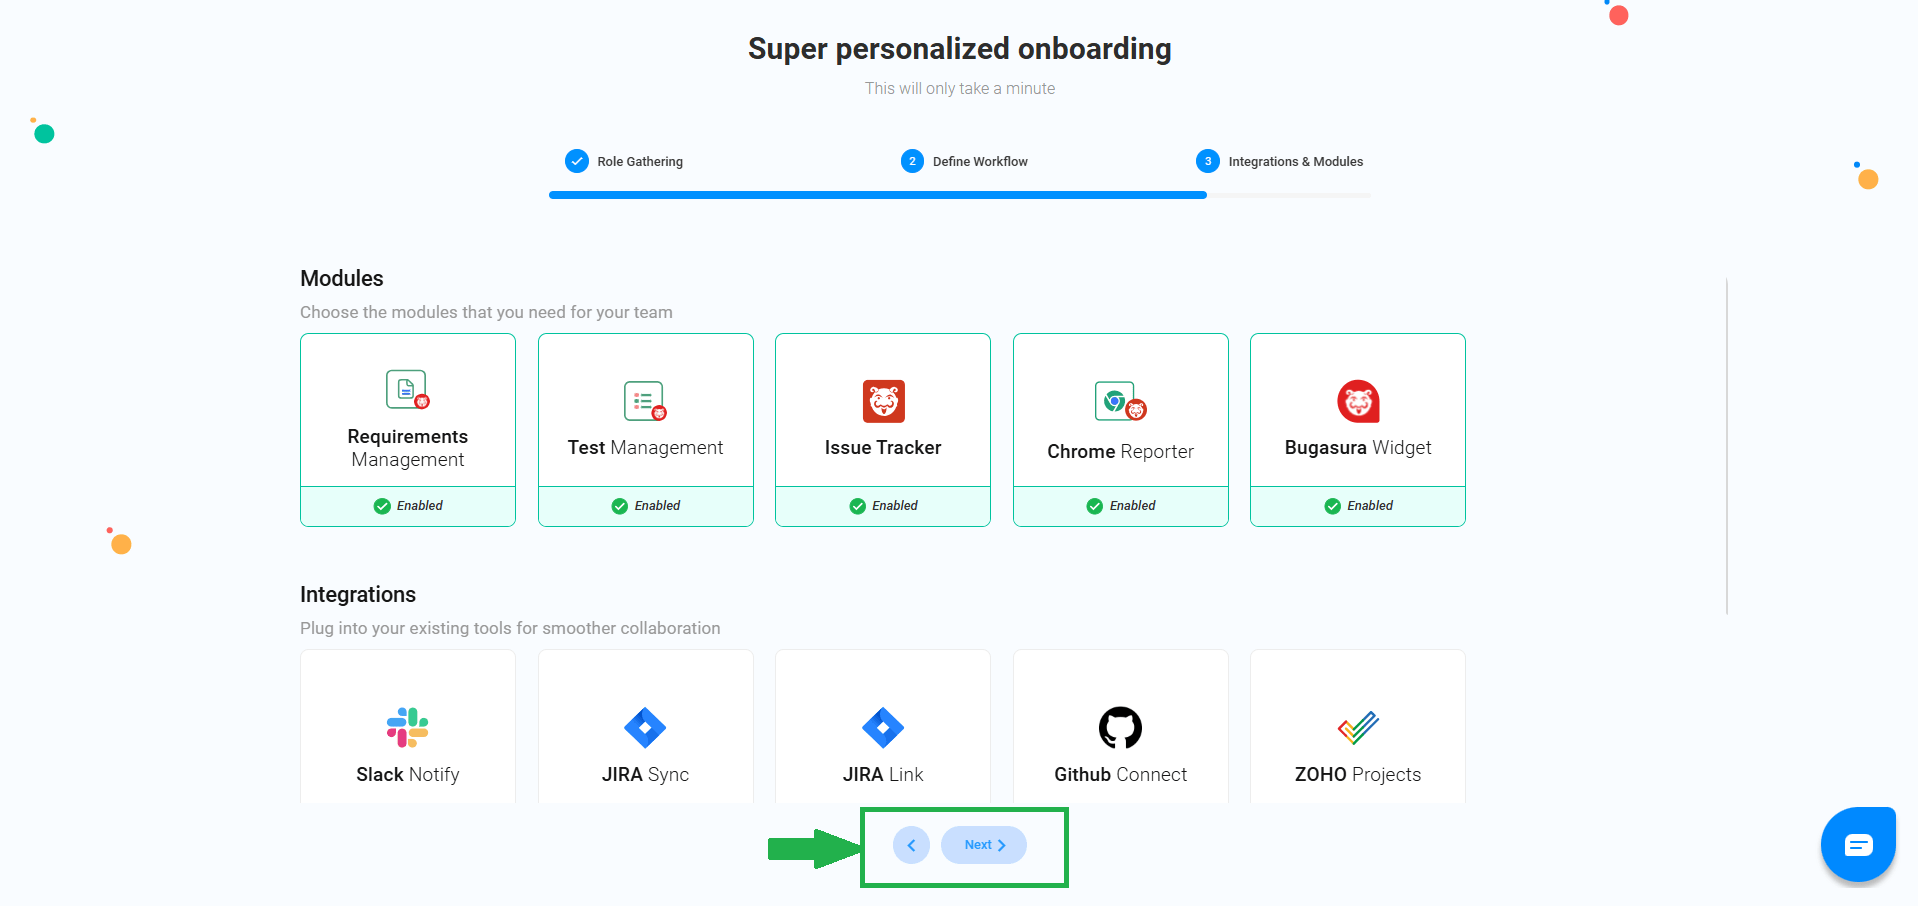
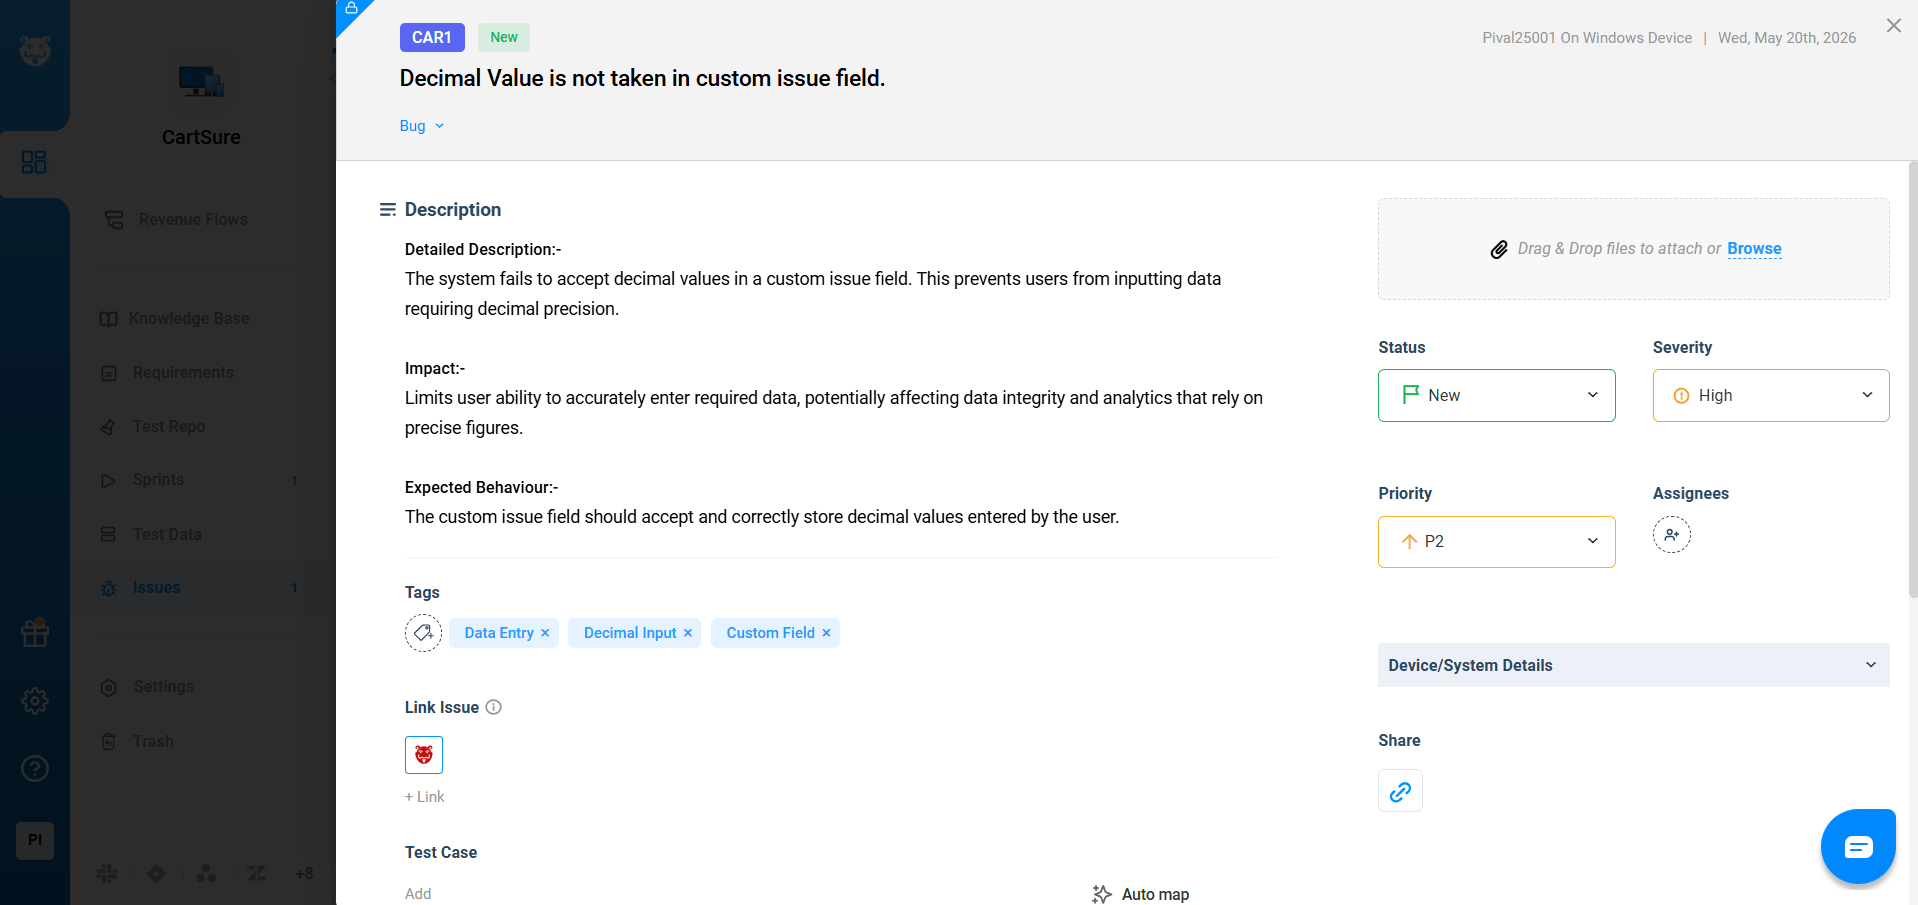
Select the option displayed in the image, then click Next
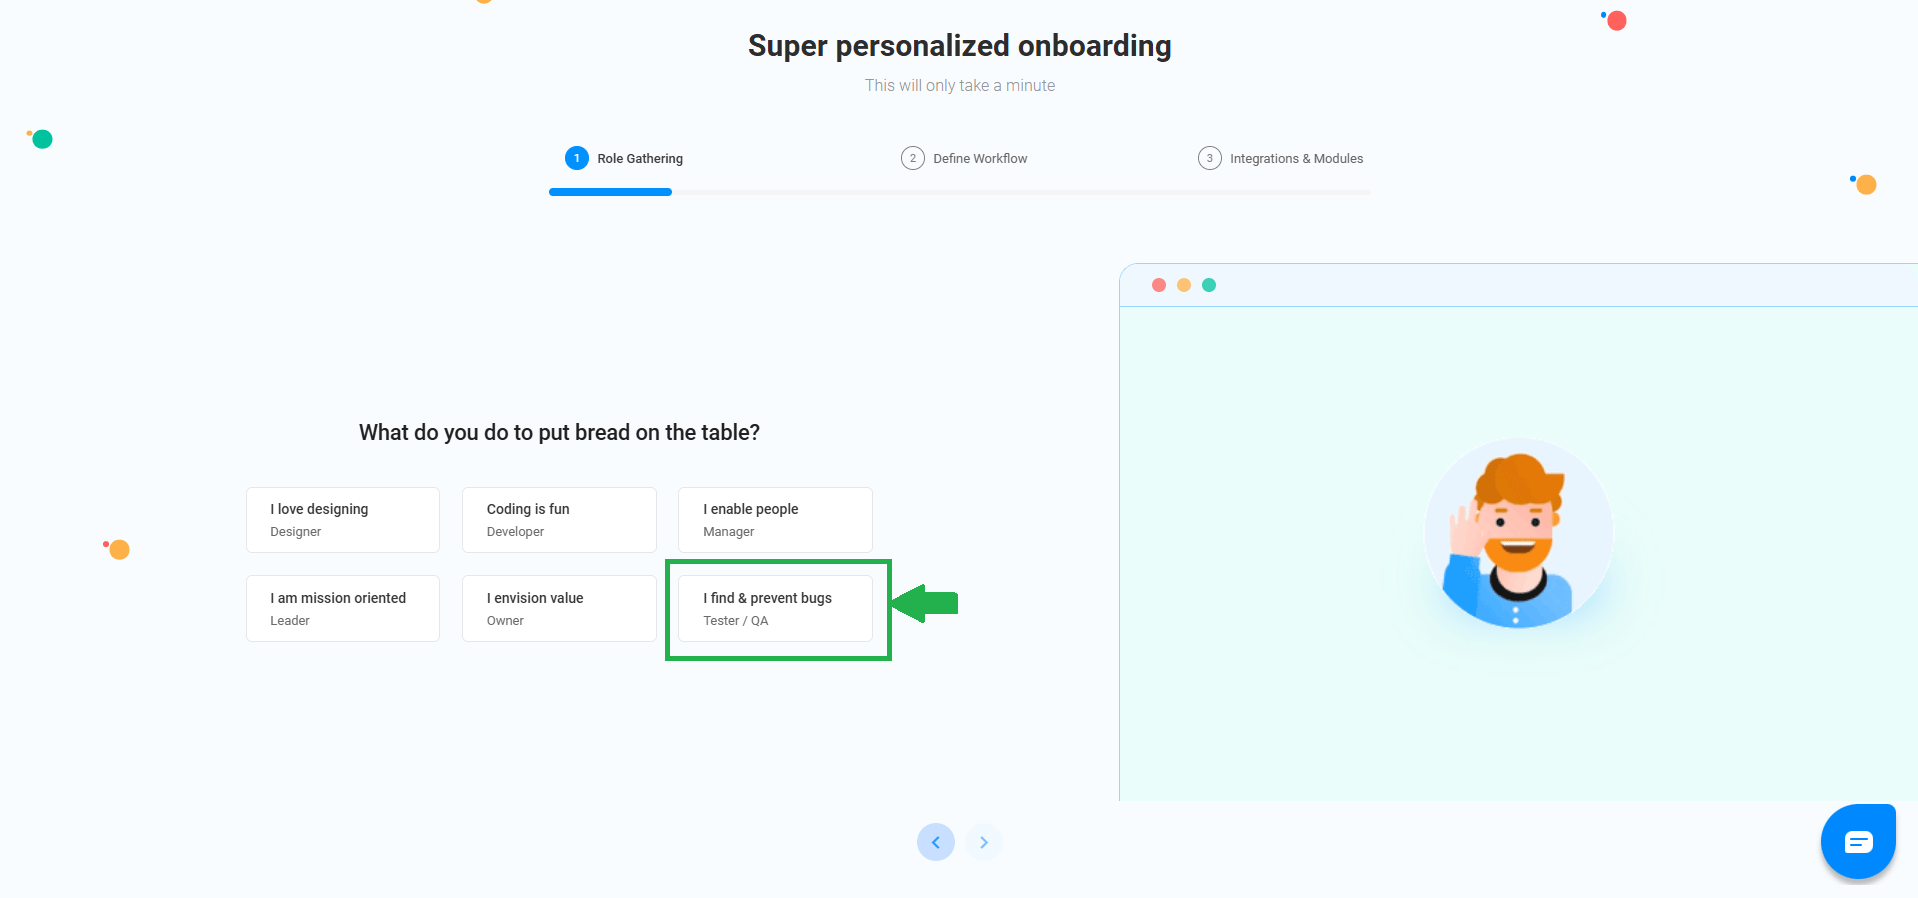
4
Select the appropriate option as per your convenience, then click Next
5
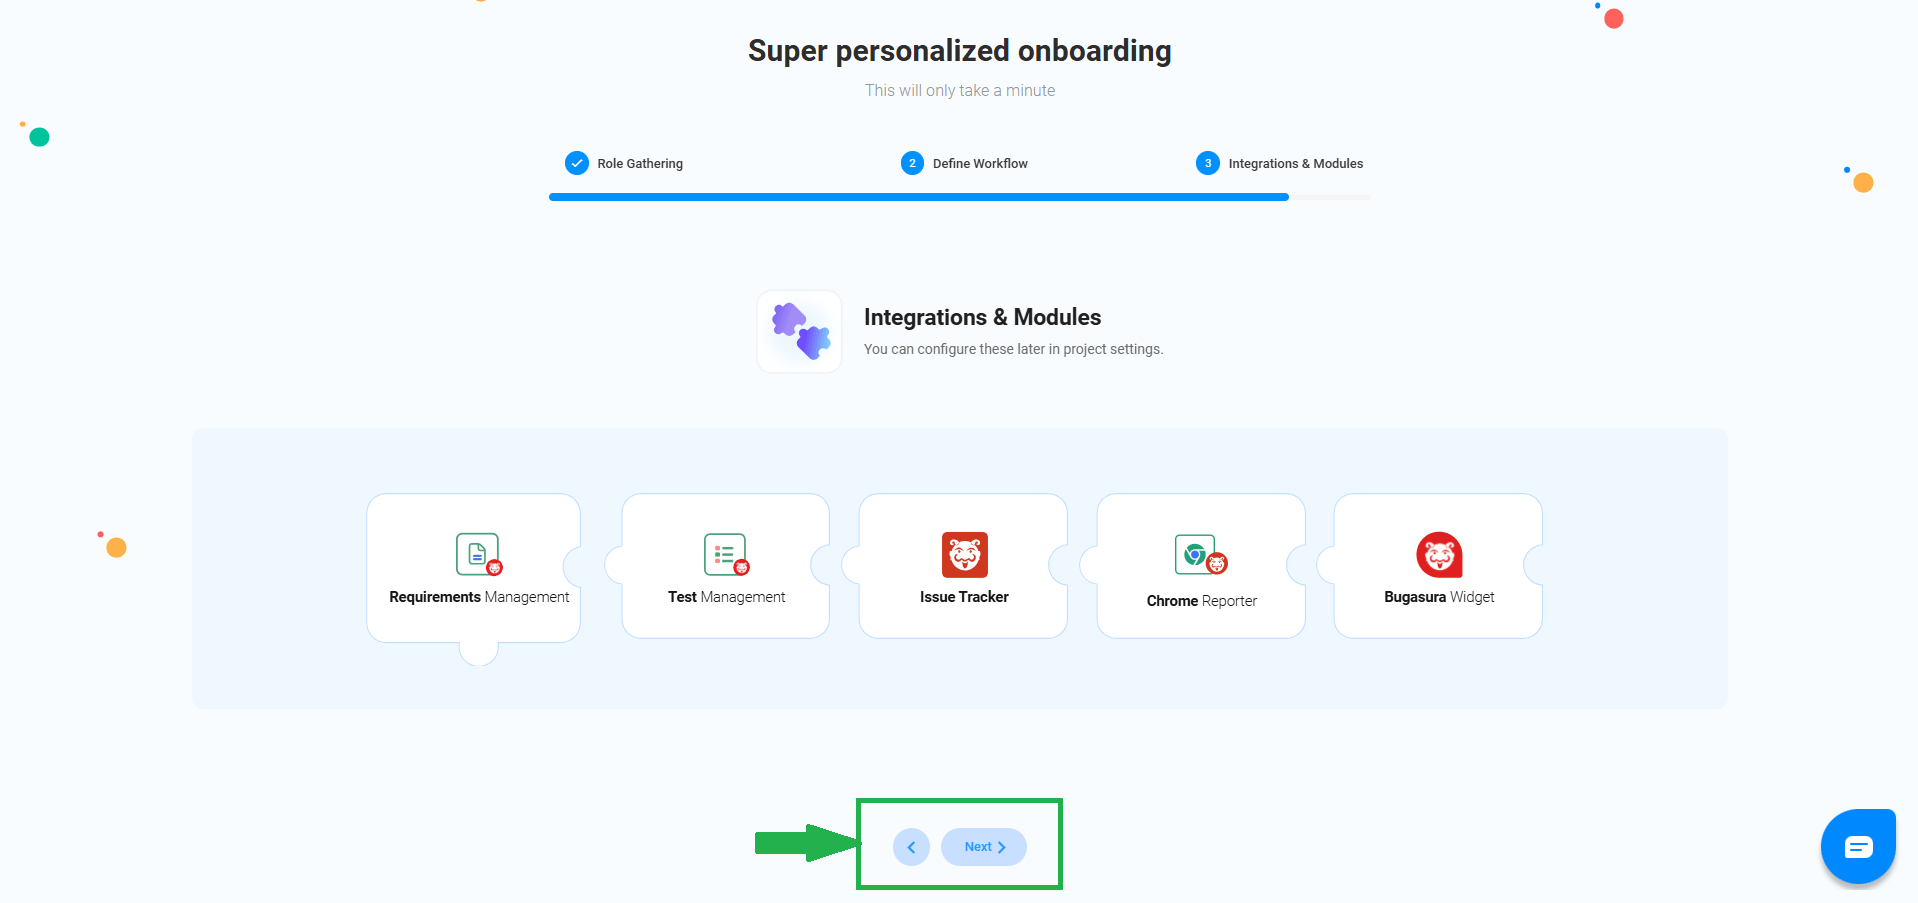
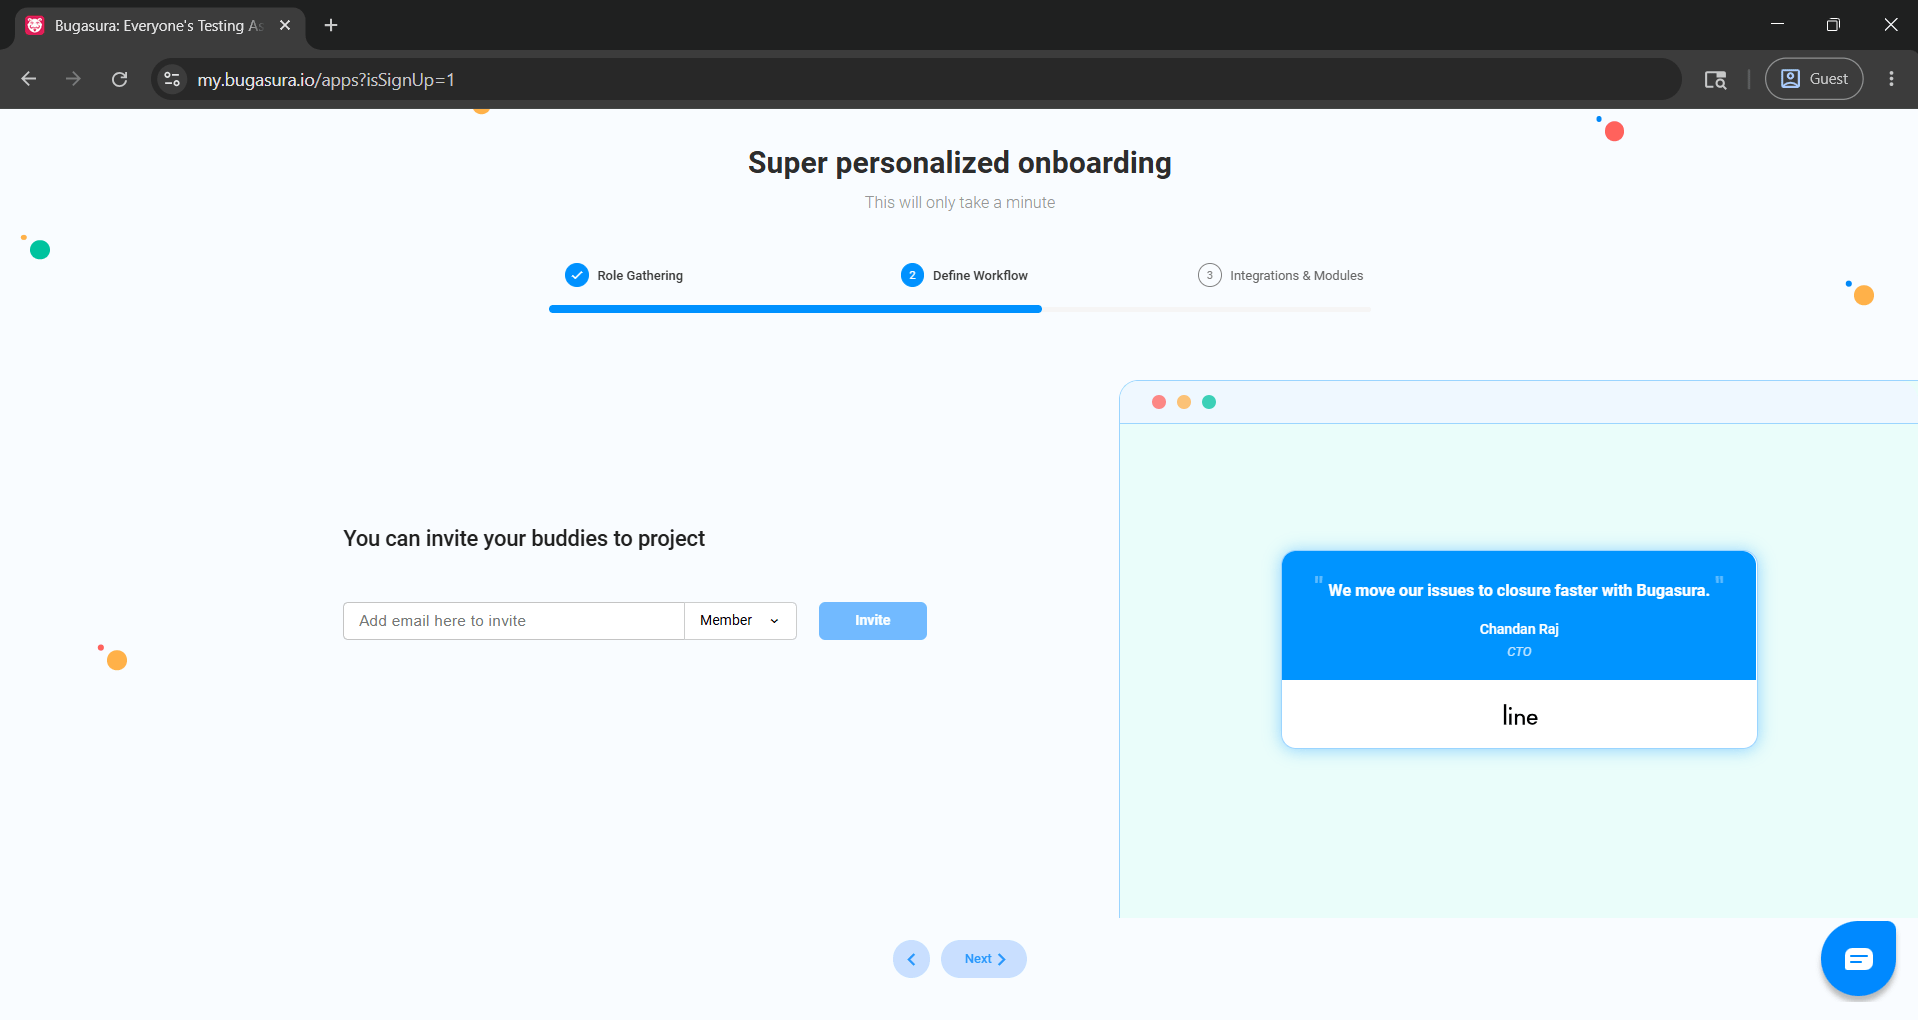
Select the option displayed in the image, then click Next
6
Select the option displayed in the image, then click Next
7
Select the option displayed in the image, then click Next
8
Select the option displayed in the image, then click Next
9
Select the option displayed in the image, then click Next
10
Select the option displayed in the image, then click Next
11
Select the option displayed in the image, then click Next
12
Select the option displayed in the image, then click Next
13
Select the option displayed in the image step by step
14
Select the option displayed in the image, then click Next
15
- Completeness
- Accuracy
- Redundancy
Execute Test Cases
1
1
Run the AI-generated test cases from Task 1.
Example: Add out-of-stock product to cart → Test fails, product is added incorrectly.
Task 2: Use AI Bugasura for defect reporting
Capture Evidence
1
2
Take screenshots, logs, or videos of failed tests.
Example: Screenshot shows “Add to Cart” button works even though stock = 0.
Input Defect into Bugasura
1
3
Provide test case info, steps, and evidence to Bugasura.
AI suggests: - Bug Title
- Severity
- Type
- Possible root cause
Example: - Title: Out-of-stock product added to cart
- Severity: Critical
- Type: Functional
- Root Cause: Missing backend stock validation
Task 2: Use AI Bugasura for defect reporting
Capture Evidence
1
2
Input Defect into Bugasura
1
3
Provide test case info, steps, and evidence to Bugasura.
AI suggests: - Bug Title
- Severity
- Type
- Possible root cause
Example: - Title: Out-of-stock product added to cart
- Severity: Critical
- Type: Functional
- Root Cause: Missing backend stock validation
Task 2: Understanding Bugasura
Capture Evidence
1
2
| Col 1 | Col 2 | Col 3 |
|---|---|---|
| Row 1 | ||
| Row 2 | ||
| Row 3 |
Formula
Profit = Revenue - Cost
Task 2: Create WireFrame
Now that you understand the requirements, don’t jump into coding yet. Before development, we always visualize the layout.
Now lets create a simple wireframe for the homepage.
A wireframe is like a layout plan of a house. Before building, you decide where rooms, doors, and windows will be placed.Similarly, a wireframe helps you plan where elements like headers, images, and buttons will appear on a webpage—before adding design or colours.
Task 3: Code Editor Installation
Good work on completing the planning phase.
Now we will start development. Before that, make sure your system is ready with the required tools.
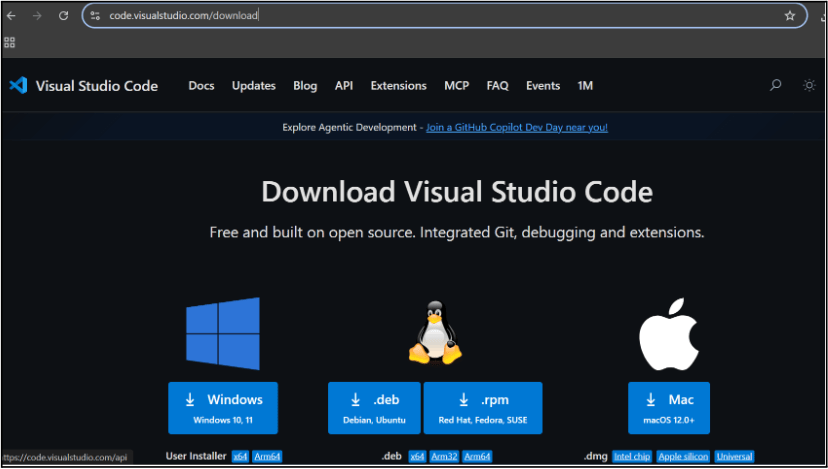
In this step we will install the VS code editor that will help to Write code efficiently,Organize files , Run and test your application
Go to the visual studio code official website
1
Click to download Homepage Wireframe : Homepage Wireframe
Choose your operating system(windows / Mac) and download the installation file.
Double click on the download app and Accept the agreement and click next
2
It is a long established fact that a reader will be distracted
b
Sub Steps
a
Double click on the download app and Accept the agreement and click next
public class MathSample {
    public static void main(String[] args) {
        int x = 10;
        int y = 20;
        int sum = x + y;

        System.out.println("The sum is: " + sum);
    }
}
public class MathSample {
public static void main(String[] args) {
int x = 10;
int y = 20;
int sum = x + y;
System.out.println("The sum is: " + sum);
}
}
public class MathSample {
public static void main(String[] args) {
int x = 10;
int y = 20;
int sum = x + y;
System.out.println("The sum is: " + sum);
}
}
Great job!
You have successfully completed your first lab on BiteBox Project Onboarding.
In this lab, you have: Understood the BRD, Created a wireframe, Set up your development environment, Organised your project structure, Run your first program
You are now ready to move to the next stage of development
Checkpoint
Next-Lab Preparation
Git Push
git push origin branchNameTopic : Working with a Text and Listin HTML
1) Power of HTML text tags
2) Customizing your style with CSS
3) Listing it right using HTML
4) HTML Link up , attributes of tag, block vs inline elements
Text box Width : 887
Business Scenario, Pre-lab Preparation, Next-lab Preparation, Task, Activity, Checkpoint : 90%.
Steps : 1,2,3 [Sub Steps - a,b,c]
Normal Text, Topic Name : 80%
Subtopic : 70%
Code Box font Size : 16px
By Content ITV


