


Content ITV PRO
This is Itvedant Content department
Learning Outcome
5
Handle user events using Angular
4
Understand event binding
3
Implement interpolation in components
2
Learn one-way binding (String Interpolation)
1
Understand data binding in Angular
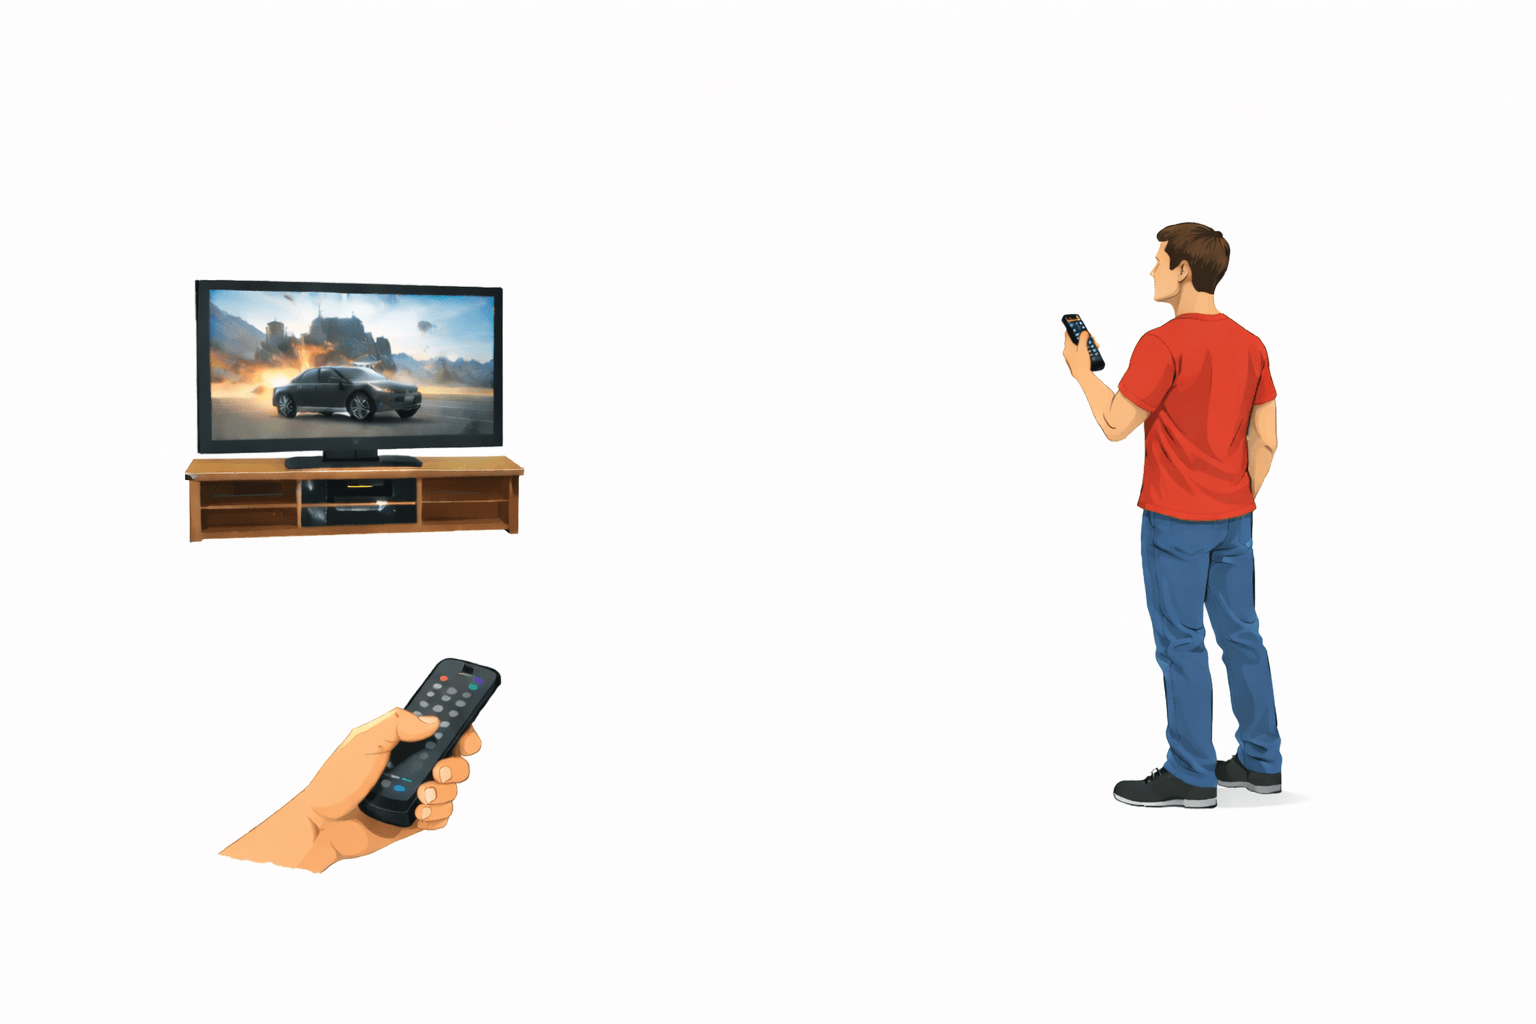
Analogy
Think of a TV and Remote.
TV displays content
Remote sends commands
Communication happens between user and device
Analogy
Same in Angular:
Data Binding = Communication bridge between component and template.
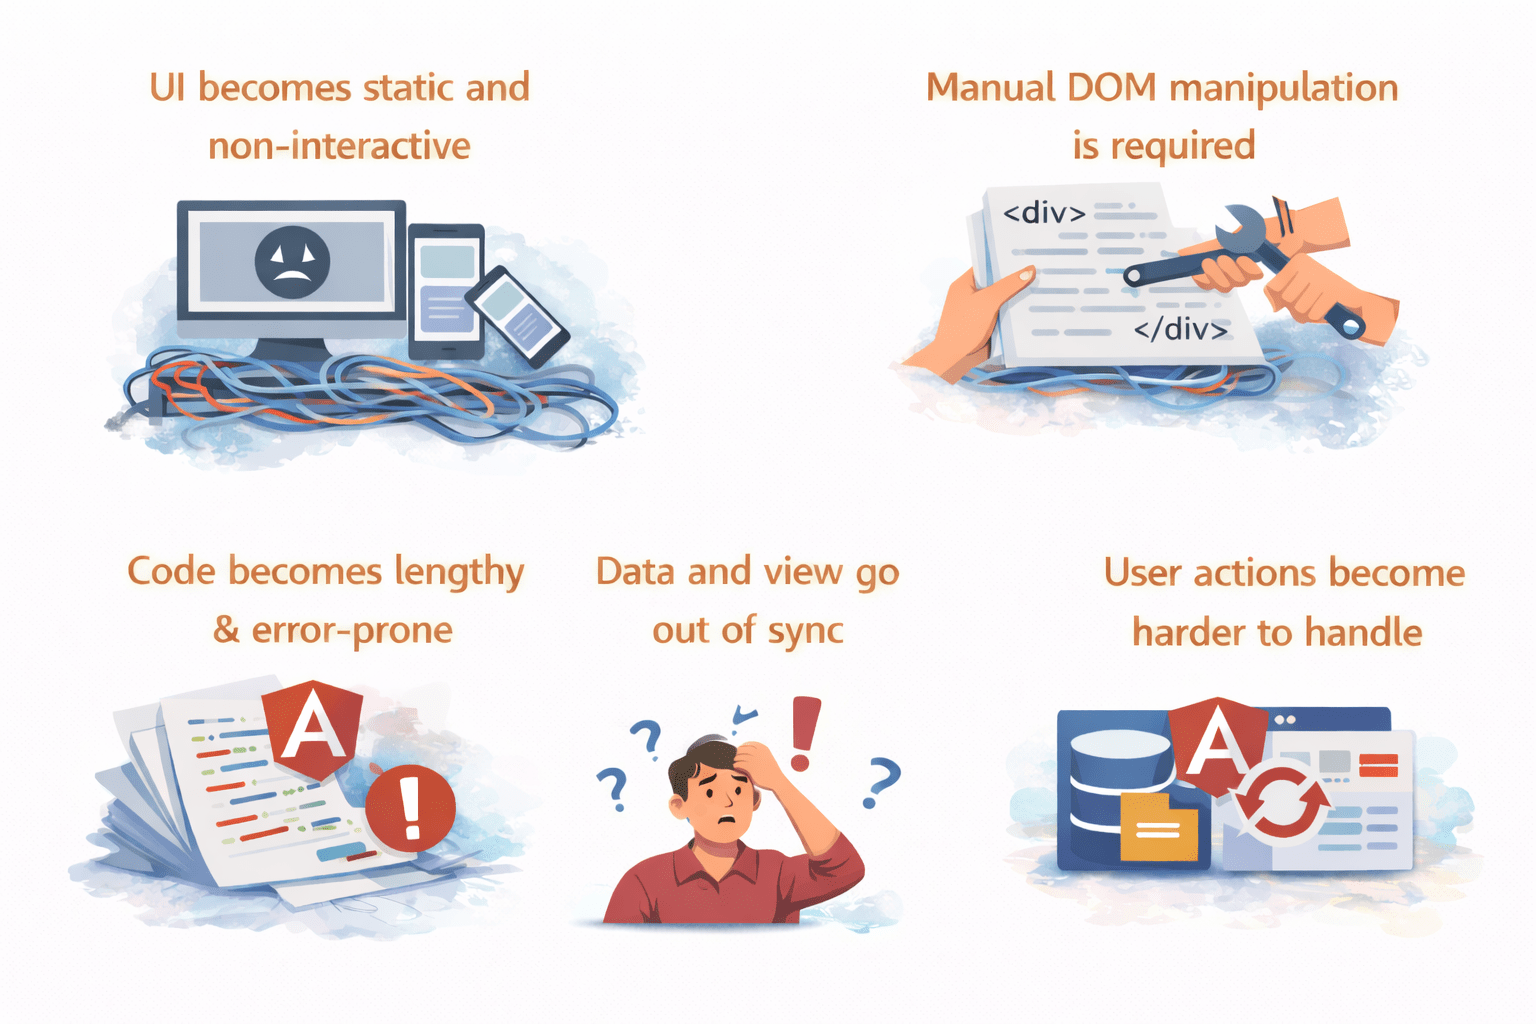
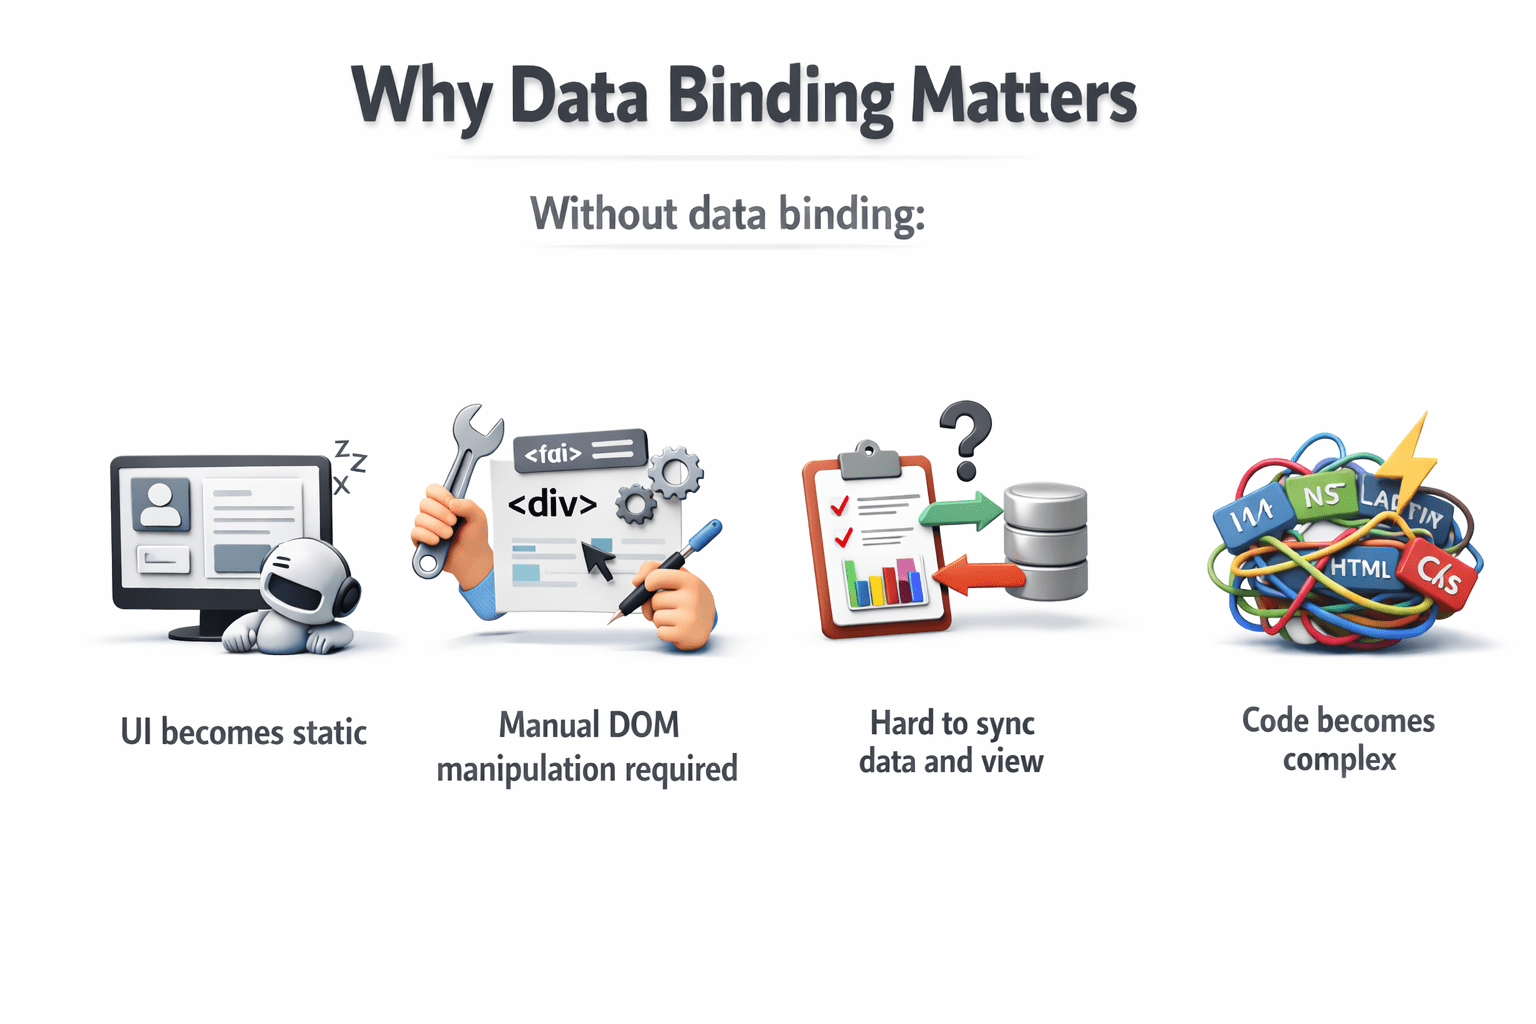
Why String Interpolation and Event Binding Matter
UI becomes static and non-interactive
Manual DOM manipulation is required
Code becomes lengthy and error-prone
Data and view go out of sync
User actions become harder to handle
Without proper data binding in Angular:
Overview of Data Binding in Angular
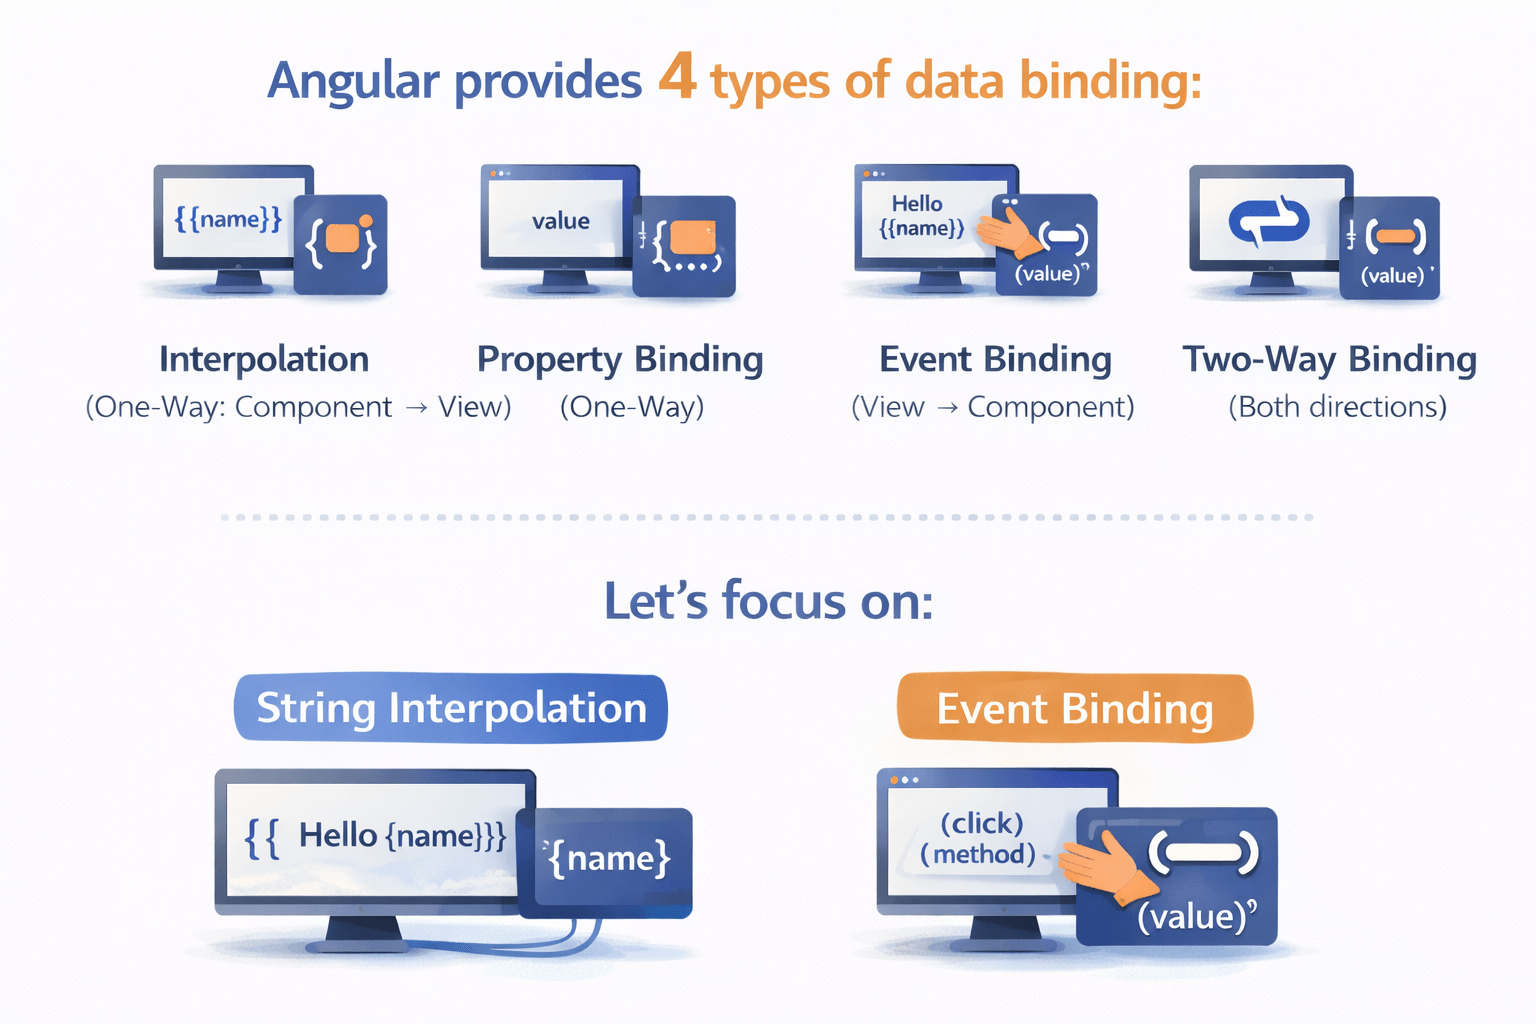
Angular provides 4 types of data binding:
Interpolation (One-Way: Component → View)
Event Binding (View → Component)
Property Binding (One-Way)
Two-Way Binding (Both directions)
In this session, we focus on:
Event Binding
String Interpolation
String Interpolation (One-Way Binding)
Interpolation is used to display data from component to template.
It works in one direction:
Component
View
Syntax:
{{ variableName }}Let’s Implementing Interpolation
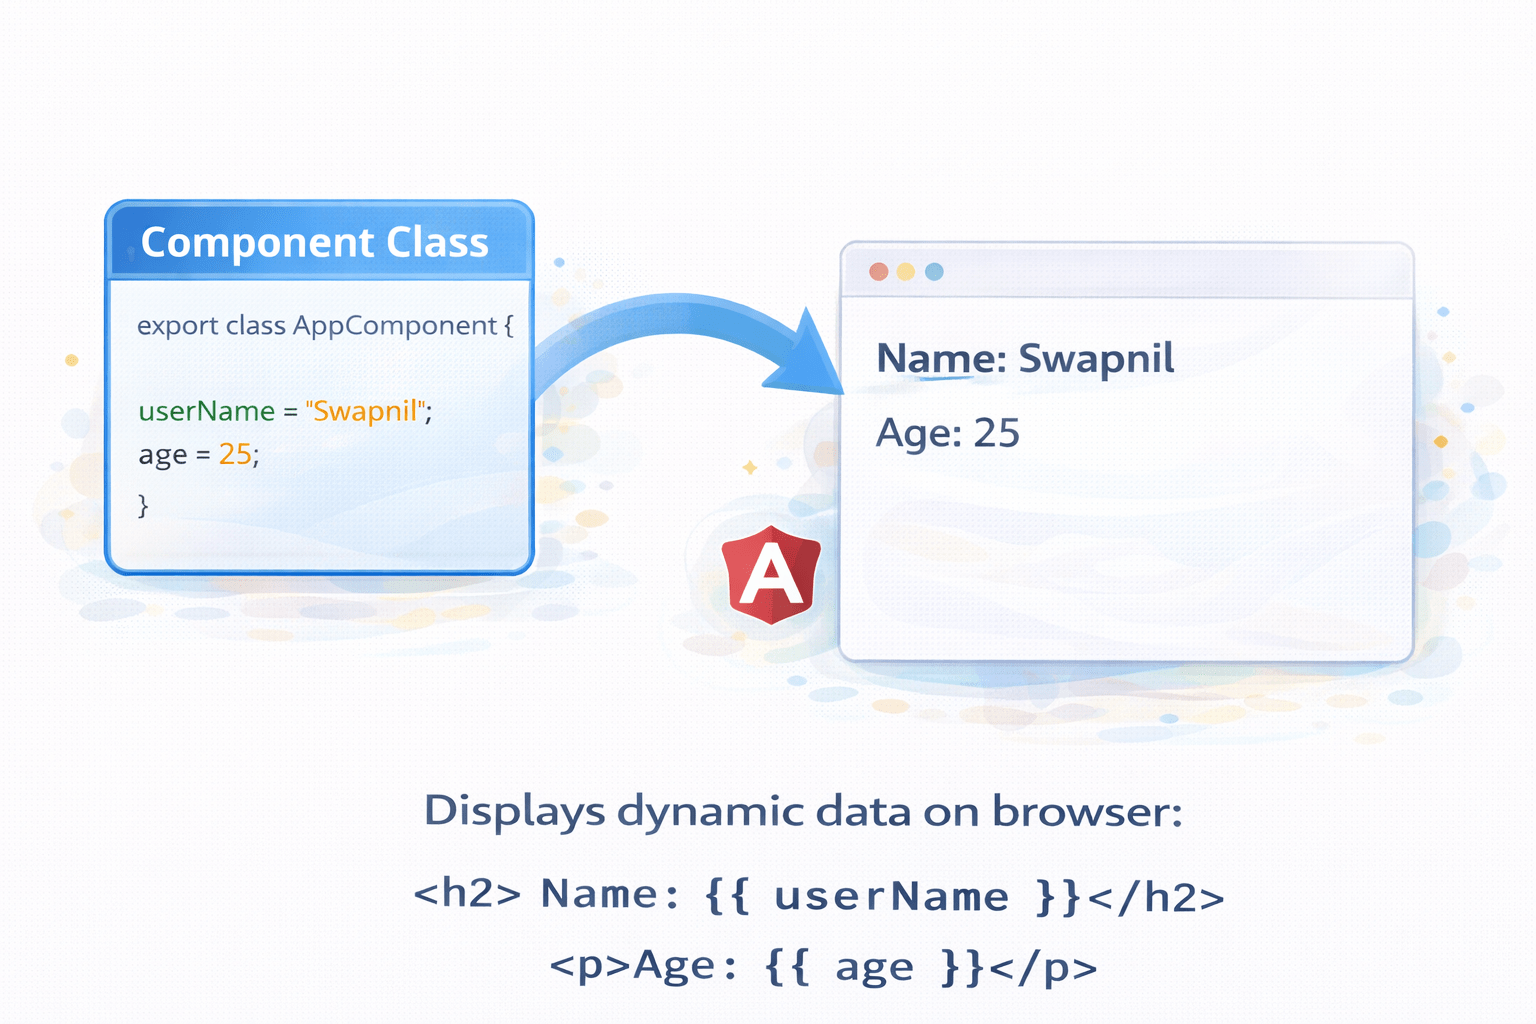
String Interpolation (One-Way Binding)
Output will display dynamic data.
Step 1: Define variable in component
app.component.ts
export class AppComponent {
 userName = "Swapnil";
 age = 25;
}
Step 2: Use in template
app.component.html
<h2>Name: {{ userName }}</h2>
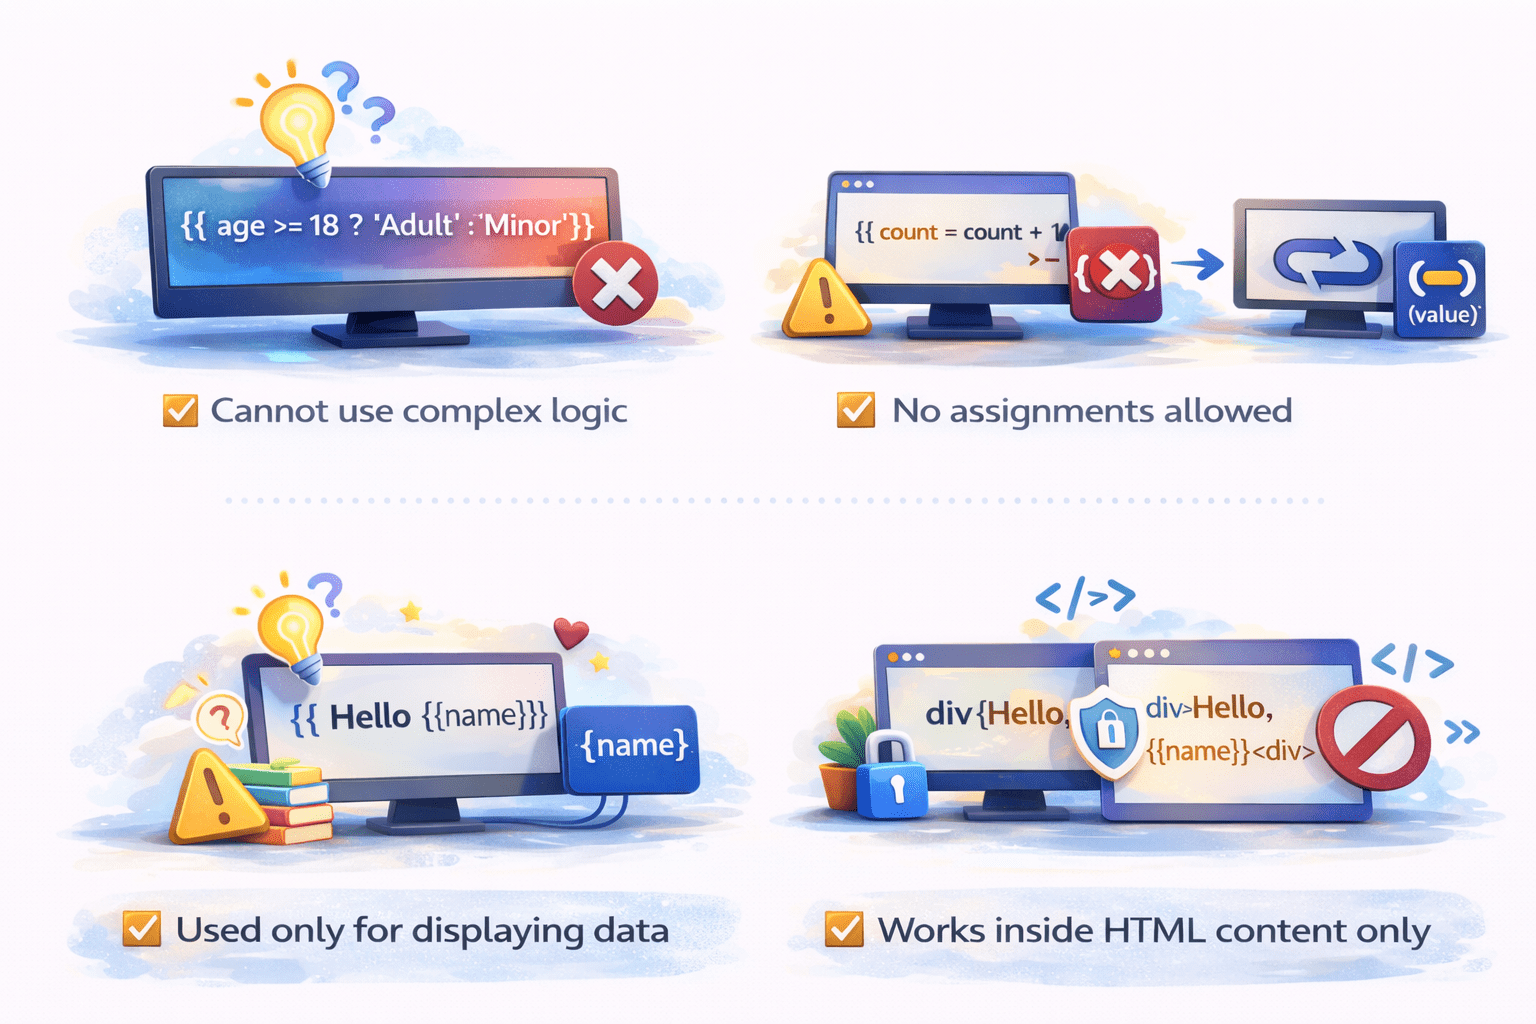
<p>Age: {{ age }}</p>Limitations of Interpolation
Cannot use complex logic
No assignments allowed
Used only for displaying data
Works inside HTML content only
Introduction to Event Binding
Event binding is used to handle user actions.
Syntax:
(eventName)="methodName()"Direction:
View
Component
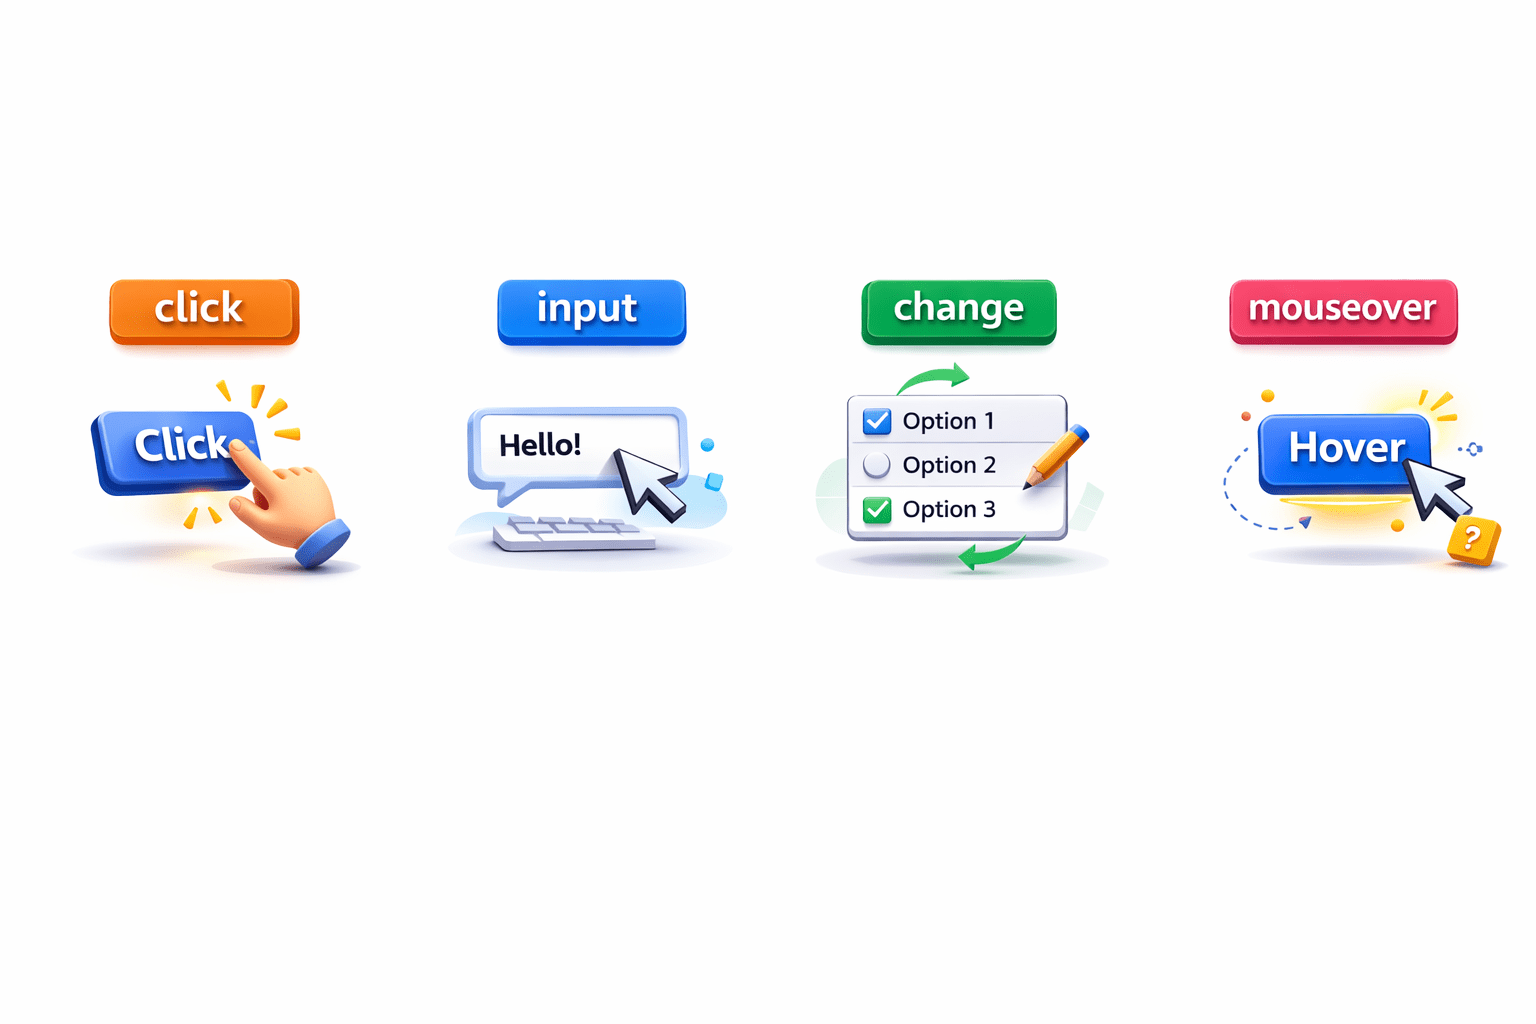
events like:
click
input
change
mouseover
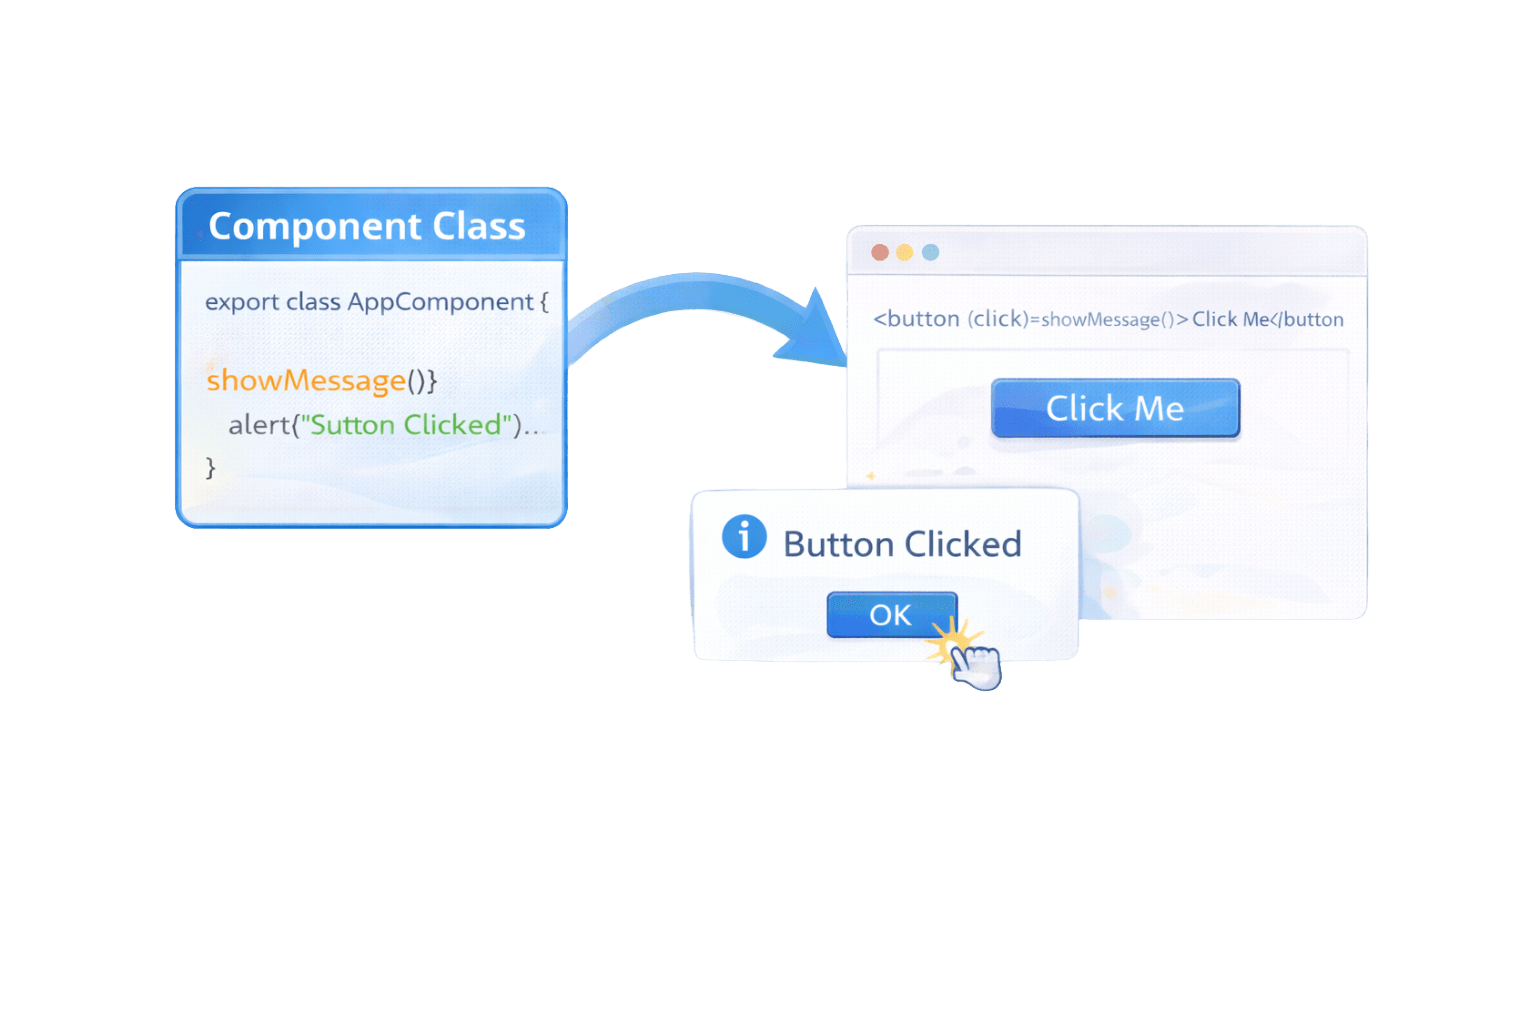
Let’s Implementing Event Binding
Step 1: Create method in component
app.component.ts
export class AppComponent {
showMessage() {
alert("Button Clicked");
}
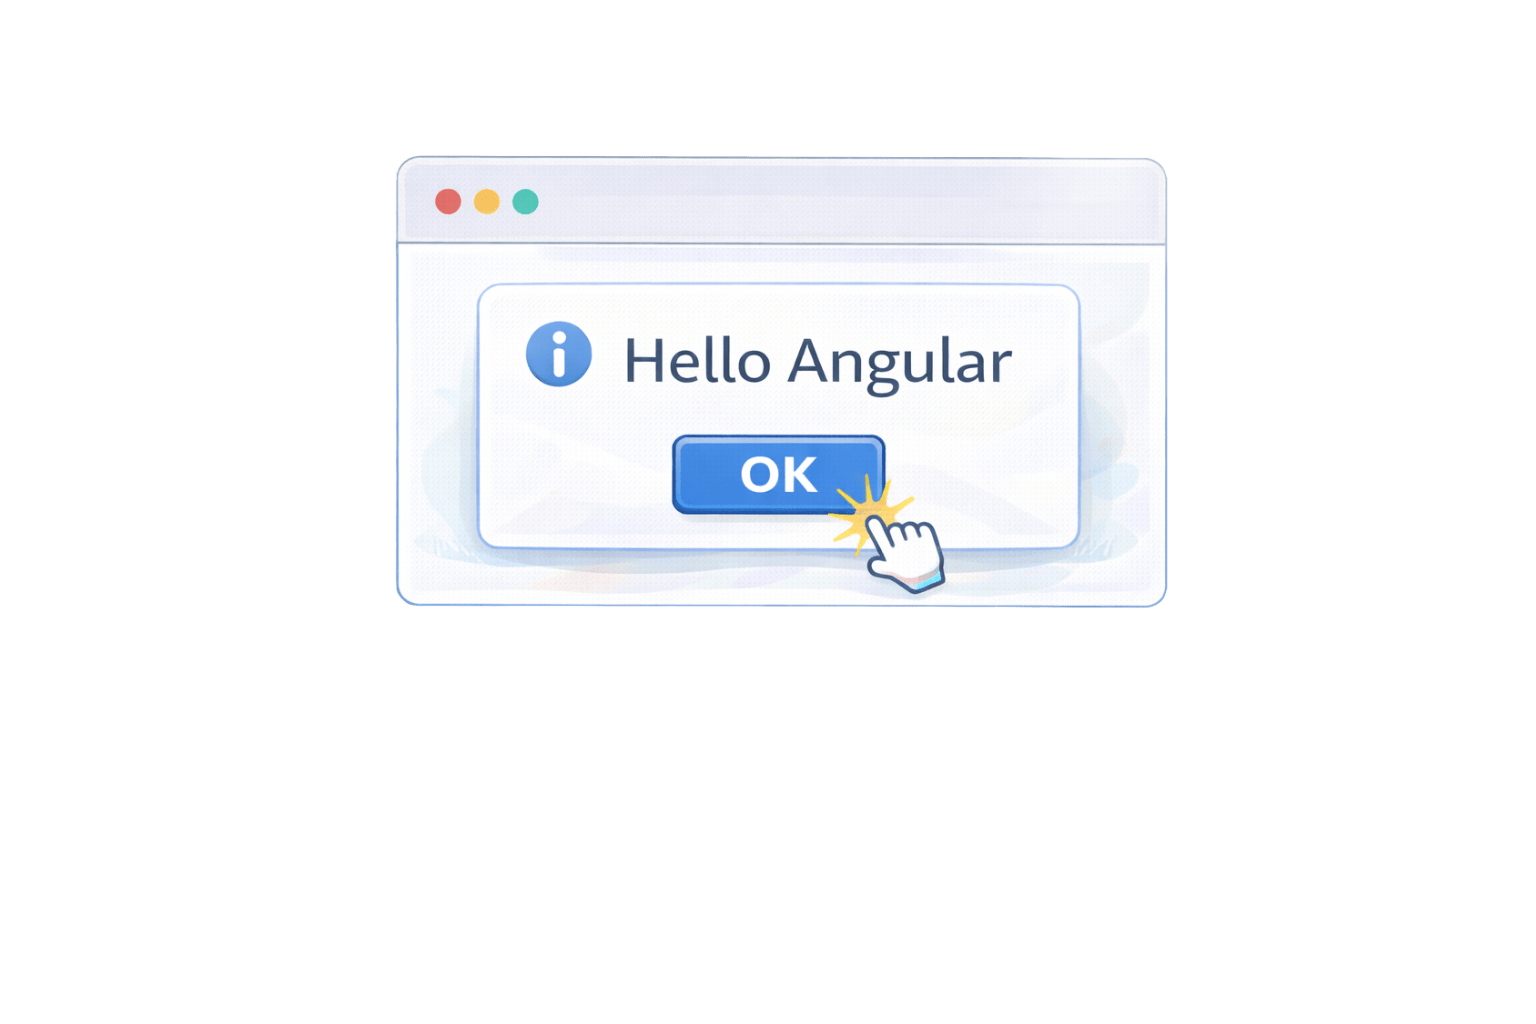
}When button is clicked, method executes.
Step 2: Bind event in template
app.component.html
<button (click)="showMessage()">Click Me</button>Passing Parameters in Event Binding
You can also pass values from template to component.
Component
export class AppComponent {
 greet(name: string) {
   alert("Hello " + name);
 }
}
Template
<button (click)="greet('Angular')">Greet</button>Why Data Binding Matters
Without data binding:
UI becomes static
Manual DOM manipulation required
Hard to sync data and view
Code becomes complex
Why Data Binding Matters
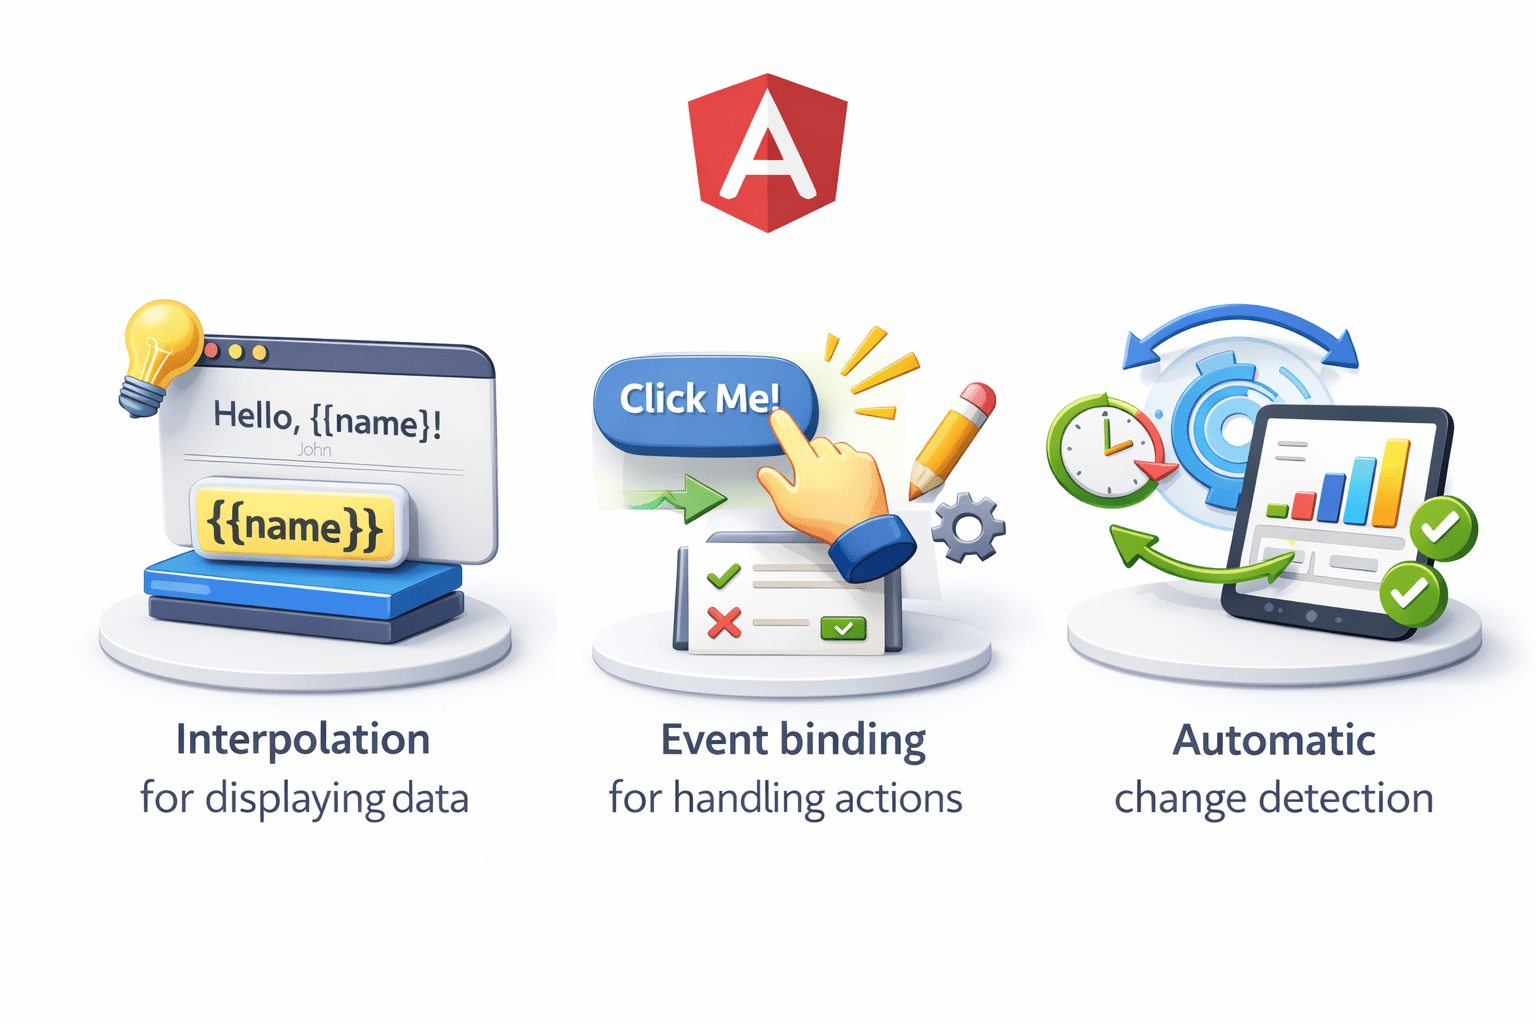
Angular simplifies this using:
Interpolation for displaying data
Event binding for handling actions
Automatic change detection
Summary
5
No manual DOM manipulation required
4
Angular automatically updates UI
3
Event binding is View → Component
2
Interpolation is one-way (Component → View)
1
Data binding connects component and template
Quiz
Interpolation is used for:
A. Handling clicks
B. Displaying data
C. Styling
D. Routing
Quiz-Answer
Interpolation is used for:
A. Handling clicks
B. Displaying data
C. Styling
D. Routing
By Content ITV


