JavaScript "Masterclass"
Craig Spence 🦄
I do JS at
@phenomnomnominal
What we're going to cover
JavaScript in 2017
⭐️ Language
⭐️ Tooling
⭐️ Community
Writing a server in JavaScript
Writing client-side web applications in JavaScript
JavaScript in 2017
The language has evolved
ES2017 ratified and being implemented in evergreen browsers
Fragmented (but converging) eco-system
Super popular - and in demand!
POWERFUL AF 💯 🔥 👌
JavaScript
var Pizza = (function () {
    var Pizza = function Pizza (options) {
        this.flavour = options.flavour;
        this.size = options.size;
    };

    return Pizza;
})();

var Human = (function () {
    var Human = function Human (options) {
        this.name = options.name;
    };

    Human.prototype.eat = function (food) {
        var flavour = food.flavour
        var foodType = food.constructor.name;
        alert('Mmmm, ' + flavour + ' ' + foodType);
    };

    return Human;
})();

var pizza = new Pizza({
    flavour: 'margherita'
});
var craig = new Human({
    name: 'Craig'
});
craig.eat(pizza);
class Pizza {
constructor (options = {}) {
Object.assign(this, options);
}
}
class Human {
constructor (options = {}) {
Object.assign(this, options);
}
eat (food) {
let { flavour } = food;
alert(`Mmmm, ${flavour} 🍕`);
}
}
let pizza = new Pizza({
flavour: 'margherita'
});
let craig = new Human({
name: 'Craig'
});
craig.eat(pizza);ES5
ES2017
JavaScript
ECMA TC-39 work on the ECMAScript specification
New versions to be released annually! 💯💯💯
ES2015 was huge - classes, promises, template strings, destructuring, meta-programming, modules & more!
ES2016, not so huge - Array.prototype.includes, exponentiation operator (**)
ES2017, medium huge? - async/await, shared memory, atomic operations, new Object functions, String padding utilities, some small syntactical additions
Tooling


Tooling
npm ecosystem is HUGE 👍
> 300,000 475,000 modules 👌
> 1,000,000,000 2,600,000,000 downloads a week 😱
Knowing what modules to use can be a nightmare ⁉️
(but that's a whole other topic)
YAY code re-use
BOO dependencies
#notmyleftpad
Community
SUPER ACTIVE! - npm, Github, etc.
Local meetups:
JavaScript NZ
#letswritecode
We're going to write a real-time multi-player game!
Start by going to
https://github.com/phenomnomnominal/summer-of-tech-js-masterclass
Click the "Clone or download" button, then "Download ZIP"
Unzip the project to your computer somewhere, and then open a terminal and navigate to the unzipped project folder.
INSTALLING A DEPENDENCY
It is also where the listing of the projects dependencies will live.
To see what I mean by that, let's add our first dependency to the project. Copy the following command and paste it into a terminal:
npm install --save expressOUR FIRST DEPENDENCY!
So, what exactly have we installed?
Express is a very commonly used npm module. It is a "Fast, unopinionated, minimalist web framework". We're going to use this to write the back-end for our game!
STARTING A SERVER
We now need somewhere to write some code. Let's create an index.js file in the root of our project folder, next to package.json.
Within that file, we're going to add three bits of code:
import express from 'express';

let app = express();
app.get('/', (req, res) => {
res.send('Hello World!');
});const server = app.listen(3000, () => {
console.log(`Server is running on port ${server.address().port}!`);
});
1⃣️
2⃣️
3⃣️
STARTING A SERVER
There's a few things to notice here:
import express from 'express';We've used the ES2015 module import syntax:
We've created some objects:
let app = ...
let server = ...
We've registered a few callbacks:
app.get('/', (req, res) => { ... });
app.listen(3000, () => { ... });
Don't Call me, I'll Call You
The idea of a callback is a very important concept in JavaScript - both on the client and the server.
JavaScript has a conceptually simple execution model. Code runs in a single thread, one instruction after another, until it runs out of things to do.
When a typical JavaScript application starts, event listeners are created. On a web page, these events might be things like a mouse click or keypress. On a web server, these events are typically HTTP requests.
app.get('/', (req, res) => { ... });This says, when the application receives a GET request, run this function. That function is the callback.
RUNNING THE SERVER
First, let's try running the server!
node index.jsFrom your terminal, run the following command:
RUNNING THE SERVER
💣🔥💣🔥💣🔥
Did everything break? Good 👌
That's expected, because we are using JavaScript from the future!
While ES2015/2016 have been standardised, they haven't yet been
implemented in all the different JavaScript run-times.
FUTURISING OUR CODE
We need to add a few more dependencies:
npm install --save babel-cli babel-preset-es2015This time, we've added Babel, and a Babel preset.
Babel is a tool for transforming JavaScript code. The ES2015 preset knows how to turn modern JavaScript into the equivalent code, but only using older, ubiquitous language features.
Now we just need to tell Node to use Babel when it runs the code. We will do that with an npm script.
npm Scripts
There's a lot of tools out there for running build tasks on projects.
The main ones are Gulp, Grunt, Broccoli and Fly - all are roughly equivalent, just slightly different implementations of the same idea.
We're going to go a slightly simpler, but equally valid route - especially for a smaller project like this one. We're going to add an npm script. Open up the package.json file again, and replace the scripts block with the following:
"scripts": {
  "start": "babel-node --presets es2015 index.js"
},
npm Scripts
This means that when the "start" script is executed, it will use babel-node with the es2015 preset to run the index.js file.
npm run startWe run that script by running the following from a terminal:
We should now see the following!
Server is running on port 3000!SUCCESS! 👏👏👏
Go to http://localhost:3000 in a browser to see it working!
OUR GAME
We're going to make two player tic-tac-toe!
We need three endpoints for it to work:
GET game-state
POST join-game
POST take-turn
STUB END POINTS
Let's add the outline of our endpoints...
app.post('/join-game', (req, res) => {
    // ...
});

app.get('/game-state', (req, res) => {
    // ...
});

app.post('/take-turn', (req, res) => {
    // ...
});
Add the following to our index.js file
⚠️ make sure you add these *after* the line that creates the app
Serving the client
We're going to use a browser to test our API. A working implementation of a Tic Tac Toe UI is included in the /client directory.
Add the following to our index.js file
app.use(express.static('client'));⚠️ make sure you add this *after* the line that creates the app
That tells Express to serve everything in the /client directory as static files.
#soeasy 😎😎😎
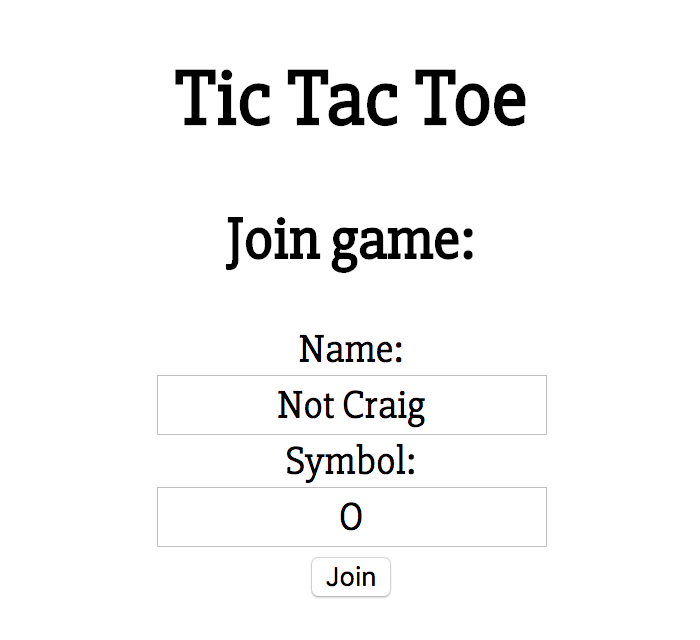
Serving the client
Go to http://localhost:3000 in a browser and you should see something like this:
npm run startLet's restart the application by running:
REPRESENTING GAME STATE
The game state endpoint is going to return all the information about what is going on in the game. That information will look something like this:
{
    "players": [{
        "name": "Player One",
        "symbol": "X"
    }, {
        "name": "Player Two",
        "symbol": "O"
    }],
    "moves": [0, 1, 2, 3, 4, 5, 6, 7, 8],
    "whoseTurn": null,
    "winner": null
}
The "players" array contains information about the players
The "move" array is the list of moves that have been made, where "0" is the top-left box, and "8" is the bottom-right.
The "whoseTurn" or "winner" fields will be updated as each move is made.
GAME STATE
Let's add some code to represent this on the server. We'll make a new file called game-state.js, and add the following to it:
export default class GameState {
    constructor () {
        this.players = [];
        this.moves = [];
        this.whoseTurn = null;
        this.winner = null;
    }

    addPlayer (player) {
        if (this.players.length < 2) {
            this.players.push(player);
        }
    }

    addMove (turn) {
        let { move } = turn;
        if (this.moves.length < 9) {
            this.moves.push(move);
        }
    }
}
CREATING A NEW GAME STATE
Now let's use our new GameState class.
In index.js, we need to import the class, after where we imported express:
import express from 'express';
import GameState from './game-state';
Notice that we've used a path (starting with ./) rather than just a module name. This tells node that we want to import a local file rather than something from node_modules.
We're going to create a new GameState when the application starts as well:
let app = express();
let gameState = new GameState();
GETTING THE GAME STATE
And finally, let's update our GET game-state endpoint to return the game state as JSON:
app.get('/game-state', (req, res) => {
    res.json(gameState);
});
This is the power of Express doing a bunch of work for us! It takes the object that represents the GameState and turns it into JSON and sends it back as the response.
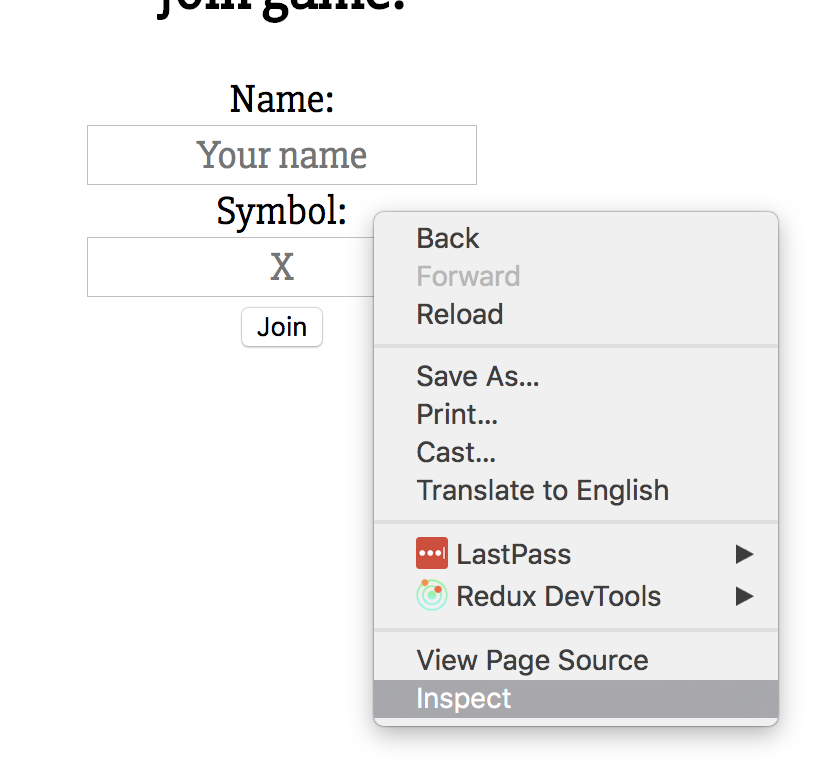
VIEWING THE GAME STATE
npm run startLet's restart our application by running the following again:
If we reload the browser, we should be able to view the request from the developer tools. The easiest way to open the dev tools (in Google Chrome) is to "right click" and then click "Inspect":
VIEWING THE GAME STATE
If you go to the "Network" tab and reload the page again, you should be able to see all the requests that the page has made:
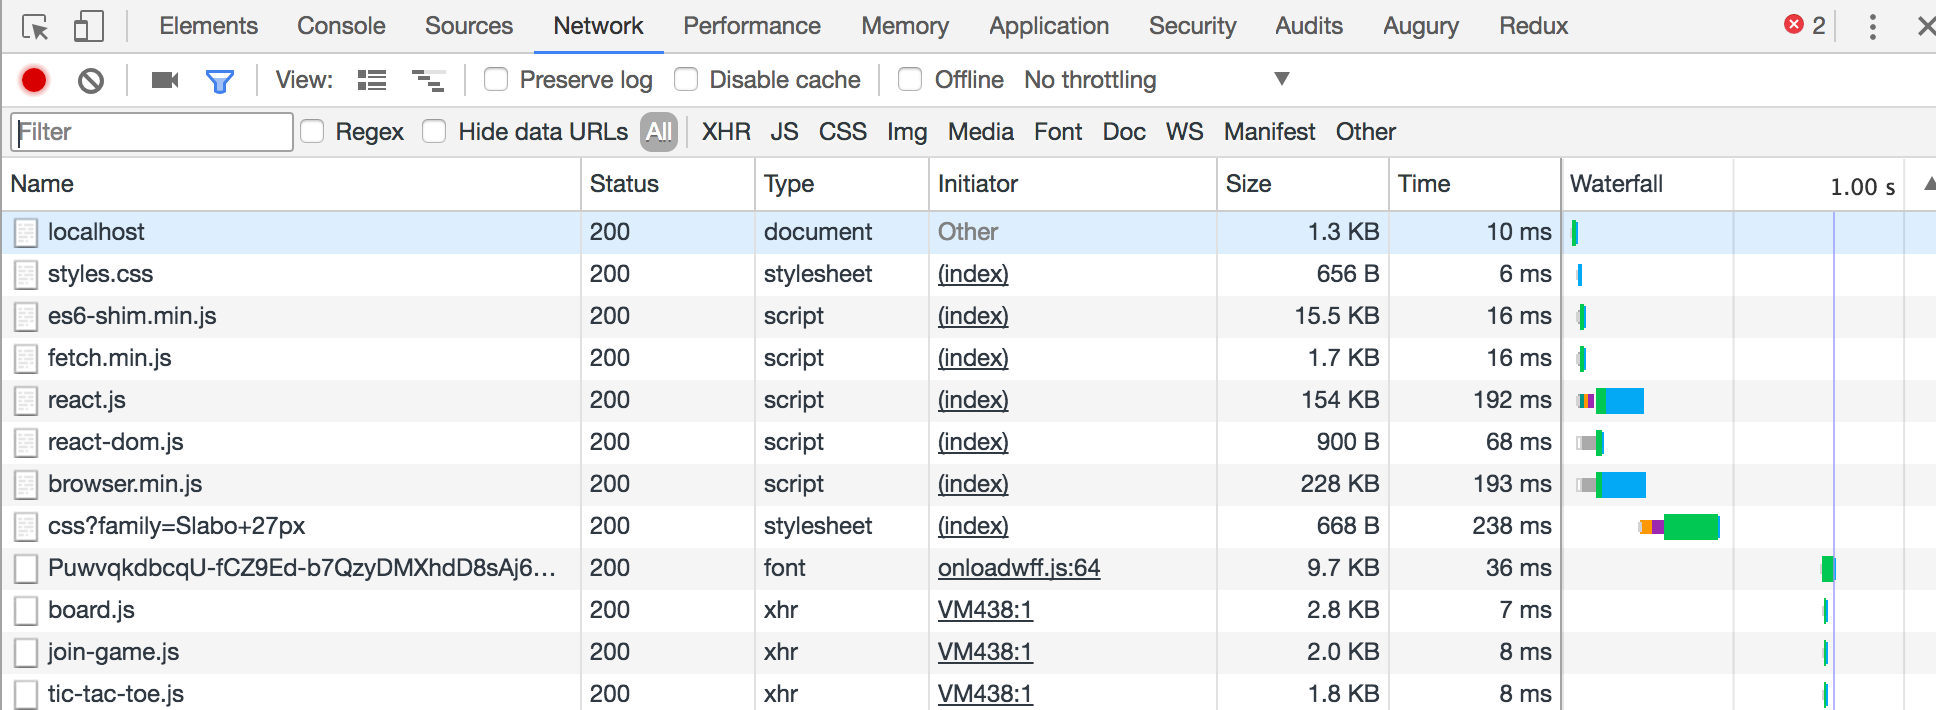
⚠️ This might look different if you're not using Google Chrome!
UPDATING THE GAME STATE
So now that we can GET the game state, we need to be able to POST to our server to update it!
We want to be able to send JSON data to the server and use that to update our gameState object. To do that, we need to add another dependency:
npm install --save body-parserFirst we need to import our dependency so we can use 'body-parser'. Add the import to the top of the index.js file:
import bodyParser from 'body-parser';UPDATING THE GAME STATE
Then, we need to tell the app to parse request bodies as JSON:
app.use(bodyParser.json());
⚠️ make sure you add these *after* the line that creates the app
UPDATING THE GAME STATE
Now we can update our POST endpoints to update the gameState object:
app.post('/join-game', (req, res) => {
    console.log(req.body);
    let { name, symbol } = req.body;
    gameState.addPlayer({ name, symbol });
    res.status(200).json({ token: 'JOINED GAME' });
});

app.post('/take-turn', (req, res) => {
    console.log(req.body);
    let { move } = req.body;
    gameState.addMove({ move });
    res.status(200).json({ });
});
Here we are doing pretty much the same thing both times - get some data off the request body, update the game state, and return a "200" response. We've also added some logging so we can see what is happening.
TESTING OUR POST METHODS
npm run startIf we restart our application by running the following again:
Open http://localhost:3000 in two different browsers (or just two different tabs!), and use the UI to join the game.

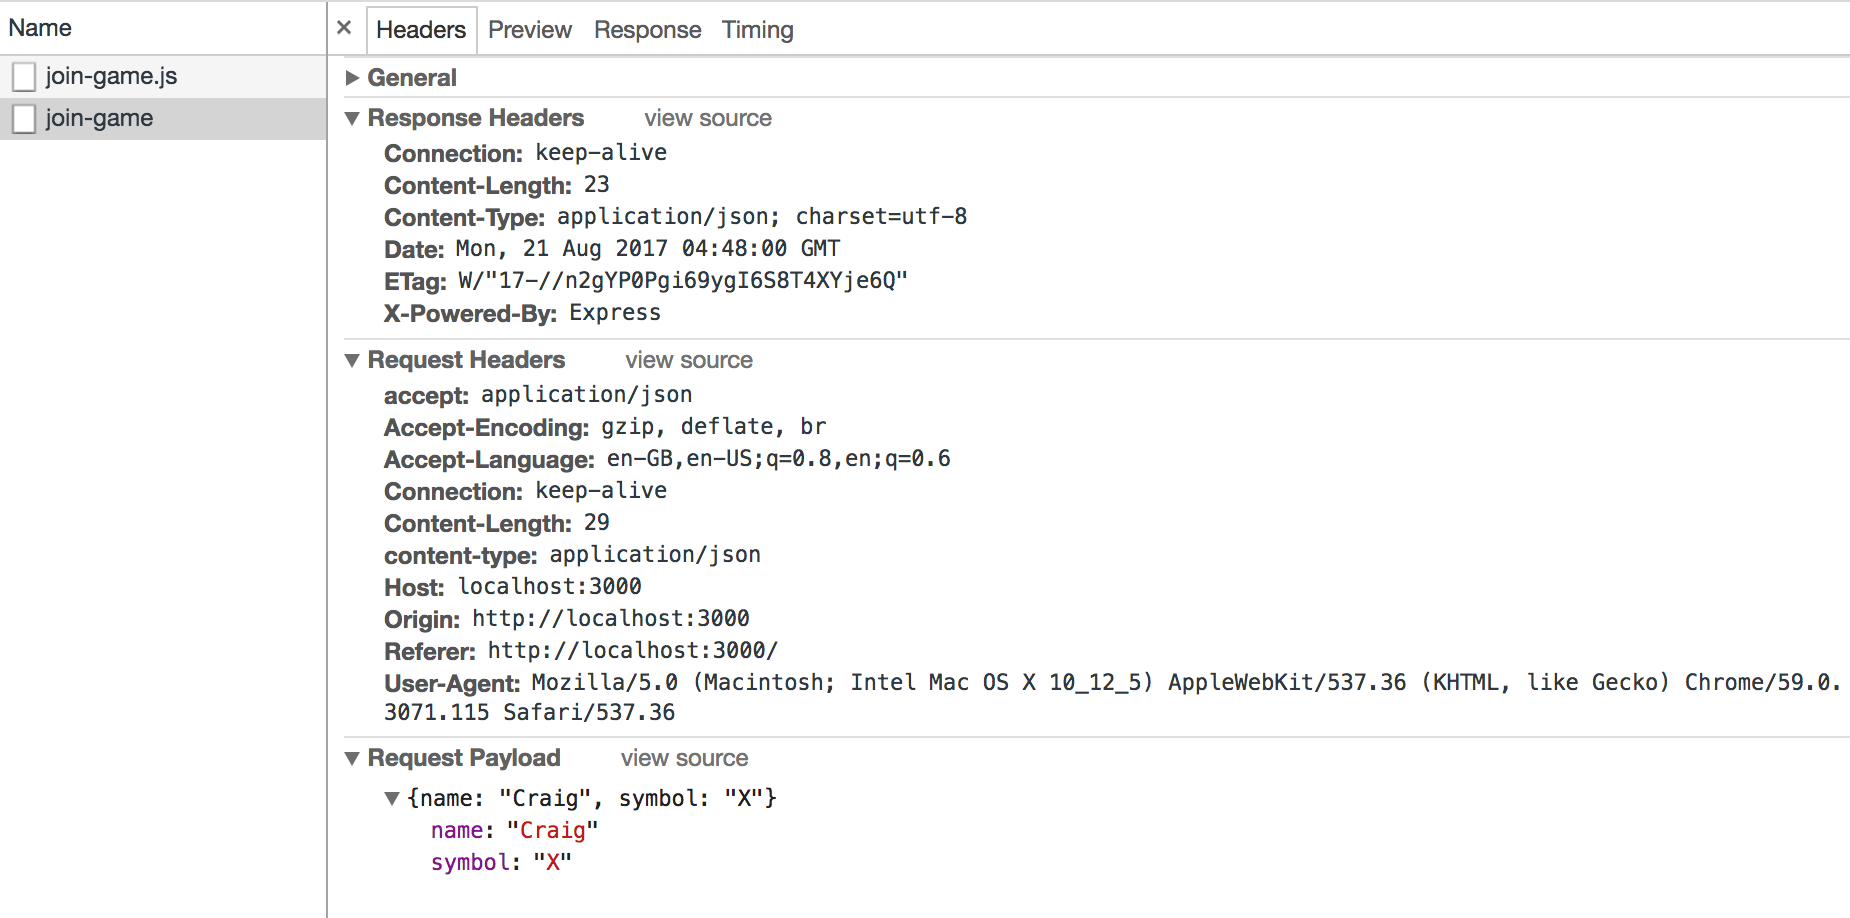
TESTING OUR POST METHODS
We can look at the "Network" tab again to inspect the requests:
Input Validation
Currently we have no validation on our endpoints. We need to make sure we validate on the server, so that any bad data that comes in a request doesn't cause any issues. Let's add the following to the start of the addPlayer method of the GameState class:
if (!player.name) {
    throw new Error('Invalid player: no name');
}
if (!player.symbol) {
    throw new Error('Invalid player: no symbol');
}
if (('' + player.symbol).length !== 1) {
    throw new Error('Invalid player: symbol should be a single character');
}
Let's restart our server and try to join the game with some invalid data!
Input Validation
💣🔥💣🔥💣🔥
Everything broke again! But that's okay, it broke because we told it to! Let's update our endpoint code to handle the error more gracefully. Back in index.js:
app.post('/join-game', (req, res) => {
    let { name, symbol } = req.body;

    try {
        gameState.addPlayer({ name, symbol });
        res.status(200).json({ token: 'JOINED GAME' });
    } catch (e) {
        let { message } = e;
        res.status(400).json({ message });
    }
});
Now our server will respond with the correct error code, and an error message.
Input Validation
Let's do the same thing for the POST take-turn endpoint too:
app.post('/take-turn', (req, res) => {
    let { move } = req.body;
    try {
        gameState.addMove({ move });
        res.status(200).json({ });
    } catch (e) {
        let { message } = e;
        res.status(400).json({ message });
    }
});
And we will change the addMove method of the GameState class to throw an error too. Add the following to the start of addMove, after the first line:
if (isNaN(+move) || move < 0 || move > 8) {
    throw new Error('Invalid turn: move should be a number from 0 to 8');
}
BUsiness rules
We're going to use the same mechanism to fail safely when the users do valid things that are against the rules of the game. Currently, you can keep adding as many people to the game as you want 👩👩👧👦 👩👩👦👦 👩👩👧👧 ! But tic-tac-toe is only a two player game!
if (this.players.length === 2) {
    throw new Error('This game is already full');
}
Now, because of the code we added before, we will get a sensible error message if too many people try to join a game 👌
Let's change the addPlayer function to fix that. Add this to the top of the function, after the existing validation:
BUsiness rules
We also want to make sure that you can't make a move that the other player has already made.
Let's have a go at adding some validation that makes sure a player can't do that!
Taking Turns
Now we can get our server to manage whose turn it is!
if (this.players.length === 2) {
    this.whoseTurn = this.players[Math.floor(Math.random() * 2)];
}
Add the following to the end of our addPlayer method to set the initial state of the game:
That will randomly give the first move to one of the two players.
Then we should add the following to the end of the addMove method:
this.whoseTurn = this.players.find(player => player !== this.whoseTurn);Taking Turns
How can we make sure that the user is who they say they are?
The current implementation will let either player take a turn at any point in the game... 😐 not ideal
Let's have a go at fixing that!
If you want a hint just ask!
Determining The Winner!
Making moves is all well and good, but we really want to be able to see who won!
Let's make a new file called win-checker.js. It's basic outline should look something like this:
export default class WinChecker {
    checkWin (gameState) {
        return false;
    }
}
For now it just returns false, but we will fix that soon!
Determining The Winner!
Let's go back to game-state.js and import our new class:
import WinChecker from './win-checker';
let winChecker = new WinChecker();
And then update the addMove method to use it:
let win = winChecker.checkWin(this);
if (win) {
    this.winner = this.whoseTurn;
    this.whoseTurn = null;
} else {
    this.whoseTurn = this.players.find(player => player !== this.whoseTurn);
}
A draw?
What happens if all the moves are done and no one has won?
Back in our game-state.js we need one last bit of code to handle a tied game. At the end of addMove, add the following:
if (!win && this.moves.length === 9) {
    this.winner = null;
    this.whoseTurn = null;
}
Determining The Winner!
Now let's go back to win-checker.js and make it actually work...
I'm going to leave it up to you to implement this!
I walk through my implementation in the next few slides, so don't look ahead if you want to work it out yourself!
If you want a hint just ask!
If you get stuck with JavaScript syntax, Google and Stack Overflow are your friends!
Determining The Winner!
First we need a representation of the different moves that make a win:
const WIN_SCENARIOS = [
    [0, 3, 6], // First column
    [1, 4, 7], // Second column
    [2, 5, 8], // Third column
    [0, 1, 2], // First row
    [3, 4, 5], // Second row
    [6, 7, 8], // Third row
    [0, 4, 8], // Left-top to right-bottom diagonal
    [2, 4, 6]  // Right-top to left-bottom diagonal
];
Then we need a way to check if a set of moves matches one of the win scenarios. Let's add this to the WinChecker class:
checkWinScenario (winMoves, currentPlayerMoves) {
    return winMoves.every(move => currentPlayerMoves.indexOf(move) !== -1);
}
This just checks that every one of the moves in a particular win scenario is in the list of the players moves.
Determining The Winner!
Now we need to run the checkWinScenario method against each of the possible scenarios. Let's add another function to the WinChecker class:
checkPlayerWin (currentPlayerMoves) {
    return WIN_SCENARIOS.some(winMoves => this.checkWinScenario(winMoves, currentPlayerMoves));
}
This method goes through each of the possible win scenarios checks if any of them match the current players move. Only one has to match for it to be successful.
All we need now is a way to determine what moves are the current players moves!
Determining The Winner!
We're going to replace the stubbed function we had before with the real implementation:
checkWin (gameState) {
    let reversedMoves = gameState.moves.slice(0).reverse();
    let currentPlayersMoves = reversedMoves.filter((_, i) => !(i % 2));
    return this.checkPlayerWin(currentPlayersMoves);
}
We're being a bit tricky here, so let's break it down:
We know the last move that happened was made by the current player, as was every second move before that.
So, we reverse the array, and then filter out every odd numbered move (the other players moves). That leaves only the current players moves!
Determining The Winner!
Our finalised WinChecker class should look like this:
const WIN_SCENARIOS = [
    [0, 3, 6], // First column
    [1, 4, 7], // Second column
    [2, 5, 8], // Third column
    [0, 1, 2], // First row
    [3, 4, 5], // Second row
    [6, 7, 8], // Third row
    [0, 4, 8], // Left-top to right-bottom diagonal
    [2, 4, 6]  // Right-top to left-bottom diagonal
];

export default class WinChecker {
    checkWin (gameState) {
        let reversedMoves = gameState.moves.slice(0).reverse();
        let currentPlayersMoves = reversedMoves.filter((_, i) => !(i % 2));
        return this.checkPlayerWin(currentPlayersMoves);
    }

    checkPlayerWin (currentPlayerMoves) {
        return WIN_SCENARIOS.some((winMoves) => this.checkWinScenario(winMoves, currentPlayerMoves));
    }

    checkWinScenario (winMoves, currentPlayerMoves) {
        return winMoves.every((move) => currentPlayerMoves.indexOf(move) !== -1);
    }
}
Let's RECAP! 😅😅😅
We've done a heap of stuff!
We wrote a basic server!
We added some endpoints.
We added an internal representation of the game state.
We fleshed out our endpoints to update that state.
We added some validation to make sure a user couldn't enter bad data, or break our rules.
👍
👍
👍
👍
👍
We wrote some code that works out if the game is over, and who won!
👍
DONE!
At this point we have a pretty fully featured API (Application Program Interface) for our game!
git checkout server-finished🌟
If you want to have a crack at implementing the UI, you should checkout the "server-finished" branch"
WRITING THE CLIENT
Now we're going to write the app that consumes our API!
We're going to open the index.html file in the /client directory, and add the following:
<!doctype html>
<html lang="en">
    <head>
        <meta charset="utf-8">

        <title>TIC TAC TOE</title>
    </head>
    <body>
        <h1>Tic Tac Toe</h1>
        <main></main>
    </body>
</html>
REACT!
We're going to write our UI in React! However, there's a million other libraries we could have used, or we could've written it without any libraries at all.
The "best" front-end framework is a hotly debated topic - but it actually doesn't matter. Whatever you pick today will be totally wrong in 6 months anyway! 😅 A good engineer picks the best tool for the job with the information that she has at the time.
🍿🍿🍿
Client-Side Dependencies
<script src="https://cdn.jsdelivr.net/es6.shim/0.35.1/es6-shim.min.js"></script>
<script src="https://cdn.jsdelivr.net/fetch/0.9.0/fetch.min.js"></script>
<script src="https://npmcdn.com/react@15.3.0/dist/react.js"></script>
<script src="https://npmcdn.com/react-dom@15.3.0/dist/react-dom.js"></script>
<script src="https://npmcdn.com/babel-core@5.8.38/browser.min.js"></script>
We're going to add some third-party code that we want to use. This should go at the bottom of the <body> tag, below our <main> tag:
What we've included here are a few shims for new browser APIs, the code for React, and Babel again so we can use ES2015+ in our browser code too.
CSS
We're going to add some CSS just so that when we make our UI it looks a bit (like a tiny bit) better than just default HTML.
Open the styles.css file within the /client directory, and add the following to it:
@import 'https://fonts.googleapis.com/css?family=Slabo+27px';

html, body { margin: 0; min-width: 320px; text-align: center; }
body, input { font-family: 'Slabo 27px', serif; font-size: 20px; }
main { width: 100%; }
input { text-align: center; }
button {
    width: 100px; height: 100px;
    background: none; border: 1px black solid;
    font-size: 50px; vertical-align: top;
}
We also need to add a reference to it in to our HTML, inside the <head> element:
<link rel="stylesheet" type="text/css" href="/styles.css">TA DA!
If you jump to http://localhost:3000 you should see a website!
There's not much here for now, but we're going to fix that.
👻
Our First Component
With React we build our UI from pieces of functionality called Components. Let's make our first one, which will manage most of the state of our application! We need modify the file called tic-tac-toe.js inside our /client directory. To start with, it should look something like this:
class TicTacToe extends React.Component {
    constructor () {
        super();
    }
    render () {
        return <div></div>
    }
}
window.TicTacToe = TicTacToe;
⚠️ We're cheating a bit here - putting things on window is generally a bad idea. We should use proper modules.
Using our component
Now we need to include it in our page. Let's add a few more script tags to the bottom of our <body>
<script type="text/babel" src="/tic-tac-toe.js"></script>
<script type="text/babel">
    ReactDOM.render(<TicTacToe/>, document.querySelector('main'));
</script>❗️Notice the "text/babel"? That's a pretty sweet hack that tells Babel that it needs to compile these scripts before they are run!
❗️Also see the weird HTML within our JavaScript? That's JSX, the templating language for React. We will see more of that later.
Fleshing It out a bit
This main component is going to do a few thing:
1⃣️
It's going to be responsible for getting the game state from the server.
2⃣️
It's going keep track of the token from the server that identifies a player.
3⃣️
And it's going to keep track of the game state and render the right thing.
constructor () {
    super();
    this.state = {
        gameState: {
            players: []
        },
        token: null
    };
}
Let's start by setting the initial state in the tic-tac-toe.js file:
Getting the game State
loadGameState () {
    fetch('/game-state')
    .then(response => response.json())
    .then(gameState => this.setState({ gameState }));
}
Let's add another function to our TicTacToe class:
Here we're using fetch, which is a new API that replaces the old janky XMLHttpRequest API. If you look back in our index.html file you'll see we had to include a polyfill for it - this is because it isn't implemented in all browsers yet.
Updating the APP State
Now we need to tell our component to actually do the call to get the data. So we need another function in TicTacToe:
componentDidMount () {
    this.loadGameState();
    setInterval(() => this.loadGameState(), 1000);
}
componentDidMount is part of the React component life-cycle. React will call this for us when the component has been successfully created. We are starting an interval that will request the updated game state every second.
If you refresh the page now, and open the Network tab of the developer tools, you should see the page making a request every second!
Rendering to the page
We want to get something to actually show up on the page now, so we need to add the most inportant method to the component - render:
render () {
    let { gameState, token } = this.state;

    let gameIsEmpty = gameState.players.length === 0;
    let waitingForPlayer = gameState.players.length === 1;
    let gameIsFull = gameState.players.length === 2;
    let gameIsUnderway = gameIsFull && gameState.whoseTurn;
    let gameIsWon = gameIsFull && !gameState.whoseTurn && gameState.winner;
    let gameIsDrawn = gameIsFull && !gameState.whoseTurn && !gameState.winner;
}
For now, this doesn't actually render anything 😅, but let's take the opportunity to check out React's error messages. Reload the page and look in the console in Dev tools - it tells us we need to actually return HTML from our render function.
Joining the game
For our bits of state we defined before, we can work out when we want to show the user a form to join the game. Let's add the following to the end of the render method:
if (!token && !gameIsFull) {
    return <JoinGame onJoinGame={token => this.setToken(token)}/>
}
Here you can see that pesky old JSX again. HTML in your JS looks a bit strange at first, but it solves a tricky problem in an interesting way.
<JoinGame> is going to be our next component.
Joining the game
Like before, we're going to modify one of the files inside the /client folder, this time join-game.js:
class JoinGame extends React.Component {
    constructor (props) {
        super();
        this.props = props;
        this.state = {
            name: '',
            symbol: ''
        };
    }
    render () {
        return <div></div>
    }
}
window.JoinGame = JoinGame;
This is much the same as last time, but with one main difference - the props parameter. This is how we can provide information to a component from the outside world.
USing The Component
Once again we need to add the script to our index.html file. Add the following before the tic-tic-toe.js script:
<script type="text/babel" src="/join-game.js"></script>
Let's refresh our page again and see if we get any errors!
Passing data to A component
Let's look at the render function of the TicTacToe class again, specifically the bit that uses the <JoinGame> component:
<JoinGame onJoinGame={token => this.setToken(token)}/>All the extra stuff is what we want to pass through to the component from the outside. In this case, we are passing a function for it to use when the user has successfully joined the game. That function doesn't exist yet, so let's add it to the TicTacToe class:
setToken (token) {
    this.state.token = token;
}
Joining the game
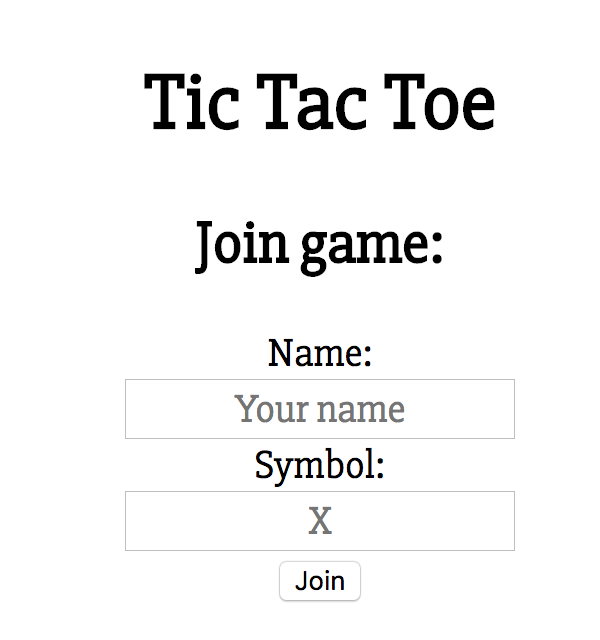
Let's tell the <JoinGame> component how to render itself by adding a render function:
render () {
    return (
        <form onSubmit={e => this.joinGame(e)}>
            <h2>Join game:</h2>
            <label>Name:</label>
            <br/>
            <input
              type="text"
              placeholder="Your name"
              value={this.state.name}
              onChange={e => this.handleNameChange(e)}
            />
            <br/>
            <label>Symbol:</label>
            <br/>
            <input
              type="text"
              placeholder="X"
              value={this.state.symbol}
              onChange={e => this.handleSymbolChange(e)}
            />
            <br/>
            <input type="submit" value="Join"/>
        </form>
    );
}
Joining the game
This looks a bit more like what we are used to, but there's still a few things worth pointing out.
We have some more event handlers being used:
onSubmit={e => this.joinGame(e)}
onChange={e => this.handleNameChange(e)}
onChange={e => this.handleSymbolChange(e)}
And we have some data binding:
value={this.state.name}
value={this.state.symbol}
Joining the game
Let's define those event handlers in our JoinGame class. First for our form values:
handleNameChange (e) {
    this.setState({ name: e.target.value });
}

handleSymbolChange (e) {
    this.setState({ symbol: e.target.value });
}
And also for our form submit:
joinGame (e) {
    e.preventDefault();

    fetch('/join-game', {
        method: 'POST',
        headers: {
          'Accept': 'application/json',
          'Content-Type': 'application/json'
        },
        body: JSON.stringify(this.state)
    })
    .then(response => response.json())
    .then(data => this.props.onJoinGame(data.token));
}
Whoop!
We should now be able to join the game! Let's reload the page and see what happens.
⚠️ Make sure you enter valid data, since we haven't got any client-side validation yet 😛
Client-side validation
Let's quickly update our code to use the error messages we send back from the server. Swap the final line of the joinGame method with the following:
.then(data => {
    let { message, token } = data;
    if (message) {
        alert(message);
    } else {
        this.props.onJoinGame(token)
    }
});
Nothing fancy, but if we get a message back from the server, at least the user will see it!
Waiting...
Cool, now we can join a game! We now need a state for when you're waiting for another player to join. Let's add the following to the end of the render method in the TicTacToe class:
if (token && waitingForPlayer) {
    return <h2>Waiting for player...</h2>
}
Try it out by opening the page in two browser tabs, and joining the game from one, and then the other!
Playing the game
Now for the fun bit! Actually making the game work!
First let's add some code to render our new state (again in the render function of the TicTacToe class):
if (gameIsUnderway) {
    return <Board token={token} gameState={gameState}></Board>
}
You can see we've got a new component, and this time we're passing two bits of data to it, the token that allows us to make moves, and the game state.
The Board Component
Let's do the same thing as before and update the file called board.js:
class Board extends React.Component {
    constructor (props) {
        super();
        this.state = {
            gameState: props.gameState,
            token: props.token
        };
    }
    render () {
        return <div></div>
    }
}
window.Board = Board;
And let's add it to the index.html file again, above the join-game.js script.
<script type="text/babel" src="/board.js"></script>Rendering the board
Once again we're going to need a render function:
render () {
    let { gameState, token } = this.state;

    let { whoseTurn } = this.state.gameState;
    let boardState = this.getBoardState(this.state.gameState);
    return (
        <div>
            <h2>Next move: {whoseTurn.name}</h2>
            <button onClick={() => this.takeTurn(0)}>{boardState[0]}</button>
            <button onClick={() => this.takeTurn(1)}>{boardState[1]}</button>
            <button onClick={() => this.takeTurn(2)}>{boardState[2]}</button>
            <br/>
            <button onClick={() => this.takeTurn(3)}>{boardState[3]}</button>
            <button onClick={() => this.takeTurn(4)}>{boardState[4]}</button>
            <button onClick={() => this.takeTurn(5)}>{boardState[5]}</button>
            <br/>
            <button onClick={() => this.takeTurn(6)}>{boardState[6]}</button>
            <button onClick={() => this.takeTurn(7)}>{boardState[7]}</button>
            <button onClick={() => this.takeTurn(8)}>{boardState[8]}</button>
        </div>
    );
}
Taking a turn
We need a few functions to make this work. First, we need one to actually tell the server that we've made a move:
takeTurn (move) {
    let { token } = this.state;
    if (token) {
        fetch('/take-turn', {
            method: 'POST',
            headers: {
              'Accept': 'application/json',
              'Content-Type': 'application/json'
            },
            body: JSON.stringify({ move, token })
        })
        .then(response => response.json())
        .then(data => {
            let { message } = data;
            if (message) {
                alert(message);
            }
        });
    }
}
Note that a token is required to make a move! This means we can have spectators, but if they click the board nothing will happen.
Updating the board
First of all, we need to tell our component to update its state when new data comes in from outside:
componentWillReceiveProps (nextProps) {
    this.setState({ gameState: nextProps.gameState });
}
This is another part of the React component life-cycle. This function is called when the data that is passed into the component changed. It is up to us to tell the inner component to update its state.
Updating the board
Now we do some magic to turn the gameState from the server into the moves on the board!
Let's add a getBoardState method to the Board component:
getBoardState (gameState) {
    let { moves, players, whoseTurn } = gameState;

    let boardState = [null, null, null, null, null, null, null, null, null];
    let otherPlayer = players.find(player => {
        // Hack ahoy!
        return JSON.stringify(player) !== JSON.stringify(whoseTurn)
    });

    let reversedMoves = moves.slice(0).reverse();
    reversedMoves.map((move, i) => {
        boardState[move] = i % 2 === 0 ? otherPlayer.symbol : whoseTurn.symbol;
    });
    return boardState;
}
Updating the board
let boardState = [null, null, null, null, null, null, null, null, null];Let's go through the important bits of that line by line. We initialise the board state to 9 null values:
Then we figure out who the other player is by looking for the player who isn't the current player. We stringify here to compare the values, since JavaScript object comparison is done by reference (there's better ways to do this, I promise!)
let otherPlayer = players.find(player => {
    // Hack ahoy!
    return JSON.stringify(player) !== JSON.stringify(whoseTurn);
});
Updating the board
Lastly, for each move that has been made, we alternate between setting that square to the symbol of each player:
let reversedMoves = moves.slice(0).reverse();
reversedMoves.map((move, i) => {
    boardState[move] = i % 2 === 0 ? otherPlayer.symbol : whoseTurn.symbol;
});#simple😅😅😅 #notmagic
The end of the game
Now all that's left to do is add states for the end of the game. Let's update the render function of TicTacToe for the last time, by adding the following to the end:
if (gameIsWon) {
    return <h2>{gameState.winner.name} won!</h2>
}
if (gameIsDrawn) {
    return <h2>Draw!</h2>
}
et voila! Our game should now be playable start to end!
Let's RECAP (AGAIN)! 😅😅😅
We've done another heap of stuff!
We made our server server static files
We wrote some HTML
We added some polyfills and dependencies
We wrote a UI for our game, including three React components!
👍
👍
👍
👍
🌟
If you want to see the complete finished project, you can check out the "finished" branch!
git checkout finishedWHAT's Next!?
There's still heaps of stuff we could do here!
We could...
make it prettier?
fix the bug where both players can have the same symbol!
let you use an emoji for your symbol!?
make it so you don't have to restart the server to start a new game 🙃
🤘
🤘
🤘
🤘
🤘
write some tests?! 🦄
FIN! THANK YOU!
🖖
summer-of-tech-js-masterclass-2017
By Craig Spence
summer-of-tech-js-masterclass-2017
Summer of Tech 2017 - JS Masterclass


