So we are going to create something like...
GAD FOUNDATION
Metropol Parasol by Jürgen Mayer
metaCAVE v.2 by Eddy Man Kim
farmScape by openUU
platform(1x2) by openUU

Using..
Photoshop
+
Rhino
+
Grasshopper
Grasshopper?
Generative
Parametric
Implicit
Explicit Modeling
vs.
Implicit Modeling
Explicit Modeling
vs.
Implicit Modeling

It is more about process, less about style
Walt Disney Concert Hall by Frank Gehry
Heydar Aliyev Center by Zaha Hadid
Let's focus on data as input, form as output
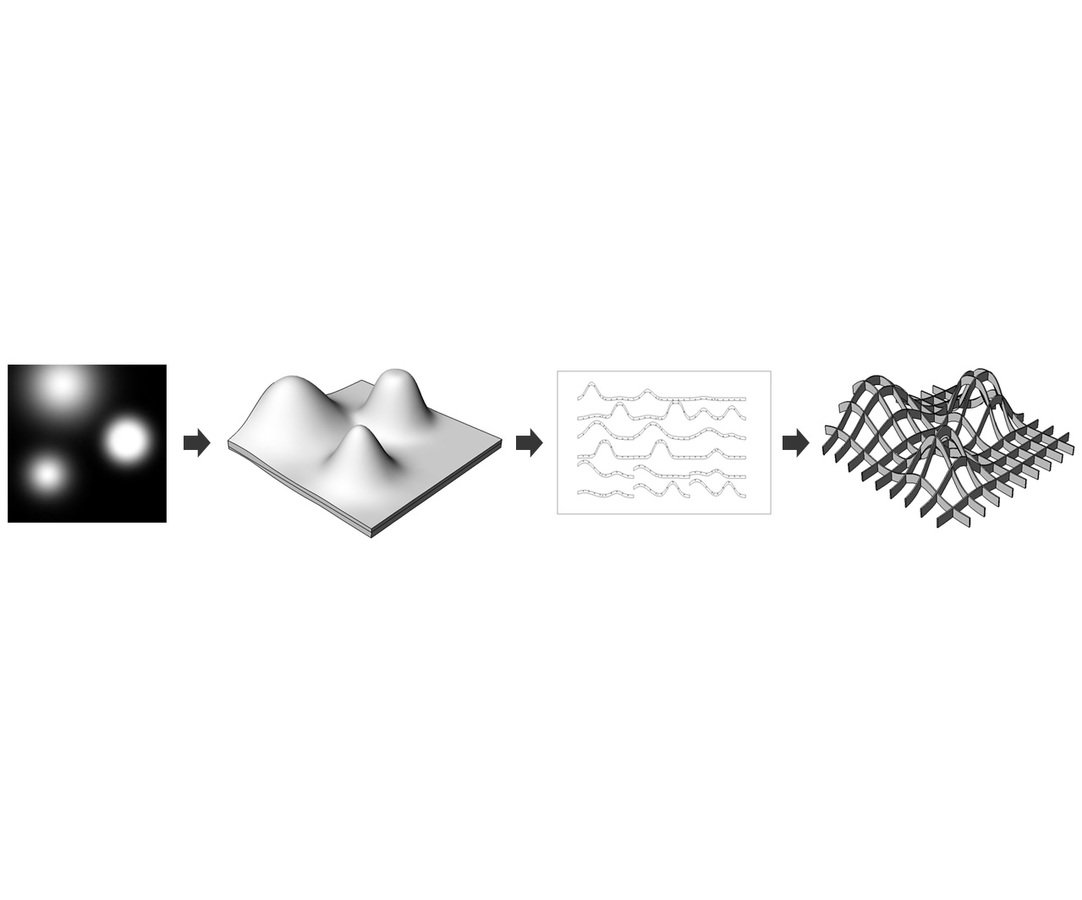
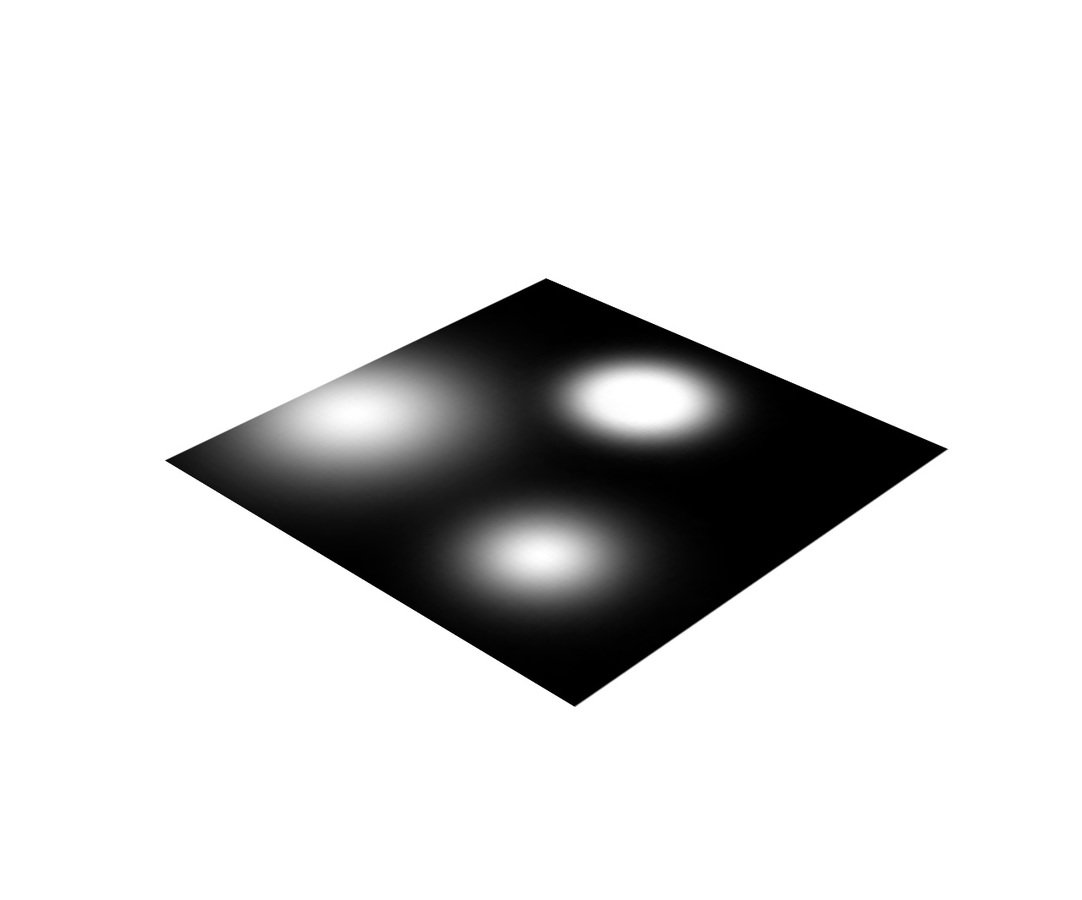
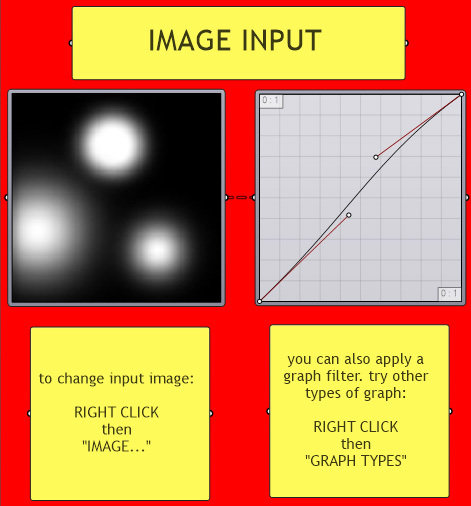
2D Image Input
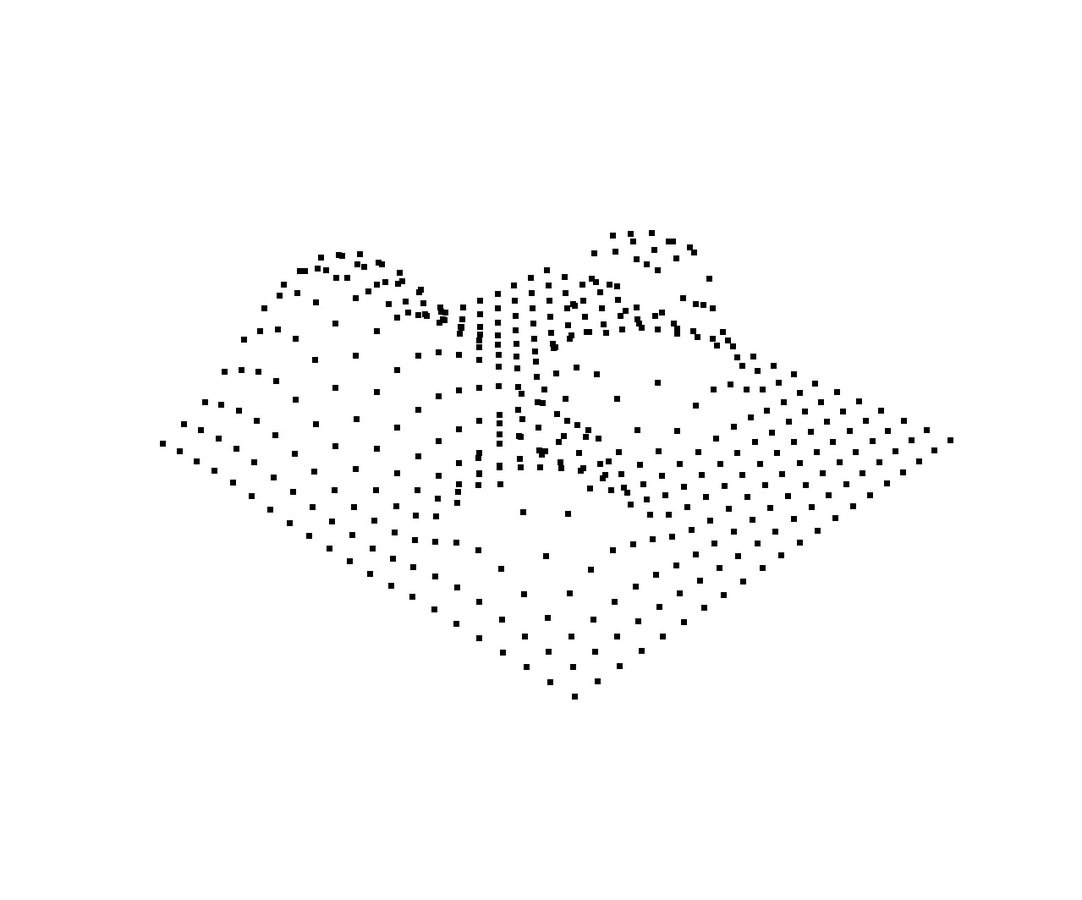
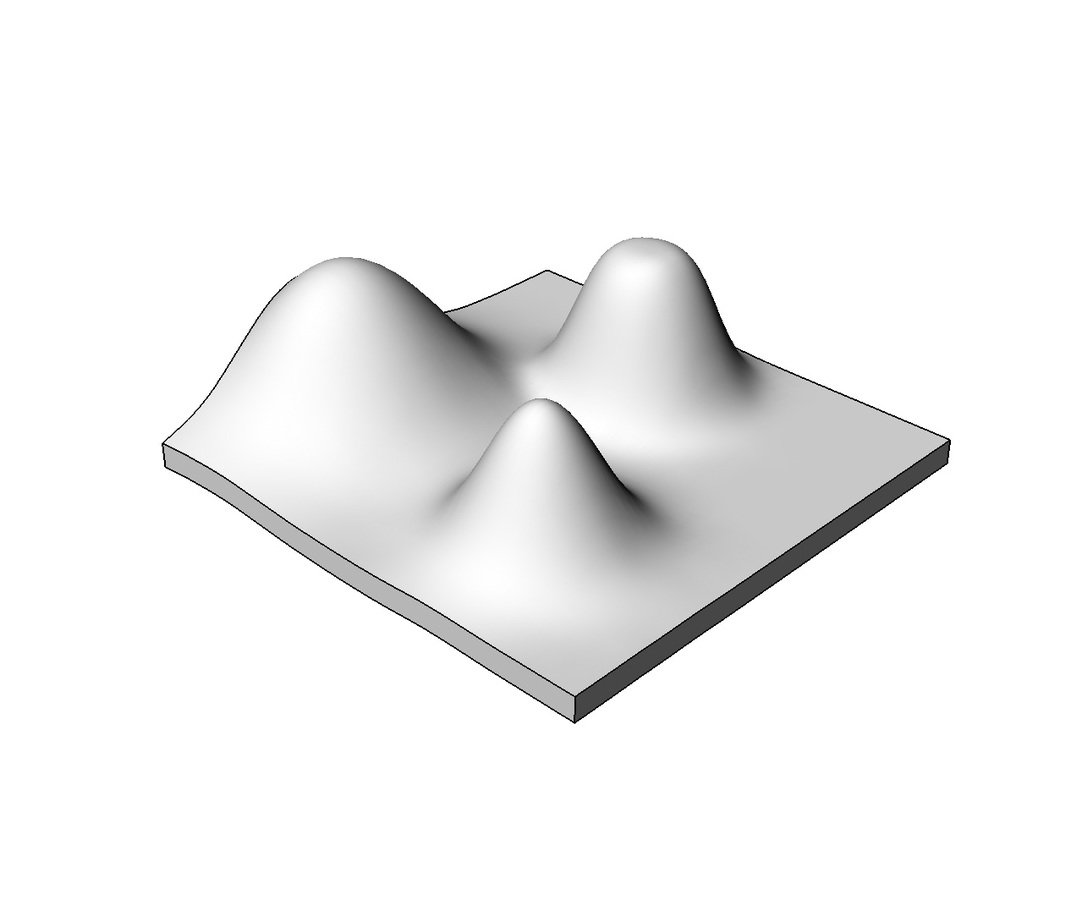
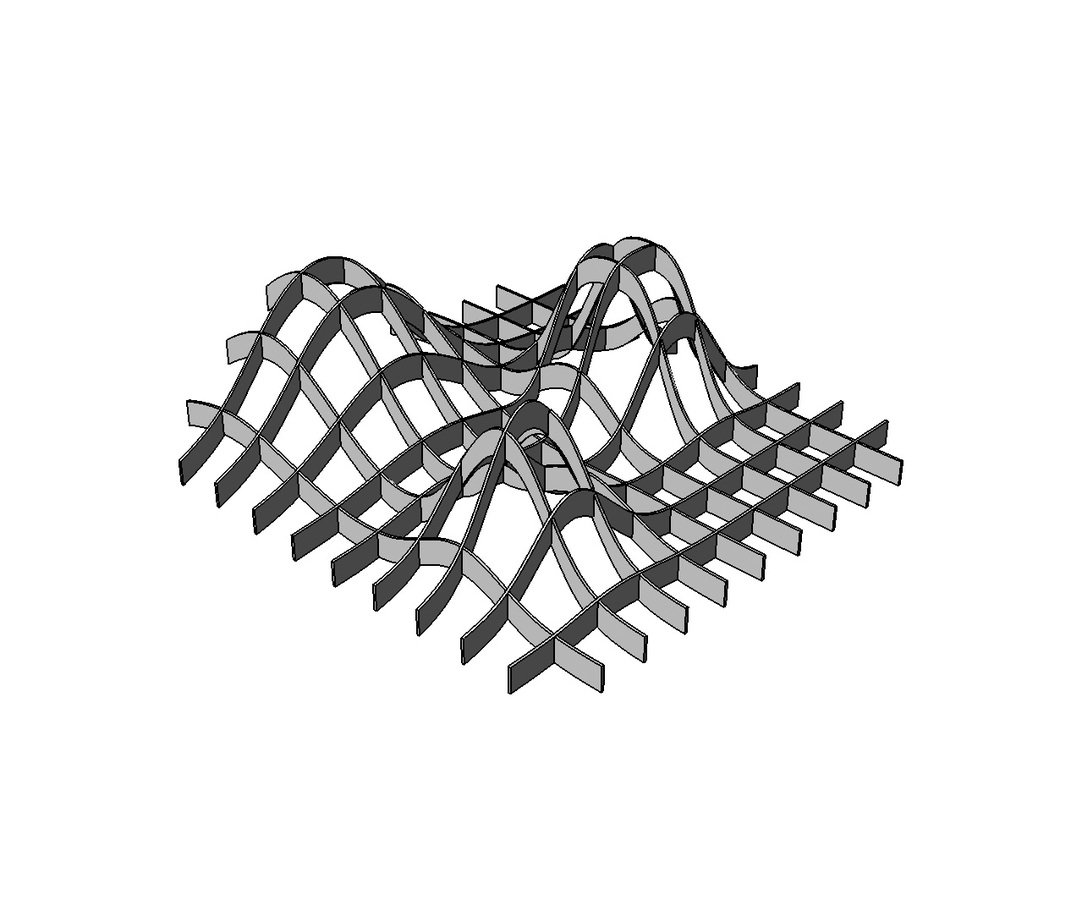
3D Form Generation
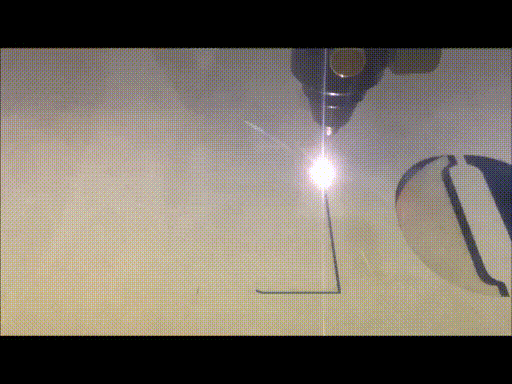
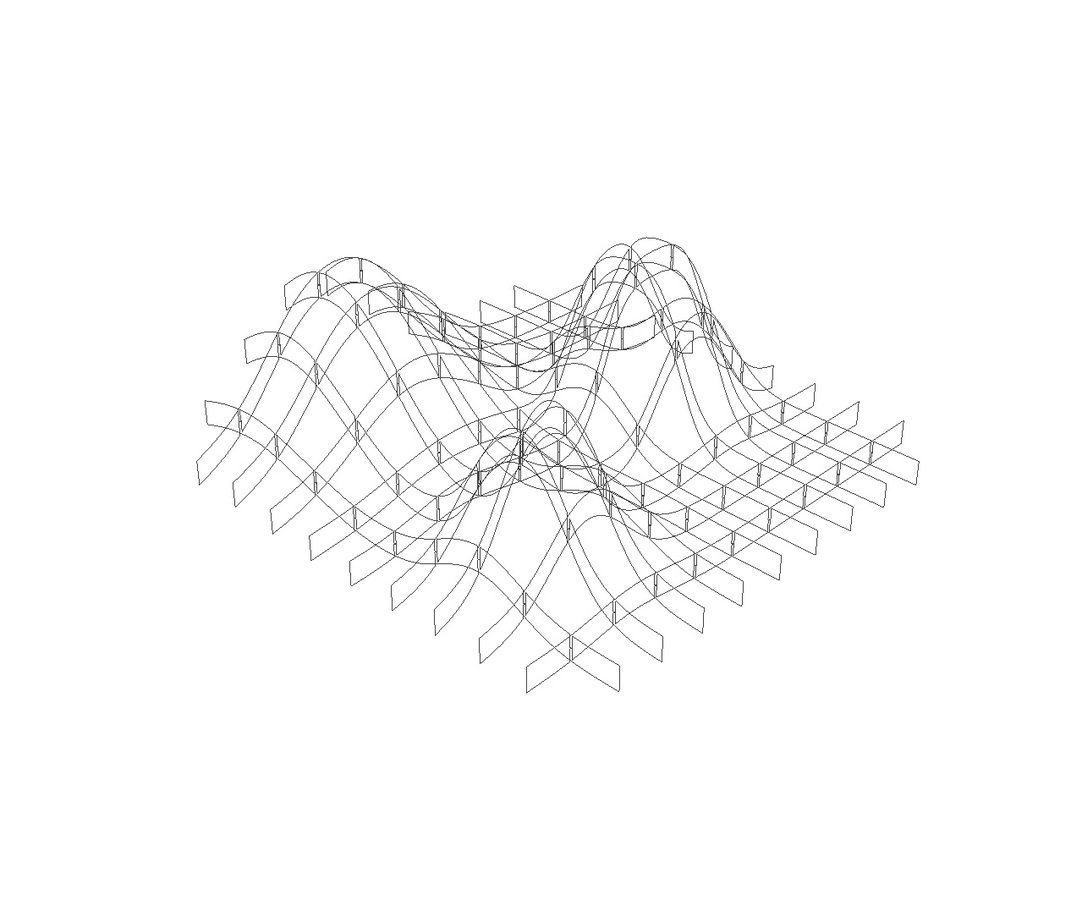
Laser Cutting
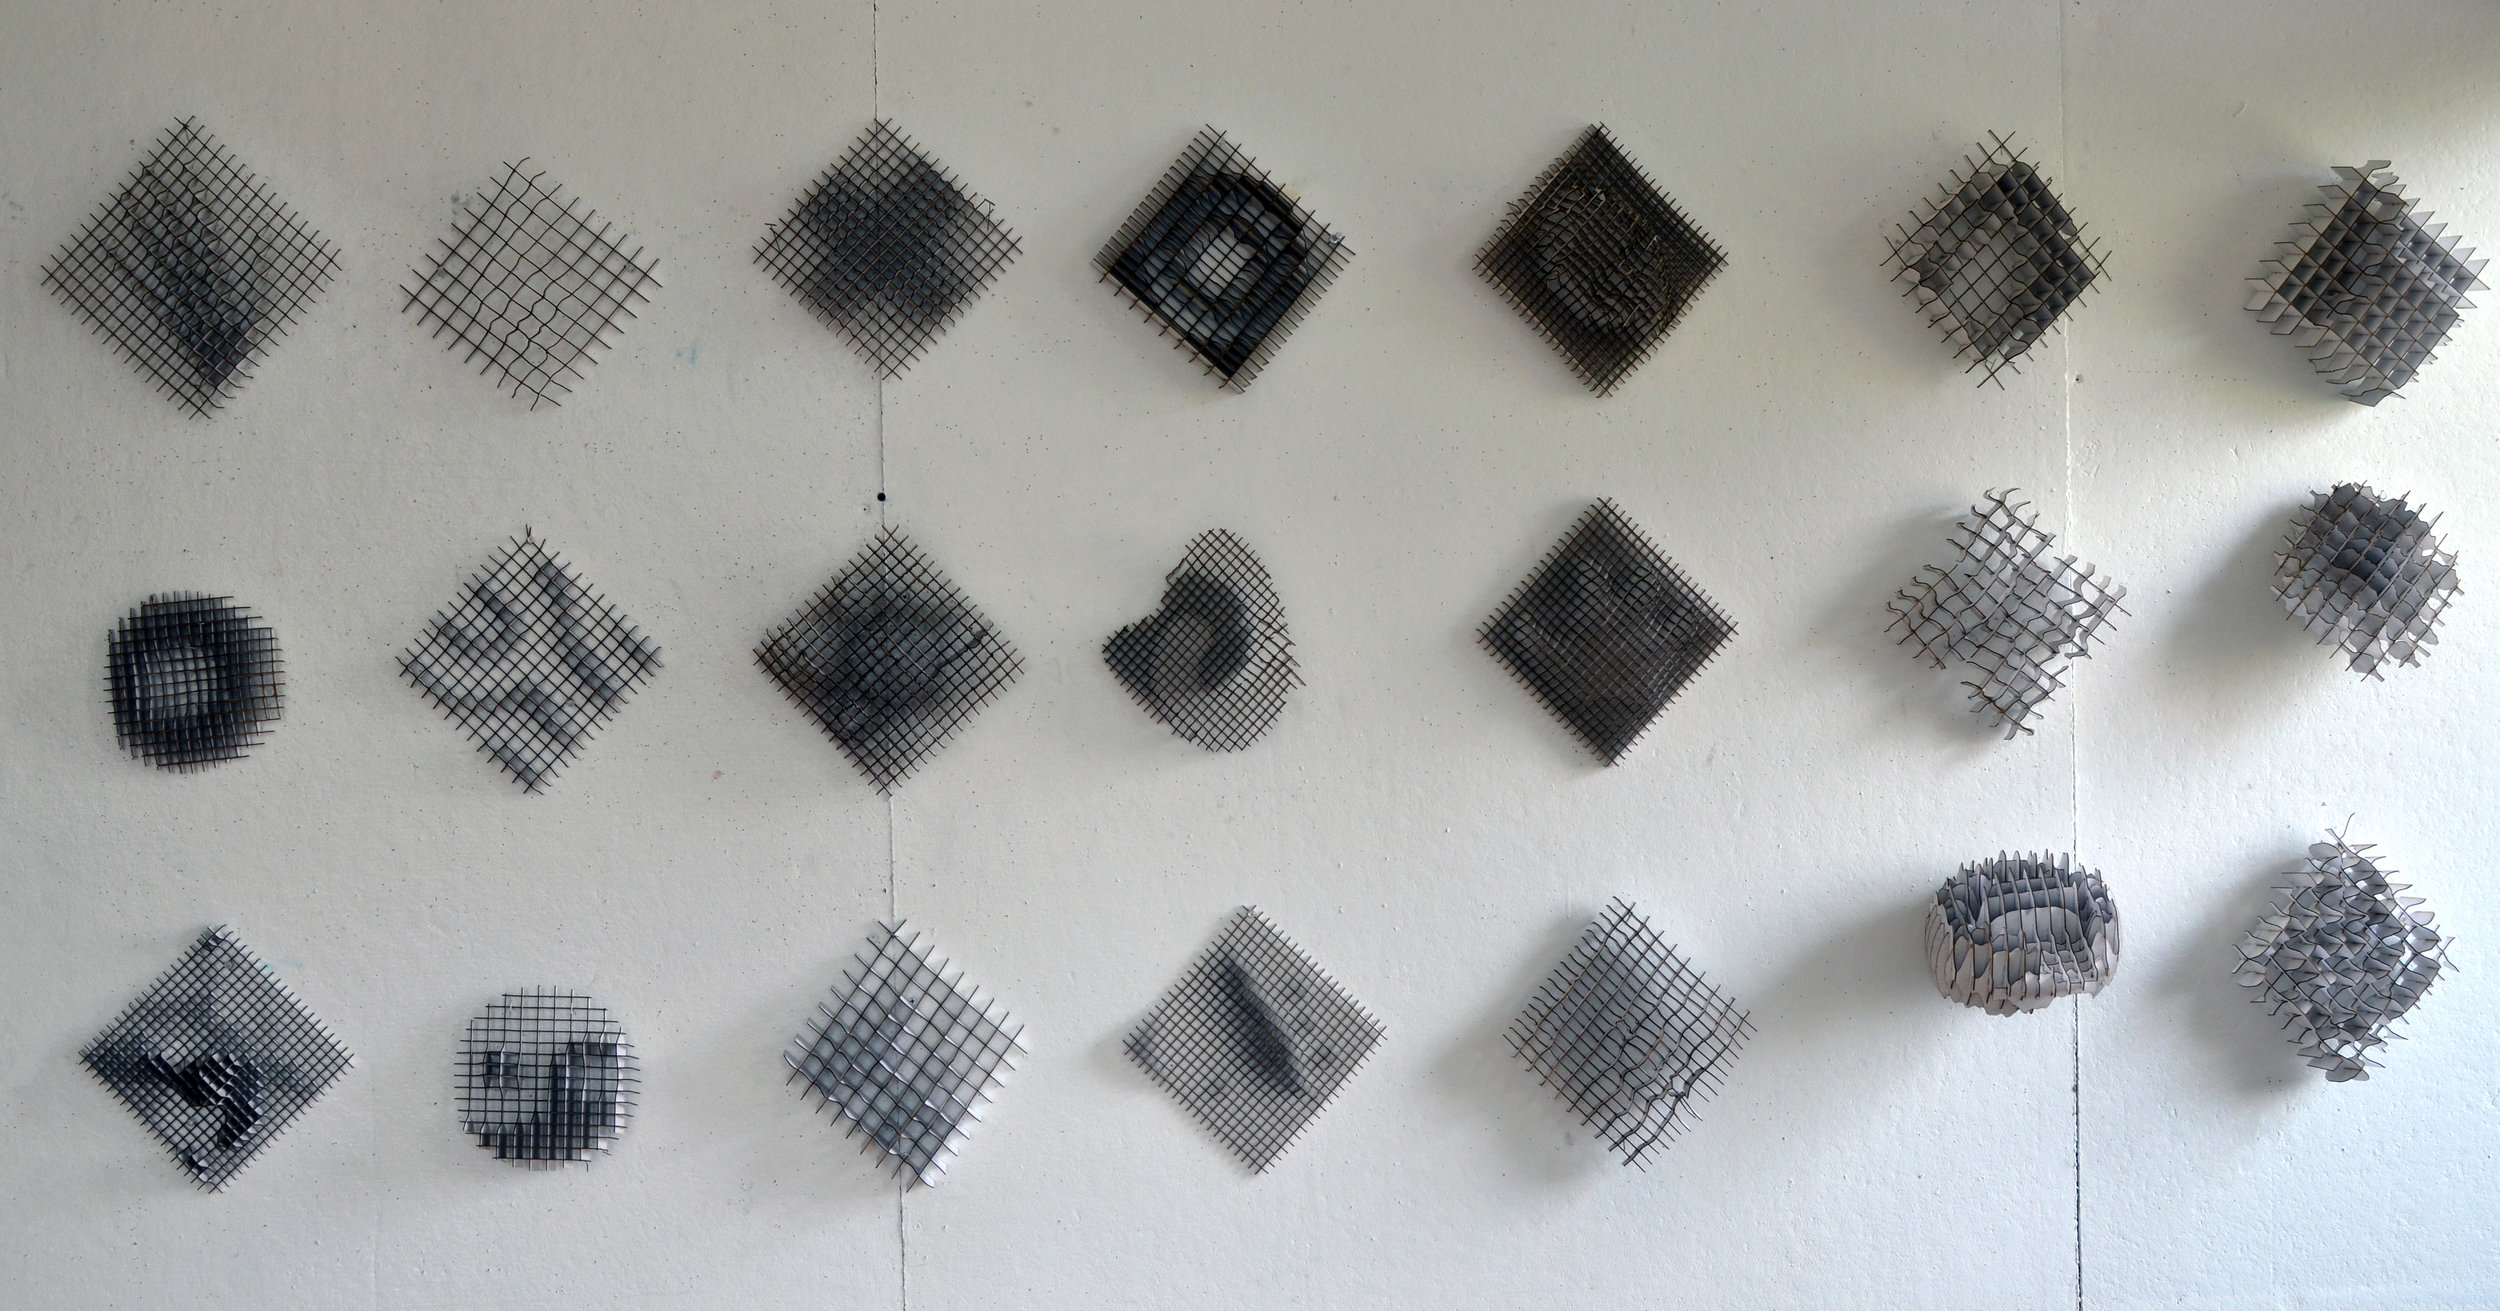
Final Assembly
The Game Plan
How it works


Work in 2D first
Use Photoshop to create your image input:
- Save as JPGs
- Image should be square
- Image should be grayscale (black = low , white = high)
- Image dimension shouldn't be larger than 1000x1000 pixels
- Work in metric millimeters. Get your rulers!
- Think of the image as input data for outputting form
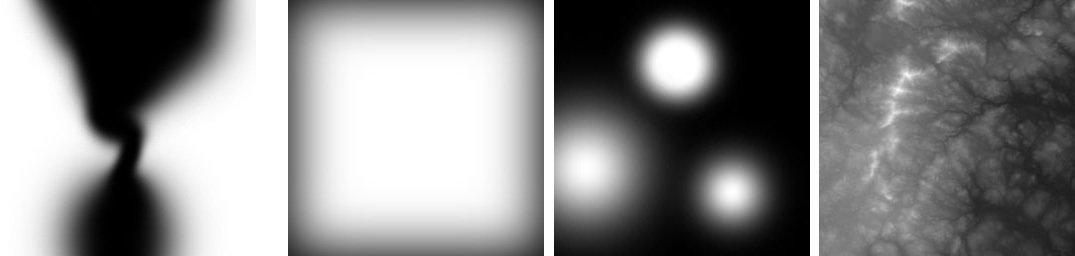
Try these tools in Photoshop:
- Gradient
- Brush (Change Hardness & Size)
- Filter > Blur
- Select > Feather

The Grasshopper Script
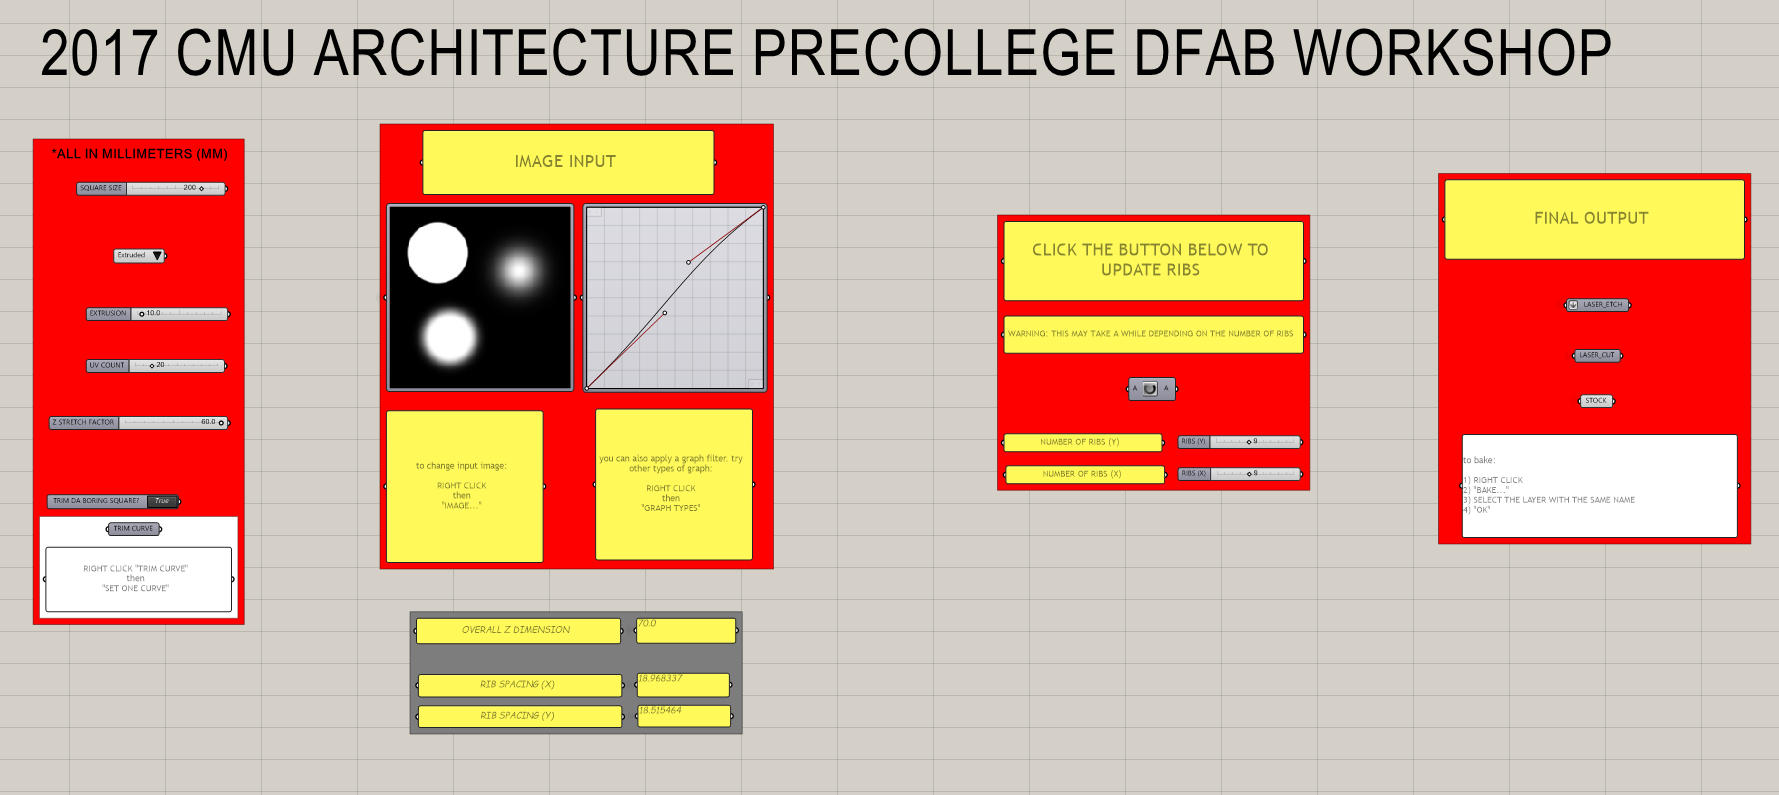
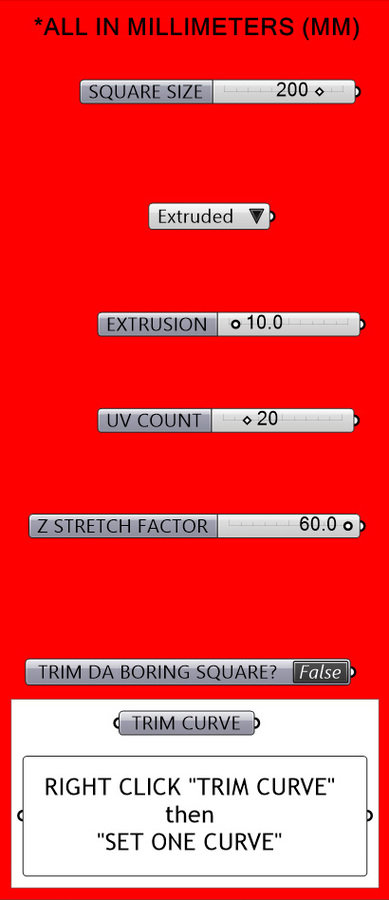
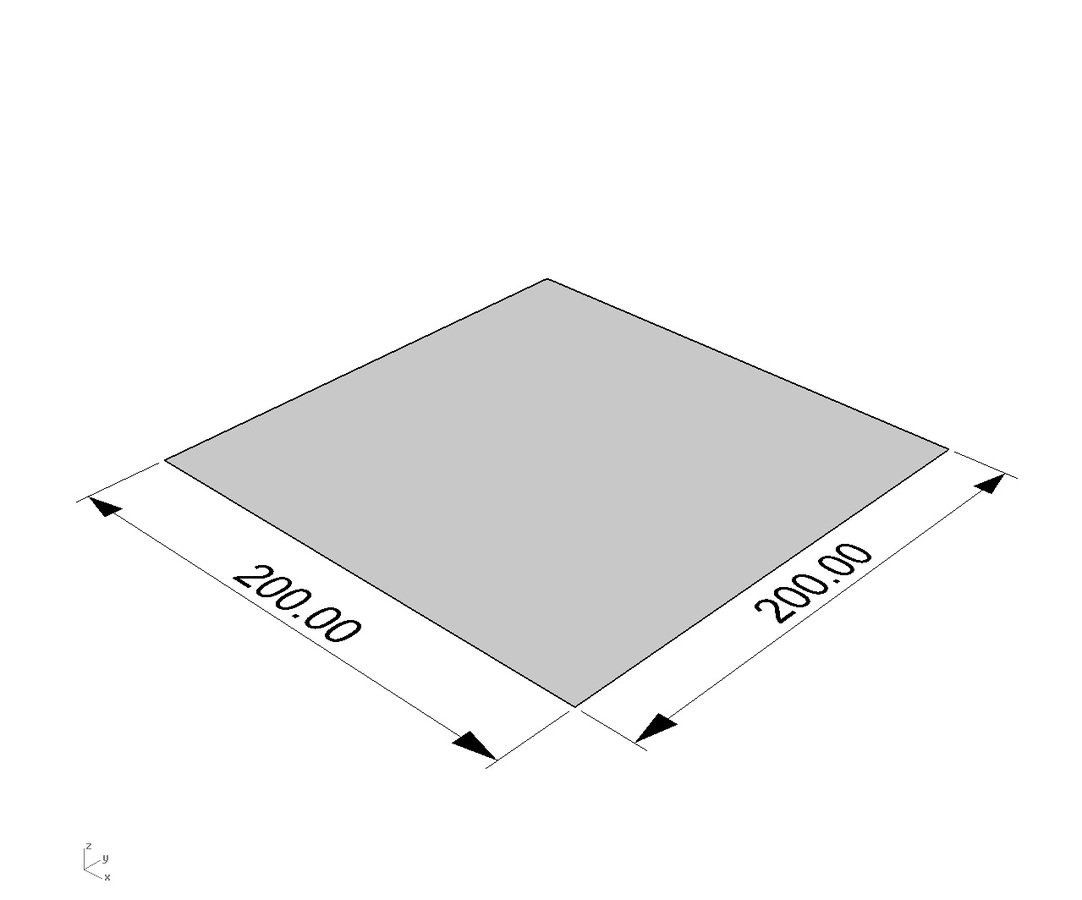
1. Double click on the number
2. Input the X and Y dimension of your model
3. Press ENTER
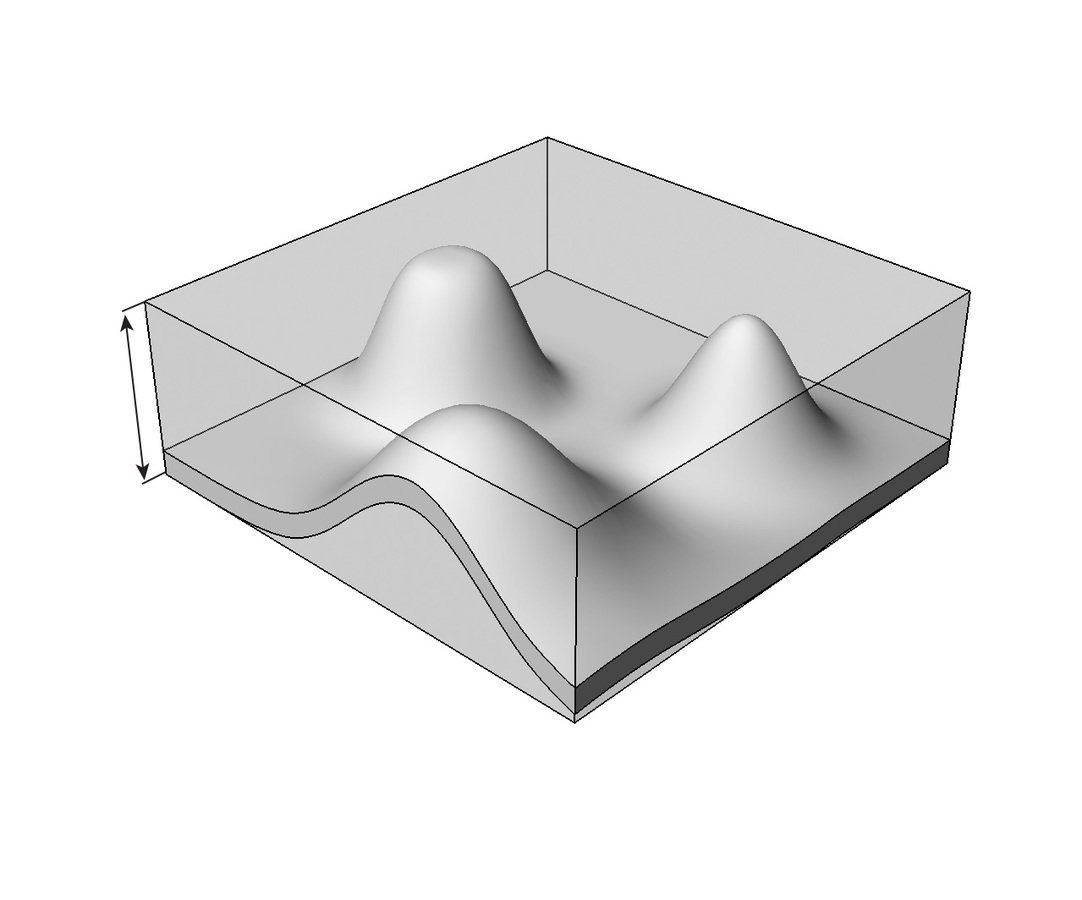
1. Click once to choose one of three options to "thicken" your model
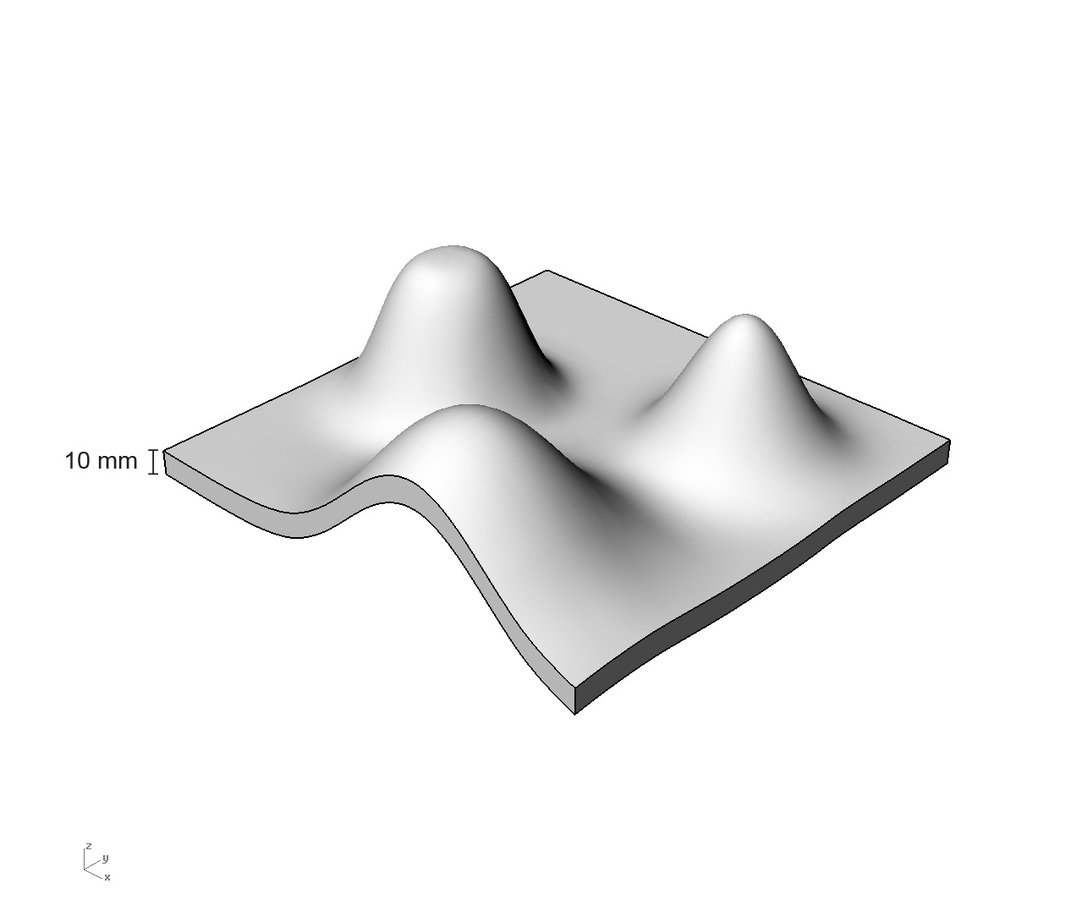
2. For the "Extruded" option, you can set the thickness of the extrusion (see below)

Currently on "Flat" option (see below)
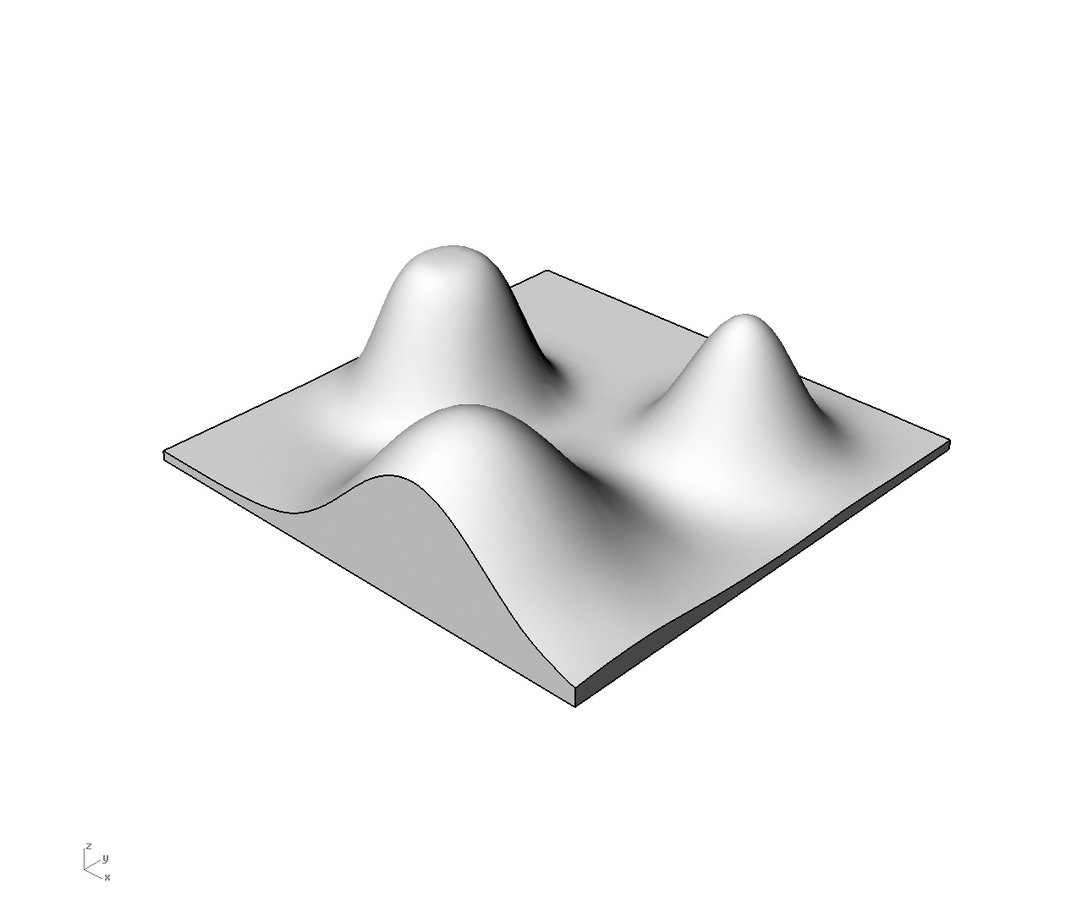

Currently on "Mirrored" option (see below)

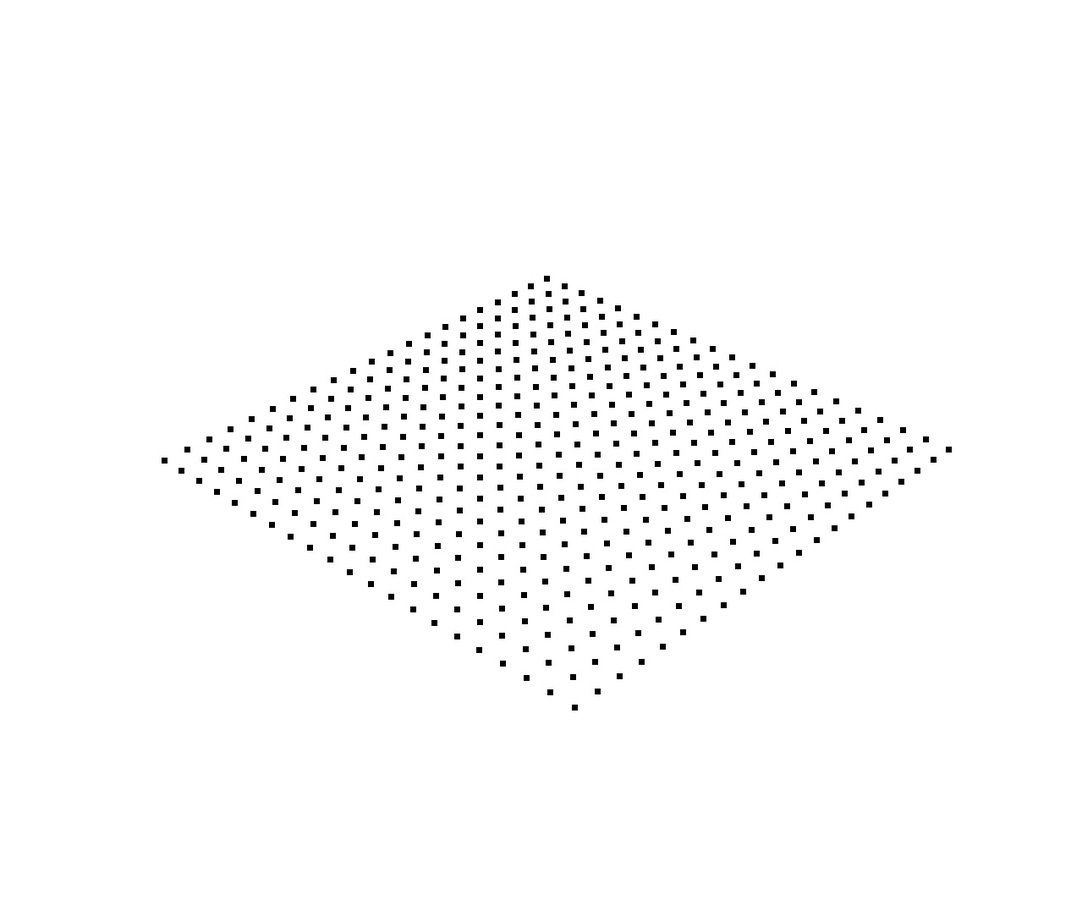
This controls the number of points used to generate the mesh. Only in special cases, you might want to increase this to capture more detail of the image input. In most cases, you shouldn't have to touch this.
1. Double click on the number
2. Input the number
3. Press ENTER
20 x 20 points
1. Double click on the number
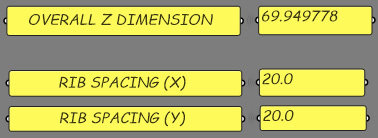
2. Input the number to control the Z (vertical) dimension of the model
3. Press ENTER
You can use ONE CLOSED CURVE to trim the square.
TIP: Try moving the control points of the curve (Press F10 with curve selected to show control points)
1. Make sure nothing is selected in Rhino
2. Double click on "False" to change it to "True"
3. Right click on "TRIM CURVE"
4. Click on "SET ONE CURVE"
5. Click on the curve you want to use
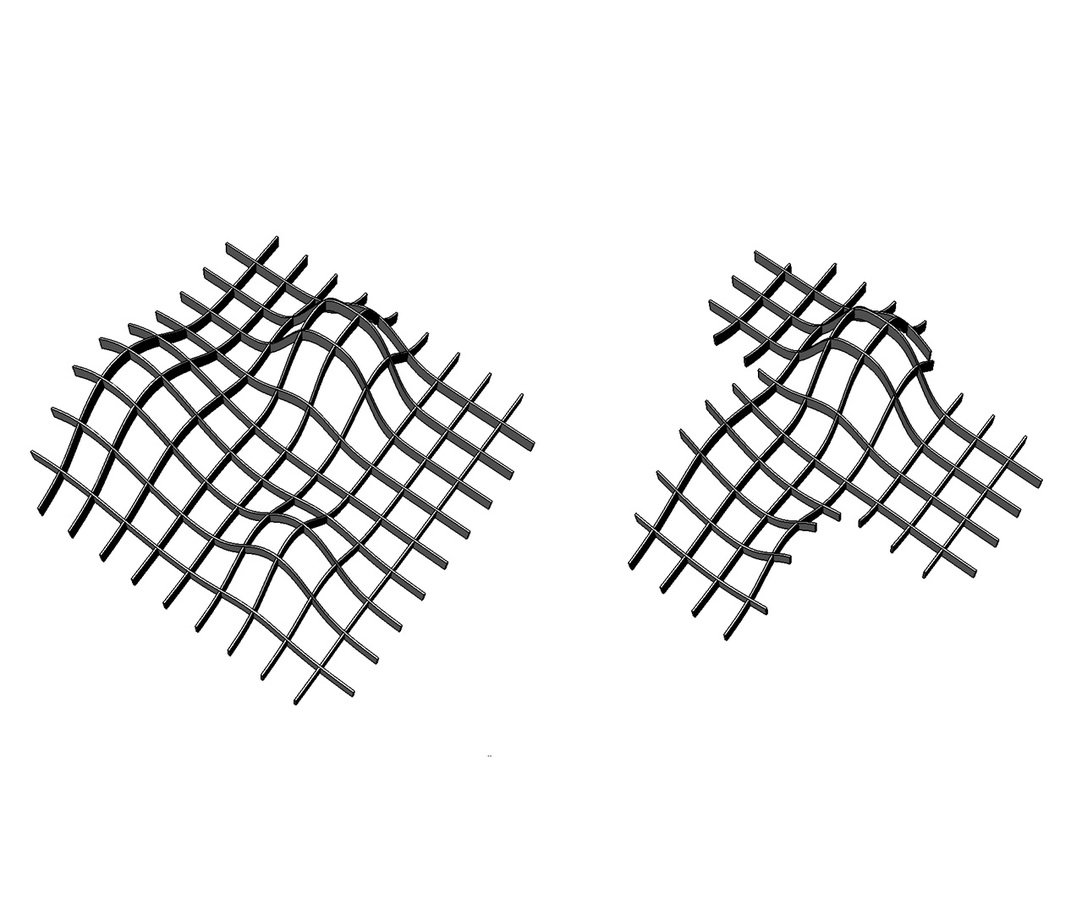
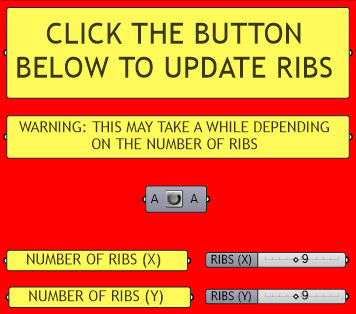
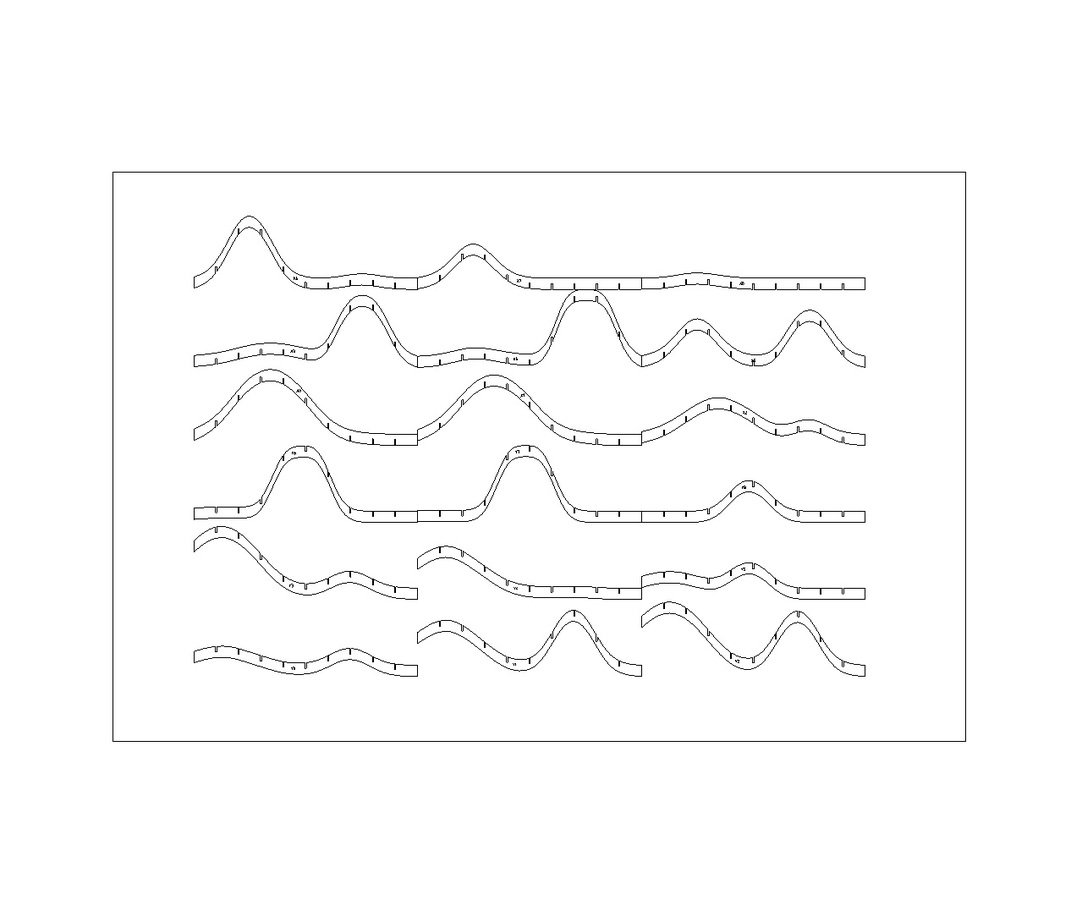
Rib Generation
Be patient here, especially if you have many ribs!
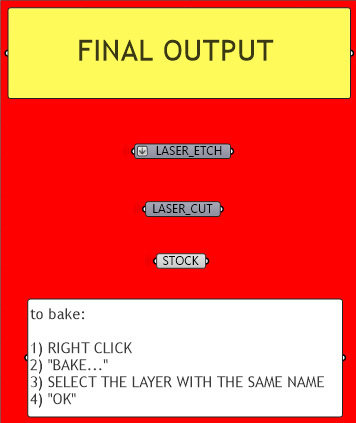
Cutsheet Preparation
- Make sure the geometries are baked into the correct layers
- Make sure every ribs has the correct etch label
- Save a screenshot of the rib order
Tuesday:
- Sign up for Friday laser cut time slots
- Get familiar with the script
- Work on 2D image
Wednesday:
- Finalize model
- Finalize cutsheet and have it inspected by the TAs
- Submit to the server for laser cutting (e.g. Lastname_Firstname.3dm)
Friday:
- Laser cut (11:00am - 3:20pm) you must show up on time for your appointment or your pieces won't be cut
Getting Started
- Download and unzip workshop files from the server
\\archpcserver\Pre College\DFAB Workshop\Resources\Workshop Files.zip
- Install Bowerbird, a Grasshopper Plugin
Instructions in the following slides
- Open Waffle.3dm
- Open Grasshopper by typing "Grasshopper" in Rhino
- Open Waffle.gh in Grasshopper
- Take note of the link to these slides
Installing Bowerbird
- In Grasshopper, go to:
File > Special Folders > Components Folder
- This should open the "Libraries" folder
- Copy Bowerbird.gha into the "Libraries" folder
- Right click on file > Properties > Make sure "Unblock" is unchecked
- Close Grasshopper and Rhino
- Open the Rhino and Grasshopper files
Have fun!
dfab 2017
By Eddy Man Kim


