PROGRAMMING FOR INTERACTION
DM2008
AY2526
PROGRAMMING FOR INTERACTION
DM2008
Programming serves as a robust creative tool, opening up new possibilities for expressive, interactive experiences.
This course introduces the principles of coding for interaction design, focusing on building dynamic, screen-based systems.

About
Why even learn to code in 2025
DM2008
AY2526
PROGRAMMING FOR INTERACTION
Despite living in the (golden) age of AI text editors, vibe-coding and no-code platforms, learning to program can be extremely liberating and deeply empowering.
Programming is a vital skill that can provide unprecedented creative control in the right hands.
Being able to read, write, and debug your own code also means you are not at the mercy of templates or tools — you can shape how things work and make them your own.
For interaction design, this fluency is especially essential. Your ideas live or die by how clearly they can be translated into behavior and interaction.
WEEK 1
COURSE OVERVIEW
ABOUT
STRUCTURE
SCHEDULE
ASSESSMENT
AI POLICY
RESOURCES
MATERIALS

Approach
DM2008
AY2526
PROGRAMMING FOR INTERACTION
Programming can seem complex or intimidating, especially if your strengths lie in visual, spatial, and/or tactile design.
This module is designed to help you break through that fear through hands-on play, visual feedback, and collaborative exploration. We will treat code like a sketchbook: a space to try, to break, and to find joy in surprising outcomes.
Coding does not have to be scary
Each week introduces core programming ideas and some hands-on activity to explore them. You will create projects that combine visual design and interactivity, building toward a final piece that showcases your creative coding chops.
The goal is not perfection, but confidence. We want you to leave this class prepared and ready to tackle other IM modules — and hopefully stay excited to keep coding.
How this module will be taught
ABOUT
STRUCTURE
SCHEDULE
ASSESSMENT
AI POLICY
RESOURCES
MATERIALS
WEEK 1
COURSE OVERVIEW

DM2008
AY2526
PROGRAMMING FOR INTERACTION
Lecture
Activities
15 minute grace period before a student may be considered absent.
Please be punctual.
Everyone is expected to participate in class.
Be mindful and remain respectful of your peers.
Please nominate a class representative to help with urgent coordination.
1 HOUR
2 HOURS
Lesson Structure
Coding Literacy
We will cover foundational topics in JavaScript and p5.js each week
Code Demos
Live walkthroughs of short sketches to illustrate core ideas in action
Discussions
Reflecting on what we do, why it matters, and its wider relevance
Tutorials & Code-along
Step-by-step walkthroughs, building sketches alongside your instructor
Weekly Assignments
Apply what you just learned and explore new ideas within class
Documentation
Capturing your process, progress and various experimentations
ABOUT
STRUCTURE
SCHEDULE
ASSESSMENT
AI POLICY
RESOURCES
MATERIALS
WEEK 1
COURSE OVERVIEW
WEEK 6
DM2008
AY2526
PROGRAMMING FOR INTERACTION
Weekly Schedule
ABOUT
STRUCTURE
SCHEDULE
ASSESSMENT
AI POLICY
RESOURCES
MATERIALS
1
Course Overview &
Intro to Creative Coding
Get introduced to creative coding with p5.js, play with basic shapes, color, and mouse interactions
Control Flows &
Interactivity
Learn how to use if, else, switch, and for loops to create interactive behavior and branching logic
Arrays, Functions & Transformations
How to store and loop through data using arrays, organize code using functions, and transform shapes
Object-oriented Programming
Part II
Expand your game by adding collision detection, states, scoring and code modularity
Object-oriented Programming
Part I
Explore OOP with class, constructor, and this, followed by creating your own object-based game
Review & Refine
Catch up, consult, and clarify key concepts from weeks 1–5, then refine and submit mini projects
2
3
4
5
6
WEEK 1
COURSE OVERVIEW

DM2008
AY2526
PROGRAMMING FOR INTERACTION
Weekly Schedule
ABOUT
STRUCTURE
SCHEDULE
ASSESSMENT
AI POLICY
RESOURCES
MATERIALS
7
Local Tooling &
Version Control
Migrate from p5.js web editor to local dev tools, folder hygiene, GitHub, and using AI for coding
Arduino Basics &
Type Systems
Dive into physical computing with Arduino, learn to wire sensors, and understand type systems in code
Sensor to Screen
Send live sensor data from Arduino to p5.js, map values to visuals, explore using external libraries
Final Project
Working Sessions
Pitch project ideas, form groups, start prototyping,
debug, get feedback, and learn to deploy sketches
Interface Design
Use p5.js DOM elements like sliders/buttons to build UIs, shape user experience and alter sketch behavior
Final Project
Showcase & Critique
Present your final project to the class, reflect on your creative coding journey (struggles to breakthroughs)
8
9
10
11–12
13
RECESS
WEEK 1
COURSE OVERVIEW
DM2008
AY2526
PROGRAMMING FOR INTERACTION
Components
ABOUT
STRUCTURE
SCHEDULE
ASSESSMENT
AI POLICY
RESOURCES
MATERIALS
Continuous
10%
In-class Activities
Individual
Aesthetic and technical outcomes of weekly assignments, coding exercises and other explorations
20%
Participation
Individual
Ongoing engagement in all in-class activities, discussions and critiques
15%
OOP Mini Project
Individual / Team
Projects
Project execution, programming fundamentals, design sensibility and experimentation
15%
Arduino Sensor Jam
Individual / Pair
Ongoing engagement in all in-class activities, discussions and critiques
40%
Final Project
Team
Conceptual quality, demonstration of coding knowledge, design and execution
WEEK 1
COURSE OVERVIEW
DM2008
AY2526
PROGRAMMING FOR INTERACTION
Using AI Chatbots
ABOUT
STRUCTURE
SCHEDULE
ASSESSMENT
AI POLICY
RESOURCES
MATERIALS
1—6
Strictly no usage of AI chatbots allowed
The objective of these initial weeks of the course is to build coding literacy and get comfortable with reading and writing code
7
Onboarding session on proper use of AI chatbot
Instructors will take you through the best practices in getting code assistance from AI chatbots, including how to ask and verify
8—13
Usage is allowed with transparent declarations
Students are expected to document and indicate any code generated with AI by commenting what was prompted / modified
If you are ever unsure about a use case, check with your instructor.
WEEK 1
COURSE OVERVIEW

DM2008
AY2526
PROGRAMMING FOR INTERACTION
Learning Resources
ABOUT
STRUCTURE
SCHEDULE
ASSESSMENT
AI POLICY
RESOURCES
MATERIALS
Textbooks
WEEK 1
COURSE OVERVIEW
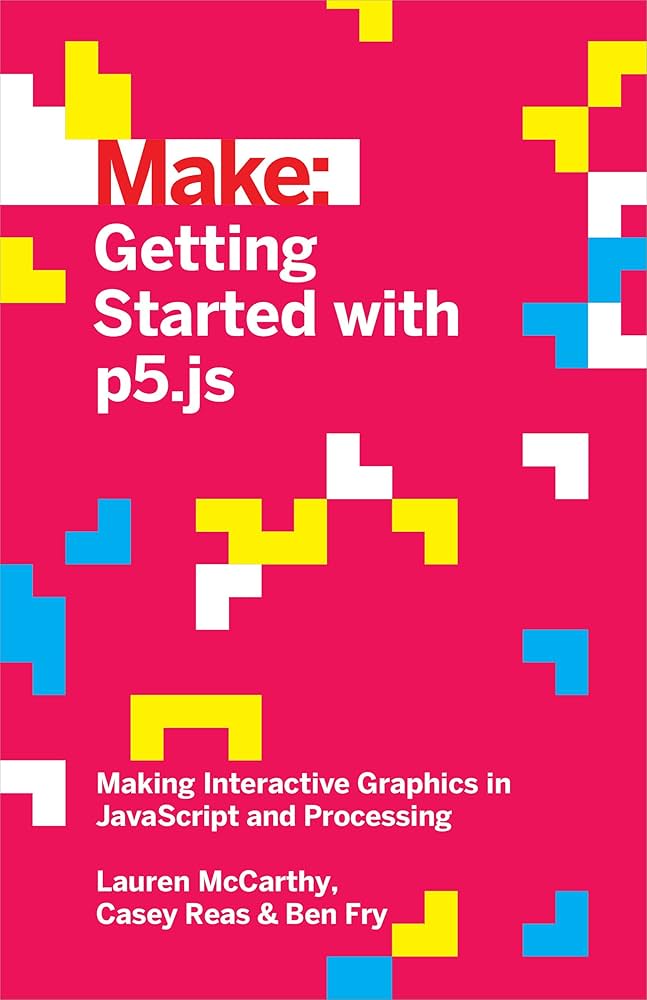
Make: Getting Started with p5.js
McCarthy, Lauren, Casey Reas, and Ben Fry.
2016
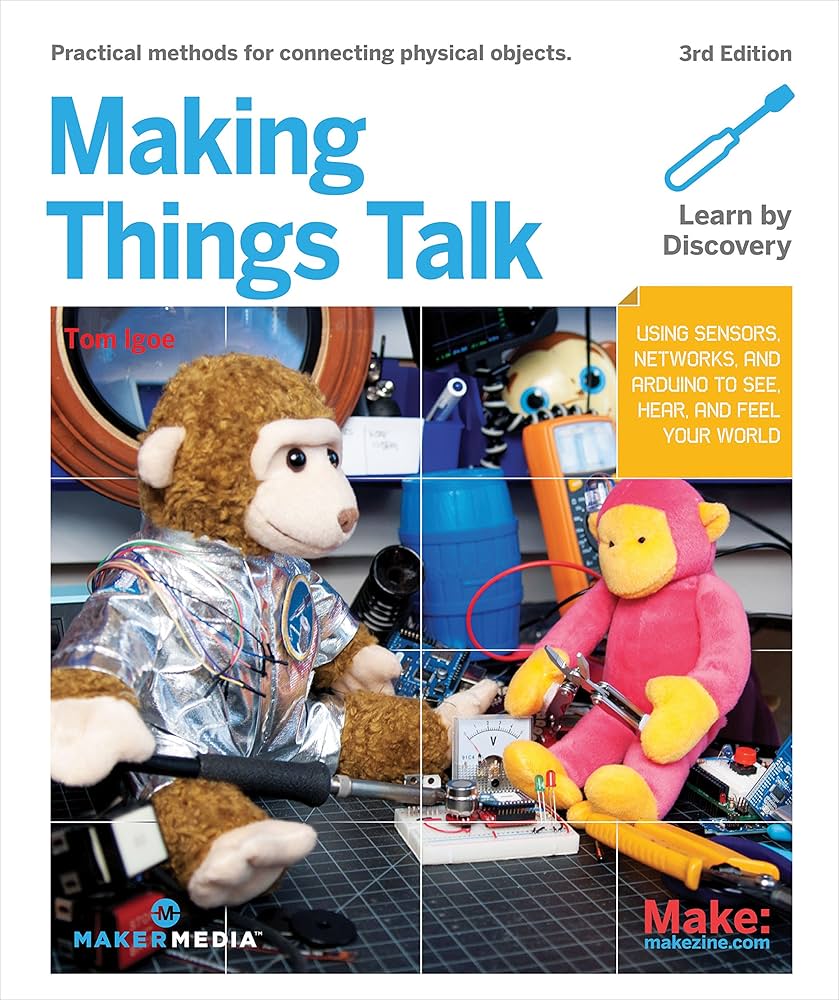
Making Things Talk
Igoe, Tom.
2017

Generative Design
Gross, Benedikt, Hartmut Bohnacker, Julia Laub, and Claudius Lazzeroni.
2018
Aesthetic Programming
Soon, Winnie, and Geoff Cox.
2020
Code as a Creative Medium
Levin, Golan, and Tega Brain.
2021

The Nature of Code
Shiffman, Daniel.
2024

DM2008
AY2526
PROGRAMMING FOR INTERACTION
Learning Resources
ABOUT
STRUCTURE
SCHEDULE
ASSESSMENT
AI POLICY
RESOURCES
MATERIALS
Tutorial Channels
WEEK 1
COURSE OVERVIEW

The Coding Train
Daniel Sciffman

Experimenting with Code
Patt Vira

TRCC
Tim Rodenbröker
Beginner tutorials, basic coding, intermediate to advanced techniques
Beginner tutorials, basic coding, intermediate to advanced techniques
Intermediate to advanced techniques, with a strong design/typography focus
p5js, JavaScript, libraries, and other platforms
p5js, JavaScript, Arduino, libraries, and other platforms
p5js, JavaScript, Processing, libraries, and other platforms

DM2008
AY2526
PROGRAMMING FOR INTERACTION
Additional Materials
ABOUT
STRUCTURE
SCHEDULE
ASSESSMENT
AI POLICY
RESOURCES
MATERIALS
1
2
3
4
Final Submission Checklist ↗︎
COMING SOON
5
Etherpad (Communal Note-taking)
WEEK 1
COURSE OVERVIEW

DM2008
AY2526
PROGRAMMING FOR INTERACTION
Introduction to Creative Coding
1
Easing into to creative coding and programming using p5.js: exploring shapes, color, and simple interactivity through playful experimentation.
Hello World
DM2008
AY2526
PROGRAMMING FOR INTERACTION
WEEK 1
INTRODUCTIONS
STUDENTS
INSTRUCTORS
1
What you would like to be called
2
What specialization are you from
3
Have you done programming before
4
What about interaction interests you
5
An interactive experience you enjoy most
Preferred name and pronouns
e.g. an app, a game, an installation, an artwork

DM2008
AY2526
PROGRAMMING FOR INTERACTION
STUDENTS
INSTRUCTORS
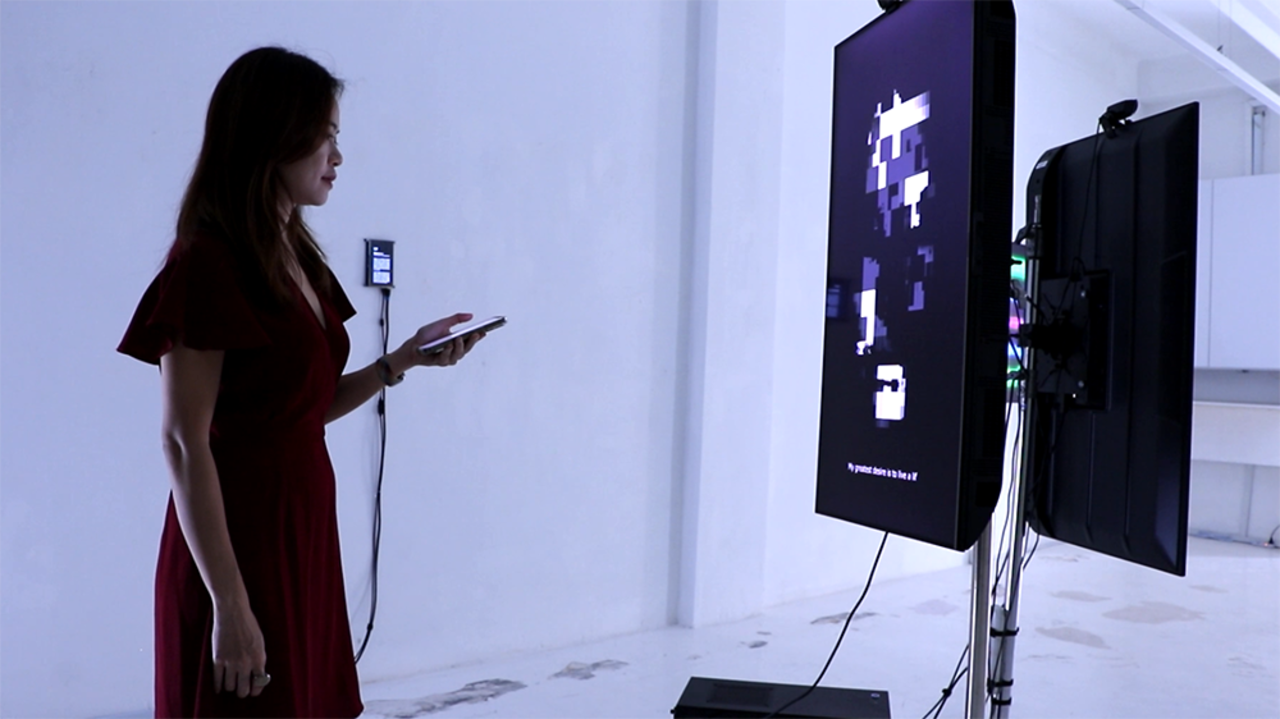
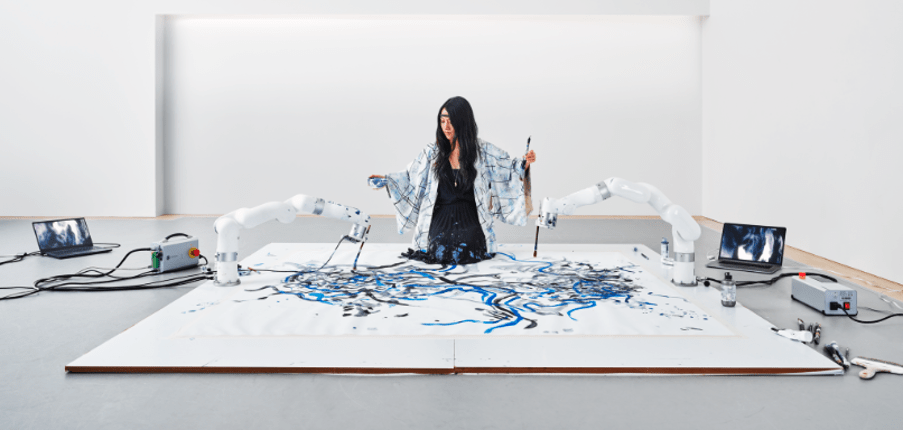
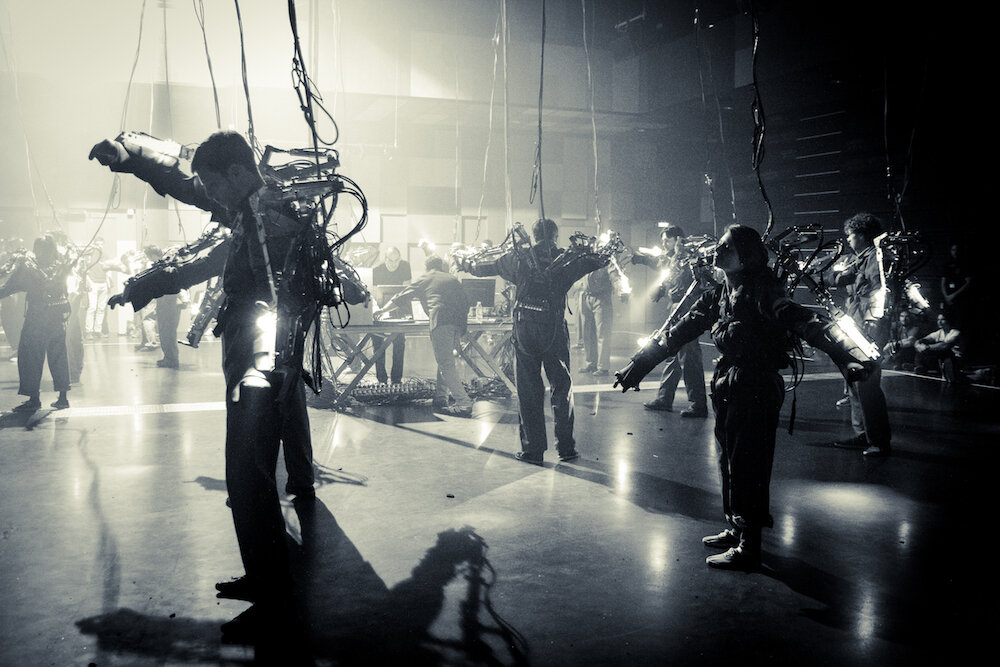
jo+kapi’s artistic research and works critically engage with the evolving modes of consuming digital art, specifically within the dynamic discourse surrounding this space – including exploring concepts around the ownership of digital art, the seat of creative labor in algorithmically generated art, and the ongoing debates surrounding intellectual property and authorship in AI-generated artworks.
The duo also investigates how emerging technologies are transforming and inspiring alternative modalities for thinking about (digital) art, as well as how artists are responding to these developments by using technology to challenge existing norms in the creation, curation, and presentation of art.
Who We Are

WEEK 1
INTRODUCTIONS
(RE)ROOTING, 2021
JO HO
National Gallery Singapore Facade,
Light to Night Festival 2021
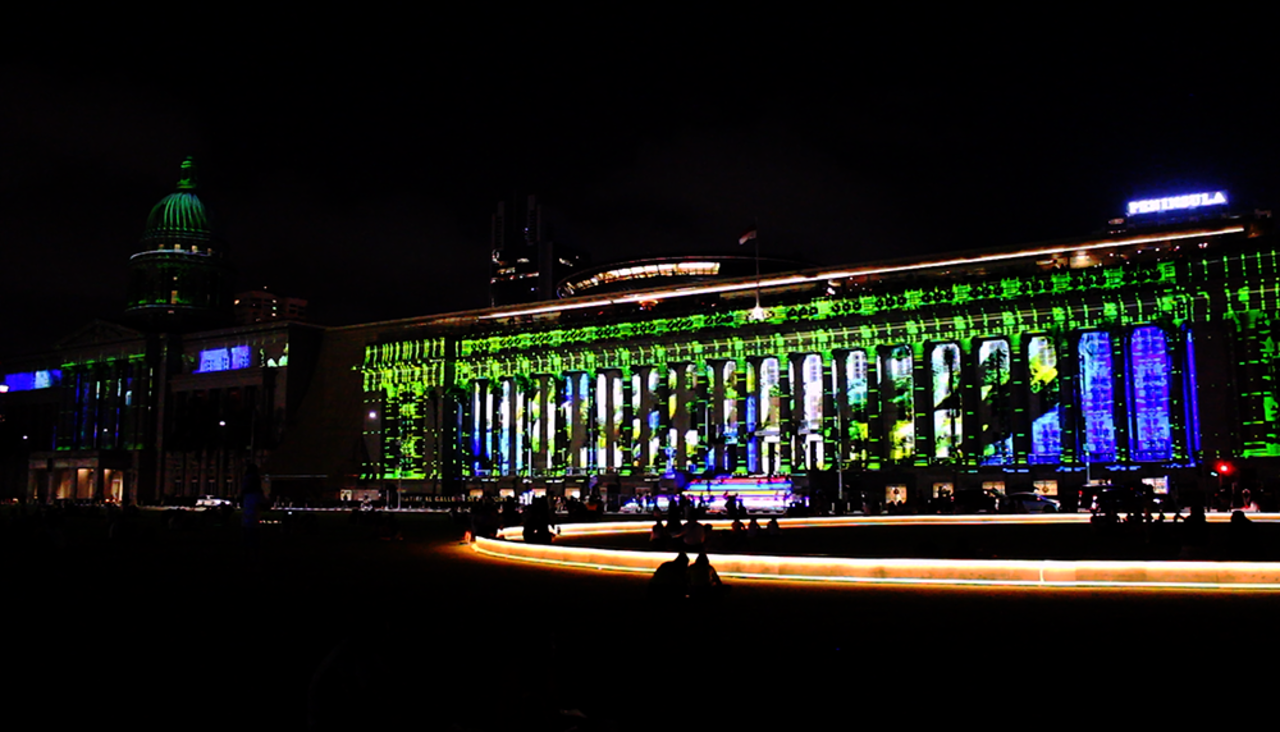

Tools
TouchDesigner, Projection Mapping, Adobe After Effects, Runway ML
DM2008
AY2526
PROGRAMMING FOR INTERACTION
Selected Works
WEEK 1
BACKGROUND
DM2008
AY 2526
Programming for Interaction
DM2008
AY2526
PROGRAMMING FOR INTERACTION
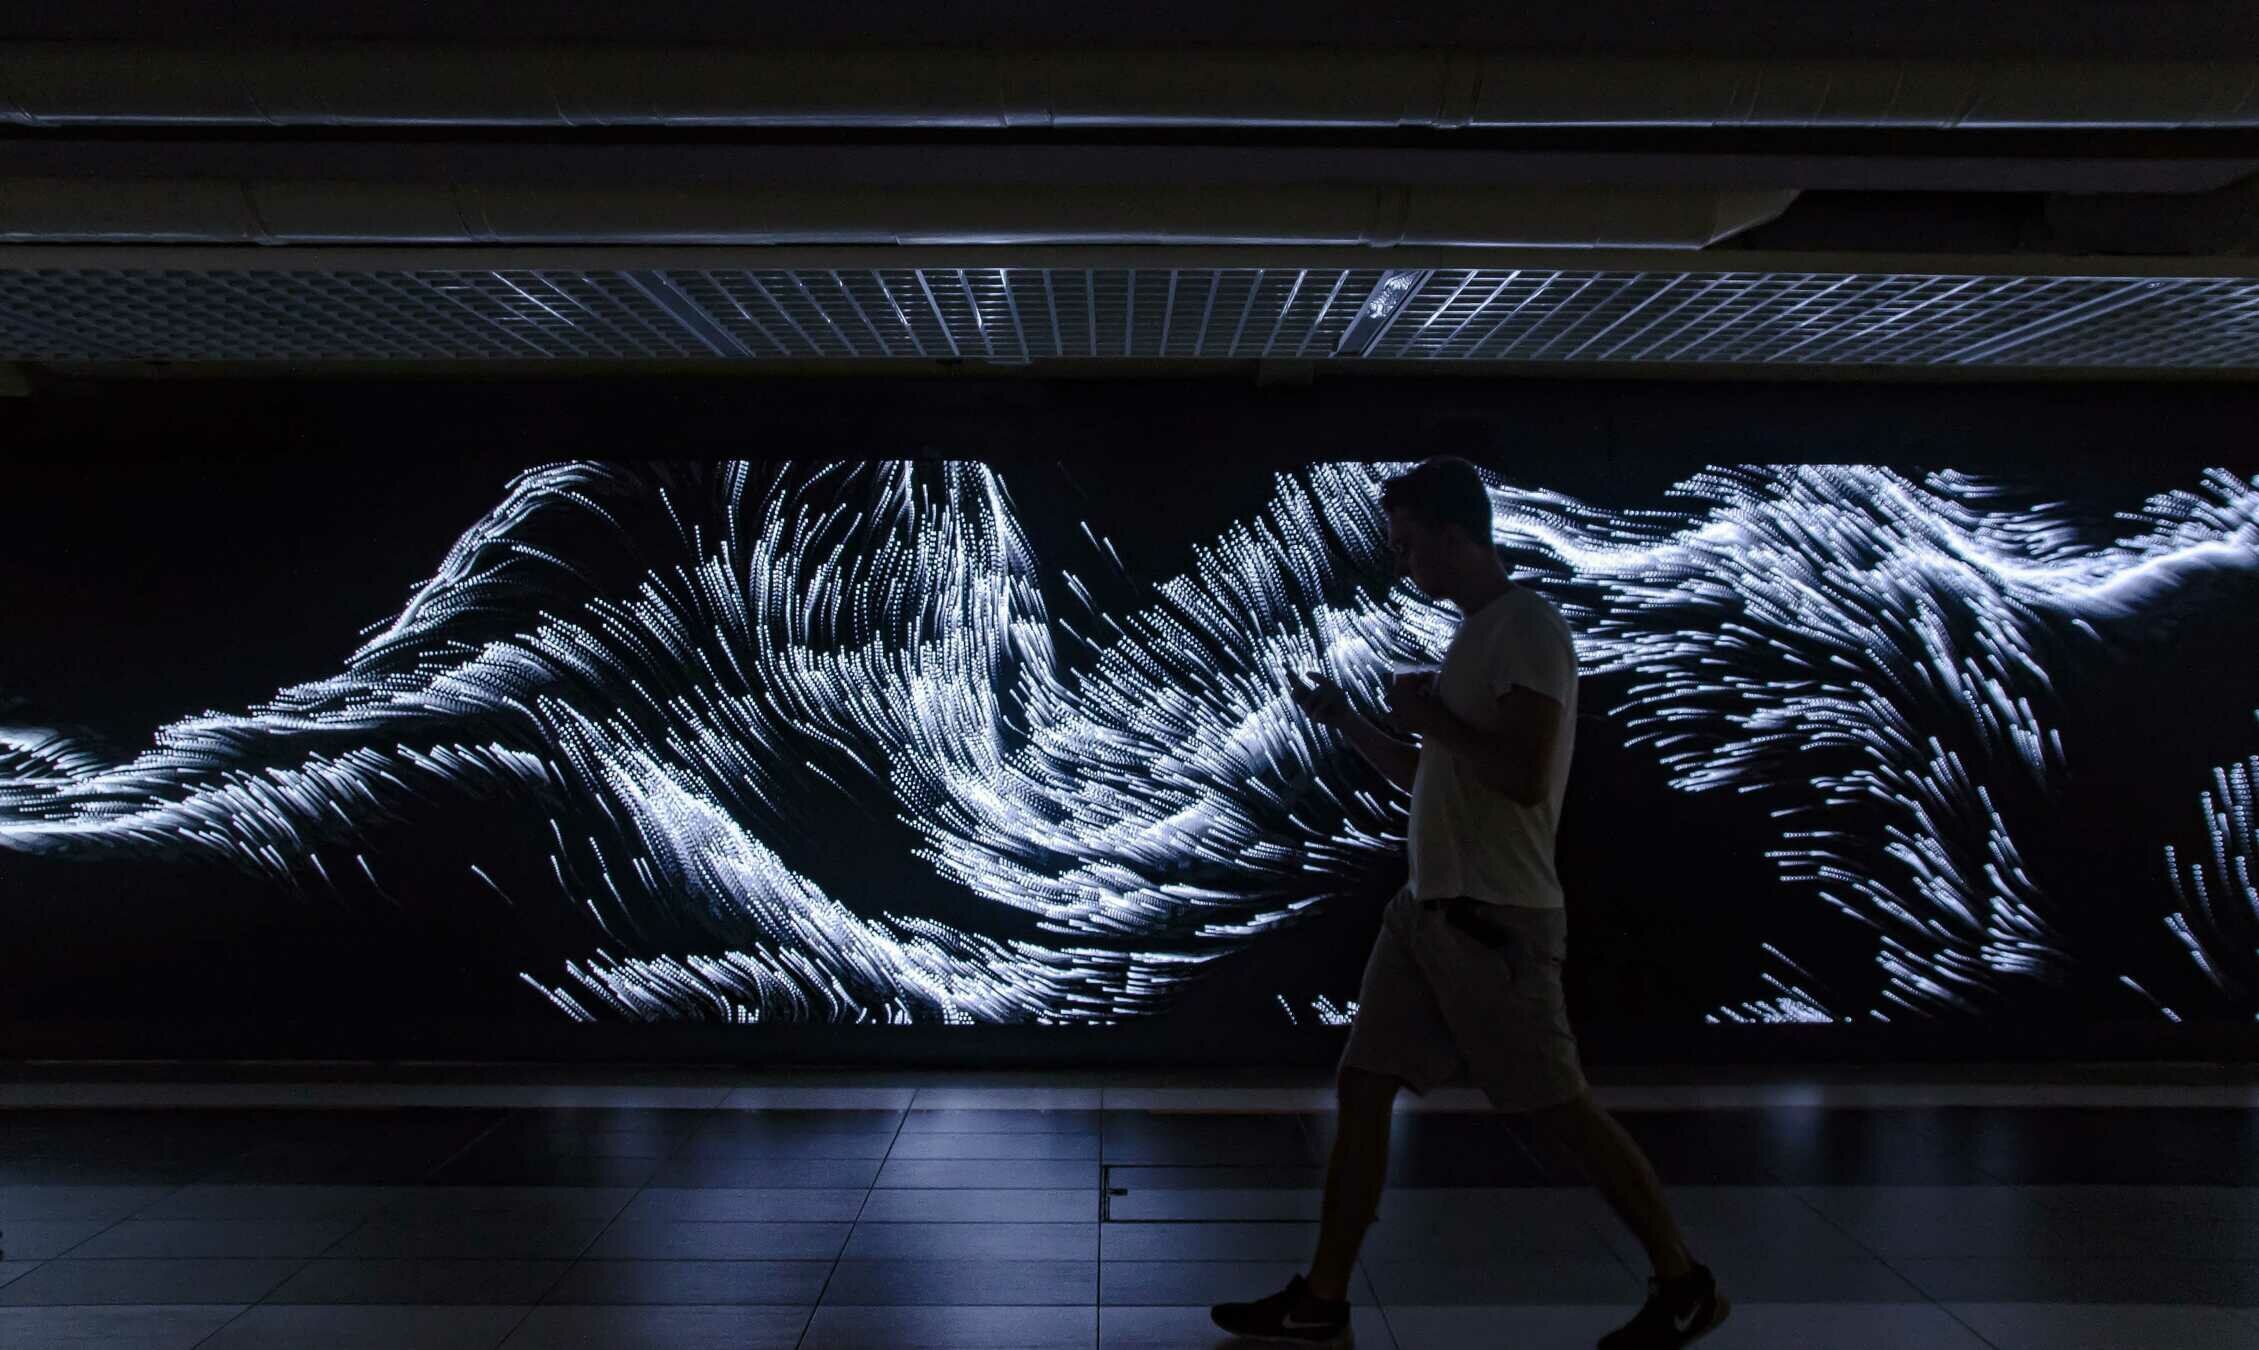
Various Live Visuals
(2021—2023)
JO HO
Tools
TouchDesigner, Projection Mapping, Adobe After Effects, Runway ML
WEEK 1
BACKGROUND


DM2008
AY2526
PROGRAMMING FOR INTERACTION
a developing slate, 2024
JO HO
Ames Yavuz Singapore,
Paratext
Tools
p5js, Adobe After Effects, Runway ML
WEEK 1
BACKGROUND


DM2008
AY2526
PROGRAMMING FOR INTERACTION
Macrocosmic Flux, 2016
KAPILAN NAIDU
Media Art Nexus, NTU
Tools
Processing, LTA Datamall API
WEEK 1
BACKGROUND
DM2008
AY2526
PROGRAMMING FOR INTERACTION
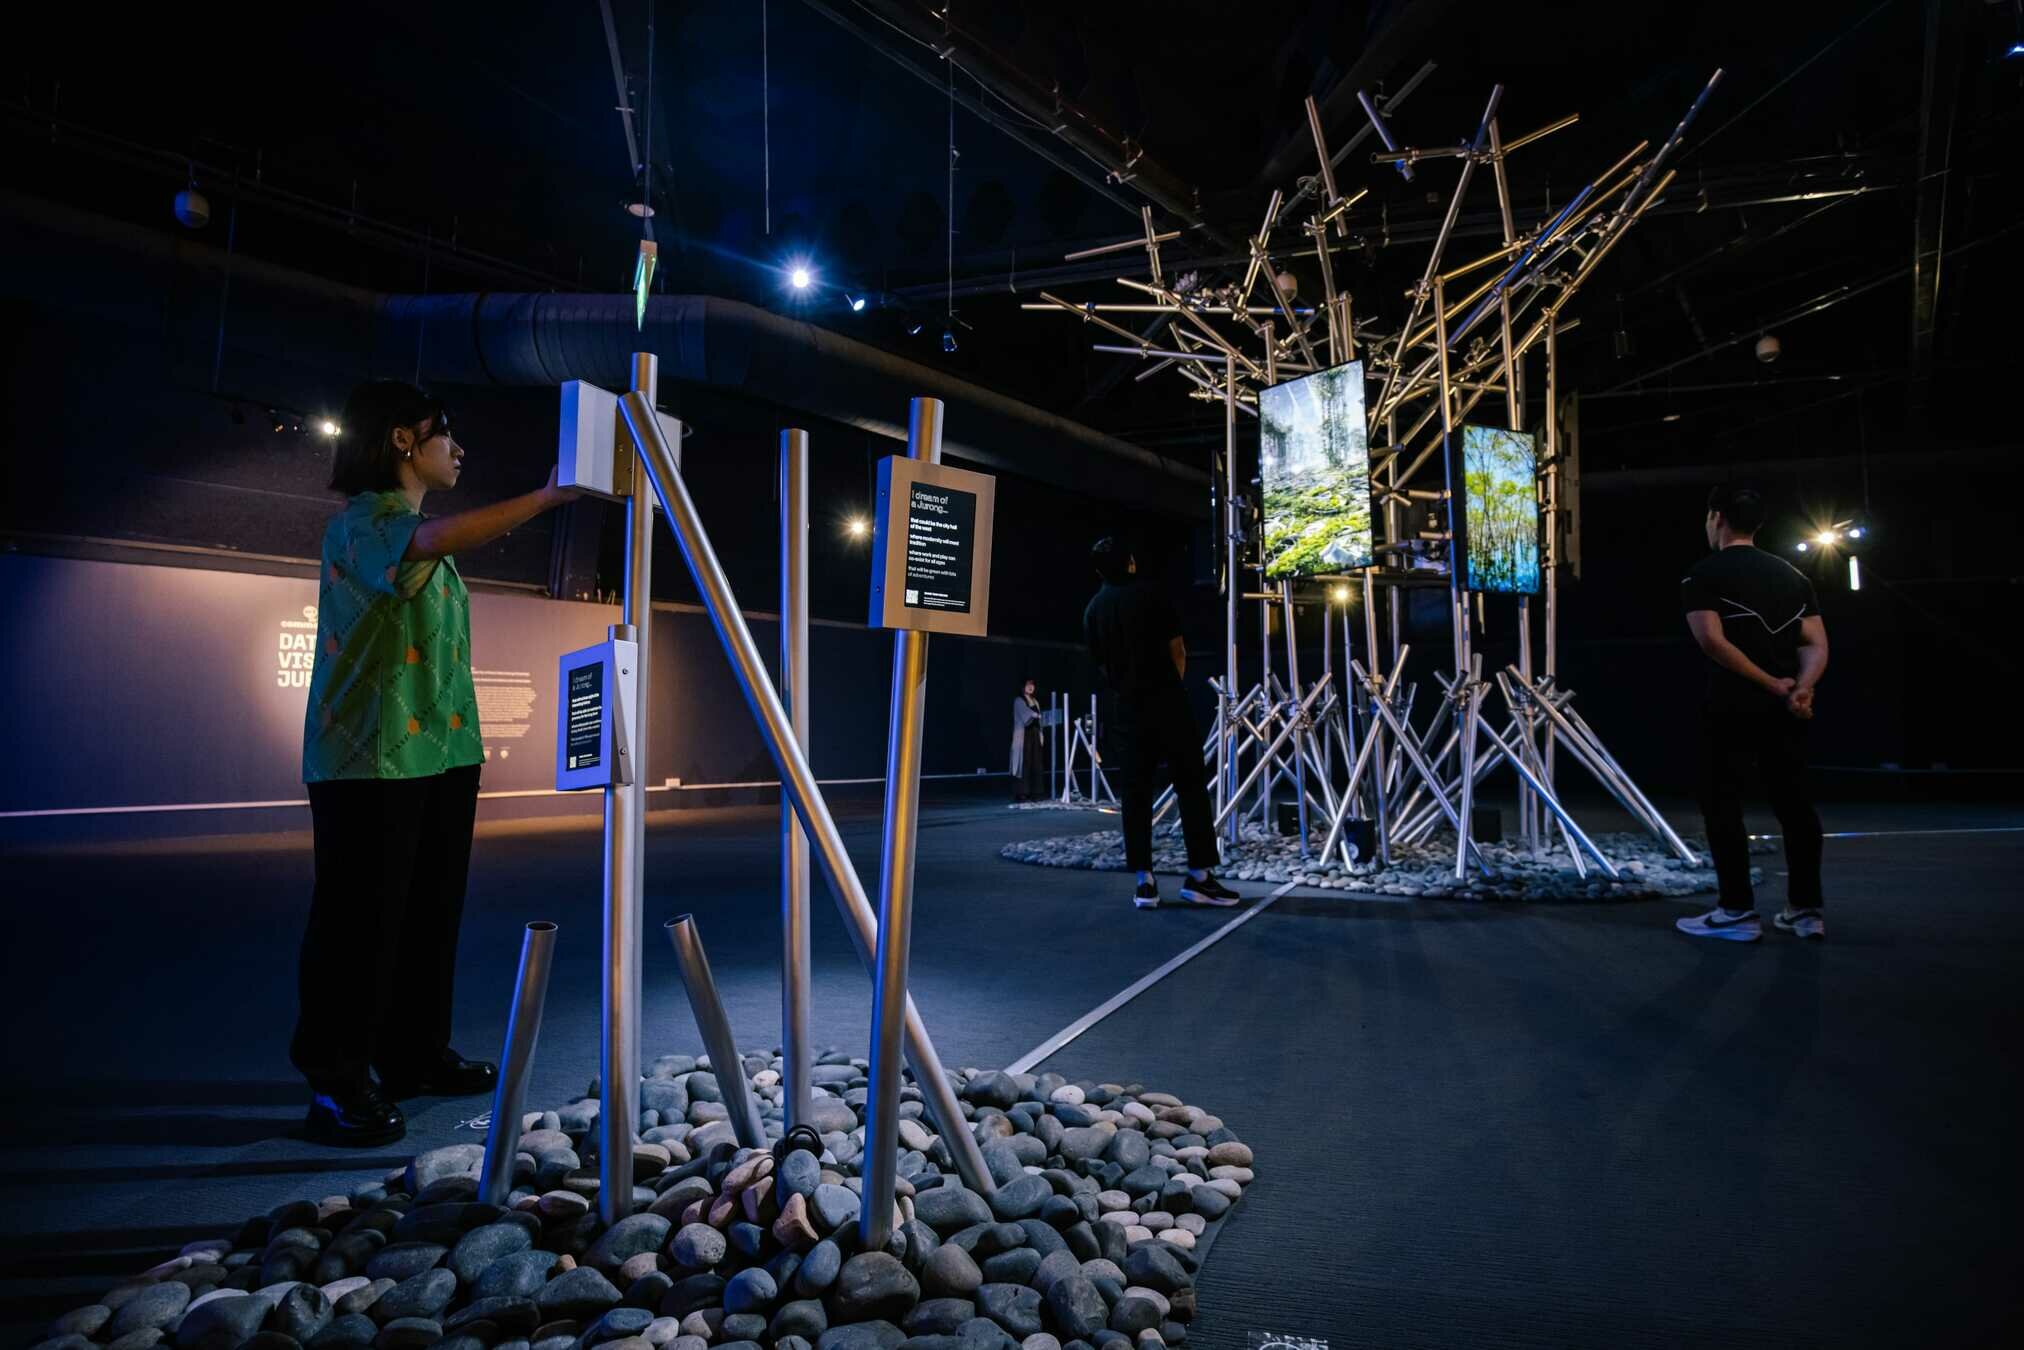
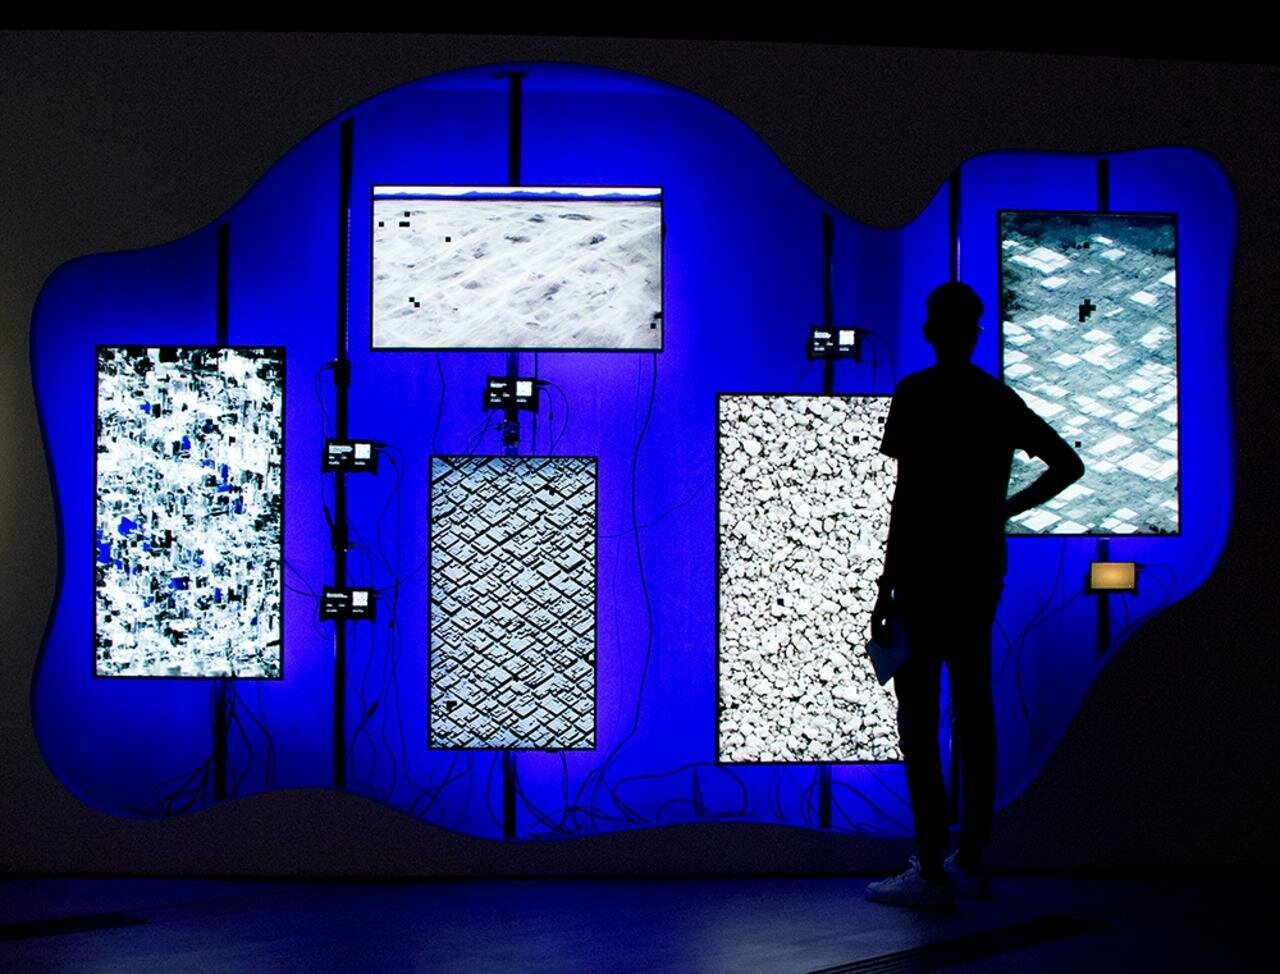
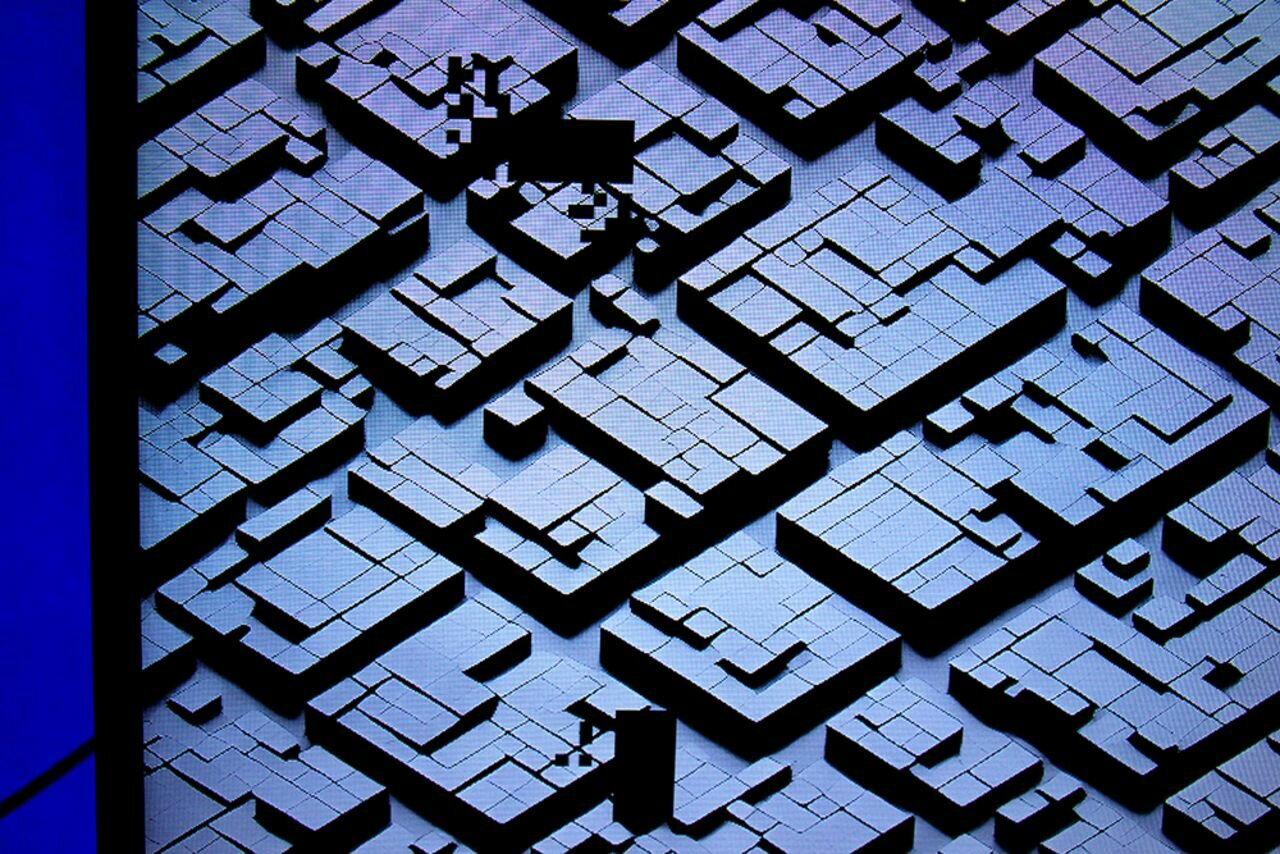
Synthetic Visions For A Future Past (Jurong Dreaming), 2024
KAPILAN NAIDU
Singapore Art Museum,
Art In The Commons: Data Visualising Jurong
Tools
Stable Diffusion, GPT-4, Replicate, Web Sockets, p5js, Raspberry Pi
WEEK 1
BACKGROUND
DM2008
AY2526
PROGRAMMING FOR INTERACTION
soliloquy_bbb, 2024
KAPILAN NAIDU
Fortune Center,
Crossroads 2024
Tools
Stable Diffusion, Runway ML, Ollama, Llama 3, Web Technologies
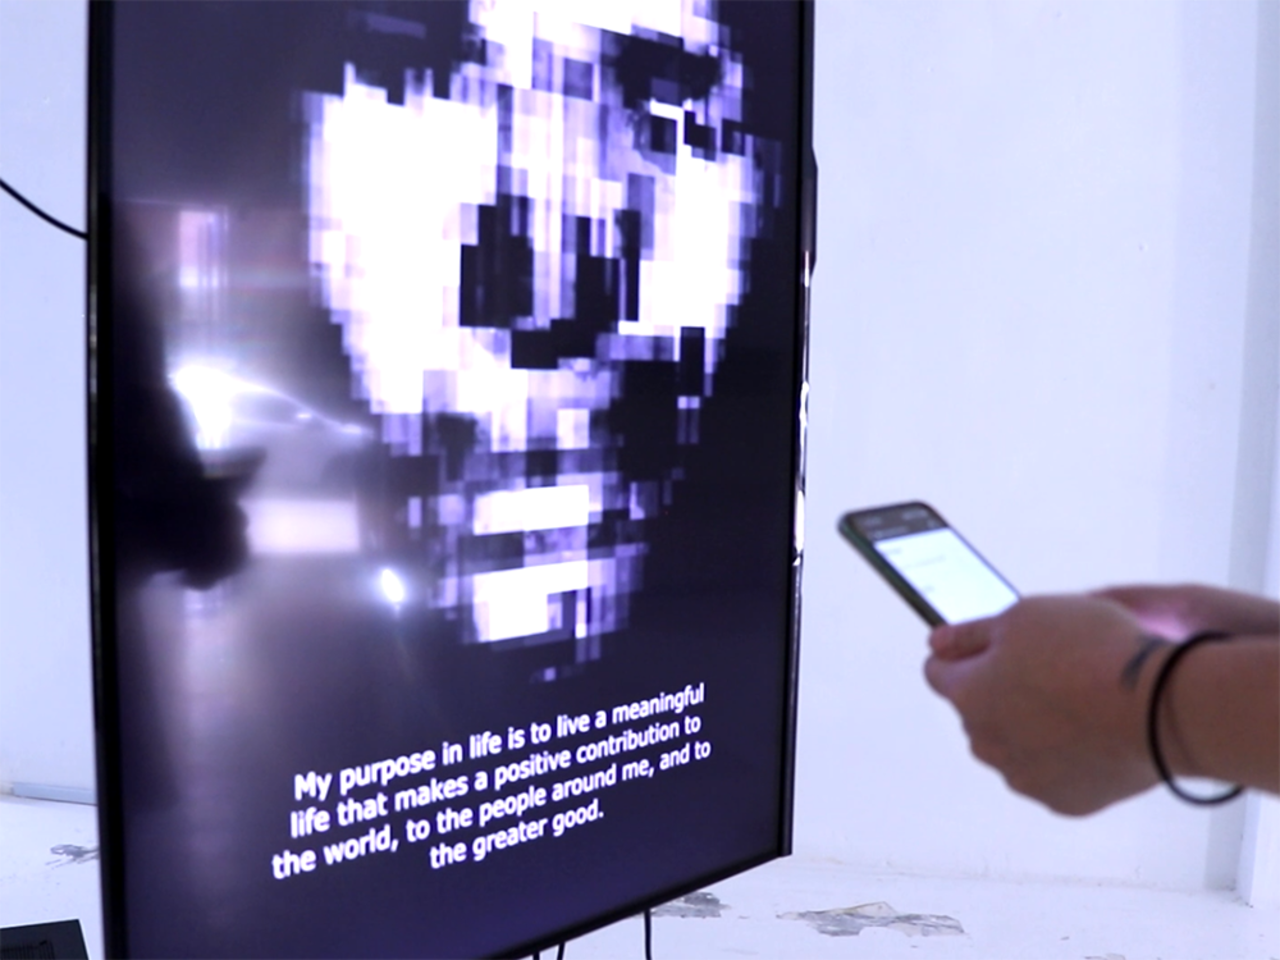
soliloquy_nlp
(Stochastic Philosopher), 2024
KAPILAN NAIDU
Ames Yavuz Singapore, Paratext
Tools
Ollama, Llama 3.1, Mistral 7B, Web Technologies

WEEK 1
BACKGROUND
DM2008
AY2526
PROGRAMMING FOR INTERACTION
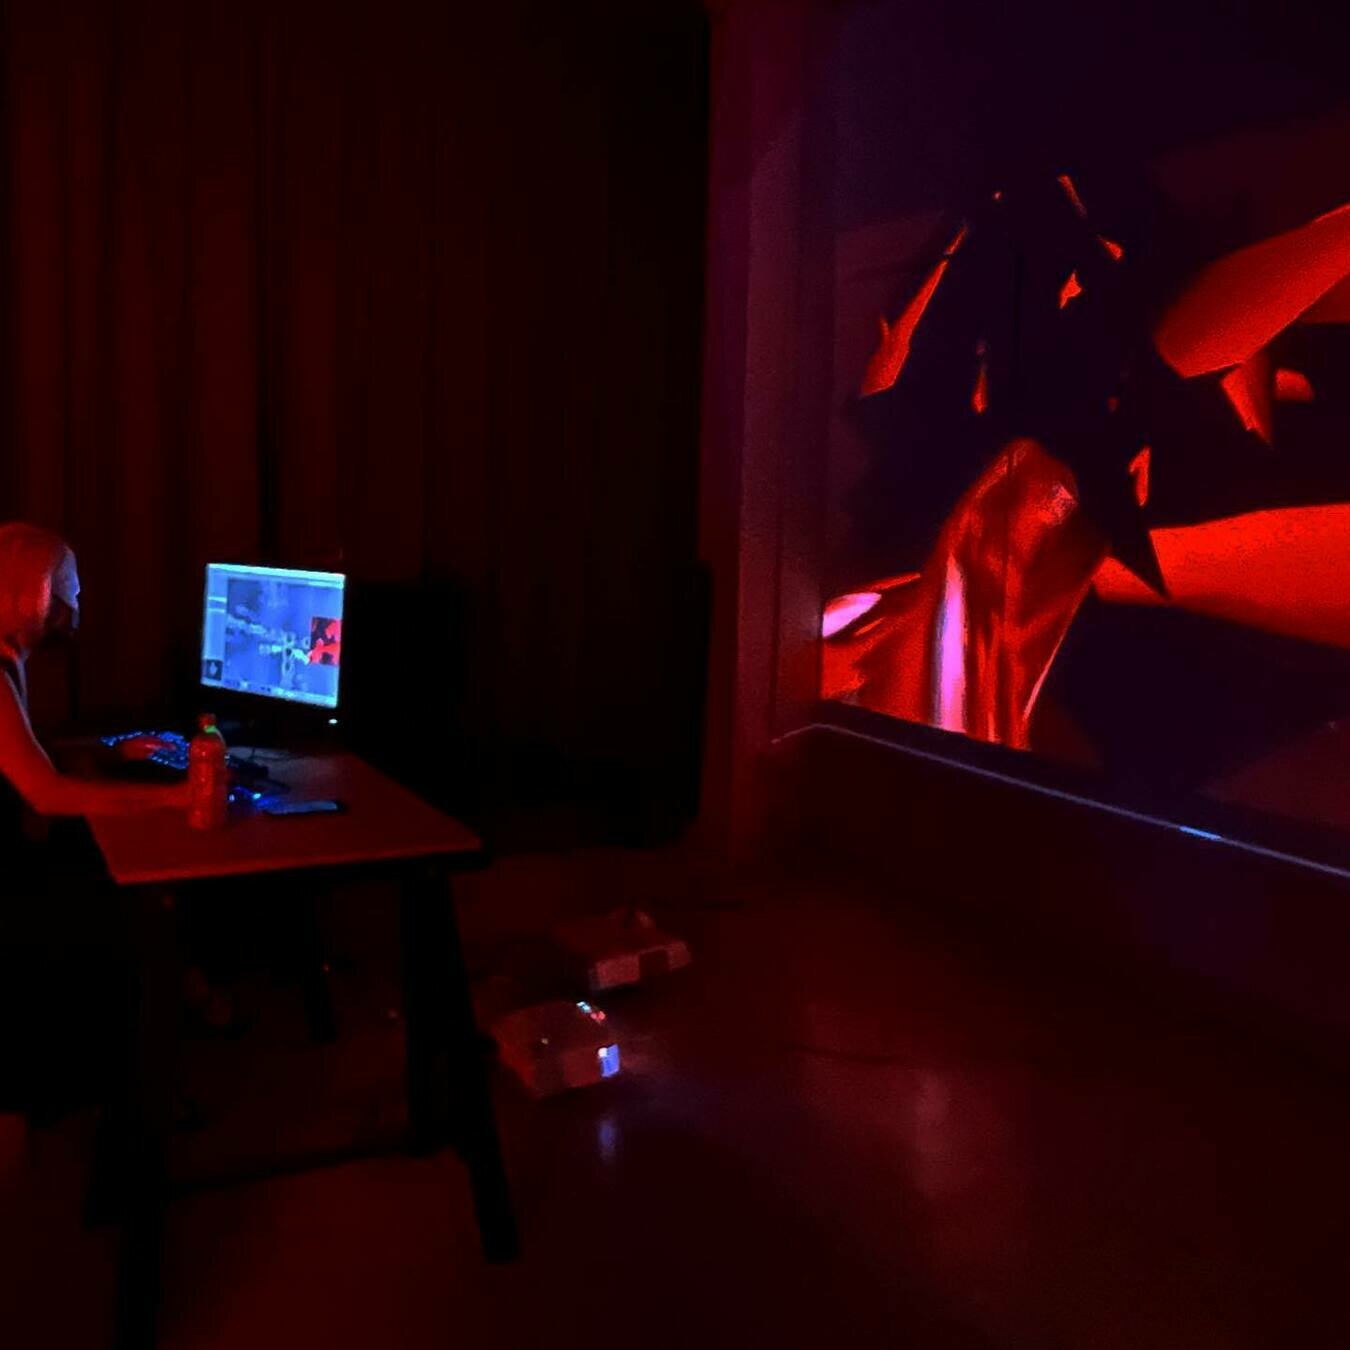
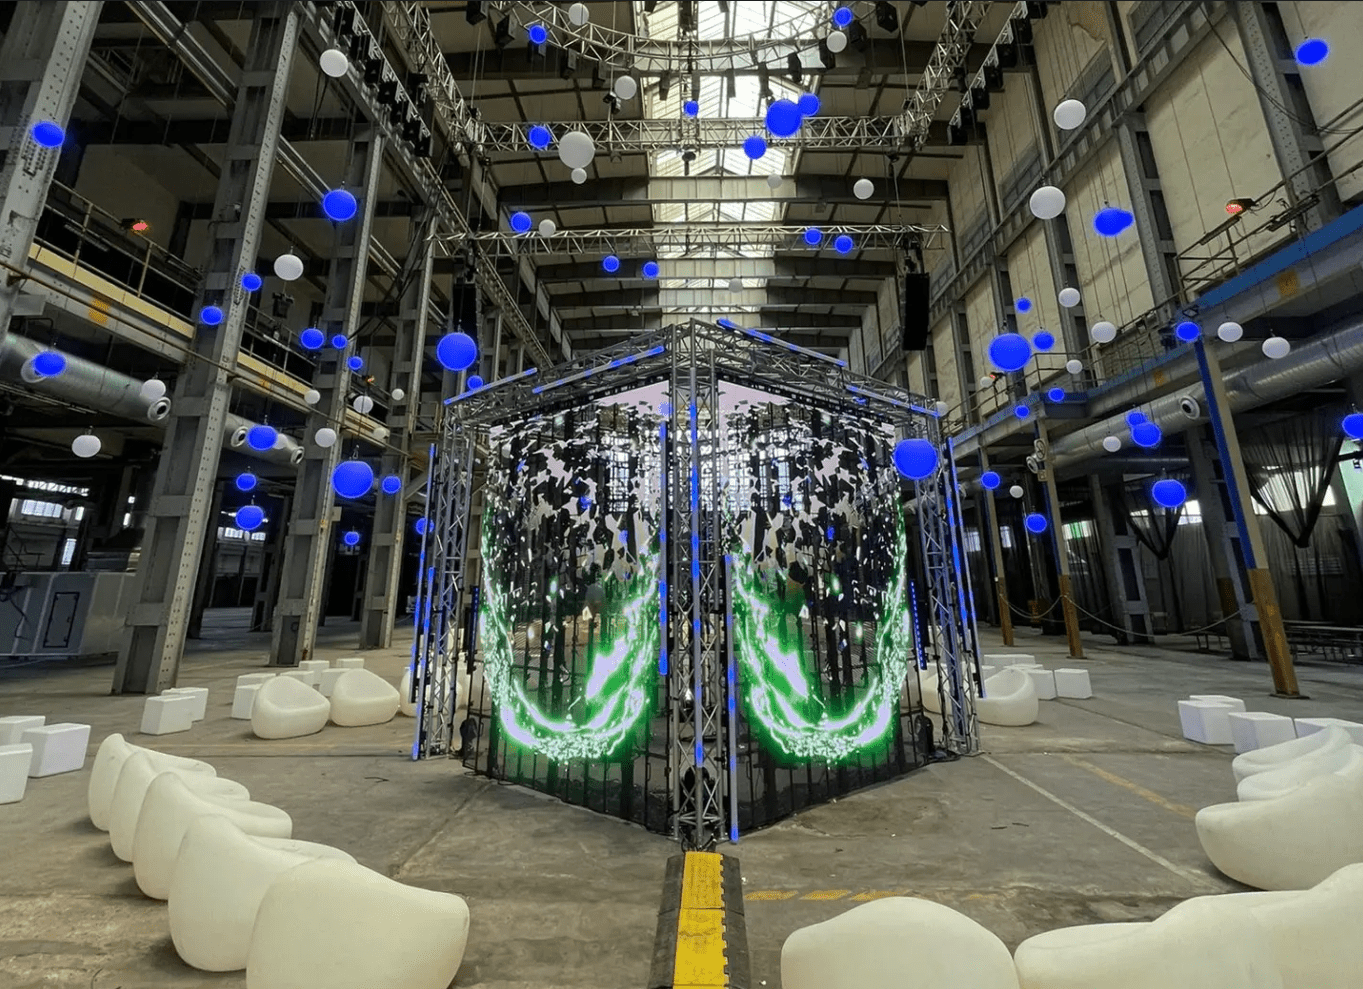
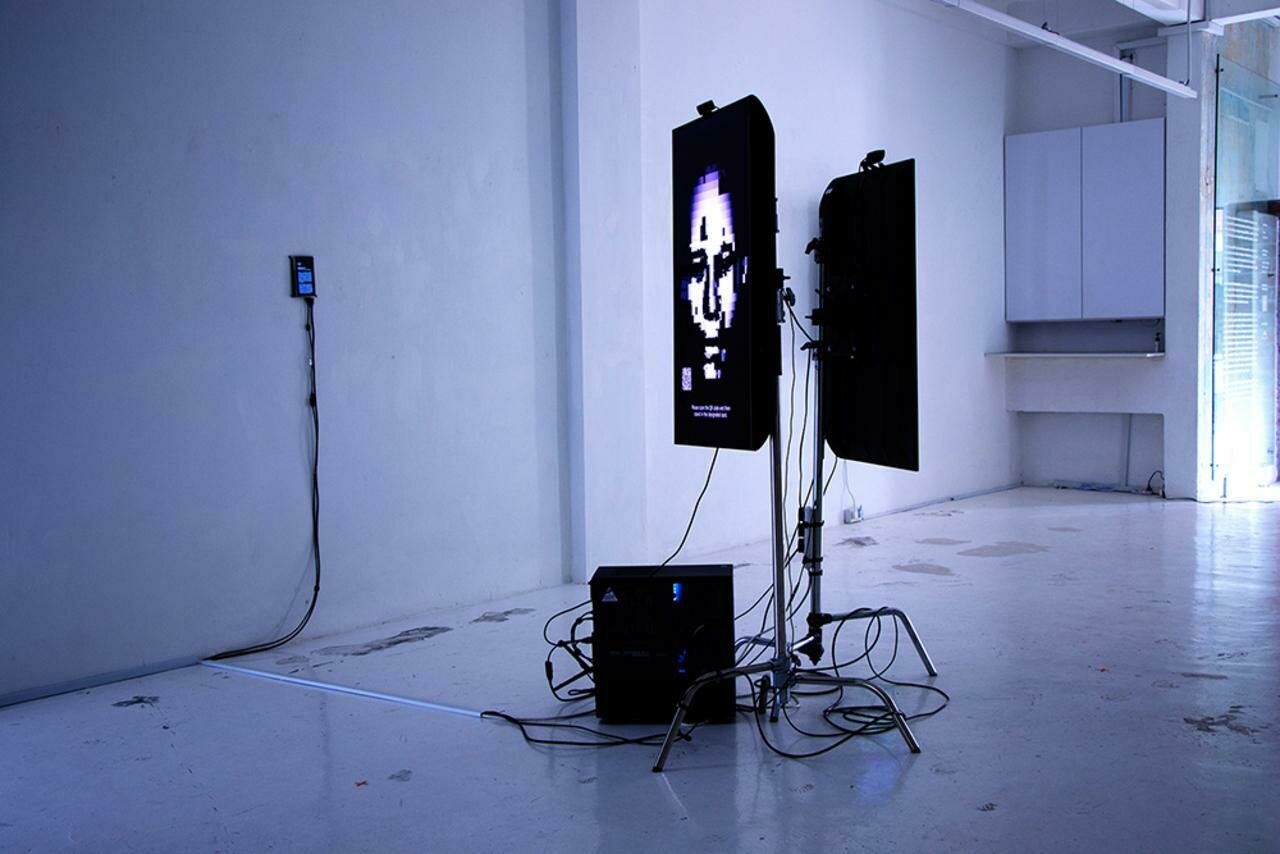
Simulacra 1.0, 2023
jo+kapi
HATCH Art Project,
Machinations of a Godless Mind
Tools
TouchDesigner, Live webcam, GPT-3, Web Sockets, Web Technologies
WEEK 1
BACKGROUND
DM2008
AY2526
PROGRAMMING FOR INTERACTION
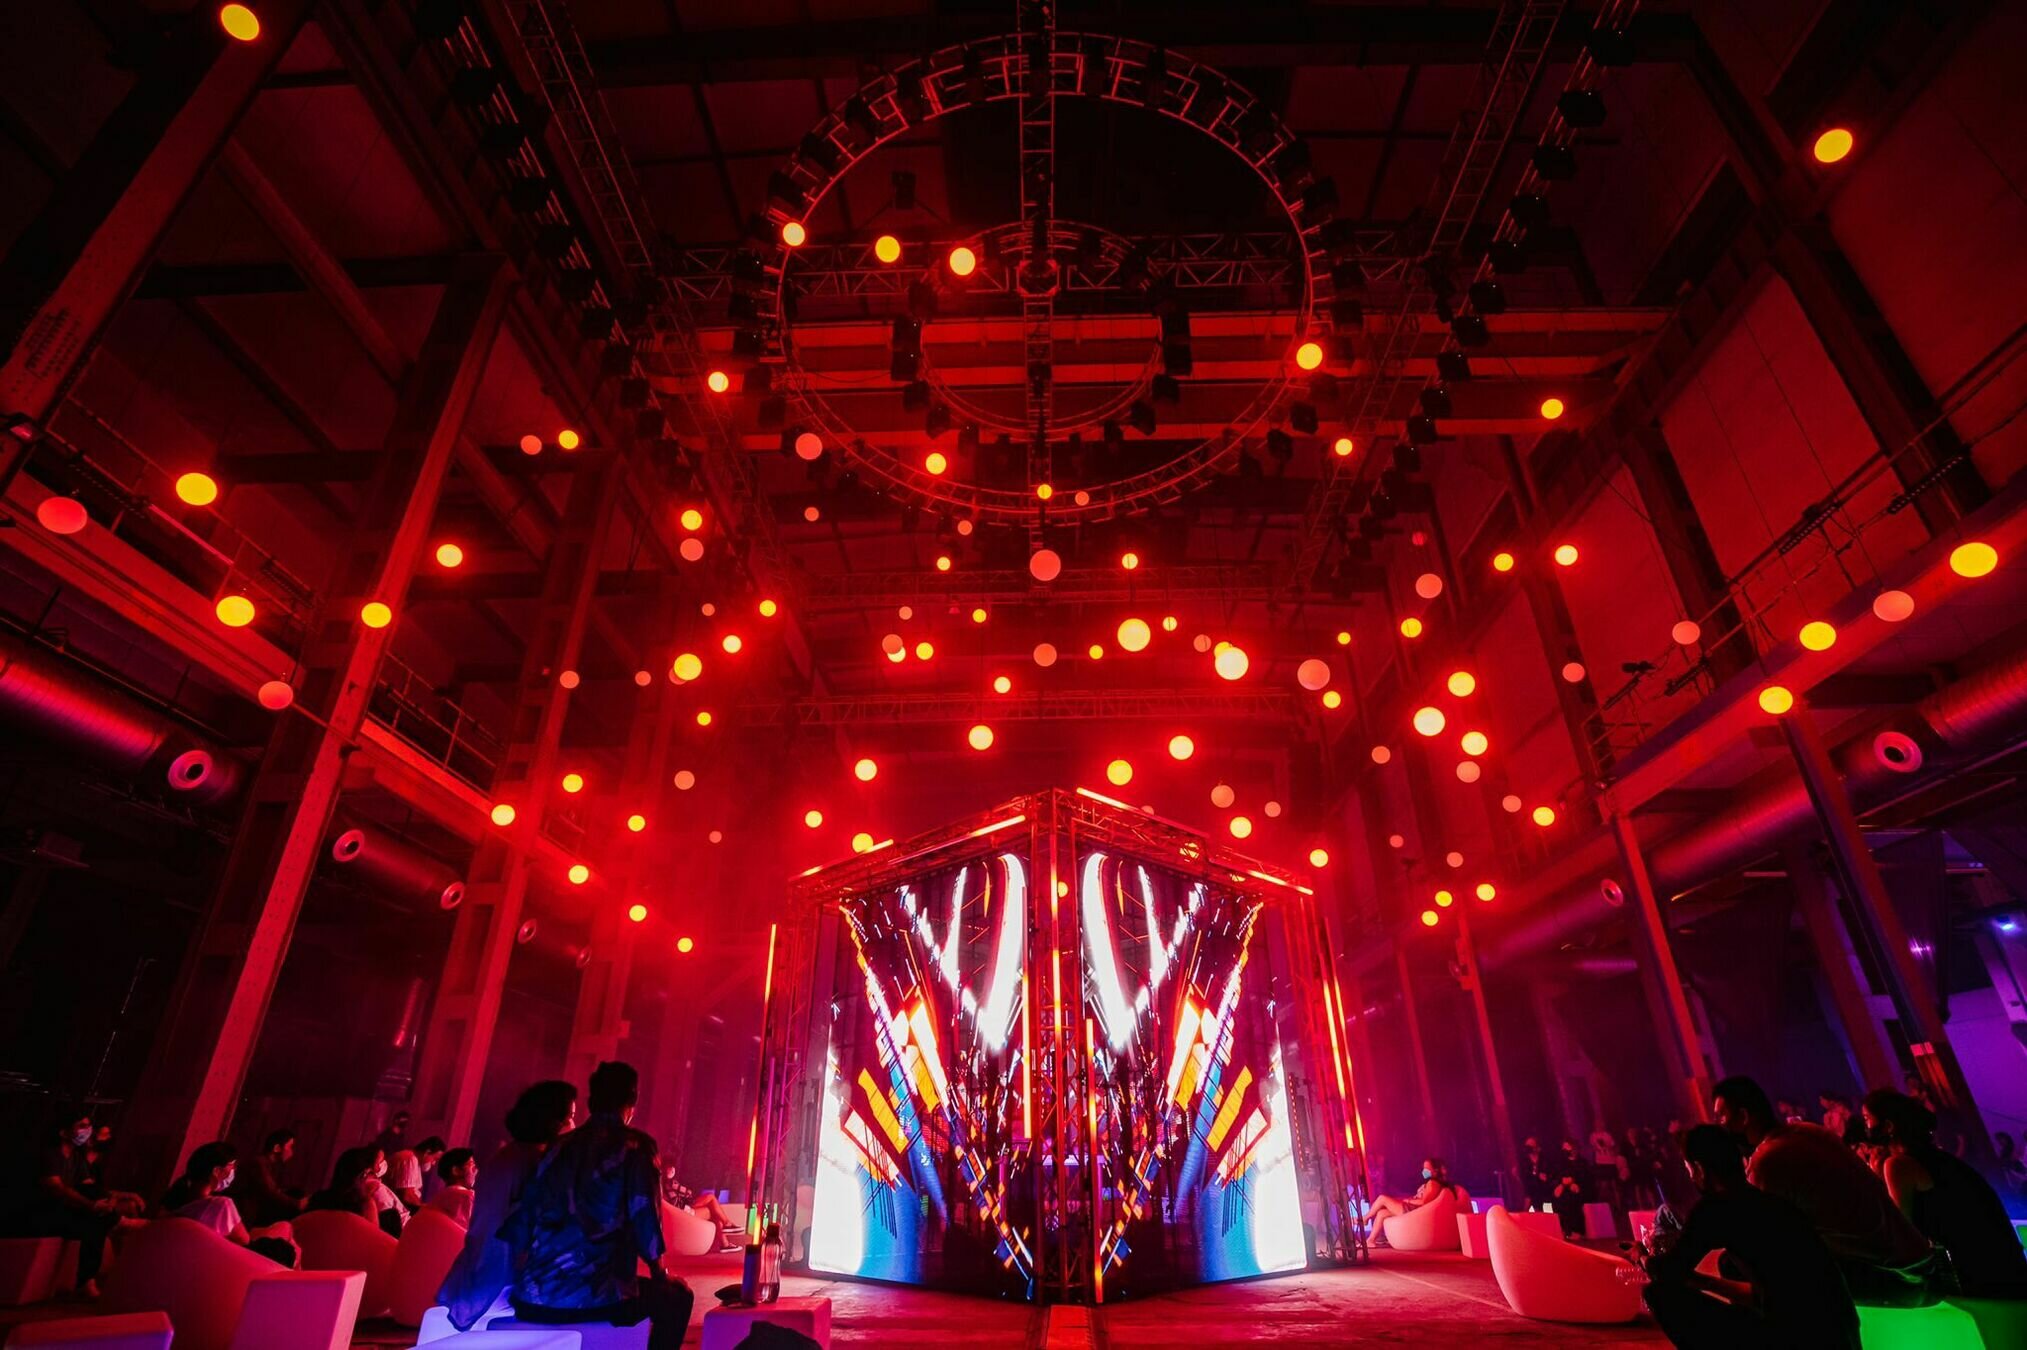
ENZYME 1.2, 2023
jo+kapi
ArtScience Museum,
Notes from the Ether
Tools
p5js, Stable Diffusion, Web Technologies

WEEK 1
BACKGROUND
Philosophy
DM2008
AY2526
PROGRAMMING FOR INTERACTION
WEEK 1
CREATIVE CODING
PHILOSOPHY
PRINCIPLES
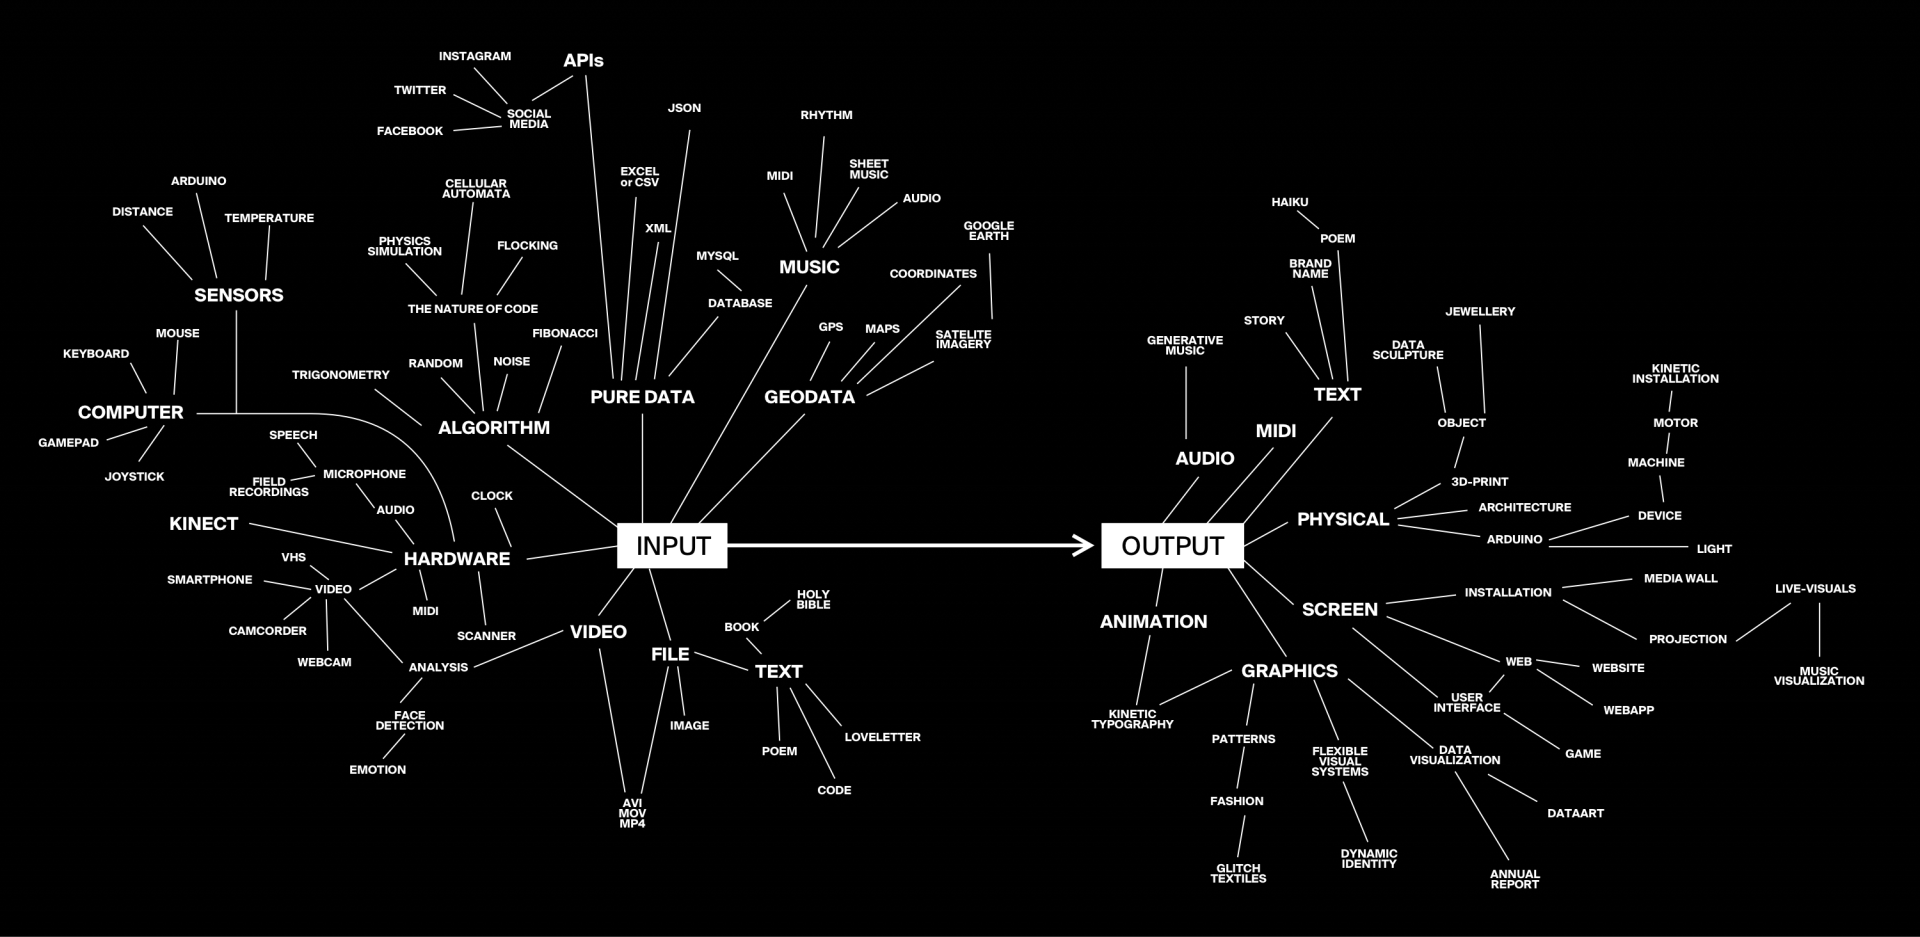
IN/OUTPUT
EXAMPLES
DIRECTORY
THE PAYOFF
DISCUSSION
The main challenge is to try and create work that touches people at an emotional level. Making poems, not demos. Short yet dense, retell-able, rhythmic, meaningful, as opposed to a demo that feels like technology for technology’s sake.
— Zach Lieberman
Code as Creative Medium
‟

Key Principles
DM2008
AY2526
PROGRAMMING FOR INTERACTION
WEEK 1
CREATIVE CODING
PHILOSOPHY
PRINCIPLES
IN/OUTPUT
EXAMPLES
DIRECTORY
THE PAYOFF
DISCUSSION
Rule-based Systems
Creating rules to generate visuals or behaviors, provides structure and constraints to experiment around.
Interactivity as Medium
Often centering the users' inputs, sensors or environmental data to make the audience part of the work.
Multi-disciplinary
Blending art, design, technology, and sometimes even math, music, and performative elements.
Process Oriented
Often approached with a mindset less about instant perfection and more about iterative refinements.
Unpredictability
Discovering creative opportunities by embracing chaos, mistakes or glitches that emerge from code.
Understanding these principles will help you view creative coding as more than just writing code.
Computational Logic
DM2008
AY2526
PROGRAMMING FOR INTERACTION
WEEK 1
CREATIVE CODING
PHILOSOPHY
PRINCIPLES
IN/OUTPUT
EXAMPLES
DIRECTORY
THE PAYOFF
DISCUSSION
Computational Logic
DM2008
AY2526
PROGRAMMING FOR INTERACTION
WEEK 1
CREATIVE CODING
PHILOSOPHY
PRINCIPLES
IN/OUTPUT
EXAMPLES
DIRECTORY
THE PAYOFF
DISCUSSION
Notable Figures
DM2008
AY2526
PROGRAMMING FOR INTERACTION
WEEK 1
CREATIVE CODING
PHILOSOPHY
PRINCIPLES
IN/OUTPUT
EXAMPLES
DIRECTORY
THE PAYOFF
DISCUSSION
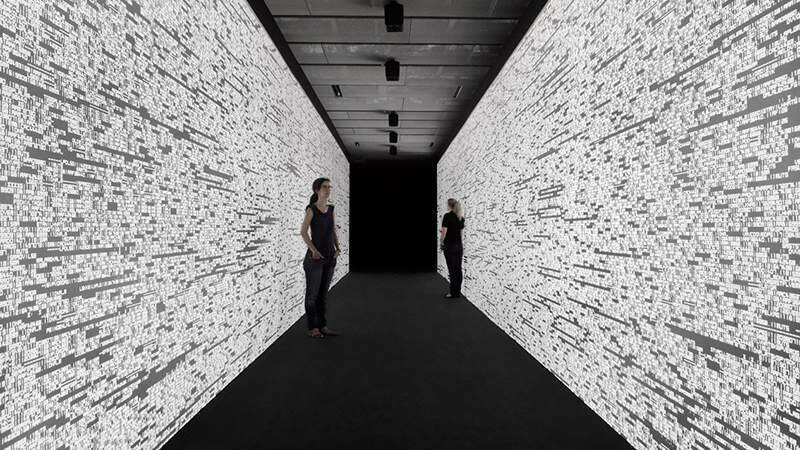
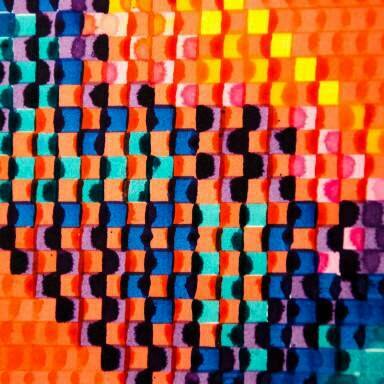
Artworks by
Notable Figures
DM2008
AY2526
PROGRAMMING FOR INTERACTION
WEEK 1
CREATIVE CODING
Artworks by
PHILOSOPHY
PRINCIPLES
IN/OUTPUT
EXAMPLES
DIRECTORY
THE PAYOFF
DISCUSSION
Notable Figures
DM2008
AY2526
PROGRAMMING FOR INTERACTION
WEEK 1
CREATIVE CODING

Artworks by
PHILOSOPHY
PRINCIPLES
IN/OUTPUT
EXAMPLES
DIRECTORY
THE PAYOFF
DISCUSSION
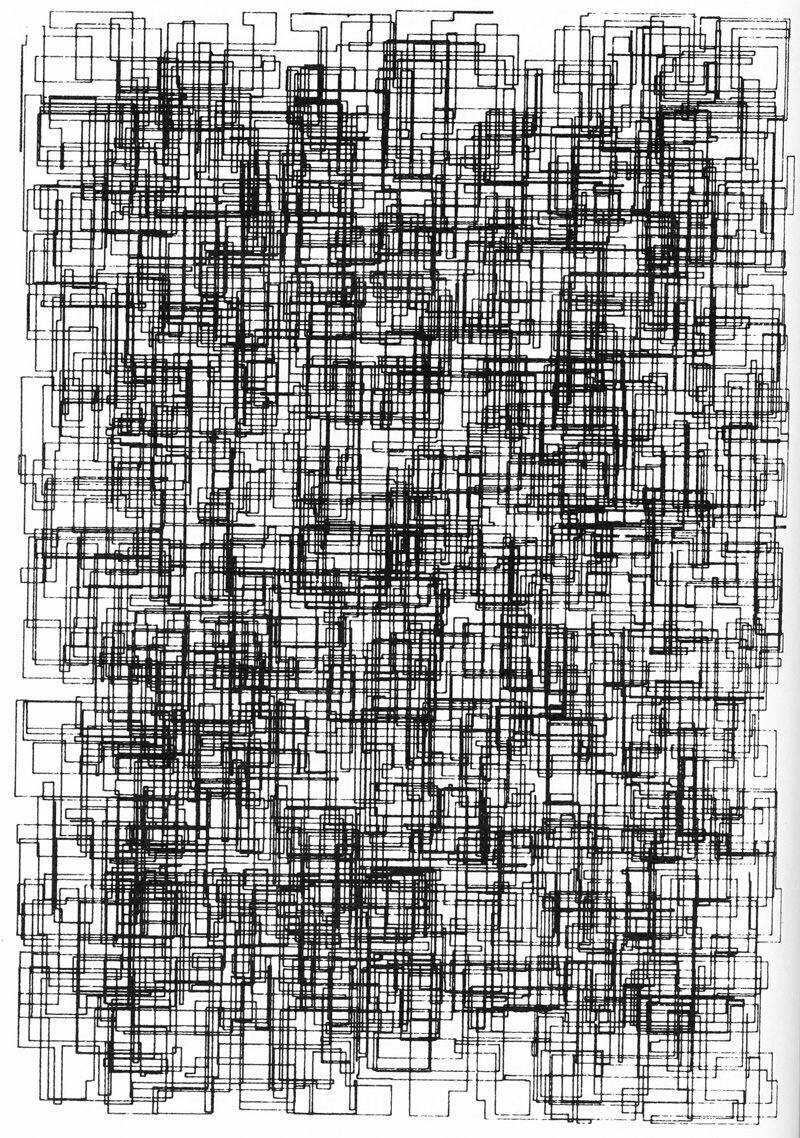
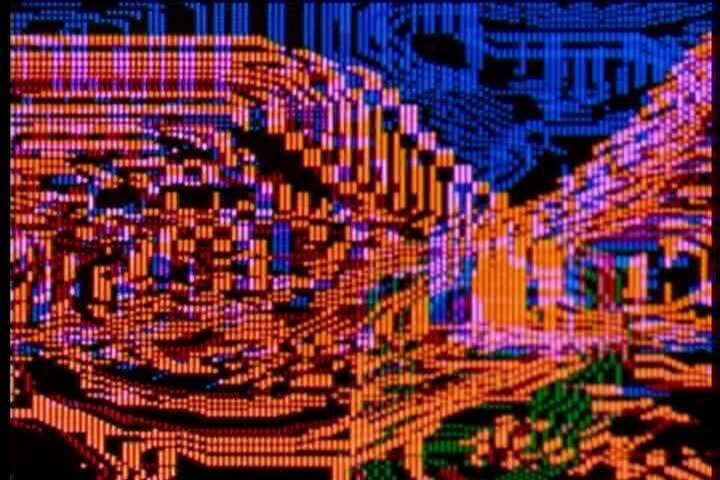
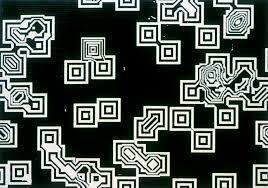
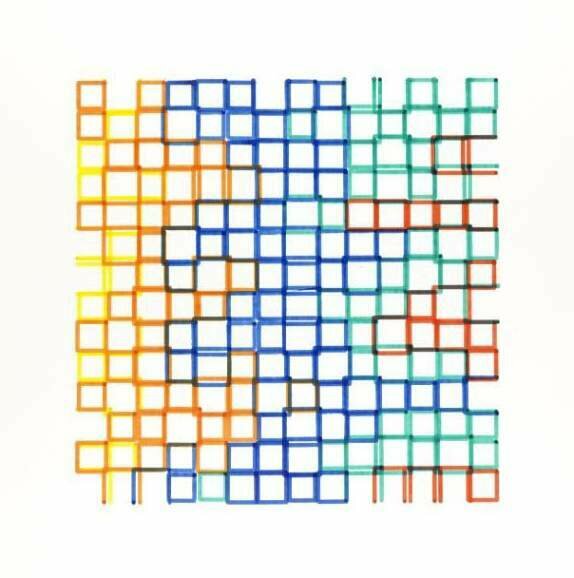
Early Pioneers
DM2008
AY2526
PROGRAMMING FOR INTERACTION
WEEK 1
CREATIVE CODING
Artworks by


PHILOSOPHY
PRINCIPLES
IN/OUTPUT
EXAMPLES
DIRECTORY
THE PAYOFF
DISCUSSION
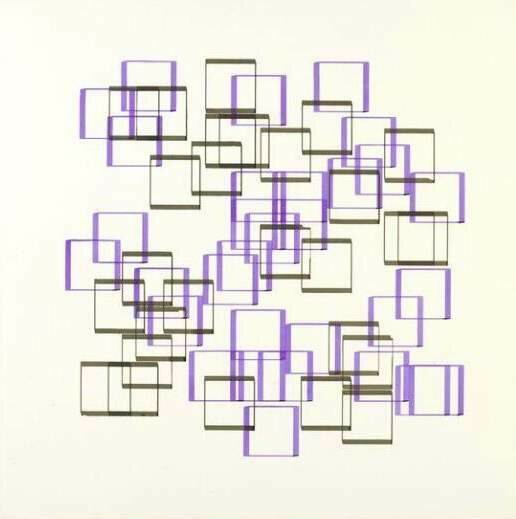
Early Pioneers
DM2008
AY2526
PROGRAMMING FOR INTERACTION
WEEK 1
CREATIVE CODING
Artworks by

PHILOSOPHY
PRINCIPLES
IN/OUTPUT
EXAMPLES
DIRECTORY
THE PAYOFF
DISCUSSION
Early Pioneers
DM2008
AY2526
PROGRAMMING FOR INTERACTION
WEEK 1
CREATIVE CODING
Artworks by
PHILOSOPHY
PRINCIPLES
IN/OUTPUT
EXAMPLES
DIRECTORY
THE PAYOFF
DISCUSSION
Interactive Works
DM2008
AY2526
PROGRAMMING FOR INTERACTION
WEEK 1
CREATIVE CODING
Art / Games by
PHILOSOPHY
PRINCIPLES
IN/OUTPUT
EXAMPLES
DIRECTORY
THE PAYOFF
DISCUSSION

Interactive Works
DM2008
AY2526
PROGRAMMING FOR INTERACTION
WEEK 1
CREATIVE CODING
Art / Performances by
PHILOSOPHY
PRINCIPLES
IN/OUTPUT
EXAMPLES
DIRECTORY
THE PAYOFF
DISCUSSION


Interactive Works
DM2008
AY2526
PROGRAMMING FOR INTERACTION
WEEK 1
CREATIVE CODING
Art / Performances by
PHILOSOPHY
PRINCIPLES
IN/OUTPUT
EXAMPLES
DIRECTORY
THE PAYOFF
DISCUSSION
Interactive Works
DM2008
AY2526
PROGRAMMING FOR INTERACTION
WEEK 1
CREATIVE CODING
Art / Performances by
PHILOSOPHY
PRINCIPLES
IN/OUTPUT
EXAMPLES
DIRECTORY
THE PAYOFF
DISCUSSION

Interactive Works
DM2008
AY2526
PROGRAMMING FOR INTERACTION
WEEK 1
CREATIVE CODING
PHILOSOPHY
PRINCIPLES
IN/OUTPUT
EXAMPLES
DIRECTORY
THE PAYOFF
DISCUSSION
Art / Performances by


Interactive Works
DM2008
AY2526
PROGRAMMING FOR INTERACTION
WEEK 1
CREATIVE CODING
PHILOSOPHY
PRINCIPLES
IN/OUTPUT
EXAMPLES
DIRECTORY
THE PAYOFF
DISCUSSION
Art / Performances by
Further Viewing
DM2008
AY2526
PROGRAMMING FOR INTERACTION
WEEK 1
CREATIVE CODING
PHILOSOPHY
PRINCIPLES
IN/OUTPUT
EXAMPLES
DIRECTORY
THE PAYOFF
DISCUSSION
collectives
The best way to get inspired and explore possibilities is to see how others use code in their practice.
artists
hashtags
Coding Spectrum
DM2008
AY2526
PROGRAMMING FOR INTERACTION
WEEK 1
CREATIVE CODING
PHILOSOPHY
PRINCIPLES
IN/OUTPUT
EXAMPLES
DIRECTORY
THE PAYOFF
DISCUSSION
no code
low code
basic code
all code
Requires little to no code to quickly build something.
This does not mean there is no code involved, just that it all runs fully hidden with only the UI exposed.
Some code is exposed in the environment you use.
Although often related to visual programming, a basic understanding of coding concepts is useful.
Understanding basic code as a designer allows you to innovate, collaborate, and communicate better across various disciplines when technical expertise is required.
This is when you are able to build your own systems with ease. Getting here will take time and practice, but allows you to create your own tools tailored to your design practice.
Limited to the tool
Some customization
Flexibly implement ideas
Complete freedom
Figma
Prompting AI chatbots
Website builders
Blender
Code templates
TouchDesigner
Unreal Engine
Wordpress
HTML, CSS, JavaScript
Frameworks (e.g. p5.js)
Scripting and automation
Arduino
Unity
Text editors & IDEs
Any programming language
Command Line
Local Servers
Remote Servers
Discussion Time
DM2008
AY2526
PROGRAMMING FOR INTERACTION
WEEK 1
CREATIVE CODING
PHILOSOPHY
PRINCIPLES
IN/OUTPUT
EXAMPLES
DIRECTORY
THE PAYOFF
DISCUSSION
Reflect on the role of code in creative practices
- Break into groups of 3 to 4.
- Discuss amongst yourselves for 5 minutes.
- We will regroup and discuss your findings.
10 MIN

Coding Environment
DM2008
AY2526
PROGRAMMING FOR INTERACTION
WEEK 1
LEARNING TO CODE
ENVIRONMENT
CONSOLE
COMMENTS
ARITHMETIC
ANATOMY
CANVAS
Language
Framework
JavaScript is the programming language of the web. It powers roughly 95% of the internet, websites and web apps we use each day.
It consistently ranks amongst the top 5 most popular programming languages in use.
Flexible and versatile, JavaScript can be used to create anything from web frontends (UI/UX), server back-ends, and even native applications.
p5.js is a powerful creative coding library and built on JavaScript. It is used in art and design schools all across the globe to teach students how to program.
The library is designed to make creative coding accessible and inclusive for creatives, despite their skill levels and backgrounds. It is also frequently used in professional settings from websites, to artworks, and even performances.
DM2008
AY2526
PROGRAMMING FOR INTERACTION
WEEK 1
LEARNING TO CODE
Coding Environment
Editor
For the first five weeks of the module, we will write code and create generative visuals using the p5.js web editor.
The web editor allows you to write code and save them to an online account. These are referred to as sketches.
You can also access sketches made by others and use them as reference or starting points for your own creative explorations. Take a moment to setup your account now.
1. Open the URL in a new tab.
2. Create an account with your email.
5 MIN
ENVIRONMENT
CONSOLE
COMMENTS
ARITHMETIC
ANATOMY
CANVAS
DM2008
AY2526
PROGRAMMING FOR INTERACTION
WEEK 1
LEARNING TO CODE
Web Editor
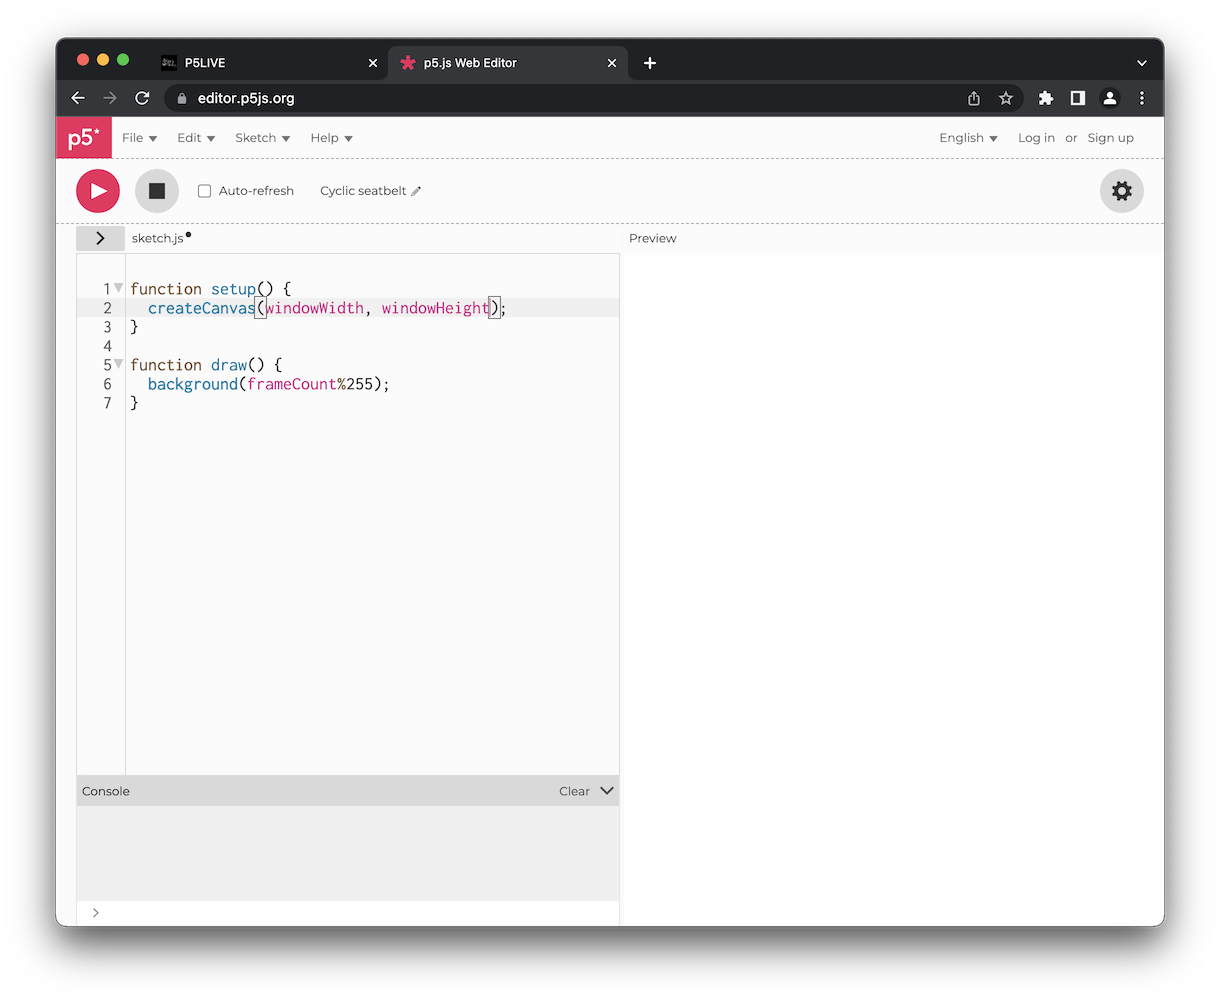
1
Main menu of the p5 web editor lets you access commonly used actions and commands.
2
Use this section here to login or create an account.
3
Run/stop your sketch with these buttons. Enabling ‘Auto-refresh’ will reload the sketch whenever code is updated in the editor.
4
This is the public title of your sketch. Click on the pencil to rename it.
1
2
3
4
ENVIRONMENT
CONSOLE
COMMENTS
ARITHMETIC
ANATOMY
CANVAS
DM2008
AY2526
PROGRAMMING FOR INTERACTION
WEEK 1
LEARNING TO CODE
Web Editor
8
5
6
5
Click here to access settings for the editor.
6
This is where you write all the code for your sketches. Notice the numbers along the left edge indicating specific lines.
7
The preview area is where you see the visual outcomes (if any)
of the code that you write.
8
The section where JavaScript “talks” to you by displaying errors and other information.
7
ENVIRONMENT
CONSOLE
COMMENTS
ARITHMETIC
ANATOMY
CANVAS
DM2008
AY2526
PROGRAMMING FOR INTERACTION
WEEK 1
LEARNING TO CODE
ENVIRONMENT
CONSOLE
COMMENTS
ARITHMETIC
ANATOMY
CANVAS
JS Console
The main purpose of the console is for p5 and JavaScript to communicate issues that may be happening within our code. This can take the form of warnings or errors.
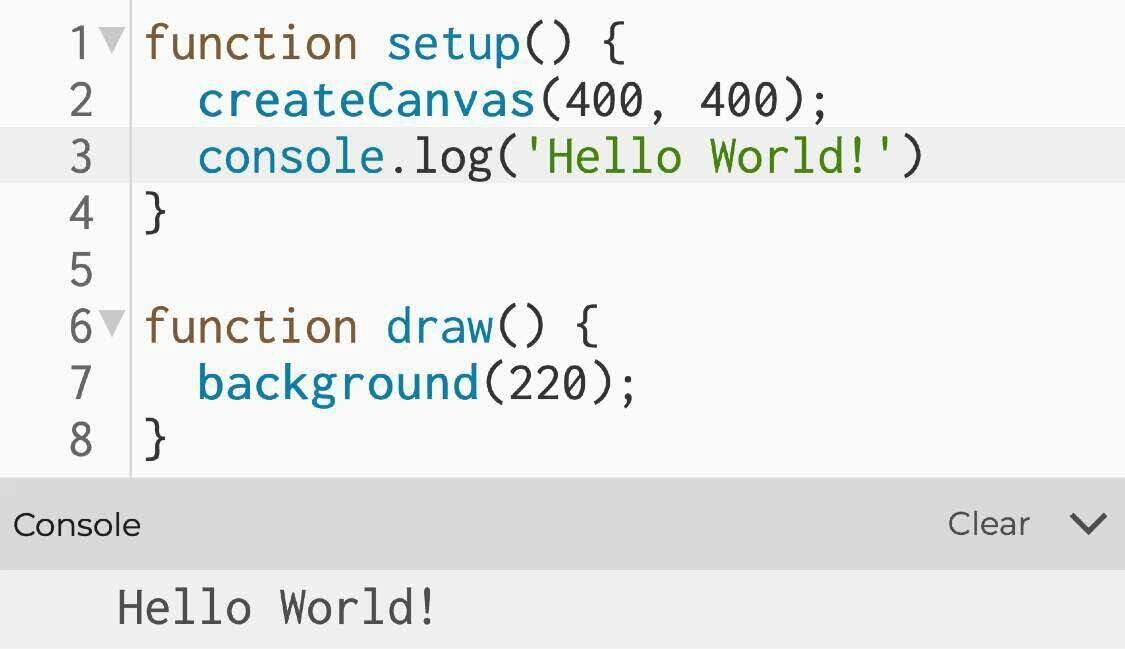
We can also get JavaScript to “talk” to us through the console when a specific line of code has executed. This is called logging.
Using the console.log() method tells JavaScript what we would like it to log.
Notice the quote marks ' ' that enclose the message. Any text that is not code must be written between quote marks.
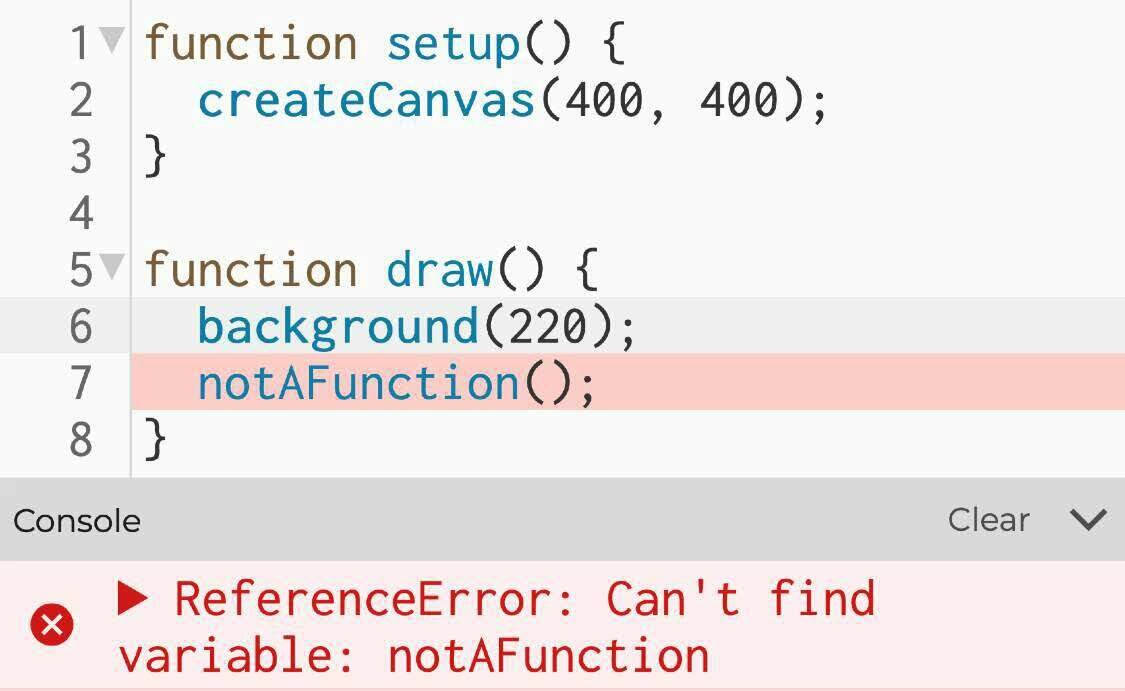
JavaScript is not fussy about single or double quotes. You can use them interchangeably.
No AI guidance allowed
DM2008
AY2526
PROGRAMMING FOR INTERACTION
WEEK 1
LEARNING TO CODE
ENVIRONMENT
CONSOLE
COMMENTS
ARITHMETIC
ANATOMY
CANVAS
Code Comments
Comments let us create lines in our code that will be ignored by JavaScript and p5.js, but continue to stay human readable.
To create a comment, simply start a line with two backslashes //.
Comments can span multiple lines. To do this, start a comment block with /* and end it with */.
// This is a comment
function setup() {
createCanvas(400, 400);
}
/*
This is a comment that is
written across many lines
*/
function draw() {
//background(220);
}We can also use the comment feature to temporarily disable certain parts of our code. This can be done quickly using the Cmd + / shortcut (Ctrl + / on Win).
Use the same shortcut to re-enable any line of code.
No AI guidance allowed
DM2008
AY2526
PROGRAMMING FOR INTERACTION
WEEK 1
LEARNING TO CODE
ENVIRONMENT
CONSOLE
COMMENTS
ARITHMETIC
ANATOMY
CANVAS
Basic Arithmetic
Computers are extremely good at doing various mathematical calculations.
It comes as no surprise then, that we can use code to compute the basic operations:
+ addition
- subtraction
* multiplication
/ division.
// logs the result 4
console.log(2+2);
// logs the result 1
console.log(8-7);
// logs the result 4.5
console.log(9/2);
/* the result is -7 since
multiplying happens 1st */
console.log(5-3*4);
/* the result is 8 since
parentheses happen 1st */
console.log((5-3)*4)
Remember that the order of operations (PEMDAS ↗︎) applies to calculations in coding as well.
No AI guidance allowed
DM2008
AY2526
PROGRAMMING FOR INTERACTION
WEEK 1
LEARNING TO CODE
ENVIRONMENT
CONSOLE
COMMENTS
ARITHMETIC
ANATOMY
CANVAS
Code Blocks
Each chunk of code you see on the right is referred to as a block. Similar to paragraphs of text, each block is a new section of code.
In JavaScript, you can easily tell blocks apart by the braces { } that contain them.
Code written within each block is executed together, with blocks being executed from top to bottom. Lines within each block also execute from top to bottom.
Notice how lines within each block are indented. This helps us tell if a line is contained inside a specific block.
// This is a block of code that runs first
function setup(){
// This line runs first
createCanvas(400, 400);
// Followed by this line
background(220);
}
// Then this block runs
function draw() {
// This line is indented
background(220);
}DM2008
AY2526
PROGRAMMING FOR INTERACTION
WEEK 1
LEARNING TO CODE
ENVIRONMENT
CONSOLE
COMMENTS
ARITHMETIC
ANATOMY
CANVAS
Core Functions
setup() runs once at the start of the program and is used to define settings like canvas size and initial background color.
draw() runs repeatedly in a loop, continuously updating the canvas.
Useful for animation and responding to input.
createCanvas() defines the height and width of the space where all your drawings, shapes, and visuals appear.
background() fills the canvas with a color.
// Setup only runs once
// when we press play
function setup() {
createCanvas(400, 400);
}
// Draw loops continuously
// until sketch is stopped
function draw() {
background(220);
}No AI guidance allowed
DM2008
AY2526
PROGRAMMING FOR INTERACTION
WEEK 1
LEARNING TO CODE
ENVIRONMENT
CONSOLE
COMMENTS
ARITHMETIC
ANATOMY
CANVAS
Canvas
Everything in p5.js is done on the canvas.
Similar to Photoshop or Illustrator, the
canvas serves as the surface upon which
graphics are generated using lines of code.
We begin with createCanvas() to generate a new surface for us to draw on.
Since we only want to create one canvas to
draw on, we write this code in setup().
Similar to Photoshop, the canvas in p5.js has attributes like size and background.
// Setup only runs once
// when we press play
function setup() {
createCanvas(400, 400);
}
// Draw loops continuously
// until sketch is stopped
function draw() {
background(220);
}No AI guidance allowed
DM2008
AY2526
PROGRAMMING FOR INTERACTION
WEEK 1
LEARNING TO CODE
Canvas Size
We can write code to modify various aspects of the canvas.
The size of a canvas is declared in pixels,
starting with the width, followed by the height. This is done in the parentheses () of the createCanvas() method.
In p5.js, the convention is always to start with properties related to the x-axis of an object, followed by those for the y-axis.
// Setup only runs once
// when we press play
function setup() {
createCanvas(400, 400);
}
// Draw loops continuously
// until sketch is stopped
function draw() {
background(220);
}In the example on the right, we are telling p5.js to create a canvas that is 400 pixels wide (x-axis) and 400 pixels tall (y-axis).
ENVIRONMENT
CONSOLE
COMMENTS
ARITHMETIC
ANATOMY
CANVAS
No AI guidance allowed
DM2008
AY2526
PROGRAMMING FOR INTERACTION
WEEK 1
LEARNING TO CODE
Background Color
We can assign background colors to the canvas using background().
This is usually done in draw(). However, background may also appear in setup().
It all depends on what we would like to achieve. We will learn the difference later.
// Setup only runs once
// when we press play
function setup() {
createCanvas(400, 400);
}
// Draw loops continuously
// until sketch is stopped
function draw() {
background(220);
}For now, let us assign a grey value as the background color. This is done by entering a number between 0 and 255.
0 is black, 255 is white, and any other value in between will produce varying grey tones. In this example, 220 gives us a light grey.
ENVIRONMENT
CONSOLE
COMMENTS
ARITHMETIC
ANATOMY
CANVAS
No AI guidance allowed
DM2008
AY2526
PROGRAMMING FOR INTERACTION
WEEK 1
LEARNING TO CODE
Coordinate System
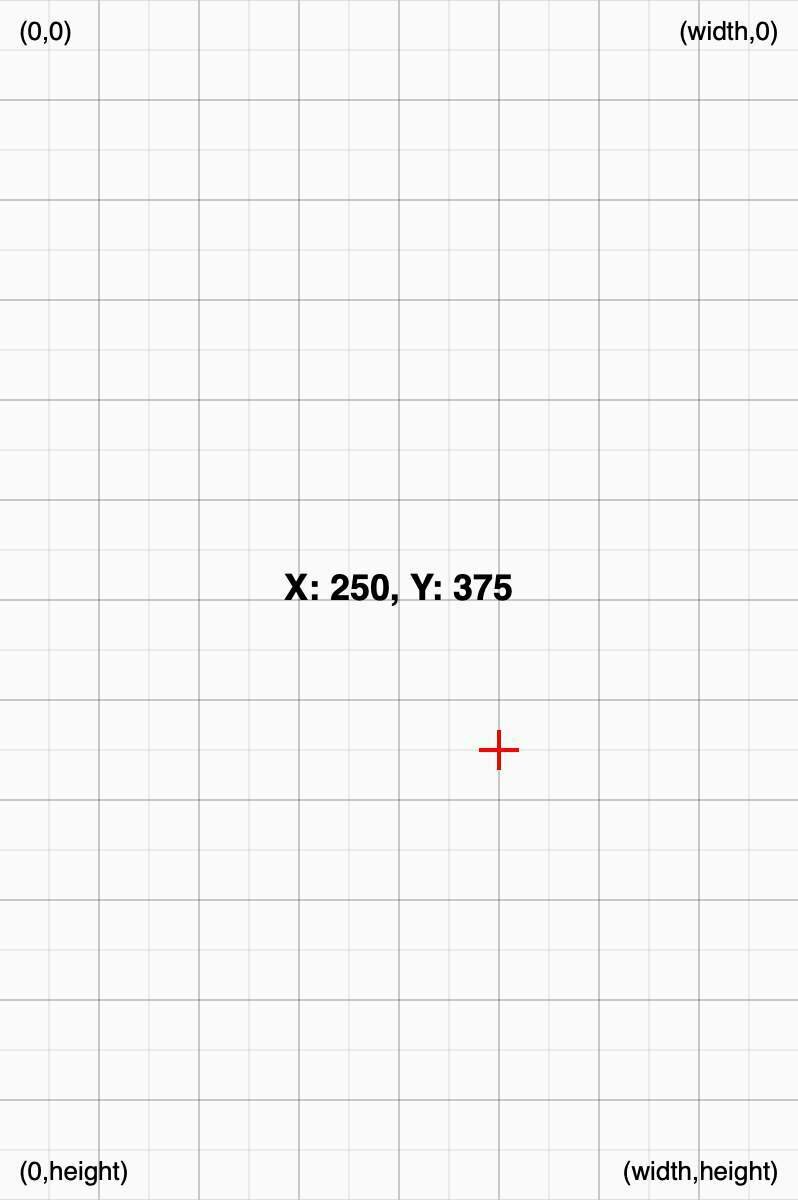
Now that we have created a canvas, we must also learn how p5.js interprets it.
The coordinate system of a canvas is derived from its size. It always begins at 0, from the top-left corner of the canvas.
Similar to graphs, the canvas has an x-axis
that runs horizontally, as well as a y-axis that runs vertically.
In this example, we have a canvas that is set to 400 pixels wide and 600 pixels tall. As a result, the red crosshair has an x-position of 250 and a y-position of 375 (250, 375).
ENVIRONMENT
CONSOLE
COMMENTS
ARITHMETIC
ANATOMY
CANVAS
x-axis
y-axis
DM2008
AY2526
PROGRAMMING FOR INTERACTION
WEEK 1
DRAWING WITH CODE
2D Primitives
p5.js comes with a number of shapes known as 2D primitives. Primitives can be thought of as the most fundamental of shapes: lines, squares and circles.
Functions such as line(), rect() and ellipse() draw these basic geometric forms on to the canvas.
Colors can be defined using Greyscale, RGB (red, green, blue) or hexadecimal
(#030303) values to control the appearance of shapes and backgrounds
fill() sets the interior color of shapes drawn after it is called, while stroke()
sets the outline color of shapes and lines.
BASIC SHAPES
STYLING
VARIABLES
ANIMATION
INTERACTION
No AI guidance allowed
function setup() {
createCanvas(400, 400);
}
function draw() {
// greyscale value
background(40);
// rgb value
fill(0, 255, 255);
// x, y, width, height
ellipse(200, 200, 150, 150);
// rgb value
fill(255, 100, 100);
// x, y, width, height
rect(200, 200, 50);
// hex value
stroke("#FFEB3B");
// x1, y1, x2, y2
line(100, 300, 300, 100);
}DM2008
AY2526
PROGRAMMING FOR INTERACTION
WEEK 1
DRAWING WITH CODE
Style Inheritance
When running the example on the right, you might have noticed that all the outlines turn yellow, even though stroke() is only ever declared once above the line().
If a style is defined, it continues to be inherited by all shapes drawn after the declaration, unless a new style is defined to override it.
In the case of the stroke(), since no other styles have been defined for the outlines, when draw() runs again, the same style continues to be applied to the ellipse() and rect().
BASIC SHAPES
STYLING
VARIABLES
ANIMATION
INTERACTION
No AI guidance allowed
function setup() {
createCanvas(400, 400);
}
function draw() {
// greyscale value
background(40);
// rgb value
fill(0, 255, 255);
// x, y, width, height
ellipse(200, 200, 150, 150);
// rgb value
fill(255, 100, 100);
// x, y, width, height
rect(200, 200, 50);
// hex value
stroke("#FFEB3B");
// x1, y1, x2, y2
line(100, 300, 300, 100);
}DM2008
AY2526
PROGRAMMING FOR INTERACTION
WEEK 1
DRAWING WITH CODE
More Styles
You can modify the thickness of an outline by using the strokeWeight() method, and declaring a pixel value for the weight.
You can use noFill() to draw shapes with a transparent fill, and noStroke() to create one without an outline.
Again, these commands will apply their appearance to all the shapes that are drawn after them, until a new style is declared to override it.
BASIC SHAPES
STYLING
VARIABLES
ANIMATION
INTERACTION
No AI guidance allowed
function setup() {
createCanvas(400, 400);
}
function draw() {
// greyscale value
background(40);
// transparent fill
noFill(0, 255, 255);
// x, y, width, height
ellipse(200, 200, 150, 150);
// rgb value
fill(255, 100, 100);
noStroke();
rect(200, 200, 50);
// hex value
stroke("#FFEB3B");
strokeWeight(3);
line(100, 300, 300, 100);
}DM2008
AY2526
PROGRAMMING FOR INTERACTION
WEEK 1
DRAWING WITH CODE
Activity 1a
BRIEF
REFERENCE
OUTPUT
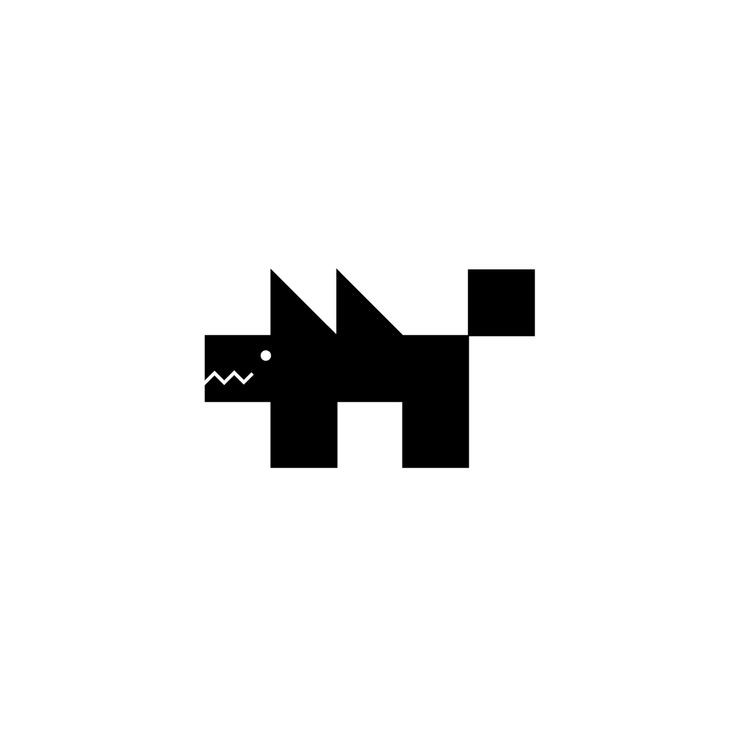
Simple Creatures
Create a drawing of a creature in p5.js to practice the core concepts introduced thus far: setup(), draw(), shapes and colors.
By the end of the exercise, you should have designed a creature, composed within a basic layout on your canvas. Ensure your design has a background color.
20 MIN
DM2008
AY2526
PROGRAMMING FOR INTERACTION
WEEK 1
DRAWING WITH CODE
Activity 1a
BRIEF
REFERENCE
OUTPUT
shapes
styling
positioning
No AI guidance allowed
Useful Methods
Consult the p5js documentation to see if you can figure out how to add opacity (an 'alpha' value) to your colors.
How does this method change the way rectangles are aligned and positioned?
Challenge yourself by reading the reference to properly incorporate the other shape methods.
DM2008
AY2526
PROGRAMMING FOR INTERACTION
WEEK 1
DRAWING WITH CODE
Activity 1a
BRIEF
REFERENCE
OUTPUT
Output
For homework and your own archival
Document your output by:
- Organizing every file in a folder on your computer
-
Saving your sketch's code and expanding the .zip
- Taking screenshots of your sketch (canvas only)
- Saving them with appropriate names
activity1a-image01.jpg
activity1a-image02.jpg
File ➝ Download
deliverables
code folder
2 images
DM2008
AY2526
PROGRAMMING FOR INTERACTION
WEEK 1
DRAWING WITH CODE
Variables
Variables are a convenient way to store and represent information across our code.
We can think of variables as containers or placeholders for any type of data we might need to use in our code.
Instead of "hard-coding" information, we use variables to set the value of something once, and then use in different places.
In JavaScript, we declare a new variable
using the let keyword, then =, followed by a unique name for said variable.
Variables are usually* declared at the top, outside of any function definitions.
BASIC SHAPES
STYLING
VARIABLES
ANIMATION
INTERACTION
// Creating a variable "w"
// Used for size of ellipses
let w = 200;
function setup() {
createCanvas(400, 400);
}
function draw() {
background(220);
noStroke();
fill(255, 0, 0);
ellipse(100, 100, w);
ellipse(300, 300, w);
}No AI guidance allowed
DM2008
AY2526
PROGRAMMING FOR INTERACTION
WEEK 1
DRAWING WITH CODE
Color Data
Storing color information within a variable is a little tricky, since some types of color data require the use of more than one value.
For these cases, we can use the color()
method to flexibly store the value of any color data type (RGB, Greyscale, Hex).
However, this method can only be used within setup(). As such, we can define an uninitialized—or empty—variable at the top of our code, before defining its intended value within setup().
color() accepts any value that would be used with the stroke(), fill() or background() methods.
BASIC SHAPES
STYLING
VARIABLES
ANIMATION
INTERACTION
No AI guidance allowed
// Creating a variable "c"
// Used for the color
let c;
function setup() {
createCanvas(400, 400);
c = color(255, 255, 0);
}
function draw() {
background(220);
stroke(0);
fill(c);
ellipse(100, 100, 150);
ellipse(300, 300, 75);
}DM2008
AY2526
PROGRAMMING FOR INTERACTION
WEEK 1
DRAWING WITH CODE
Built-in Variables
In addition to the variables that we declare on our own, p5.js also comes with a series of built-in variables to make programming a little more convenient.width and height offer a quick way to reference the dimensions of the canvas. Using simple calculations, we can use width and height to place shapes in the exact middle of our canvas.
This is done by dividing these variables in half. When a shape is placed at half the canvas width along its x-axis, it will align horizontally centered. A similar thing happens when placing a shape halfway along the canvas height in its y-axis. It is vertically centered.
BASIC SHAPES
STYLING
VARIABLES
ANIMATION
INTERACTION
No AI guidance allowed
function setup() {
createCanvas(400, 400);
// Draw rect from center
rectMode(CENTER);
}
function draw() {
background("#262626");
noStroke();
fill("#FF7461");
// Use width & height
rect(width/2, height/2, 100);
}
DM2008
AY2526
PROGRAMMING FOR INTERACTION
WEEK 1
DRAWING WITH CODE
Basic Animations
Besides using variables as placeholders, we can also use the draw() loop to update the value of a variable.
This can be useful for changing the size of a shape, or moving a shape across the canvas over a period of time.
We can change a variable by using the equals sign = to alter its value. In this example, we are adding 1 pixel to the variable w each time the draw() loops.
BASIC SHAPES
STYLING
VARIABLES
ANIMATION
INTERACTION
No AI guidance allowed
// New variable for width
let w = 30;
function setup() {
createCanvas(400, 400);
noStroke();
rectMode(CENTER);
}
function draw() {
background(220);
fill("#FF7461");
rect(200, 200, w);
// Add one to 'w'
w = w + 1;
console.log(w);
}This has the effect of increasing the size of the square by one pixel in each frame, making it expand over time.
DM2008
AY2526
PROGRAMMING FOR INTERACTION
WEEK 1
DRAWING WITH CODE
Background Quirks
Up to this point, we have always set the background of our sketch in draw().
background() is usually drawn first each time the draw() loop runs, then everything else is drawn above it.
If we were to move our background into setup(), we notice that new frames are drawn on top of each other, without the canvas getting cleared first.
This results in a trail effect being created.
BASIC SHAPES
STYLING
VARIABLES
ANIMATION
INTERACTION
No AI guidance allowed
// New variable for x-position
let x = 0;
function setup() {
createCanvas(400, 400);
rectMode(CENTER);
//Set background in setup
background(220);
}
function draw() {
fill("#FF7461");
rect(x, 200, 50, 50);
// Add four to 'x'
x = x + 4;
}
DM2008
AY2526
PROGRAMMING FOR INTERACTION
WEEK 1
DRAWING WITH CODE
Background Alpha
We can take this trail effect a step further by adding an opacity (alpha) value to the background color. This creates a fading trail as a slightly opaque background is drawn over the sketch each frame.
We can alter the amount of opacity the background has in order to lengthen or shorten the appearance of these trails.
BASIC SHAPES
STYLING
VARIABLES
ANIMATION
INTERACTION
No AI guidance allowed
// New variable for x-position
let x = 0;
function setup() {
createCanvas(400, 400);
rectMode(CENTER);
}
function draw() {
// Background with opacity
background(220, 40);
fill("#FF7461");
rect(x, 200, 50, 50);
// Add four to 'x'
x = x + 4;
}
DM2008
AY2526
PROGRAMMING FOR INTERACTION
WEEK 1
DRAWING WITH CODE
Randomness
Sometimes, it could interesting to have the sketch randomly decide how things change or animate. For these situations, we can utilize random() to generate values.
As its name suggests, this method will produce a random number. It takes two inputs within the parentheses (), a lower limit, followed by an upper limit.
A random value between the two limits is generated. Optionally, if you provide just one number as the upper limit, the method will assume a lower limit of 0.
BASIC SHAPES
STYLING
VARIABLES
ANIMATION
INTERACTION
No AI guidance allowed
function setup() {
createCanvas(400, 400);
noFill();
}
function draw() {
background("#262626");
stroke("#7956FC");
// Set random stroke weight
// between 1 and 5
strokeWeight(random(1, 5));
// Set random x position
// between 0 and width
ellipse(random(width), height/2, 100);
}
DM2008
AY2526
PROGRAMMING FOR INTERACTION
WEEK 1
DRAWING WITH CODE
Randomness
Since random() generates a number, we are able to use it anywhere a number is treated as a valid input within our code. We saw how we can use this to set a random size and position for our shapes.
We can also use random() to generate colors using RGB or greyscale values. Instead of using a fixed number, we can use random(255) to generate a value between 0 and 255.
BASIC SHAPES
STYLING
VARIABLES
ANIMATION
INTERACTION
No AI guidance allowed
function setup() {
createCanvas(400, 400);
noFill();
}
function draw() {
background(38, 60);
// Set random G & B values
stroke(255, random(60, 200), random(255));
// Set random stroke weight
strokeWeight(random(1, 5));
// Set random position & size
ellipse(random(width), random(height), random(50, 100));
}
Selectively applying randomness to some color channels, and not others, produces a controlled variance in color palettes.
DM2008
AY2526
PROGRAMMING FOR INTERACTION
WEEK 1
DRAWING WITH CODE
Basic Interactivity
Another set of built-in variables that p5.js comes with are mouseX and mouseY.
These variables contain references to the x and y positions of the mouse cursor on the screen at any given moment.
As the mouse position updates constantly, these values are only useful within draw().
BASIC SHAPES
STYLING
VARIABLES
ANIMATION
INTERACTION
No AI guidance allowed
function setup() {
createCanvas(400, 400);
noStroke();
}
function draw() {
background('#262626');
fill('#FF7461');
// Use mouse for x & y
rect(mouseX, mouseY, 70);
}
// Moving the cursor causes
// the square to move along
// with it on the canvasThe values of mouseX and mouseY are returned in pixels, similar to the x and y coordinates of the canvas. They can be used directly in our code anywhere a numerical value is usually used.
DM2008
AY2526
PROGRAMMING FOR INTERACTION
WEEK 1
DRAWING WITH CODE
Mouse & Keyboard
In addition to setup() and draw(), p5js also provides functions for us to detect and take action when a mouse button or key has been interacted with.
We can write code in mousePressed()
and keyPressed() to trigger changes to our sketch based on user interactions.
For now, we will use random() to reassign values to a variable to affect our shapes.
BASIC SHAPES
STYLING
VARIABLES
ANIMATION
INTERACTION
No AI guidance allowed
// Variables for ellipse
let w = 75;
let c = 220;
function setup() {
createCanvas(400, 400);
noStroke();
}
function draw() {
background(20);
// Use 'c' for fill
fill(c);
// Use 'w' for size
ellipse(mouseX, mouseY, w);
}
function mousePressed() {
w = random(25, 200);
}
function keyPressed() {
c = random(100,255);
}mousePressed() and keyPressed() are their own functions, and require the function keyword similar to setup() and draw().
DM2008
AY2526
PROGRAMMING FOR INTERACTION
WEEK 1
DRAWING WITH CODE
Activity 1b
BRIEF
REFERENCE
OUTPUT
Learning By Making
Using either of the provided sketches as a starting point, apply the coding techniques you have learnt in this session to modify the outcome.
Ensure your modifications reflect your own aesthetics and design sensibilities. Be sure to document your progress.
50 MIN
DM2008
AY2526
PROGRAMMING FOR INTERACTION
WEEK 1
DRAWING WITH CODE
Activity 1b
BRIEF
REFERENCE
OUTPUT
values
interactivity
utility
No AI guidance allowed
Useful Methods
Can you figure how to invert mouseX and mouseY so the shapes travel in an opposite direction?
Consult the documentation to learn how you can directly export your canvas as an image file.
Read up on other ways that you can change and assign values to variables.
DM2008
AY2526
PROGRAMMING FOR INTERACTION
WEEK 1
DRAWING WITH CODE
Activity 1b
BRIEF
REFERENCE
OUTPUT
Output
For homework and your own archival
Document your output by:
- Organizing every file in a folder on your computer
-
Saving your sketch's code and expanding the .zip
- Exporting images of your canvas with
saveCanvas() - Screen recording your generative/interactive outcomes
- Saving them with appropriate names
activity1b-image01.jpg
activity1b-video01.mp4
File ➝ Download
deliverables
code folder
3 images
2 videos
DM2008
AY2526
PROGRAMMING FOR INTERACTION
WEEK 1
WRAPPING UP
Homework
HOMEWORK
TUTORIALS
Reading Assignment
For next week's discussion, please read:
Documentation
Activity 1a
Code folder
Minimum (2) still images
1
2
Activity 1b
Code folder
Minimum (3) still images
Minimum (2) screen recordings
Your documentation should demonstrate your iterations
Please save images as jpeg and videos as mp4

DM2008
AY2526
PROGRAMMING FOR INTERACTION
WEEK 1
WRAPPING UP
Video Tutorials
HOMEWORK
TUTORIALS
1
2
3
4
5
6

DM2008
AY2526
PROGRAMMING FOR INTERACTION
Control Flows and Interactivity
2
Building on the basics by introducing conditionals and loops to add decision-making, repetition and bring richer interactivity to sketches.
Last Session
Last session we explored creative coding through examples from pioneering and contemporary artists, and got oriented with the p5.js web editor.
We set up a canvas, worked with shapes, color, and the coordinate system, then introduced variables, simple animation through variable updates, and randomness.
We also tried basic interactivity with the mouse and keyboard, and wrapped with two studies: a simple shape-based “creature” and your own spin on an artist-inspired sketch.
DM2008
AY2526
PROGRAMMING FOR INTERACTION
PREVIOUSLY
OBJECTIVES
DISCUSSION
WEEK 2
WARM UP
Last Session
DM2008
AY2526
PROGRAMMING FOR INTERACTION
WEEK 2
WARM UP
Variables
Interactivity
let, const
store and reuse values; const cannot be reassigned after it has been set
x = x + 1; x +=1;
change properties such as size, position, or color by updating variable values
width, height
store the canvas dimensions to size or position things dynamically
mouseX, mouseY
built-in variables that track the mouse position on the canvas as it moves
mousePressed()
runs code whenever the mouse is clicked within the sketch
keyPressed()
runs code when any key is pressed while the sketch is focused
PREVIOUSLY
OBJECTIVES
DISCUSSION
Last Session
DM2008
AY2526
PROGRAMMING FOR INTERACTION
WEEK 2
WARM UP
Animation Essentials
x = x + 1; x +=1;
change properties such as size, position, or color by updating variable values
random(min, max)
generates a random number between a range for variation and unpredictability
PREVIOUSLY
OBJECTIVES
DISCUSSION
Sketch Anatomy
Code is always executed top to bottom in setup()
and draw(). Overlapping shapes drawn earlier in the code appear under shapes that are drawn later.
setup()
executes its containing code once, whenever the sketch is started
draw()
keeps repeating its instructions ~ 60 times a second, until the sketch is stopped — we call each repetition a frame
This Session
DM2008
AY2526
PROGRAMMING FOR INTERACTION
WEEK 2
WARM UP
PREVIOUSLY
OBJECTIVES
DISCUSSION
Conditionals let your code make decisions, so your sketch can respond to different situations—like changing colors when the mouse moves to one side, or showing a shape when a key is pressed.
Loops let you repeat instructions efficiently, perfect for patterns, grids, or handling many shapes at once.
Together, they make your sketches more dynamic, responsive, and efficient, while opening the door to more complex and engaging interactions.
1
2
3
In today's session, you will

DM2008
AY2526
PROGRAMMING FOR INTERACTION
WEEK 2
WARM UP
PREVIOUSLY
OBJECTIVES
DISCUSSION
Discussion Time
Decisions in code can create different paths and outcomes for the user.
- Break into groups of 3 to 4.
-
Discuss, with reference to the reading, how branching paths can lead to different outcomes in interactive art or design.
-
Regroup to share insights with the class.
10 MIN
What are the trade-offs between giving users control vs. guiding them down a set path?
How might a system decide what happens next based on a user’s actions or inputs?

DM2008
AY2526
PROGRAMMING FOR INTERACTION
WEEK 2
CONTROL FLOWS
Controlling Programs
Thus far, we have written very simple instructions to the computer using code to tell it what shapes to draw, where, and in what color and/or style.
We also saw how variables and random()
could be used to introduce changes within our sketches to create simple animations.
However, with the exception of some basic interactions using the keyboard and mouse, our programs have not been capable of making any decisions on their own.
Control flows are special types of code that allow the computer to dynamically change between different instructions, depending on the situation it is facing.
Learn more here
Start ▶︎
setup()
draw()
Option A
Option B
Stop ▦
draw() loop
PREVIOUSLY
OBJECTIVES
DISCUSSION
DM2008
AY2526
PROGRAMMING FOR INTERACTION
Conditional Statements
Conditional Statements are the first type of control flow we will explore.
These statements evaluate a condition
and branch the program in one of two or more directions.
If the condition is true, one block of code runs. If it is false, another block is chosen to run instead.
This true-or-false logic, also known as booleans, forms the basis of decision-making in code.
Learn more here
In JavaScript, conditional statements are written in two main ways: if–else or switch.
draw()
Conditional Statement
condition ✔︎
condition ✕
action A
action B
draw() loop
WEEK 2
CONDITIONALS
CONDITIONALS
IF–ELSE
SWITCH
EVENTS
DM2008
AY2526
PROGRAMMING FOR INTERACTION
If...
If statements are the simplest kind of conditionals to implement.
Behind the scenes, whenever a computer encounters an if() statement, it asks a yes-or no question: is this condition truthy?
If yes → the code inside runs.
If no → that block is skipped.
This lets your sketch react to situations
and change its behavior based on the conditions you define.
Learn more here
Truthy means any value the computer treats as true when checked in a condition, even if it is not literally the word true.
draw()
if(condition)
truthy
falsy
run code
draw() loop
WEEK 2
CONDITIONALS
CONDITIONALS
IF–ELSE
SWITCH
EVENTS
DM2008
AY2526
PROGRAMMING FOR INTERACTION
Comparison Operators
Comparison operators are vital to working with if() statements. They let you test the relationships between different values and set the condition you want to observe.
They return either true or false.
> greater than
< less than
>= greater than or equal
<= less than or equal
== equal to
!= not equal
Learn more here
function setup() {
createCanvas(400, 400);
rectMode(CENTER);
}
function draw() {
background(220);
// Compare mouseX to canvas center
if (mouseX < width/2) {
noStroke();
fill(30);
ellipse(mouseX, mouseY, 80);
}
// Midline for reference
stroke(255, 0, 0, 128);
line(width/2, 0, width/2, height);
}
function keyPressed() {
console.log("A key was pressed")
if(key == "c") {
console.log("It was the C key");
}
}key is a built-in p5.js variable that returns the human readable name of the key that was recently used.
WEEK 2
CONDITIONALS
CONDITIONALS
IF–ELSE
SWITCH
EVENTS
DM2008
AY2526
PROGRAMMING FOR INTERACTION
Logical Operators
Logical operators allow you to combine more than one condition inside an if()
statement.
They return true or false depending on how the conditions relate to each other.
&& (AND) → true only if both conditions are true
|| (OR) → true if at least one condition is true
This lets you describe more complex situations in your sketches, for example:
“if the mouse is on the right AND not exactly on the center line”
“if the mouse is on the left OR near the top.”
Learn more here
function setup() {
createCanvas(400, 400);
rectMode(CENTER);
}
function draw() {
background(220);
// Mouse on right AND not midline
if (mouseX >= width/2 && mouseX != width/2) {
fill(200, 50, 50);
rect(width*0.75, height/2, 80);
}
// Mouse on left OR mouseY is high
if (mouseX < width/2 || mouseY < height/2) {
fill(50, 150, 200);
ellipse(width/4, height/2, 80);
}
// Midlines for reference
stroke(0, 80);
line(width/2, 0, width/2, height);
line(0, height/2, width, height/2);
}WEEK 2
CONDITIONALS
CONDITIONALS
IF–ELSE
SWITCH
EVENTS
DM2008
AY2526
PROGRAMMING FOR INTERACTION
If...else
If...else statements expand on the if() syntax by letting your program choose between two possible paths.
When a computer encounters an if…else
block, it checks the condition(s) in if().
If it's true → the first block of code runs.
If it's false → else block runs instead.
This guarantees that one of the two blocks will always run. The else block is like a fallback, catching all other scenarios that do not match the if() condition.
Learn more here
function setup() {
createCanvas(400, 400);
rectMode(CENTER);
}
function draw() {
background(220);
// If mouse is on left, draw circle
if (mouseX < width/2) {
fill(0, 150, 255);
ellipse(width/4, height/2, 80);
}
// Else, draw square
else {
fill(255, 100, 0);
rect(width*0.75, height/2, 80);
}
// Midline for reference
stroke(0, 60);
line(width/2, 0, width/2, height);
}else goes straight into { } without ( ) because it does not test for anything—it only runs when the if() is not true.
WEEK 2
CONDITIONALS
CONDITIONALS
IF–ELSE
SWITCH
EVENTS
DM2008
AY2526
PROGRAMMING FOR INTERACTION
Else if...
Else if statements let you check more than one condition in sequence.
Upon reaching an if…else if…else chain, the computer checks the first condition:
- If the first condition is
true, its block is run and the rest of the code is skipped. - If it’s
false, the computer moves on to check theelse if()condition. - If none of the conditions are true, the final
elseblock runs.
This is useful when you want to handle three or more possible scenarios in your sketch. Note that as soon as a condition is true, the rest of the chain is skipped.
Learn more here
draw()
if(cond)
if() {code}
true
else if(cond)
false
else if() {code}
true
else {code}
false
rest of draw()
draw() loop
WEEK 2
CONDITIONALS
CONDITIONALS
IF–ELSE
SWITCH
EVENTS
DM2008
AY2526
PROGRAMMING FOR INTERACTION
Else if...
Learn more here
const sz = 80; // size of shapes
function setup() {
createCanvas(400, 400);
rectMode(CENTER);
}
function draw() {
background(220);
// Check where mouse is horizontally
if (mouseX < width/3) {
fill(0, 150, 255); // left
ellipse(width/6, height/2, sz);
} else if (mouseX < 2 * width/3) {
fill(0, 200, 100); // middle
rect(width/2, height/2, sz);
} else {
fill(255, 100, 0); // right
triangle(width*0.85, height/2-sz/2,
width*0.75, height/2+sz/2,
width*0.95, height/2+sz/2);
}
// Guidelines
stroke(0, 60);
line(width/3, 0, width/3, height);
line(2*width/3, 0, 2*width/3, height);
}Else if statements let you check more than one condition in sequence.
Upon reaching an if…else if…else chain, the computer checks the first condition:
- If the first condition is
true, its block is run and the rest of the code is skipped. - If it’s
false, the computer moves on to check theelse if()condition. - If none of the conditions are true, the final
elseblock runs.
This is useful when you want to handle three or more possible scenarios in your sketch. Note that as soon as a condition is true, the rest of the chain is skipped.
WEEK 2
CONDITIONALS
CONDITIONALS
IF–ELSE
SWITCH
EVENTS
DM2008
AY2526
PROGRAMMING FOR INTERACTION
Switch Statement
Learn more here
While if…else if works well for a few conditions, chaining four or more quickly becomes long and messy.
The switch() statement provides a much cleaner and more efficient alternative.
It checks the value of a single variable or expression against different cases, and runs that matching block of code. If no case matches, a default block runs instead.
Unlike if…else if, switch() checks only one variable or expression against multiple cases. This makes it especially handy for keyboard controls or switching between modes.
draw()
switch(cond)
case 1:
code to run;
break;
true
false
case 2:
code to run;
break;
true
false
case n:
code to run;
break;
true
false
default
code to run;
break;
rest of draw()
draw() loop
WEEK 2
CONDITIONALS
CONDITIONALS
IF–ELSE
SWITCH
EVENTS
DM2008
AY2526
PROGRAMMING FOR INTERACTION
Switch Statement
Learn more here
A switch() statement is made up of the following parts:
-
switch(condition)→ the single variable or expression being checked. -
case value:→ defines a match. -
code to run;→ the block that executes if thecasematches -
break;→ ends that case and allows the statement to exit when matched. -
default:→ runs if no case matches (like anelseblock, it is optional)
This structure makes it easier to handle multiple scenarios clearly and consistently.
WEEK 2
CONDITIONALS
switch(condition) { case 1: console.log("Hello"); break;
case 2: // code to run break; case n: // code to run break;
default: // code to run }
CONDITIONALS
IF–ELSE
SWITCH
EVENTS
DM2008
AY2526
PROGRAMMING FOR INTERACTION
Switch Statement
Learn more here
switch() is often used together with events like keyPressed() to handle complex interaction logic like mapping keys to certain actions.
In this particular static example, draw()
does nothing. We clear the canvas and draw the chosen shape defined in each case whenever a keypress is detected.
Because keyPressed() only runs once each time a key interaction is detected, we have to place all the associated drawing instructions within our case.
In this example, if background() remains in draw(), it will clear the canvas almost instantly, hiding the shapes from view.
WEEK 2
CONDITIONALS
function setup() {
createCanvas(400, 400);
rectMode(CENTER);
background(220);
}
function draw() {
// empty on purpose
}
function keyPressed() {
switch (key) {
case '1':
background(220);
fill(255, 0, 0);
ellipse(width/2, height/2, 80);
break;
case '2':
background(220);
fill(0, 150, 255);
rect(width/2, height/2, 80, 80);
break;
case '3':
background(220);
fill(0, 200, 100);
triangle(width/2, height/2 - 40,
width/2 - 40, height/2 + 40,
width/2 + 40, height/2 + 40);
break;
default:
background(220);
fill(100);
ellipse(width/2, height/2, 20); // fallback
}
}CONDITIONALS
IF–ELSE
SWITCH
EVENTS
DM2008
AY2526
PROGRAMMING FOR INTERACTION
CONDITIONALS
IF–ELSE
SWITCH
EVENTS
Switch Statement
Learn more here
In the last example, we used switch()
inside keyPressed() to draw different shapes directly when a key was pressed.
Here, we use the same structure, but instead of drawing right away, switch()
changes the value of a variable.
A variable called shapeColor stores the current fill color and pressing the r, g, or b keys updates shapeColor to a new value. In draw(), we use shapeColor to fill the ellipse continuously.
This shows how switch() can be used to not only trigger actions, but also to control variables that persist across frames.
WEEK 2
CONDITIONALS
let shapeColor;
function setup() {
createCanvas(400, 400);
shapeColor = color(100); // starts gray
}
function draw() {
background(220);
fill(shapeColor);
ellipse(width/2, height/2, 100);
}
function keyPressed() {
switch (key) {
case 'r':
shapeColor = color(255, 0, 0);
break;
case 'g':
shapeColor = color(0, 200, 100);
break;
case 'b':
shapeColor = color(0, 150, 255);
break;
default:
shapeColor = color(100); // fallback
}
}DM2008
AY2526
PROGRAMMING FOR INTERACTION
CONDITIONALS
IF–ELSE
SWITCH
EVENTS
Event-driven Conditions
No AI guidance allowed
We just saw how keyPressed() can be used to trigger actions once, whenever a keyboard interaction is detected. That said, sometimes, we may want our sketch to keep checking the input while it is being held down, instead of just a once off.
This is where the built-in boolean variables mouseIsPressed and keyIsPressed
come in handy. These variables are always true or false depending on whether the mouse or any key is currently held down.
Since they update every frame in draw(), they let the sketch respond continuously.
WEEK 2
CONDITIONALS
function setup() {
createCanvas(400, 400);
rectMode(CENTER);
}
function draw() {
background(220);
// If mouse is held, draw circle
if (mouseIsPressed) {
fill(0, 150, 255);
ellipse(width/2, height/2, 80);
}
// If any key is held, draw square
if (keyIsPressed) {
fill(255, 100, 0);
rect(width/2, height/2, 80);
}
}Boolean variables like mouseIsPressed do not require == true. Their values are inferred directly.
DM2008
AY2526
PROGRAMMING FOR INTERACTION
CONDITIONALS
IF–ELSE
SWITCH
EVENTS
Nested If...
Handling more advanced input event combinations may require us to check multiple conditions at the same time.
For example, we might want something to happen only if the mouse is pressed and a certain key is also held down.
To deal with these cases, we can nest one if() statement inside another—letting us check multiple conditions in sequence.
WEEK 2
CONDITIONALS
function setup() {
createCanvas(400, 400);
}
function draw() {
background(220);
// Check if mouse is held
if (mouseIsPressed) {
// Check if key is also held
if (keyIsPressed) {
// Is the key 'r'?
if (key == 'r') {
fill(255, 0, 0);
}
// Is the key 'g'?
if (key == 'g') {
fill(0, 200, 100);
}
// Is the key 'b'?
if (key == 'b') {
fill(0, 150, 255);
}
} else {
fill(150);
}
ellipse(width/2, height/2, 80);
}
}
Nesting too deeply can get confusing and make your code harder to read. Next, we will look at how switch() can sometimes simplify this logic
DM2008
AY2526
PROGRAMMING FOR INTERACTION
CONDITIONALS
IF–ELSE
SWITCH
EVENTS
Readable Conditions
While a useful technique, checking multiple conditions sequentially with nested if()
statements can get messy.
To keep our code clean and easier to read:
- Use logical operators like
&&or||to combine conditions in a singleif().
- Use a
switch()inside anif()when we want to first check for some broad condition(s), and then branch into several specific cases.
WEEK 2
CONDITIONALS
function setup() {
createCanvas(400, 400);
}
function draw() {
background(220);
// Check if mouse OR key is held
if (mouseIsPressed || keyIsPressed) {
// Now decide color by key pressed
switch (key) {
case 'r':
fill(255, 0, 0);
break;
case 'g':
fill(0, 200, 100);
break;
case 'b':
fill(0, 150, 255);
break;
default:
fill(150);
}
ellipse(width/2, height/2, 80);
}
}
Good code hygiene is about readability as much as correctness—choosing the right tool makes your intent clearer.
DM2008
AY2526
PROGRAMMING FOR INTERACTION
WEEK 2
CONDITIONALS
Activity 2a
BRIEF
REFERENCE
OUTPUT
Mode Switch
Build an interactive sketch in p5.js with multiple visual "modes" and practice using both if…else and switch().
By the end of the exercise, you should implement at least 3 modes that change the sketch in different ways (color palette, shape types, motion, etc.)
20 MIN
DM2008
AY2526
PROGRAMMING FOR INTERACTION
Activity 2a
BRIEF
REFERENCE
OUTPUT
conditionals
events
operators
Useful Code
Can you figure out how to replace the ellipse with a rect on mouse press?
How does the NOT operator change how you read and write conditionals?
Add more cases to the switch() to expand your sketch's "modes".
No AI guidance allowed
WEEK 2
CONDITIONALS
DM2008
AY2526
PROGRAMMING FOR INTERACTION
Activity 2a
BRIEF
REFERENCE
OUTPUT
Output
For homework and your own archival
Document your output by:
- Organizing every file in a folder on your computer
-
Saving your sketch's code and expanding the .zip
- Exporting images of your canvas with
saveCanvas() - Screen recording your generative/interactive outcomes
- Saving them with appropriate names
activity2a-image01.jpg
activity2a-video01.mp4
File ➝ Download
deliverables
code folder
3 images
1 video
WEEK 2
CONDITIONALS
DM2008
AY2526
PROGRAMMING FOR INTERACTION
ITERATIONS
FOR LOOP
VARIATIONS
Iteration Statements
WEEK 2
ITERATIONS
Learn more here
Iteration Statements are another kind of control flow in programming.
Instead of branching into different options, iterations let our code repeat one or more actions multiple times.
These repeating instructions are called loops, and they help us avoid writing the same code over and over again.
We usually provide the computer with some conditions that determine if the loop should continue running or exit.
draw()
Iteration Statement
condition ✔︎
action(s)
draw() loop
loop exits
condition ✕
This is separate from the draw() loop, which simply runs your sketch continuously until it's stopped.
DM2008
AY2526
PROGRAMMING FOR INTERACTION
ITERATIONS
FOR LOOP
VARIATIONS
For Loop
WEEK 2
ITERATIONS
For loops let us tell the computer to repeat some action(s) a specific number of times.
Instead of deciding which code to run (like a conditional), a for() loop decides how many times to run the same block of code.
Each iteration, the loop checks a condition:
If true → the loop repeats the action(s).
If false → loop exits, sketch progresses.
for() loops allow us quickly create repetition and patterns, without having to copy the same lines of code by hand.
Learn more here
The for() loop will repeat all its contained action(s) within a single frame of draw().
draw()
for(condition)
continue
action(s)
exit
rest of draw()
draw() loop
DM2008
AY2526
PROGRAMMING FOR INTERACTION
For Loop
WEEK 2
ITERATIONS
A for() loop is made up of the following parts:
-
start → sets up a counter
-
test → checks a condition prior to run
-
step → updates the counter each loop
-
action(s) → runs this block of code whenever the test is
true.
You can also use the counter variable i
within the action's code, for example as a position, size, or color value.
When running the code on the left, notice how i starts at 0 in the console and only goes up to 9 before stopping.
Learn more here
for(let i = 0; i < 10; i++) { // actions(s) console.log(i); }
Also referred to as an iterator, this can be named anything — i is the standard practice.
i++ is the same as i = i + 1
All comparison operators valid
ITERATIONS
FOR LOOP
VARIATIONS
DM2008
AY2526
PROGRAMMING FOR INTERACTION
Simple Iterator
WEEK 2
ITERATIONS
Sometimes we just want to repeat an action many times in a row. In these cases, the for() loop’s counter variable i serves as a simple iterator.
Each time the loop runs, i goes up by 1 (i++). We can use that changing value inside our code to affect position, size, or any other numerical property.
In this example, i controls the x-position of a set of lines, all pointing to the mouse. The larger the test value, the more lines appear.
const numLines = 20;
let spacing;
function setup() {
createCanvas(400, 400);
spacing = width/numLines;
}
function draw() {
background(220);
// i starts at 0, runs up to numLines
for (let i = 0; i < numLines; i++) {
line(i * spacing, 0, mouseX, mouseY);
}
}i is shifting the starting point of each new line by a set amount of space across the canvas.
No AI guidance allowed
ITERATIONS
FOR LOOP
VARIATIONS
DM2008
AY2526
PROGRAMMING FOR INTERACTION
Spacing Step
WEEK 2
ITERATIONS
Other times, we may want to repeat an action but increase the counter by a value larger than 1. One such use is stepping by larger amounts to control spacing.
In this case, instead of using i++, we write i += spacing. Each time the loop runs, i increases by a set value.
This makes it easy to place shapes in a column (or even a grid) without calculating every position by hand. The larger the step, the more spread out the shapes become.
const circleSize = 20;
const spacing = circleSize * 2;
function setup() {
createCanvas(400, 400);
}
function draw() {
background(220);
// i starts at 0, goes up by spacing
for(let i = 0; i < height; i += spacing) {
ellipse(width/2, i, circleSize);
}
}Here, i jumps down the canvas in equal steps, spacing each new ellipse along the way.
No AI guidance allowed
ITERATIONS
FOR LOOP
VARIATIONS
DM2008
AY2526
PROGRAMMING FOR INTERACTION
Modulo Variations
WEEK 2
ITERATIONS
In addition to simple repetition, we could also introduce a rule that changes the pattern as the loop runs.
The modulo operator % is useful here. It gives us the remainder after dividing, which creates predictable cycles.
For example, when we write i % 2, the result alternates between 0 and 1 as i
increases. This allows us to make every other element behave differently with just one extra condition.
const spacing = 20;
function setup() {
createCanvas(400, 400);
rectMode(CENTER);
}
function draw() {
background(225);
noStroke();
// Use modulo to alternate within loop
for (let i = 0; i < width; i += spacing) {
// If the current step is even
if ((i / spacing) % 2 == 0) {
fill(30);
ellipse(i + spacing/2, height/2, 14);
}
// If the step is odd
else {
fill(200, 50, 50);
rect(i + spacing/2, height/2, 14);
}
}
}ITERATIONS
FOR LOOP
VARIATIONS
In this sketch, % makes the loop “switch modes” as it runs — even values draw circles, odd draw squares.
Learn more here
DM2008
AY2526
PROGRAMMING FOR INTERACTION
WEEK 2
ITERATIONS
Activity 2b
BRIEF
OUTPUT
Pattern Making
Build a generative pattern in p5.js using for() loops and conditions that introduces variation and interactivity to the sketch.
You should create a repeating pattern that changes based on a rule (e.g., alternating colors, size change, or spacing), with at least one interaction that modifies the rule.
40 MIN
DM2008
AY2526
PROGRAMMING FOR INTERACTION
BRIEF
OUTPUT
Output
For homework and your own archival
File ➝ Download
deliverables
code folder
3 images
1 video
WEEK 2
ITERATIONS
Activity 2b
Document your output by:
- Organizing every file in a folder on your computer
-
Saving your sketch's code and expanding the .zip
- Exporting images of your canvas with
saveCanvas() - Screen recording your generative/interactive outcomes
- Saving them with appropriate names
activity2b-image01.jpg
activity2b-video01.mp4
DM2008
AY2526
PROGRAMMING FOR INTERACTION
WEEK 2
WRAPPING UP
Homework
HOMEWORK
TUTORIALS
Documentation
Activity 2a
Code folder
Minimum (3) still images
Minimum (1) screen recording
1
Activity 2b
Code folder
Minimum (3) still images
Minimum (1) screen recording
Your documentation should demonstrate your iterations
Please save images as jpeg and videos as mp4

DM2008
AY2526
PROGRAMMING FOR INTERACTION
Video Tutorials
HOMEWORK
TUTORIALS
1
2
3
4
5
WEEK 2
WRAPPING UP

DM2008
AY2526
PROGRAMMING FOR INTERACTION
Arrays, Functions and Transformations
3
From scattered code to structured systems: arrays and functions manage complexity, while transformations reshape how elements appear on screen.
Last Session
Last session, we built on the basics by introducing decision-making and repetition. We explored how conditionals shape outcomes, using if, else, and switch to branch sketches into multiple modes and responses.
We then turned to loops, learning how to repeat shapes and patterns efficiently, and how to combine loops with conditionals for variations.
We wrapped with two studies: a “mode switch” sketch that explored branching logic, and a pattern-making exercise that used loops to generate dynamic, rule-based designs.
DM2008
AY2526
PROGRAMMING FOR INTERACTION
PREVIOUSLY
OBJECTIVES
WEEK 3
WARM UP
Last Session
DM2008
AY2526
PROGRAMMING FOR INTERACTION
Conditionals
Iterations
if, else
check conditions and choose between two or more paths
switch
test one value against multiple cases more cleanly than if…else chains
mouseIsPressed, keyIsPressed
built-in Boolean variables that stay true while the mouse or keys are held down
for loop
repeat a block of code a specific number of times with a counter, or using steps
%
use the modulo operator to alternate behaviors of elements within loops
PREVIOUSLY
OBJECTIVES
WEEK 3
WARM UP
This Session
DM2008
AY2526
PROGRAMMING FOR INTERACTION
PREVIOUSLY
OBJECTIVES
Arrays let you keep a whole list of values in one place instead of many separate variables that can get cumbersome.
Functions act like recipes: you give them inputs (parameters) and they run steps to produce an output.
Transforms let you move or spin the canvas itself, so you can draw shapes relative to new positions or rotations.
Combined, these tools help you structure your code, reduce repetition, and unlock more creative control in your sketches.
1
In this session, you will
2
3
4
WEEK 3
WARM UP

DM2008
AY2526
PROGRAMMING FOR INTERACTION
Arrays
Arrays are a way to store and organize multiple values inside a single variable.
Instead of creating separate variables for every item, we can keep them together in a list. Each item in this list has an index to help easily find, change, or loop through it.
In the context of p5.js, arrays are especially useful when working with sets of colors, shapes, positions, or repeated values.
They help keep our sketches organized, flexible, and easier to expand.
Arrays in JavaScript start counting at index 0; the first item is always at position 0, not 1.
WEEK 3
ORGANIZING CODE
ARRAYS
FUNCTIONS
TRANSFORMS
COMBINATION
palette
"#eeeeee"
"#222222"
"#f64a23"
"#009878"
"#3c78d8"
0
1
2
3
4
No AI guidance allowed
DM2008
AY2526
PROGRAMMING FOR INTERACTION
Creating Arrays
In JavaScript, arrays are created with square brackets []. Like variables, we give them a name with let, but instead of just one value, they can hold a list of many.
You can start with an empty array and add items later, or you can create one that already contains initial values. In both cases, items within the array are separated by commas.
Arrays in JavaScript can hold on to many different types of items at the same time: numbers, text, booleans, even other arrays.
WEEK 3
ORGANIZING CODE
ARRAYS
FUNCTIONS
TRANSFORMS
COMBINATION
Learn more here
// Empty array
let palette = [];
// Array with initial items
let numbers = [10, 20, 30];
let colors = ["#f06449", "#009988", "#3c78d8"];
// Array with mixed data types
let mixedArray = [[1,2,3,4], "hello", "world", true];Think of an array as a container: it does not care what is inside, as long as you keep the items in order.
DM2008
AY2526
PROGRAMMING FOR INTERACTION
Accessing Items
Each item in an array has a position called an index. JavaScript starts counting at 0, so the first item is at index 0, the second at index 1, and so on.
We use square brackets [n] with the index number to access specific items:
palette[0] → the first item
palette[2] → the third item
Arrays also have a property .length, which tells us how many items are inside, and updates automatically as the array grows or shrinks.
WEEK 3
ORGANIZING CODE
ARRAYS
FUNCTIONS
TRANSFORMS
COMBINATION
Learn more here
// Define an array of colors
let palette = ["#f06449", "#009988", "#3c78d8", "#eeeeee"];
// Access specific items
console.log(palette[0]); // "#f06449"
console.log(palette[2]); // "#3c78d8"
// Find out total items in the array
console.log(palette.length); // 4
// Use .length to access last item
console.log(palette[palette.length - 1]); // "#eeeeee"Arrays start at index 0, so the last item is always at index position .length - 1.
DM2008
AY2526
PROGRAMMING FOR INTERACTION
Updating Arrays
Arrays aren't fixed — we can change their contents after they have been created.
To replace an item, we use its index directly and just assign it a new value.
To add items to the end of the array, we can use the method .push().
To remove items, we can use .splice(index, count).
This lets us cut out one or more items starting from a chosen index.
WEEK 3
ORGANIZING CODE
ARRAYS
FUNCTIONS
TRANSFORMS
COMBINATION
Learn more here
// Start with an array
let palette = ["#f06449", "#009988", "#3c78d8"];
function setup() {
createCanvas(400, 400);
}
function draw() {
background(220);
}
// Press 1, 2, then 3 in that order
function keyPressed() {
if (key == "1") {
// Replace an item
palette[0] = "#ff0000";
console.log(palette); // ["#ff0000", "#009988", "#3c78d8"]
}
if (key == "2") {
// Add a new item at the end
palette.push("#eeeeee");
console.log(palette); // ["#ff0000", "#009988", "#3c78d8", "#eeeeee"]
}
if (key == "3") {
// Remove one item at index 1
palette.splice(1, 1);
console.log(palette); // ["#ff0000", "#3c78d8", "#eeeeee"]
}
}
Arrays are essentially ordered lists, so replacing, adding, removing or referencing always depends on the item’s index position.
DM2008
AY2526
PROGRAMMING FOR INTERACTION
Loop Over Arrays
Arrays shine when we loop over them.
With a for() loop, we can visit every single item in the list and use it to drive drawing actions, such as setting a color, size, or position.
Because the loop uses .length, it will automatically adapt when items are added or removed. That means the same code can keep working as your array changes.
This is demonstrated here where the sketch continues to work even when we .push() and .splice() items from it.
WEEK 3
ORGANIZING CODE
ARRAYS
FUNCTIONS
TRANSFORMS
COMBINATION
Learn more here
// Create a new array with some colors
let palette = ["#f06449", "#009988", "#3c78d8"];
function setup() {
createCanvas(400, 400);
noStroke();
}
function draw() {
background(225);
// Even spacing based on how many items are in the array
const spacing = width / (palette.length + 1);
// Draw one circle for each palette color
for (let i = 0; i < palette.length; i++) {
fill(palette[i]); // use the i-th color
const x = (i + 1) * spacing; // position from the loop index
ellipse(x, height / 2, 60);
}
}
// Try changing the array while the loop keeps adapting
function keyPressed() {
if (key == 'a' || key == 'A') {
// Add a new random color to the end
palette.push(color(random(255), random(255), random(255)));
}
if (key == 'r' || key == 'R' ) {
// Remove the last color (if any)
if (palette.length > 0) {
palette.splice(palette.length - 1, 1);
}
}
}When working with arrays, always tie for loops to .length so it stays flexible if the array changes.
DM2008
AY2526
PROGRAMMING FOR INTERACTION
Randomize Arrays
Sometimes you may not want to pick items in order, and instead want one at random.
In p5.js, the random() function works perfectly with arrays. Instead of stating a range within the parenthesis, you give the method the name of your array.
This is especially useful for color palettes, random prompts, or picking a shape.
WEEK 3
ORGANIZING CODE
ARRAYS
FUNCTIONS
TRANSFORMS
COMBINATION
let palette = ["#f06449", "#009988", "#3c78d8", "#eeeeee"];
let picked;
function setup() {
createCanvas(400, 400);
noStroke();
picked = random(palette); // pick one at start
}
function draw() {
background(220);
fill(picked);
ellipse(width/2, height/2, 200);
}
function mousePressed() {
// pick a new random color
picked = random(palette);
}Try running random() inside draw() for continuous variety, or in mousePressed()
for one-off surprises.
DM2008
AY2526
PROGRAMMING FOR INTERACTION
Activity 3a
BRIEF
REFERENCE
OUTPUT
Array Sampler
Create a sketch in p5.js that visualizes data from an array. The array can store information like size, color, or positions.
Use keyPressed() or mousePressed()
to alter the items in the array and have the change(s) be seen in your sketch. Use .length to loop over your array(s).
25 MIN
WEEK 3
ORGANIZING CODE
DM2008
AY2526
PROGRAMMING FOR INTERACTION
BRIEF
REFERENCE
OUTPUT
arrays
loops
events
Useful Code
You can use i % 2 to alternate fill and stroke for every other shape drawn.
Can you use keyPressed() to swap which array is used for your sketch?
Try replacing the last item by using arrayName.length - 1.
No AI guidance allowed
Activity 3a
WEEK 3
ORGANIZING CODE
DM2008
AY2526
PROGRAMMING FOR INTERACTION
Activity 3a
BRIEF
REFERENCE
OUTPUT
Output
For homework and your own archival
Document your output by:
- Organizing every file in a folder on your computer
-
Saving your sketch's code and expanding the .zip
- Screen recording your generative/interactive outcomes
- Saving them with appropriate names
activity3a-video01.mp4
File ➝ Download
deliverables
code folder
1 video
WEEK 3
ORGANIZING CODE
DM2008
AY2526
PROGRAMMING FOR INTERACTION
Functions
A function is a named block of code that performs a task.
Instead of writing the same instructions over and over, we can bundle them into a function and call it whenever we need it.
Think of it like a recipe: once written, you can reuse it as many times as you want. Later, we will see how to give it different ‘ingredients’. A function can contain its own variables, conditionals and even loops.
Functions make sketches more organized, easier to read, and much simpler to modify.
WEEK 3
ORGANIZING CODE
ARRAYS
FUNCTIONS
TRANSFORMS
COMBINATION
No AI guidance allowed
In p5.js, setup() and draw() are functions too — you’ve already been using them without realizing it.
Start ▶︎
setup()
draw()
a series of instructions
Stop ▦
other set of instructions
DM2008
AY2526
PROGRAMMING FOR INTERACTION
Function Definition
Defining a function in JavaScript always starts with the keyword function, followed by a name you choose. Inside curly braces { }, we place the instructions we want the function to perform.
Once defined, the function will not run by itself, we must call it by its name whenever we want those instructions to execute.
Functions can be defined anywhere in your sketch, but it’s common to place them below setup() & draw() for readability.
WEEK 3
ORGANIZING CODE
ARRAYS
FUNCTIONS
TRANSFORMS
COMBINATION
No AI guidance allowed
Functions do not run until you call them. Think of them as “ready-to-use” instructions waiting for a turn. Functions can also be called before they are defined.
function setup() {
createCanvas(400, 400);
}
function draw() {
background(220);
// Call the function here
drawCircle();
}
// Define a new function
function drawCircle() {
fill(200, 100, 150);
ellipse(200, 200, 100, 100);
}DM2008
AY2526
PROGRAMMING FOR INTERACTION
Parameters
Functions become more flexible when we give them parameters. These act like placeholders for values we pass into the function when we call it.
We place these parameters within the ( )
of the function, and provide them names that make sense.
Within the function, these parameter names behave just like variables. This lets us reuse the same function to draw many variations — without rewriting the code.
WEEK 3
ORGANIZING CODE
ARRAYS
FUNCTIONS
TRANSFORMS
COMBINATION
No AI guidance allowed
Parameters are like blanks in a recipe; you decide what to fill in each time you use the function.
function setup() {
createCanvas(400, 400);
}
function draw() {
background(220);
// Call with different values
drawCircle(100, 200, 50);
drawCircle(300, 200, 100);
}
// Define a function with parameters
function drawCircle(x, y, size) {
fill(200, 100, 150);
ellipse(x, y, size, size);
}DM2008
AY2526
PROGRAMMING FOR INTERACTION
Anchors in Functions
Sometimes a function needs to draw more than one shape together.
Instead of fixing the positions of each part, we can use the function’s parameters as an anchor point.
By adding or subtracting from the anchor values (x, y), we can place related shapes relative to each other.
This makes our drawings flexible — we can reuse the same function in different spots, at different scales, and it'll still look correct.
WEEK 3
ORGANIZING CODE
ARRAYS
FUNCTIONS
TRANSFORMS
COMBINATION
No AI guidance allowed
Think of parameters as the “origin” for your design. Every shape you add can be positioned relative to this anchor, making the graphic easy to move/resize.
function setup() {
createCanvas(400, 400);
}
function draw() {
background(220);
// Draw multiple faces with different anchors + sizes
drawFace(100, 200, 80);
drawFace(mouseX, mouseY, 120);
}
// Define a composite graphic using relative values
function drawFace(x, y, size) {
// head
fill(255, 220, 180);
ellipse(x, y, size, size);
// eyes (offset relative to center)
fill(0);
ellipse(x - size/4, y - size/6, size/8, size/8);
ellipse(x + size/4, y - size/6, size/8, size/8);
// mouth (offset below center)
noFill();
stroke(0);
arc(x, y + size/6, size/2, size/4, 0, PI);
}DM2008
AY2526
PROGRAMMING FOR INTERACTION
Anchors in Functions
Sometimes a function needs to draw more than one shape together.
Instead of fixing the positions of each part, we can use the function’s parameters as an anchor point.
By adding or subtracting from the anchor values (x, y), we can place related shapes relative to each other.
This makes our drawings flexible — we can reuse the same function in different spots, at different scales, and it'll still look correct.
WEEK 3
ORGANIZING CODE
ARRAYS
FUNCTIONS
TRANSFORMS
COMBINATION
No AI guidance allowed
Think of parameters as the “origin” for your design. Every shape you add can be positioned relative to this anchor, making the graphic easy to move/resize.
function setup() {
createCanvas(400, 400);
}
function draw() {
background(220);
// Drawing two different flowers
myFlower(width/2, height/2, 50, 50);
myFlower(mouseX, mouseY, 25, 25);
}
// Custom fuction using relative values
function myFlower(x, y, w, h) {
noStroke();
fill("#795548");
ellipse(x, y, w, h);
fill("#FFC107");
ellipse(x, y - h, w/2, h * 1.5);
ellipse(x, y + h, w/2, h * 1.5);
ellipse(x - w, y, w * 1.5, h/2);
ellipse(x + w, y, w * 1.5, h/2);
}DM2008
AY2526
PROGRAMMING FOR INTERACTION
Transformations
Computers draw shapes on a fixed grid with an origin at (0,0).
Transformations let us move, rotate, or scale that grid.
Instead of redrawing shapes with new numbers each time, we can transform the grid and draw as usual, with the shapes following the "new rules" of the canvas.
This makes it easier to position, rotate, or resize graphics without manually changing every single number.
WEEK 3
MODIFYING SHAPES
ARRAYS
FUNCTIONS
TRANSFORMS
COMBINATION
Transformations change the drawing space, not the shapes themselves. All transforms are calculated from the origin (0,0).
← A rect() drawn at 20,20
on a 100 by 100 canvas.
→ A rect() still drawn at 20,20 on a 100 by 100 canvas, and rotated by 45°.
0,0
0,0
what we see on screen
what we see on screen
DM2008
AY2526
PROGRAMMING FOR INTERACTION
Translate and Rotate
Once we understand that transformations move the grid itself, we can start applying them in code.
translate(x, y) shifts the grid’s origin to a new spot. From then on, everything you draw will be positioned relative to that new origin. Our shape is drawn at (0,0).
rotate(angle) spins the grid around its current origin, turning all shapes that follow. Because transforms stack, the order matters. If you translate first and then rotate, rotation happens at the new origin.
WEEK 3
MODIFYING SHAPES
ARRAYS
FUNCTIONS
TRANSFORMS
COMBINATION
By default, rotate() uses radians, not degrees. A quarter turn is PI/2. If you prefer degrees, use angleMode(DEGREES) or radians(degrees).
let angle = 0;
function setup() {
createCanvas(400, 400);
rectMode(CENTER);
}
function draw() {
background(220);
// a rectangle drawn normally
fill(200);
rect(width/2, height/2, 100, 50);
// apply transformations
translate(width/2, height/2); // move origin to the canvas center
rotate(angle); // rotate by our variable
fill(100, 200, 250);
rect(0, 0, 100, 50); // drawn at the new origin, rotated
// increment angle each frame
angle += 0.02;
}No AI guidance allowed
DM2008
AY2526
PROGRAMMING FOR INTERACTION
Scale
Scaling lets us stretch or shrink the grid.
When we write scale(x, y), everything drawn after that is scaled in the x and y
directions. A value larger than 1 makes things bigger. A value between 0 and 1
makes things smaller. Negative values flip the drawing across that axis.
Because we’re scaling the drawing space, stroke weights also scale up or down; something to keep in mind.
Notice that once we scale, the effect applies to everything that follows as well.
WEEK 3
MODIFYING SHAPES
ARRAYS
FUNCTIONS
TRANSFORMS
COMBINATION
We will next learn how we can limit transformations so they do not affect everything indiscriminately.
function setup() {
createCanvas(400, 400);
rectMode(CENTER);
}
function draw() {
background(220);
// normal rectangle
fill(200);
rect(width/3, height/2, 50, 50);
// scaled rectangle
translate(2*width/3, height/2);
scale(1.5, 0.5); // stretch wider, shrink vertically
fill(100, 200, 250);
rect(0, 0, 50, 50);
// this rectangle is ALSO scaled
fill(250, 150, 100);
rect(100, 100, 50, 50);
}No AI guidance allowed
DM2008
AY2526
PROGRAMMING FOR INTERACTION
Push and Pop
In arrays, we learned .push() as a way to add an item to the end of a list.
But here, push() means something completely different. In the drawing context, push() saves the current state of the canvas — things like translations, rotations, scales, colors, and stroke weights.
Later, when we call pop(), those settings are restored, as if the transform never happened. This is useful when we want a transform to only affect one shape, without messing up everything else that follows.
WEEK 3
MODIFYING SHAPES
ARRAYS
FUNCTIONS
TRANSFORMS
COMBINATION
Think of push() and pop() as “brackets” that contain or limit transformations. They are always called together as a pair.
function setup() {
createCanvas(400, 400);
rectMode(CENTER);
}
function draw() {
background(220);
// normal rectangle
fill(200);
rect(width/3, height/2, 50, 50);
// scaled rectangle (contained with push/pop)
push(); // save state
translate(2*width/3, height/2);
rotate(radians(45));
scale(1.5, 0.5);
fill(100, 200, 250);
rect(0, 0, 50, 50); // only this is scaled & rotated
pop(); // restore state
// unaffected rectangle
fill(250, 150, 100);
rect(width/2, 100, 50, 50);
}No AI guidance allowed
DM2008
AY2526
PROGRAMMING FOR INTERACTION
Activity 3b
BRIEF
REFERENCE
OUTPUT
One Function Wonder
Write one custom function that draws something simple (like a small graphic, icon, or composite shape).
Your function should take at least one parameter (e.g. position, size, color, or rotation). Call your function in multiple places with different values to see variation.
15 MIN
WEEK 3
ORGANIZING CODE

DM2008
AY2526
PROGRAMMING FOR INTERACTION
BRIEF
REFERENCE
OUTPUT
functions
transforms
Useful Code
You can strategically use push() and pop() to save and restore appearances.
Try calling your custom function within a for() loop to create a pattern.
No AI guidance allowed
WEEK 3
ORGANIZING CODE
Activity 3b
utility
Using the radians() method is preferable to altering how angles are computed.
DM2008
AY2526
PROGRAMMING FOR INTERACTION
BRIEF
REFERENCE
OUTPUT
Output
For homework and your own archival
File ➝ Download
deliverables
WEEK 3
ORGANIZING CODE
Activity 3b
Document your output by:
- Organizing every file in a folder on your computer
-
Saving your sketch's code and expanding the .zip
- Exporting images of your canvas with
saveCanvas() - Screen recording your generative/interactive outcomes
- Saving them with appropriate names
activity3b-image01.jpg
activity3b-video01.mp4
code folder
3 images
1 video (optional)
DM2008
AY2526
PROGRAMMING FOR INTERACTION
Arrays and Functions
So far, we have looked at arrays and functions separately. Arrays let us store
collections of values, and functions let
us package reusable instructions.
When we combine the two, we can build much more flexible sketches. Store data in an array, write a function to decide what to do with those items, then loop through the array to process everything in one go.
This pattern — data + function — is the foundation for many interactive systems, and it sets us up for building potentially more complex sketches.
WEEK 3
ORGANIZING CODE
ARRAYS
FUNCTIONS
TRANSFORMS
COMBINATION
Imagine arrays as “buckets of stuff” and functions as “what you want to do with that stuff.”
let palette = ["#f06449", "#009988", "#3c78d8"];
function setup() {
createCanvas(400, 400);
}
function draw() {
background(220);
// loop through array
for (let i = 0; i < palette.length; i++) {
drawCircle(i * 100 + 100, height/2, palette[i]);
}
}
// function uses data from array
function drawCircle(x, y, col) {
fill(col);
ellipse(x, y, 60);
}DM2008
AY2526
PROGRAMMING FOR INTERACTION
Activity 3c
BRIEF
OUTPUT
Painting App
Build a simple painting application using arrays, functions and transformations.
Store at least 3 brush types in an array and define each brush as its own function. Use keyboard input to switch brushes and draw on the canvas while the mouse button is held down.
50 MIN
WEEK 3
ORGANIZING CODE
DM2008
AY2526
PROGRAMMING FOR INTERACTION
BRIEF
OUTPUT
Output
For homework and your own archival
File ➝ Download
deliverables
WEEK 3
ORGANIZING CODE
Activity 3c
Document your output by:
- Organizing every file in a folder on your computer
-
Saving your sketch's code and expanding the .zip
- Exporting images of your canvas with
saveCanvas() - Screen recording your generative/interactive outcomes
- Saving them with appropriate names
activity3c-image01.jpg
activity3c-video01.mp4
code folder
2 images
1 video
DM2008
AY2526
PROGRAMMING FOR INTERACTION
WEEK 3
WRAPPING UP
Homework
HOMEWORK
TUTORIALS
Documentation
Activity 3a
Code folder
Minimum (1) screen recording
1
Activity 3b
Code folder
Minimum (3) still images
Your documentation should demonstrate your iterations
Please save images as jpeg and videos as mp4
Activity 3c
Code folder
Minimum (2) still images
Minimum (1) screen recording

DM2008
AY2526
PROGRAMMING FOR INTERACTION
Video Tutorials
HOMEWORK
TUTORIALS
1
2
3
4
5
WEEK 3
WRAPPING UP

DM2008
AY2526
PROGRAMMING FOR INTERACTION
Object-oriented Programming (Part I)
4
From individual shapes to autonomous actors: classes bundle data and behaviour into objects, while arrays of objects bring systems of many moving parts to life.
Last Session
Last session, we explored arrays as a way to store multiple values, and how looping through them allows us to display and update collections of data.
We then looked at functions as reusable blocks of code, using parameters to customize behaviour. Briefly touching on transformations, we looked at how translate, rotate and scale affects shapes.
We wrapped with three studies: an array sampler that looped through its items, a custom function powered drawing, and a simple painting app that combined arrays, functions, and transformations into an interactive sketch.
DM2008
AY2526
PROGRAMMING FOR INTERACTION
WEEK 4
WARM UP
PREVIOUSLY
OBJECTIVES
DISCUSSION
Last Session
DM2008
AY2526
PROGRAMMING FOR INTERACTION
Arrays
let arrayName = [ ]
arrays are created with square brackets, holding many different types of items
arrayName = [0, 1, 2, 3]
the position of an item in an array is its index—the first items is always index 0.
arrayName.push(item)
add new items declared in the parenthesis to the end of an array
arrayName.splice(index, count)
remove one or more items from the array, starting at the chosen index
WEEK 4
WARM UP
PREVIOUSLY
OBJECTIVES
DISCUSSION
arrayName.length
returns the total number of items inside the array, updating as contents change
Last Session
DM2008
AY2526
PROGRAMMING FOR INTERACTION
WEEK 4
WARM UP
PREVIOUSLY
OBJECTIVES
DISCUSSION
Functions
function functionName() {}
define a named, reusable block of code that will execute its containing instructions
functionName (x, y, s)
pass parameters so the function can adapt its behavior using different inputs
Last Session
DM2008
AY2526
PROGRAMMING FOR INTERACTION
Transformations
PREVIOUSLY
OBJECTIVES
DISCUSSION
WEEK 4
WARM UP
translate(x, y)
move the grid’s origin (0,0) so shapes are now drawn from this new position
scale(x, y)
stretch or shrink the grid horizontally and vertically (also affects stroke weight)
rotate(angle)
spins the grid around its origin, turning everything by the given angle value
push(), pop()
saves and restores states, such that transformations only affect selected shapes within the pair
radians(degree)
convert degrees into radians, the unit rotate() uses for angles by default
This Session
DM2008
AY2526
PROGRAMMING FOR INTERACTION
PREVIOUSLY
OBJECTIVES
DISCUSSION
Objects let you package properties (position, size) with methods (move, display) so each "thing" in your sketch can manage itself.
Classes define the overall structure of an object using a constructor and methods, making it easy to create many instances.
By combining classes and arrays, you can create systems of independently moving and changing elements, without needing repeated functions and variables.
WEEK 4
WARM UP
1
In this session, you will
2
3
4

DM2008
AY2526
PROGRAMMING FOR INTERACTION
PREVIOUSLY
OBJECTIVES
DISCUSSION
Discussion Time
Through code, simple systems can feel dynamic, responsive, and almost alive.
- Break into groups of 3 to 4.
-
Discuss how various interactive works make characters or systems that seem to have their own life and/or agency.
-
Regroup to share insights with the class.
10 MIN
What makes an object feel autonomous rather than static?
How do properties and behaviors combine to suggest life or intention?
WEEK 4
WARM UP

DM2008
AY2526
PROGRAMMING FOR INTERACTION
Object-oriented Programming
Objects are a useful way for programmers to group related data and actions into a single package.
Instead of having variables and functions scattered everywhere, with multiple ones for each new shape or design, we can consolidate them in one data structure.
A Class is the master template: it describes all the properties an object should have and how it should behave. An Object is created from this template, and it carries its own individually unique values for each property.
WEEK 4
BLUEPRINTS & SYSTEMS
OBJECTS
CLASSES
PROPERTIES
METHODS
No AI guidance allowed
Think of a class as a recipe and each object as a dish baked from it. The recipe stays the same, but each dish can have its own unique details.
properties
methods
class
width
height
speed
show()
update()
checkEdges()
properties
methods
object
width = 10
height = 20
speed = 55
show()
update()
checkEdges()
DM2008
AY2526
PROGRAMMING FOR INTERACTION
Classes in JavaScript
OBJECTS
CLASSES
PROPERTIES
METHODS
A class in JavaScript is like a template or blueprint for creating new objects.
By convention, we name classes using UpperCamelCase so they are easy to spot in our code. Objects, variables & functions on the other hand, usually use camelCase.
Every class begins with a special function called the constructor(). It sets up the initial "shape" of the object — defining the default properties it should start with when a new instance is created. In this example, the instance is assigned to chocChip.
Learn more here
// Defining a Class
class Cookie {
constructor(flavor, sz) {
this.flavor = flavor;
this.sz = sz;
}
}
// Making an object (instance) of Cookie
let chocChip = new Cookie("choc-chip", 10);
console.log(chocChip);The constructor() is like a setup step that runs automatically whenever you make a new object from a particular class.
WEEK 4
BLUEPRINTS & SYSTEMS
DM2008
AY2526
PROGRAMMING FOR INTERACTION
Properties in Classes
OBJECTS
CLASSES
PROPERTIES
METHODS
Learn more here
Within a class, we can give each potential object its own set of properties. We can achieve this using the this keyword.
this refers to the object being created right now, and .propertyName assigns a value to the property being defined.
When we want these properties to have unique values for each new object, we pass them into the constructor() and assign them with this.propertyName.
Each object now carries its own properties, despite coming from the same class.
// Defining a Class
class Cookie {
constructor(flavor, sz) {
// this refers to the new cookie
// we are making
this.flavor = flavor;
this.sz = sz;
}
}
// Making an object (instance) of Cookie
let chocChip = new Cookie("choc-chip", 10);
console.log(chocChip);this lets each cookie "baked" from the same recipe still have its own unique flavor and size.
WEEK 4
BLUEPRINTS & SYSTEMS
DM2008
AY2526
PROGRAMMING FOR INTERACTION
Methods in Classes
OBJECTS
CLASSES
PROPERTIES
METHODS
Learn more here
Methods are simply just functions that live inside of a class. They describe what an object can do.
Within a method, we use this to read or change the object’s own properties. For example, a show() method can draw a cookie using its own position, size, and flavor to determine its visual design.
To run a method, we call it on an object with dot syntax:
objectName.methodName(params)
let cookie;
function setup() {
createCanvas(400, 400);
noStroke();
// make one cookie object
cookie = new Cookie("choc-chip", 80, width/2, height/2);
}
function draw() {
background(230);
cookie.show(); // call the method on our object
}
// Class definition
class Cookie {
constructor(flavor, sz, x, y) {
this.flavor = flavor;
this.sz = sz;
this.x = x;
this.y = y;
}
// Method: draw the cookie using its own data
show() {
if (this.flavor == "choc-chip") {
fill(196, 146, 96);
} else {
fill(220, 180, 120);
}
ellipse(this.x, this.y, this.sz);
// a few "chips" placed relative to size
const s = this.sz * 0.1;
fill(60);
ellipse(this.x - this.sz*0.22, this.y - this.sz*0.15, s);
ellipse(this.x + this.sz*0.18, this.y - this.sz*0.10, s);
ellipse(this.x - this.sz*0.05, this.y + this.sz*0.12, s);
ellipse(this.x + this.sz*0.20, this.y + this.sz*0.18, s);
}
}Constructors run automatically; methods only run when you call them. If a method needs extra info, you can give it parameters like any other function.
WEEK 4
BLUEPRINTS & SYSTEMS
DM2008
AY2526
PROGRAMMING FOR INTERACTION
Activity 4a
BRIEF
REFERENCE
OUTPUT
Bake a Cookie
Modify a sketch in p5.js that implements a Cookie class. The class should store the cookie’s flavor, size, and position, and include a show() method to display it.
Add keyboard interaction so the cookie can move around the canvas, and a mouse click action that randomizes its flavor between a minimum of three options.
30 MIN
WEEK 4
BLUEPRINTS & SYSTEMS

DM2008
AY2526
PROGRAMMING FOR INTERACTION
Activity 4a
BRIEF
REFERENCE
OUTPUT
classes
Useful Code
loops & functions
events
WEEK 4
BLUEPRINTS & SYSTEMS
DM2008
AY2526
PROGRAMMING FOR INTERACTION
Activity 4a
BRIEF
REFERENCE
OUTPUT
Output
For homework and your own archival
Document your output by:
- Organizing every file in a folder on your computer
-
Saving your sketch's code and expanding the .zip
- Screen recording your generative/interactive outcomes
- Saving them with appropriate names
activity4a-video01.mp4
File ➝ Download
deliverables
code folder
1 video
WEEK 4
BLUEPRINTS & SYSTEMS
DM2008
AY2526
PROGRAMMING FOR INTERACTION
Multiple Object Instances
Within a program, we rarely stop at just one object. Most of the time, we want to create many instances—like a batch of cookies, a flock of birds, or a field of bouncing balls.
Each instance comes from the same exact class, but carries unique properties.
By grouping them inside an array, we can loop through the list and update or display every object without repeating code. We can use this to build systems where many things change or interact simultaneously.
INSTANCES
POPULATING
MANAGING
Multiple instances let us build collections of objects that feel alive together: like a flock, a swarm, or a field of moving shapes.
properties
methods
class
color
position
show()
update()
array[]
object instance 0 from class
object instance 1 from class
object instance 2 from class
object instance 3 from class
object instance 4 from class
WEEK 4
BLUEPRINTS & SYSTEMS
DM2008
AY2526
PROGRAMMING FOR INTERACTION
Objects in Arrays
Instead of creating each new instance of an object by hand, we can use a loop to fill an array with many new objects at once.
When the loop runs, it will create a new instance from the specified class and add it into the desired array. This way, we skip the need to for cookie1, cookie2, cookie3—the loop does the repetitive work for us.
Once filled, the array becomes a container holding all the object instances which we can then display, move, or update together.
// An empty array to hold cookies
let cookies = [];
function setup() {
createCanvas(400, 400);
// Use a loop to make 10 cookies
for (let i = 0; i < 10; i++) {
// set a random value for x, y and size
let x = random(width);
let y = random(height);
let sz = random(30, 80);
// use those random values when making each cookie
cookies.push(new Cookie("chocolate", sz, x, y));
}
}
function draw() {
background(220);
// Loop through array to show each cookie
for (let i = 0; i < cookies.length; i++) {
cookies[i].show();
}
}
class Cookie {
constructor(flavor, sz, x, y) {
this.flavor = flavor;
this.sz = sz;
this.x = x;
this.y = y;
}
show() {
fill(196, 146, 96);
ellipse(this.x, this.y, this.sz);
}
}Arrays in this context, give us a single “basket” for many objects, making them easy to keep track of and manage as a single group.
WEEK 4
BLUEPRINTS & SYSTEMS
INSTANCES
POPULATING
MANAGING
DM2008
AY2526
PROGRAMMING FOR INTERACTION
Changes over Time
Objects do not have to remain static in our sketches. We can give them properties that change over time, like speed, direction, size, and even color.
To make these changes happen, we can write methods that update the object’s properties each frame. By calling these methods inside draw(), each object manages its own behavior.
This makes it easy to animate and control many objects at once, without writing separate code for each one.
let cookies = [];
function setup() {
createCanvas(400, 400);
// Create cookies with random positions and speeds
for (let i = 0; i < 10; i++) {
let x = random(width);
let y = random(height);
let sz = random(30, 60);
let spd = random(1, 3);
cookies.push(new Cookie("chocolate", sz, x, y, spd));
}
}
function draw() {
background(220);
for (let i = 0; i < cookies.length; i++) {
cookies[i].move(); // update position
cookies[i].show(); // display
}
}
class Cookie {
constructor(flavor, sz, x, y, spd) {
this.flavor = flavor;
this.sz = sz;
this.x = x;
this.y = y;
this.spd = spd;
}
move() {
this.x += this.spd; // move horizontally
if (this.x > width) {
this.x = 0; // wrap around
}
}
show() {
if (this.flavor == "chocolate"){
fill(196, 146, 96);
} else {
fill(0, 0, 0);
}
ellipse(this.x, this.y, this.sz);
}
}Objects carry their own instructions for how they change, so each one feels “alive” even when managed in a big group.
WEEK 4
BLUEPRINTS & SYSTEMS
INSTANCES
POPULATING
MANAGING
DM2008
AY2526
PROGRAMMING FOR INTERACTION
Objects with Lifespan
Objects do not always need to live forever either. We can give them a lifespan — a property that counts down over time.
When the lifespan runs out (like a cookie shrinking to nothing), the object can remove itself from the array.
This keeps our sketch clean, prevents arrays from filling endlessly, and models how things in the real world appear and disappear.
let cookies = [];
function setup() {
createCanvas(400, 400);
// Make a batch of cookies
for (let i = 0; i < 10; i++) {
let x = random(width);
let y = random(height);
let sz = random(30, 60);
cookies.push(new Cookie("chocolate", sz, x, y));
}
}
function draw() {
background(220);
// Loop backwards so splice() doesn’t skip items
for (let i = cookies.length - 1; i >= 0; i--) {
cookies[i].shrink();
cookies[i].show();
if (cookies[i].sz <=0) {
cookies.splice(i, 1);
}
}
}
class Cookie {
constructor(flavor, sz, x, y) {
this.flavor = flavor;
this.sz = sz;
this.x = x;
this.y = y;
}
shrink() {
this.sz -= 0.3; // shrink each frame
}
show() {
fill(196, 146, 96);
ellipse(this.x, this.y, this.sz);
}
}Arrays and objects together let us build complex systems that grow and shrink dynamically.
WEEK 4
BLUEPRINTS & SYSTEMS
INSTANCES
POPULATING
MANAGING
DM2008
AY2526
PROGRAMMING FOR INTERACTION
Activity 4b
BRIEF
OUTPUT
Objects in Motion
Design your own class to create a system of objects that move or change over time. Use an array to manage your instances.
Ensure that your objects have at least one property that changes as the sketch runs (e.g. size, speed color) and that it has at least one additional method beyond show(), which modifies your object.
60 MIN
WEEK 4
BLUEPRINTS & SYSTEMS
DM2008
AY2526
PROGRAMMING FOR INTERACTION
Activity 4b
BRIEF
OUTPUT
Output
For homework and your own archival
Document your output by:
- Organizing every file in a folder on your computer
-
Saving your sketch's code and expanding the .zip
- Screen recording your generative/interactive outcomes
- Saving them with appropriate names
activity4b-video01.mp4
File ➝ Download
deliverables
code folder
1 video
WEEK 4
BLUEPRINTS & SYSTEMS
DM2008
AY2526
PROGRAMMING FOR INTERACTION
WEEK 4
WRAPPING UP
Homework
HOMEWORK
TUTORIALS
Your documentation should demonstrate your iterations
Please save images as jpeg and videos as mp4
Research Assignment
For next week's discussion, please familiarize yourself with the classic games of Pong (1972) and Flappy Bird (2013). Think about how various elements within each game could potentially become their own classes.
Documentation
Activity 4a
Code folder
Minimum (1) screen recording
1
2
Activity 4b
Code folder
Minimum (1) screen recording

DM2008
AY2526
PROGRAMMING FOR INTERACTION
Video Tutorials
HOMEWORK
TUTORIALS
1
2
3
4
WEEK 4
WRAPPING UP

DM2008
AY2526
PROGRAMMING FOR INTERACTION
Object-oriented Programming (Part II)
5
Objects take on agency as they collide, change state, and follow rules, laying the groundwork for simple games and responsive systems.
Last Session
In the previous session, we learned how objects
can group related data and behaviors together, letting us manage them as a single package.
We then looked at classes as blueprints for creating many objects with the same structure, using properties and methods to define what each object has and what it can do.
From there, we created multiple instances of objects and stored them in arrays, looping through them to display or update whole systems at once. We ended the session by creating a brand new class and defining our own characteristics for it.
DM2008
AY2526
PROGRAMMING FOR INTERACTION
WEEK 5
WARM UP
PREVIOUSLY
OBJECTIVES
Last Session
DM2008
AY2526
PROGRAMMING FOR INTERACTION
Classes
class ClassName {}
defines a class as a reusable template for creating objects from (UpperCamelCase)
constructor(params)
sets up the initial "shape" of the object whenever a new instance is made
methodName() {}
adds behavior to the object: functions that every instance is able to call
new ClassName(params)
creates an object from a class, passing in any values defined in the parentheses
this.property = value
gives each object its own unique data, even when made from the same class.
WEEK 5
WARM UP
PREVIOUSLY
OBJECTIVES
This Session
DM2008
AY2526
PROGRAMMING FOR INTERACTION
PREVIOUSLY
OBJECTIVES
Collisions let objects respond when they overlap or touch, adding a sense of physical interaction.
States define different modes of behavior for an object — for example objects can be dead or alive, moving or stopped.
Combining collisions, states, and arrays provides the building blocks of simple game logic, where many objects act and interact together.
1
In this session, you will
2
3
4
WEEK 5
WARM UP

DM2008
AY2526
PROGRAMMING FOR INTERACTION
Collision Detection
Objects don’t just exist in isolation — they often need to interact with one another.
A common way to do this is through Collision Detection, where our code checks if two objects are overlapping.
By giving objects methods that compare their positions and sizes, we can detect collisions and trigger new behaviors. This allows objects to interact dynamically, rather than existing in isolation. They can have reactions such as bouncing away or "dying", making sketches feel alive.
WEEK 5
DYNAMIC SYSTEMS
COLLISIONS
VECTORS
STATES
GAME LOGIC
Collisions are the foundation of many interactive systems, from playful sketches to complex games.
distance > radius sum → not colliding
distance < radius sum → is colliding
radius
radius
radius
DM2008
AY2526
PROGRAMMING FOR INTERACTION
Circular Collisions
To detect when two circles are colliding, we can compare the distance between their centers to the sum of their radii.
We use the radius and not the diameter which is usually how we determine the size of an ellipse in our code. If the distance is less than this sum, then we can be sure the circles are overlapping.
With dist(x1, y1, x2, y2), we can calculate the distance between any two points, making collisions straightforward.
let radiusA = 30;
let radiusB = 50;
function setup() {
createCanvas(500, 350);
noStroke();
}
function draw() {
background(232);
// calculate distance between positions
let d = dist(mouseX, mouseY, width/2, height/2);
// check for collisions
if (d < radiusA + radiusB) {
fill(220, 60, 60); // red when colliding
} else {
fill(20, 130, 155); // teal when not colliding
}
ellipse(width/2, height/2, radiusB * 2);
// draw mouse circle
fill(255, 170, 70);
ellipse(mouseX, mouseY, radiusA * 2);
// log values in console
console.log(d, radiusA + radiusB);
}This simple approach works well for circular objects. For rectangular ones, we will need a few more checks.
WEEK 5
DYNAMIC SYSTEMS
COLLISIONS
VECTORS
STATES
GAME LOGIC
No AI guidance allowed
DM2008
AY2526
PROGRAMMING FOR INTERACTION
Rectangular Collisions
Not all collisions involve circles. Sometimes we want to check if rectangles or other shapes bump into each other.
For rectangles, we can compare their x, y, width, and height to see if they overlap.
This method mostly works, but it starts getting more complicated with angled or irregular shapes. It also lacks precision.
This is why many games and interactive systems simplify everything into circles for collision, keeping the math clean, flexible and to the absolute minimum.
let rectX = 150;
let rectY = 100;
let rectW = 100;
let rectH = 80;
function setup() {
createCanvas(400, 300);
noStroke();
}
function draw() {
background(230);
// check overlap between rectangle and mouse point
if (
mouseX > rectX &&
mouseX < rectX + rectW &&
mouseY > rectY &&
mouseY < rectY + rectH
) {
fill(220, 60, 60); // red on collision
} else {
fill(20, 130, 155); // teal otherwise
}
rect(rectX, rectY, rectW, rectH);
// draw mouse circle
fill(255, 170, 70);
ellipse(mouseX, mouseY, 60);
}You can approximate an imaginary circle with a radius that contains your rectangular/irregular objects.
WEEK 5
DYNAMIC SYSTEMS
COLLISIONS
VECTORS
STATES
GAME LOGIC
DM2008
AY2526
PROGRAMMING FOR INTERACTION
Vectors
So far, we’ve been moving shapes by adjusting x and y separately, using separate variables for each axis.
But movement is really about combining both—speed and direction—at once. That’s where vectors come in handy. They store two values together, an x and a y.
In p5.js, the createVector() method makes it easy to bundle these into one object, so we can manage the position, velocity, and acceleration more clearly. We use .x and .y to access a vector's values.
let position;
let velocity;
let size = 40;
function setup() {
createCanvas(400, 300);
// start at center
position = createVector(width/2, height/2);
// give it some speed and direction
velocity = createVector(2, 1.5);
}
function draw() {
background(230);
// draw the moving circle
noStroke();
fill(20, 130, 155);
ellipse(position.x, position.y, size);
// update position by velocity
position.add(velocity);
// wrap around canvas edges
if (position.x > width + size/2) {position.x = -size/2;}
if (position.x < -size/2) {position.x = width + size/2;}
if (position.y > height + size/2) {position.y = -size/2;}
if (position.y < -size/2) {position.y = height + size/2;}
}Think of a vector as a little arrow that points where something is going, with a certain length for its speed.
WEEK 5
DYNAMIC SYSTEMS
COLLISIONS
VECTORS
STATES
GAME LOGIC
No AI guidance allowed
DM2008
AY2526
PROGRAMMING FOR INTERACTION
Magnitude and Heading
Vectors describe motion both by how much
(magnitude) and which way (heading).
Magnitude is the length of the vector, also referred to as the speed of movement.
Heading is the angular direction that the vector is pointing in.
In p5.js, we can get these values directly:
myVector.mag() → length
myVector.heading() → radians
This makes it easy to reason about the motion and orientation of a vector without juggling raw x/y numbers.
let position;
let velocity;
let size = 40;
function setup() {
createCanvas(400, 300);
position = createVector(width/2, height/2);
velocity = createVector(3, 2); // direction + speed
}
function draw() {
background(230);
// draw circle
fill(20, 130, 155);
ellipse(position.x, position.y, size);
// update position using velocity
position.add(velocity);
// wrap around edges
if (position.x > width + size/2) {position.x = -size/2;}
if (position.x < -size/2) {position.x = width + size/2;}
if (position.y > height + size/2) {position.y = -size/2;}
if (position.y < -size/2) {position.y = height + size/2;}
// log magnitude and heading to console
console.log("Mag: " + velocity.mag(), "Hdg: " + velocity.heading());
}
function mousePressed() {
// randomly change velocity on click
velocity = createVector(random(-3, 3), random(-2, 2));
}WEEK 5
DYNAMIC SYSTEMS
COLLISIONS
VECTORS
STATES
GAME LOGIC
No AI guidance allowed
DM2008
AY2526
PROGRAMMING FOR INTERACTION
Set Magnitude and Heading
Vectors also come with built-in helpers to change their speed and direction without doing the complex math yourself.
myVector.setMag() → speed
myVector.setHeading() → direction
To avoid becoming an advanced math class, we will just do a quick demo here.
If this sparks your interest, you can dive deeper into vector math on your own. There is a video series on p5.js vectors
linked at the end of this session's slides.
let pos;
let vel;
let size = 40;
function setup() {
createCanvas(400, 400);
pos = createVector(width/2, height/2);
vel = createVector(2, 0); // start moving right
}
function draw() {
background(230);
fill(255, 150, 50);
ellipse(pos.x, pos.y, size);
pos.add(vel);
// wrap around edges
if (pos.x > width) pos.x = 0;
if (pos.x < 0) pos.x = width;
if (pos.y > height) pos.y = 0;
if (pos.y < 0) pos.y = height;
}
// Press keys to alter vector
function keyPressed() {
if (key === '1') {
vel.setMag(5); // faster
} else if (key === '2') {
vel.setMag(1); // slower
} else if (key === '3') {
vel.setHeading(PI/4); // diagonally down-right
} else if (key === '4') {
vel.setHeading(-PI/4); // diagonally up-right
}
}WEEK 5
DYNAMIC SYSTEMS
COLLISIONS
VECTORS
STATES
GAME LOGIC
No AI guidance allowed
DM2008
AY2526
PROGRAMMING FOR INTERACTION
Vector Collisions
When an object using vectors collides with something in its path, we can change its direction by reversing its velocity vector.
This creates a simple “bounce” effect, not unlike what we were already able to achieve previously with just variables.
In this example, a moving circle bounces off a stationary circle in the center. To keep it in play, we also wrap it back around the screen when it goes off the edge. We do all of these position changes using vectors.
let pos, vel;
let rMoving = 20;
let rStationary = 40;
function setup() {
createCanvas(500, 350);
pos = createVector(100, height/2);
vel = createVector(3, 0.5);
noStroke();
}
function draw() {
background(240);
// stationary circle in center
fill(200);
ellipse(width/2, height/2, rStationary * 2);
// moving circle
fill(50, 150, 200);
ellipse(pos.x, pos.y, rMoving * 2);
// move the circle
pos.add(vel);
// check collision with center circle
let d = dist(pos.x, pos.y, width/2, height/2);
if (d < rMoving + rStationary) {
vel.x *= -1; // reverse direction
vel.y *= -1;
}
// wrap around screen edges
if (pos.x > width) {pos.x = 0;}
if (pos.x < 0) {pos.x = width;}
if (pos.y > height) {pos.y = 0;}
if (pos.y < 0) {pos.y = height;}
}WEEK 5
DYNAMIC SYSTEMS
COLLISIONS
VECTORS
STATES
GAME LOGIC
This is a simplified approach—realistic physics would require checking both objects’ vectors and calculating angles, which we will leave aside for now.
DM2008
AY2526
PROGRAMMING FOR INTERACTION
Objects, Vectors, Collisions
Up until now, we’ve tested collisions with just one moving circle and one target. But when we’re working with classes, each object can carry its own properties like its position, size, and velocity.
Again, by storing multiple objects in an array, we can update them all each frame, and even let each one check if it’s currently colliding with the others.
This way, collisions aren’t just something we test once per object — they become part of how the objects live in the sketch, constantly interacting with each other and their environment.
let balls = [];
function setup() {
createCanvas(400, 400);
// make 2 balls to start
balls.push(new Ball(100, 200));
balls.push(new Ball(300, 200));
}
function draw() {
background(230);
// update & display each ball
for (let i = 0; i < balls.length; i++) {
balls[i].move();
balls[i].show();
// check collision with others
balls[i].checkCollision(balls);
}
}
class Ball {
constructor(x, y) {
this.r = random(30, 40);
this.pos = createVector(x, y);
this.vel = createVector(random(-2, 2), random(-2, 2));
}
move() {
this.pos.add(this.vel);
// wrap around edges
if (this.pos.x < -this.r) {this.pos.x = width + this.r;}
if (this.pos.x > width + this.r) {this.pos.x = -this.r;}
if (this.pos.y < -this.r) {this.pos.y = height + this.r;}
if (this.pos.y > height + this.r) {this.pos.y = -this.r;}
}
show() {
fill(100, 180, 220);
noStroke();
ellipse(this.pos.x, this.pos.y, this.r * 2);
}
checkCollision(others) {
for (let i = 0; i < others.length; i++) {
// Make sure we do not compare the ball to itself
if (others[i] !== this) {
let other = others[i];
let d = dist(this.pos.x, this.pos.y, other.pos.x, other.pos.y);
if (d < this.r + other.r) {
push();
stroke(200, 60, 60);
strokeWeight(4);
noFill();
ellipse(this.pos.x, this.pos.y, this.r * 2); // highlight on collision
pop();
}
}
}
}
}
WEEK 5
DYNAMIC SYSTEMS
COLLISIONS
VECTORS
STATES
GAME LOGIC
DM2008
AY2526
PROGRAMMING FOR INTERACTION
Activity 5a
BRIEF
REFERENCE
OUTPUT
Colliding Circles
Create a sketch in p5.js that implements a Ball class. The class should store each ball's size, and utilize vectors for its position and movements.
Check the distance between the balls with dist(). When they collide, show some kind of feedback — like a color change, bounce, or a shift in size.
30 MIN
WEEK 5
DYNAMIC SYSTEMS
DM2008
AY2526
PROGRAMMING FOR INTERACTION
BRIEF
REFERENCE
OUTPUT
collisions & vectors
Useful Code
Activity 5a
WEEK 5
DYNAMIC SYSTEMS
classes
loops & functions
DM2008
AY2526
PROGRAMMING FOR INTERACTION
BRIEF
REFERENCE
OUTPUT
Output
For homework and your own archival
Document your output by:
- Organizing every file in a folder on your computer
-
Saving your sketch's code and expanding the .zip
- Screen recording your generative/interactive outcomes
- Saving them with appropriate names
activity5a-video01.mp4
File ➝ Download
deliverables
code folder
1 video
Activity 5a
WEEK 5
DYNAMIC SYSTEMS
DM2008
AY2526
PROGRAMMING FOR INTERACTION
State Management
State Management is all about keeping track of what mode your sketch is in and using that information to control behavior.
Rather than having everything always run, you can use states to turn features on or off, or to switch between different modes.
States are often stored in programs as Boolean Variables (true or false), which act like simple flags that guide how the rest of the code should behave.
WEEK 5
DYNAMIC SYSTEMS
COLLISIONS
VECTORS
STATES
GAME LOGIC
Think of states as “on/off switches” for your sketch — small variables that decide what runs, and when.
draw()
Boolean Variable
true
false
State A
State B
draw() loop
DM2008
AY2526
PROGRAMMING FOR INTERACTION
Boolean Variables
Boolean Variables are the simplest way to keep track of state in your sketch. They can only hold two values: true or false.
By declaring your own Boolean variables, you can set flags that decide when or whether something should happen.
We can also toggle a Boolean back and forth — for example, switching between true and false each time a key is pressed. This gives us an easy way to turn behaviors on and off inside draw().
We can use the ! NOT operator to set a flag to be the opposite of its current value. It is quicker and more convenient.
let isOn = false;
function setup() {
createCanvas(400, 400);
}
function draw() {
background(220);
if (isOn) {
fill(0, 200, 100);
ellipse(width/2, height/2, 100);
} else {
fill(200, 50, 50);
rect(width/2 - 50, height/2 - 50, 100, 100);
}
}
function keyPressed() {
isOn = !isOn; // toggle true/false
// if (isOn == true) {
// is0n = false;
// }
// if (isOn == false) {
// isOn = true;
// }
}WEEK 5
DYNAMIC SYSTEMS
COLLISIONS
VECTORS
STATES
GAME LOGIC
No AI guidance allowed
DM2008
AY2526
PROGRAMMING FOR INTERACTION
State inside Classes
Objects don’t only carry properties like position or size, they can also hold state.
By giving each object its own Boolean variable, we can control whether it should display, move, or interact.
This allows us to gate behavior inside the object’s methods:
If isActive is true, the object draws itself or moves on screen. If isActive is false, it “turns off” and ignores updates.
In this way, states become local to each object, instead of just global switches — each on decides if it's "on" or "off".
let ball;
function setup() {
createCanvas(400, 400);
ball = new Ball(width/2, height/2);
}
function draw() {
background(230);
ball.move();
ball.show();
}
function mousePressed() {
ball.toggle(); // toggle state with mouse
}
class Ball {
constructor(x, y) {
this.pos = createVector(x, y);
this.r = 30;
this.isActive = true; // state variable
}
move() {
if (this.isActive) {
this.pos.add(random(-2, 2), random(-2, 2));
}
}
show() {
if (this.isActive) {
fill(100, 180, 220);
} else {
fill(180); // greyed out when inactive
}
ellipse(this.pos.x, this.pos.y, this.r * 2);
}
toggle() {
this.isActive = !this.isActive; // flip state
}
}WEEK 5
DYNAMIC SYSTEMS
COLLISIONS
VECTORS
STATES
GAME LOGIC
DM2008
AY2526
PROGRAMMING FOR INTERACTION
Collision-driven States
Collisions are not restricted to just changing visuals; they can also change the state of your sketch or its objects.
When two objects collide, you can use that event as a trigger to toggle booleans, update variables, or even stop the sketch.
This makes collisions more meaningful: instead of just bouncing or changing color, they can affect the “rules” of the system.
let ball;
function setup() {
createCanvas(400, 400);
ball = new Ball(200, 200, 40);
noStroke();
}
function draw() {
background(230);
ball.show();
// check collision with mouse circle
let d = dist(mouseX, mouseY, ball.pos.x, ball.pos.y);
if (d < ball.r + 20) {
ball.alive = false; // update state
}
// draw mouse circle
fill(255, 150, 80);
ellipse(mouseX, mouseY, 40);
}
class Ball {
constructor(x, y, r) {
this.pos = createVector(x, y);
this.r = r;
this.alive = true;
}
show() {
if (this.alive) {
fill(100, 180, 220);
ellipse(this.pos.x, this.pos.y, this.r * 2);
}
}
}WEEK 5
DYNAMIC SYSTEMS
COLLISIONS
VECTORS
STATES
GAME LOGIC
In this context, collisions serve as signals. The signal says “something happened” and your code decides what to do next with that information.
DM2008
AY2526
PROGRAMMING FOR INTERACTION
Game Logic
Game Logic gives structure to interactive systems. It defines how your sketch keeps track of progress, enforces rules, and decides outcomes.
Common elements include:
- Score-keeping to measure success.
- Win/loss states to signal game is over.
- Collisions that trigger changes, like losing a life or gaining points.
-
Timers that decide a round's duration
Even the simplest games use these mechanics to feel alive and engaging.
WEEK 5
DYNAMIC SYSTEMS
COLLISIONS
VECTORS
STATES
GAME LOGIC
Recall the last simple game you played. Where did it keep score, decide when you lost, or tell you the game was over? That’s game logic in action.
Player Actions
Game Logic
State Changes
Visual Feedback
check rules
update score, check lives
DM2008
AY2526
PROGRAMMING FOR INTERACTION
WEEK 5
DYNAMIC SYSTEMS
COLLISIONS
VECTORS
STATES
GAME LOGIC
Discussion Time
Behind every simple game is a set of rules that tracks progress, enforces limits, and decides outcomes.
- Break into groups of 3 to 4.
-
Discuss what game logic you noticed in Pong and Flappy Bird. How do they keep score, decide win/loss and handle collisions?
-
Regroup to share key takeaways and learnings with the class.
15 MIN
In Pong, what rules keep the rally going, and what ends a round?
In Flappy Bird, how are collisions with pipes or the ground handled?
What do both games share in their core logic? Where do they differ?

DM2008
AY2526
PROGRAMMING FOR INTERACTION
Mini Project
BRIEF
OUTPUT
Clone A Classic Game
Either individually or in a pair, select one of the two starter scaffolds below to begin creating your own version of the classic games: Pong or Flappy Bird.
Complete the implementation of required classes or rewrite your own. Ensure your game has states and tracks score. Focus on making a controllable actor for today.
45 MIN
WEEK 5
DYNAMIC SYSTEMS
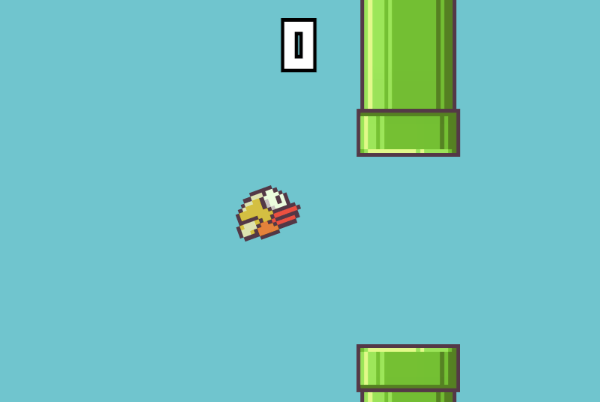
Studio: Week 6
Due: Week 7
DM2008
AY2526
PROGRAMMING FOR INTERACTION
BRIEF
OUTPUT
Output
For homework and your own archival
Document your output by:
- Organizing every file in a folder on your computer
-
Saving your sketch's code and expanding the .zip
- Screen recording your process and interactive outcomes
- Saving them with appropriate names
activity5b-video01.mp4
File ➝ Download
deliverables
code folder
4 videos
brief reflection (~300 words)
Mini Project
WEEK 5
DYNAMIC SYSTEMS
DM2008
AY2526
PROGRAMMING FOR INTERACTION
WEEK 5
WRAPPING UP
Homework
HOMEWORK
TUTORIALS
Your documentation should demonstrate your iterations
Please save images as jpeg and videos as mp4
Mini Project
Continue working on your selected Mini Project. If you are working in pairs, it would be wise to save a back-up version of your latest working code so that any breaking edits can be undone.
Documentation
Activity 5a
Code folder
Minimum (1) screen recording
1
2
Mini Project (Due Week 7)
Code folder
Minimum (4) screen recordings
Brief reflection (~ 300 words)

DM2008
AY2526
PROGRAMMING FOR INTERACTION
Video Tutorials
HOMEWORK
TUTORIALS
1
2
3
WEEK 5
WRAPPING UP
4

DM2008
AY2526
PROGRAMMING FOR INTERACTION
Review & Refine
6
A chance to untangle tricky code, tighten up past work with feedback and cleanup, and explore a few new ideas that go beyond the basics.
Last Session
Last session, we explored how objects interact with each other and their environment, using collision detection and basic game logic to drive sketches.
We introduced the idea of state—using boolean
variables to gate interactions and track things like game over conditions or scores. We also worked with p5.Vector() to represent speed and direction, making motion and collisions easier to manage across a lesser number of variables.
By combining these techniques, we began to prototype and start the initial coding phase of our Mini Projects based on Pong or Flappy Bird.
DM2008
AY2526
PROGRAMMING FOR INTERACTION
WEEK 6
WARM UP
PREVIOUSLY
OBJECTIVES
Last Session
DM2008
AY2526
PROGRAMMING FOR INTERACTION
WEEK 6
WARM UP
PREVIOUSLY
OBJECTIVES
dist(x1, y1, x2, y2)
calculates the distance between two points on the canvas
if (d < r1 + r2)
checks if two circles are touching by comparing the distance d between their centers to the sum of their radii
Collision Detection
Vectors
createVector(x, y)
creates a vector object that stores x and y values together
myVector.add(otherVector)
adds the x and y component of one vector to another (e.g. add velocity to position)
myVector.x, myVector.y
access the value of the x and y
component of a vector respectively
Last Session
DM2008
AY2526
PROGRAMMING FOR INTERACTION
WEEK 6
WARM UP
PREVIOUSLY
OBJECTIVES
let flag = false;
declares a boolean variable that can be used to track on/off or true/false states in your sketch
if (flag) {}
runs the code inside the block only when flag is true — toggling behavior based on state
Boolean Variables
This Session
DM2008
AY2526
PROGRAMMING FOR INTERACTION
PREVIOUSLY
OBJECTIVES
Coding style guides help your code stay readable and consistent. Where you place setup() and draw(), how you name things, and even your quote marks can save you from painful bugs later.
Media loading lets you bring in external assets like images or sounds. It needs careful setup, but adds a lot of polish and personality to your sketch.
Return values let your functions give something back. They’re useful for calculations and for keeping your code modular and reusable.
1
In this session, you will
2
3
4
WEEK 6
WARM UP

DM2008
AY2526
PROGRAMMING FOR INTERACTION
p5.js Functions
In p5.js, special functions such as setup(), draw(), mousePressed(), or keyPressed() should only be included once within your sketches.
These functions are built-in entry points that p5.js looks for. If you write multiple versions of the same function, only the last one will run while all previous isntances are ignored.
Make sure each p5.js function you use is defined only a single time, and place all the code you need for that behavior inside it.
WEEK 6
REVIEW & REFINE
COMMON ISSUES
STYLE GUIDE
LOADING MEDIA
RETURN VALUES
// Only one function setup
function setup() {
createCanvas(400, 400);
}
// If you have two function draw(), only the last one will be executed.
function draw() {
//grey background
background(220);
}
function draw() {
//black background
background(0);
}It is also common for all p5.js related functions to be placed further up in your code, before custom functions and classes are defined.
DM2008
AY2526
PROGRAMMING FOR INTERACTION
Preventing Syntax Errors
The p5.js web editor has a few settings that can make coding smoother.
However, auto-complete can sometimes be distracting or insert code you might not intend to write. You can disable this feature if it starts getting in the way.
Auto-close brackets, on the other hand, are helpful because they prevent common errors with missing braces or parentheses. The web editor also highlights bracket pairs with a rectangular outline when your text caret is placed next to one.
WEEK 6
OBSERVATIONS
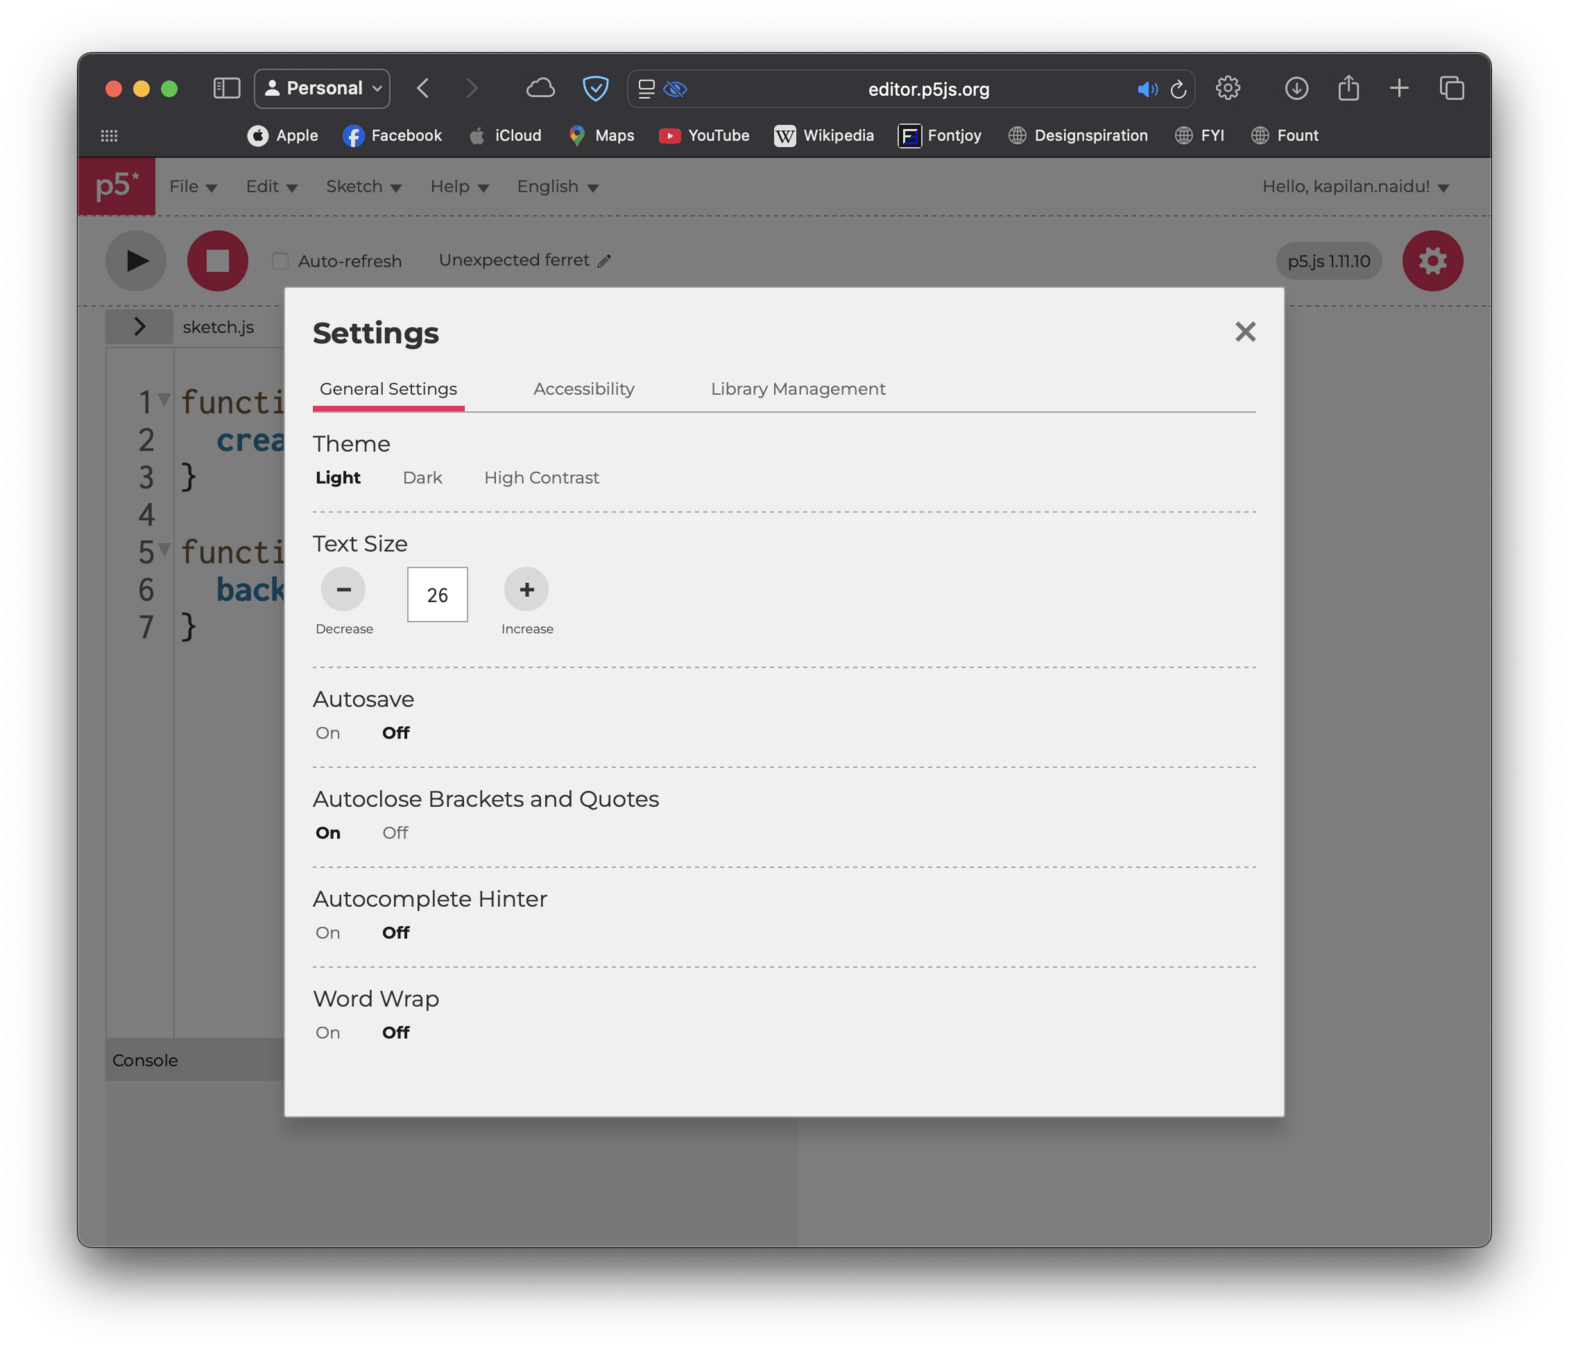
Ensure you are logged in when you change the settings so that the web editor remembers them.
COMMON ISSUES
STYLE GUIDE
LOADING MEDIA
RETURN VALUES
DM2008
AY2526
PROGRAMMING FOR INTERACTION
Preventing Syntax Errors
When working with loops, it is a good idea to disable auto-refresh.
While working on a sketch, you may inadvertently create an infinite loop that could freeze your sketch, crash the browser and cause you to lose any unsaved work.
You can always use Cmd + Return on macOS, or Ctrl + Enter on Windows, to re-run your sketch without having to click on the run button several times.
Adjusting these settings helps reduce frustration and lets you focus more on writing the code itself.
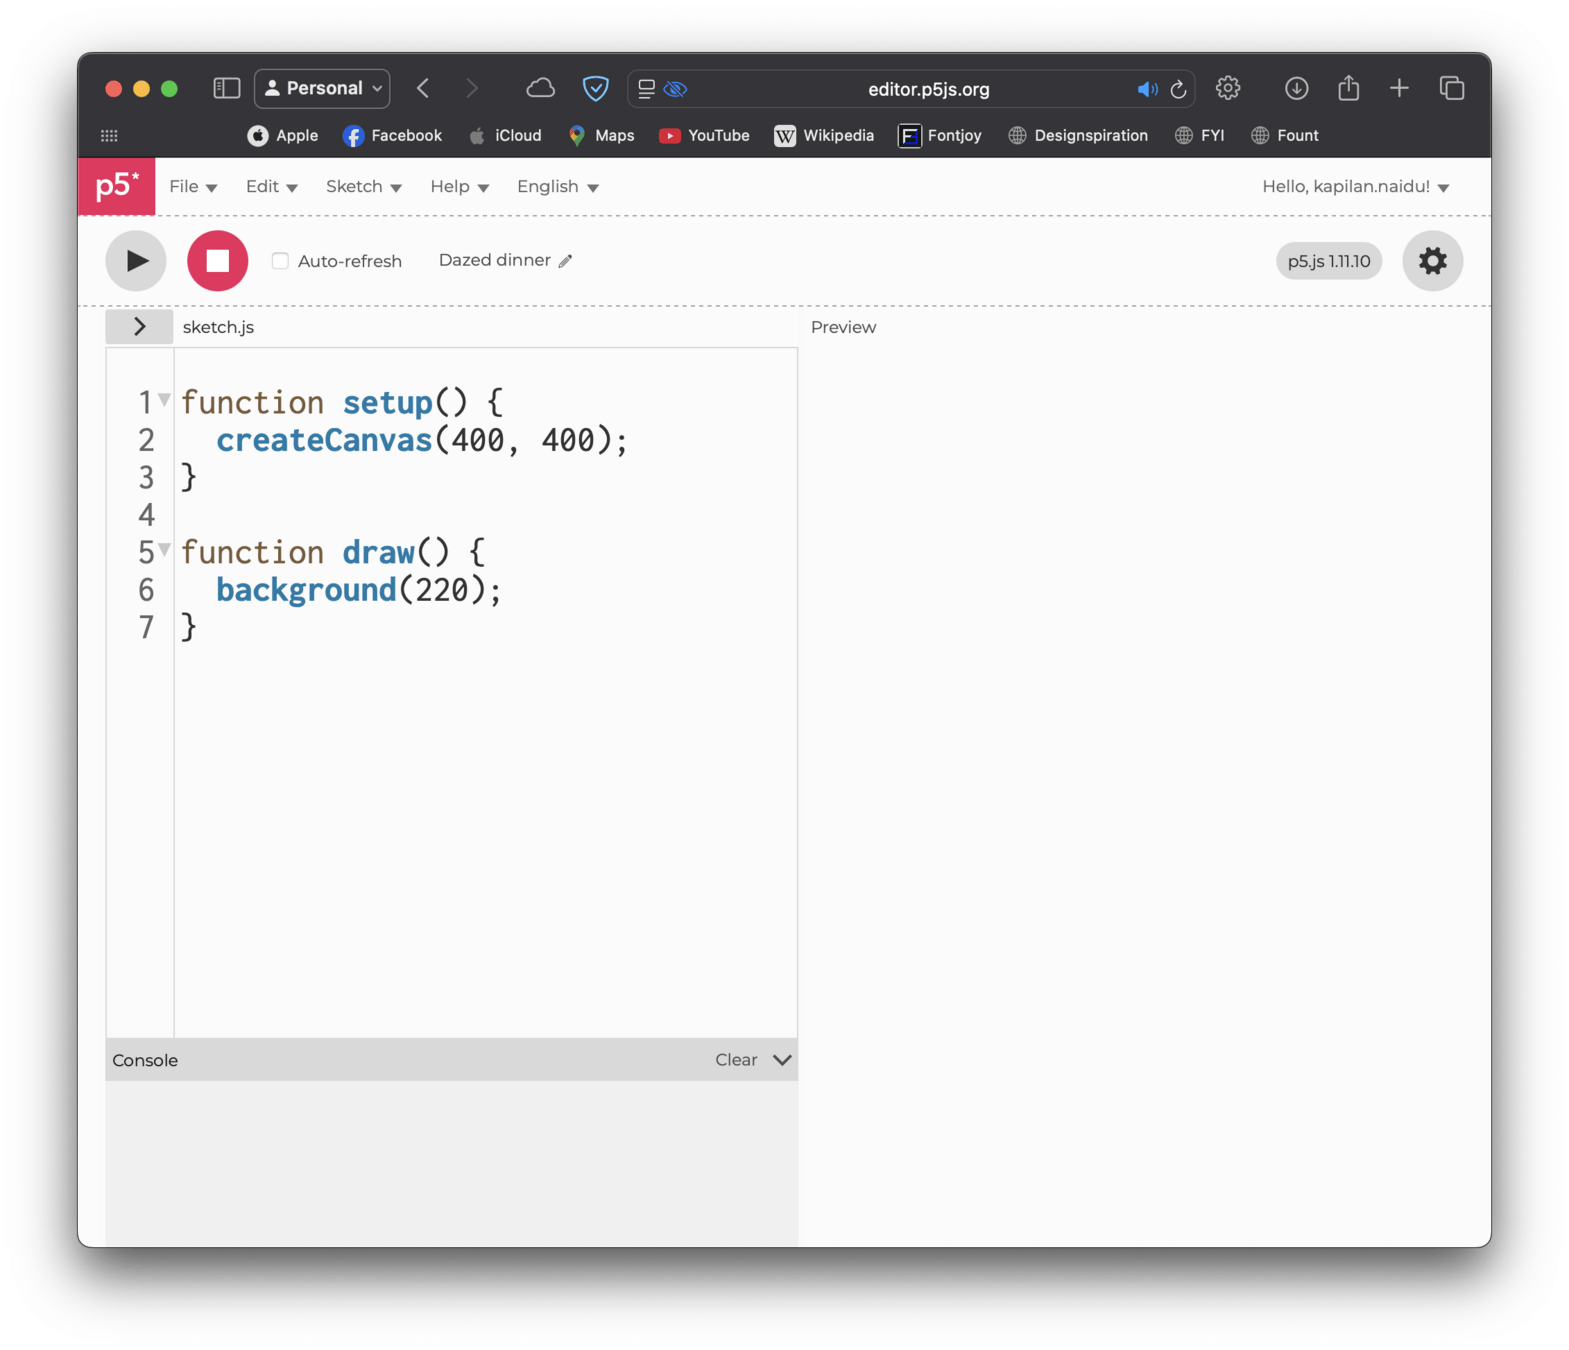
COMMON ISSUES
STYLE GUIDE
LOADING MEDIA
RETURN VALUES
WEEK 6
OBSERVATIONS
A Beginner's Guide
DM2008
AY2526
PROGRAMMING FOR INTERACTION
Coding Style Guide
Following a consistent code style makes your sketches easier to read and debug. A good habit is to place global variables at the very top so you can quickly see what controls the sketch.
Again, keep the main p5.js functions like setup() and draw() near the top, since they form the structure of your program.
Classes and custom functions should go lower in the file, where they can be defined once and then called from above.
Organizing code in this way creates a clear flow from global settings, to main structure, to supporting details, which makes projects easier to manage as they grow.
//Global variables at the top
let circleX;
let circleY;
let myBall;
//Main p5.js functions higher up
function setup() {
createCanvas(400, 400);
circleX = width / 2;
circleY = height / 2;
myBall = new Ball(200, 300, 30);
}
function draw() {
background(220);
noStroke();
drawCircle(circleX, circleY, 50);
myBall.show();
myBall.move();
}
// Custom function lower in code
function drawCircle(x, y, size) {
fill(100, 180, 220);
ellipse(x, y, size);
}
// Class definition lower in code
class Ball {
constructor(x, y, r) {
this.x = x;
this.y = y;
this.r = r;
this.speed = 2;
}
show() {
fill(255, 150, 80);
ellipse(this.x, this.y, this.r * 2);
}
move() {
this.x += this.speed;
if (this.x > width || this.x < 0) {
this.speed *= -1;
}
}
}COMMON ISSUES
STYLE GUIDE
LOADING MEDIA
RETURN VALUES
WEEK 6
OBSERVATIONS
DM2008
AY2526
PROGRAMMING FOR INTERACTION
Code Style-guide
It’s important to be consistent with quote marks and semicolons in your code.
In JavaScript, both single '' and double "" quotes work for strings, but it is best to pick one style and use it everywhere.
Semicolons at the end of statements also help prevent hidden errors, especially as sketches get more complex. When moving into stricter coding environments, these details matter even more.
Arduino for example, requires semicolons at the end of each line, and distinguishes between single quotes for characters ('a') and double quotes for strings ("hello").
COMMON ISSUES
CODE STYLE
LOADING MEDIA
RETURN VALUES
let message;
function setup() {
createCanvas(400, 200);
// Use double quotes for strings
message = "Hello, world!";
}
function draw() {
background(220);
// Display the string
textSize(24);
text(message, 100, 100);
// Example: single quotes for one character
let letter = 'A';
text(letter, 100, 150);
}
WEEK 6
OBSERVATIONS
DM2008
AY2526
PROGRAMMING FOR INTERACTION
Uploading Files
To use images or sounds in the p5.js web editor, you first need to upload them into your project. In the editor, first reveal the file tree on the left side, then click the “+”.
You will only see this on sketches that belong to you. If the "+" is not visible, duplicate the sketch first.
From there you can choose “Upload File” to add an image or sound directly, or “Create Folder” if you want to keep assets organized inside an assets folder.
Make sure your files are below 5 MB.
WEEK 6
OPTIONAL FEATURES
COMMON ISSUES
CODE STYLE
LOADING MEDIA
RETURN VALUES
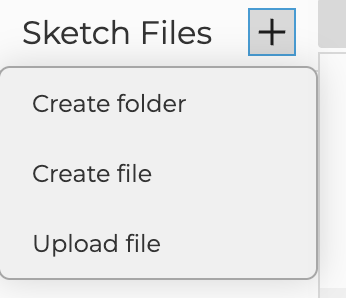
It is always a good idea to rename your file to be something sensible before you upload.
DM2008
AY2526
PROGRAMMING FOR INTERACTION
Referencing Files
When working with external files in p5.js, file paths and names are a common source of errors. After uploading assets, you need to make sure you reference them exactly as they appear. Common errors include using the wrong file extension, adding spaces, or mismatched capitalization.
For example, MyImage.png will not be found if you type myimage.png.
If you organize files inside a folder, remember to include the folder name in the path (e.g. assets/myImage.png).
Keeping file names short, lowercase, and without spaces helps avoid these issues.
COMMON ISSUES
CODE STYLE
LOADING MEDIA
RETURN VALUES
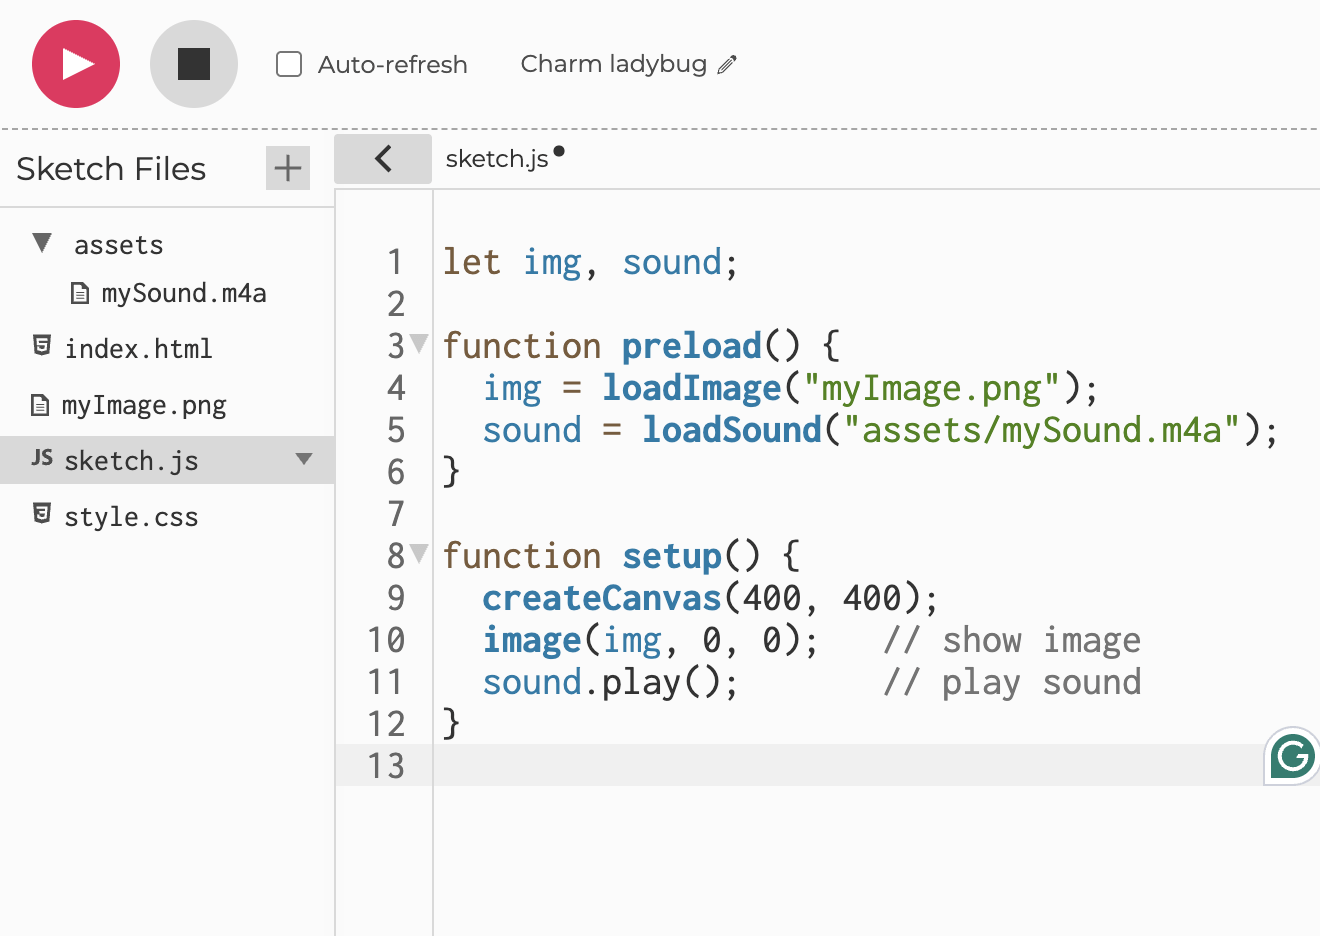
WEEK 6
OPTIONAL FEATURES
DM2008
AY2526
PROGRAMMING FOR INTERACTION
Pre-loading Media
Once you’ve uploaded your media file(s) into the p5.js editor, you need to load it into memory before your sketches can access these assets and use them.
The correct place to do this is inside the special preload() function, which runs before setup(). We achieve this by first creating an uninitialized global variable at the top of our code.
We then assign a file to the variable using loadImage() or loadSound(). Ensure the correct file name and path is referenced in quotes, within the parentheses of the respective load methods.
COMMON ISSUES
CODE STYLE
LOADING MEDIA
RETURN VALUES
let img, sound;
function preload() {
img = loadImage("myImage.png");
sound = loadSound("mySound.mp3");
}
function setup() {
createCanvas(400, 400);
image(img, 0, 0); // show image
sound.play(); // play sound
}
No AI guidance allowed
WEEK 6
OPTIONAL FEATURES
DM2008
AY2526
PROGRAMMING FOR INTERACTION
Using Media
Once you know how to load images and sounds separately, you can combine them to create richer interactive sketches.
For example, you might display an image with image() while playing a sound with .play() whenever the mouse is clicked or a key is pressed.
This simple functional demo shows an image appearing on the canvas and trigger a sound effect at the same time.
Combinations such as this are often the first step toward building more immersive projects, such as interactive posters, simple games, or audiovisual performances.
COMMON ISSUES
CODE STYLE
LOADING MEDIA
RETURN VALUES
let img, mySound;
function preload() {
// Load your own files here
img = loadImage("assets/chat.png");
img2 = loadImage("assets/notification.png");
mySound = loadSound("assets/notified.mp3");
}
function setup() {
createCanvas(400, 400);
imageMode(CENTER); // draw image from its center
}
function draw() {
background(220);
// Display image in the center
image(img, width / 2, height / 2, 250, 250);
if (mouseIsPressed) {
image(img2, width / 4 * 3 , height / 4 , 75, 75);
}
}
// Play sound when mouse is pressed
function mousePressed() {
mySound.play();
}
No AI guidance allowed
WEEK 6
OPTIONAL FEATURES
DM2008
AY2526
PROGRAMMING FOR INTERACTION
Returning from Functions
Functions in JavaScript can be used in one of two different ways.
Most functions simply complete a set of instructions, like drawing some shapes or changing the background. But some can return a value using the return keyword.
This means the function runs its code, produces a result, and hands that result back so it can be stored in a variable or used elsewhere in the sketch.
For example, a function might take two numbers as parameters, add them together, and return the sum.
COMMON ISSUES
CODE STYLE
LOADING MEDIA
RETURN VALUES
function setup() {
createCanvas(400, 400);
}
function draw() {
background(220);
noStroke();
// Use the function to get a new size
let sz = half(mouseX);
// Draw ellipse with the returned size
ellipse(width / 2, height / 2, sz);
}
// Function that returns a value
function half(x) {
return x / 2; // returns half of input
}
WEEK 6
OPTIONAL FEATURES
Learn more here
DM2008
AY2526
PROGRAMMING FOR INTERACTION
Studio Session
In this in-class studio session, you will continue developing your mini-projects.
This session is also chance to review your work so far, troubleshoot problems, and polish/complete your previous sketches with added guidance from your instructor.
You are also highly encouraged to share progress with your peers, get feedback, and learn from one another’s approaches.
WEEK 6
REVIEW & REFINE
STUDIO
WEEK 1
WEEK 2
WEEK 3
WEEK 4
WEEK 5
CONSULTATIONS

DM2008
AY2526
PROGRAMMING FOR INTERACTION
Week 1
WEEK 6
REVIEW & REFINE
STUDIO
WEEK 1
WEEK 2
WEEK 3
WEEK 4
WEEK 5
CONSULTATIONS
Basics & Drawing with Code
TIPS ✨
Always include createCanvas() in setup().
Use background() in draw() to clear the frame each loop.
DM2008
AY2526
PROGRAMMING FOR INTERACTION
Week 1
WEEK 6
REVIEW & REFINE
STUDIO
WEEK 1
WEEK 2
WEEK 3
WEEK 4
WEEK 5
CONSULTATIONS
Activity 1a
Activity 1b
DM2008
AY2526
PROGRAMMING FOR INTERACTION
Week 2
WEEK 6
REVIEW & REFINE
STUDIO
WEEK 1
WEEK 2
WEEK 3
WEEK 4
WEEK 5
CONSULTATIONS
Conditionals & Loops
TIPS ✨
Watch the boundary limits (i < x) to prevent errors and issues.
Combine loops and conditionals for more complex patterns.
Nest loops within each other to create a grid, and use modulo to alternate.
DM2008
AY2526
PROGRAMMING FOR INTERACTION
Week 2
WEEK 6
REVIEW & REFINE
Activity 2a
Activity 2b
STUDIO
WEEK 1
WEEK 2
WEEK 3
WEEK 4
WEEK 5
CONSULTATIONS
DM2008
AY2526
PROGRAMMING FOR INTERACTION
Week 3
WEEK 6
REVIEW & REFINE
STUDIO
WEEK 1
WEEK 2
WEEK 3
WEEK 4
WEEK 5
CONSULTATIONS
Arrays, Functions & Transformations
TIPS ✨
Remember array indices start at 0.
Functions can make sketches shorter, cleaner, and more organized.
Use push() and pop() around transformation to contain them.
DM2008
AY2526
PROGRAMMING FOR INTERACTION
Week 3
WEEK 6
REVIEW & REFINE
Activity 3a
Activity 3b
Activity 3c
STUDIO
WEEK 1
WEEK 2
WEEK 3
WEEK 4
WEEK 5
CONSULTATIONS
DM2008
AY2526
PROGRAMMING FOR INTERACTION
Week 4
WEEK 6
REVIEW & REFINE
STUDIO
WEEK 1
WEEK 2
WEEK 3
WEEK 4
WEEK 5
CONSULTATIONS
Blueprints & Objects
TIPS ✨
Keep p5.js functions setup() and draw() outside the class.
Use this.x and this.y instead of global variables.
Start small: make one object, then add more instances with an array.
DM2008
AY2526
PROGRAMMING FOR INTERACTION
Week 4
WEEK 6
REVIEW & REFINE
Activity 4a
Activity 4b
STUDIO
WEEK 1
WEEK 2
WEEK 3
WEEK 4
WEEK 5
CONSULTATIONS
DM2008
AY2526
PROGRAMMING FOR INTERACTION
Week 5
WEEK 6
REVIEW & REFINE
STUDIO
WEEK 1
WEEK 2
WEEK 3
WEEK 4
WEEK 5
CONSULTATIONS
Dynamic Systems & Collisions
TIPS ✨
Use if (d < r1 + r2) for circular collision boundaries.
Give objects a Boolean property (e.g. isActive) to gate behaviors.
Try different responses to collisions: bounce, disappear or change color.
DM2008
AY2526
PROGRAMMING FOR INTERACTION
Week 5
WEEK 6
REVIEW & REFINE
Activity 5a
Mini Project
STUDIO
WEEK 1
WEEK 2
WEEK 3
WEEK 4
WEEK 5
CONSULTATIONS
DM2008
AY2526
PROGRAMMING FOR INTERACTION
Consultations
This consultation time is set aside to review the material from Weeks 1 to 5, making sure everyone is confident with the foundations before moving forward.
It’s a chance to clarify any concepts that still feel unclear, whether it’s variables, loops, arrays, or objects, and to revisit the activities you’ve completed.
By checking in on your earlier work, we can troubleshoot issues, fill in gaps, and strengthen your understanding, so you are better prepared to apply these skills in your Mini Projects.
WEEK 6
REVIEW & REFINE
STUDIO
WEEK 1
WEEK 2
WEEK 3
WEEK 4
WEEK 5
CONSULTATIONS

DM2008
AY2526
PROGRAMMING FOR INTERACTION
WEEK 6
WRAPPING UP
Homework
HOMEWORK
Documentation should demonstrate process
Please save images as jpeg and videos as mp4
Mini Project
Continue working on your selected Mini Project.
Documentation
Activity 5a
Code folder
Minimum (1) screen recording
1
3
Mini Project (Due Week 7)
Code folder
Minimum (4) screen recordings
Brief reflection (~ 300 words)
Download and Install
2

DM2008
AY2526
PROGRAMMING FOR INTERACTION
Local Tooling
7
Moving beyond the p5.js Web Editor into local coding with VSCode, using GitHub for version control and exploring how AI assistants can support workflows.

Last Session
Last session, we consolidated the fundamentals from Weeks 1–5 and addressed common coding issues, from syntax errors to structuring sketches with more clarity and organization.
We also explored how to load and use external media in p5.js, and introduced the idea of return values within functions.
The session closed with some guided studio time, where you refined your Mini Projects, received consultations on earlier concepts/activities, and prepared these items for submission.
DM2008
AY2526
PROGRAMMING FOR INTERACTION
WEEK 7
WARM UP
PREVIOUSLY
OBJECTIVES
DISCUSSION
Mini Project Progress
DM2008
AY2526
PROGRAMMING FOR INTERACTION
WEEK 7
WARM UP
PREVIOUSLY
OBJECTIVES
DISCUSSION
Please save images as jpeg and videos as mp4
Mini Project
Code folder
Minimum (4) screen recordings
Brief reflection (~ 300 words)
You should have completed (or be in the midst of completing) your mini projects individually or in pairs. Please make sure you have your files ready for this class, as you will be uploading them onto a GitHub Repository by the end of recess week.
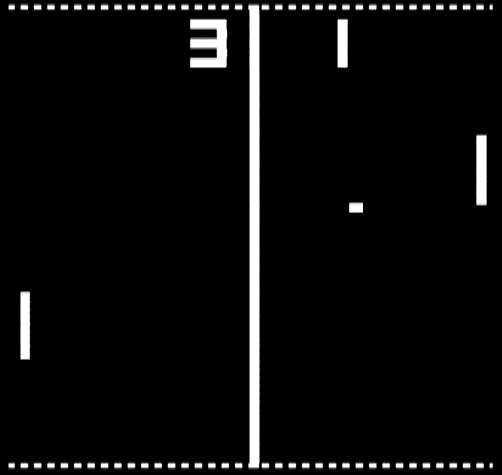
Last Session
DM2008
AY2526
PROGRAMMING FOR INTERACTION
WEEK 7
WARM UP
PREVIOUSLY
OBJECTIVES
DISCUSSION
function preload() { }
runs before setup, used to load files like images or sounds so they are ready when the sketch starts
img = loadImage("path")
snd = loadSound("path")
loads an image or sound file into the variable being assigned the value
Media Loading
image(img, x, y)
displays an image on the canvas at any given position
snd.play()
plays a loaded sound file
Last Session
DM2008
AY2526
PROGRAMMING FOR INTERACTION
WEEK 7
WARM UP
PREVIOUSLY
OBJECTIVES
DISCUSSION
return
keyword that sends a value back from a function
let s = myFunction()
stores the returned value from a function into a variable
Return Values
// global variables on top
keep important values easy to find and consistently at the top of your sketch
Code Style-guide
" " vs ' '
use double quotes for strings and single quotes for characters
; semicolons
end statements clearly to avoid errors later (especially in Arduino)
This Session
DM2008
AY2526
PROGRAMMING FOR INTERACTION
PREVIOUSLY
OBJECTIVES
DISCUSSION
Local environments give you more control over your projects, making it easier to manage files, organize assets, and work beyond the web editor.
Version control with GitHub keeps track of changes, prevents lost work, and makes it easier to collaborate.
AI coding assistants can speed up coding by handling syntax, boilerplate, and debugging. Used well, they are guides rather than shortcuts, helping you learn and experiment.
1
In this session, you will
2
3
4
WEEK 7
WARM UP

DM2008
AY2526
PROGRAMMING FOR INTERACTION
PREVIOUSLY
OBJECTIVES
DISCUSSION
Discussion Time
Reflecting on your coding workflow: what works well, what gets in the way?
- Break into groups of 3 to 4.
-
Share your experiences using the p5.js Web Editor. What felt easy or convenient, and what was frustrating or limiting?
-
Regroup to compare and collect insights.
10 MIN
What features (auto-save, auto-complete) made coding smoother?
What issues (auto-refresh, crashes, file handling) slowed you down?
If you could change one thing about the Web Editor, what would it be?
WEEK 7
WARM UP

DM2008
AY2526
PROGRAMMING FOR INTERACTION
Coding Locally
So far, we’ve been coding in the p5.js Web Editor, which is convenient but also limited.
When you move your code to your own computer, you get full control of your files and how they’re organized. No more surprise crashes, auto-refreshes, or losing work because of the browser.
Coding locally is also how most developers and designers work on real projects. It makes sharing code and collaborating with others much easier as well.
Think of it as moving from a sketchbook into a proper (collaborative) studio space.
WEEK 7
LOCAL TOOLING
CODING LOCALLY
PROJECT ANATOMY
ASSETS
CSS
NAMING
VSCODE
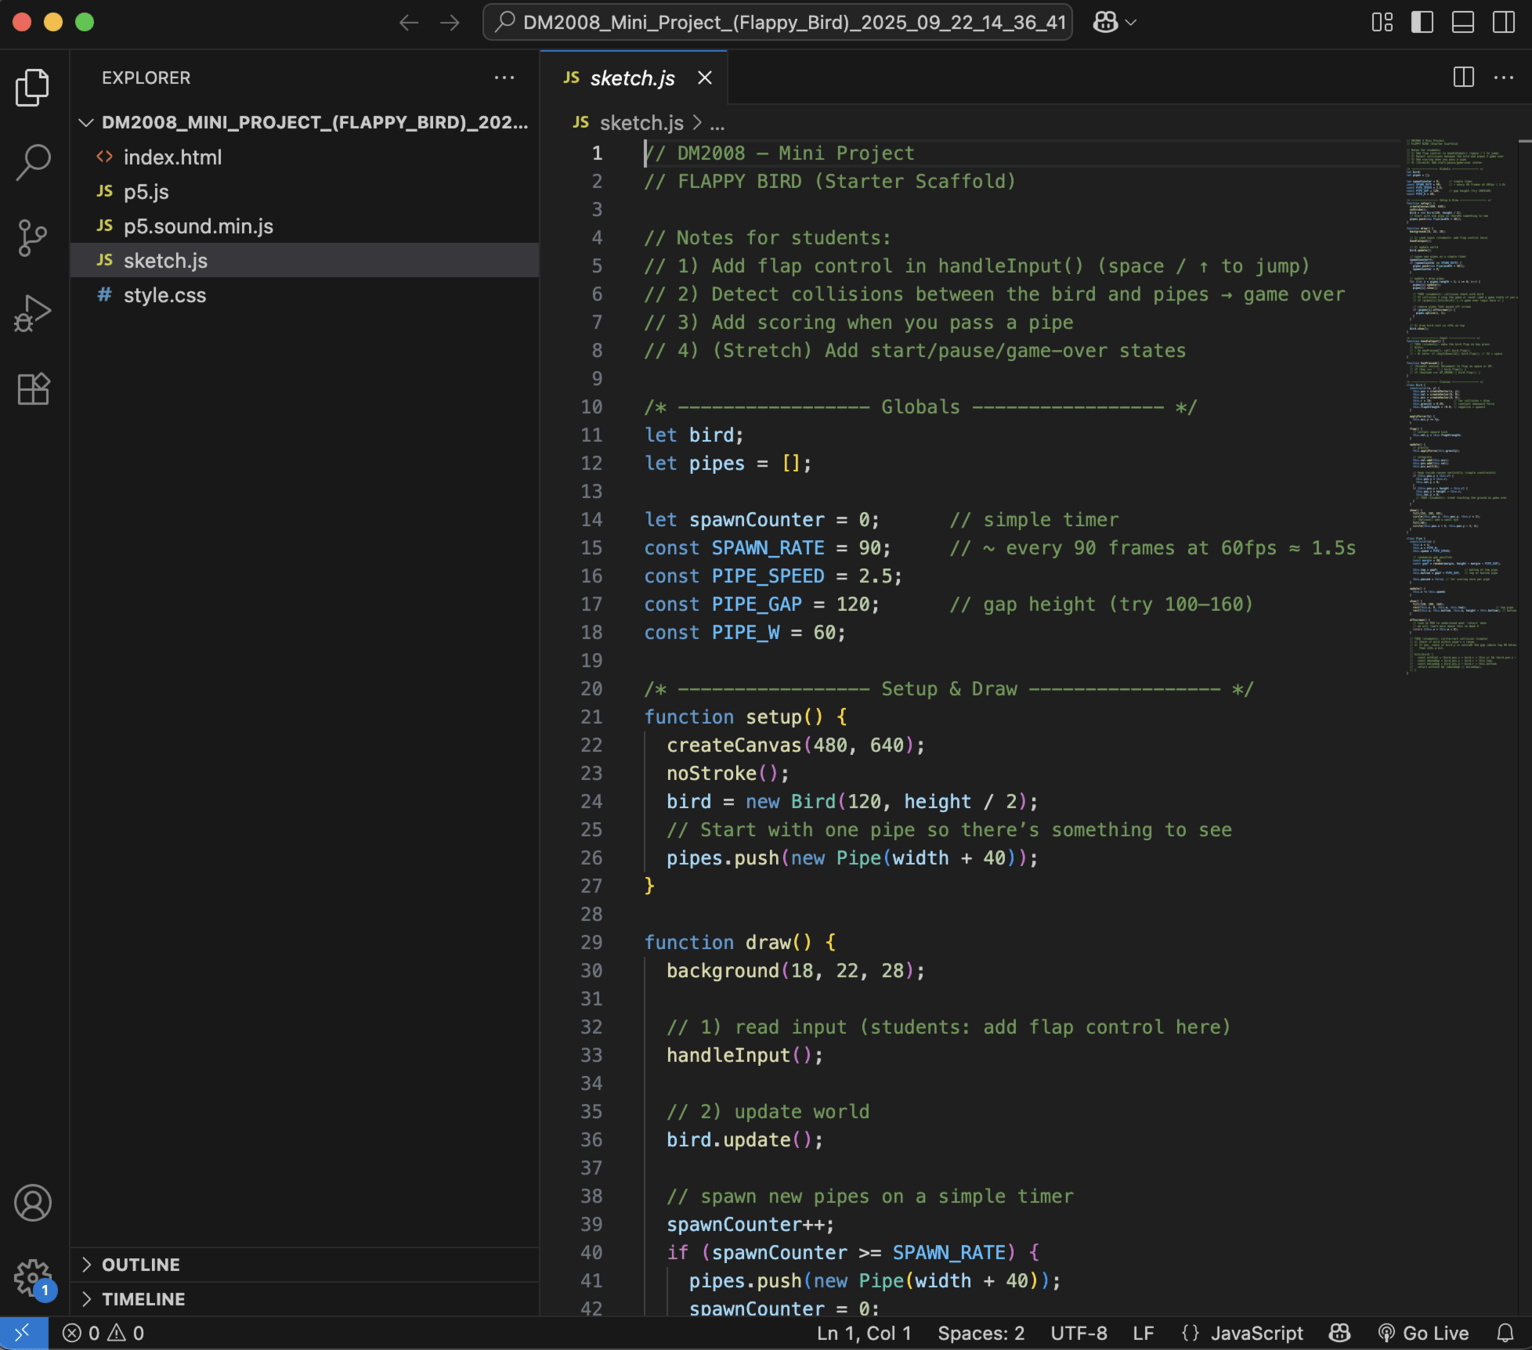
DM2008
AY2526
PROGRAMMING FOR INTERACTION
Project Anatomy (p5.js)
When you move beyond the p5.js web editor, your project lives inside a folder on your computer. That folder is called a directory, and inside it are all the files your sketch needs (HTML, JS, media, etc.).
A clean folder structure makes it easier to find your code, link assets, and share projects with others. If your files are messy or scattered, your code can break because paths won’t match.
Think of folders as the “skeleton” that holds your project together. Getting this structure right early will save you headaches later.
WEEK 7
LOCAL TOOLING
CODING LOCALLY
PROJECT ANATOMY
ASSETS
CSS
NAMING
VSCODE
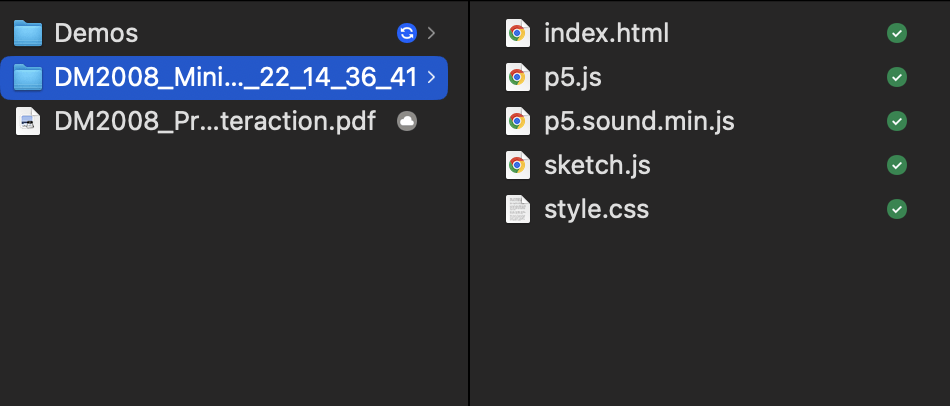
DM2008
AY2526
PROGRAMMING FOR INTERACTION
HTML Index
Every web project has an index.html file. It’s the entry point that browsers reads first.
HTML is made of tags like <head>, <body>, and <script> that describe the structure of your page. This is where you load your sketch, styles, and assets.
It also defines paths like where to find files like sketch.js or an image in /assets.
If a path is wrong (like a typo or wrong folder name), your file won’t load.
Understanding index.html is like setting the stage before any of your code runs.
WEEK 7
LOCAL TOOLING
CODING LOCALLY
PROJECT ANATOMY
ASSETS
CSS
NAMING
VSCODE
<!DOCTYPE html>
<html lang="en">
<head>
<script src="https://cdn.jsdelivr.net/npm/p5@1.11.10/lib/p5.js"></script>
<script src="https://cdn.jsdelivr.net/npm/p5@1.11.10/lib/addons/p5.sound.min.js"></script>
<link rel="stylesheet" type="text/css" href="style.css">
<meta charset="utf-8" />
</head>
<body>
<main>
</main>
<script src="sketch.js"></script>
</body>
</html>DM2008
AY2526
PROGRAMMING FOR INTERACTION
Importing p5.js
Your sketch won’t run unless you import the p5.js library into your HTML. This is usually done within a <script> tag in the index.html file.
You can link to the CDN (a hosted online version of p5.js) or download a local copy into your project folder.
CDN is quick and easy but needs internet; local p5.js works offline and gives you more control.
Either way, your browser loads p5.js first
so your sketch knows what to do. Without this step, you’ll see errors because p5.js functions like setup(), createCanvas() and draw() are not loaded yet.
WEEK 7
LOCAL TOOLING
CODING LOCALLY
PROJECT ANATOMY
ASSETS
CSS
NAMING
VSCODE
<!DOCTYPE html>
<html lang="en">
<head>
<script src="https://cdn.jsdelivr.net/npm/p5@1.11.10/lib/p5.js"></script>
<script src="https://cdn.jsdelivr.net/npm/p5@1.11.10/lib/addons/p5.sound.min.js"></script>
<link rel="stylesheet" type="text/css" href="style.css">
<meta charset="utf-8" />
</head>
<body>
<main>
</main>
<script src="sketch.js"></script>
</body>
</html>DM2008
AY2526
PROGRAMMING FOR INTERACTION
Sketch File
Your main sketch code usually lives in a file called sketch.js. This file can be placed in the project root, or inside a /js folder to stay organized.
You must include it in index.html with a <script> tag. Always put this tag before
the closing </body> tag, so the HTML loads first, then the sketch script runs.
If you forget this, your code may run too early and break. Think of sketch.js as the “brain” of your project, but it needs HTML to boot it up first.
WEEK 7
LOCAL TOOLING
CODING LOCALLY
PROJECT ANATOMY
ASSETS
CSS
NAMING
VSCODE
<!DOCTYPE html>
<html lang="en">
<head>
<script src="https://cdn.jsdelivr.net/npm/p5@1.11.10/lib/p5.js"></script>
<script src="https://cdn.jsdelivr.net/npm/p5@1.11.10/lib/addons/p5.sound.min.js"></script>
<link rel="stylesheet" type="text/css" href="style.css">
<meta charset="utf-8" />
</head>
<body>
<main>
</main>
<script src="sketch.js"></script>
</body>
</html>DM2008
AY2526
PROGRAMMING FOR INTERACTION
Assets
Any media you use (images, sounds, fonts) should go inside an /assets folder. This keeps your project tidy and separates code from content.
When linking, you’ll use a relative path like assets/myimage.png. Make sure the spelling and capitalization are exactly as the file and folders are named.
If you dump everything into the main folder, it quickly gets messy and harder to debug.
Good asset management practices make collaboration smoother and avoids “file not found” errors.
WEEK 7
LOCAL TOOLING
CODING LOCALLY
PROJECT ANATOMY
ASSETS
CSS
NAMING
VSCODE
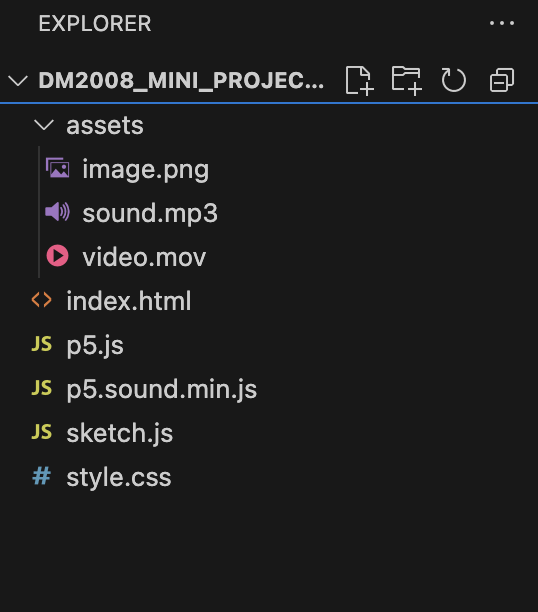
DM2008
AY2526
PROGRAMMING FOR INTERACTION
CSS Basics
CSS is a separate scripting language that controls the style of your page: things like background color, fonts, and layout.
It doesn’t affect your p5.js sketch directly, but it styles everything around it.
By keeping your CSS styles in its own file (style.css), your code stays clean and organized. This file can live in the project root or in a /css folder.
You connect it in index.html with a <link> tag in the <head>. Think of CSS as the “paint job” for your website. It changes how things appear and are positioned, not how they work.
WEEK 7
LOCAL TOOLING
CODING LOCALLY
PROJECT ANATOMY
ASSETS
CSS
NAMING
VSCODE
<!DOCTYPE html>
<html lang="en">
<head>
<script src="https://cdn.jsdelivr.net/npm/p5@1.11.10/lib/p5.js"></script>
<script src="https://cdn.jsdelivr.net/npm/p5@1.11.10/lib/addons/p5.sound.min.js"></script>
<link rel="stylesheet" type="text/css" href="style.css">
<meta charset="utf-8" />
</head>
<body>
<main>
</main>
<script src="sketch.js"></script>
</body>
</html>DM2008
AY2526
PROGRAMMING FOR INTERACTION
Naming Conventions
When files and variables are named consistently, your code just works better.
For variables and functions, we use camelCase like myShapeSize.
For classes, we switch to UpperCamelCase — like Cookie or Ball.
For folders and files, we stick to lowercase or kebab-case, like my-project.
This consistency prevents broken file paths or confusing errors. It’s like using the same styling rules or color palettes in design.
It keeps the system clear, organized, and readable for you and other collaborators.
WEEK 7
LOCAL TOOLING
CODING LOCALLY
PROJECT ANATOMY
ASSETS
CSS
NAMING
VSCODE
When we start saving lots of sketches, it’s easy for names to get messy. For file and folder names, we use kebab-case, like:
week-07-project or
my-sketch.html.
This keeps everything lowercase, with dashes instead of spaces, so paths never break. Avoid names like My Project Final V2!!!. Browsers and code really don’t like spaces or symbols.
Clear naming makes it easier to link assets like images and sounds without errors.
Think of it like labeling folders in a studio. Simple, consistent names help you stay organized as projects grow.
DM2008
AY2526
PROGRAMMING FOR INTERACTION
VSCode Setup
VSCode is the tool we’ll use to code outside of the web editor. It’s a text editor that gives you a lot of control and flexibility.
With the Live Server plugin, you can preview your sketches in your default browser instantly, with auto-refresh.
You’ll open your whole project folder in VSCode so all files are connected. If something is messy, you can rename or reorganize right within the interface.
From now on, this will be your “home base” for coding locally.
WEEK 7
LOCAL TOOLING
CODING LOCALLY
PROJECT ANATOMY
ASSETS
CSS
NAMING
VSCODE
DM2008
AY2526
PROGRAMMING FOR INTERACTION
Starter Templates
To save time and standardize things, in future we will use a starter templates with everything already set up. It includes index.html, sketch.js, p5.js, an assets folder, and CSS for various needs.
This ensures everyone has the same project structure from the start.
You’ll clone or download it from GitHub
(covered in Week 8), so you don't have to always build everything from scratch.
Once these templates are downloaded onto your computer, you can immediately start coding your future projects locally!
WEEK 7
LOCAL TOOLING
CODING LOCALLY
PROJECT ANATOMY
ASSETS
CSS
NAMING
VSCODE
DM2008
AY2526
PROGRAMMING FOR INTERACTION
Activity 7a
BRIEF
REFERENCE
OUTPUT
Local Migration
Download your mini-project from the p5.js Web Editor as a ZIP file. Unzip the file to create your project folder.
Open the folder in VSCode. Recorganize or rename files/folders if needed. Fix any path names so assets still load correctly.
Run the project using Live Server and view it in the browser.
25 MIN
WEEK 7
LOCAL TOOLING
DM2008
AY2526
PROGRAMMING FOR INTERACTION
BRIEF
REFERENCE
OUTPUT
folders & files
Useful Code & Structure
naming conventions
vscode
Right-click index.html and open with Live Server for your project to open in your browser instantly.
WEEK 7
LOCAL TOOLING
Activity 7a
DM2008
AY2526
PROGRAMMING FOR INTERACTION
BRIEF
REFERENCE
OUTPUT
Output
For homework and your own archival
Document your output by:
- Downloading your mini-project as a .zip file.
- Saving your code locally and expanding the .zip
- Opening the expanded folder in VSCode and reorganizing the files as needed.
- Running your sketch with the Live Server extension to confirm it works locally on your device.
File ➝ Download
deliverables
local mini-project folder
sketch running in Live Server
WEEK 7
LOCAL TOOLING
Activity 7a
DM2008
AY2526
PROGRAMMING FOR INTERACTION
Versions on GitHub
So far, you’ve been saving your code like a sketchbook, but what happens if you mess something up and want to go back? That’s where version control comes in.
It keeps a history of all your changes so you can rewind, branch out, or share your work safely. Instead of juggling “final-final-v3.js” files, every step is stored clearly.
Version control also makes it easier to collaborate, since multiple people can work on the same project without overwriting each other. And if something breaks, you can always roll back to a working version instead of starting over.
WEEK 7
VERSION CONTROL
VERSION CONTROL
TERMINOLOGY
GITHUB DESKTOP
NEW REPO
README.MD
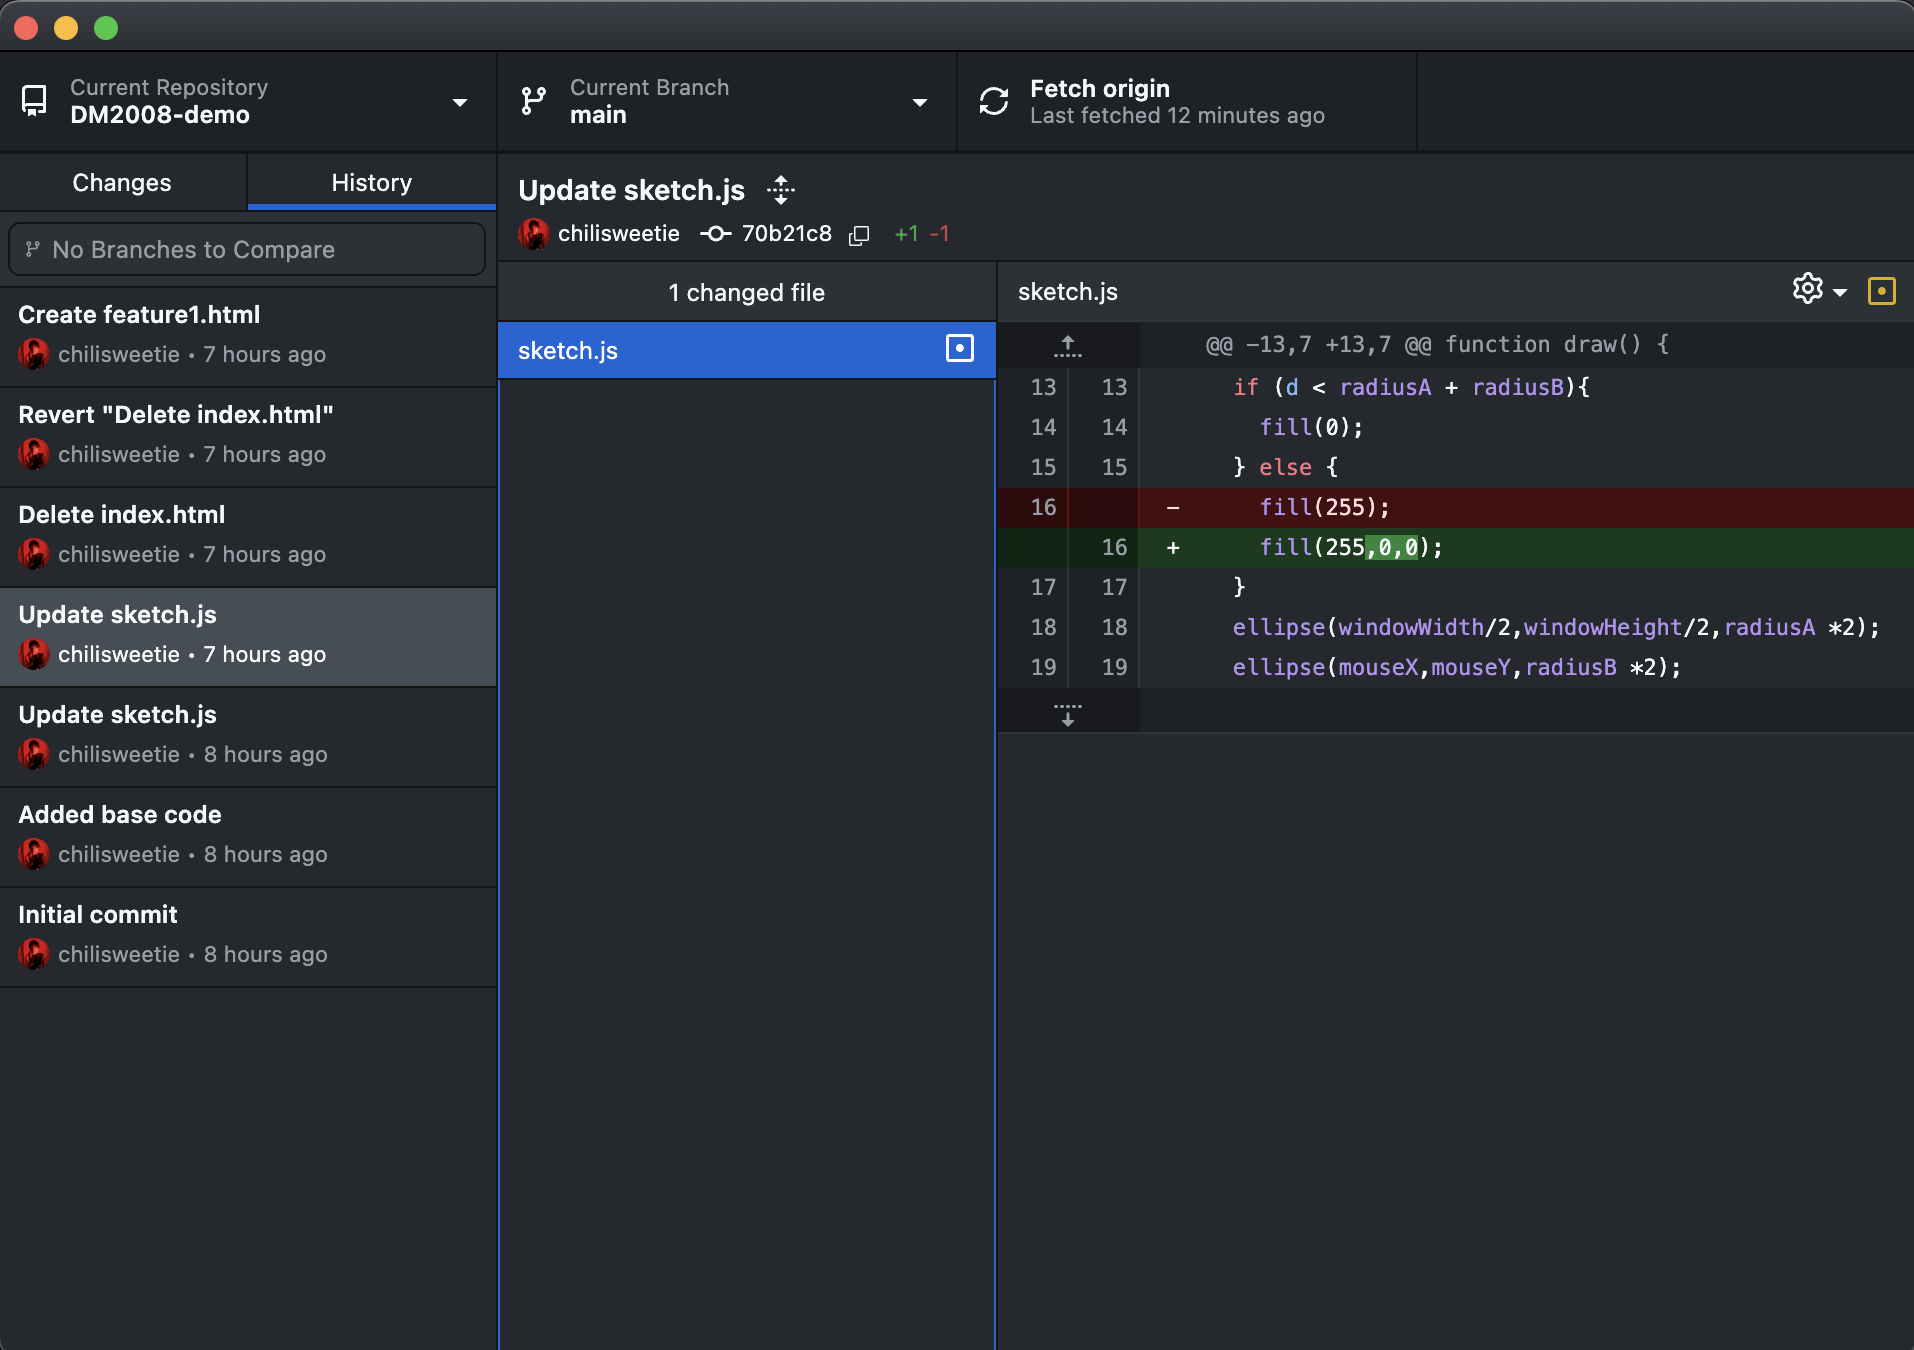
DM2008
AY2526
PROGRAMMING FOR INTERACTION
Terminology
To use GitHub, you need to understand a few basic terminology. These words might sound new, but they describe actions you have already been doing, just in a more structured way.
VERSION CONTROL
TERMINOLOGY
GITHUB DESKTOP
NEW REPO
README.MD
A repository (repo) is a place where you can store your code and each of its revision. It can have multiple collaborators and can be either public or private.
To clone a repository, you download a full copy of it including all versions of every file and folder.
Push and Pull are fundamental Git operations used to sync changes between your local and remote respository.
Push to upload your local commits to the repository,
pull to download changes from that same repository.
A commit records changes to one or more files to your branch and takes a snapshot of your project's files at any point in time.
WEEK 7
VERSION CONTROL
DM2008
AY2526
PROGRAMMING FOR INTERACTION
GitHub Desktop
Using GitHub Desktop means you do not have to type complicated commands. It gives you a clear interface where you can see your files, your history, and all your changes in one place.
With just a few clicks, you can commit, push, or pull your project. It’s like having a simple dashboard for managing your code’s timeline.
GitHub Desktop also shows exactly what lines have changed, so you understand your edits at a glance. Once you’re logged in, your projects can be synced and shared with almost no extra setup.
VERSION CONTROL
TERMINOLOGY
GITHUB DESKTOP
NEW REPO
README.MD
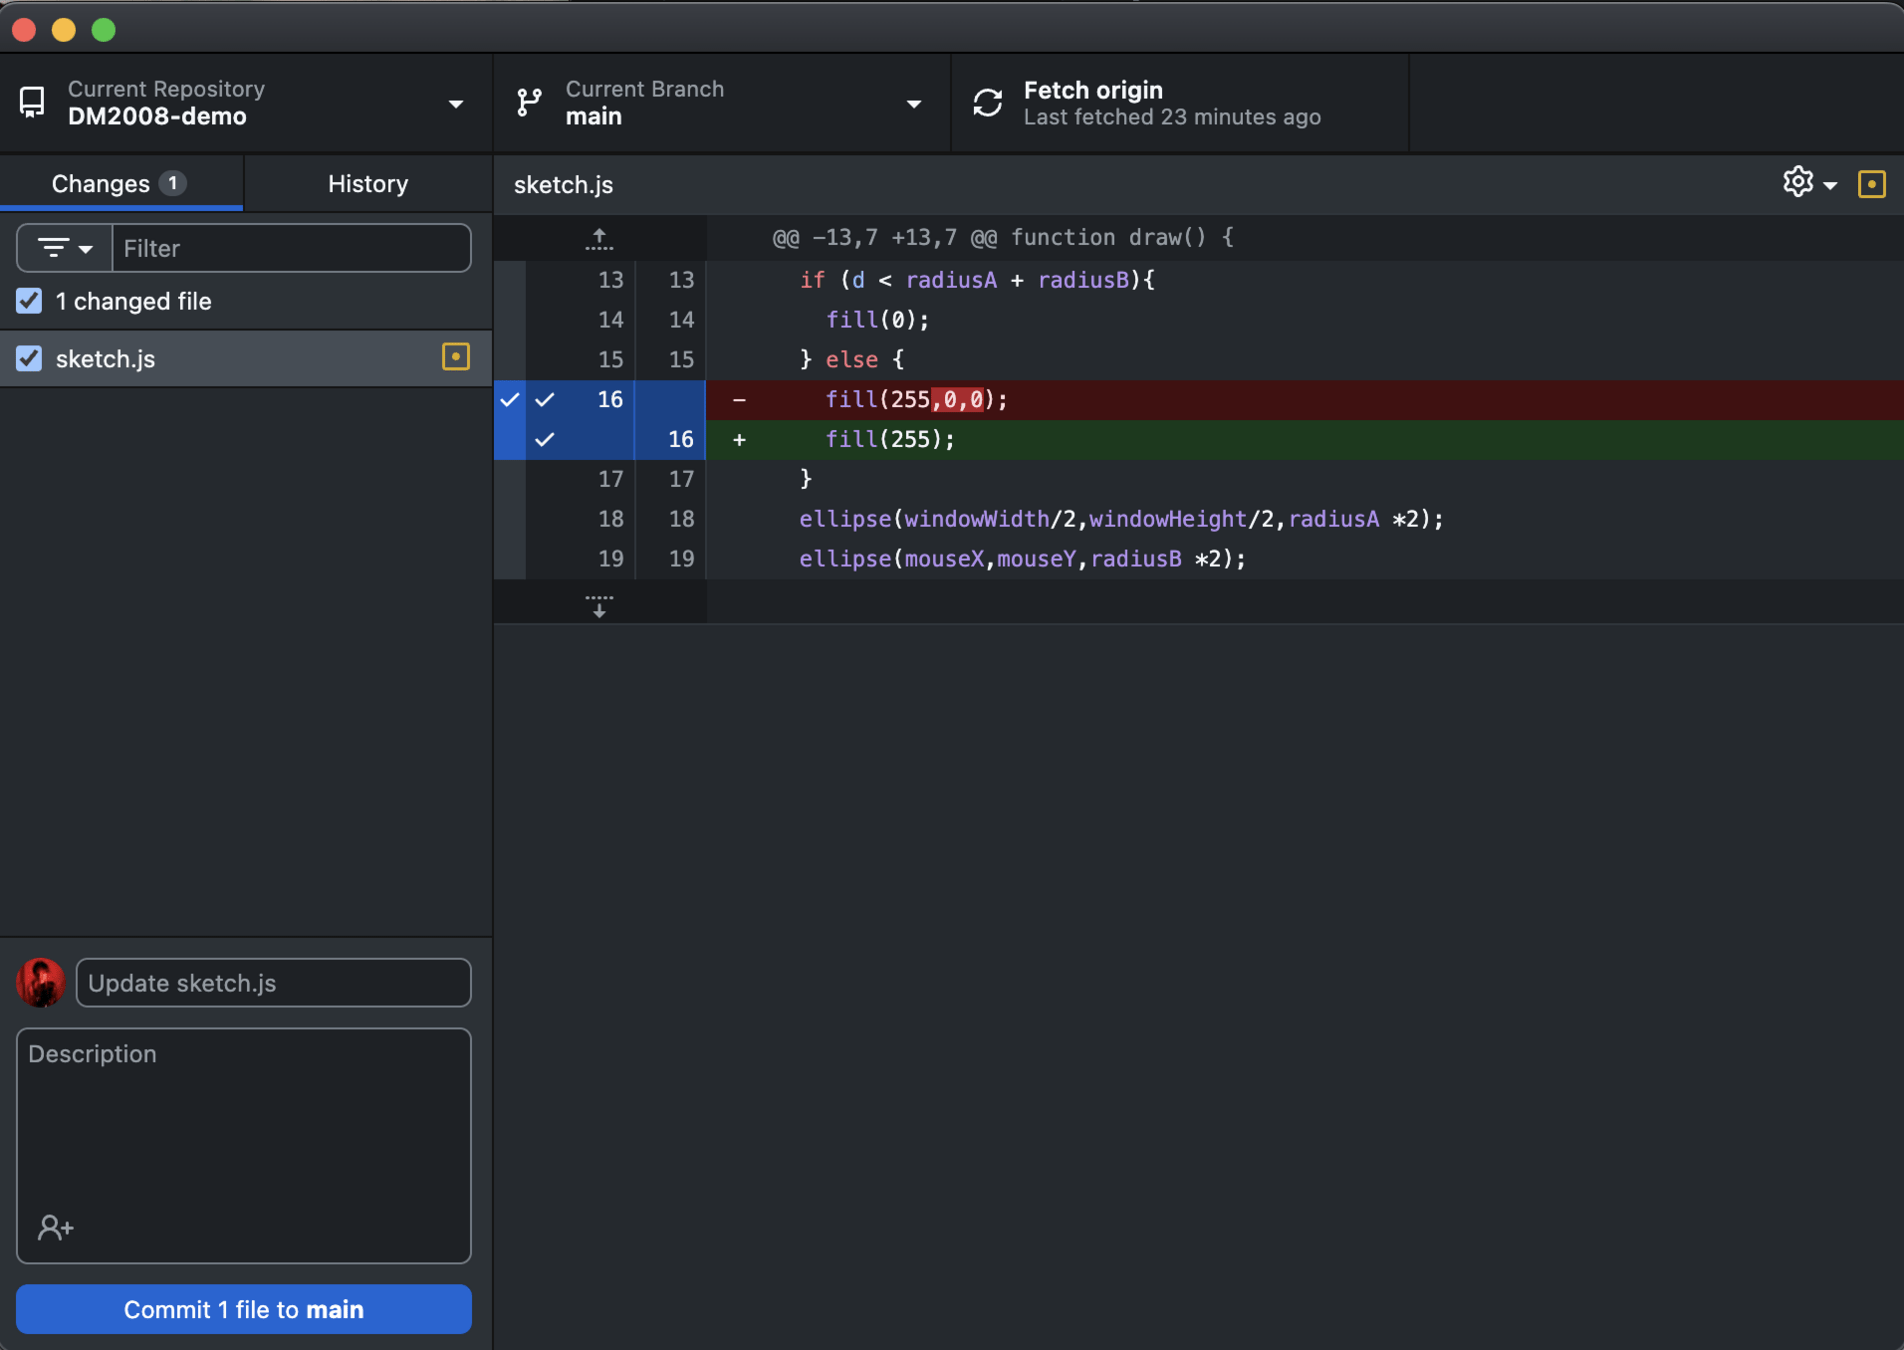
WEEK 7
VERSION CONTROL
DM2008
AY2526
PROGRAMMING FOR INTERACTION
New Repository
Every project you track on GitHub needs its own repository, or repo. Making one is like opening a new folder that GitHub will keep an eye on. You can start from scratch or connect one of your existing projects.
For our class, we’ll all follow the same naming convention: dm2008-Firstname-Lastname-AY2526-S1.
This keeps things tidy and makes it easy for everyone to find their work later. Having a repo also means your project is backed up online and can be accessed from any computer you log into.
VERSION CONTROL
TERMINOLOGY
GITHUB DESKTOP
NEW REPO
README.MD
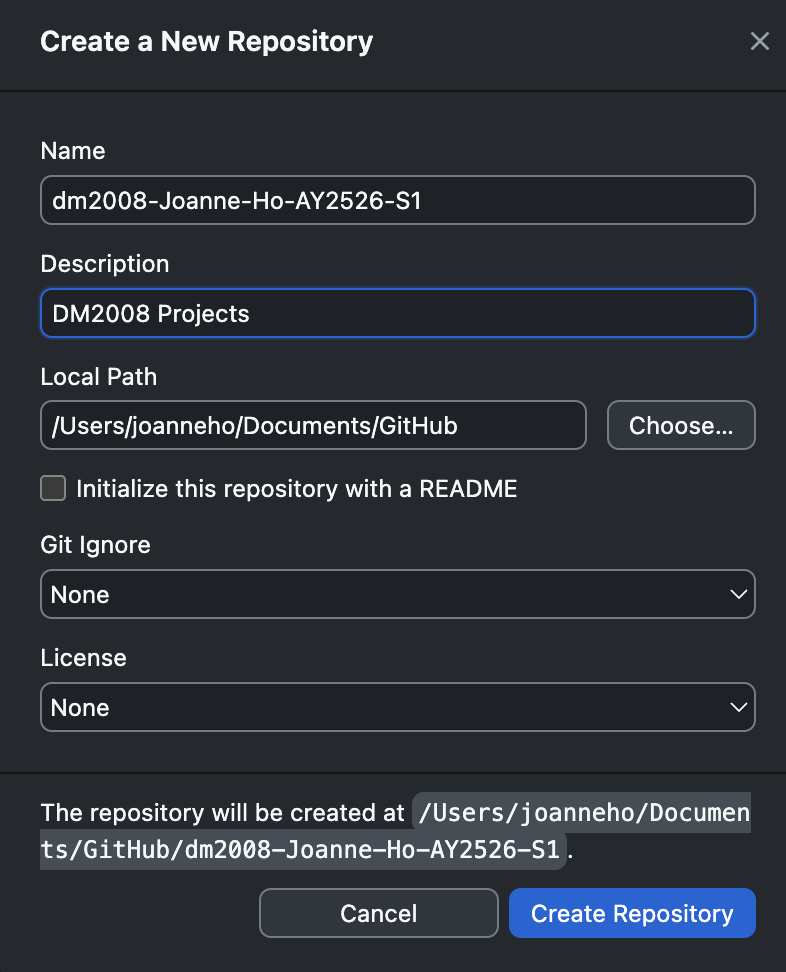
WEEK 7
VERSION CONTROL
DM2008
AY2526
PROGRAMMING FOR INTERACTION
Readme Document
A README is the welcome mat for your project. It’s the first thing anyone sees when they open your repo, and it explains what your project is and how it works.
You write it in Markdown, which is just a way to add simple formatting like titles, bullet points, or links. Each folder should have its own README so nothing gets lost.
A clear README helps others (and future you) quickly understand your project without digging through the code. It’s also a place to show off documentation or even instructions for running your sketch.
VERSION CONTROL
TERMINOLOGY
GITHUB DESKTOP
NEW REPO
README.MD
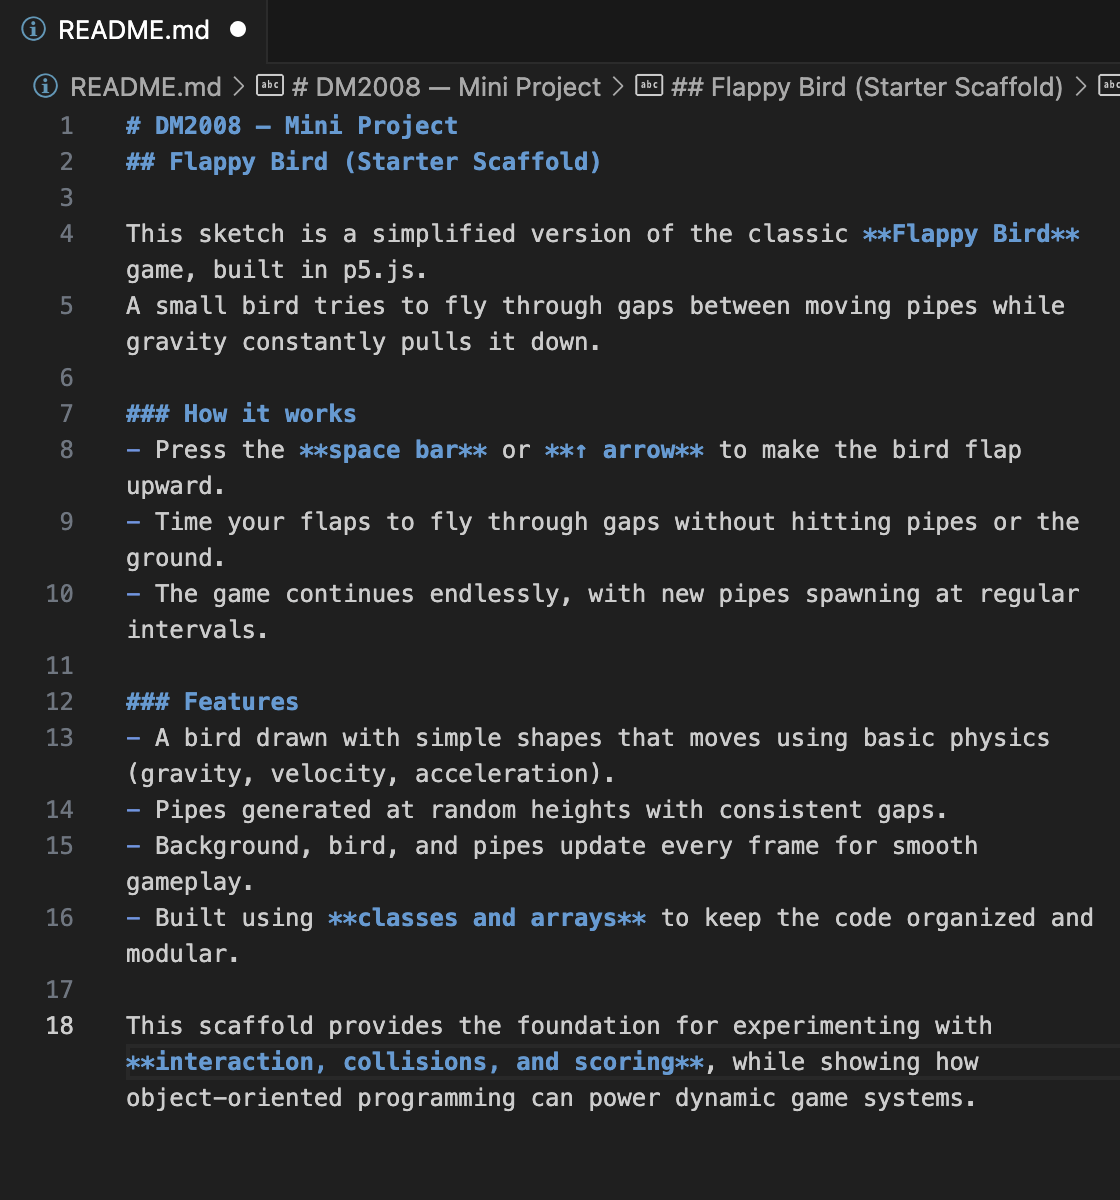
WEEK 7
VERSION CONTROL
DM2008
AY2526
PROGRAMMING FOR INTERACTION
Activity 7b
BRIEF
REFERENCE
OUTPUT
Version Controlled
Create a new repo in GitHub Desktop. Add a directory for your Mini Project and include a README.
Make empty directories for each week and drop in placeholder READMEs. Commit your changes and push the repo to GitHub.
Share your repo link on the class EtherPad.
25 MIN
WEEK 7
VERSION CONTROL
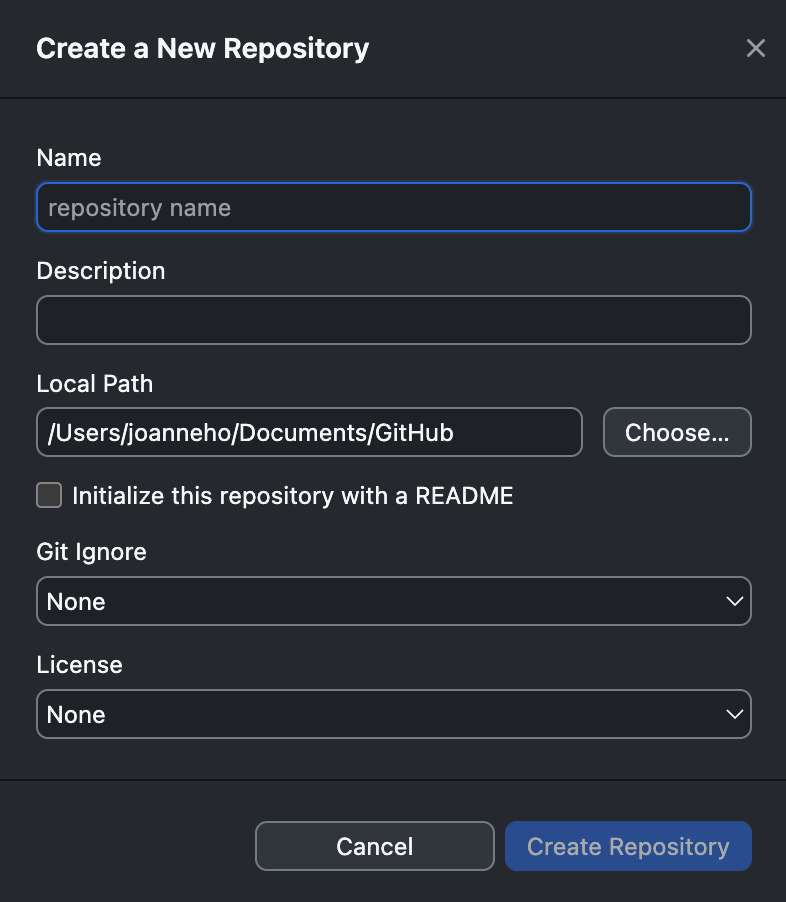
DM2008
AY2526
PROGRAMMING FOR INTERACTION
BRIEF
REFERENCE
OUTPUT
Key Terms
Useful Code & Structure
README.md
Activity 7b
WEEK 7
VERSION CONTROL
DM2008
AY2526
PROGRAMMING FOR INTERACTION
BRIEF
REFERENCE
OUTPUT
Output
For homework and your own archival
Document your output by:
- Creating a new repo using GitHub Desktop
- Adding a Mini Project folder with a README inside
- Making empty folders for each week and including placeholder READMEs
- Committing changes and pushing the repo to GitHub
- Sharing your repo link on the class EtherPad.
deliverables
GitHub repo with correct naming convention
Mini Project folder and weekly folders with READMEs
Repo link shared online
Activity 7b
WEEK 7
VERSION CONTROL
DM2008
AY2526
PROGRAMMING FOR INTERACTION
AI Assistants (Pros)
AI coding assistants shine when it comes to explaining concepts in simple, beginner-friendly language. If you’re confused about how a for loop works, AI can break it down step by step, often in a way that feels like a tutor walking you through the logic.
They’re also great at generating boilerplate code, spotting missing syntax like a forgotten semicolon, and even adding comments to explain what each part of the code does.
On top of that, they can troubleshoot logic issues, acting like a patient teaching partner who helps you understand not just the what but also the why.
WEEK 7
AI GENERATED CODE
POSITIVES
NEGATIVES
BEST PRACTICES
PROMPTING
MODELS
You might ask, “Why doesn’t my circle stay on screen?” The AI could explain that background() inside draw() is clearing it every frame, so your circle only appears for an instant.
function setup() {
createCanvas(400, 400); // set up the canvas
}
function draw() {
ellipse(width/2, height/2, 100); // draw a circle (this runs first)
background(220); // clear screen each frame
// ❌ Problem: this is called AFTER the ellipse,
// so it "paints over" the circle immediately.
// The result is that the circle seems invisible.
}DM2008
AY2526
PROGRAMMING FOR INTERACTION
AI Assistants (Cons)
AI doesn’t always understand the full context of your sketch or your creative intent.
It may suggest variable names or functions that don’t exist in your code, or even mix up concepts from different coding libraries.
Sometimes the code will run, but it won’t do what you wanted because AI can’t fully “see” your project the way you do.
This means you need to double-check everything and adapt its suggestions to your own codebase.
POSITIVES
NEGATIVES
BEST PRACTICES
PROMPTING
MODELS
let y= 200;
let yspeed = 3;
function setup() {
createCanvas(400, 400);
}
function draw() {
background(220);
ellipse(200, y, 50);
y += yspeed;
}You might ask for bouncing ball code, and the AI gives you variables like ballX and ballY, even though your sketch already uses x and y. The code won’t work until you connect the suggestion to your existing variables.
ballY += ySpeed;
if (ballY > height || ballY < 0) {
ySpeed *= -1;
}WEEK 7
AI GENERATED CODE
DM2008
AY2526
PROGRAMMING FOR INTERACTION
Best Practices
Avoid one-shot prompting
Don’t ask the AI to “make the whole project.” Break tasks into smaller questions.
Use clear language and code snippets
Be specific about what you want, and share the part of your code that’s relevant.
Verify suggestions
Test the code AI gives you, does it work?
POSITIVES
NEGATIVES
BEST PRACTICES
PROMPTING
MODELS
Instead of saying “Make me a painting app,” you could ask “How do I use mousePressed() to draw circles on the canvas?” Then add features step by step until you have your full app.
Iterate in small steps
Build feature by feature, checking that each piece works before moving on.
Stay at the function or method level
Ask about one function at a time instead of pasting your entire sketch.
WEEK 7
AI GENERATED CODE
DM2008
AY2526
PROGRAMMING FOR INTERACTION
Prompting
One of the most common mistakes is asking AI for help in a way that’s too vague. The more specific your prompt, the more useful and accurate the response will be.
Always give context and include your code snippets. It helps the AI give you a solution that actually fits your sketch.
POSITIVES
NEGATIVES
BEST PRACTICES
PROMPTING
MODELS
Vague prompt #2: “Make me a Pong game.”
Better prompt #2: “How can I make a rectangle move left and right with the arrow keys?” (A small, concrete step toward Pong.)
Vague prompt #1: “Fix my code, it’s broken.” (Too vague, AI might not know what’s wrong.)
Better prompt #1: “In my draw() function, I want my ellipse to move with arrow keys, but nothing happens. Here’s the code. What am I missing?” (AI can now tell you to add keyPressed())
WEEK 7
AI GENERATED CODE
DM2008
AY2526
PROGRAMMING FOR INTERACTION
Models to Use
There are different AI assistants you can try, and each one has strengths.
ChatGPT is good for step-by-step help and debugging explanations.
Claude is very strong at explaining concepts in beginner-friendly terms.
GitHub Copilot works directly inside VSCode and can suggest code as you type, which is great for speeding up repetitive tasks.
The best way is to try a few and see which best fits your style of working.
POSITIVES
NEGATIVES
BEST PRACTICES
PROMPTING
MODELS
Co-pilot in VSCode is free for students via GitHub Student Developer Pack.
WEEK 7
AI GENERATED CODE
DM2008
AY2526
PROGRAMMING FOR INTERACTION
WEEK 7
WRAPPING UP
Homework
Mini Project
Continue refining your project in a local environment.
Ensure project is backed up to your GitHub repo.
Complete documentation of the process and project.
1
GitHub Repo
2
Read the Notion Companion for tips on how to compress media.
Complete placing files for activities from Week 1–5 into repo.
Push changes to GitHub and upload your projects there.
HOMEWORK
TUTORIALS

3
Contains a deep-dive on platforms and topics covered in this session. Consult this companion first before reaching out for help from instructor.
DM2008
AY2526
PROGRAMMING FOR INTERACTION
HOMEWORK
TUTORIALS
1
2
3
4

WEEK 7
WRAPPING UP
Video Tutorials
DM2008
AY2526
PROGRAMMING FOR INTERACTION
Arduino Basics
8
Exploring Arduino as an introduction to physical computing, understanding wiring basics, and exploring how inputs and outputs enable simple interactions.
Last Session
Last session, we moved from the p5.js Web Editor into coding locally with VSCode, gaining more control over file structure and project organization.
We also introduced GitHub for version control, learning how repositories keep a history of changes and make collaboration safer and easier.
Finally, we explored the role of AI coding assistants, discussing where they help, where they fail, and how to use them responsibly, before wrapping up with hands-on activities setting up repos and pushing code.
DM2008
AY2526
PROGRAMMING FOR INTERACTION
WEEK 8
WARM UP
PREVIOUSLY
OBJECTIVES
Last Session
DM2008
AY2526
PROGRAMMING FOR INTERACTION
WEEK 8
WARM UP
PREVIOUSLY
OBJECTIVES
index.html
Main page containing the sketch
Files & Folders
sketch.js
The code for your p5.js sketch
styles.css
CSS file for handling presentation
Right-click index.html and open with Live Server
Click on "Go Live" on the bottom right corner of VS Code
Live Server (VS Code)
Either option above runs your project's code locally using the default browser
/assets
Folder for images, sounds, fonts
kebab-case
Case formatting for names of files and folders (week-07-project)
Last Session
DM2008
AY2526
PROGRAMMING FOR INTERACTION
WEEK 8
WARM UP
PREVIOUSLY
OBJECTIVES
Repository
Main folder
Version Control
Commit
Save a snapshot
Push
Send commits to GitHub
README.md
Use Markdown (.md) for formatting
Add notes about each project
Can be directly edited in GitHub or a text editor
Pull
Retrieve changes from GitHub
This Session
DM2008
AY2526
PROGRAMMING FOR INTERACTION
PREVIOUSLY
OBJECTIVES
Physical computing is connecting code to the physical world by sensing, reacting, and responding.
Digital and analog signals determine how Arduino reads the world. Digital signals are binary (on/off), analog signals vary across a range of values.
Breadboards and good wiring are essential tools for prototyping circuits safely and efficiently. Learning how to connect components is the first step to building interactive systems.
In this session, you will
WEEK 8
WARM UP
1
2
3
DM2008
AY2526
PROGRAMMING FOR INTERACTION
Arduino Basics
Up until now, we’ve only coded for things on laptops and screens. What if we wanted our code to interact with the real world?
A microcontroller is a super tiny computer on a chip. It has its own brain, memory, and pins that let it talk to sensors and control things such as lights, motors and more.
A microcontroller serves as a bridge between your code and the physical world.
The Arduino board, using its onboard microcontroller, helps make this possible through a simplified software platform.
WEEK 8
ARDUINO BASICS
ARDUINO BASICS
ANATOMY
ARDUINO IDE
USB CONNECTION
"BLINK" SKETCH
BREADBOARD
JUMPER WIRES
CIRCUITS
RESISTORS
LEDS
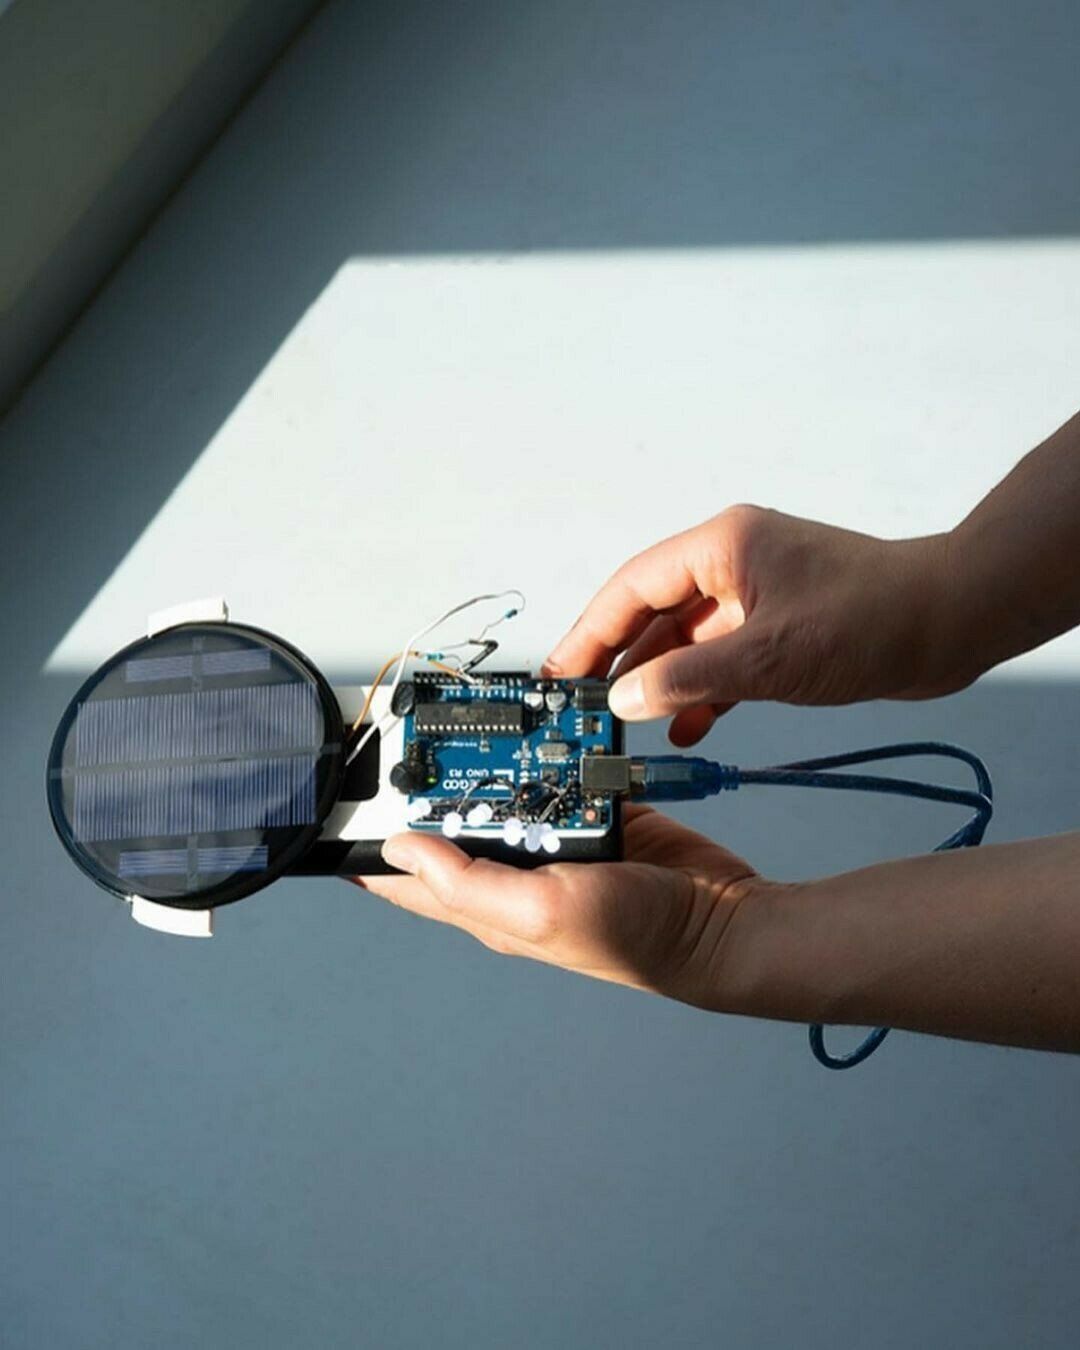
DM2008
AY2526
PROGRAMMING FOR INTERACTION
Pairing Up
Before we start the class, we will be handing out Arduino kits for each group.
Please pair up since we do not have enough Arduinos to go around for every single person.
We will be doing this in steps together amidst some slides for information.
WEEK 8
ARDUINO BASICS
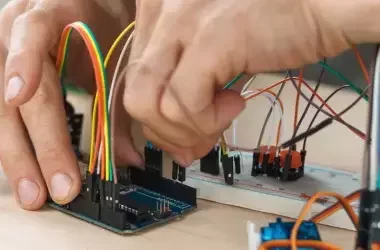
ARDUINO BASICS
ANATOMY
ARDUINO IDE
USB CONNECTION
"BLINK" SKETCH
BREADBOARD
JUMPER WIRES
CIRCUITS
RESISTORS
LEDS
Find a partner to pair up with
3 MIN
DM2008
AY2526
PROGRAMMING FOR INTERACTION
Anatomy of Arduino
The Arduino board has lots of little pins, and each one has a job.
Digital pins can only do ON or OFF, like flipping a switch.
Analog pins can read a range of values, like how bright or dark it is.
Power pins give electricity to your sensors and LEDs.
Once you know what each pin does, you can start plugging in sensors and outputs to build your own interactive systems.
WEEK 8
ARDUINO BASICS
ARDUINO BASICS
ANATOMY
ARDUINO IDE
USB CONNECTION
"BLINK" SKETCH
BREADBOARD
JUMPER WIRES
CIRCUITS
RESISTORS
LEDS
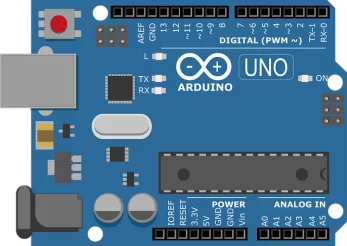
DM2008
AY2526
PROGRAMMING FOR INTERACTION
Arduino IDE
To write code for Arduino, you’ll need the Arduino IDE (Integrated Development Environment). It is simple program you install on your laptop.
It’s where you type your code, check for errors, and send it over to the Arduino board.
Think of it like the p5.js Web Editor for Arduino. This is your main workspace for testing and uploading ideas into hardware.
WEEK 8
ARDUINO BASICS
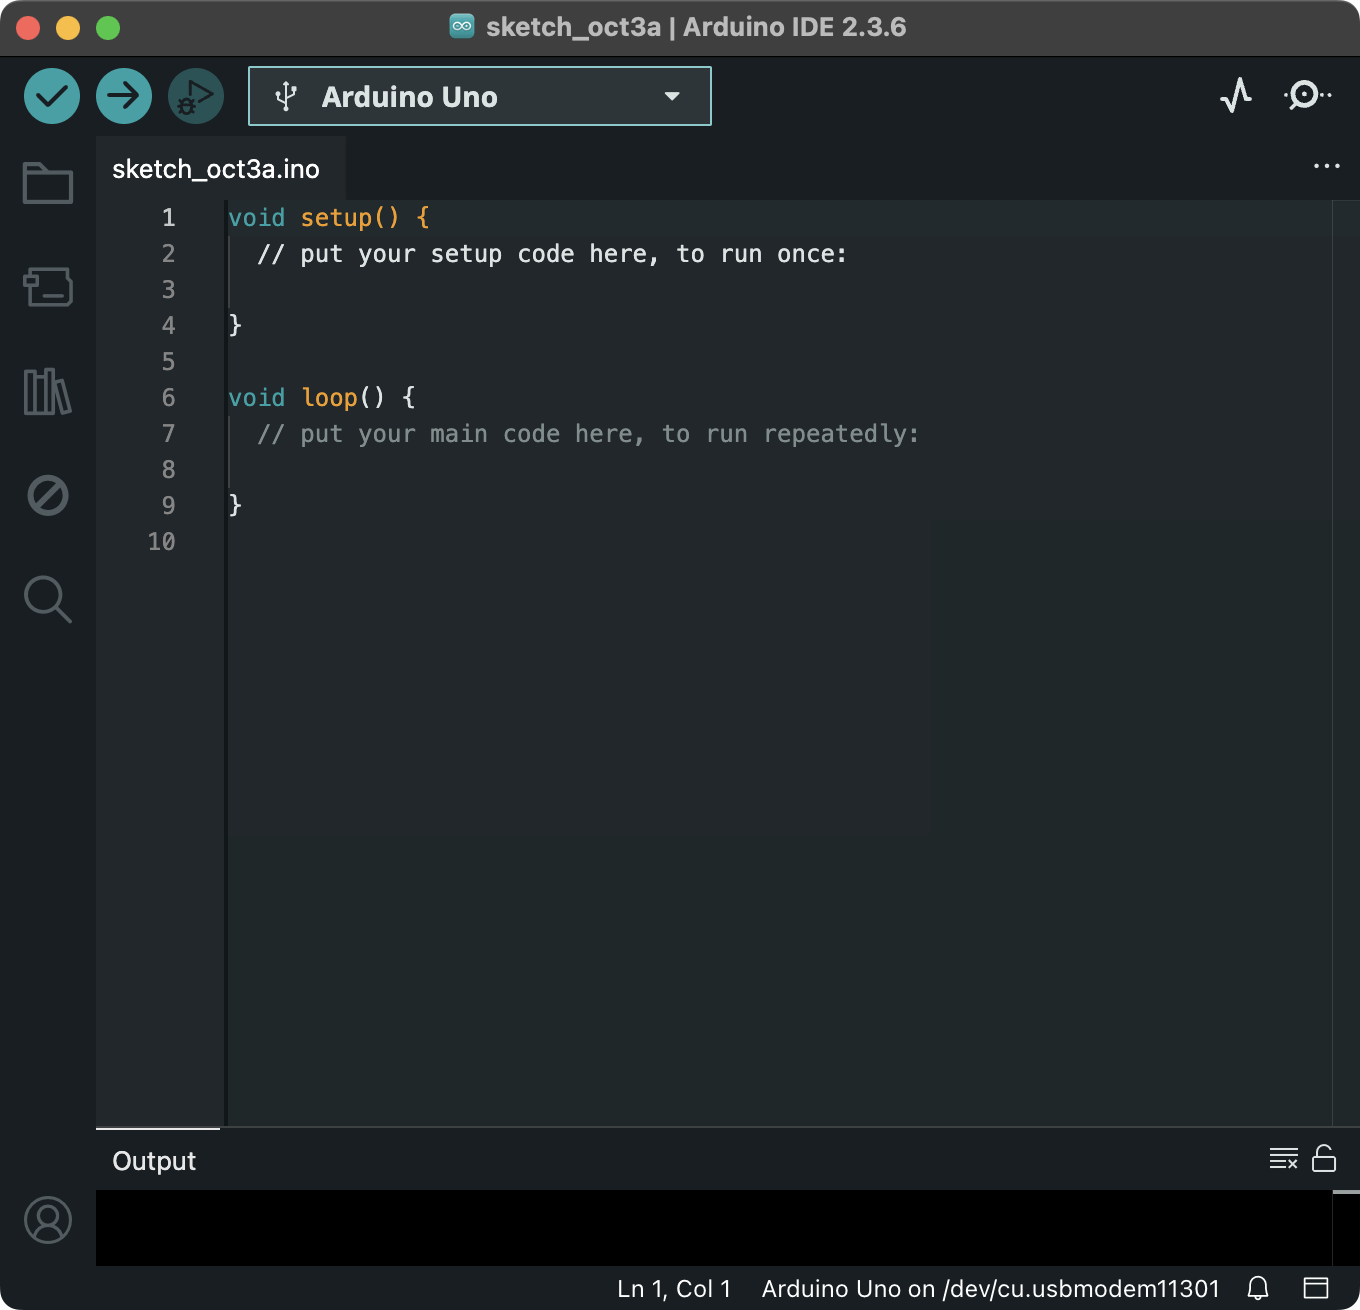
ARDUINO BASICS
ANATOMY
ARDUINO IDE
USB CONNECTION
"BLINK" SKETCH
BREADBOARD
JUMPER WIRES
CIRCUITS
RESISTORS
LEDS
Learn more here
5 MIN
DM2008
AY2526
PROGRAMMING FOR INTERACTION
Arduino IDE
WEEK 8
ARDUINO BASICS
2
3
1
4
ARDUINO BASICS
ANATOMY
ARDUINO IDE
USB CONNECTION
"BLINK" SKETCH
BREADBOARD
JUMPER WIRES
CIRCUITS
RESISTORS
LEDS
1
This shows the name of the sketch you are currently working on.
2
This is the area where you write the code for your sketch.
3
The output console shows logs and error messages. When debugging, this is the first place you should check.
4
This dropdown menu allows you to select your Arduino board when it's connected to your computer.
DM2008
AY2526
PROGRAMMING FOR INTERACTION
Arduino IDE
WEEK 8
ARDUINO BASICS
5
Verify and compile your sketch by clicking on this button.
6
Upload your code onto the Arduino by clicking this button.
7
Save sketches locally on your device or on the cloud with your Arduino account.
8
Log in with an Arduino account here.
5
6
7
8
ARDUINO BASICS
ANATOMY
ARDUINO IDE
USB CONNECTION
"BLINK" SKETCH
BREADBOARD
JUMPER WIRES
CIRCUITS
RESISTORS
LEDS
DM2008
AY2526
PROGRAMMING FOR INTERACTION
Arduino Language
WEEK 8
ARDUINO BASICS
Even though p5.js and Arduino may look different, they follow the same logical flow:
- setup things once,
- then loop continuously
Arduino uses the Arduino Programming Language (based on C++), while p5.js uses JavaScript, so the syntax changes, even though the ideas stay the same.
p5.js
Arduino
ARDUINO BASICS
ANATOMY
ARDUINO IDE
USB CONNECTION
"BLINK" SKETCH
BREADBOARD
JUMPER WIRES
CIRCUITS
RESISTORS
LEDS
DM2008
AY2526
PROGRAMMING FOR INTERACTION
USB Connection
The Arduino connects to your laptop with a USB cable. This does two things at once. It gives power to the board, and it lets the Arduino “talk” to your computer through serial communication.
That means sensor data can travel from your Arduino to your laptop and then into your p5.js sketches, making your visuals react to the real world.
WEEK 8
ARDUINO BASICS
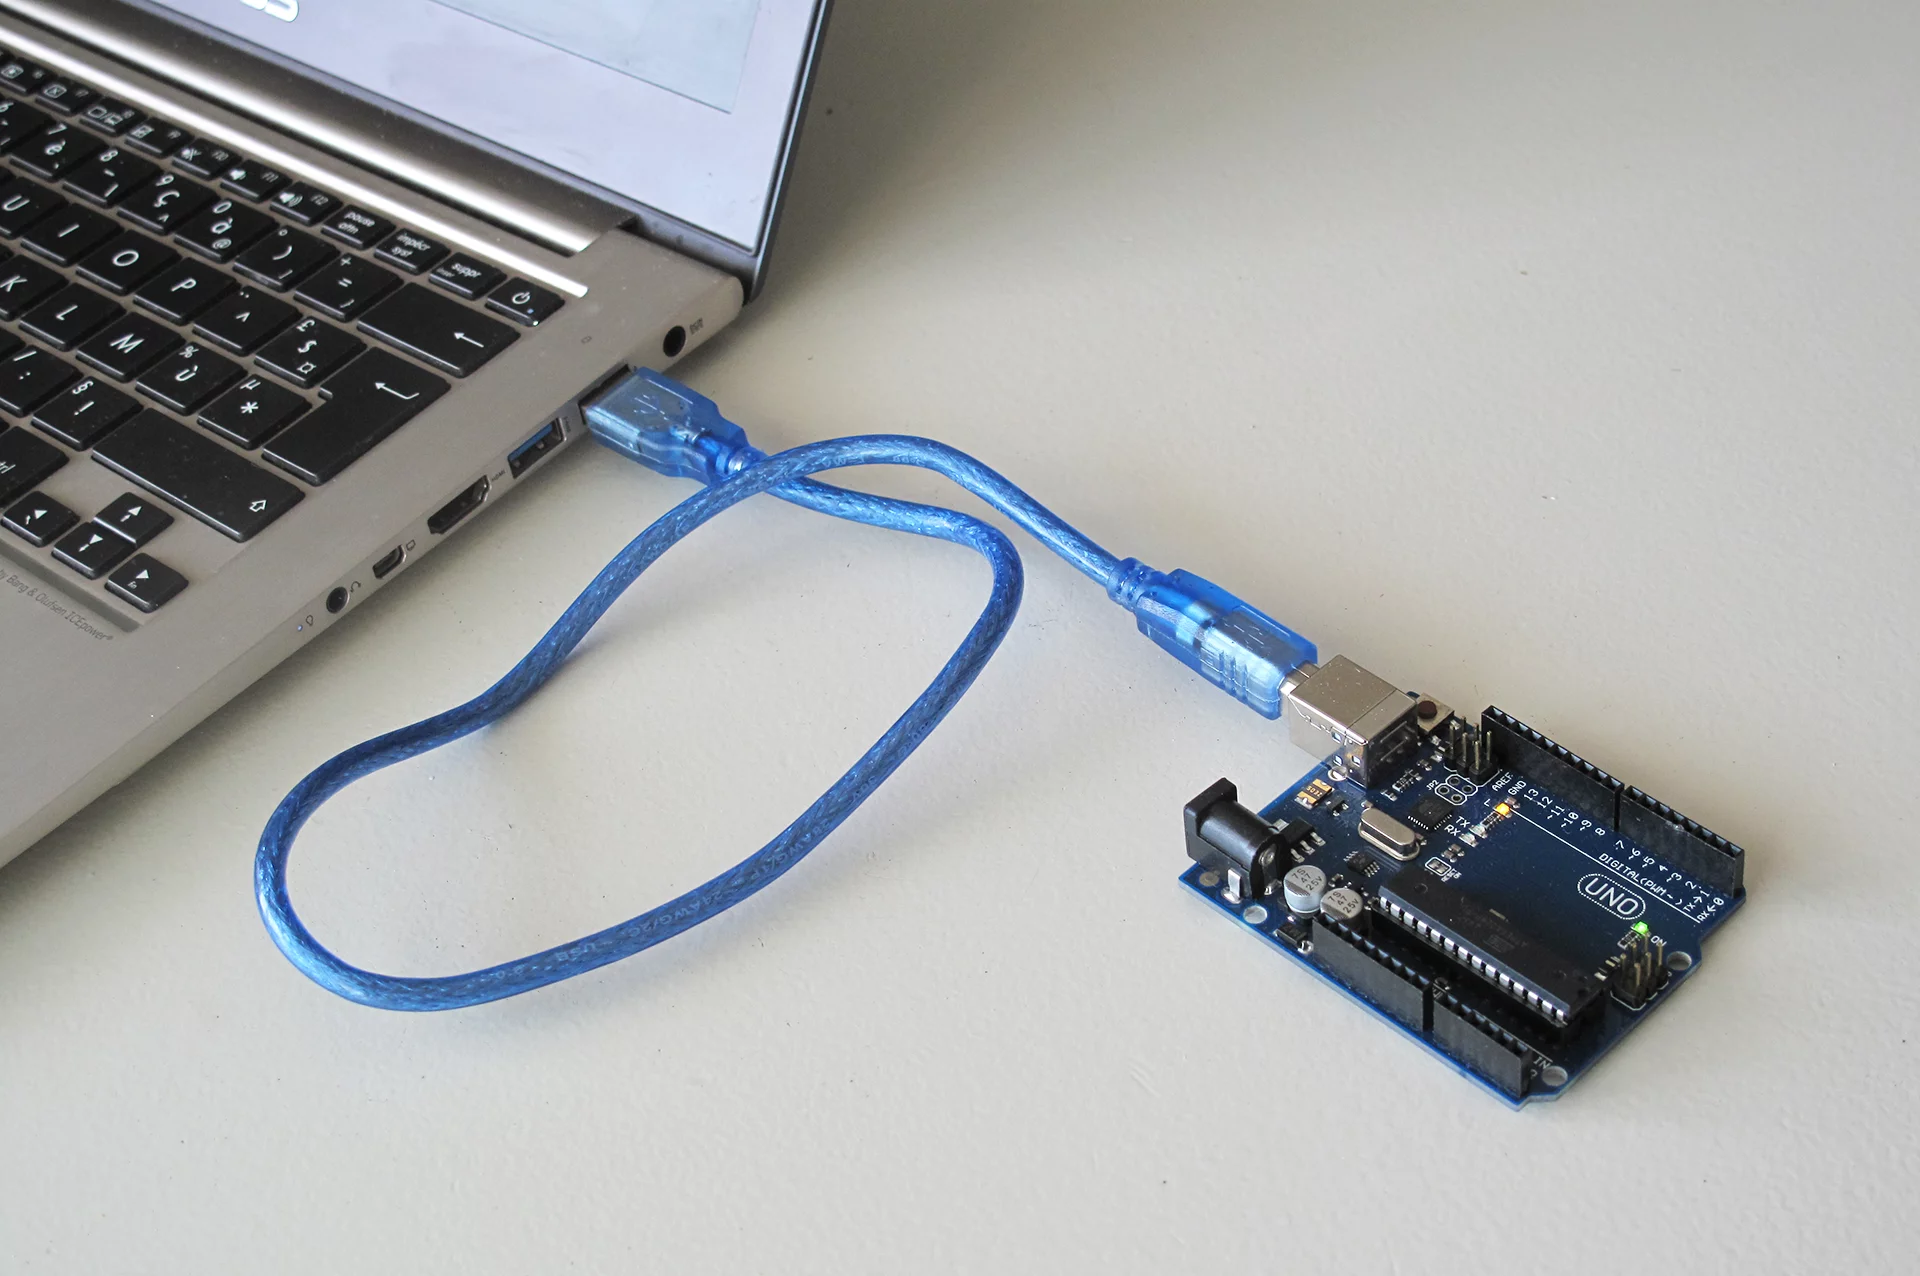
ARDUINO BASICS
ANATOMY
ARDUINO IDE
USB CONNECTION
"BLINK" SKETCH
BREADBOARD
JUMPER WIRES
CIRCUITS
RESISTORS
LEDS
Connect the Arduino to your computer using the USB cable. Ensure it connects to the IDE.
5 MIN
DM2008
AY2526
PROGRAMMING FOR INTERACTION
"Blink" Sketch
The very first program most people usually run is simple sketch called "Blink".
It makes the onboard LED on the Arduino board turn on and off in sequence—the physical computing equivalent of a “hello world”.
Running Blink shows you that your board is working, your code is uploading, and your setup is ready to go.
WEEK 8
ARDUINO BASICS
/*
Blink
Turns an LED on for one second, then off for one second, repeatedly.
This example code is in the public domain.
https://www.arduino.cc/en/Tutorial/BuiltInExamples/Blink
*/
// the setup function runs once when you press reset or power the board
void setup() {
// initialize digital pin LED_BUILTIN as an output.
pinMode(LED_BUILTIN, OUTPUT);
}
// the loop function runs over and over again forever
void loop() {
digitalWrite(LED_BUILTIN, HIGH); // turn the LED on (HIGH is the voltage level)
delay(1000); // wait for a second
digitalWrite(LED_BUILTIN, LOW); // turn the LED off by making the voltage LOW
delay(1000); // wait for a second
}
ARDUINO BASICS
ANATOMY
ARDUINO IDE
USB CONNECTION
"BLINK" SKETCH
BREADBOARD
JUMPER WIRES
CIRCUITS
RESISTORS
LEDS
Learn more here
Copy this code into your IDE
1 MIN
DM2008
AY2526
PROGRAMMING FOR INTERACTION
"Blink" Sketch
The Arduino already has a tiny LED built into the board (usually marked “L” near pin 13). When you upload the Blink code, that LED will blink on and off without adding anything else.
First, compile your code 🅐 then upload it to your connected Arduino 🅑.
WEEK 8
ARDUINO BASICS
Learn more here
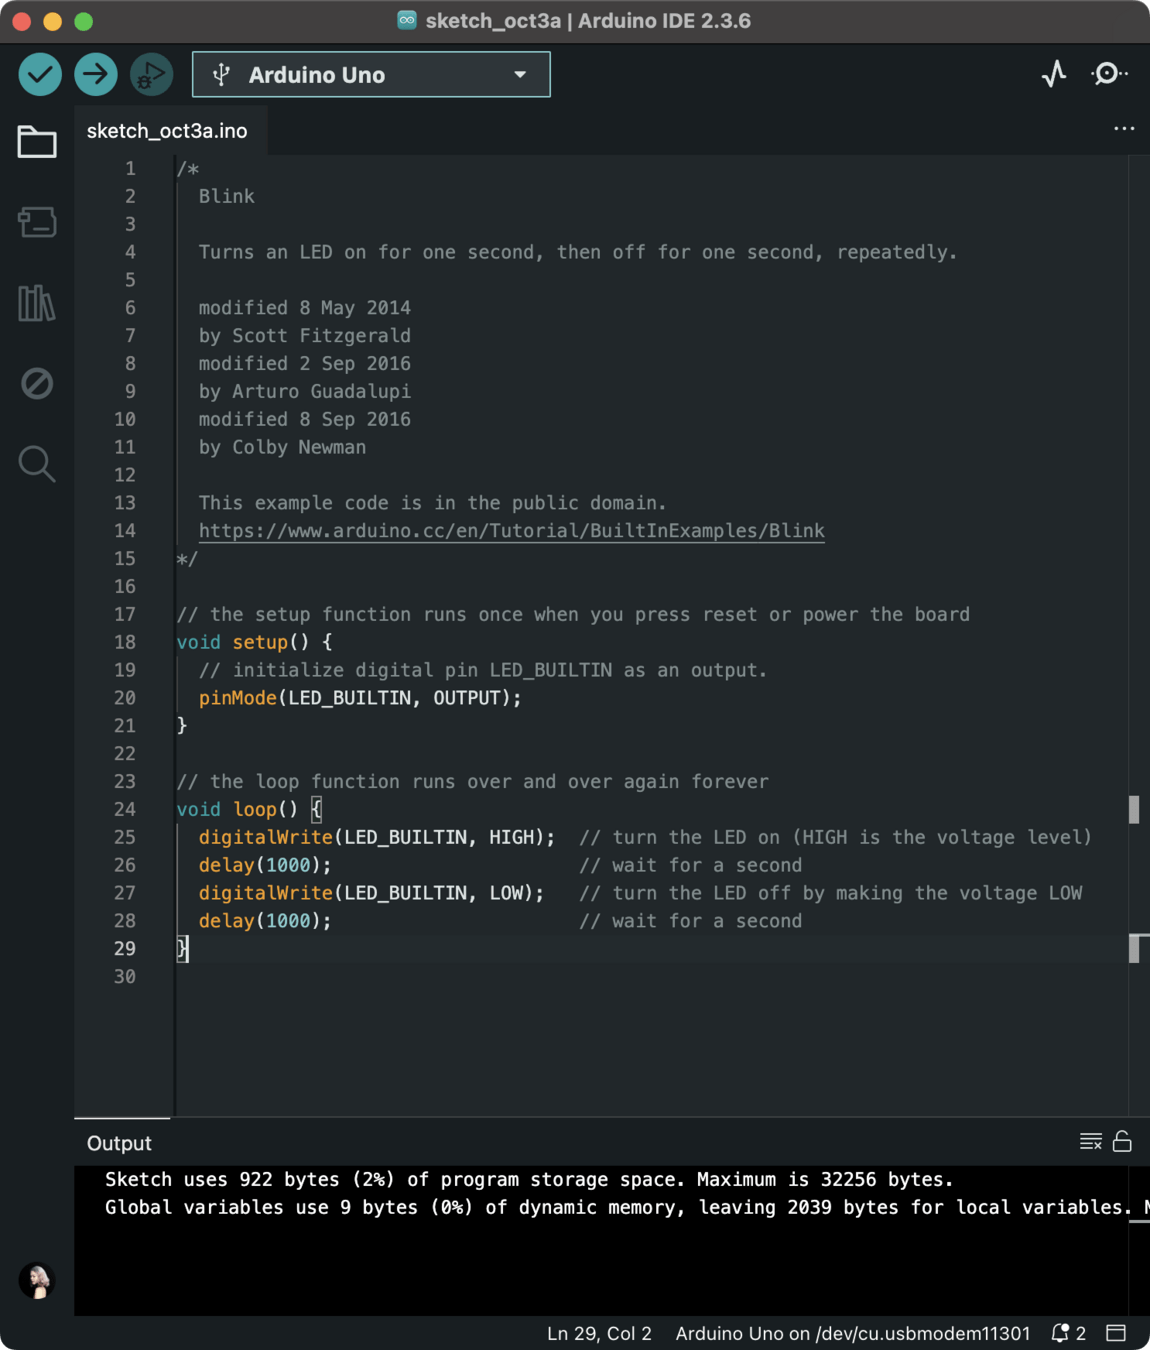
A
B
Compile and upload the code. Change the delay(1000) value to make the LED blink faster or slower.
5 MIN
ARDUINO BASICS
ANATOMY
ARDUINO IDE
USB CONNECTION
"BLINK" SKETCH
BREADBOARD
JUMPER WIRES
CIRCUITS
RESISTORS
LEDS
DM2008
AY2526
PROGRAMMING FOR INTERACTION
"Blink" Sketch
In case you were wondering, in Arduino, the function delay() measures time in milliseconds.
1 second = 1000 milliseconds
1/2 second = 500 milliseconds
WEEK 8
ARDUINO BASICS
Arduino uses milliseconds because it’s more precise for hardware timing, letting you do things in fractions of a second when needed.
ARDUINO BASICS
ANATOMY
ARDUINO IDE
USB CONNECTION
"BLINK" SKETCH
BREADBOARD
JUMPER WIRES
CIRCUITS
RESISTORS
LEDS
DM2008
AY2526
PROGRAMMING FOR INTERACTION
Solder-less Breadboard
The breadboard is a reusable sandbox for building circuits that does not require any messy or difficult soldering.
You plug components and wires into the tiny holes, and the board’s hidden strips of metal connect them together.
The side rails (marked + and –) act as power lines to distribute electricity.
You can think of this as a “prototyping board” where you can build, test and rearrange your circuits easily.
WEEK 8
ARDUINO BASICS
ARDUINO BASICS
ANATOMY
ARDUINO IDE
USB CONNECTION
"BLINK" SKETCH
BREADBOARD
JUMPER WIRES
CIRCUITS
RESISTORS
LEDS
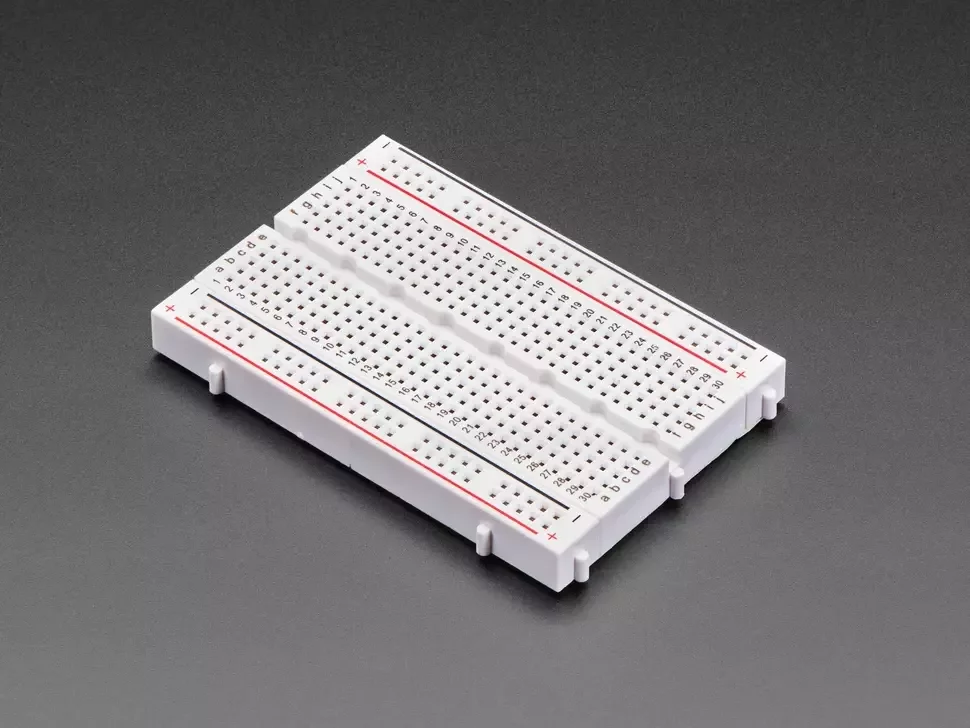
DM2008
AY2526
PROGRAMMING FOR INTERACTION
When you look inside a breadboard, you’ll see rows of metal strips that connect the holes together.
The two long rails on the sides (red and blue lines) are used for power (+) and ground (–). The short horizontal rows in the middle connect your wires and components.
WEEK 8
ARDUINO BASICS
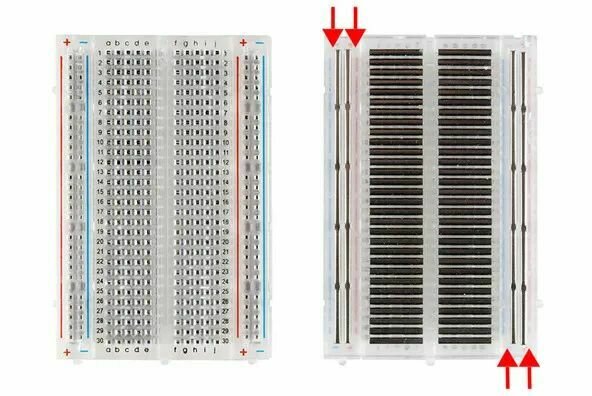
The divider down the center breaks the board in half, so chips or microcontrollers can straddle the gap, giving each pin its own connection.
Solder-less Breadboard
ARDUINO BASICS
ANATOMY
ARDUINO IDE
USB CONNECTION
"BLINK" SKETCH
BREADBOARD
JUMPER WIRES
CIRCUITS
RESISTORS
LEDS
DM2008
AY2526
PROGRAMMING FOR INTERACTION
Each row of 5 holes on one side of the breadboard is connected underneath.
If you plug two or more pins of a device into the same row, those pins will be electrically tied together.
With nothing in between to resist or use the power, it has the same effect as connecting the two ends of a battery with a wire. The energy dumps instantly, short circuits and it can damage your board.
Always remember to end a circuit by connecting it to the ground.
WEEK 8
ARDUINO BASICS
Solder-less Breadboard
ARDUINO BASICS
ANATOMY
ARDUINO IDE
USB CONNECTION
"BLINK" SKETCH
BREADBOARD
JUMPER WIRES
CIRCUITS
RESISTORS
LEDS
DM2008
AY2526
PROGRAMMING FOR INTERACTION
Jumper Wires
Jumper wires are the “bridges” that connect your Arduino, breadboard, and sensors.
Male-to-Male (M/M): pin on both ends, fits breadboard holes and Arduino headers.
Male-to-Female (M/F): one pin, one socket. Useful for modules or sensors with pins.
Female-to-Female (F/F): sockets on both ends, used to connect two modules directly.
WEEK 8
ARDUINO BASICS
ARDUINO BASICS
ANATOMY
ARDUINO IDE
USB CONNECTION
"BLINK" SKETCH
BREADBOARD
JUMPER WIRES
CIRCUITS
RESISTORS
LEDS

DM2008
AY2526
PROGRAMMING FOR INTERACTION
Arduino-Breadboard Circuits
Let's unplug the Arduino from the
power source (your laptop) for now.
Connect the Arduino's 5V line to the breadboard's power (+) rail with a red jumper wire.
Connect the Arduino GND line to the breadboard's ground (-) rail with a black jumper wire.
WEEK 8
ARDUINO BASICS
ARDUINO BASICS
ANATOMY
ARDUINO IDE
USB CONNECTION
"BLINK" SKETCH
BREADBOARD
JUMPER WIRES
CIRCUITS
RESISTORS
LEDS
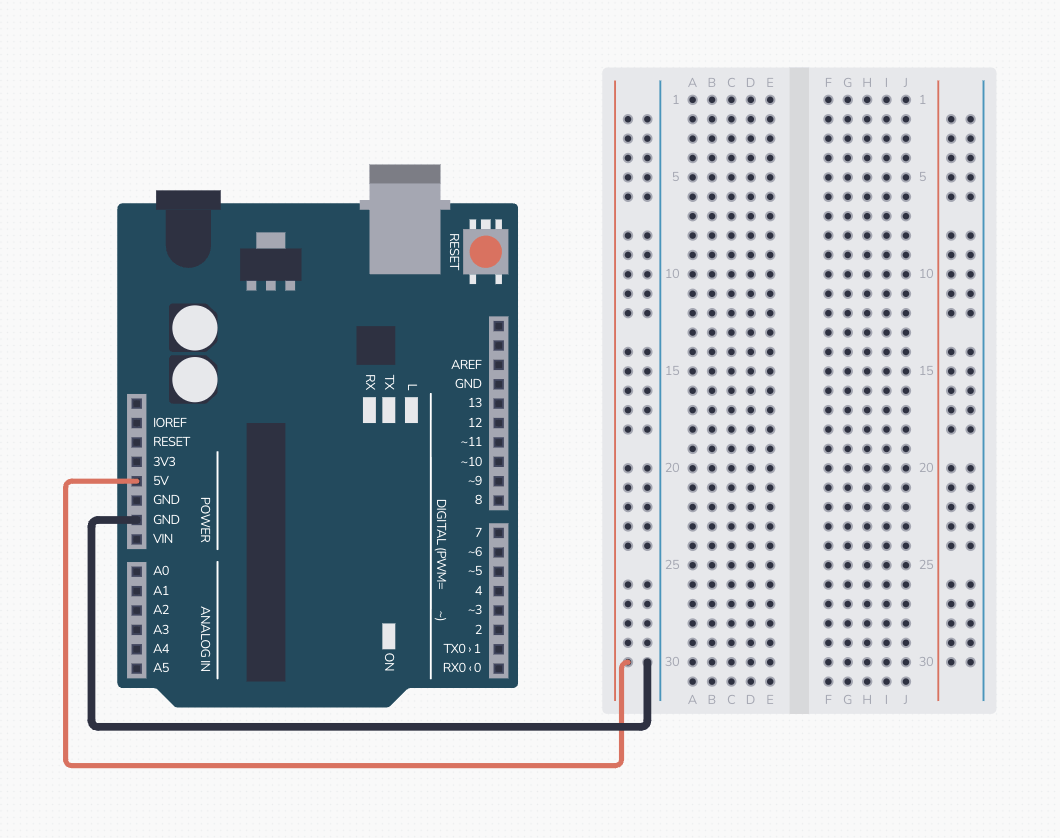
This gives your breadboard a clean 5V and ground everywhere along those two rails.
3 MIN
DM2008
AY2526
PROGRAMMING FOR INTERACTION
We need to bridge each half with jumpers so the whole rail is continuous and to bring power to both sides of the breadboard.
WEEK 8
ARDUINO BASICS
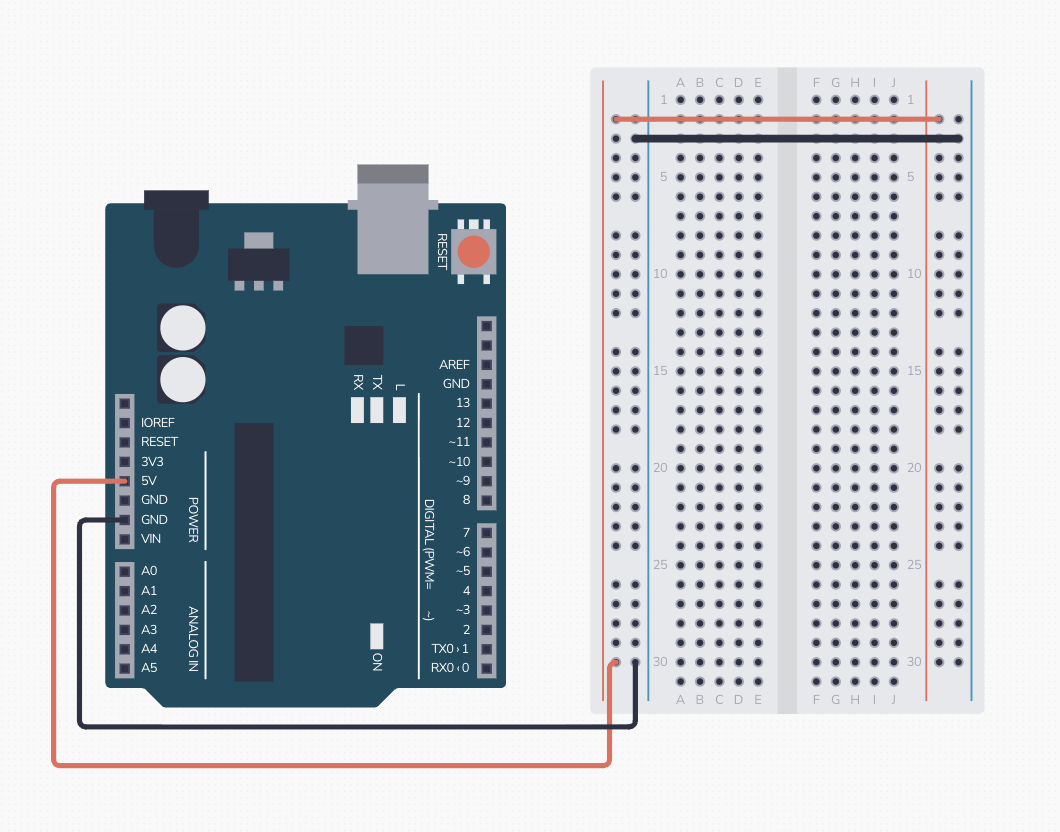
3 MIN
Connect a red jumper wire from the breadboard's power (+) rail on the left side to the right side, on the same row.
Connect a black jumper wire from the breadboard's ground (-) rail on the left side to the right side, on the same row.
Arduino-Breadboard Circuits
ARDUINO BASICS
ANATOMY
ARDUINO IDE
USB CONNECTION
"BLINK" SKETCH
BREADBOARD
JUMPER WIRES
CIRCUITS
RESISTORS
LEDS
DM2008
AY2526
PROGRAMMING FOR INTERACTION
Resistors
Resistors control how much current flows through a particular circuit.
For LEDs, resistors are vital to stop them from burning out (too much power makes them deteriorate quickly).
For sensors, resistors can act as “pull-ups”. These behave like a gentle spring that always pushes the signal up to HIGH, unless something stronger pulls it down.
WEEK 8
ARDUINO BASICS
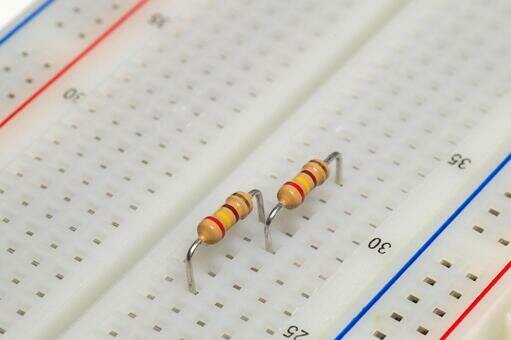
ARDUINO BASICS
ANATOMY
ARDUINO IDE
USB CONNECTION
"BLINK" SKETCH
BREADBOARD
JUMPER WIRES
CIRCUITS
RESISTORS
LEDS
Adding resistors ensures you always get a stable signal, even when a sensor is not being actively pressed, triggered or otherwise interacted with.
DM2008
AY2526
PROGRAMMING FOR INTERACTION
Resistors
Resistors don’t have numbers printed on them for their Ω (ohm) value. Instead, they use colored bands to show their value.
Resistors usually have 4 bands (sometimes 5). They follow the color code system:
-
Digits (1st & 2nd band) → the number.
-
Multiplier (3rd band) → how many zeros or decimal to add.
-
Tolerance (4th band) → accuracy.
WEEK 8
ARDUINO BASICS
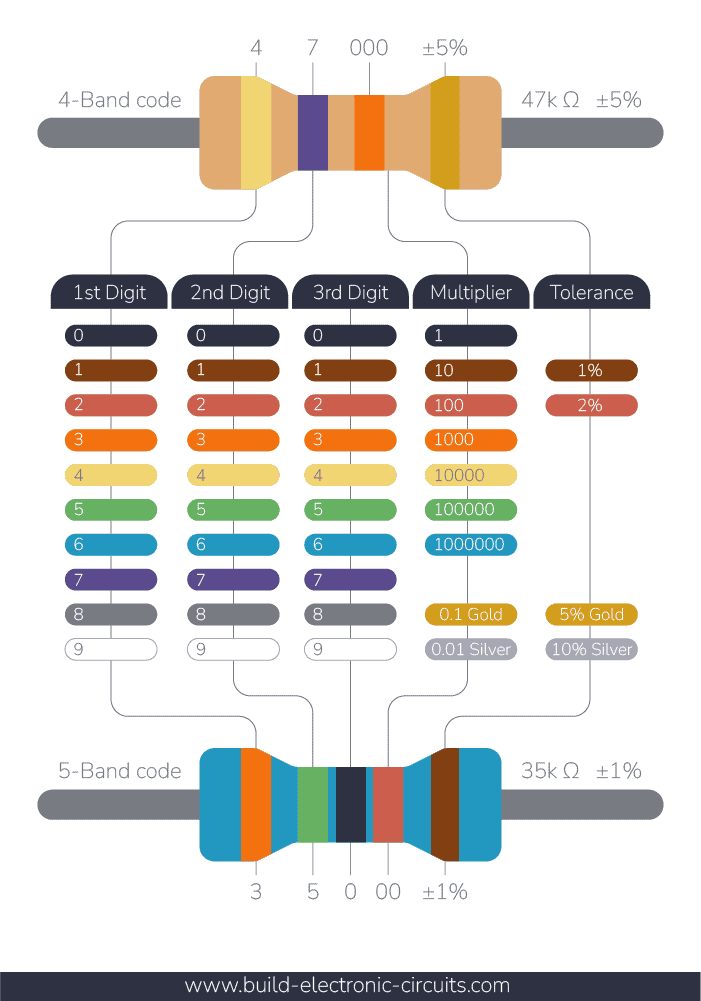
You can identify the specific ohms of a resistor using online reference charts.
ARDUINO BASICS
ANATOMY
ARDUINO IDE
USB CONNECTION
"BLINK" SKETCH
BREADBOARD
JUMPER WIRES
CIRCUITS
RESISTORS
LEDS
DM2008
AY2526
PROGRAMMING FOR INTERACTION
LEDs
LEDs are the simplest output device you can add to a circuit. It gives instant visual feedback, perfect for testing if your circuit or code is working.
You can turn them ON or OFF, blink them, or even use RGB LEDs for different colors.
It has a tiny colored bulb with a clear or colored dome and has 2 legs: one long (positive (+), anode) and one short (negative (-), cathode).
WEEK 8
ARDUINO BASICS

Power goes through the LEDs in a specific direction, through the positive (+) leg and out of the negative (-) leg. Reversing the polarity can damage the LED.
ARDUINO BASICS
ANATOMY
ARDUINO IDE
USB CONNECTION
"BLINK" SKETCH
BREADBOARD
JUMPER WIRES
CIRCUITS
RESISTORS
LEDS
DM2008
AY2526
PROGRAMMING FOR INTERACTION
LEDs
LEDs are delicate, they only need a very small amount of current to light up.
If you connect an LED directly to 5V power without any resistance, too much current will flow through it, and the LED will burn out instantly. That’s why we always use a resistor in series with an LED.
For most basic circuits, a 220Ω (ohm) or 330Ω resistor works well. 220Ω gives a brighter light, while 330Ω makes it slightly dimmer and much safer.
WEEK 8
ARDUINO BASICS
Place the resistor before or after the LED in the circuit. Both ways work, as long as it is along the same path.
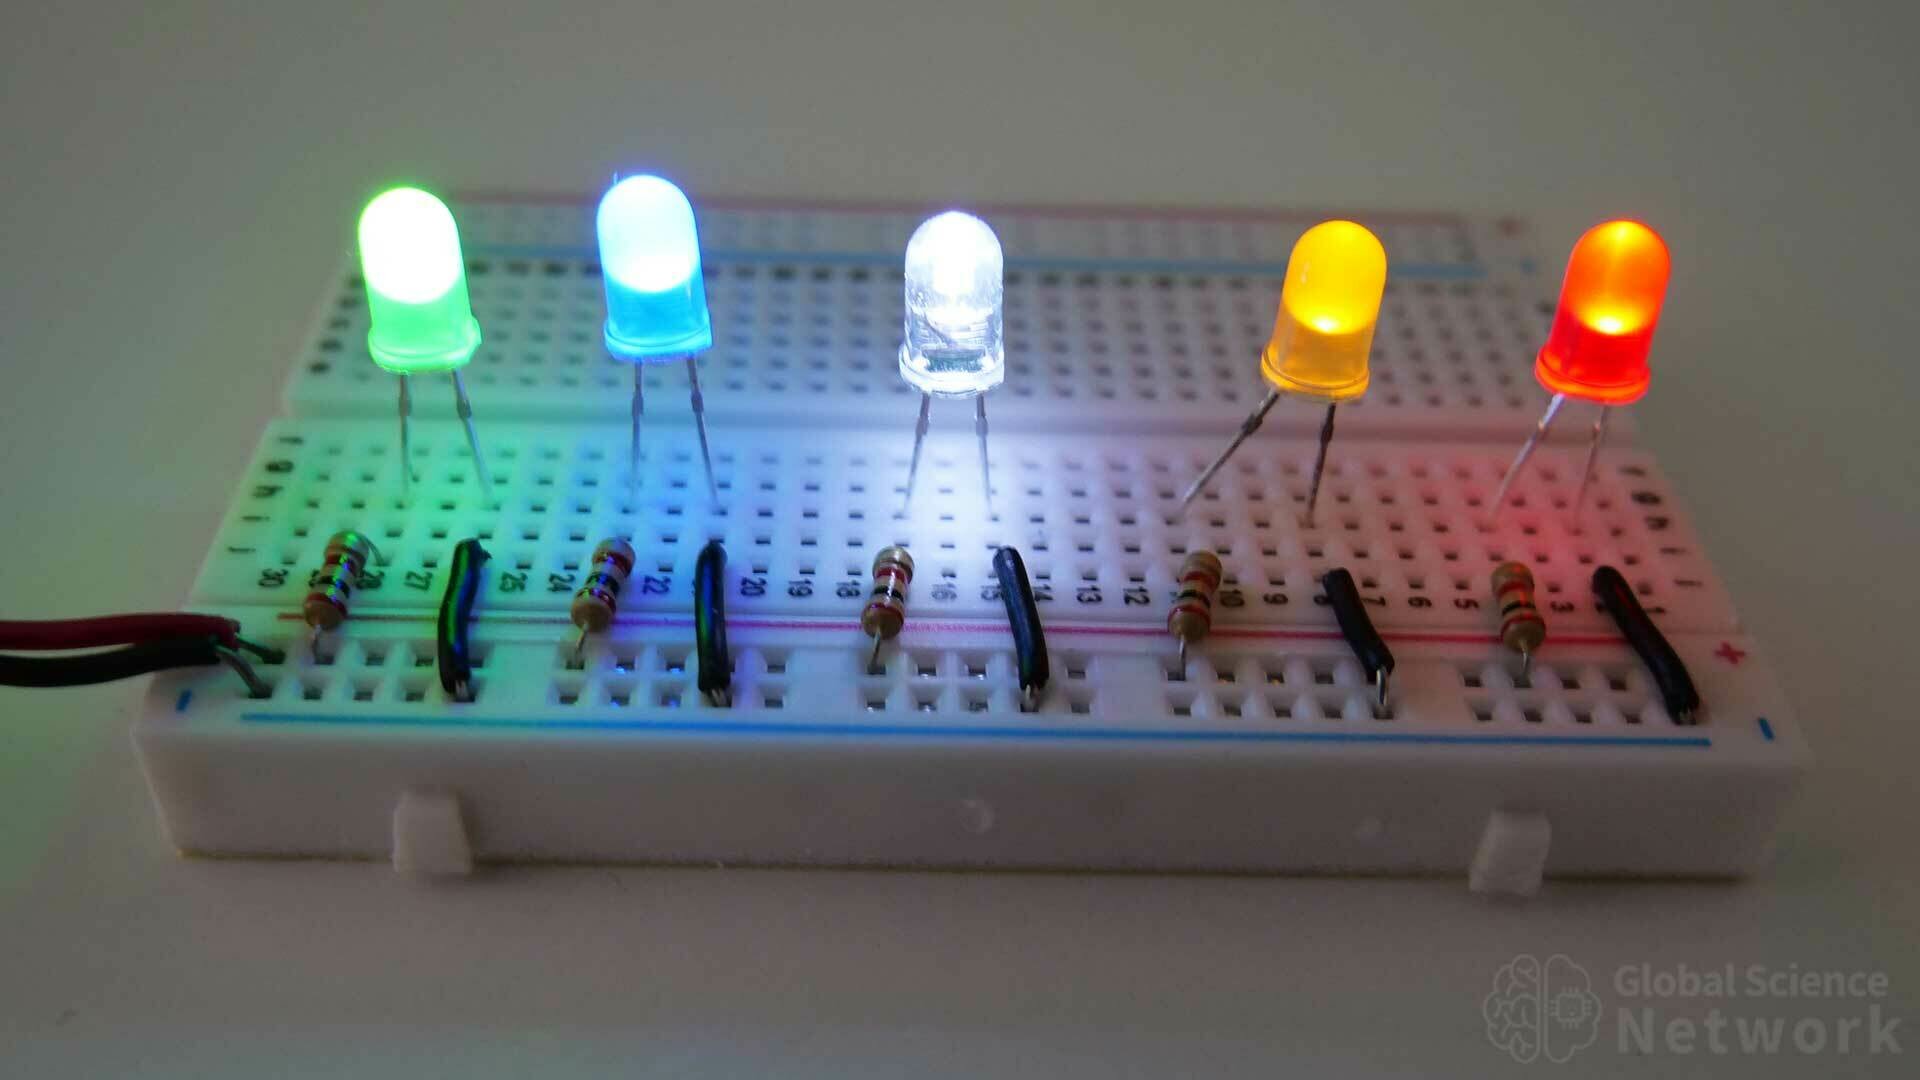
ARDUINO BASICS
ANATOMY
ARDUINO IDE
USB CONNECTION
"BLINK" SKETCH
BREADBOARD
JUMPER WIRES
CIRCUITS
RESISTORS
LEDS
DM2008
AY2526
PROGRAMMING FOR INTERACTION
Multiple LEDs in a Row
Even if LEDs take up very little power, every pin on the Arduino can provide a certain amount of voltage, usually 5 volts on the 5V pin and about 0–5V on the digital and analog output pins.
When you connect devices like LEDs or sensors to the same row on the breadboard, they share that voltage. The current (flow of electricity) splits between everything in that row.
That’s why it’s important to design your circuits carefully. If too many components share the same connection, each one may receive less power and behave differently.
WEEK 8
ARDUINO BASICS
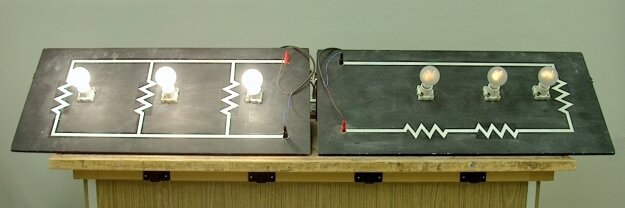
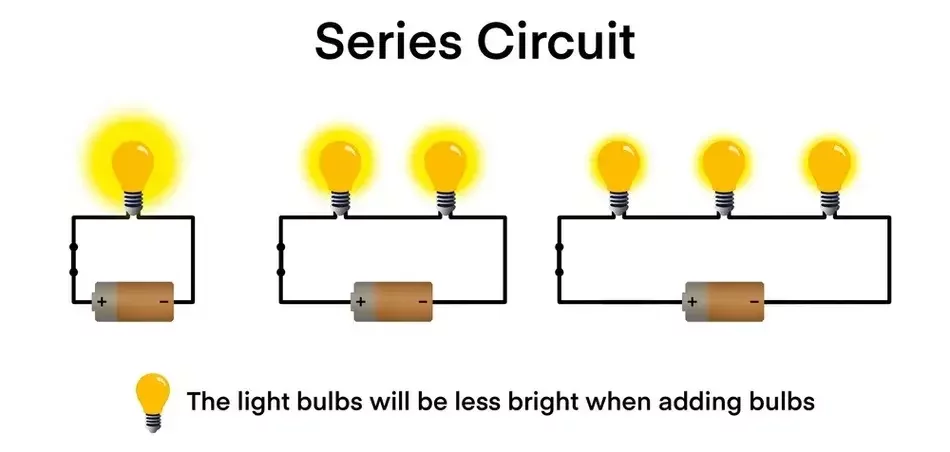
ARDUINO BASICS
ANATOMY
ARDUINO IDE
USB CONNECTION
"BLINK" SKETCH
BREADBOARD
JUMPER WIRES
CIRCUITS
RESISTORS
LEDS
DM2008
AY2526
PROGRAMMING FOR INTERACTION
Activity 8a
BRIEF
REFERENCE
OUTPUT
Light it Up
With guided demos, learn to power and control an LED using Arduino and the breadboard.
Explore three different ways to power and control an LED using Arduino and understand the difference between:
- Constant power (always on),
- Digital output (on/off control), and
- PWM output (dimming and fading).
45 MIN
WEEK 8
ARDUINO BASICS
DM2008
AY2526
PROGRAMMING FOR INTERACTION
Activity 8a
BRIEF
REFERENCE
OUTPUT
Type 1: Always On
Connect the LED directly to a constant 5V supply—stays on while board is powered.
- Unplug your Arduino from USB before wiring!
- Place the LED on the breadboard:
- Long leg (positive +) → any empty row
- Short leg (negative -) → a different row
- Place a resistor (220Ω or 330Ω):
- One end → same row as the LED’s long leg
- Other end → red power rail (+)
- Connect a jumper wire from the row with the LED’s short leg to the blue ground rail (-).
- Plug the Arduino back in to and upload code.

WEEK 8
ARDUINO BASICS
10 MIN
DM2008
AY2526
PROGRAMMING FOR INTERACTION
Activity 8a
BRIEF
REFERENCE
OUTPUT
Type 2: On/Off Control
Control the LED with code using a digital output pin and your code.
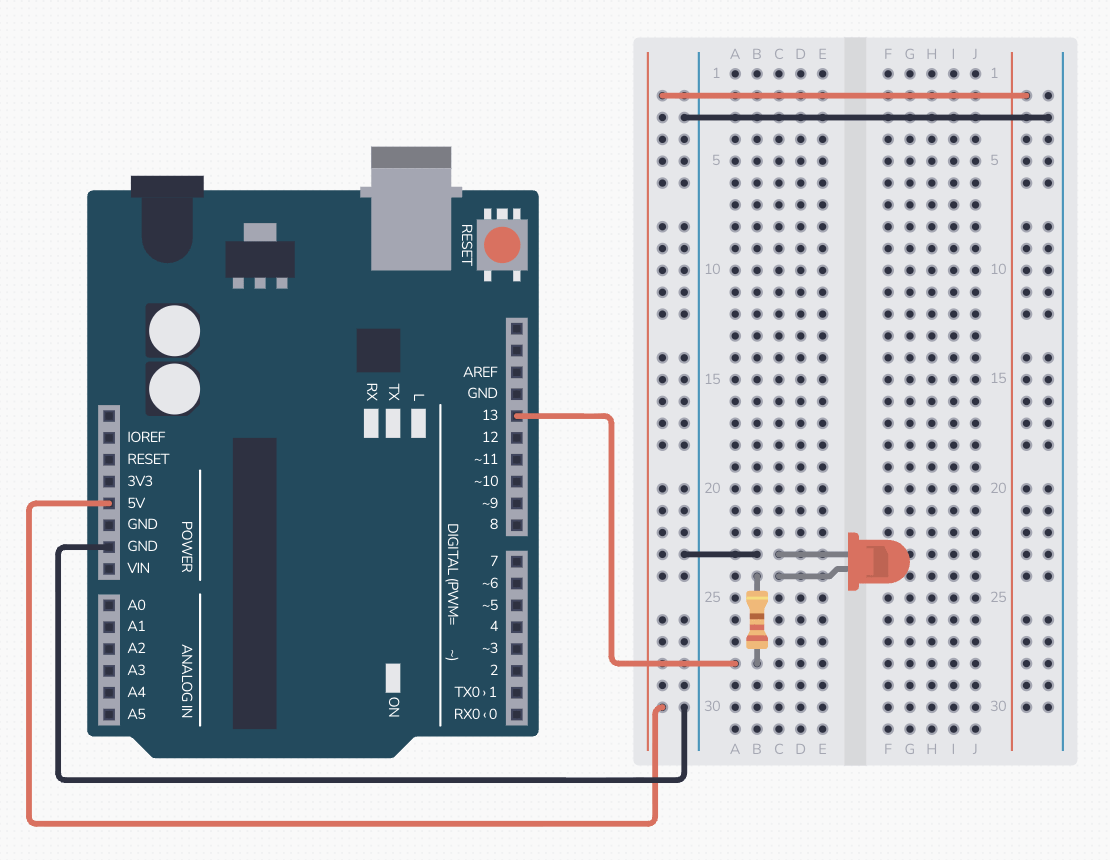
- Unplug your Arduino from USB before wiring!
- Keep one end of your resistor in the same row as the positive (+) leg of your LED, the other, rotate it to an empty row.
- Connect a jumper wire from Arduino pin 13 to the same row as the end of your resistor.
- Be sure that your circuit is closed and there is jumper wire connecting the row of the negative
(-) leg of your LED to the ground.
- Plug the Arduino in to upload your code.
WEEK 8
ARDUINO BASICS
10 MIN
DM2008
AY2526
PROGRAMMING FOR INTERACTION
Activity 8a
BRIEF
REFERENCE
OUTPUT
int ledPin = 13;
void setup() {
pinMode(ledPin, OUTPUT);
}
void loop() {
digitalWrite(ledPin, HIGH); // LED on
delay(500);
digitalWrite(ledPin, LOW); // LED off
delay(500);
}Copy, paste and upload the code on the right into your Arduino IDE.
This code controls your LED through digitalWrite(), which sends a HIGH (on) or LOW (off) signal to pin 13.
The delay() function pauses the program for a set time in milliseconds before continuing.
What happens if you change the delay time?
What if you remove one of the delay() lines entirely?
How might you make the blink feel “alive” or rhythmic?
Type 2: On/Off Control
WEEK 8
ARDUINO BASICS
DM2008
AY2526
PROGRAMMING FOR INTERACTION
Activity 8a
BRIEF
REFERENCE
OUTPUT
Control the LED with code using an analog output pin and your code.
- Unplug your Arduino from USB before wiring!
- Remove the jumper wire that is connected to your Arduino pin 13, and place that in Arduino pin ~ 9.
- Be sure that your circuit is closed and there is jumper wire connecting the row of the negative
(-) leg of your LED to the ground.
- Plug the Arduino in and upload your code.
Pin 9 has a (~) symbol. This means it supports PWM, or “Pulse Width Modulation,” which lets us fake analog control by flickering really fast.
Type 3: Fade Control
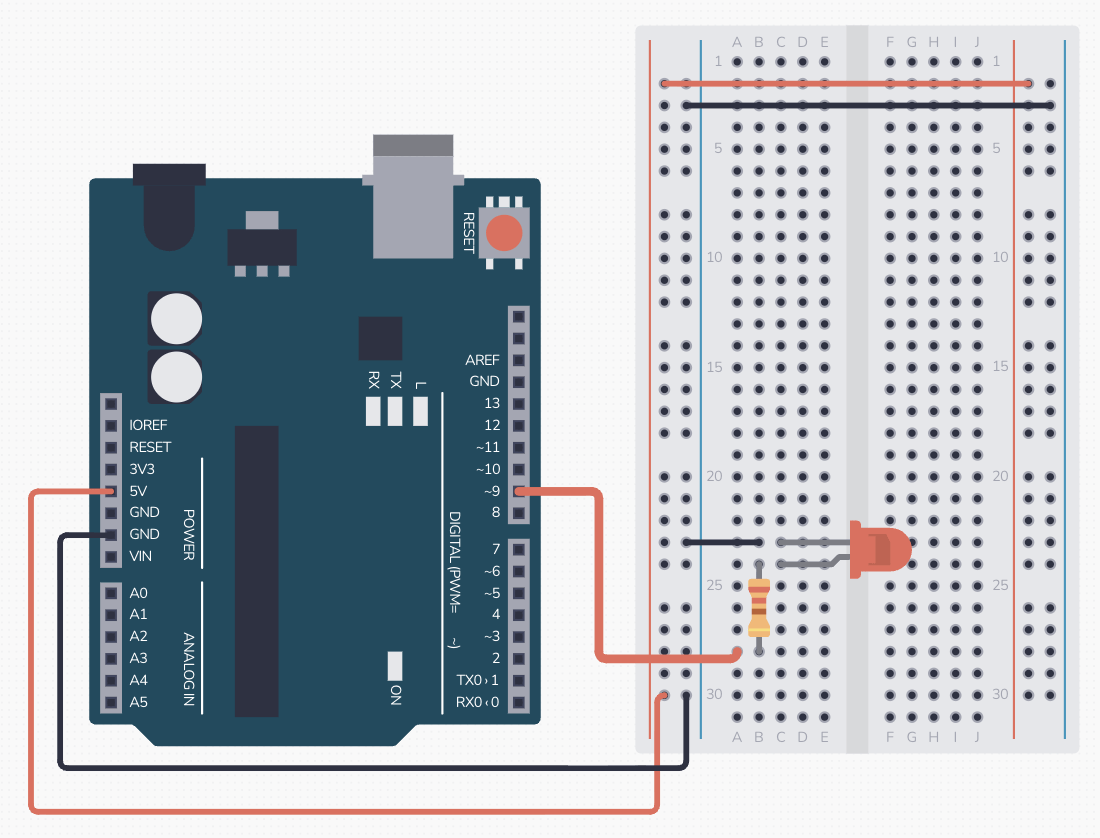
WEEK 8
ARDUINO BASICS
10 MIN
DM2008
AY2526
PROGRAMMING FOR INTERACTION
Activity 8a
BRIEF
REFERENCE
OUTPUT
int ledPin = 9;
int brightness = 0;
int fadeAmount = 5;
void setup() {
pinMode(ledPin, OUTPUT);
}
void loop() {
analogWrite(ledPin, brightness);
brightness += fadeAmount;
if (brightness <= 0 || brightness >= 255) {
fadeAmount = -fadeAmount;
}
delay(30);
}
Type 3: Fade Control
Copy, paste and upload the code to the right into your Arduino IDE.
In this code, analogWrite() sends values from 0 to 255, controlling how bright the LED appears.
digitalWrite() turns a pin ON or OFF (5V or 0V), while analogWrite() uses PWM to simulate varying levels of power, letting you fade or dim outputs like an LED.
What happens if you change the fadeAmount?
What happens if you make the delay shorter?
Can you make it fade in slowly and fade out fast?
WEEK 8
ARDUINO BASICS
DM2008
AY2526
PROGRAMMING FOR INTERACTION
Activity 8a
BRIEF
REFERENCE
OUTPUT
// DM2008 – LED Challenge
// One LED blinks (digitalWrite), one LED fades (analogWrite)
int fadeLED = 9; // PWM pin for fade control (~)
int blinkLED = 13; // Digital pin for on/off blink
int brightness = 0; // Current brightness level (0–255)
int fadeAmount = 5; // How much to change brightness each frame
void setup() {
// Set pins as outputs
pinMode(fadeLED, OUTPUT);
pinMode(blinkLED, OUTPUT);
}
void loop() {
// Blink LED (digitalWrite)
digitalWrite(blinkLED, HIGH); // Turn on
delay(100); // Wait 100ms
digitalWrite(blinkLED, LOW); // Turn off
delay(100); // Wait 100ms
// Fade LED (analogWrite)
analogWrite(fadeLED, brightness); // Set brightness (0–255)
brightness += fadeAmount; // Increase or decrease brightness
// Reverse direction at brightness limits
if (brightness <= 0 || brightness >= 255) {
fadeAmount = -fadeAmount;
}
delay(30); // Small pause for smooth fading
}Combination Challenge
Build a simple light system using three LEDs.
1. One should stay constantly ON using the 5V rail.
2. Another should blink ON and OFF using digital pin 13.
3. The third should fade in and out smoothly using PWM pin 9.
Before powering your circuit, double-check that every LED has a resistor and that each circuit connects back to GND. This ensures your Arduino doesn’t get damaged.
WEEK 8
ARDUINO BASICS
15 MIN
DM2008
AY2526
PROGRAMMING FOR INTERACTION
Activity 8a
BRIEF
REFERENCE
OUTPUT
wiring & setup
Useful Code
digital control
analog control (PWM)
WEEK 8
ARDUINO BASICS
DM2008
AY2526
PROGRAMMING FOR INTERACTION
Activity 8a
BRIEF
REFERENCE
OUTPUT
Output
For homework and your own archival
Document your output by:
- Organizing every file in a folder on your computer
-
Saving your
.inofiles from the Arduino IDE.
- Take photos and videos of your Arduino setup and experiments.
- Upload everything onto your GitHub repo in your activity folder.
- Create a README.md for this activity.
File ➝ Save As ➝ activity-8a_lightitup-01.ino
deliverables
.ino file(s)
4 photos of setups
1 short demo video combining shots showing progression
Update GitHub repo
WEEK 8
ARDUINO BASICS
DM2008
AY2526
PROGRAMMING FOR INTERACTION
Sensors
This session, we will work with three main types of sensors:
Light sensor measures brightness.
Force sensor detects pressure or touch.
Ultrasonic sensor measures distance.
Each one gives a different kind of input, letting you move beyond just keyboard and mouse into physical interactions.
WEEK 8
SENSOR BASICS
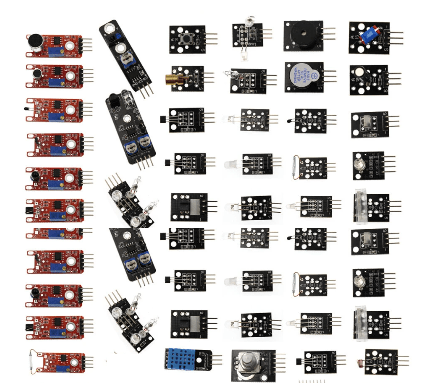
SENSORS
DATA
LIGHT
FORCE
ULTRASONIC
DM2008
AY2526
PROGRAMMING FOR INTERACTION
Sensor Data in Arduino IDE
Once your sensor is wired, the first step isn’t to make it control anything. It’s just to see what it’s saying.
We can see each sensor sending out streams of data using the Serial Monitor
in the Arduino IDE (the magnifying glass icon on the top right).
To make the Arduino “talk” to the Serial Monitor, we use two commands:
Serial.begin(9600);
Serial.println(sensorValue);
// starts communication inside setup()
// pints sensor readings in loop()

Learn more here
WEEK 8
SENSOR BASICS
SENSORS
DATA
LIGHT
FORCE
ULTRASONIC
DM2008
AY2526
PROGRAMMING FOR INTERACTION
Sensor Data in Arduino IDE
When you upload your code and open the Serial Monitor, you’ll start to see a stream of numbers changing as you touch, press, or move near your sensor.
Each value represents how the sensor is responding in that moment, brighter light, closer distance, stronger pressure.
Use analogRead() for sensors that output a range of values (like 0–1023)
Use digitalRead() for simple
ON/OFF sensors.
SENSORS
DATA
LIGHT
FORCE
ULTRASONIC
WEEK 8
SENSOR BASICS
DM2008
AY2526
PROGRAMMING FOR INTERACTION
Light Sensor (LDR)
A light sensor (aka LDR Photoresistor) is a small round disc with squiggly orange or brown zig-zag lines on its surface.
It changes its output depending on how bright the environment is.
It has 2 metal prongs like most simple components (similar to an LED). Brighter lights give a stronger signal, dimmer lights result in a weaker signal.
With this, your code can respond to events such as day-night cycles, shadows, or a flashlight pointed directly at the sensor.
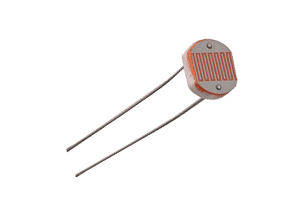
SENSORS
DATA
LIGHT
FORCE
ULTRASONIC
WEEK 8
SENSOR BASICS
DM2008
AY2526
PROGRAMMING FOR INTERACTION
Phototransistor Sensor
Another type of light sensor is a small module with a white 4-pin Grove connector on one end. Instead of the zig-zag pattern of an LDR, it uses a phototransistor to detect brightness more precisely.
It has three main connections: SIG, VCC, and GND. The sensor outputs an analog signal, where more light gives a higher reading and less light gives a lower one.
There is another pin that you may ignore, the NC pin. It’s a placeholder pin just there to keep the standard 4-pin Grove connector shape consistent across different modules.
SENSORS
DATA
LIGHT
FORCE
ULTRASONIC
WEEK 8
SENSOR BASICS
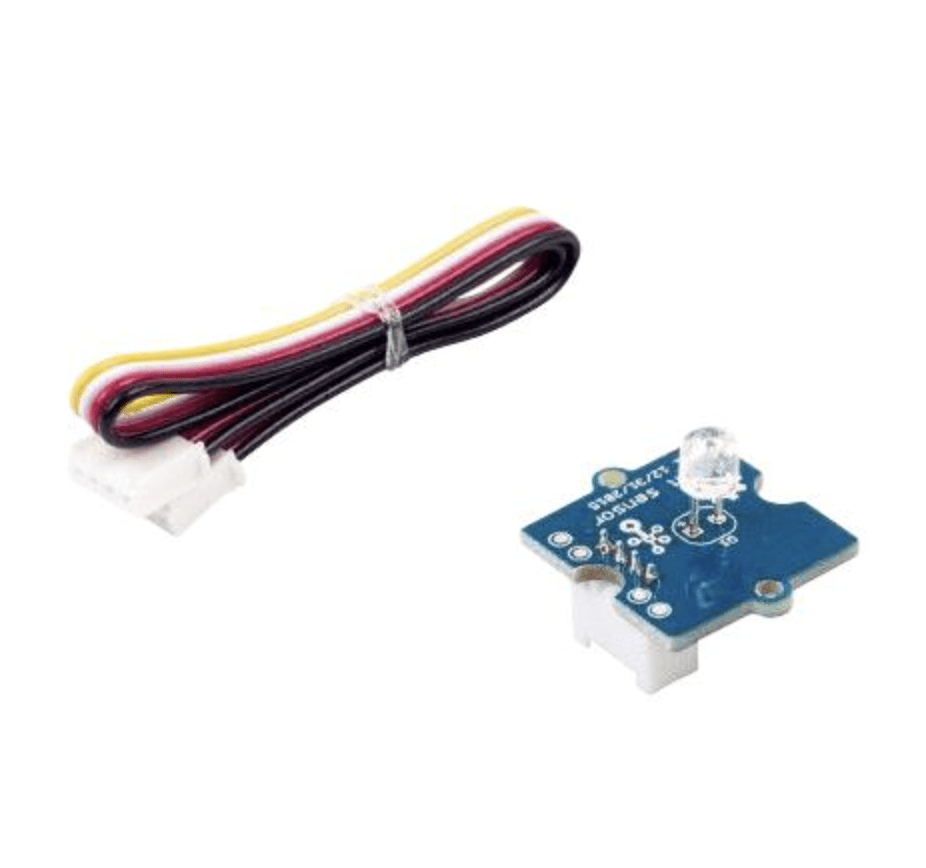
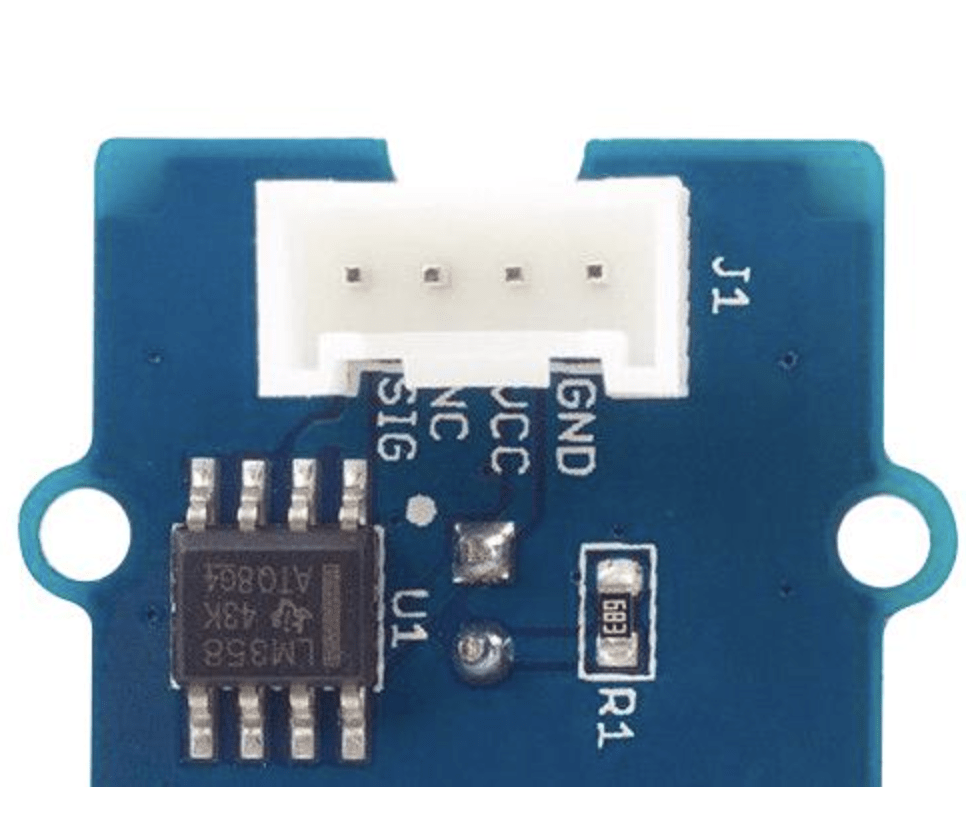
DM2008
AY2526
PROGRAMMING FOR INTERACTION
Force Sensor
A force sensor is a flat, flexible strip or circle, usually black or grey, and it changes its resistance when you apply pressure.
The harder you press, the lower the resistance, so the Arduino reads it as a stronger signal.
It’s an easy way to capture “how much force” or “how soft vs hard” a touch is. You can imagine it as letting your code “feel pressure” the way your skin does.
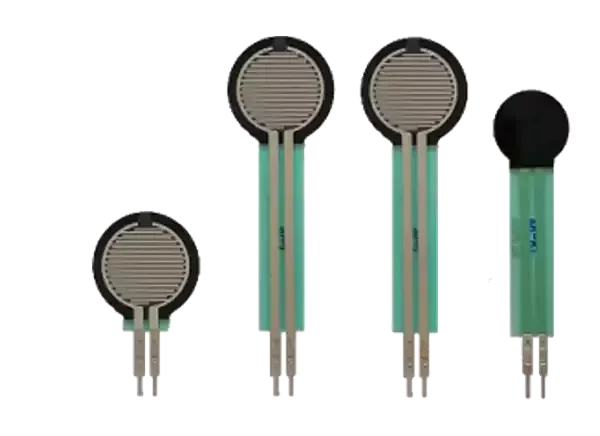
SENSORS
DATA
LIGHT
FORCE
ULTRASONIC
WEEK 8
SENSOR BASICS
DM2008
AY2526
PROGRAMMING FOR INTERACTION
Ultrasonic Sensor
The ultrasonic sensor sends out sound waves and listens for them to bounce back.
The model we are using has 3 pins:
-
+→5V) -
-→GND). -
A→A0or any analog pin.
By timing the echo, it can measure how far away an object is.
You can use it to make visuals react when someone gets closer, or trigger events when they step into a certain space.
It's like giving your project “radar vision.”
SENSORS
DATA
LIGHT
FORCE
ULTRASONIC
WEEK 8
SENSOR BASICS
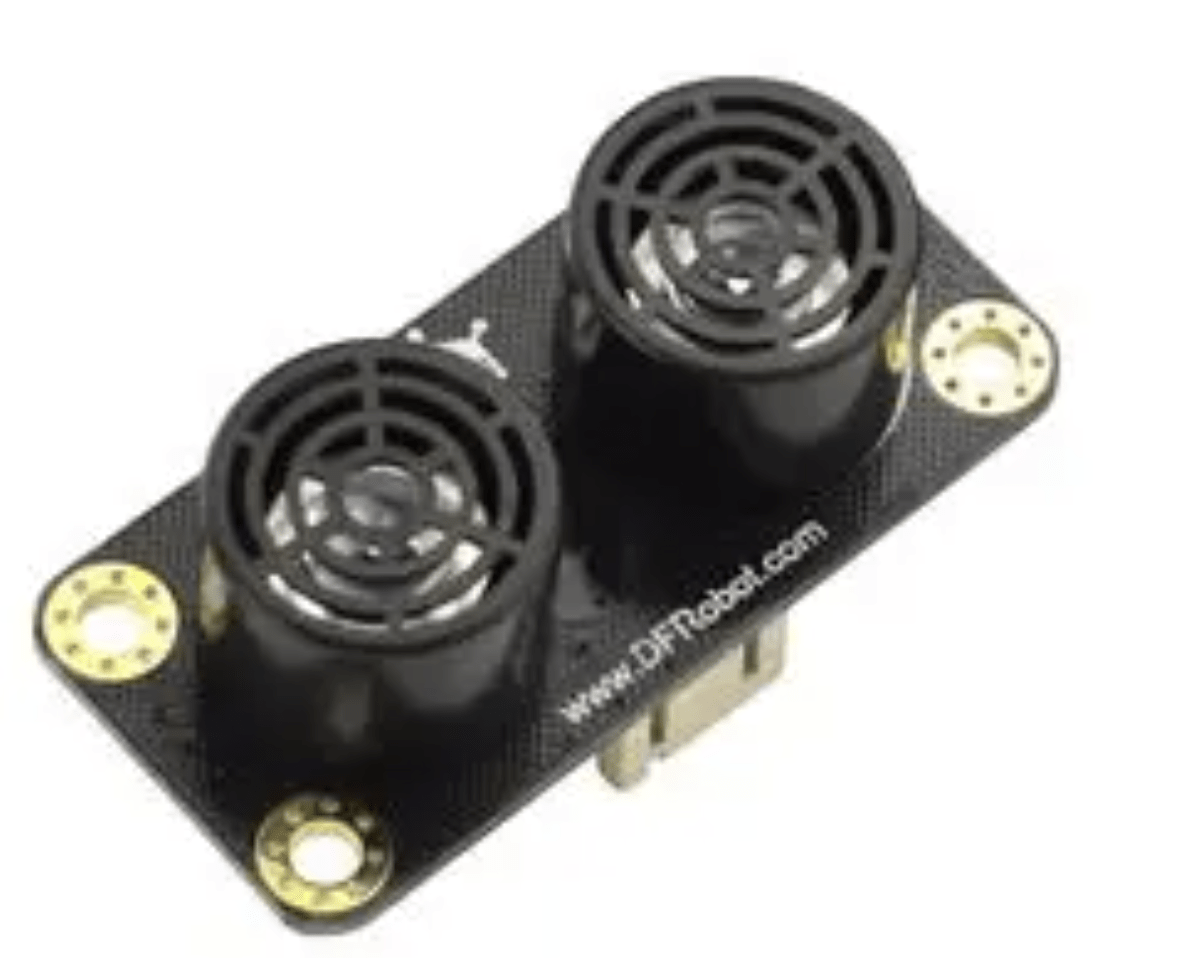
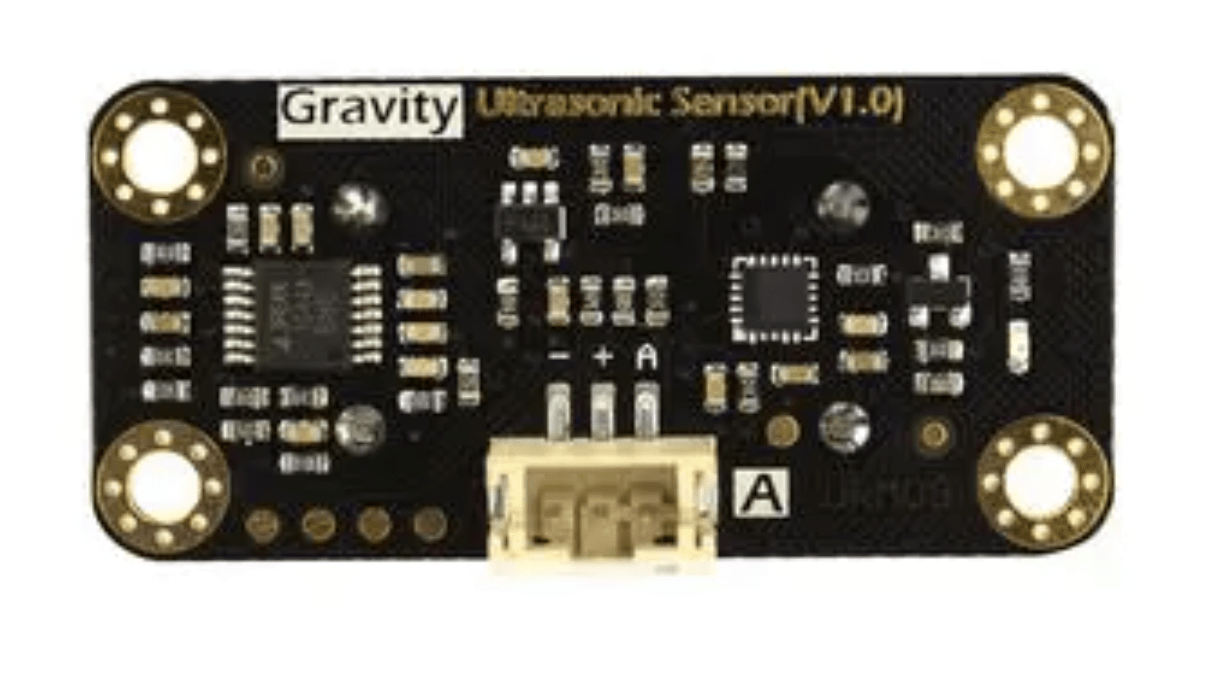
DM2008
AY2526
PROGRAMMING FOR INTERACTION
Activity 8b
BRIEF
REFERENCE
OUTPUT
Sensor Check
In this activity, you’ll wire and test each sensor one at a time to see how they respond to changes in the environment.
Compare how analog sensors (like light and force) give smooth, changing values, while digital sensors (like ultrasonic) give more defined signals.
WEEK 8
SENSOR BASICS
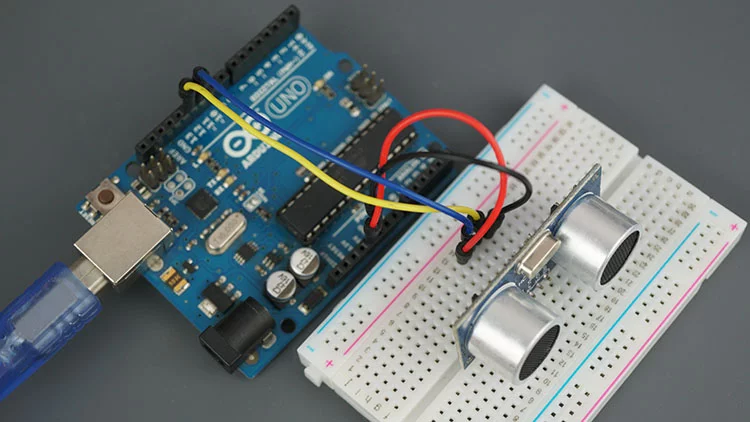
Use Serial.println() in the Arduino IDE to print live readings and observe how each sensor behaves.
40 MIN
DM2008
AY2526
PROGRAMMING FOR INTERACTION
Activity 8b
BRIEF
REFERENCE
OUTPUT
Type 1: LDR Sensor
The light sensor works just like the force sensor. It uses analogRead() because its readings change smoothly depending on how bright the light is.
It has two legs:
- One connects to
5V(power) - The other connects to an analog pin like
A0(connect with jumper wire).
Add a 10kΩ resistor between the analog pin and GND. This helps the Arduino read changes in light accurately.
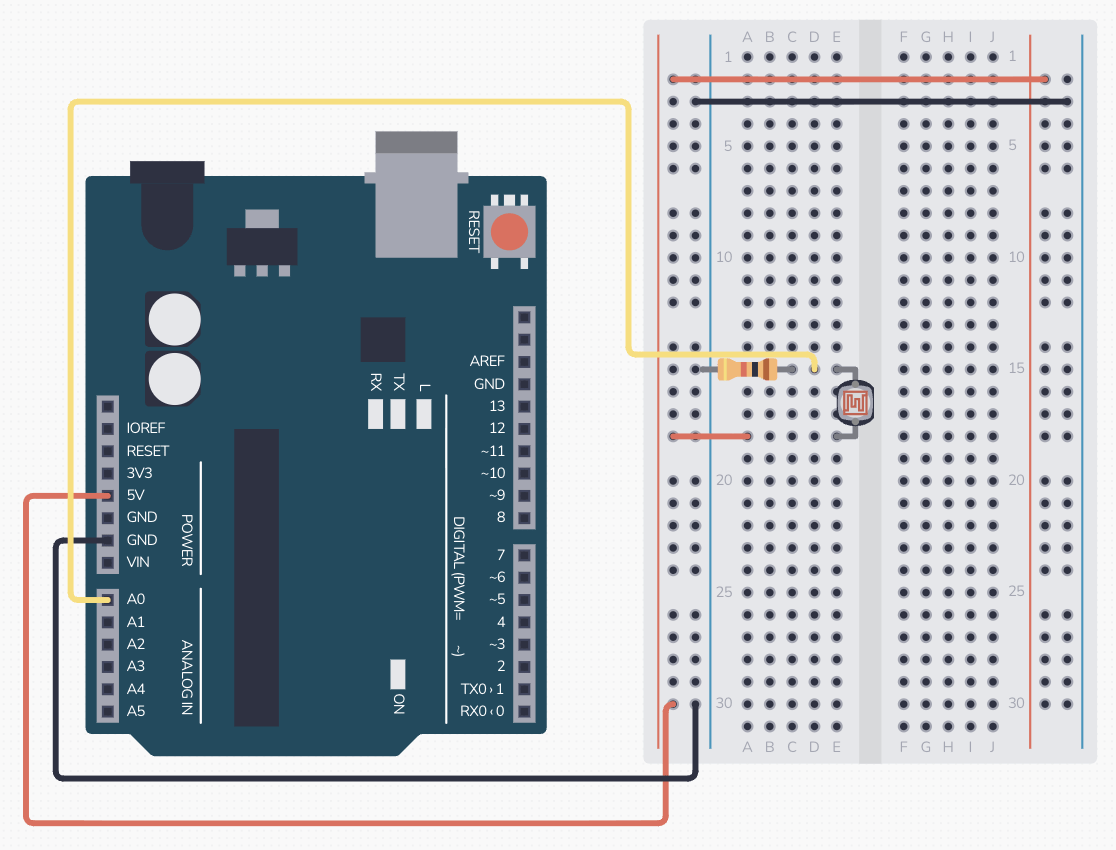
Place the sensor where light can reach it easily, like near the top of your breadboard.
10 MIN
WEEK 8
SENSOR BASICS
DM2008
AY2526
PROGRAMMING FOR INTERACTION
Activity 8b
BRIEF
REFERENCE
OUTPUT
Type 1: LDR Sensor
Read and print live data from a sensor connected to analog pin A0.
Serial.begin(9600);
analogRead(A0);
Serial.println(sensorValue);
delay(100);
Try covering or shining light on your sensor. You’ll see the numbers move up or down depending on the input.
void setup() {
Serial.begin(9600);
}
void loop() {
int sensorValue = analogRead(A0);
Serial.println(sensorValue);
delay(100);
}starts communication with your computer so you can see the values in the Serial Monitor.
measures the voltage coming from your sensor (from 0 to 1023).
prints that value to the screen so you can watch it change live.
slows it down slightly, so the numbers are easier to read.
WEEK 8
SENSOR BASICS
DM2008
AY2526
PROGRAMMING FOR INTERACTION
Activity 8b
BRIEF
REFERENCE
OUTPUT
Type 1: Phototransistor Sensor
The light sensor uses analogRead()
because its readings change smoothly depending on how bright the light is.
It has three working pins:
-
SIG→ ArduinoA0(or any analog pin) -
VCC→ Arduino5V -
GND→ ArduinoGND
-
NC→ leave this unconnected
Plug the three male ends of your jumper wires (SIG, VCC, GND) into separate rows.
10 MIN
WEEK 8
SENSOR BASICS
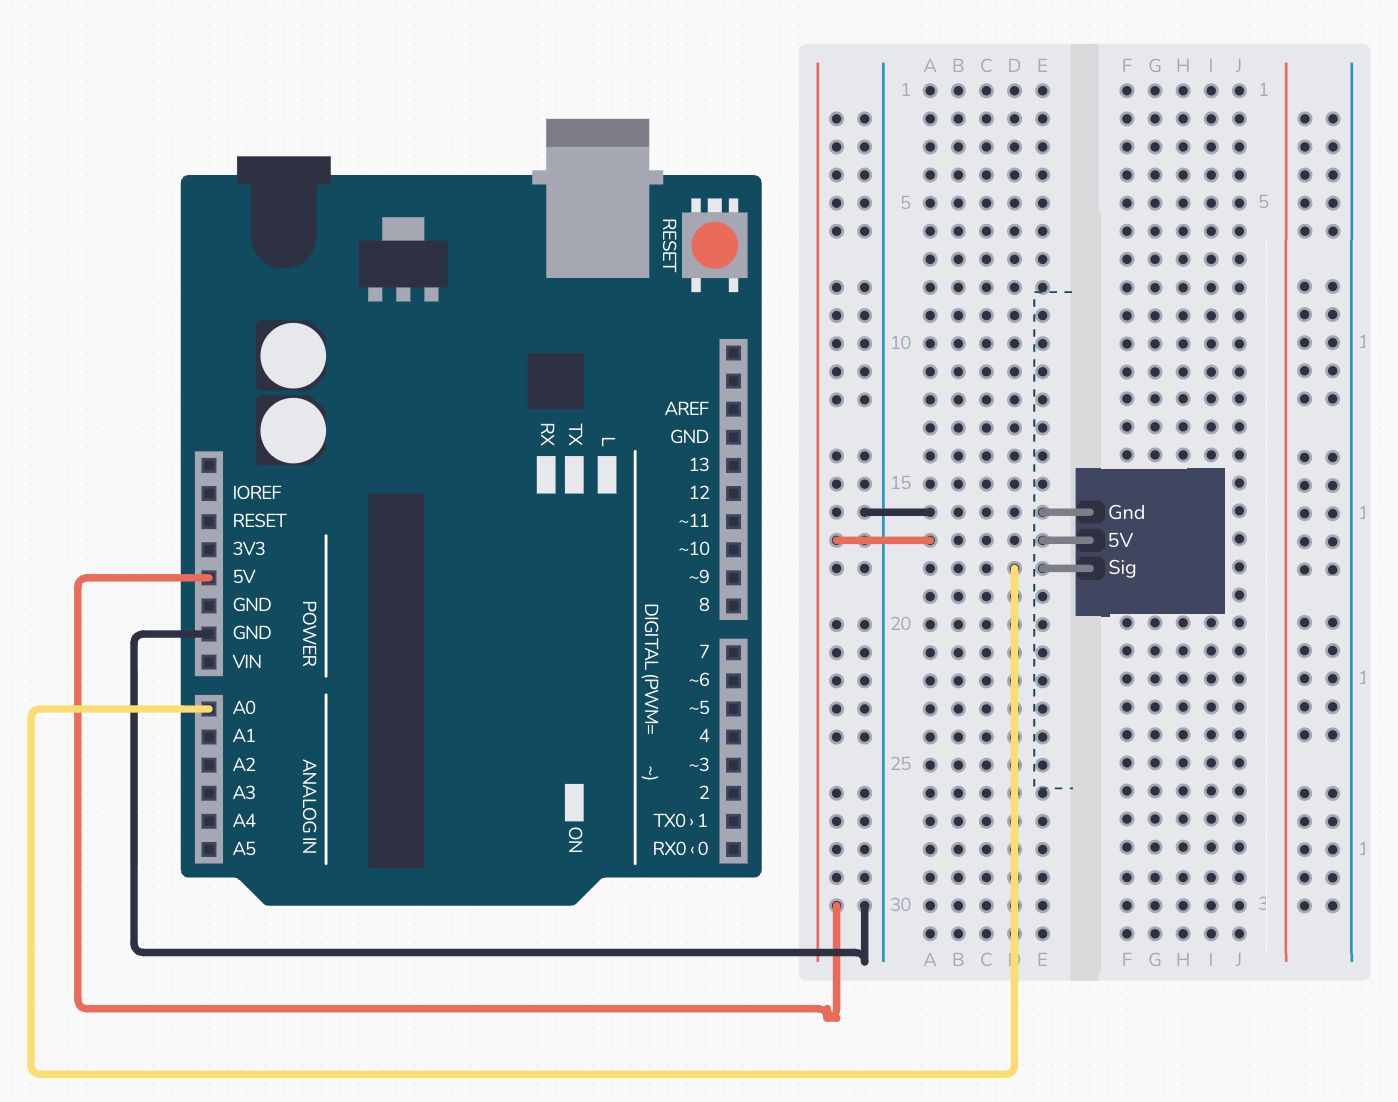
DM2008
AY2526
PROGRAMMING FOR INTERACTION
Activity 8b
BRIEF
REFERENCE
OUTPUT
Read and print live data from a sensor connected to analog pin A0.
Serial.begin(9600);
analogRead(A0);
Serial.println(sensorValue);
delay(100);
Try covering or shining light on your sensor. You’ll see the numbers move up or down depending on the input.
const int lightPin = A1;
void setup() {
Serial.begin(9600);
}
void loop() {
int luxVal = analogRead(lightPin); // 0..1023, higher = brighter
Serial.println(luxVal);
delay(100);
}starts communication with your computer so you can see the values in the Serial Monitor.
measures the voltage coming from your sensor (from 0 to 1023).
prints that value to the screen so you can watch it change live.
slows it down slightly, so the numbers are easier to read.
WEEK 8
SENSOR BASICS
Type 1: Phototransistor Sensor
DM2008
AY2526
PROGRAMMING FOR INTERACTION
Activity 8b
BRIEF
REFERENCE
OUTPUT
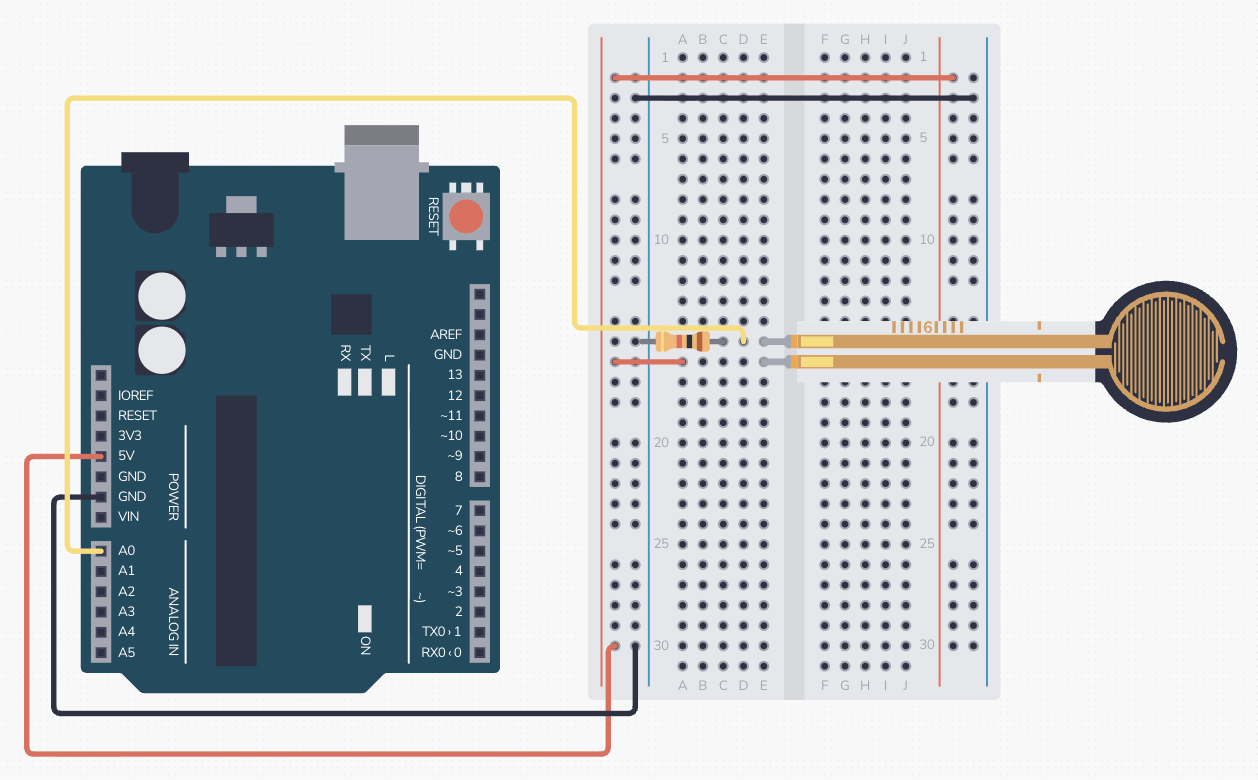
Type 2: Force Sensor
The force sensor measures how much pressure you apply. The harder you press, the higher the number it sends. It uses analogRead(), giving a range of values.
It has two legs:
- One connects to 5V (power)
- The other connects to an analog pin like A0 (connect with jumper wire).
Add a 10kΩ resistor between the analog pin and GND. This helps the Arduino read changes in light accurately.
Place the round pad facing up on the breadboard. The sensor is sensitive, so press gently!
10 MIN
WEEK 8
SENSOR BASICS
DM2008
AY2526
PROGRAMMING FOR INTERACTION
Activity 8b
BRIEF
REFERENCE
OUTPUT
Type 2: Force Sensor
void setup() {
Serial.begin(9600);
}
void loop() {
int sensorValue = analogRead(A0);
Serial.println(sensorValue);
delay(100);
}Read and print live data from a sensor connected to analog pin A0.
This is exactly the same code as the one we used for the LDR Sensor because we are using the same pin (A0).
Don’t press too hard! Force sensors are delicate — too much pressure can damage the sensing material.
WEEK 8
SENSOR BASICS
DM2008
AY2526
PROGRAMMING FOR INTERACTION
Activity 8b
BRIEF
REFERENCE
OUTPUT
Type 3: Ultrasonic Sensor
The ultrasonic sensor measures distance using sound waves. It sends out a quick pulse and listens for the echo that bounces back. The shorter the time it takes, the closer the object is.
You’ll see the distance readings in cm printed in the Serial Monitor.

10 MIN
WEEK 8
SENSOR BASICS
DM2008
AY2526
PROGRAMMING FOR INTERACTION
Activity 8b
BRIEF
REFERENCE
OUTPUT
Type 3: Ultrasonic Sensor
Give the sensor power and ground it:
+ → 5V rail (red (+) rail)
- → blue (-) rail (ground)
Connect the signal pin to Arduino digital pins using jumper wires:
A → any analog pin (like pin A0, A1)
WEEK 8
SENSOR BASICS
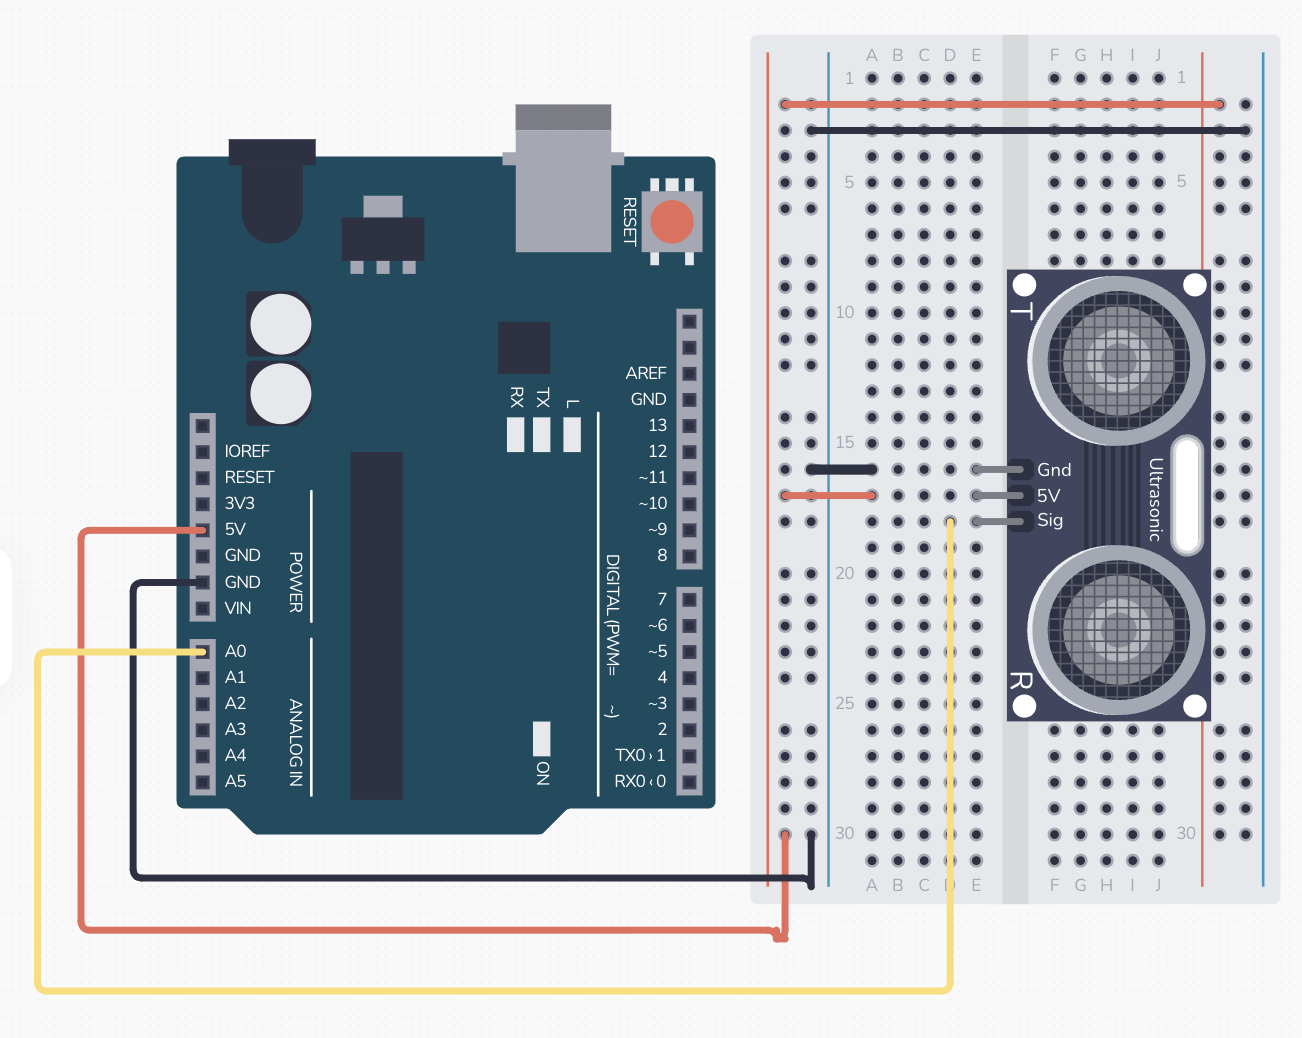
DM2008
AY2526
PROGRAMMING FOR INTERACTION
Activity 8b
BRIEF
REFERENCE
OUTPUT
Type 3: Ultrasonic Sensor
This code makes the Arduino measure distance using the ultrasonic sensor’s “sound pulse.”
It outputs a voltage that’s proportional to the distance, so you can observe it using analogRead().
The time between sending and receiving the sound is stored as duration.
The code then converts the duration taken into centimeters using a bit of math, since sound travels at a known speed.
const int ultraPin = A0;
void setup() {
Serial.begin(9600);
}
void loop() {
int duration = analogRead(ultraPin); // 0..1023
float distanceCM = (duration * 520.0) / 1023.0; // per DFRobot
// Optional clamp if you like
if (distanceCM < 2) distanceCM = 2;
if (distanceCM > 500) distanceCM = 500;
Serial.print("Distance: ");
Serial.print(distanceCM, 1);
Serial.println(" cm");
delay(100);
}WEEK 8
SENSOR BASICS
DM2008
AY2526
PROGRAMMING FOR INTERACTION
Activity 8b
BRIEF
REFERENCE
OUTPUT
Useful Code
WEEK 8
SENSOR BASICS
serial monitor & inputs
DM2008
AY2526
PROGRAMMING FOR INTERACTION
Activity 8b
BRIEF
REFERENCE
OUTPUT
Output
For homework and your own archival
Document your output by:
- Organizing every file in a folder on your computer
-
Saving your
.inofiles from the Arduino IDE.
- Take photos and videos of your Arduino setup and experiments
- Upload everything onto your GitHub repo in your activity folder.
- Create a README.md for this activity.
File ➝ Save As ➝ activity-8b_sensorcheck.ino
deliverables
.ino file
2–3 photos
1 short demo video combining shots showing progression
Update GitHub repo
WEEK 8
SENSOR BASICS
DM2008
AY2526
PROGRAMMING FOR INTERACTION
WEEK 8
WRAPPING UP
Homework
Document Activities
1
HOMEWORK
TUTORIALS
Your documentation should demonstrate your experimentations
Please save images as jpeg and videos as mp4
Activity 8a and 8b
Save your .ino code
Minimum (1) video of your Arduino set-up
Minimum (1) photo of your Arduino set-up
GitHub Repository
2
Commit your .ino code onto your GitHub Repository
Create a README.md for each activity.
DM2008
AY2526
PROGRAMMING FOR INTERACTION
HOMEWORK
TUTORIALS
1
2
3
4
WEEK 8
WRAPPING UP
Video Tutorials
DM2008
AY2526
PROGRAMMING FOR INTERACTION
Sensor to Screen
9
Bridging physical inputs and digital outputs, connecting an Arduino to p5.js over serial communication, and translating sensor data into screen-based interactions.
Last Session
Previously, we were introduced to Arduino as a tool for physical computing, learning how these micro-controllers can read sensors and control outputs.
We covered the fundamentals of wiring circuits
using breadboards, resistors, and jumper wires, and practiced reading data from various sensors through the Serial Monitor.
We wrapped up with hands-on activities wiring
and testing sensors, making sure our circuits were working, while also learning to identify, debug, and troubleshoot hardware or software issues.
DM2008
AY2526
PROGRAMMING FOR INTERACTION
WEEK 9
WARM UP
PREVIOUSLY
OBJECTIVES
Last Session
DM2008
AY2526
PROGRAMMING FOR INTERACTION
int x = 13;
declares a variable of type integer (more on this later) and assigns it a value of 13
HIGH / LOW
constants used with digitalWrite() and digitalRead() to represent on/off states
void setup() {}
runs once at the start; use this to set pin modes and initialize serial communication
void loop() {}
runs continuously after setup(); use it to check sensors, update outputs, or run logic
INPUT / OUTPUT
constants used with pinMode() to setup whether a pin receives or sends signals
PREVIOUSLY
OBJECTIVES
WEEK 9
WARM UP
Variables & Constants
Functions
delay(milliseconds)
pauses the program for a set number of milliseconds, useful for timing or pulsing electronics such as LEDs
Last Session
DM2008
AY2526
PROGRAMMING FOR INTERACTION
pinMode(pin, mode)
sets whether a specified pin will act as an input or output using INPUT or OUTPUT
digitalRead(pin)
reads the state of a digital input pin and returns HIGH or LOW (on or off)
analogRead(pin)
reads a voltage (0–5V) from an analog input pin, and returns 0 thru 1023
analogWrite(pin, value)
writes a PWM signal (0–255) to a pin marked with ~ to simulate analog output (e.g., dimming an LED)
digitalWrite(pin, value)
sends a HIGH or LOW signal to a digital output pin (e.g., to turn an LED on or off)
PREVIOUSLY
OBJECTIVES
WEEK 9
WARM UP
Digital I/O
Analog I/O
This Session
DM2008
AY2526
PROGRAMMING FOR INTERACTION
PREVIOUSLY
OBJECTIVES
Typing defines how a programming language handles values. Some languages enforce types strictly, others let you be more flexible.
Serial communication is a way for Arduino to “talk” to your computer. It sends sensor data as text over USB so other programs can use it.
Mapping sensor data to visuals brings physical computing full circle by connecting what you touch or trigger to what you see on screen.
1
In this session, you will
2
3
4
WEEK 9
WARM UP
DM2008
AY2526
PROGRAMMING FOR INTERACTION
Data Types in Code
Thus far, we have been writing code in JavaScript, where variables are flexible: they can hold any kind of value, and you are not expected to say what type they are.
But in Arduino, you have to be specific. You need to declare whether a variable is an int, a float, or even a char.
If you get it wrong, the code may fail to compile, or it may run with unintended results. This has to do with how different programming languages handle data types—some are more chill, others are stricter.
WEEK 9
CODING WITH ARDUINO
DATA TYPES
DYNAMISM
STRENGTH
RETURNING
Before we even start sending sensor data to p5.js, let's first take a look at how these systems think and behave differently from one another.
WEAK
STRONG
TypeScript
Python
Rust
Java
C#
JavaScript
PHP
Lua
C/C++
Go
Ardiuno Lang
STATIC
DYNAMIC
DM2008
AY2526
PROGRAMMING FOR INTERACTION
Dynamic vs. Static Typing
In dynamically typed languages like JavaScript, you can create a variable without saying what kind of data it holds.
The type is figured out by your computer while the code is running.
In statically typed languages like the Arduino programming language (C++),
you must declare the type of each and every single variable ahead of time.
Again, your code may fail to compile if there are type mismatches.
WEEK 9
CODING WITH ARDUINO
DATA TYPES
DYNAMISM
STRENGTH
RETURNING
JavaScript gives you flexibility, but Arduino forces you to be precise — which helps with performance and memory, but also means more room for errors.
// JavaScript is Dynamically Typed
let score = 0;
score = "game over"; // totally allowed
function draw() {
let x = 10; // no type declaration
}// Arduino Language is Statically Typed
int score = 0;
score = "game over"; // type mismatch error!
void loop() {
int x = 10; // must declare type
}JavaScript
Arduino
DM2008
AY2526
PROGRAMMING FOR INTERACTION
Strong vs. Weak Typing
In strongly typed languages, you can’t mix different types without being explicit — the system protects you from doing weird or unsafe things.
In weakly typed languages, the system tries to be helpful — it will automatically convert between types, sometimes in ways that are confusing or unpredictable.
This is why JavaScript lets you add a number and a string, but Arduino (C++) throws an error if you try the same thing. This will become more important later.
WEEK 9
CODING WITH ARDUINO
DATA TYPES
DYNAMISM
STRENGTH
RETURNING
C++ is technically weakly typed because it allows type coercion (changing types behind the scenes) but in the Arduino IDE, the compiler is very strict.
// JavaScript is Weakly Typed
// "55" (number + string becomes string)
let x = 5 + "5";
// 20 (string gets converted to number)
let y = "10" * 2;
// 2 (true becomes 1)
let z = true + 1; // Arduino Compiler enforces Strongly Typed
// error: invalid operands
int x = 5 + "5";
// error: cannot convert 'const char*' to int
int y = "10" * 2;
// allowed: true is treated as 1
int z = true + 1;JavaScript
Arduino
DM2008
AY2526
PROGRAMMING FOR INTERACTION
Return Types in Functions
In JavaScript, you can define a function without worrying about what it returns. You can completely leave out return, or return any value at any time.
In Arduino (C++), you have to declare the return type up front. The compiler needs to know what kind of data the function will give back—or if it won’t return anything.
When you see void, it means the function does not return anything. It just runs all the code contained within and ends.
WEEK 9
CODING WITH ARDUINO
DATA TYPES
DYNAMISM
STRENGTH
RETURNING
This is why Arduino functions like setup() and loop() are written as void setup() and void — they do things, not return values back.
loop()
function sayHello() {
console.log("Hello"); // no return needed
// function ends on it own
}
function add(a, b) {
return a + b; // return to get sum back
}void setup() {
// runs once, returns nothing
pinMode(LED_BUILTIN, OUTPUT);
}
// parameters also need types declared
int add(int a, int b) {
return a + b;
}JavaScript
Arduino
DM2008
AY2526
PROGRAMMING FOR INTERACTION
Remapping Values
WEEK 9
CODING WITH ARDUINO
REMAPPING
DATA SHEETS
Sensors don't always provide usable raw values that fit neatly into the ranges we require to control certain outputs.
For example, a light sensor may return values in the range of 0–1023, but LED brightness values range 0–255.
Remapping helps us translate one range of values into another, turning these raw digits into something useful to our code.
Arduino makes this process much easier with the help of the built-in functions called map() and constrain().
Raw Light Sensor Value
Remapped to LED Value
0
1023
341
0
255
85
Use remapping anytime you need to connect a sensor’s raw output to a range your code expects.
DM2008
AY2526
PROGRAMMING FOR INTERACTION
Remapping Values
WEEK 9
CODING WITH ARDUINO
REMAPPING
DATA SHEETS
map() converts a variable from one range to another. This is useful when your input sensor values don’t match your expected output range.
The first input of the method is the value you want to map, followed be the original min and max range, and finally the newly mapped min and max range.
In the example on the right, we remap sensorVal (the value we want to remap) that has an original range of 0–1023, to a new range of 0–255.
You can always use Serial.println() to check what values your sensors are producing and debug your remapping logic.
// Reads a value from 0–1023
int sensorVal = analogRead(A0);
// Remap sensor value to brightness range
int brightness = map(sensorVal, 0, 1023, 0, 255);
// Ensure the brightness stays within 0–255
brightness = constrain(brightness, 0, 255);
// Output value to LED on pin 9
analogWrite(9, brightness);
// Print values to the Serial Monitor
Serial.print("Sensor: ");
Serial.print(sensorValue);
Serial.print(" → Brightness: ");
Serial.println(brightness);Learn more here
Arduino
DM2008
AY2526
PROGRAMMING FOR INTERACTION
Remapping Values
WEEK 9
CODING WITH ARDUINO
REMAPPING
DATA SHEETS
constrain() on the other hand, keeps a value within a specific range.
This can be useful in preventing errors or unpredictable behavior by capping values above or below certain limits. This method requires the value you want to constrain as the first parameter, followed by the range.
In the example on the right, we constrain the value of brightness after it has been remapped, just to be safe — in case any values happen to jump beyond the 0-255
range that is needed to control LEDs.
// Reads a value from 0–1023
int sensorVal = analogRead(A0);
// Remap sensor value to brightness range
int brightness = map(sensorVal, 0, 1023, 0, 255);
// Ensure the brightness stays within 0–255
brightness = constrain(brightness, 0, 255);
// Output value to LED on pin 9
analogWrite(9, brightness);
// Print values to the Serial Monitor
Serial.print("Sensor: ");
Serial.print(sensorValue);
Serial.print(" → Brightness: ");
Serial.println(brightness);Learn more here
You can also use Serial.println() to check that you values are being constrained correctly.
Arduino
DM2008
AY2526
PROGRAMMING FOR INTERACTION
Reading Data Sheets
WEEK 9
CODING WITH ARDUINO
REMAPPING
DATA SHEETS
Not all sensors behave the same way. It is important to understand how your specific sensor (make and model) behaves, so you can write code that works as expected.
This is where Data Sheets come in handy!
They help you understand how a device operates (voltage, output signal, ranges), the format that it outputs data (analog or digital, raw voltage or encoded), and even explain how to wire it to your Arduino.
Sometimes, these resources also include sample code to jump start your projects. This can save you time and headaches by showing you what values to expect, and set realistic map() ranges.
DFRobot Data Sheet
The URM09 Ultrasonic Sensor (Gravity Analog) outputs an analog signal that corresponds to distance.
According to its data sheet, the measurable range is 0.02m to 5m, with output voltage scaling accordingly to distance. The sensor has a resolution of 1cm.
The data sheet also let's us know that we have to set the maximum range as 520cm in order to calculate and map distances accurately using the sensor.
We would not have known to do this had we not looked up the data sheet first!
DM2008
AY2526
PROGRAMMING FOR INTERACTION
Reading Data Sheets
WEEK 9
CODING WITH ARDUINO
REMAPPING
DATA SHEETS
By understanding the limitations, range
and expected output of the specific sensor we are working with, we are now able to create code that will match up to what the sensor is actually doing.
We can now adapt the provided sample code into our program to use the sensor.
It is a good habit to always look up the data sheet of devices you work with.
DFRobot Data Sheet
Arduino program adapted from the sample code provided in the data sheet.
int usSensorPin = A0; // select input pin
float usMaxRange = 520.0;
float dataSize = 1023.0; // 10-bit data
float sensorVal, distVal;
void setup() {
// Begin serial communication
Serial.begin(9600);
}
void loop() {
// read the value from the sensor:
sensorVal = analogRead(usSensorPin);
distVal = sensorVal * usMaxRange / dataSize;
Serial.print(distVal);
Serial.println("cm");
delay(500);
}Arduino
DM2008
AY2526
PROGRAMMING FOR INTERACTION
Activity 9a
BRIEF
REFERENCE
OUTPUT
WEEK 9
CODING WITH ARDUINO
Mapping Sensors
30 MIN
// Ultrasonic Sensor → LED Brightness
// Closer the object, brighter the LED
int usSensorPin = A0; // select input pin
float usMaxRange = 520.0;
float dataSize = 1023.0; // 10-bit data
float sensorVal, distVal;
int brightness = 0;
void setup() {
// Begin serial communication
Serial.begin(9600);
}
void loop() {
// read the value from the sensor:
sensorVal = analogRead(usSensorPin);
distVal = sensorVal * usMaxRange / dataSize;
// clamp min and max distances
if (distVal < 2) {
distVal = 2;
}
if (distVal > 500) {
distVal = 500;
}
// map distance to brightess, and constrain
brightness = map(distVal, 2, 500, 0, 255);
brightness = constrain(brightness, 0, 255);
Serial.print(distVal);
Serial.println("cm");
Serial.print("Brightness is at:");
Serial.println(brightness);
delay(500);
}In this activity, you’ll use the map() function to turn readings from the Ultrasonic Sensor into LED behavior.
Make the distance from the ultrasonic sensor control the brightness of an LED.
Test your setup, adjust your code, and refine your wiring until the output feels responsive and smooth.
Arduino
DM2008
AY2526
PROGRAMMING FOR INTERACTION
Activity 9a
BRIEF
REFERENCE
OUTPUT
WEEK 9
CODING WITH ARDUINO
Mapping Sensors
30 MIN
Wiring Guide for Sensor
Connect the sensor to power and ground:
+ → 5V (red (+) rail)
- → GND (blue (-) rail)
Connect the signal pin to the Arduino's analog pin using jumper wires:
A → any analog pin (like pin A0, A1)
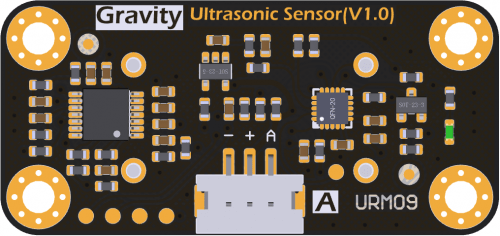
This diagram does not include instructions to wire the LED
DM2008
AY2526
PROGRAMMING FOR INTERACTION
BRIEF
REFERENCE
OUTPUT
Useful Code
mapping & scaling
WEEK 9
CODING WITH ARDUINO
loops & functions
Activity 9a
DM2008
AY2526
PROGRAMMING FOR INTERACTION
BRIEF
REFERENCE
OUTPUT
Output
For homework and your own archival
Document your output by:
- Organizing every file in a folder on your computer
-
Saving your
.inofiles from the Arduino IDE
- Taking photos & videos of your Arduino experiments
- Uploading everything onto GitHub repo in activity folder
- Creating a README.md for this activity
File ➝ Save As ➝ activity-9a.ino
deliverables
.ino file
2–3 photos of setup
1 short demo video combining shots showing progression
Update GitHub repo
WEEK 9
CODING WITH ARDUINO
Activity 9a
DM2008
AY2526
PROGRAMMING FOR INTERACTION
Serial Communication
Serial Communication allows two devices to "talk" to each other by sending data one bit at a time, over a shared connection.
This is usually done over a wired cable such as USB, but can also be achieved through WiFi and Bluetooth.
Your Arduino uses this protocol to send sensor and other data to your computer so other programs (like the Arduino IDE or p5.js) can read that information.
Only one program can use the serial connection at a time — so if you are reading data in p5.js, you willl need to close the Serial Monitor in the Arduino IDE first.
WEEK 9
BEYOND THE ARDUINO
SERIAL
LIBRARIES
WEB SERIAL
Arduino
Computer
Serial Monitor
Serial Communication
Usually over USB
p5.js
Serial is short for “serial data transfer” — a universal way for devices to exchange data with computers.
DM2008
AY2526
PROGRAMMING FOR INTERACTION
Serial Communication
To use serial communication on Arduino, we first need to initialize the serial port with the line:
Serial.begin(9600);
This tells the Arduino to start sending data at a baud rate of 9600 bits per second.
This refers to the speed at which data is transferred, with 9600 being a speed most programs can understand.
Once started, we can send data using:
Serial.println(value);
This prints a value (plus a newline) to the Serial Monitor or any listening application.
WEEK 9
BEYOND THE ARDUINO
SERIAL
LIBRARIES
WEB SERIAL
void setup() {
// Start serial communication
Serial.begin(9600);
}
void loop() {
// Send to Serial Monitor
Serial.println("Hello World!");
// Wait half a second
delay(500);
}Arduino
The baud rate must match on both ends — if p5.js expects 9600 but Arduino sends at 115200, your data will come out scrambled.
DM2008
AY2526
PROGRAMMING FOR INTERACTION
Coding Libraries
Before we can start connecting the Arduino to p5.js, we need to take a quick detour to learn more about coding libraries.
A library is a collection of pre-written code that makes it easier to do specific things — like draw shapes, play sound, or read sensor data.
You’ve already been using one this whole time! p5.js is itself a JavaScript library — built to make creative coding simpler.
JavaScript allows you to add external libraries to your sketch to extend its capabilities. These libraries can also be specific to p5.js, giving it more features.
WEEK 9
BEYOND THE ARDUINO
SERIAL
LIBRARIES
WEB SERIAL
Some examples of libraries that extend p5.js include:
p5.sound: adds sound synthesis and analysis tools
p5.play: a game engine made for p5.js
p5.webserial: lets p5.js talk to Arduino using the browser’s serial API
DM2008
AY2526
PROGRAMMING FOR INTERACTION
p5.webserial
The p5.webserial library lets your p5.js sketch receive live data from Arduino.
It works using something called the Web Serial API, which is built into Chrome. No extra installs are required, just plug in your Arduino, and sketches can start listening.
Whenever you use Serial.println() in Arduino, that data can be picked up in p5.js using this library. The data comes in as a string, after which you can convert it into numbers, use it to move shapes, change colors, trigger animations, or anything else you want achieve.
WEEK 9
BEYOND THE ARDUINO
SERIAL
LIBRARIES
WEB SERIAL
p5.webserial is the bridge between your physical sensor and your digital on-screen canvas.
Arduino
Computer
USB Cable
p5.js
Serial.println()
Chrome
p5.webserial
sketch.js
Canvas & Console
Learn more here
DM2008
AY2526
PROGRAMMING FOR INTERACTION
Adding Libraries
To use an external library in p5.js, you need to include it in the HTML file (index.html) using a <script> tag.
If you’re coding in the p5 Web Editor, you can just add the library via the sidebar.
But when working locally, like we are now, you’ll need to link to it manually — just like we did with p5.js itself in Week 7.
You should include this before your sketch.js so your code has access to everything the library provides.
The starter template you are about to use already includes this for you, but it’s always good to understand what’s going on.
WEEK 9
BEYOND THE ARDUINO
SERIAL
LIBRARIES
WEB SERIAL
Learn more here
<!DOCTYPE html>
<html lang="en">
<head>
<meta charset="UTF-8" />
<meta http-equiv="X-UA-Compatible" content="IE=edge" />
<meta name="viewport" content="width=device-width, initial-scale=1.0" />
<title>Sensor Jam Template</title>
<link rel="stylesheet" href="css/normalize.css" />
<link rel="stylesheet" href="css/style.css" />
<script src="js/resize-handler.js"></script>
<script src="js/p5.min.js"></script>
<script src="js/p5.sound.min.js"></script>
<!-- load p5.webserial library -->
<script src="js/p5.webserial.js"></script>
</head>
<body>
<script src="sketch.js"></script>
<!-- Add any additional js files below this -->
</body>
</html>
index.html
DM2008
AY2526
PROGRAMMING FOR INTERACTION
Using the Template
To save you time and headaches, we have prepared a starter template.
It includes:
- The correct folder structure
- p5.js and p5.webserial linked in HTML
- A
sketch.jswith serial connection - Console logs so you can check if your data is coming through
All you need to do is:
- Download and unzip the folder
- Open the project in VSCode
- Start Live Server with Chrome
- Connect your Arduino and test it using the sensor setup from Activity 9a
WEEK 9
BEYOND THE ARDUINO
SERIAL
LIBRARIES
WEB SERIAL
Learn more here
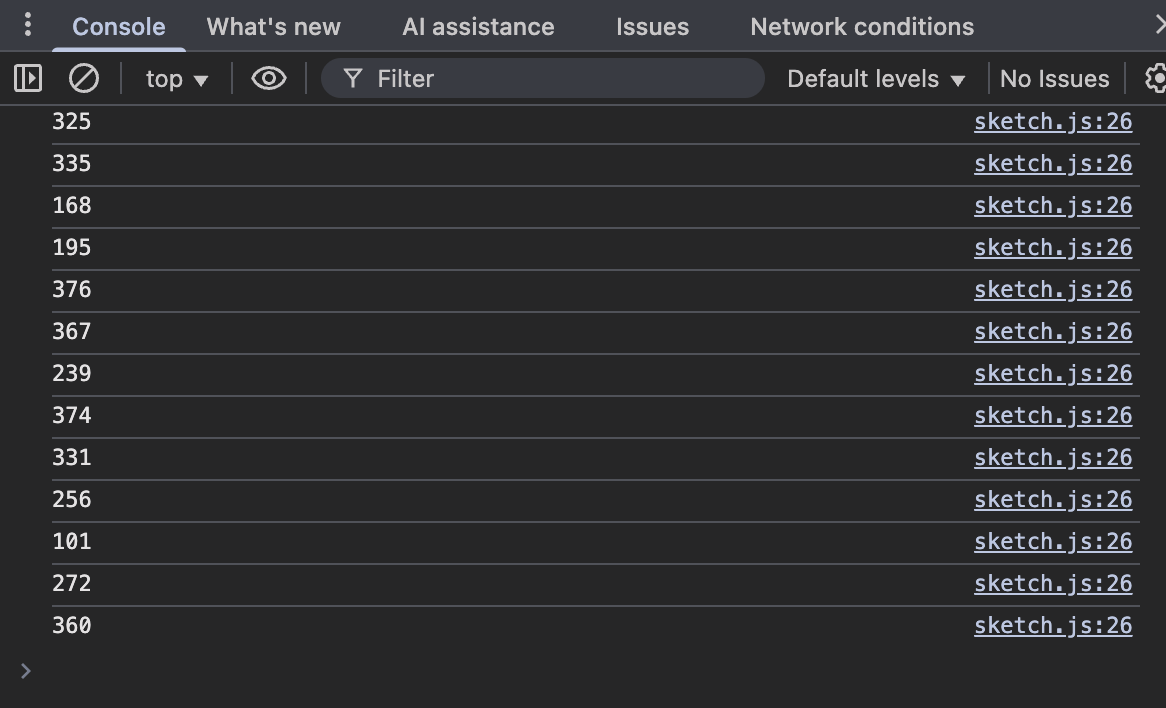
If everything is working as it should, you will see the serial output from your Arduino being reflected in Chrome's console.
macOS: Cmd + Opt + J Windows: Ctrl + Shift + J
DM2008
AY2526
PROGRAMMING FOR INTERACTION
Activity 9b
BRIEF
OUTPUT
WEEK 9
BEYOND THE ARDUINO
Sensor-to-Screen Jam
60 MIN
You may choose to work solo or in pairs
to implement a sensor in Arduino, and have its data influence some visuals in p5.js.
Work with the starter template provided.
When you have one sensor working, you can choose to implement more. Consult an AI assistant to get help with reading data from multiple sensors.
Remember to document your progress.
DM2008
AY2526
PROGRAMMING FOR INTERACTION
BRIEF
OUTPUT
Output
For homework and your own archival
Document your output by:
- Organizing every file in a folder on your computer
-
Saving your
.inofiles from the Arduino IDE
- Taking photos & videos of your Arduino experiments
-
Uploading to GitHub repo in
03-sensor-jamfolder - Creating a README.md for this activity
File ➝ Save As ➝ activity-9b_sensor-jam.ino
deliverables
.ino file
2–3 photos of setup
1 short demo video combining shots showing progression
documentation of your visuals as screenshots or recordings
Update GitHub repo
Activity 9b
WEEK 9
BEYOND THE ARDUINO
DM2008
AY2526
PROGRAMMING FOR INTERACTION
WEEK 9
WRAPPING UP
Homework
Document Activities
1
HOMEWORK
Your documentation should demonstrate your experimentations
Please save images as jpeg and videos as mp4
Activity 9a and 9b
Save your .ino code
Minimum (1) video of your Arduino set-up
Minimum (2) photos of your Arduino set-up
GitHub Repository
2
Commit your .ino code onto your GitHub Repository
Commit your Sensor Jam folder to GitHub
Create a README.md for each activity.
DM2008
AY2526
PROGRAMMING FOR INTERACTION
Interface Design
10
Designing interactive control panels with p5.js, using sliders, buttons, and drop-downs that shape both the user experience, as well as the behavior of sketches.
Last Session
In the previous session, we explored how we can connect the physical and digital worlds by sending live sensor data from an Arduino to p5.js.
We also looked at how different programming languages handle variable types, comparing JavaScript’s loose flexibility to Arduino’s stricter expectations — including how functions in Arduino require knowledge of return values beforehand.
Through two activities, we first mapped sensor values to hardware outputs in Arduino, then used p5.webserial to control on-screen visuals, bridging inputs and outputs across both platforms.
DM2008
AY2526
PROGRAMMING FOR INTERACTION
WEEK 10
WARM UP
PREVIOUSLY
OBJECTIVES
DISCUSSION
Last Session
DM2008
AY2526
PROGRAMMING FOR INTERACTION
Serial.begin(9600);
starts serial communication between the Arduino and computer with the baud rate
map(value, fmMin, fmMax, toMin, toMax)
re-maps the input variable value from the original range to the desired one
constrain(value, min, max)
limits an input variable's value to stay within the provided range
Serial Communication
Re-mapping Values
int, float, char, String
variable data types used in Arduino that define what kind of information a variable holds (whole numbers, decimals, characters, or text)
PREVIOUSLY
OBJECTIVES
DISCUSSION
WEEK 10
WARM UP
Serial.println(value);
sends value as a string followed by a newline from the Arduino to the serial port so applications can access, one at a time
Arduino
Last Session
DM2008
AY2526
PROGRAMMING FOR INTERACTION
port = createSerial();
initializes a new serial connection object used to communicate data from Arduino
port.open(9600)
Opens the serial port and begins the communication at the specified baud rate
port.close()
closes the serial port when the sketch is done using it, preventing data hogging
Serial Communication
PREVIOUSLY
OBJECTIVES
DISCUSSION
WEEK 10
WARM UP
p5.webserial
if (port.opened()) {}
port.readUntil("\n")
checks if the port is open before trying to read data, preventing device errors
reads the incoming serial data until it hits a newline (\n) — Serial.println() sends each reading as a new line of text
Last Session
DM2008
AY2526
PROGRAMMING FOR INTERACTION
Re-mapping Values
float(string)
converts a string (like "23.7") into a floating-point number (decimal), making it more useful within p5.js sketches
PREVIOUSLY
OBJECTIVES
DISCUSSION
WEEK 10
WARM UP
map(value, fmMin, fmMax, toMin, toMax)
constrain(value, min, max)
re-maps the input variable value from the original range to the desired one
limits an input variable's value to stay within the provided range
p5.js
int(string)
converts a string (like "42") into an integer, stripping away decimal places to give a whole number instead
This Session
DM2008
AY2526
PROGRAMMING FOR INTERACTION
UI elements such as sliders, buttons, and dropdowns let your sketch respond to input. They are simple to build, but how they are placed and styled affects how people use them.
DOM (Document Object Model) is how web pages are structured. p5.js gives you access to it, so you can add HTML elements and control them directly through your sketch.
CSS (Cascading Style Sheets) controls how things look. You can use CSS classes with p5.js to style UI, making it more usable or expressive.
1
During this session, you will
2
3
4
PREVIOUSLY
OBJECTIVES
DISCUSSION
WEEK 10
WARM UP
DM2008
AY2526
PROGRAMMING FOR INTERACTION
PREVIOUSLY
OBJECTIVES
DISCUSSION
Discussion Time
What makes an interface feel
intuitive, and why does that matter for interaction?
- Break into groups of 3 to 4.
-
Reflect on interfaces you use every day (apps, tools, games or websites). What makes them feel “natural” or satisfying to use?
-
Regroup to compare and collect insights.
10 MIN
What types of feedback (color, motion, sound) help users feel in control?
When have you been confused by an interface, and what caused it?
How might your own sketch communicate state or feedback to users?
WEEK 10
WARM UP
DM2008
AY2526
PROGRAMMING FOR INTERACTION
What is the DOM?
Throughout this module, we have created code-based visuals within the p5.js canvas.
But this canvas really exists within a larger structure that forms the web page on which it appears. That larger structure is called the DOM, or Document Object Model.
To build interface elements such as sliders, buttons and dropdowns, we work with the DOM to create them outside the canvas.
We can also use the DOM to build small interfaces that speak directly to our visuals. This becomes especially useful when we want to give the user control without changing the code directly.
WEEK 10
INTERFACE DESIGN
HTML DOM
UI ELEMENTS
POSITIONING
STYLING UI
A simplified representation of HTML elements within the DOM, organized as a tree of nodes
DOM tree
document
html
head
title
meta
h1
p
body
link
canvas
select
button
slider
DM2008
AY2526
PROGRAMMING FOR INTERACTION
Creating UI with p5.js
In addition to creating and drawing onto a canvas element, p5.js also lets us create common interface elements such as
sliders, buttons, and selects (commonly known as dropdowns).
These elements live outside the canvas, but they can still talk to your sketch and change what it does.
When we want to give someone a way to interact with our visuals (to adjust values, trigger behaviors, or make choices) we use these interface DOM elements.
WEEK 10
INTERFACE DESIGN
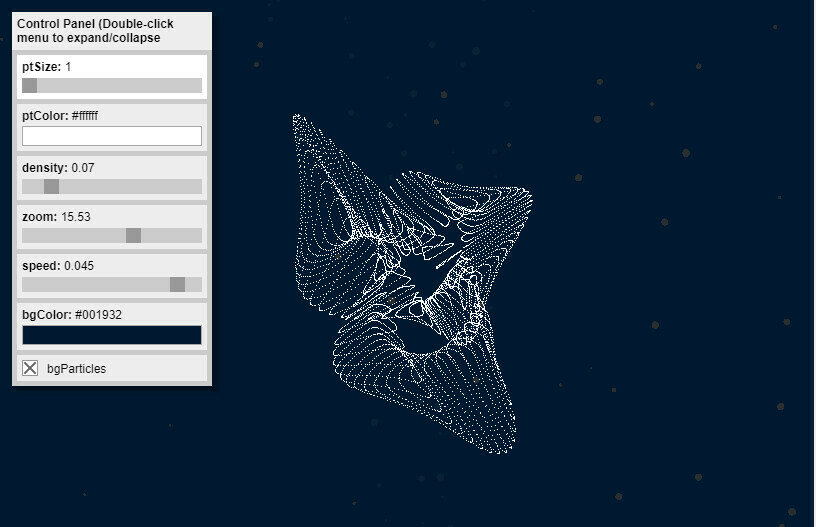
HTML DOM
UI ELEMENTS
POSITIONING
STYLING UI
Once created, these UI elements can serve as a bridge to our sketch, connecting human input to the visual behavior of your code.
DM2008
AY2526
PROGRAMMING FOR INTERACTION
Creating UI with p5.js
WEEK 10
INTERFACE DESIGN
HTML DOM
UI ELEMENTS
POSITIONING
STYLING UI
The benefit of using DOM user-interface elements is that they can directly control what happens in your sketch.
You can read the output of a slider or dropdown for each frame of draw(), and use that value to adjust your visuals live.
For instance, a slider could control the size of a shape, a button could toggle between ellipse and rect, and a dropdown could switch between color palettes.
This is the first step toward building a data-driven interface. Your code reacts to user inputs in real time, without having to touch the code or refresh your sketch constantly.
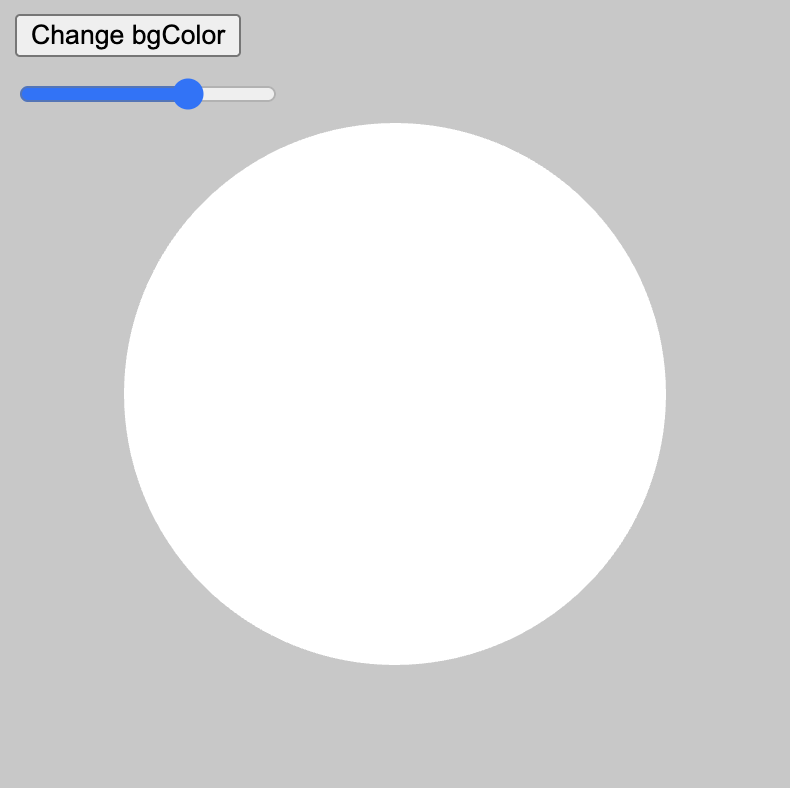
DM2008
AY2526
PROGRAMMING FOR INTERACTION
Basic HTML UI Elements
p5.js makes creating UI elements super simple. You can call createSlider() and createButton() to instantly generate working HTML controls right from your sketch.
Each of these functions returns an object that you can move, style, or connect to your variables.
For example, a slider can control color brightness or animation speed, while a button can reset or toggle a setting.
WEEK 10
INTERFACE DESIGN
let bgcolor, button, slider;
function setup() {
createCanvas(400, 400);
// button affects background color
bgcolor = color(200);
button = createButton("Change bgColor");
button.mousePressed(changeColor);
button.position(10, 10);
// button.style('font-size', '12px');
// button.style('padding', '12px 24px');
// button.style('border-radius', '50px');
// slider affects circle size
// createSlider(min, max, start, step);
slider = createSlider(0, 400, 50, 1);
slider.position(10, 70);
}
function draw() {
background(bgcolor);
// draw the ellipse, connect the size to slider value
let ellipseSize = slider.value();
noStroke();
fill(255);
ellipse(200, 200, ellipseSize);
}
function changeColor() {
bgcolor = color(random(255));
}
HTML DOM
UI ELEMENTS
POSITIONING
STYLING UI
DM2008
AY2526
PROGRAMMING FOR INTERACTION
Positioning Elements
Once you’ve created UI elements, you can place them where you want using position(x, y). You can also attach them to the canvas or another HTML container with parent().
p5.js also lets you style them directly using style(property, value). Want your button to be bigger or have rounded corners? You can define it inline or later in a CSS file.
This flexibility allows you to choose whether your UI lives within the canvas (overlayed) or outside it, like a proper control dashboard.
WEEK 10
INTERFACE DESIGN
let bgcolor, button, slider;
function setup() {
createCanvas(400, 400);
// button affects background color
bgcolor = color(200);
button = createButton("Change bgColor");
button.mousePressed(changeColor);
button.position(10, 10);
button.style('font-size', '12px');
button.style('padding', '12px 24px');
button.style('border-radius', '50px');
// slider affects circle size
// createSlider(min, max, start, step);
slider = createSlider(0, 400, 50, 1);
slider.position(10, 70);
}
function draw() {
background(bgcolor);
// draw the ellipse, connect the size to slider value
let ellipseSize = slider.value();
noStroke();
fill(255);
ellipse(200, 200, ellipseSize);
}
function changeColor() {
bgcolor = color(random(255));
}
Learn more here
HTML DOM
UI ELEMENTS
POSITIONING
STYLING UI
DM2008
AY2526
PROGRAMMING FOR INTERACTION
Styling UI with CSS
While p5.js can style elements through style(), you can go further using CSS classes. These are not like JavaScript “classes”. They’re style definitions that describe how things look.
You can add or remove them dynamically in your sketch using addClass(). A CSS class might define color, border, padding, or even hover effects.
WEEK 10
INTERFACE DESIGN
let button;
function setup() {
createCanvas(400, 200);
background(240);
button = createButton('Click Me!');
button.position(100, 80);
button.addClass('big-btn'); // links to your CSS style
}p5.js
.big-btn {
font-size: 24px;
padding: 12px 24px;
background-color: #082E5B;
color: white;
border: none;
border-radius: 12px;
cursor: pointer;
}
.big-btn:hover {
background-color: #A7356E;
}CSS
Learn more here
HTML DOM
UI ELEMENTS
POSITIONING
STYLING UI
DM2008
AY2526
PROGRAMMING FOR INTERACTION
Styling UI with CSS
Common CSS Properties
WEEK 10
INTERFACE DESIGN
.big-btn {
font-size: 24px;
padding: 12px 24px;
background-color: #082E5B;
color: white;
border: none;
border-radius: 12px;
cursor: pointer;
}
.big-btn:hover {
background-color: #A7356E;
}CSS
Learn more here
HTML DOM
UI ELEMENTS
POSITIONING
STYLING UI
DM2008
AY2526
PROGRAMMING FOR INTERACTION
Data → Interface → Visuals
WEEK 10
INTERFACE DESIGN
THE INTERFACE
DESIGNING A UI
INTUITIVE UI
EXAMPLES
So far, we’ve been creating visuals that respond automatically to data, from sensors, variables, or random values. But as designers, we often want the flexibility to have differejt types of control over our work.
This is where interfaces come in. They act as a middle layer between you and your code, letting you adjust and explore your sketch in real time.
UI elements like sliders and buttons turn abstract code into something you can feel and tweak. They become the bridge between input, code logic, and visual response.
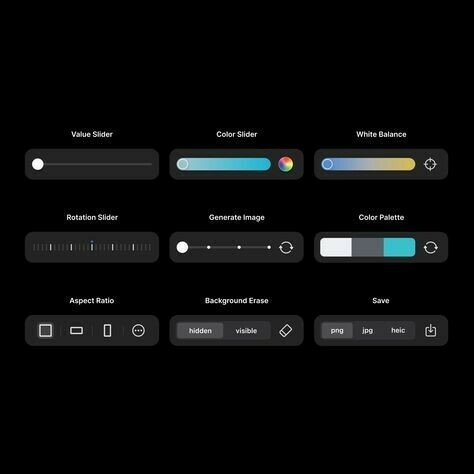
DM2008
AY2526
PROGRAMMING FOR INTERACTION
Designing with Intention
WEEK 10
INTERFACE DESIGN
Every interface begins with intention: a reason for why it exists and what it should help you or others do.
Some interfaces are made for yourself, to test, debug, or fine-tune your sketch more efficiently. Others are designed for users, helping them interact, explore, or play with your visuals.
When designing your UI, think about purpose and feedback:
What does each control change, and how will the user know it worked?
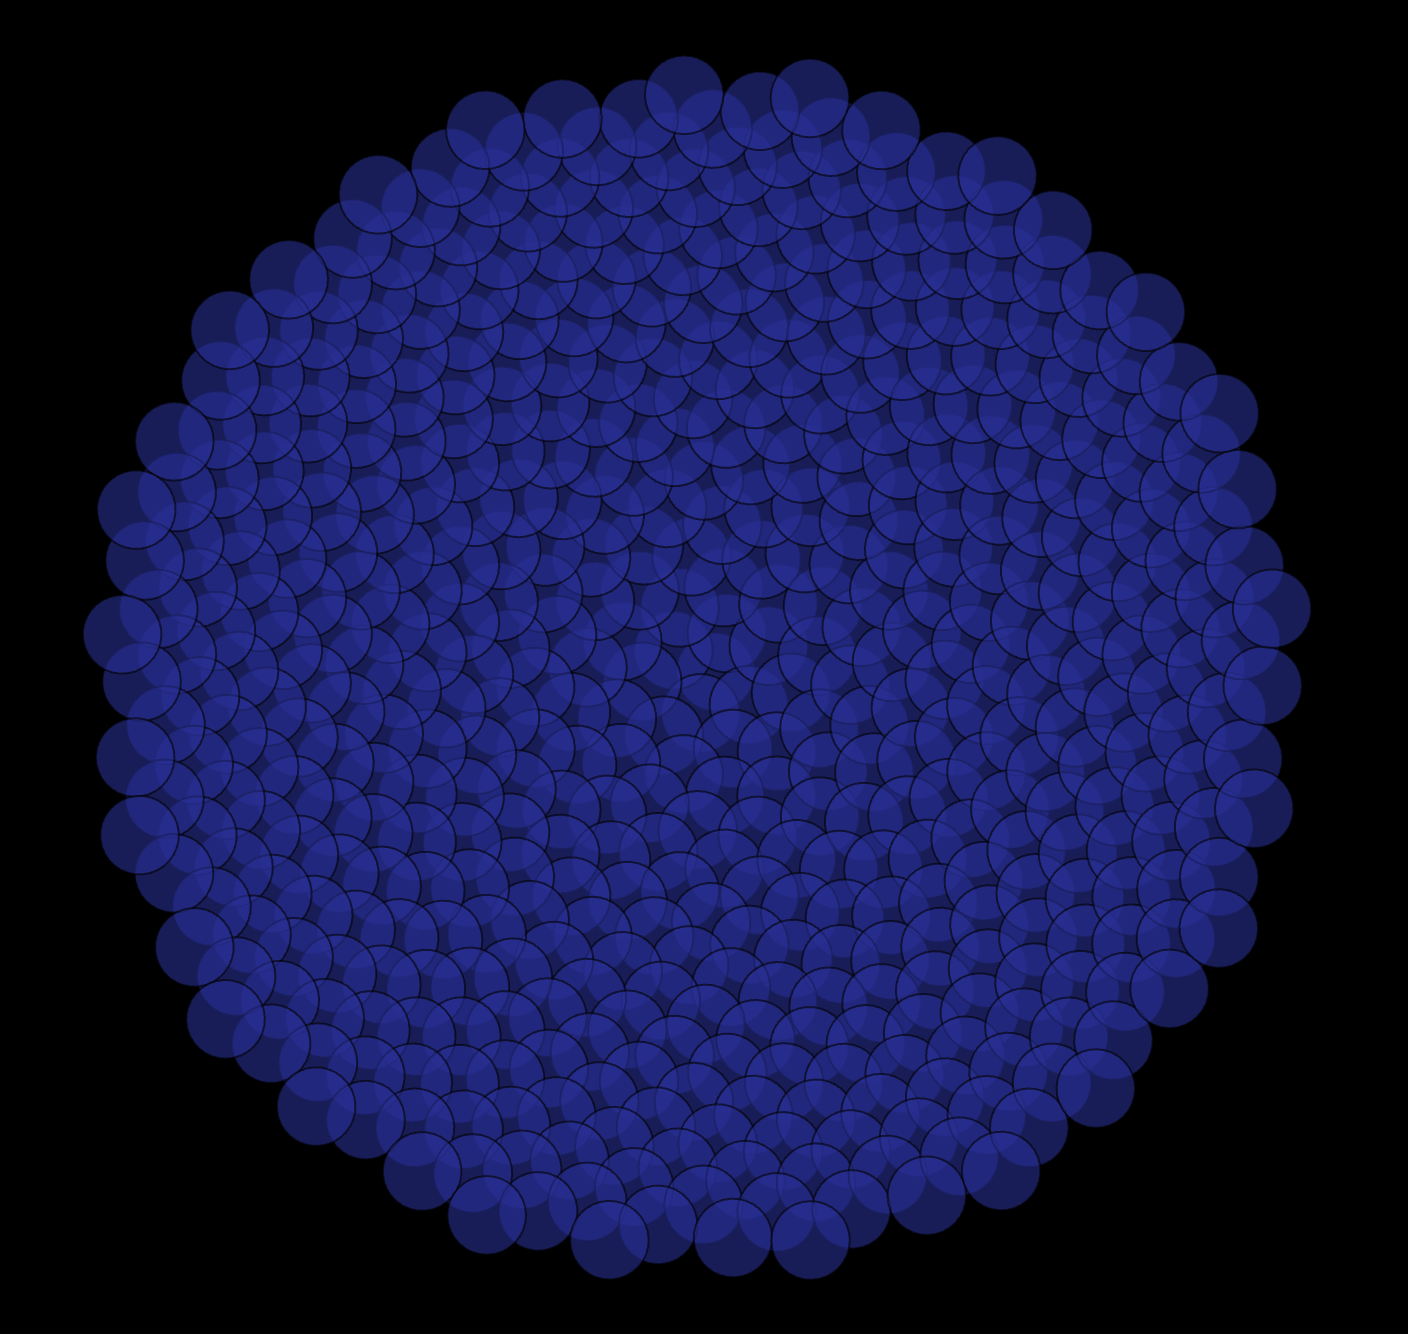
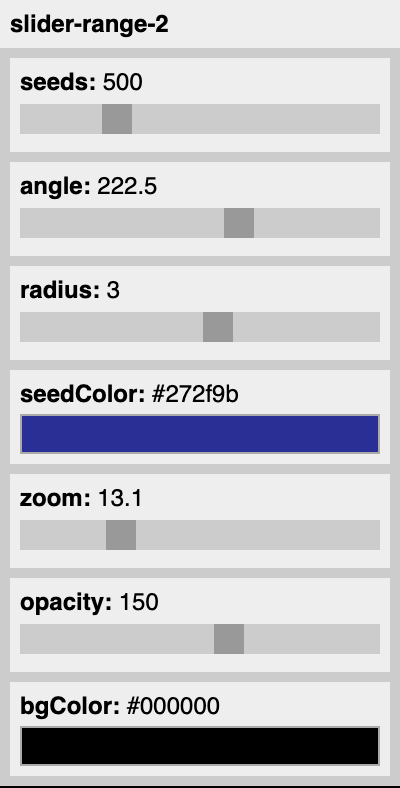
THE INTERFACE
DESIGNING A UI
INTUITIVE UI
EXAMPLES
DM2008
AY2526
PROGRAMMING FOR INTERACTION
Intuitive Interfaces
WEEK 10
INTERFACE DESIGN
An intuitive interface feels natural. People can use it without needing to stop and think. It’s built on small decisions: clear labels, consistent layouts, and controls that are grouped in logical ways.
Make sure the visuals match their purpose. A color slider should actually change color, and buttons should give clear feedback when pressed.
You can learn a lot by studying familiar examples from games, music tools, or design software. They balance clarity, hierarchy, and a sense of play.
THE INTERFACE
DESIGNING A UI
INTUITIVE UI
EXAMPLES
DM2008
AY2526
PROGRAMMING FOR INTERACTION
Interface Examples
WEEK 10
INTERFACE DESIGN
THE INTERFACE
DESIGNING A UI
INTUITIVE UI
EXAMPLES
1
2
3
4
5
6
7
8
9
10
DM2008
AY2526
PROGRAMMING FOR INTERACTION
Activity 10
BRIEF
REFERENCE
OUTPUT
WEEK 10
INTERFACE DESIGN
Control Center
40 MIN
Build a small control panel that modifies a provided generative sketch using p5.js DOM elements.
Your goal is to design an interface that makes your code feel intractable: sliders, buttons, dropdowns, or inputs that shape what’s on screen.
DM2008
AY2526
PROGRAMMING FOR INTERACTION
Activity 10
BRIEF
REFERENCE
OUTPUT
WEEK 10
INTERFACE DESIGN
Control Center
50 MIN
Experiment with how your controls are arranged, labeled, and styled.
By the end, your UI should:
- Change at least two visual variables in real time
- Include at least two types of input (e.g., a slider and a button)
- Feel intentional in layout and design
let colorBtn, sizeSlider, shapeSelect;
let shapeColor;
function setup() {
createCanvas(640, 400);
noStroke();
textFont("Helvetica, Arial, sans-serif");
// starting color
shapeColor = color(random(255), random(255), random(255));
// Button: change color
colorBtn = createButton("Change Color");
colorBtn.position(16, 16);
colorBtn.mousePressed(randomShapeColor);
function randomShapeColor() {
shapeColor = color(random(255), random(255), random(255));
}
// Slider: controls size
createP("Size").position(0, 50).style("margin", "4px 0 0 16px");
sizeSlider = createSlider(20, 220, 100, 1);
sizeSlider.position(15, 70);
// Dropdown: choose shape
createP("Shape").position(0, 100).style("margin", "8px 0 0 16px");
shapeSelect = createSelect();
shapeSelect.position(16, 130);
shapeSelect.option("ellipse");
shapeSelect.option("rect");
shapeSelect.option("triangle");
}
function draw() {
background(240);
push();
translate(width * 0.65, height * 0.5);
let s = sizeSlider.value();
fill(shapeColor);
// draw chosen shape
let choice = shapeSelect.value();
if (choice === "ellipse") {
ellipse(0, 0, s, s);
} else if (choice === "rect") {
rectMode(CENTER);
rect(0, 0, s, s);
} else if (choice === "triangle") {
triangle(-s * 0.6, s * 0.5, 0, -s * 0.6, s * 0.6, s * 0.5);
}
pop();
}
DM2008
AY2526
PROGRAMMING FOR INTERACTION
BRIEF
REFERENCE
OUTPUT
Useful Code
UI Elements (DOM)
event handling
Activity 10
WEEK 10
INTERFACE DESIGN
DM2008
AY2526
PROGRAMMING FOR INTERACTION
BRIEF
REFERENCE
OUTPUT
Useful Code
styling & layout
logic & variables
Activity 10
WEEK 10
INTERFACE DESIGN
DM2008
AY2526
PROGRAMMING FOR INTERACTION
BRIEF
REFERENCE
OUTPUT
Output
For homework and your own archival
Document your output by:
- Organizing every file in a folder on your computer
- Saving your sketch files
- Taking screen grabs of your experiments
- Uploading everything onto GitHub repo in activity folder
- Creating a README.md for this activity
deliverables
2–3 screenshots
1 short demo video
showing progression
Update GitHub repo
Activity 10
WEEK 10
INTERFACE DESIGN
DM2008
AY2526
PROGRAMMING FOR INTERACTION
Introduction to Final Project
WEEK 10
INTERFACE DESIGN
BRIEF
REQUIREMENTS
CONCEPTS
Everything you’ve learned so far — from drawing shapes to using sensor data — comes together in this final project.
You’ll design and build your own creative coding sketch using p5.js as the foundation. You can choose to work solo or in a group (up to 3 people), and if you want, you can integrate Arduino to add physical input or output.
Next week, you’ll pitch your idea. For now, start brainstorming and exploring what excites you.
You’ll also be using a provided template repo to help you get started quickly — we’ll walk through how to clone and use it.
DM2008
AY2526
PROGRAMMING FOR INTERACTION
Introduction to Final Project
WEEK 10
INTERFACE DESIGN
BRIEF
REQUIREMENTS
CONCEPTS
Your final submission must include:
- A browser-based sketch built in p5.js
- (Optional) Arduino integration for physical interactivity
- A GitHub repo with:
- Your final code (p5 + .ino if applicable)
- Documentation: screenshots, short video, and any relevant sketches or notes
- A 200–300 word reflection about what you made, how it evolved, and what you learned
You’ll present your project to the class in our final session — show us what your code can do!
DM2008
AY2526
PROGRAMMING FOR INTERACTION
Introduction to Final Project
WEEK 10
INTERFACE DESIGN
BRIEF
REQUIREMENTS
CONCEPTS
Not sure where to begin? Here are a few possible directions your final project could take:
-
Interactive visual systems
Use UI, sound, or motion to shape your sketch in real time. -
Sensor-driven installations
Bring in Arduino to respond to the world around your work — light, motion, sound, or even touch. -
Creative storytelling through code
Use visuals, data, and interaction to tell a story that evolves. -
Generative behaviors and feedback loops
Build systems that respond to themselves — explore repetition, randomness, and cause-and-effect.
You don’t have to pick just one — mix and match ideas, and think about what kind of experience you want to create.
DM2008
AY2526
PROGRAMMING FOR INTERACTION
WEEK 10
WRAPPING UP
Homework
HOMEWORK
TUTORIALS
Prepare for Final Project
2
Form your groups of maximum 3 people
Come up with a concept or idea for the project
Pitch your concept next session
Your documentation should demonstrate your iterations
Please save images as jpeg and videos as mp4
Documentation
Activity 10
Commit code to GitHub repo
Minimum (2) screenshots
1
Update README.md
Minimum (1) screen recording
DM2008
AY2526
PROGRAMMING FOR INTERACTION
HOMEWORK
TUTORIALS
1
2
3
Video Tutorials
WEEK 10
WRAPPING UP
4
Final Project Kickoff
Week 11
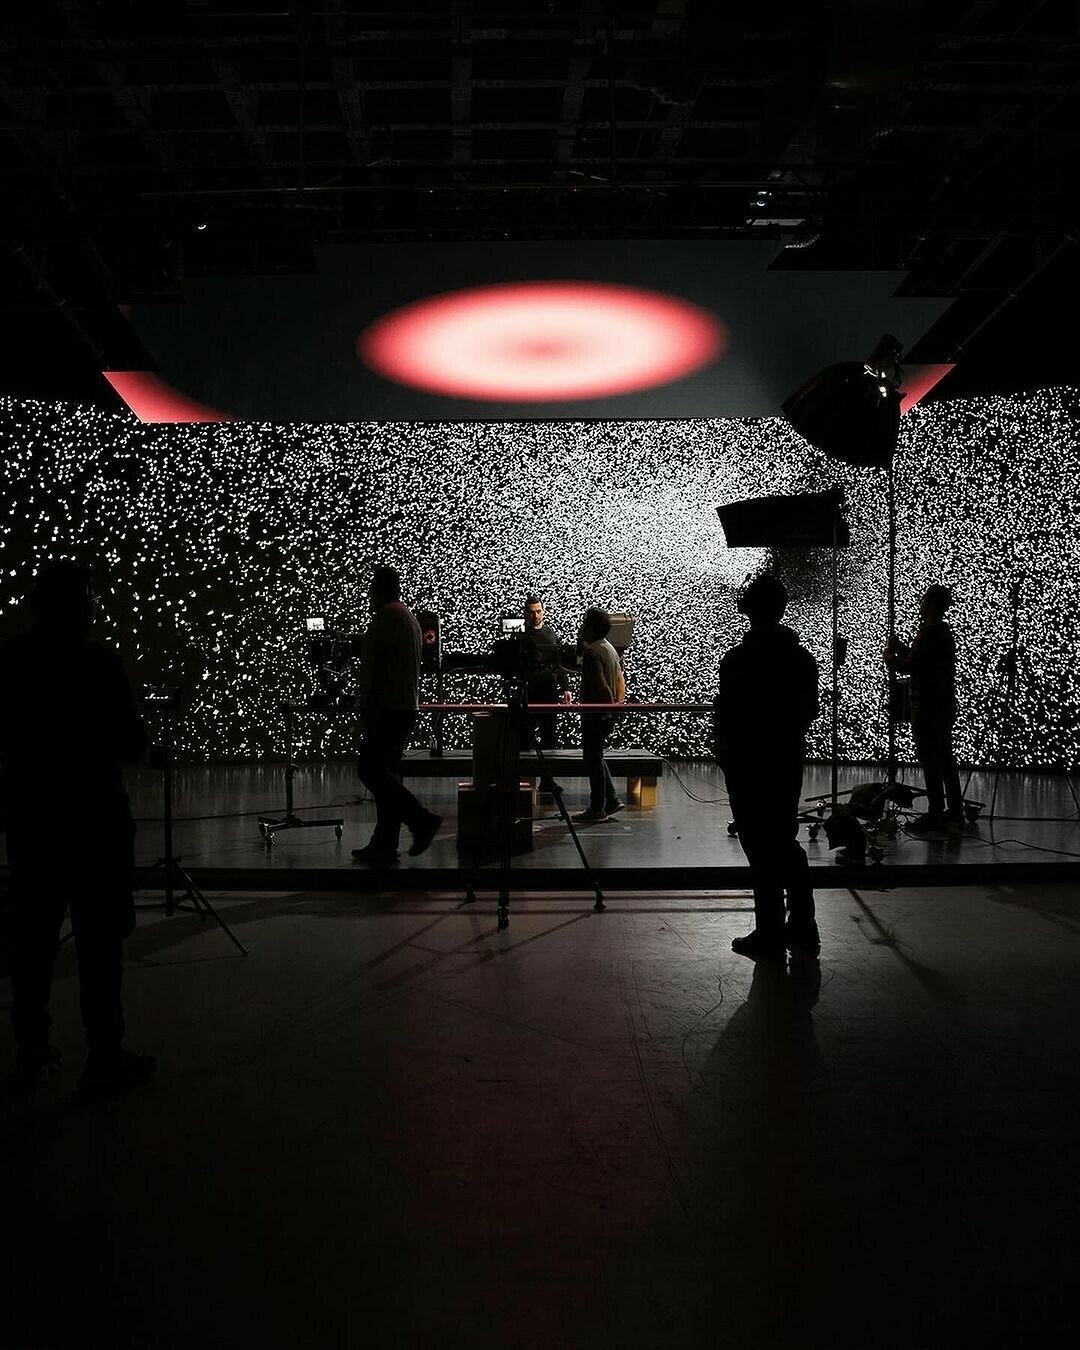
DM2008
AY2526
PROGRAMMING FOR INTERACTION
DM2008-S1-2526
By Joanne Ho
