Angular Tutorial
第二課 Angular安裝、資料繫結、事件繫結
Angular CLI: v.10.1.3
Last updated: 2020/9/24
課程目標
- 安裝Angular
- Angular CLI
- Angular基礎
- 資料繫結、事件繫結
安裝Angular環境
安裝Angular CLI
CLI: Command Line Interface
命令列介面 (非圖形化操作介面)
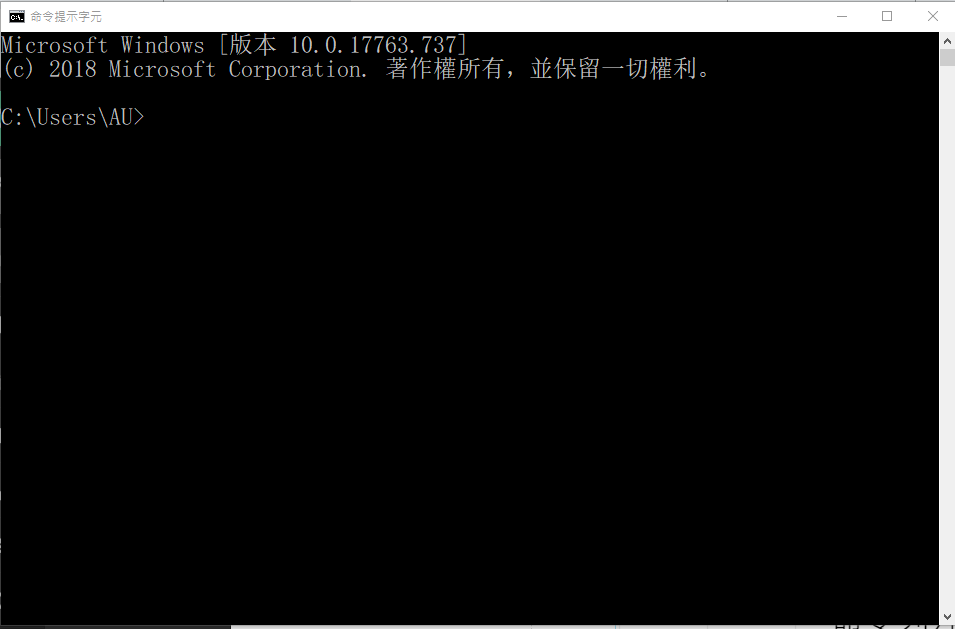
微軟工具: cmd (命令提示字元)
安裝工作(非唯一方式)
- 安裝Node.js 與 npm
- 安裝Angular CLI (Command Line Interface)
- 建立Angular專案: ng new
執行專案!
安裝node.js
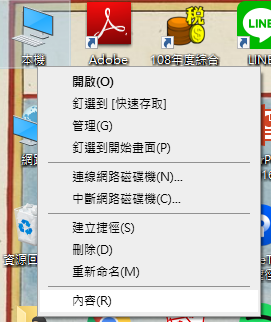
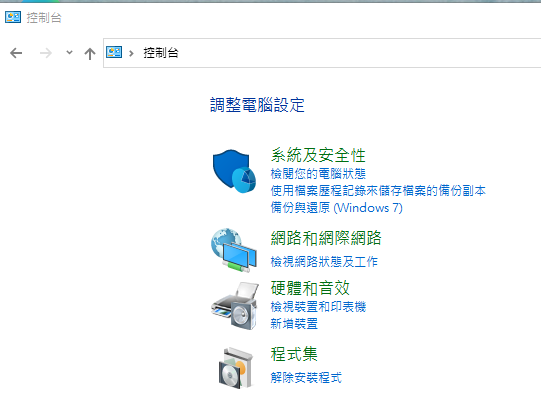
若電腦教室的node.js版本太舊,請先移除
安裝node.js
最新版本(LTS):14.18.0( npm 6.14.15) 2021/10/2
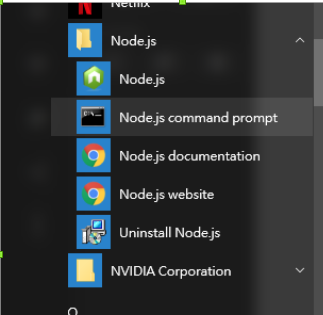
命令提示字元

安裝angular CLI
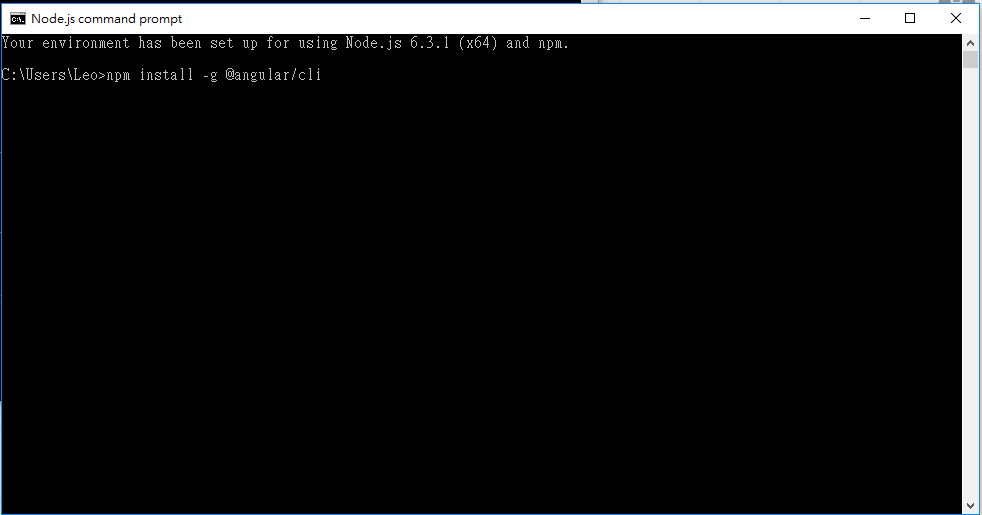
npm install -g @angular/cli
或用
npm i -g @angular/cli
cli最新版本:v12.2.8 2021/10/2
建立Angular專案
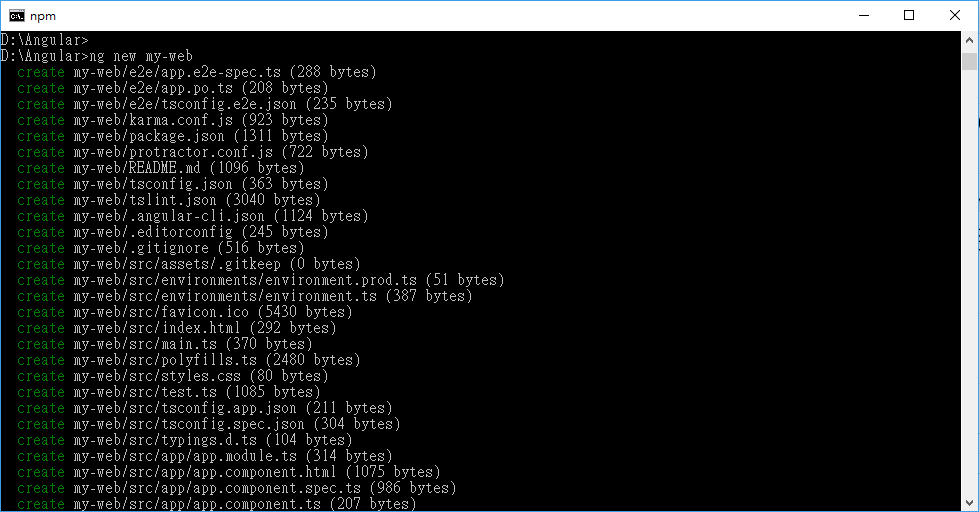
ng new my-web
- 建立專案指令: ng new 專案名稱
建立名為my-web的專案
安裝需一些時間
1. 是否加入angular routing?(y/N) Y
2. CSS
執行專案!
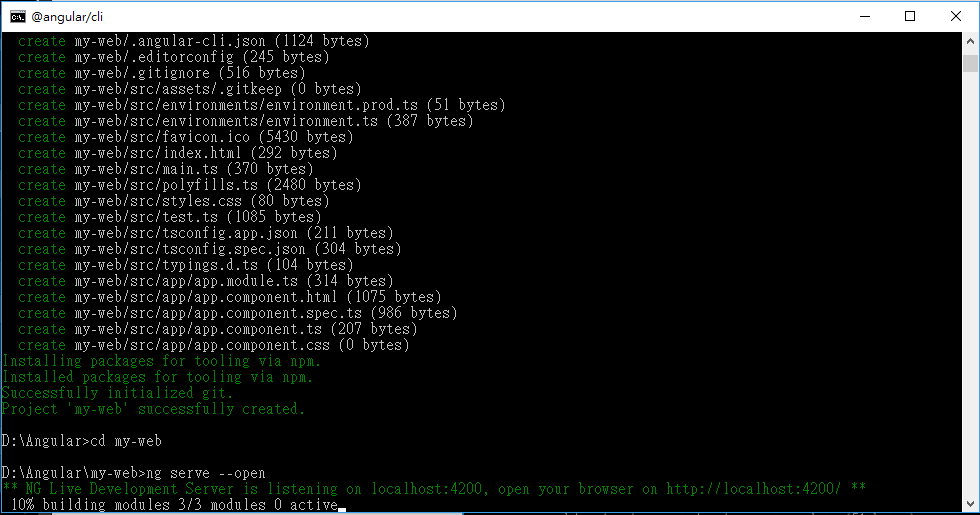
cd my-web
ng serve --open
- cd 專案名稱
- ng serve --open
將會開啟瀏覽器,執行
http://localhost:4200
執行專案!執行畫面
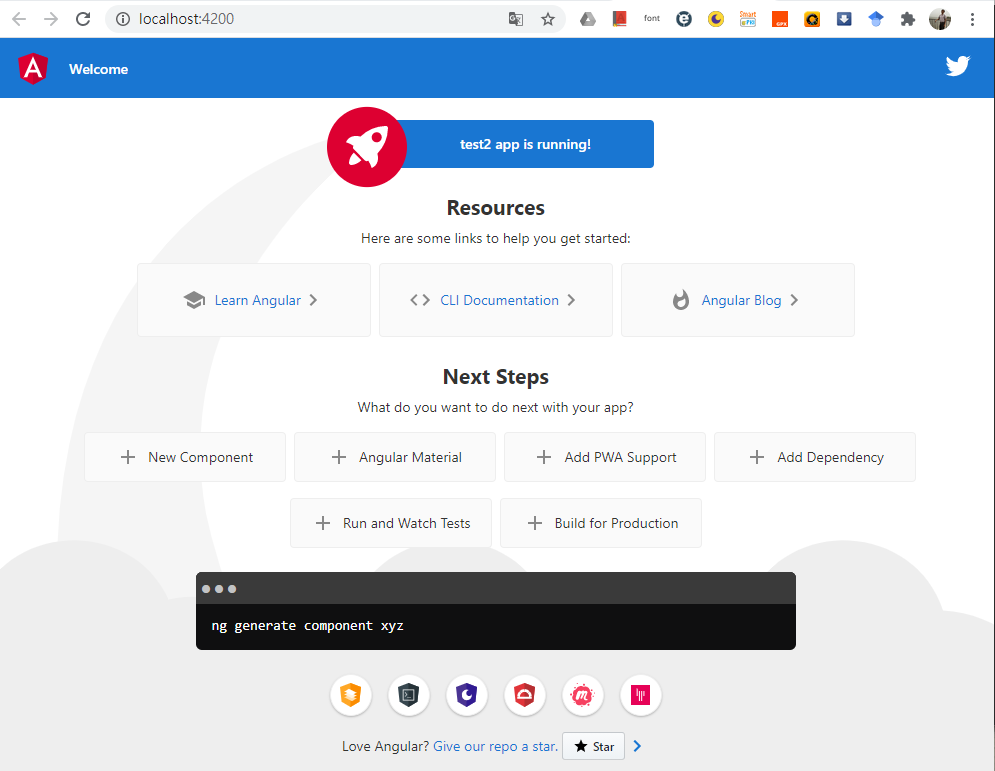
注意:網址列、改變瀏覽器寬度後畫面的變化
responsive web(響應式網頁)
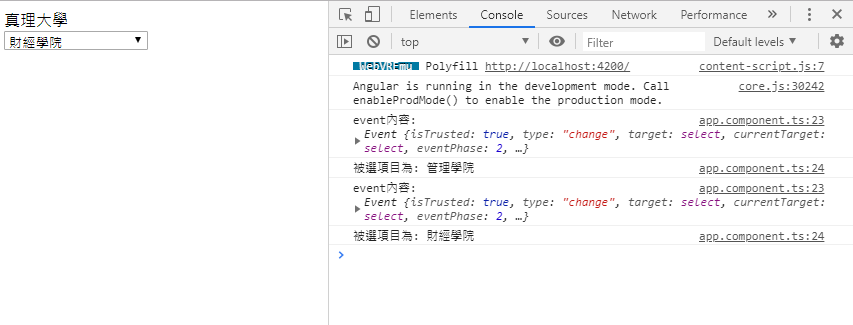
執行專案!偵錯畫面
Windows: 按F12
Mac: 同時按下Command-option-i
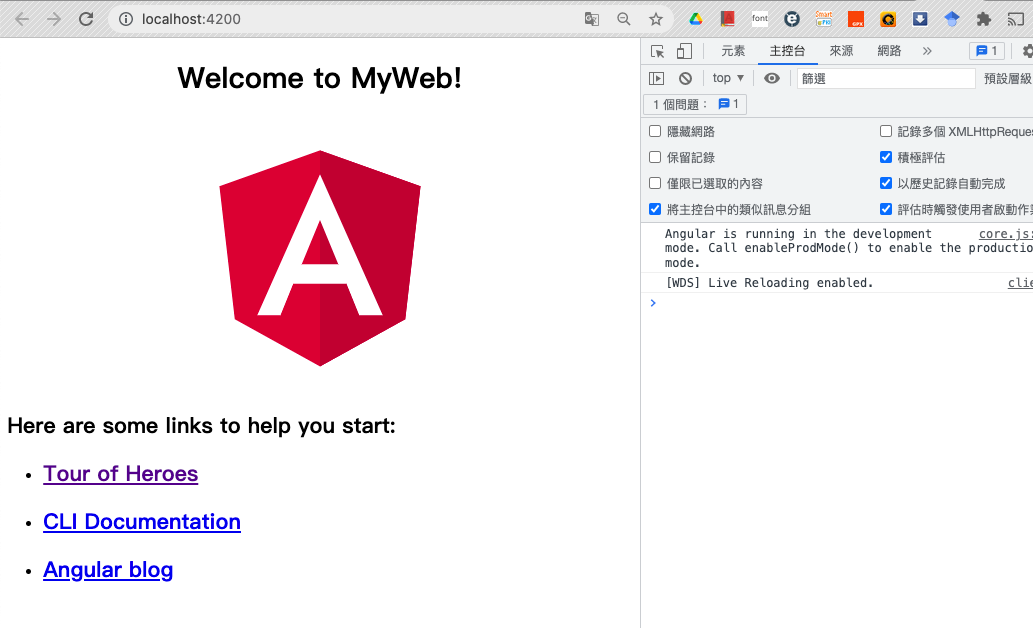
網頁執行區
主控台訊息區
CSS檢查工具
響應式模式切換
重要!!
小結
- ts檔:程式所在
- html檔:頁面版型
- css檔:版型細部設定
每一個頁面(網頁、元件)都有三個檔案:
工具介紹
VS Code
VS Code安裝與使用(1/4)
❶下載、安裝VS Code
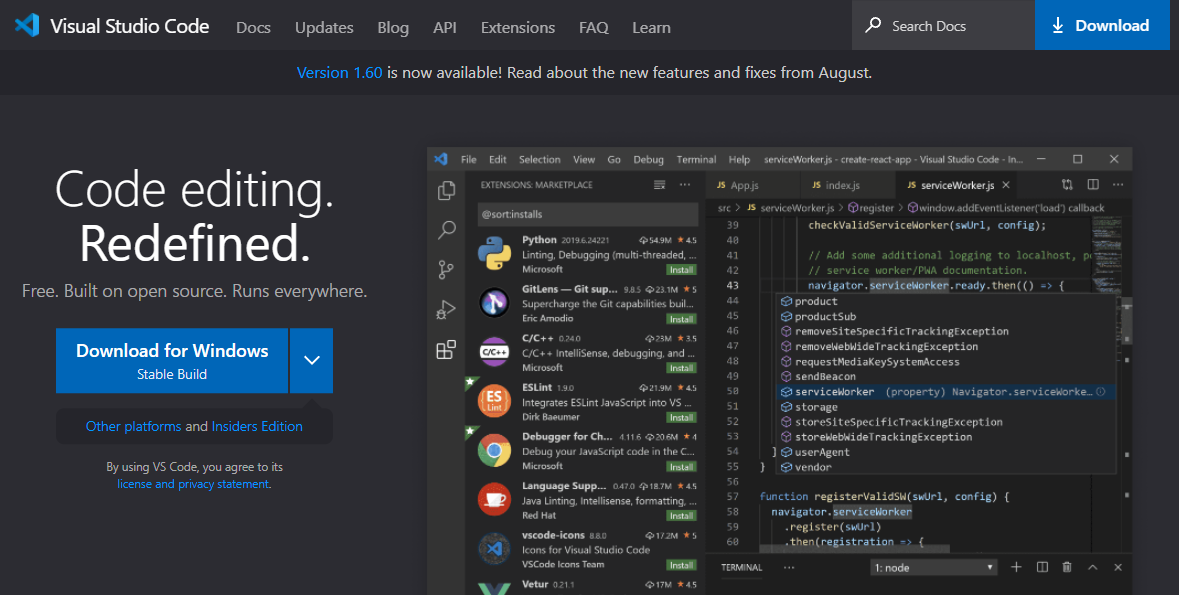
VS Code官網:https://code.visualstudio.com/
VS Code安裝與使用(2/4)
❷中文化
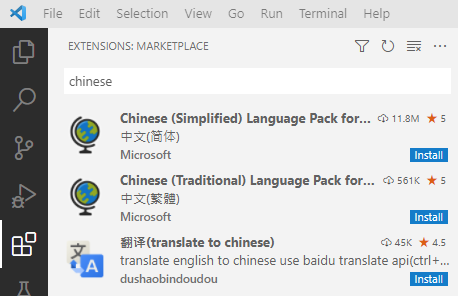
Chinese
點選安裝
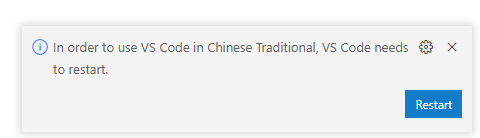
Restart重新啟動
VS Code安裝與使用(3/4)
❸ 必裝延伸模組 Angular Language Service
angular
Restart重新啟動
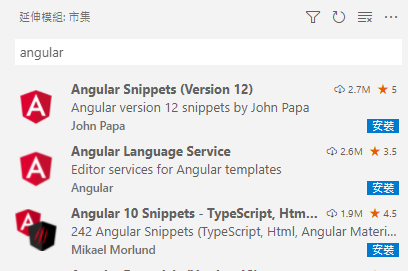
點選安裝
選裝
選裝
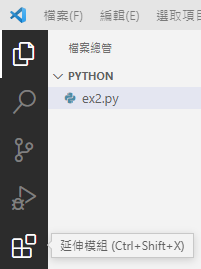
VS Code安裝與使用(4/4)
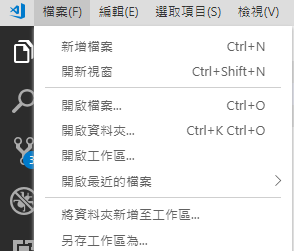
❹ 務必以「開啟資料夾」方式開啟專案!
❶ 開啟專案
檔案總管
❷ 儲存工作區
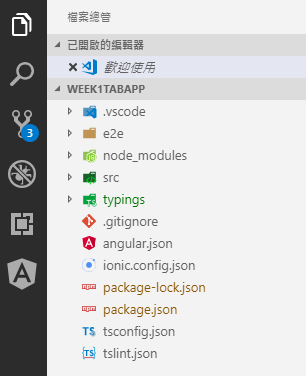
延伸模組
Your Turn!
- 找到 src/app/app.component.ts,修改title變數的內容
- 找到 src/app/app.component.html,修改其內容
- 找到 src/app/app.component.css,加入下列css
- 注意每次存檔後,頁面的即時變化
h1 {
  color: red;
  font-family: Arial, Helvetica, sans-serif;
  font-size: 150%;
}
Angular基礎
第一個範例:ng new test
- 範例說明:TS檔與HTML檔的關聯
- 屬性(資料內容) 與 屬性繫結
- 事件(操作行為) 、方法(回應行為的程式碼)與 事件繫結
範例說明(1/3)
ng new testexport class AppComponent {
// 屬性(Property): 教學單位陣列
title = '真理大學'; // 屬性:字串
units = [ // 屬性:陣列
'人文學院',
'觀光休閒與運動學院',
'管理學院',
'財經學院',
'資訊與商業智慧學院',
'通識教育中心',
'體育教育中心'
];
}❶ 建立專案
❷ 修改app.component.ts
修改title值
加入屬性units
export class AppComponent {
  // 屬性(Property): 教學單位陣列
  ... 略 ....

  // 方法(Method): 選取項目
  itemSelected(e: any) {
    console.log('event內容:', e);
    console.log('被選項目為:', e.target.value);
  }
}
加入方法
範例說明(2/3)
<nav>
{{ title }}
</nav>
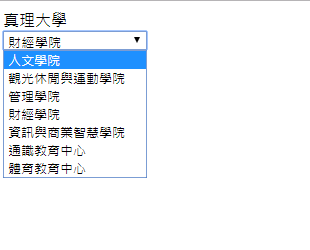
<section>
<select (change)="itemSelected($event)">
<option *ngFor="let item of units">{{item}}</option>
</select>
</section>
<router-outlet></router-outlet>❸ 修改app.component.html
使用屬性units
建立清單(select)
change事件發生時,呼叫方法 itemSelected()
範例說明(3/3)
❹ 模擬執行結果
cd test
ng serve --open- ts檔, html結構?
- 屬性? 如何建立? 如何使用?
- 方法? 如何建立? 如何使用?
- 清單(list)? 如何建立? 其他頁面格式?
頁面結構ts檔結構(1/4)
import { Component } from '@angular/core';

@Component({
  selector: 'app-root',
  templateUrl: './app.component.html',
  styleUrls: ['./app.component.css']
})
export class AppComponent {
  // 屬性(Property): 教學單位陣列
  title = '真理大學';
  units = [
    '人文學院',
    '觀光休閒與運動學院',
    '管理學院',
    '財經學院',
    '資訊與商業智慧學院',
    '通識教育中心',
    '體育教育中心'
  ];

  // 方法(Method): 選取項目
  itemSelected(e: any) {
    console.log('event內容:', e);
    console.log('被選項目為:', e.target.value);
  }
}
app.component.ts
| AppModule |
| AppComponent元件 |
| 其他模組 |
| XXX 元件 ... ... |
| angular/core模組 |
| Component元件 ... ... |
import
import
1. 使用其他模組的功能必須import
2. export: 代表模組/元件功能開放其他模組import
3. @Component: 類別註釋(decorator)
有固定之屬性可標記, selector, templateUrl為常用屬性
4. 屬性:例如units
5. 方法:例如itemSelected
1
2
3
4
5
頁面結構ts檔結構(2/4)
import { Component } from '@angular/core';

@Component({
  selector: 'app-root',
  templateUrl: './app.component.html',
  styleUrls: ['./app.component.css']
})

export class AppComponent {
  title = 'app';
}
import元件
Decorator
元件定義
<nav>
  {{ title }}
</nav>

<section>
  <select (change)="itemSelected($event)">
    <option *ngFor="let item of units">{{item}}</option>
  </select>
</section>

<router-outlet></router-outlet>
app.component.html
❶ html標籤:
nav (導覽列), section (段落)
❷ *ngFor:Angular for迴圈
「資料繫結」取得對應ts檔的units陣列
let 迴圈變數 of 陣列變數
❸(change):change事件處理
「事件繫結」呼叫對應ts檔的方法
change事件為「選取值改變時」發生的事件
❹ {{ 屬性 }}:內插屬性值
頁面結構html檔結構(3/4)
❺ angular指令
router-outlet: 根據目前的網址列,置換頁面內容
<div class="jumbotron text-center">
  <h1>My First Bootstrap Page</h1>
  <p>Resize this responsive page to see the effect!</p>
</div>

<div class="container">
  <div class="row">
    <div class="col-sm-4">
      <h3>Column 1</h3>
      <p>Lorem ipsum dolor..</p>
    </div>
    <div class="col-sm-4">
      <h3>Column 2</h3>
      <p>Lorem ipsum dolor..</p>
    </div>
    <div class="col-sm-4">
      <h3>Column 3</h3>
      <p>Lorem ipsum dolor..</p>
    </div>
  </div>
</div>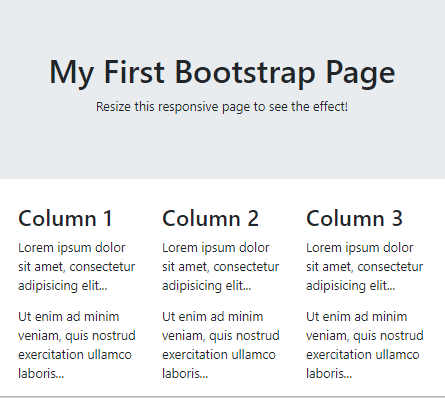
頁面結構html檔結構(4/4)
使用Bootstrap 4套件產生版型
div標籤
class屬性
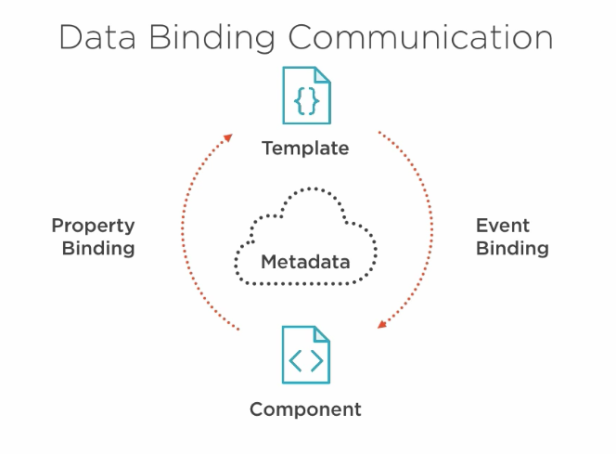
屬性property
- 如何與TS檔一起運作?
- 內插
- 屬性繫結 (property binding)
- 屬性:暫存資料, 供頁面(html檔)使用
- 3種類型
- 一般數值
- 物件
- 陣列
屬性 基本用法: 內插(1/14)
import { Component } from '@angular/core';

... 略
export class AppComponent {
  // 屬性(Property): 教學單位陣列
  title = '真理大學'
  units = [
  .... 略 ...
}
title: string = '真理大學' // 定義於ts檔屬性名稱
型別 (經常省略)
初值
<div>        <!-- 使用於html檔 -->
    {{ title }}
</div>
屬性內插
{{ 屬性名稱 }} 使用於.html檔
<nav class="jumbotron text-center">
  <h1>
    {{ title }}
  </h1>
</nav>

...略...
屬性
繫結
屬性屬性繫結(property binding)(2/14)
tab1.page.ts
tab1.page.html
屬性繫結
資料流
屬性
繫結
屬性 字串、數值(3/14)
  title = '關於我';
  author = 'Leo Wang';
  fileName = 'logo.png';
  lucky = 7;
  motto = '要怎麼收穫 先那麼栽';
數值型別: number
字串型別: string
import { Component } from '@angular/core';

@Component({
  selector: 'app-root',
  templateUrl: './app.component.html',
  styleUrls: ['./app.component.css']
})
export class AppComponent {
  title = '關於我';
  author = 'Leo Wang';
  fileName = 'logo.png';
  lucky: number = 7;
  motto = '要怎麼收穫 先那麼栽';
}
將屬性加入app.component.ts
屬性
繫結
屬性 字串、數值(4/14)
<nav>
  <h1>
    {{ title }}
  </h1>
</nav>

<section class="container">
  <div class="card">
    <img [src]="'/assets/images/' + fileName" />
    <div>
      <h1>{{ author }}</h1>
    </div>
    <div>
      <p>座右銘:{{ motto }}</p>
      <p>幸運號碼:{{ lucky }}</p>
    </div>
  </div>
</section>
在app.component.html使用所有屬性

在assets下建立images
放入圖檔
屬性
繫結
屬性 基本用法:屬性繫結與內插(5/14)
<p>座右銘:{{ motto }}</p><img [src]="'/assets/images/' + fileName" />
  title = '關於我';
  author = 'Leo Wang';
  fileName = 'logo.png';
  lucky = 7;
  motto = '要怎麼收穫 先那麼栽';
為什麼fileName屬性不能加「兩對大括弧」?
屬性繫結: 直接打名稱
內插: 要外加兩對大括弧
使用時機: 位於「開始標籤」內(通常出現在等號右側)
使用時機: 位於html內容處(開始、結束標籤之間)
屬性
繫結
練習2-1
- 在app頁面建立「關於我」頁面
- 版型不限,使用div, nav, section, h1, p, img...等即可
- 在ts檔建立下列屬性(非照此順序展示)
- 頭像檔名(string)
- 我希望的成績(number)
- 姓名(string)
- 學號(string)
- 我想說的一句話(string)
屬性
繫結
屬性物件(6/14)
  title = '關於我';
  author = 'Leo Wang';
  fileName = 'logo.png';
  lucky = 7;
  motto = '要怎麼收穫 先那麼栽';
改寫為「物件」: aboutme, 內有四個欄位
同屬「關於我」的不同欄位
aboutme = {
    name: 'Leo Wang',
    avatar: 'logo.png',
    lucky: 7,
    motto: '要怎麼收穫 先那麼栽'
};
aboutme = {
name: 'Leo Wang',
avatar: 'logo.png',
lucky: 7,
motto: '要怎麼收穫 先那麼栽'
};物件名稱
欄位名稱
欄位初值
物件初值: 以{}包起來
欄位之間: 以逗點分隔
欄位名稱: 欄位初值,屬性
繫結
屬性物件(7/12)
import { Component } from '@angular/core';
@Component({
selector: 'app-root',
templateUrl: './app.component.html',
styleUrls: ['./app.component.css']
})
export class AppComponent {
title = '關於我';
aboutme = {
    name: 'Leo Wang',
    avatar: 'logo.png',
    lucky: 7,
    motto: '要怎麼收穫 先那麼栽'
};
}將物件屬性取代原先屬性tab3.page.ts
屬性
繫結
屬性物件(8/12)
<nav>
  <h1>
    {{ title }}
  </h1>
</nav>

<section class="container">
  <div class="card">
    <img [src]="'/assets/images/' + aboutme.avatar" />
    <div>
      <h1>{{ aboutme.name }}</h1>
    </div>
    <div>
      <p>座右銘:{{ aboutme.motto }}</p>
      <p>幸運號碼:{{ aboutme.lucky }}</p>
    </div>
  </div>
</section>
改寫app.component.html
物件名稱.欄位名稱
屬性
繫結
練習2-2
- 將「關於我」頁面改為使用物件
  // 物件 aboutme: 4個欄位
  aboutme = {
    name: 'Leo Wang',
    avatar: 'logo.png',
    lucky: 7,
    motto: '要怎麼收穫 先那麼栽'
  };
屬性
繫結
屬性 屬性繫結其他用法(9/12)
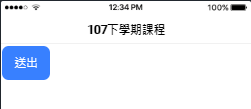
<detail-page [cid]="currentId"></detail-page><button [disabled]="isUnchanged">
送出
</button>@Component({
selector: 'detail-page',
...
})
export class DetailComponent {
@Input() cid: number;
...
}detail.component.ts
[屬性]使用時機❶:繫結DOM屬性
用途:傳遞參數到下一頁
cid值
app.component.html
<ion-img [src]="'/assets/images/' + aboutme.avatar"></ion-img>使用方括弧:[屬性名稱]
DOM屬性
用途: 將DOM屬性設定為等號右側數值
[屬性]使用時機❷:繫結@input()屬性
屬性
繫結
app.component.html
detail.component.ts
什麼是DOM屬性?(10/12)
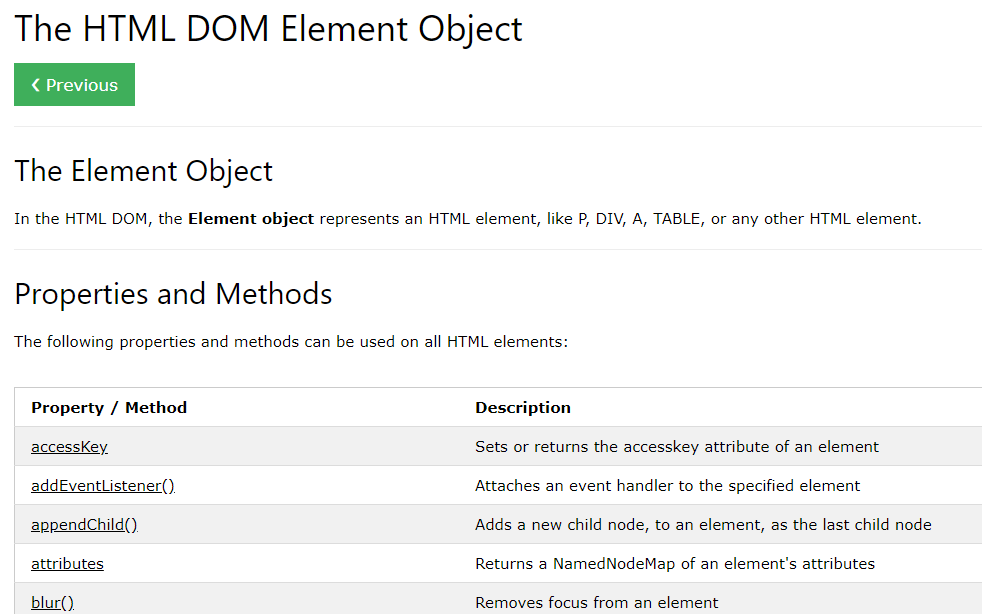
DOM(Document Object Model) :相對於HTML頁面裡的各元素,瀏覽器所建立之對應物件
DOM裡各元素之物件,都有屬性與方法可供使用
DOM屬性
屬性
繫結
屬性陣列(11/12)
  courses = [
    {name: '手機程式設計', credit: 3, subject: '選修', desc: '行動app開發課程' },
    {name: '行動技術與應用', credit: 3, subject: '選修', desc: '科技最新發展趨勢介紹與體驗' },
    {name: '基礎程式設計', credit: 3, subject: '必修', desc: 'python程式語言介紹' }
  ];
陣列:相同類型的「物件」或數值
陣列名稱
3個元素,都是物件
陣列初值: 以[]包起來
元素之間: 以逗點分隔
屬性
繫結
陣列變數
方括弧、逗點分隔
物件:每一欄=> 屬性:屬性值
屬性陣列(12/12)
  <ul>
    <li *ngFor='let item of courses'>
      <div>{{ item.name }}</div>
      <p> {{ item.desc }}</p>
      <p> 學分數:{{ item.credit }}, 必選修: {{ item.subject }}</p>
    </li>
  </ul>
使用方式: 迴圈指令 *ngFor
迴圈變數
迴圈內: 使用迴圈變數
陣列變數,來自ts檔
*ngFor='let 迴圈自訂變數 of 陣列變數"*ngFor='let item of courses"*ngFor用於要重複出現的標籤
屬性
繫結
<ul>
    <li>教士會館</li>
    <li>會館訊息</li>
    <li>特色餐點</li>
    <li>交通資訊</li>
</ul>
迴圈指令 *ngFor
用於HTML內文
套用需要重複產生之標籤,如<li>
搭配陣列變數
let 迴圈變數 of 陣列變數
練習2-3
- 加入陣列,紀錄你想要販售的商品
- 商品4個欄位:名稱,價格,說明, 圖片
  // 物件陣列 products: 4個欄位 名稱,價格,說明, 圖片
  products = [
    {name: '蜂蜜檸檬水', price: 100, desc: '不加一滴水熬煮,風味純正', img: 'honey.png'},
    {name: '美式咖啡', price: 80, desc: '口感明亮滑順,回甘不苦澀', img: 'coffee.png'}
  ];
屬性
繫結
網頁版型
- Bootstrap v4.2中譯版
- Angular Material v12.2.8英文版
練習
- 手動加入Bootstrap版型庫(什麼是Bootstrap?)
- 找到app.component.html換版型
- 找到app.component.ts 加入屬性 title, mycss, file
- 在app.component.html使用屬性
Angular練習加入bootstrap版型庫(1/4)
<link rel="stylesheet" href="https://stackpath.bootstrapcdn.com/bootstrap/4.1.1/css/bootstrap.min.css" integrity="sha384-WskhaSGFgHYWDcbwN70/dfYBj47jz9qbsMId/iRN3ewGhXQFZCSftd1LZCfmhktB" crossorigin="anonymous">
1. 找到index.html,在<head>裡加入CSS
2.同樣在index.html,找到</body>,在其前面加入Javascript
<script src="https://code.jquery.com/jquery-3.3.1.slim.min.js" integrity="sha384-q8i/X+965DzO0rT7abK41JStQIAqVgRVzpbzo5smXKp4YfRvH+8abtTE1Pi6jizo" crossorigin="anonymous"></script>
<script src="https://cdnjs.cloudflare.com/ajax/libs/popper.js/1.14.3/umd/popper.min.js" integrity="sha384-ZMP7rVo3mIykV+2+9J3UJ46jBk0WLaUAdn689aCwoqbBJiSnjAK/l8WvCWPIPm49" crossorigin="anonymous"></script>
<script src="https://stackpath.bootstrapcdn.com/bootstrap/4.1.1/js/bootstrap.min.js" integrity="sha384-smHYKdLADwkXOn1EmN1qk/HfnUcbVRZyYmZ4qpPea6sjB/pTJ0euyQp0Mk8ck+5T" crossorigin="anonymous"></script>參考:Bootstrap簡介
版
型
Angular練習換上基本版型(2/4)
<div class="container">
  <h1>第一個BS4網頁</h1>
  <p>這是我的第一個BS4網頁</p>
</div>
3. 找到app.component.html,清空內容,輸入:
app.component.html
<div class="container">
  <!--佔桌機螢幕約1000圖點左右-->
</div>
<div class="container-fluid">
  <!--佔全螢幕100%-->
</div>
版
型
Angular練習定義屬性(3/4)
import { Component } from '@angular/core';

@Component({
  selector: 'app-root',
  templateUrl: './app.component.html',
  styleUrls: ['./app.component.css']
})
export class AppComponent {
  title = '第一個網頁';   // 屬性
  mycss = "text-danger"; // 屬性
  file = "logo.png";     // 屬性
}
4. 找到app.component.ts,定義幾個屬性:
app.component.ts
版
型
Angular練習使用屬性(4/4)
<div class="container">
  <h1 class="text-primary">{{ title }}</h1>
  <p [class]="mycss">這是我的第一個網頁</p>
  <p bind-class="mycss">這也是我的第一個網頁</p>
  <p class="{{mycss}}">這還是我的第一個網頁</p>
  <img src="/assets/images/{{file}}" />
</div>
5. 修改app.component.html,使用屬性:
<a href="{{myContact.fb}}">
<a [href]="myContact.fb">
<a bind-href="myContact.fb">
html檔使用屬性
用於HTML內文:{{屬性名稱}}
用於HTML開始標籤內: "屬性名稱"
新增圖檔logo.png到/assets/images/ 下
app.component.html
版
型
事件
- 軟體執行過程中發出的訊號
- 例如: 滑鼠點選, 手指滑動, 鬧鐘, 資料庫新增資料
- 分類: ❶DOM事件 ❷自訂事件
- Angular處理事件的方式: 事件繫結
Icons made by Smashicons from www.flaticon.com is licensed by CC 3.0 BY
Icons made by Yannick from www.flaticon.com is licensed by CC 3.0 BY
Icons made by Freepik from www.flaticon.com is licensed by CC 3.0 BY


事件繫結 event binding(1/5)
app.component.ts
app.component.html
屬性繫結
資料流
事件流
事件繫結
事件產生
回呼函式
呼叫
事件繫結
事件繫結 event binding(2/5)
app.component.ts
app.component.html
...
export class AppComponent {
  myEvent(event) {
    console.log(event);
  };
}
<button (click)="myEvent($event)">
閱讀更多
</button>(DOM事件):事件繫結
雙引號內為ts檔定義的事件處理器(函式)
$event為發生的事件內容
事件繫結
事件繫結 event binding(3/5)
...
export class AppComponent {
  myEvent(event) {
    console.log(event);
  }
}
<button (click)="myEvent($event)">
閱讀更多
</button>❶ html端語法 寫在開始標籤內
(DOM事件)="事件處理器(參數)"
xxx.component.html
xxx.component.ts
雙引號內為ts檔定義的事件處理器(回呼函式)
$event為發生的事件內容
(自訂事件)
任何ts檔內都可以自訂事件
❷ ts端: 建立事件處理器 export class ...{ }大括弧內
函式名稱(參數: 參數型別) {}
(DOM事件)
事件處理器(回呼函式)
❸ 除了DOM事件外, 括弧內可以是...
事件處理器(回呼函式)
事件繫結
什麼是DOM事件?(4/5)

JavaScript程式可針對任一HTML元素所屬的DOM事件,註冊事件處理器
事件繫結
事件繫結呼叫事件處理器(5/5)
<button (click)="doSomething($event)">送出</button><標籤名 (click)="函式名稱()"></標籤名><標籤名 (click)="函式名稱(參數1,參數2,...)"></標籤名> <!--1個以上參數-->
<標籤名 (click)="函式名稱($event)"></標籤名> <!--$event是系統提供的事件內容-->HTML檔內事件繫結 以click事件為例
範例: click事件繫結函式doSomething()
其他用法
需在ts檔撰寫事件處理器(回呼函式)
export class TabComponent {
  doSomething(e) {  // e: ts檔內參數名稱
    // e的值由HTML檔傳入, 即e = $event
  }
}
事件繫結
練習2
- 修改app.component.html加入按鈕、設定事件繫結
- 修改app.component.ts 加入事件處理器
Angular練習2設定事件繫結(1/2)
<div class="container">
  <h1 class="text-primary">{{ title }}</h1>
  <p [class]="mycss">這是我的第一個網頁</p>
  <p bind-class="mycss">這也是我的第一個網頁</p>
  <p class="{{mycss}}">這還是我的第一個網頁</p>
  <img src="/assets/images/{{file}}" />
  <div>
    <button class="btn btn-primary" (click)="changeColor()">
    換色
    </button>
  </div>
</div>
1. 修改app.component.html,加入按鈕,設定繫結:
app.component.html
Angular練習2事件處理器(2/2)
...
export class AppComponent {
  title = '第一個網頁';
  mycss = "text-danger";
  file = "logo.png";

  changeColor(){
    if(this.mycss=="text-danger") {
      this.mycss="text-primary";
    } else {
      this.mycss="text-danger";
    }
  }
}
2. 修改app.component.ts,加入事件處理器:
app.component.ts(非完整)
Bootstrap 4 快速導覽
- 基本版型
- 常用類別
BS4快速導覽基本版型(1/7)

廣告屏幕 jumbotron
可收合選單 navbar
網格系統 grid
頁尾 footer
會設定為jumbotron
版
型
網站雛型
版
型
BS4快速導覽廣告屏幕jumbotron(2/7)
<!--廣告屏幕 -->
<div class="jumbotron text-center" style="margin-bottom:0">
  <h1 class="display-3">{{ jumbo.title }}</h1>
  <p class="lead">{{ jumbo.lead }}</p>
</div>
<!--廣告屏幕 -->
<div class="jumbotron">
  ...
</div>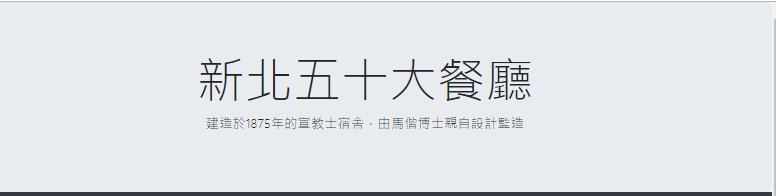
基本設定
範例
<h1>
<p class="lead">
版
型
BS4快速導覽選單(3/7)
<!--網站收合選單-->
<nav class="navbar navbar-expand-sm">
  <!--網站標題-->
  <a class="navbar-brand" href="#">網站標題</a>
  <!--選單項目 -->
  <ul class="navbar-nav">
    <li class="nav-item">
      <a class="nav-link">回到首頁</a>
    </li>
  </ul>
</nav>
<a class="navbar-brand">
<nav class="navbar navbar-expand-sm navbar-light navbar-dark bg-dark">
<nav class="navbar">
<ul class="navbar-nav">
<li class="nav-item">
<a class="nav-link">連結</a>
<li>
版
型
BS4快速導覽收合選單(4/7)
<!--網站收合選單-->
<nav class="navbar navbar-expand-lg navbar-light navbar-dark bg-dark">
  <button class="navbar-toggler" type="button" data-toggle="collapse"
    data-target="#nav-content" aria-controls="nav-content"
    aria-expanded="false" aria-label="Toggle navigation">
    <span class="navbar-toggler-icon"></span>
  </button>
  <!--網站標題-->
  <a class="navbar-brand" href="#">教士會館</a>
  <!--選單項目 -->
  <ul class="navbar-nav collapse navbar-collapse" id="#nav-content">
    ...
</nav>
<nav class="navbar-expand-lg"
data-target="#nav-content" #名稱可自訂
漢堡按鈕
選單項目:必須設定「收合」
lg:large
收合: 小於 992px
展開: 大於等於992px
漢堡按鈕(照抄)
<ul class="... collapse navbar-collpse">
<ul... id="#nav-content">
id與data-target相同
版
型
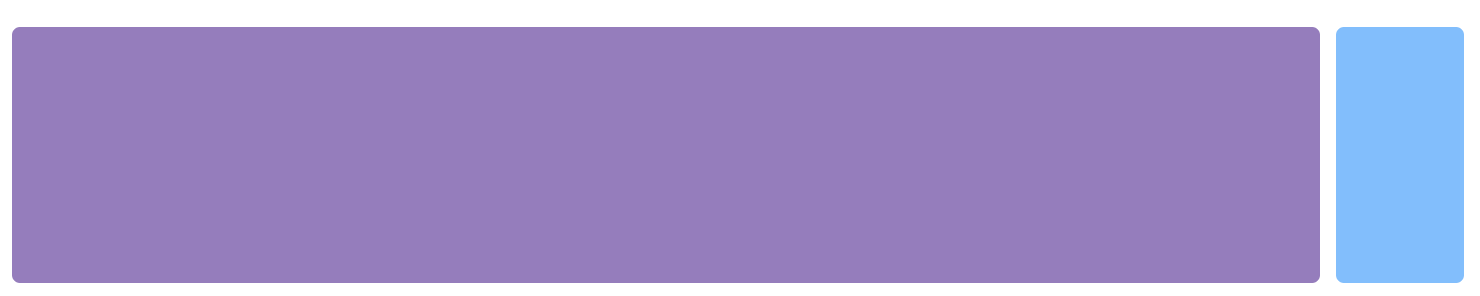
BS4快速導覽收合選單尺寸(5/7)
<nav class="navbar-expand-lg"
navbar-expand-sm
navbar-expand-xl
navbar-expand-md
版
型
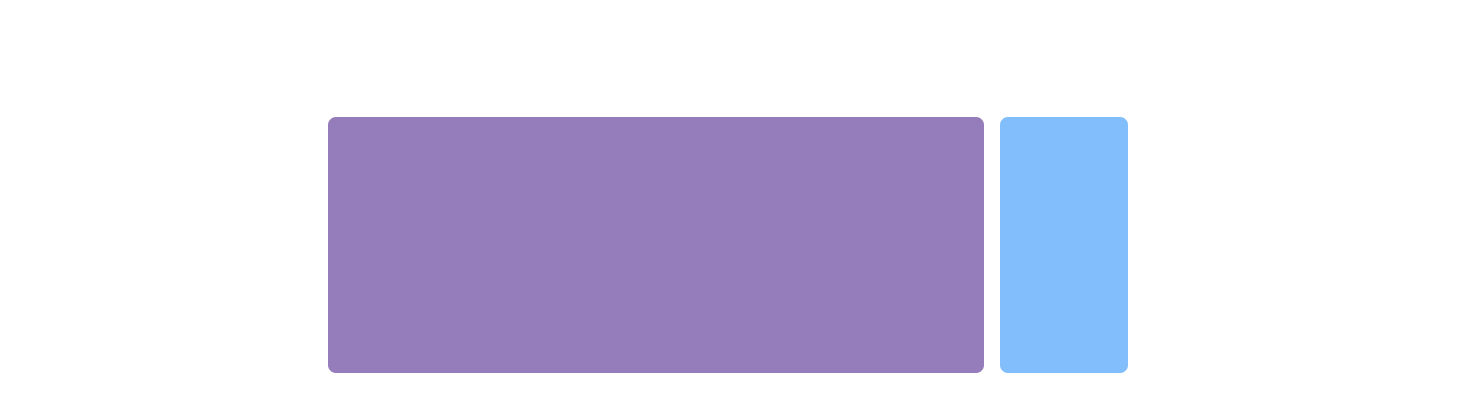
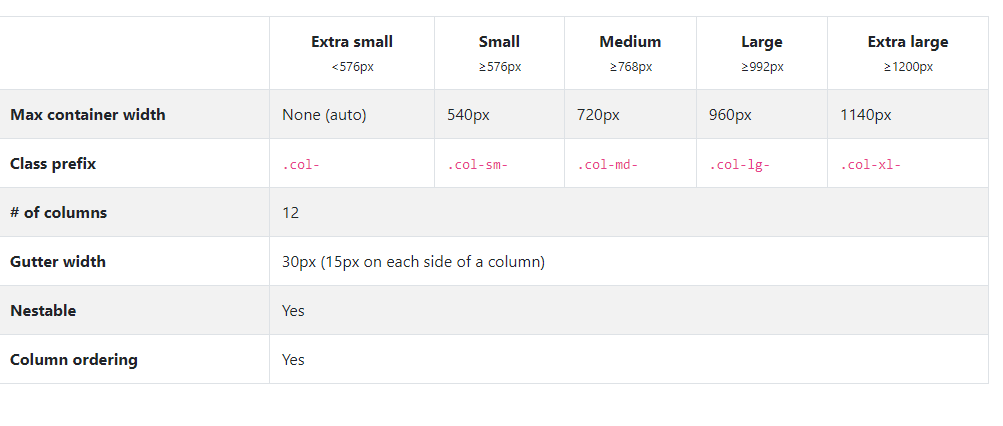
BS4快速導覽內容主體(6/7)
<!-- 網站內容主體 -->
<div class="container" style="margin-top:30px">
  <div class="row">
    <!-- 第一行 -->
    <div class="col-sm-4">
      <!--第一行 左欄 -->
    </div>
    <div class="col-sm-8">
      <!--第一行 右欄 -->
    </div>
  </div>
</div>
<div class="container">
<div class="row">
第一行
Responsive響應式網頁
寬度100%
max-width:1140px
<div class="col-sm-4">
<div class="col-sm-8>
網格系統:每一行12格
十分複雜!
版
型
BS4快速導覽頁尾(7/7)
<!-- 頁尾 (使用jumbostron類別產生)-->
<div class="jumbotron bg-dark text-light mb-0">
<div class="container">
<p>真理大學 教士會館</p>
<p>© 2018~真理大學 版權所有 </p>
</div>
</div>使用jumbotron類別
建議加上container類別
以便使用網格編排內容
版
型
BS4快速導覽Summary
- 容器類別:container, container-fluid
- 廣告屏幕類別:jumbotron
- 簡易選單類別:nav, nav-item, nav-link
- 收合選單類別:navbar
<div class="container">容器</div>

<div class="jumbotron">廣告屏幕</div>

<ul class="nav">
    <li class="nav-item">
        <a class="nav-link">選單項目1</a>
    </li>
    <li...>...</li>
</ul>

<nav class="navbar">
    <ul class="navbar-nav">
        <li class="nav-item">
            ...
    </ul>
</nav>
版
型
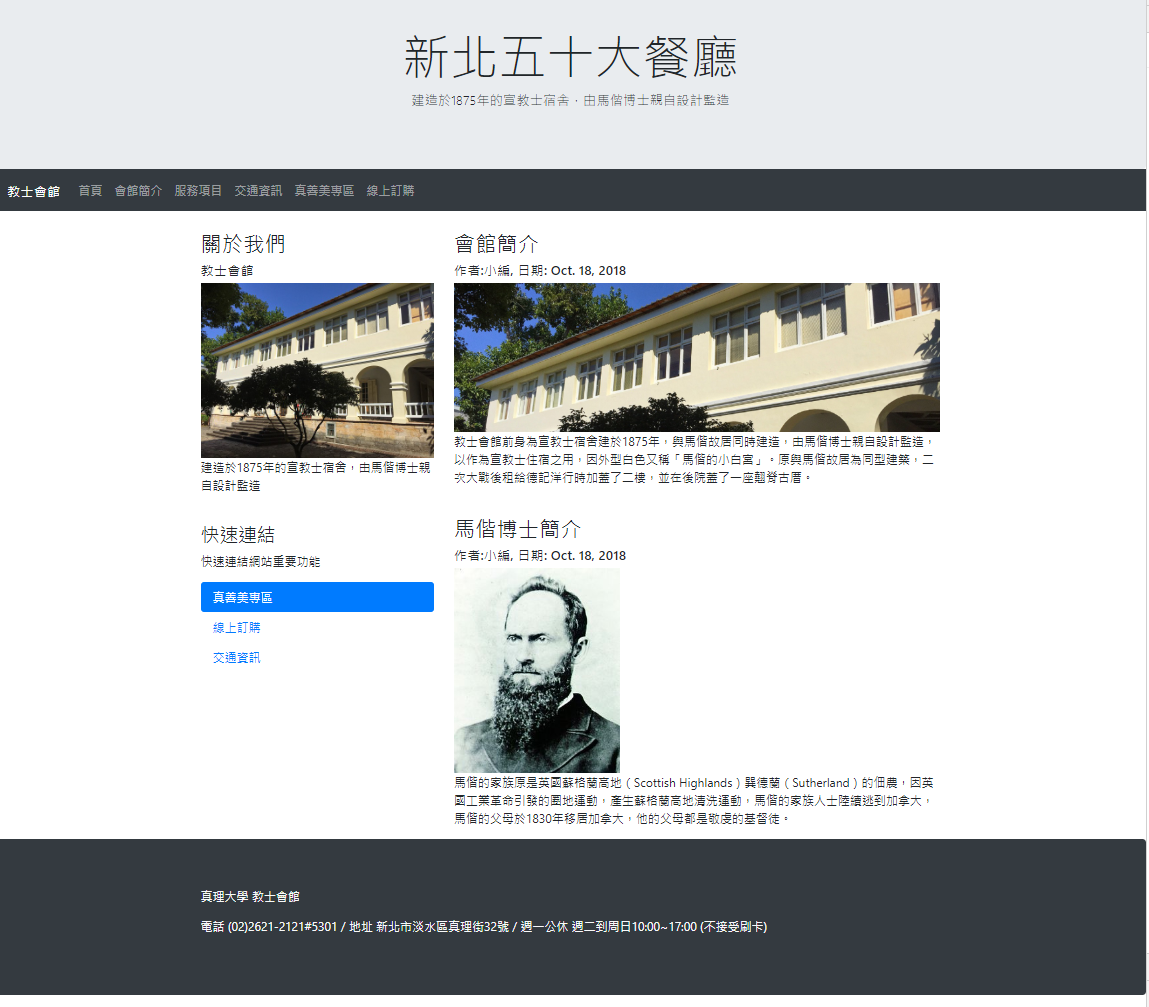
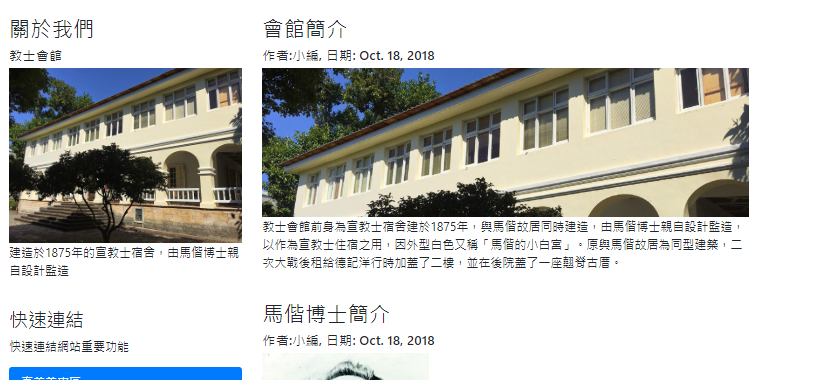
範例網站:教士會館
- ng new MissionHouse
- 修改app.component.ts
- 修改app.component.html
app.component.ts
import { Component } from '@angular/core';

@Component({
  selector: 'app-root',
  templateUrl: './app.component.html',
  styleUrls: ['./app.component.css']
})
export class AppComponent {
  title = '教士會館';
  menu = ['首頁','會館簡介','服務項目','交通資訊','真善美專區','線上訂購'];
  jumbo = {
    title:'新北五十大餐廳',
    lead:'建造於1875年的宣教士宿舍,由馬偕博士親自設計監造'
  }

  articles = [
    {
      title:'會館簡介',
      author:'小編',
      date:'Oct. 18, 2018',
      image:'house.jpg',
      content:'教士會館前身為宣教士宿舍建於1875年,與馬偕故居同時建造,由馬偕博士親自設計監造,以作為宣教士住宿之用,因外型白色又稱「馬偕的小白宮」。原與馬偕故居為同型建築,二次大戰後租給德記洋行時加蓋了二樓,並在後院蓋了一座翹脊古厝。'
    },
    {
      title:'馬偕博士簡介',
      author:'小編',
      date:'Oct. 18, 2018',
      image:'mackay.jpg',
      content:'馬偕的家族原是英國蘇格蘭高地(Scottish Highlands)巽德蘭(Sutherland)的佃農,因英國工業革命引發的圈地運動,產生蘇格蘭高地清洗運動,馬偕的家族人士陸續逃到加拿大,馬偕的父母於1830年移居加拿大,他的父母都是敬虔的基督徒。'
    }
  ]
}
app.component.html
<!--廣告屏幕 -->
<div class="jumbotron text-center mb-0">
  <h1 class="display-3">{{ jumbo.title }}</h1>
  <p class="lead">{{ jumbo.lead }}</p>
</div>
<!--網站收合選單-->
<nav class="navbar navbar-expand-lg navbar-light navbar-dark bg-dark">
  <button class="navbar-toggler" type="button" data-toggle="collapse"
    data-target="#nav-content" aria-controls="nav-content"
    aria-expanded="false" aria-label="Toggle navigation">
    <span class="navbar-toggler-icon"></span>
  </button>
  <!--網站標題-->
  <a class="navbar-brand" href="#">{{ title }}</a>
  <!--選單項目 -->
  <ul class="navbar-nav collapse navbar-collapse" id="#nav-content">
    <li *ngFor="let item of menu" class="nav-item">
      <a class="nav-link">{{item}}</a>
    </li>
  </ul>
</nav>
<!-- 網站內容主體 -->
<div class="container" style="margin-top:30px">
  <div class="row">
    <!-- 第一行 -->
    <div class="col-sm-4">
      <!--第一行 左欄 -->
      <h2>關於我們</h2>
      <h5>教士會館</h5>
      <img class="img-fluid" src="/assets/images/about.jpg" />
      <p>建造於1875年的宣教士宿舍,由馬偕博士親自設計監造</p>
      <br />
      <h3>快速連結</h3>
      <p>快速連結網站重要功能</p>
      <ul class="nav flex-column nav-pills">
        <li class="nav-item"><a class="nav-link active" href="#">真善美專區</a></li>
        <li class="nav-item"><a class="nav-link" href="#">線上訂購</a></li>
        <li class="nav-item"><a class="nav-link" href="#">交通資訊</a></li>
      </ul>
    </div>
    <div class="col-sm-8">
      <!--第一行 右欄 -->
      <div *ngFor="let article of articles">
        <h2>{{ article.title }}</h2>
        <h5>作者:{{ article.author }}, 日期: {{ article.date }}</h5>
        <img class="img-fluid" src="/assets/images/{{ article.image }}" />
        <p>{{ article.content }}</p>
        <br />
      </div>
    </div>
  </div>
</div>

<!-- 頁尾 (使用jumbostron類別產生)-->
<div class="jumbotron bg-dark text-light mb-0">
  <div class="container">
    <p>真理大學 教士會館</p>
    <p>電話 (02)2621-2121#5301 / 地址 新北市淡水區真理街32號 / 週一公休 週二到周日10:00~17:00 (不接受刷卡)</p>
  </div>
</div>
圖片資源
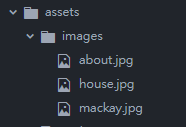
- 在src/assets新建images資料夾
- 複製house.jpg等檔案至此
- 注意html檔<img src="路徑" />的寫法
<div *ngFor="let article of articles">
  <h2>{{ article.title }}</h2>
  <h5>作者:{{ article.author }}, 日期: {{ article.date }}</h5>
  <img class="img-fluid" src="/assets/images/{{ article.image }}" />
  <p>{{ article.content }}</p>
  <br />
</div>
Your Turn
- 使用陣列、物件
- 使用*ngFor
- 定義與使用事件
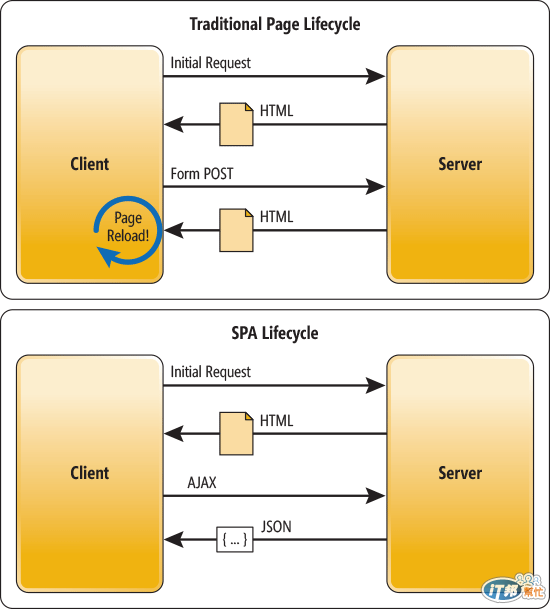
單頁面應用程式
Angular Tutorial
By Leuo-Hong Wang
Angular Tutorial
第二課:安裝、資料繫結、事件繫結


