Unity: Game Making
Learning Objectives
To be able to:
- Use and recognise the tools of Unity
- Open and create a new 2D project in Unity
- Use and manipulate shapes in Unity to create Game objects
- Apply basic scripts to objects
The features and tools of Unity
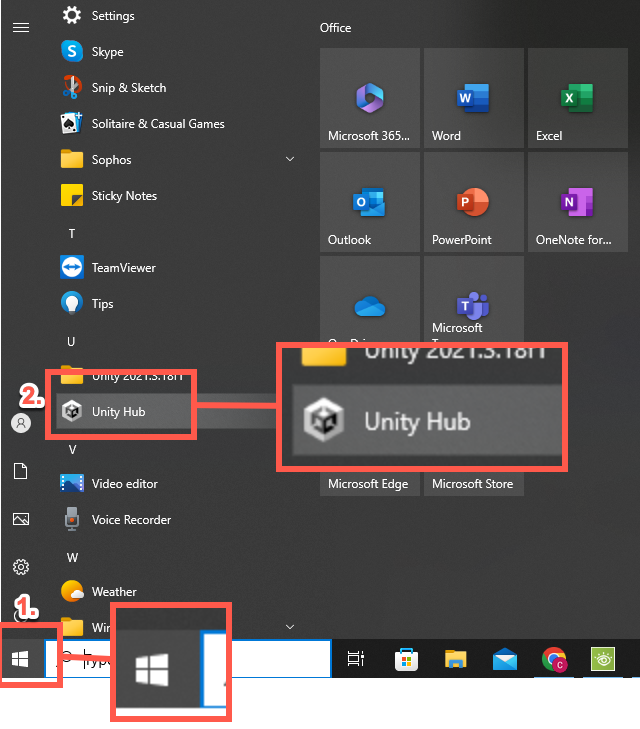
Opening Unity
In your Start Menu, scroll down to 'U' and open the Unity Hub
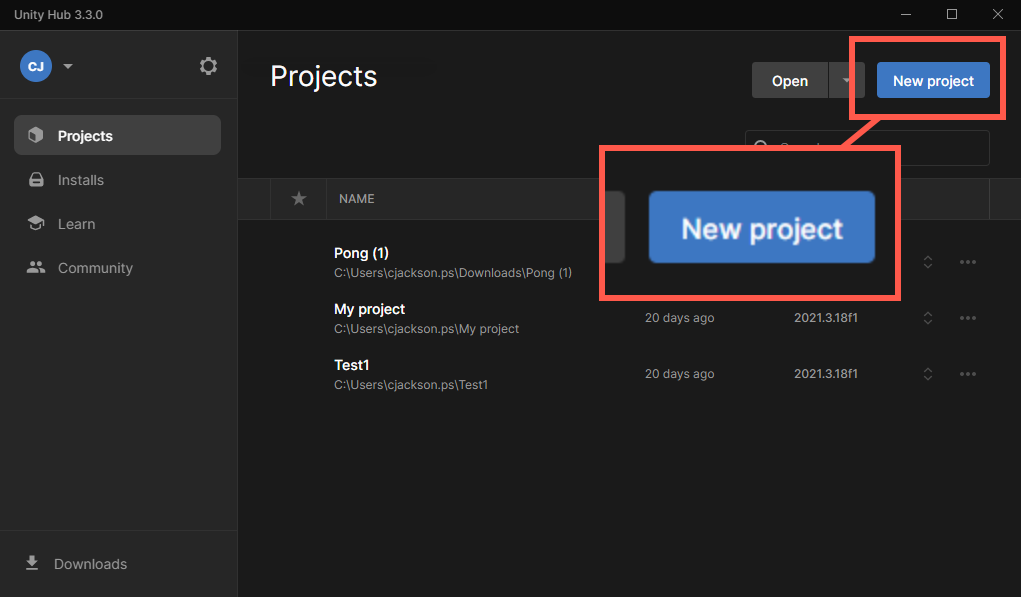
Creating a New Project
In your Unity Hub you will need to click on New Project and give it the settings on the next slide.
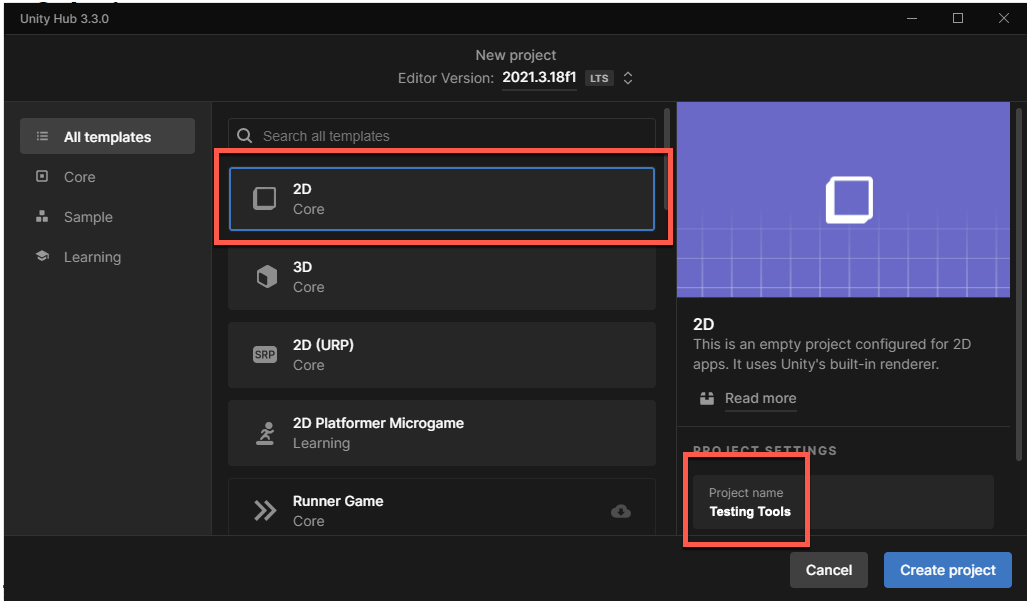
Creating a New Project
Select a 2D template in the main section of your Hub, then name your Project "Testing Tools"
Once you have done both, select 'Create Project' in the bottom right corner.
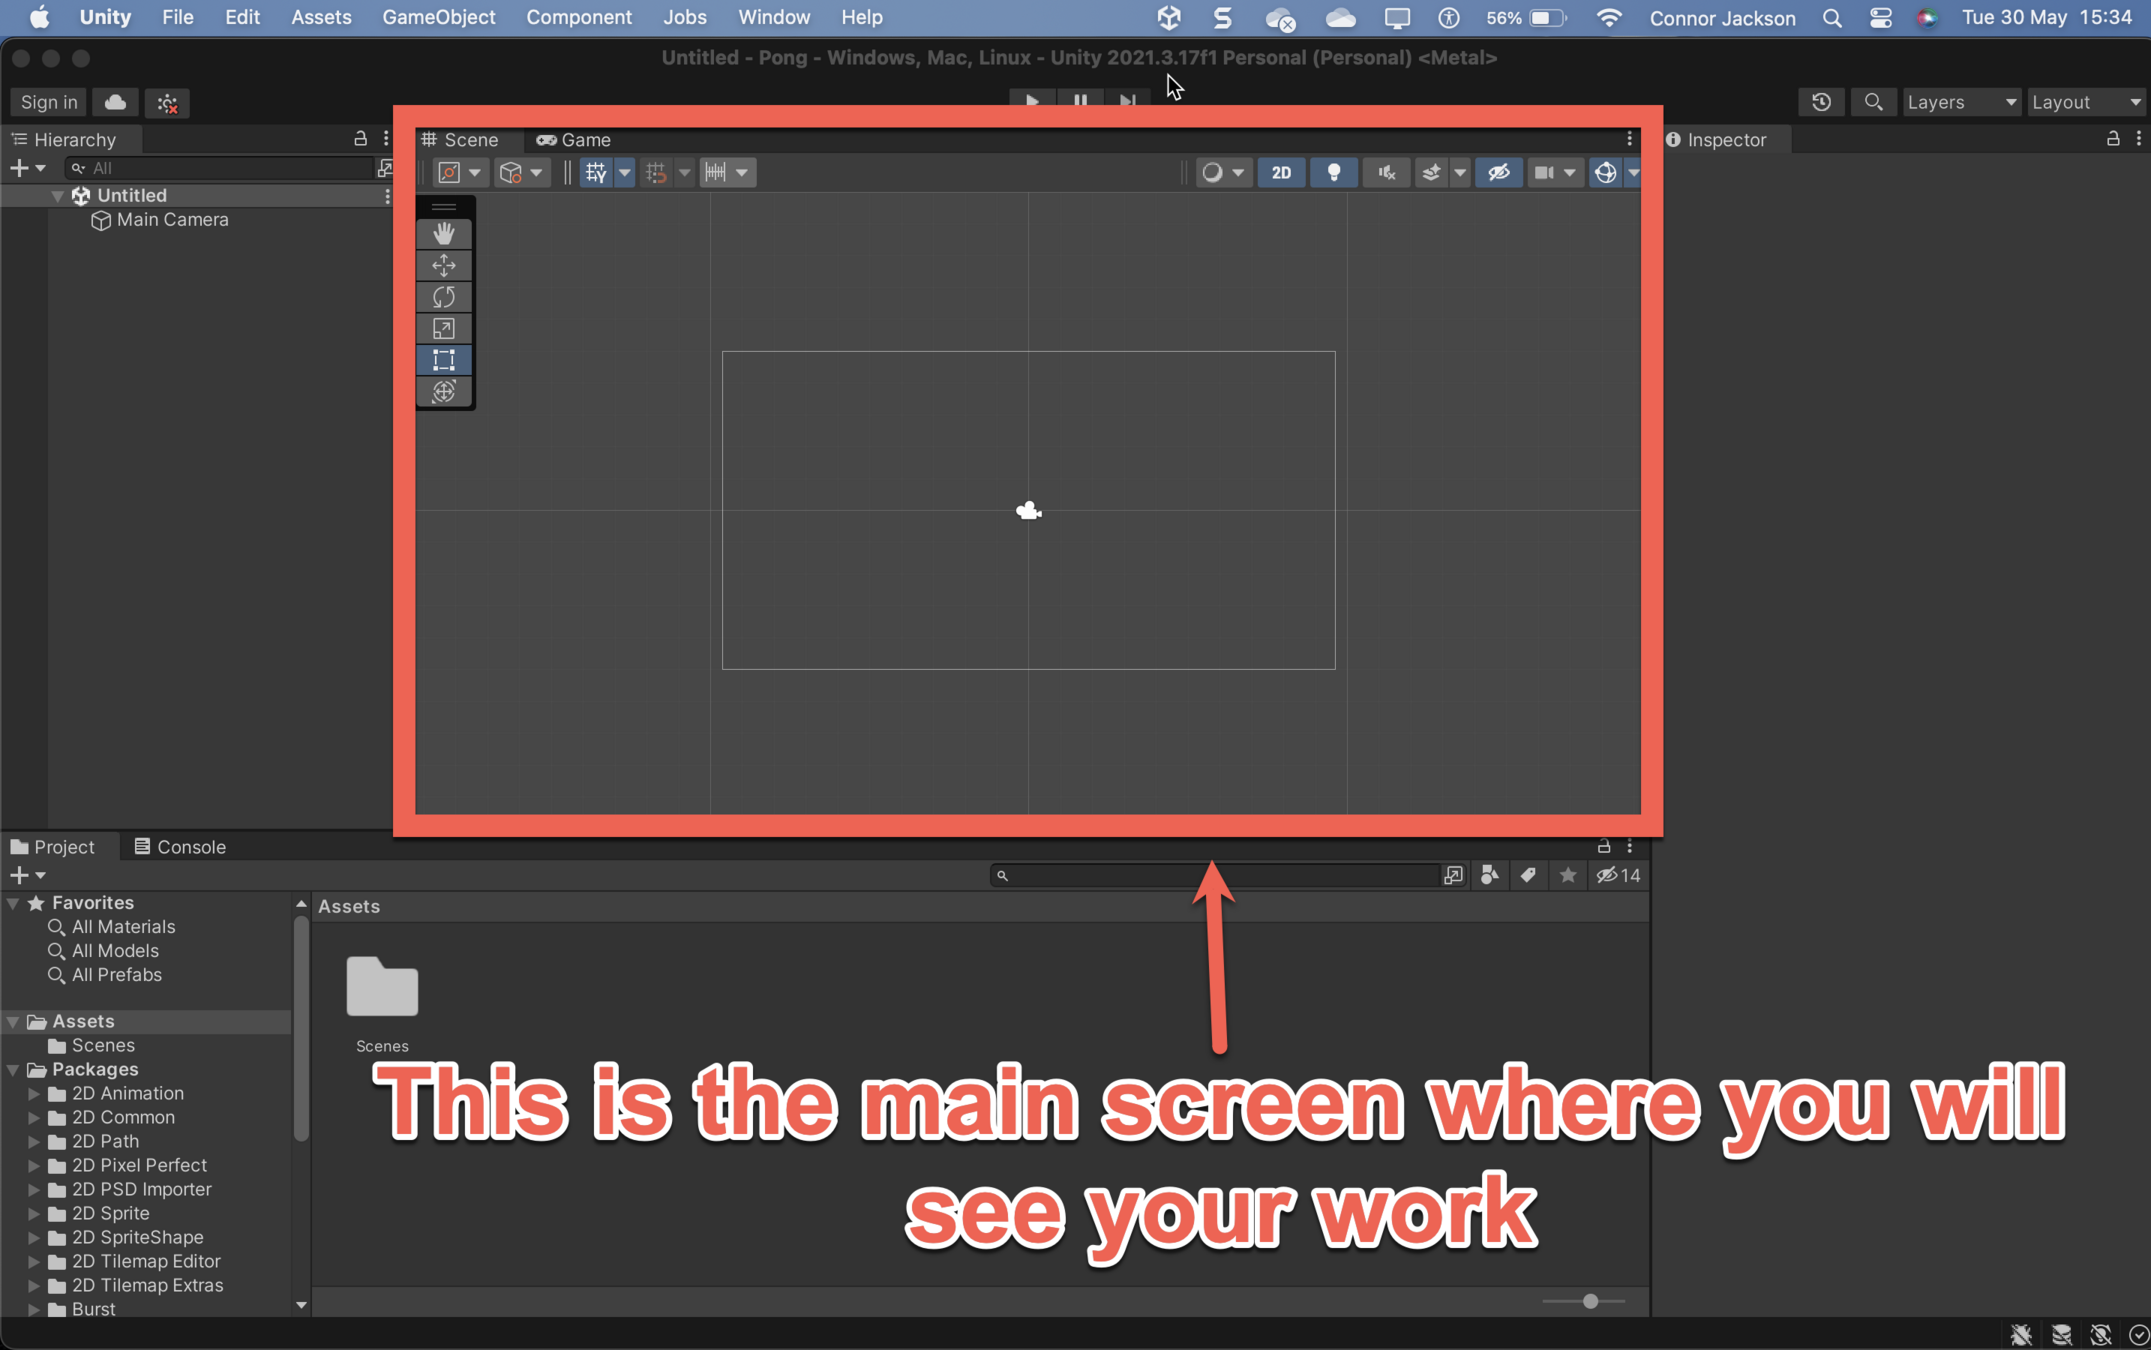
Main Screen
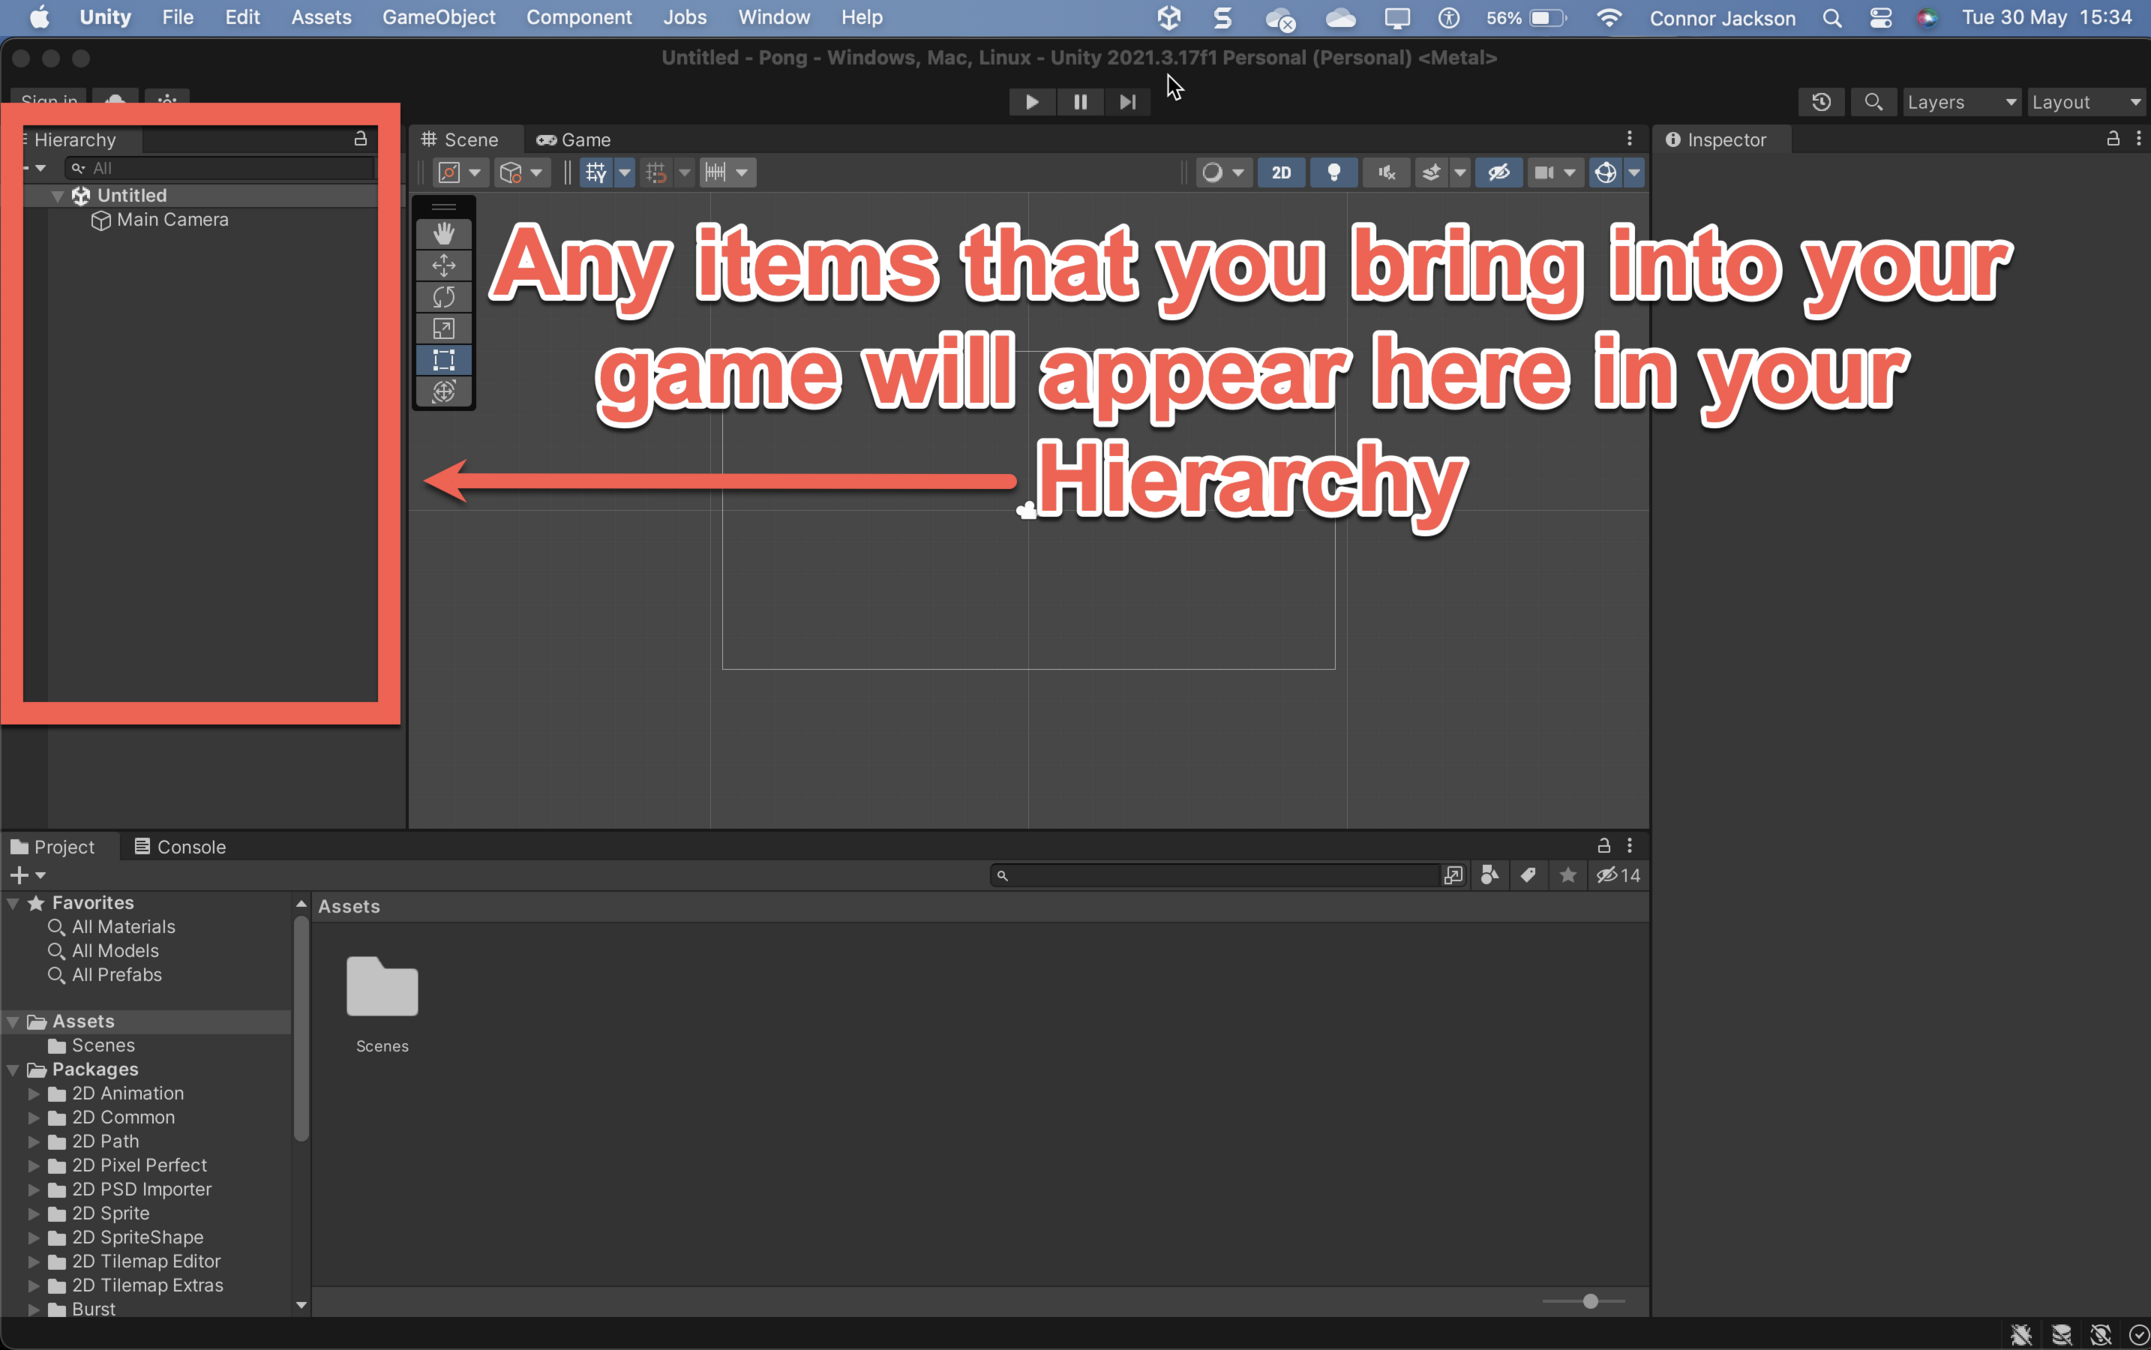
Hierarchy
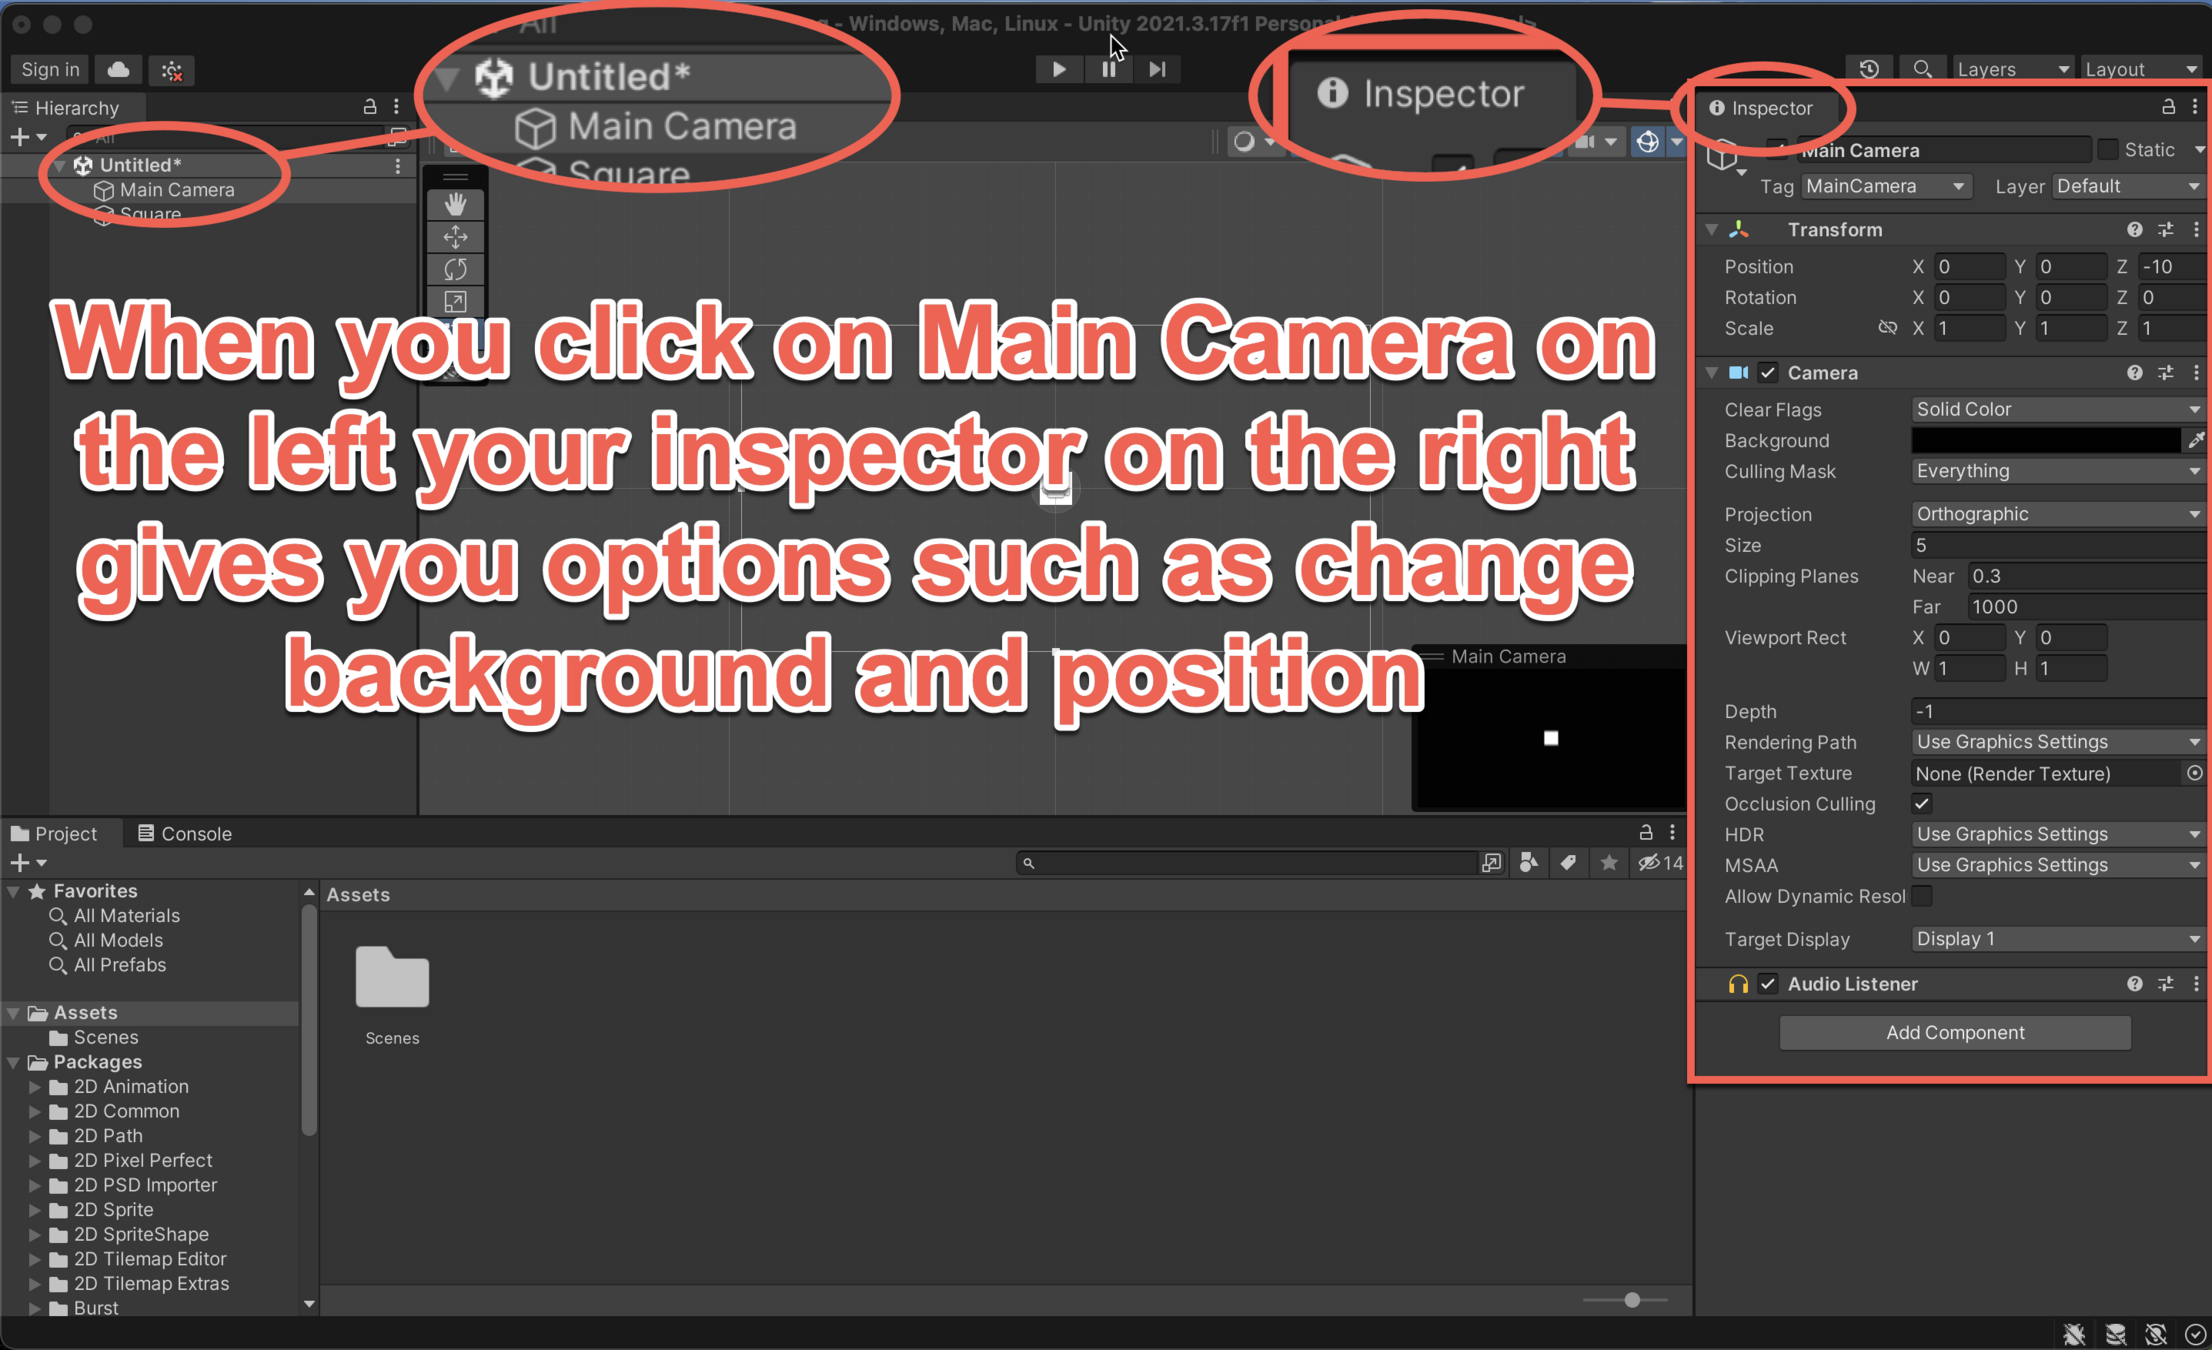
Inspector
Adding Shapes
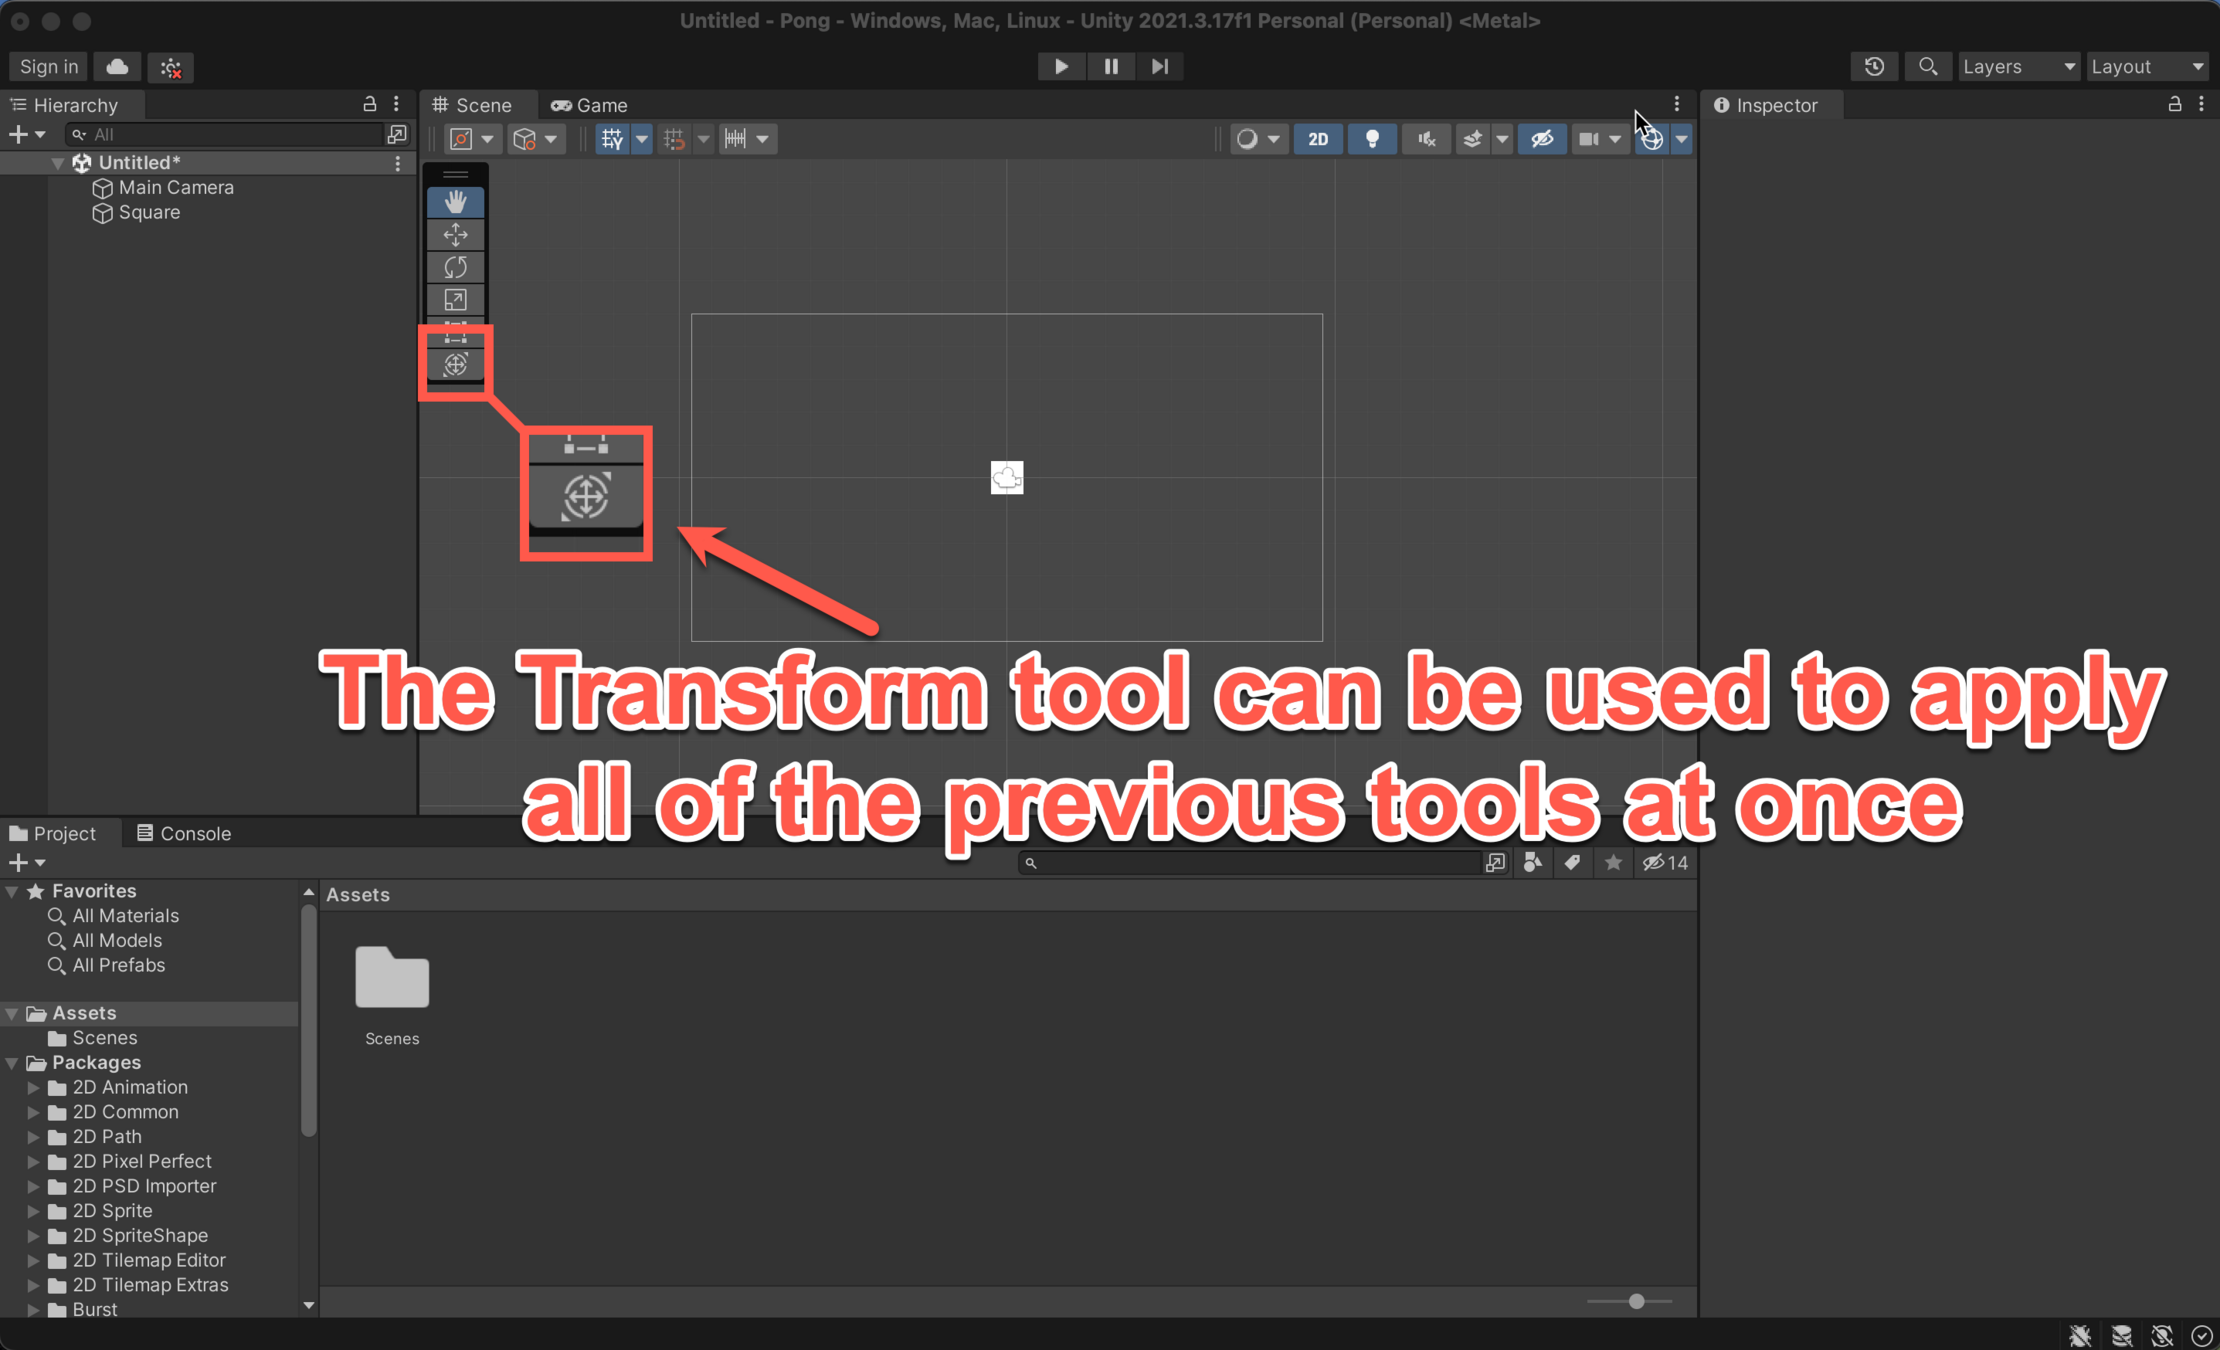
Tools
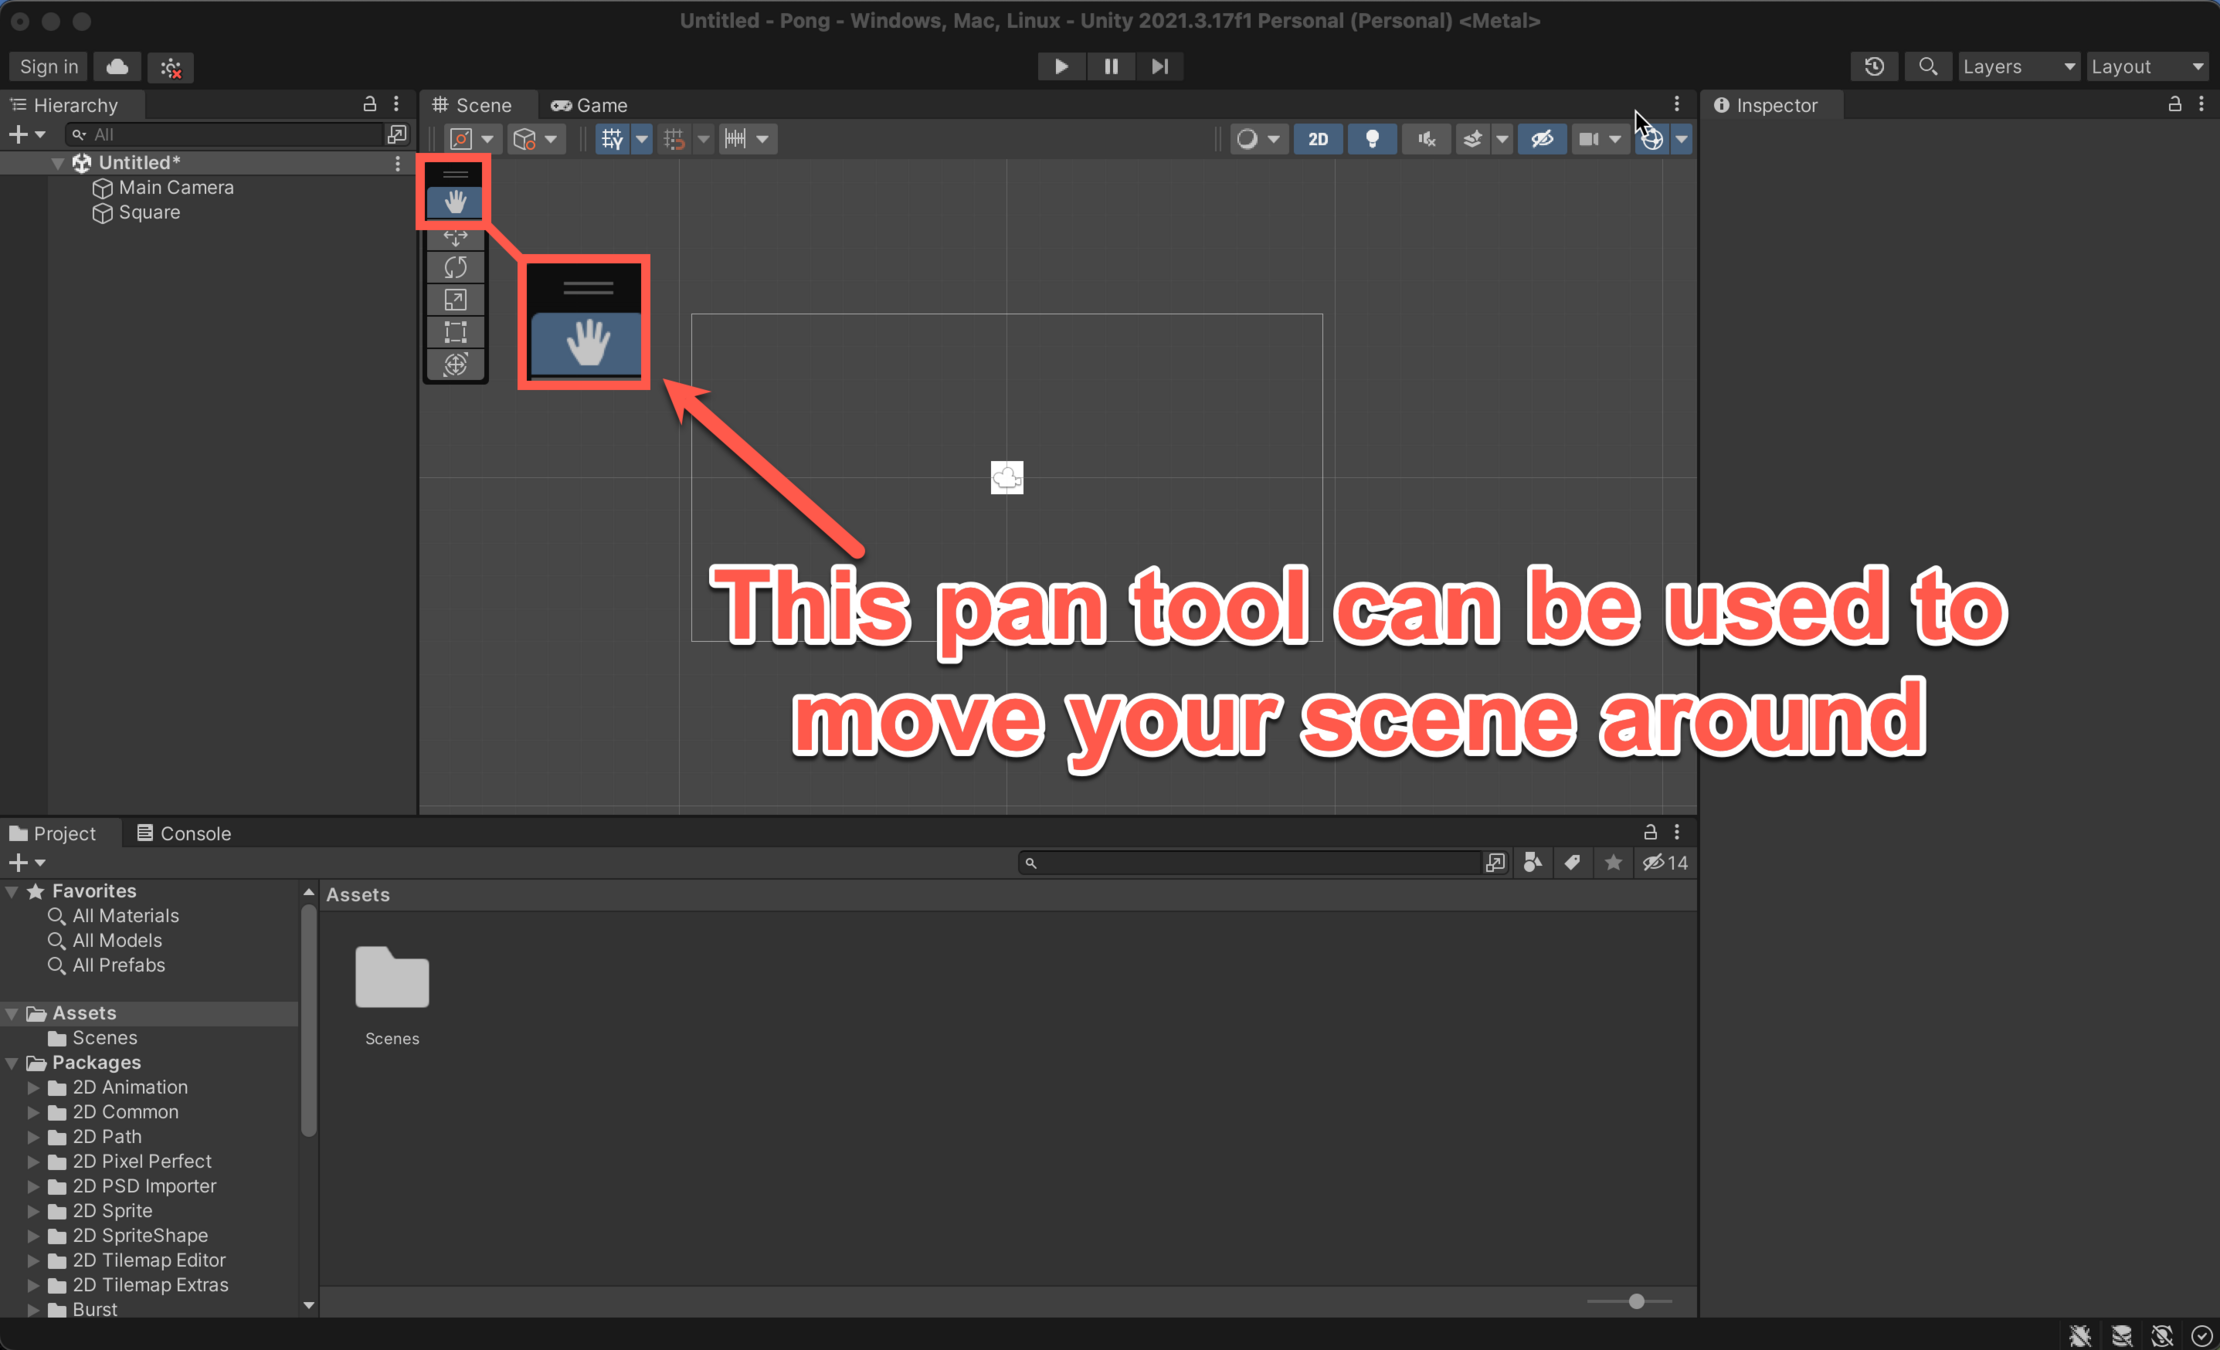
Tools
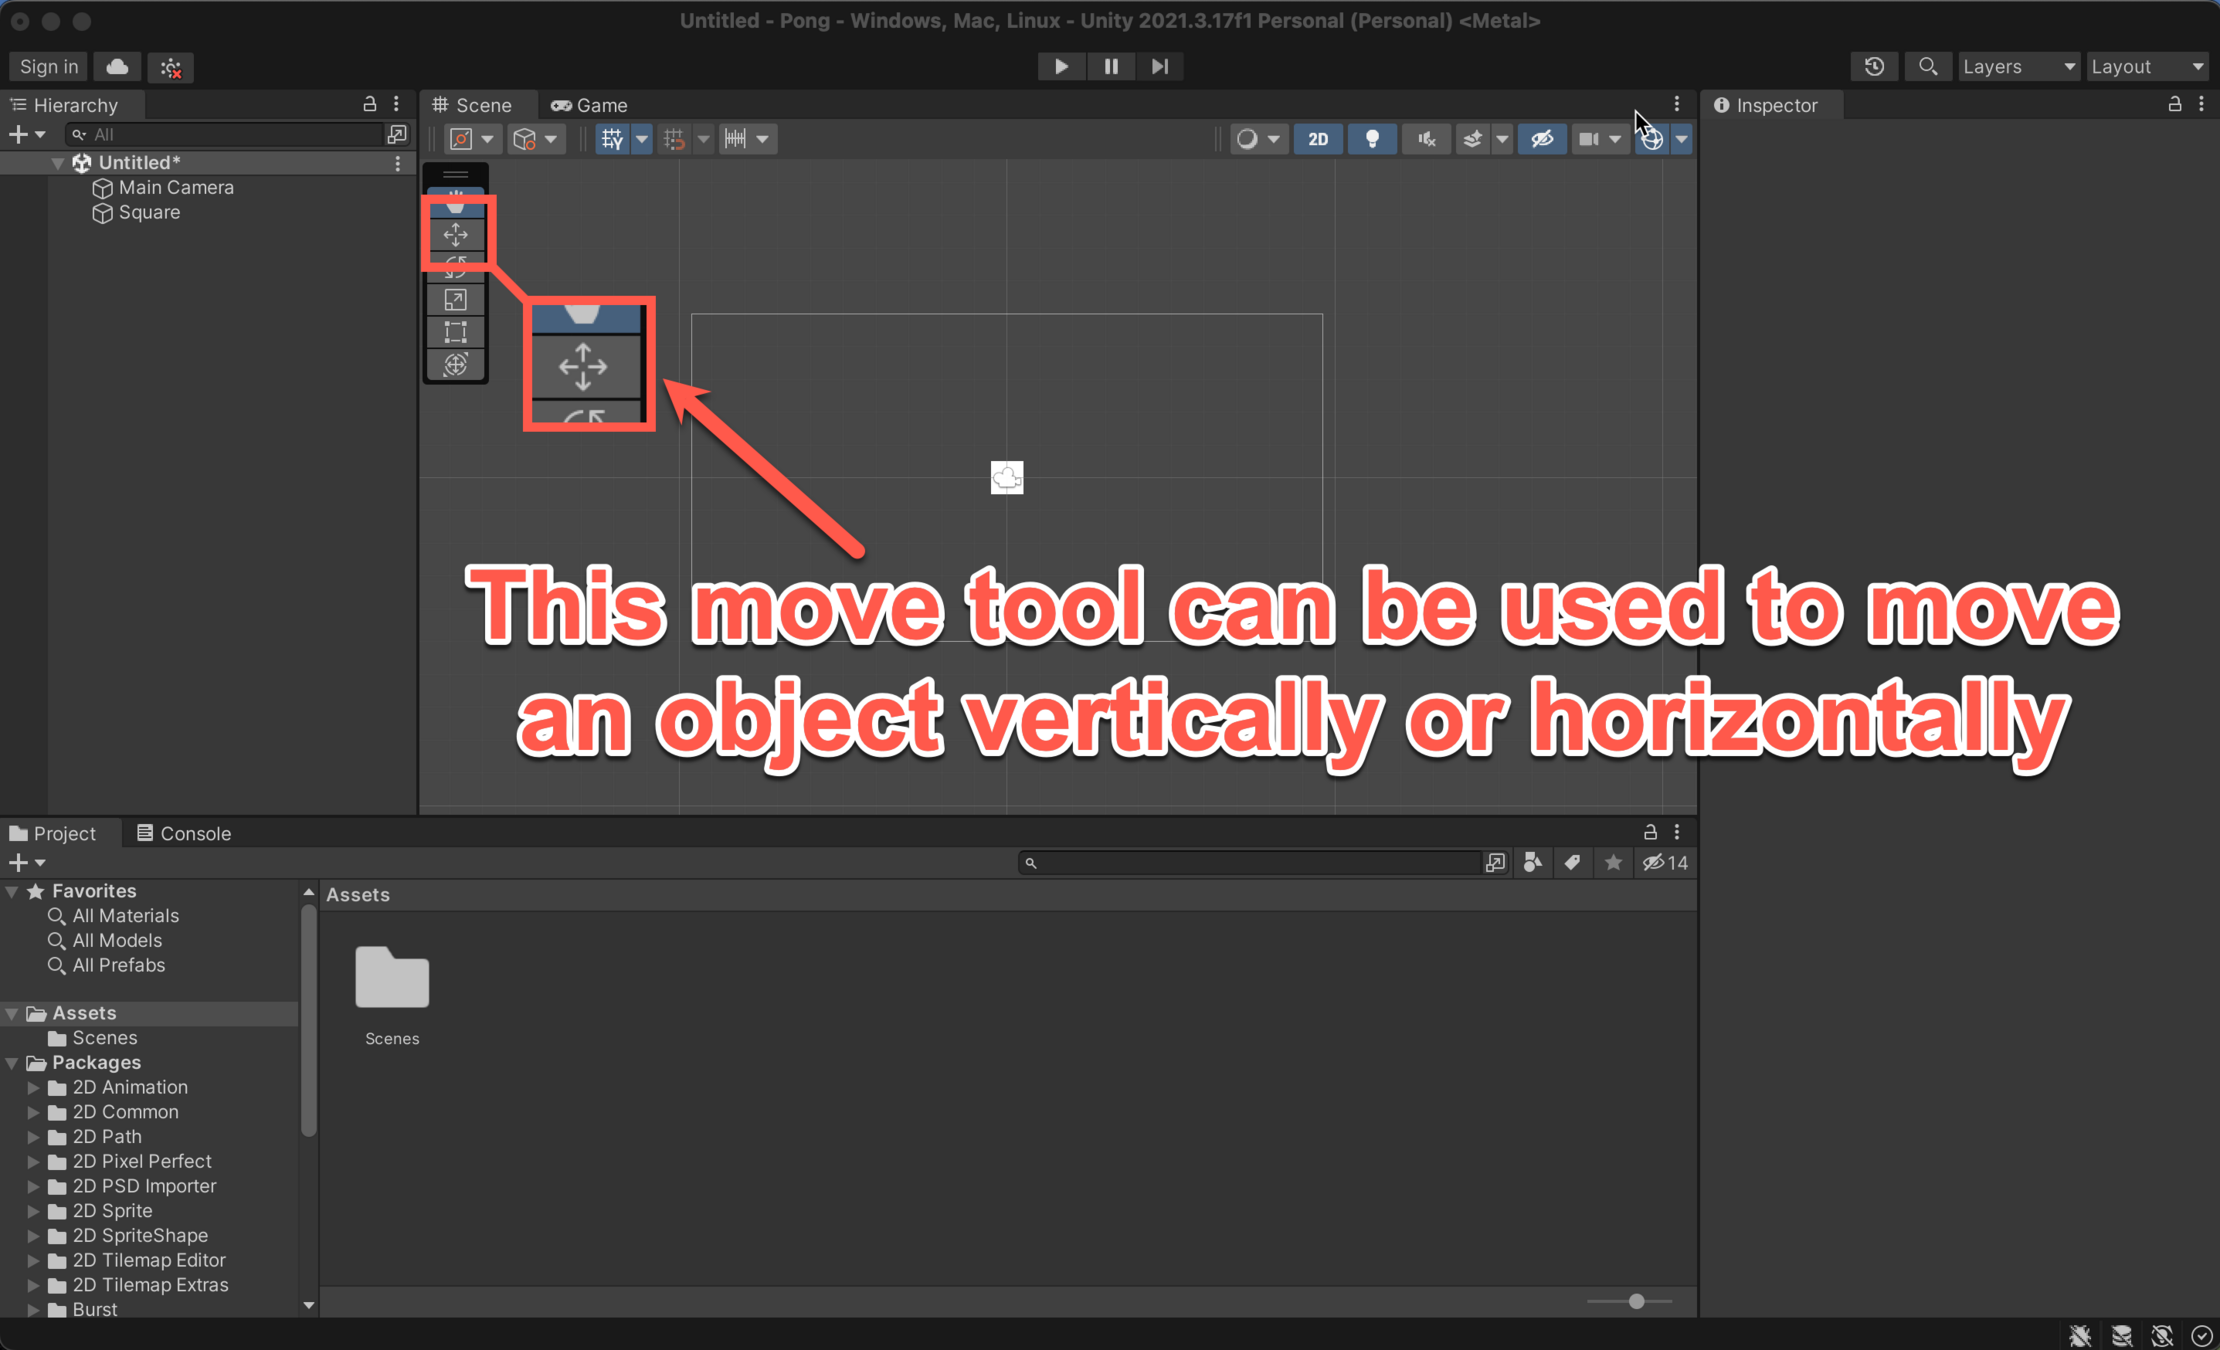
Tools
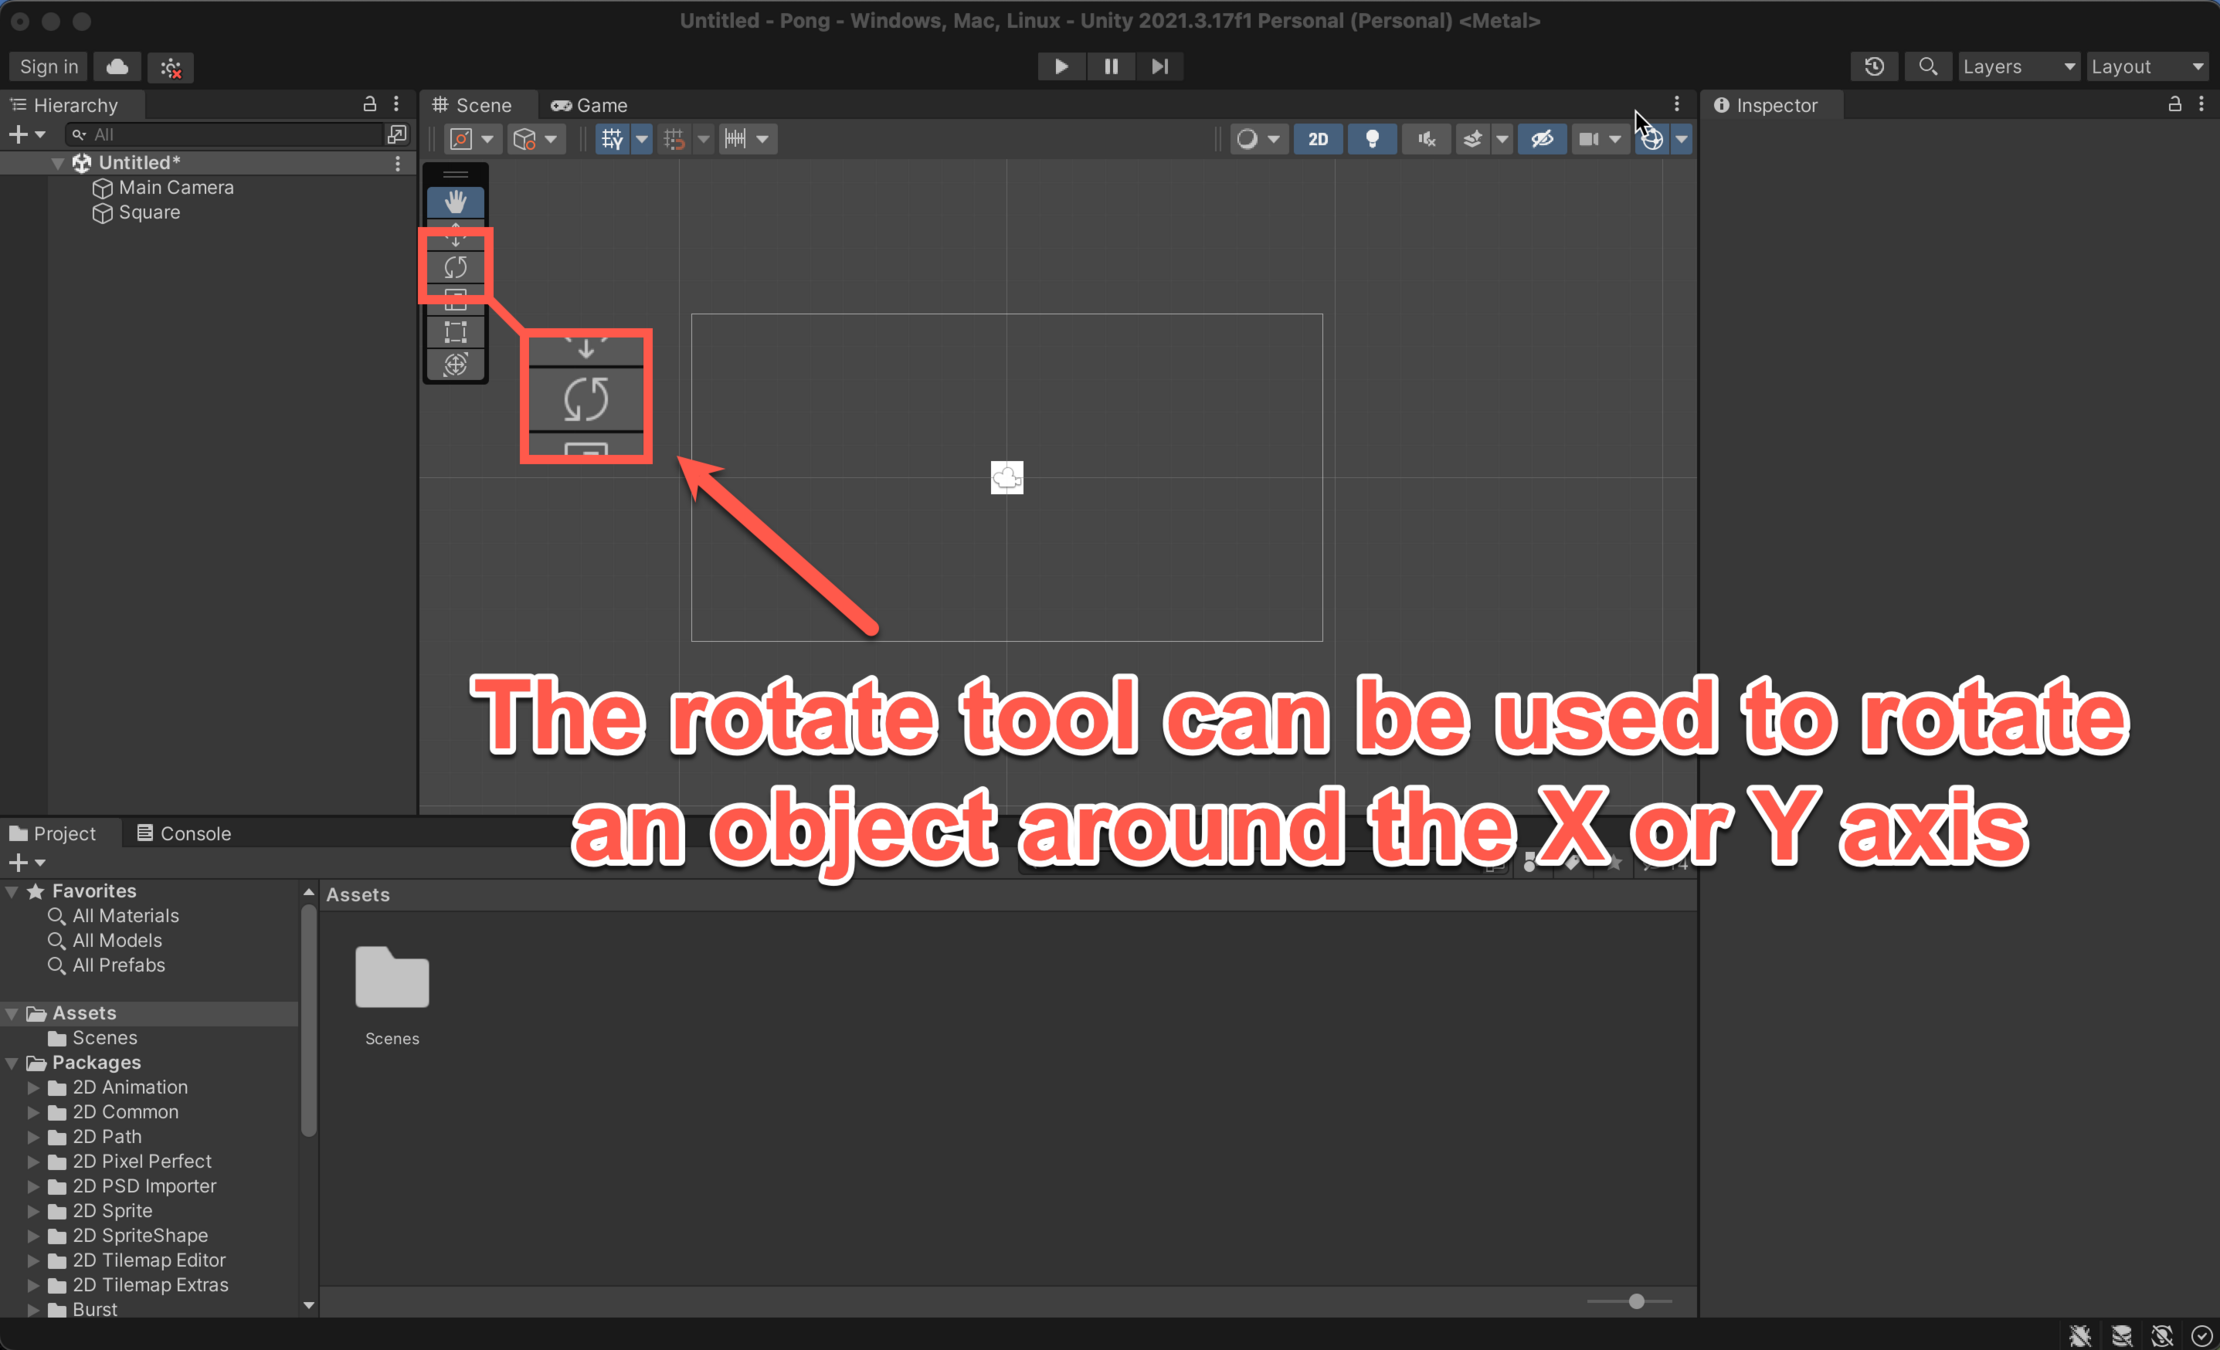
Tools
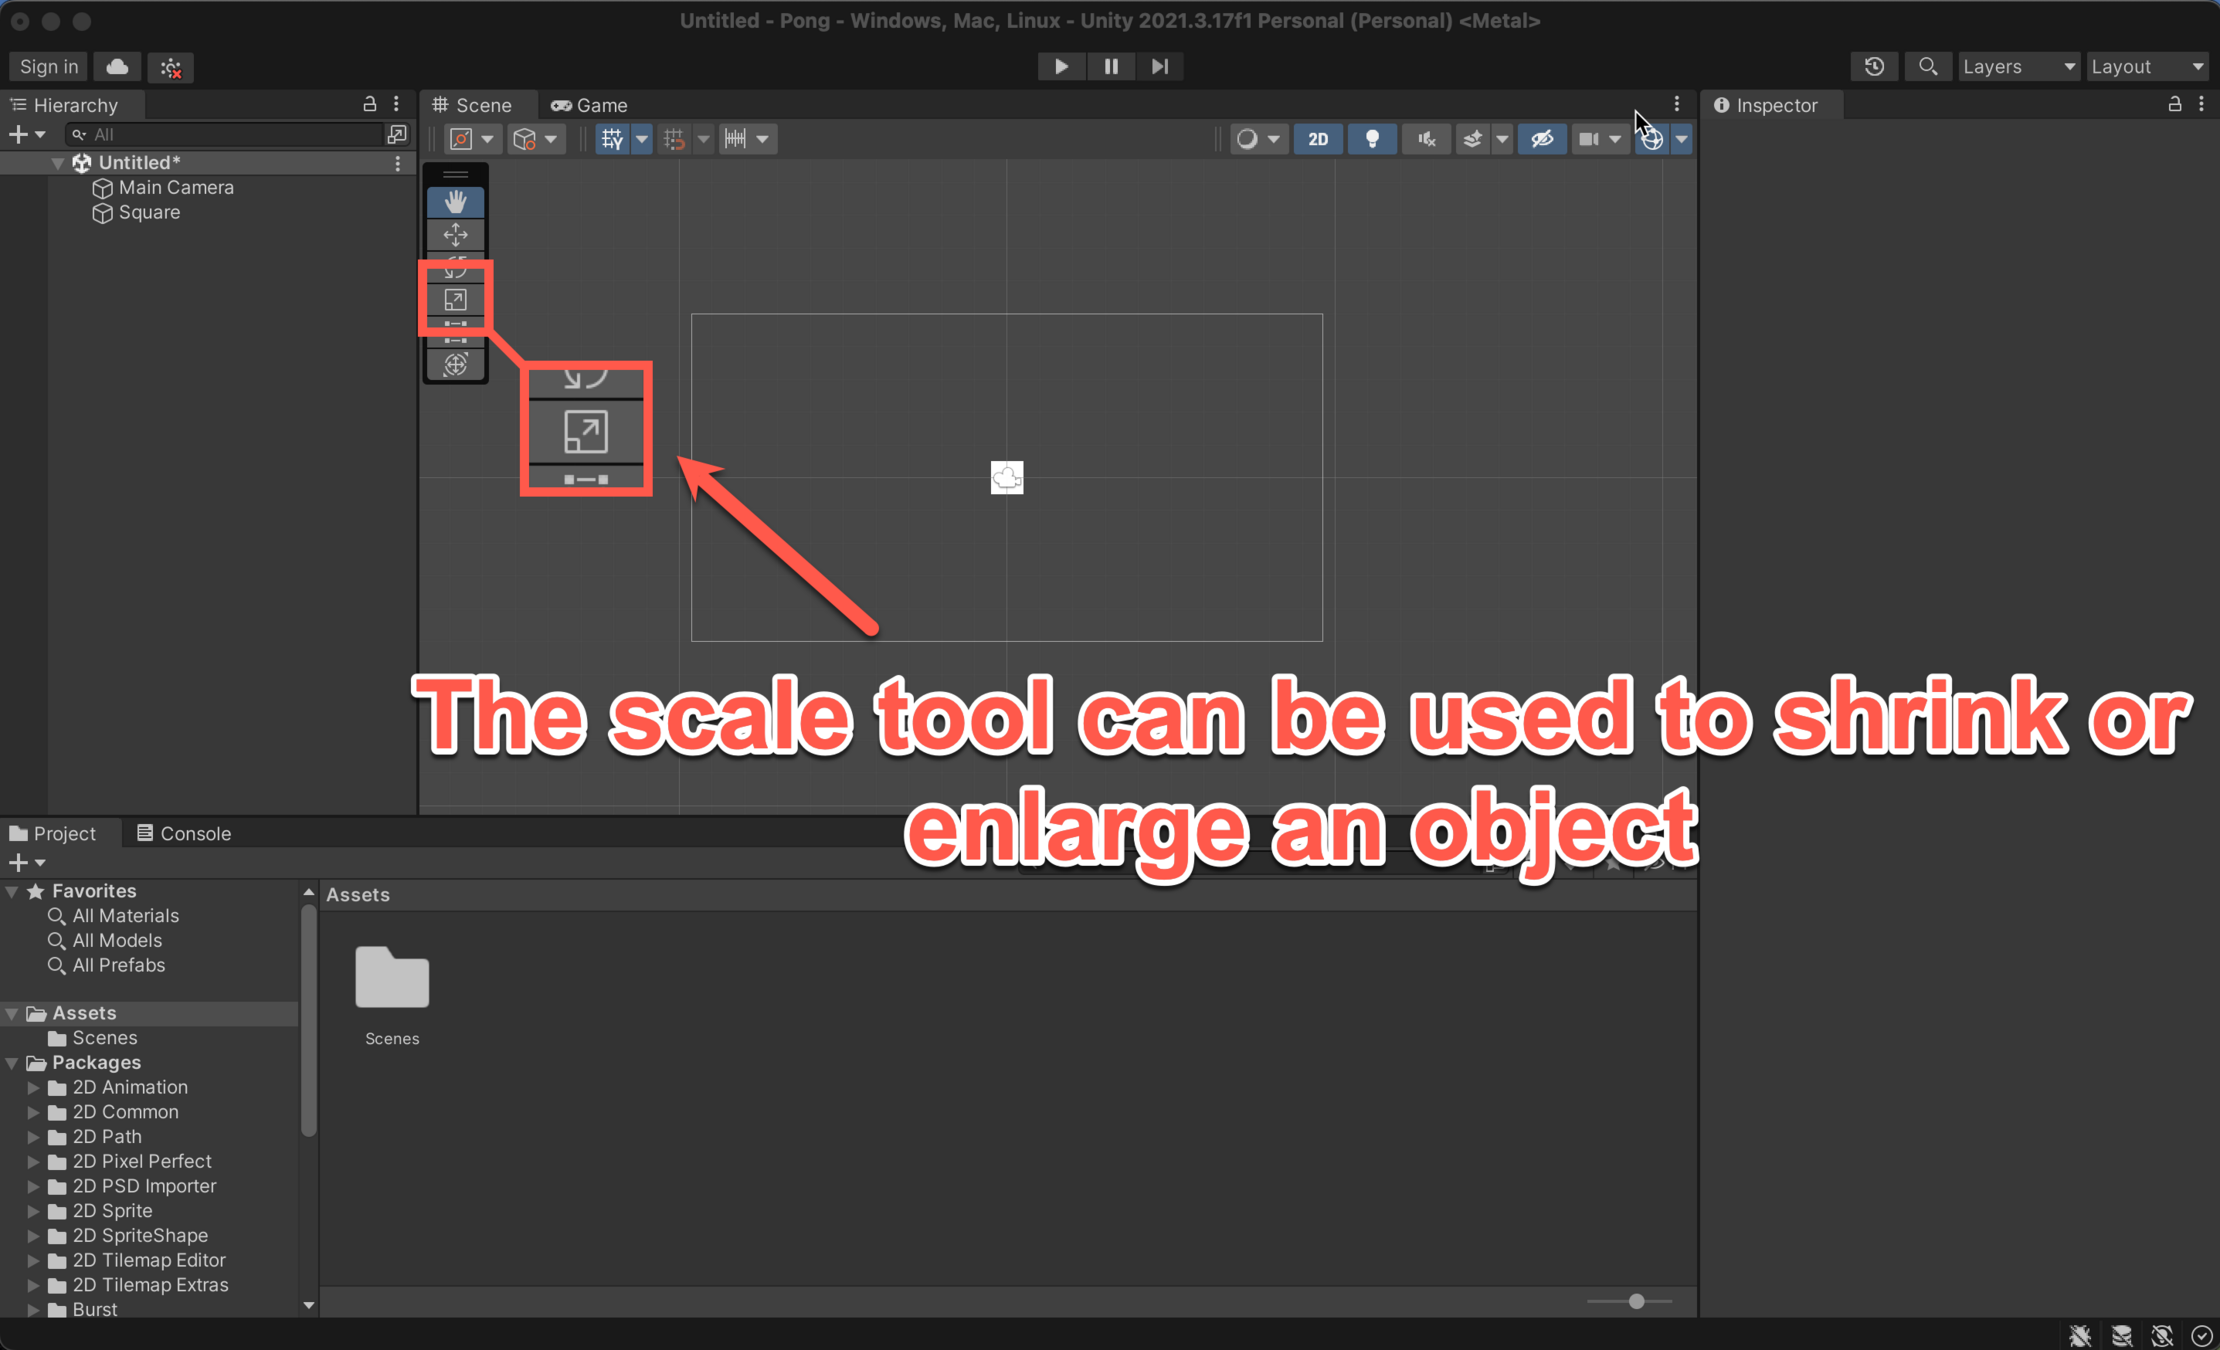
Tools
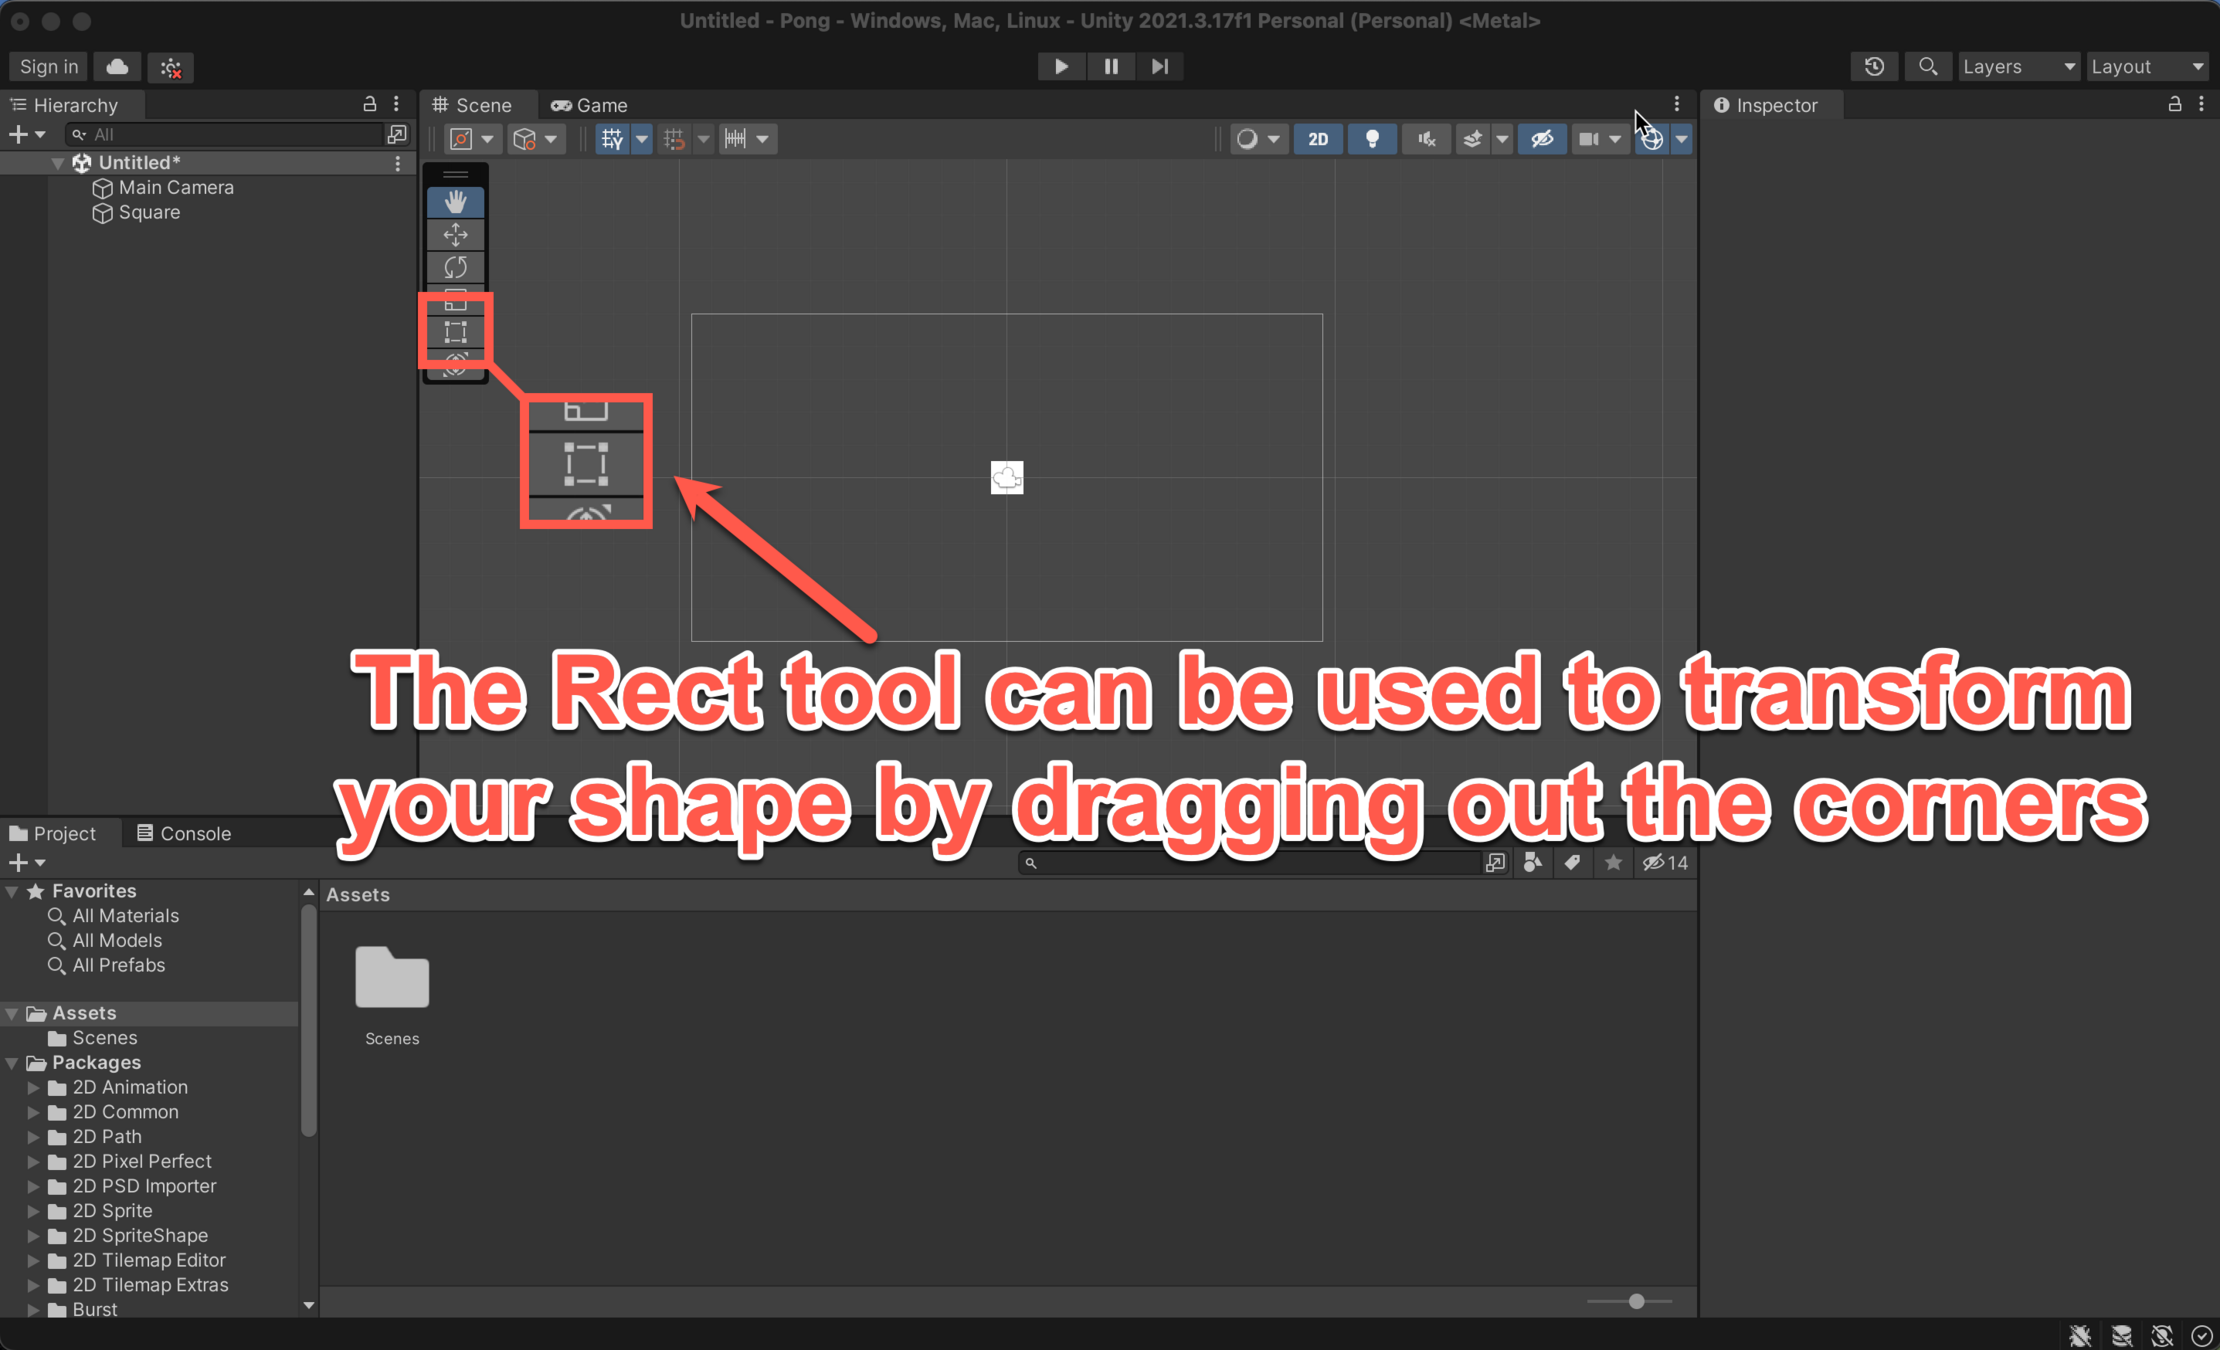
Tools
Tools (Video)
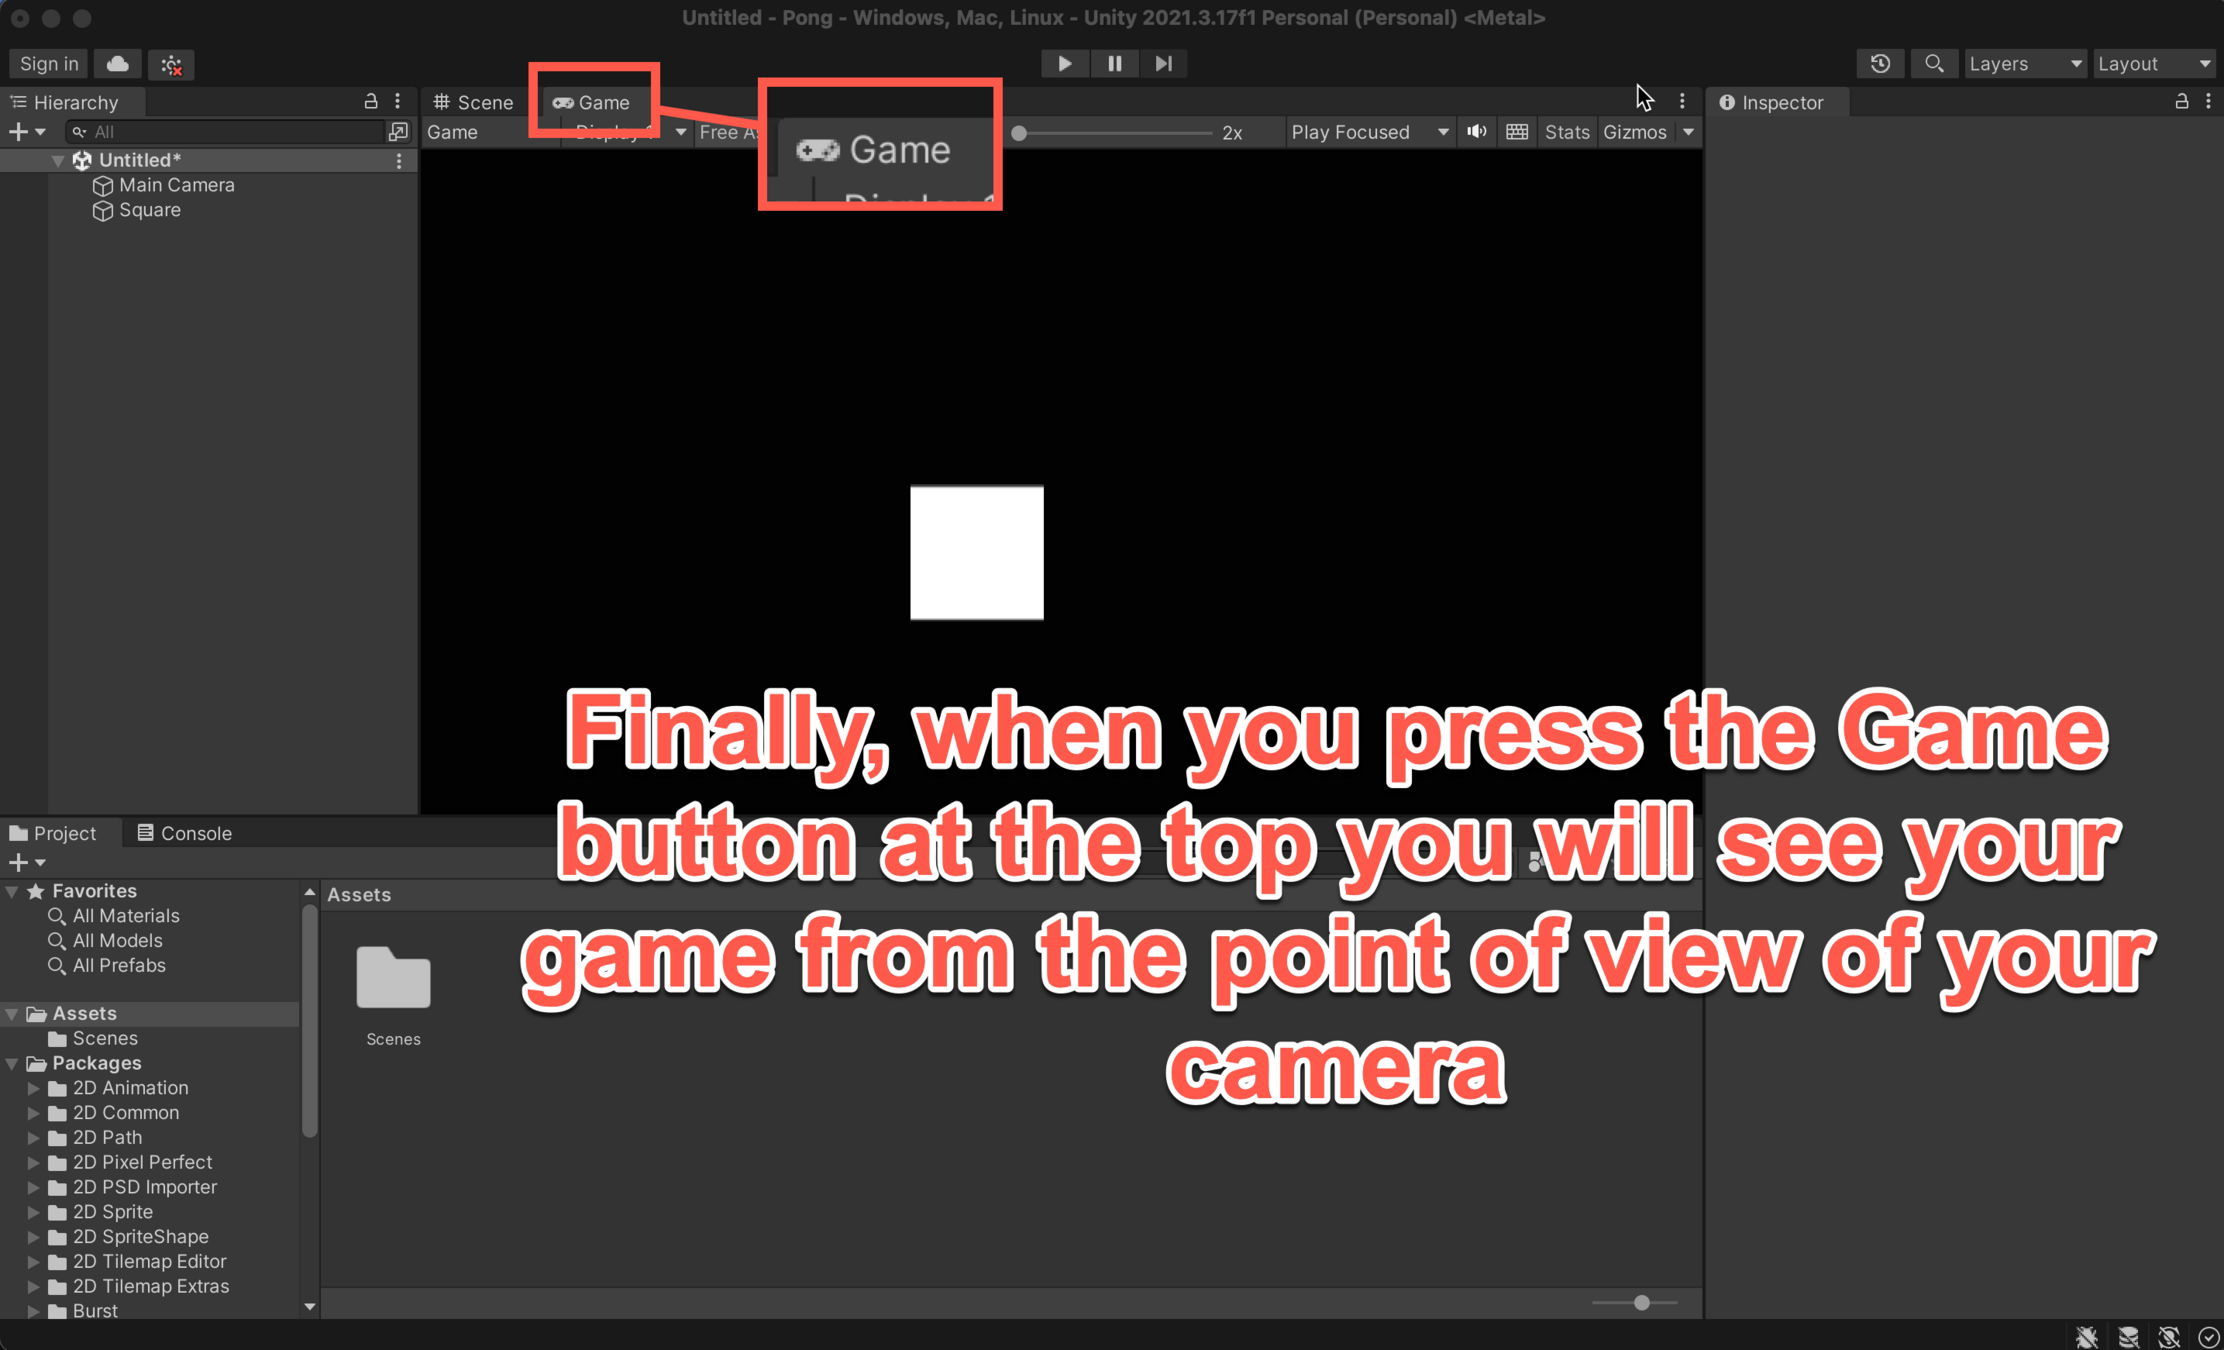
View Points
Activity
Follow the instructions in the following slides to complete build your first game of Pong
Open a new Project
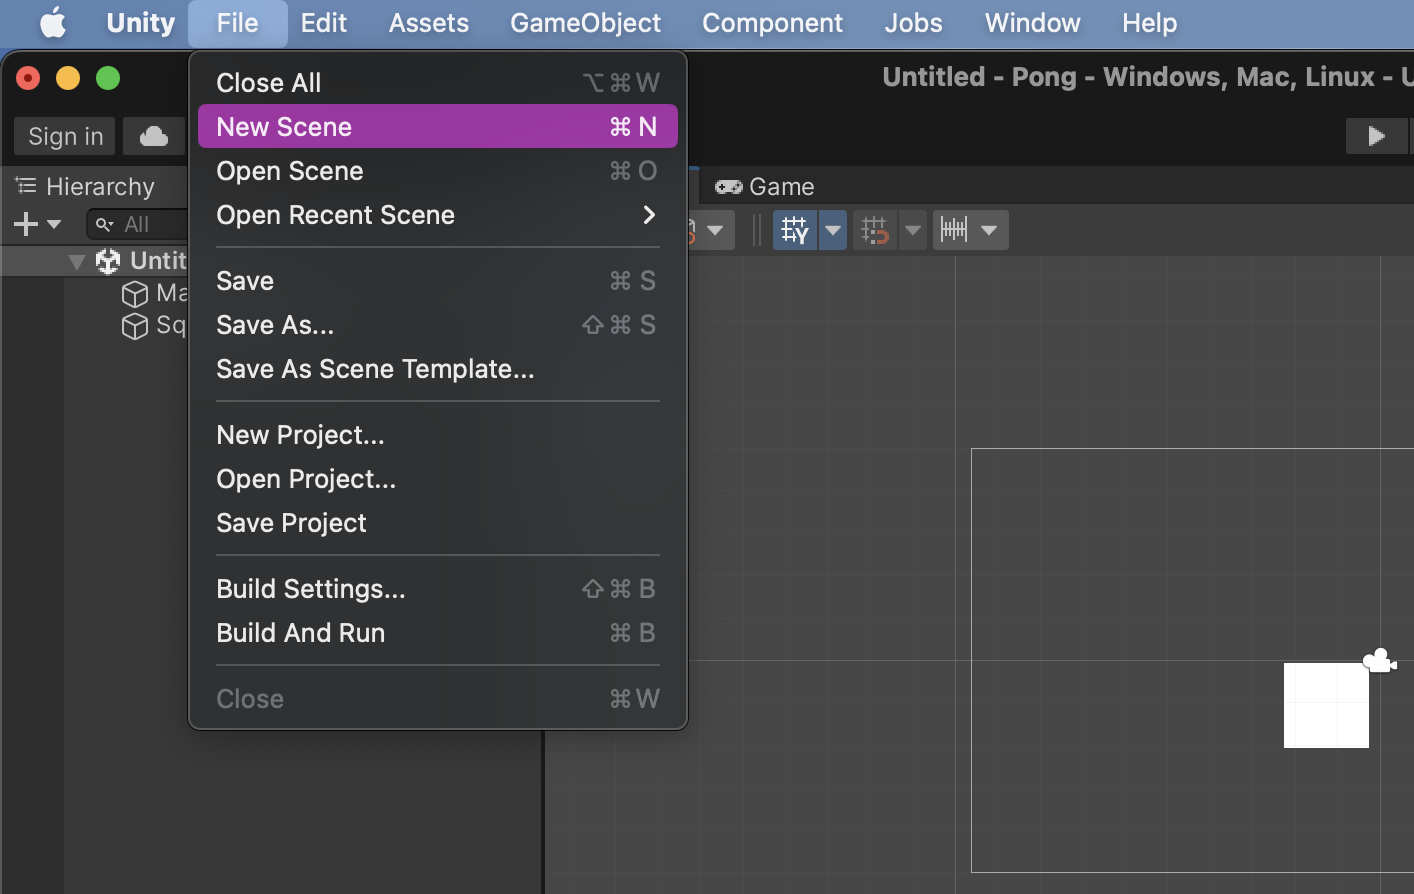
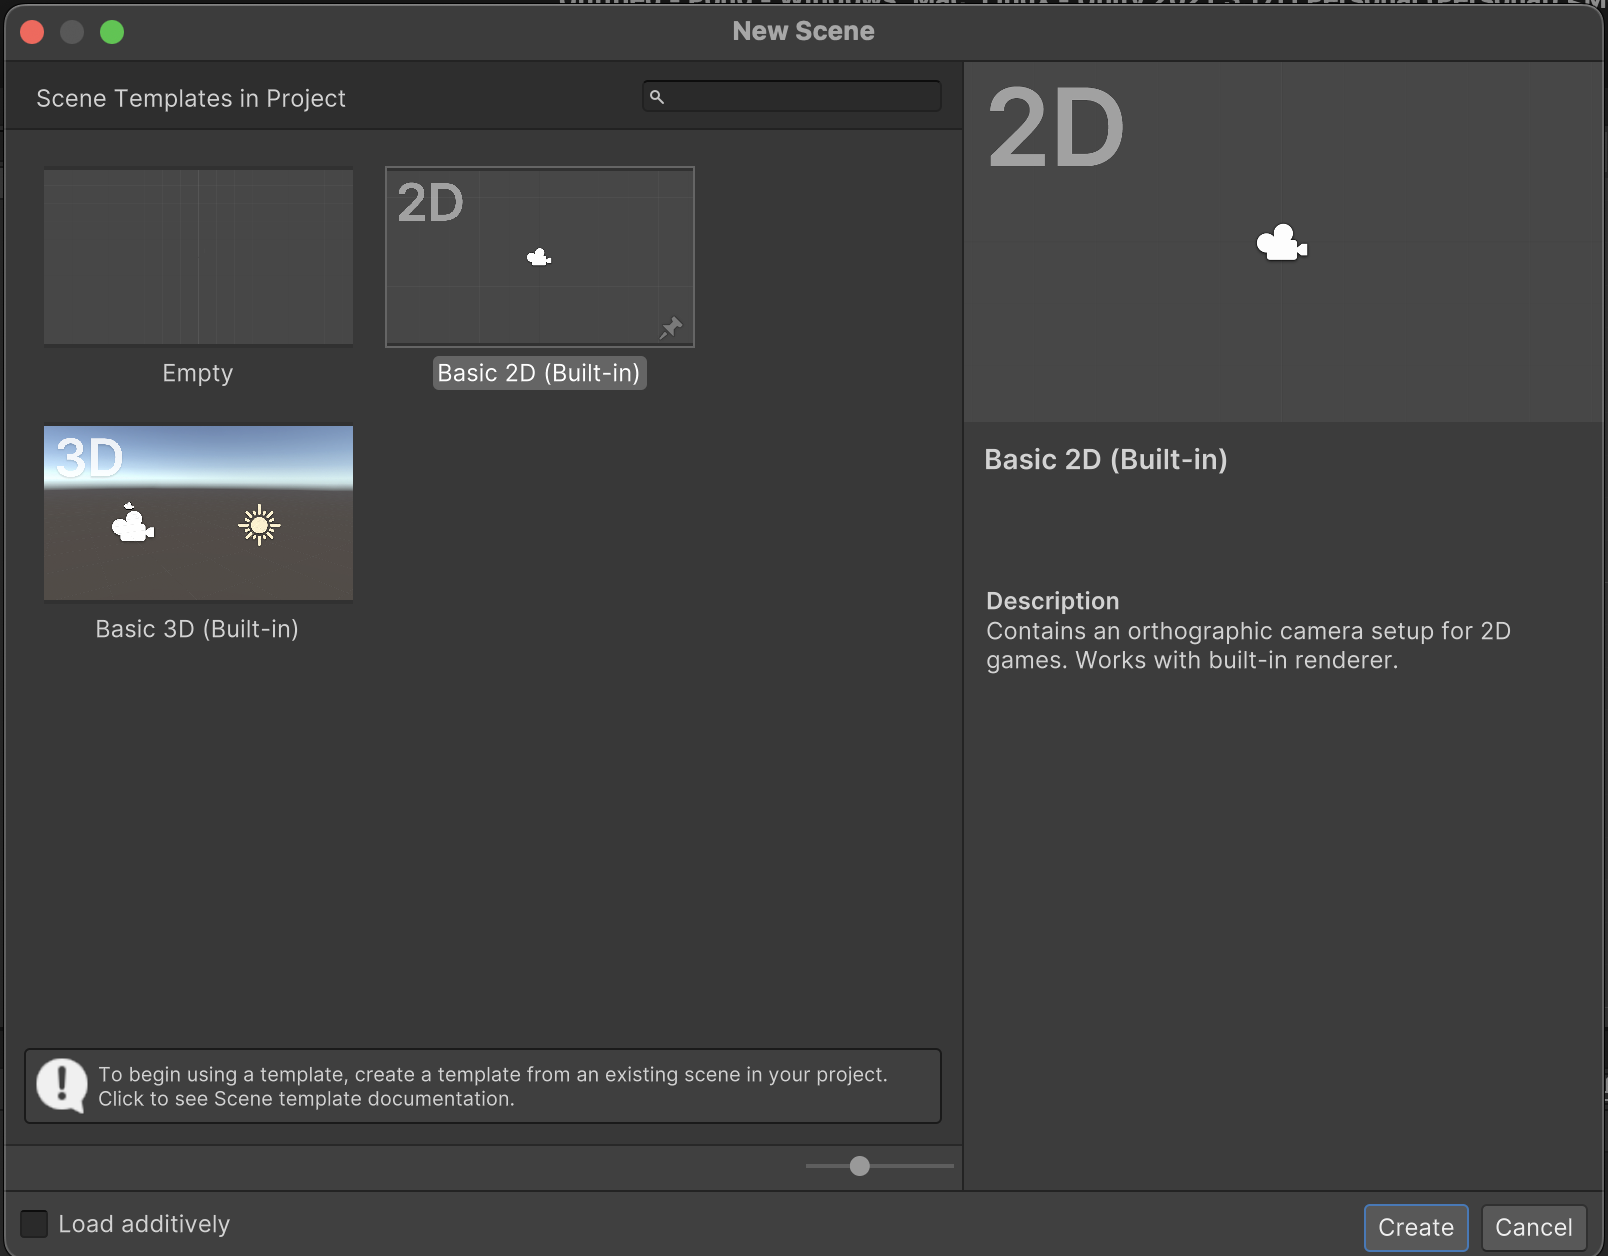
Go to File, New Scene and make sure to press "Basic 2D (Built-in)" -->
(You don't need to save previous work)
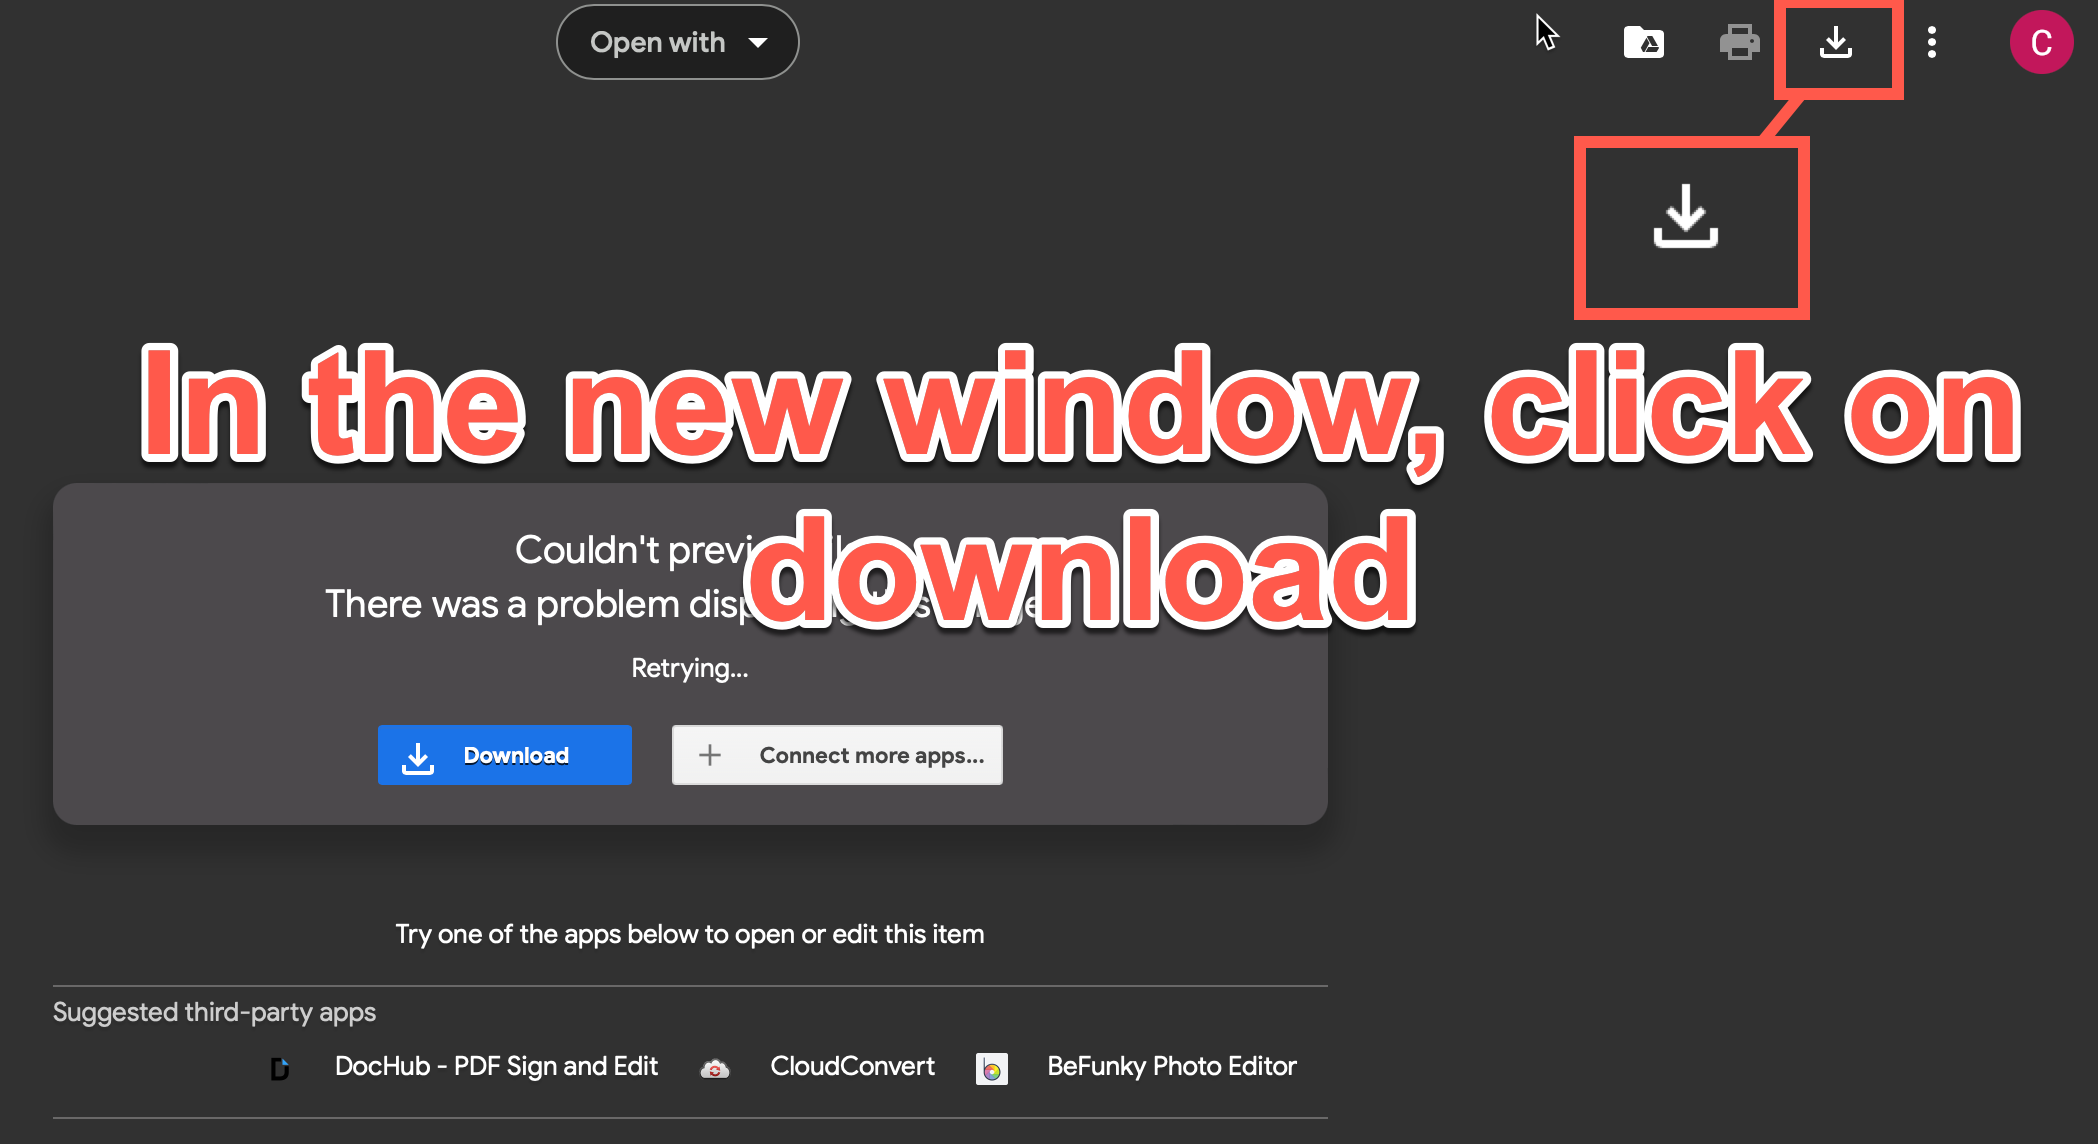
Downloading the square
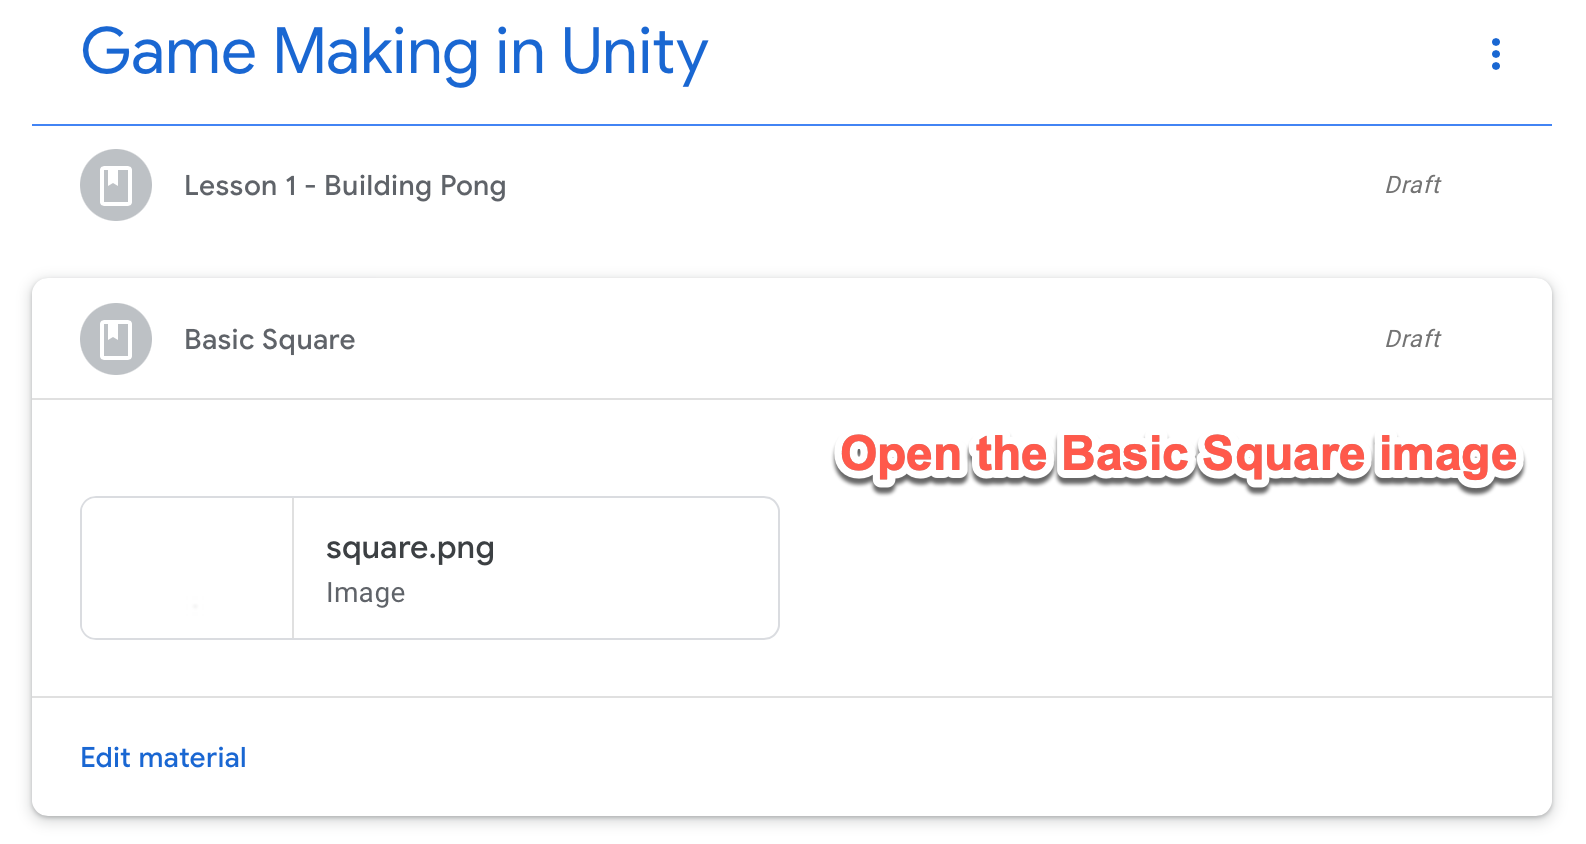
Downloading the square
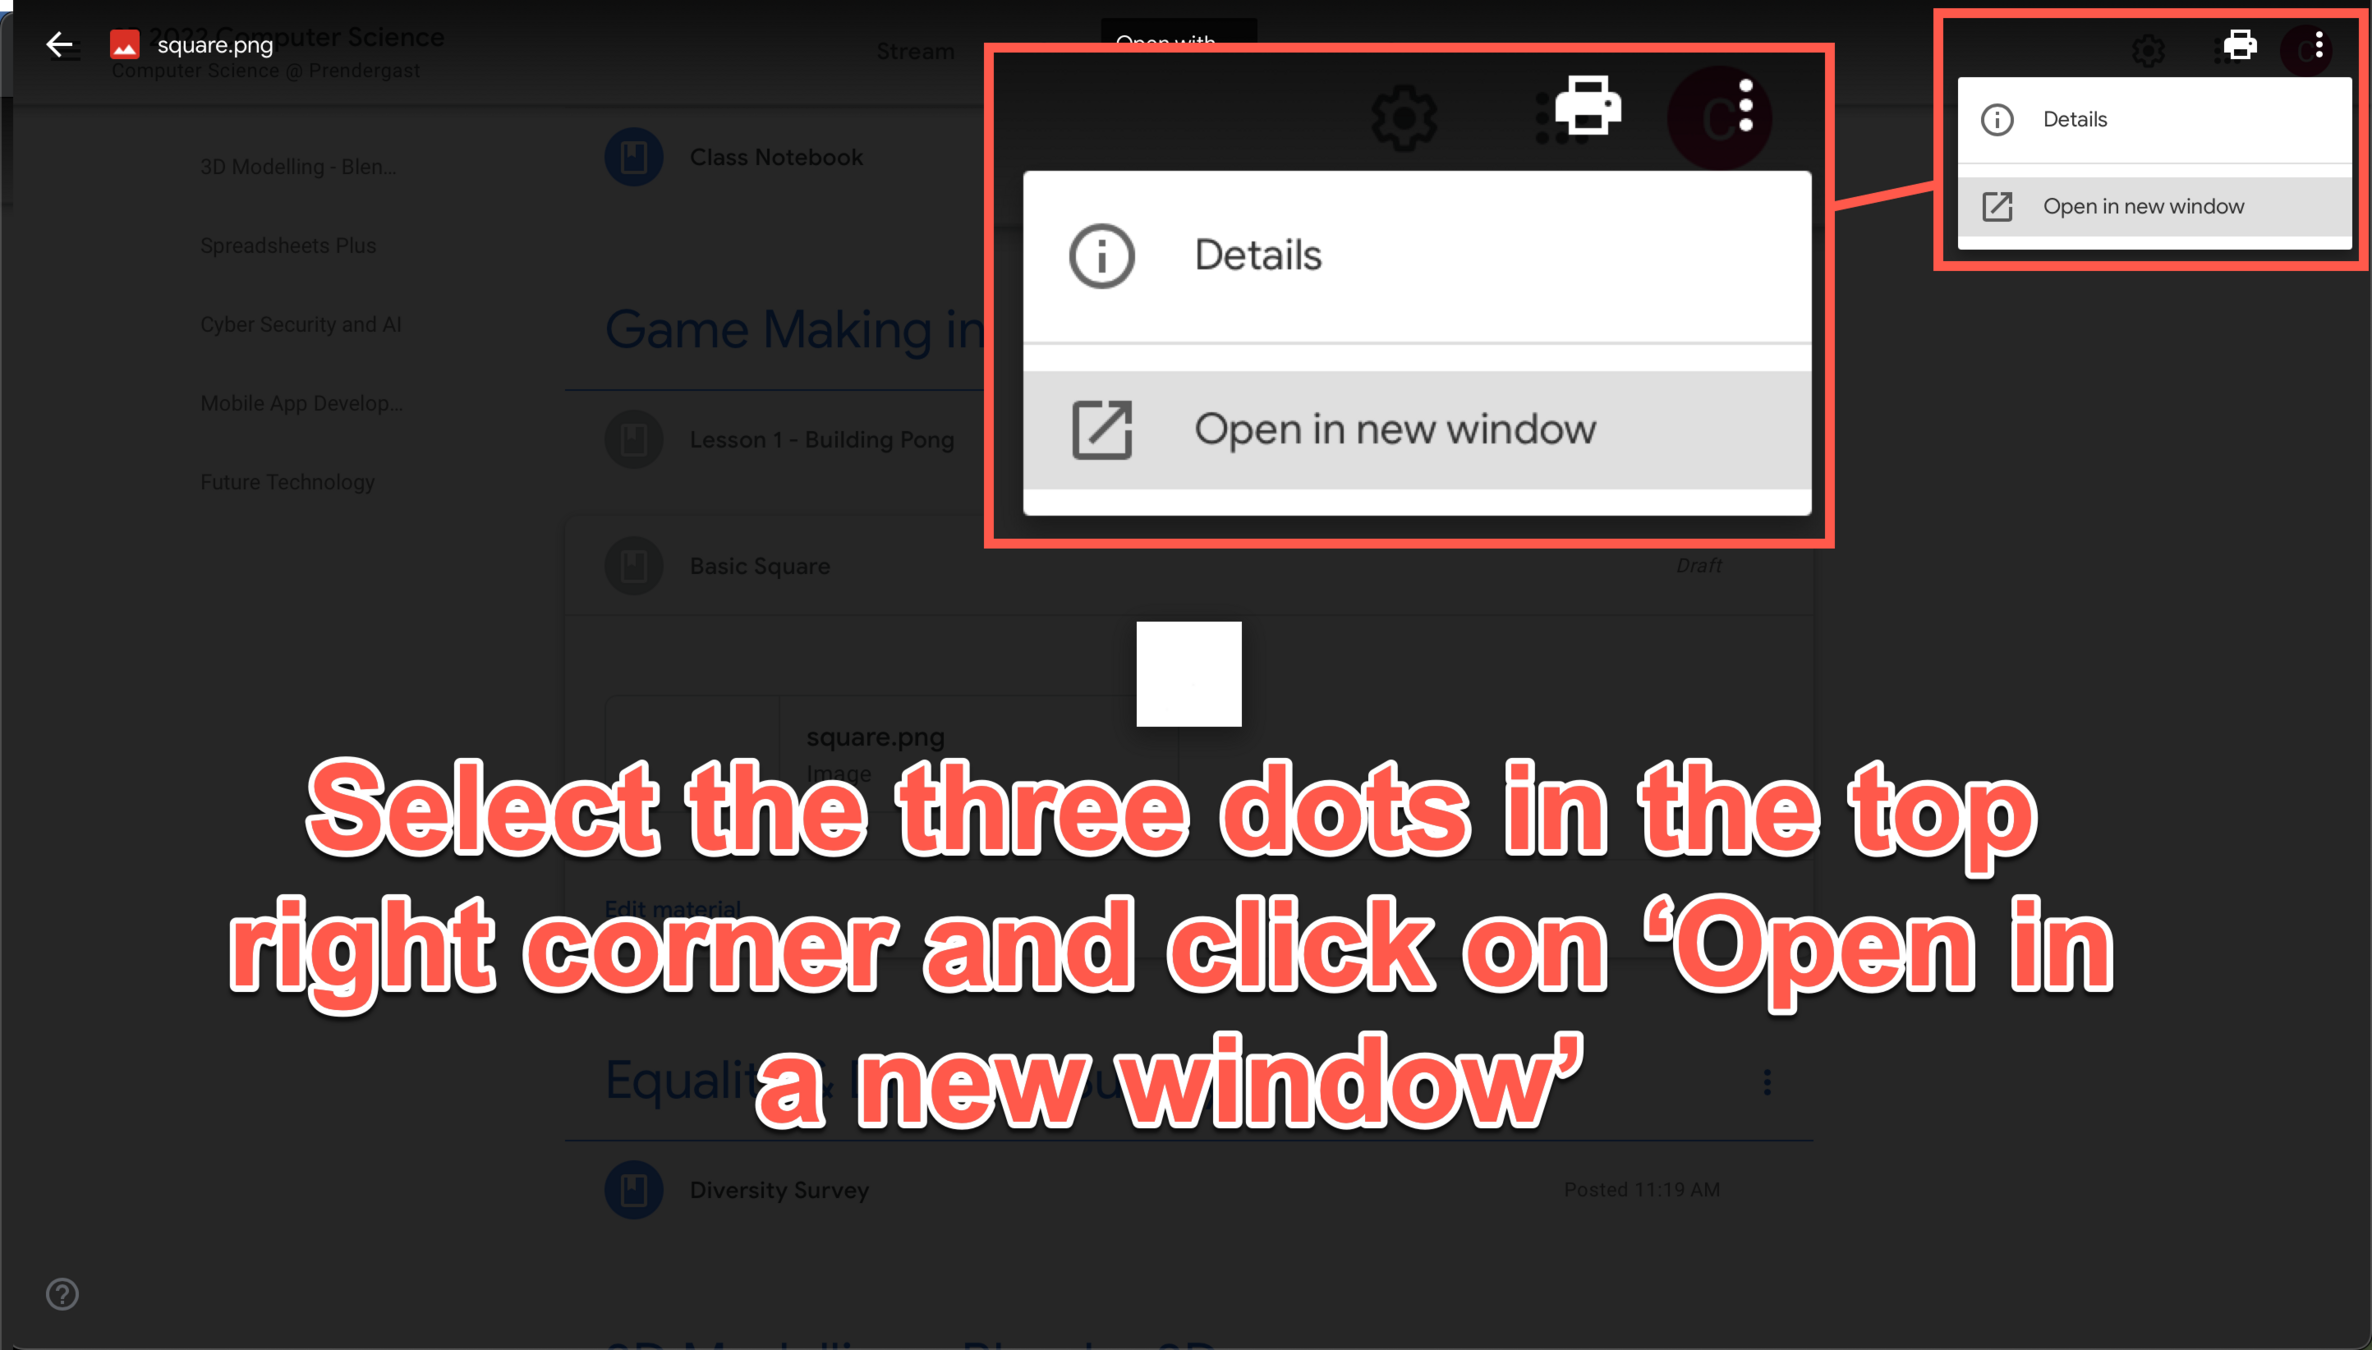
Downloading the square
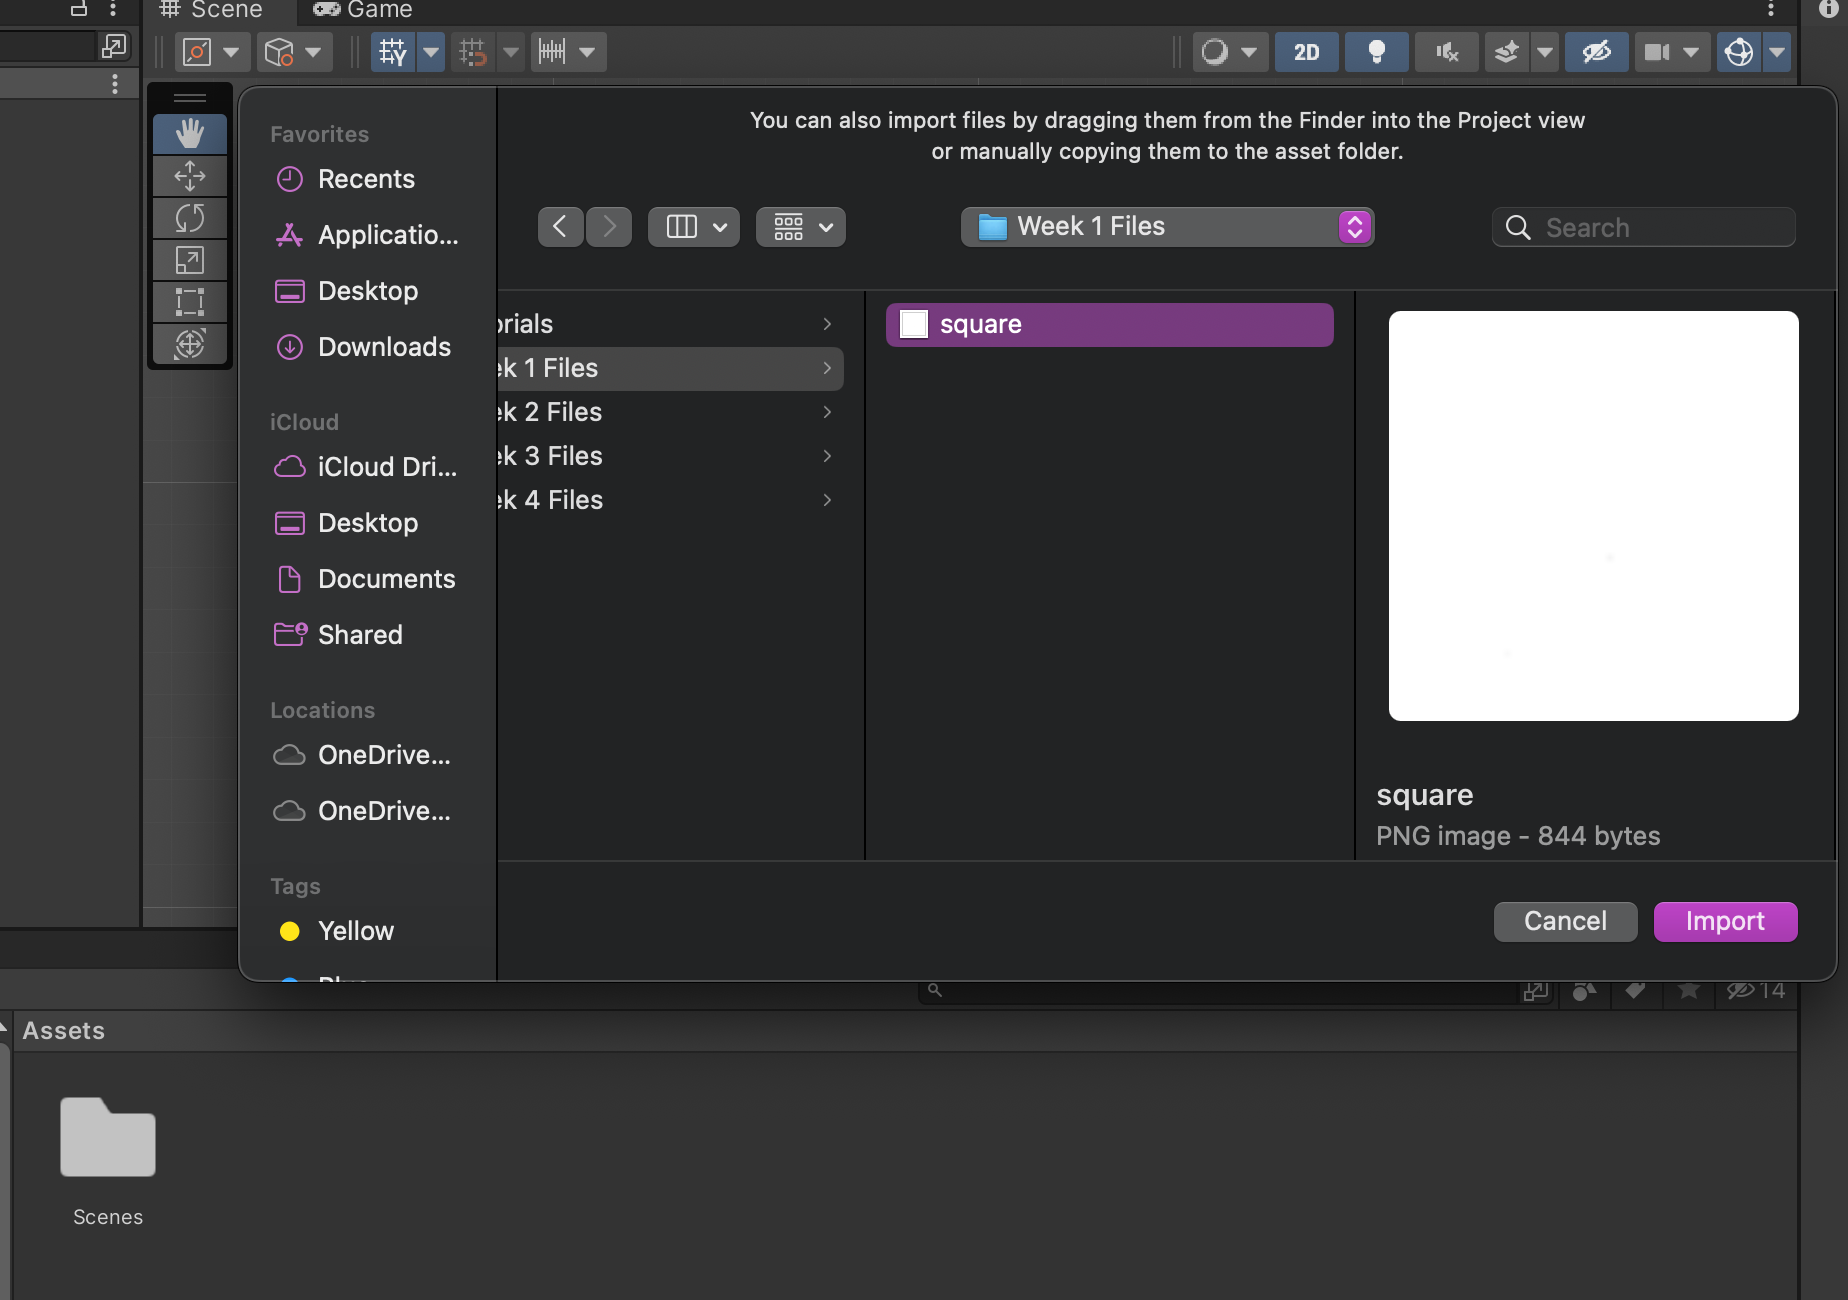
Importing the square
Right click in the assets area (not over the folder), Select "Import new asset", select "square.png"
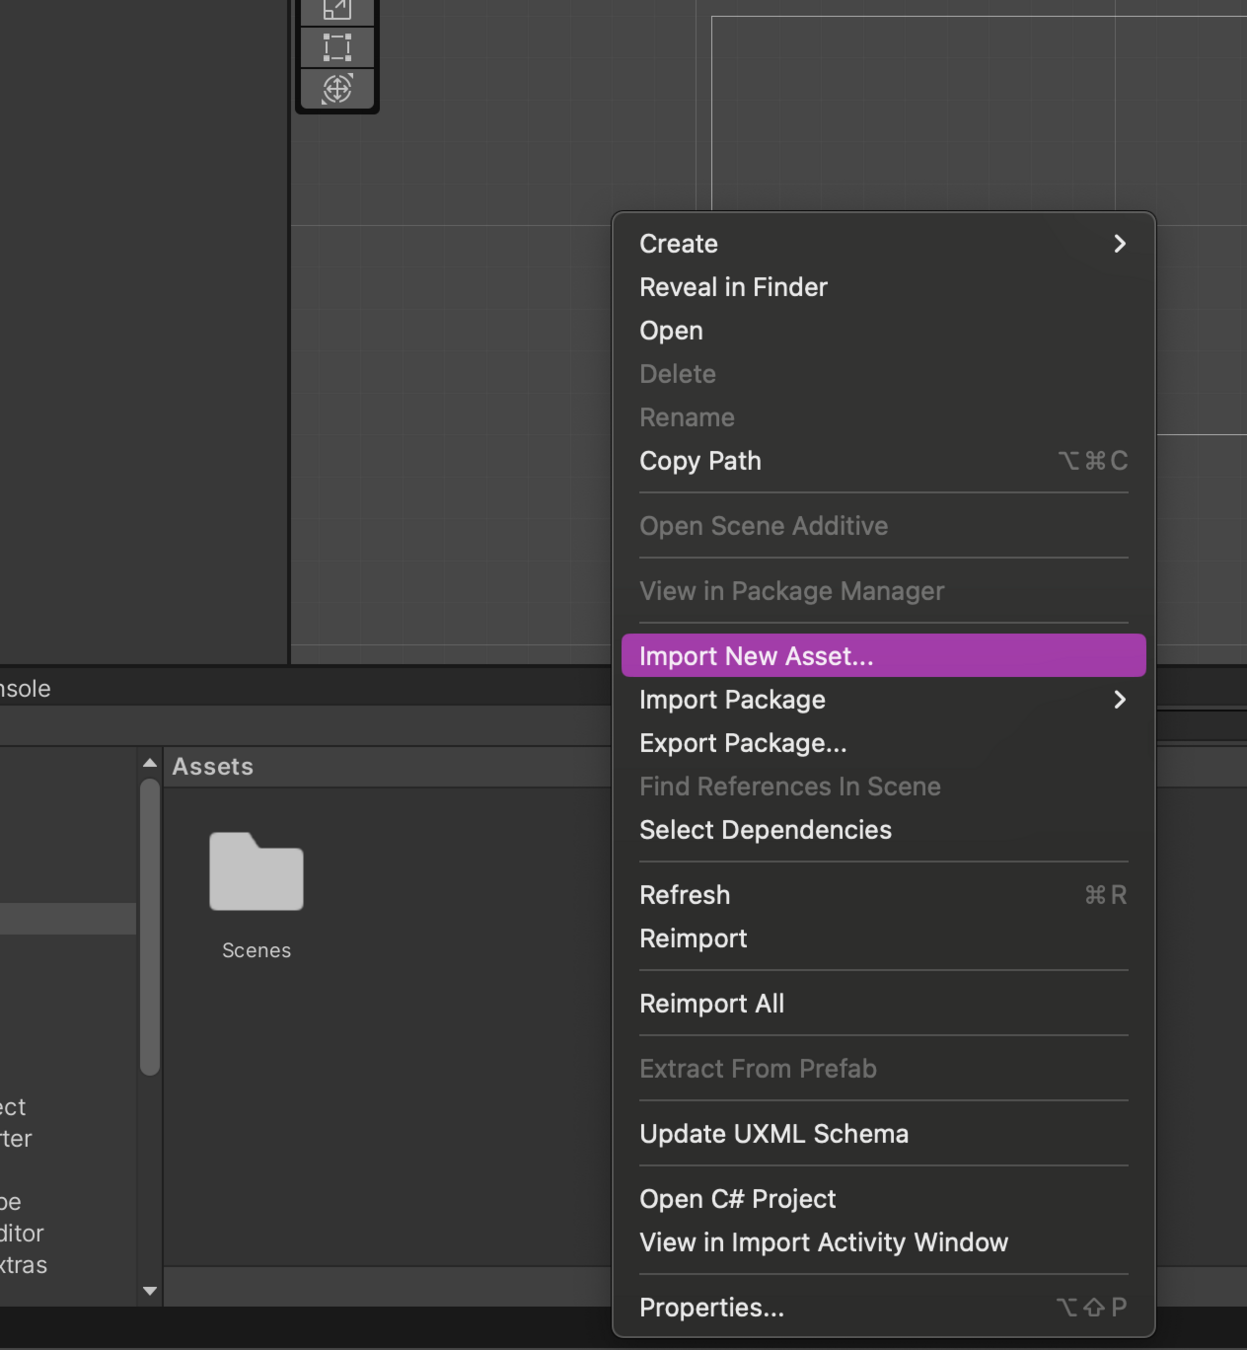
Importing the square
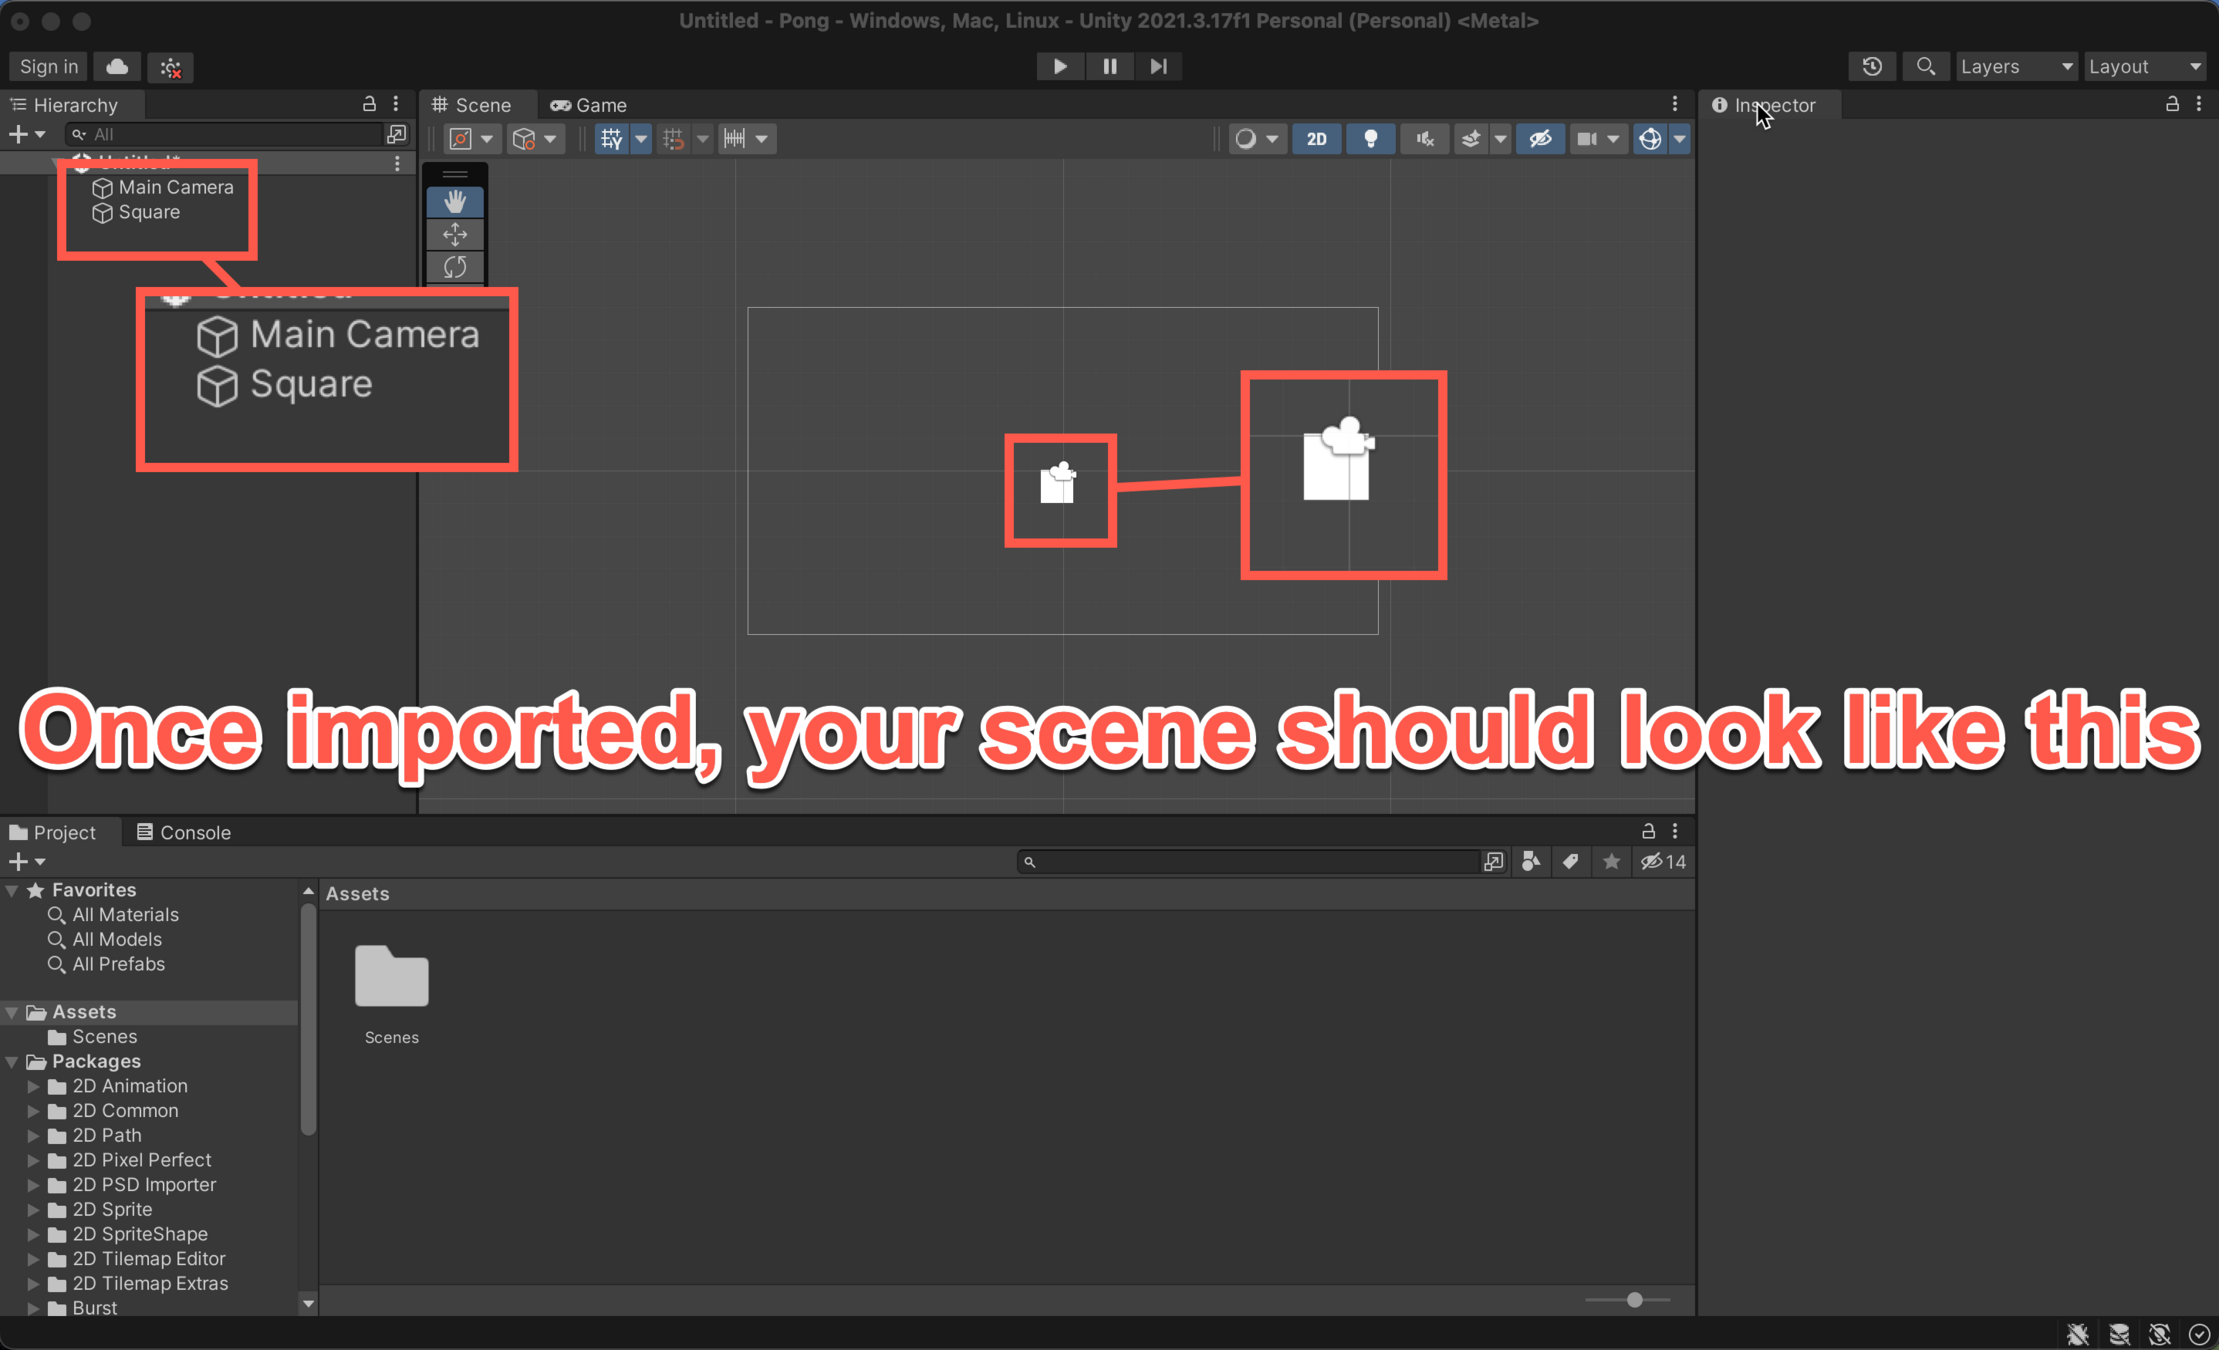
Importing the square
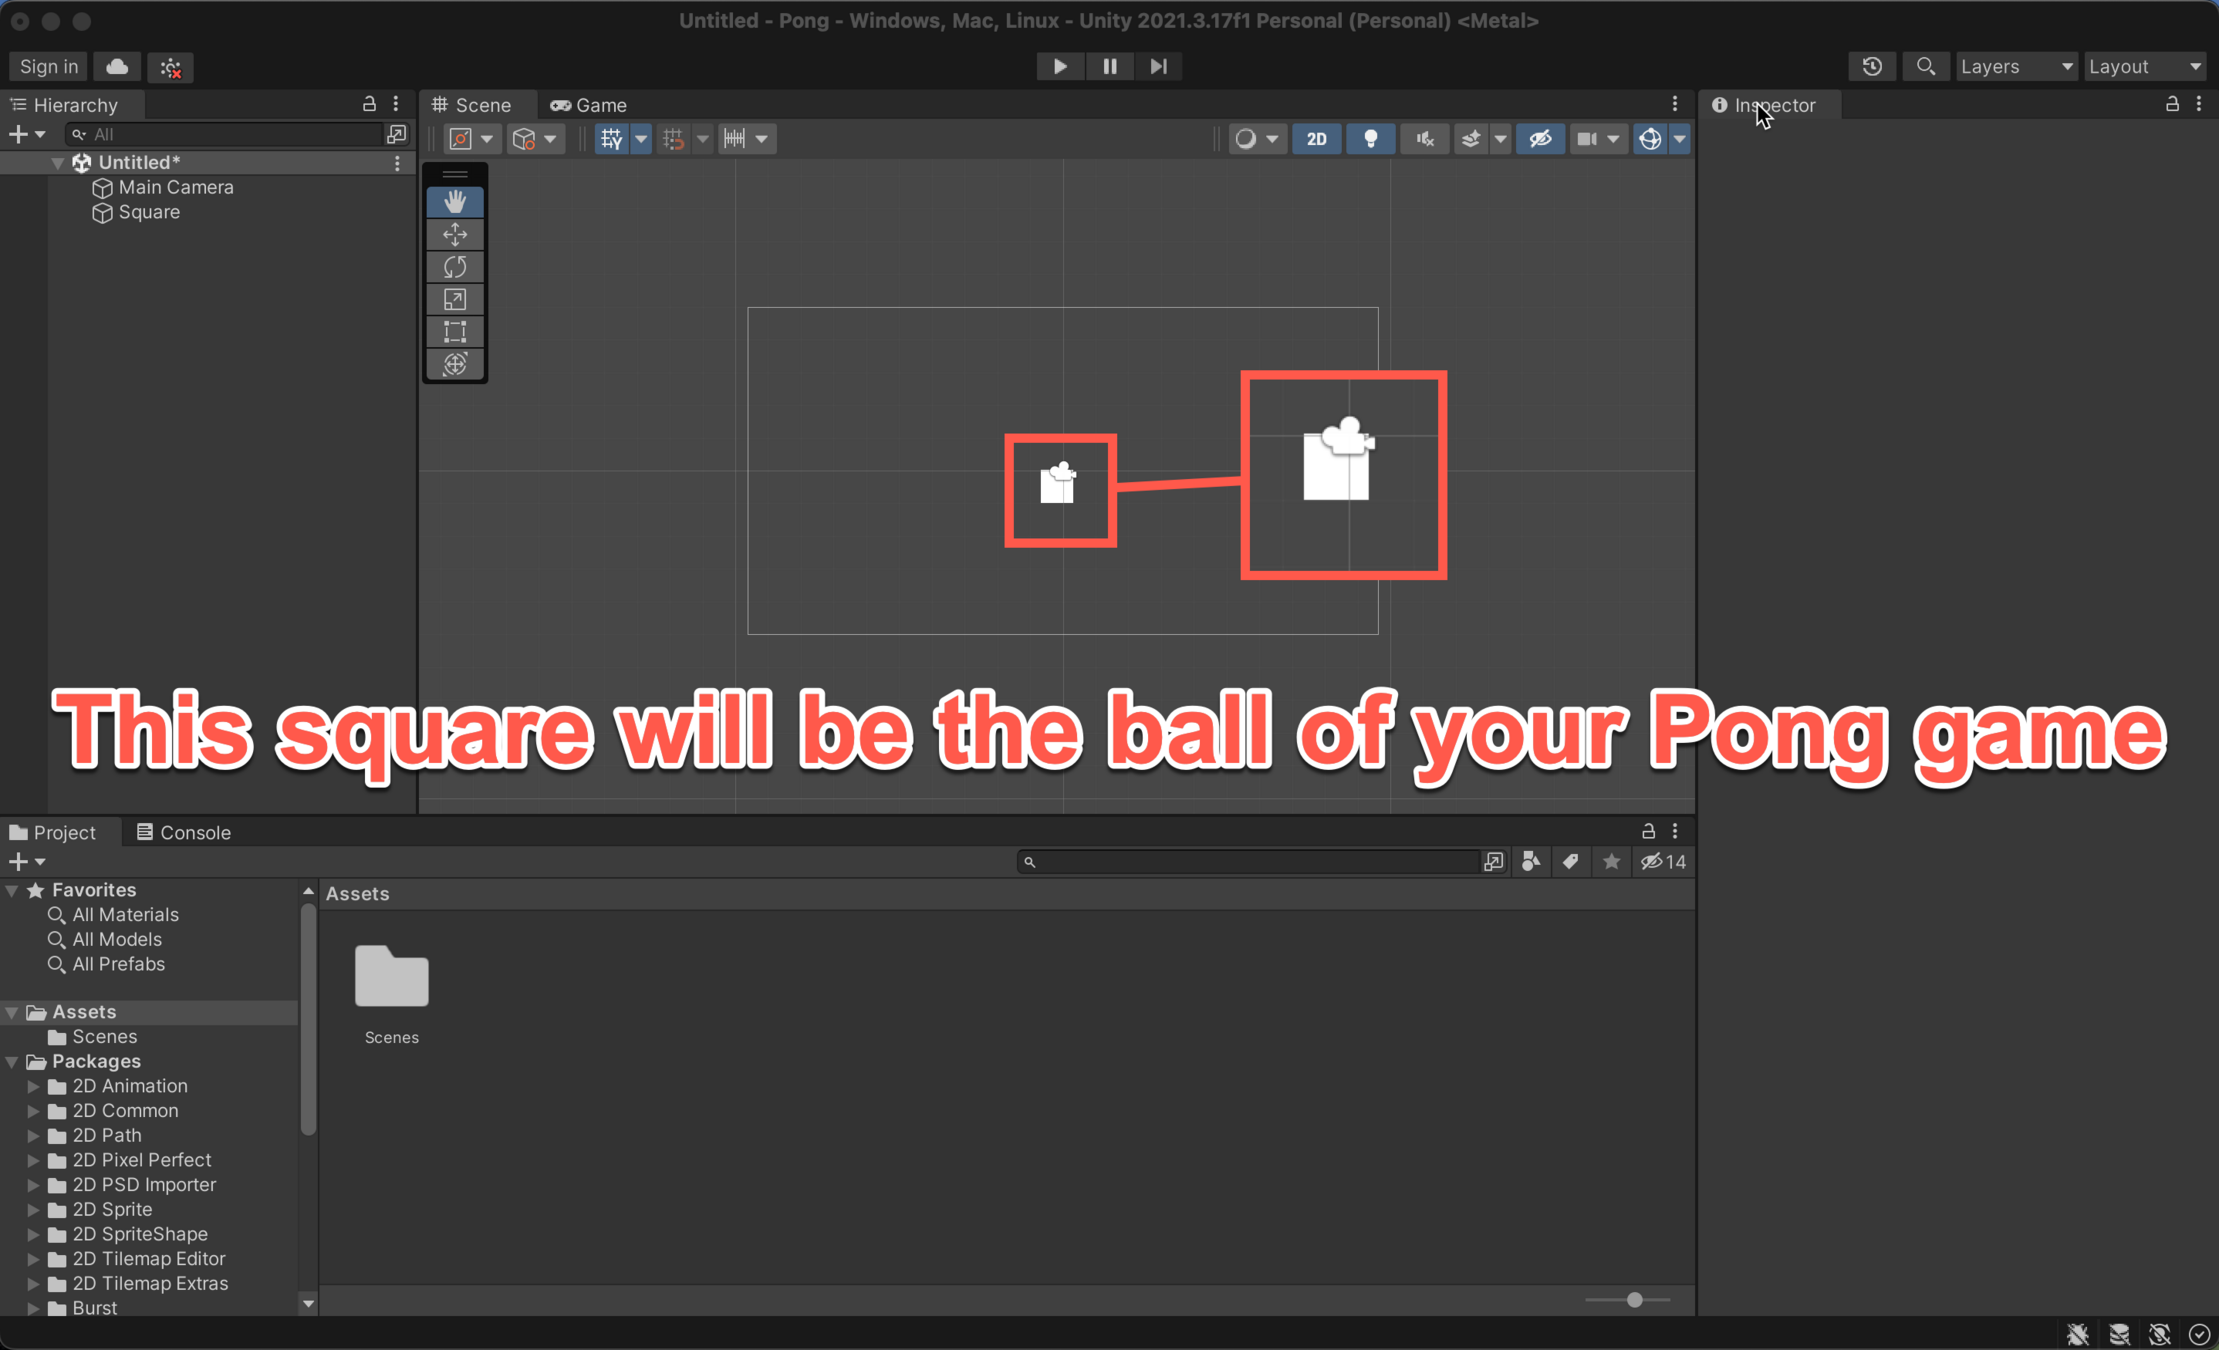
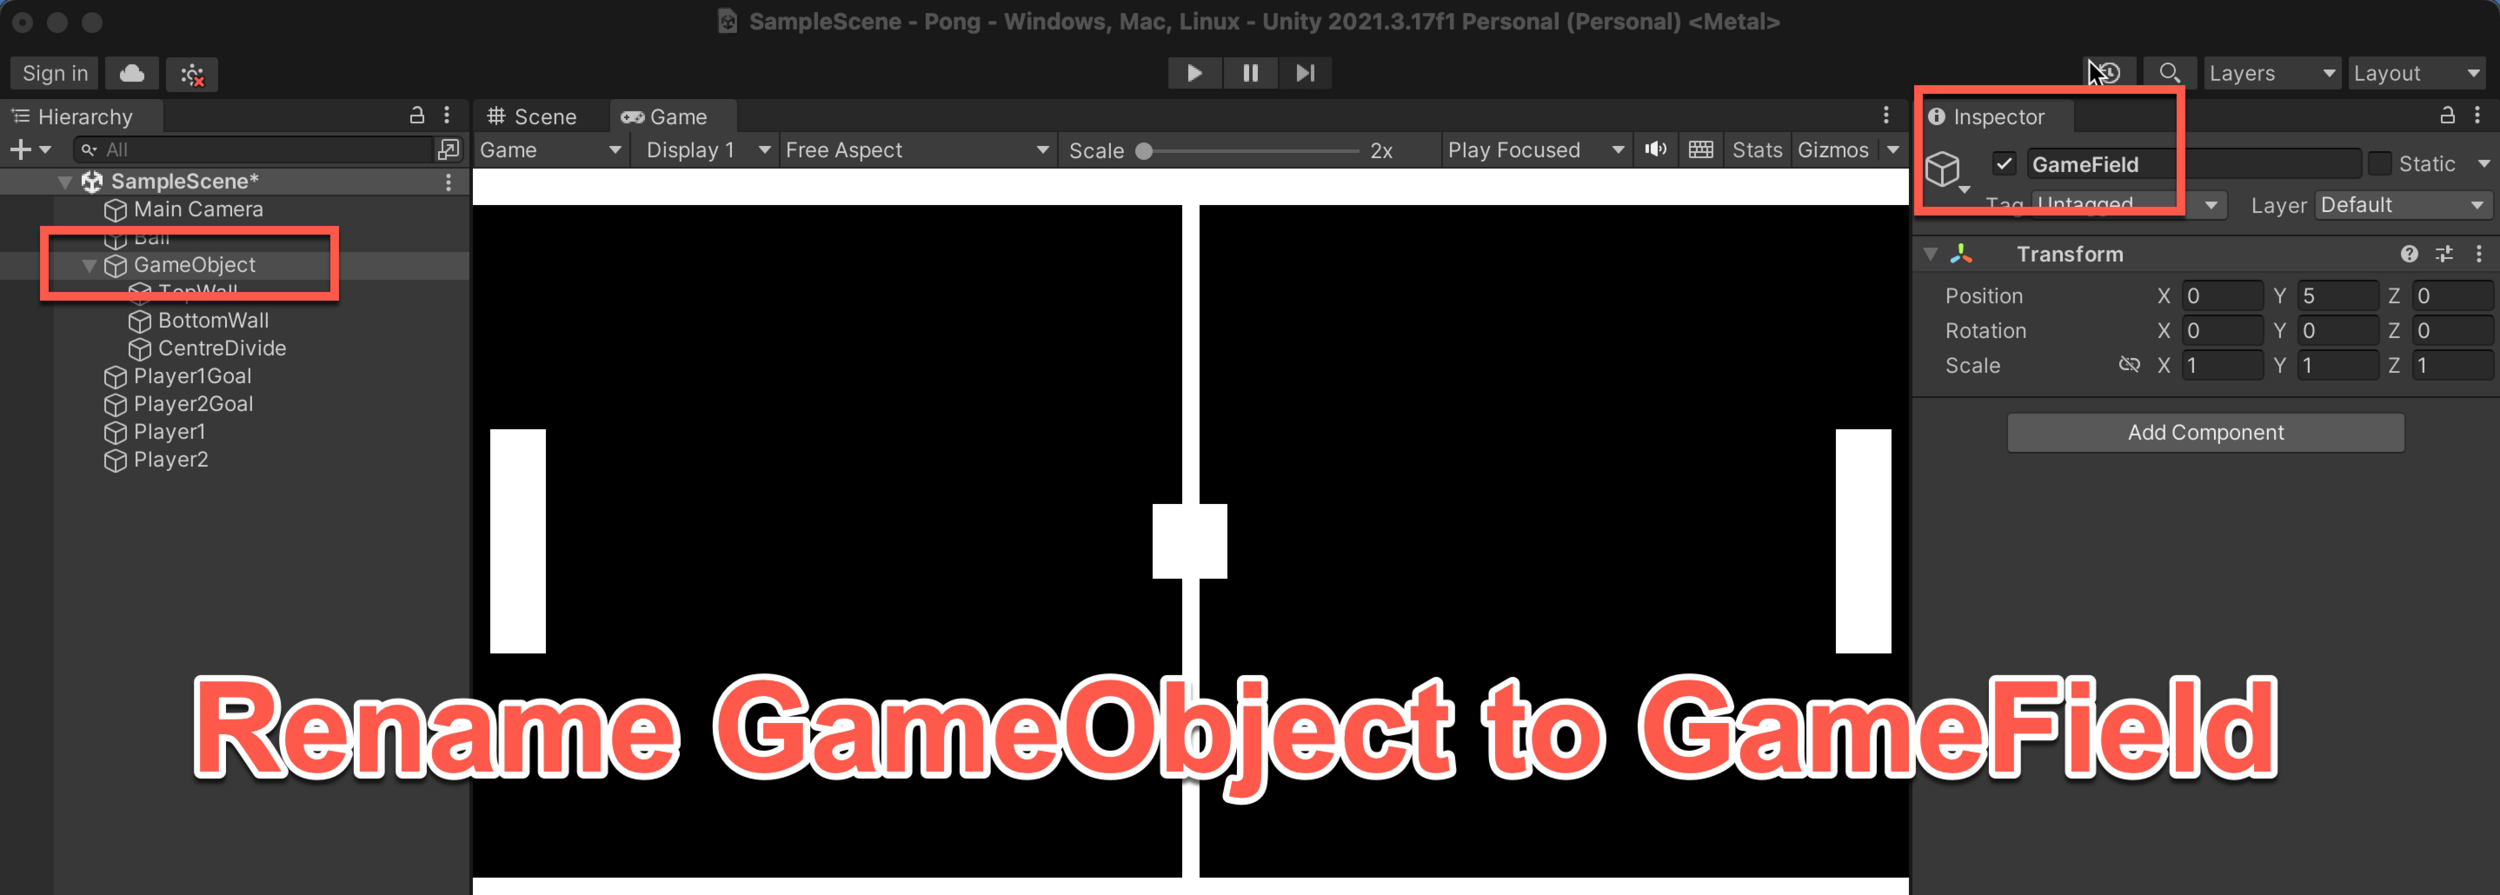
Rename the Square

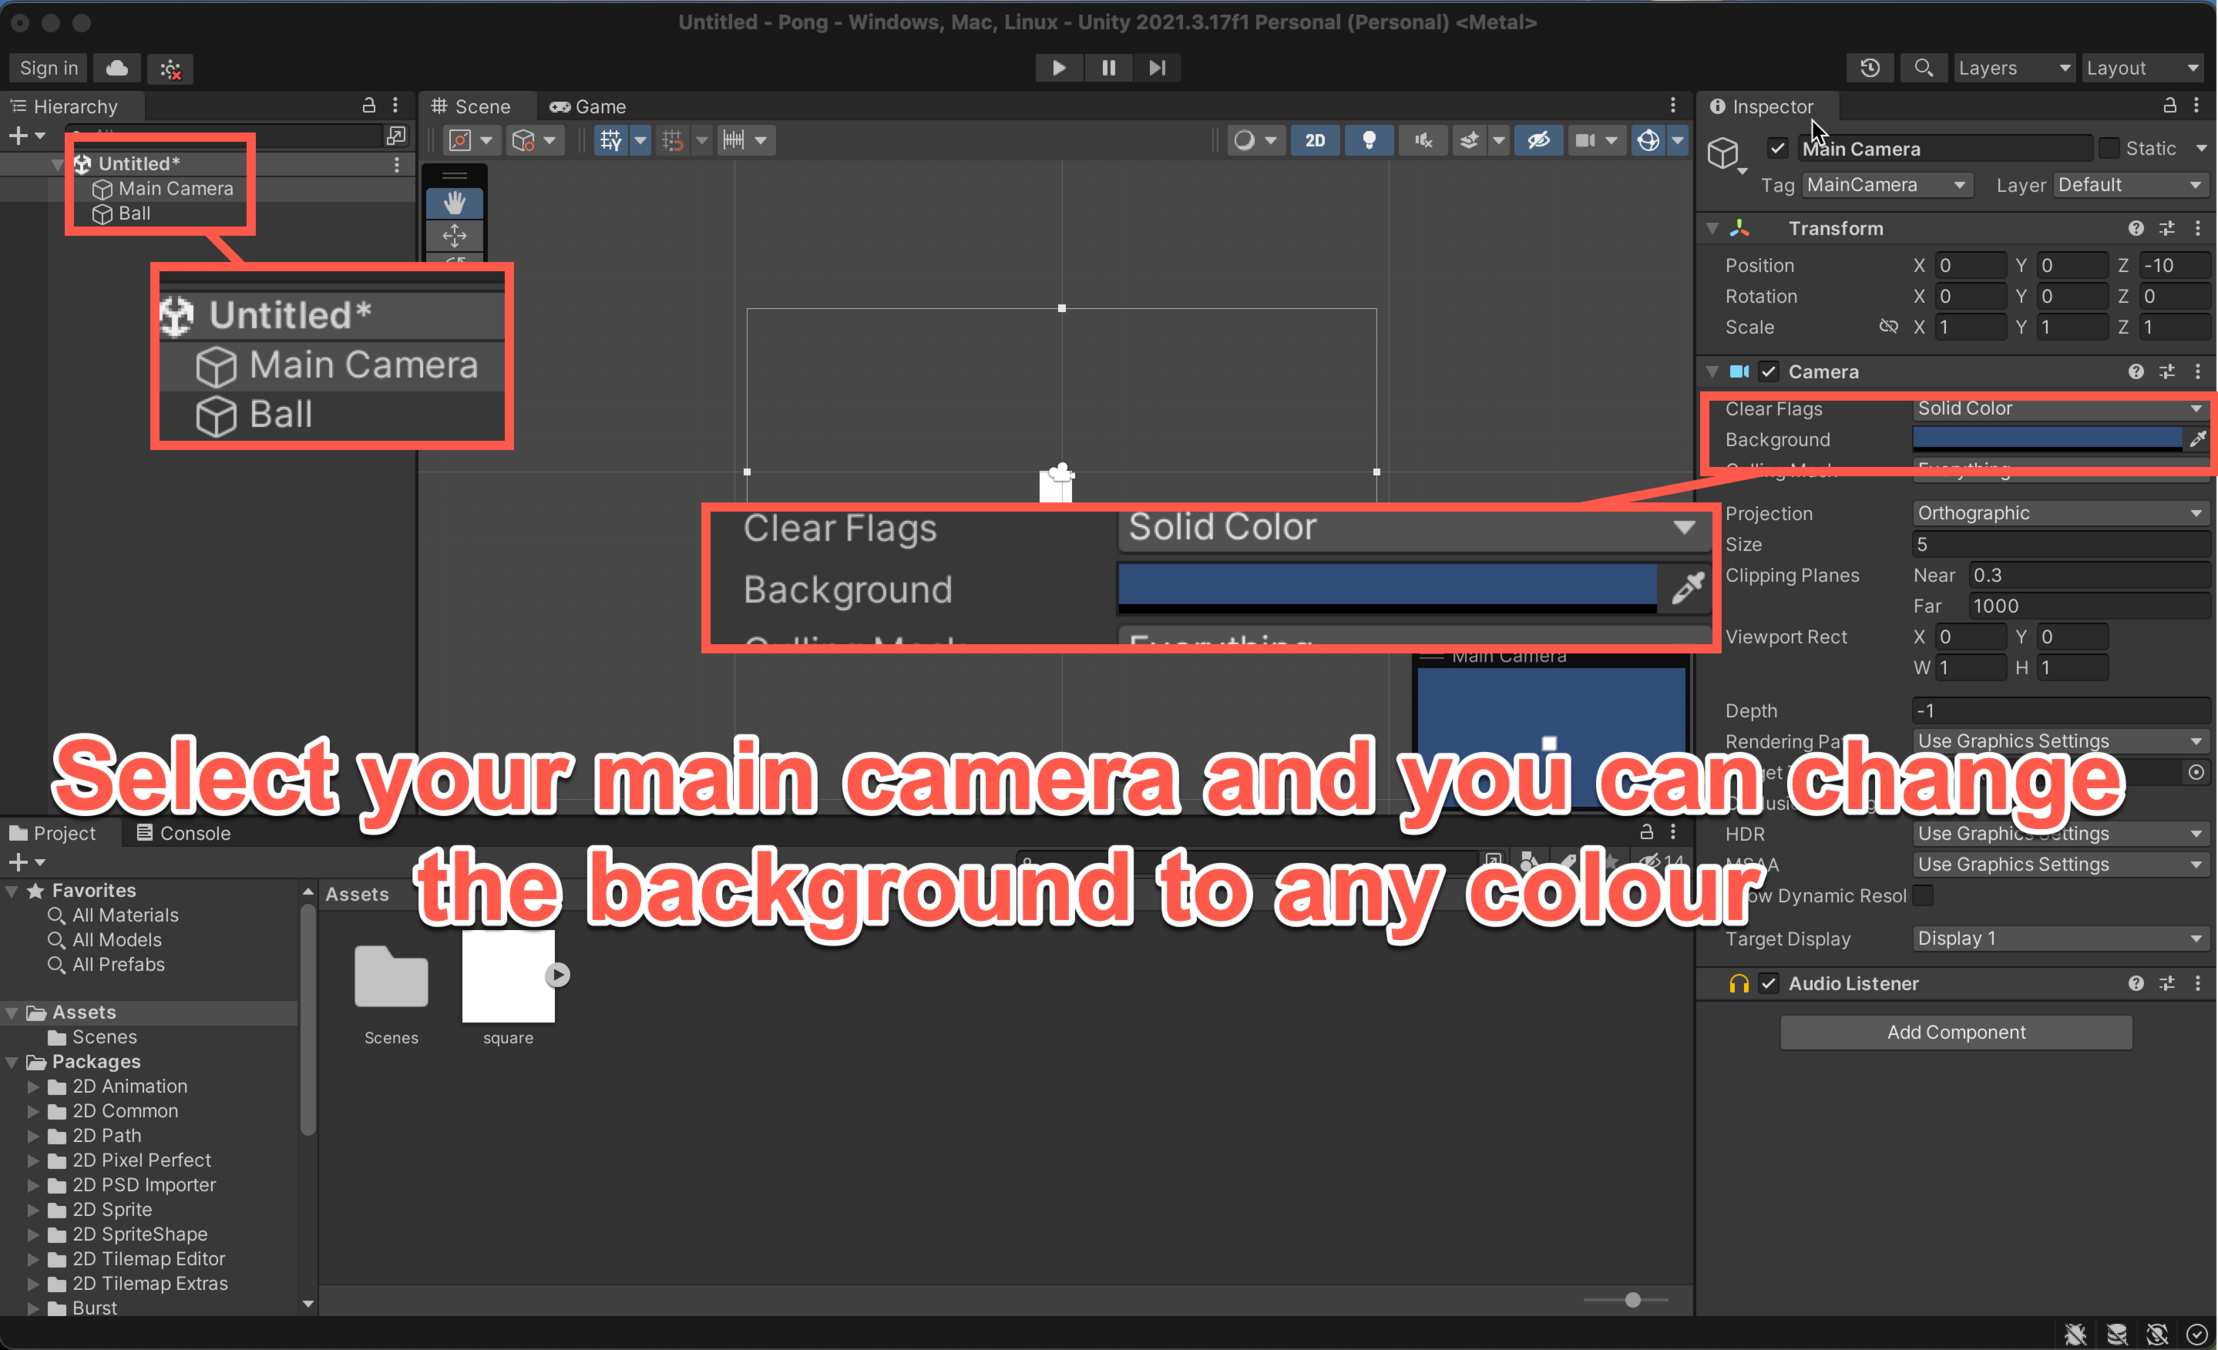
Change the Background
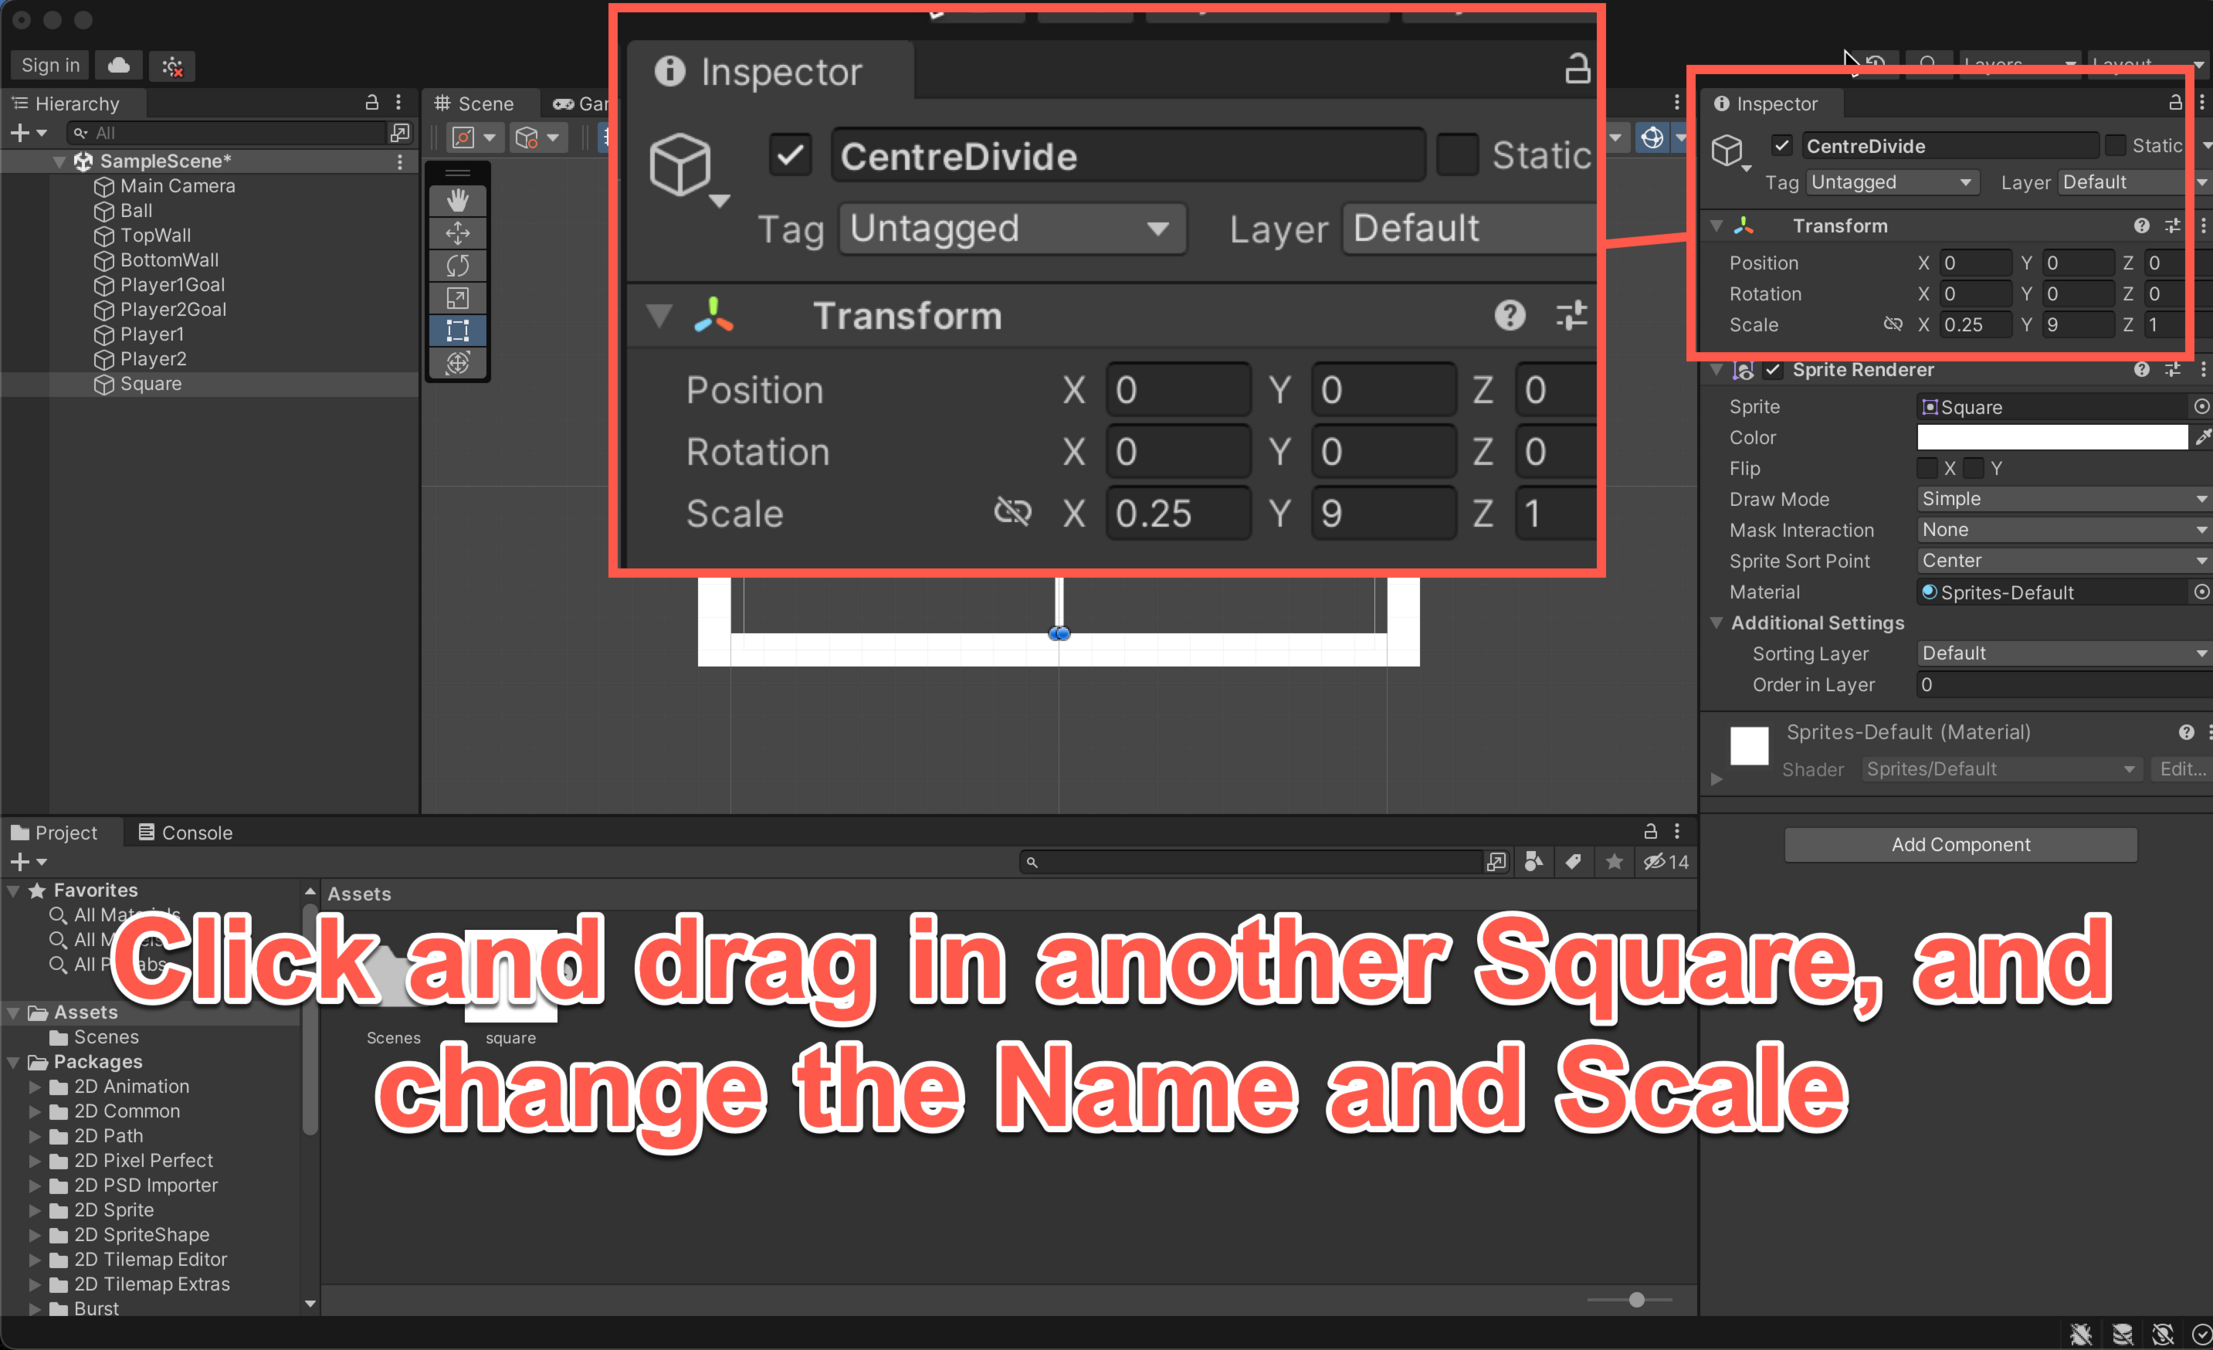
Setting the Boundaries and Goals
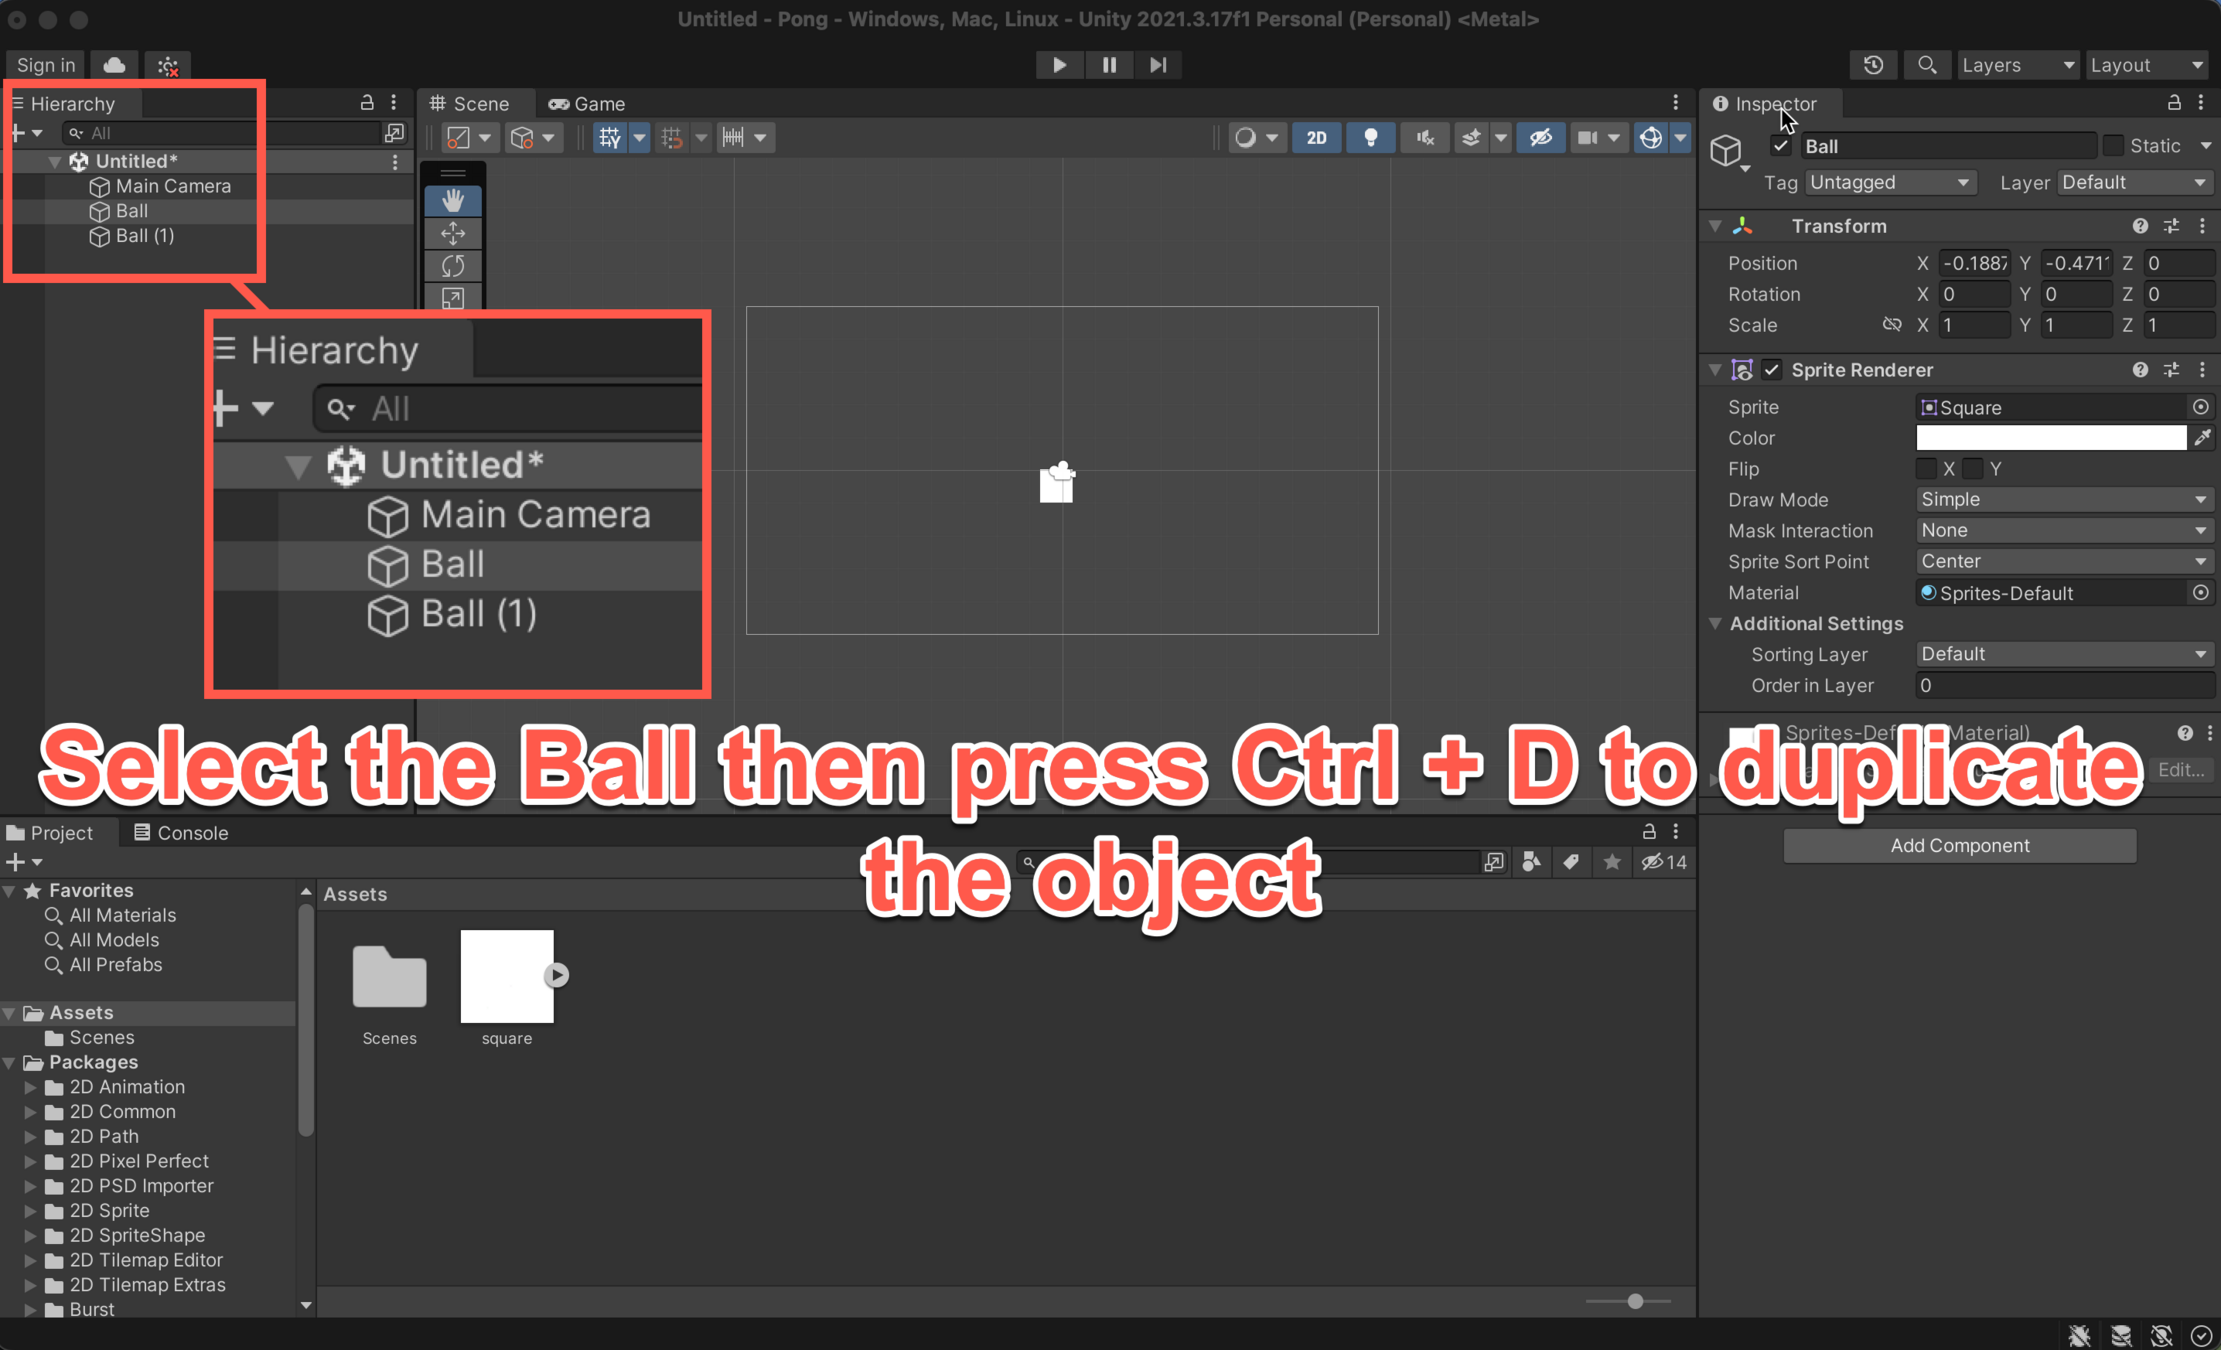
Setting the Boundaries and Goals

Setting the Boundaries and Goals
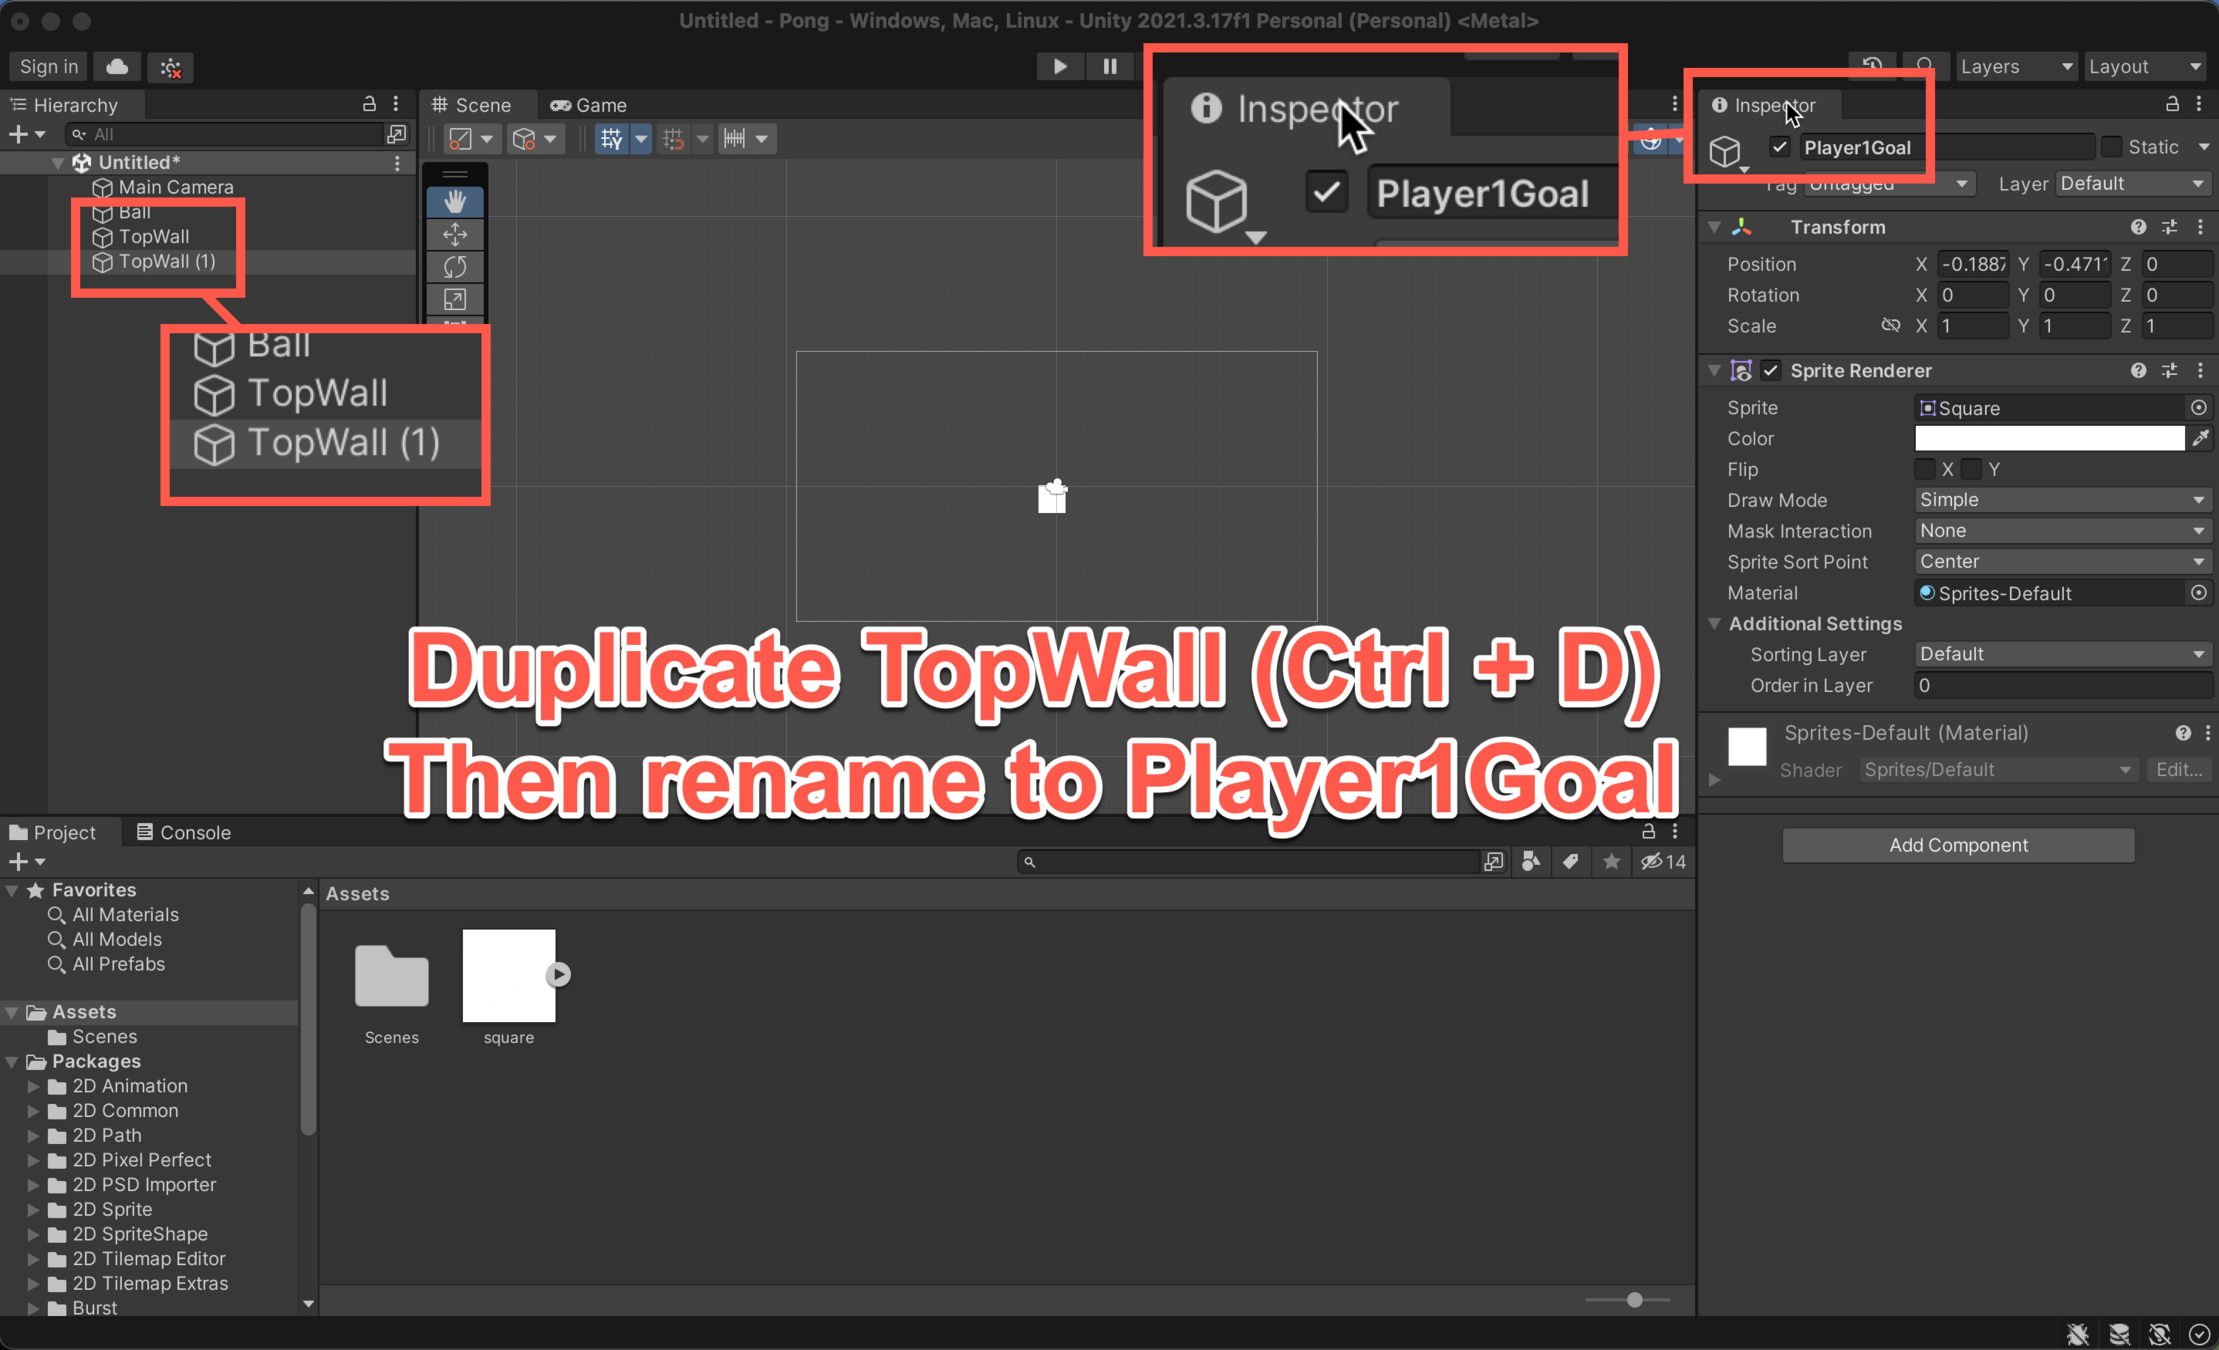
Setting the Boundaries and Goals
Setting the Boundaries and Goals
Setting the Boundaries and Goals
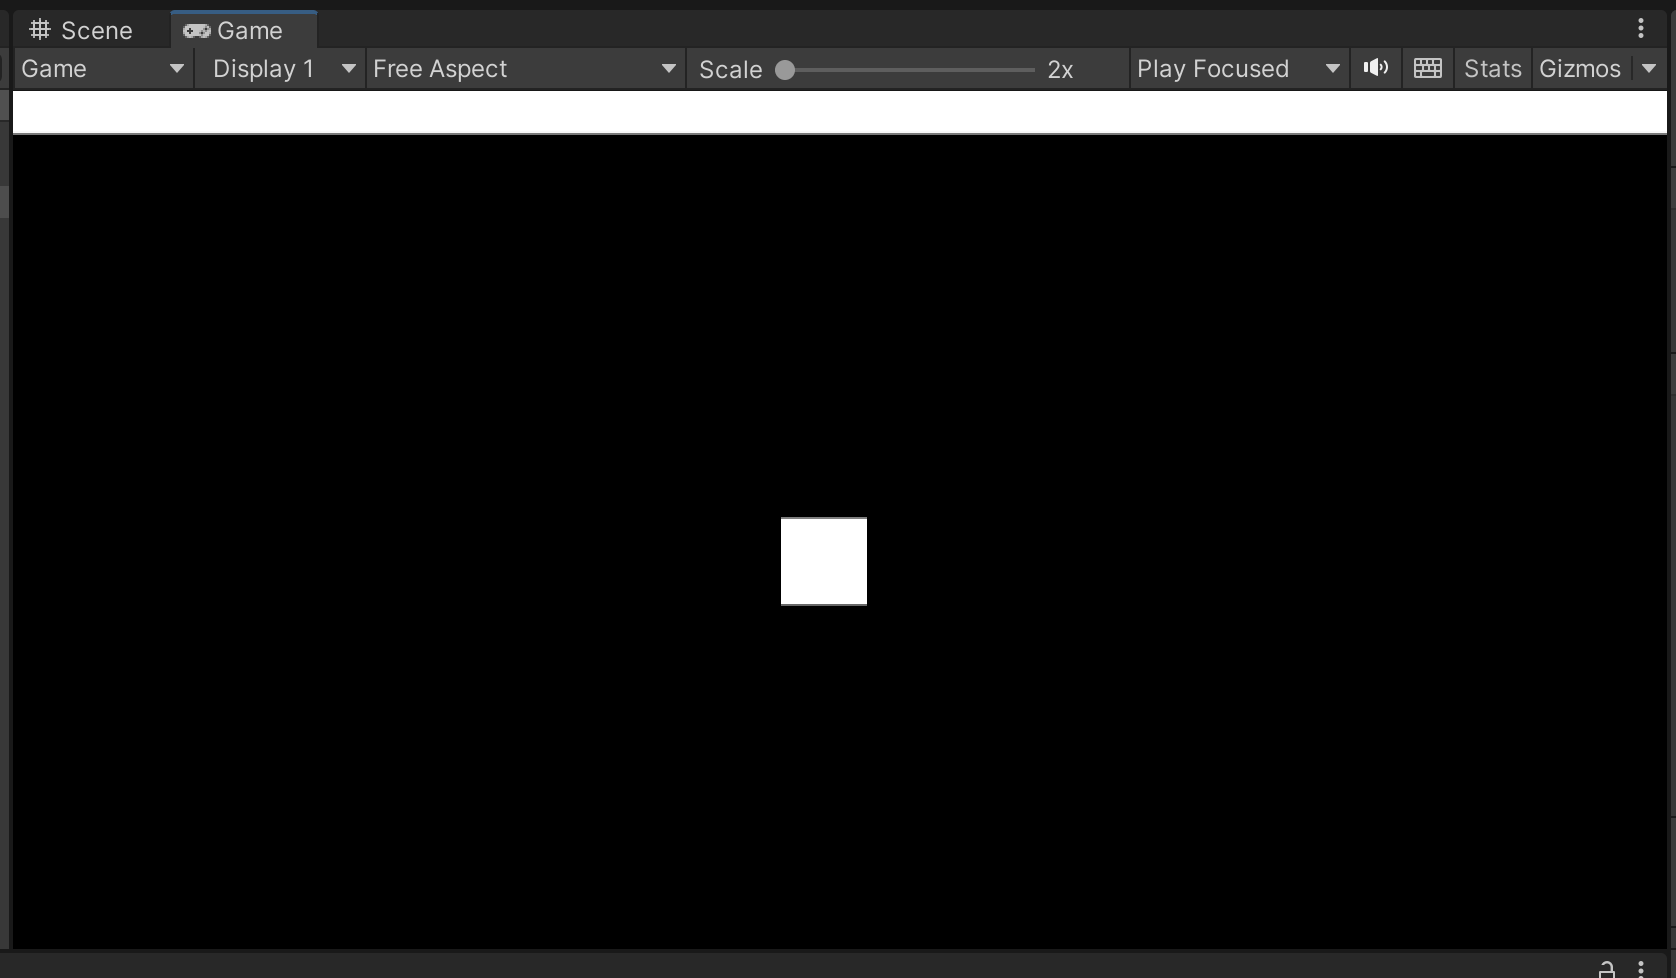
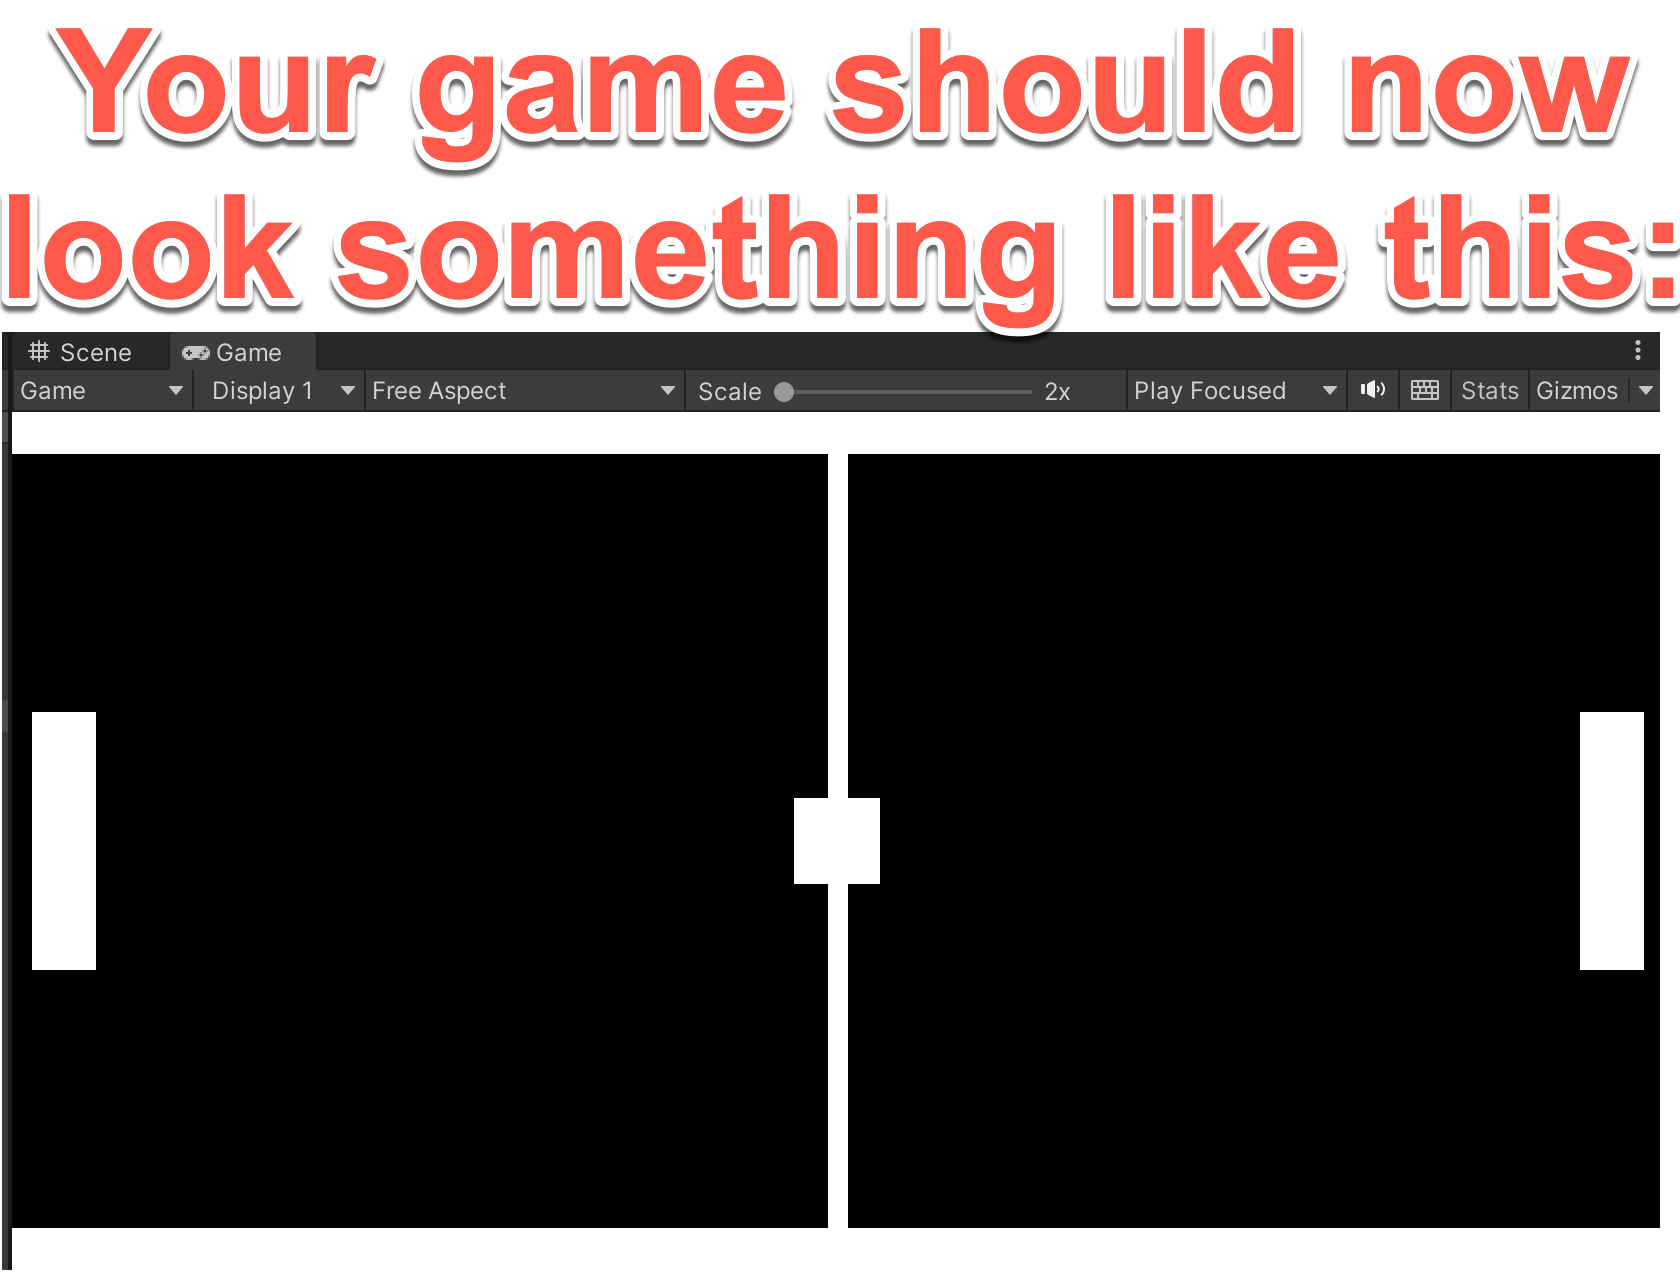
You can check the size fits by selecting Game at the top and look to see if your TopWall covers the entire width of the camera.
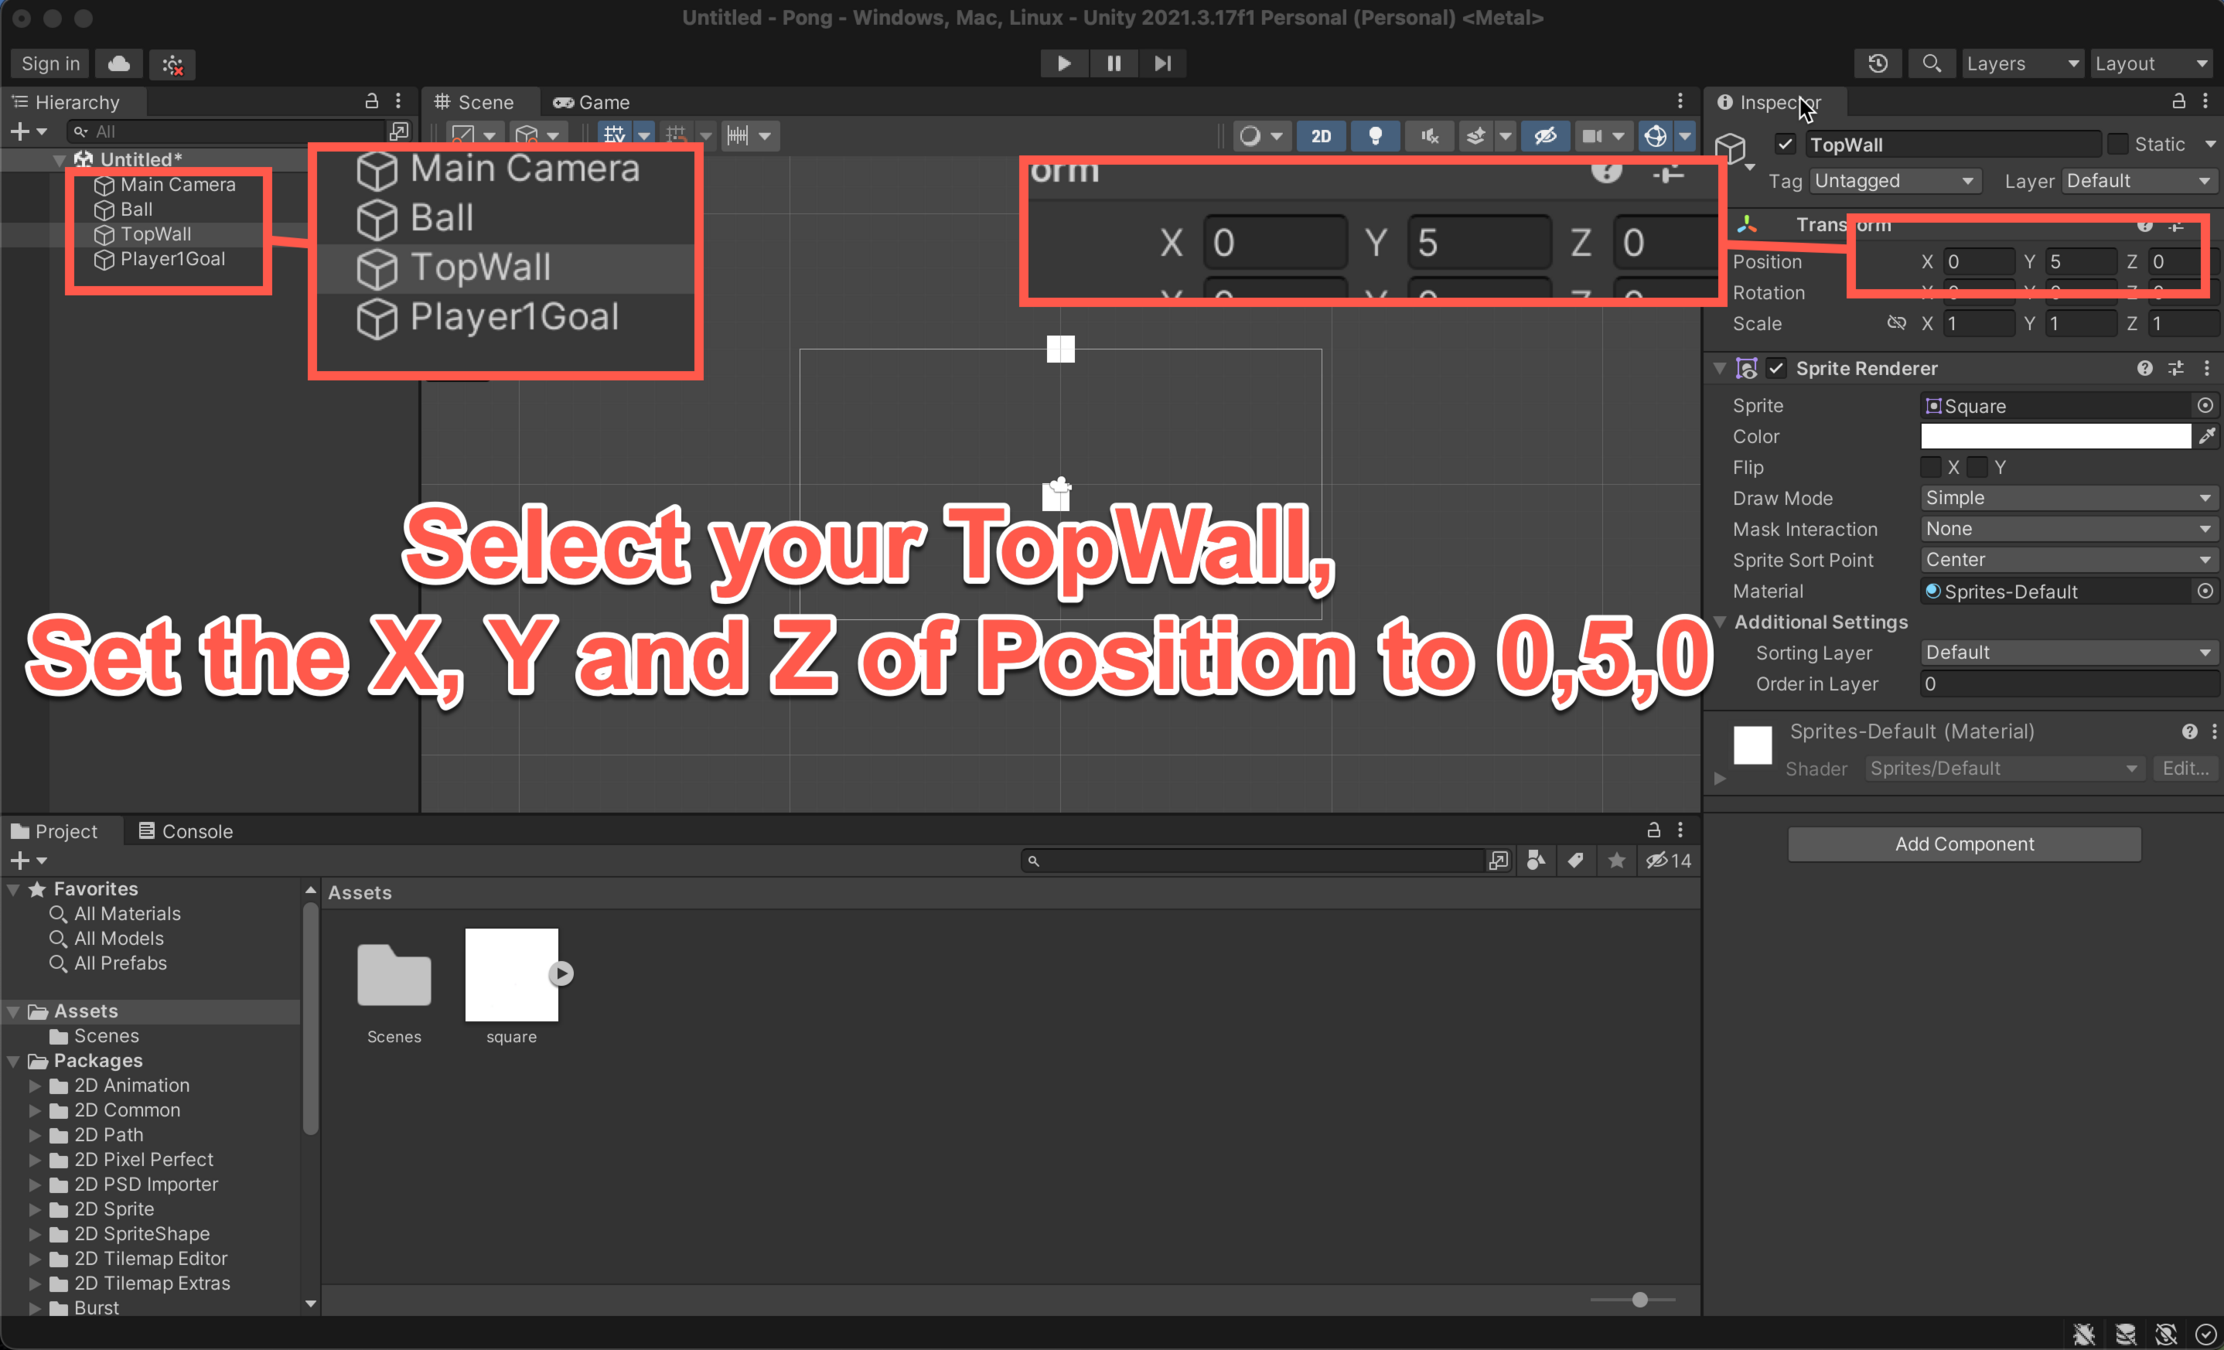
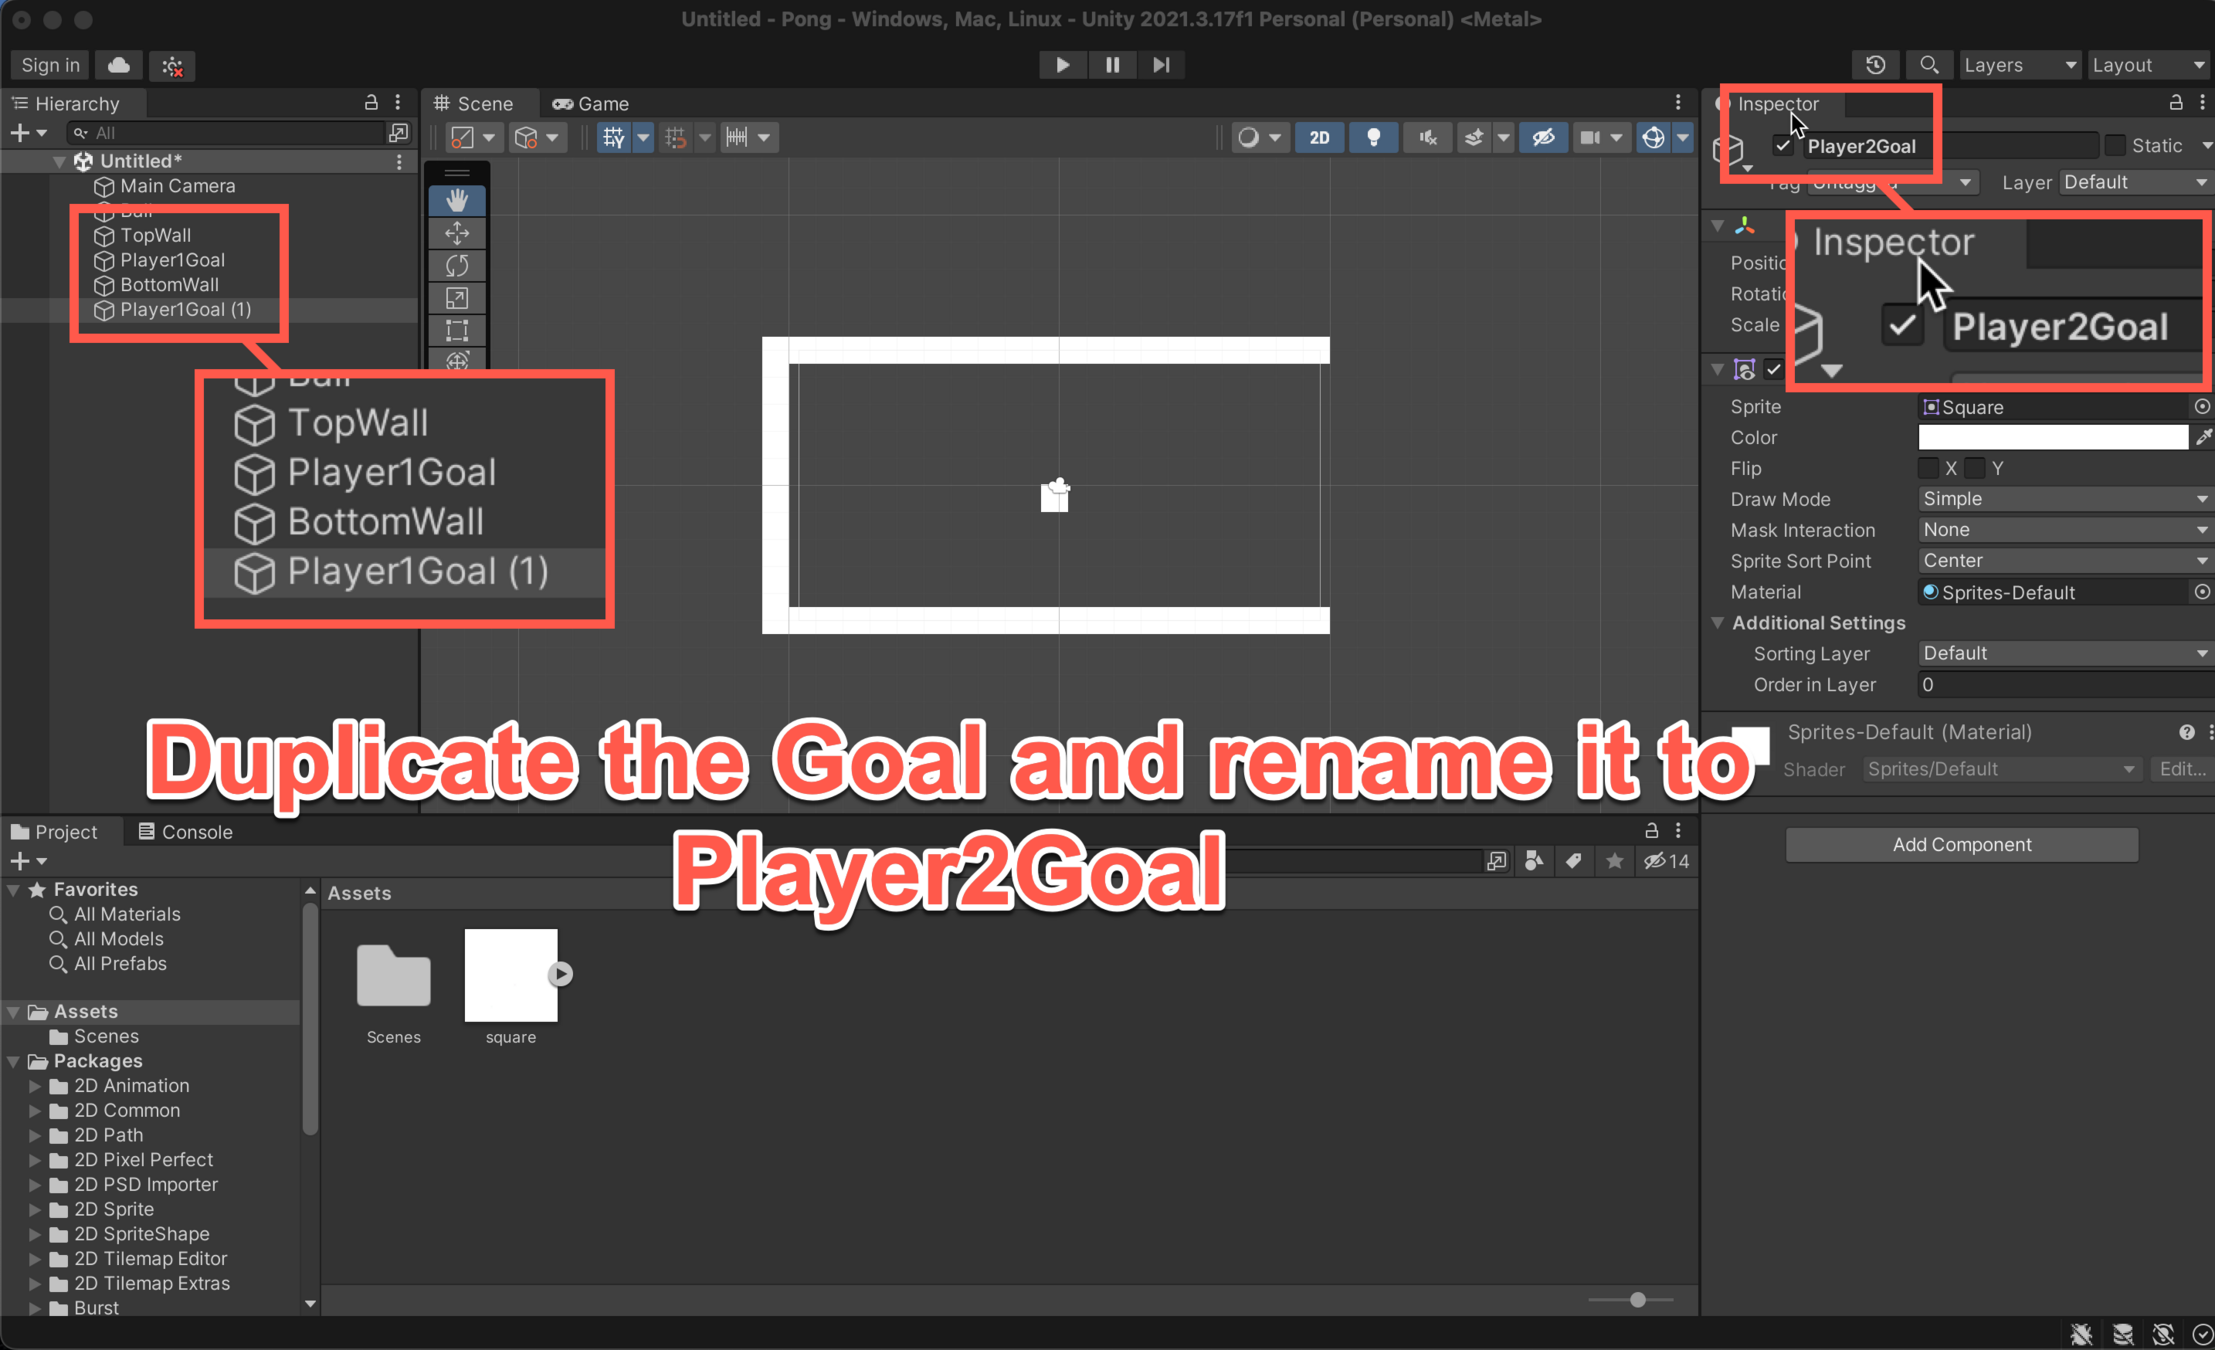
Setting the Boundaries and Goals
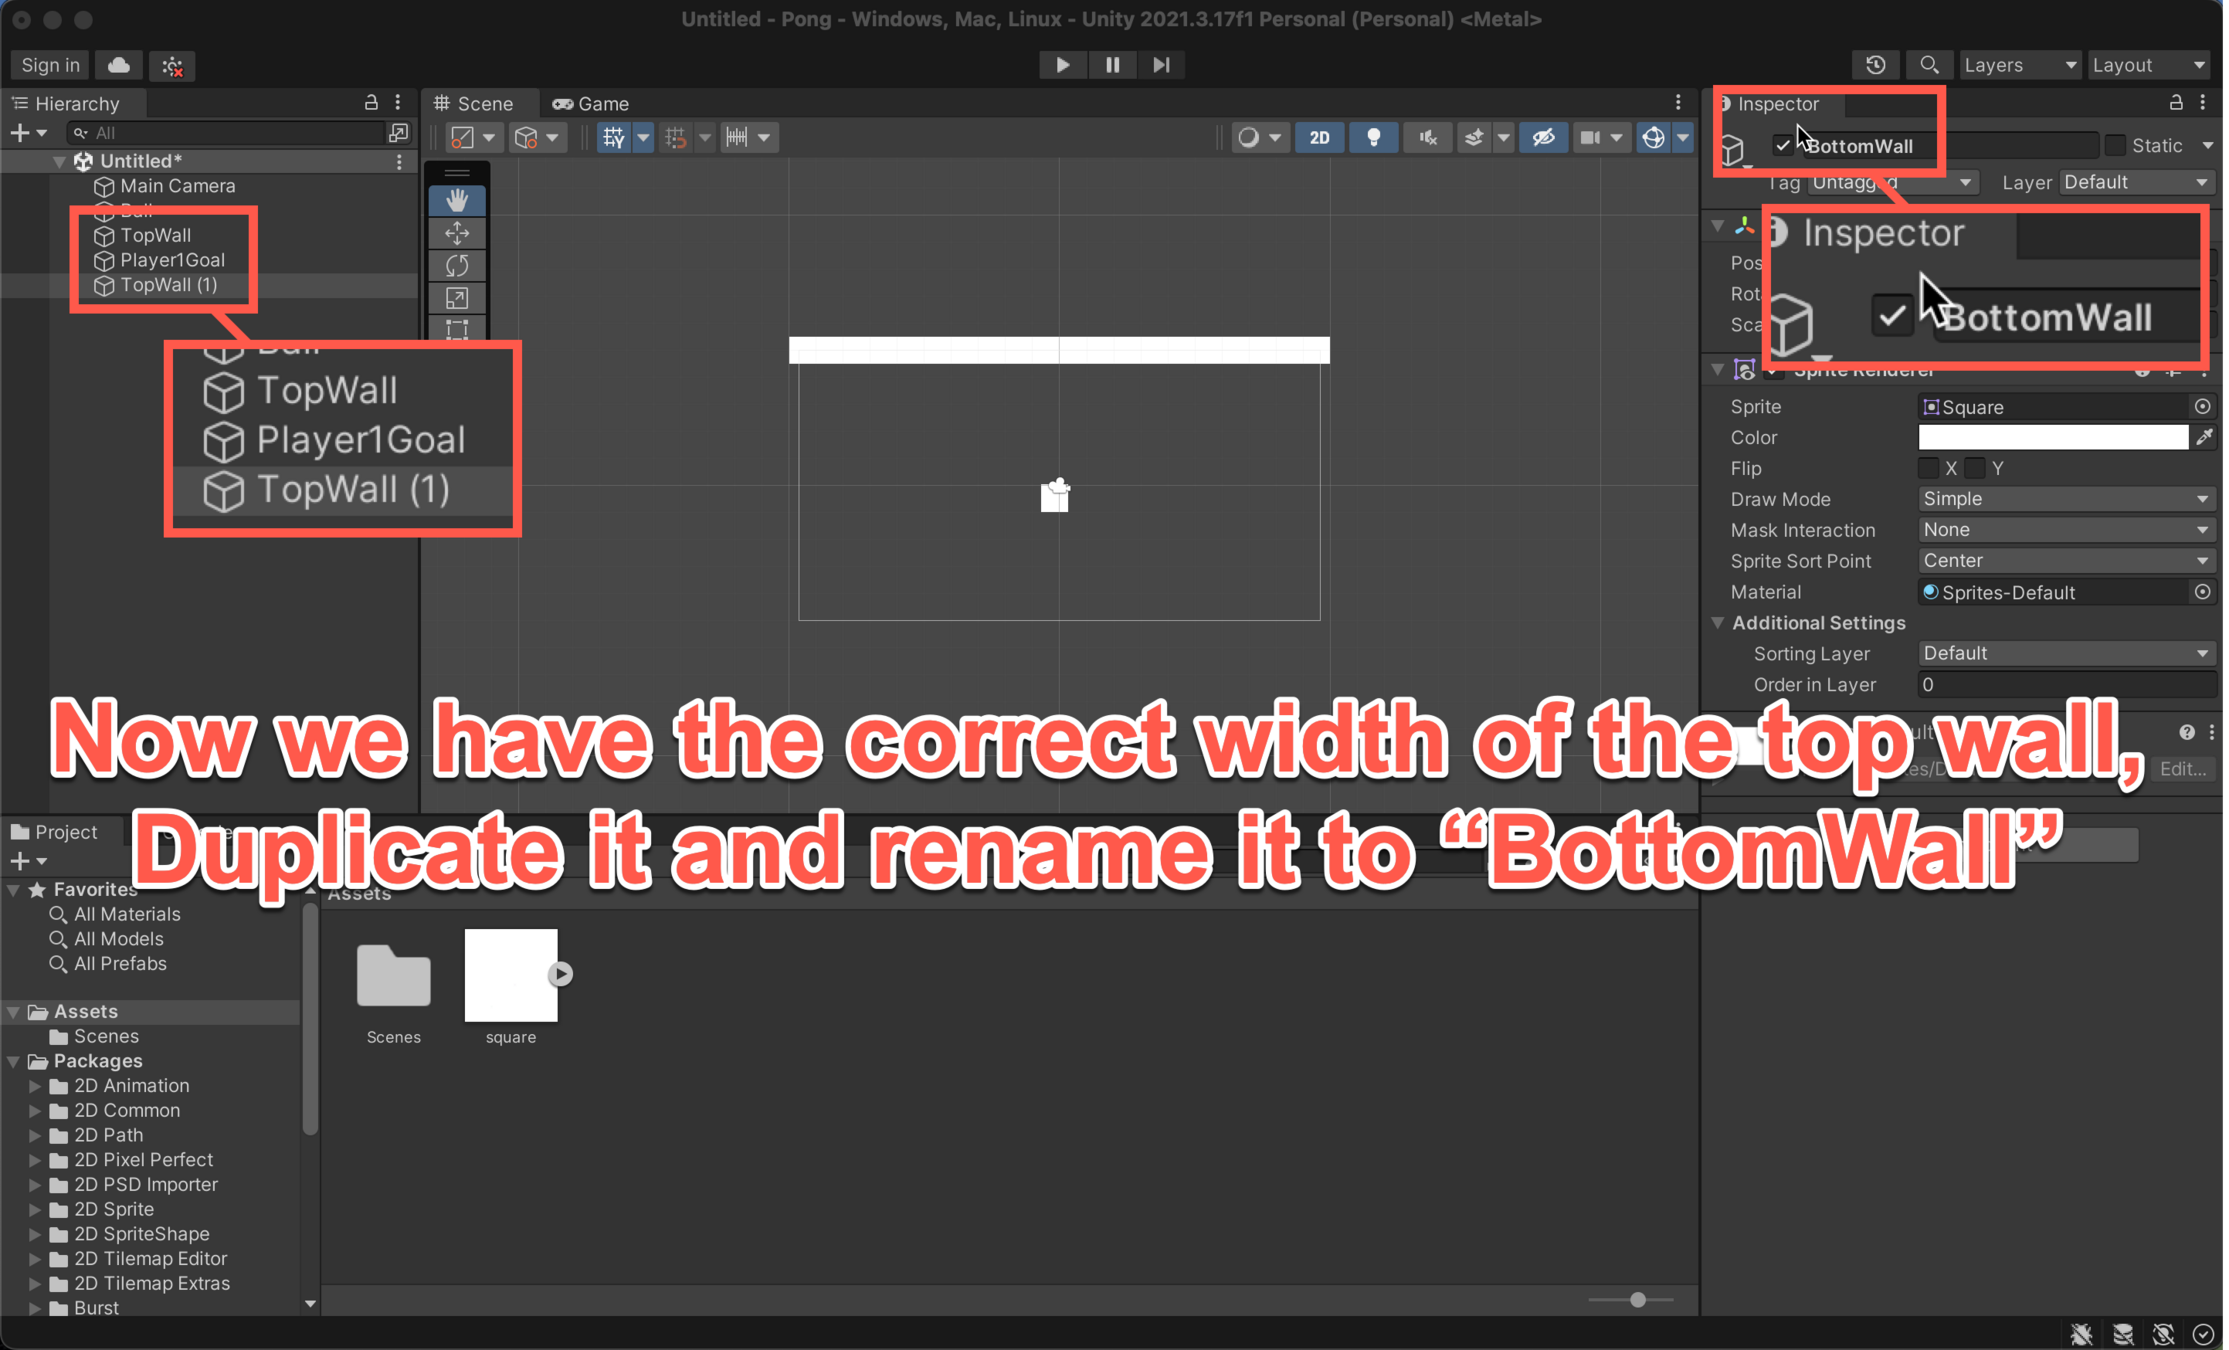
Setting the Boundaries and Goals
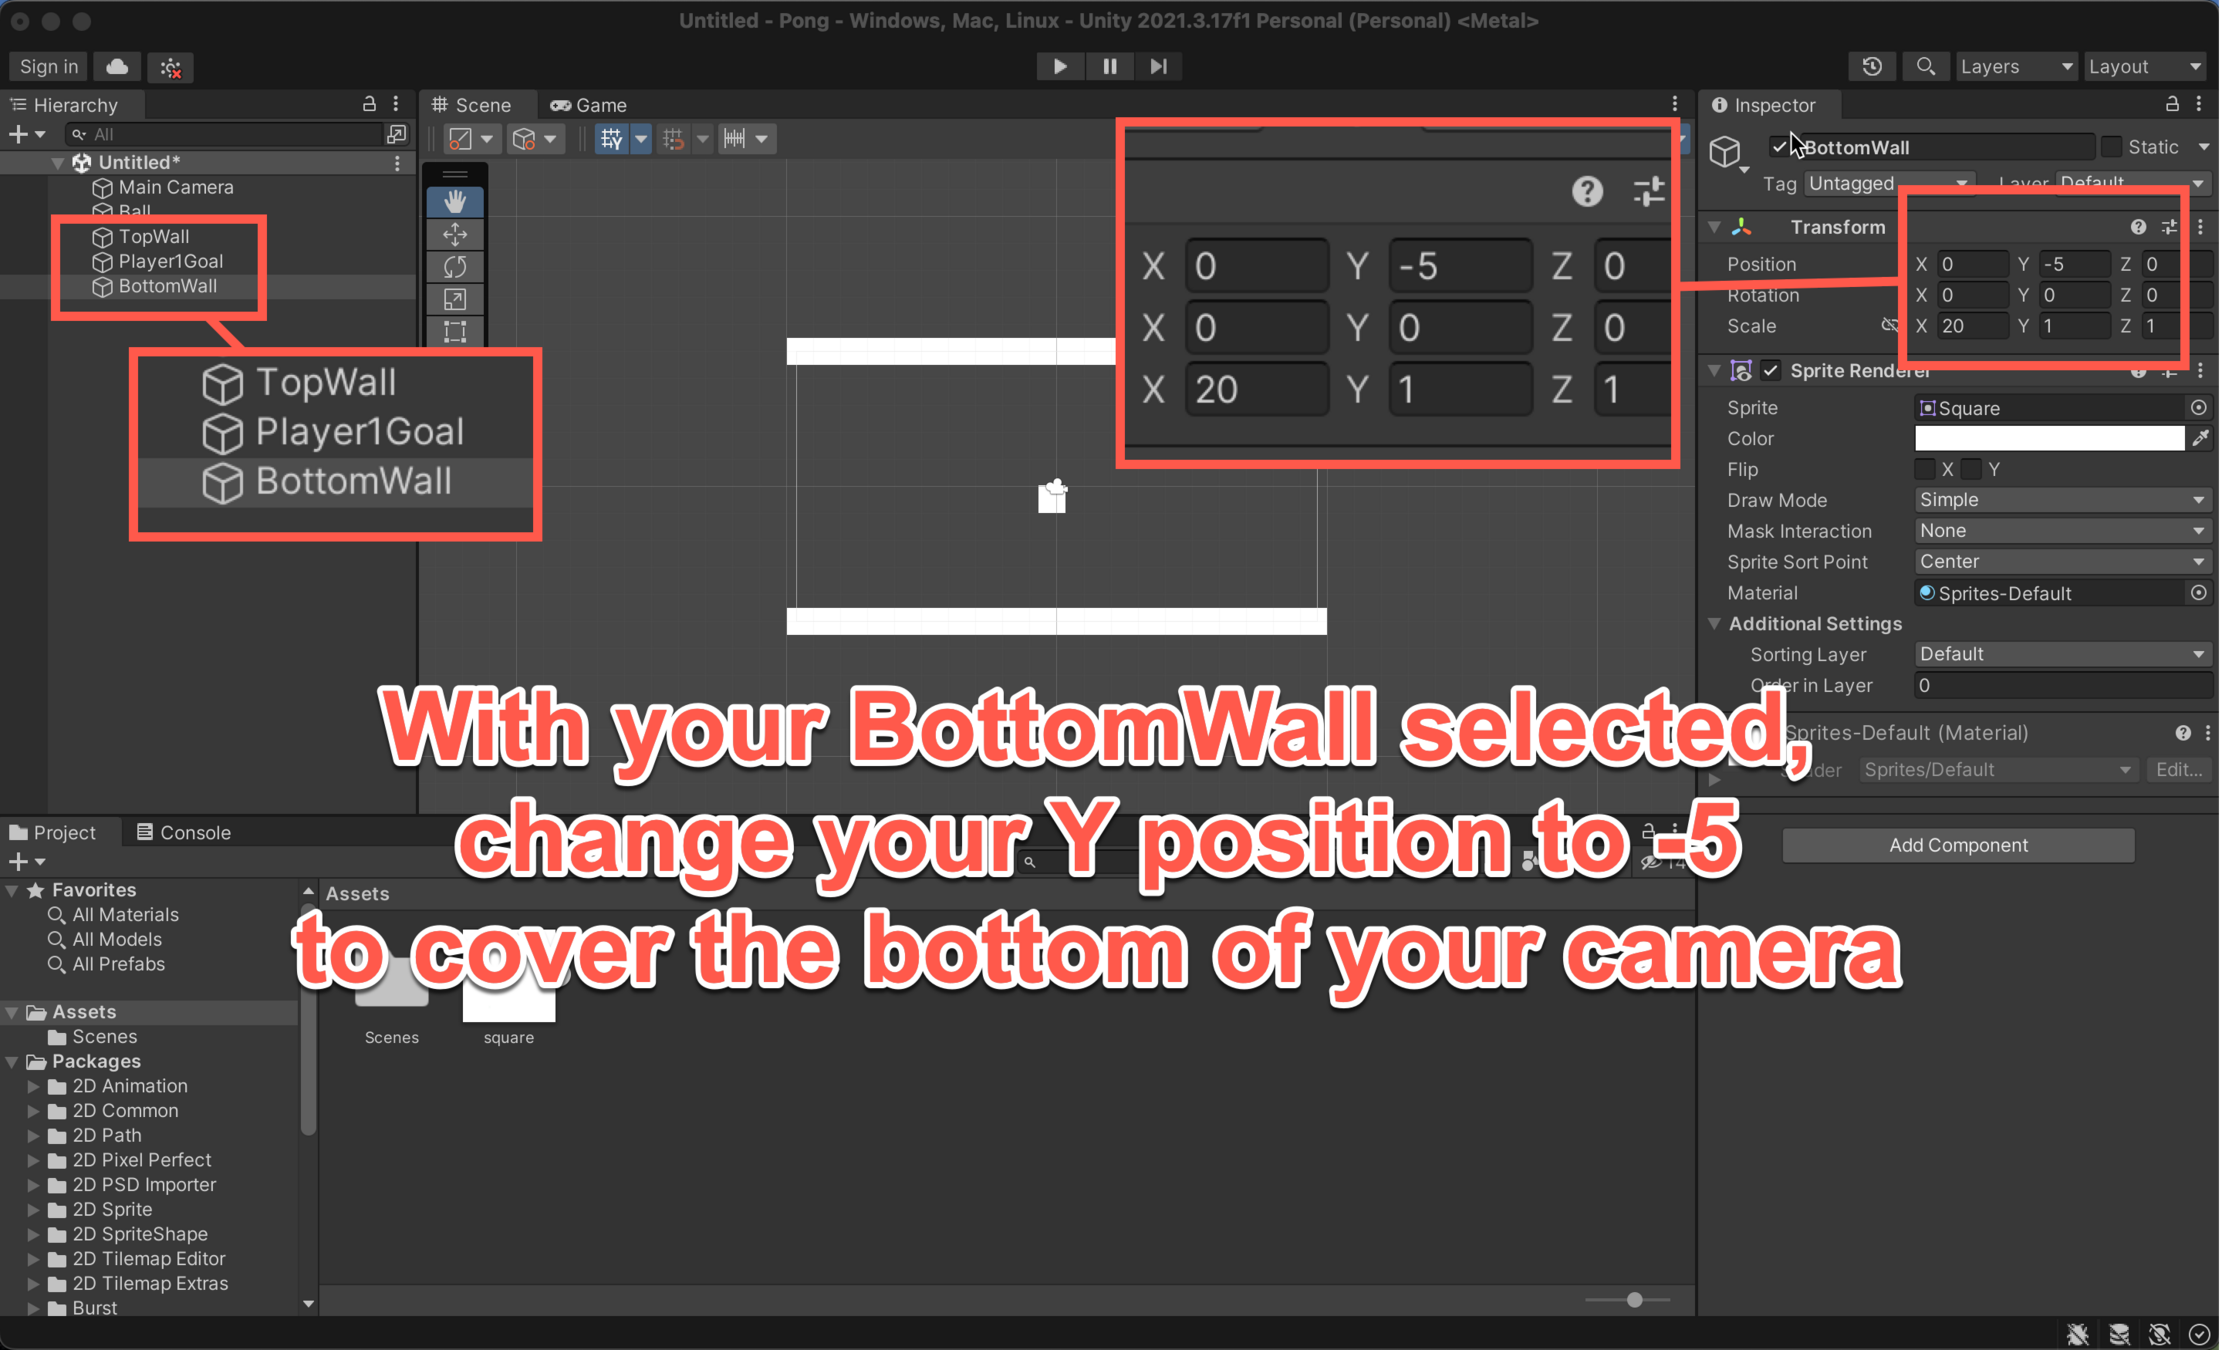
Setting the Boundaries and Goals
Our Player1Goal needs to be outside of the camera and cover the height of the camera.
(On the next slide)
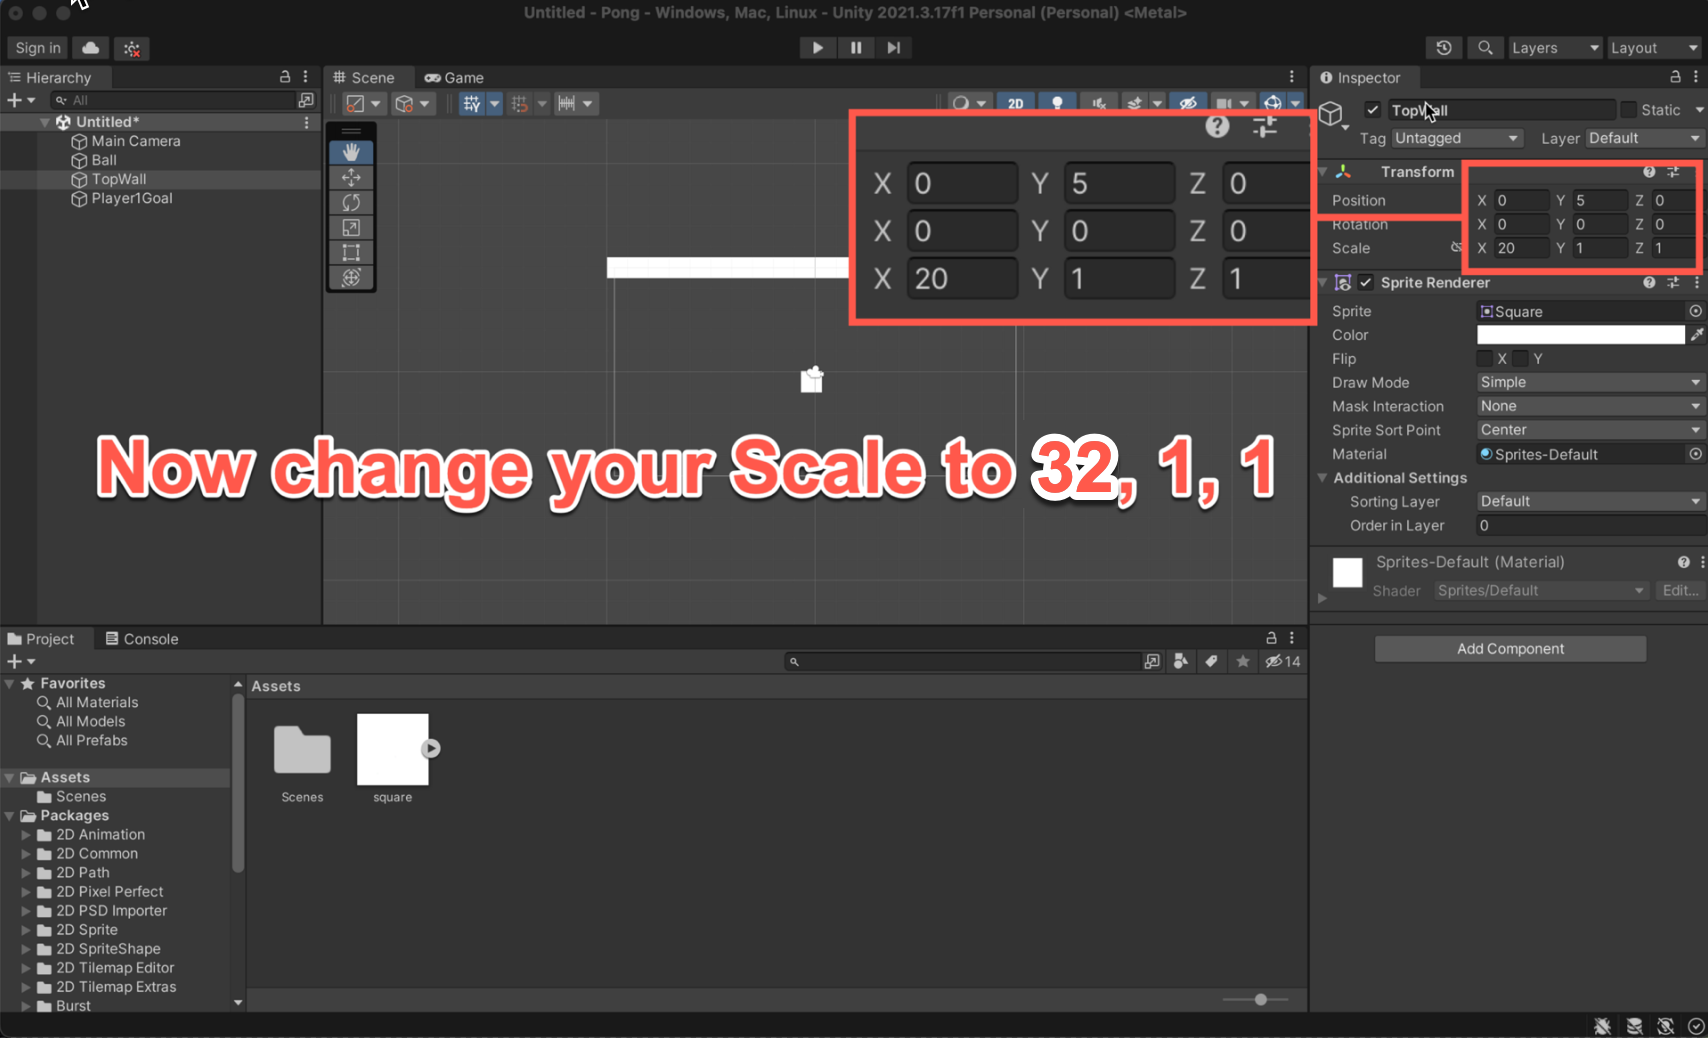
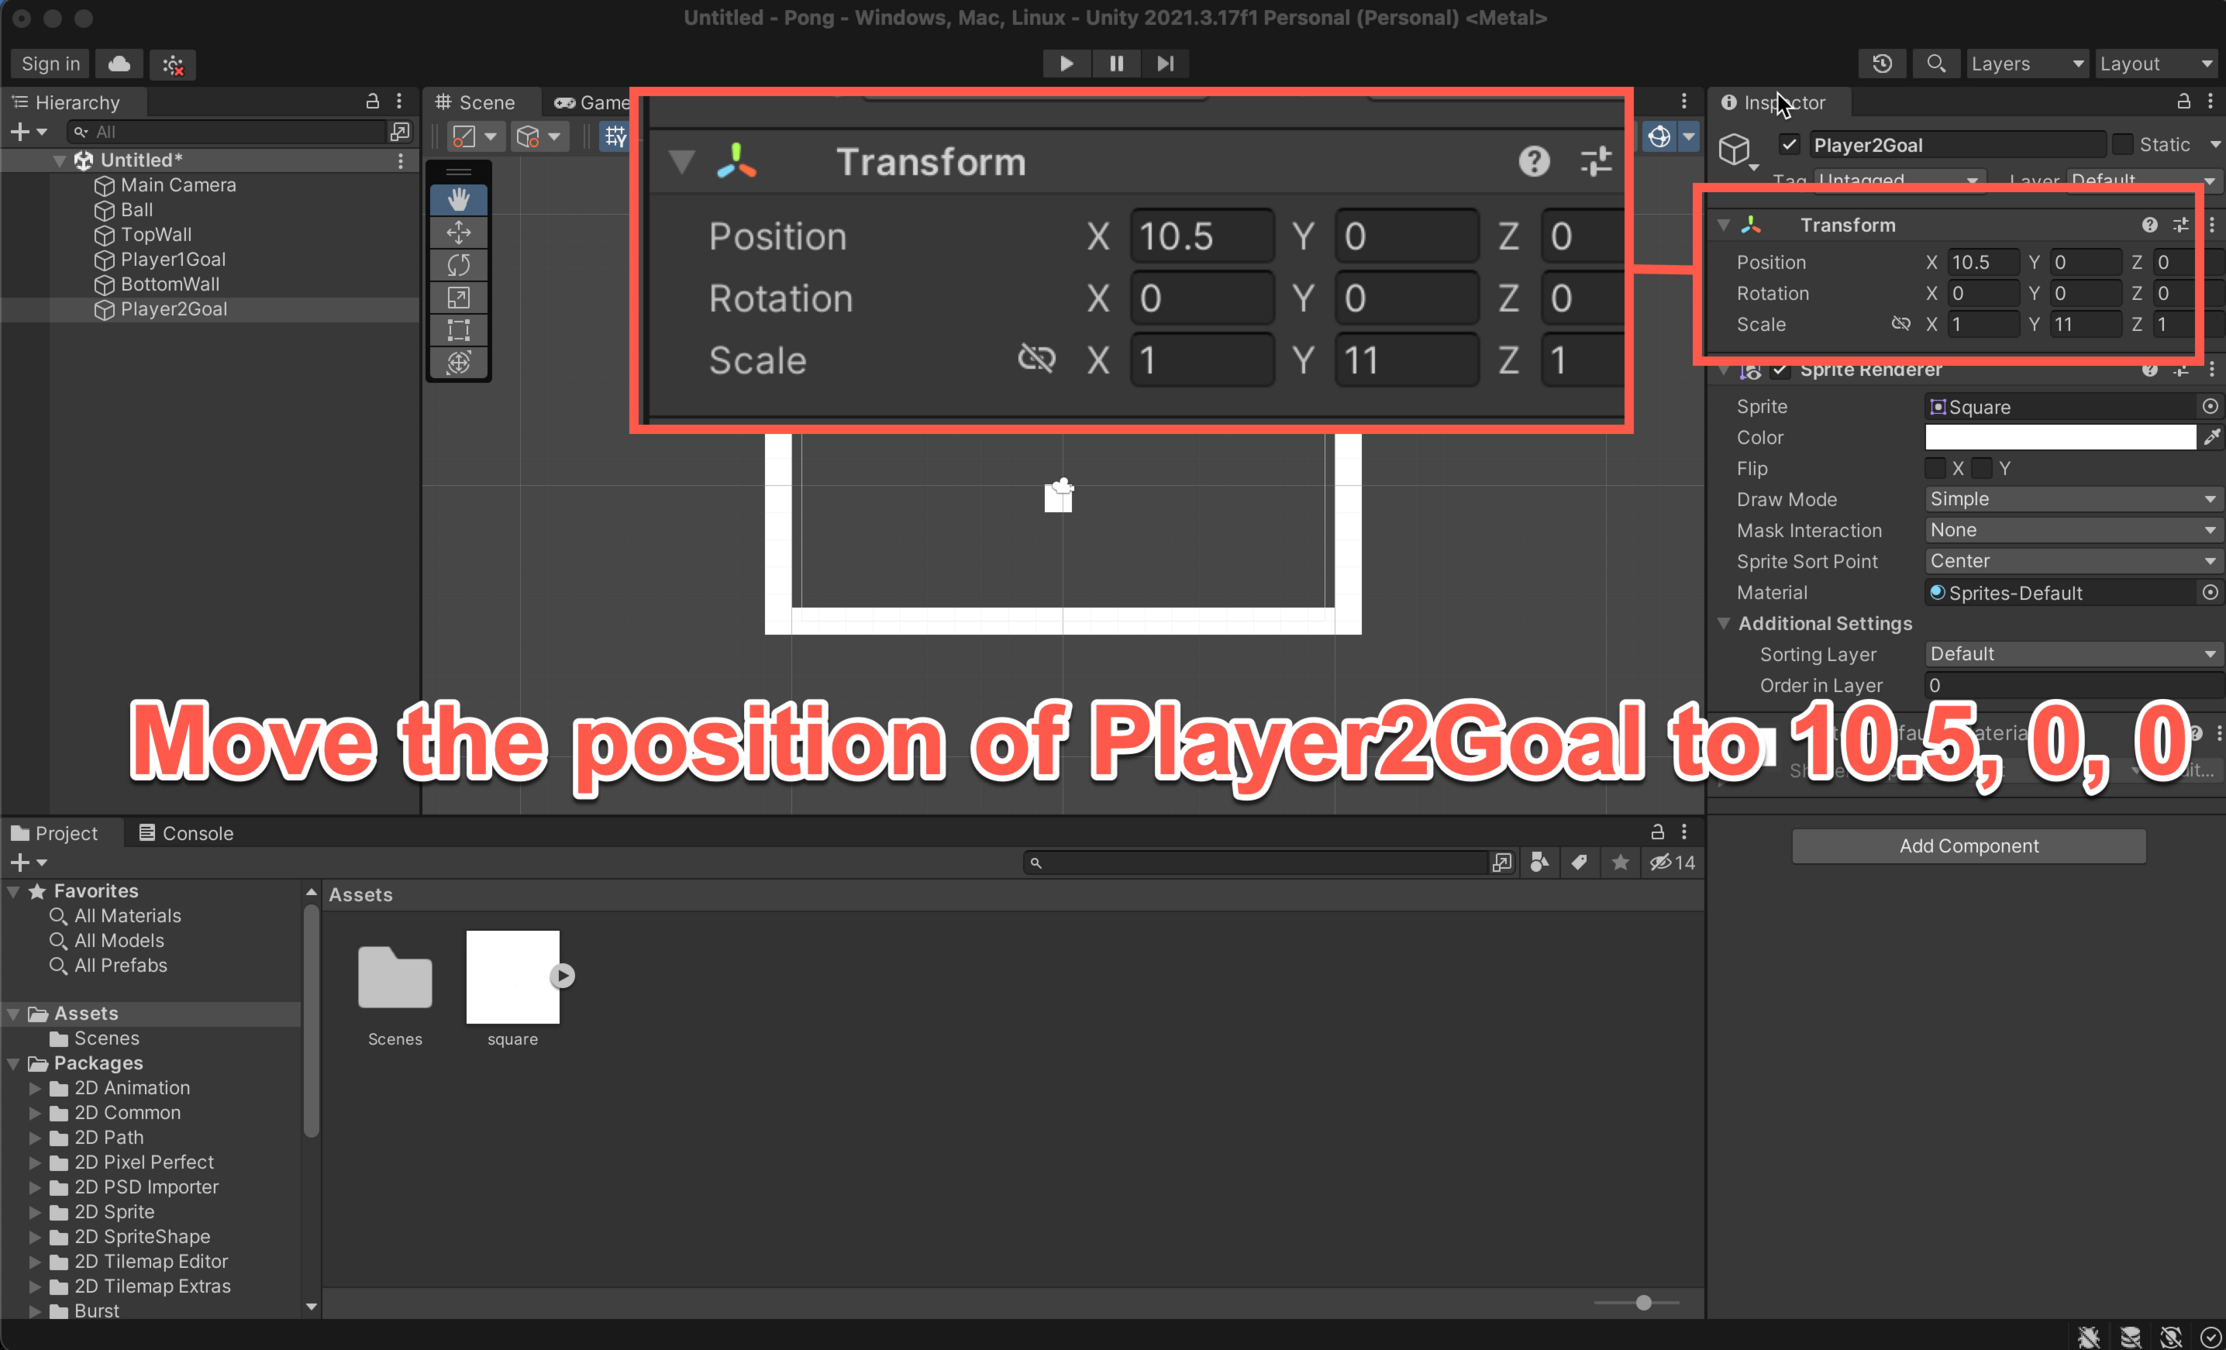
Setting the Boundaries and Goals
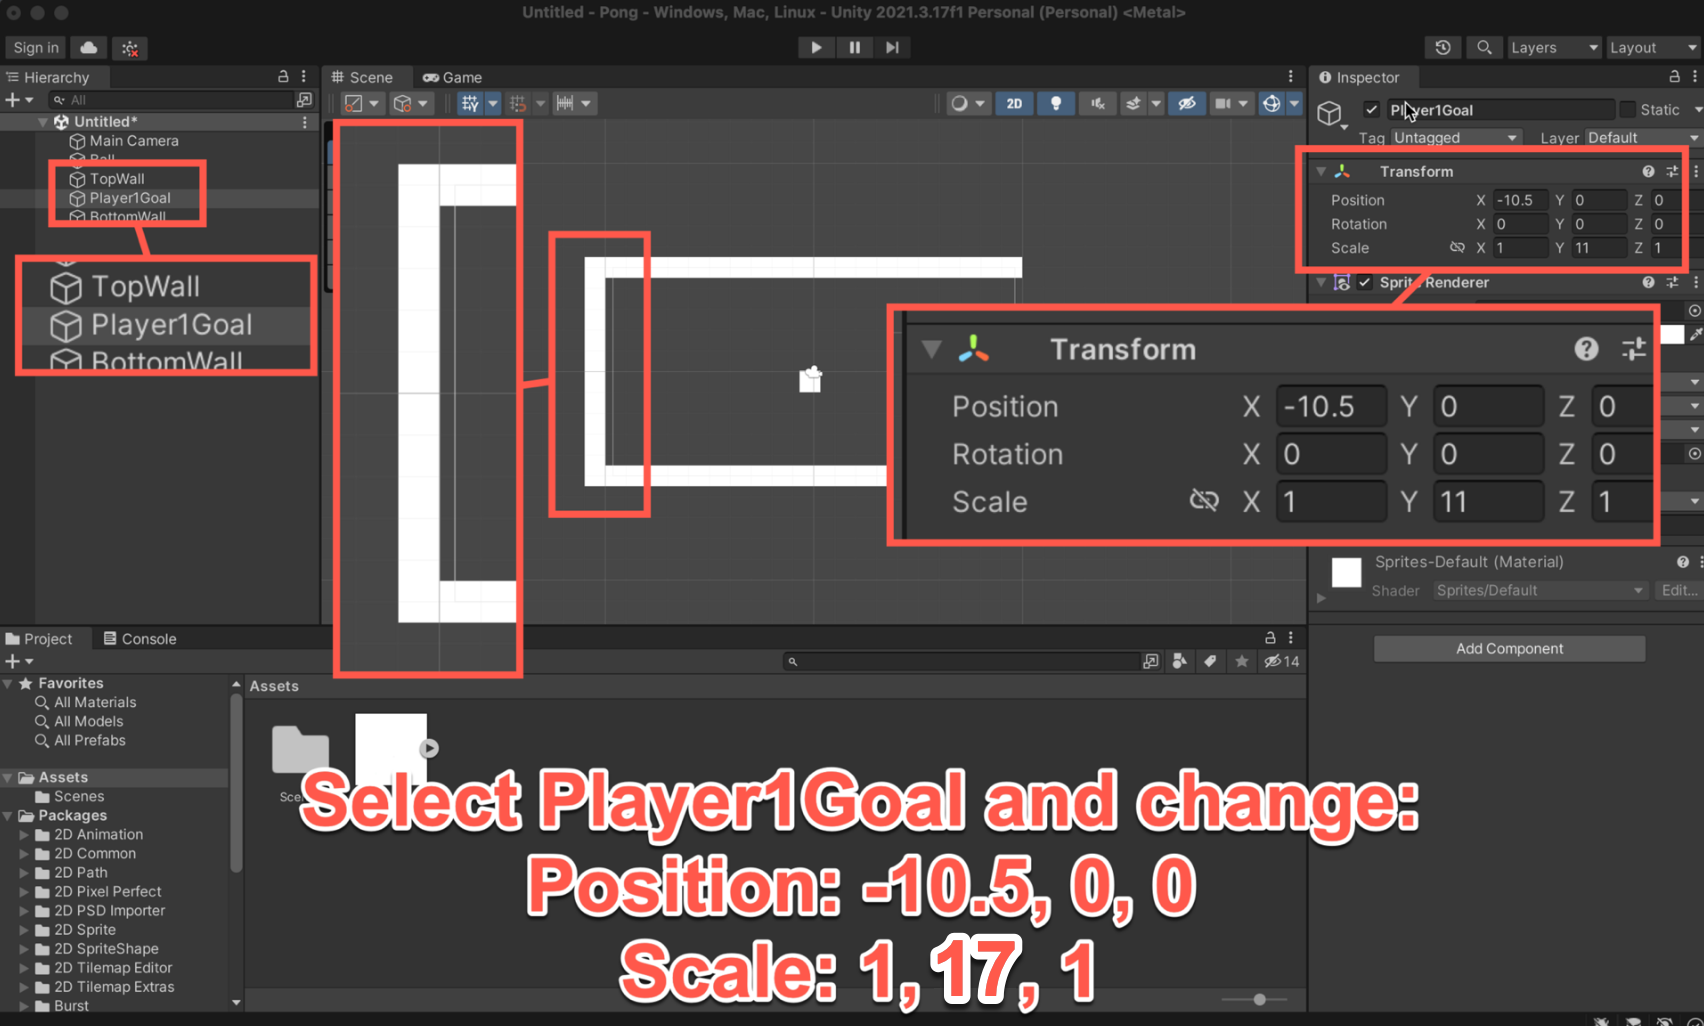
Setting the Boundaries and Goals
Setting the Boundaries and Goals
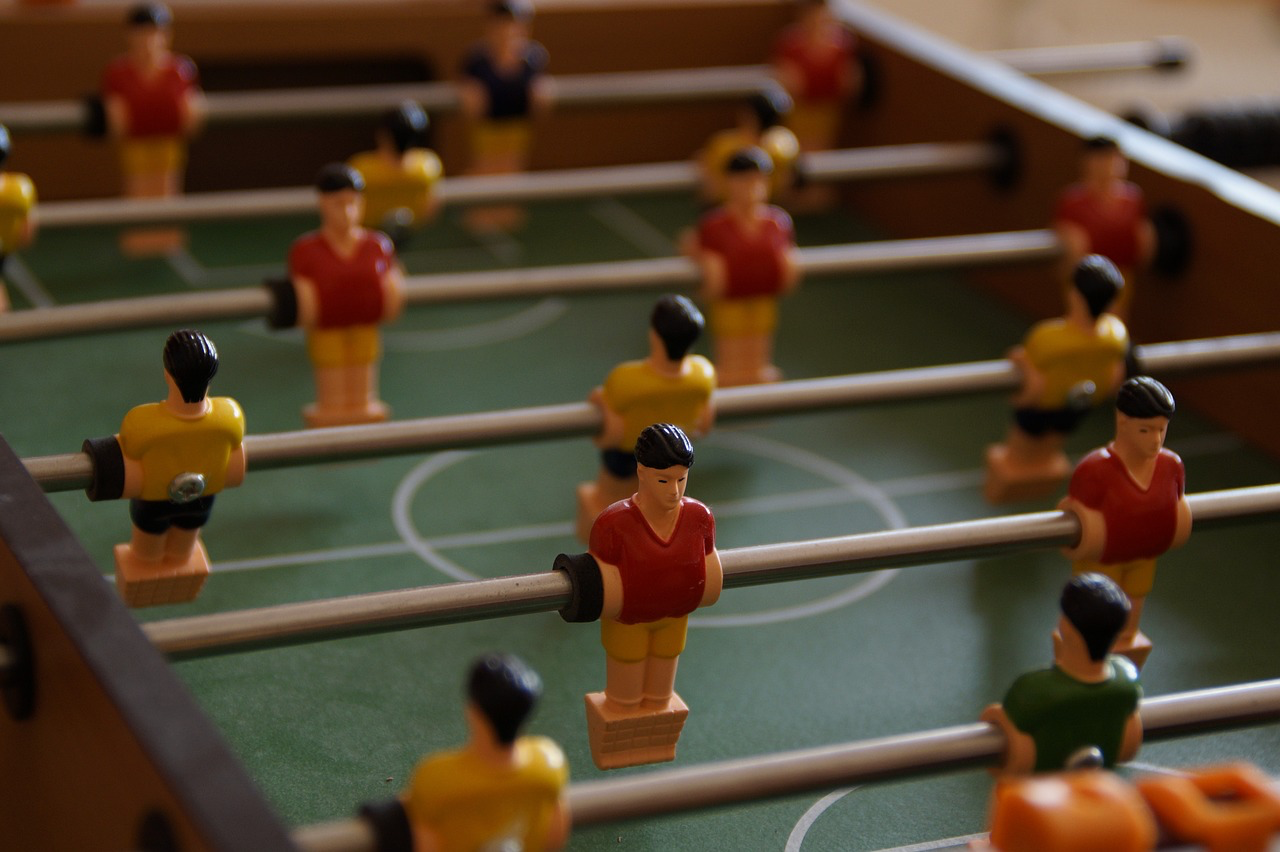
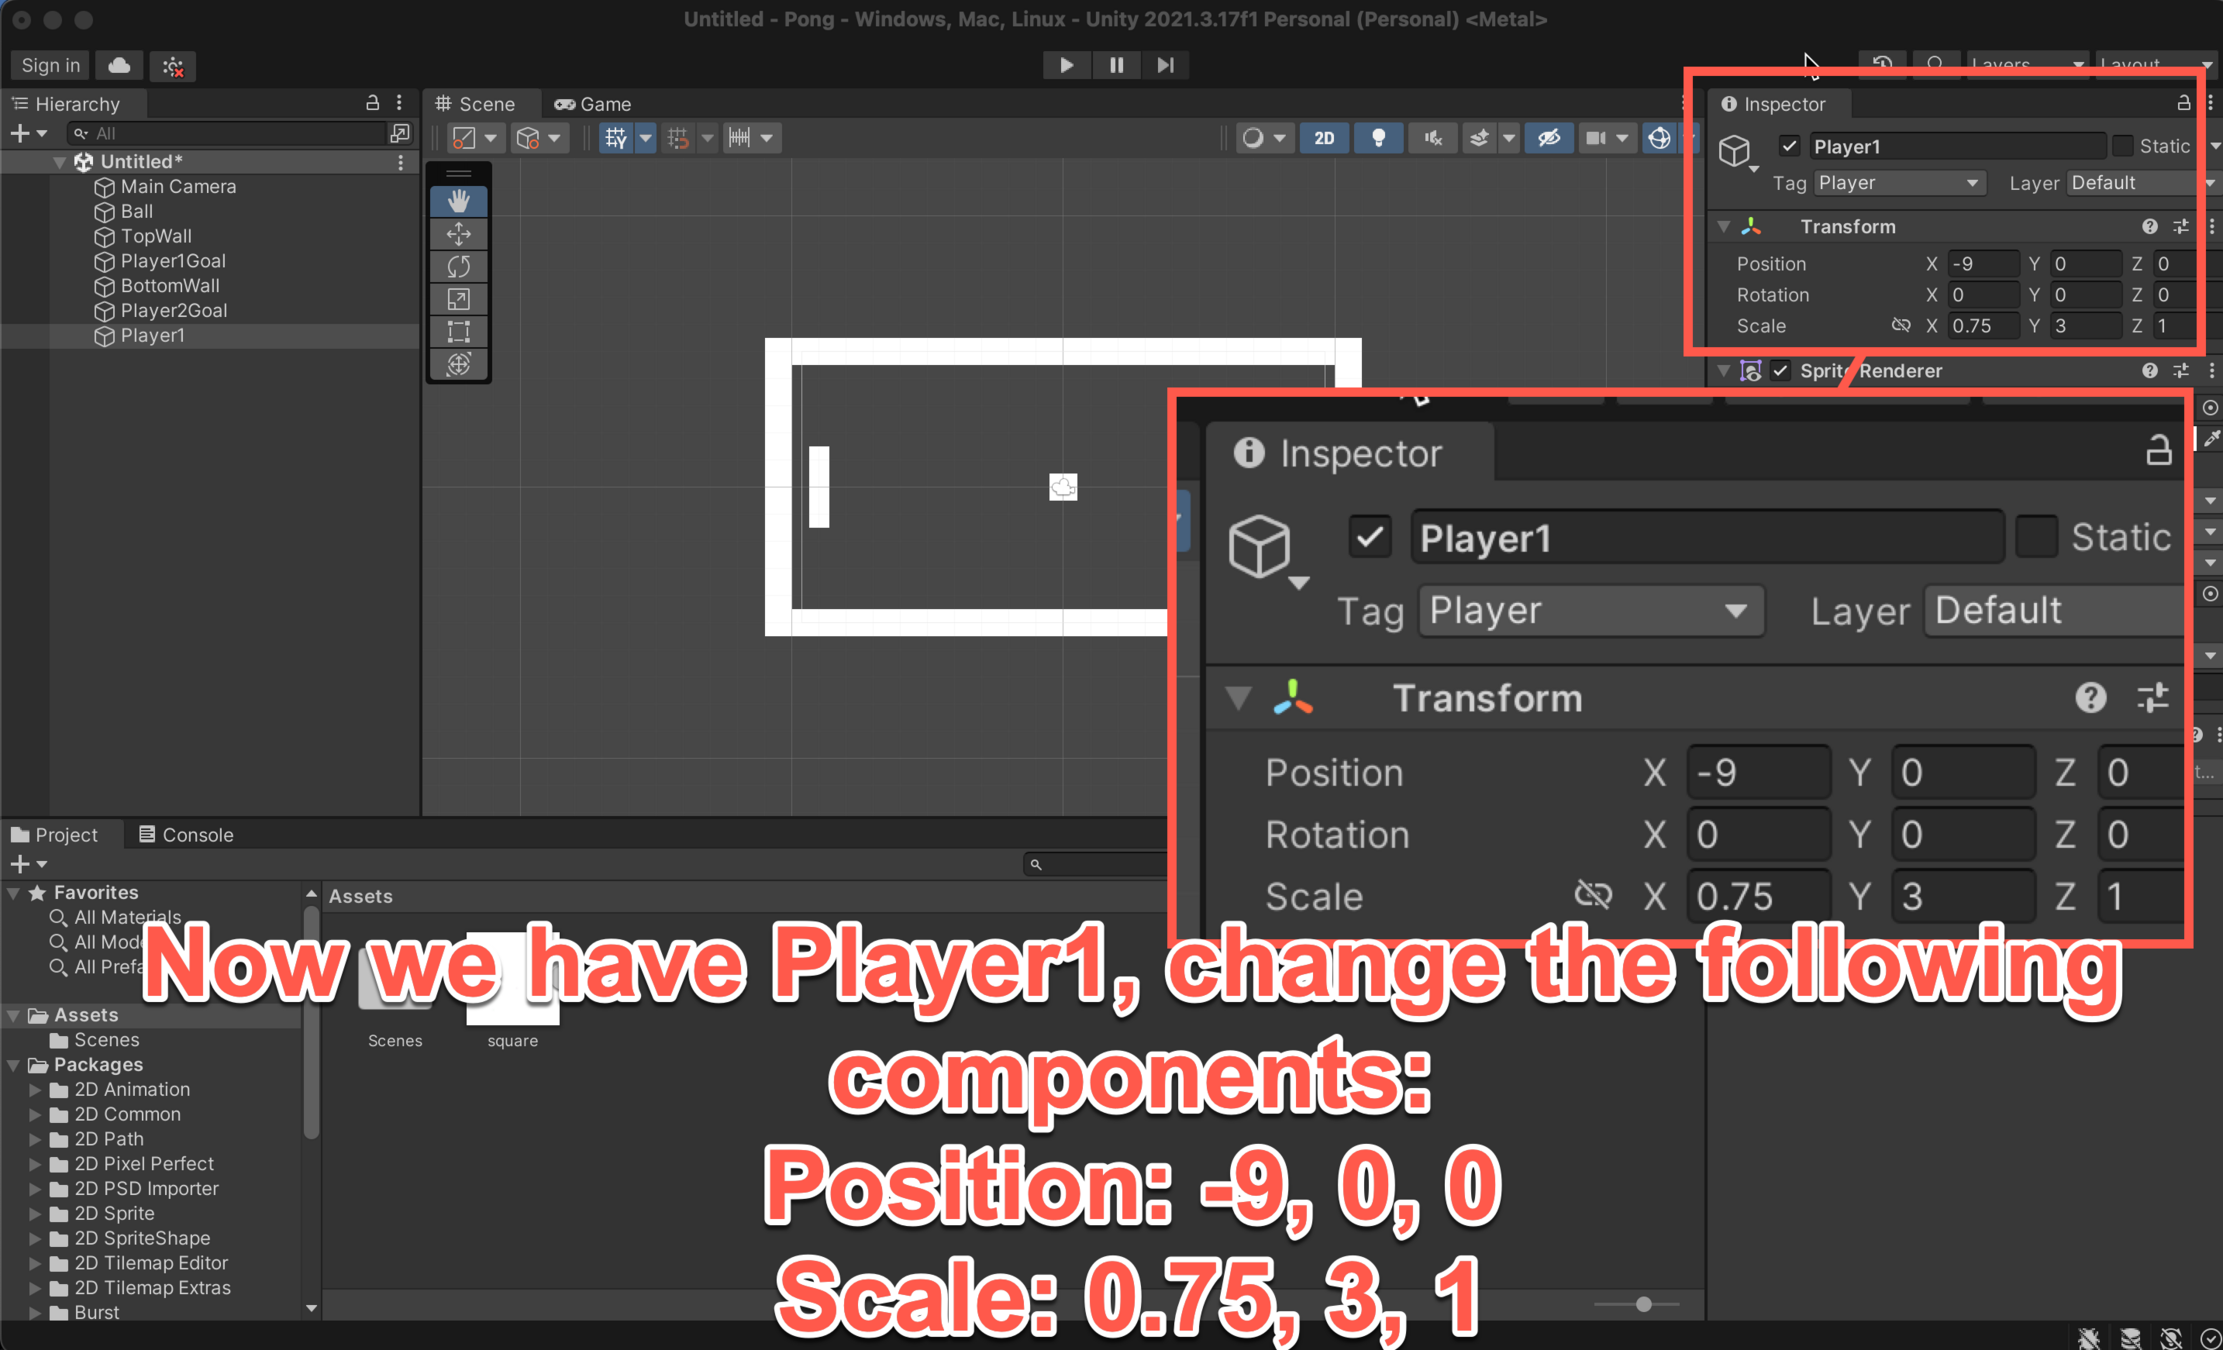
Creating the Players
Now that we have the boarders of the game, we need some players to control.
Creating the Players
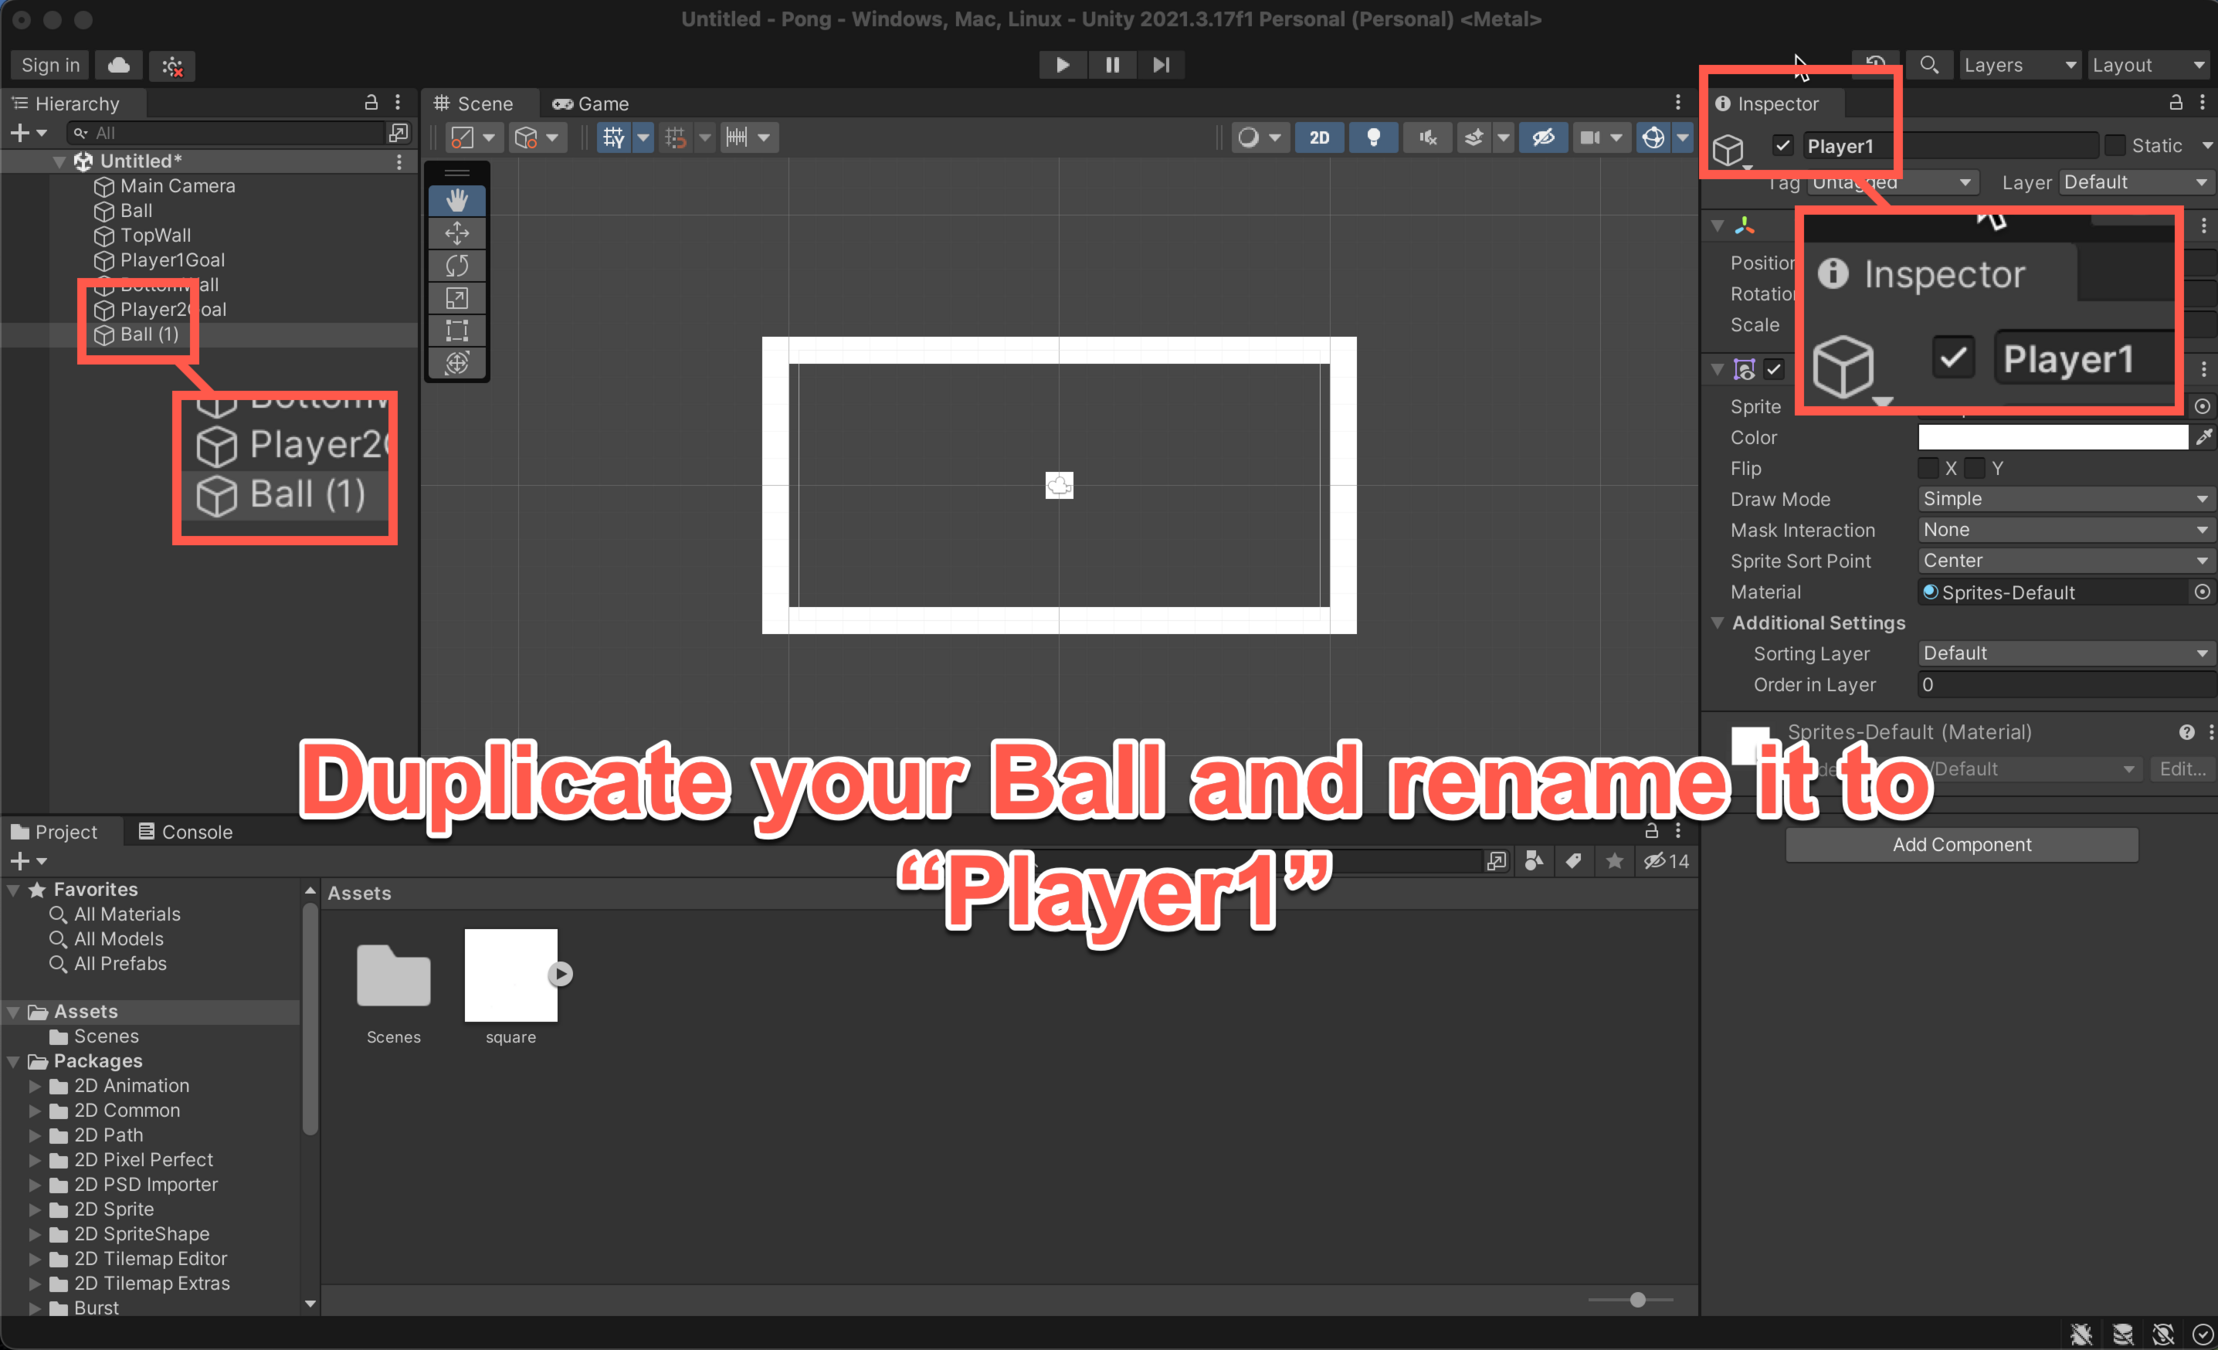
Creating the Players
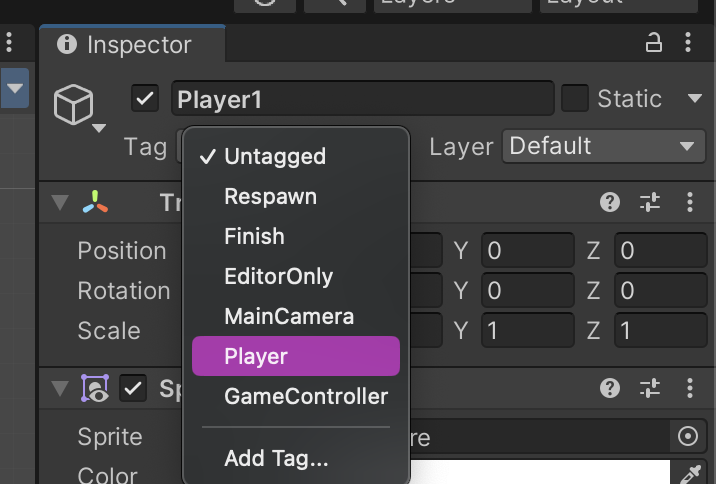
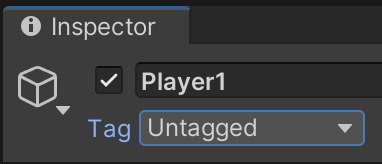
Change the Tag of your Player1 to Player.
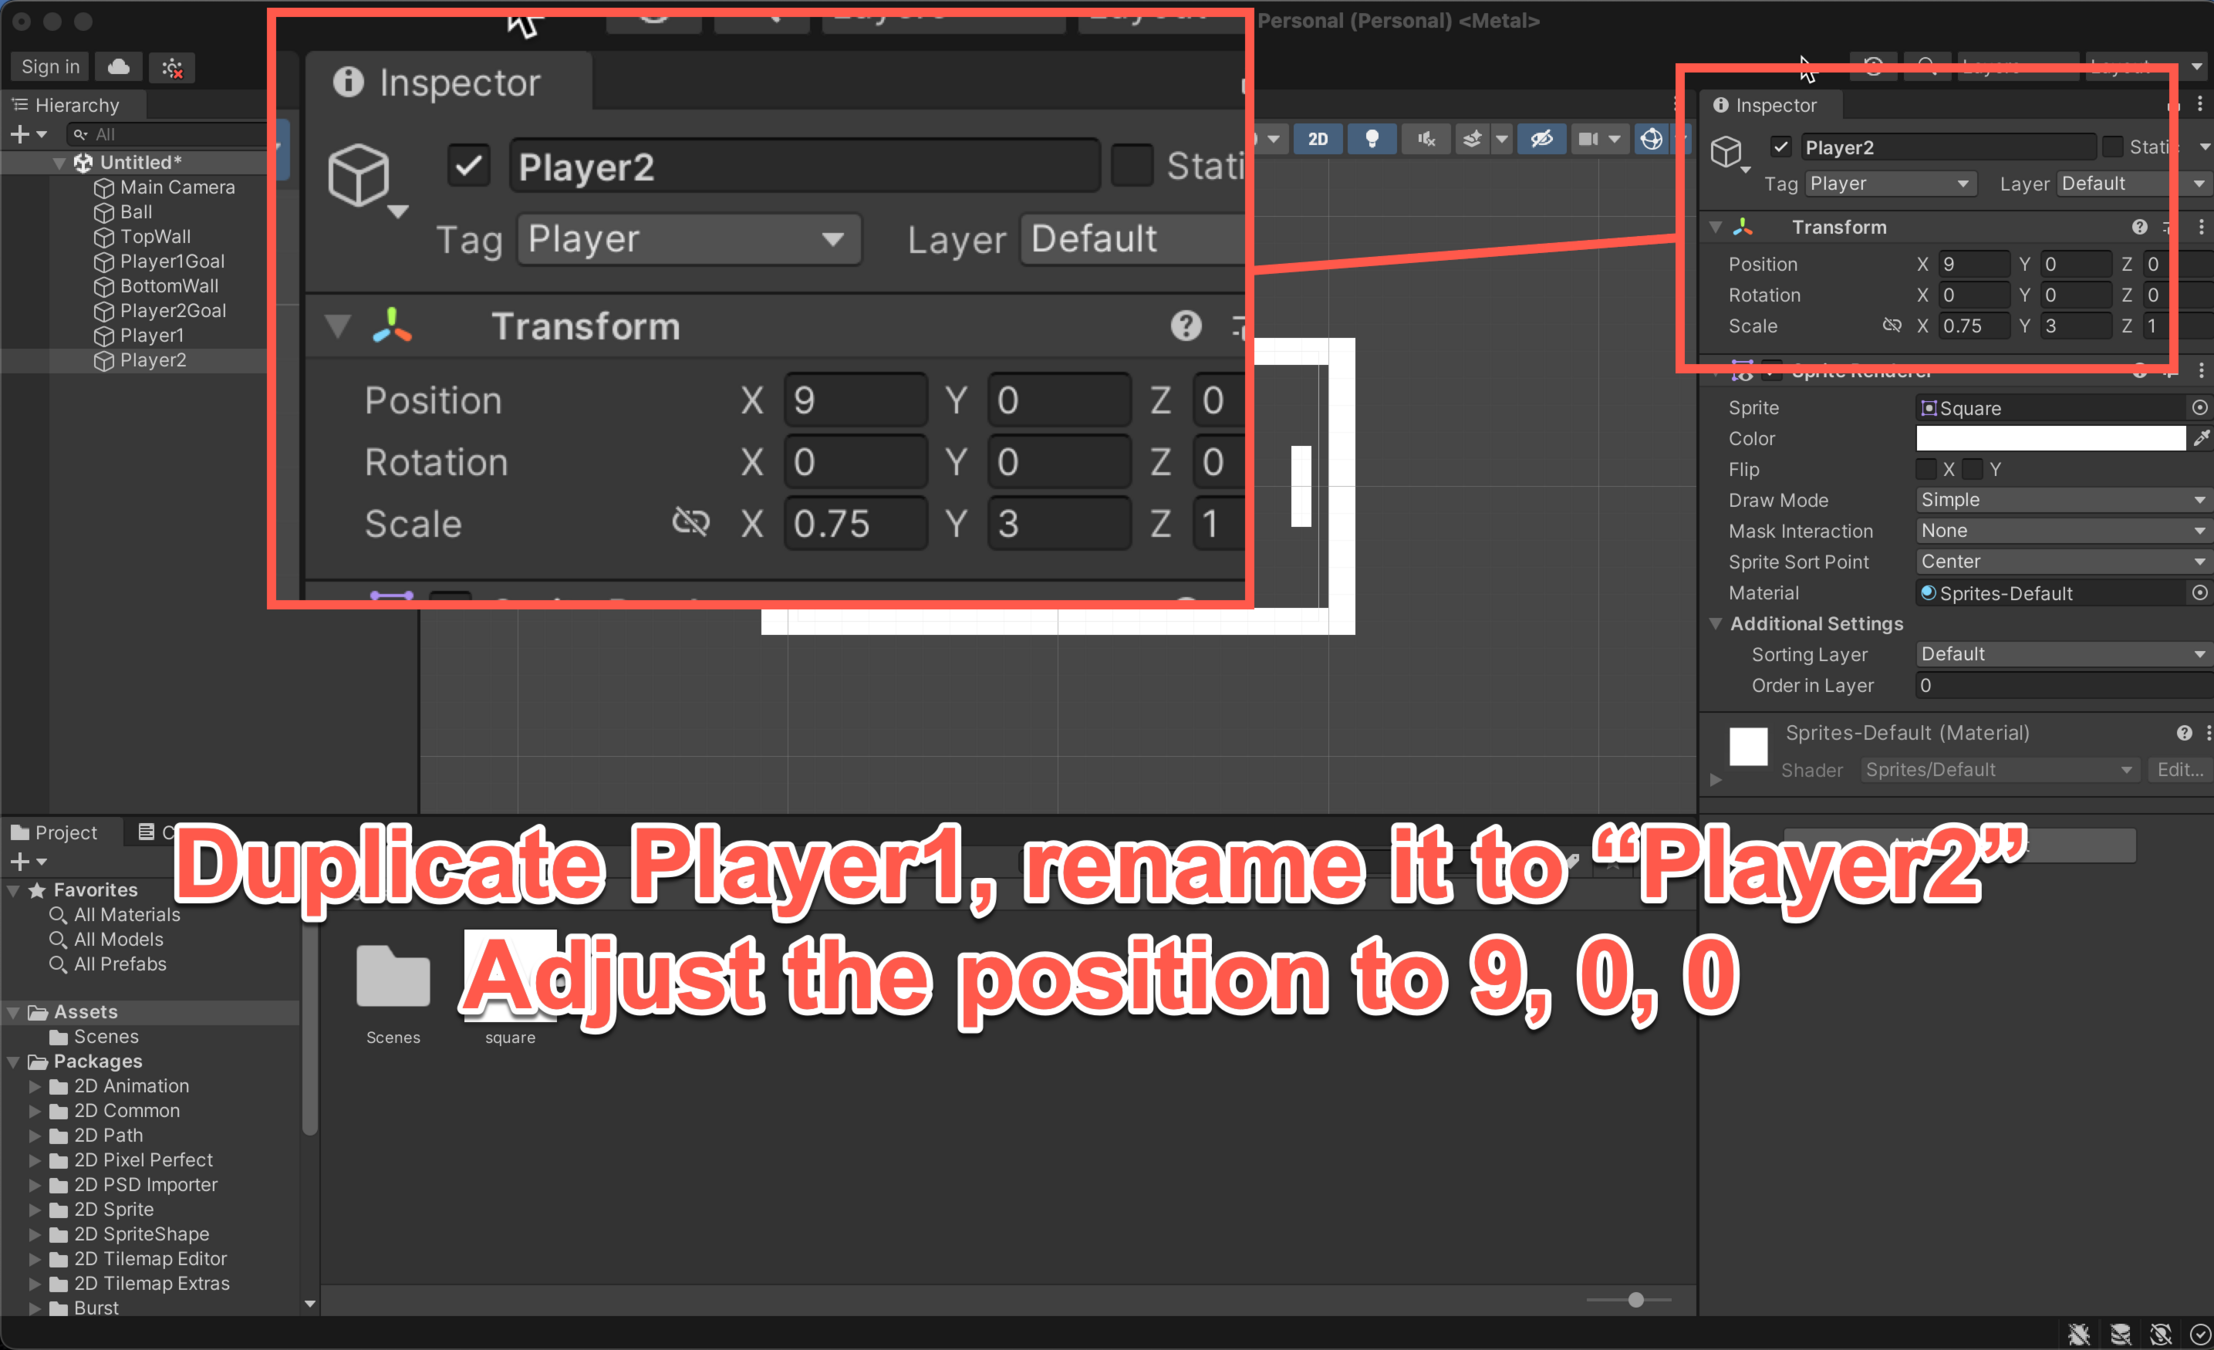
Creating the Players
Creating the Players
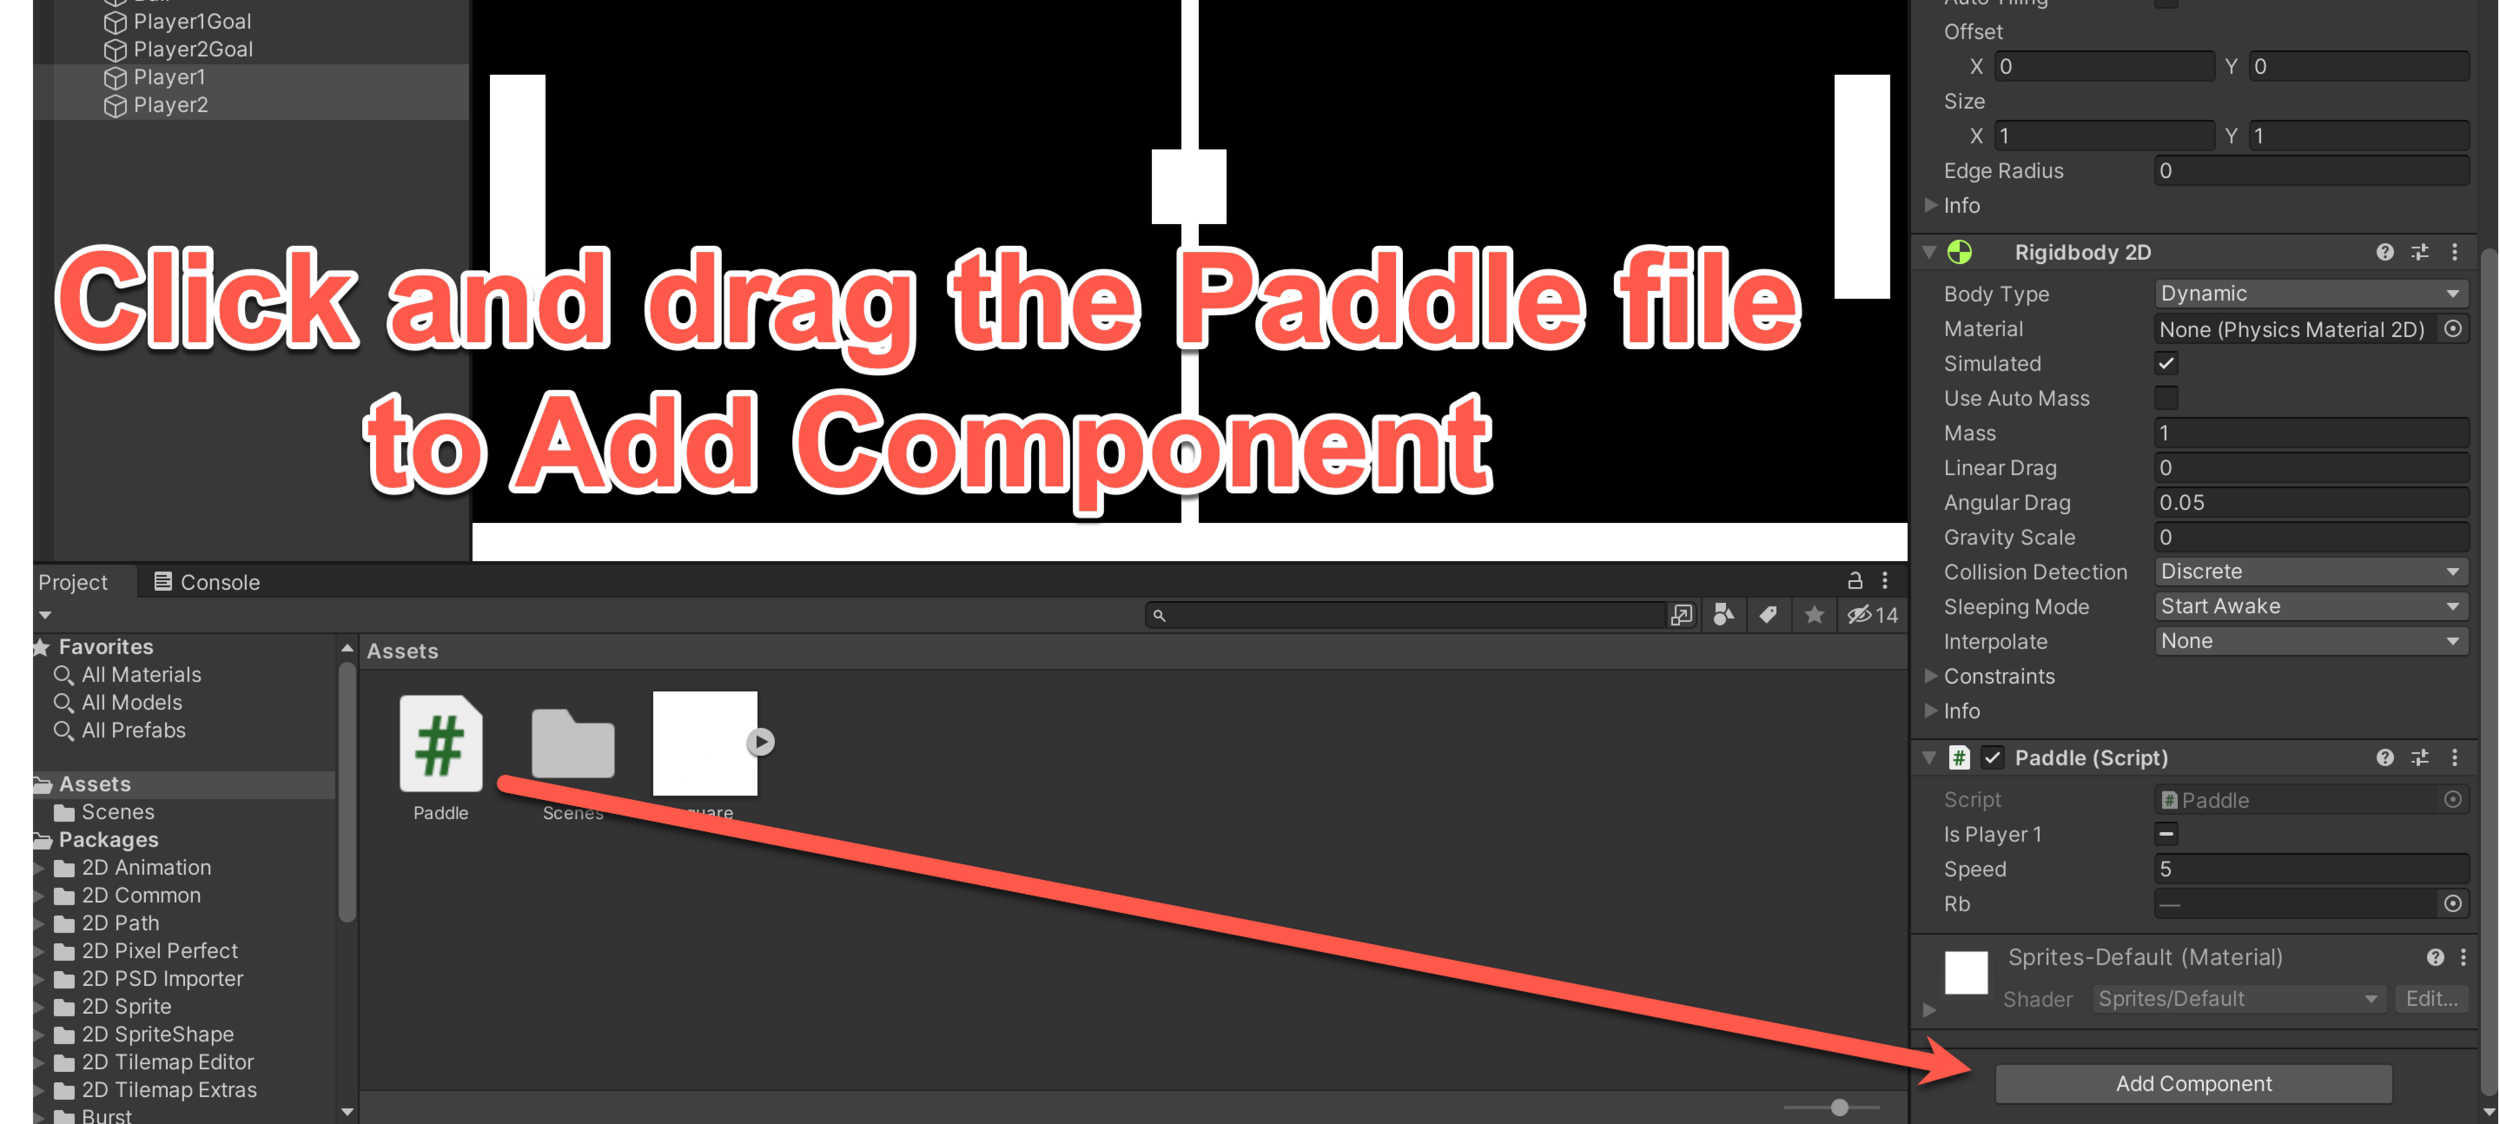
Adding Components
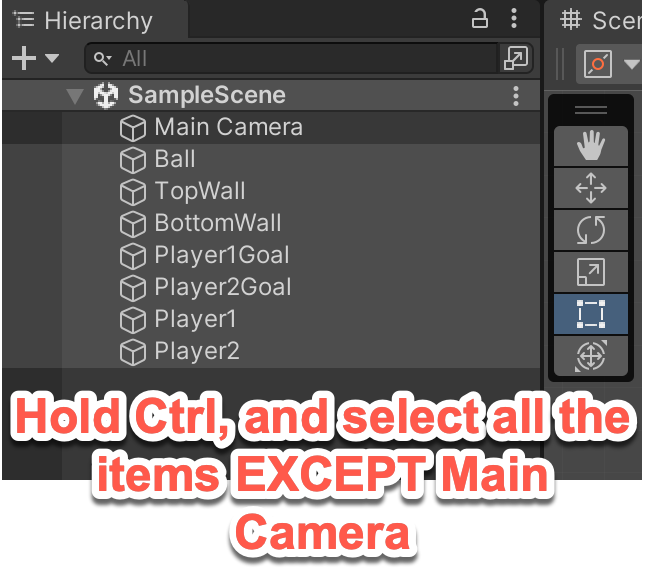
Adding Components
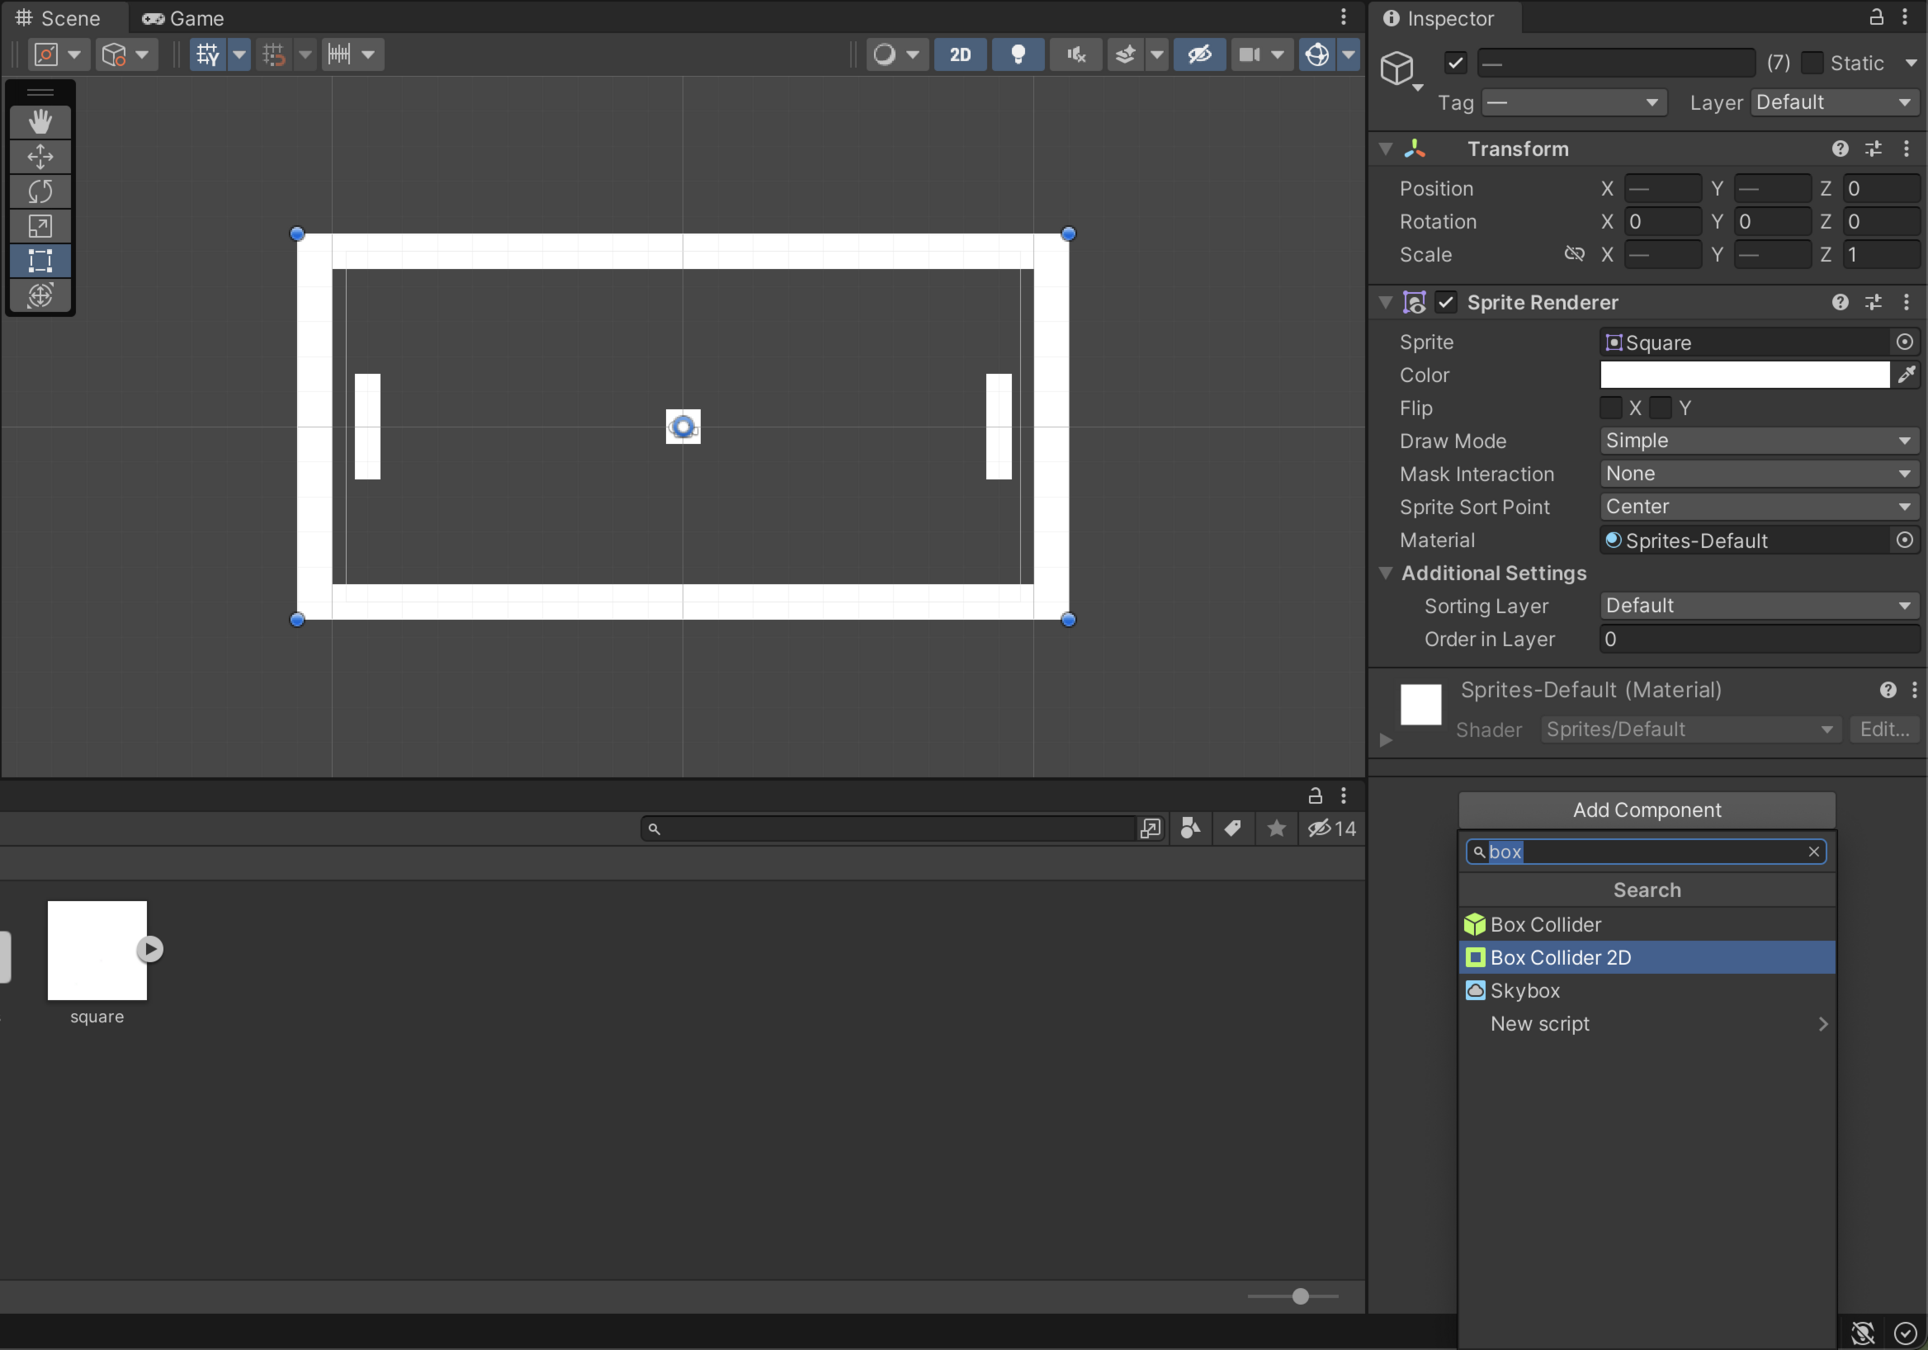
With all objects selected, click on add component in the bottom right and type in Box Collider 2D
Adding Components
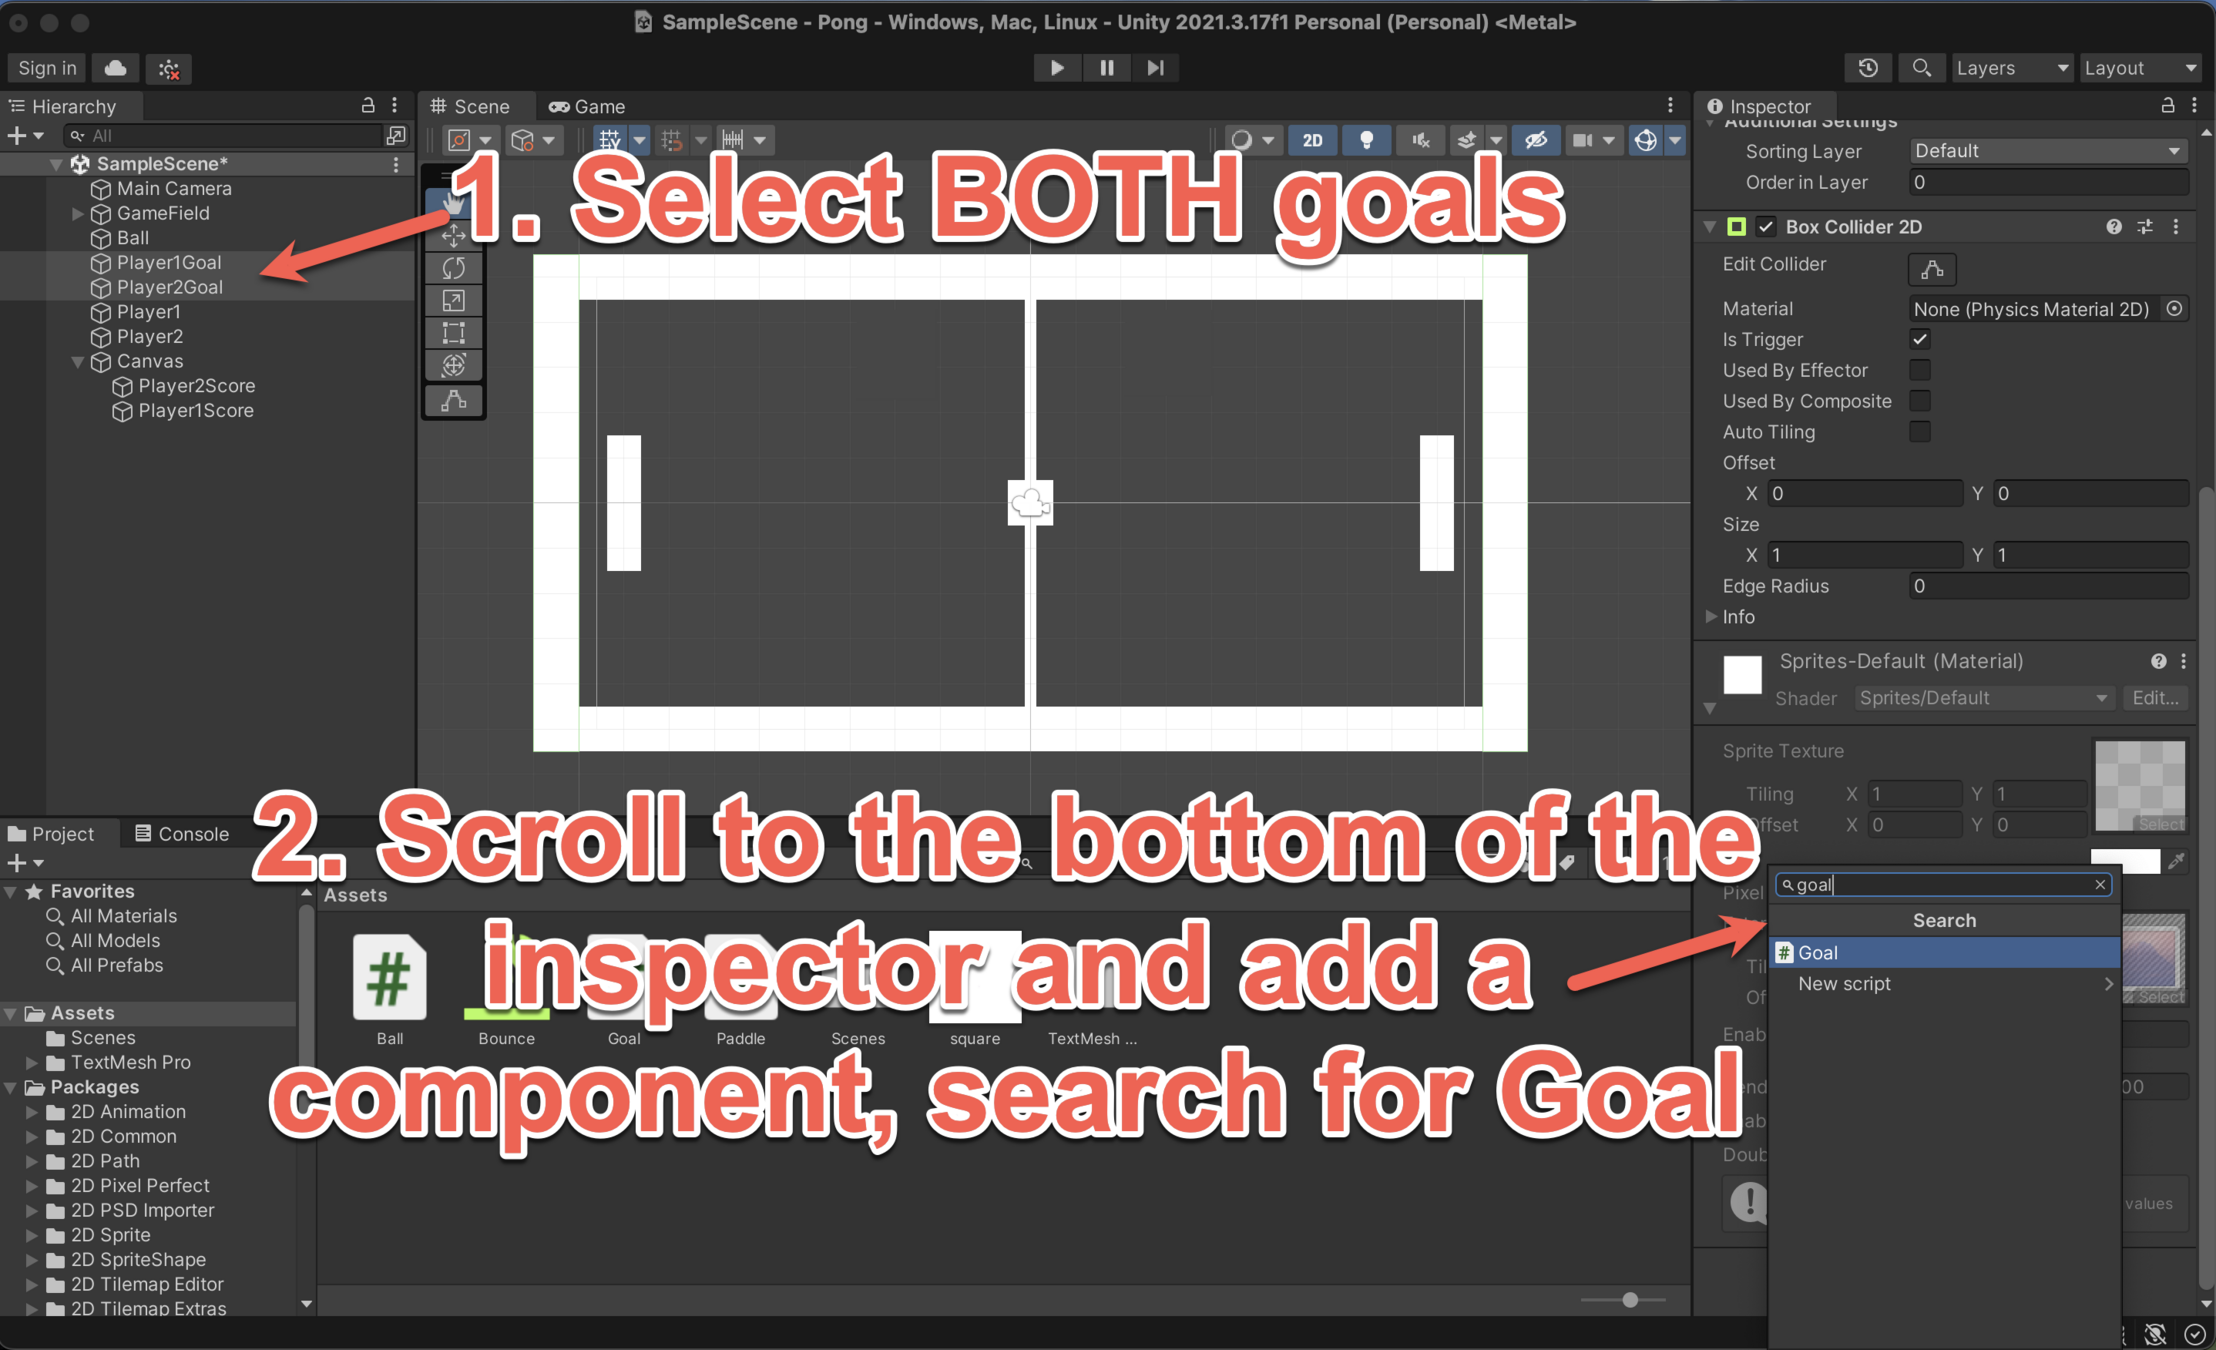
Changing this allows the score to change when the ball hits the goal
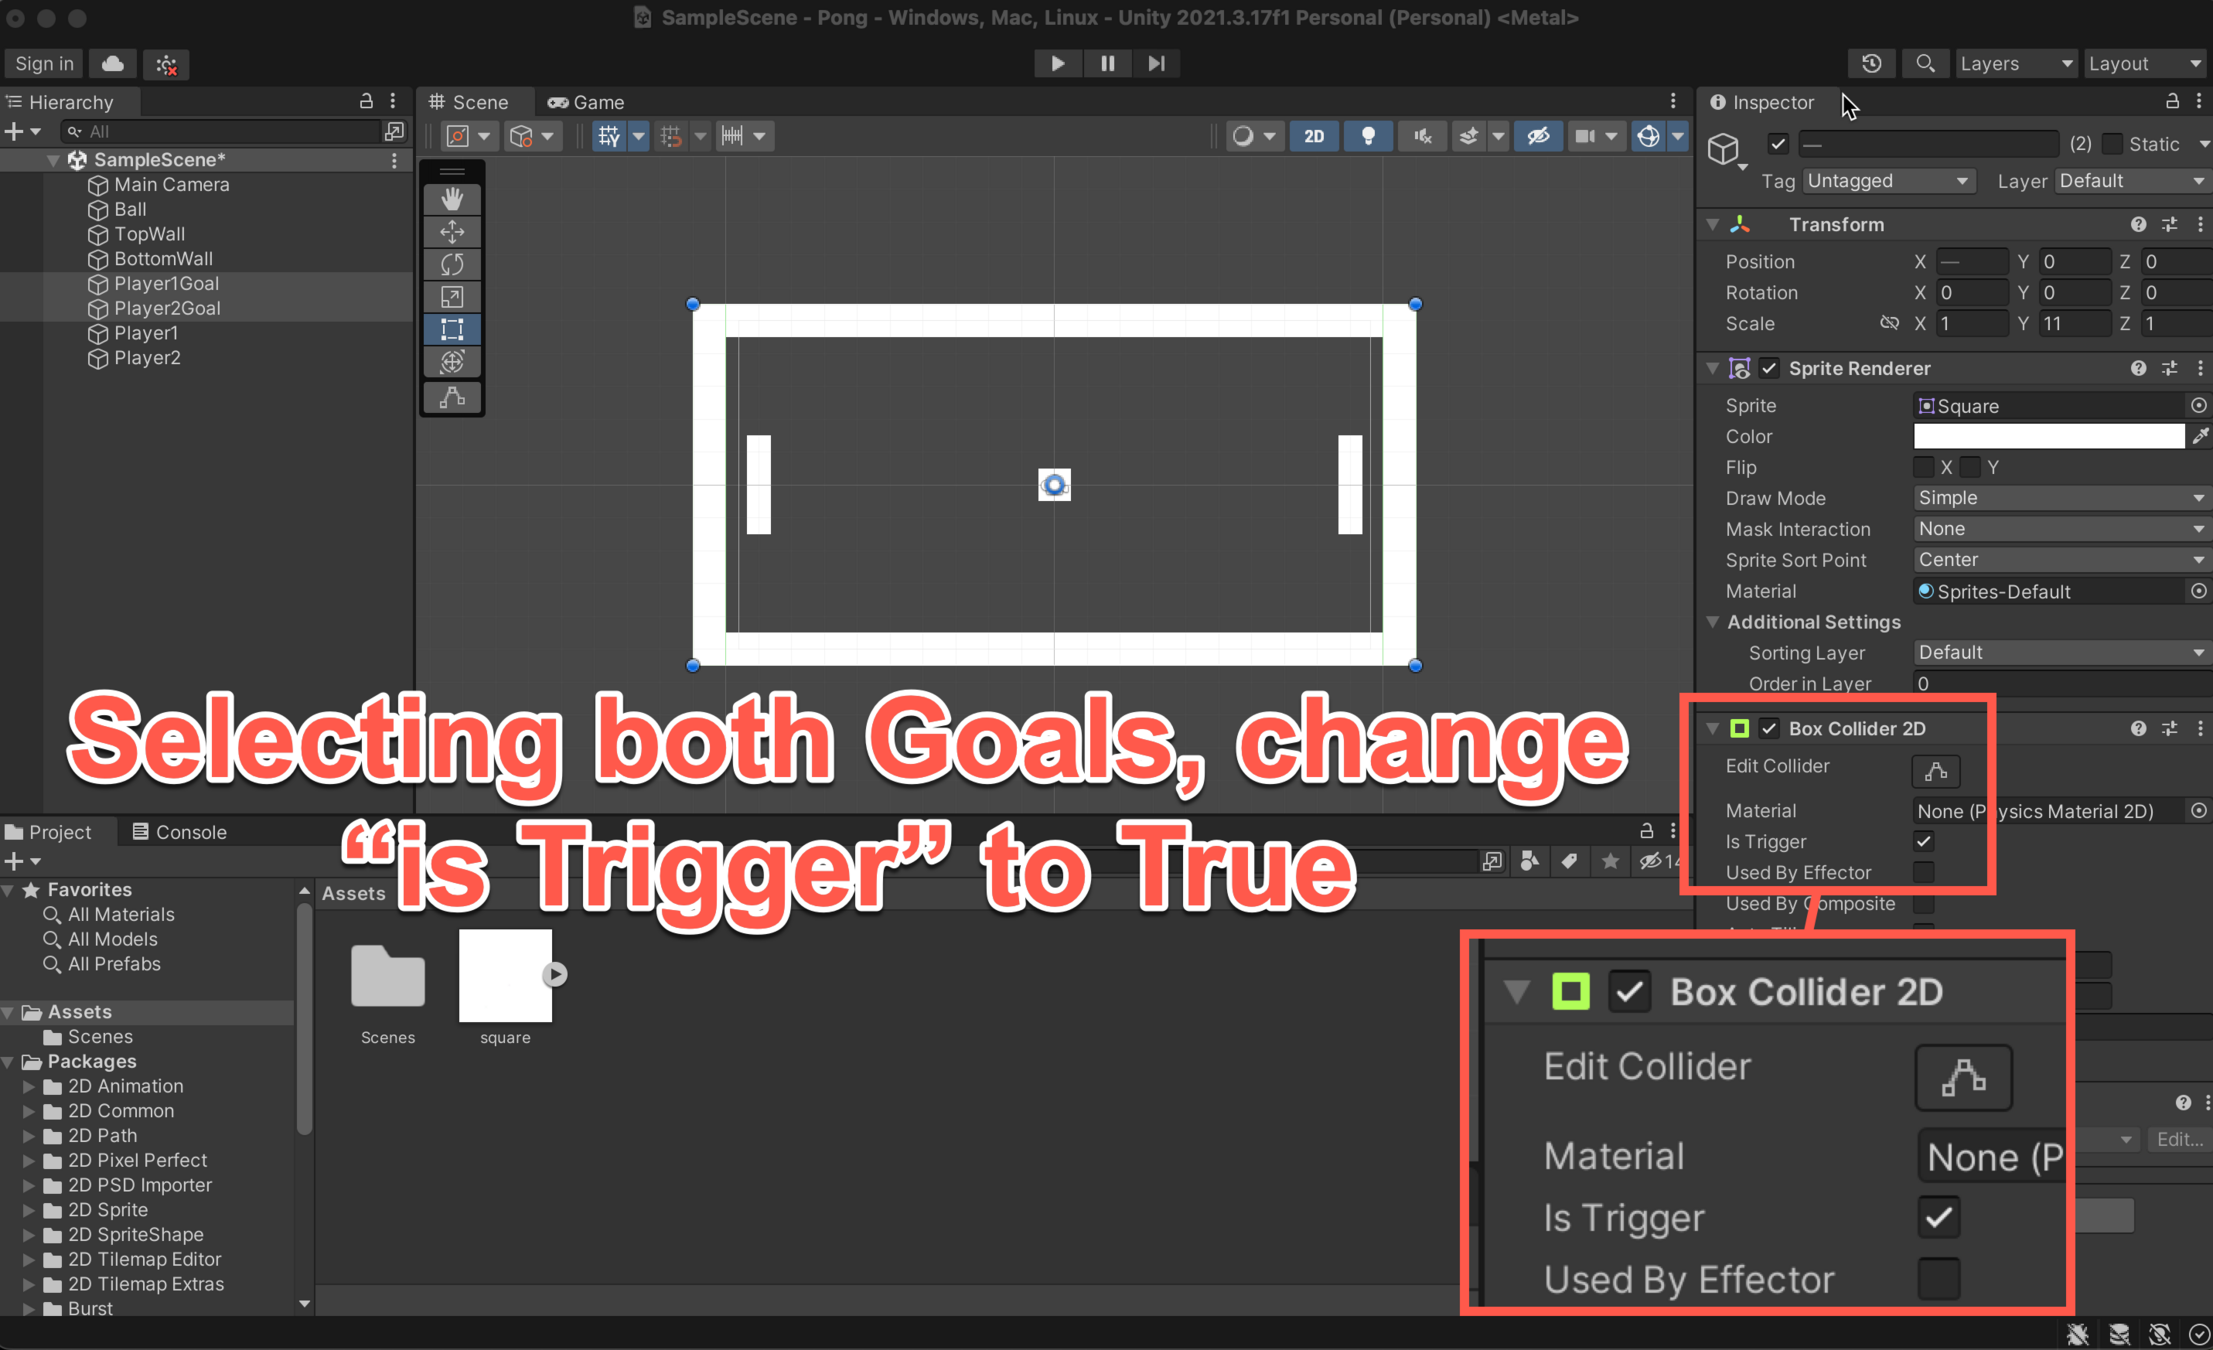
Adding Components
Adding Components
Final Design Feature
Progress
Neat Labels
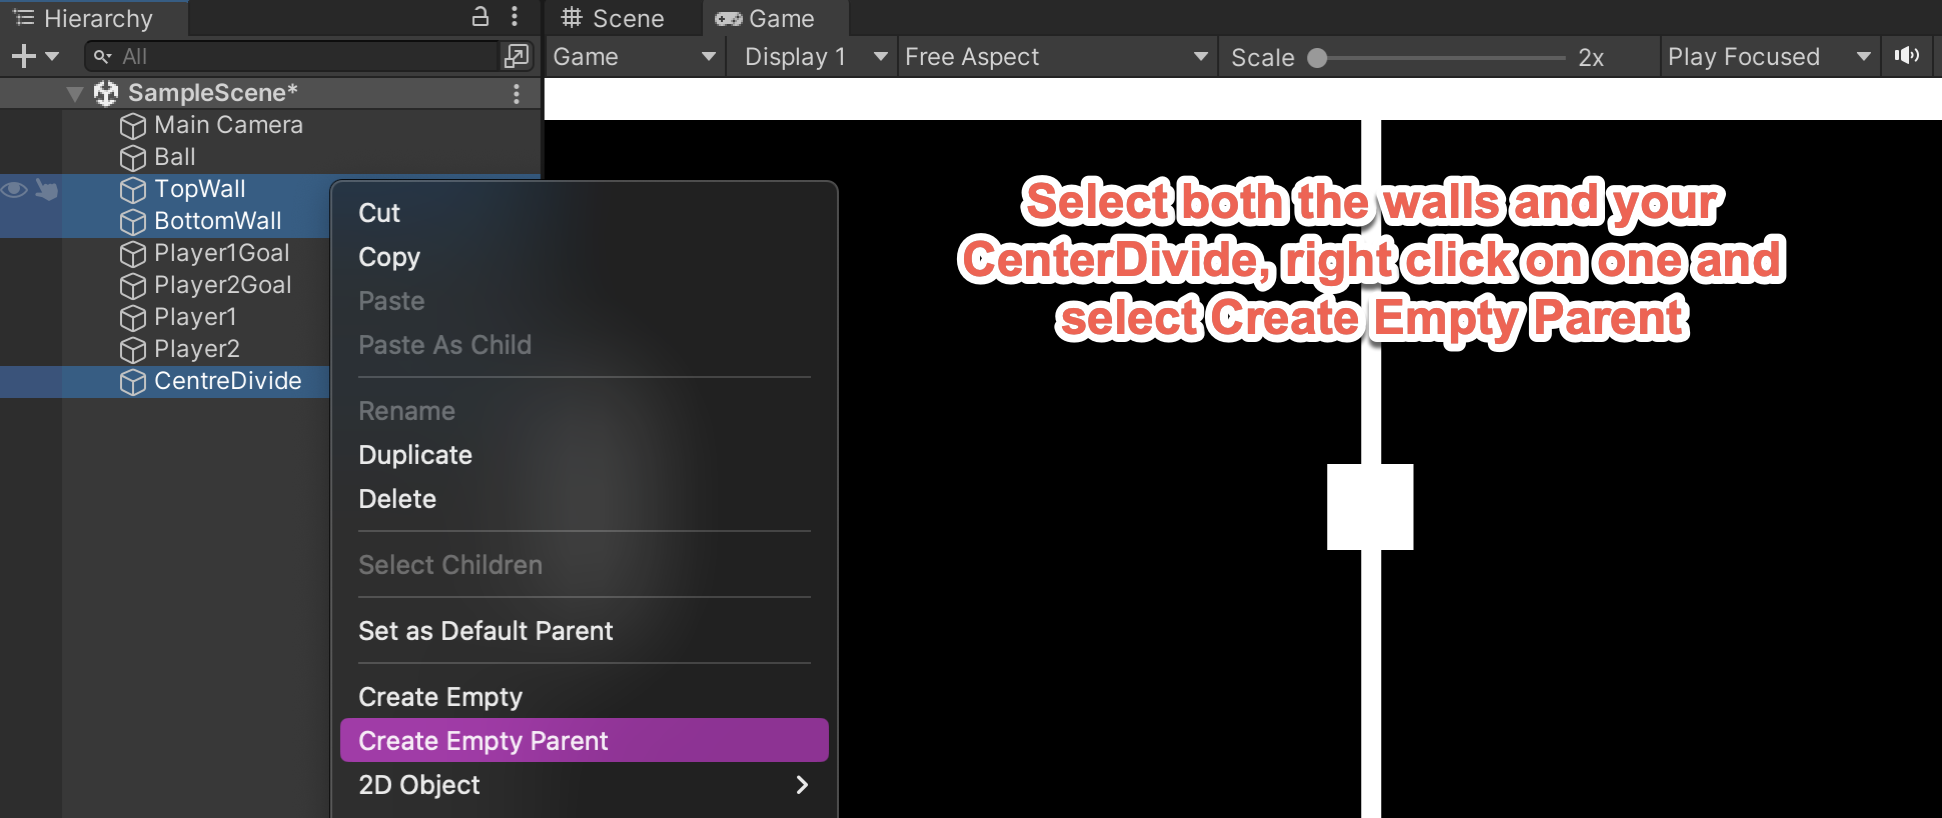
It is good practise to keep objects organised, so we will put the boarders into a folder
Neat Labels
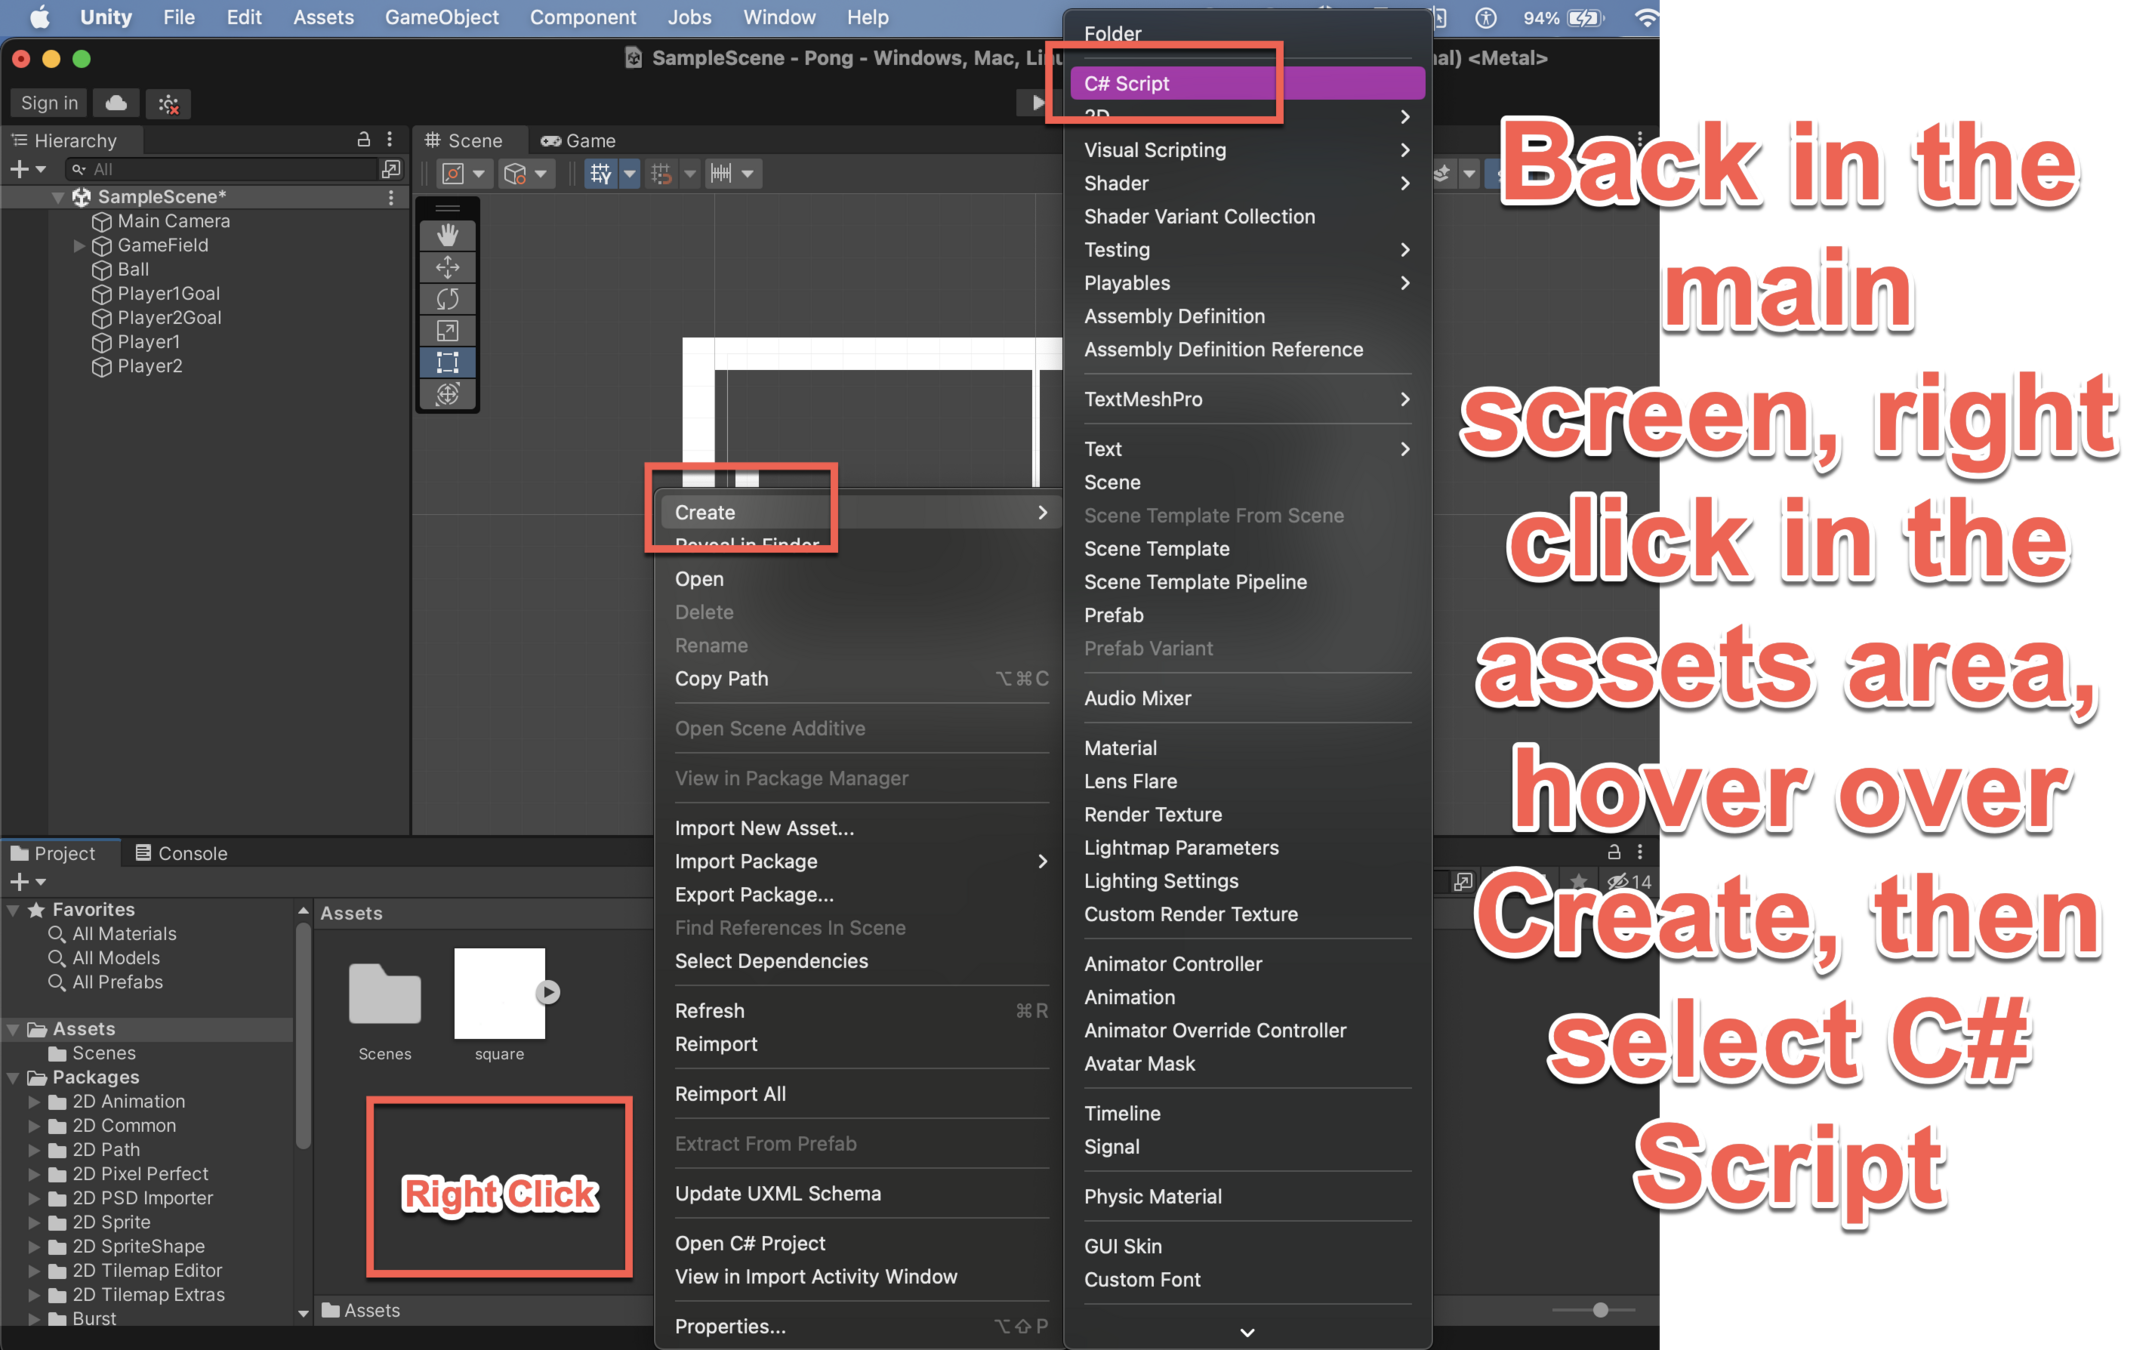
Logic
You have now got the base of your game and the next step is to add in some logic so your game works.

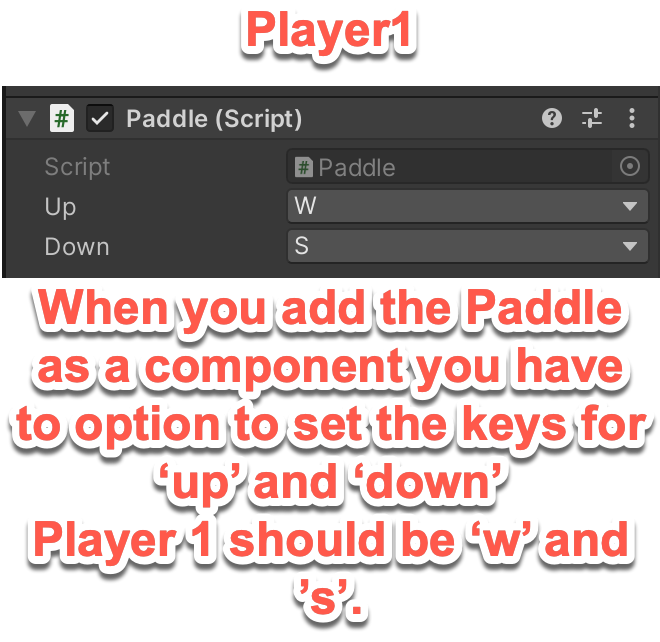
Player Logic

Player Logic
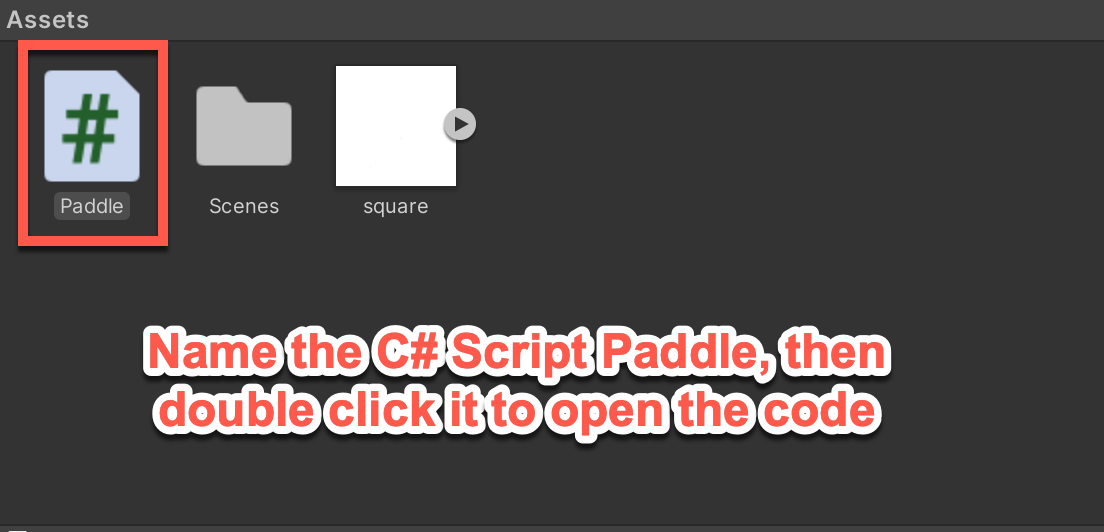
Player Logic
using System.Collections;
using System.Collections.Generic;
using UnityEngine;

public class Paddle : MonoBehaviour
{
    public KeyCode up;
    public KeyCode down;
    Rigidbody2D rigidBody;

    // Start is called before the first frame update
    void Start()
    {
        rigidBody = GetComponent<Rigidbody2D>();
    }

    // Update is called once per frame
    void Update()
    {
        if(Input.GetKey(up))
	{
    		rigidBody.velocity = new Vector2(0f, 7f);
	}
	else if(Input.GetKey(down))
	{
    		rigidBody.velocity = new Vector2(0f, -7f);
	}
	else
	{
    		rigidBody.velocity = new Vector2(0f, 0f);
	}
    }
}
Copy and replace the code in the window that opens, with this code on the left.
KEEP TRACK OF THE CAPITAL LETTERS!
Press CTRL + S to save your code, otherwise you won't be able to control your players.
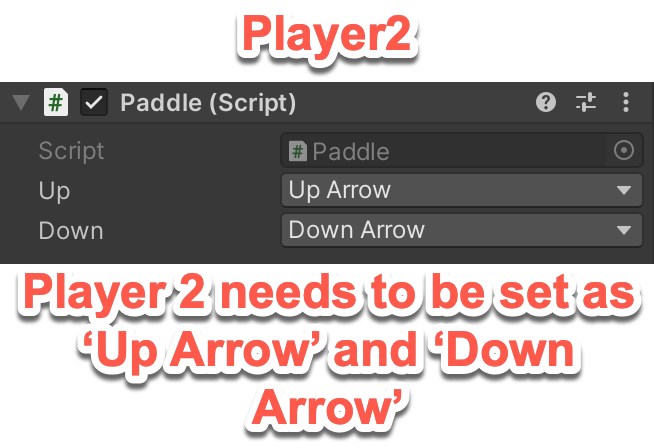
Player Logic
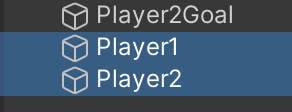
Select both of your players
Player Logic
Player Logic
Player Logic
Test if your Players can Move
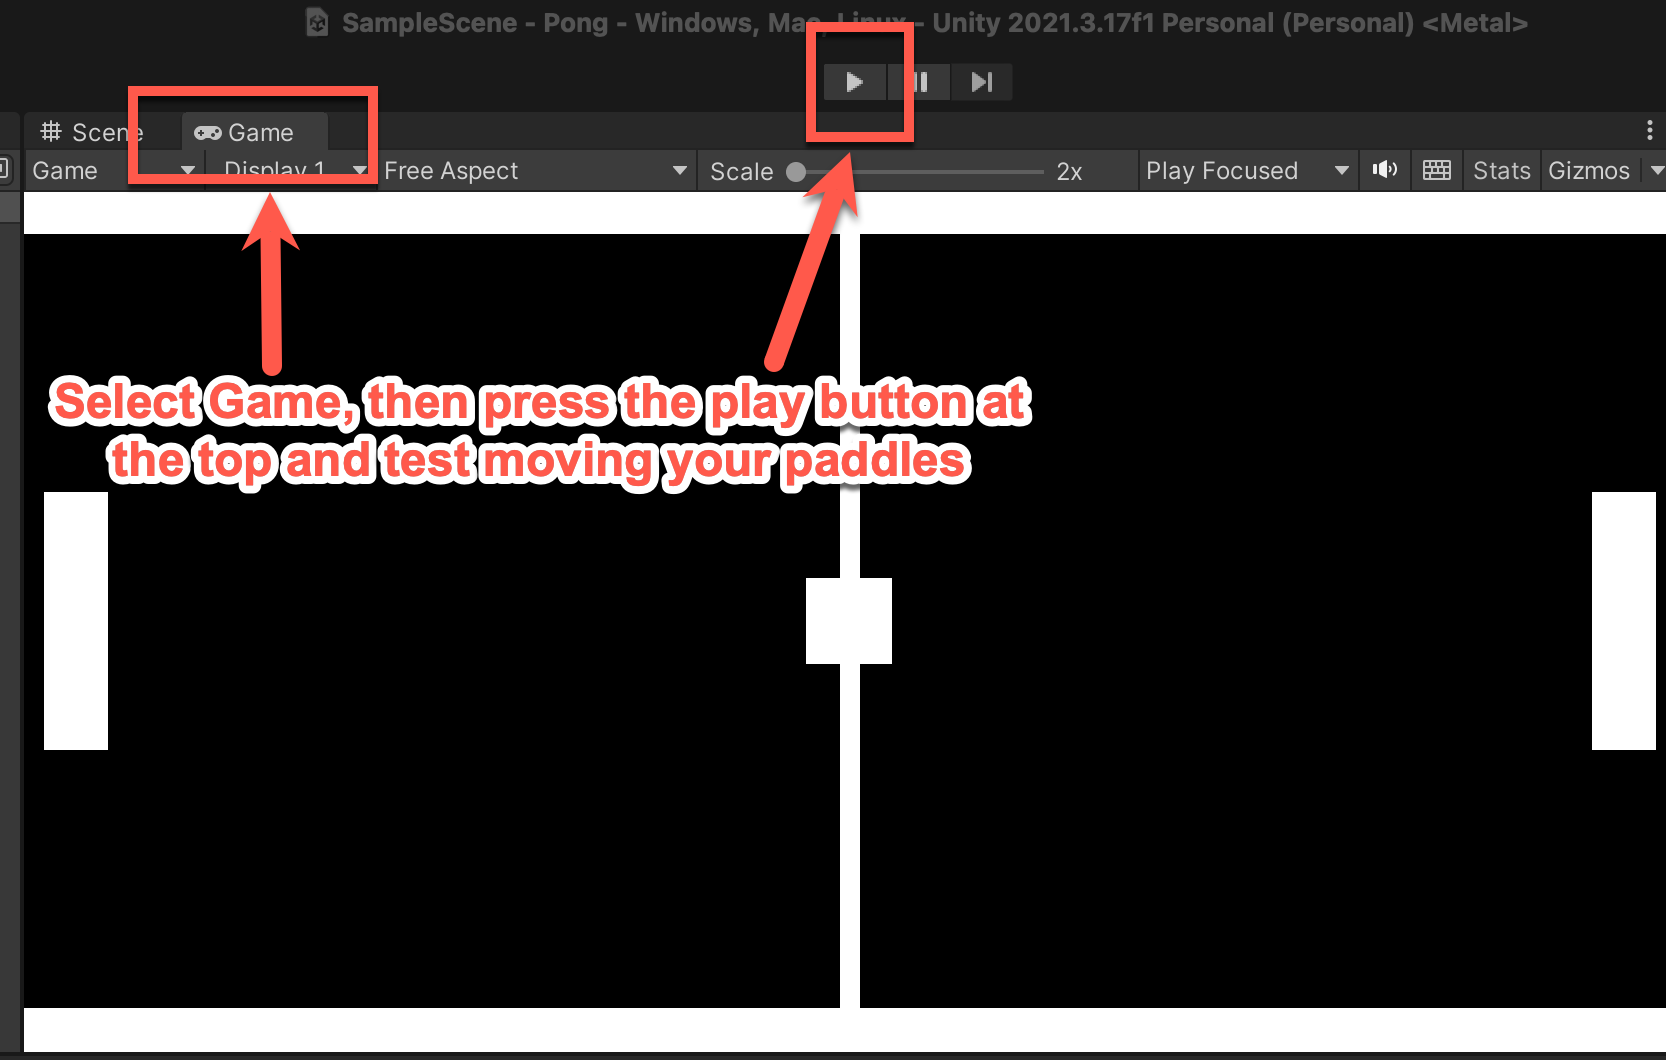
Press play again when you are done
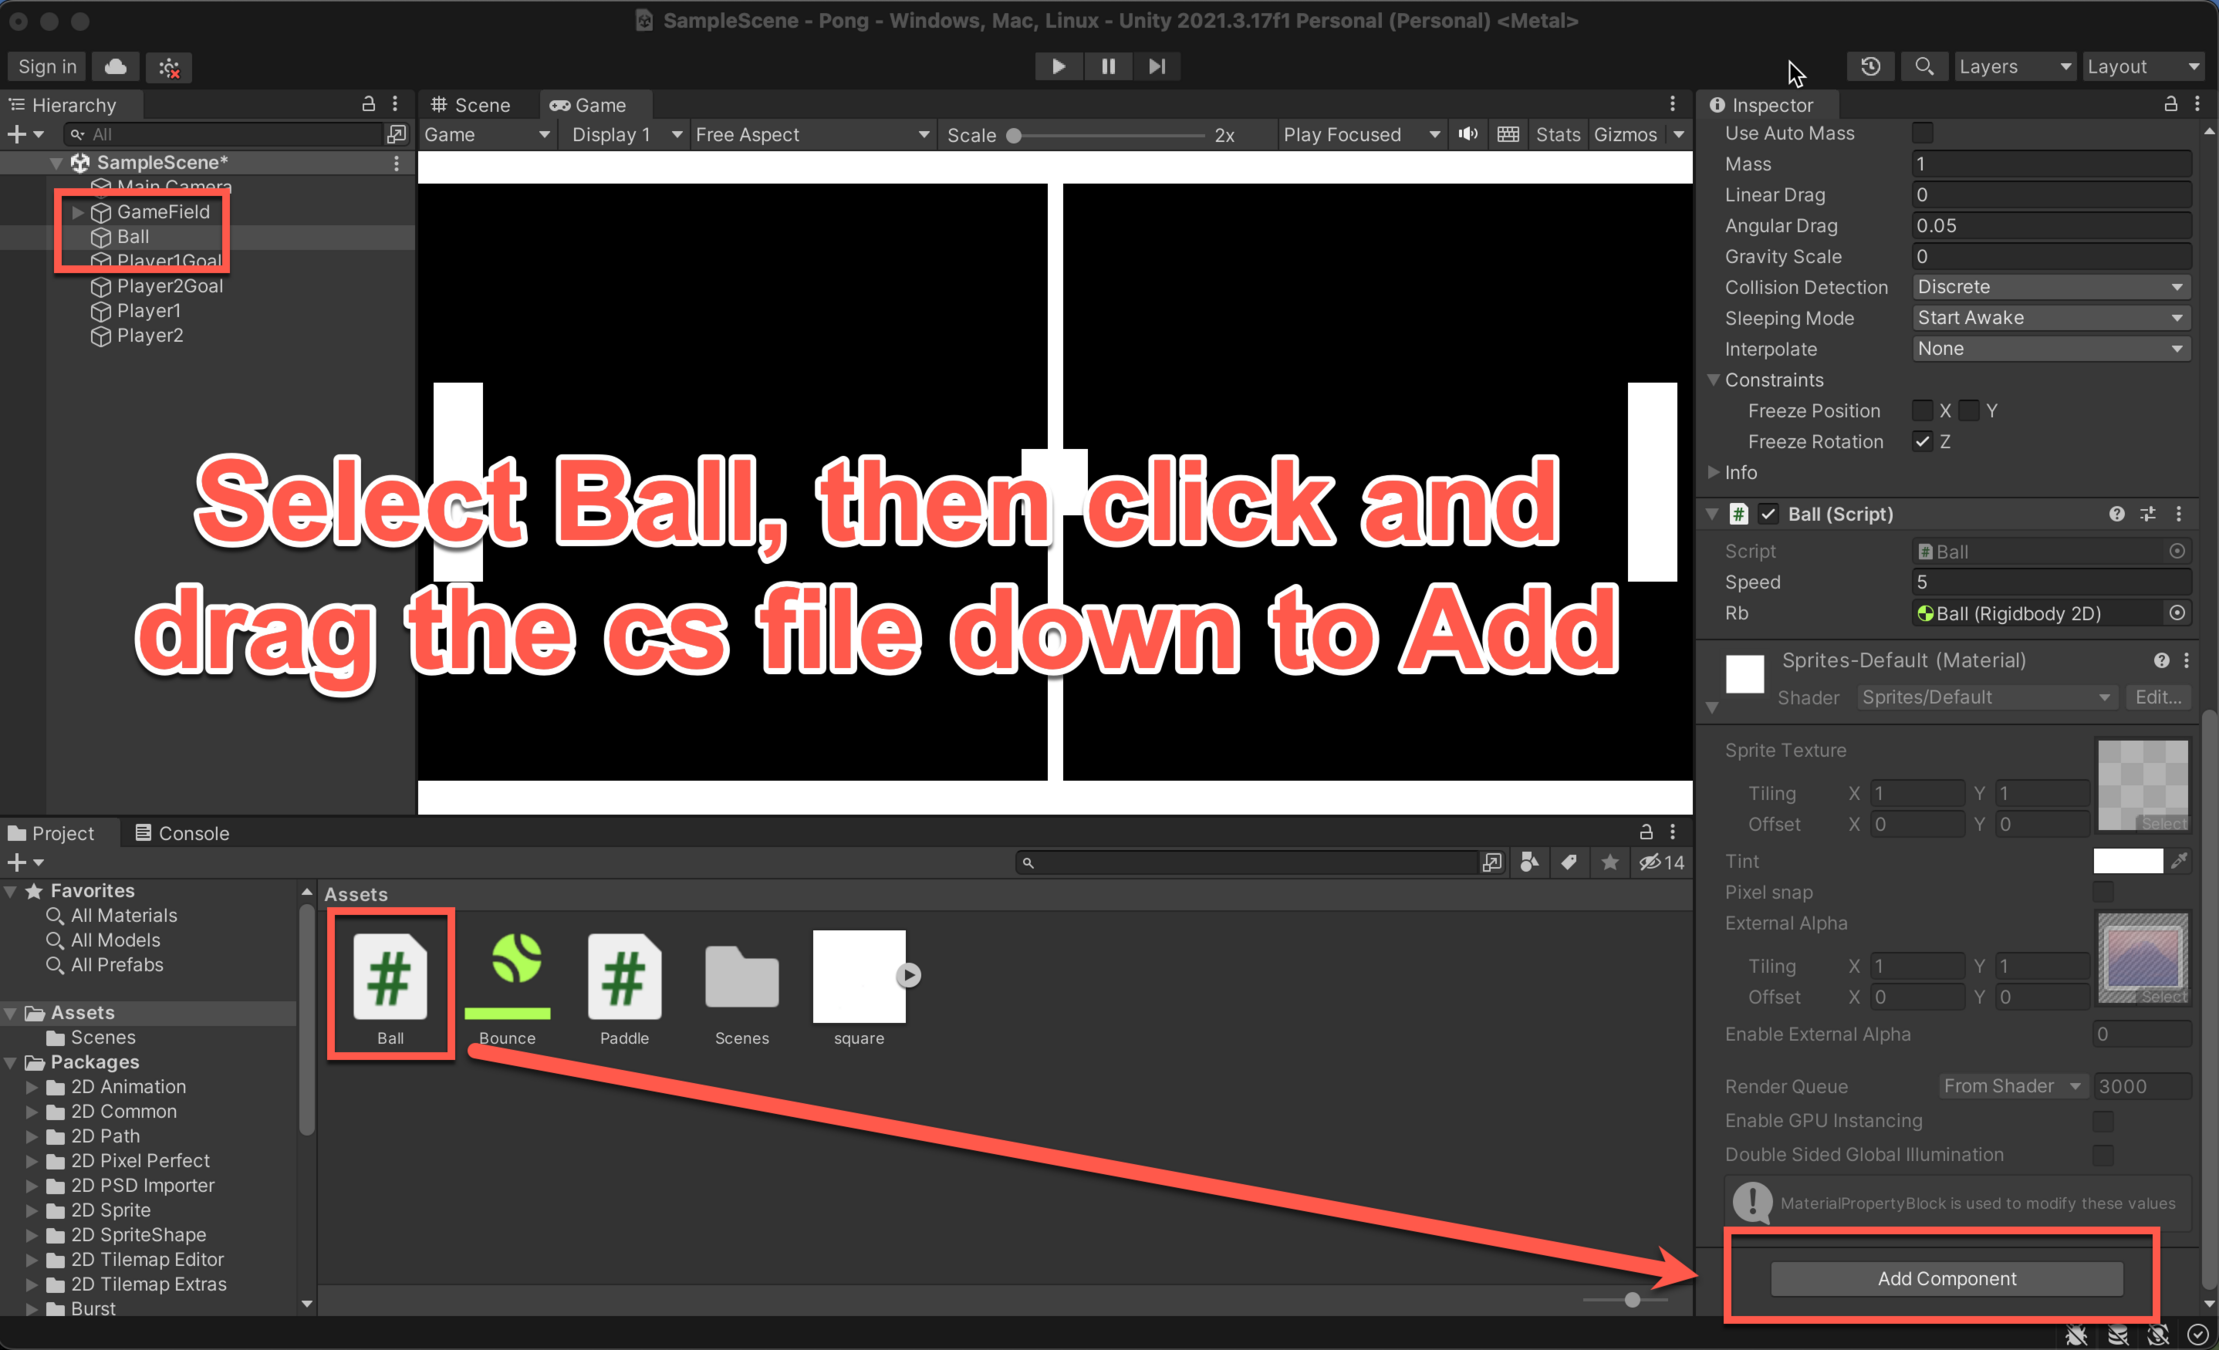
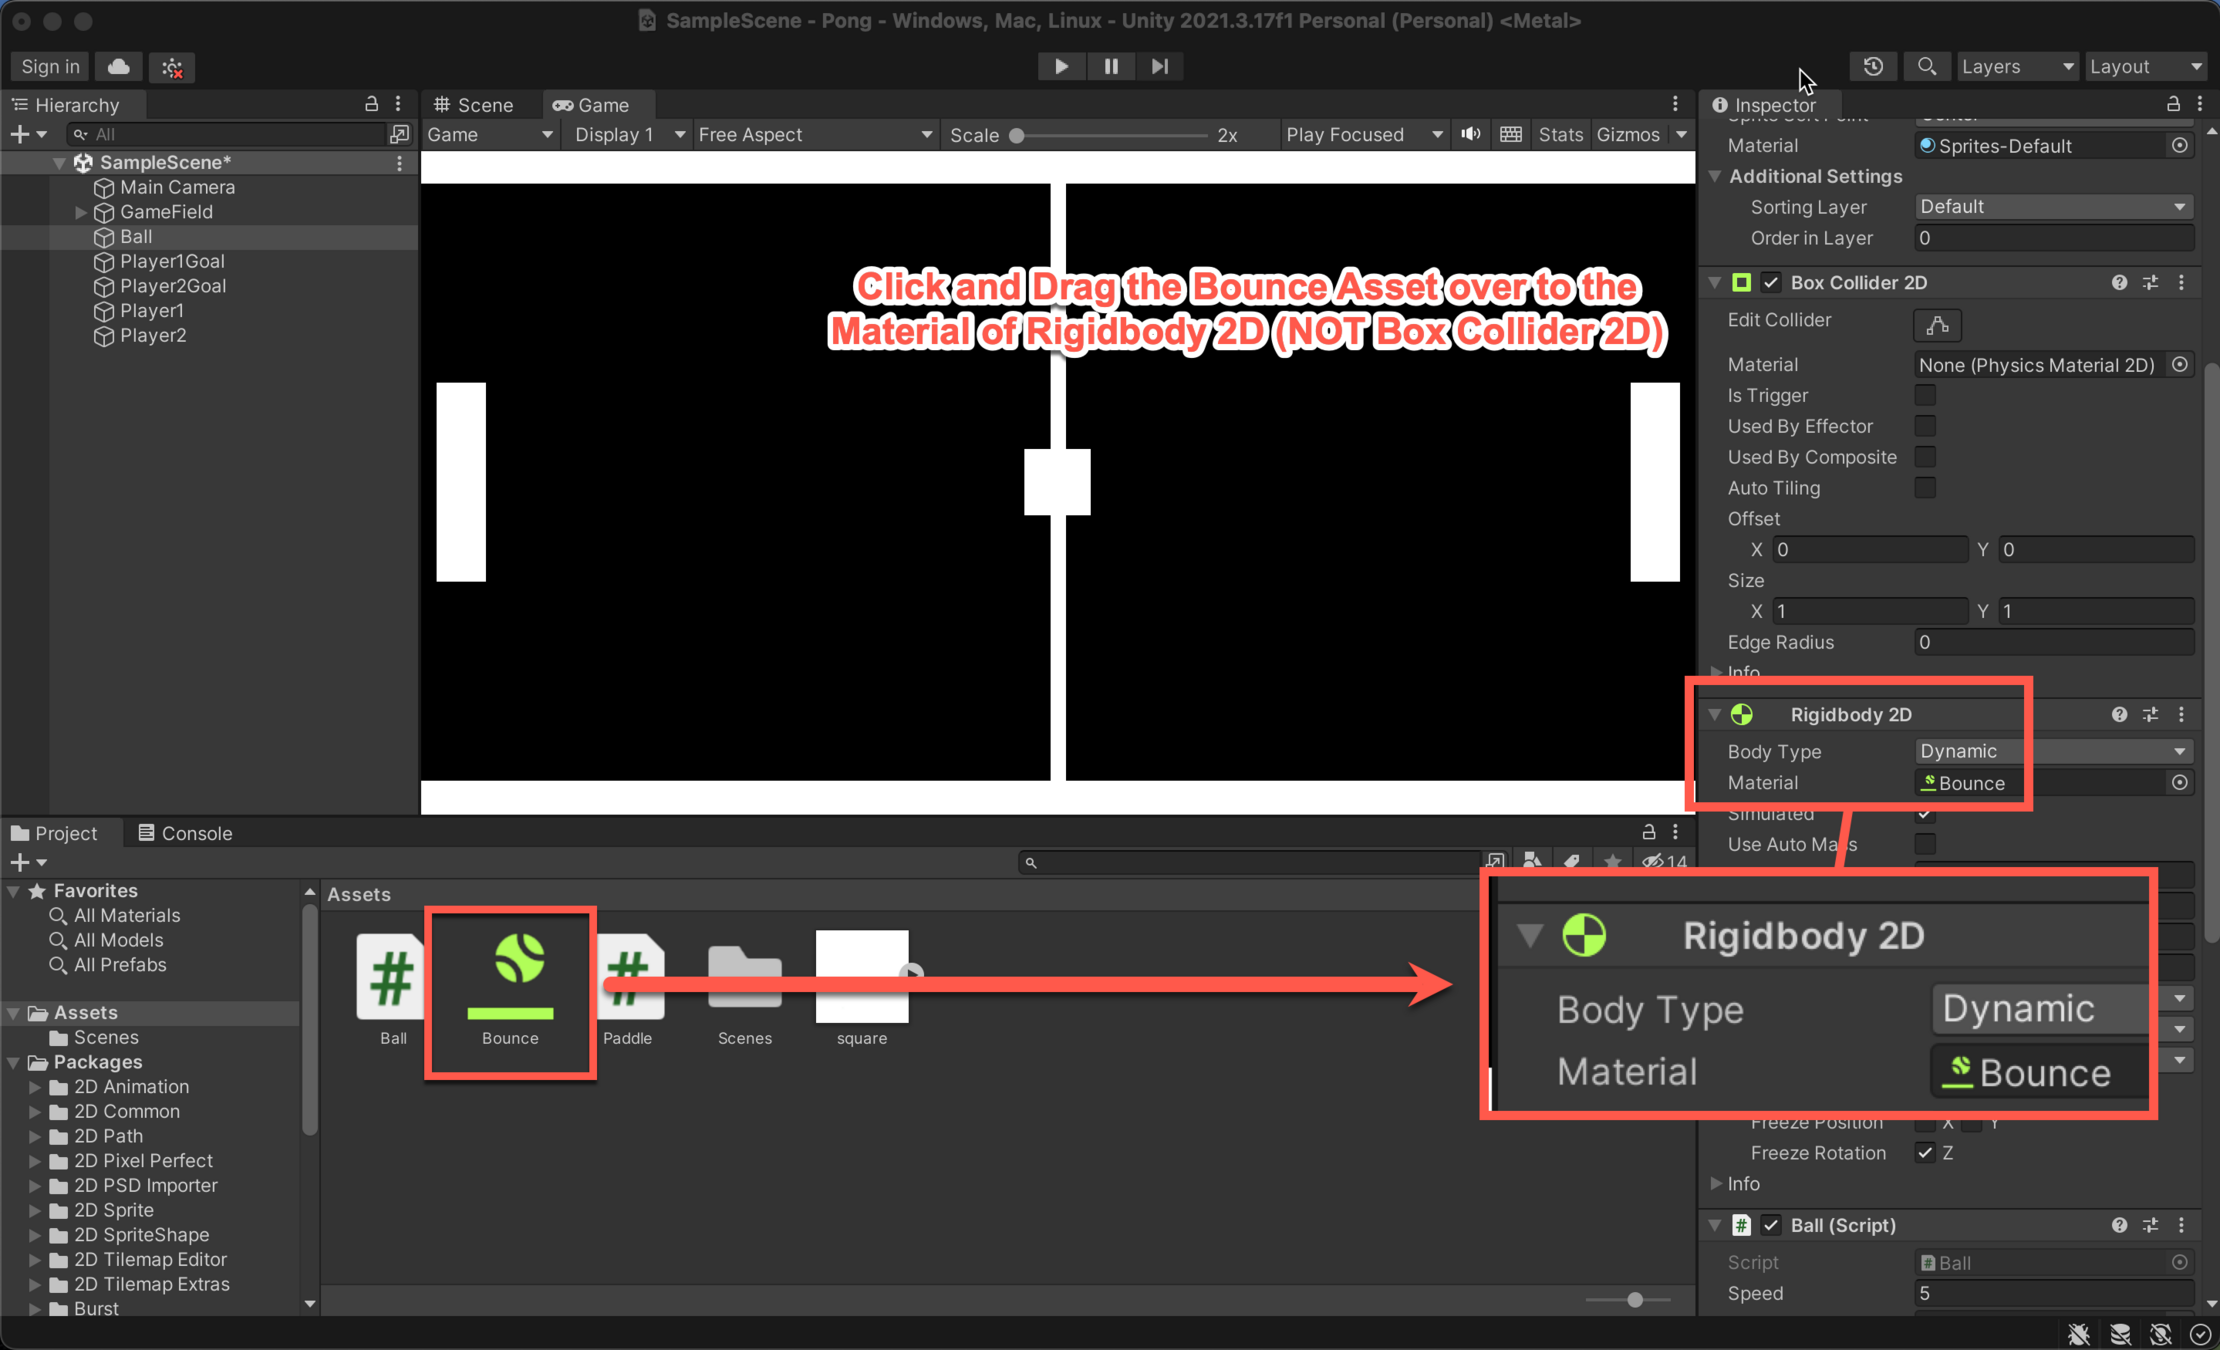
Ball Logic
Ball Logic
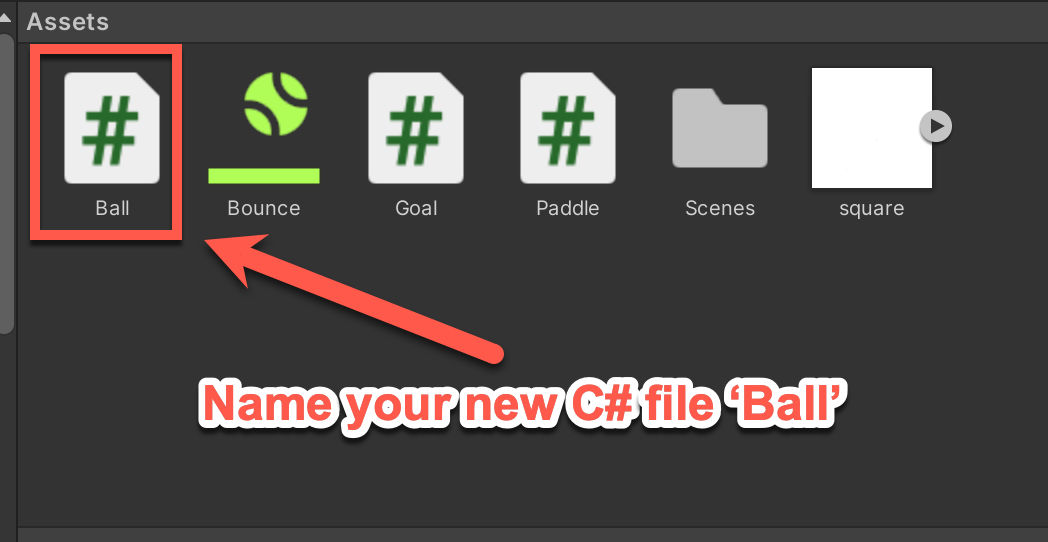
Ball Logic
Copy and replace the code in the window that opens, with this code on the left.
KEEP TRACK OF THE CAPITAL LETTERS!
Press CTRL + S to save your code, otherwise your ball won't move around.
using System.Collections;
using System.Collections.Generic;
using UnityEngine;

public class Ball : MonoBehaviour
{
    Rigidbody2D rigidBody;

    // Start is called before the first frame update
    void Start()
    {
        rigidBody = GetComponent<Rigidbody2D>();
        Direction();
    }

    // Update is called once per frame
    void Update()
    {

    }

    public void Direction()
    {
        int direction;
        direction = Random.Range(0, 2);
        if(direction == 0)
        {
            rigidBody.velocity = new Vector2(5f, -3f);
        }
        else
        {
            rigidBody.velocity = new Vector2(-5f, 3f);
        }
    }
}
Ball Logic
Ball Logic
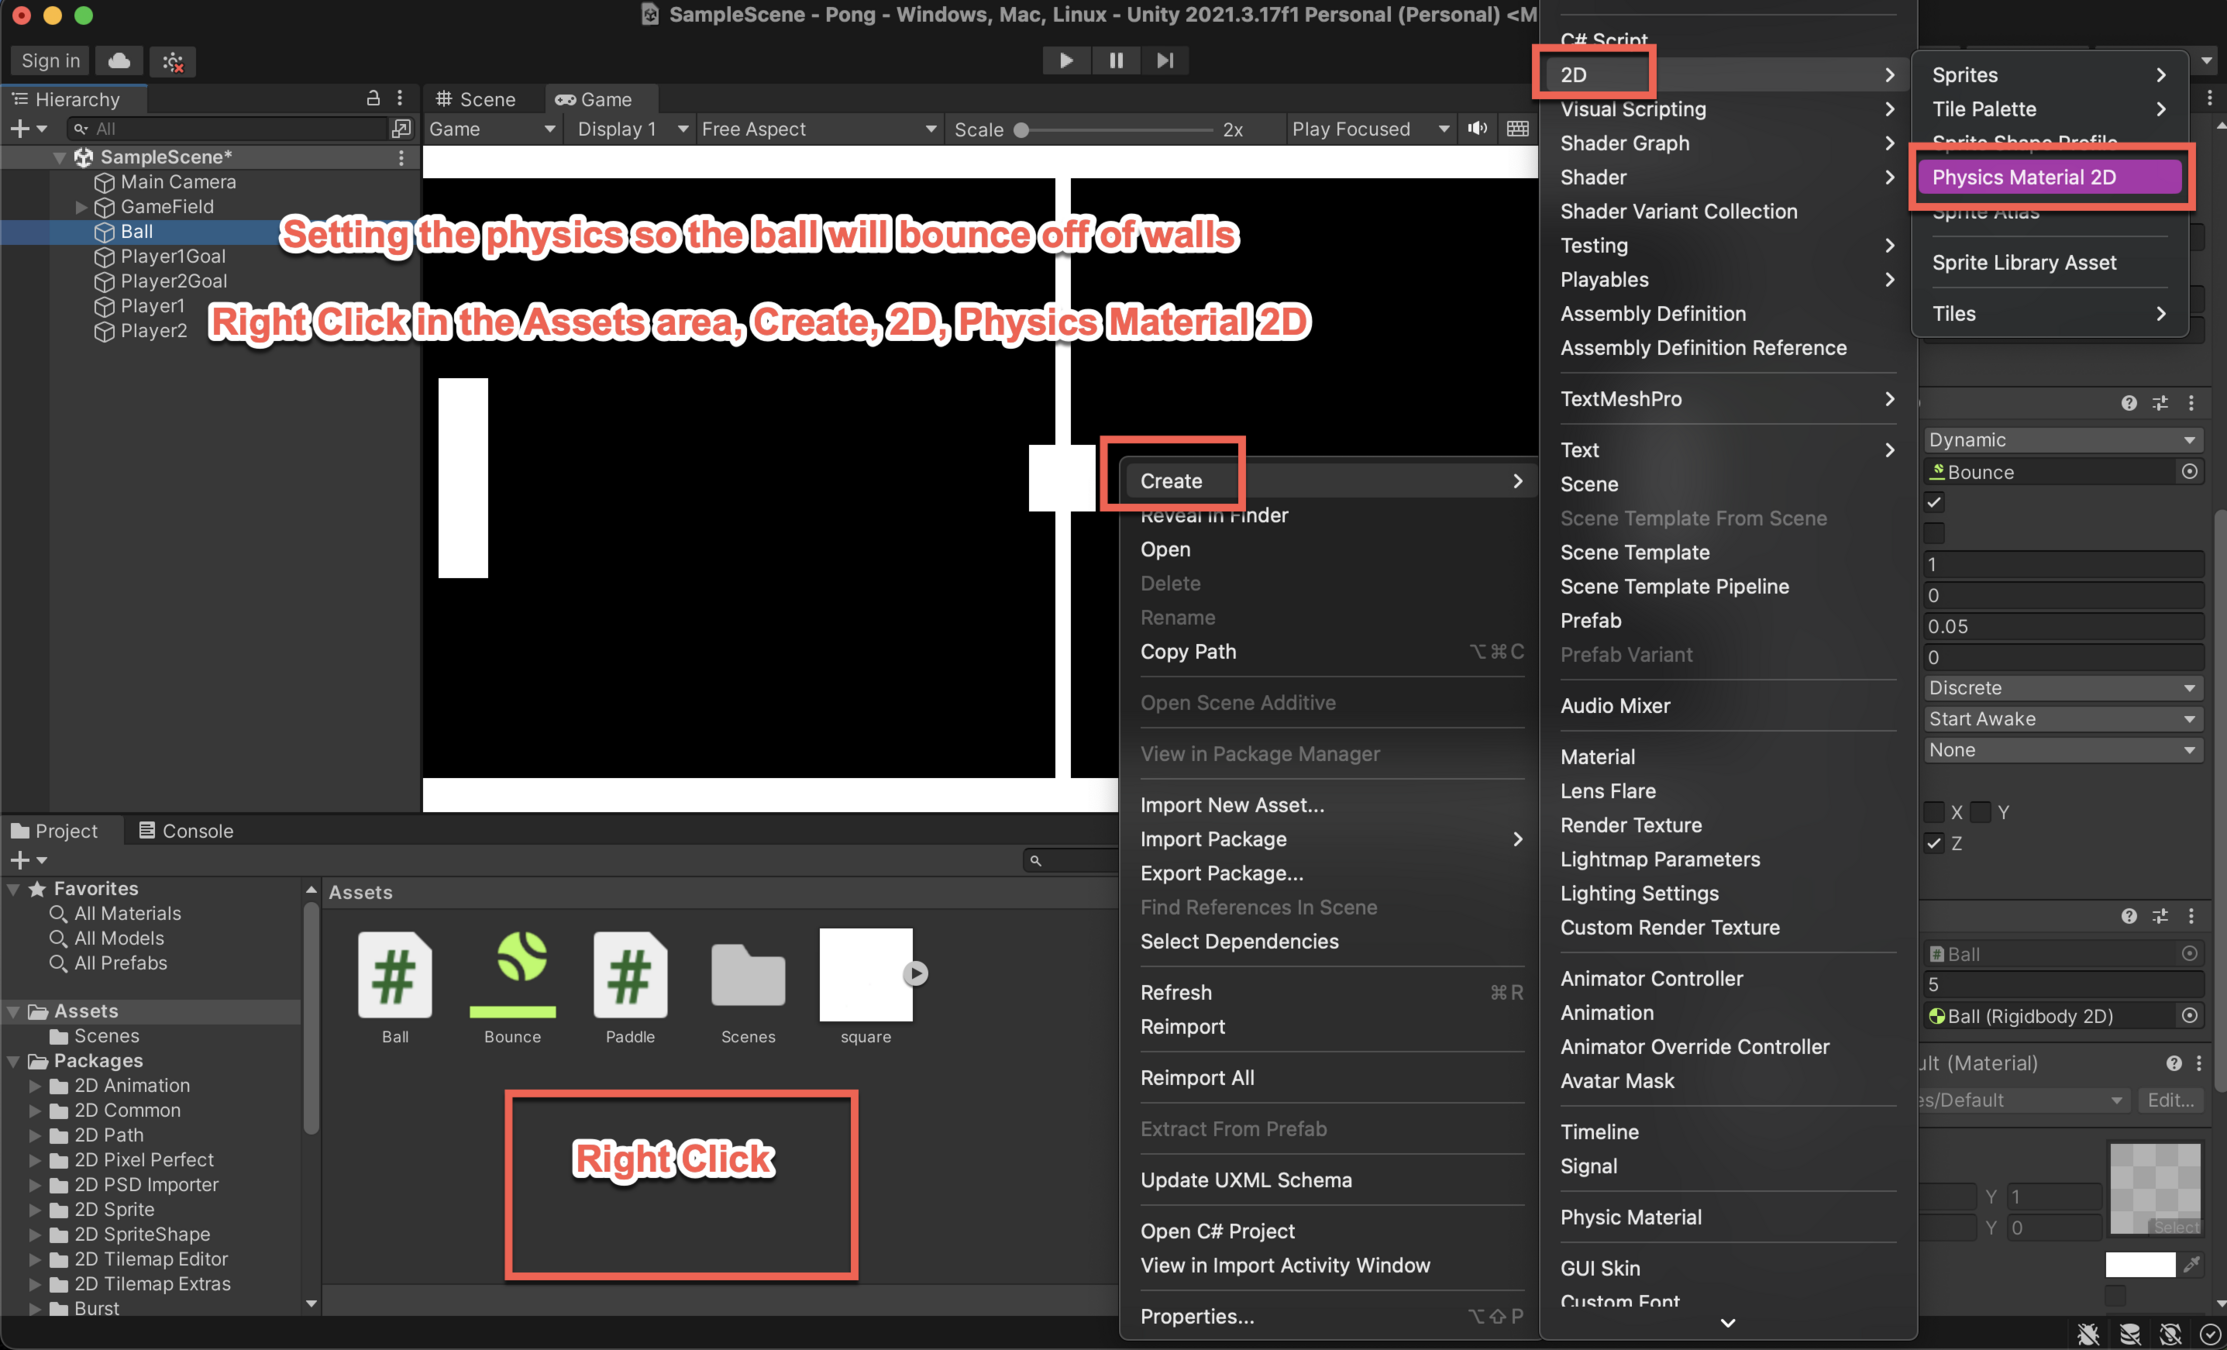
Ball Logic
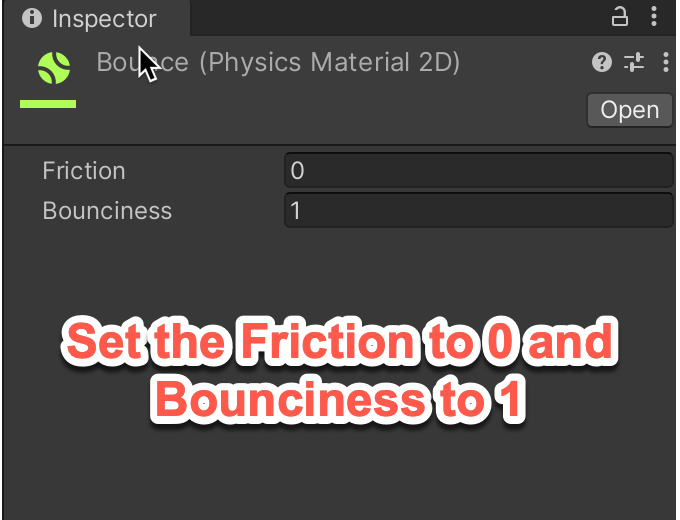
Ball Logic
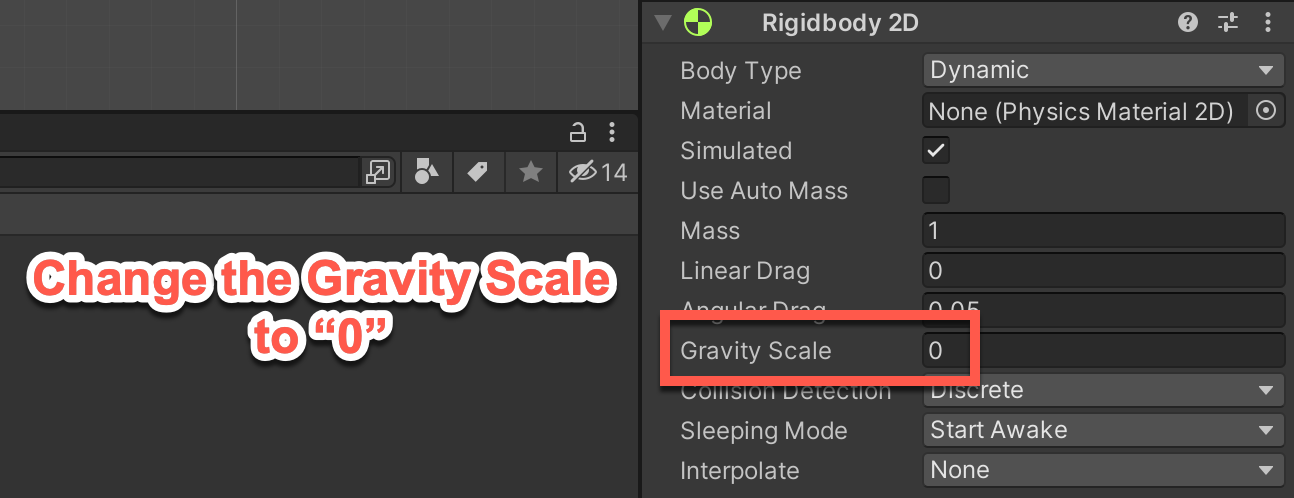
Freeze the Ball and both Players
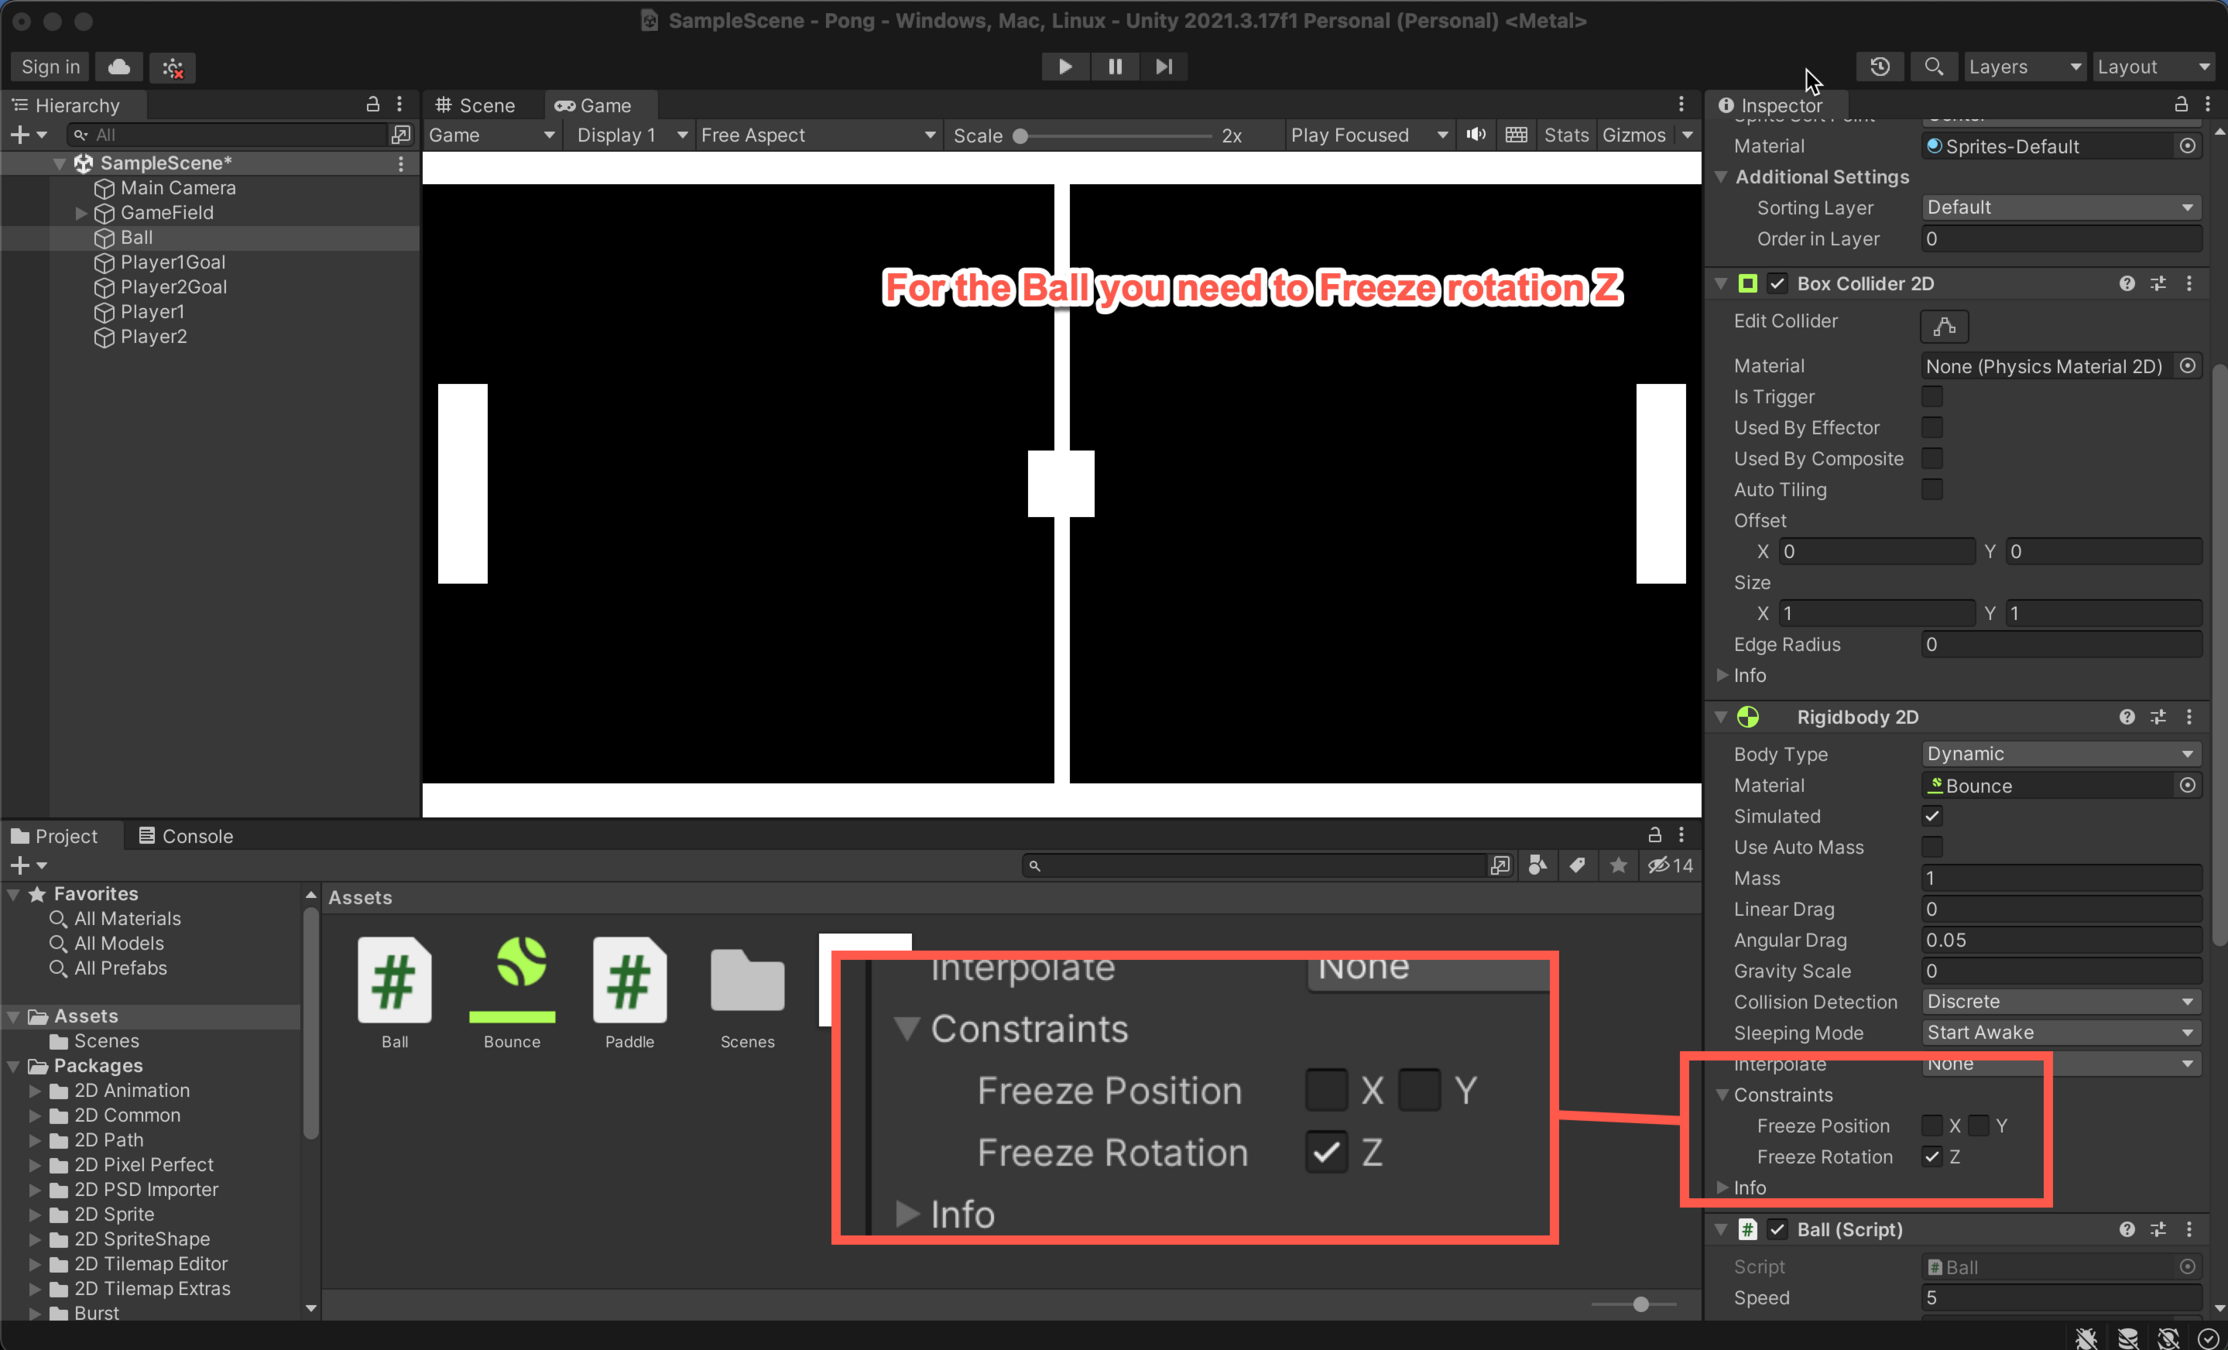
Freeze the Ball and both Players

Game Engine - Goals
Game Engine - Goals

Game Engine - Goals
using System.Collections;
using System.Collections.Generic;
using UnityEngine;

public class Goal : MonoBehaviour
{
    // Start is called before the first frame update
    void Start()
    {

    }

    // Update is called once per frame
    void Update()
    {

    }

    private void OnTriggerEnter2D(Collider2D collider)
    {
        collider.GetComponent<Ball>().Direction();
        collider.transform.position = new Vector2(0f, 0f);
    }
}
Add the function OnTriggerEnter2D() to your script.
Once you have, make sure to press CTRL + S to save your code.
Game Engine - Goals
You should now have a fully functioning game of Pong!
Extension
Experiment with certain aspects of the physics to change the difficulty level of your games. You can try adapting:
- The size of the paddles and ball or
- The Linear Drag of your Players
Unity Lesson 1
By CJackson


