Java 語法教學
Java 簡介
什麼是 Java?
- 混和編譯式語言和直譯式語言的神奇語言(等等說明)
-
簡單
(就是打的字多了點) - 跨平台
- 網路功能(Networking)
- 例外處理(Exception Handling)
- Unicode(終於不再有中文亂碼問題了...嗎?)
- 多執行緒(Multithreading)
- 資源回收系統(Garbage Collection)
- 物件導向(OOP)
- 免費!
辣個神奇的咖啡杯
編譯式語言
代表 :
- C
- C++
先寫好程式碼,再將程式碼給編譯器翻譯成機器語言(也就是二進位的0和1)
優點 :
- 執行速度快
缺點 :
- 程式碼一長就要花時間等編譯
- 每次改程式碼就要重新編譯
直譯式語言
代表 :
- Python
寫好程式碼後,直譯器翻譯一行程式碼,電腦就執行一行程式碼
優點 :
- 說改就改,不必在等待編譯時間
缺點 :
- 執行速度慢
我可以兩個的優點都要ㄇ
Java : 熊掌和魚當然都要
小朋友才做選擇,大人當然是全都要
Java 程式碼
Java 編譯器
Java 位元碼
Byte Code
Java 虛擬機
(JVM)
執行程式
只能說最後變成了兩者優點和缺點都各有一點點的神奇存在
執行效率&編譯時間
界在兩者之間
原理說明 :
Java 的各個平台
- Java ME (Java Micro Edition) :
又稱 Java 微型版,因為此版本的主要開發對性為性能比電腦差的機上盒、功能手機...等等,所以 Java 在此版本提供的能力較少
-
Java SE (Java Standard Edition) :
一般應用的標準執行環境,像是常見電腦上的 Java 就是這個。若沒有特別提到,一般看到 Java 都是指這個平台。我們要學的就是這個,Minecraft Mod 也是用這個開發
- Java EE (Java Enterprise Edition) :
這是為了企業級開發準備的平台,以 Java SE 為基礎,但架構、開發規模都更強大,故能提供更大規模的運算能力
JDK
-
Java SE Development Kit :
沒特別講,就是 JDK 的全名
其他的就會以全名稱呼 - Java ME Development Kit
- Java EE Development Kit
Java Development Kit
Java Development Kit(JDK)是昇陽電腦針對 Java 開發人員發布的免費軟體開發套件(SDK,Software development kit)。自從 Java 推出以來,JDK 已經成為使用最廣泛的 Java SDK。由於 JDK 的一部分特性採用商業許可證,而非開源。因此,2006年昇陽電腦宣布將發布基於 GPL 的開源 JDK,使 JDK 成為自由軟體。在去掉了少量閉源特性之後,昇陽電腦最終促成了 GPL 的 OpenJDK 的發布。
摘自維基百科
開發工具 - Eclipse & IntelliJ IDEA
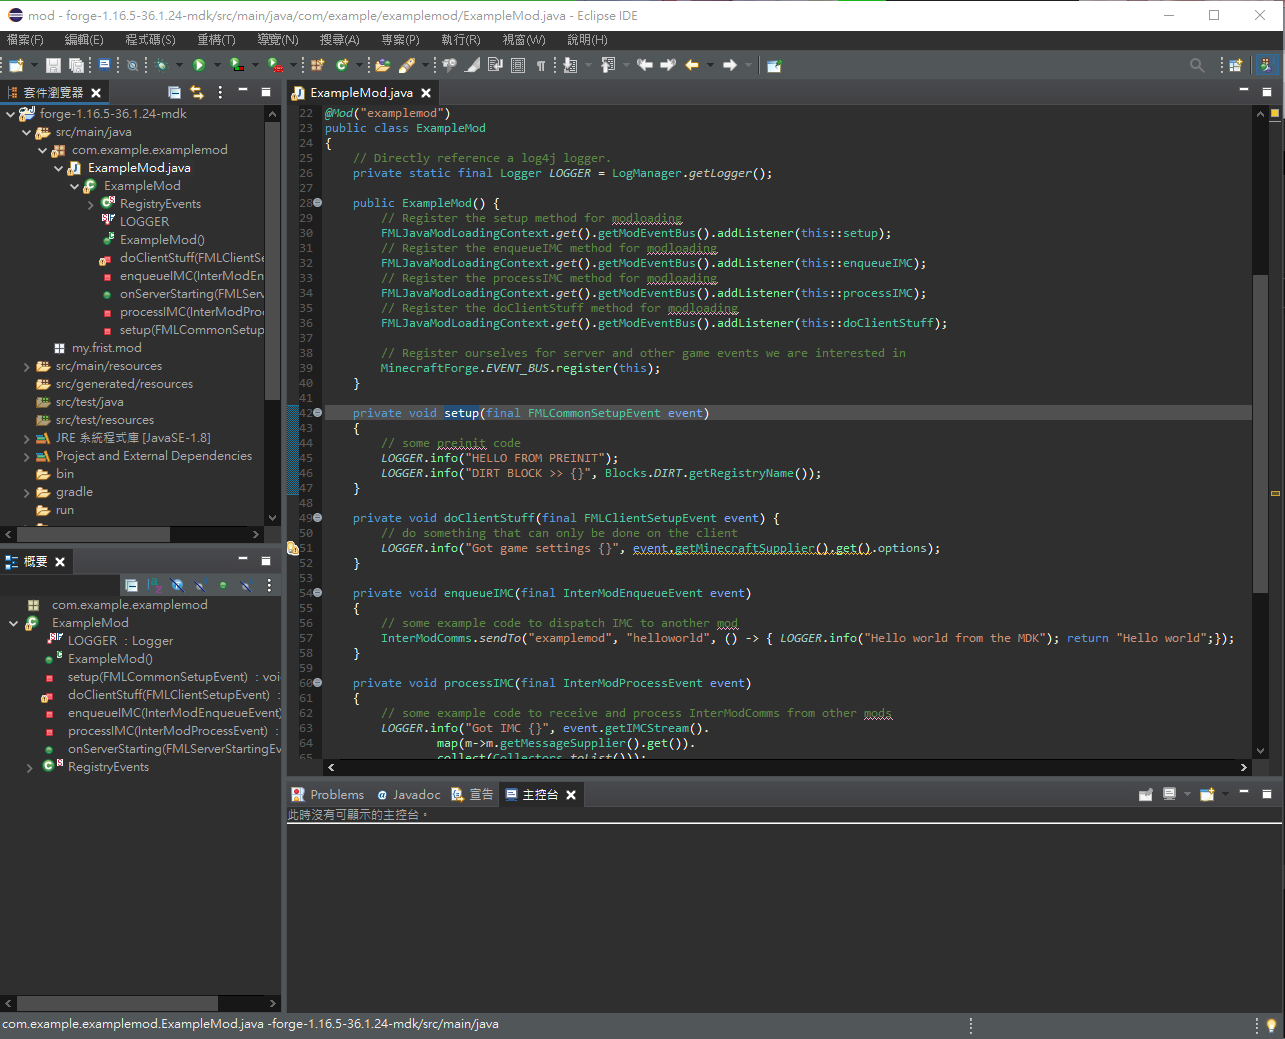
這是 Eclipse
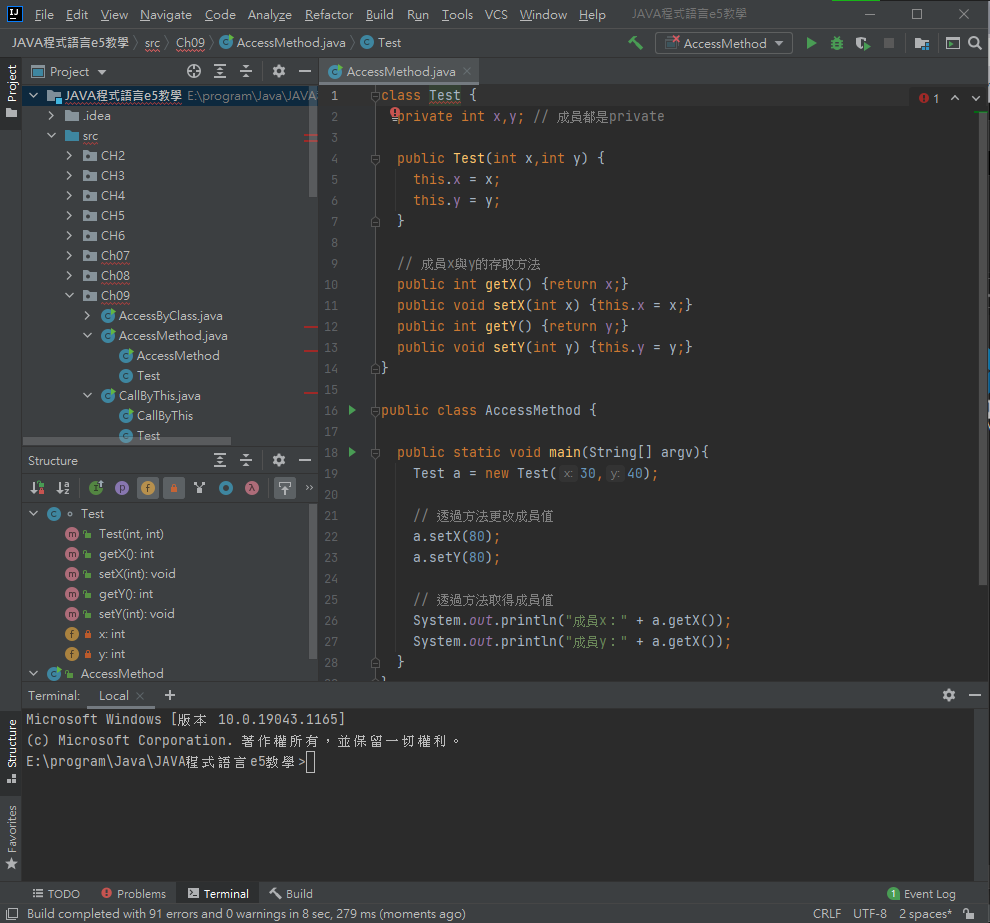
這是 IntelliJ IDEA

最帥編輯器
帥氣ㄟ萬能開發工具 - VSCode
我是懶人,不想設定麻煩的 JDK、環境變數
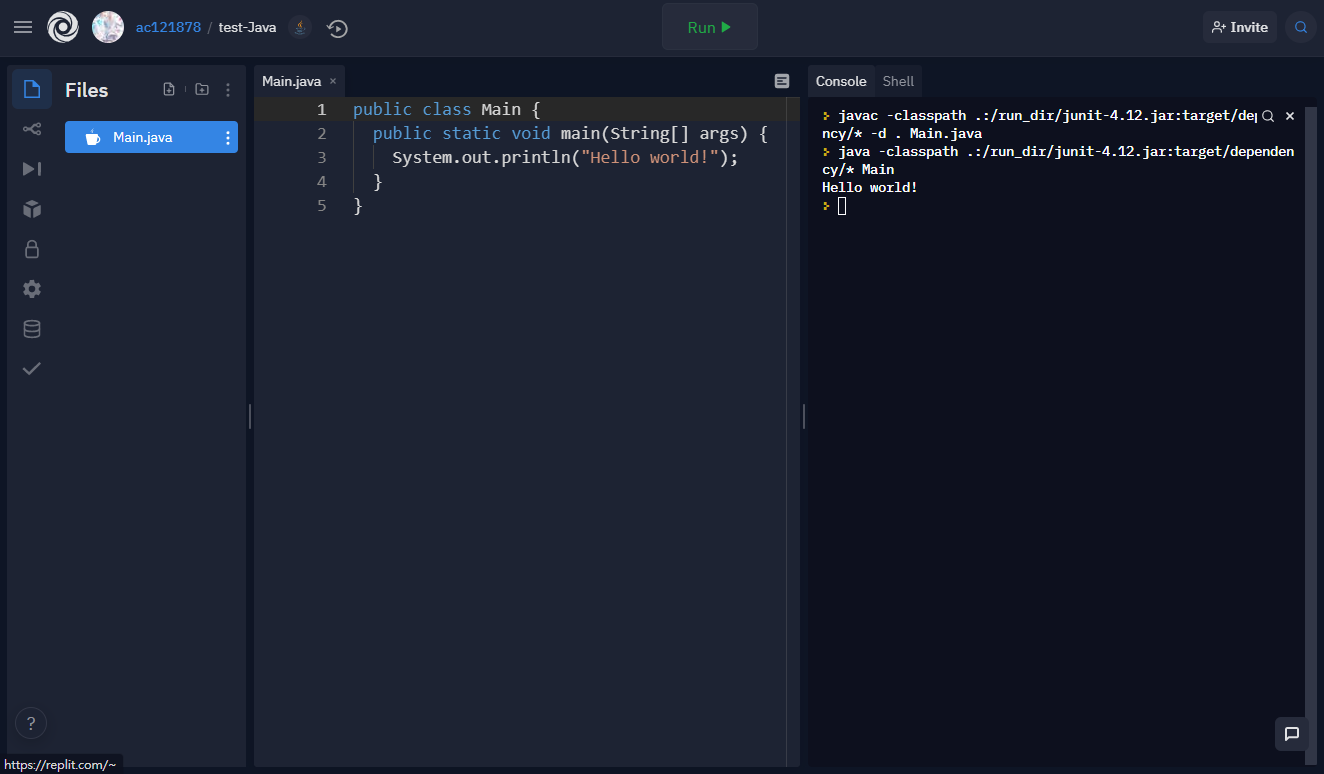
線上 IDE - https://replit.com
我是個努力向上的好孩子
我要玩 JDK、環境變數
不會、看不懂可以私訊我
IG : @ac121878
這輩子基本不用(除了發廢文)
Hello, world!
學每個程式語言都要學的第一個程式
Coding 的一小步
public class Hallo_world {
  public static void main(String[] args) {
    System.out.println("Hello world!");
  }
}
/* Hi! */
// I'm so great.
打開電腦中的 Eclipse,建立新專案
再建立新檔案,檔案名稱命名為
Hello_world
Coding 的一小步
-
public :
物件導向中的"公開"修飾子(幹麻用的之後會學到) -
class :
物件導向中表示"類別"的關鍵字(幹麻用的之後會學到) -
Hello_world :
類別名稱,每個檔案中只能有一個 public 屬性的類別,
且必須和檔案名稱一樣
public class Hallo_world {


}
Coding 的一小步
-
{} :
用來表示"區塊"(Block),變數僅在宣告的區塊中生效
結尾處不必加分號(詳細功能之後會再慢慢提到)
public class Hallo_world {


}
Coding 的一小步
-
static :
(幹麻用的之後會學到) -
void :
表示沒有回傳值(幹麻用的之後會學到) -
main(String[] args) :
main 函式,為程式碼執行的起點
  public static void main(String[] args) {

  }
Coding 的一小步
整個程式碼的基本框架長這樣
所有的主要程式碼都會在 main() 函式之中
除了 Hello_world 會因為檔案名稱而有所改變之外
其他的都是固定的東東,缺一不可
字是真的很多沒錯啦
public class Hello_world {
  public static void main(String[] args) {

  }
}
Coding 的一小步
這行敘述用途是輸出括號中的東西到終端機中
並且換行
System.out.println("Hello world!");
雙引號記得加
用來表示"字串"(String)
Java最大特色之字真的超多 = =
這個叫"敘述"(Statement),每行敘述結尾都必須要有分號(;)
沒加雙引號會被當成變數
Coding 的一小步
/* Hi! */
// I'm so great.
-
/* */ :
這是註解(Comment),寫給自己看的,用來幫助自己了解自己寫了什麼。電腦會自動忽略掉 /* 和 */ 之間的內容 -
// :
也是註解,不過電腦會自動忽略掉 // 之後一整行的內容
養成寫註解的好習慣會幫助你看懂你在幹嘛,
尤其是程式碼長的時候
Coding 的一小步
'\n' // 換行
'\\' // 輸出 \
'\t' // 相當一個 Tab
'\'' // 輸出 '
'\"' // 輸出 "
補充 : 跳脫字元
用 \ 來幫助輸出一些特定字元
雖然這樣就有兩個字,但對電腦來說,這還是算一個字喔
Coding 的一小步
試著讓 Java 輸出一些自訂的文字吧!
變數 - I
變數宣告 & 使用
變數型別 變數名稱;
變數型別 變數名稱 = 初始值;
變數型別 變數名稱1, 變數名稱2;
變數型別 變數名稱1 = 初始值, 變數名稱2 = 初始值;
變數命名規則
- 名稱不可使用保留字
- 僅能以英文開頭或 "_" 或 "$"
- 可以包含數字,但不可以數字開頭
- 沒有名稱長度上限
建議宣告就指定初始值
建議使用有意義名稱
可以用 age_of_mom 這種底線方式命名
也可以用駝峰 ageOfMom
Java 在編譯期間自動建立的變數通常是以 "$" 開頭來命名,所以盡量別以 "$" 來命名
變數宣告 & 使用
保留字表
| abstract | continue | for | new | switch |
|---|---|---|---|---|
| assert | default | goto | package | synchronized |
| boolean | do | if | private | this |
| break | double | implements | protected | throw |
| byte | else | import | public | throws |
| case | enum | instanceof | return | transient |
| catch | exends | int | short | try |
| char | final | interface | static | void |
| class | finally | long | strictfp | volatile |
| const | float | native | super | while |
| true | false | null |
雖然 String 不是保留字,但也請別使用 String當變數名稱,會發生很多奇怪的事
public class Main {
  public static void main(String[] args) {
    byte by = 1;
    short sht = 666;
    int i = 214748354;
    long l = 999999999999l;
    char c = 'C';
    char ck = '帥';
    char unicode = '\u5a8b';
    boolean b = true;
    String str = "666我好棒";
    float f = 0.87f;
    double d = 0.8787878;
  }
}
變數宣告 & 使用
基本變數型別
| 名稱 | 資料類型 | 範圍 | 備註 |
|---|---|---|---|
| byte | 整數 | -128 ~ 127 | 佔1個位元組 |
| short | 整數 | -32768 ~ 32767 | 佔2個位元組 |
| int | 整數 | -2147483648 ~ 2147483647 |
佔4個位元組 |
| long | 整數 | -9223372036854775808 ~ 9223372036854775807 |
佔8個位元組 |
| char | 單一字元 | 0 ~ 65535 | 佔2個位元組 |
- char 可儲存 Unicode,格式為"\uXXXX",其中"XXXX"為16進位字元代碼,因為中文字也在 Unicode 中,所以可以存單一中文字
- long 型別請在數字後加上 L(or "l")
基本變數型別
| 名稱 | 資料類型 | 範圍 | 備註 |
|---|---|---|---|
| boolean | true / false | 用 "true" / "false" 存值 | |
| String | 字串(一堆字元) | 他其實一種"參照型別"啦 |
| float | 單精度浮點數 | ±3.40282374E+38 ~ ±1.40239846E-45 |
佔4個位元組 |
|---|---|---|---|
| double | 雙精度浮點數 | ±1.79769313486231570E+308 ~ ±4.94065645841246544E-324 | 佔8個位元組 |
- float、double 都可以使用科學記號(如上所示)
- float 請在結尾加上 F(or "f")
- "參照型別"我們之後會細講
-
優先級高先算
-
同等優先級由左到右
-
可用括號()指定先算的部分
Java 的 N 則運算
基本運算子
| 運算子 | 說明 | 優先級 | 計算方向 |
|---|---|---|---|
| ++、-- | 遞增/減 | 1 | 從右到左 |
| +、- | 正/負號 | 1 | 從右到左 |
| ! | 邏輯反向 | 1 | 從右到左 |
| (型別) | 強制轉型 | 1 | 從右到左 |
| *、/、% | 乘、除、取餘數 | 2 | 從左到右 |
| +、- | 加/減法 | 3 | 從左到右 |
| >、<、>=、<= | 比較 | 4 | 從左到右 |
| ==、!= | 等於/不等於比較 | 5 | 從左到右 |
| && | 邏輯"且" | 6 | 從左到右 |
| || | 邏輯"或" | 7 | 從左到右 |
| =、*=、+=、/=、%=、-= | 指定運算(=)和 複合指定運算們 |
8 | 從右到左 |
還有其他運算子,就不一一列舉了
a = a + 1;
public class Main {
  public static void main(String[] args) {
    int a = 0;
    a = a + 1;
    System.out.print(a);
  }
}
猜猜看,結果是什麼?
- 數學老師 : 什麼鬼,沒這東西
- WTF
- 窩不知道
- 0
- 1
System.out.print()是"不換行"版本
a = a + 1;
= 稱為指定運算子,意思為"將右邊的值指定給左邊的變數"
或著是"將左邊的變數設為右邊的值"
a += 1;
public class Main {
  public static void main(String[] args) {
    int a = 0;
    a += 1;
    System.out.println(a);
  }
}
a = a + 1; 懶人寫法
a++ & ++a
public class Main {
  public static void main(String[] argv) {
    int i = 0,j;
    j = (i++) * 10; // 後置遞增
    System.out.println("後置遞增");
    System.out.println("變數 i 的內容是:" + i);
    System.out.println("變數 j 的內容是:" + j);

    i = 0;
    j = (++i) * 10; // 前置遞增
    System.out.println("前置遞增");
    System.out.println("變數 i 的內容是:" + i);
    System.out.println("變數 j 的內容是:" + j);
  }
}System.out.println() 括號裡可用 + 連接多個輸出內容,或直接放算式進去做輸出
System.out.print() 也是
(int)a
public class Main {
  public static void main(String[] argv) {
    float a = 3.14;
    int b = (int)a; // 強制轉型
    System.out.println("a = " + a);
    System.out.println("b = " + b);
  }
}
小數轉整數會失去小數點
整數轉小數可能會有多出來的小數點 ex: 1.000000001234...
沒有(String) (這是另一種神奇的東西,講到物件時會講為什麼不行)
=、==、!=
一個 = 是指定運算子
兩個 == 是比較兩邊的數值一不一樣
a != b 和 !(a == b) 是一樣的
對於 String 型別比較要使用
字串1.equals(字串2)
這種方式比較
原因請參閱 "參照型別"
5 / 2 != 5 / 2.0 ???
public class Main {
  public static void main(String[] argv) {
    System.out.println(5 / 2 == 5 / 2.0);
  }
}
整數除整數答案還是整數,但整數除小數卻會是小數
反之亦然
只要被除數或除數是小數答案就是小數
變數 - II
變數的轉型
自動轉型(又稱"隱式轉型")
public class Main {
  public static void main(String[] argv) {
    double a = 3;
    int c = 1;
    double b = a + c; // 隱式轉型
    System.out.println("a = " + a);
    System.out.println("b = " + b);
  }
}
1. byte、short、int、char、long 型態在這裡會被 Java 自動轉型成 double 型態
因為他和 double 型態的變數 a 作運算了
變數的轉型
自動轉型(又稱"隱式轉型")
public class Main {
  public static void main(String[] argv) {
    double a = 3;
    float c = 1;
    double b = a + c; // 隱式轉型
    System.out.println("a = " + a);
    System.out.println("b = " + b);
  }
}
2. 當 double 遇到 flaot 時,float 會自動轉型成double
變數的轉型
自動轉型(又稱"隱式轉型")
public class Main {
  public static void main(String[] argv) {
    byte a = 3;
    long c = 1;
    long b = a + c; // 隱式轉型
    System.out.println("a = " + a);
    System.out.println("b = " + b);
  }
}
3. 當 byte、short、int、char 遇到 long 時,byte、short、int、char 會自動轉型成 long
變數的轉型
自動轉型(又稱"隱式轉型")
public class Main {
  public static void main(String[] argv) {
    byte a = 3;
    short c = 1;
    int b = a + c; // 隱式轉型
    System.out.println("a = " + a);
    System.out.println("b = " + b);
  }
}
4. 當前面的條件都不滿足時,會自動將
byte、short、char 轉換成 int 型態
變數的轉型
自動轉型(又稱"隱式轉型")
public class Main {
  public static void main(String[] argv) {
    char a = 87;
    short c = 1;
    char b = a + c; // 隱式轉型
    System.out.println("a = " + a);
    System.out.println("b = " + b);
  }
}
char 是以 Unicode 編碼,而 Unicode 前128個編碼符號和 ASCII 一一對應
變數的轉型
強制轉型(又稱"顯式轉型")
沒有(int)"12",真的要可以試試
int a = Integer.parsInt("666");
double b = Double.parsDouble("66.66");
...
public class Main {
  public static void main(String[] argv) {
    float a = 3.14;
    int b = (int)a; // 強制轉型
    System.out.println("a = " + a);
    System.out.println("b = " + b);
  }
}
原因等講到 String 細節時會教
我寫 C 語言都手刻
變數的轉型
強制轉型(又稱"顯式轉型")
沒有(String),真的要可以試試
String a = String.valueOf(666);
...
public class Main {
  public static void main(String[] argv) {
    float a = 3.14;
    int b = (int)a; // 強制轉型
    System.out.println("a = " + a);
    System.out.println("b = " + b);
  }
}手刻方式等到講陣列時會教
我寫 C 語言都手刻
基本輸入/出
Java 的基本輸出/入
輸出 :
- System.out.print()
不會自動換行 - System.out.println()
會自動在輸出結尾處換行
Java 的基本輸出/入
輸入 :
import java.util.Scanner;

public class Main {
  public static void main(String[] args) {
    Scanner sc = new Scanner(System.in);
    int a = sc.nextInt();
    System.out.println(a);
  }
}
必須 import java.util.Scanner 套件
然後建立 Scannner 物件
在使用 sc.nextInt()來取得 int 整數
看不懂沒差,照抄即可
物件導向的東東會在未來講(如果進度可以的話)
Java 的基本輸出/入
各種sc.nextXXX()函式 :
- sc.nextInt() : for int
- sc.nextByte() : for byte
- sc.nextLong() : for long
- sc.nextShort() : for short
- sc.nextBoolean() : for boolean
- sc.nextFloat() : for float
- sc.nextDouble() : for double
- sc.next().charAt(0) : for char
- sc.nextLine() : 輸入一整行的"字串"
- sc.next() : 輸入"字串",以空格區分
記得以正確的資料型別來接收回傳值,不然會出錯
Java 的基本輸出/入
練習題 - zerojudge a001
練習題 - zerojudge a002
流程控制 - I
if
if (條件式) 敘述;
if (條件式)
{
    敘述1;
    敘述2;
    .
    .
    .
}
當條件滿足時,就做後面接的敘述(或大括號裡的事)
if
if (scord >= 60) System.out.println("及格了!");
if (scord < 60)
{
    System.out.println("哈哈哈,重補修吧!");
    restart();
}
當條件滿足時,就做後面接的敘述(或大括號裡的事)
else if
if (scord >= 60) System.out.println("及格了!");
else if (scord < 60)
{
    System.out.println("哈哈哈,重補修吧!");
    restart();
}
可以用 else if 連接多個 if
else if
int a = 10;
if (a >= 10) System.out.println("A");
if (a < 60)
{
    System.out.println("AA");
}
OutPut :
A
AA
int a = 10;
if (a >= 10) System.out.println("A");
else if (a < 60)
{
    System.out.println("AA");
}
OutPut :
A
看出差別了嗎?
else if 會在滿足其中一個條件時無視其他判斷條件
else
if (scord == 100) System.out.println("學霸求帶飛")
else if (scord >= 60) System.out.println("及格了!");
else
{
    System.out.println("哈哈哈,重補修吧!");
    restart();
}
可以用 else 來處理其他沒 if 到的東西
巢狀 if
if (有錢)
{
    if (是資本家)
    {
    	if (開資訊科技公司)
        {
            if (Windows是他的)
            {
            	System.out.println("他一定是比爾蓋茲");
            }
        }
    }
}
if 裡面可以塞很多層 if,else if、else 也是
if
練習題 - zerojudge a053
switch
switch (變數)
{
    case 值:
        敘述1;
        敘述2;
        .
        .
        .
        break;
    case 值:
        敘述1;
        敘述2;
        .
        .
        .
        break;
}
當變數的值和 case 後面接的值一樣時,就做 case 後面的事,直到遇到 break;
switch
char scord = 'A'
switch (scord)
{
    case 'A':
        System.out.println("Great!");
        break;
    case 'B':
        System.out.println("Not bad");
        break;
}
當變數的值和 case 後面接的值一樣時,就做 case 後面的事,直到遇到 break;
default
char scord = 'A'
switch (scord)
{
    case 'A':
        System.out.println("Great!");
        break;
    case 'B':
        System.out.println("Not bad");
        break;
    default:
    	System.out.println("Brush");
}
和 if 的 else 一樣,只不過沒有硬性要求放最後面
若不放最後面,記得加上 break;
default
char scord = 'A'
switch (scord)
{
    default:
    	System.out.println("Brush");
        break;
    case 'A':
        System.out.println("Great!");
        break;
    case 'B':
        System.out.println("Not bad");
}
switch 的最後一個判斷式(case or default)可以不加 break;
不影響執行流程
switch
char scord = 'B';
switch (scord)
{
    case 'A':
        System.out.println("Great!");
    case 'B':
        System.out.println("Not bad");
    default:
    	System.out.println("Brush");
}
OutPut :
Not bad
Brush
char scord = 'A'
switch (scord)
{
    case 'A':
        System.out.println("Great!");
        break;
    case 'B':
        System.out.println("Not bad");
        break;
    default:
    	System.out.println("Brush");
}
OutPut :
Great
看到差別了沒有?
沒有break就會一直執行下去,直到遇到break或switch結束為止
流程控制 - II
for
for (初始值; 終止條件; 每次回圈的變化值;) 敘述;
for (初始值; 終止條件; 每次回圈的變化值;)
{
    敘述1;
    敘述2;
}
可以重複執行的東西
幫助你重複執行某些程式,就不用一直複製貼上了
for
public class Test {
    public static void main(String[] args) {
        for (int a = 0; a < 10; a++) System.out.println(a);
    }
}
執行流程為 :
確立初始值 -> 判斷是否滿足終止條件 -> 執行裡面的敘述 -> 做"遞增值"
巢狀 for
public class Test {
    public static void main(String[] args) {
        for (int a = 1; a <= 10; a++)
        {
            for (int i = 0; i < a; i++)
                System.out.print('*');
            System.out.println();
        }
    }
}
for 裡面當然可以塞 for
執行看看,會有什麼?
for & break
public class Test {
    public static void main(String[] args) {
        for (int a = 1; a <= 10; a++)
        {
            if (a != 5) System.out.println(a);
            else break;
        }
    }
}
當執行期間遇到 break,會直接跳出迴圈
for & continue
public class Test {
    public static void main(String[] args) {
        for (int a = 1; a <= 10; a++)
        {
            if (a != 5) System.out.println(a);
            else continue;
            System.out.println("hi");
        }
    }
}
當執行期間遇到 continue,會直接略過本次迴圈,但不跳出
while
while (終止條件;) 敘述;
while (終止條件;)
{
    敘述1;
    敘述2;
}
可以重複執行的東西
幫助你重複執行某些程式,就不用一直複製貼上了
常用在不確定具體執行次數時使用
while
import java.util.Scanner;

public class Test {
    public static void main(String[] args) {
        Scanner sc = new Scanner(System.in);
        int ans = 666, input = sc.nextInt();
        while (ans != input) input = sc.nextInt();
        System.out.println("NiceTry!(NT)");
    }
}
可以重複執行的東西
幫助你重複執行某些程式,就不用一直複製貼上了
常用在不確定具體執行次數時使用
巢狀while
人家 for 都可以了,憑什麼 while 不行??
具體做法就交給各位思考了
(雖然幾乎用不上)
while & break;
和 for 一樣
請參閱 for & break;
while & continue;
和 for 一樣
請參閱 for & continue;
練習題 - 流程控制
陣列
Java 陣列
變數(物件)型態[] 陣列名稱;Java 的陣列算是一種物件,也因如此會有需多物件的特性
陣列是一種連續的變數儲存空間
可以想成一連串的保險櫃來理解
通常是用來存資料,然後排序
宣告陣列物件
Java 陣列
String[] texts;
int[] As;
Java 的陣列算是一種物件,也因如此會有需多物件的特性
陣列是一種連續的變數儲存空間
可以想成一連串的保險櫃來理解
通常是用來存資料,然後排序
宣告陣列物件
Java 陣列
陣列名稱 = new 陣列型態[陣列大小];可以先宣告再配置,或一起來
配置陣列物件
Java 陣列
String[] texts;
int[] As;

texts = new String[6];
As = new int[10];

double[] DD = new double[666];
可以先宣告再配置,或一起來
實作陣列物件
Java 陣列
public class Test {
    public static void main(String[] args) {
        int[] scord = {100, 95, 87, 66, 78};
        for (int i = 0; i < scord.length; i++)
            System.out.println("學生" + i + 1 + "的成績: " + scord[i]);
    }
}
可以在宣告時直接用 { } 來指定初始值,也只能在宣告時使用
可以透過 陣列名稱.length 來取得陣列長度
可以使用 陣列名稱[索引值]取得某個元素的值
索引值從 0 開始計算,最大值為 陣列大小 - 1
Java 陣列
public class Test {
    public static void main(String[] args) {
        int[] scord = {100, 95, 87, 66, 78};
        System.out.println(scord[5]);
    }
}
索引值從 0 開始計算,最大值為 陣列大小 - 1
超出範圍將會無法編譯
Java 陣列
public class Test {
    public static void main(String[] args) {
        int[] scord = {100, 95, 87, 66, 78};
        for (int i : scord)
            System.out.println(i);
    }
}
陣列可以配合 for 迴圈寫出 for-each 寫法
他會從陣列的第一個元素開始跑回圈,每迴圈一次就將 i 的值按索引值順序依次更新,直到陣列結束
Java 陣列
int[][][] a = new int[3][2];陣列可以多維度
| a[0][0] | a[0][1] |
|---|---|
| a[1][0] | a[1][1] |
| a[2][0] | a[2][1] |
Java 陣列
int[][][] a = new int[3][][];
a[0] = new int[3][1];
a[1] = new int[2][2];
a[2] = new int[666][777];

int[][][] b = new int[][6][] // 錯誤示範
int[][][] c = new int[666][][] // 正確示範
int[][][][] d = new int[777][666][][] // 正確示範
int[][][][] e = new int[9][][6][] // 錯誤示範
陣列可以多維度
也可以不規則形狀(比 C/C++ 簡單多了)
窩畫ㄅ出來QQ
配置陣列時,較低維度可先空著,但高維度不行
Java 陣列
int[][] a = {{1, 2},
             {3, 4, 5}}; //這樣排方便閱讀
陣列可以多維度
也可以不規則形狀(比 C/C++ 簡單多了)
窩畫ㄅ出來QQ
可以在宣告時直接指定初始值
Java 陣列
public class Test {
  public static void main(String[] argv) {
    int[][] a = {{1,2,3,4},
                 {5,6,7}};

    System.out.println("a共有" + a.length + "個元素");

    for(int i = 0;i< a.length;i++) {
      System.out.println("a[" + i + "]共有" + a[i].length + "個元素");

      for(int j = 0;j < a[i].length;j++)
        System.out.println("a[" + i + "][" + j +  "]: " + a[i][j]);
    }
  }
}
多維陣列也可以用 for 迴圈
for-each 也可以
Java 陣列
public class Test {
    public static void main(String[] argv) {
        int[][] a = {{1,2,3,4},
                   {5,6,7,8}};
        for(int i[] : a) {
            for(int j : i)
                System.out.print(j + " ");
            System.out.println();
        }
    }
}
多維陣列也可以用 for 迴圈
for-each 也可以
Java 陣列
public class BubbleSort { // 經典排序法: 氣泡排序法
  public static void main(String[] argv) {
    int[] data = {50, 87, 78, 66, 100, 90}; // 未排序的資料
    int temp; // 用來交換元素的暫存變數

    for(int i = 0;i < data.length - 1;i++) {
      // 共需進行元素個數-1輪
      for(int j = 0;j < data.length - 1 - i;j++ ) {
        // 第i輪比對到倒數第i+1個元素
        if(data[j] > data[j + 1]) {
          temp = data[j];
          data[j] = data[j + 1];
          data[j + 1] = temp;
        }
      }
      System.out.println("");
    }
    for (int i : data)
        System.out.println(i);
  }
}
有了迴圈和陣列,就可以幫陣列做排序了!
不過經典歸經典,泡沫的速度是真的慢......
Java 陣列
補充 : String[] argv
各位目前都不會用到,所以當補充
有興趣、看不懂得可以來問我
參照型別
Java 的參照型別
除了基本型態,其他的物件實例、陣列、字串都是參照型別
雖然這三個都是物件 = =
接下來,將以陣列為例說明參照型別的特殊性質
Java 的參照型別
有學過 C/C++ 指標的接下來可以當指標去理解
參照型別本質就是回傳各種資料型態的參考
每個物件、陣列使用 new 關鍵字宣告出來後
變數儲存的都是該物件、陣列的指標
因此參考有的基本特性 Java 的參照型別都有
Java 的參照型別
int a[] = {1, 2, 3};
a[2] = 666;
參照型別特性 1.
間接存取資料
文言文 :
第二行的程式並不是簡單的把 a[2] 這個變數改成 666
而是先找到 a 所指向的記憶體位址(ex: 0x1b2f35e9...)
再按照索引值計算目標變數所在記憶體的實際位址來取值做運算
Java 的參照型別
int a[] = new int[99999];
a[20823] = 666;
參照型別特性 1.
間接存取資料
白話文 :
- 將變數 a 的內容取出,找到所指向地址
(ex: 100台北市中正區濟南路一段71號) - 按地址找到成功高中,按索引碼找到 20823 所指向的東西
- 將 20823 所指向的東西設為 666
Java 的參照型別
- 將變數 a 的內容取出,找到 a 所指向地址
(ex: 100台北市中正區濟南路一段71號)
Java 的參照型別
2. 按地址找到成功高中,按索引碼找到 20823 所指向的東西

a[20823]
Java 的參照型別
3. 將 a[20823] 所指向的東西設為 666
a[20823]
= 666
Java 的參照型別
所以真正 666 的是講師我,並不是陣列的 a[20823] 這個變數
邏輯是沒有錯啦
這就是間接取值的概念,a 儲存的是"找到這個陣列的地址"
a[20823] 儲存的是"找到這個值的地址"
從一開始就不是儲存資料本身
Java 的參照型別
參照型別特性 2.
指定運算不會複製資料
看看兩個陣列分別輸出什麼?
public class Test {
  public static void main(String[] argv) {
    int[] god = {20, 30, 40};
    int[] me = god; // 將 god 的內容指定給 me

    me[2] = 100; // 更改陣列 me 的內容

    System.out.print("陣列 god 的元素:");
    for(int i : god)
      System.out.print(" " + i);

    System.out.print("\n陣列 me 的元素:");
    for(int i : me)
      System.out.print(" " + i);
  }
}
Java 的參照型別
參照型別特性 2.
指定運算不會複製資料
int me[] = god;
相當於將 god 所指向的地址複製給 me

{20, 30, 40}god
me
Java 的參照型別
參照型別特性 2.
指定運算不會複製資料
me[2] = 100;
相當於將 god & me 所指向的陣列做修改
{20, 30, 100}god
me
Java 的參照型別
參照型別特性 2.
指定運算不會複製資料
因此,才會導致改一個陣列等於改兩個陣列的效果
{20, 30, 100}god
me
Java 的參照型別
所以創世神 = 我,我就是創世神
邏輯上就是這樣
指定運算複製的是"找到這個參照型別的地址"
不是"資料本身"
這點和 C/C++ 的參考很像
不過 C/C++ 的參考對象是固定的,但 Java 可以隨便換
Java 的參照型別
public class Test {
  public static void main(String[] argv) {
    int[] a = {20, 30, 40};  // 原本是 3 個元素的陣列

    System.out.print("陣列a:");
    for(int i : a)
      System.out.print(" " + i);

    a = new int[5]; // 重新配置陣列
    a[0] = 100;
    a[1] = 200;

    System.out.print("\n重新配置陣列a:");
    for(int i : a)
      System.out.print(" " + i);
  }
}陣列因為是參照型別,又因為參照型別可以隨便換參照的地址
所以你完全可以再 new 一個新陣列給他
就像 DD 們的推可以隨便換,因為他們單推整個 Vtuber?
Java 的參照型別
public class Test {
  public static void main(String[] argv) {
    int[] a = {20, 30, 40};  // 原本是 3 個元素的陣列

    System.out.print("陣列a:");
    for(int i : a)
      System.out.print(" " + i);

    a = {100, 200, 0, 0, 0}; // 這好嗎?這不好

    System.out.print("\n重新配置陣列a:");
    for(int i : a)
      System.out.print(" " + i);
  }
}
補充 : 第九行不可以改成
a = {100, 200, 0, 0, 0};
這個只能用在宣告時使用
硬要用會出錯
Java 的參照型別
等到講物件時會再次提到參照型別的其他特性(騷操作)
目前各位知道這些東西就足夠了
Java 的資源回收系統
啊我要是一直 new 一直 new,豈不是要把記憶體塞爆?
public class Test {
  public static void main(String[] argv) {
    int[] a;
    while(true) {
      a = new int[666];
    }
  }
}
Java 的資源回收系統
所有的參照型別的東西都有一個叫參照計數的東東
用來計算有多少個變數是指向這個參照型別
若參照計數歸零,會自動在系統沒那麼操時歸還記憶體資源
各位也不必了解什麼叫"系統沒那麼操"
這咚咚涉及很底層的東西,是 Java 一直在努力優化的其中一項功能
public class Test {
  public static void main(String[] argv) {
    int[] god = {20, 30, 40};
    int[] me = god; // 將 god 的內容指定給 me,{20, 30, 40} 陣列參照計數 +1

    me[2] = 100; // 更改陣列 me 的內容

    System.out.print("陣列 god 的元素:");
    for(int i : god)
      System.out.print(" " + i);

    System.out.print("\n陣列 me 的元素:");
    for(int i : me)
      System.out.print(" " + i);
  }
}
參照計數
Java 的資源回收系統
對於參照型別,你可以使用 null 這個保留字來取消參照東西
原本被參照的東西它的參照計數就會 -1 (哭阿砲車)
當參照計數歸零時,這個參照物就會在系統覺得合適的時機被銷毀
public class Test {
  public static void main(String[] argv) {
    int[] a;
    a = new int[666];
    a = null; // int[666] 將會在系統覺得可以的時間消失!
  }
}
參照計數
方法(Method)
Java 方法
用來將重複功能的程式碼包裝成一個懶人包
醬子就不用打那麼多字
也不用一直複製貼上
(Are you sure?)
public class Test {
    public static void main(String argv[]) {
        for (int i = 0; i < 10; i++)
            Say();
    }

    public static void Say(){
        System.out.println("Hi!");
    }
}
Java 方法
像醬子就不用一直打
System.out.println("Hi!");
(好像沒有比較輕鬆?)
public class Test {
    public static void main(String argv[]) {
        for (int i = 0; i < 10; i++)
            Say();
    }

    public static void Say(){
        System.out.println("Hi!");
    }
}
Java 方法
第六行是方法的基本宣告方式
注意 ! 一定要宣告在和 main() 同類別裡面
static 是一定要的,原因將在後續物件導向中說明
public 可加可不加,原因也將在物件導向中說明
// 方法宣告在這裡不行

public class Test { // main() 的類別,方法一定要宣告在這裡面
    public static void main(String argv[]) {
        方法名稱();
    }

    public static 回傳值型態 方法名稱(){
        敘述1;
        敘述2;
        .
        .
        .
    }
}
// 方法宣告在這裡也不行
Java 方法
參數(引數)
public class Test { // main() 的類別,方法一定要宣告在這裡面
    public static void main(String argv[]) {
        Say("hi"); // 將 "hi" 當 String 型態參數傳入 Say() 中
    }

    public static void Say(String text){
        System.out.println(text);
    }
}
在宣告方法的括號中加上參數的型態與名稱,即可在函式中使用
該變數僅在函式中生效
Java 方法
參數(引數)
public class Test { // main() 的類別,方法一定要宣告在這裡面
    public static void main(String argv[]) {
        int[] s = {60, 60, 60, 60, 60};
        Say("我的英文快裂開了", 16, true, s);
    }

    public static void Say(String name, int age, boolean DD, int[] scord){
        System.out.print("Hi, my name is " + name +
                      ".\nI'm " + age + " years old.\nAnd I'm " +
                      (DD ? "a DD." : "not a DD.") + "\nMy socord:");
        for(int i : scord)
           System.out.print(" " + i);
    }
}
參數可以有很多個,沒有限制
參數型態也可以有很多種
都以逗號( , )區隔
? : 是一種運算元
用法如下 :
(條件式) ? (條件為真回傳值) : (條件為假回傳值)
Java 方法
回傳值
public class Test { // main() 的類別,方法一定要宣告在這裡面
    public static void main(String argv[]) {
        int[] s = {60, 60, 60, 60, 60};
        int sum = Sum(s);
        System.out.println(sum);
    }

    public static int/*在這裡指定回傳型態!*/ Sum(int[] array){
        int i = 0;
        for (int j : array)
           i += j;
        return i; // i 必須是 int 型態!
    }
}
將回傳型態從 void 改為其他型態或物件時
一定要用 return 回傳一個對應型態的變數或物件
例如這裡宣告時指定 int,那我 return 的 i 就必須是 int
Java 方法
回傳值
public class Test { // main() 的類別,方法一定要宣告在這裡面
    public static void main(String argv[]) {
        int[] s = {60, 60, 60, 60, 60};
        System.out.println(Sum(s)); // 把 Sum() 的回傳值當參數用
    }

    public static int/*在這裡指定回傳型態!*/ Sum(int[] array){
        int i = 0;
        for (int j : array)
           i += j;
        return i; // i 必須是 int 型態!
    }
}
回傳值可以直接當參數用
Java 方法
看到這你可能明白了
System.out.print() 其實是一種方法
可是為什麼他如此萬能
參數支援各式各樣的型態呢?
Java 方法
多載(Overloading)
有一種東西叫做方法簽名(Signature)不是家長簽名
這是 Java 用來辨識各種方法的重要依據
public class Test {
    public static void main(String argv[]) {
        for (int i = 0; i < 10; i++)
            Say();
    }

    public static void Say(){
        System.out.println("Hi!");
    }
}
對於類別 Test 來說,Say() 是他的類別方法
main() 也是
你現在對於 main() 的了解只差 public 和 static
棒不棒?
String[] argv 是給終端機玩家玩的,各位完全可以用 Scanner 來取得資料,有興趣可以找我私下聊
Java 方法
多載(Overloading)
public class Test {
    public static void main(String argv[]) {
        for (int i = 0; i < 10; i++)
            Say();
    }

    public static void Say(){
        System.out.println("Hi!");
    }
    public static void Say(int i){
        System.out.println(i);
    }
    public static void Say(String i){
        System.out.println(i);
    }
    public static void Say(String i, int b){
        System.out.println(i + b);
    }
}
Java 方法簽名的依據
- 方法名稱
- 方法的參數型態
- 方法的參數數量
- 絕對沒有參數的名稱
- 絕對沒有方法的回傳型態
像 Say() 一樣,同名稱方法不同用途
醬子就叫做"多載"
Java 方法
public class Argument {
  public static void main(String[] argv){
    int i = 20;

    System.out.println("前 i = " + i);
    changePara(i);   // 傳入 i
    System.out.println("後 i = " + i);
  }

  public static void changePara(int x) { // 會修改參數值的方法
    System.out.println("...方法參數 x = "+ x);
    System.out.println("...修改中");
    x++;   // 更改接收到的參數值
    System.out.println("...現在參數 x = "+ x);
  }
}
參數傳遞 : Call by value
對於基本型別,會複製原始值當參數給方法
Java 方法
public class Test {
    public static void main(String argv[]) {
        int[] i = {10, 100};
        Set(0, 2, i); // 將 i[0] 設為 2
        for(int j : i)
            System.out.print(j + " ");
    }

    public static void Set(int a, int b, int[] data){
        data[a] = b; // 修改
    }
}
參數傳遞 : Call by reference
對於參照型別,會把整個原始值當參數給方法
因為複製的是"找到資料的地址"
不是"資料本身"
還記得之前講的參照型別特性嗎?
Java 方法
public class Test {
    public static void main(String argv[]) {
        for (int i = 0; i < 10; i++)
            Say();
    }

    public static void Say(){
        System.out.println("Hi!");
        Say(666);
    }
    public static void Say(int i){
        System.out.println(i);
    }
}
小細節
方法裡面可以呼叫其他方法
也可以呼叫多載的同名方法
Java 方法
public class Test {
    public static void main(String argv[]) {
        Say(1);
    }

    public void Say(int i){
        System.out.println(i);
        Say(i);
    }
}
小細節
要是呼叫方法簽名和自己一樣的方法(也就是自己)
我們稱之為"遞迴"
要記得為遞迴設置終止條件
不然執行期間會出事
Java 方法
public class Test {
    public static void main(String argv[]) {
        System.out.println(Factorial(5));
    }

    public long Factorial(int i){
        if (i == 1) return 1;
        else return Factorial(i - 1) * i;
    }
}
小細節
使用遞迴可以做到很多神奇的事
例如算階乘
很多演算法都是基於遞迴完成的
對演算法有興趣的同學可以找隔壁算法班的講師學算法
雖然他是教 C++,但算法的概念是一樣的,就語法不一樣而已
而且 C++ 大多數的基本語法和 Java 差不多
Java 方法
import java.util.Scanner;

public class Test {
  public static void main(String[] argv) {
    int[] data = new int[10];
      Scanner sc = new Scanner(System.in);

    for(int i = 0;i < data.length;i++)
      data[i] = sc.nextInt();

    // 排序
    quickSort(0, data.length - 1, data);

    show(data);
  }
  static void quickSort(int start, int end, int[] data) {
    // 如果只有一個元素,直接返回
    if(start >= end) {
       return;
    }

    // 取得中間元素的值
    int mid = data[(start + end) / 2];

    int left = start;
    int right = end;
    while(left < right) { // 還未相遇
    // 往尾端搜尋
      while((left < end) && (data[left] < mid)) {
        left++;
      }

    // 往前端搜尋
      while((right > start) && (data[right] > mid)) {
        right--;
      }

    // 還未交錯
      if(left <= right) {
        int temp = data[left]; // 交換元素
        data[left] = data[right];
        data[right] = temp;
        left++; // 往尾端移動
        right--; // 往前端移動
      }
    }

    // 遞迴排序前後兩段
    quickSort(start, right, data);
    quickSort(left, end, data);
  }
  static void show(int[] data) {
    for(int i:data) {
      System.out.print(i +" ");
    }
    System.out.println("");
  }
}
遞迴の騷操作
遞迴也可以排序
例如快速排序演算法
效率快泡沫不知道多少倍(一個 一個
O(n^2)
O(nlog(n)))
物件導向程式設計
Object-Oriented Programming
(OOP)
各位辛苦這麼久
終於可以學一些 Java 的精髓了!
鼓掌~
到這裡為止,前面所介紹的範例程式都還算小型
但對於 Java 來說
Java 希望不管程式碼多簡單
都盡可能以物件導向的概念去設計程式
一直派軍機擾台的鄰居翻譯為"面向對象程序設計"
啊所以物件導向到底是啥?
既然稱為物件導向,那肯定要先介紹物件,對吧?
類別(class) 與物件
class 名稱{
    屬性1;
    屬性2;
    .
    .
    .
    行為1(){
    }
    行為2(){
    }
    .
    .
    .
}類別基本宣告如下:
每個類別,都會有不同的屬性(自己的變數)和行為(自己的方法)
可以把類別想像成藍圖
按照藍圖定義所製作的成品就是物件
註: 類別中的變數又稱成員
類別(class) 與物件
class person{
    int age;
    String name;

    void Say(){
        System.out.println("My name is " + name);
    }
    void Ask(){
        System.out.println("How old are you?");
    }
}

public class Main {
    public static void main(String[] argv){
    }
}類別基本宣告如下:
每個類別,都會有不同的屬性(自己的變數)和行為(自己的方法)
可以把類別想像成藍圖
按照藍圖定義所製作的成品就是物件
類別(class) 與物件
類別名稱 物件名稱 = new 類別名稱();物件基本宣告如下:
是不是感覺和宣告陣列很像?
因為陣列其實就是一種物件
唯一的區別就是陣列要用中括號
物件用小括號
類別(class) 與物件
public class Main {
    public static void main(String[] argv){
        person asadfggle = new person();
        asadfggle.age = 16;
        asadfggle.name = "Minecraft God";
        asadfgglie.Say();
        asadfgglie.Ask();
    }
}

class person{
    int age;
    String name;

    void Say(){
        System.out.println("My name is " + name);
    }
    void Ask(){
        System.out.println("How old are you?");
    }
}物件基本宣告如下:
按照藍圖定義所製作的成品就是物件
物件的各個參數可以用 物件名稱.參數 來存取
物件的方法也是
物件之間的值不會互相影響
public class Main {
    public static void main(String[] argv){
        person man = new person(), female = new person();
        man.age = 16;
        man.name = "man";
        female.age = 12;
        female.name = "female";
        man.Say();
        female.Say();
    }
}
class person{
    int age;
    String name;

    void Say(){
        System.out.println("My name is " + name);
    }
    void Ask(){
        System.out.println("How old are you?");
    }
}
其實你在用 String 的時候就知道了,每個 String 都是獨立分開的
就算內容一樣也是分開的
要注意,物件變數存的都是參照
class Test { // 測試類別
  int x = 3; // 設定初始值

  void show() {
    System.out.println("x = " + x);
  }
}

public class Main {

  public static void main(String[] argv){
    Test a,b,c;

    a = new Test();  // 建立 2 個物件並做比較
    b = new Test();
    System.out.println("a == b ? " + (a == b));

    c = b;           // 讓 c 和 b 參照到同一物件
    c.x = 10;
    System.out.println("c == b ? " + (c == b));
    System.out.print("a.");
    a.show();
    System.out.print("b.");
    b.show();
    System.out.print("c.");
    c.show();
  }
}
所以不能用 == 來比較,要用 物件.參數 的方式
一個一個參數去比較
而且之前提到的參照型別特性,物件也全都會有
物件陣列
class Card {  // 代表卡的類別
  long id;      // 卡號
  int money;    // 餘額

  void show() {  // 顯示卡片資訊的方法
    System.out.print("卡號 "+ id);
    System.out.println(", 餘額 " + money + " 元 ");
  }
}

public class Main {
  public static void main(String[] argv) {
    Card[] Cards = new Card[6];     // 建立物件陣列

    for(int i = 0; i < Cards.length; i++) {
      Cards[i] = new Card();         // 要記得建立物件
      Cards[i].id = 0x666666AB + i;  // 0x來表示16進位的數字,還記得嗎?
      Cards[i].money = 666 + i * 123;
    }

    for(Card c : Cards)  // 也可以用 For-each 迴圈
      c.show();      // 呼叫方法
  }
}
物件也可以建立陣列
只是要記得一個一個 new 出來
不然不能用
方法的參數
class Test {
    long id;

    void set(long value) {
        id = value;
    }
}

public class Main {
    public static void main(String[] argv) {
      Test tmp = new Test();
      tmp.set(666);
      System.out.println(tmp.id);
    }
}再給方法的參數命名時,要注意不要和類別的變數撞名
不然會產生遮蔽效應
記得注意方法的 Call By Value 和 Call By Reference
方法可以有回傳值,要記得用對應變數或物件去接收回傳值
return 也別忘記加
遮蔽效應
class Test {
    long id;

    void set(long id) {
        id = id;
    }
}

public class Main {
    public static void main(String[] argv) {
      Test tmp = new Test();
      tmp.set(666);
      System.out.println(tmp.id);
    }
}
試試看,tmp.id 等於多少?
遮蔽效應
class Test {
    long id;

    void set(long id) {
        this.id = id;
    }
}

public class Main {
    public static void main(String[] argv) {
      Test tmp = new Test();
      tmp.set(666);
      System.out.println(tmp.id);
    }
}
this
要是真的懶得取名,或想不到其他名子
可以用 this 關鍵字
這樣就可以區分類別裡的成員和方法裡的參數了
有趣但實用的騷操作
class Test {
    void show(String[] text) {
        for(String t:text)
            System.out.println(t);
    }
}

public class Main {
    public static void main(String[] argv) {
      Test tmp = new Test();
      tmp.show(new String[]{"666","777","888"});
    }
}
匿名陣列
有時候要傳參數的時候,每次都要為了參數創一個陣列顯得有點麻煩
擁有聰明的智商又佔領高地了!的 Java 開發者想出了新方法 - 匿名陣列
一個僅作為傳遞參數用途的陣列,酷吧?
方法的多載
class Test {
    void show(String[] text) {
        for(String t:text)
            System.out.println(t);
    }
    void show(int i){
        System.out.println(i);
    }
}

public class Main {
    public static void main(String[] argv) {
      Test tmp = new Test();
      tmp.show(new String[]{"666k","777k","888k"});
      tmp.show(123)
    }
}
對,就是那個多載
對於類別的方法而言,一樣也可以多載
畢竟程式設計師的天賦點沒有點太多在取名上
對吧?
建構物件
建構子
public class Main {
    public static void main(String[] argv){
        person man = new person(), female = new person();
        man.age = 16;
        man.name = "man";
        female.age = 12;
        female.name = "female";
        man.Say();
        female.Say();
    }
}
class person{
    int age;
    String name;

    void Say(){
        System.out.println("My name is " + name);
    }
    void Ask(){
        System.out.println("How old are you?");
    }
}
每次都要 物件.參數 一一設定各個物件的值
很麻煩對吧?
建構子
class person{
    int age;
    String name;

    void Say(){
        System.out.println("My name is " + name);
    }
    void Ask(){
        System.out.println("How old are you?");
    }
    person(int age, String name){
        this.age = age;
        this.name = name;
    }
}
public class Main {
    public static void main(String[] argv){
        person man = new person(16, "man"), female = new person(12, "female");
        man.Say();
        female.Say();
    }
}
有注意到 line:11 的東東嗎?
像這種東東我們稱為"建構子"
建構子你可以想成一個初始化物件的方法
在 new 一個新的物件時,要記得在括號中傳入對應的參數
建構子多載
class person{
    int age;
    String name;

    void Say(){
        System.out.println("My name is " + name);
    }
    void Ask(){
        System.out.println("How old are you?");
    }
    person(int age, String name){
        this.age = age;
        this.name = name;
    }
    person(int age){
        this.age = age;
        this.name = "I don\'t have a name. QQ :(";
    }
}
public class Main {
    public static void main(String[] argv){
        person man = new person(16, "man"), female = new person(12);
        man.Say();
        female.Say();
    }
}
建構子既然是一種方法,當然可以多載
建構子多載的騷操作
class person{
    int age;
    String name;

    void Say(){
        System.out.println("My name is " + name);
    }
    void Ask(){
        System.out.println("How old are you?");
    }
    person(int age, String name){
        this.age = age;
        this.name = name;
    }
    person(int age){
        this.age = age;
        this.name = "I don\'t have a name. QQ :(";
    }
}
public class Main {
    public static void main(String[] argv){
        person man = new person(16, "man"), female = new person(12);
        man.Say();
        female.Say();
    }
}
注意 line:16,你會發現和 line:12 的建構方法差不多
差別是只少一個參數而已
那麼,我們有什麼方法來簡化程式碼呢?
建構子多載的騷操作
class person{
    int age;
    String name;

    void Say(){
        System.out.println("My name is " + name);
    }
    void Ask(){
        System.out.println("How old are you?");
    }
    person(int age, String name){
        this.age = age;
        this.name = name;
    }
    person(int age){
        this(age, "I don\'t have a name. QQ :(");
    }
}
public class Main {
    public static void main(String[] argv){
        person man = new person(16, "man"), female = new person(12);
        man.Say();
        female.Say();
    }
}
這種運用這種方式,就可以加大維護程式碼的方便程度
還可以少寫一點程式碼
一舉兩得,爽否?
封裝與資訊隱藏
在物件導向中,我們希望其他程式設計師不僅不能直接存取我們類別的屬性,同樣也不能直接修改我們類別的屬性,醬子就叫做資訊隱藏(Informatiom Hiding)
好處是:
當你今天超勇的,開發了一個框架(假設是Minecraft的插件框架)
你要是有做好資訊隱藏與封裝,那你只需要負責提供類別、方法即可
其他人用你的Minecraft的插件框架開發時,
他們也只需要用你提供的方法、類別,不需要管你怎麼辦到的
這麼一來你在更新框架、維護框架時,只要你不去改變類別名稱、方法的簽名,那別人在更新框架時完全不需要改自己的程式碼
這麼一來就可以讓你專心開發框架
其他人專心用你的框架
實現分工合作
起不美哉
But how to do that?
存取控制字符(Access Mocifier)
| 字符 | 說明 |
|---|---|
| private | 只有在成員所屬類別中才可使用 |
| protected | 在子類別或同套件中的類別可以使用 |
| public | 沒有限制 |
| (沒有控制字符) | 同套件就可以 |
private
public
class person{
  private int age;
  String name;
  person(int age){
      this.age = age;
  }
}
public class Test {
  public static void main(String[] argv){
      person female = new person(12);
      System.out.println(female.age);
  }
}
class person{
public int age;
String name;
person(int age){
this.age = age;
}
}
public class Test {
public static void main(String[] argv){
person man = new person(12);
System.out.println(man.age);
}
}在第11行的時候,左邊的程式碼會出錯,但右邊的不會
private
public
class person{
  private int age;
  String name;
  person(int age){
      this.age = age;
  }

  private int get_age(){
      return this.age;
  }
}
public class Test {
  public static void main(String[] argv){
      person female = new person(12);
      System.out.println(female.get_age());
  }
}
class person{
private int age;
String name;
person(int age){
this.age = age;
}
public int get_age(){
return this.age;
}
}
public class Test {
public static void main(String[] argv){
person female = new person(12);
System.out.println(female.get_age());
}
}在第11行的時候,左邊的程式碼會出錯,但右邊的不會
同樣的,方法也可以用存取控制字符來修飾
所謂資訊隱藏
- 除非必要,否則請養成為所有成員變數加上private的好習慣
- 如果要修改或存取某個成員變數的值,請建立一個get_XXX()或set_XXX()方法
- 如果需要透過成員變數來做某些事,請為其建立對應方法
- 所有要給外界使用的方法都應該設為public
- 對於建構方法,除非必要,請不要使用private,否則你會new不出來
- 如果有些方法是類別自己內部專用的方法,記得加上private
只要做到以上所有事,你就隱藏一半的資訊了
一個 new 不出來的栗子
class person{
  private int age;
  String name;
  private person(int age){
      this.age = age;
  }
}
public class Test {
  public static void main(String[] argv){
      person female = new person(12); // Oh, new 不出來的可憐人
      System.out.println(female.name);
  }
}
你沒隱藏的剩下那一半資訊 - 物件成員資訊
先看下面的例子
class Point {   // 點
  private double x,y;

  public void set_x(double x) {
    this.x = x;
  }

  public void set_y(double y) {
    this.y = y;
  }

  public String toString() { // 將物件資訊轉成字串
    return "(" + x + "," + y + ")";
  }

  public Point(double x,double y) {
    this.x = x;
    this.y = y;
  }

  public Point() {
    x = y = 0;
  }
}

class Circle {       // 圓
  private Point p;   // 圓心
  private double r;  // 半徑

  public Point get_p() {
    return p;        // 直接傳回成員物件
  }

  Circle(double x,double y,double r) {
    p = new Point(x,y);
    this.r = r;
  }

  Circle() {
    this(0,0,1);
  }

  public String toString() {  // 將物件資訊轉成字串
    return "圓心:" + p.toString() + " 半徑:" + r;
  }
}

public class SettingPrivateMember {
  public static void main(String[] argv) {
    Circle c = new Circle(3,4,5);  // 圓心 (3,4), 半徑 5

    Point p = c.get_p();            // 取得圓心的參照
    p.set_x(6);                     // 變更圓心座標
    System.out.println(c.toString());
  }
}
你沒隱藏的剩下那一半資訊 - 物件成員資訊
正確的作法
class Point {   // 點
  private double x,y;

  public void set_x(double x) {
    this.x = x;
  }

  public void set_y(double y) {
    this.y = y;
  }

  public String toString() { // 將物件資訊轉成字串
    return "(" + x + "," + y + ")";
  }

  public Point(double x,double y) {
    this.x = x;
    this.y = y;
  }

  public Point() {
    x = y = 0;
  }
  public Point(Point p){ // 複製物件用的建構子
    this(p.x, p.y);
  }
}

class Circle {       // 圓
  private Point p;   // 圓心
  private double r;  // 半徑

  public Point get_p() {
    Point tmp = new Point(p); // 複製一個複製品
    return tmp;               // 再傳回複製的成員物件
  }

  Circle(double x,double y,double r) {
    p = new Point(x,y);
    this.r = r;
  }

  Circle() {
    this(0,0,1);
  }

  public String toString() {  // 將物件資訊轉成字串
    return "圓心:" + p.toString() + " 半徑:" + this.r;
  }
}

public class SettingPrivateMember {
  public static void main(String[] argv) {
    Circle c = new Circle(3,4,5);     // 圓心 (3,4), 半徑 5

    Point p = c.get_p();              // 取得圓心的參照
    p.set_x(6);                       // 變更圓心座標
    System.out.println(c.toString()); // 顆顆,改不了了吧
  }
}
所謂資訊隱藏
- 除非必要,否則請養成為所有成員變數加上private的好習慣
- 如果要修改或存取某個成員變數的值,請建立一個get_XXX()或set_XXX()方法
- 如果需要透過成員變數來做某些事,請為其建立對應方法
- 所有要給外界使用的方法都應該設為public
- 對於建構方法,除非必要,請不要使用private,否則你會new不出來
- 如果有些方法是類別自己內部專用的方法,記得加上private
- 如果是要透過方法存取物件成員,請回傳複製的一個新物件
只要做到以上所有事,你就成功的隱藏資訊了
這就是所謂的封裝
static
當成員變數遇到static
class hi{
  public static int h;
}

public class SettingPrivateMember {
  public static void main(String[] argv) {
    hi c = new hi();
    hi p = new hi();
    p.h = 666;              // 將p.h設為666
    System.out.println(c.h);// Isn't it cool?
  }
}
只要是同類別的物件都會共享 static 的成員
當成員變數遇到static
class hi{
  public static int h;
}

public class SettingPrivateMember {
  public static void main(String[] argv) {
    hi.h = 777;              // 將hi的static變數設為666
    hi p = new hi();
    System.out.println(p.h);
  }
}
只要是 static 的成員變數,可以直接用類別名稱呼叫,不需要另外建構新物件
當方法遇到static
class hi{
  public static void haha(){
    System.out.println(666);
  }
}

public class SettingPrivateMember {
  public static void main(String[] argv) {
    hi.haha();
  }
}
只要是 static 的方法,可以直接用類別名稱呼叫,不需要另外建構新物件
當方法遇到static
class hi{
  public static void haha(){
    System.out.println(666);
  }
}

public class SettingPrivateMember {
  public static void main(String[] argv) {
    hi tmp = new hi();
    tmp.haha();
  }
}
雖然是 static 的方法,但還是可以用物件呼叫就是了
當方法遇到static
class hi{
  static int i = 789;
  public static void haha(){
    System.out.println(i); // i 必須是 static 才行!
  }
}

public class SettingPrivateMember {
  public static void main(String[] argv) {
    hi.haha();
  }
}
static 方法中僅能使用 static 成員變數
static 區塊
class person{
  static int age;

  static{
    age = 666;
  }

  public person(){}

}
public class Test {
  public static void main(String[] argv){
      person man = new person();
      System.out.println(man.age);
  }
}
用來在一開始設定 static 變數初始值的地方
String 基本應用
這個東東其實和物件導向沒啥關係
不過和各位將來打比賽、寫自己的摳、做模組/插件時有很大的關係
尤其是插件,涉及字串處理
因此還是蠻有必要說明一下
至於現在才講是因為有些東東需要一點物件導向的概念後,各位在使用以下所述方法時會比較清楚他到底在幹嘛
在看完這篇字串的應用說明後,
相信各位會發現就算我根本不知道底層實際的演算法是啥,
我也可以輕鬆的處理字串,
也就更能體會字串的妙用
String 物件的產生
字串本質是一個 String 物件
所以宣告一個字串變數,其實就是 new 一個 String 物件參照出來
然後讓變數名稱指向參照
因此,你有以下建構子來建構字串物件:
| 方法 | 說明 |
|---|---|
| String() | 建立空字串 |
| String(char[] value) | 建立 value 內容的字串 |
| String(char[] value, int offset, int count) | 建立從 value[offset] 開始取出 count 個元素,以此為內容的字串 |
| String(String original) | 複製一個 original 的字串 |
| String(StringBuffer buffer) | 由 StringBuffer 建立字串 |
| String(StringBuilder builder) | 由 StringBuilder 建立字串 |
StringBuilder & StringBuffer 為另類字串類別,有一些特殊用法,有興趣可以自行研究
public class Test {

  public static void main(String[] argv) {

    char[] test = {'這','是','個','測','試','字','串'};
    String a = new String();         // 空字串
    String b = new String(test);     // "這是個測試字串"
    String c = new String(test,2,3); // "個測試"
    String d = new String(b);        // b 字串的副本

    System.out.println("a:" + a);
    System.out.println("b:" + b);
    System.out.println("c:" + c);
    System.out.println("d:" + d);

    // d 是 b 的副本
    System.out.println("b == d ?" + (b == d)); // 兩者參照不同
  }
}
要注意,字串是物件,不可直接用 == 來比較是否相同
就算是副本也不行
Java 對字串的特別支援
public class Test {
  public static void main(String[] argv) {
    // 為何 a 可以這樣定義?
    String a = "Look that move!\nLook that move!\nWhat was that!\nFaker!";
    System.out.println(a);
  }
}
對於所有字串的字面常數
Java 會自動為它建立一個 String 的參照
所以字面常數可以使用 String 的方法
public class ConstructString {
  public static void main(String[] argv) {
    System.out.println("a".equals("a"));
  }
}
Java 對字串的特別支援
public class ConstructString {
  public static void main(String[] argv) {
    System.out.println("a" + "a");
  }
}
對於所有字串的加法
Java 會自動把兩個字串接起來
並回傳新字串的全新參照
public class ConstructString {
  public static void main(String[] argv) {
    String a = "a";
    String tmp = a; // 取得 a 的參照
    a += ""; // 做字串加法
    System.out.println(a == tmp); // 比較兩個字串的參照
  }
}
String 的物件特性
自動轉型
class TestString {
  public String toString() {
    return "666";
  }
}

public class Test {
  public static void main(String[] argv) {
    TestString t = new TestString();
    String a = "測試字串";
    String b = a + t; // 等同 String b = a + t.toString();

    System.out.println("a:" + a);
    System.out.println("b:" + b);
  }
}
如果遇到非字串與字串作加法,
Java 會嘗試呼叫該物件的 toString() 方法
String 的方法
public boolean equals(Object anObject)
public class Test {
  public static void main(String[] argv) {
    String a = "abcd";
    System.out.println(a.equals("ab"));
  }
}
比較兩個字串的文本內容是否相同
有忽視大小寫的 equalsIgnoreCase() 版本
Object 表示你可以傳入任何物件
不過根據底層實作定義,
只有 String 類別物件或子類別物件才會比較是否相同
其他的會直接回傳 false
String 的方法
public int compareTo(String anotherString)
public class Test {
  public static void main(String[] argv) {
    String a = "abcd";
    System.out.println(a.compareTo("abcb"));
    System.out.println(a.compareTo("abcd"));
    System.out.println(a.compareTo("abce"));
    System.out.println(a.compareTo("abcde"));
    System.out.println(a.compareTo("Abcd"));
  }
}String 的方法
public char charAt(int index)
public class Test {
  public static void main(String[] argv) {
    String a = "測試字串";
    System.out.println(a.charAt(2));
  }
}
可以把字串當成一個 char 陣列
用 charAt() 來取得對應索引碼的字元
String 的方法
public int length()
public class Test {
  public static void main(String[] argv) {
    String a = "878kk";
    System.out.println(a.length());
  }
}
回傳字串長度
String 的方法
public String toUpperCase()
public class Test {
  public static void main(String[] argv) {
    String a = "878kk";
    System.out.println(a.toUpperCase());
    System.out.println(a);
  }
}
將字串中的小寫字母轉換成大寫後回傳
原始字串不變
String 的方法
public String toLowerCase()
public class Test {
  public static void main(String[] argv) {
    String a = "878ABl";
    System.out.println(a.toLowerCase());
    System.out.println(a);
  }
}
將字串中的大寫字母轉換成小寫後回傳
原始字串不變
String 的方法
public boolean contains(CharSequence s)
public class CompareTo {
  public static void main(String[] argv) {
    String a = "abcd";
    System.out.println(a.contains("ab"));
    System.out.println(a.contains("abc"));
    System.out.println(a.contains("abcd"));
    System.out.println(a.contains("abcde"));
    System.out.println(a.contains("Abcd"));
  }
}
比較字串 s 是否為原始字串的一部分
CharSequence 是一種介面
現在各位只需要知道所有 CharSequence 類型參數都可以傳入
String、StringBuffer、StringBuilder 類別物件即可
String 的方法
public boolean startsWith(String prefix)
public class Test {
  public static void main(String[] argv) {
    String a = "878kk";
    System.out.println(a.startsWith("87"));
  }
}檢查字串開頭是否為 suffix 字串
String 的方法
public boolean endsWith(String suffix)
public class Test {
  public static void main(String[] argv) {
    String a = "878kk";
    System.out.println(a.endsWith("kk"));
  }
}檢查字串結尾是否為 suffix 字串
String 的方法
public String trim()
public class Test {
  public static void main(String[] argv) {
    String a = "\t878ABl666878   ";
    System.out.println("..." + a.trim() + "??");
    System.out.println("..." + a + "??");
  }
}
將字串開頭和結尾的空格、\t 定位字元去除並回傳
原始字串不變
String 的方法
public int indexOf(String str, int fromIndex)
public int indexOf(int ch, int fromIndex)
public class Test {
  public static void main(String[] argv) {
    String a = "878kk";
    System.out.println(a.indexOf('8', 1));
    System.out.println(a.indexOf("8k", 1));
  }
}
從第 fromIndex 個字開始
往後尋找第一次出現 str 字串或 ch 字元的索引碼
有對應的 lastIndexOf() 方法
用於往前尋找
大致告一段落
其他的有興趣可以翻官方文件說明
練習題
final
當你會用 static 設定物件的共用變數時,
通常這個變數是屬於"常數"資料
也就是設定了初始值後就不可以隨便更改
例如角色的初始攻擊力等等
那麼,就可以使用 final 這個存取控制來限制
class person{
  static final int age;

  static{
    age = 666;
  }

  public person(){}

}
public class Test {
  public static void main(String[] argv){
      person man = new person();
      System.out.println(man.age);
  }
}
像這樣,所有的 person 物件都不能更改age的值
並且 age 這個值還是所有 person 物件共享
繼承
有時候,你會發現有些類別很相似
例如
寵物類別 & 狗狗類別
都很可愛(屬性)
都有名子(屬性)
狗狗會叫(方法)(多的方法)
狗狗會討摸摸(方法)(多的方法)
狗狗是哺乳類(屬性)(多的屬性)
class Pet{
  boolean isCute = true;
  String name;
}
class Dog{
  boolean isCute = true;
  String name;

  public void Say(){
    System.out.println("汪");
  }
  public void touchMe(){
    System.out.println("我要討摸摸!");
  }
  boolean isMammals = true;
}
public class Test{
  public static void main(String[] argv) {
  }
}
可以發現,兩個類別某些定義完全一樣
你可以這麼說:
"狗狗類別就是寵物類別的進階完善版"
阿今天我除了狗狗,還有貓咪、兔子、烏龜怎麼辦?
那就多定義幾個類別就好了,對嗎?
class Dog{
  boolean isCute = true;
  String name;

  public void Say(){
    System.out.println("汪");
  }
  public void touchMe(){
    System.out.println("我要討摸摸!");
  }
  boolean isMammals = true;
}
class Cat{
  boolean isCute = true;
  String name;

  public void Say(){
    System.out.println("Meow");
  }
  public void touchMe(){
    System.out.println("我要討摸摸!");
  }

    boolean isMammals = true;

  private String emotion;
}
class Rabbbit{
  boolean isCute = true;
  String name;

  public void Say(){
    System.out.println("咭!");
  }
  public void touchMe(){
    System.out.println("我要討摸摸!");
  }
  boolean isMammals = true;

  boolean peko;
}
class Turtle{
  boolean isCute = true;
  String name;

  boolean isMammals = false;

  boolean Zzzzz;
}
public class Test{
  public static void main(String[] argv) {
  }
}
辣麼多類別都要一一定義多麻煩阿
更別提要做修改了
往高層次來看,剛剛這些都是寵物隊吧?
那麼,有沒有一種更簡潔的寫法呢?
class Pet{
  boolean isCute = true;
  String name;
  boolean isMammals = true;
}
class Dog extends Pet{
  public void Say(){
    System.out.println("汪");
  }
  public void touchMe(){
    System.out.println("我要討摸摸!");
  }
}
class Cat extends Pet{
  public void Say(){
    System.out.println("Meow");
  }
  public void touchMe(){
    System.out.println("我要討摸摸!");
  }
  private String emotion;
}
class Rabbbit extends Pet{
  public void Say(){
    System.out.println("咭!");
  }
  public void touchMe(){
    System.out.println("我要討摸摸!");
  }
  boolean peko;
}
class Turtle extends Pet{
  boolean Zzzzz;
  Turtle(){
    this.isMammals = false;
  }
}
public class Test{
  public static void main(String[] argv) {
  }
}
物件的繼承 - extends
在定義類別時,使用 extends 來繼承其他類別
這樣繼承的新類別會自帶被繼承類別的一切屬性、方法
其中,Pet 類別被稱為"父類別"
Dog、Cat 等類別被稱為"子類別"
建構子的呼叫順序
從輩分大的開始呼叫
最後才是當前類別
class Parent{
  Parent(){
    System.out.println("Call me Dady!");
  }
  Parent(String text){
    System.out.println(text);
  }
}
class Child extends Parent{
  Child(){
    System.out.println("I want money, Dad.");
  }
}
public class Test{
  public static void main(String[] argv) {
    Child son = new Child();
  }
}
在呼叫父類別的建構子時,預設呼叫無參數版本
建構子的呼叫順序
呼叫其他版本的父類別建構子
class Parent{
  Parent(){
    System.out.println("Call me Dady!");
  }
  Parent(String text){
    System.out.println(text);
  }
}
class Child extends Parent{
  Child(){
    super("666");
    System.out.println("I want money, Dad.");
  }
}
public class Test{
  public static void main(String[] argv) {
    Child son = new Child();
  }
}
使用 super() 來呼叫
注意,super() 僅能出現在子類別建構子中的第一行
protected
class Parent{
  Parent(){
    System.out.println("Call me Dady!");
  }
  Parent(String text){
    System.out.println(text);
  }
  protected String name;
}
class Child extends Parent{
  Child(String text){
    super(text);
    System.out.println("I want money, Dad.");
    name = text;
  }
}
public class Test{
  public static void main(String[] argv) {
    Child son = new Child("gg");
  }
}
protected 的存取權限為子類別才可以存取
這樣要是有哪些是想讓子類別存取卻又不想讓外界存取的東西就可以設定為 protected
繼承可以很多層
就像你外婆生了你媽,你媽生了你一樣多層
class Grandma{
  Grandma(){
    System.out.println("Call me Grandma.");
  }
  Grandma(String text){
    System.out.println(text);
  }
  protected String name;
}
class Mom extends Grandma{
  Mom(){
    System.out.println("Call me Mom!");
  }
  Mom(String text){
    System.out.println(text);
  }
}
class Child extends Mom{
  Child(String text){
    super(text);
    System.out.println("I want money, mom.");
    name = text;
  }
}
public class Test{
  public static void main(String[] argv) {
    Child son = new Child("gg");
  }
}
遮蔽效應
class Mom{
  Mom(){
  }
  int age = 30;
}
class Child extends Mom{
  int age;
  Child(int age){
    this.age = age;
  }
}
public class Test{
  public static void main(String[] argv) {
    Child son = new Child(18);
    System.out.println(son.age);
    System.out.println();
    System.out.println(new Mom().age);
  }
}
若子類別與父類別有同名的屬性,以參照物件類別的屬性為優先考量
方法的重新定義
Override
class Mom{
  Mom(){
  }
  void Say(){
    System.out.println("Say Mom");
  }
}
class Child extends Mom{
  Child(){
  }
  void Say(){
    System.out.println("Say Hi");
  }
}
public class Test{
  public static void main(String[] argv) {
    Child son = new Child();
    Mom mom = new Mom();
    mom.Say();
    son.Say();
  }
}
若子類別與父類別有同簽名的方法,會重新以子類別的方法來改寫定義
方法的重新定義
@Override
class Mom{
  Mom(){
  }
  void Say(){
    System.out.println("Say Mom");
  }
}
class Child extends Mom{
  Child(){
  }
  @Override
  void Say(){
    System.out.println("Say Hi");
  }
}
public class Test{
  public static void main(String[] argv) {
    Child son = new Child();
    Mom mom = new Mom();
    mom.Say();
    son.Say();
  }
}
可以用 @Override 來告訴編譯器這個方法就是要複寫(Override)父類別方法用的
若編譯器發現父類別沒有同樣簽名的方法,就會出錯
final 與方法
被標記為 final 的方法不可以被覆寫
class Mom{
  Mom(){
  }
  final void Say(){
    System.out.println("Say Mom");
  }
}
class Child extends Mom{
  Child(){
  }
  void Say(){ // 不可以 Override
    System.out.println("Say Hi");
  }
}
public class Test{
  public static void main(String[] argv) {
    Child son = new Child();
    Mom mom = new Mom();
    mom.Say();
    son.Say();
  }
}
所有人的爹
Object 類別
/*
* Copyright (c) 1994, 2012, Oracle and/or its affiliates. All rights reserved.
* ORACLE PROPRIETARY/CONFIDENTIAL. Use is subject to license terms.
*
*
*
*
*
*
*
*
*
*
*
*
*
*
*
*
*
*
*
*
*/
package java.lang;
/**
* Class {@code Object} is the root of the class hierarchy.
* Every class has {@code Object} as a superclass. All objects,
* including arrays, implement the methods of this class.
*
* @author unascribed
* @see java.lang.Class
* @since JDK1.0
*/
public class Object {
private static native void registerNatives();
static {
registerNatives();
}
/**
* Returns the runtime class of this {@code Object}. The returned
* {@code Class} object is the object that is locked by {@code
* static synchronized} methods of the represented class.
*
* <p><b>The actual result type is {@code Class<? extends |X|>}
* where {@code |X|} is the erasure of the static type of the
* expression on which {@code getClass} is called.</b> For
* example, no cast is required in this code fragment:</p>
*
* <p>
* {@code Number n = 0; }<br>
* {@code Class<? extends Number> c = n.getClass(); }
* </p>
*
* @return The {@code Class} object that represents the runtime
* class of this object.
* @jls 15.8.2 Class Literals
*/
public final native Class<?> getClass();
/**
* Returns a hash code value for the object. This method is
* supported for the benefit of hash tables such as those provided by
* {@link java.util.HashMap}.
* <p>
* The general contract of {@code hashCode} is:
* <ul>
* <li>Whenever it is invoked on the same object more than once during
* an execution of a Java application, the {@code hashCode} method
* must consistently return the same integer, provided no information
* used in {@code equals} comparisons on the object is modified.
* This integer need not remain consistent from one execution of an
* application to another execution of the same application.
* <li>If two objects are equal according to the {@code equals(Object)}
* method, then calling the {@code hashCode} method on each of
* the two objects must produce the same integer result.
* <li>It is <em>not</em> required that if two objects are unequal
* according to the {@link java.lang.Object#equals(java.lang.Object)}
* method, then calling the {@code hashCode} method on each of the
* two objects must produce distinct integer results. However, the
* programmer should be aware that producing distinct integer results
* for unequal objects may improve the performance of hash tables.
* </ul>
* <p>
* As much as is reasonably practical, the hashCode method defined by
* class {@code Object} does return distinct integers for distinct
* objects. (This is typically implemented by converting the internal
* address of the object into an integer, but this implementation
* technique is not required by the
* Java™ programming language.)
*
* @return a hash code value for this object.
* @see java.lang.Object#equals(java.lang.Object)
* @see java.lang.System#identityHashCode
*/
public native int hashCode();
/**
* Indicates whether some other object is "equal to" this one.
* <p>
* The {@code equals} method implements an equivalence relation
* on non-null object references:
* <ul>
* <li>It is <i>reflexive</i>: for any non-null reference value
* {@code x}, {@code x.equals(x)} should return
* {@code true}.
* <li>It is <i>symmetric</i>: for any non-null reference values
* {@code x} and {@code y}, {@code x.equals(y)}
* should return {@code true} if and only if
* {@code y.equals(x)} returns {@code true}.
* <li>It is <i>transitive</i>: for any non-null reference values
* {@code x}, {@code y}, and {@code z}, if
* {@code x.equals(y)} returns {@code true} and
* {@code y.equals(z)} returns {@code true}, then
* {@code x.equals(z)} should return {@code true}.
* <li>It is <i>consistent</i>: for any non-null reference values
* {@code x} and {@code y}, multiple invocations of
* {@code x.equals(y)} consistently return {@code true}
* or consistently return {@code false}, provided no
* information used in {@code equals} comparisons on the
* objects is modified.
* <li>For any non-null reference value {@code x},
* {@code x.equals(null)} should return {@code false}.
* </ul>
* <p>
* The {@code equals} method for class {@code Object} implements
* the most discriminating possible equivalence relation on objects;
* that is, for any non-null reference values {@code x} and
* {@code y}, this method returns {@code true} if and only
* if {@code x} and {@code y} refer to the same object
* ({@code x == y} has the value {@code true}).
* <p>
* Note that it is generally necessary to override the {@code hashCode}
* method whenever this method is overridden, so as to maintain the
* general contract for the {@code hashCode} method, which states
* that equal objects must have equal hash codes.
*
* @param obj the reference object with which to compare.
* @return {@code true} if this object is the same as the obj
* argument; {@code false} otherwise.
* @see #hashCode()
* @see java.util.HashMap
*/
public boolean equals(Object obj) {
return (this == obj);
}
/**
* Creates and returns a copy of this object. The precise meaning
* of "copy" may depend on the class of the object. The general
* intent is that, for any object {@code x}, the expression:
* <blockquote>
* <pre>
* x.clone() != x</pre></blockquote>
* will be true, and that the expression:
* <blockquote>
* <pre>
* x.clone().getClass() == x.getClass()</pre></blockquote>
* will be {@code true}, but these are not absolute requirements.
* While it is typically the case that:
* <blockquote>
* <pre>
* x.clone().equals(x)</pre></blockquote>
* will be {@code true}, this is not an absolute requirement.
* <p>
* By convention, the returned object should be obtained by calling
* {@code super.clone}. If a class and all of its superclasses (except
* {@code Object}) obey this convention, it will be the case that
* {@code x.clone().getClass() == x.getClass()}.
* <p>
* By convention, the object returned by this method should be independent
* of this object (which is being cloned). To achieve this independence,
* it may be necessary to modify one or more fields of the object returned
* by {@code super.clone} before returning it. Typically, this means
* copying any mutable objects that comprise the internal "deep structure"
* of the object being cloned and replacing the references to these
* objects with references to the copies. If a class contains only
* primitive fields or references to immutable objects, then it is usually
* the case that no fields in the object returned by {@code super.clone}
* need to be modified.
* <p>
* The method {@code clone} for class {@code Object} performs a
* specific cloning operation. First, if the class of this object does
* not implement the interface {@code Cloneable}, then a
* {@code CloneNotSupportedException} is thrown. Note that all arrays
* are considered to implement the interface {@code Cloneable} and that
* the return type of the {@code clone} method of an array type {@code T[]}
* is {@code T[]} where T is any reference or primitive type.
* Otherwise, this method creates a new instance of the class of this
* object and initializes all its fields with exactly the contents of
* the corresponding fields of this object, as if by assignment; the
* contents of the fields are not themselves cloned. Thus, this method
* performs a "shallow copy" of this object, not a "deep copy" operation.
* <p>
* The class {@code Object} does not itself implement the interface
* {@code Cloneable}, so calling the {@code clone} method on an object
* whose class is {@code Object} will result in throwing an
* exception at run time.
*
* @return a clone of this instance.
* @throws CloneNotSupportedException if the object's class does not
* support the {@code Cloneable} interface. Subclasses
* that override the {@code clone} method can also
* throw this exception to indicate that an instance cannot
* be cloned.
* @see java.lang.Cloneable
*/
protected native Object clone() throws CloneNotSupportedException;
/**
* Returns a string representation of the object. In general, the
* {@code toString} method returns a string that
* "textually represents" this object. The result should
* be a concise but informative representation that is easy for a
* person to read.
* It is recommended that all subclasses override this method.
* <p>
* The {@code toString} method for class {@code Object}
* returns a string consisting of the name of the class of which the
* object is an instance, the at-sign character `{@code @}', and
* the unsigned hexadecimal representation of the hash code of the
* object. In other words, this method returns a string equal to the
* value of:
* <blockquote>
* <pre>
* getClass().getName() + '@' + Integer.toHexString(hashCode())
* </pre></blockquote>
*
* @return a string representation of the object.
*/
public String toString() {
    return getClass().getName() + "@" + Integer.toHexString(hashCode());
}
/**
* Wakes up a single thread that is waiting on this object's
* monitor. If any threads are waiting on this object, one of them
* is chosen to be awakened. The choice is arbitrary and occurs at
* the discretion of the implementation. A thread waits on an object's
* monitor by calling one of the {@code wait} methods.
* <p>
* The awakened thread will not be able to proceed until the current
* thread relinquishes the lock on this object. The awakened thread will
* compete in the usual manner with any other threads that might be
* actively competing to synchronize on this object; for example, the
* awakened thread enjoys no reliable privilege or disadvantage in being
* the next thread to lock this object.
* <p>
* This method should only be called by a thread that is the owner
* of this object's monitor. A thread becomes the owner of the
* object's monitor in one of three ways:
* <ul>
* <li>By executing a synchronized instance method of that object.
* <li>By executing the body of a {@code synchronized} statement
* that synchronizes on the object.
* <li>For objects of type {@code Class,} by executing a
* synchronized static method of that class.
* </ul>
* <p>
* Only one thread at a time can own an object's monitor.
*
* @throws IllegalMonitorStateException if the current thread is not
* the owner of this object's monitor.
* @see java.lang.Object#notifyAll()
* @see java.lang.Object#wait()
*/
public final native void notify();
/**
* Wakes up all threads that are waiting on this object's monitor. A
* thread waits on an object's monitor by calling one of the
* {@code wait} methods.
* <p>
* The awakened threads will not be able to proceed until the current
* thread relinquishes the lock on this object. The awakened threads
* will compete in the usual manner with any other threads that might
* be actively competing to synchronize on this object; for example,
* the awakened threads enjoy no reliable privilege or disadvantage in
* being the next thread to lock this object.
* <p>
* This method should only be called by a thread that is the owner
* of this object's monitor. See the {@code notify} method for a
* description of the ways in which a thread can become the owner of
* a monitor.
*
* @throws IllegalMonitorStateException if the current thread is not
* the owner of this object's monitor.
* @see java.lang.Object#notify()
* @see java.lang.Object#wait()
*/
public final native void notifyAll();
/**
* Causes the current thread to wait until either another thread invokes the
* {@link java.lang.Object#notify()} method or the
* {@link java.lang.Object#notifyAll()} method for this object, or a
* specified amount of time has elapsed.
* <p>
* The current thread must own this object's monitor.
* <p>
* This method causes the current thread (call it <var>T</var>) to
* place itself in the wait set for this object and then to relinquish
* any and all synchronization claims on this object. Thread <var>T</var>
* becomes disabled for thread scheduling purposes and lies dormant
* until one of four things happens:
* <ul>
* <li>Some other thread invokes the {@code notify} method for this
* object and thread <var>T</var> happens to be arbitrarily chosen as
* the thread to be awakened.
* <li>Some other thread invokes the {@code notifyAll} method for this
* object.
* <li>Some other thread {@linkplain Thread#interrupt() interrupts}
* thread <var>T</var>.
* <li>The specified amount of real time has elapsed, more or less. If
* {@code timeout} is zero, however, then real time is not taken into
* consideration and the thread simply waits until notified.
* </ul>
* The thread <var>T</var> is then removed from the wait set for this
* object and re-enabled for thread scheduling. It then competes in the
* usual manner with other threads for the right to synchronize on the
* object; once it has gained control of the object, all its
* synchronization claims on the object are restored to the status quo
* ante - that is, to the situation as of the time that the {@code wait}
* method was invoked. Thread <var>T</var> then returns from the
* invocation of the {@code wait} method. Thus, on return from the
* {@code wait} method, the synchronization state of the object and of
* thread {@code T} is exactly as it was when the {@code wait} method
* was invoked.
* <p>
* A thread can also wake up without being notified, interrupted, or
* timing out, a so-called <i>spurious wakeup</i>. While this will rarely
* occur in practice, applications must guard against it by testing for
* the condition that should have caused the thread to be awakened, and
* continuing to wait if the condition is not satisfied. In other words,
* waits should always occur in loops, like this one:
* <pre>
* synchronized (obj) {
* while (<condition does not hold>)
* obj.wait(timeout);
* ... // Perform action appropriate to condition
* }
* </pre>
* (For more information on this topic, see Section 3.2.3 in Doug Lea's
* "Concurrent Programming in Java (Second Edition)" (Addison-Wesley,
* 2000), or Item 50 in Joshua Bloch's "Effective Java Programming
* Language Guide" (Addison-Wesley, 2001).
*
* <p>If the current thread is {@linkplain java.lang.Thread#interrupt()
* interrupted} by any thread before or while it is waiting, then an
* {@code InterruptedException} is thrown. This exception is not
* thrown until the lock status of this object has been restored as
* described above.
*
* <p>
* Note that the {@code wait} method, as it places the current thread
* into the wait set for this object, unlocks only this object; any
* other objects on which the current thread may be synchronized remain
* locked while the thread waits.
* <p>
* This method should only be called by a thread that is the owner
* of this object's monitor. See the {@code notify} method for a
* description of the ways in which a thread can become the owner of
* a monitor.
*
* @param timeout the maximum time to wait in milliseconds.
* @throws IllegalArgumentException if the value of timeout is
* negative.
* @throws IllegalMonitorStateException if the current thread is not
* the owner of the object's monitor.
* @throws InterruptedException if any thread interrupted the
* current thread before or while the current thread
* was waiting for a notification. The <i>interrupted
* status</i> of the current thread is cleared when
* this exception is thrown.
* @see java.lang.Object#notify()
* @see java.lang.Object#notifyAll()
*/
public final native void wait(long timeout) throws InterruptedException;
/**
* Causes the current thread to wait until another thread invokes the
* {@link java.lang.Object#notify()} method or the
* {@link java.lang.Object#notifyAll()} method for this object, or
* some other thread interrupts the current thread, or a certain
* amount of real time has elapsed.
* <p>
* This method is similar to the {@code wait} method of one
* argument, but it allows finer control over the amount of time to
* wait for a notification before giving up. The amount of real time,
* measured in nanoseconds, is given by:
* <blockquote>
* <pre>
* 1000000*timeout+nanos</pre></blockquote>
* <p>
* In all other respects, this method does the same thing as the
* method {@link #wait(long)} of one argument. In particular,
* {@code wait(0, 0)} means the same thing as {@code wait(0)}.
* <p>
* The current thread must own this object's monitor. The thread
* releases ownership of this monitor and waits until either of the
* following two conditions has occurred:
* <ul>
* <li>Another thread notifies threads waiting on this object's monitor
* to wake up either through a call to the {@code notify} method
* or the {@code notifyAll} method.
* <li>The timeout period, specified by {@code timeout}
* milliseconds plus {@code nanos} nanoseconds arguments, has
* elapsed.
* </ul>
* <p>
* The thread then waits until it can re-obtain ownership of the
* monitor and resumes execution.
* <p>
* As in the one argument version, interrupts and spurious wakeups are
* possible, and this method should always be used in a loop:
* <pre>
* synchronized (obj) {
* while (<condition does not hold>)
* obj.wait(timeout, nanos);
* ... // Perform action appropriate to condition
* }
* </pre>
* This method should only be called by a thread that is the owner
* of this object's monitor. See the {@code notify} method for a
* description of the ways in which a thread can become the owner of
* a monitor.
*
* @param timeout the maximum time to wait in milliseconds.
* @param nanos additional time, in nanoseconds range
* 0-999999.
* @throws IllegalArgumentException if the value of timeout is
* negative or the value of nanos is
* not in the range 0-999999.
* @throws IllegalMonitorStateException if the current thread is not
* the owner of this object's monitor.
* @throws InterruptedException if any thread interrupted the
* current thread before or while the current thread
* was waiting for a notification. The <i>interrupted
* status</i> of the current thread is cleared when
* this exception is thrown.
*/
public final void wait(long timeout, int nanos) throws InterruptedException {
if (timeout < 0) {
throw new IllegalArgumentException("timeout value is negative");
}
if (nanos < 0 || nanos > 999999) {
throw new IllegalArgumentException(
"nanosecond timeout value out of range");
}
if (nanos > 0) {
timeout++;
}
wait(timeout);
}
/**
* Causes the current thread to wait until another thread invokes the
* {@link java.lang.Object#notify()} method or the
* {@link java.lang.Object#notifyAll()} method for this object.
* In other words, this method behaves exactly as if it simply
* performs the call {@code wait(0)}.
* <p>
* The current thread must own this object's monitor. The thread
* releases ownership of this monitor and waits until another thread
* notifies threads waiting on this object's monitor to wake up
* either through a call to the {@code notify} method or the
* {@code notifyAll} method. The thread then waits until it can
* re-obtain ownership of the monitor and resumes execution.
* <p>
* As in the one argument version, interrupts and spurious wakeups are
* possible, and this method should always be used in a loop:
* <pre>
* synchronized (obj) {
* while (<condition does not hold>)
* obj.wait();
* ... // Perform action appropriate to condition
* }
* </pre>
* This method should only be called by a thread that is the owner
* of this object's monitor. See the {@code notify} method for a
* description of the ways in which a thread can become the owner of
* a monitor.
*
* @throws IllegalMonitorStateException if the current thread is not
* the owner of the object's monitor.
* @throws InterruptedException if any thread interrupted the
* current thread before or while the current thread
* was waiting for a notification. The <i>interrupted
* status</i> of the current thread is cleared when
* this exception is thrown.
* @see java.lang.Object#notify()
* @see java.lang.Object#notifyAll()
*/
public final void wait() throws InterruptedException {
wait(0);
}
/**
* Called by the garbage collector on an object when garbage collection
* determines that there are no more references to the object.
* A subclass overrides the {@code finalize} method to dispose of
* system resources or to perform other cleanup.
* <p>
* The general contract of {@code finalize} is that it is invoked
* if and when the Java™ virtual
* machine has determined that there is no longer any
* means by which this object can be accessed by any thread that has
* not yet died, except as a result of an action taken by the
* finalization of some other object or class which is ready to be
* finalized. The {@code finalize} method may take any action, including
* making this object available again to other threads; the usual purpose
* of {@code finalize}, however, is to perform cleanup actions before
* the object is irrevocably discarded. For example, the finalize method
* for an object that represents an input/output connection might perform
* explicit I/O transactions to break the connection before the object is
* permanently discarded.
* <p>
* The {@code finalize} method of class {@code Object} performs no
* special action; it simply returns normally. Subclasses of
* {@code Object} may override this definition.
* <p>
* The Java programming language does not guarantee which thread will
* invoke the {@code finalize} method for any given object. It is
* guaranteed, however, that the thread that invokes finalize will not
* be holding any user-visible synchronization locks when finalize is
* invoked. If an uncaught exception is thrown by the finalize method,
* the exception is ignored and finalization of that object terminates.
* <p>
* After the {@code finalize} method has been invoked for an object, no
* further action is taken until the Java virtual machine has again
* determined that there is no longer any means by which this object can
* be accessed by any thread that has not yet died, including possible
* actions by other objects or classes which are ready to be finalized,
* at which point the object may be discarded.
* <p>
* The {@code finalize} method is never invoked more than once by a Java
* virtual machine for any given object.
* <p>
* Any exception thrown by the {@code finalize} method causes
* the finalization of this object to be halted, but is otherwise
* ignored.
*
* @throws Throwable the {@code Exception} raised by this method
* @see java.lang.ref.WeakReference
* @see java.lang.ref.PhantomReference
* @jls 12.6 Finalization of Class Instances
*/
protected void finalize() throws Throwable { }
}
所有類別的最頂層的父類別就是 Object 類別
若沒有使用 extends 指定繼承的類別
預設會自動繼承 Object 類別
所有人的爹
Object 類別
所有類別的最頂層的父類別就是 Object 類別
若沒有使用 extends 指定繼承的類別
預設會自動繼承 Object 類別
所以 Object 類別中,有一些方法是推薦各位去覆寫的
- toString()
- equals()
所有人的爹
Object 類別
toString()
public String toString() {
return getClass().getName() + "@" + Integer.toHexString(hashCode());
}這是 Object 類別中的原始定義
就是回傳類別名稱與記憶體資訊
所有人的爹
Object 類別
equals()
public boolean equals(Object obj) {
    return (this == obj);
}
這是 Object 類別中的原始定義
就僅僅是比較兩個物件的參照是否相同而已
final 類別
不可以被當成父類別的類別
就是絕子絕孫的類別
class Mom{
  Mom(){
  }
  void Say(){
    System.out.println("Say Mom");
  }
}
final class Child extends Mom{ // 斷子絕孫!
  Child(){
  }
  @Override
  void Say(){
    System.out.println("Say Hi");
  }
}
public class Test{
  public static void main(String[] argv) {
    Child son = new Child();
    Mom mom = new Mom();
    mom.Say();
    son.Say();
  }
}
多型
Polymorphism
(Poly-mor-phism)
其實就是把集合的概念拿到程式設計中
例如:
我們是人類
我們同時是靈長目
我們也同時是哺乳綱
我們還是脊索動物門
我們屬於動物界
所以,人類有:
- 動物界的基本屬性、方法
- 脊索動物門的屬性、方法
- 哺乳綱的屬性、方法
- 靈長目的屬性、方法
- 人類的專有屬性、方法
因此,若"人類"是一個類別,那"人類"的"父類別"們的成員變數、方法一定包含在人類中
例如:
脊索動物門類別有"脊髓"這個屬性
人類也有"脊髓"
哺乳綱類別會"哺乳"這個方法
人類也會
既然如此,我讓一個父類別的物件變數指向一個子類別參照,並且使用其父類別方法,可以嗎?
其實就是我讓哺乳動物物件變數指向人類物件,
然後問這個物件變數可不可以使用"哺乳"這個方法的意思
多型
父類別的方法
Override (覆寫)
class Mammalia{
  void breastFeeding(){
    System.out.println("我會哺乳");
  }
}
class Human extends Mammalia{
  @Override
  void breastFeeding(){
    System.out.println("我是人類,我會哺乳");
  }
}
public class Test{
  public static void main(String[] argv) {
    Human person = new Human();
    Mammalia Mammalia = person;
    Mammalia.breastFeeding();
    // 呼叫 Mammalia 類別的方法還是 Human 類別的方法?
  }
}
不管父類別是哪個父類別,一律以
所指向的類別參照來考慮呼叫的方法
多型
父類別的方法
Overloading (多載)
class Mammalia{
  void breastFeeding(){
    System.out.println("我會哺乳");
  }
}
class Human extends Mammalia{
  void breastFeeding(String text){ // Overloading(多載父類別方法)
    System.out.println(text + "我會哺乳");
  }
  // 沒有定義 breastFeeding() 無參數的方法
}
public class Test{
  public static void main(String[] argv) {
    Human person = new Human();
    Mammalia Mammalia = person;
    Mammalia.breastFeeding();
    // 呼叫 Mammalia 類別的方法還是 Human 類別的方法?
  }
}若所指向的物件參照沒有該方法
依序往上尋找父類別中有的方法
多型
編譯時的檢查
class Mammalia{
  void breastFeeding(){
    System.out.println("我會哺乳");
  }
}
class Human extends Mammalia{
  void breastFeeding(String text){ // Overloading(多載父類別方法)
    System.out.println(text + "我會哺乳");
  }
}
public class Test{
  public static void main(String[] argv) {
    Human person = new Human();
    Mammalia Mammalia = person;
    Mammalia.breastFeeding("666");
    // 可以編譯嗎?
    // 如果可以,是呼叫 Mammalia 類別的方法還是 Human 類別的方法?
  }
}編譯時,編譯器會檢查父類別有沒有對應的方法簽名,但實際執行時卻是以所指向的物件參照為準
如果父類別沒有對應的方法簽名,會無法編譯
總結一下
參照型別決定可以呼叫哪些方法
參照指向的物件決定要呼叫哪個版本的方法
也就是解決覆寫方法所帶來的方法呼叫問題
多型的規則
- Java 編譯器先找出參照變數所屬的類別
- 檢查參照變數所屬類別有沒有該方法簽名如果沒有,就無法編譯
- 執行程式時,JVM 會以參照所指性的物件呼叫該物件的方法
多型的應用
今天,我有各種圖案
我想計算他們的面積總和
那我們就可以運用多型在方法上的特性
多型的運用
class shape{
    double area(){return 0;}
    // 僅僅用於存在,使多型成立
}
class cicyle extends shape{
    double r;

    cicyle(double r){
        this.r = r;
    }

    @Override
    double area(){
        return r * r * Math.PI;
    }
}
class rectangle extends shape{
    double h, w;

    rectangle(double h, double w){
        this.h = h;
        this.w = w;
    }

    @Override
    double area(){
        return h * w;
    }
}
public class Test{
    public static void main(String[] args) {
        cicyle c = new cicyle(5);
        rectangle rect1 = new rectangle(3, 5);
        rectangle rect2 = new rectangle(3, 2);

        System.out.println(sumArea(new shape[]{rect1, rect2})); // 傳入 rectangle class 的陣列
        System.out.println(sumArea(new shape[]{c, rect1})); // 傳入有 cicyle class 和 rectangle class 的陣列
    }
    static double sumArea(shape[] shapeList){
        double sum = 0;
        for (shape shape : shapeList) {
            sum += shape.area(); // 顆顆,多行無情計算,都不需要管傳入了什麼物件
        }
        return sum;
    }
}
以圓形與長方形為例
我可以透過多形讓他們共同的父類別 shape 建立陣列
再將陣列中的元素指向我們各自物件的實例
最後用迴圈來執行 area() 方法
這樣就不需要在乎要怎麼處理不同形狀計算面積公式不同的問題
instanceof
檢查前面的物件是不是屬於後面的類別(或父類別)
拿剛剛的例子來改改做示範
class shape{
    double area(){return 0;}
    // 僅僅用於存在,使多型成立
}
class cicyle extends shape{
    double r;

    cicyle(double r){
        this.r = r;
    }

    @Override
    double area(){
        return r * r * Math.PI;
    }
}
class rectangle extends shape{
    double h, w;

    rectangle(double h, double w){
        this.h = h;
        this.w = w;
    }

    @Override
    double area(){
        return h * w;
    }
}
public class Test{
    public static void main(String[] args) {
        shape s;
        cicyle c = new cicyle(5);
        rectangle rect = new rectangle(3, 5);

        s = c;
        System.out.println(s instanceof cicyle);
        s = rect;
        System.out.println(s instanceof cicyle);
    }
}
物件的強制轉型
class shape{
    double area(){return 0;}
    // 僅僅用於存在,使多型成立
}
class cicyle extends shape{
    double r;

    cicyle(double r){
        this.r = r;
    }

    @Override
    double area(){
        return r * r * Math.PI;
    }
}
class rectangle extends shape{
    double h, w;

    rectangle(double h, double w){
        this.h = h;
        this.w = w;
    }

    @Override
    double area(){
        return h * w;
    }
}
public class Test{
    public static void main(String[] args) {
        shape s;
        cicyle c = new cicyle(5);
        rectangle rect = new rectangle(3, 5);

        s = c;
        System.out.println(s instanceof cicyle);
        s = rect;
        System.out.println(s instanceof cicyle);
        rectangle another = (rectangle)s;
        System.out.println(another == rect); // 參照還是一樣
        System.out.println(s instanceof rectangle);
    }
}
除了父類別轉成子類別
反過來也行
物件的強制轉型
class shape{
    double area(){return 0;}
    // 僅僅用於存在,使多型成立
}
class cicyle extends shape{
    double r;

    cicyle(double r){
        this.r = r;
    }

    @Override
    double area(){
        return r * r * Math.PI;
    }
}
class rectangle extends shape{
    double h, w;

    rectangle(double h, double w){
        this.h = h;
        this.w = w;
    }

    @Override
    double area(){
        return h * w;
    }
}
public class Test{
    public static void main(String[] args) {
        shape s;
        cicyle c = new cicyle(5);
        rectangle rect = new rectangle(3, 5);

        s = c;
        System.out.println(s instanceof cicyle);
        s = rect;
        System.out.println(s instanceof cicyle);
        s = (shape)s;
        System.out.println(s.h); // error
    }
}
子類別轉成父類別時
子類別新增的屬性、方法都會失效
除非重新轉型成子類別
多型的騷操作
可以傳入任何東西的方法
class shape{
    double area(){return 0;}
    // 僅僅用於存在,使多型成立
}
class cicyle extends shape{
    double r;

    cicyle(double r){
        this.r = r;
    }

    @Override
    double area(){
        return r * r * Math.PI;
    }
}
class rectangle extends shape{
    double h, w;

    rectangle(double h, double w){
        this.h = h;
        this.w = w;
    }

    @Override
    double area(){
        return h * w;
    }
}
public class Test{
    public static void main(String[] args) {
        shape s = new shape();
        cicyle c = new cicyle(5);
        rectangle rect = new rectangle(3, 5);
        test(s);
        System.out.println("==========");
        test(c);
        System.out.println("==========");
        test(rect);
    }
    static void test(Object obj){
        System.out.println(obj);
        if(obj instanceof cicyle){
            cicyle c = (cicyle)obj;
            System.out.println(c.r);
            System.out.println(c.area());
        }
        else if(obj instanceof rectangle){
            rectangle r = (rectangle)obj;
            System.out.println(r.h);
            System.out.println(r.w);
            System.out.println(r.area());
        }
        else if(obj instanceof shape){
            shape s = (shape)obj;
            System.out.println(s.area());
        }
    }
}
這裡的任何東西包含基本的 int 等等
如果是基本型別
Java 會自動幫你把它變成一個對應型態的物件
稱為"自動封包"
抽象類別
Abstract class
還記得上次上課時的範例嗎?
多型的運用
class shape{
    double area(){return 0;}
    // 僅僅用於存在,使多型成立
}
class cicyle extends shape{
    double r;

    cicyle(double r){
        this.r = r;
    }

    @Override
    double area(){
        return r * r * Math.PI;
    }
}
class rectangle extends shape{
    double h, w;

    rectangle(double h, double w){
        this.h = h;
        this.w = w;
    }

    @Override
    double area(){
        return h * w;
    }
}
public class Test{
    public static void main(String[] args) {
        cicyle c = new cicyle(5);
        rectangle rect1 = new rectangle(3, 5);
        rectangle rect2 = new rectangle(3, 2);

        System.out.println(sumArea(new shape[]{rect1, rect2})); // 傳入 rectangle class 的陣列
        System.out.println(sumArea(new shape[]{c, rect1})); // 傳入有 cicyle class 和 rectangle class 的陣列
    }
    static double sumArea(shape[] shapeList){
        double sum = 0;
        for (shape shape : shapeList) {
            sum += shape.area(); // 顆顆,多行無情計算,都不需要管傳入了什麼物件
        }
        return sum;
    }
}
這個範例中的 shape 類別在我們的設計中
僅僅是一個用於讓多型成立的角色
不過卻需要為此定義一個 area() 方法
還要讓其回傳 0
不覺得有點囉嗦嗎?
在剛剛的範例中
shape 類別不應該用於實例化成實際物件
真正的物件應該是 shape 類別的子類別
因此,我們可以將 shape 類別標記為
"抽象類別"
抽象類別
abstract class shape{
    double area(){return 0;}
    // 僅僅用於存在,使多型成立
}
class cicyle extends shape{
    double r;

    cicyle(double r){
        this.r = r;
    }

    @Override
    double area(){
        return r * r * Math.PI;
    }
}
class rectangle extends shape{
    double h, w;

    rectangle(double h, double w){
        this.h = h;
        this.w = w;
    }

    @Override
    double area(){
        return h * w;
    }
}
public class Test{
    public static void main(String[] args) {
        cicyle c = new cicyle(5);
        rectangle rect1 = new rectangle(3, 5);
        rectangle rect2 = new rectangle(3, 2);

        System.out.println(sumArea(new shape[]{rect1, rect2})); // 傳入 rectangle class 的陣列
        System.out.println(sumArea(new shape[]{c, rect1})); // 傳入有 cicyle class 和 rectangle class 的陣列
    }
    static double sumArea(shape[] shapeList){
        double sum = 0;
        for (shape shape : shapeList) {
            sum += shape.area(); // 顆顆,多行無情計算,都不需要管傳入了什麼物件
        }
        return sum;
    }
}
像這樣,就不可以 new shape() 來實例化一個 shape 物件
不過建立一個指向 shape 物件的陣列是可以的
畢竟陣列裡面我可以裝 shape 類別的子類別物件嘛
抽象方法
abstract class shape{
    abstract double area();
    // 僅僅用於存在,使多型成立
}
class cicyle extends shape{
    double r;

    cicyle(double r){
        this.r = r;
    }

    @Override
    double area(){
        return r * r * Math.PI;
    }
}
class rectangle extends shape{
    double h, w;

    rectangle(double h, double w){
        this.h = h;
        this.w = w;
    }

    @Override
    double area(){
        return h * w;
    }
}
public class Test{
    public static void main(String[] args) {
        cicyle c = new cicyle(5);
        rectangle rect1 = new rectangle(3, 5);
        rectangle rect2 = new rectangle(3, 2);

        System.out.println(sumArea(new shape[]{rect1, rect2})); // 傳入 rectangle class 的陣列
        System.out.println(sumArea(new shape[]{c, rect1})); // 傳入有 cicyle class 和 rectangle class 的陣列
    }
    static double sumArea(shape[] shapeList){
        double sum = 0;
        for (shape shape : shapeList) {
            sum += shape.area(); // 顆顆,多行無情計算,都不需要管傳入了什麼物件
        }
        return sum;
    }
}
抽象化方法後,就不需要也不能去定義方法的實作了
醬子就不需要為了回傳值而去回傳無意義的值
注意,有抽象方法的類別必須是抽象類別
抽象類別也不可以以 final 標記
抽象方法也是
抽象類別
abstract class shape{
    String name;
    shape(String name){
        this.name = name;
    }
    abstract double area();
    // 僅僅用於存在,使多型成立
}
class cicyle extends shape{
    double r;

    cicyle(double r){
        super("cicyle");
        this.r = r;
    }

    @Override
    double area(){
        return r * r * Math.PI;
    }
}
class rectangle extends shape{
    double h, w;

    rectangle(double h, double w){
        super("rectangle");
        this.h = h;
        this.w = w;
    }

    @Override
    double area(){
        return h * w;
    }
}
public class Test{
    public static void main(String[] args) {
        cicyle c = new cicyle(5);
        rectangle rect1 = new rectangle(3, 5);
        rectangle rect2 = new rectangle(3, 2);

        System.out.println(sumArea(new shape[]{rect1, rect2})); // 傳入 rectangle class 的陣列
        System.out.println(sumArea(new shape[]{c, rect1})); // 傳入有 cicyle class 和 rectangle class 的陣列
    }
    static double sumArea(shape[] shapeList){
        double sum = 0;
        for (shape shape : shapeList) {
            sum += shape.area(); // 顆顆,多行無情計算,都不需要管傳入了什麼物件
        }
        return sum;
    }
}
抽象類別中可以存在成員變數、有定義的非抽象方法
但建構子不可以為抽象方法
抽象與繼承關係
如果有一個抽象類別,他有抽象方法
而他的子類別沒有實作這個抽象方法
那麼這個類別必須標記為抽象類別
abstract class Parent{
    abstract void show();
}
abstract class Child extends Parent{
    // 沒有實作show,必須成為抽象類別
}
class Grandson extends Child{
    void show(){
        System.out.println("666");
    }
}
public class Test{
    public static void main(String[] args) {
        Grandson g = new Grandson();
        g.show();
    }
}
必須要抽象化的類別
抽象化類別僅僅適用 :
該類別必須由子類別來產生物件的場合
如果是希望這個類別不會被實例化
那應該建立一個 private 的無參數建構子
這種作法適用在只提供 static 方法的類別
如 : Math 類別
介面
Interface
飛機會飛
鳥會飛
所以飛機要當鳥的父類別?
還是鳥要當飛機的父類別?
為了解決飛機、鳥的繼承問題
我們可以使用介面 (Interface) 來解決這個問題
interface
interface Flying{
    void Fly();
    // 等同 public abstract void Fly();
}
所有在介面中的方法會自動有 public abstract 的效果
可以省略,但不能更改
由於 abstract 的效果
所有的方法都不可以定義實際內容
通常會以動詞命名
或在名稱前面加上"I"表示這是個介面
啊我要怎麼使用介面??
implements
interface Flying{
    void Fly();
    // 等同 public abstract void Fly();
}
class plane implements Flying{
    @Override
    public void Fly() {
        System.out.println("飛機飛,飛飛飛");
    }
}
class bird implements Flying{
    @Override
    public void Fly(){
        System.out.println("鳥鳥飛,鳥鳥飛");
    }
}
public class Test{
    public static void main(String[] args) {
        plane p = new plane();
        bird b = new bird();
        p.Fly();
        b.Fly();
    }
}
可以在宣告 class 的時候用 implements 來"實作"介面
可以 implement 介面的同時 extends 類別
一旦實作了某個介面
就必須實作介面中的所有方法
介面中的變數
interface Flying{
    void Fly();
    // 等同 public abstract void Fly();
    int KILOMETE = 1000;
    // 等同 public static final int KILOMETE = 1000;
}
class plane implements Flying{
    @Override
    public void Fly() {
        System.out.println("飛機飛,飛飛飛");
    }
}
class bird implements Flying{
    @Override
    public void Fly(){
        System.out.println("鳥鳥飛,鳥鳥飛");
    }
}
public class Test{
    public static void main(String[] args) {
        plane p = new plane();
        bird b = new bird();
        p.Fly();
        b.Fly();
        System.out.println(Flying.KILOMETE);
    }
}
所有變數自帶 public static final
可以省略
不能更改
因為有 static
所以可以用介面名稱取值
介面性質 - 多重實作
類別不能多重繼承
就像你沒有"爸爸們"
但介面可以多重實作
就像你有一堆"同學們"
程式碼取自 1.16.5 Forge Item class 的部分定義
package net.minecraft.item;

public class Item extends net.minecraftforge.registries.ForgeRegistryEntry<Item> implements IItemProvider, net.minecraftforge.common.extensions.IForgeItem {
   public static final Map<Block, Item> BLOCK_TO_ITEM = net.minecraftforge.registries.GameData.getBlockItemMap();
   protected static final UUID ATTACK_DAMAGE_MODIFIER = UUID.fromString("CB3F55D3-645C-4F38-A497-9C13A33DB5CF");
   protected static final UUID ATTACK_SPEED_MODIFIER = UUID.fromString("FA233E1C-4180-4865-B01B-BCCE9785ACA3");
   protected static final Random random = new Random();
   protected final ItemGroup group;
   private final Rarity rarity;
   private final int maxStackSize;
   private final int maxDamage;
   private final boolean isImmuneToFire;
   private final Item containerItem;
   @Nullable
   private String translationKey;
   @Nullable
   private final Food food;

   public Item(Item.Properties properties) {
      this.group = properties.group;
      this.rarity = properties.rarity;
      this.containerItem = properties.containerItem;
      this.maxDamage = properties.maxDamage;
      this.maxStackSize = properties.maxStackSize;
      this.food = properties.food;
      this.isImmuneToFire = properties.immuneToFire;
      this.canRepair = properties.canRepair;
      this.toolClasses.putAll(properties.toolClasses);
      Object tmp = properties.ister == null ? null : net.minecraftforge.fml.DistExecutor.callWhenOn(Dist.CLIENT, properties.ister);
      this.ister = tmp == null ? null : () -> (net.minecraft.client.renderer.tileentity.ItemStackTileEntityRenderer) tmp;
   }
}
介面性質 - 繼承
介面可以繼承
而且還可以多重繼承
用逗號區分
用 extends 來繼承
但介面不可以實作介面
interface P{
    void Show(Object obj);
    int i = 20;
}
interface O{
    long O = 66666L;
}
interface C extends P, O{
    void Show(Object obj);
    int i = 20000;
}
public class Test implements C{
    public static void main(String[] args) {
        Test t = new Test();
        t.Show("obj");
    }

    @Override
    public void Show(Object obj) {
        // 實作 void Show(Object obj); 即可
        // 不必管是 P 介面還是 C 介面的 Show()
        System.out.println(obj);
    }
}
介面要是出現了同簽名方法
實作時不用區標明實作哪個介面的版本
若是 Overloading 的方法
就必須一一實作
介面性質 - 繼承
interface P{
    void Show();
    int i = 20;
}
interface O{
    long O = 66666L;
}
interface C extends P, O{
    void Show();
    int i = 20000;
}
public class Test implements C{
    public static void main(String[] args) {
        Test t = new Test();
        t.Show();
    }
    @Override
    public void Show() {
        System.out.println("C.i " + C.i);
        System.out.println("P.i " + P.i);
        System.out.println("O.O " + O);
    }
}
介面要是出現了同名變數
使用時需要以介面名稱標註是哪個介面的變數
介面性質 - 參數類型
interface P{
    void Show();
    int i = 20;
}
class O implements P{
    @Override
    public void Show() {
        System.out.println("666");
    }
    public void Show(String text) {
        System.out.println(text);
    }
}
class A implements P{
    @Override
    public void Show() {
        System.out.println("9487");
    }
    public void Show(String text, int i) {
        System.out.println(text + i);
    }
}
public class Test{
    public static void main(String[] args) {
        Show(new O());
        Show(new A());
    }
    public static void Show(P p) {
        p.Show();
        // p.Show("666"); 不可以!
    }
}
介面可以當成方法的參數類型
用來指"有實作這個介面的類別"
在方法中僅能呼叫該介面中宣告的方法
恭喜各位完成本學期的基礎語法學習
下個學期將由 蔡永駿 講師為各位說明如何運用這些語法觀念
製作屬於自己的 Minecraft Server 插件
蔡永駿他會邊複習邊講解的,所以真的忘記了別怕
要是寒假閒的無聊
也可以繼續自學進階語法概念(註釋、枚舉、反射...)
寫成學習歷程也不賴?
如果各位真的有興趣、想聽
我也可以另外開 Minecraft 模組製作的課程就是了
Copy of Java 基本語法
By Richard Lai


