GTEST in Gecko
Introduction
- Google C++ Testing Framework (Google Test)
- On a variety of platforms(Linux, Mac OSX, Cygwin, Windows CE and Symbian).
- Based on the xUnit architecture
- Support a rich set of assertions, user-defined assertions, death tests, fatal and non-fatal failures, value- and type-parameterized tests and XML test report generation
Why gtest is good?
- Fast
- Independent and repeatable
- Well organized and reflect the structure of the tested code
- Portable and reusable
- When tests fail, they should provide as much information about the problem as possible
- The testing framework should liberate test writers from housekeeping chores and let them focus on the test content.
Basic Concepts
- Start by writing assertions
- statements that check whether a condition is true
- result can be success, nonfatal failure, or fatal failure
- Tests use assertions to verify the tested code's behavior
- A test case contains one or many tests.
- Group your tests into test cases that reflect the structure of the tested code
- A test program can contain multiple test cases.
Test Program
Test Case
Test
Assertion
Assertions
- Google Test assertions are macros.
- When an assertion fails, Google Test prints the assertion's source file and line number location, along with a failure message.
- Can supply a custom failure message which will be appended to original message (simply stream the custom failure message into the macro using << operator)
- EXPECT_* v.s. ASSERT_*
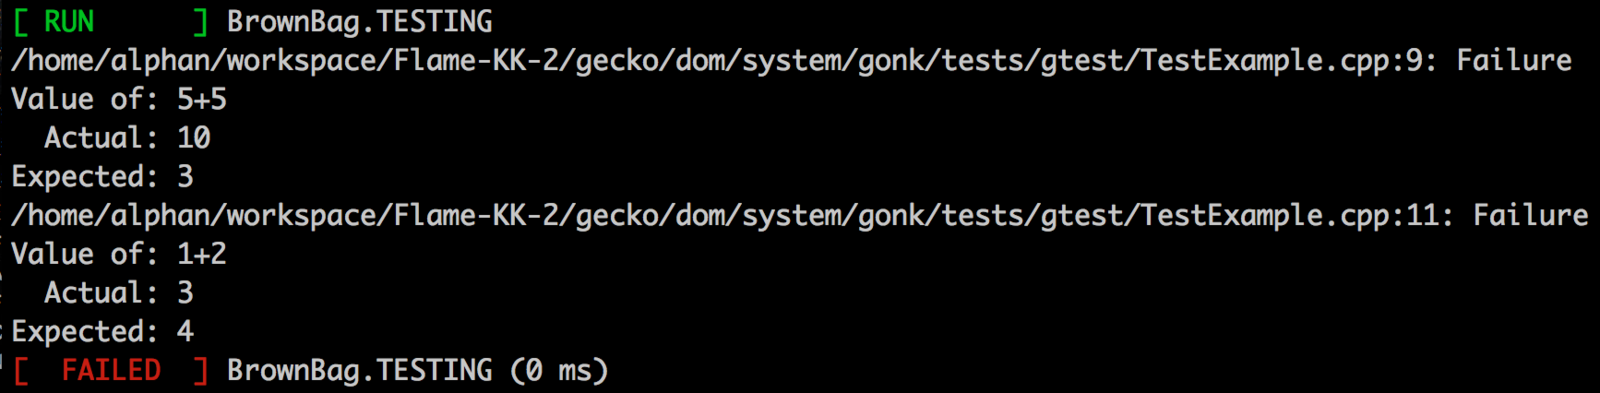
failure message
Example
ASSERT_EQ(x.size(), y.size()) << "Vectors x and y are of unequal length";

for (int i = 0; i < x.size(); ++i) {
EXPECT_EQ(x[i],y[i]) << "Vectors x and y differ at index " << i;
}
Basic Assertions
| FATAL | NON-FATAL |
|---|---|
| ASSERT_TRUE(condition); | EXPECT_TRUE(condition); |
| ASSERT_FALSE(condition); | EXPECT_FALSE(condition); |
Binary Comparison
| FATAL | NON-FATAL | |
|---|---|---|
| ASSERT_EQ(val1, val2); | EXPECT_EQ(val1, val2); | val1 == val2 |
| ASSERT_NE(val1, val2); | EXPECT_NE(val1, val2); | val1 != val2 |
| ASSERT_LT(val1, val2); | EXPECT_LT(val1, val2); | val1 < val2 |
| ASSERT_LE(val1, val2); | EXPECT_LE(val1, val2); | val1 <= val2 |
| ASSERT_GT(val1, val2); | EXPECT_GT(val1, val2); | val1 > val2 |
| ASSERT_GE(val1, val2); | EXPECT_GE(val1, val2); | val1 >= val2 |
String Comparison
| FATAL | NON-FATAL |
|---|---|
| ASSERT_STREQ(str1, str2); | EXPECT_STREQ(str1, str2); |
| ASSERT_STRNE(str1, str2); | EXPECT_STRNE(str1, str2); |
| ASSERT_STRCASEEQ(str1, str2); | EXPECT_STRCASEEQ(str1, str2); |
| ASSERT_STRCASENE(str1, str2); | EXPECT_STRCASENE(str1, str2); |
For more string comparison tricks (substring, prefix, suffix, and regular expression matching), see the Advanced Google Test Guide.
Simple Tests
- Use the TEST() macro to define and name a test function which don't return a value.
- In this function, alone with any valid C++ statements, use the assertions to check values
- Result is determined by the assertions.
TEST(test_case_name, test_name) {
... test body ...
}
int Factorial(int n); // Returns the factorial of n// Tests factorial of 0
TEST(FactorialTest, HandlesZeroInput) {
EXPECT_EQ(1, Factorial(0));
}
// Tests factorial of positive numbers.
TEST(FactorialTest, HandlesPositiveInput) {
EXPECT_EQ(1, Factorial(1));
EXPECT_EQ(2, Factorial(2));
EXPECT_EQ(6, Factorial(3));
EXPECT_EQ(40320, Factorial(8));
}Simple Tests
Test Fixtures
- If there are two or more tests that operate on similar data, you can use a test fixture.
- Derive a class from "::testing::Test". Start its body with protected: or public: as we'll access fixture member from sub-classses.
- Inside the class, declare any objects you need.
- If necessary, write a default constructor or SetUp() to prepare the object for each test.
- A destructor or TearDown() function to release any resource you allocate in SetUp().
- If needed, define subroutines for your tests
Test Fixtures
- Use TEST_F() instead of TEST()
- Define a test fixture class before using it in a TEST_F(), or you'll get the compiler error "virtual outside class declaration"
- Steps of TEST_F():
- Create a fresh test fixture at runtime
- Immediately initialize it via SetUp()
- Run the test
- Clean up by calling TearDown()
- Delete the test fixture
Test Fixtures
template <typename E> // E is the element type.
class Queue {
 public:
  Queue();
  void Enqueue(const E& element);
  E* Dequeue(); // Returns NULL if the queue is empty.
  size_t size() const;
  ...
};
Test Fixtures
class QueueTest : public ::testing::Test {
 protected:
  virtual void SetUp() {
    q1_.Enqueue(1);
    q2_.Enqueue(2);
    q2_.Enqueue(3);
  }

  // virtual void TearDown() {}

  Queue<int> q0_;
  Queue<int> q1_;
  Queue<int> q2_;
};
TEST_F(QueueTest, IsEmptyInitially) {
EXPECT_EQ(0, q0_.size());
}
TEST_F(QueueTest, DequeueWorks) {
int* n = q0_.Dequeue();
EXPECT_EQ(NULL, n);
n = q1_.Dequeue();
ASSERT_TRUE(n != NULL);
EXPECT_EQ(1, *n);
EXPECT_EQ(0, q1_.size());
delete n;
n = q2_.Dequeue();
ASSERT_TRUE(n != NULL);
EXPECT_EQ(2, *n);
EXPECT_EQ(1, q2_.size());
delete n;
}GTest in Gecko
- The Mozilla build process will build GTest on supported platform(not yet supported on mobile)
- However xul-gtest will only be built when tests are required to save an expensive second linking process
- obj-xxx/dist/bin/gtest/libxul.so
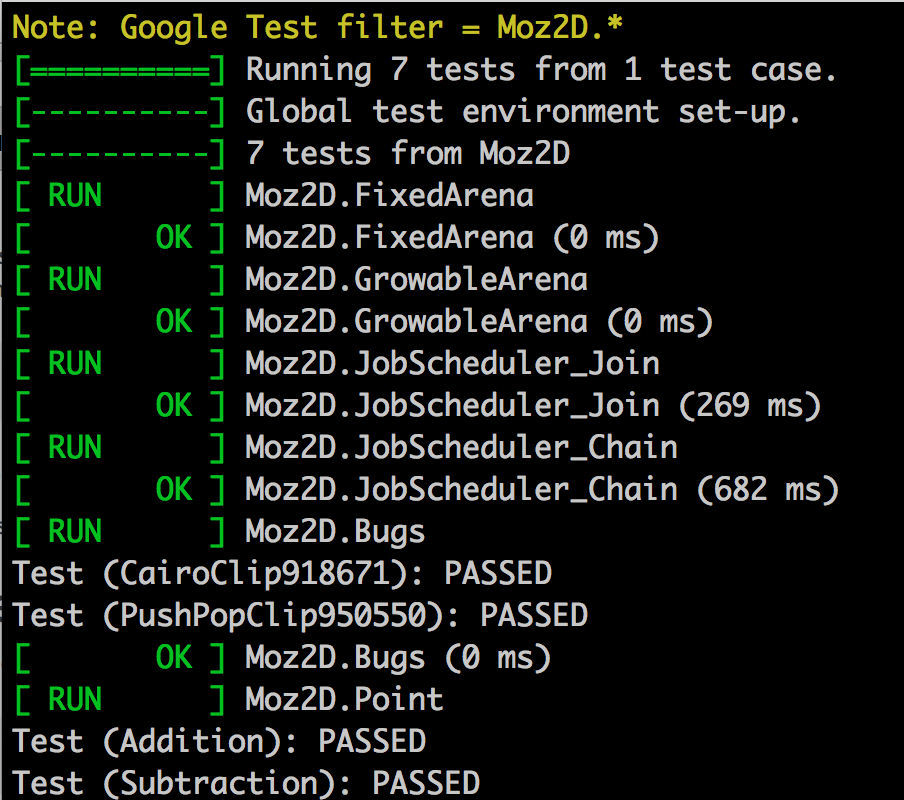
- Running selected tests
- ./mach gtest Moz2D.*
GTest in Gecko


Adding a test
- Find a gtest directory appropriate for the module
- If none exist, create a directory as '<submodule>/tests/gtest'
- Create a moz.build file in this directory.
- Set "UNIFIED_SOURCE" to contain all of the test file names.
- Set "SOURCES" and "LOCAL_INCLUDES" to include needed file
- Set "TEST_DIRS" of a appropriate moz.build to contain your gtest directory
GTEST in Gecko
By Alphan Chen


