Que signifie "émuler" ?
"En informatique, l'émulation est l'ensemble des techniques utilisées pour qu'une machine obtienne les même résultats qu'une autre"
Quelques émulateurs
- PSX: EPSX, PCSX
- PS2: PCSX2
- GBA: VBA, No$GBA
- Wii: Dolphin
- Misc: QEMU
- ...
Cas d'étude: la Gameboy
Fiche technique
- Démarrage le 21 Avril 1989
- Arrêt le 23 mars 2003
- 245 instructions
- 8k RAM
- 8k Video RAM
- 256k - 8Mo ROM
L'intérieur d'un émulateur
- CPU
- MMU
- GPU
- Timer / Input / Sounds
CPU
Fait correspondre un entier à une action
Ex: 0x80 signifie "A = A + B"

CPU : Implémentation
- Un énorme switch / case
- Tableau de fonctions
- Code auto-généré
- Facilement testable
    'LDHL_r16_i8' : ( address, nextAddress, parameters, h ) => `

        var hlBefore = ${h.readR16(parameters[0])};
        var hlAfter = ${h.add16('hlBefore', parameters[1])};

        ${h.writeR16('hl', 'hlAfter')};

        ${h.bcd(false)};
        ${h.zero(false)};
        ${h.half('hlAfter', '<', 'hlBefore')};
        ${h.carry('hlAfter', '<', 'hlBefore')};

        ${h.applyClockCycles(3)};

    `,

    'LDI_(r16)_r8' : ( address, nextAddress, parameters, h ) => `

        var position = ${h.readR16(parameters[0])};
        ${h.writeMem8('position', h.readR8(parameters[1]))};

        ${h.writeR16(parameters[0], h.add16('position', 1))}

        ${h.applyClockCycles(2)};

    `,

    'LDI_r8_(r16)' : ( address, nextAddress, parameters, h ) => `

        var position = ${h.readR16(parameters[1])};
        ${h.writeR8(parameters[0], h.readMem8('position'))};

        ${h.writeR16(parameters[1], h.add16('position', 1))};

        ${h.applyClockCycles(2)};

    `,

    'LDD_(r16)_r8' : ( address, nextAddress, parameters, h ) => `

        var position = ${h.readR16(parameters[0])};
        ${h.writeMem8('position', h.readR8(parameters[1]))};

        ${h.writeR16(parameters[0], h.sub16('position', 1))}

        ${h.applyClockCycles(2)};

    `,
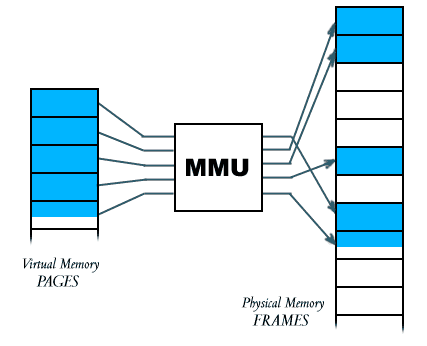
MMU
Route les accès mémoire vers le "hardware"
L'équivalent des getters / setters en Javascript

MMU : Implémentation
- Une table de fonctions
- Trop lent pour être considéré
- Plein de if pour gérer les ranges
- Fallback sur un switch / case pour le reste☺
- Relativement facilement debuggable
    _fastWriteUint8( address, value ) {

        if ( address >= 0x0000 && address < 0x8000 )
            this.mbc.writeRomUint8( address, value );

        else if ( address >= 0x8000 && address < 0xA000 ) {
            if ( ! this._environment.gpuLcdFeature || this._environment.gpuMode !== 0x03 ) {
                this._vramBankNN[ address & 0x1FFF ] = value;
                if ( address < 0x9800 ) {
                    this._gpu.updateTile( this._environment.cgbVramBank, address & 0x1FFF );
                } else if ( this._environment.cgbVramBank === 0x01 ) {
                    this._gpu.updateMetadata( address - 0x9800 );
                }
            }
        }

        else if ( address >= 0xA000 && address < 0xC000 )
            this.mbc.writeRamUint8( address - 0xA000, value );

        else if ( address >= 0xC000 && address < 0xD000 )
            this._wramBank00[ address - 0xC000 ] = value;

        else if ( address >= 0xD000 && address < 0xE000 )
            this._wramBankNN[ address - 0xD000 ] = value;

        else if ( address >= 0xE000 && address < 0xF000 )
            this._wramBank00[ address - 0xE000 ] = value;

        else if ( address >= 0xF000 && address < 0xFE00 )
            this._wramBankNN[ address - 0xF000 ] = value;

        else if ( address >= 0xFE00 && address < 0xFEA0 ) {
            if ( ! this._environment.gpuLcdFeature || this._environment.gpuMode <= 0x01 ) {
                this._oam[ address - 0xFE00 ] = value;
                this._gpu.updateSprite( address - 0xFE00 );
            }
        }

        else if ( address >= 0xFF80 && address < 0xFFFF )
            this._hram[ address - 0xFF80 ] = value;

        else switch ( address ) {

            case 0xFF00:
                this._environment.ioKeyColumn = value & 0x30;
            break ;

            case 0xFF04:
                this._environment.timerDivider = 0;
            break ;

            case 0xFF05:
                this._environment.timerCounter = value;
            break ;

            case 0xFF06:
                this._environment.timerCounterModulo = value;
            break ;

            case 0xFF07:
                this._environment.timerCounterFeature = ( value & 0b100 ) >>> 2;
                this._environment.timerCounterFrequency = timerFrequencies[ ( value & 0b011 ) >>> 0 ];
                this._environment.timerCounterControl = ( value & 0b111 ) >>> 0;
            break ;

            case 0xFF0F:
                this._environment.pendingInterrupts = value;
            break ;
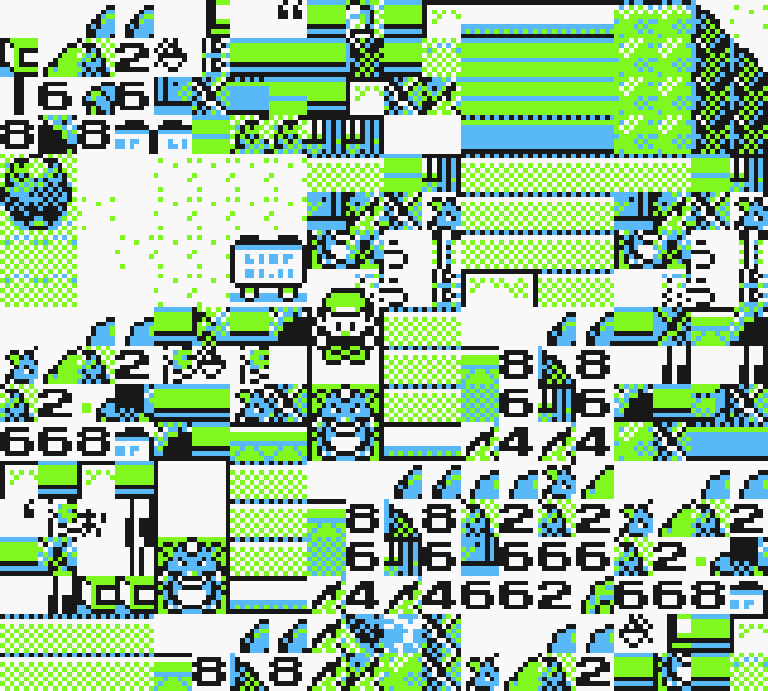
GPU
Transforme la Video RAM en tableau de pixels
Bien plus complexe qu'un CPU ! Nombreuses règles


GPU : Implémentation
- Machine à états (4 différents)
- Beaucoup de règles différentes
- Beaucoup d'exceptions aux règles à implémenter
- Difficile à tester
- Très difficile à débugger
    for ( var x = 0; x < ROW_PIXELS; ++ x ) {

        // Same computations than before, but for X coordinates

        var actualX = ( scrollX + offsetX + x ) & 0xFF;
        var mapOffsetX = ( actualX >>> 3 ) & 31;
        var tileX = actualX & 0x7;

        // Knowing the X and Y map offset, we can now fetch the tile index from the VRAM

        var mapOffset = baseAddress + mapOffsetY + mapOffsetX;
        var tileIndex = this._vramBank00[ mapOffset ];

        // When using the second tileset, the index is actually a signed number so that whatever the tileset, the same index greater than 0x7F (such as 0xFF) will always point toward the same tile (that's actually pretty clever!)

        if ( ! this._environment.gpuTilesetBase )
            if ( tileIndex > 0x7f )
                tileIndex -= 0x100;

        // In CGB, each mixed tile has also metadata associed

        if ( this._environment.cgbUnlocked ) {

            var metadata = this._metadata[ mapOffset - 0x1800 ];

            if ( metadata.xflip )
                tileX = 8 - ( tileX + 1 );

            if ( metadata.yflip )
                tileY = 8 - ( tileY + 1 );

            vramBank = metadata.bank;
            palette = this._environment.cgbBackgroundRgbPalettes[ metadata.paletteCgb ];

        }

        // We just have to get the palette index color stored in the tileset cell, then the color from the palette

        var paletteIndex = this._tilesets[ vramBank ][ tilesOffset + tileIndex ][ tileY ][ tileX ];
        var trueColor = palette[ paletteIndex ];

        // We store the palette index inside the 'color' (internally only, it will disappear when sent to the screen device), because the sprite may be behind the background. In such case, we have to know if they are behind a transparent pixel or not.

        this._scanline[ x ] = ( paletteIndex << 24 ) | trueColor;
Les outils développés
Virtjs
Implémente des devices interchangeables
Permet de se concentrer sur le développement du core

PProcjs / Audiojs
Implémentent des devices additionnels pour Virtjs
Permettent d'appliquer facilement du postprocessing !

Archjs
Compile les coeurs de la Libretro via Emscripten
Utilise les interfaces Virtjs pour tourner partout

    var Engine = Archjs.byName.vbanext;

    var canvas = document.querySelector('#screen');

    // Start a WebGL renderer on the specified canvas
    var screen = new WebGLScreen({ canvas });
    screen.setOutputSize(canvas.width, canvas.height);

    // Listen for keyboard actions and bind them to the engine keycodes
    var input = new KeyboardInput({ codeMap: Engine.codeMap });

    // Use requestAnimationFrame for the internal timer
    var timer = new AnimationFrameTimer();

    // Use Audiojs to provide an audio output using browsers APIs
    var audio = new AudiojsAudio();

    // Finally create the engine, linked to our devices
    var engine =  new Engine({ devices: { screen, timer, input, audio } });

    // Load the game ROM (you can use window#fetch to get an ArrayBuffer from an HTTP stream)
    engine.loadArrayBuffer(arrayBuffer, { fileName });

    // You can easily get a save state at any time
    var state = engine.getState();

    // And use this save state to restore your game
    engine.setState(state);

    // That's it!
Start9.io
Une plate-forme construite au dessus d'Archjs
Archivez vos jeux, jouez, sauvegardez votre progression

Emulation en Javascript
By arcanis
Emulation en Javascript
- 2,024


