Content ITV PRO
This is Itvedant Content department
Performing Appointment Actions from Frontend using React & Spring Boot
Business Scenario
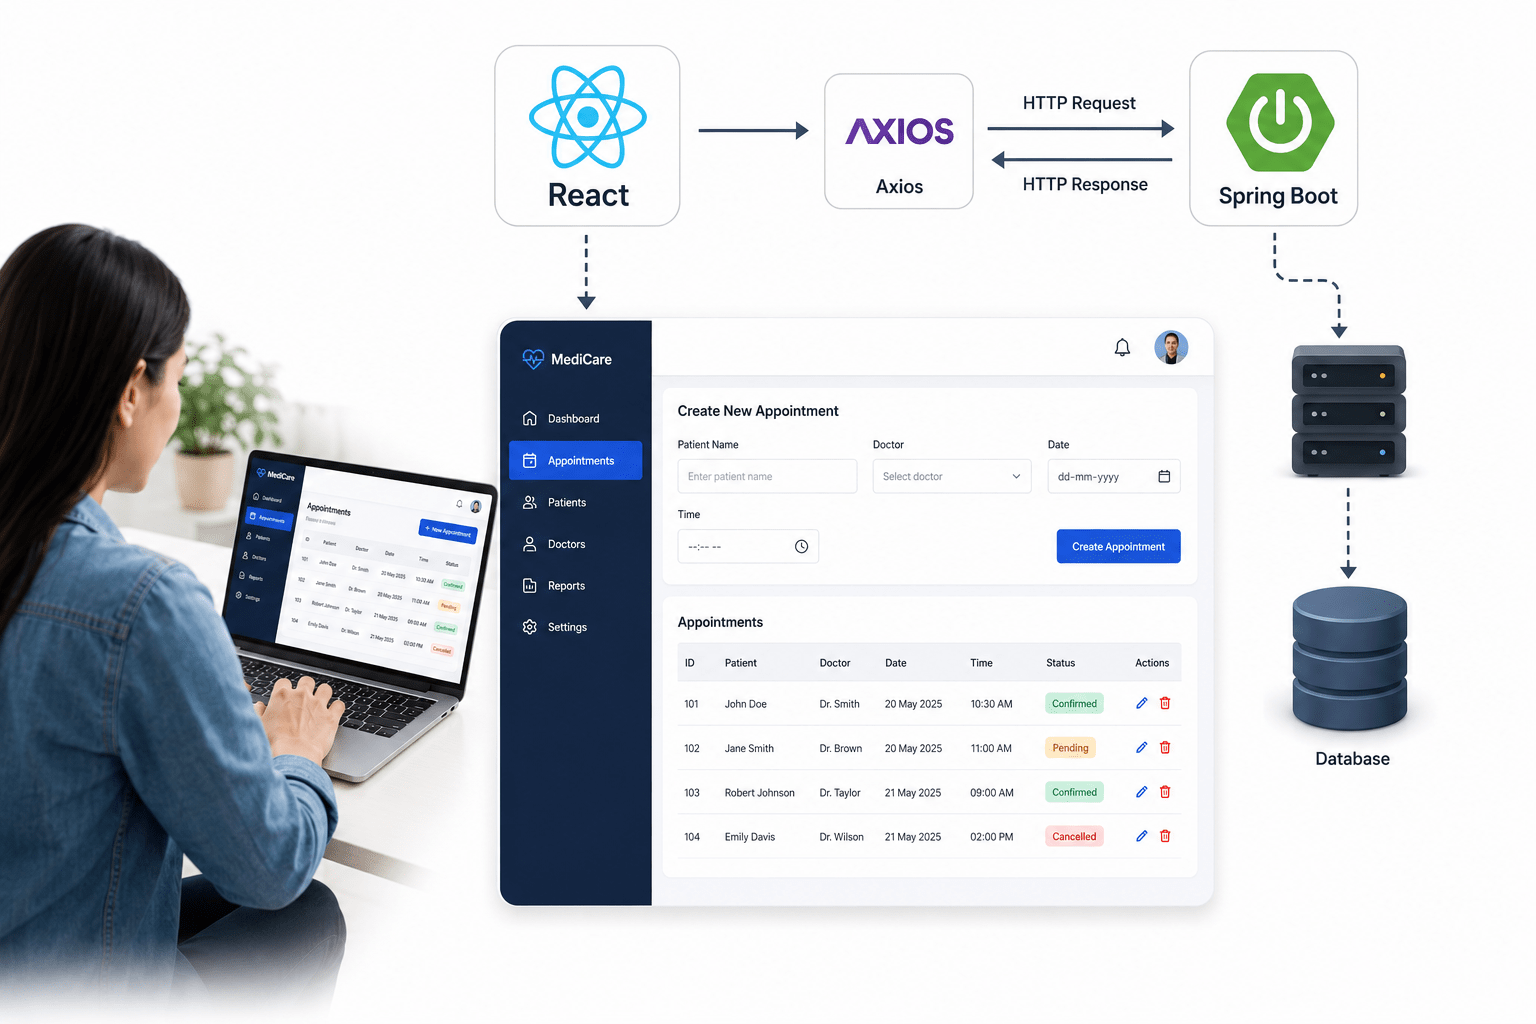
The objective of this lab is to integrate a React frontend with a Spring Boot backend to perform appointment-related operations. Students will develop a user interface using JSX and CSS, connect it with backend REST APIs, allow users to book new appointments, and display updated appointment records dynamically. This lab demonstrates how frontend components interact with backend services in a full-stack healthcare application.
Introduction
React is a popular JavaScript library used for building interactive user interfaces. It allows developers to create reusable components that communicate with backend applications through REST APIs.
In this lab, React is integrated with the Spring Boot backend developed in previous modules. The frontend sends HTTP requests using Axios to create new appointments and retrieve appointment details from the database. The retrieved data is displayed in a responsive and user-friendly interface designed using JSX and CSS.
This implementation demonstrates the complete frontend-to-backend communication process in a healthcare management system.
1
Create React Components
Create two React components:
AddAppointment.jsx
AppointmentList.jsx
Responsibilities:
AddAppointment.jsx collects appointment details from the user.
AppointmentList.jsx displays appointment information received from the backend.
JSX is used to create reusable and interactive UI components.
2
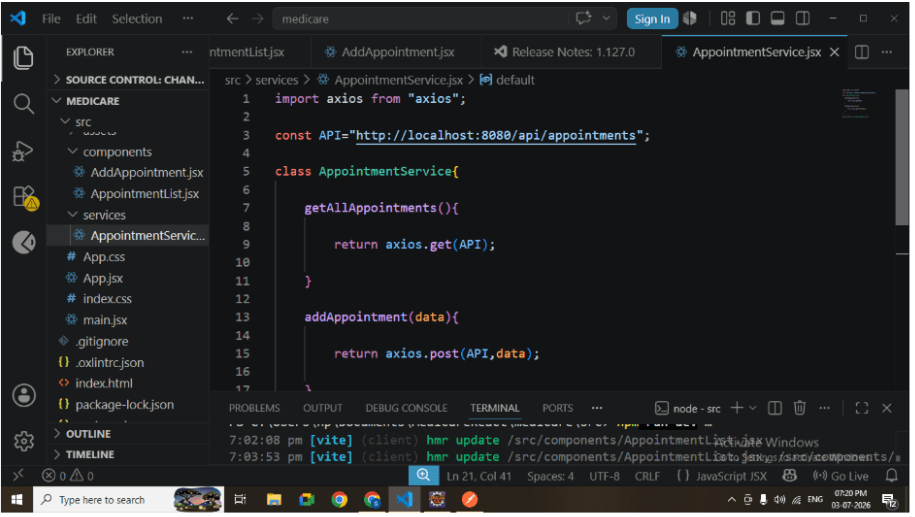
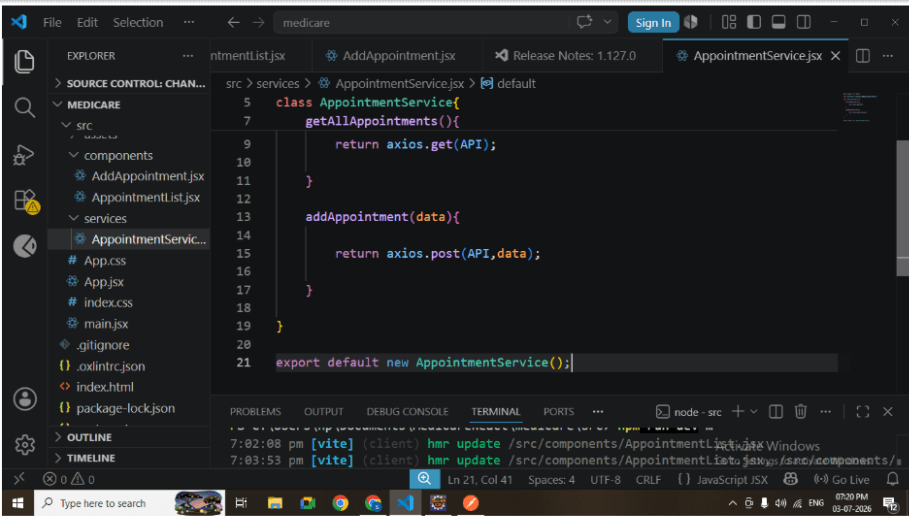
Create Service Layer
Create AppointmentService.js inside the services folder.
Responsibilities:
Store backend API URLs.
Send GET requests.
Send POST requests.
Return API responses to React components.
Using a service layer keeps API-related logic separate from UI components and improves code organization.
3
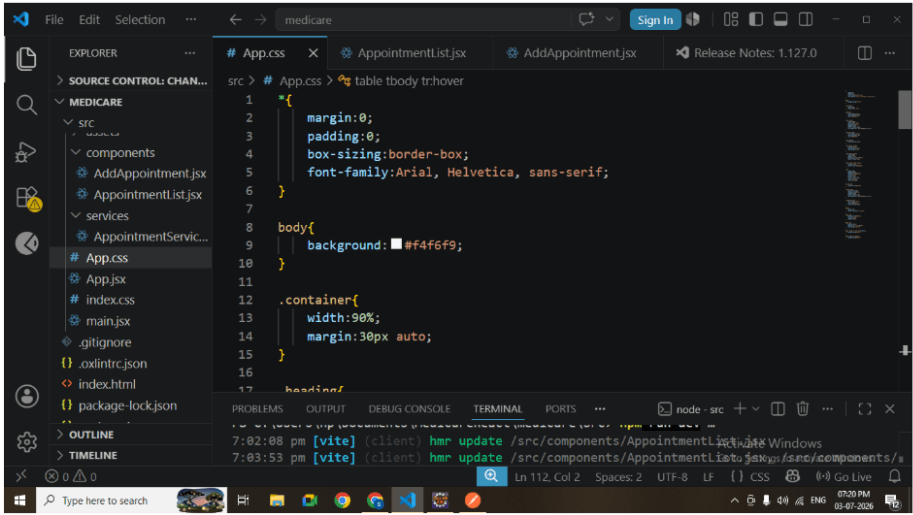
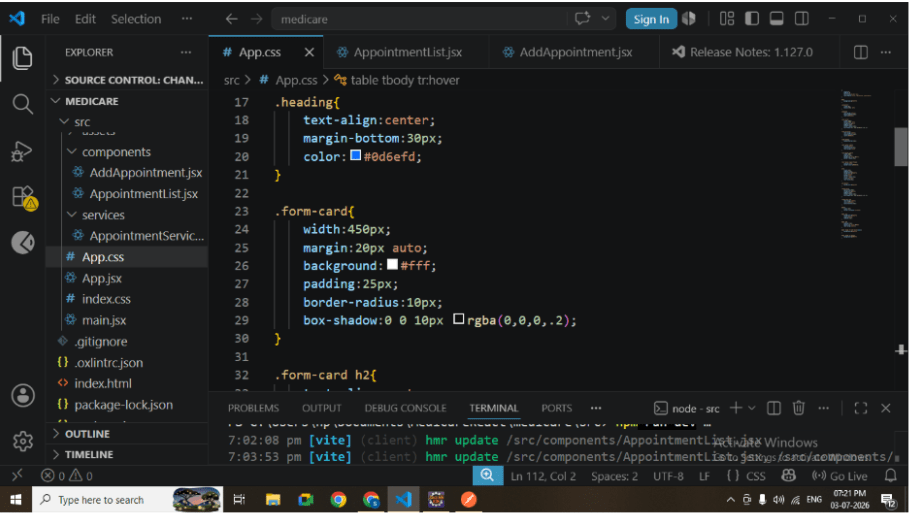
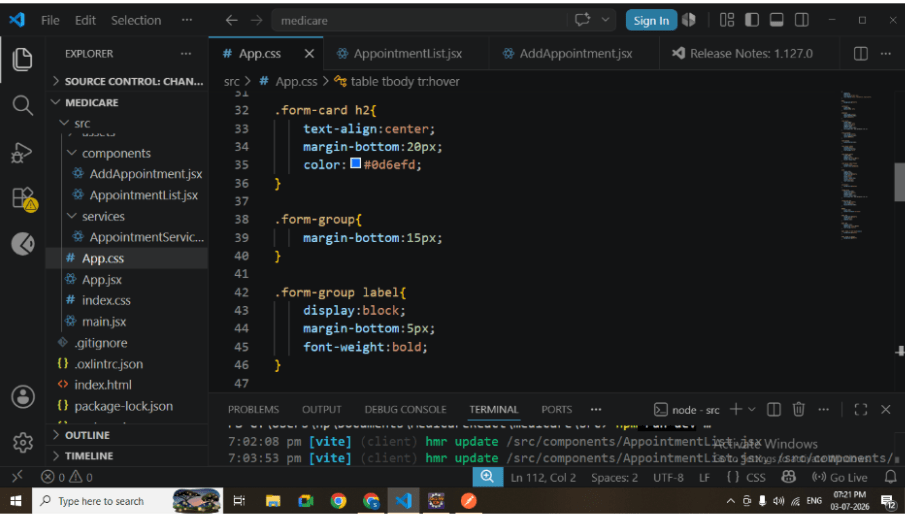
Design User Interface using CSS
Create App.css to style the application.
Apply styling for:
Appointment booking form
Input fields
Buttons
Appointment table
Layout
Colors
Hover effects
The CSS provides a clean and professional appearance similar to Bootstrap without requiring additional libraries.
4
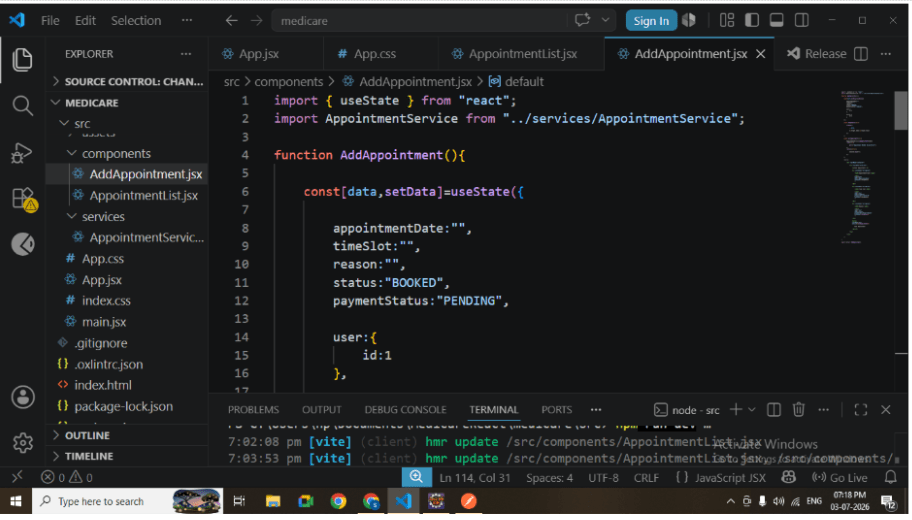
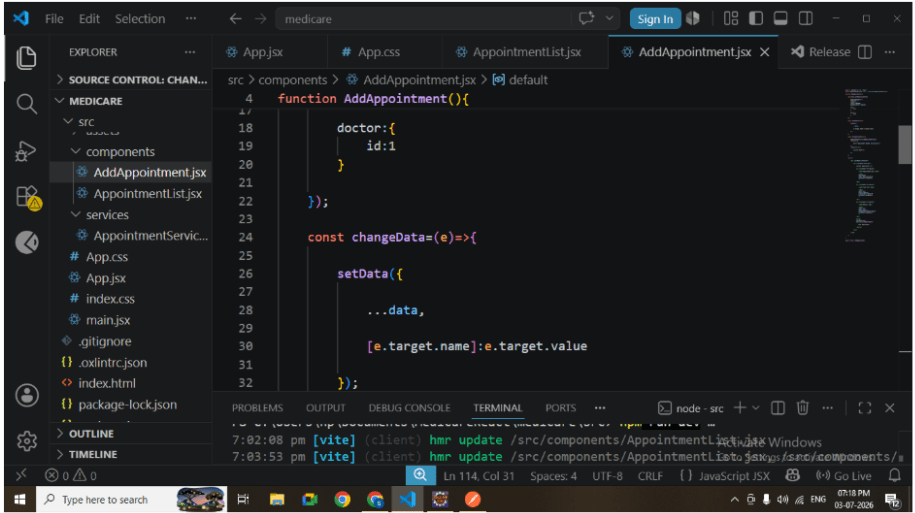
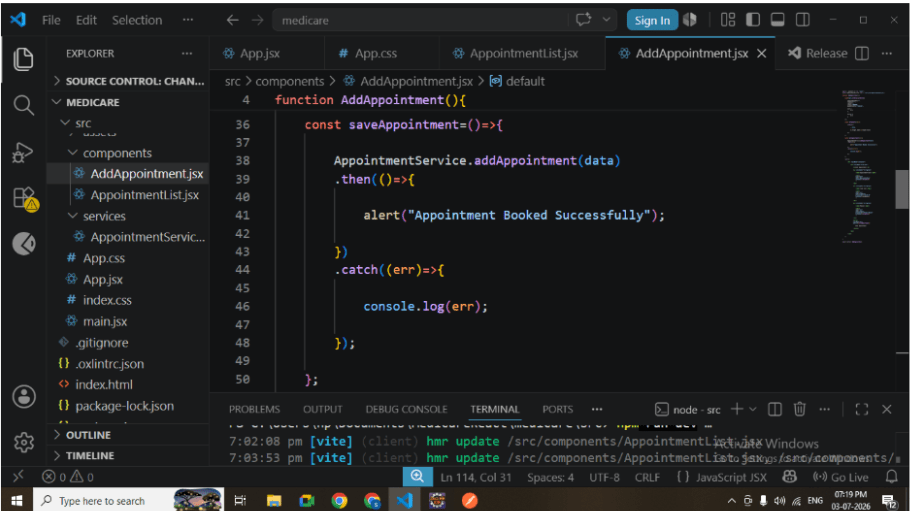
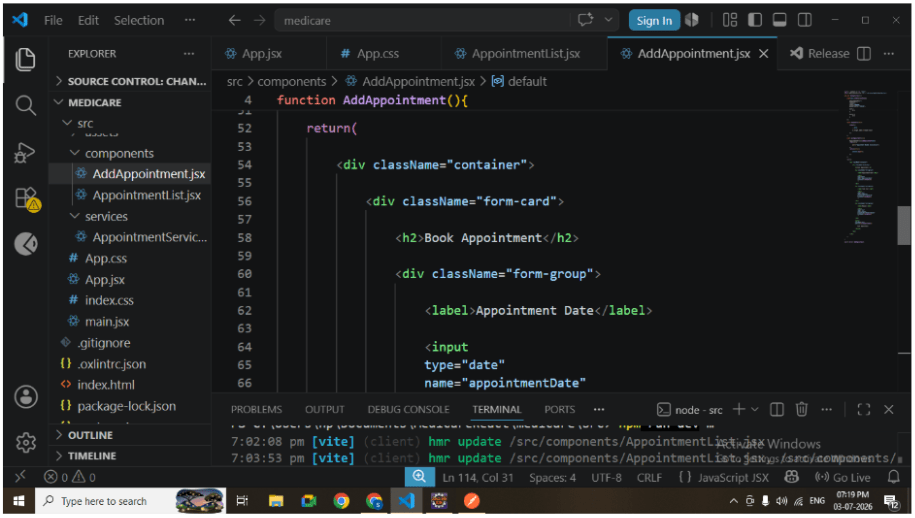
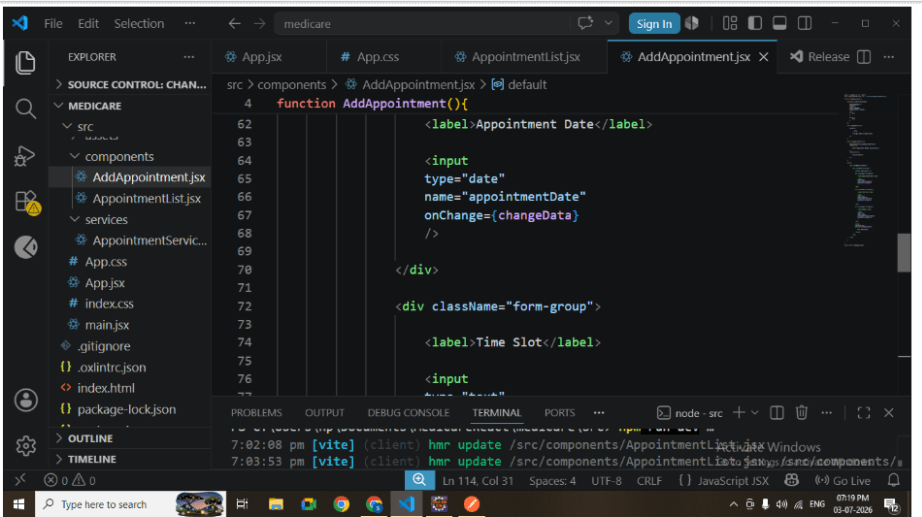
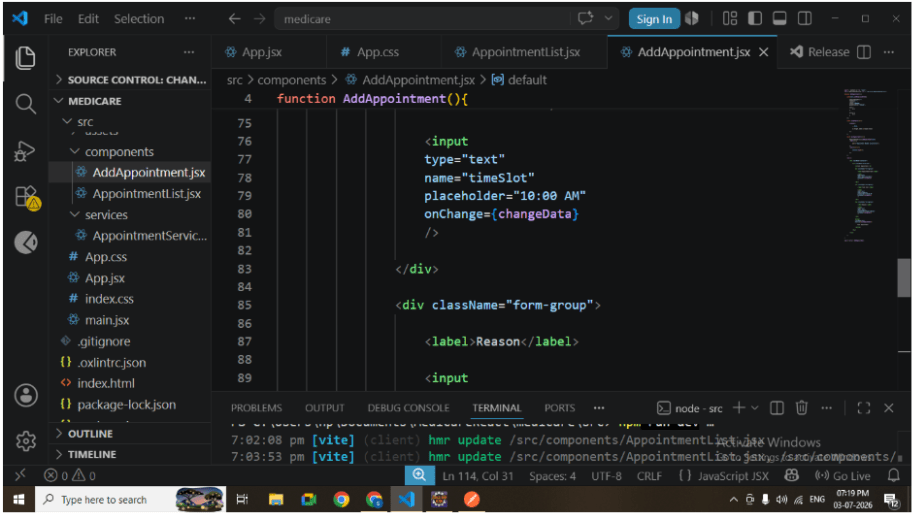
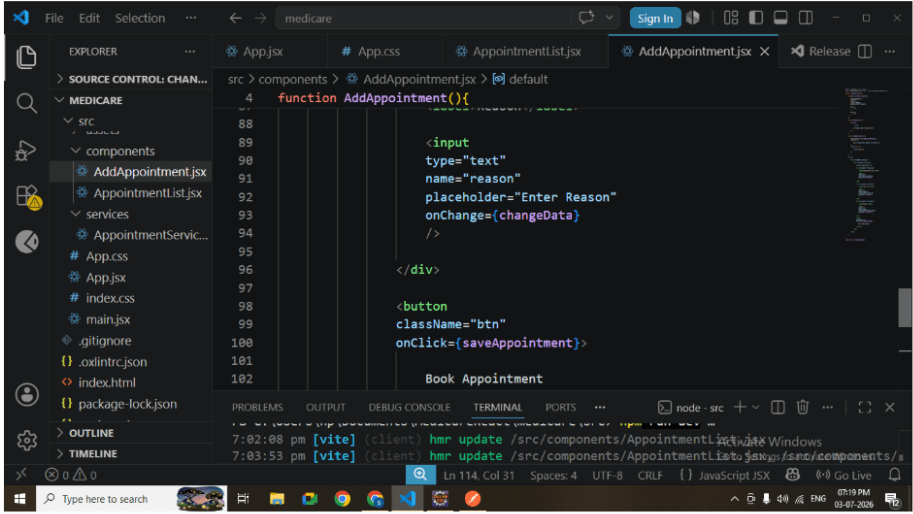
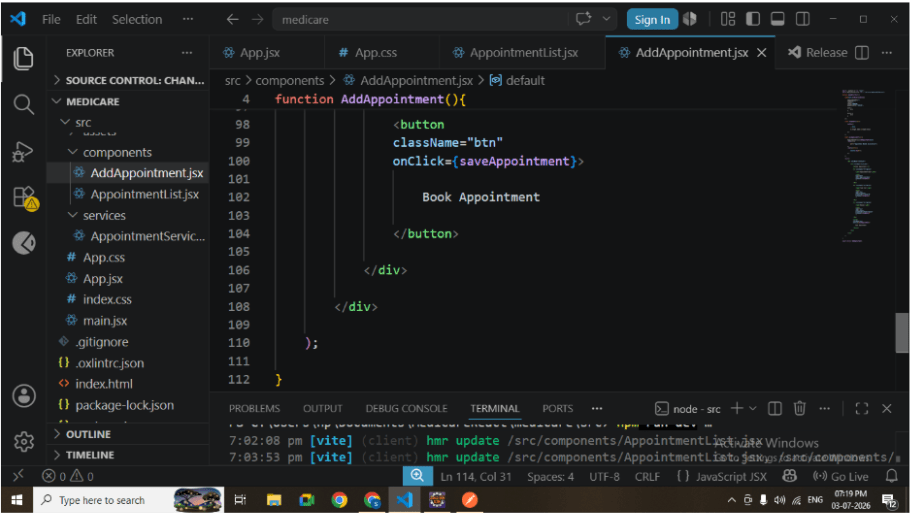
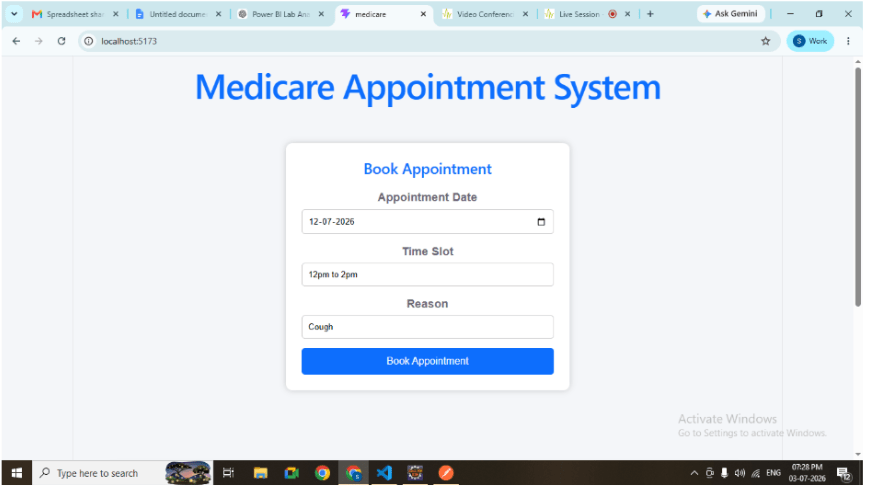
Develop Appointment Booking Form
Inside AddAppointment.jsx:
Responsibilities:
Create appointment booking form using JSX.
Capture user input using useState.
Update state dynamically using onChange events.
Submit appointment details to the backend.
Display success message after booking.
Appointment fields include:
Appointment Date
Time Slot
Reason
User ID
Doctor ID
5
Display Appointment Details
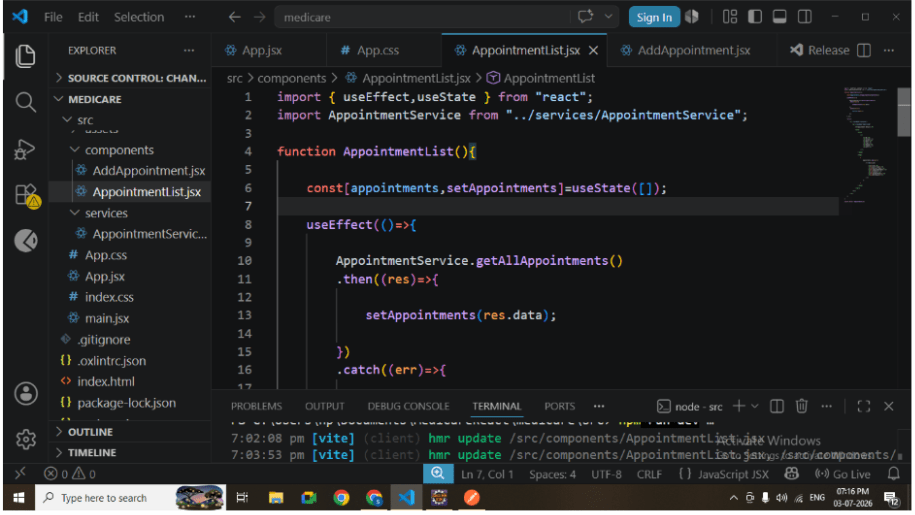
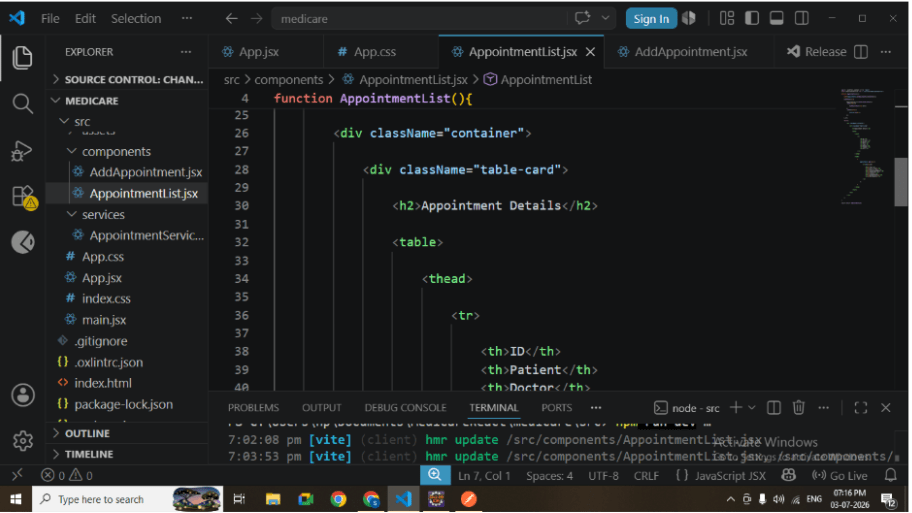
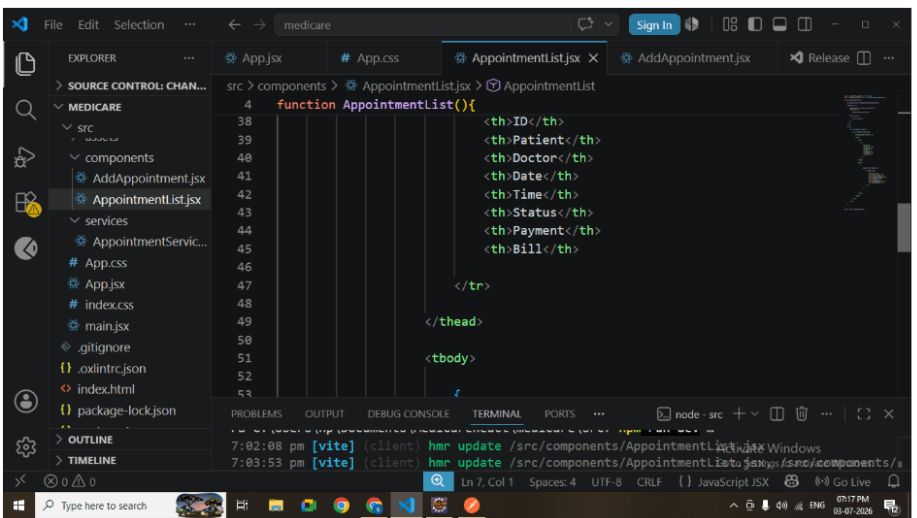
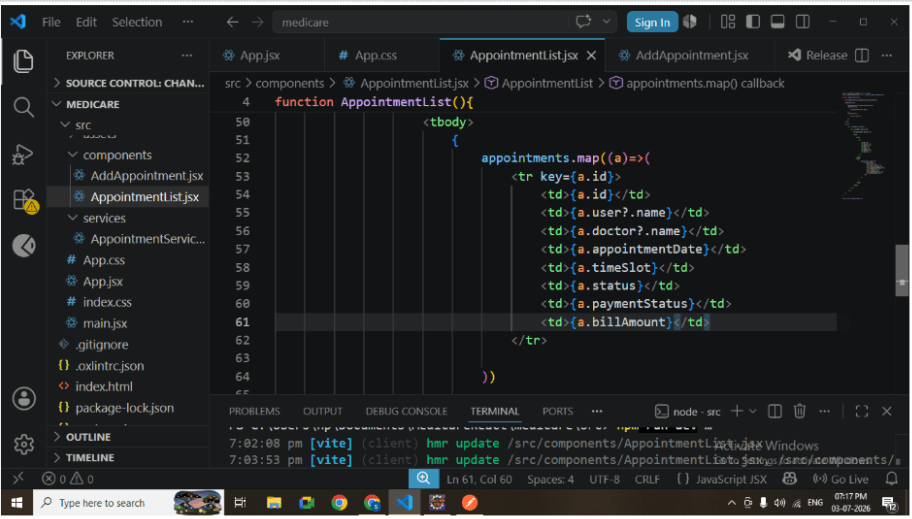
Inside AppointmentList.jsx:
Responsibilities:
Fetch appointment data from backend.
Store response using useState.
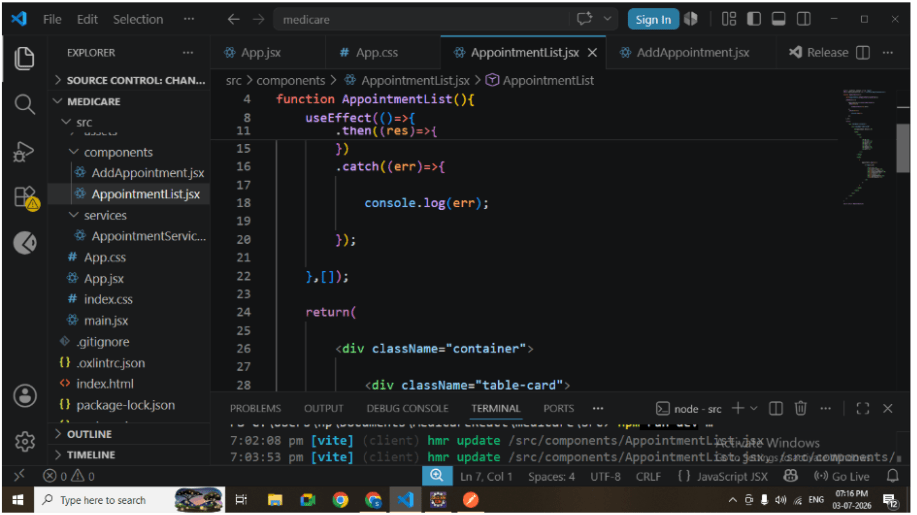
Execute API call using useEffect.
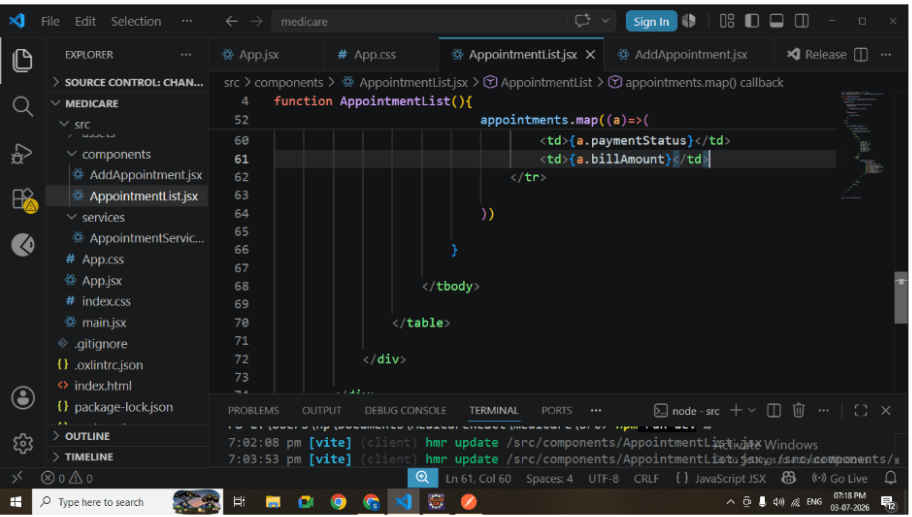
Render appointment records dynamically.
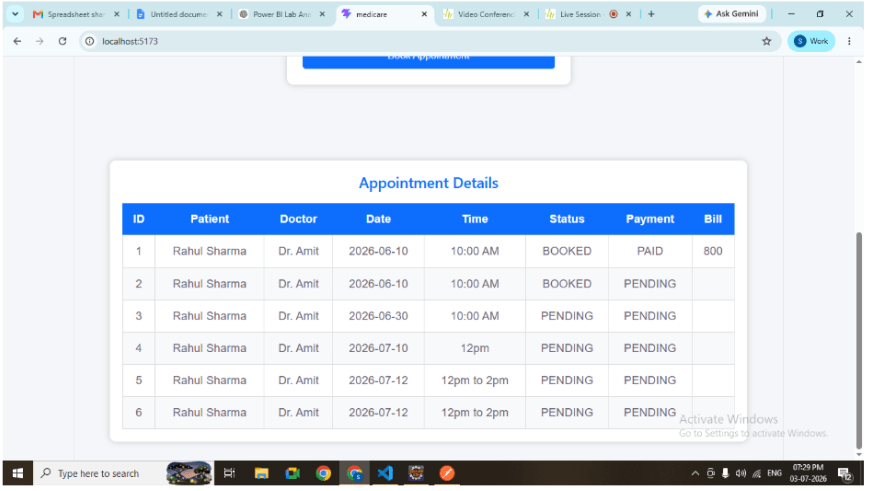
Display appointment information in a table.
Displayed fields:
Appointment ID
Patient Name
Doctor Name
Appointment Date
Time Slot
Appointment Status
Payment Status
Bill Amount
Appointment list.
6
Integrate React with Spring Boot
Configure Axios to communicate with the backend.
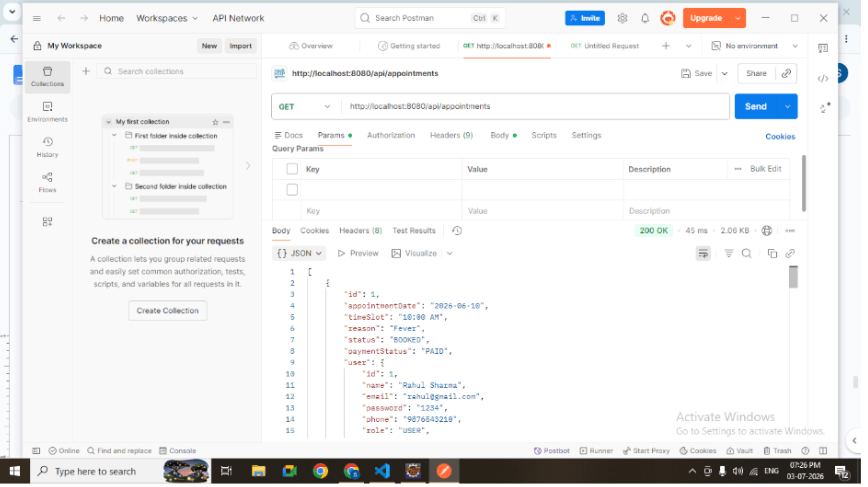
Backend API: GET
http://localhost:8080/api/appointments
POST http://localhost:8080/api/appointments
7
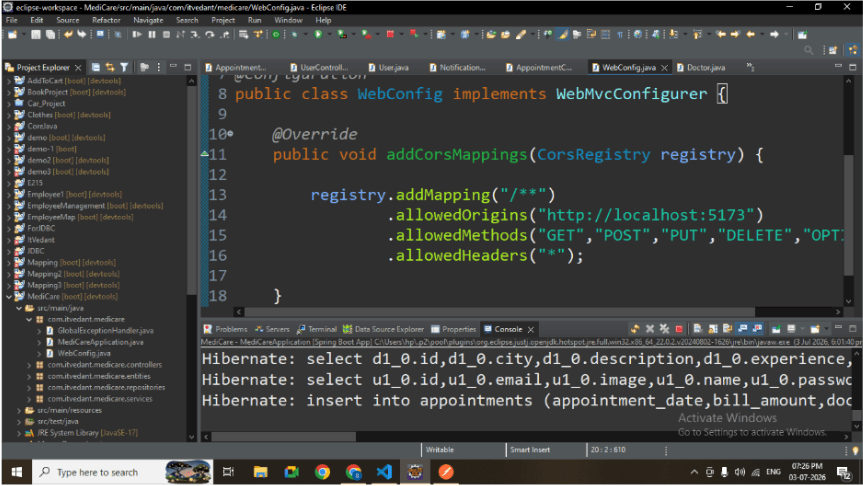
Run Spring Boot Application
Run the backend application.
Verify:
Application starts successfully.
Database connection is established.
Appointment APIs are working properly.
9
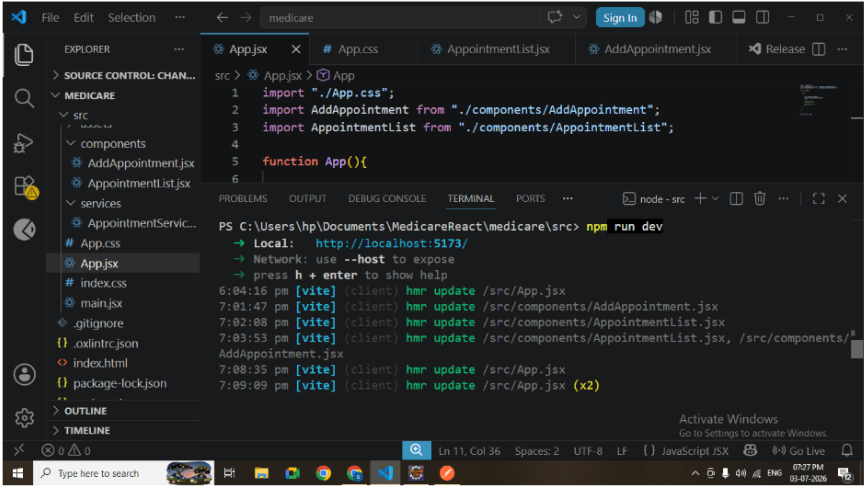
Run React Application
Start the React application.
Verify:
React compiles successfully.
Frontend loads without errors.
CSS styling is applied correctly.
8
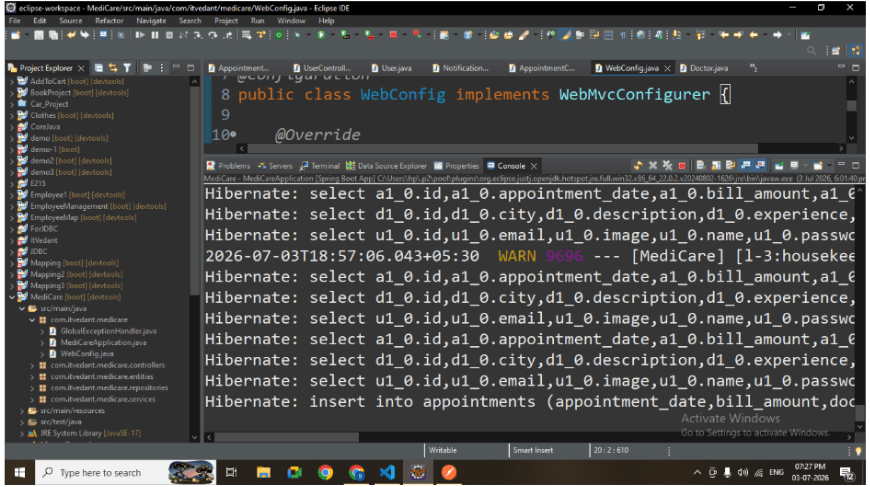
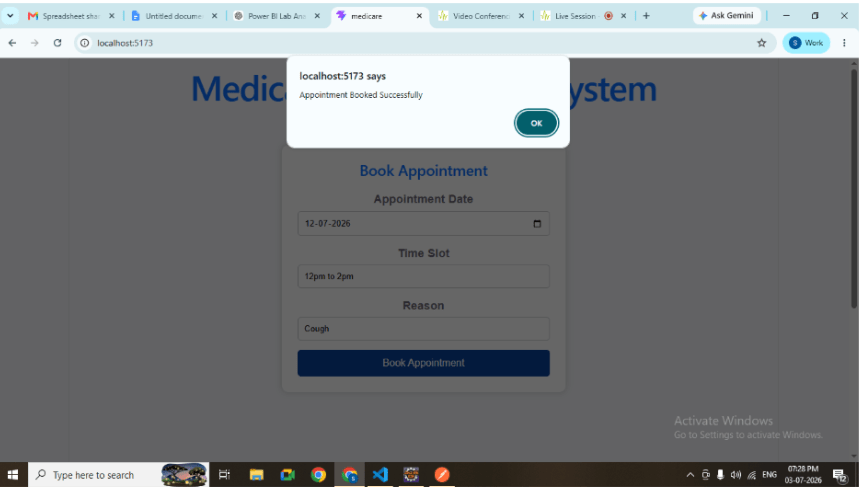
Test Appointment Booking
Enter appointment details into the booking form.
Click the Book Appointment button.
Verify:
Appointment is stored successfully.
Success message is displayed.
Backend receives the POST request.
Successful appointment booking.
10
Verify Updated Appointment List
After booking, refresh or reload the appointment list.
Verify that the newly created appointment appears in the table.
Displayed information should include:
Appointment ID
Patient Name
Doctor Name
Appointment Date
Time Slot
Appointment Status
Payment Status
Bill Amount
Great job!
Create reusable React components.
Design user interfaces using JSX and CSS.
Integrate React with Spring Boot.
Consume REST APIs using Axios.
Manage component state using useState.
Execute API calls using useEffect.
Perform appointment creation from the frontend.
Display dynamic backend data in the browser.
Checkpoint
By Content ITV