Slides for Developers
We strive to make Slides a great and flexible tool for developers. Presentations created on Slides are HTML documents under the hood, so generally anything that HTML can do, Slides can do. We make it easy to access and edit the underlying HTML and CSS through the Developer Mode.
There's also an API for creating new presentations with preset content, called the Define API.
For external REST and MCP API docs, see API Documentation.
Syntax Highlighted Code
Slides is the best presentation tool out there when it comes to presenting and showing code. Highlighting is provided for all common languages and you can pick from multiple different highlight themes.
Line Highlights
You can emphasize specific lines of code to direct the audience's attention. Multiple code highlight steps can be added and stepped through for the same code block. An empty highlight step means that no code is highlighted.
Developer Mode
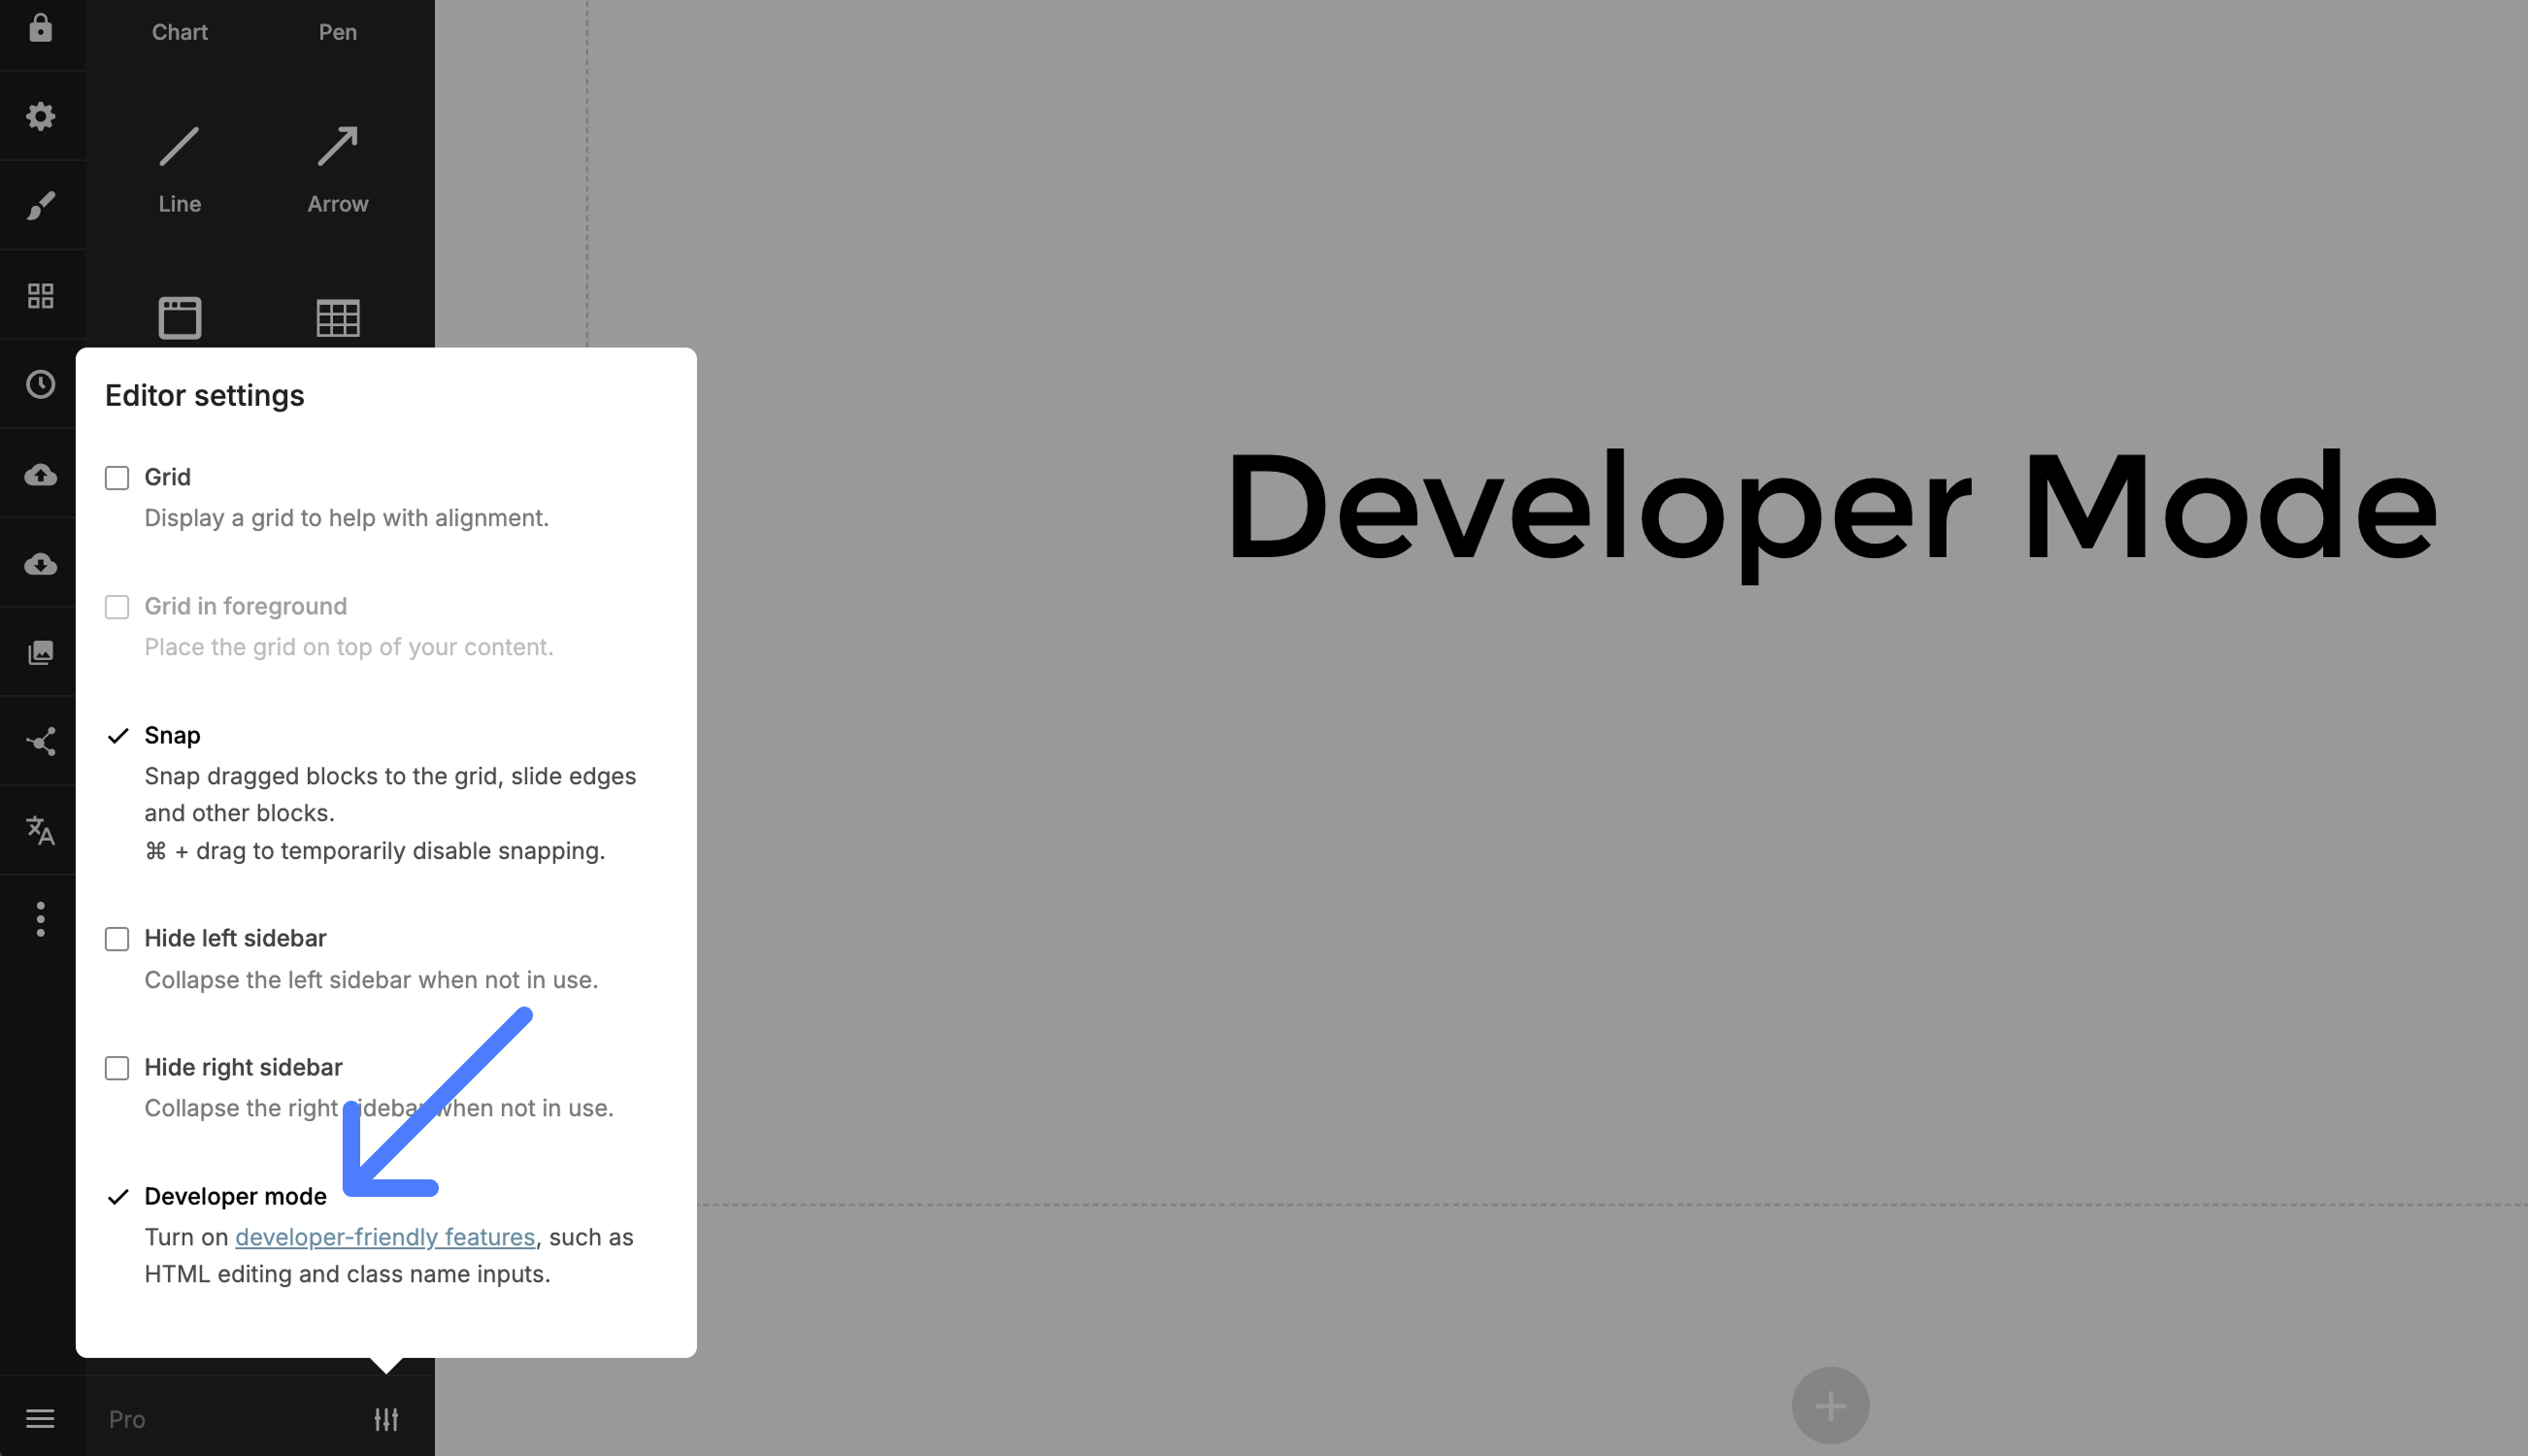
The Slides editor has a developer mode which is useful if you know a bit of HTML and CSS. With this mode active you will be able to modify the underlying HTML of your deck, allowing you to make adjustments that the Slides editor does not provide interface options for.
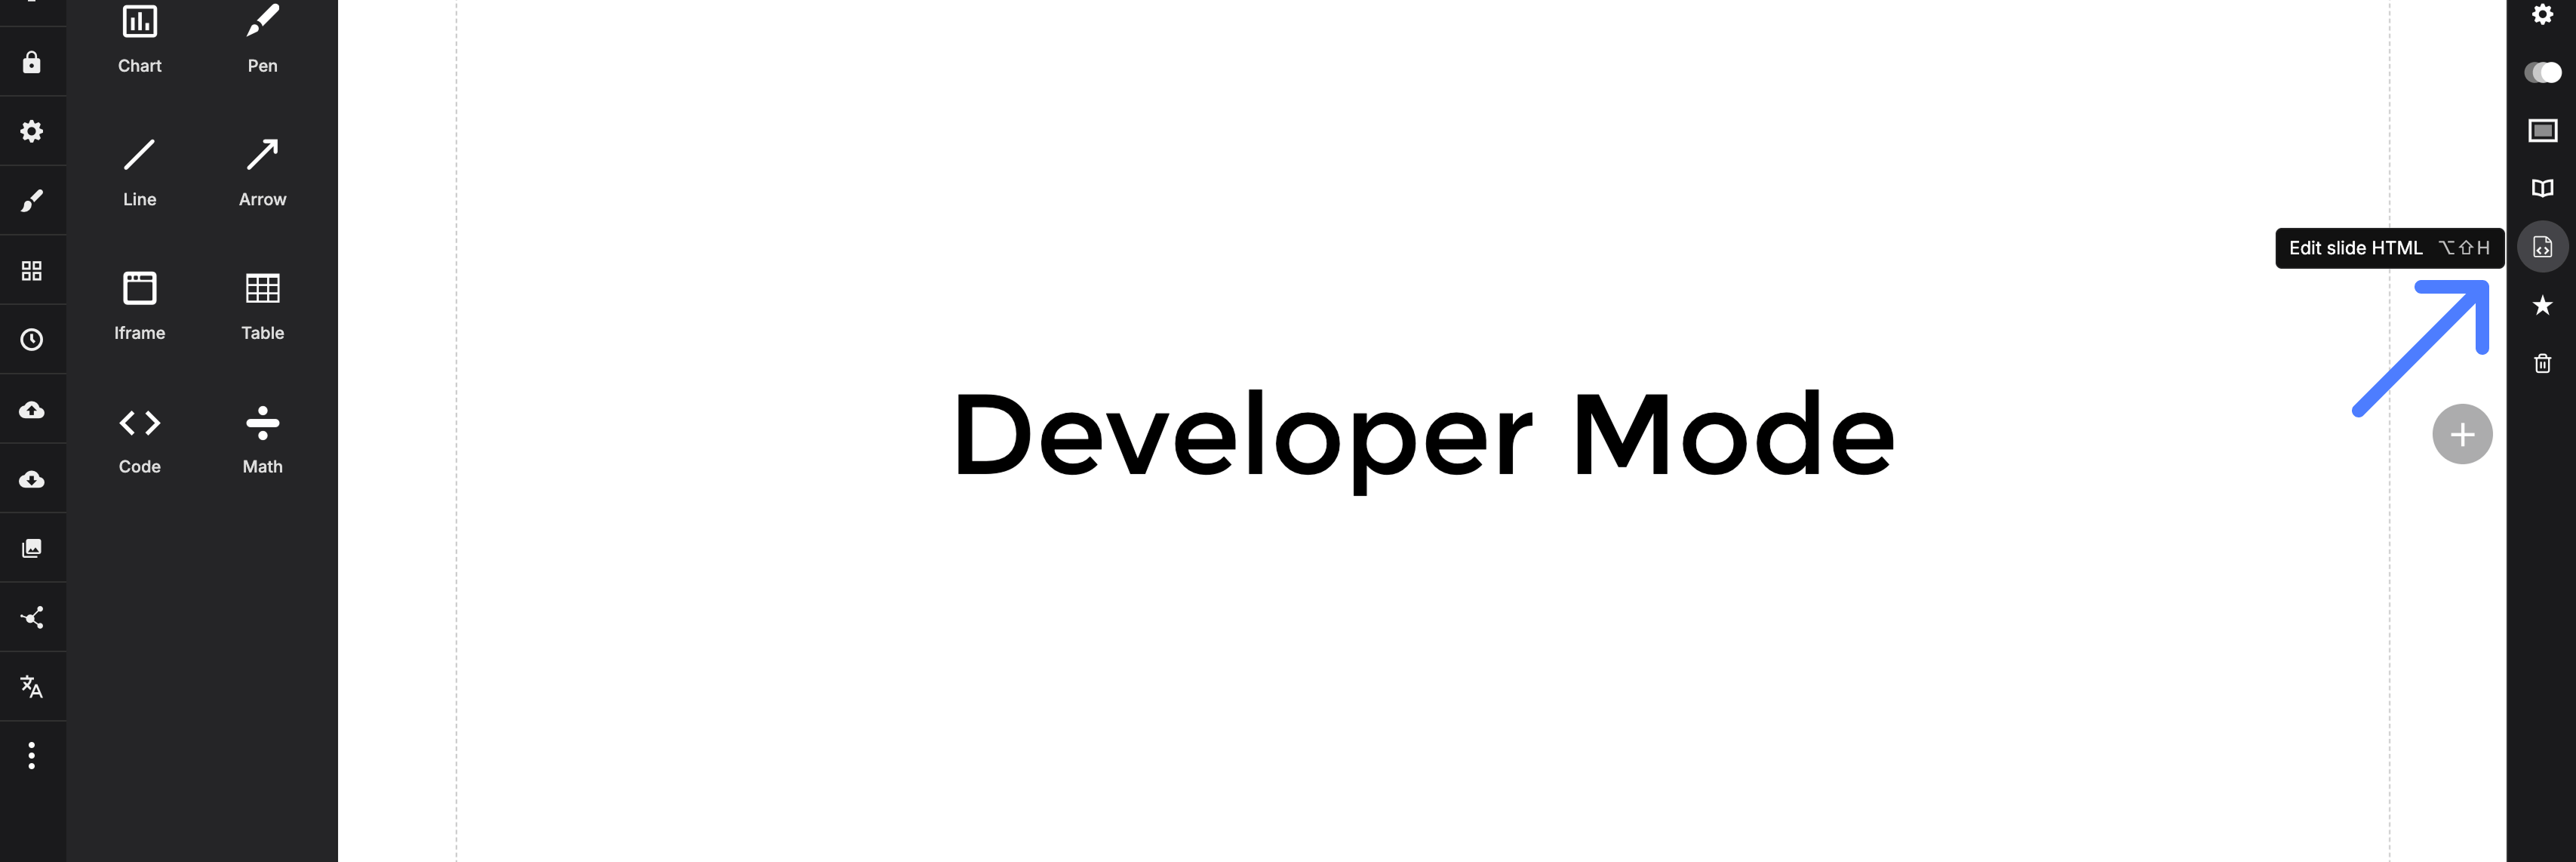
To enable the developer mode open the editor settings in the bottom left corner:
Editing HTML
The per-slide HTML editor can be accessed from the slide options area. It gives you raw access to the current slide's HTML, allowing you to change anything you like. Note that some elements, such as <script> and <link>, are not allowed for security reasons.
Element Classes
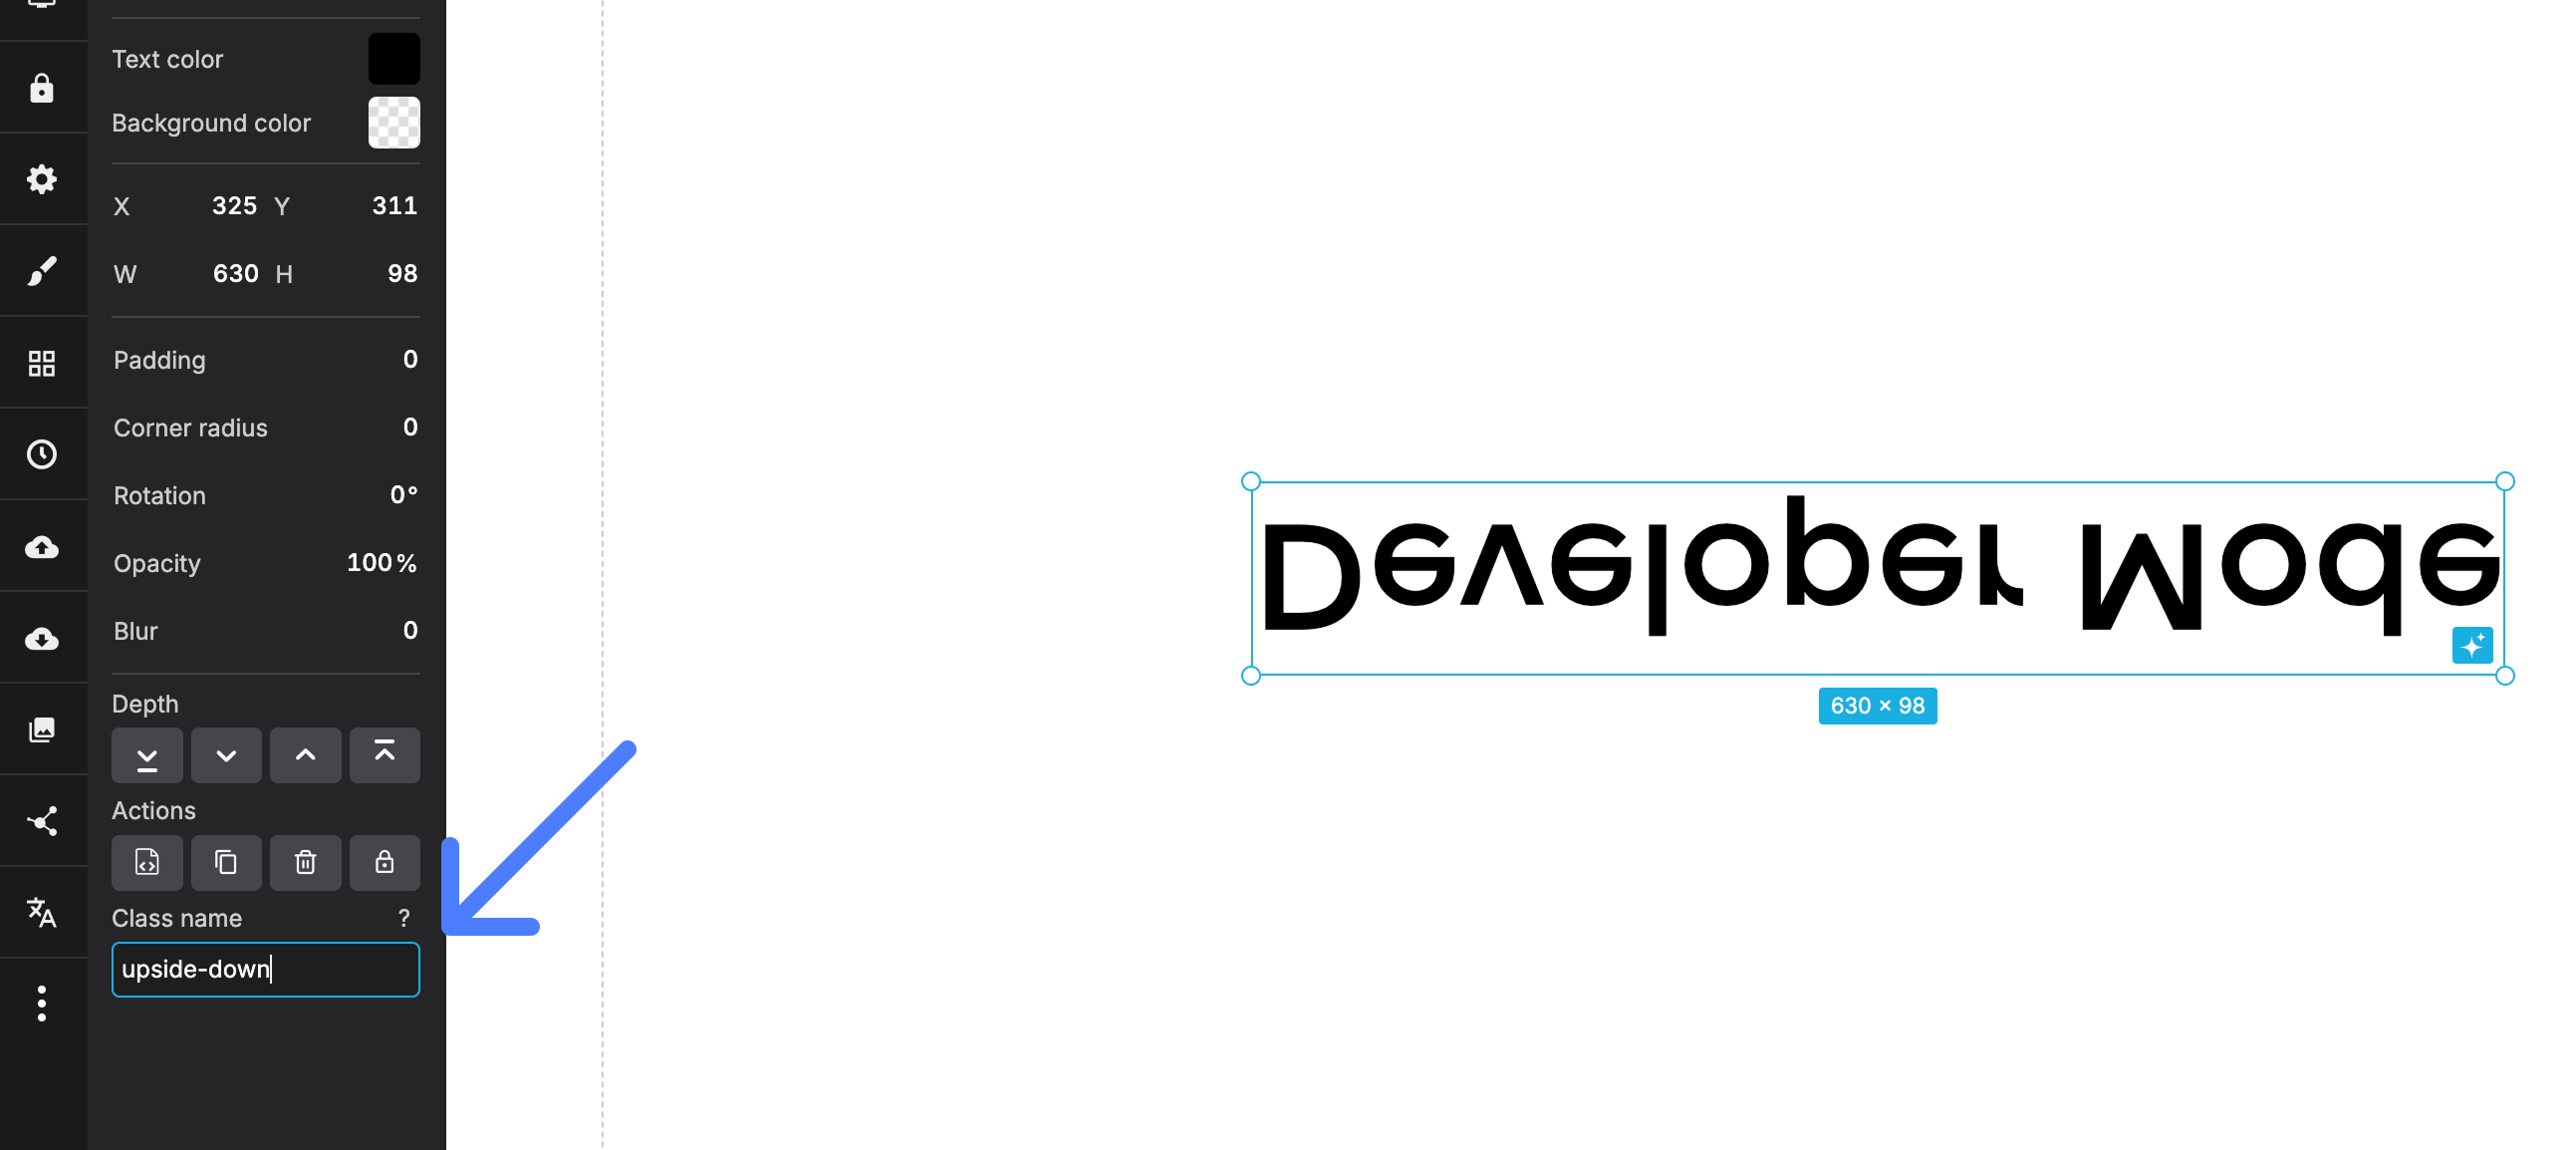
Requires ProAs a paying Slides customer you have access to the CSS editor which allows you to add custom styles to your deck. By turning on the developer mode a new "class name" field will appear for any block that you focus. This allows you to easily target a specific element with your CSS.
Here's an example that defines an "upside-down" class using custom CSS and applies it to a text block.
.upside-down {
    transform: scale( 1, -1 );
}
Slide Classes
Requires ProJust like you can add custom classes to individual elements it's also possible to add custom classes at the slide level. This can used to apply broader changes to the whole slide like inverting text and icon colors or changing the slide transition.
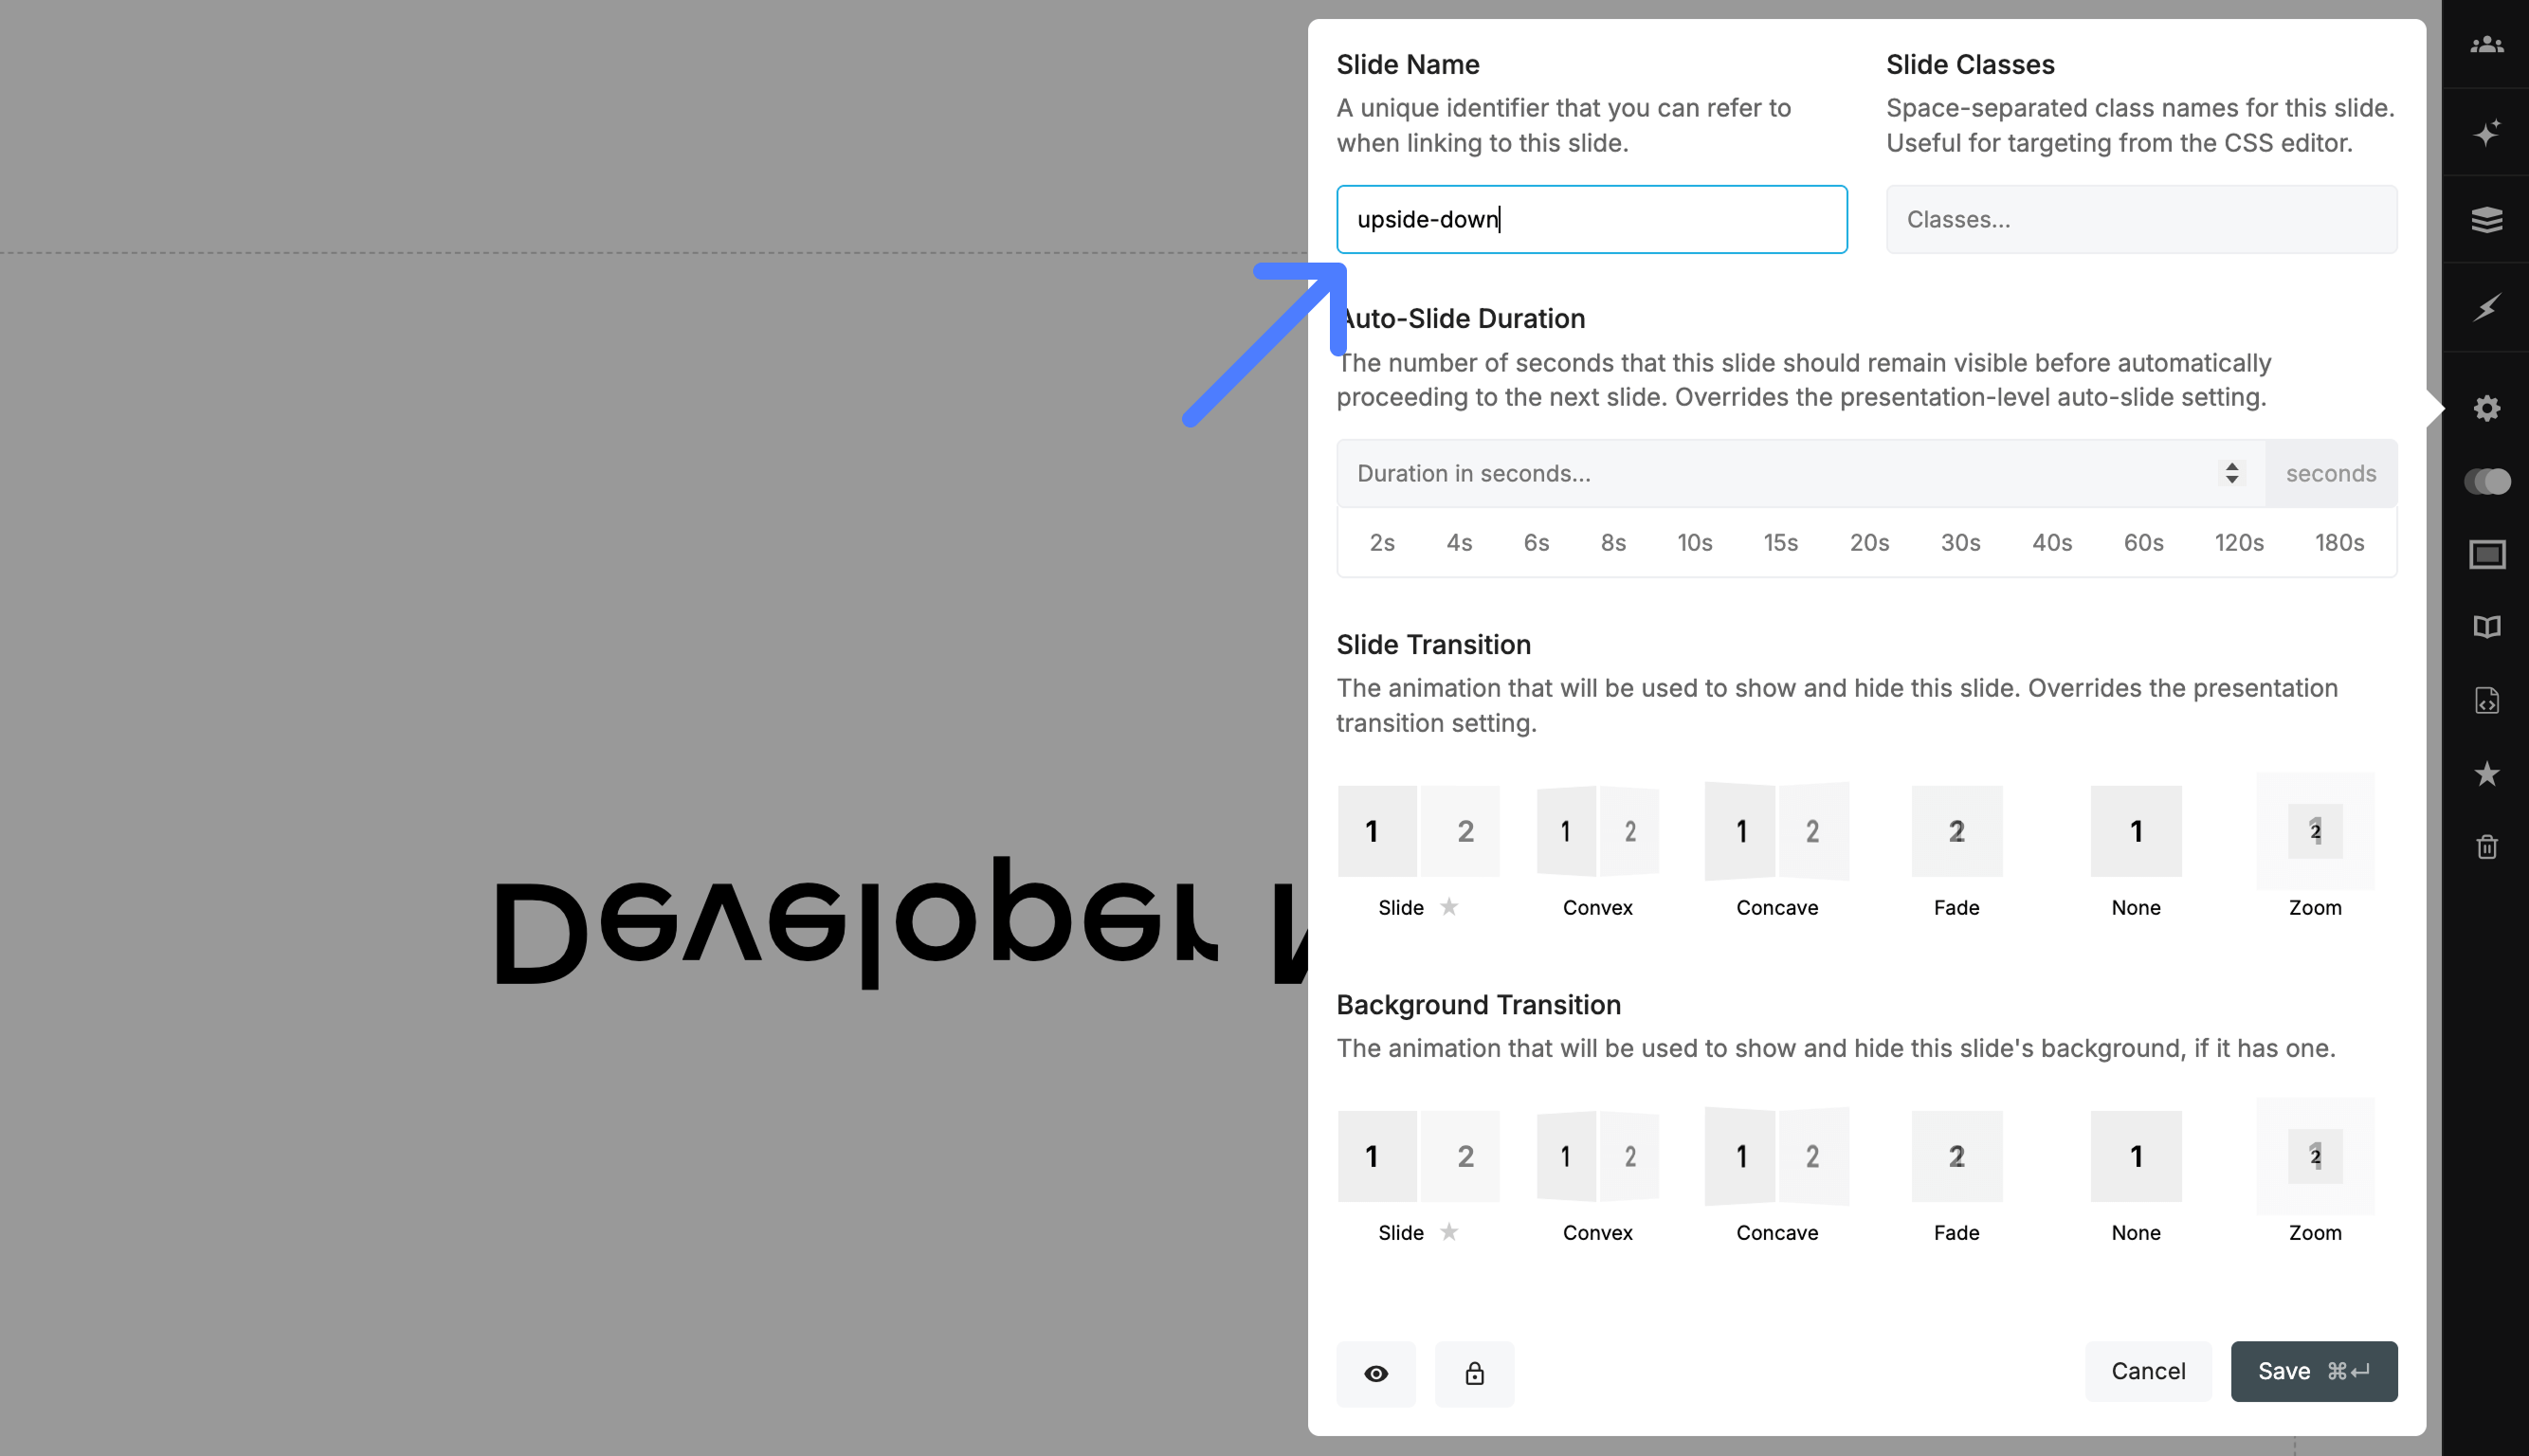
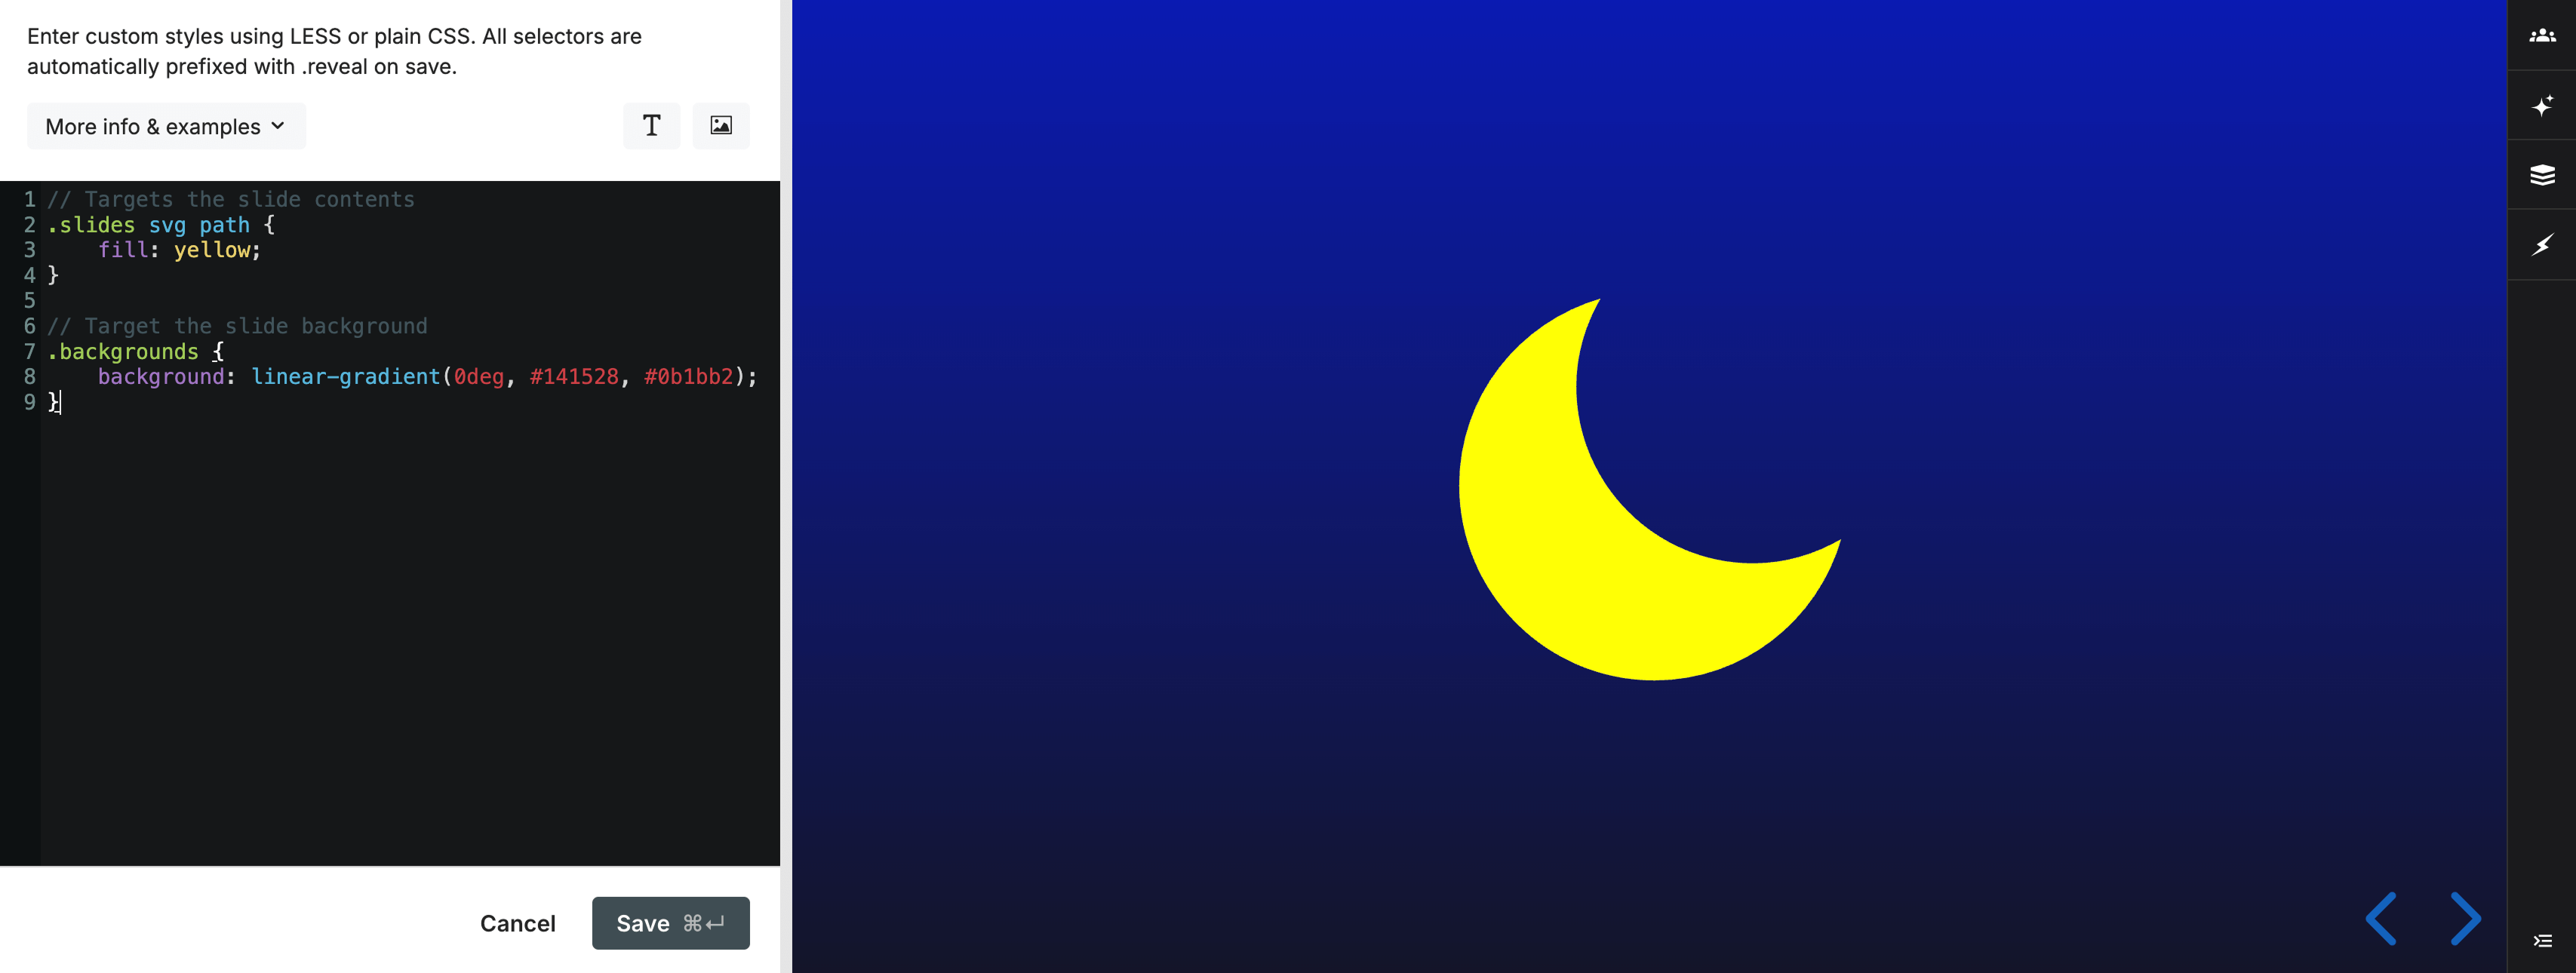
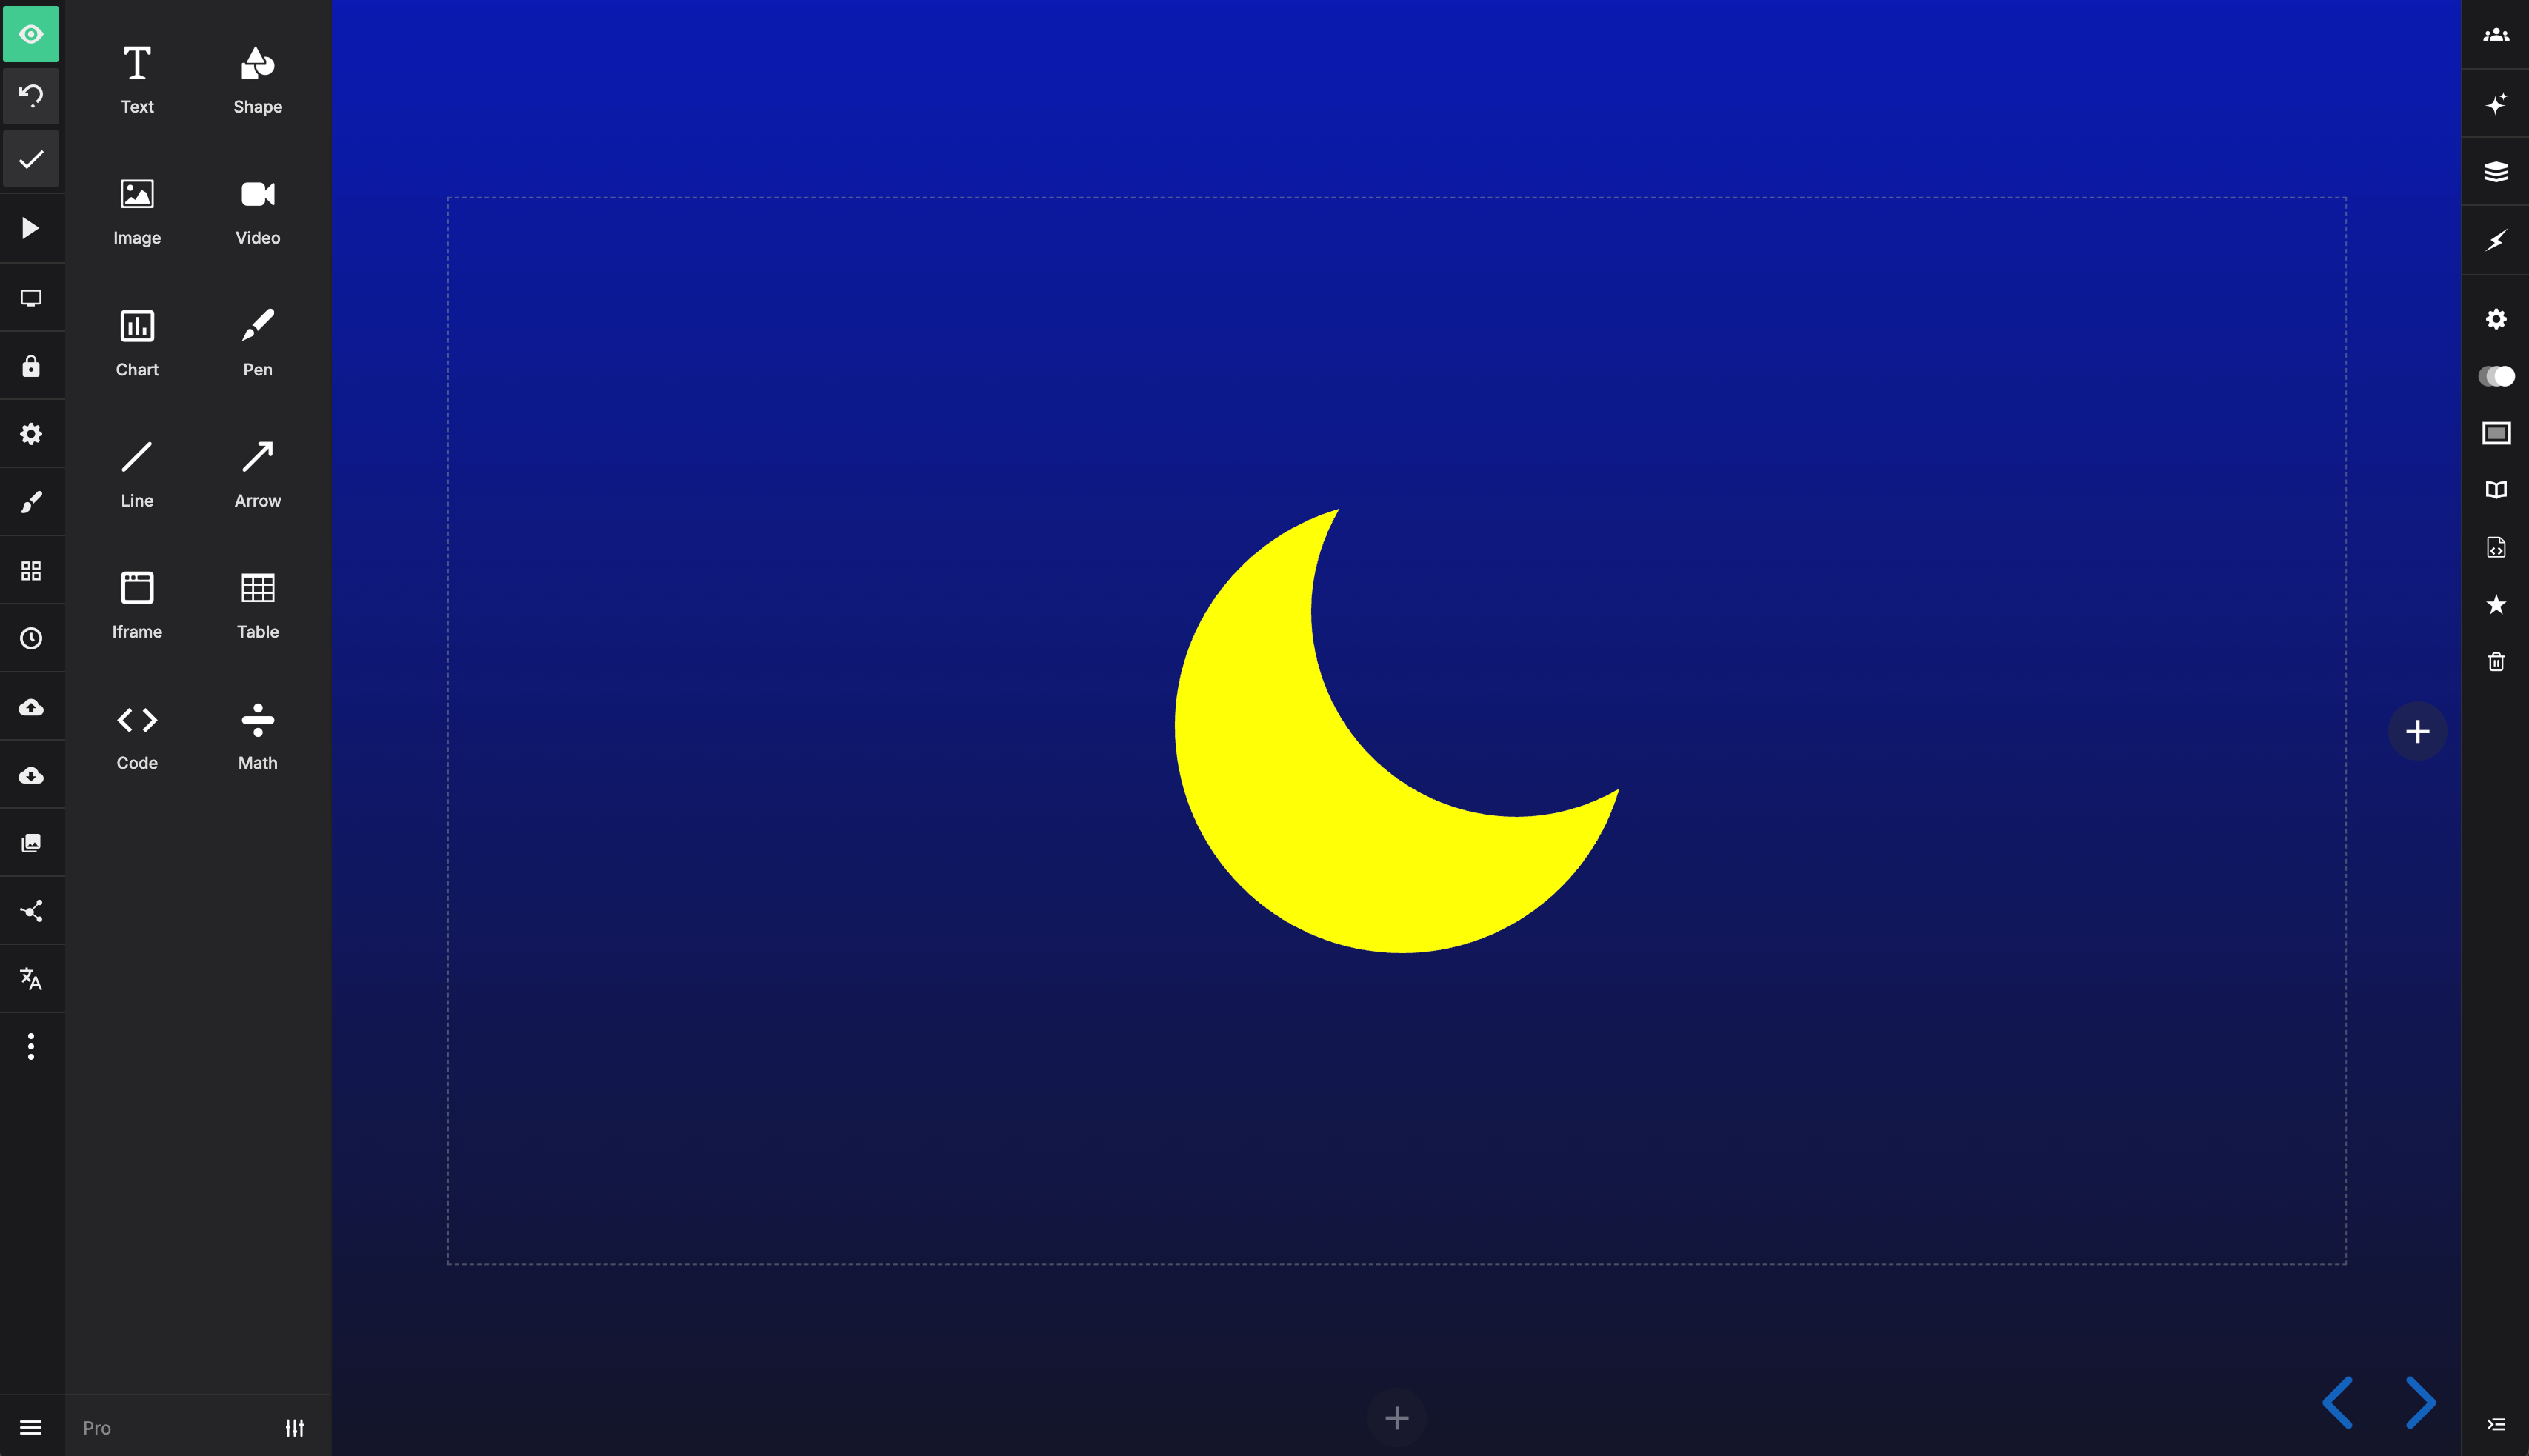
Under the hood the slide background element is separate from the slide itself. Here are two examples showing how you'd target the slide contents or slide background using a custom class called "night-sky":
// Targets the slide contents
.slides .night-sky svg path {
    fill: yellow;
}

// Target the slide background
.backgrounds .night-sky {
    background: linear-gradient(0deg, #141528, #0b1bb2);
}
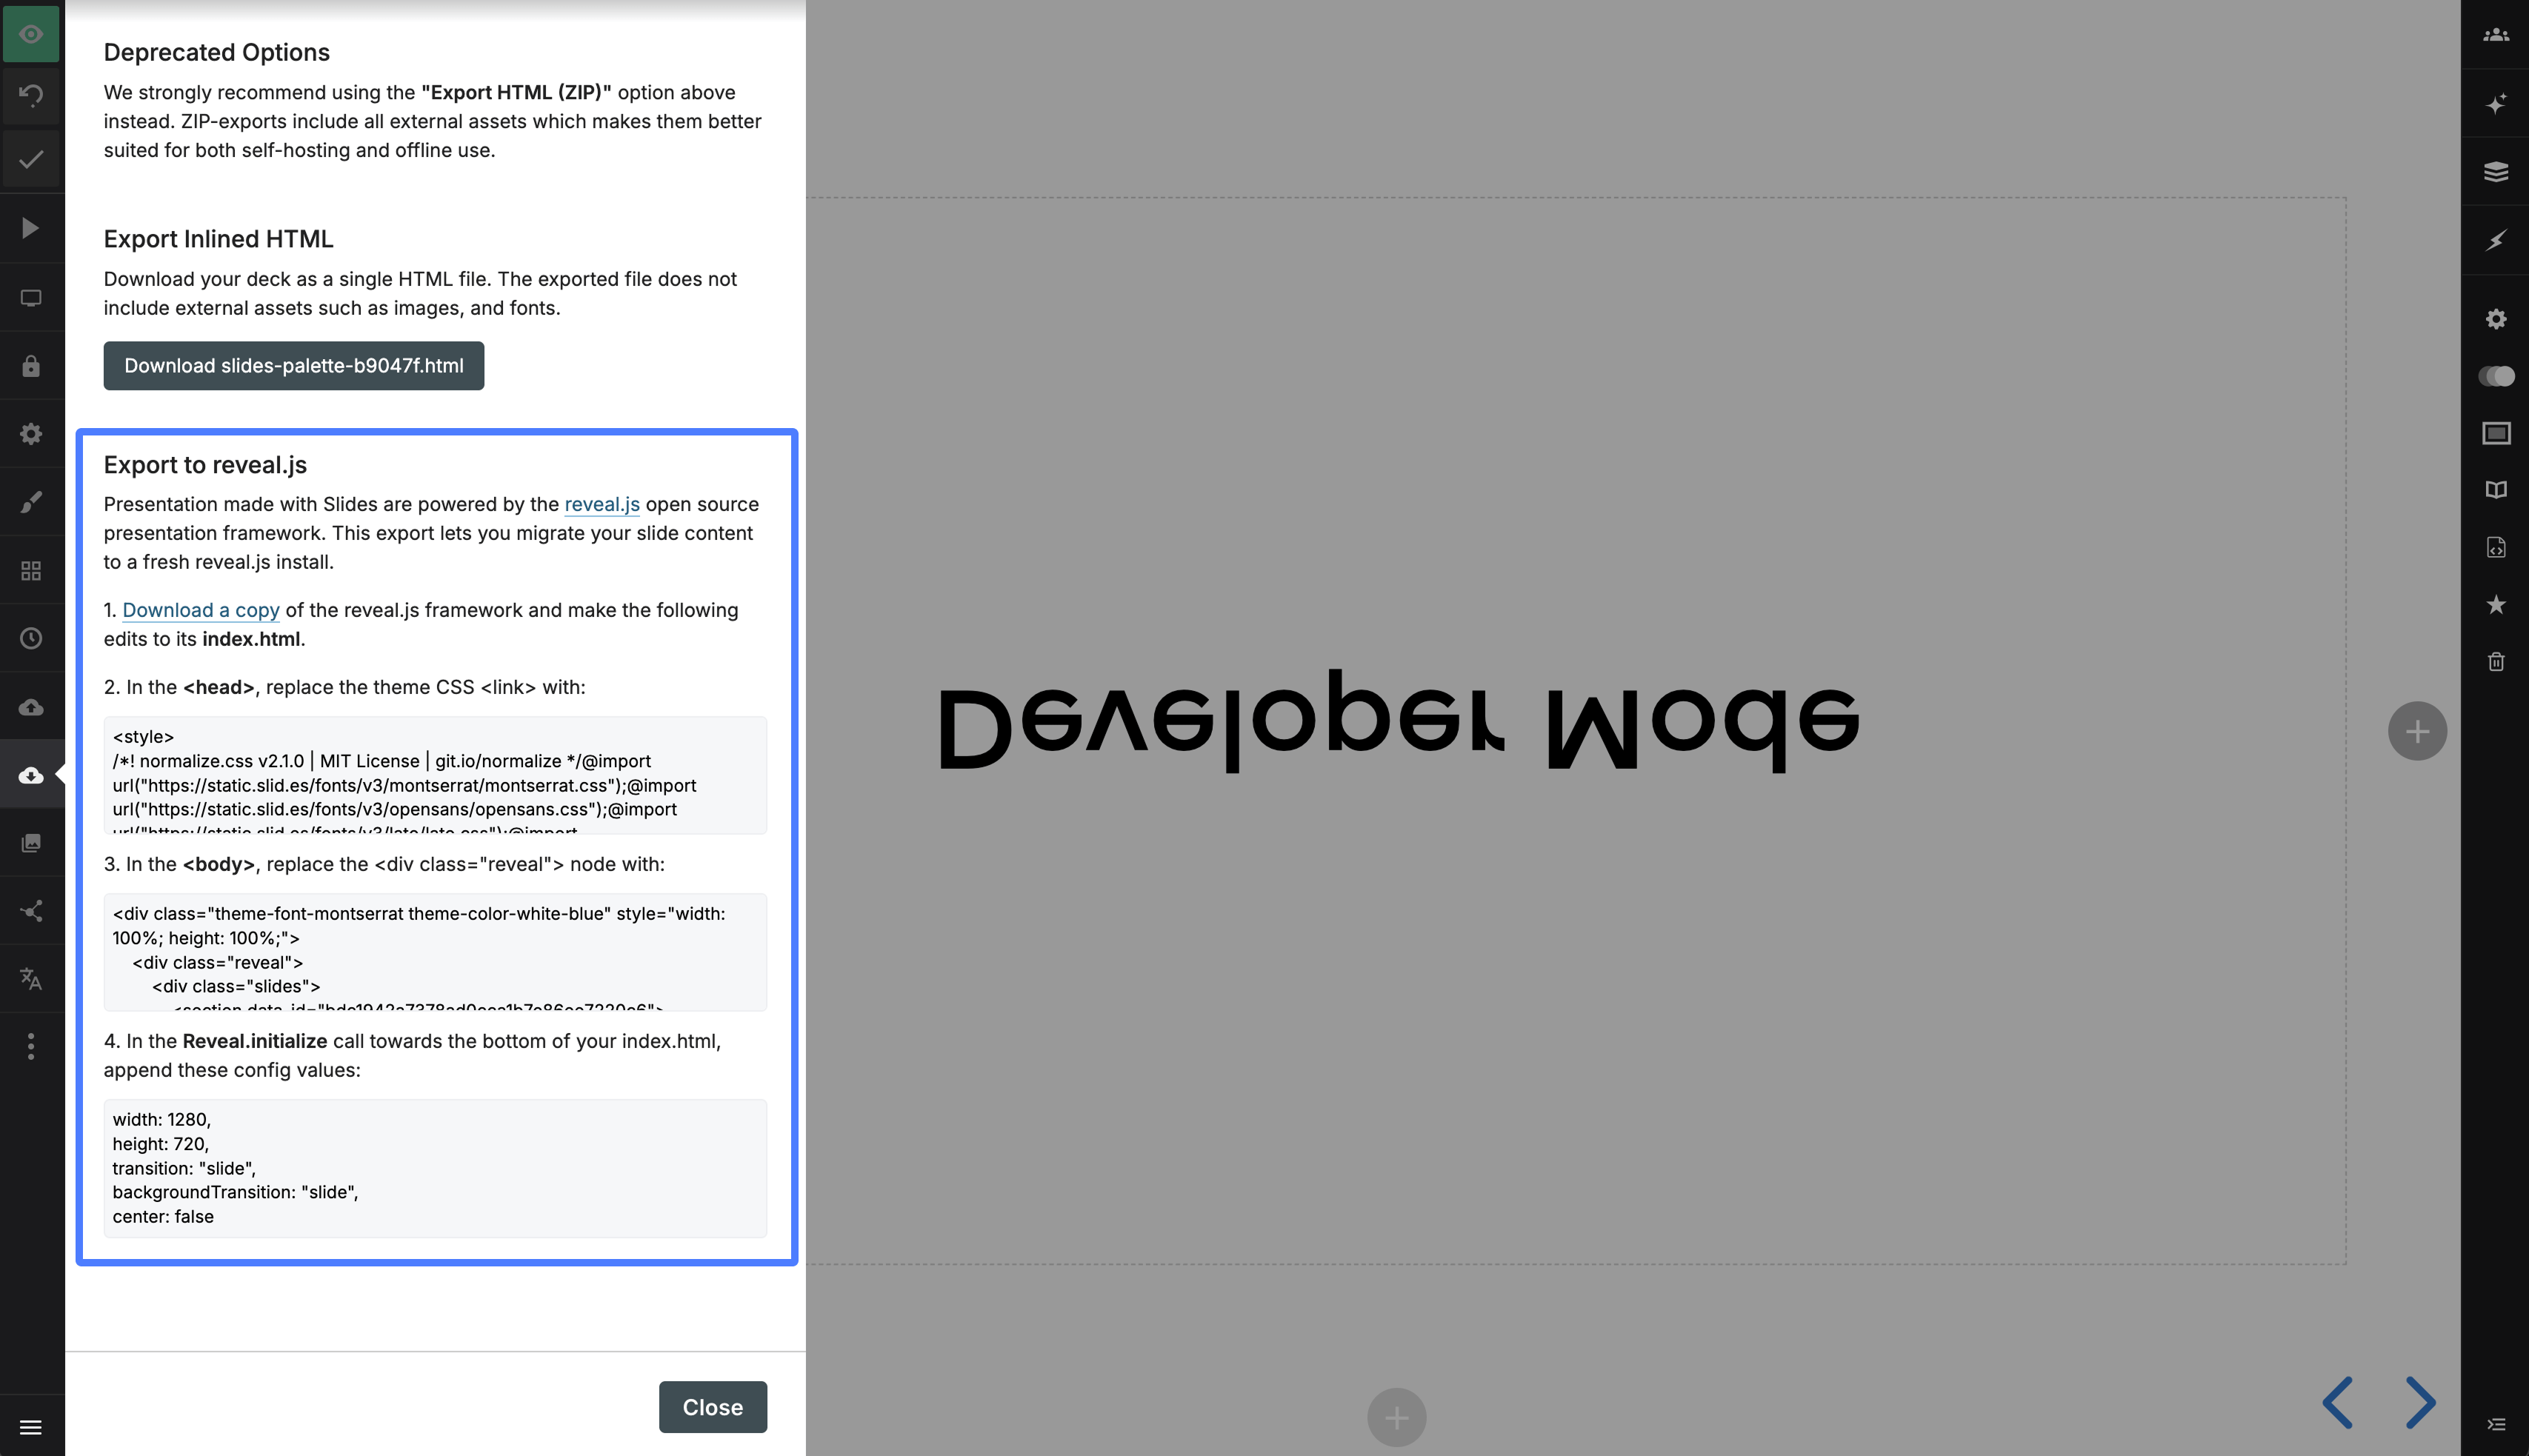
Export HTML
You can access the complete HTML for all slides in your deck inside of the export panel, under "Export to reveal.js". This provides a way of exporting your deck markup and the core Slides styles to reveal.js. There are a few limitations with exporting this way but it should provide a good starting point.
CSS Editor
Requires ProThe CSS editor lets you author custom styles for your presentation with a real-time preview of the result. It's available as an option inside of the Style panel of the presentation editor.
The editor preprocesses styles using LESS, though you're free to write plain CSS as well. We apply the styles in real-time as you type so there's no need to leave the editor or even press a refresh button to see what you're getting. Note that when your styles are saved they will be automatically wrapped in a ".reveal {}" selector to avoid conflicts with other page styles.
Custom Fonts
You can load custom fonts from Typekit and Google fonts and apply them using custom CSS. Find out more.
Developer Mode
If you turn on the developer mode you can also add custom classes to any focused element. This is a convenient way to easily apply your CSS to specific elements.
Examples
// Change presentation progress bar color
.progress span {
  background: #ff0000;
}

// Change control arrow color
.controls button {
  color: #ff0000;
}

// Change presentation background
& {
  background: #a83239;
}

// Change color of body text
.slides {
  color: #009999;
}

// Turn text white if the slide has a dark background
.has-dark-background {
  color: #ffffff;
}

// Larger slide numbers (if slide numbers are enabled for the deck)
.slide-number {
  font-size: 20px;
}

// Add a blue border to all slides (each slide is a <section>)
.slides section {
  outline: 1px solid blue;
}

// Add a red border to all vertical stacks of slides
.slides section.stack {
  outline: 1px solid red;
}

// Include a custom font
@font-face {
  font-family: "Cabin Sketch";
  src: url("https://static.slid.es/fonts/cabinsketch/cabinsketch-regular.woff") format("woff")
}

.slides h1, .slides h2, .slides h3 {
  font-family: "Cabin Sketch";
}
Here's where you can access the CSS editor from inside of the Style panel:
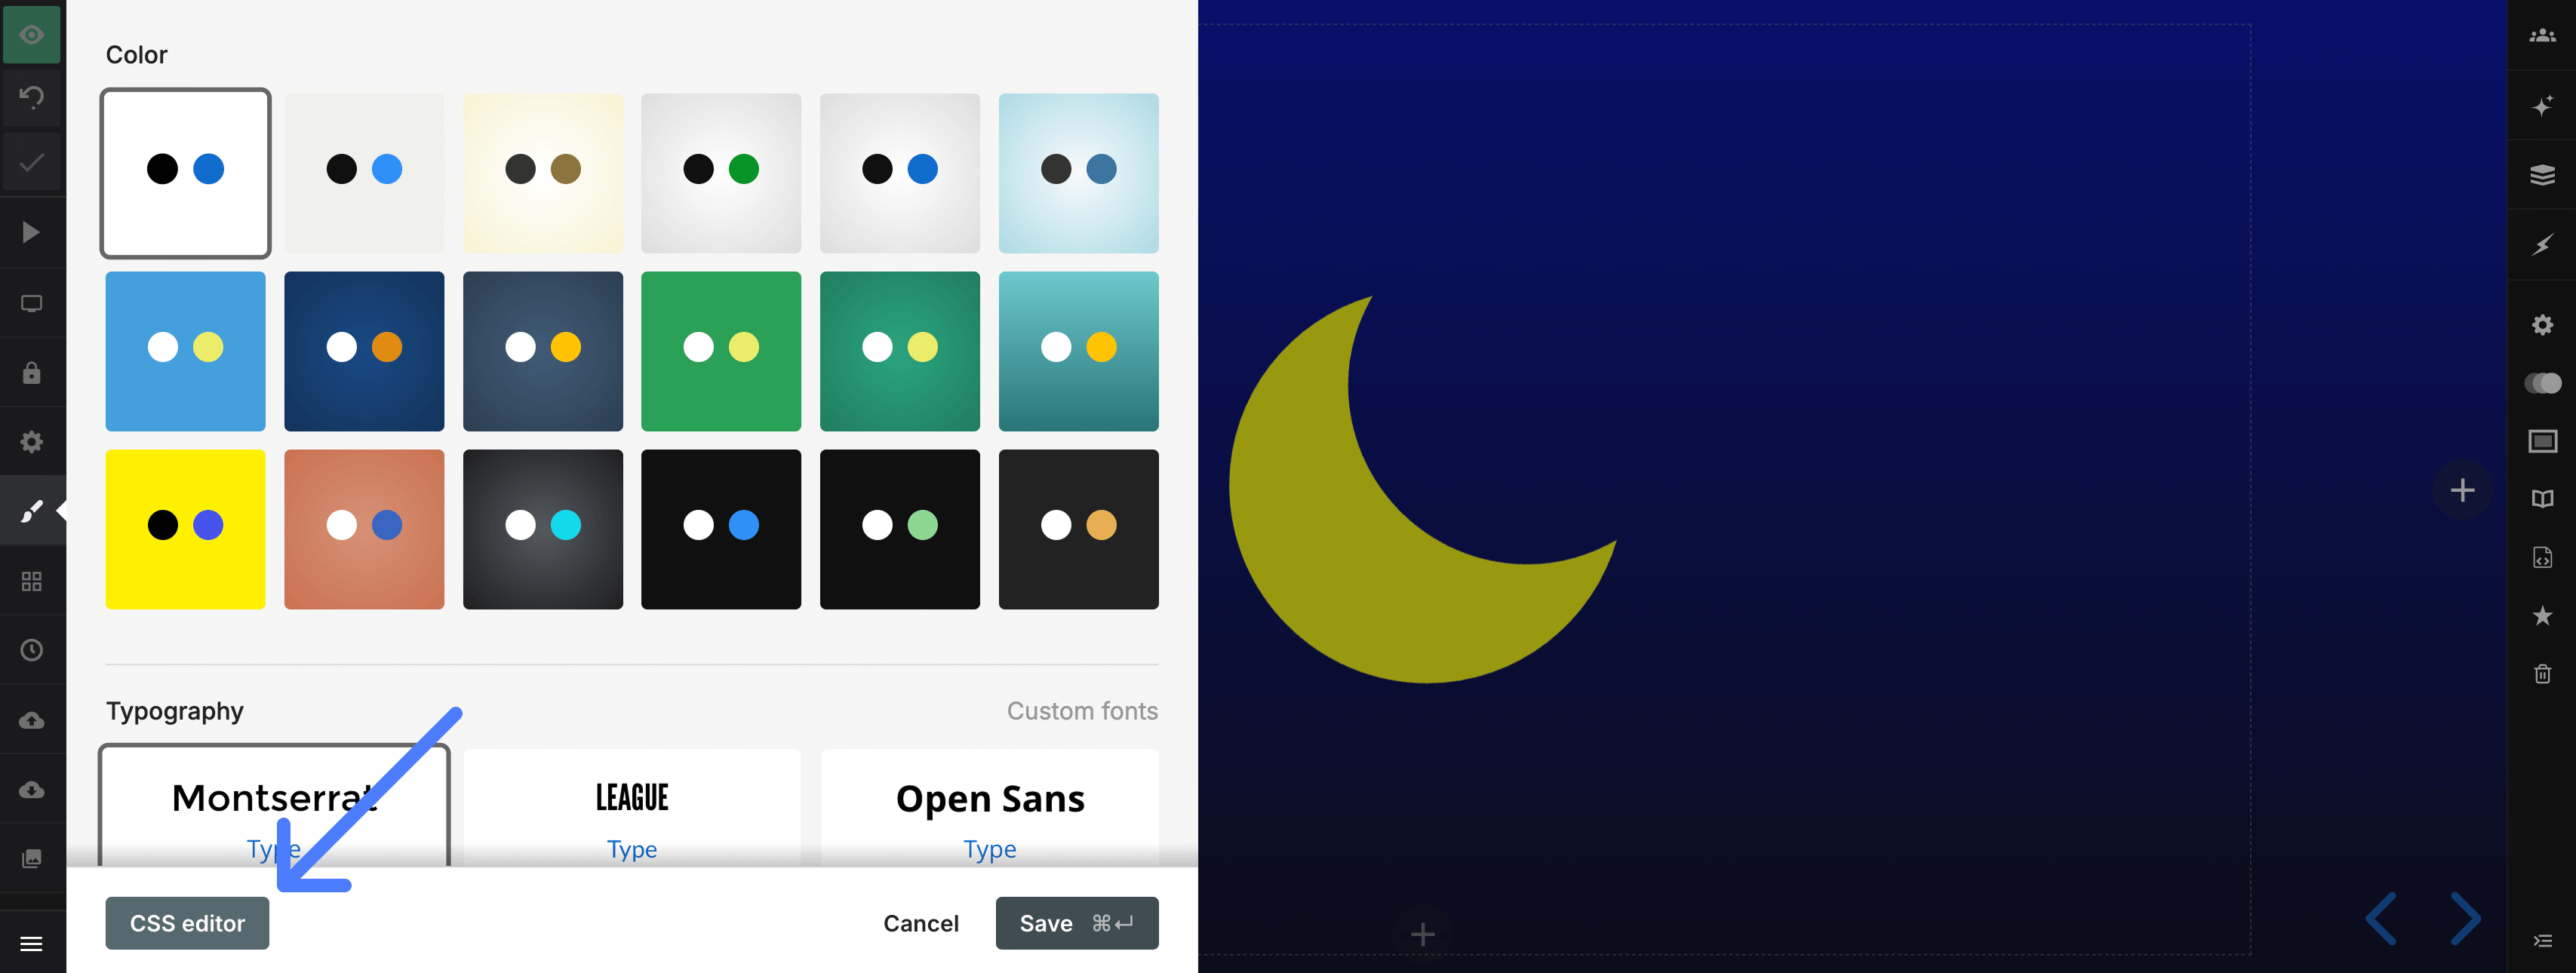
A screenshot of the editor: