Adventures in Time Travel and Parallel Universes:
An Introduction to Git
Who am I?
- Senior Developer at Phase2
- Been using Git since 2011
- Have trained and mentored devs, designers, and clients in use of Git

Conference hashtag: #devsigner
Session evaluation: devsignercon.com/eval
Who are you?
- Assumption is that you have little to no prior experience in Git.
- You may or may not have much coding experience.
- You may or may not be comfortable on the command line.
- We will use a graphical tool instead of the command line, but we can talk about how to do any of these tasks on the command line.
Conference hashtag: #devsigner
Session evaluation: devsignercon.com/eval
What will we cover?
- Time Travel (moving among commits)
- Alternate Universes (switching branches)
- Stashing Changes
- Merging Branches
- Pushing to a Remote
- Merging from Another Remote
Conference hashtag: #devsigner
Session evaluation: devsignercon.com/eval
Let's get started!
Install Git and SourceTree
(or use my USB drive)
https://www.sourcetreeapp.com/download
(or use my USB drive)

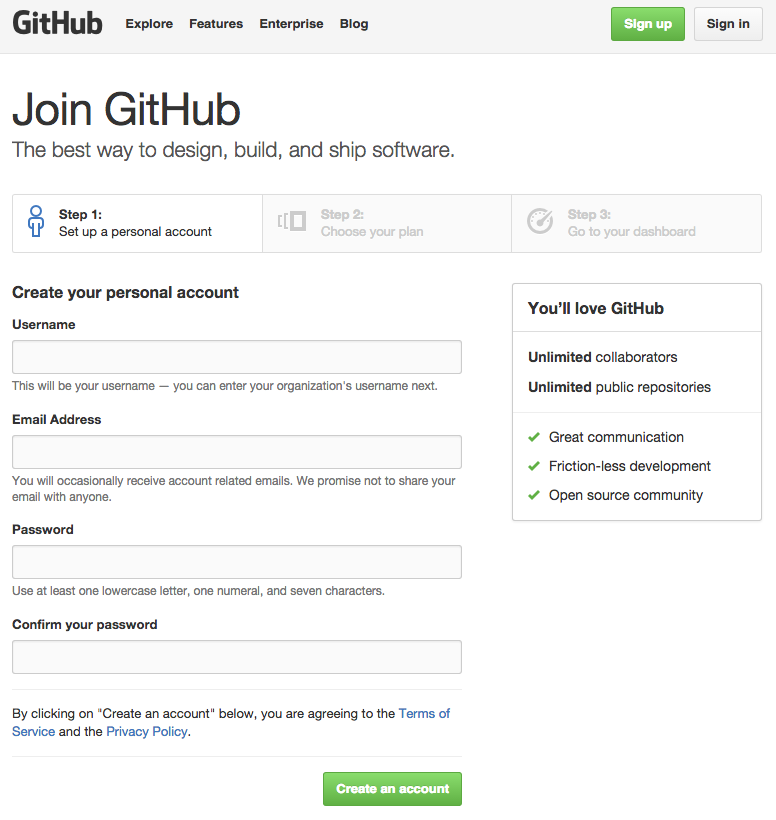
Create GitHub Account
Grab the story (step 1)
https://github.com/danmuzyka/time-travel-parallel-universes-git
You are going to make a copy of what we call the repository and put the copy into your own GitHub account.
A repository consists of the files that Git tracks for you.
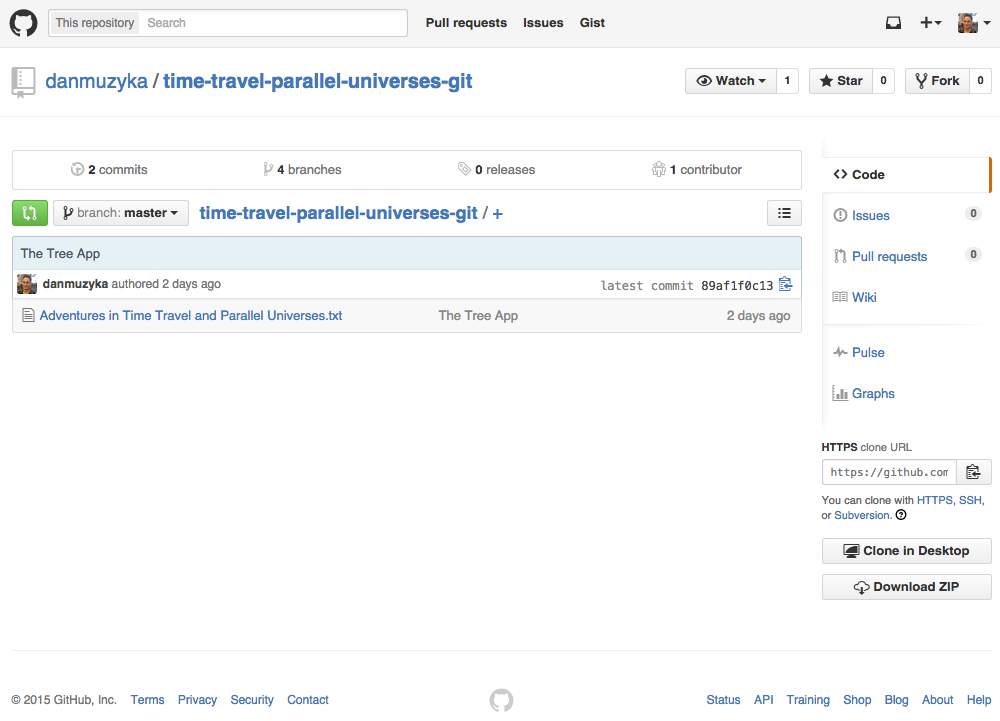
Grab the story (step 2)

Click the button to Fork my repository into your GitHub account.
Grab the story (step 3)
Copy the URI for the repository.

Grab the story (step 4)
Clone into SourceTree:
- Select File > New/Clone
- Select Clone from URL

Grab the story (step 5)
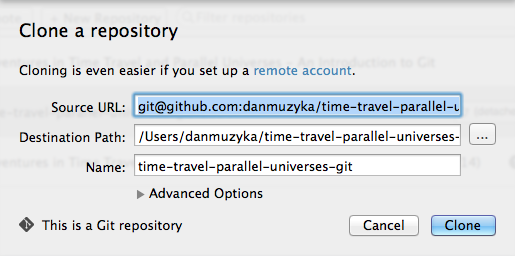
Paste the URL into the Source URL field. You can leave the default values in the other fields.
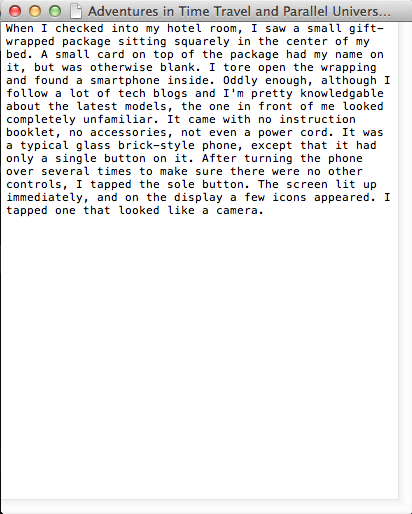
Open the story
Click the button to reveal the selected file in the folder where it lives.
Then, open that file in a text editor.
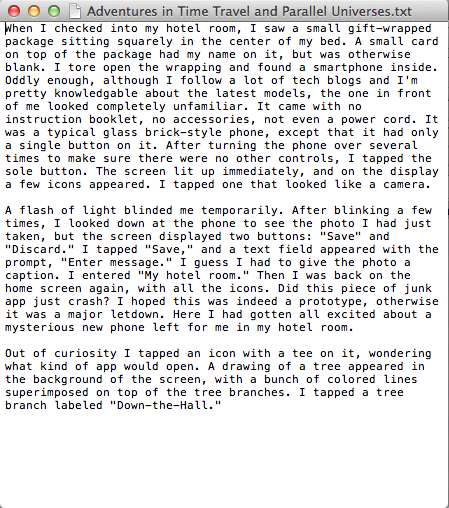
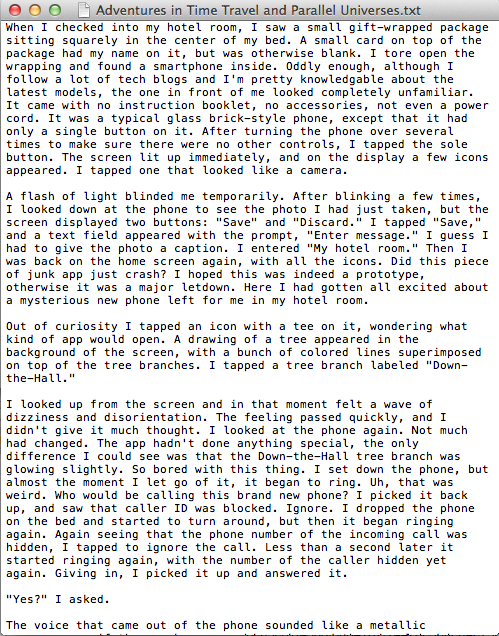
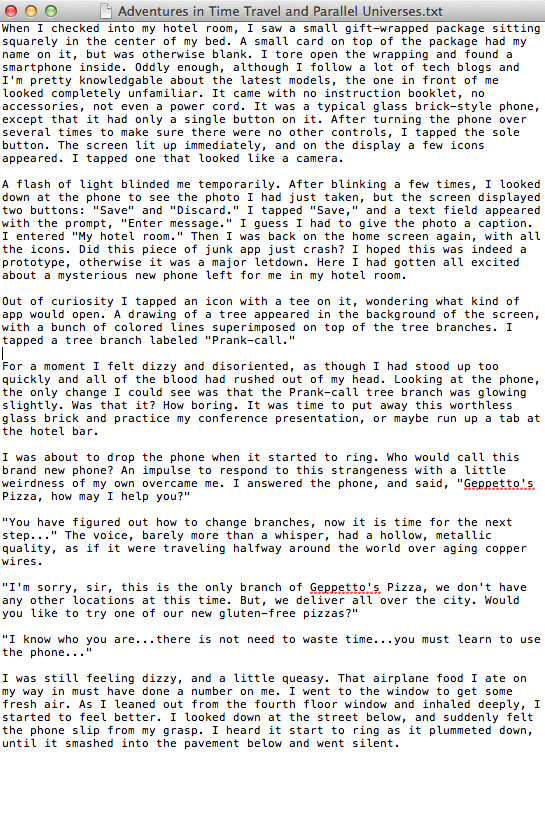
Read what's in the story so far - it is a metaphor about Git.

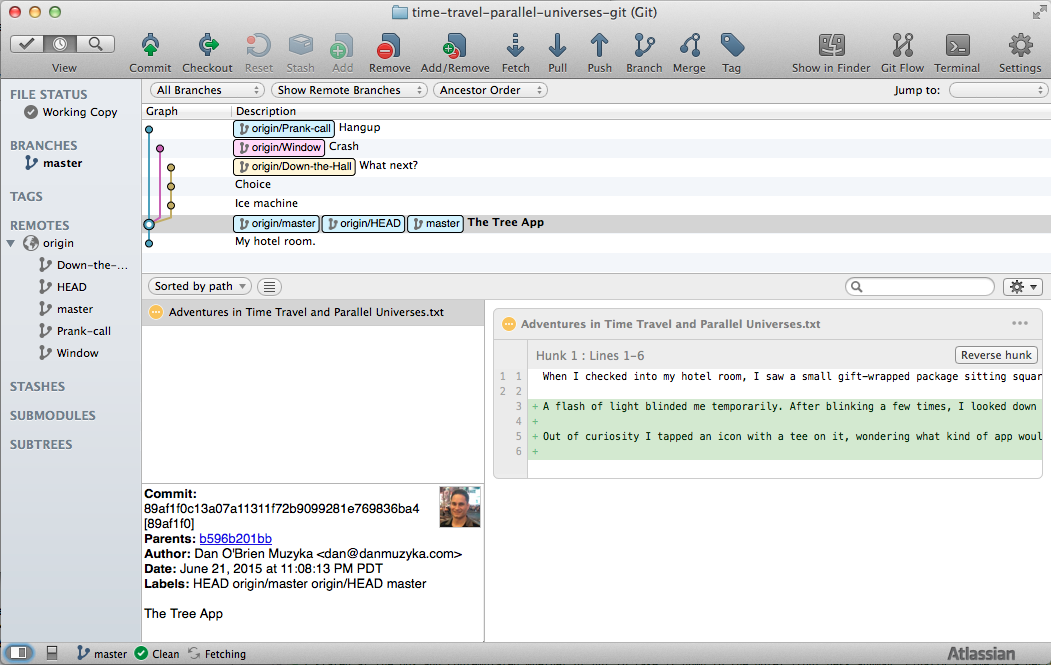
Time Travel
Time Travel
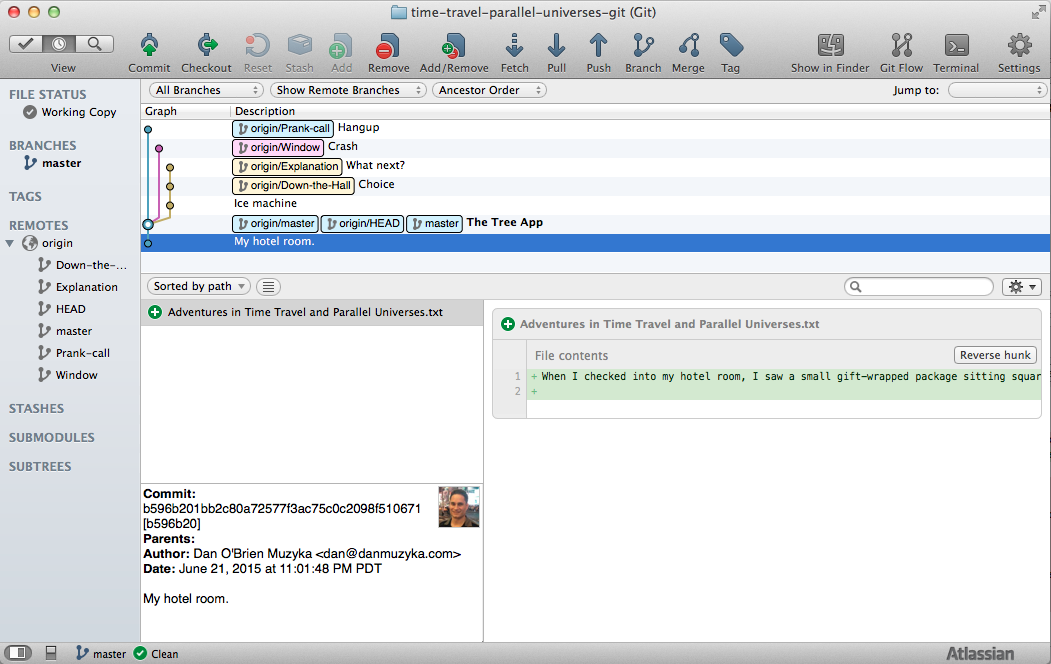
Now let's travel back in time to a previous moment in the story. Select My hotel room from the list, then click the Checkout button.

Time Travel
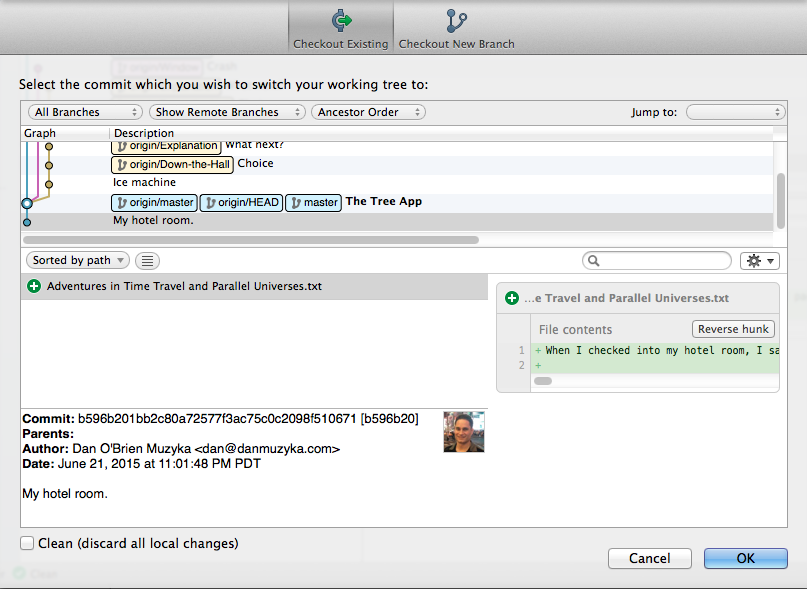
Click OK.
Time Travel
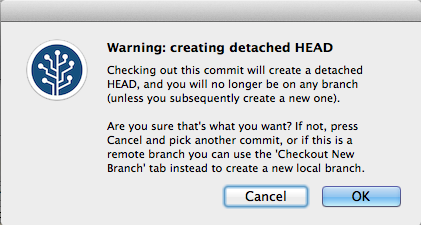
Accept the warning and click OK.
Normally you wouldn't do things this way, but we're doing it now for demonstration purposes.
Time Travel
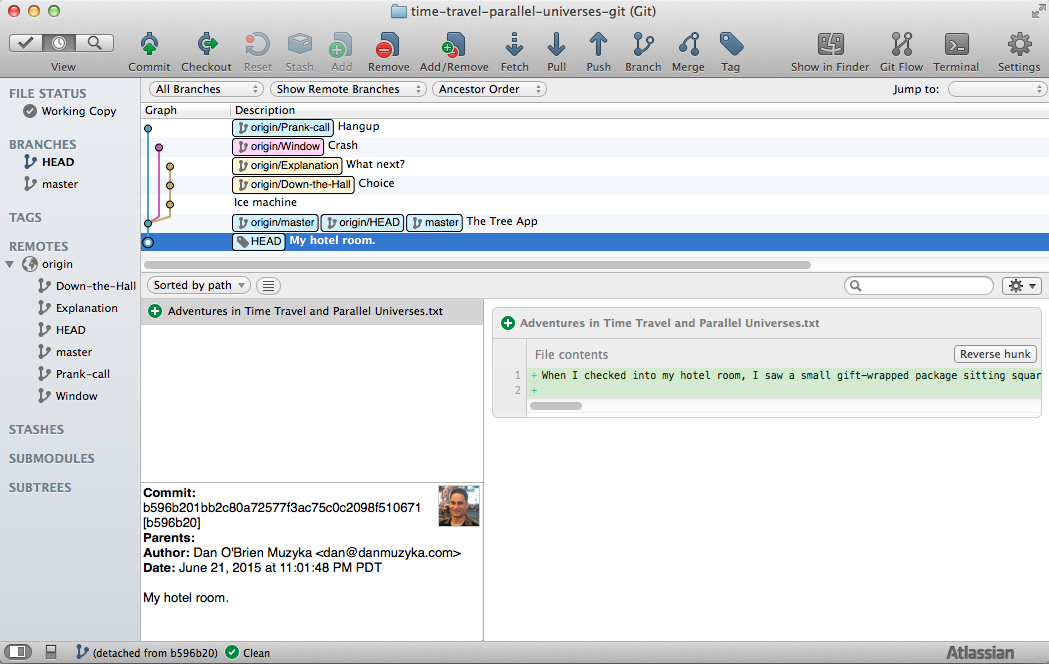
Notice that HEAD is now at "My hotel room." HEAD is just where you currently are.
Time Travel
Close, then re-open the story in your text editor. You should see that the story now stops at a previous point in time.
An Alternate Universe
An Alternate Universe
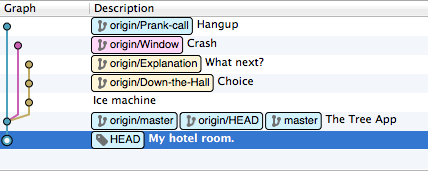
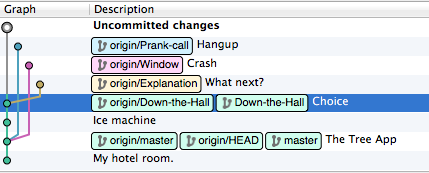
Now let's jump forward in time, to one of several possible futures. You can see several possibilities branching off from where you are.
An Alternate Universe
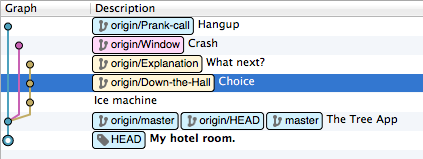
Let's switch to the branch (the parallel universe) named Down-the-Hall.
Click on Down-the-Hall.
Click Checkout then click Checkout New Branch.
An Alternate Universe

In the drop-down, select origin/Down-the-Hall. Click OK.
Now the branch (parallel universe) that existed on GitHub also exists on your computer.
An Alternate Universe
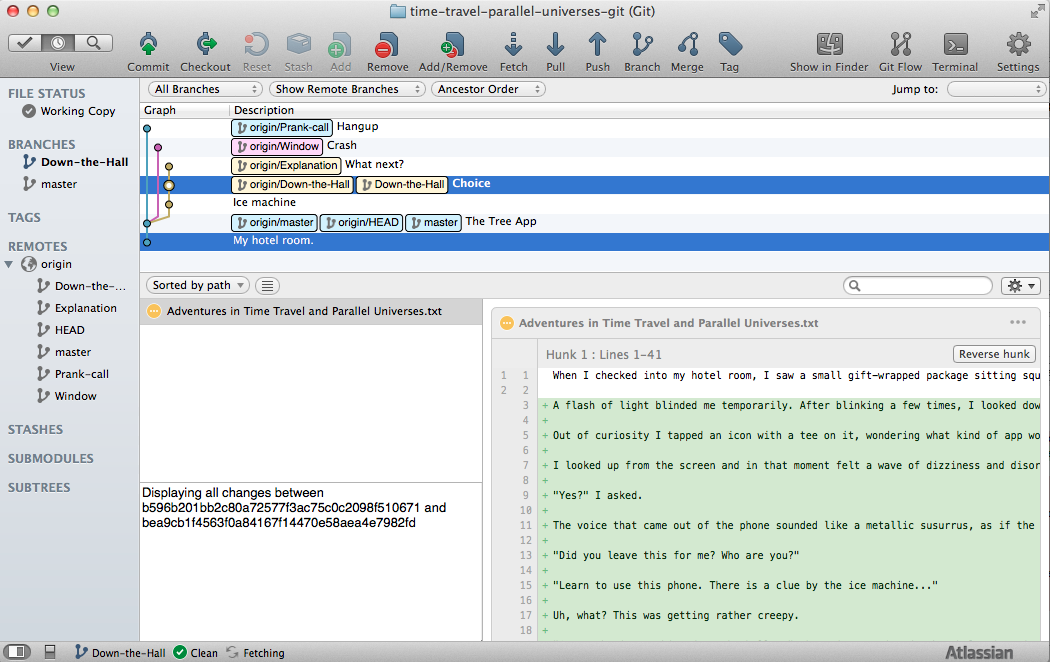
You can compare what is different between two revisions (known in Git as "commits").
An Alternate Universe
Close and reopen the story. You should now see the version of it that lives in the Down-the-Hall branch.
An Alternate Universe
- Now make some changes to the story.
- They can be any changes you want.
- They can be at the beginning, middle, or end.
An Alternate Universe
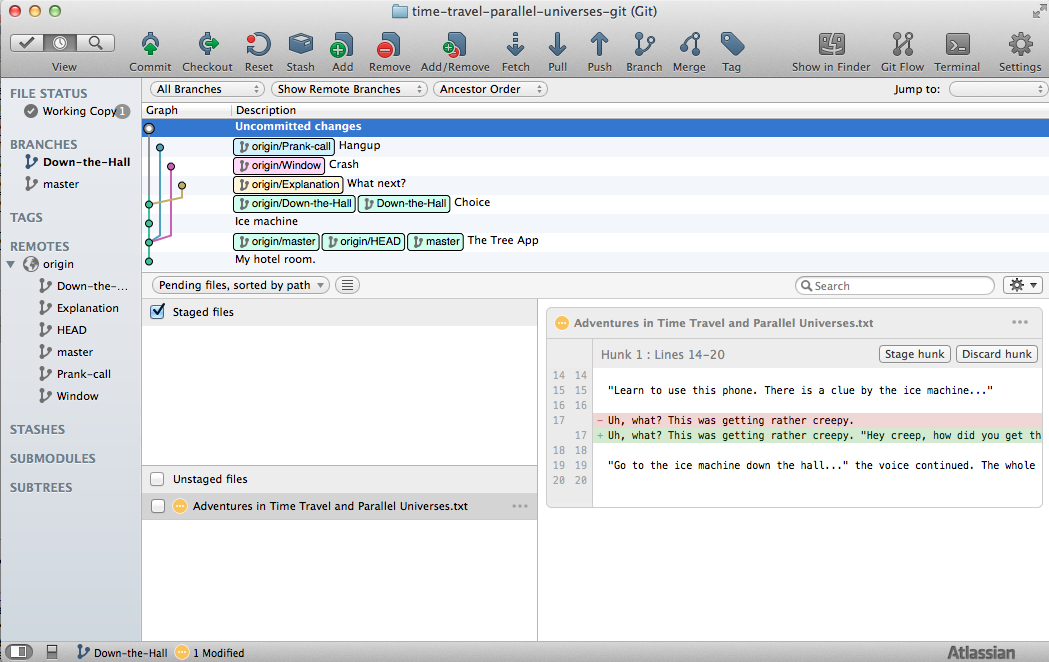
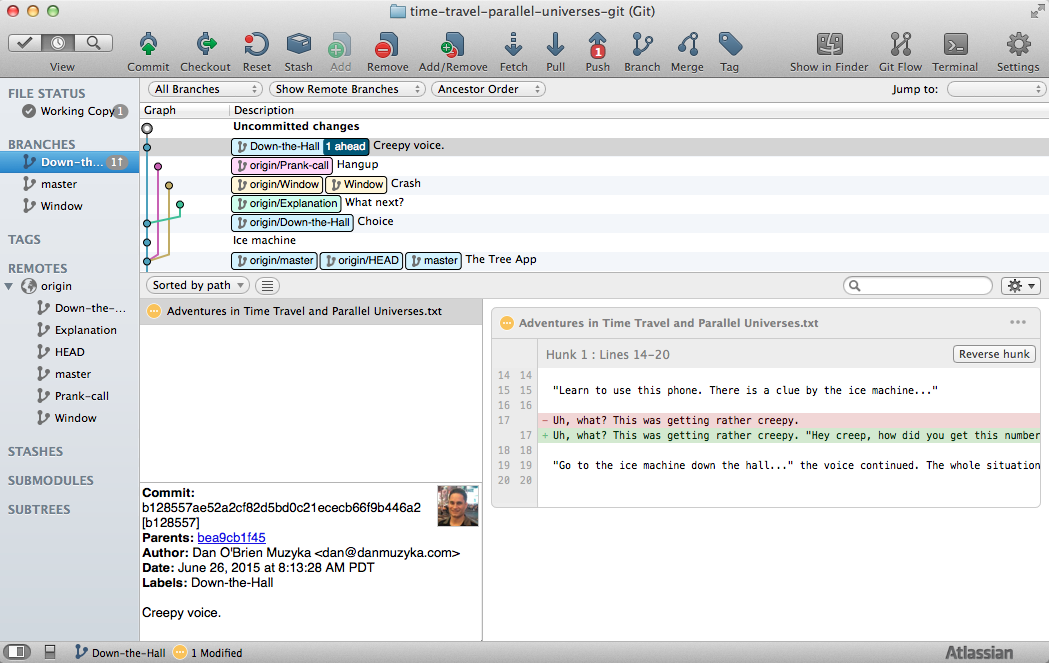
Now you have uncommitted changes.
An Alternate Universe
Go ahead and save a snapshot of this version of your story by committing your changes.
An Alternate Universe
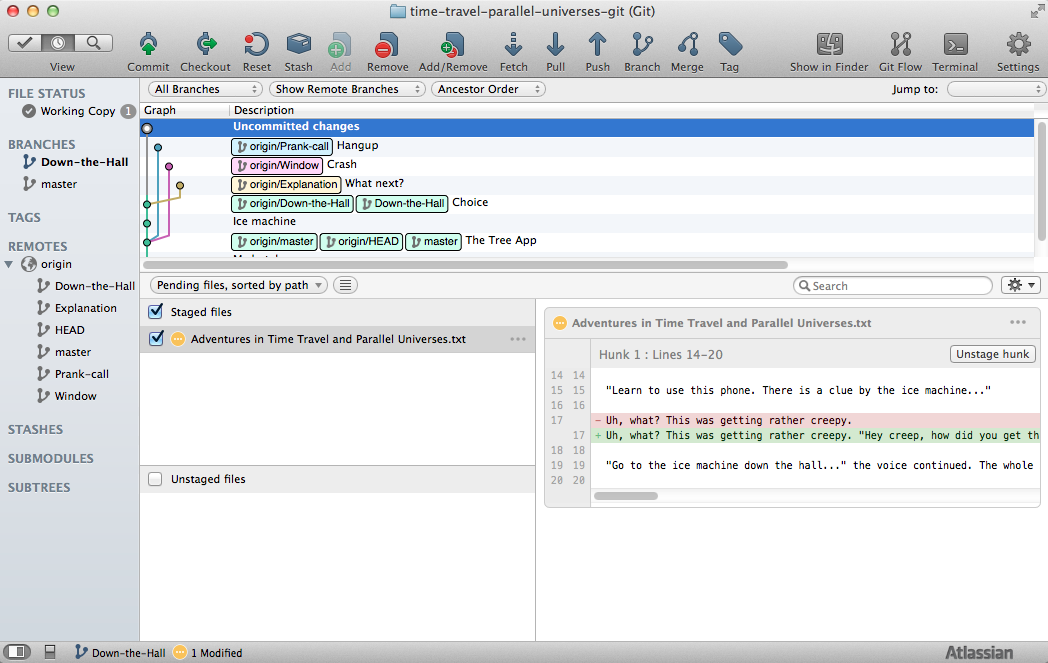
Your changes are now "staged."
An Alternate Universe
Staging is a way to identify which changes you want to package together in this snapshot of your project ("commit" in Git terminology) and which changes you want to leave out of the snapshot.
In our case, we only have one file, so we can't include some changes and leave out others.
An Alternate Universe
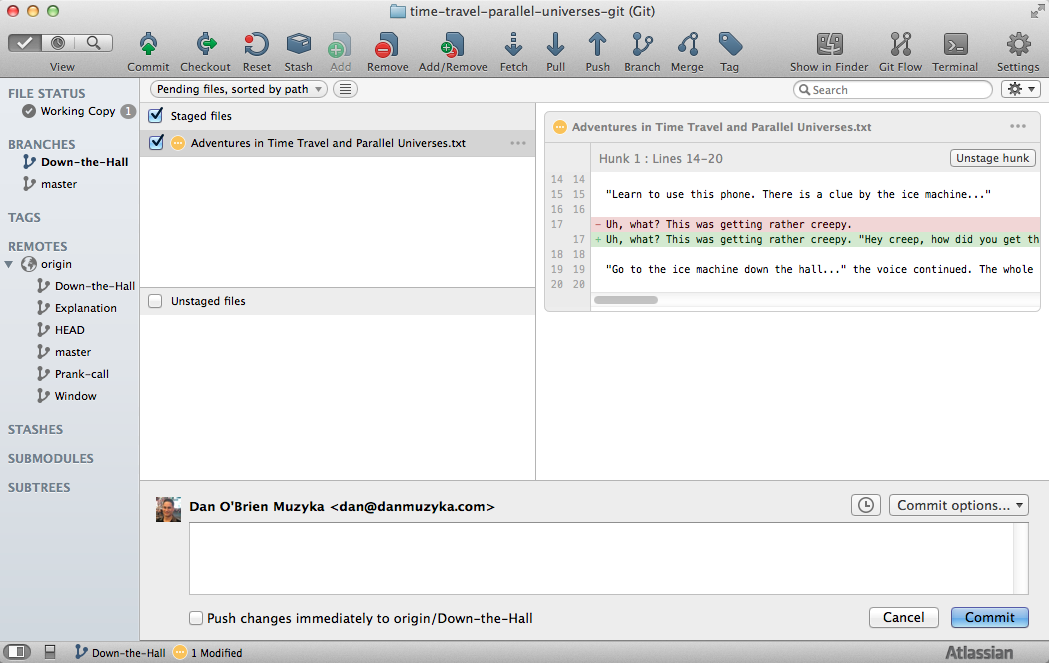
Click Commit . This tells Git that you want to make a snapshot of all of your staged changes.

An Alternate Universe
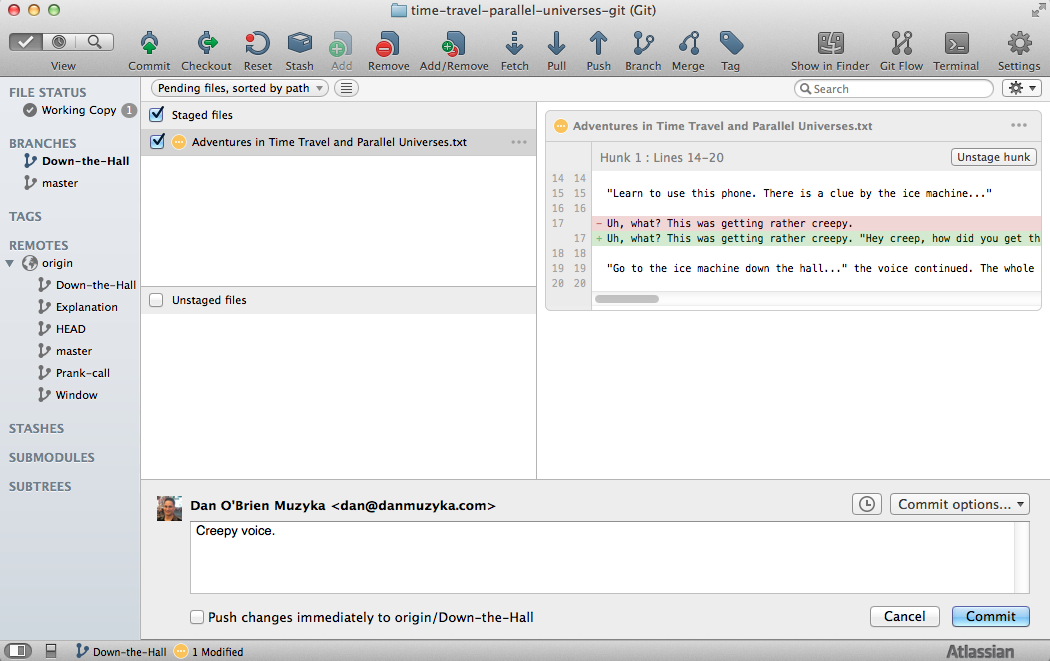
Now you can enter a commit message (the "photo caption" in the story) to describe the changes.
An Alternate Universe

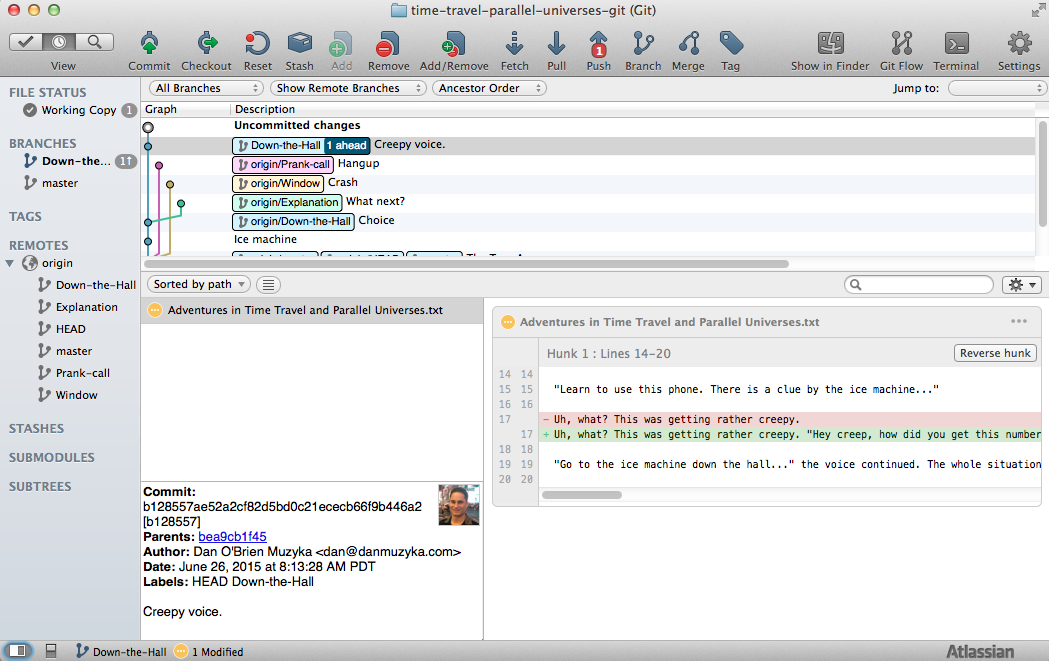
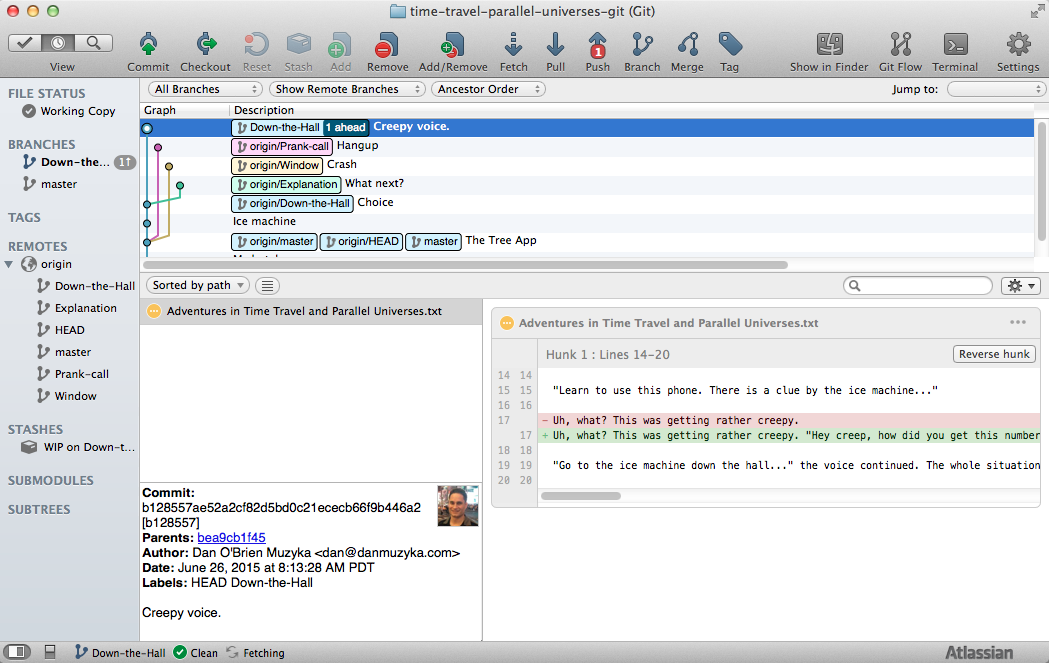
The new commit now appears. It is ahead of "origin" (GitHub) because it only exists on your computer right now.
Stashing Changes
Stashing Changes
Suppose you are in the middle of making changes but aren't ready to commit them, yet.
Then, you need to switch gears and work on unrelated changes. What is a good way to do that?
Stashing Changes
You have changes in the Down-the-Hall branch, but you need to pause that work and make some changes to the Window branch.
Stashing Changes
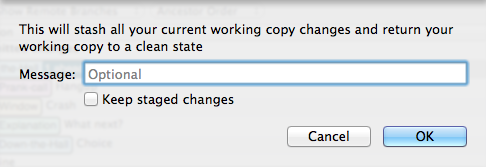
Click the Stash button.
Optionally enter a message, then click OK.

Stashing Changes
The changes disappear, but they are tucked away in a stash for later retrieval.
Stashing Changes
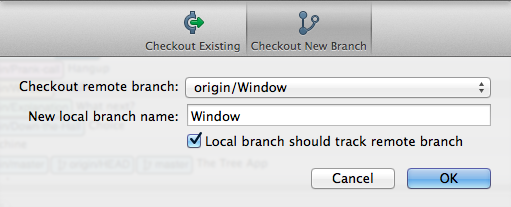
Switch to another branch:
- Click Checkout > Checkout New Branch.
- Then select origin/Window from the drop-down.
- Click OK.
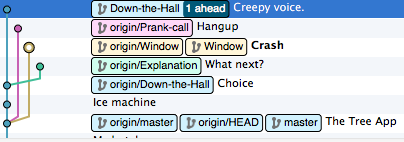
Stashing Changes
Now you can make whichever changes you need on your Window branch.
Stashing Changes
When you're finished, switch back to the Down-the-Hall branch.
- Click on Down-the-Hall.
- Click Checkout.
- Remain on Checkout Existing and click OK.

Stashing Changes
You could check out existing this time because you have previously copied down the branch from origin (GitHub) to your computer.
Stashing Changes
Now right-click on your stash and select Apply Stash, then click OK.
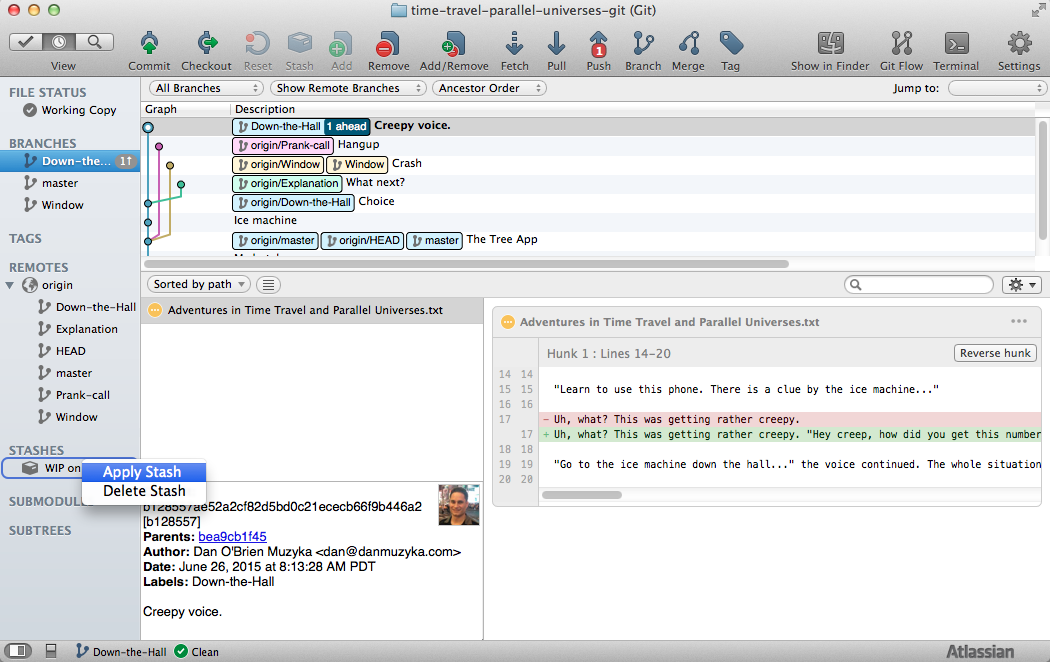
Stashing Changes
At this point, either undo your changes, or commit them.
Merging Branches
Merging Branches
Having separate branches allows you, or an entire team, to work on different parts of a project at the same time.
When the work in a branch is finished, you need to be able to merge it in with your other changes. Merging code is a powerful feature of Git.
Merging Branches
Let's merge some changes into the root of the project, also known as the master branch.
Merging Branches
Start by checking out the master branch by following the same procedures we have been using.
Merging Branches
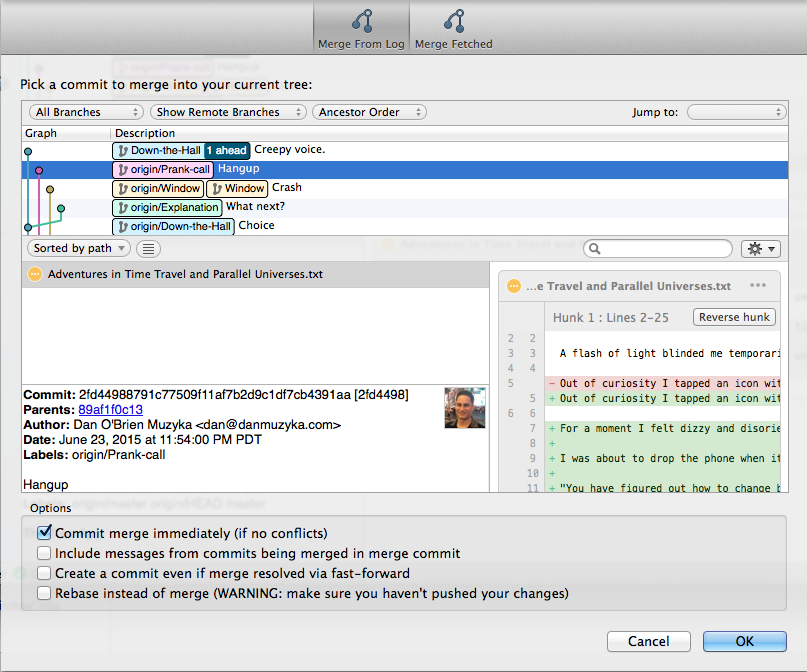
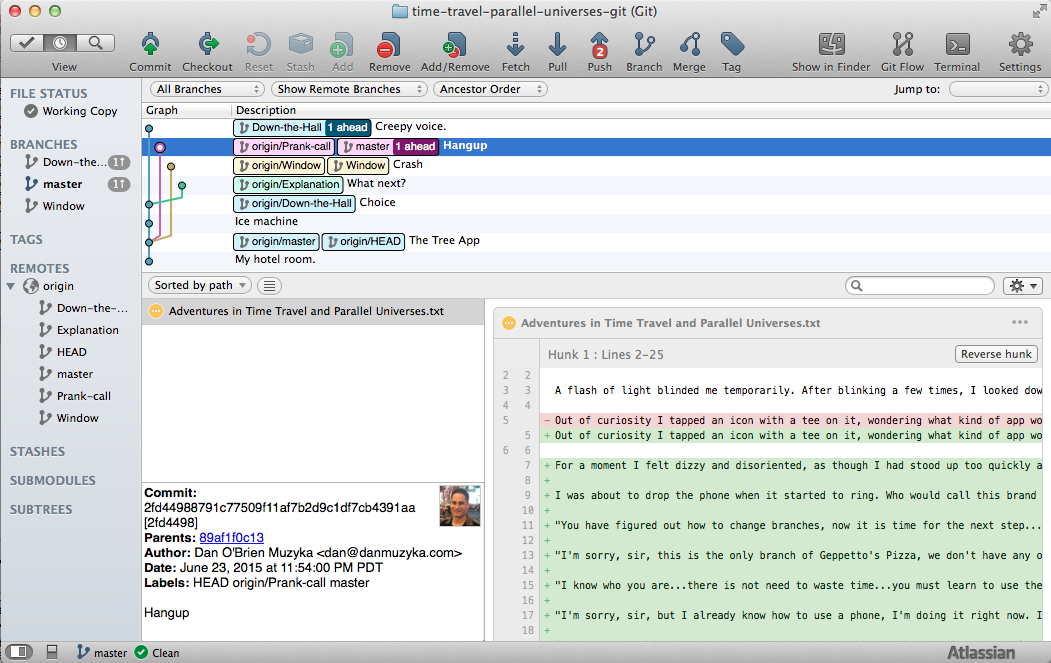
Click the Merge button , then select the Prank-call branch and click OK.

Merging Branches
Your local copy of master now has the content of the Prank-call branch merged in.
Notice that your version of master is now different from the one on origin (GitHub).
Merging Branches
Merging Branches
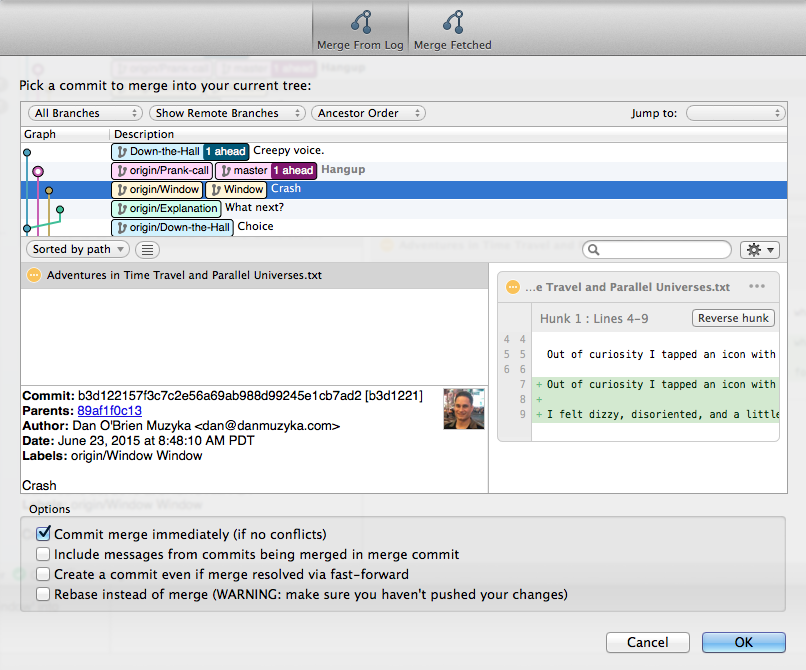
Let's merge in another branch: Window.
Click Merge , click Window, and click OK.
Merging Branches
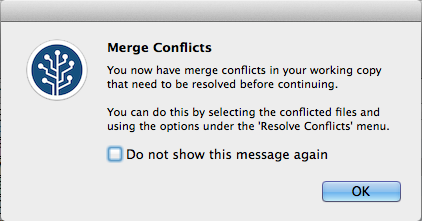
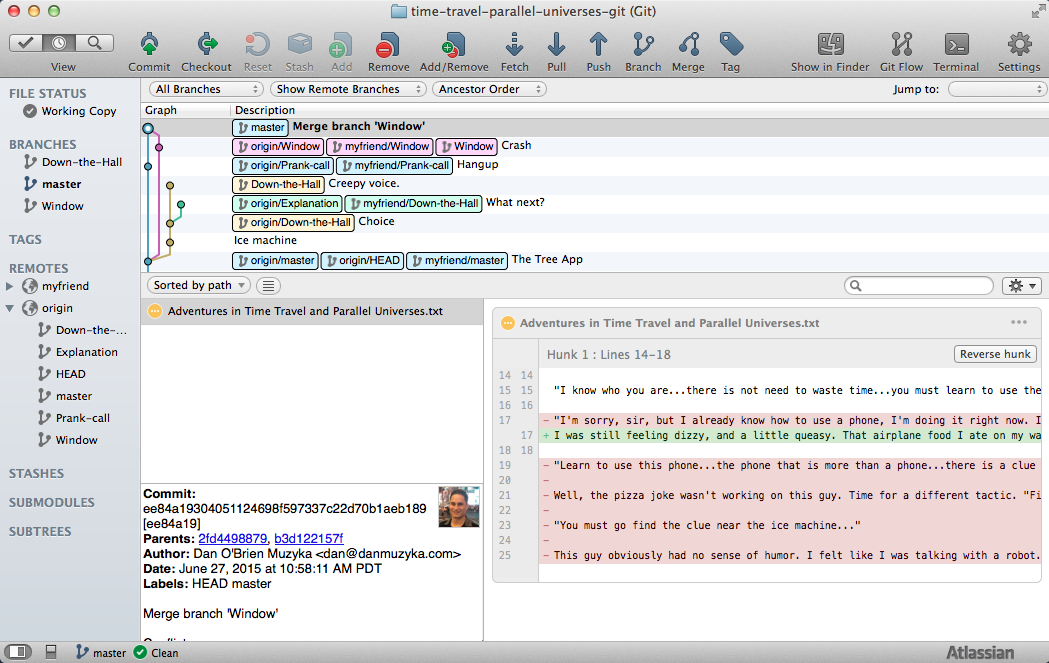
We have merge conflicts. That's OK! We can resolve that issue.
Merging Branches
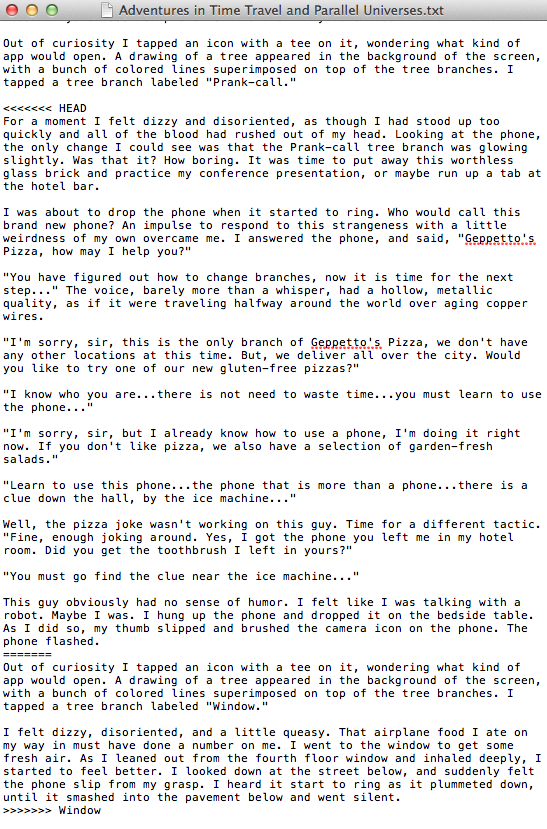
To resolve the merge conflict, open the file, and find the lines that Git added:
<<<< HEAD
=========
>>>> Window
Merging Branches
The part between <<<< HEAD and ==== is what was in your branch before.
The part between ==== and >>>> Window is the text from the branch that you tried to merge in.
Merging Branches
The blocks of text between these lines represent what is different between the branches that Git couldn't merge automatically.
Usually, Git can figure out how to merge the branches automatically, but sometimes it needs help.
Merging Branches
Usually, the number of conflicting lines that Git can't resolve automatically is fairly small.
This example has larger merge conflicts than this speaker typically experiences.
Merging Branches
To resolve the conflict, just manually edit the document to include the specific content you want from each branch.
Save your changes.
Merging Branches
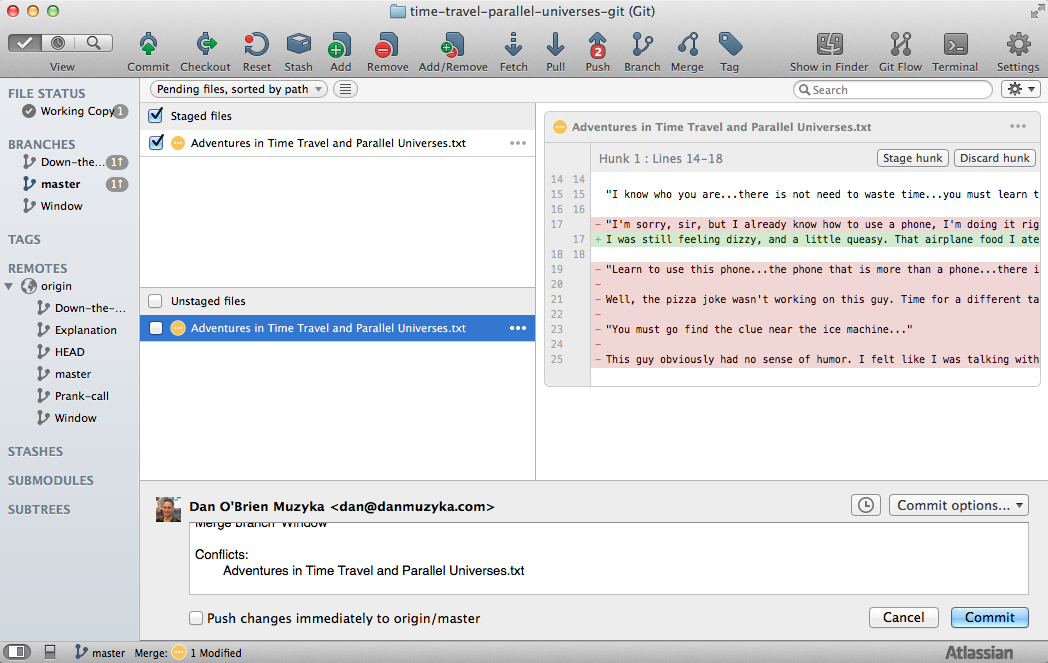
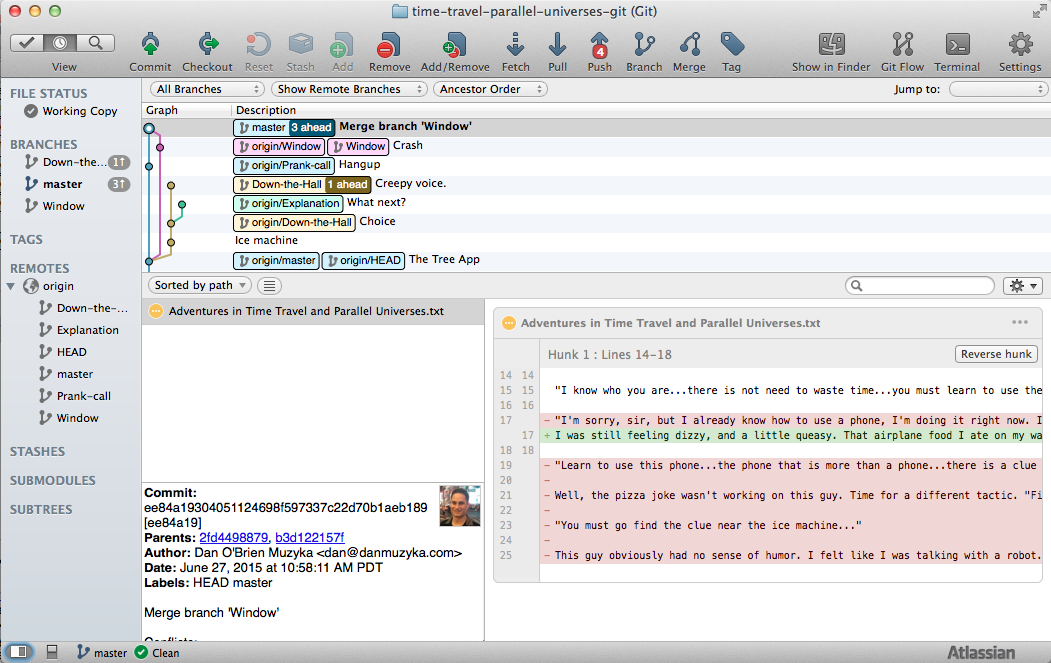
Click Commit to commit the changes you just made and complete the merge.
Merging Branches
Select the file in the Unstaged files section, then click Add to stage the changes you made. Click Commit.
Merging Branches

You have successfully merged the branch into master!
Pushing to a Remote
Pushing to a Remote
Now that you've made some changes, you're ready to share them with the world. You can push them up to GitHub so that others can get your changes.
Pushing to a Remote
Click the Push button.
Pushing to a Remote
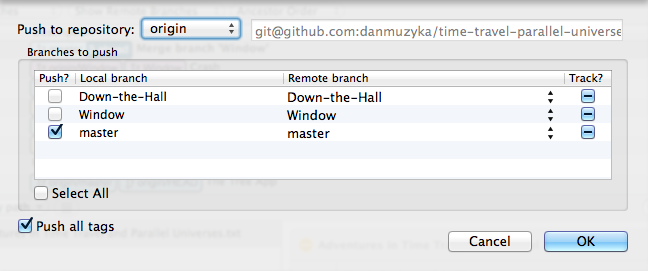
Select the remote location where you want to push. In this case, we only have one, GitHub, which is nicknamed origin.
Pushing to a Remote

Select the branches you want to push to the remote. Click OK.
Pushing to a Remote
Your changes are now on GitHub. :-)
Merging from Another Remote
Merging from Another Remote
You've worked on this project on your own, but now you're ready to merge in the work of a teammate.
Normally you and your team members would be pushing and pulling from the same remote, but in this case you'll pull from the remote of someone else in this workshop.
Merging from Another Remote
Turn to another person in this workshop and ask for the clone URL of his or her GitHub repository.
Merging from Another Remote
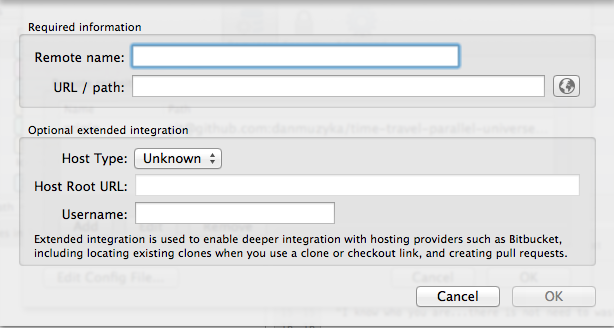
In SourceTree, select Repository > Add Remote...
Merging from Another Remote
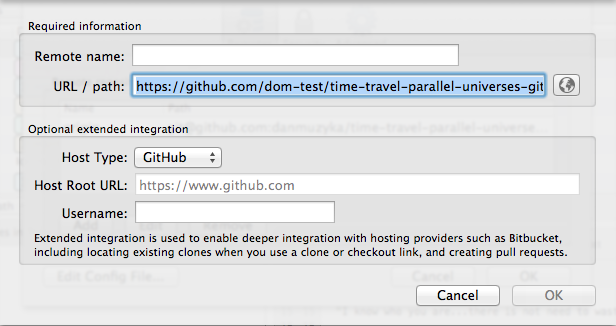
Paste in the other person's clone URL in the URL/path field.
Merging from Another Remote
Just as your GitHub remote is nicknamed origin, your collaborator's remote needs a nickname.
For example, you could use the person's first name.
Merging from Another Remote
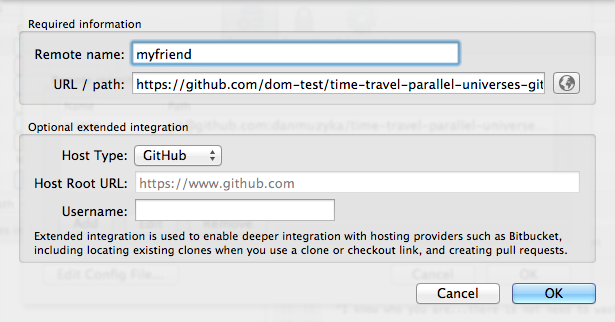
In the Remote name field, give this remote a nickname.
Click OK.
Merging from Another Remote
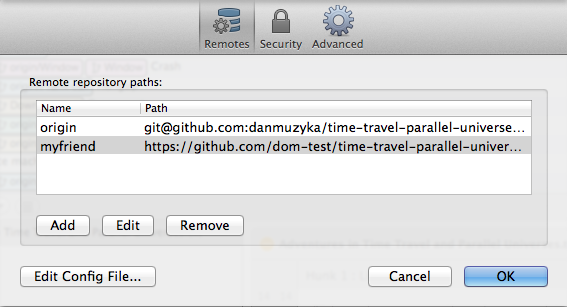
Click OK again.
Merging from Another Remote

Your friend's remote is now available.
Merging from Another Remote
To pull down and merge the changes from your friend's version of the master branch, click the Pull button.

Merging from Another Remote
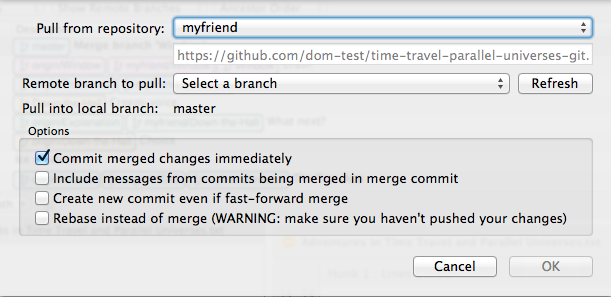
Select your friend's remote.
Merging from Another Remote
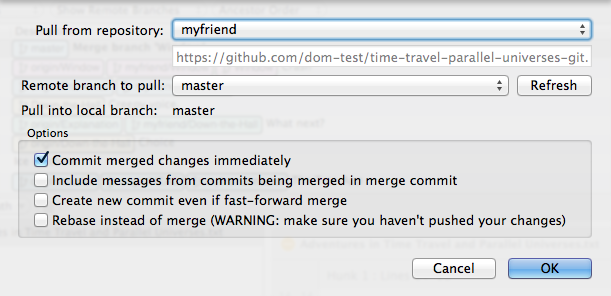
Select the master branch of your friend's remote.
Click OK.
Merging from Another Remote
If there are any merge conflicts, resolve them using the same process as we did earlier.
Merging from Another Remote
You have successfully merged in the master branch from your friend's remote.
Summary
- Time Travel (moving among commits)
- Alternate Universes (switching branches)
- Stashing Changes
- Merging Branches
- Pushing to a Remote
- Merging from Another Remote
Conference hashtag: #devsigner
Session evaluation: devsignercon.com/eval
Questions?
Contact Me
- dan@danmuzyka.com
- @danmuzyka
- https://www.linkedin.com/in/danmuzyka
Conference hashtag: #devsigner
Session evaluation: devsignercon.com/eval
Adventures in Time Travel and Parallel Universes: An Introduction to Git
By danmuzyka