Getting to Know Alloy Part 2
by
David Plummer
for
Clearly Innovative
Overview
- Git
- Bitbucket
- Windows
- Navigation Groups
Git
WHAT IS IT?
Git is a version control system that lets you manage the progress of your project locally and remotely.
BENEFITS
-
You can revert changes you've made to your project as far back as its inception
-
You can access your project remotely from different computers and still maintain the same version between each workstation
-
You can collaborate on the same project with other team members locally and remotely
(NOTE: You must have the git command-line interface installed in order to perform these operations. You can download it from here: http://git-scm.com/ )
Git Repository (Repo)
A repo is a version controlled project created by tools such as git and mercurial.
You can use git to make an empty repo to work in or you can make your project first and then use git to turn it into a repo. For Titanium apps, we make the project first and then turn it into a repo.
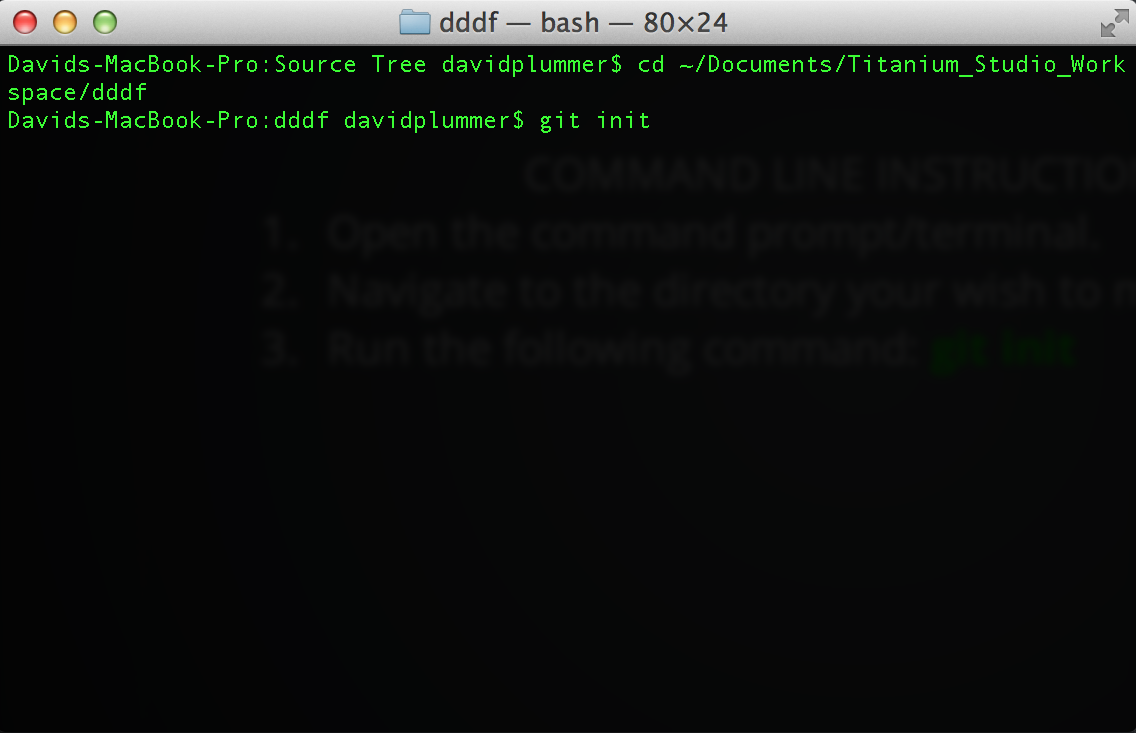
Creating a repo
COMMAND LINE INSTRUCTIONS
- Open the command prompt/terminal.
- Navigate to the directory your wish to make a repo.
- Run the following command: git init
Creating a repo
TITANIUM STUDIO INSTRUCTIONS
- Create a project.
- In the project explorer, right-click in the project area and choose Team -> Share Project

Creating a repo
TITANIUM STUDIO INSTRUCTIONS
3. In the Configure Git repository, select your project from the list, click Create..., and then click Finish.

At this point, you've made a local repo. You're now going to share it with others using bitbucket.
Bitbucket & Remote Repos
Bitbucket is a repo management web site. It allows you to create, import, and manage your repos for both public and private access. We use it to share projects with our teammates for collaborative purposes.
Exercise
Create a bitbucket account at https://bitbucket.org
Transferring a repo to bitbucket
To share your project with others remotely, you can upload your repo to bitbucket.
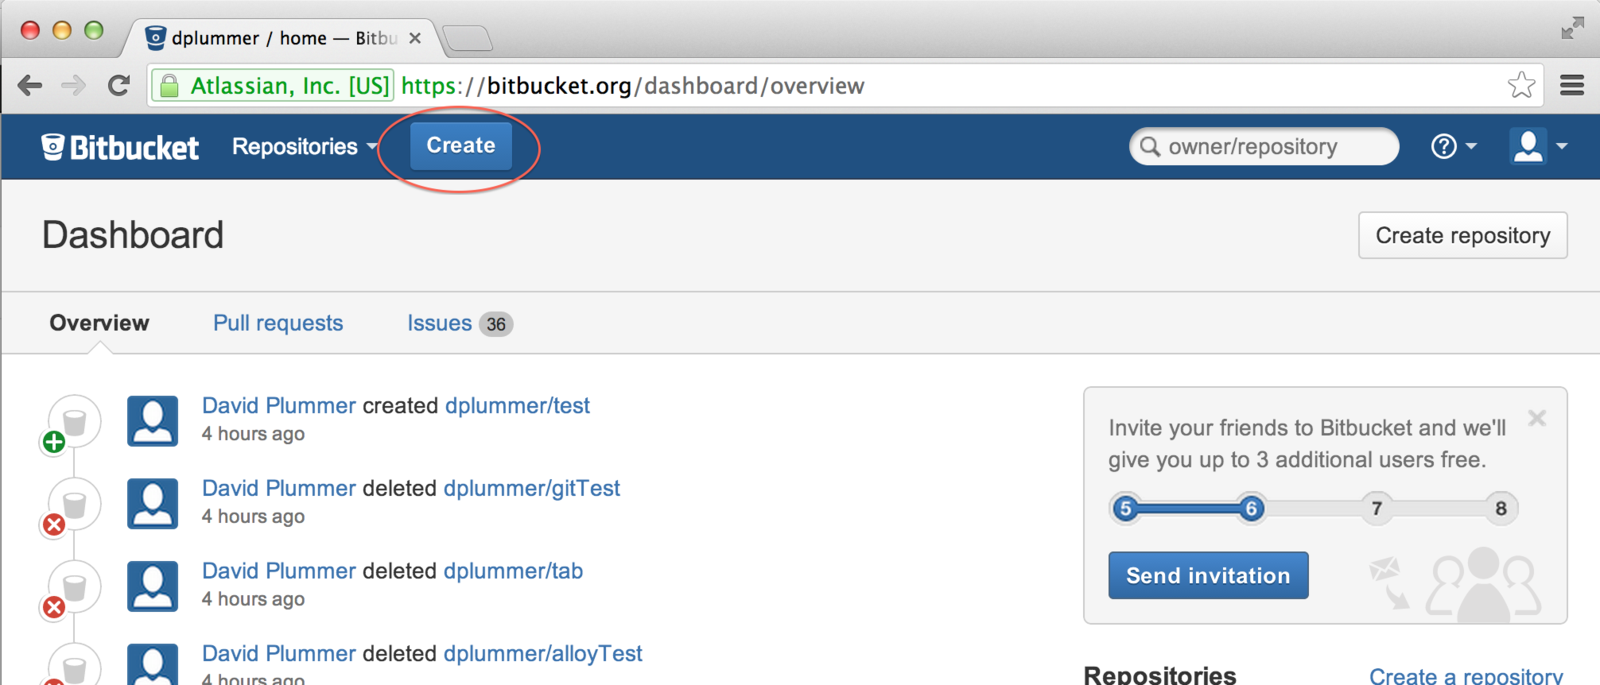
INSTRUCTIONS
- Log into bitbucket.
- Click the create button from the dashboard.
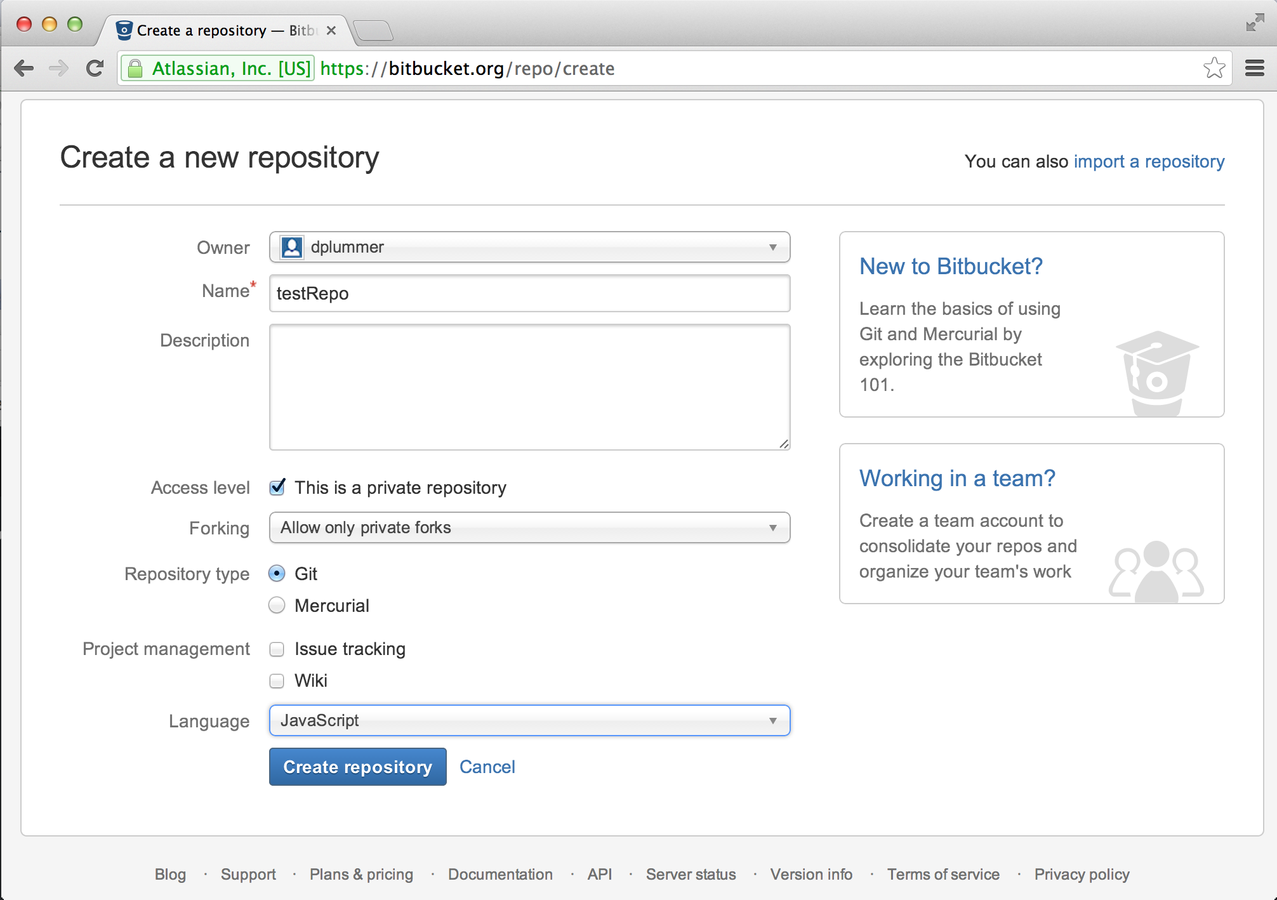
Transferring a repo to bitbucket
3. Enter a name for the repo.
4. Select JavaScript as the language.
5. Click Create Repository.
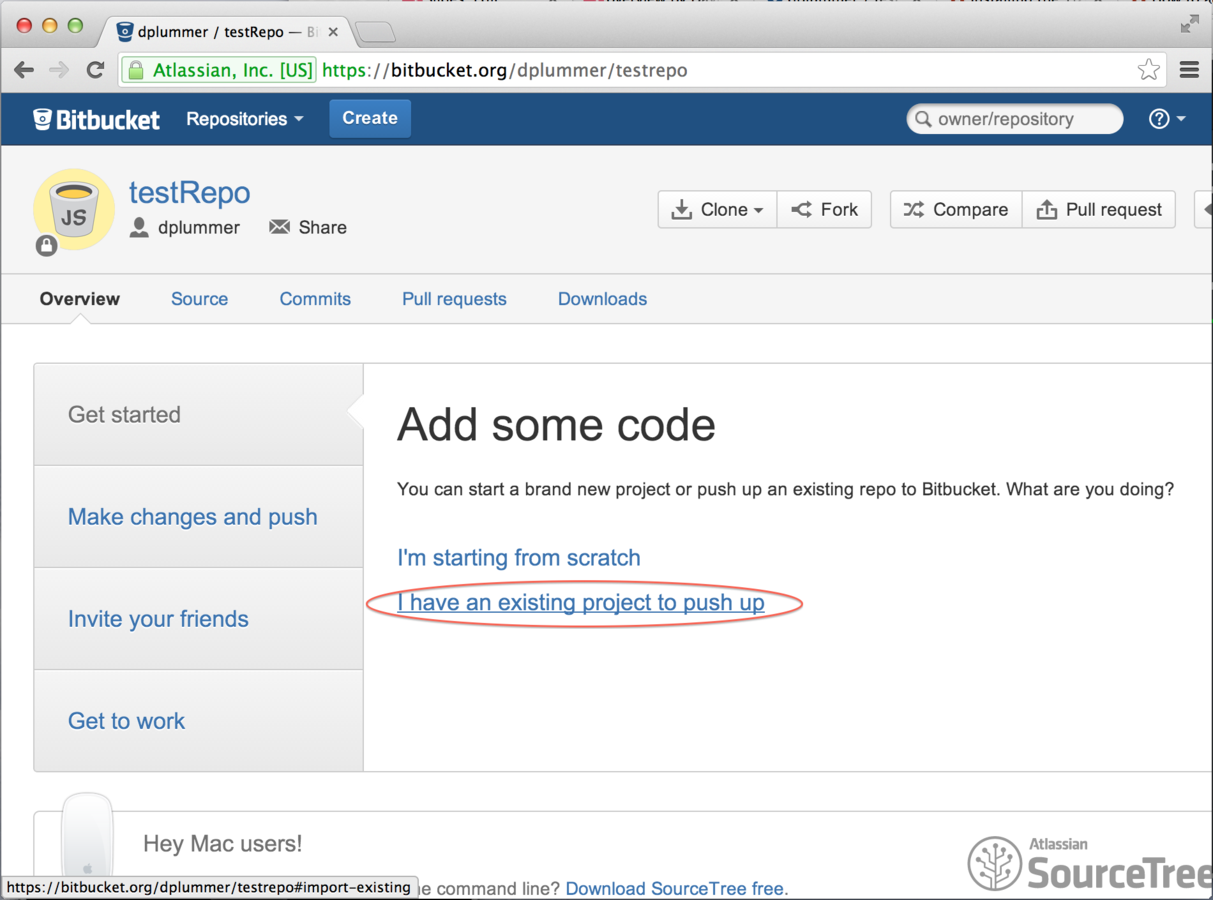
Transferring a repo to bitbucket
6. From the repository overview page, choose I have an existing project to push up
Transferring a repo to bitbucket
7. Open the command prompt/terminal, navigate to the root directory or your project, and execute the following commands in green:
git remote add origin #THE_URL_FOR_YOUR_REPO#
git add .gitignore
git commit -m "Initial push."
git push -u origin --all
git push -u origin --tags
Transferring a repo to bitbucket
8. Within bitbucket, navigate to your repository.
9. View the repo's source.
10. Choose the .gitignore file in the root of your repo and choose Edit.

Transferring a repo to bitbucket
What is .gitignore?
This is a hidden file that exists in the root of your project. The git tool checks it whenever you attempt to push changes to your repo. If a file or directory is listed in the .gitignore file, its changes will not be acknowledged by git and it will not be pushed to your repo by default. The .gitignore file must be pushed to bitbucket in order for its changes to take effect.
Why do we use .gitignore?
The reason we use .gitignore is because there are certain files in our project that will change whenever we compile, like files in the Resources directory. This can cause a conflict because the Resources directory can be totally different for two team members working on the same repo for an alloy project. Consequently, if one person pushes their Resources directory to the repo, the other will have to resolve all of the differences before (s)he can push his/her changes. To avoid having this happen, we ignore the Resources directory altogether. This is fine since the content of the Resources directory is recreated when you compile your alloy project.
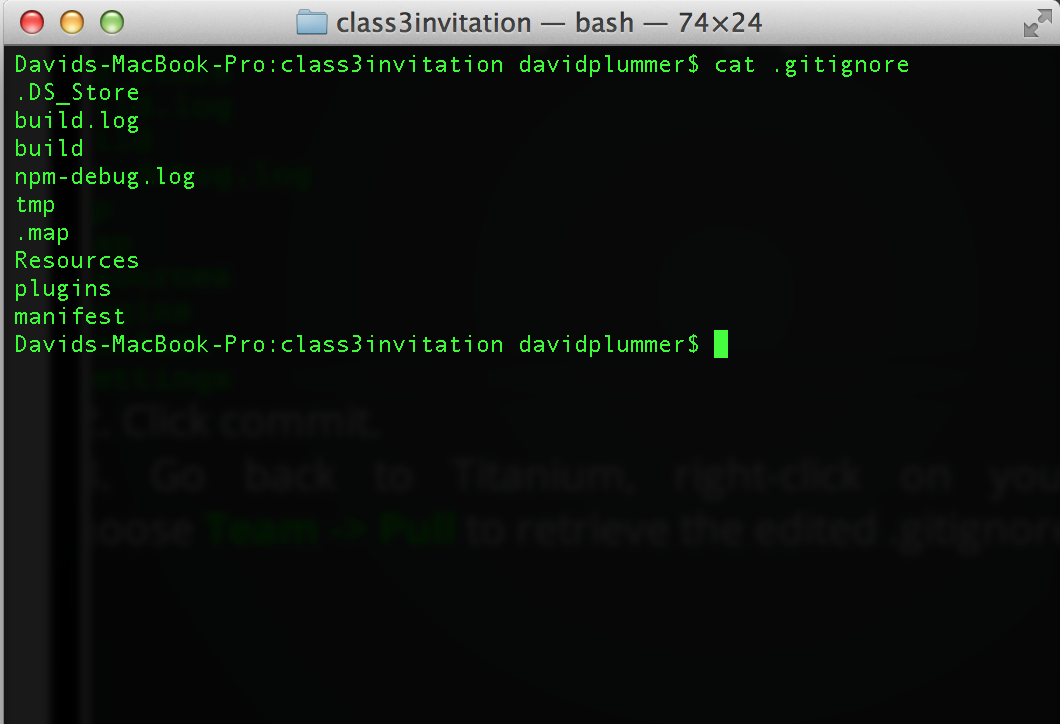
Check your .gitignore
With your command prompt/terminal still open, make sure you're in the root of your alloy project and execute the yellow command for Mac (cat .gitignore) and the green command for Windows (type .gitignore). You should see something like this:
Send the rest of your project to bitbucket
If the .gitignore file is well formed, execute the following commands to push the rest of your project to bitbucket:
git add .
git commit -m "push all project files"
git push #THE _URL_FOR_YOUR_REPO#
Pushing changes to bitbucket via git
Now that your project is tied to a bitbucket, you can use Titanium Studio to push your changes using the Titanium Studio UI.
- After saving changes to a file, right-click the one of the project files in the project explorer and choose Team -> Commit...

Pushing changes to bitbucket
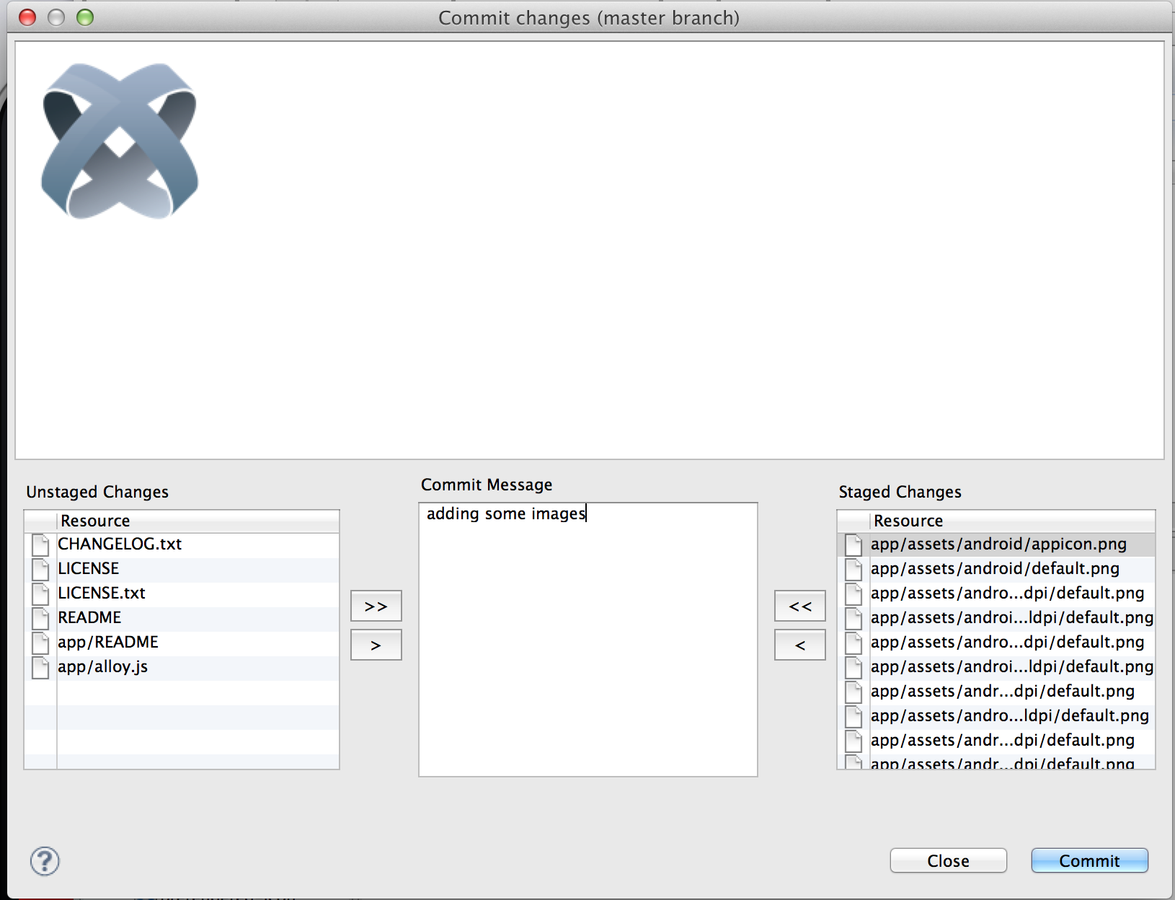
2. In the Commit changes dialog, use the list buttons to transfer files from the Unstaged Changes area to the Staged Changes area and then enter a commit message.
3. Press Commit and then Close.
Pushing changes to bitbucket
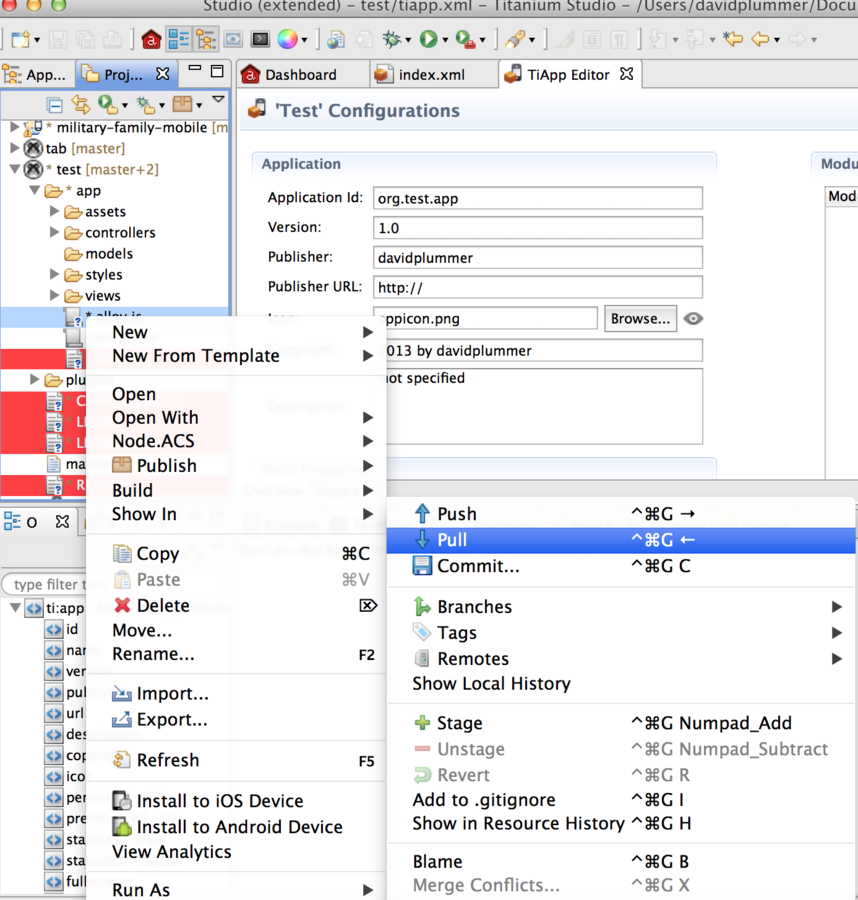
4. Within your project explorer, right-click on a file within your project and choose Team -> Pull
Pushing changes to bitbucket
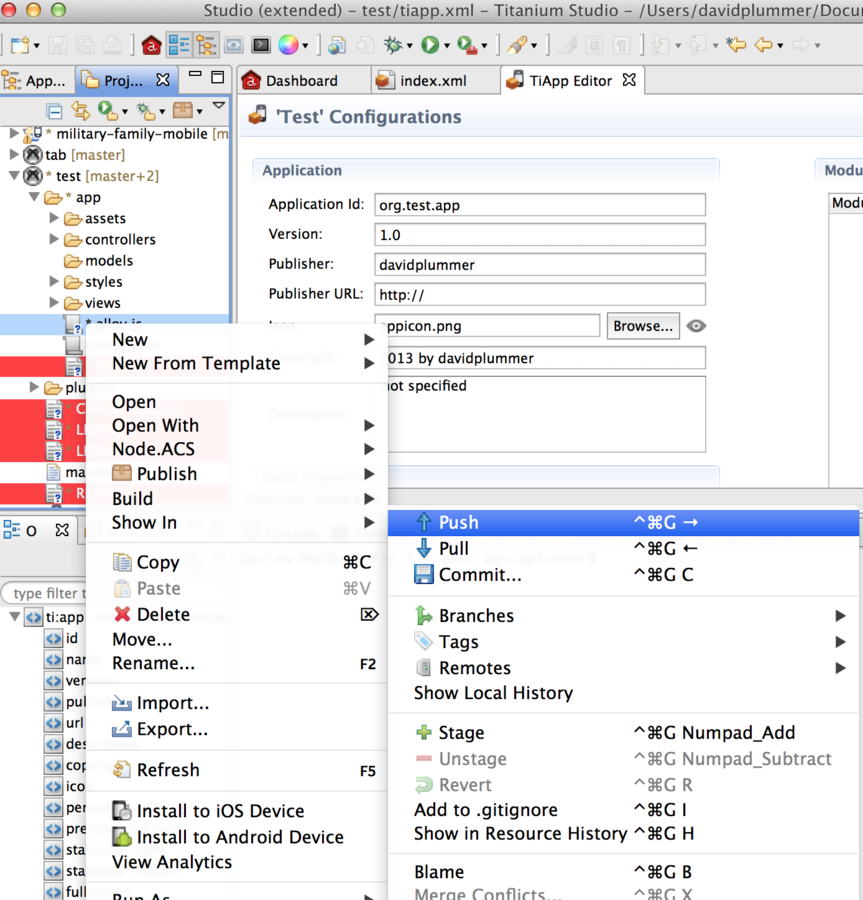
5. Within your project explorer, right-click on a file within your project and choose Team -> Push
Pushing changes to bitbucket
The console output for your pull should look something like this:

The console output for your push should look something like this:

Sharing your repo via bitbucket
Bitbucket offers the ability to share your repo with other users.
You have the ability specify whether or not each user can view and/or edit your repo.
Read == the user can only download your repo, but not change it
Write == the user can download, and push changes to your repo
Admin == the user can download & edit your repo as well as alter access permissions among other things
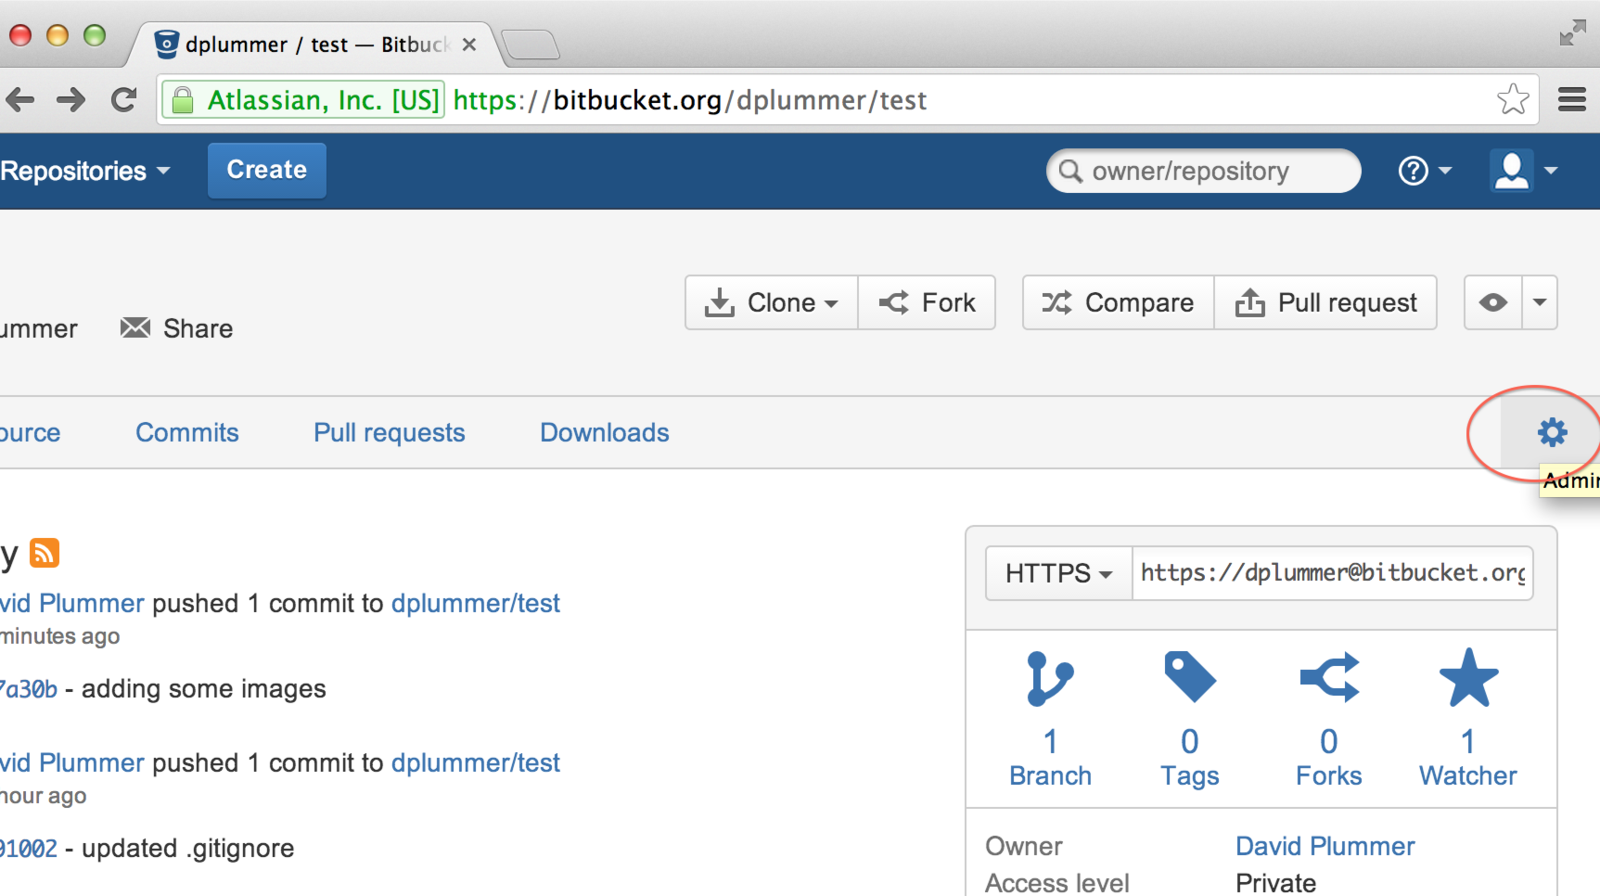
Sharing your repo via bitbucket
1. Log into bitbucket.
2. Choose one of your own repos.
3. Click on the settings icon in the upper-right of the window.
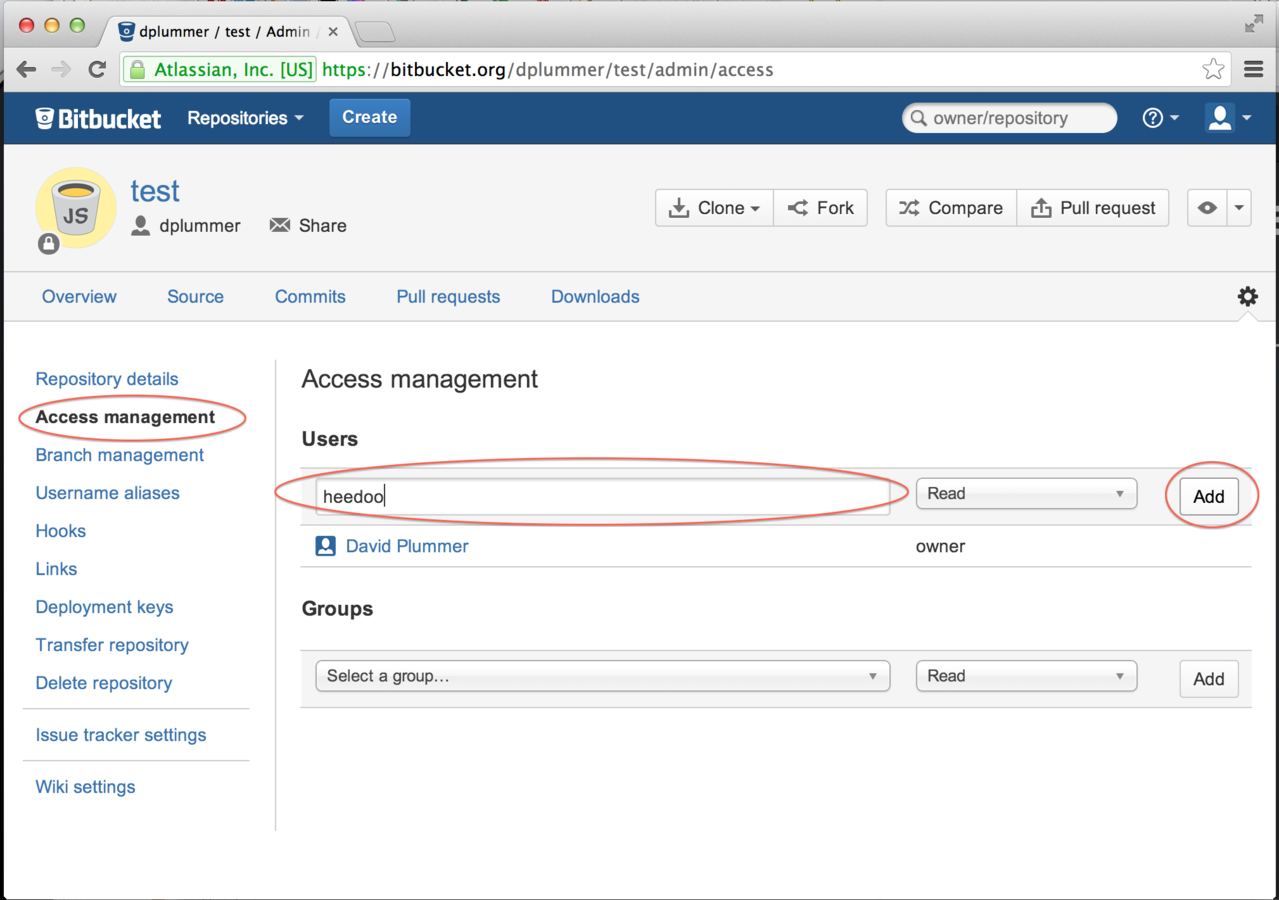
Sharing your repo via bitbucket
4. Choose Access Management.
5. Input a user's email address or bitbucket username.
6. Set the user's access permission and click Add.
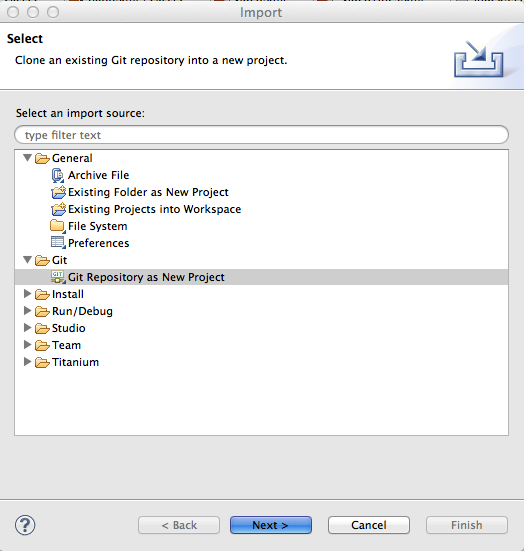
Pulling a repo from bitbucket
- In Titanium Studio, right-click within the project explorer section and choose Import.
- From the Import dialog, choose Git -> Git Repository as New Project
Pulling a repo from bitbucket
3. Paste the url for your repo into the URI field and click Finish (if prompted for you password, you should enter the password for the account where the repo resides be it bitbucket, github, or some other provider)

Git - After pulling down an alloy repo...
You'll have to recreate the Resources directory of the app locally in order to get your app to run. To do so, perform the following:
- Open a command prompt/terminal.
- Navigate to the root of the downloaded repo.
- Execute the following commands:
alloy compile --config platform=android
alloy compile --config platform=ios
Note: You cannot execute the second command if you're running Titanium Studio on a Windows workstation.
Exercise
Objective: create a project and share it with me on bitbucket
- Create an alloy project.
- Turn the project into a repo.
- Make a bitbucket repository for this project and call it alloy_2_#your_name#.
- Edit and push the .gitignore file.
- Push the remainder of your project to bitbucket.
- Give me read permission for your repo.
My Bitbucket Username : dplummer
My Email Address : david@clearlyinnovative.com
Optional
Download Source Tree and create a repo from your alloy project using it instead of the command line. Push the repo to bitbucket (name the repo alloy_2_optional_#your_name#) and invite me to the repo with read access.
Windows
Windows are containers that hold other views and UI elements. Unlike a view, a window can be opened, closed, and act as the launch pad for an app.
Windows - Syntax
View

Style
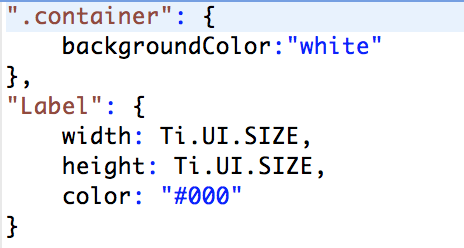
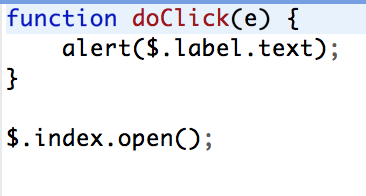
Controller
Windows - Output

Navigation Group
The navigation group is a view that is inserted into a window. The view allows the user to maintain a hierarchical structure while moving through his/her app.
The navigation group is put in a window and then another window is put in the navigation group.
To become a part of the navigation group hierarchy and inherit the navigation bar, a window MUST be opened by the navigation group NavigationGroup.open(WindowVariable);
The window MUST NOT open itself:
WindowVariable.open();
THE NAVIGATION GROUP IS FOR IOS ONLY.
Navigation Group - Syntax
View

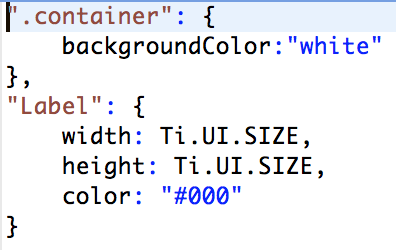
Style
Controller

Navigation Group - Output

The Navigation Group's Bar
The navigation group adds a navigation bar to the top of your window. Remember that this bar is attached to the current window open in the navigation group, not the window that the navigation group is put inside of.
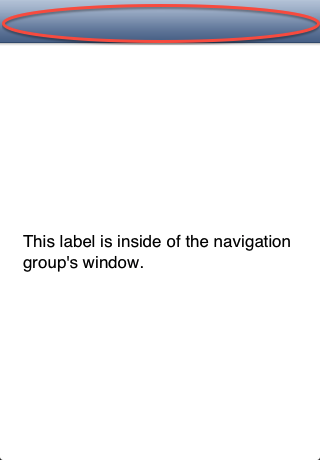
This bar can be edited to include a left nav button, a right nav button, and a title or title image.
Exercise
Create a project (or use an existing test project) with a window in index.js. The window should contain a button that, when pressed, opens another window that contains a navigation group.
Optional
Add a text field to the the window in index.js. The text entered in the text field should be used to change the title for the navigation bar when the second window is opened.
Navigation Group Properties
LEFT NAVIGATION BUTTON (Window.leftNavButton)
The left navigation button is usually set as the title of the current window's parent in the navigation group hierarchy. There are some occasions when this can be set by you (ex. the first window in the navigation group can have its left navigation button styled)
TITLE (Window.title)
The title is of the navigation bar is the title of the current window.
RIGHT NAVIGATION BUTTON (Window.rightNavButton)
The right navigation button works the same way as the left navigation button.
Homework
Continue to build the interface for the med signal app. Invite me to the bitbucket repo so I can view your progress.
Study the following : http://backbonetutorials.com/what-is-a-model/
Resources
Windows Docs
Navigation Group Docs
Git Tutorial
Source Tree (GUI for git)
;
Getting to Know Alloy - Part 2
By David Plummer


