Module 5-2
Linux System Administration

ATTENTION PLEASE
When you see slides with a white background:
- listen to your instructor
- takes note if you want
- ask questions ;)
🚀 HANDS-ON
When you see slides with a colored background:
- do the exercices
- talk to your instructor
- ask questions ;)
AGENDA
FEW DAYS WITH
- Process management
-
Disk management
- Devices, partitions, FS, mounting, troubleshooting, LVM
-
Boot management
- Bootloader, init and runlevels
-
System management
- Scheduling, logging, resource monitoring, package management
- Network management
- Backup management
PROCESS MANAGEMENT
PROCESS MANAGEMENT
INTRODUCTION TO PROCESSES
terminology (1)
- process: A process is compiled source code that is currently running on the system.
- PID: All processes have a process id or PID.
- PPID: Every process has a parent process. The child is often started by the parent process.
- init: The init process always has process ID 1. It is started by the kernel itself so technically it does not have a parent process. init serves as a foster parent for orphaned processes.
- kill: When a process stops running, the process dies. When you a process to die, you kill it.
terminology (2)
- daemon: Process that start at system startup and keep running forever are called daemon processes or daemons. These daemons never die.
- zombie: When a process is killed, but it still shows up on the system, then the process is referred to as zombie. You cannot kill zombies, because they are already dead.
$$ and $PPID
Environment variables contain information about processes.
$ echo $$ $PPID
4224 4223
# $$ = current process ID
# $PPID = parent PID
pidof
You can find all process id's by name using the
pidof command.
$ pidof python
1015 847 839
parent and child
Processes have a parent-child relationship. Every process has a parent process.
$ bash
$ echo $$ $PPID
4812 4224
$ exit
$ echo $$ $PPID
4224 4223
$
ps
One of the most common tools on Linux to look at processes.
[paul@centos]$ echo $$ $PPID
117051 117049
[paul@centos]$ bash
[paul@centos]$ echo $$ $PPID
127802 117051
[paul@centos]$ bash
[paul@centos]$ echo $$ $PPID
127845 127802
[paul@centos]$ ps fx
   PID TTY      STAT   TIME COMMAND
117048 pts/0    S      0:00 sudo su -
117049 pts/0    S      0:00  \_ su -
117051 pts/0    S      0:00      \_ -bash
127802 pts/0    S      0:00          \_ bash
127845 pts/0    S      0:00              \_ bash
127882 pts/0    R+     0:00                  \_ ps fx
top
Can order processes according to cpu usage or other properties.
$ top
In case of trouble,
top is often the first tool to fire up, since it also provides you memory and swap space information.
kill
The
kill command will kill (or stop) a process.
# List signals
$ kill -l

# kill -1 (SIGHUP) <= force to re-read its configuration file.
$ kill -1 1

# kill -15 (SIGTERM) <= standard kill
$ kill 1942
$ kill -15 1942


# kill -9 (SIGKILL) <= also called a sure kill. The kernel will shoot down the process.
$ kill -9 3342
🚀 HANDS-ON
- Use ps to search for the systemd process by name.
- What is the process id of the systemd process ?
- Use the who am i command to determine your terminal name.
- Using your terminal name from above, use ps to find all processes associated with your terminal.
- What is the process id of your shell ?
- What is the parent process id of your shell ?
PROCESS MANAGEMENT
BACKGROUND JOBS
jobs
Display stuff that runs in background of current shell.
$ jobs
$
control-Z
This sends a SIGSTOP signal to the Linux kernel, effectively freezing the operation of the process.
[paul@centos]$ vim test

[1]+  Stopped                 vim test
[paul@centos]$ jobs
[1]+  Stopped                 vim test
[paul@centos]$
& ampersand
Processes that are started in background using the
& character at the end of the command line are also visible with the
jobs command.
[paul@centos]$ find / > allfiles.txt 2> /dev/null &
[2] 129217
[paul@centos]$ jobs
[1]+  Stopped                 vim test
[2]-  Running                 find / > allfiles.txt 2> /dev/null &
[paul@centos]$
fg
Will bring a background job to the foreground.
[paul@centos]$ jobs
[2]   Running                 sleep 1000 &
[3]-  Running                 sleep 2000 &
[4]+  Running                 sleep 3000 &
[paul@centos]$ fg 3
sleep 2000
bg
Jobs that are
suspended in background can be started in background with
bg. Will sent a
SIGCONT signal.
# Example of the sleep command being reactivated in background with bg.
[paul@centos]$ jobs
[paul@centos]$ sleep 5000 &
[1] 129641
[paul@centos]$ sleep 3000
^Z
[2]+  Stopped                 sleep 3000
[paul@centos]$ jobs
[1]-  Running                 sleep 5000 &
[2]+  Stopped                 sleep 3000
[paul@centos]$ bg 2
[2]+ sleep 3000 &
[paul@centos]$ jobs
[1]-  Running                 sleep 5000 &
[2]+  Running                 sleep 3000 &
🚀 HANDS-ON
- Use the
jobscommand to verify whether you have any processes running in background. - Use
vito create a little text file. Suspend vi in background. - Verify with
jobsthatviis suspended in background. - Start
find / > allfiles.txt 2>/dev/nullin foreground. Suspend it in background before it finished? - Start two long
sleepprocesses in background. - Display all
jobsin background. - Use the
killcommand to suspend the lastsleepprocess.
DISK MANAGEMENT
DISK MANAGEMENT
DISK DEVICES
disks vs partitions vs FS
ata (ide) device naming
All ata drives on your system will start with /dev/hd followed by a unit letter. The master hdd on the first ata controller is /dev/hda, the slave is /dev/hdb. For the second controller, the names of the devices are /dev/hdc and /dev/hdd.

IDE device naming
scsi device naming
scsi drives follow a similar scheme, but all start with /dev/sd.
A modern Linux system will use /dev/sd* for scsi and sata devices, and also for sd-cards, usb-sticks, (LEGACY) ATA/IDE devices and solid state drives.
scsi device naming

Understanding SAS, SATA, SCSI and ATA
disk devices & partitions
/sbin/fdisk to find out what kind of disks are seen by the kernel.
# fdisk -l | grep Disk
Disk /dev/sda: 32.2 GB, 32214351872 bytes, 62918656 sectors
Disk label type: dos
Disk identifier: 0x000a41c5
Disk /dev/sdb: 10.7 GB, 10737418240 bytes, 20971520 sectors
Disk label type: dos
Disk identifier: 0x59e794fa

# fdisk -l /dev/sda
Disk /dev/sda: 32.2 GB, 32214351872 bytes, 62918656 sectors
Units = sectors of 1 * 512 = 512 bytes
Sector size (logical/physical): 512 bytes / 512 bytes
I/O size (minimum/optimal): 512 bytes / 512 bytes
Disk label type: dos
Disk identifier: 0x000a41c5
   Device Boot      Start         End      Blocks   Id  System
/dev/sda1   *        2048     1026047      512000   83  Linux
/dev/sda2         1026048    62914559    30944256   83  Linux
dmesg
Kernel boot messages can be seen after boot with
dmesg.
# dmesg | grep disk
[    1.439543] systemd[1]: Running in initial RAM disk.
[    3.392719] sd 2:0:0:0: [sda] Attached SCSI disk
[    3.398665] sd 3:0:1:0: [sdb] Attached SCSI disk
🚀 HANDS-ON
- Use
dmesgto make a list of hard disk devices detected at boot-up. - Use
fdiskto find the total size of all hard disk devices on your system.
DISK MANAGEMENT
PARTITIONS
primary, extended and logical
Linux requires you to create one or more partitions.
primary, extended and logical partitions

partition naming
We saw before that hard disk devices are named /dev/hdx or /dev/sdx with x depending on the hardware configuration.
Next is the partition number, starting the count at 1.
Partition naming

fdisk -l
Example below show you can see two partitions exists on /dev/sda
[root@centos]# fdisk -l /dev/sda

Disk /dev/sda: 32.2 GB, 32214351872 bytes, 62918656 sectors
Units = sectors of 1 * 512 = 512 bytes
Sector size (logical/physical): 512 bytes / 512 bytes
I/O size (minimum/optimal): 512 bytes / 512 bytes
Disk label type: dos
Disk identifier: 0x000a41c5

   Device Boot      Start         End      Blocks   Id  System
/dev/sda1   *        2048     1026047      512000   83  Linux
/dev/sda2         1026048    62914559    30944256   83  Linux
partitioning new disks
First, we check with fdisk -l whether Linux can see the new disk. Then :

🚀 HANDS-ON
- Use fdisk -l to display existing partitions and sizes.
- Use df -h to display existing partitions and sizes.
- Compare the output of fdisk and df.
- Create a 200MB primary partition.
- Create a 400MB primary partition and two 300MB.
- Use df -h and fdisk -l to verify your work.
- Remove all your partitions with fdisk.
DISK MANAGEMENT
FILE SYSTEMS
about FS
A FS is a way of organizing files on your partition. Besides file-base storage, file systems usually include directories and access control, and contain meta information about files likes access times, modifications times and file ownership.
/proc/filesystems
The Linux kernel will inform you about currently loaded file system drivers in
/proc/filesystems.
root@centos ~# cat /proc/filesystems | grep -v nodev
 ext2
 iso9660
 ext3
common file systems

putting a FS on a partition
[root@poc-david ~]# mkfs /dev/sdc1
mke2fs 1.42.9 (28-Dec-2013)
Discarding device blocks: done
Filesystem label=
OS type: Linux
Block size=1024 (log=0)
Fragment size=1024 (log=0)
Stride=4 blocks, Stripe width=4 blocks
51200 inodes, 204800 blocks
10240 blocks (5.00%) reserved for the super user
First data block=1
Maximum filesystem blocks=67371008
25 block groups
8192 blocks per group, 8192 fragments per group
2048 inodes per group
Superblock backups stored on blocks:
        8193, 24577, 40961, 57345, 73729

Allocating group tables: done
Writing inode tables: done
Writing superblocks and filesystem accounting information: done
🚀 HANDS-ON
- List the filesystems that are known by your system.
- Create an ext2 filesystem on the 200MB partition.
- Verify your work with
fdiskanddf. - Perform a file system check on all new file sytems.
DISK MANAGEMENT
MOUNTING
mkdir
This example shows how to create a new mount point with mkdir.
root@ipme:~# mkdir /home/project42mount
When the
mount point is created, and a
file system is present on the partition, then
mount can
mount the
file system on the
mount point directory.
[root@ipme ~]# mkdir /home/project42
[root@ipme ~]# mount -t ext2 /dev/sdc1 /home/project42/
[root@ipme ~]# cd /home/
[root@ipme home]# ls -l
total 1
drwx------. 4 david    david      91 Jan 22 15:16 david
drwxr-xr-x. 3 root     root     1024 Jan 22 15:44 project42
[root@ipme home]# df -h
Filesystem      Size  Used Avail Use% Mounted on
...
/dev/sdc1       194M  1.6M  183M   1% /home/project42
One monted, the new FS is accessible to users.
umount
You can
unmount a mounted FS using the
umount
command.
root@ipme:~# umount /home/project42displaying mounted FS
Using
mount,
/proc/mounts
and
/etc/mtab
.
root@ipme:~# mount | grep /dev/sdc
/dev/sdc1 on /home/project42 type ext2 (rw,relatime,seclabel,stripe=4)

root@ipme:~# cat /proc/mounts | grep /dev/sdc
/dev/sdc1 /home/project42 ext2 rw,seclabel,relatime,stripe=4 0 0

root@ipme:~# cat /etc/mtab | grep /dev/sdc
/dev/sdc1 /home/project42 ext2 rw,seclabel,relatime,stripe=4 0 0

[root@poc-david home]# df -h
Filesystem      Size  Used Avail Use% Mounted on
...
/dev/sdc1       194M  1.6M  183M   1% /home/project42
permanent mounts
Using
blkid and
/etc/fstab
.
[root@ipme home]# blkid
...
/dev/sdc1: UUID="3d66bc42-6b8a-4884-8a25-2b92fe676be8" TYPE="ext2"
[root@ipme home]# cat /etc/fstab

#
# /etc/fstab
# Created by anaconda on Thu Jan 18 19:00:00 2018
#
# Accessible filesystems, by reference, are maintained under '/dev/disk'
# See man pages fstab(5), findfs(8), mount(8) and/or blkid(8) for more info
#
UUID=bf383770-7408-48df-b204-d408f67e439b /                       xfs     defaults        0 0
UUID=203575e2-7c86-408b-b2e0-59df18bba2fb /boot                   xfs     defaults        0 0
UUID=3d66bc42-6b8a-4884-8a25-2b92fe676be8 /home/project42         ext2    defaults        0 0
🚀 HANDS-ON
- Mount the small 200MB partition on /home/project22.
- Verify your work with fdisk, df and mount. Also look in /etc/mtab and /proc/mounts.
- Make the mount permanent and test that it works.
- What happens when you mount a FS on a directory that contains some files ?
- What happens when you mount two FS on the same mount point ?
DISK MANAGEMENT
LOGICAL VOLUMENT MANAGEMENT
problems with standard partitions

Imagine you want to enlarge space available for /src/project42.
You're force to unmount the FS, take a backup of the data, remove and recreate partitions, and then restore the data and remout the FS.
solution with lvm
Virtual layer between the mounted FS and the hardware device.

physical volume (pv)
A physical volume is any block device (a disk, a partition ...).
All these devices can become a member of a volume group.
[root@ipme ~]# pv
pvchange   pvck       pvcreate   pvdisplay  pvmove     pvremove   pvresize   pvs        pvscan
volume group (vg)
A volume group is an abstraction layer between block devices and logical volumes.
[root@ipme ~]# vg
vgcfgbackup    vgchange       vgconvert      vgdisplay      vgextend       vgimportclone
vgmknodes      vgremove       vgs            vgsplit        vgcfgrestore   vgck
vgcreate       vgexport       vgimport       vgmerge        vgreduce       vgrename
vgscan
logical volume (lv)
A logical volume is created in a volume group. Logical volumes that contain a FS can be mounted. The use of lv is similar to the use of partitions and is accomplished with the same standard commands (mkfs, mount...).
[root@ipme ~]# lv
lvchange     lvcreate     lvextend     lvmconf      lvmdiskscan  lvmetad      lvmsadc
lvreduce     lvrename     lvs          lvconvert    lvdisplay    lvm          lvmconfig
lvmdump      lvmpolld     lvmsar       lvremove     lvresize     lvscan
LVM sum-up
lvm example #1
How can we use a device to create vg & lv:
[root@ipme00 ~]# pvcreate /dev/sdc
  Physical volume "/dev/sdc" successfully created.
[root@ipme00 ~]# vgcreate vg /dev/sdc
  Volume group "vg" successfully created
[root@ipme00 ~]# lvcreate --size 500m vg
  Logical volume "lvol0" created.
[root@ipme00 ~]# mke2fs -m0 -j /dev/vg/lvol0
mke2fs 1.42.9 (28-Dec-2013)
Discarding device blocks: done
Filesystem label=
...
[root@ipme00 ~]# mkdir /home/project10
[root@ipme00 ~]# mount /dev/vg/lvol0 /home/project10/
[root@ipme00 ~]# df -h | grep proj
/dev/mapper/vg-lvol0  477M  2.3M  474M   1% /home/project10
A logical volume is very similar to a partition, it can be formatted with a file system and can be mounted so that users can access it.
lvm example #2
Extend a logical volume
[root@ipme00 ~]# df -h | grep pro
/dev/mapper/vg-lvol0  477M  2.3M  474M   1% /home/project10
[root@ipme00 ~]# lvextend -L +100 /dev/vg/lvol0
  Size of logical volume vg/lvol0 changed from 500.00 MiB (125 extents) to 600.00 MiB (150 extents).
  Logical volume vg/lvol0 successfully resized.
[root@ipme00 ~]# df -h | grep pro
/dev/mapper/vg-lvol0  477M  2.3M  474M   1% /home/project10
[root@ipme00 ~]# lvdisplay /dev/vg/lvol0 | grep Size
  LV Size                600.00 MiB
[root@ipme00 ~]# resize2fs /dev/vg/lvol0
resize2fs 1.42.9 (28-Dec-2013)
Filesystem at /dev/vg/lvol0 is mounted on /home/project10; on-line resizing required
old_desc_blocks = 2, new_desc_blocks = 3
The filesystem on /dev/vg/lvol0 is now 614400 blocks long.

[root@ipme00 ~]# df -h | grep pro
/dev/mapper/vg-lvol0  574M  2.3M  571M   1% /home/project10
vgs
Display a quick overview of all volume groups.
[root@ipme00 ~]# vgs
  VG #PV #LV #SN Attr   VSize   VFree
  vg   1   1   0 wz--n- <50.00g 49.41g
vgscan
Scan all disks for existing Volume Groupes. Also update the
/etc/lvm/.cache file.
[root@ipme00 ~]# vgscan
  Reading volume groups from cache.
  Found volume group "vg" using metadata type lvm2
vgdisplay
Give more detailed information about a volume group.
[root@ipme00 ~]# vgdisplay vg
  --- Volume group ---
  VG Name               vg
  System ID
  Format                lvm2
  Metadata Areas        1
  Metadata Sequence No  3
  VG Access             read/write
  VG Status             resizable
  MAX LV                0
  Cur LV                1
  Open LV               1
  Max PV                0
  Cur PV                1
  Act PV                1
  VG Size               <50.00 GiB
  PE Size               4.00 MiB
  Total PE              12799
  Alloc PE / Size       150 / 600.00 MiB
  Free  PE / Size       12649 / 49.41 GiB
  VG UUID               qzcwDf-EpF6-Xjsr-dZaI-7kTv-Nbut-u2WNYb
lvs / lvscan / lvdisplay
[root@ipme00 ~]# lvs
  LV    VG Attr       LSize   Pool Origin Data%  Meta%  Move Log Cpy%Sync Convert
  lvol0 vg -wi-ao---- 600.00m
[root@ipme00 ~]# lvscan
  ACTIVE            '/dev/vg/lvol0' [600.00 MiB] inherit
[root@ipme00 ~]# lvdisplay /dev/vg/lvol0
  --- Logical volume ---
  LV Path                /dev/vg/lvol0
  LV Name                lvol0
  VG Name                vg
  LV UUID                7ZKmUs-wmY9-8gT0-P25J-fWMR-vkZO-ejs1UL
  LV Write Access        read/write
  LV Creation host, time ipme00, 2018-02-04 11:21:42 +0000
  LV Status              available
  # open                 1
  LV Size                600.00 MiB
  Current LE             150
  Segments               1
  Allocation             inherit
  Read ahead sectors     auto
  - currently set to     256
  Block device           253:0
pvcreate
Use
pvcreate command to add devices to lvm.
# How to add a disk to lvm
[root@ipme00 ~]# pvcreate /dev/sdc
  Physical volume "/dev/sdc" successfully created.

# How to add partition to lvm
[root@ipme00 ~]# pvcreate /dev/sdc1
  Physical volume "/dev/sdc1" successfully created.

# How to add multiple disks or partitions to lvm
[root@ipme00 ~]# pvcreate /dev/sde /dev/sdf /dev/sdg
  Physical volume "/dev/sdce" successfully created.
  Physical volume "/dev/sdcf" successfully created.
  Physical volume "/dev/sdcg" successfully created.
pvremove
Use
pvremove command to remove physical volumes to lvm.
[root@ipme00 ~]# pvremove /dev/sde /dev/sdf /dev/sdg
  Label on physical volume "/dev/sde" successfully wiped.
  Label on physical volume "/dev/sdf" successfully wiped.
  Label on physical volume "/dev/sdg" successfully wiped.
pvresize
When you used
fdisk to resize a partition on a disk, then you must use
pvresize to make lvm recognize the new size of the physical volume that represents this partition.
[root@ipme00 ~]# pvresize /dev/sdc
  Physical volume "/dev/sdc" changed
  1 physical volume(s) resized / 0 physical volume(s) not resized
vgcreate
Use
vgcreate
command to create a volume group.
# You can immediately name all the physical volume that span to the volume group
[root@ipme00 ~]# vgcreate vg42 /dev/sdc /dev/sdd
  Volume group "vg42" successfully created
vgextend
Use the
vgextend command to extend an existing volume group with a physical volume.
[root@ipme00 ~]# vgextend vg42 /dev/sdg
  Volume group "vg42" successfully extended
vgremove
Use the
vgremove command to remove volume groups from lvm. The volume groups may not be in use.
[root@ipme00 ~]# vgremove vg42
  Volume group "vg42" successfully removed
vgreduce
Use the
vgreduce command to remove a Physical Volume from a Volume Group.
[root@ipme00 ~]# pvs
  PV         VG  Fmt  Attr PSize   PFree
  /dev/sdc   vg1 lvm2 a--  <50.00g <50.00g
  /dev/sdd       lvm2 ---   10.00g  10.00g
[root@ipme00 ~]# vgextend vg1 /dev/sdd
  Volume group "vg1" successfully extended
[root@ipme00 ~]# pvs
  PV         VG  Fmt  Attr PSize   PFree
  /dev/sdc   vg1 lvm2 a--  <50.00g <50.00g
  /dev/sdd   vg1 lvm2 a--  <10.00g <10.00g
[root@ipme00 ~]# vgreduce vg1 /dev/sdc
  Removed "/dev/sdc" from volume group "vg1"
[root@ipme00 ~]# pvs
  PV         VG  Fmt  Attr PSize   PFree
  /dev/sdc       lvm2 ---   50.00g  50.00g
  /dev/sdd   vg1 lvm2 a--  <10.00g <10.00g
lvcreate
Use the
lvcreate command to create Logical Volumes in a VG.
# Creates a 8GB Logical Volume in Volume Group vg42
[root@ipme00 ~]# lvcreate -L8G vg42
  Logical volume "lvol0" created.

# Creates a 200MB Logical Volume named MyLV in Volume Group vg42
[root@ipme00 ~]# lvcreate -L200M -nMyLV vg42
  Logical volume "MyLV" created.

# Does the same thing, but with different syntax
[root@ipme00 ~]# lvcreate --size 200M -n MyLV vg42
  Logical Volume "MyLV" already exists in volume group "vg42"

# Creates a LV that occupies 10 percent of the VG
[root@ipme00 ~]# lvcreate -l 10%VG -n MyLV2 vg42
  Logical volume "MyLV2" created.

# Creates a LV that occupies 30 percent of the remaining free space in the VG
[root@ipme00 ~]# lvcreate -l 30%FREE -n MyLV3 vg42
  Logical volume "MyLV3" created.
lvremove
Use the
lvremove command to remove Logical Volume from a Volume Group.
[root@ipme00 ~]# lvremove /dev/vg42/lvol0
Do you really want to remove active logical volume vg42/lvol0? [y/n]: y
  Logical volume "lvol0" successfully removed

[root@ipme00 ~]# lvremove /dev/vg42/MyLV /dev/vg42/MyLV2 /dev/vg42/MyLV3
Do you really want to remove active logical volume vg42/MyLV? [y/n]: y
  Logical volume "MyLV" successfully removed
Do you really want to remove active logical volume vg42/MyLV2? [y/n]: y
  Logical volume "MyLV2" successfully removed
Do you really want to remove active logical volume vg42/MyLV3? [y/n]: y
  Logical volume "MyLV3" successfully removed

[root@ipme00 ~]#
lvextend
To extend a Logical Volume ;-)
[root@ipme00 ~]# lvdisplay /dev/vg42/lvol0 | grep Size
  LV Size                5.00 GiB
[root@ipme00 ~]# lvextend -L +100 /dev/vg42/lvol0
  Size of logical volume vg42/lvol0 changed from 5.00 GiB (1280 extents) to <5.10 GiB (1305 extents).
  Logical volume vg42/lvol0 successfully resized.
[root@ipme00 ~]# lvdisplay /dev/vg42/lvol0 | grep Size
  LV Size                <5.10 GiB
lvrename
Renaming a Logical Volume is done with
lvrename.
[root@ipme00 ~]# lvrename /dev/vg42/lvol0 /dev/vg42/COUCOU
  Renamed "lvol0" to "COUCOU" in volume group "vg42"

[root@ipme00 ~]# lvdisplay
  --- Logical volume ---
  LV Path                /dev/vg42/COUCOU
  LV Name                COUCOU
  VG Name                vg42
  LV UUID                nbwc3d-qT2p-v6u2-D1t6-KtLF-MN98-ewAMd3
  LV Write Access        read/write
  LV Creation host, time ipme00, 2018-02-04 12:45:10 +0000
  LV Status              available
  # open                 0
  LV Size                <5.10 GiB
  Current LE             1305
  Segments               1
...
🚀 HANDS-ON
- Create a volume group that contains a complete disk and a partition on another disk.
- Create two logical voumes (a small one and a bigger one) in this volume group. Format them with ext3, mount them and copy some files to them.
- Verify the usage of
fdisk,mount,pvs,vgs,lvs, (pv|lv|vg)displayanddf. Doesfdiskgive you any information about lvm?
BOOT MANAGEMENT
BOOT MANAGEMENT
BOOTLOADER
BOOT MANAGEMENT
INIT AND RUNLEVELS
system init - process id 1
The kernel receives system control from the bootloader. After a while the kernel starts the init daemon. The init daemon (/sbin/init) is the first daemon that is started and receives process id 1 (PID 1). Init never dies.
configuration in /etc/inittab
When /etc/init is started, it will first read its configuration file /etc/inittab. In that file, it will look for the value of initdefault.
[paul@centos ~]$ grep ^id /etc/inittab
id:3:initdefault:
initdefault
The value found in initdefault indicates the default runlevel.
# Default runlevel. The runlevels used by RHS are:
#   0 - halt (Do NOT set initdefault to this)
#   1 - Single user mode
#   2 - Multiuser, without NFS (The same as 3, if you don't have network)
#   3 - Full multiuser mode
#   4 - unused
#   5 - X11
#   6 - reboot (Do NOT set initdefault to this)
Runlevel 0 = shutting down ; 1 = troubleshooting ; 3 = servers ; 5 = desktop ; 6 = reboot
/etc/rc.d/rc.sysinit
Independent of the selected runlevel, init will run the /etc/rc.d/rc.sysinit script to initialize hardware, populate /etc/mtab while mounting file systems, [...]
[paul@centos ~]$ egrep -e"^# Ini" -e"^# Sta" -e"^# Che" /etc/rc.d/rc.sysinit
# Check SELinux status
# Initialize hardware
# Start the graphical boot, if necessary; /usr may not be mounted yet...
# Initialiaze ACPI bits
# Check filesystems
# Start the graphical boot, if necessary and not done yet.
# Check to see if SELinux requires a relabel
# Initialize pseudo-random number generator
# Start up swapping.
# Initialize the serial ports.
rc scripts
Init will start the rc script with the runlevel as the only parameter.
l0:0:wait:/etc/rc.d/rc 0
l1:1:wait:/etc/rc.d/rc 1
l2:2:wait:/etc/rc.d/rc 2
l3:3:wait:/etc/rc.d/rc 3
l4:4:wait:/etc/rc.d/rc 4
l5:5:wait:/etc/rc.d/rc 5
l6:6:wait:/etc/rc.d/rc 6
rc directories
/etc/rcX.d/ directories contain links to scripts in /etc/init.d/.
[root@centos rc3.d]# ls -l | tail -4
lrwxrwxrwx 1 root root 19 Oct 11  2008 S98haldaemon -> ../init.d/haldaemon
lrwxrwxrwx 1 root root 19 Oct 11  2008 S99firstboot -> ../init.d/firstboot
lrwxrwxrwx 1 root root 11 Jan 21 04:16 S99local -> ../rc.local
lrwxrwxrwx 1 root root 16 Jan 21 04:17 S99smartd -> ../init.d/smartd
starting or stopping daemons
Scripts in /etc/init.d/ can be used when the system is running to start and stop daemons (services).
 root@centos:~# /etc/init.d/samba restart
 * Stopping Samba daemons...                               [ OK ]
 * Starting Samba daemons...                               [ OK ]

[root@centos ~]# service smb restart
Shutting down SMB services:
Shutting down NMB services:
Starting SMB services:
Starting NMB services:
[  OK  ]
[  OK  ]
[  OK  ]
[  OK  ]
chkconfig (1)
The purpose of
chkconfig is to relieve system administrators of manually managing all the links and scripts in
/etc/init.d and
/etc/rcX.d/.
chkconfig (2)
chkconfig to list the status of a service in the different runlevels.
[root@centos ~]# chkconfig --list crond
crond           0:off 1:off 2:on 3:on 4:on 5:on 6:off
runlevel configuration
[root@centos ~]# chkconfig --level 3 crond off
[root@centos ~]# chkconfig --list crond
crond           0:off 1:off 2:on 3:off 4:on 5:on 6:off
chkconfig configuration
Every script in
/etc/init.d/ can have lines to tell
chkconfig what to do with the service.
[root@RHEL52 ~]# head -9 /etc/init.d/crond | tail -5
# chkconfig: 2345 90 60
# description: cron is a standard UNIX program that runs user-specified
#              programs at periodic scheduled times. vixie cron adds a
#              number of features to the basic UNIX cron, including better
#              security and more powerful configuration options.
The service should be started (2345), followed by the priority for start (90) and stop (60).
enable/disable services
Services can be enable/disable in all runlevels with one command.
[root@centos ~]# chkconfig crond off
[root@centos ~]# chkconfig --list crond
crond           0:off   1:off   2:off   3:off   4:off   5:off   6:off
[root@centos ~]# chkconfig crond on
[root@centos ~]# chkconfig --list crond
crond           0:off   1:off   2:on    3:on    4:on    5:on    6:off
display the runlevel
See your current runlevel with the
runlevel or
who -r command.
[root@centos ~]# runlevel
N 3

[root@centos ~]# who -r
         run-level 3  Jul 28 09:15
changing the runlevel
Switch to another runlevel with the
telinit command. On linux,
/sbin/telinit is usually a (hard) link to
/sbin/init.
root@centos:~# runlevel
N 2
root@centos:~# init 3
root@centos:~# runlevel
2 3
/sbin/shutdown
Used to properly shut down a system.
Common switches :
-a,
-t,
-h and
-r.
root@centos:~# man shutdown # ;-)
root@centos:~# shutdown -t5 -h now
halt, reboot and poweroff
The binary /sbin/reboot is the same as /sbin/halt and /sbin/poweroff.
When in runlevel 0 or 6
halt,
reboot and
poweroff will tell the kernel to
halt,
reboot or
poweroff the system.
When not in runlevel 0 or 6, typing
reboot as root actually calls the
shutdown command with the
-r switch.
/var/log/wtmp
halt,
reboot and
poweroff all write to
/var/log/wtmp. To look at
/var/log/wtmp, we need to use th
last.
[root@centos ~]# last | grep reboot
reboot   system boot  2.6.18-128.el5   Fri May 29 11:44   (192+05:01)
reboot   system boot  2.6.18-128.el5   Wed May 27 12:10    (06:49)
reboot   system boot  2.6.18-128.el5   Mon May 25 19:34   (1+15:59)
reboot   system boot  2.6.18-128.el5   Mon Feb  9 13:20   (106+21:13)
BOOT MANAGEMENT
SYSTEMD
systemd
It is likely that systemd will replace all the standard init/runlevel/rc functionality. Both Red Hat and Debian have decided in 2014 that systemd will be replacing init in future releases (RHEL7/CENTOS7 and Debian 8).
-wrap up-
# Gérer les services
$ systemctl

# Connaître la liste des services actifs
$ systemctl list-units -t service

# Connaître la liste de tous les services
$ systemctl list-units -t service --all

# Gestion des unistés
$ systemctl start <unit>
$ systemctl stop <unit>
$ systemctl restart <unit>
$ systemctl reload <unit>

# Activer une unité au démarrage
$ systemctl enable <unit>
$ systemctl disable <unit>

# Mask une unité
$ systemctl mask <unit>
$ systemctl unmask <unit>

# Lire les logs
$ journalctl
🚀 HANDS-ON
- Use
systemctlto list enabled services. - Create a custom service that will launch a custom writeTextToFile.sh shell script when VM boot.
- Check it works!

SYSTEM MANAGEMENT
SYSTEM MANAGEMENT
SCHEDULING
contrab file
The
crontab command can be used to maintain the
crontab file.
Each user can have their own crontab file to schedule jobs at a specific time.
This time can be specified with five fields in this order: minute, hour, day of the month, month and day of the week.
If fields contains asterisk (*), then this means all values of that field.
crontab command
User should not edit the crontab file directly, instead they should type
crontab -e which will use the editor defined in the EDITOR or VISUAL environment variable. Users can display their cron table with
crontab -l.
cron.allow and cron.deny
The cron daemon crond is reading the cron tables, taking into account the /etc/cron.allow and /etc/cron.deny files.
When the
cron.allow file exists, then your username has to be in it, otherwise you cannot use
cron.
When the
cron.deny file does not exists, then your username cannot be in the
cron.deny file if you want to use
cron.
/etc/crontab
The /etc/crontab file contains entries for when to run hourly/daily/weekly... tasks.
SHELL=/bin/bash
PATH=/sbin:/bin:/usr/sbin:/usr/bin
MAILTO=root HOME=/
# run-parts
01 * * * * root run-parts /etc/cron.hourly
02 4 * * * root run-parts /etc/cron.daily
22 4 * * 0 root run-parts /etc/cron.weekly
42 4 1 * * root run-parts /etc/cron.monthly
/etc/cron*
Contain the tasks that are run at the times scheduled in /etc/crontab.
paul@centos:~$ ls -ld /etc/cron.*
drwxr-xr-x 2 root root 4096 2008-04-11 09:14 /etc/cron.d
drwxr-xr-x 2 root root 4096 2008-04-19 15:04 /etc/cron.daily
drwxr-xr-x 2 root root 4096 2008-04-11 09:14 /etc/cron.hourly
drwxr-xr-x 2 root root 4096 2008-04-11 09:14 /etc/cron.monthly
drwxr-xr-x 2 root root 4096 2008-04-11 09:14 /etc/cron.weekly
🚀 HANDS-ON
- As a normal user, use
crontab -eto schedule a script to run every four minutes. - As root, display crontab file of your normal user.
- As the normal user again, remove your crontab file.
SYSTEM MANAGEMENT
LOGGING
about syslog
The standard method of logging on Linux was through the syslogd daemon.
Syslog was developed by Eric Allman for sendmail, but quickly became a standard among many Unix application.
The syslogd daemon can receive message on udp port 514 from many applications, and can append to log files, print, displays messages on terminal ...
syslogds daemon configuration is in /etc/syslog.conf
about rsyslog
The new method is called reliable and extended syslogd and uses the rsyslogd daemon and the /etc/rsyslogd.conf configuration file. The syntax is backwards compatible.
Each line uses a facility to determine where the message is coming from and also a priority for the severity of the message and an action to decide on what to do with the message.
modules
rsyslogd has many more features that can be expanded by using modules.
root@ipme00:/etc# man rsyslog.conf # C'est kdo Cédric ;-)
root@ipme00:/etc# man rsyslogd
root@ipme00:/etc#
facilities
The
man rsyslog.conf will explain the different default facilities for certain deamon, such as mail, kernel msg ...
# List of several facilities
auth (security)
authpriv
cron
daemon
ftp
kern
lpr mail
mark (internal use only)
news
syslog
user
uucp
local0-7
priorities
The worst severity message can have is emerg followed by alert and crit. Lowest should go to info and debug messages.
# List of all priorities
debug
info
notice
warning (warn)
err (error)
crit
alert
emerg (panic)
actions
Default action: send a message to users listed as action.
root,user1      list of users, separated by comma's
*               message to all logged on users
/               file (can be a printer, a console, a tty, ...)
-/              file, but don't sync after every write
|               named pipe
@               other syslog hostname
configuration
Below a simple configuration of custom local4 messages in /etc/rsyslog.conf.
local4.crit             /var/log/critandabove
local4.=crit            /var/log/onlycrit
local4.*                /var/log/alllocal4
restarting rsyslogd
Don't forget to restart the server after changing its configuration.
root@ipme00:/etc# service rsyslog restart
Shutting down system logger:                               [  OK  ]
Starting system logger:                                    [  OK  ]
root@ipme00:/etc#
logger
To generate syslog test messages.
[root@ipme00 ~]# logger -p local4.debug "l4 debug"
[root@ipme00 ~]# logger -p local4.crit "l4 crit"
[root@ipme00 ~]# logger -p local4.emerg "l4 emerg"
[root@ipme00 ~]#

[root@ipme00 ~]# cat /var/log/critandabove
Feb 08 19:55:19 root root: l4 crit
Feb 08 19:55:28 root root: l4 emerg
rotating logs
A lot of files are always growing in size. We need to purge them.
$ cat /etc/logrotate.d/yum
/var/log/yum.log {
    missingok
    notifempty
    size 30k
    yearly
    create 0600 root root
}
🚀 HANDS-ON
- Examine syslog to find the location of the log file containing ssh failed logins.
- Configure syslog to put local4.error and above messages in /var/log/l42e.log and local4.info only .info in /var/log/l42i.log. Test that it works with the logger tool!
- Configure /var/log/Mysu.log, all the su to root messages should go in that log. Test that it works!
SYSTEM MANAGEMENT
MEMORY MANAGEMENT
/proc/meminfo
Displaying /proc/meminfo will tell you a lot about the memory.
[ipme@ipme00 ~]$ cat /proc/meminfo
MemTotal:         932648 kB
MemFree:          527548 kB
MemAvailable:     572792 kB
Buffers:            2232 kB
Cached:           164968 kB
SwapCached:            0 kB
Active:           144668 kB
Inactive:         100616 kB
Active(anon):      78248 kB
Inactive(anon):     5968 kB
Active(file):      66420 kB
Inactive(file):    94648 kB
Unevictable:           0 kB
Mlocked:               0 kB
SwapTotal:             0 kB
...
free
The
free tool can display the information provided by
/proc/meminfo in a more readable format.
[ipme@ipme00 ~]$ free -m
              total        used        free      shared  buff/cache   available
Mem:            910         164         515           5         230         559
Swap:             0           0           0
about swap space
When the operating system needs more memory than physically present in RAM, it can use swap space.
Swap space is located on slower but cheaper memory. Notice that, although hard disks are commonly used for swap space, their access times are one thousand times slower.
The swap space can be a file, a partition, or a combination of files and partitions. cf
cat /proc/swaps.
monitoring memory
You can find information about
swap usage using
vmstat.
[ipme@ipme00 ~]$ vmstat
procs -----------memory---------- ---swap-- -----io---- -system-- ------cpu-----
 r  b   swpd   free   buff  cache   si   so    bi    bo   in   cs us sy id wa st
 3  0      0 525232   2232 235696    0    0    21    20   25   86  1  0 98  1  0
🚀 HANDS-ON
- Use
dmesgto find the total amount of memory in your computer. - Use
freeto display memory usage in kilobytes (then in megabytes). - Display the usage of swap with
vmstatduring a memory leak.
SYSTEM MANAGEMENT
RESOURCE MONITORING
iostat
The
iostat tool can display disk and cpu statistics.
[ipme@ipme ~]$ iostat -c
Linux 3.10.0-693.11.6.el7.x86_64 (ipme04) 	08/02/2018 	_x86_64_	(1 CPU)

avg-cpu:  %user   %nice %system %iowait  %steal   %idle
           1,24    0,05    0,47    0,69    0,00   97,55
nmon

htop
SYSTEM MANAGEMENT
PACKAGE MANAGEMENT
package management
Most Linux distribution have a package management system with online repositories containing thousands of packages.
This makes it very easy to install and remove applications, OS components, documentation and much more.
Debian package format:
.deb. Tools:
dpkg,
apt-get and
aptitude.
Red Hat package format:
.rpm. Tools:
rpm and
yum.
about rpm
The
Red Hat package manager can be used on the command line with
rpm. Type
rpm --help.
Software distributed in the rpm format will be name foo-version.platform.rpm.
rpm -qa
To obtain list of all installed software, use
rpm -qa command.
[root@ipme00 ~]$ rpm -qa | grep samba
samba-common-4.6.2-12.el7_4.noarch
samba-client-libs-4.6.2-12.el7_4.x86_64
rpm -q
To verify whether one package is installed, use
rpm -q.
[root@ipme00 ~]$ rpm -q gcc
le paquet gcc n'est pas installé
[root@ipme00 ~]$ rpm -q yum
yum-3.4.3-154.el7.centos.noarch
rpm -Uvh
To install or upgrade a package, use the -Uvh switches.
root@ipme00:~# rpm -Uvh gcc-3.4.6-3rpm -e
To remove a package, use the -e switch.
root@ipme00:~# rpm -e gcc-3.4.6-3/var/lib/rpm
The rpm database is located at /var/lib/rpm. This database contains all meta information about package that are installed (via rpm). It keeps track of all files, which enables complete removes of software.
about yum
The Yellowdog Updater, Modified (yum) is an easier command to work with rpm packages. It is installed by default on Fedora and RHEL since version 5.2.
yum list
Issue yum list available to see a lit of available package.
[root@ipme00 ~]$ yum list | wc -l
10006
[root@ipme00 ~]$ yum list samba
Modules complémentaires chargés : fastestmirror, langpacks
Loading mirror speeds from cached hostfile
Paquets disponibles
samba.x86_64                                                                               4.6.2-12.el7_4                                                                               updates
[root@ipme00 ~]$
yum search
To search for a package containing a certain string in the description or name use
yum search $string.
[root@ipme00 ~]$ yum search gcc
Modules complémentaires chargés : fastestmirror, langpacks
Loading mirror speeds from cached hostfile
====================================================================================== N/S matched: gcc =======================================================================================
gcc-c++.x86_64 : C++ support for GCC
gcc-gnat.x86_64 : Ada 95 support for GCC
gcc-objc.x86_64 : Objective-C support for GCC
gcc-objc++.x86_64 : Objective-C++ support for GCC
gcc-plugin-devel.x86_64 : Support for compiling GCC plugins
libgcc.i686 : GCC version 4.8 shared support library
libgcc.x86_64 : GCC version 4.8 shared support library
relaxngcc-javadoc.noarch : Javadoc for relaxngcc
compat-gcc-44.x86_64 : Compatibility GNU Compiler Collection
compat-gcc-44-c++.x86_64 : C++ support for compatibility compiler
compat-gcc-44-gfortran.x86_64 : Fortran support for compatibility compiler
gcc.x86_64 : Various compilers (C, C++, Objective-C, Java, ...)
...
yum install
To install an application, use
yum install $package. Naturally
yum will install all the necessary dependencies.
[root@ipme00 ~]# yum install tcl
Loaded plugins: fastestmirror, langpacks
base                                                                                                                                                                    | 3.6 kB  00:00:00
epel/x86_64/metalink                                                                                                                                                    |  27 kB  00:00:00
epel                                                                                                                                                                    | 4.7 kB  00:00:00
extras                                                                                                                                                                  | 3.4 kB  00:00:00
openlogic                                                                                                                                                               | 2.9 kB  00:00:00
updates                                                                                                                                                                 | 3.4 kB  00:00:00
(1/2): epel/x86_64/updateinfo                                                                                                                                           | 880 kB  00:00:00
(2/2): epel/x86_64/primary_db                                                                                                                                           | 6.2 MB  00:00:01
Loading mirror speeds from cached hostfile
 * epel: mirrors.coreix.net
Resolving Dependencies
--> Running transaction check
---> Package tcl.x86_64 1:8.5.13-8.el7 will be installed
--> Finished Dependency Resolution
...
yum update
To bring all application up to date, by downloading and installing them, issue
yum update.
[root@ipme00 ~]# yum update -y/etc/yum.conf and repositories
The configuration of yum repositories is done in /etc/yum/yum.conf and /etc/yum/repos.d/.
Configuration of yum itself is done in /etc/yum.conf. This file will contain the location of a log file and a cache directory for yum and can also contain list of repositories.
🚀 HANDS-ON
- Verify whether gcc, sudo and wesnoth are installed.
- Use
yumto search for and install the scp, tmux, and man-pages packages. Did you find them all? - Search the internet for 'webmin' and figure out how to install it.
NETWORK MANAGEMENT
NETWORK MANAGEMENT
GENERAL NETWORKING
seven OSI layers

unicast
A unicast communication originates from one computer and is destined for exactly one other.

multicast
A multicast is destined for a group (of computers).

broadcast
A broadcast is meant for everyone.

anycast
The root name server of the internet use anycast. An anycast signal goes to the (geographically) nearest of well defined group.

lan vs man vs wan

internet vs intranet vs extranet

tcp vs udp

NETWORK MANAGEMENT
INTERFACE CONFIGURATION
ifconfig
To list all active network interface cards, including wireless and the loopback interface.
[root@ipme00 ~]# ifconfig
eth0: flags=4163<UP,BROADCAST,RUNNING,MULTICAST>  mtu 1500
        inet 10.0.0.11  netmask 255.255.240.0  broadcast 10.0.15.255
        inet6 fe80::20d:3aff:feb6:76c3  prefixlen 64  scopeid 0x20<link>
        ether 00:0d:3a:b6:76:c3  txqueuelen 1000  (Ethernet)
        RX packets 890  bytes 414485 (404.7 KiB)
        RX errors 0  dropped 0  overruns 0  frame 0
        TX packets 1176  bytes 188441 (184.0 KiB)
        TX errors 0  dropped 0 overruns 0  carrier 0  collisions 0

lo: flags=73<UP,LOOPBACK,RUNNING>  mtu 65536
        inet 127.0.0.1  netmask 255.0.0.0
        inet6 ::1  prefixlen 128  scopeid 0x10<host>
        loop  txqueuelen 1  (Local Loopback)
        RX packets 0  bytes 0 (0.0 B)
        RX errors 0  dropped 0  overruns 0  frame 0
        TX packets 0  bytes 0 (0.0 B)
        TX errors 0  dropped 0 overruns 0  carrier 0  collisions 0
ip
ifconfig
tool is deprecated on some systems. Use the
ip tool instead.
[root@ipme00 ~]# ip a
1: lo: <LOOPBACK,UP,LOWER_UP> mtu 65536 qdisc noqueue state UNKNOWN qlen 1
    link/loopback 00:00:00:00:00:00 brd 00:00:00:00:00:00
    inet 127.0.0.1/8 scope host lo
       valid_lft forever preferred_lft forever
    inet6 ::1/128 scope host
       valid_lft forever preferred_lft forever
2: eth0: <BROADCAST,MULTICAST,UP,LOWER_UP> mtu 1500 qdisc pfifo_fast state UP qlen 1000
    link/ether 00:0d:3a:b6:76:c3 brd ff:ff:ff:ff:ff:ff
    inet 10.0.0.11/20 brd 10.0.15.255 scope global eth0
       valid_lft forever preferred_lft forever
    inet6 fe80::20d:3aff:feb6:76c3/64 scope link
       valid_lft forever preferred_lft forever
hostname
Every host receives a hostname, often placed in a DNS name space forming the Fully Qualified Domain Name (fqdn).
[root@ipme00 ~]# cat /etc/hostname
ipme00
[root@ipme00 ~]# hostname
ipme00
route
See the computer's local routing table with
route.
[root@ipme00 ~]# netstat -r
Kernel IP routing table
Destination     Gateway         Genmask         Flags   MSS Window  irtt Iface
default         gateway         0.0.0.0         UG        0 0          0 eth0
10.0.0.0        0.0.0.0         255.255.240.0   U         0 0          0 eth0
168.63.129.16   gateway         255.255.255.255 UGH       0 0          0 eth0
link-local      0.0.0.0         255.255.0.0     U         0 0          0 eth0
169.254.169.254 gateway         255.255.255.255 UGH       0 0          0 eth0
[root@ipme00 ~]# route
Kernel IP routing table
Destination     Gateway         Genmask         Flags Metric Ref    Use Iface
default         gateway         0.0.0.0         UG    0      0        0 eth0
10.0.0.0        0.0.0.0         255.255.240.0   U     0      0        0 eth0
168.63.129.16   gateway         255.255.255.255 UGH   0      0        0 eth0
link-local      0.0.0.0         255.255.0.0     U     1002   0        0 eth0
169.254.169.254 gateway         255.255.255.255 UGH   0      0        0 eth0
ping
If you can ping to another host, the tcp/ip is enabled.
[root@ipme00 ~]# ping 10.0.0.11
PING 10.0.0.11 (10.0.0.11) 56(84) bytes of data.
64 bytes from 10.0.0.11: icmp_seq=1 ttl=64 time=0.022 ms
64 bytes from 10.0.0.11: icmp_seq=2 ttl=64 time=0.045 ms
64 bytes from 10.0.0.11: icmp_seq=3 ttl=64 time=0.046 ms
^C
--- 10.0.0.11 ping statistics ---
3 packets transmitted, 3 received, 0% packet loss, time 1999ms
rtt min/avg/max/mdev = 0.022/0.037/0.046/0.013 ms
NETWORK MANAGEMENT
NETWORK SNIFFING
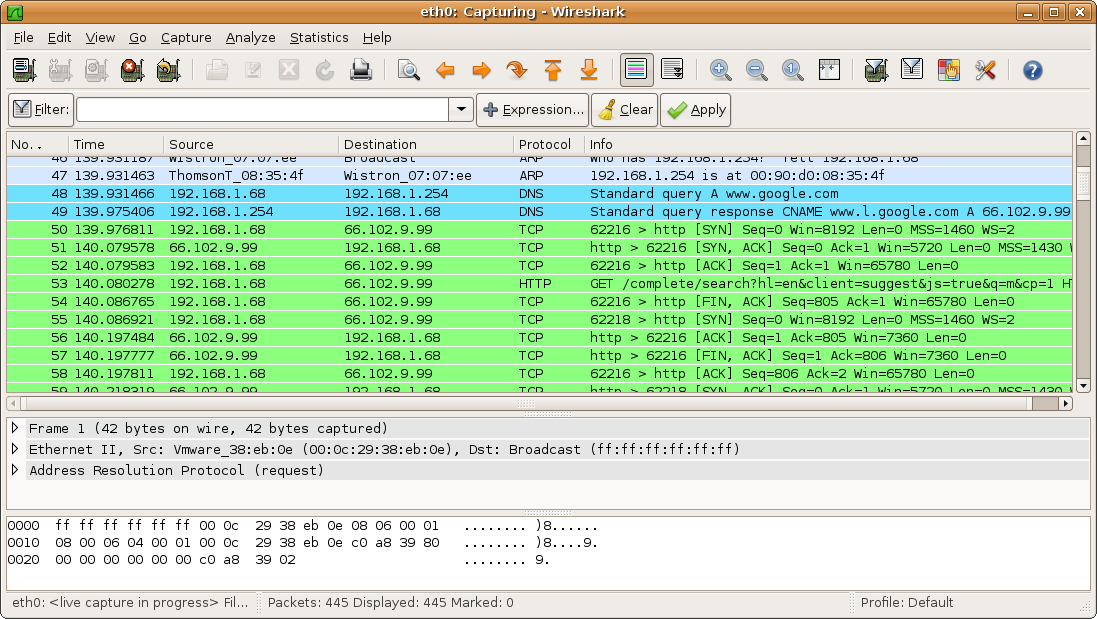
wireshark
tcpdump
Sniffing on the command line can be done with
tcpdump.
[root@ipme00 ~]# tcpdump -w /tmp/sshdump.tcpdump tcp port 22
tcpdump: listening on eth0, link-type EN10MB (Ethernet), capture size 262144 bytes
^C4 packets captured
4 packets received by filter
0 packets dropped by kernel

[root@ipme00 ~]# tcpdump -r /tmp/sshdump.tcpdump
reading from file /tmp/sshdump.tcpdump, link-type EN10MB (Ethernet)
19:06:00.668871 IP ipme00.ssh > mlr78-h01-176-190-15-230.dsl.sta.abo.bbox.fr.58643: Flags [P.], seq 2952236723:2952236847, ack 2519052889, win 313, options [nop,nop,TS val 309500 ecr 598022889], length 124
19:06:00.681738 IP mlr78-h01-176-190-15-230.dsl.sta.abo.bbox.fr.58643 > ipme00.ssh: Flags [.], ack 0, win 4094, options [nop,nop,TS val 598022936 ecr 309467], length 0
19:06:00.720669 IP mlr78-h01-176-190-15-230.dsl.sta.abo.bbox.fr.58643 > ipme00.ssh: Flags [.], ack 124, win 4092, options [nop,nop,TS val 598022974 ecr 309500], length 0
19:06:04.292994 IP mlr78-h01-176-190-15-230.dsl.sta.abo.bbox.fr.58643 > ipme00.ssh: Flags [P.], seq 1:37, ack 124, win 4096, options [nop,nop,TS val 598026531 ecr 309500], length 36
NETWORK MANAGEMENT
INTRODUCTION TO NETWORKING
firewall
BACKUP MANAGEMENT
BACKUP MANAGEMENT
BACKUP
to read articles
🚀FINAL PRACTICE🚀
🚀1 - INSTALL HTTPD
- Install & start httpd
- Check it works!
- Make httpd start on VM boot automatically
- Check it works!
- Where are located httpd logs ?
- What is your VM URL (e.g. public IP) ?
🚀2 - INSTALL PostgreSQL SERVER
- Install & start postgresql server
- Check it works!
- Make postgresql service start automatically on VM boot.
- Check it works!
- Create a database named ipme_javaapp.
- Create the ipme_login user. He must have full access on ipme_javaapp database and his password is ipme_pwd.
- Check it works!
- Allow ipme_login to enable remote connection to ipme_javaapp database.
🚀3 - PREPARE THE F.S.
- Create the user onepiece.
- Create the following directories
- /busapps/ owned by root.
- /busapps/donepiece/1.0/ owned by onepiece.
- /busdata/ owned by root.
- /busdata/donepiece/1.0/data/ owned by onepiece.
- /busdata/donepice/1.0/logs/ owned by onepiece.
🚀4 - INSTALL TOMCAT
- Install OpenJdk in /busapps/donepiece/1.0/.
- Untar apache-tomcat-9.0.XX.tar.gz in /busapps/donepiece/1.0/. The Tomcat version must be compatible with the openjdk you installed.
- Configure Tomcat JAVA_HOME & JRE_HOME variables.
- Make sure that all apache-tomcat-9.0.XX/bin/*.sh files are executable.
- Start Tomcat with onepiece user; check it works ; check logs ; stop it.
- Replace apache-tomcat-9.0.XX/logs folder by a symbolic link to /busdata/donepiece/1.0/logs/
- Customize apache-tomcat-X.X.XX/bin/setenv.sh with VM optimized parameters.
🚀5 - Administration
- Make Apache Tomcat start automatically on VM boot.
- Check it works!
- Apply a logrotate policy on Apache Tomcat logs.
- Backup ipme_javaapp PostgreSQL database every night, at 01:00. We want to keep 30 days history.
- Create a script that restores database based on a specific backup given.
- Check it works!
🚀6 - Security
- Disable PostgreSQL remote access possibility.
- Configure Apache httpd server as Reverse Proxy for Apache Tomcat.
httpd listen on :80
Apache Tomcat on :8080 - Install a second Apache Tomcat on the VM that will listen locally on port :9090
- Configure httpd to load balance incoming :80 trafic on both Apache Tomcat
- Enable HTTPS on Apache httpd server.
- Enable only incoming trafic from 22, 80 & 443 port on the VM.
🚀7 - Extra
- Remove MySQL server, do it with PostgreSQL now :-)
🚀FINAL PRACTICE #2🚀
🚀Jira & httpd
- Remove tomcat local installation
- Install Jira from archive correctly: manage logs (symbolic link to /busdata), folders permissions (donepiece owner & group)
- Make Jira start on VM boot automatically
- Put httpd in front of Jira (reverse proxy)
- (bonus) let's encrypt: httpd must expose :443
🚀WireGuard VPN
- Read this article
- Install WireGuard VPN server on the machine
- Install WireGuard VPN client on your workstation
- Make it work!
THE END.
Linux System Administration
By dawlys
