Angular
Routing

The three questions the router must ask itself while navigating:
1. Given a URL, which set of components should I navigate to?
2. Can I navigate to those components?
3. Should I prefetch any data for those components?
A Tree of States

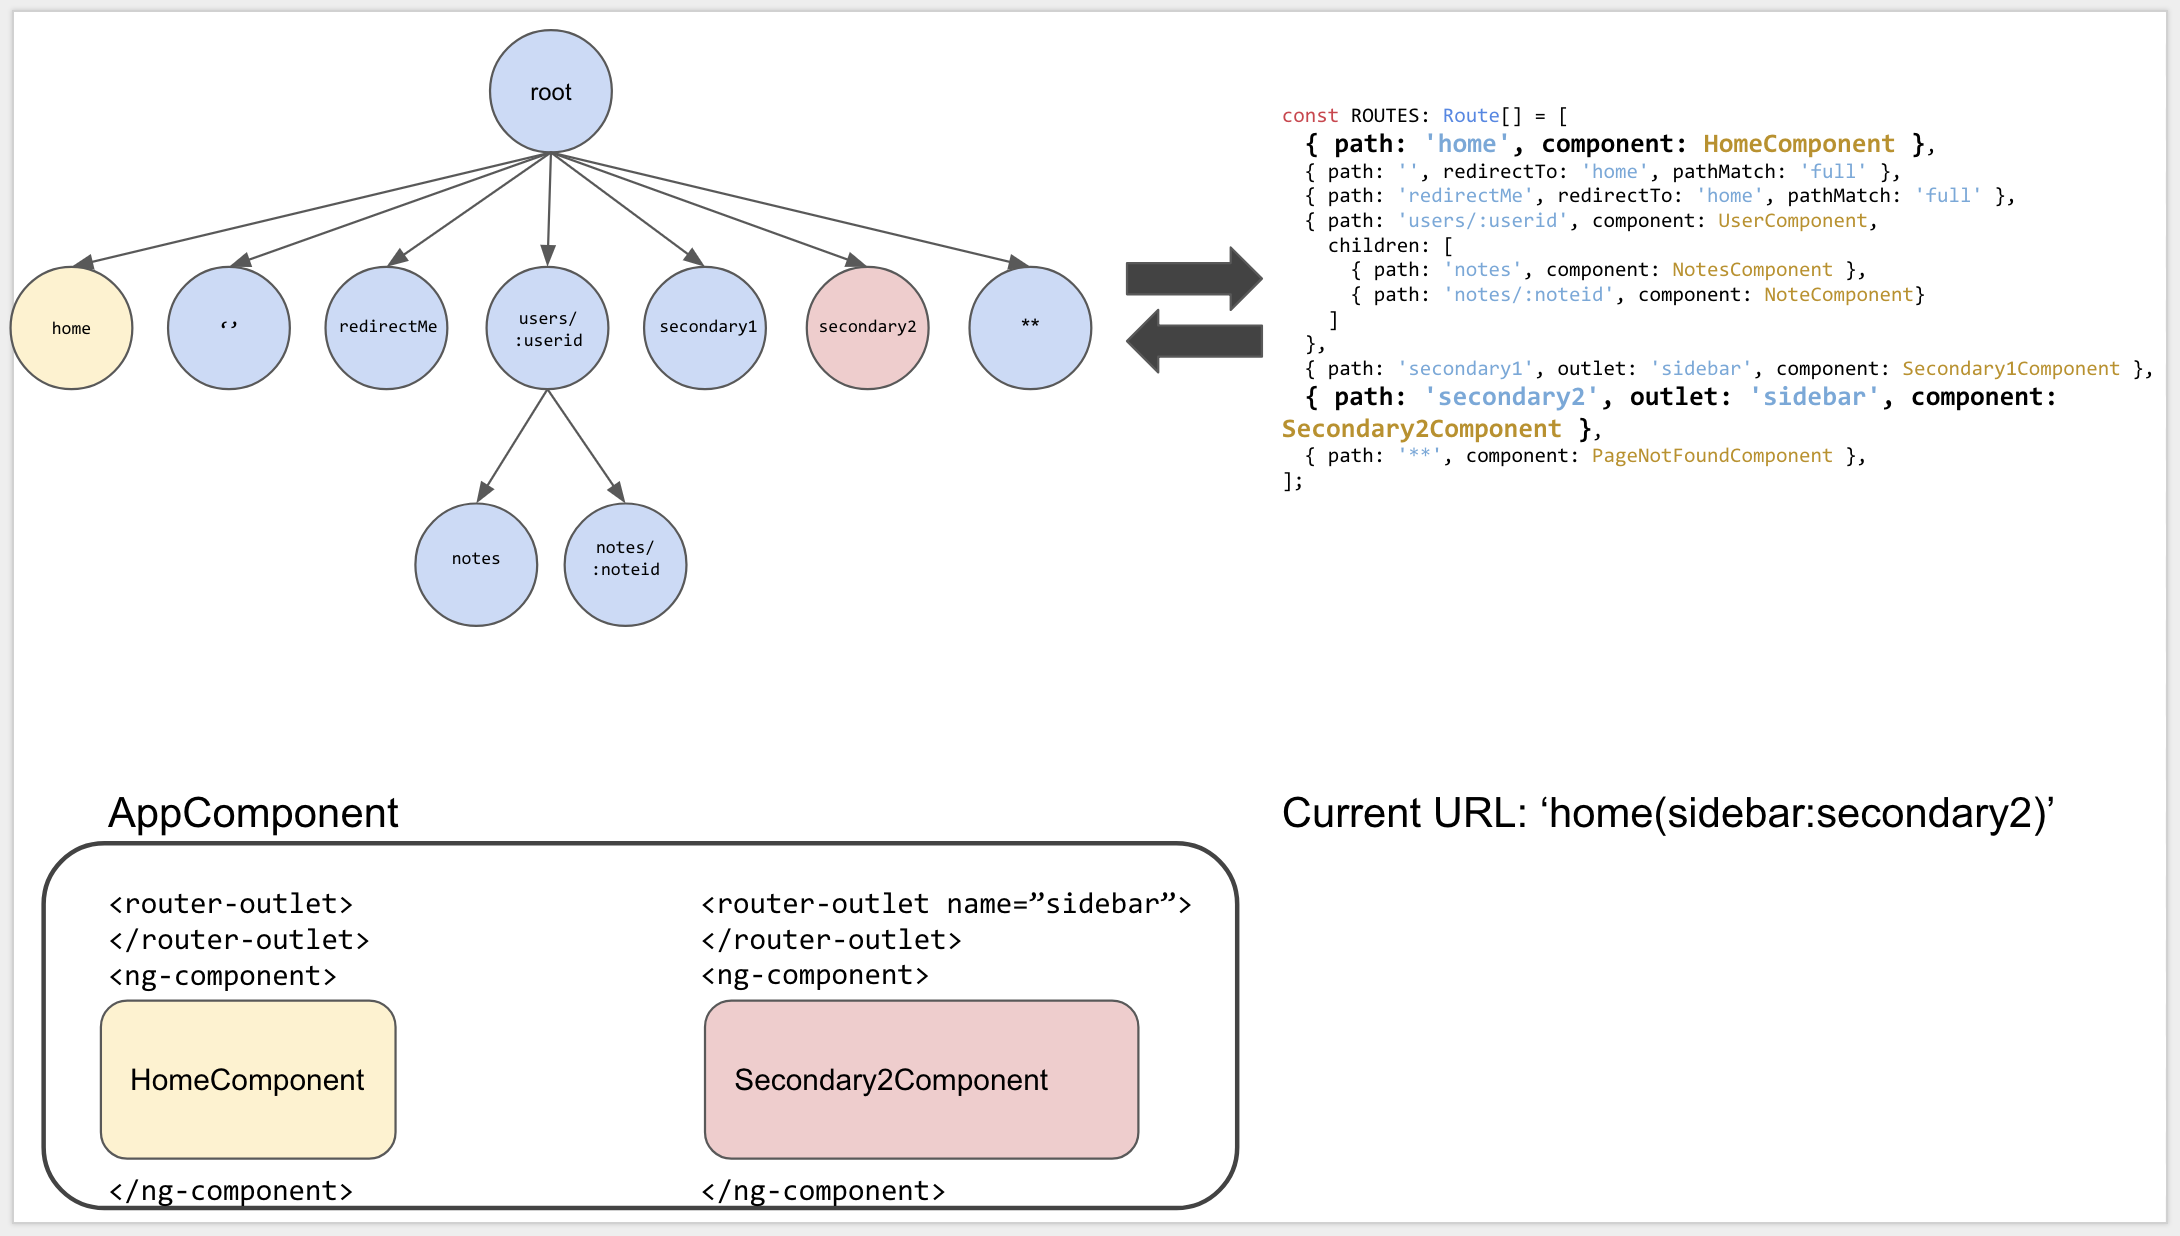
The relationship between the ROUTES config(top right), the tree representation of that config (top left), the current state of the application (bottom left), and the current URL being routed to (bottom right).
Urls and UrlSegmentGroups
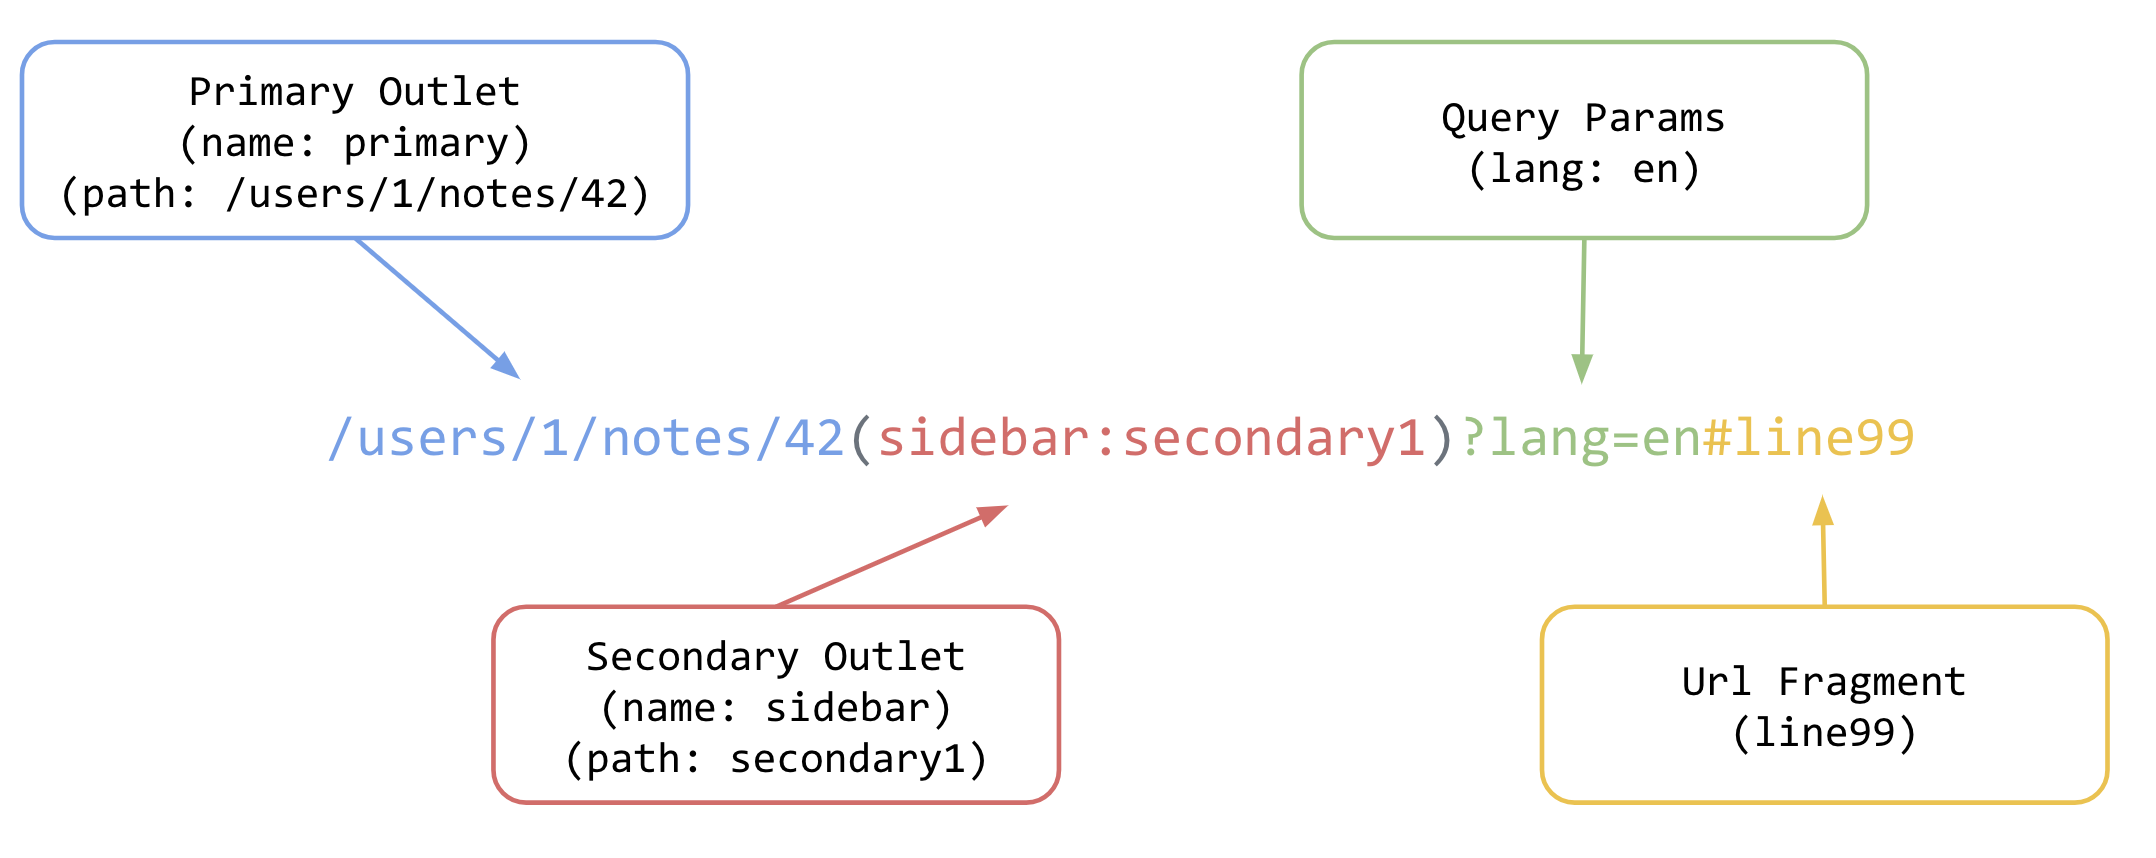

Tree structure generated from the url ‘/users/1/notes/42(sidebar:secondary1)?lang=en#line99’.
Some properties of objects have been omitted for brevity.
Primary outlet is in blue, secondary sidebar outlet is in red.
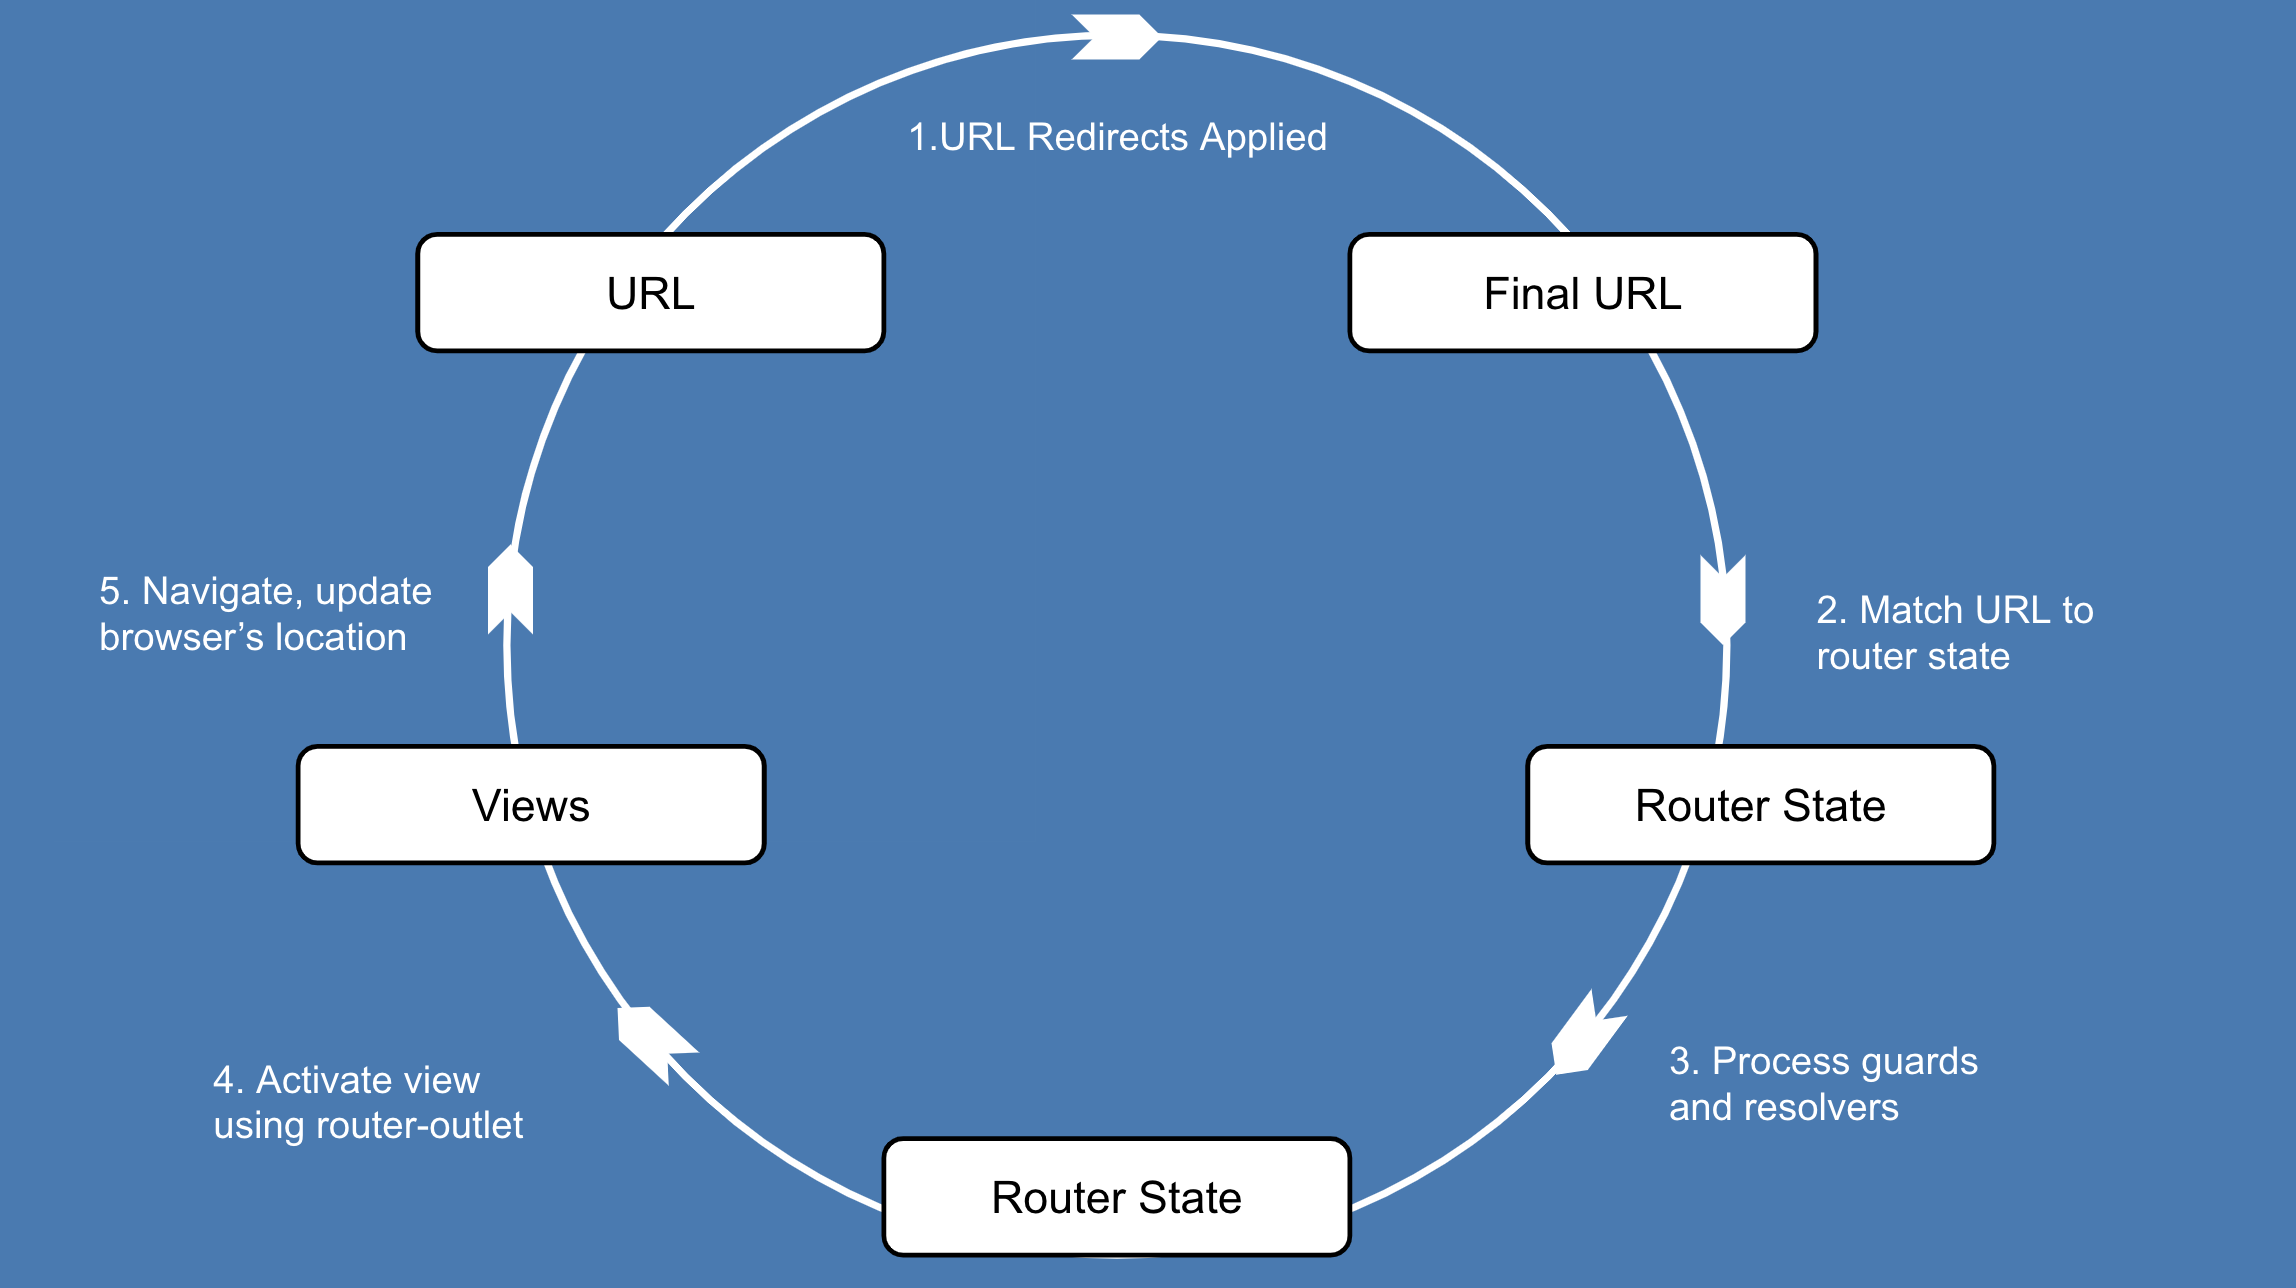
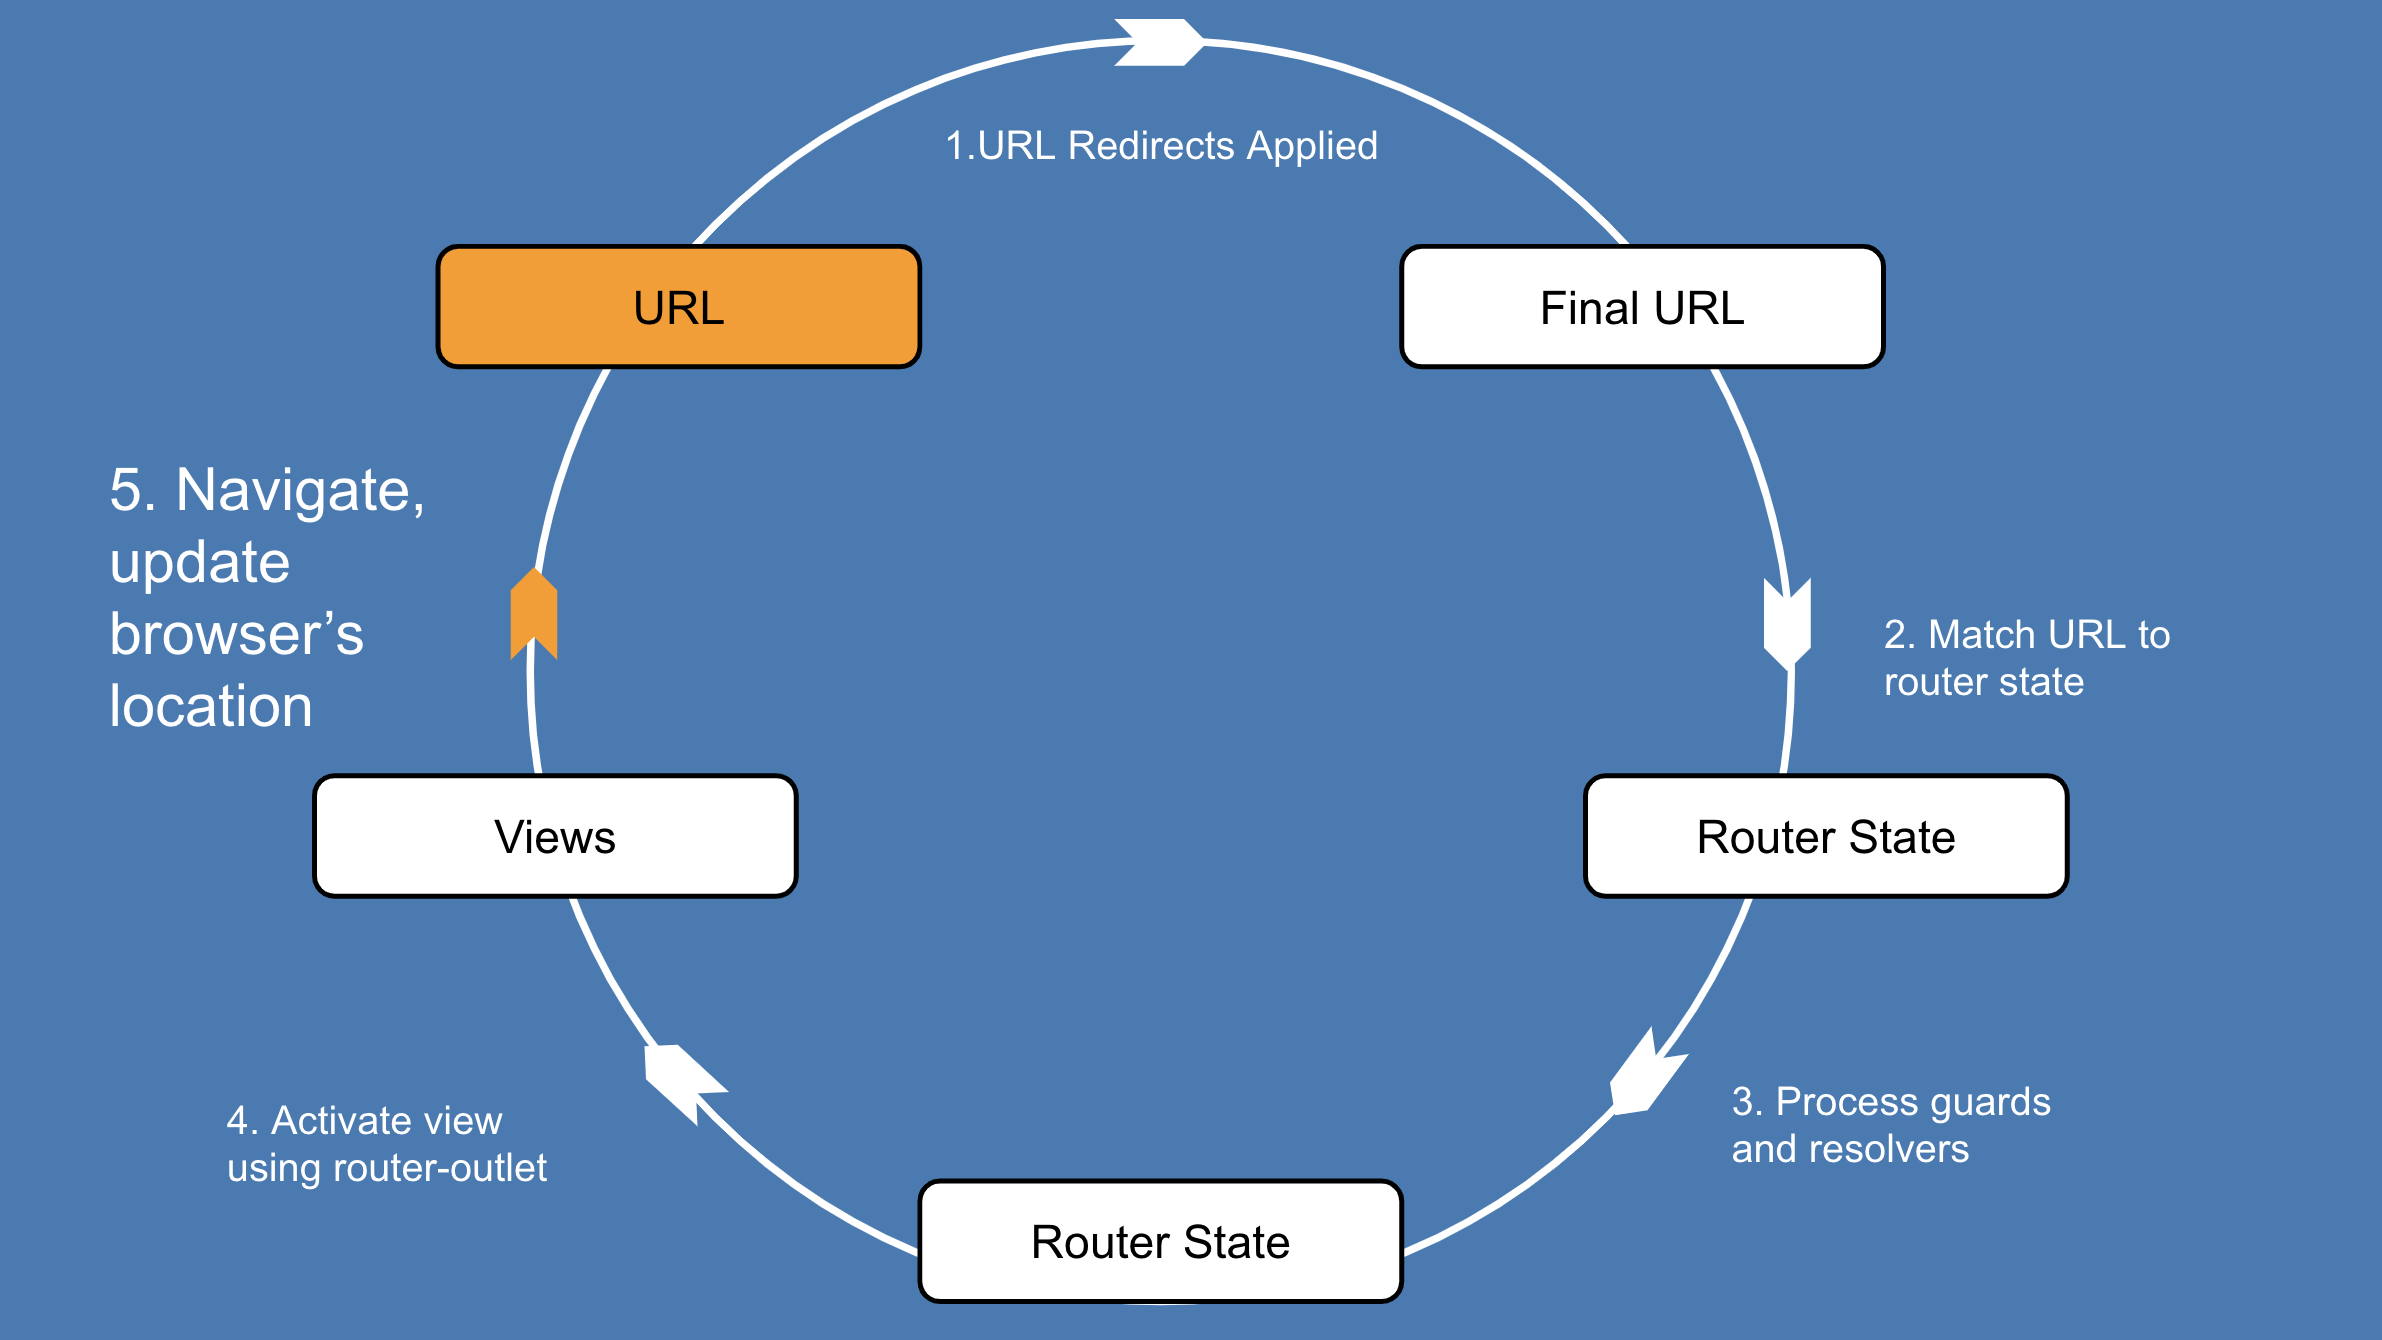
The Router’s navigation lifecycle
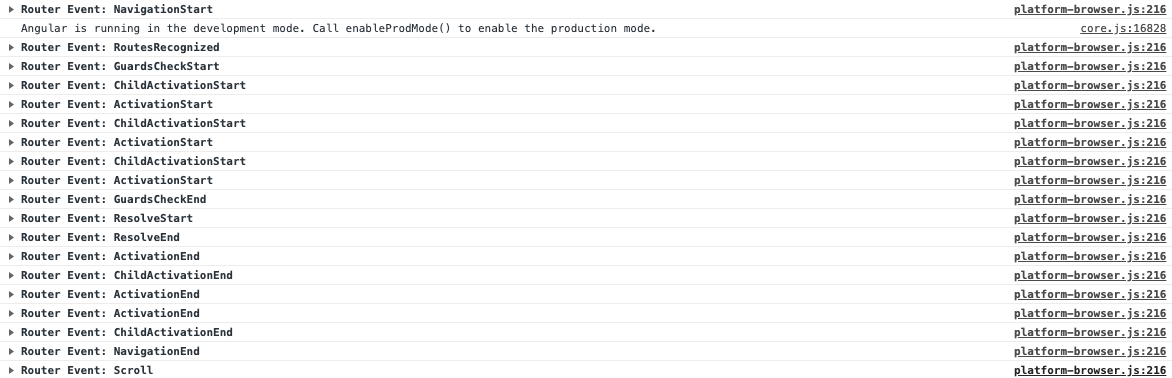
Navigation Cycle and Router Events
A great way to see the navigation cycle is by subscribing to the Router service’s events observable:
constructor(private router: Router) {
this.router.events.subscribe( (event: RouterEvent) => console.log(event))
}
RouterModule.forRoot(ROUTES, {
enableTracing: true
})
During development, you can also pass along an option of enableTracing: true in the router configuration.
The events emitted during a navigation to the /users route:
Navigation events
Navigation Start
Whenever the router detects a click on a router link directive, it starts the navigation cycle. There are imperative means of starting a navigation as well, such as the Router Service’s navigate and navigateByUrl methods.
<a [routerLink]="['/users/1/notes/42']">
Navigate to note 42
</a>
events: NavigationStart
URL Matching, and Redirects
events: RoutesRecognized
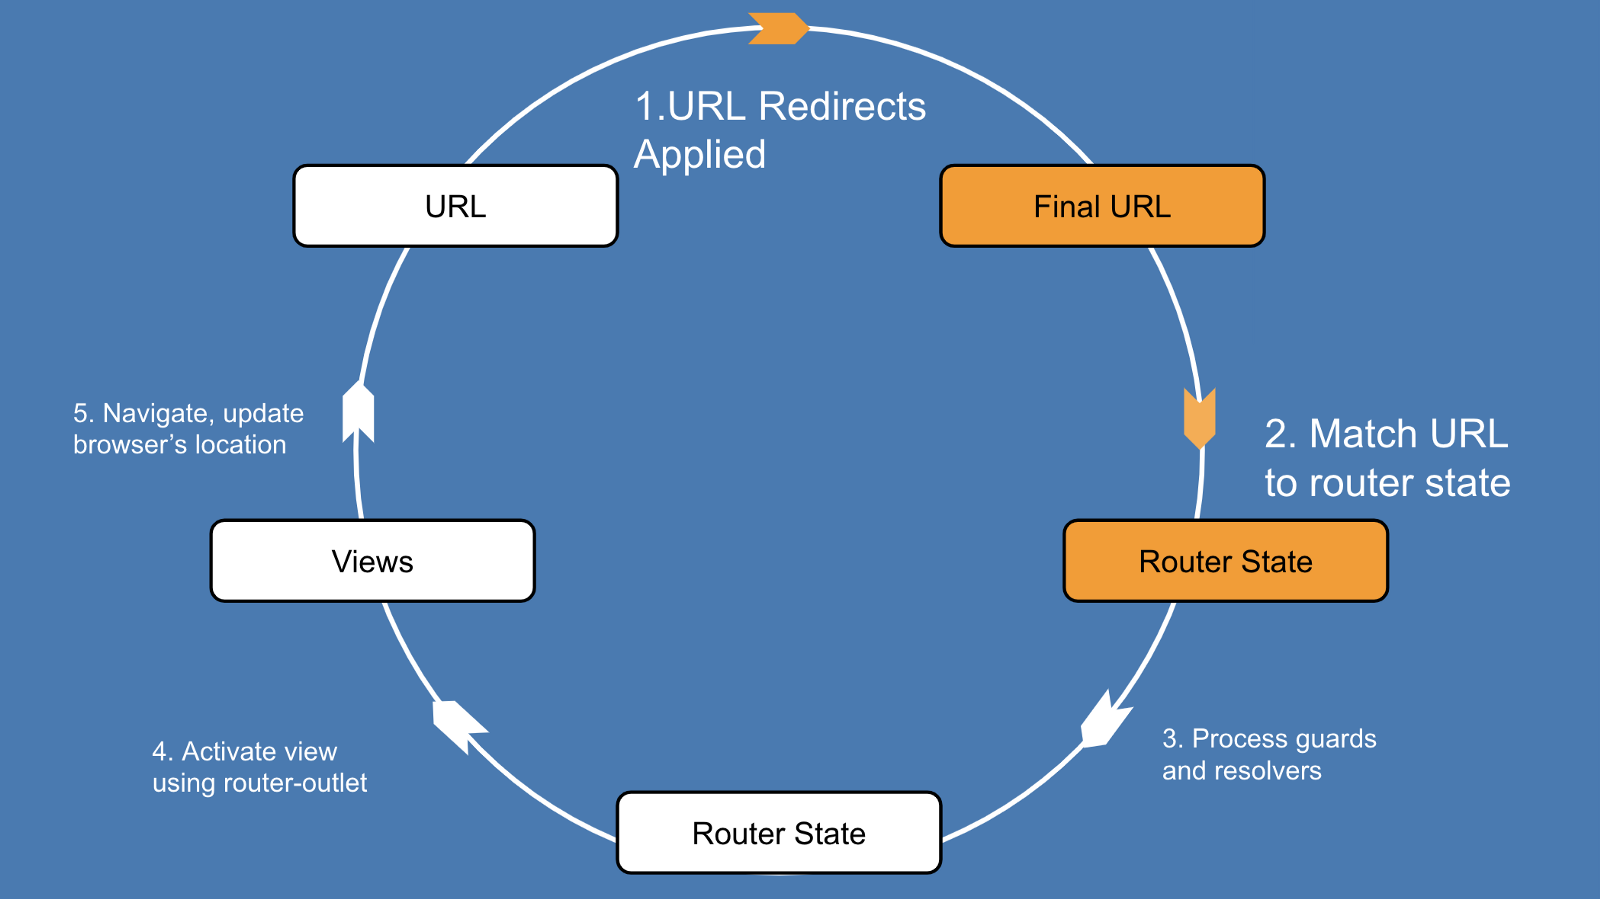
Applying Redirects
The first thing the router does is apply any redirects defined for each segment of the URL.
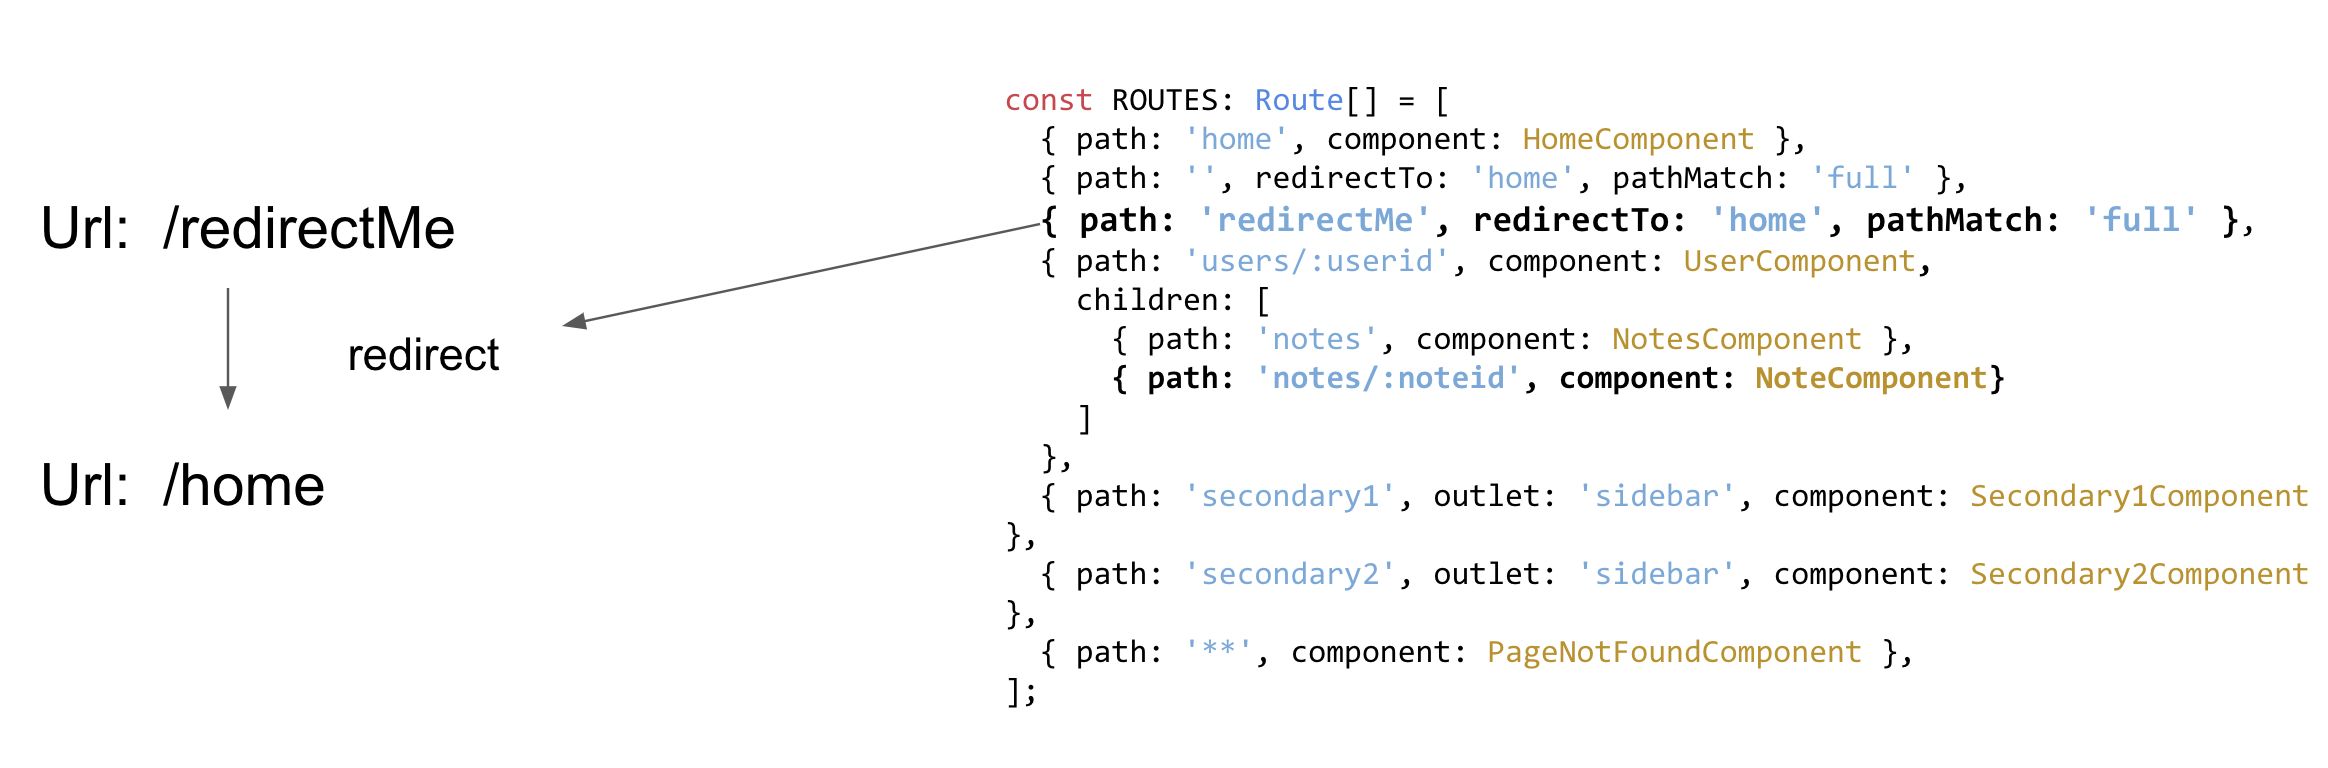
Processing a simple redirect from /redirectMe to /home
Why would you ever want to do this?
Redirect transformations are applied to a URL before it is matched against a router state, which means that redirects are very useful for normalizing URLs or performing refactors.

URL Matching
At the heart of the router lies a powerful URL matching engine. Without the ability to associate URLs with the appropriate set of components to render, navigation within an application would not be possible.
A route can be broadly defined by the following:
- Its path, or, how to match against a URL segment
- Its component, or children, or outlet, etc. What to do once it has matched a URL segment.

Example router configuration to demonstrate matching
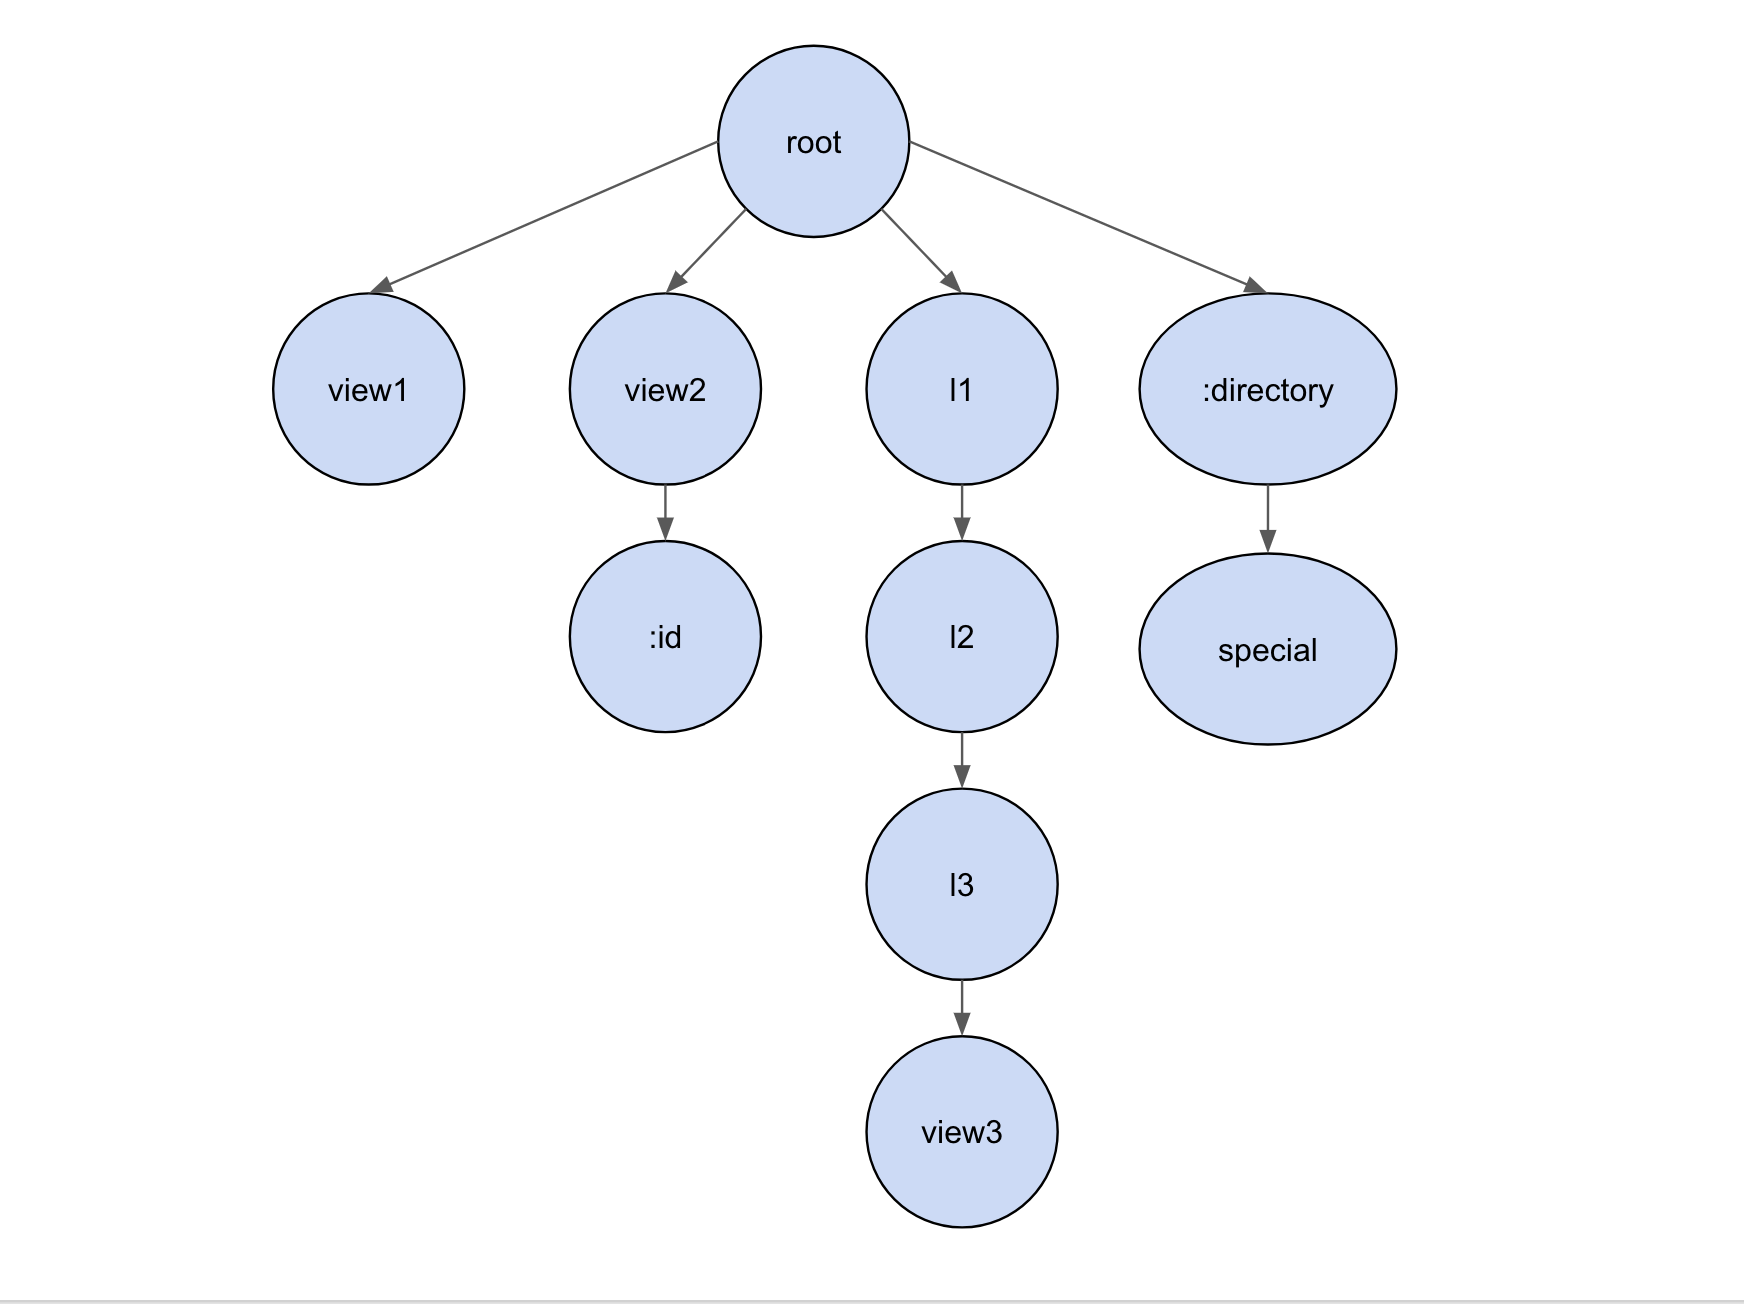
Tree of ROUTES. Nodes display their path properties
Matching the url ‘/l1/l2/l3/view3’
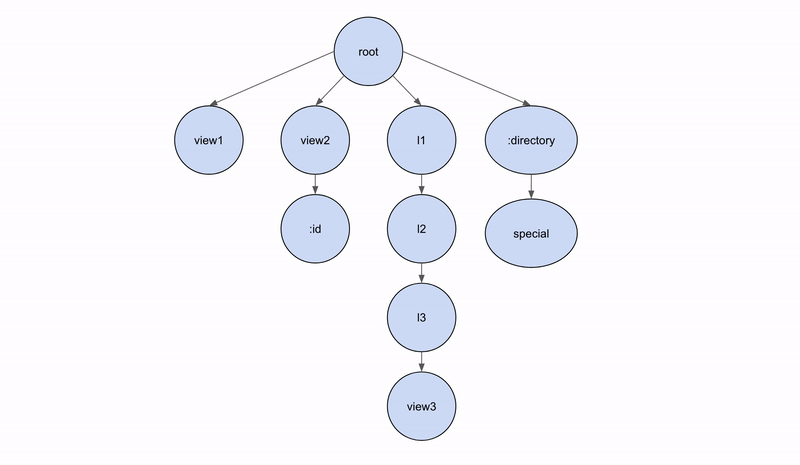
Sometimes, the router will have to backtrack when matching. For instance, consider the path l1/special. In this case:

An example of backtracking
The router takes a depth-first approach to matching URL segments with paths. This means that the first path of routes to fully consume a URL wins.
The router emits a RoutesRecognized event to signal that it has found a match for the URL, and a component to navigate to (Component).
This answers the router’s first question, “What should I navigate to?”
In URLs which have secondary outlets, such as:
'/users/1/notes/42(sidebar:secondary1)'
The outlets are routed independently of each other, so navigating from secondary1 to secondary2 would not affect the part of the URL associated with the primary outlet, /users/1/notes/42.
Route Guards
events: GuardsCheckStart, GuardsCheckEnd
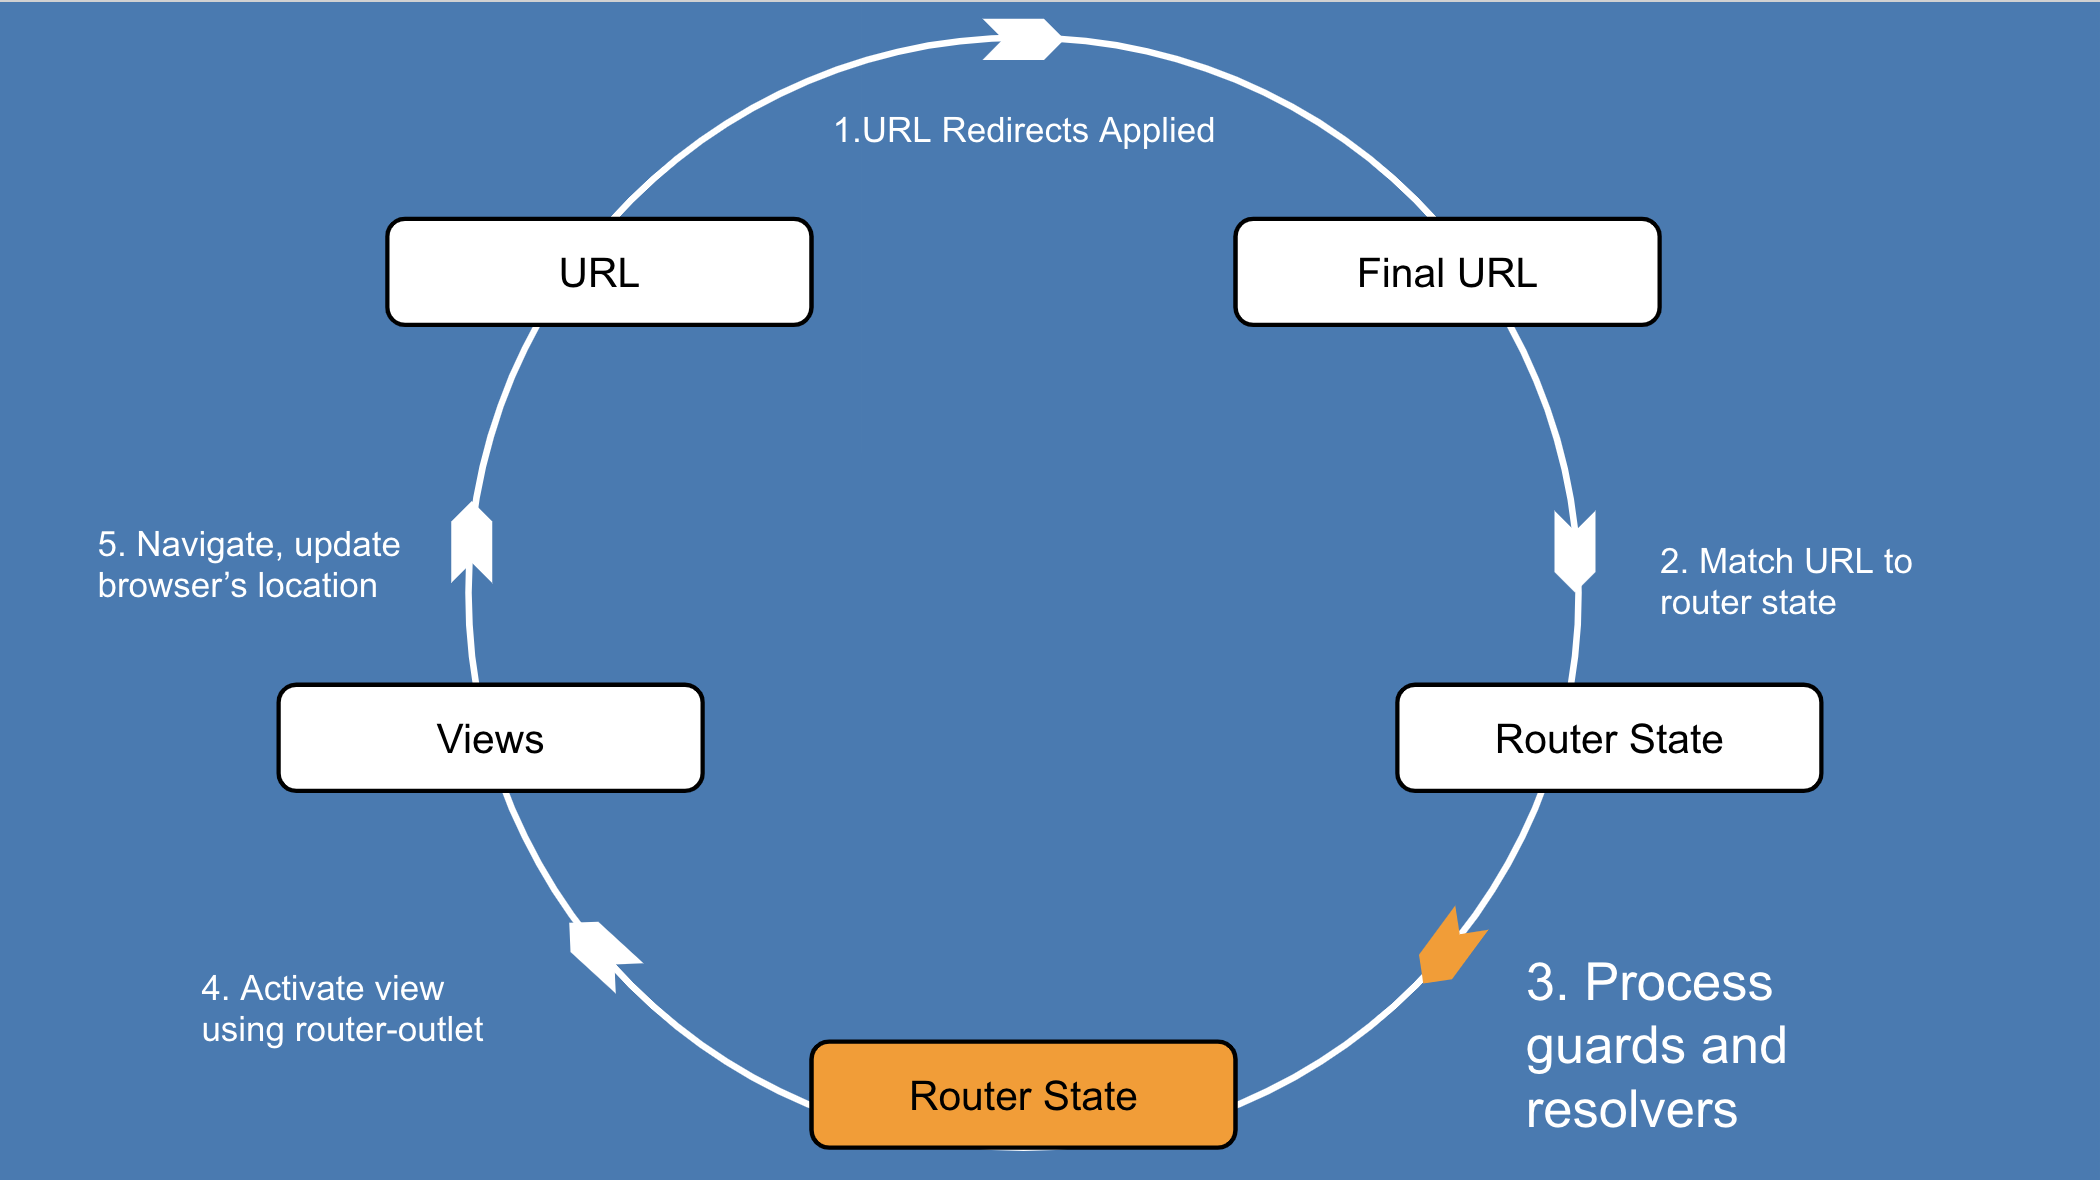
As developers, we use guards to control whether a navigation can occur or not.
{
  path: 'users',
  ...,
  canActivate: [CanActivateGuard],
  canDeactivate: [CanDeactivateGuard]
}
The canActivate guard is run before any data is fetched for the route, since there is no reason to fetch data for a route that shouldn’t be activated.
Once the guard has passed, the router has answered its second question, “Should I perform this navigation?”
Route Resolvers
events: ResolveStart, ResolveEnd
Resolvers let us prefetch component data during routing.
{
   path: 'users',
   ...,
   resolve: {
      user: UserResolver
   }
}
Once the router has processed all resolvers, the next step is to start rendering components using the appropriate router outlets.
The resolver has answered its third question,
“Should I prefetch any data for those components?”
Activating Routes
events: ActivationStart, ActivationEnd, ChildActivationStart, ChildActivationEnd
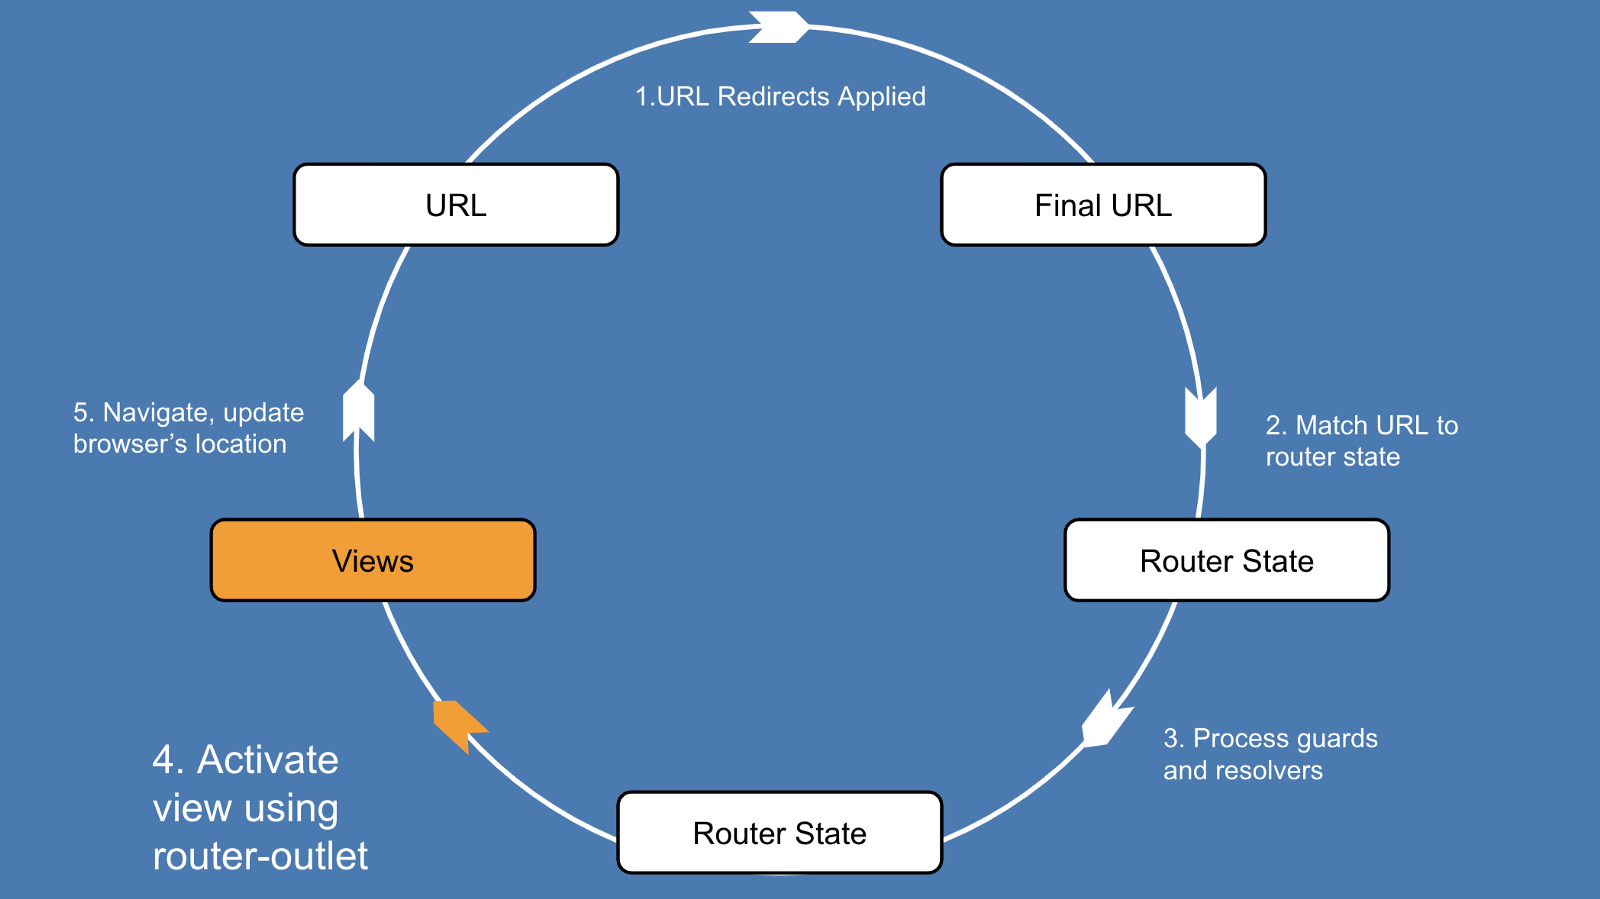
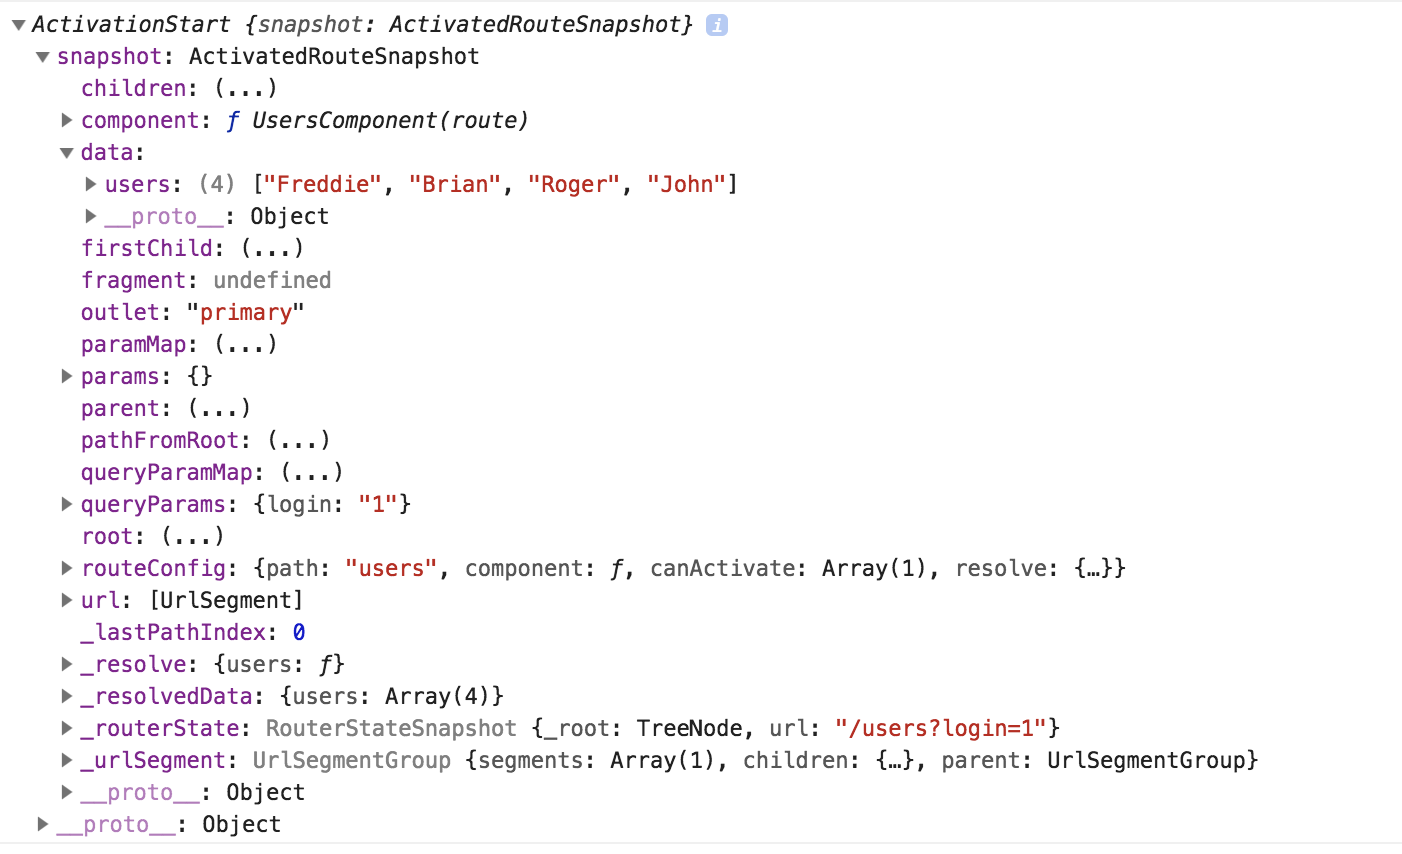
It’s time to activate the components, and display them using a<router-outlet>. The router can extract the information it needs about the component from the tree of ActivatedRouteSnapshots that it built during the previous steps of the navigation cycle.
Updating the URL
Angular Routing
By Igor Tikhonov


