Developing is all about reading docs

Let's Start (no docs)
    <script type="text/javascript" src="http://cdn.webix.com/edge/webix.js"></script>
    <link rel="stylesheet" type="text/css" href="http://cdn.webix.com/edge/webix.css">
<script type="text/javascript" charset="utf-8">
webix.ui({
view:"button",
value:"Click me",
width:200
});
</script>
Let's Start (no docs)
    <script type="text/javascript" src="http://cdn.webix.com/edge/webix.js"></script>
    <link rel="stylesheet" type="text/css" href="http://cdn.webix.com/edge/webix.css">
<script type="text/javascript" src="./testdata.js"></script>
<script type="text/javascript" charset="utf-8">
webix.ui({
view:"datatable",
autoConfig:true,
data:small_film_set
});
</script>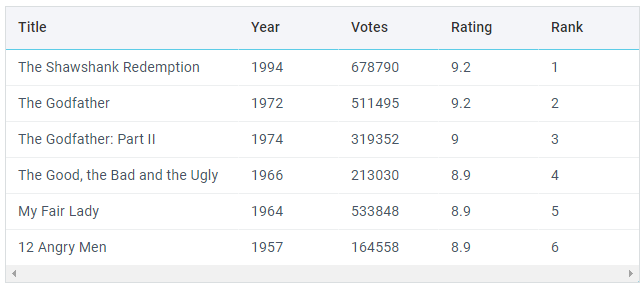
Webix Widgets
Organize the UI
Get user data
Visualize data
Visualize anything
- Layout
- Multiview
- Dashboard
- Datatable
- List
- Chart
- Form
- Text
- Combo
- Calendar
- Barcode
- Template
UI Container
        webix.ready(function(){ //same as body.onload
            webix.ui({
                view:"button",
                container:"test",
                value:"Click me",
                width:200
            });
        });
<body>
    <div id="test"></div>
    <script type="text/javascript" charset="utf-8">
</script>
</body<Only for 'top' views that lie immediately within webix.ui()
View id and Other Properties
    webix.ui({
        view:"button",
        id:"mybutton",
        value:"Click me",
        width:200
    });
    var button = $$("mybutton");
    var config = button.config;
var width = button.config.width;- View id should be unique
- View id is optional
View id and Other Properties
    webix.ui({
        view:"button",
        id:"mybutton",
        value:"Click me",
        width:200
    });

    $$("mybutton").config;


    {
      borderless: true,
      width: 200,
      height: 38,
      gravity: 1,
      view: "button",
      id: "mybutton",
      value: "Click me",
      $topView: true
    }
View Methods
  webix.ui({
    view:"button",
    value:"Click me",
    width:200
  });

  $$("mybutton").setValue("I'm the best button");

  $$("mybutton").config.width = 400;
  $$("mybutton").resize();
All properties and methods are listed in API reference: https://docs.webix.com/api__toc__ui.html
Don't use any methods/properties starting with _ (like '_settings'). They are private.
View Size
  webix.ui({
    view:"button",
    autowidth:true,
    value:"Click me"
});- No size
-
Fixed size
- width:200, height:400
-
Min/max size
- minHeight:200, maxWidth:800
-
Size to content (not for all)
- autowidth:true, autoheight:true
Sizes are in pixels. You should provide numbers for sizes, no strings.
View Styling
  webix.ui({
    view:"button",
    id:"mybutton",
    value:"Click me",
    width:200
  });
View Styling
    <div class="webix_view webix_control webix_el_button webix_secondary"
        view_id="mybutton" style="width: 200px; height: 38px;">
        <div class="webix_el_box" style="width:200px; height:38px">
            <button type="button" class="webix_button">Click me</button>
        </div>
    </div>
.webix_el_box {
box-sizing: border-box;
padding: 3px 2px;
overflow: hidden;
}
.webix_button{
border-radius: 2px;
height: 100%;
width: 100%;
cursor: pointer;
font-family: Roboto, sans-serif;
font-size: 16px;
font-weight: 500;
letter-spacing: 0px;
outline: none;
}
.webix_secondary .webix_button {
background: #F4F5F9;
color: #1CA1C1;
}HTML:
CSS:
View Styling
<style>
    .webix_button{
      border:1px solid green;
      color:green;
    }
    .webix_secondary .webix_button{
      background-color:#90ee90;
    }
</style>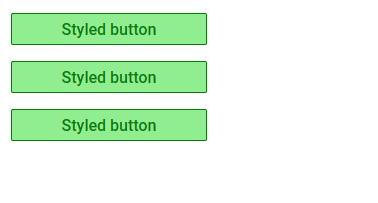
View Styling
.greenbutton .webix_button{
    border:1px solid green;
    color:green;
}
.greenbutton .webix_button{
    background-color:#90ee90;
}
webix.ui({
view:"button", value:"Styled button", css:"greenbutton"
});* For most cases styling should not touch margins/paddings and sizes.
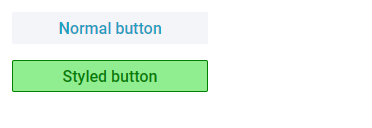
View Styling
<div class="webix_view webix_control webix_el_button webix_secondary greenbutton"
view_id="mybutton" style="width: 200px; height: 38px;">
<div class="webix_el_box" style="width:200px; height:38px">
<button type="button" class="webix_button">Click me</button>
</div>
</div>Where to find class names:
- inspect DOM with browser dev tools
- use CSS image maps in docs: https://docs.webix.com/desktop__css_image_maps.html
webix.ui({
    view:"button", value:"Styled button", css:"greenbutton"
});Practice Makes Perfect
- Get files
- Create and style a button
- Inspect its HTML and CSS
Layout: Rows and Columns
webix.ui({
    view:"layout",
    cols:[
        { view:"button", value:"Button 1"},
        { view:"button", value:"Button 2"}
    ]
});
webix.ui({
view:"layout",
rows:[
{ view:"button", value:"Button 1"},
{ view:"button", value:"Button 2"}
]
}); webix.ui({
// view:"layout" is optional
margin:10,
padding:30,
rows:[
{ view:"button", value:"Button 1"},
{ view:"button", value:"Button 2"}
]
});- margin
- padding, paddingX, paddingY
cols:
rows:
Layout: Elements
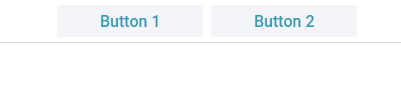
webix.ui({
    view:"toolbar",
    elements:[
        { view:"button", value:"Button 1"},
        { view:"button", value:"Button 2"}
    ]
});
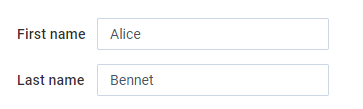
webix.ui({
    view:"form",
    elements:[
        { view:"text", value:"Alice"},
        { view:"text", value:"Bennet"}
    ]
});
Toolbar:
Form:
- Toolbar elements are cols
- Form elements are rows
- It's valid to use rows or cols instead of elements
View Sizes in Layout
    webix.ui({
        cols:[
            { view:"template", template:"Column 1"},
            { template:"Column 2"} // view:"template" is optional
        ]
});-
No sizes
- autocalculation, responsiveness
-
Fixed sizes
- for all or some views
-
Proportions: gravity
- for all or some views
Spacer and Resizer
    webix.ui({
        cols:[
            { template:"Column 1"},
            { template:"Column 2"},
            {}
        ]
});- Shows nothing
- Takes space
    webix.ui({
        cols:[
            { template:"Column 1"},
            { view:"resizer"},
            { template:"Column 2"}
        ]
});- Can be dragged by user
Nested Layouts
    webix.ui({
        rows:[
            { template:"Row 1"},
            { cols:[ // Row 2
                { template:"Column 1"},
                { template:"Column 2"},
            ]},
            { template:"Row 2"},
        ]
    });
var row2 = {
cols:[
{ template:"Column 1"},
{ template:"Column 2"}
]
};
webix.ui({
rows:[
{ template:"Row 1"},
row2,
{ template:"Row 2"}
]
});We can do better ;)
First App!
    var side = {
        rows:[
          {
            view:"list",
            id:"mylist",
            width:200,
            data:[ "Start", "Data", "Profile" ]
          },
          { },
          { view:"button", id:"mybutton", value:"Log out"}
        ]
    };

    var main = {
        rows:[
            { template:"Data"},
            { template:"Controls", height:200}
        ]
    };

    webix.ui({
       id:"app",
       cols:[side, main]
});Practice Makes Perfect
- Create a simple layout
- Inspect views with a debug menu (right+click)
- Work in console:
- Call view methods:
- $$(id).getParentView();
- $$(id).getChildViews();
- $$(id).queryView("list");
- Log view properties: $$(id).config;
- Call view methods:
Webix How-To
- Use debug version of Webix
- Use Webix toolkit
- Draw basic layout
- Work with some section
- Keep UI blocks separately
Webix Toolkit
- webix.event()
- webix.extend()
- webix.copy()
- webix.ajax().get()
- webix.ajax.post()
Date and Localization
- webix.Date.add()
- webix.Date.equal()
- webix.i18n.dateFormatStr()
Helpful Links
Webix topics:
Task for practice: click here
Follow-up text: click here
1-1. Webix Basics. UI Layouts.
By ihelga
1-1. Webix Basics. UI Layouts.
How to create your first Webix app.


