Build and deploy a basic webapp in 21 minutes

Jay Landro
What are we building?
Today we are going to build a secure and performant web application which lists side dish ideas.
We will call our application
Snack App

What you will need
- Laptop
- VS Code (or other editor)
- GitHub Account
- Netlify Account
Create a repo in GitHub
Open terminal or powershell...
Mac: ⌘ + space then type terminal
Windows: Win key + s then search powershell
And 🤖 Clone the repo
Git not found? See below ↓
Install Git
-
git config --global user.name "Tamara Hartett" -
git config --global user.email "tamara@kam.com"
Configure Git
- Windows install
-
Mac install with homebrew
brew install git -
Linux
sudo apt-get install git
🚀 Let's go back top and clone! ⬆️
🏡 Sweet home...
Index.html is the foundation on which nearly every website and web application is built.
It lives in the root directory of our webserver and contains the home content as well as site title, links to CSS styles and JavaScript files for interactivity
Many sites only have this single HTML page, birthing the name
single page apps (SPA)
<!DOCTYPE html>
<html lang="en">

<head>
    <meta charset="UTF-8">
    <meta http-equiv="X-UA-Compatible" content="IE=edge">
    <meta name="viewport" content="width=device-width, initial-scale=1.0">
    <title>Snack App</title>
    <link rel="stylesheet" href="css/style.css">
    <script src="js/main.js" type="text/javascript"></script>
</head>

<body>
    <main>
        <h1>Snacks sweet snacks</h1>
    </main>
</body>

</html>
Create & edit index.html
- In terminal cd to the directory we cloned earlier
- Type code index.html this opens up VS code in the directory with a new file named index.html
- In VS Code type html:5 and press tab
- Command + s to save the file

Install Netlify CLI
Netlify CLI is a command line program which allows us to run our application locally as well as linking our GitHub repo to create a new Netlify site. Netlify is a webhost that provides free build pipeline, hosting, SSL certificates as well as serverless functions.
From the terminal enter:
npm install netlify-cli -g
Then, start up your site:
netlify dev
Visit your new homepage at the url http://localhost:8888
Open index.html in VS Code and
add CONTENT 📝
<!DOCTYPE html>
<html lang="en">

<head>
    <meta charset="UTF-8">
    <meta http-equiv="X-UA-Compatible" content="IE=edge">
    <meta name="viewport" content="width=device-width, initial-scale=1.0">
    <title>Snack App 🍕</title>

    <style>
        html {
            min-height: 100%;
        }

        body {
            font-family: monospace;
            background: #D7E71E;
            background: linear-gradient(to bottom right, #D7E71E, #AA4B83);
            height: 100%;
        }
    </style>
</head>

<body>
    <h1>Snack App</h1>

    <main class="snack-content"></main>
</body>

</html>
Create & deploy new site
Fetching the snacks with JS
const loadSnacks = async () => {
  try {
    const snackCategories = await fetch(
      "https://www.themealdb.com/api/json/v1/1/filter.php?c=Side"
    );
    const { meals } = await snackCategories.json();

    return meals;
  } catch (error) {
    console.error(error);
  }
};

const render = (content) => {
  return content
    .map(
      (item) =>
        `<figure><img src=${item.strMealThumb}><figcaption>${item.strMeal}</figcaption></figure>`
    )
    .join(" ");
};

window.addEventListener("DOMContentLoaded", (event) => {
  const resultsContainer = document.querySelector(".snack-results");

  loadSnacks().then((sides) => (resultsContainer.innerHTML = render(sides)));
});
Create a new file called main.js containing this
Link the script in index.html
<head>
    <meta charset="UTF-8">
    <meta http-equiv="X-UA-Compatible" content="IE=edge">
    <meta name="viewport" content="width=device-width, initial-scale=1.0">
    <title>Snack App 🍕</title>

    <script src="main.js"></script>

    <style>
        html {
            min-height: 100%;
        }

        body {
            font-family: monospace;
            background: #D7E71E;
            background: linear-gradient(to bottom right, #D7E71E, #AA4B83);
            height: 100%;
        }
    </style>
</head>
Deploy 🚀
Create serverless function
This serverless function will keep track of snacks a user has added to their list.
It consists of a JS file to read and write to a JSON file we will be using as a database.
Default directory for functions is netlify/functions
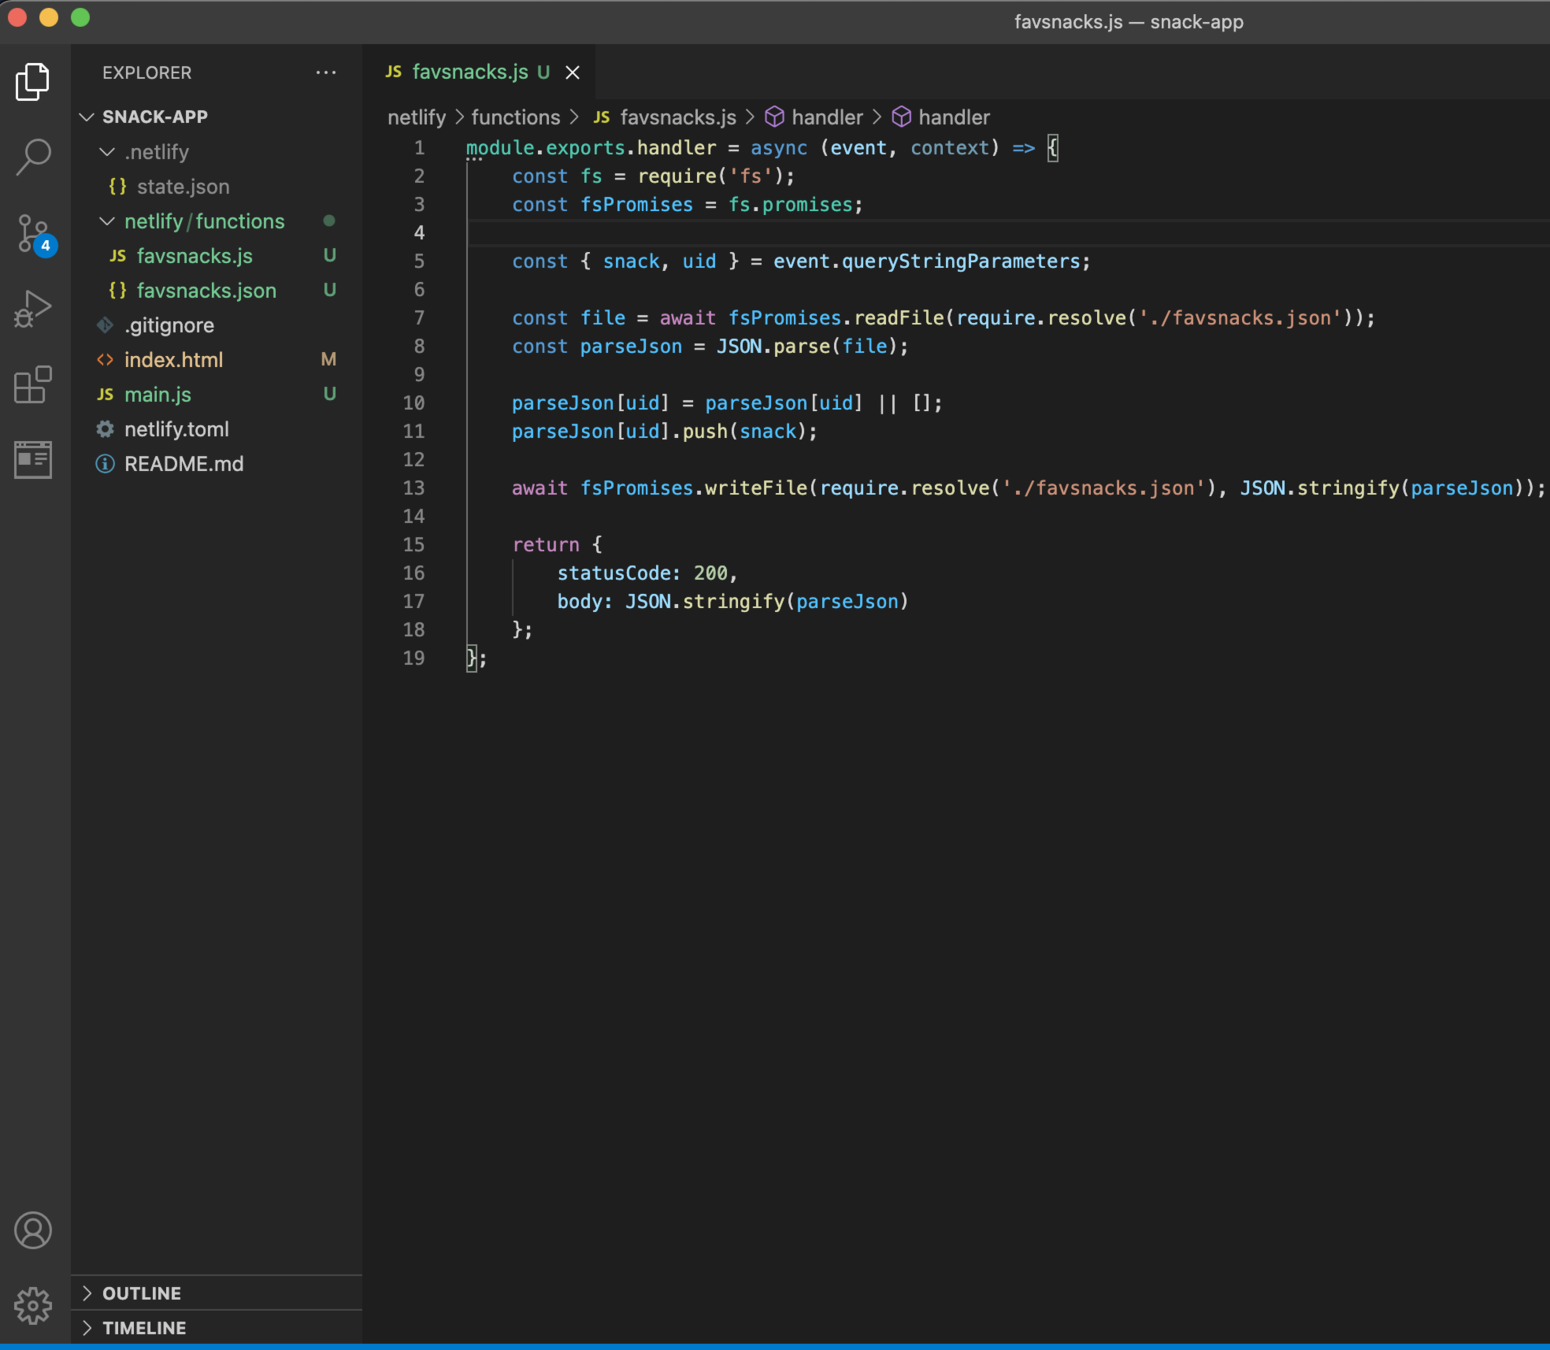
favsnacks.js
module.exports.handler = async (event, context) => {
    const fs = require('fs');
    const fsPromises = fs.promises;

    const { snack, uid } = event.queryStringParameters;

    const file = await fsPromises.readFile(require.resolve('./favsnacks.json'));
    const parseJson = JSON.parse(file);

    parseJson[uid] = parseJson[uid] || [];
    parseJson[uid].push(snack);

    await fsPromises.writeFile(require.resolve('./favsnacks.json'), JSON.stringify(parseJson));

    return {
        statusCode: 200,
        body: JSON.stringify(parseJson)
    };
};
favsnacks.json
{}Application flow
- User visits site https://snack-app-verica.netlify.app
- User selects sides/snacks they want to eat
- Each time the user selects a snack, we call a serverless function which adds the entry to our JSON DB
Update main.js
const loadSnacks = async () => {
    try {
        const snackCategories = await fetch(
            "https://www.themealdb.com/api/json/v1/1/filter.php?c=Side"
        );
        const { meals } = await snackCategories.json();

        return meals;
    } catch (error) {
        console.error(error);
    }
};

const favSnack = async (id) => {
    try {
        const userId = localStorage.getItem('uuid');
        const favSnackItem = await fetch(
            `/.netlify/functions/favsnacks?snack=${id}&uid=${userId}`, {
            method: "POST"
        });

        return favSnackItem;
    } catch (error) {
        console.error(error);
    }
};

const render = (content) => {
    return content
        .map(
            (item) =>
                `<figure>
                    <img src=${item.strMealThumb}>
                    <figcaption>${item.strMeal} | <input type="checkbox" onclick="favSnack(${item.idMeal})">Add to eatlist</figcaption>
                </figure>`
        )
        .join(" ");
};

const registerUser = () => {
    if (!localStorage.getItem('uuid')) {
        var array = new Uint32Array(1);
        const userId = crypto.getRandomValues(array);

        localStorage.setItem('uuid', userId.toString());
    }
}

window.addEventListener("DOMContentLoaded", (event) => {
    registerUser();

    const resultsContainer = document.querySelector(".snack-content");

    loadSnacks().then((sides) => (resultsContainer.innerHTML = render(sides)));
});
How to basic webapp
By jaylandro