jigsawye@台中前端社群
Webpack
Who Am I
- 臺中科技大學資工大四
- Web Developer
- 台中前端社群跑龍套講者
-
laravel-taiwan/docs contributor
-
React, Redux -
Laravel - 內耳失衡成就(1/1)
葉裕安 Evan Ye
@jigsawye
jigsawye.com
jigsaw.ye@gmail.com
github.com/jigsawye
facebook.com/jigsaw.ye
注意!
這不是上課,是「聚會」
所以不會從頭到尾教會你東西。
只是開個頭,讓大家討論學習!
現世的王道組合


套件管理
預處理器(Babel)
下一代 JavaScript
資源處理


輸出只有 js 與 image(甚至沒有)
Demo
首要之事
$ npm i -g webpack webpack-dev-server

// npm install --global webpack webpack-dev-server
先安裝 Webpack 就對了
你必須確定已經安裝 node.js
前言
$ browserify main.js > bundle.js
# 會同等於
$ webpack main.js bundle.js
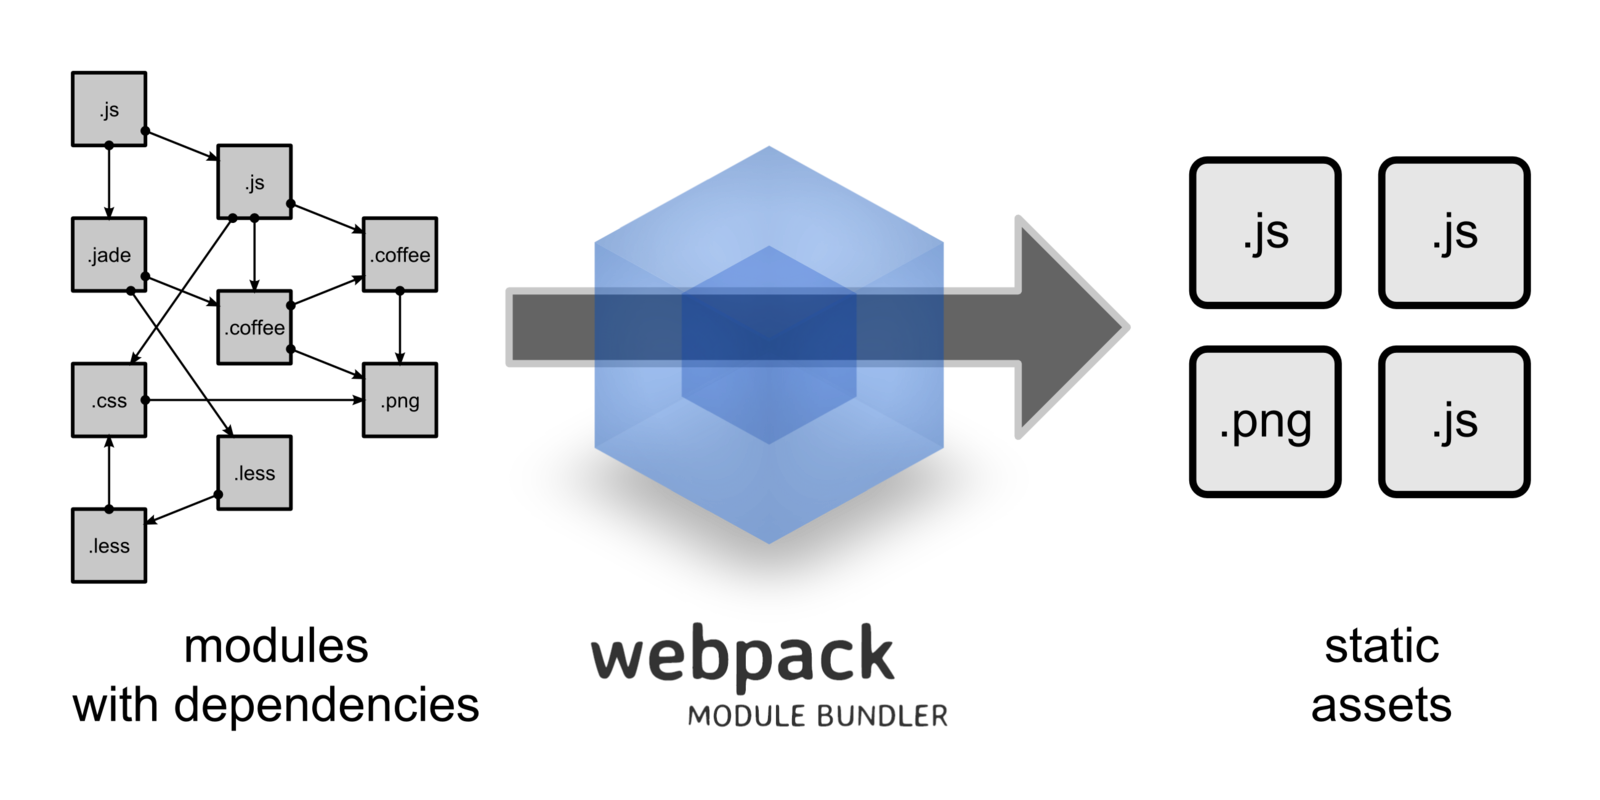
Webpack 是一個如同 Grunt 與 Gulp 的前端建構(Build)系統。
可以像 Browserify 一般將它作為模組打包器
(module bundler)
// webpack.config.js
module.exports = {
  entry: './main.js',
  output: {
    filename: 'bundle.js'
  }
};設定檔:webpack.config.js
透過設定檔執行
$ webpack一些你應該知道的 command-line 選項
-
webpack – 在 development 環境 build 一次
-
webpack -p – 在 production 環境 build 一次(壓縮)
-
webpack --watch – 監控並自動 build
-
webpack -d – 包含 source maps
-
webpack --colors – 讓它更美觀
你可以撰寫 package.json 檔案的 scripts 區塊
// package.json
{
  // ...
  "scripts": {
    "dev": "webpack-dev-server --devtool eval --progress --colors",
    "deploy": "NODE_ENV=production webpack -p"
  },
  // ...
}Demo01:進入點檔案(source)
// main.js
document.write('<h1>Hello World</h1>');
進入點檔案會被 Webpack 讀取並 build 成 bundle.js
例如,main.js 是個進入點檔案
Webpack 會遵循 webpack.config.js 來 build bundle.js
index.html
<html>
  <body>
    <script type="text/javascript" src="bundle.js"></script>
  </body>
</html>
// webpack.config.js
module.exports = {
entry: './main.js',
output: {
filename: 'bundle.js'
}
};執行伺服器,瀏覽 http://127.0.0.1:8080。
$ webpack-dev-serverDemo02:多個進入點檔案(source)
// main1.js
document.write('<h1>Hello World</h1>');

// main2.js
document.write('<h2>Hello Webpack</h2>');
多個進入點檔案是可行的
這在多頁的 app 相當的有用
webpack.config.js
index.html
<html>
  <body>
    <script src="bundle1.js"></script>
    <script src="bundle2.js"></script>
  </body>
</html>
module.exports = {
entry: {
bundle1: './main1.js',
bundle2: './main2.js'
},
output: {
filename: '[name].js'
}
};Demo03:Babel-loader(source)
index.html
main.jsx 是個 JSX 檔案
import React from 'react';
import ReactDOM from 'react-dom';

ReactDOM.render(
  <h1>Hello, world!</h1>,
  document.querySelector('#wrapper')
);
<html>
<body>
<div id="wrapper"></div>
<script src="bundle.js"></script>
</body>
</html>webpack.config.js
module.exports = {
  entry: './main.jsx',
  output: {
    filename: 'bundle.js'
  },
  module: {
    loaders:[
      {
        test: /\.js[x]?$/,
        exclude: /node_modules/,
        loader: 'babel-loader?presets[]=es2015&presets[]=react'
      },
    ]
  }
};
module.loaders 部份被使用於指定 loaders 上方的程式片段使用了 babel-loader 它還同時需要 babel-preset-es2015 與 babel-preset-react 來轉譯 ES6 及 React
你也可以使用其他方式來設定 babel 的 query 選項
module: {
  loaders: [
    {
      test: /\.jsx?$/,
      exclude: /node_modules/,
      loader: 'babel',
      query: {
        presets: ['es2015', 'react']
      }
    }
  ]
}Demo04:CSS-loader(source)
Webpack 讓你可以 在 JS 檔案中 require CSS,並使用 CSS-loader 來預處理 CSS 檔案
index.html
<html>
  <head>
    <script type="text/javascript" src="bundle.js"></script>
  </head>
  <body>
    <h1>Hello World</h1>
  </body>
</html>require('./app.css');main.js
body {
  background-color: blue;
}
app.css
webpack.config.js
module.exports = {
  entry: './main.js',
  output: {
    filename: 'bundle.js'
  },
  module: {
    loaders:[
      { test: /\.css$/, loader: 'style-loader!css-loader' },
    ]
  }
};
這邊需要使用兩種 loaders 來轉譯 CSS 檔案
- CSS-loader 讀取 CSS 檔案
- Style-loader 寫入 Style 標籤至 HTML 頁面
- 不同的 loaders 使用驚嘆號(!)來連接
webpack.config.js
module.exports = {
  entry: './main.js',
  output: {
    filename: 'bundle.js'
  },
  module: {
    loaders:[
      { test: /\.css$/, loaders: ['style-loader', 'css-loader'] },
    ]
  }
};
也可以使用陣列來使用多個 loaders
(注意:key 是 loaders)
在執行伺服器之後
index.html 會擁有 inline style
<head>
  <script type="text/javascript" src="bundle.js"></script>
  <style type="text/css">
    body {
      background-color: blue;
    }
  </style>
</head>
Demo05:Image loader(source)
var img1 = document.createElement("img");
img1.src = require("./small.png");
document.body.appendChild(img1);

var img2 = document.createElement("img");
img2.src = require("./big.png");
document.body.appendChild(img2);
Webpack 也可以在 JS 檔案中 require 圖片
main.js
<html>
  <body>
    <script type="text/javascript" src="bundle.js"></script>
  </body>
</html>
index.html
webpack.config.js
module.exports = {
  entry: './main.js',
  output: {
    filename: 'bundle.js'
  },
  module: {
    loaders:[
      { test: /\.(png|jpg)$/, loader: 'url-loader?limit=8192' }
    ]
  }
};在執行伺服器之後 small.png 及 big.png 會變成下方的 URLs
<img src="data:image/png;base64,iVBOR...uQmCC">
<img src="4853ca667a2b8b8844eb2693ac1b2578.png">
Demo06:CSS Module(source)
css-loader?modules(查詢參數 modules)
會開啟 CSS Modules 功能

這代表你 module 的 CSS 預設會是 local scoped 的 CSS
你可以在 selector 及/或 rules 使用 :global(...)
切換成關閉(更多資訊)
app.css
index.html
<html>
<body>
  <h1 class="h1">Hello World</h1>
  <h2 class="h2">Hello Webpack</h2>
  <div id="example"></div>
  <script src="./bundle.js"></script>
</body>
</html>
.h1 {
  color:red;
}

:global(.h2) {
  color: blue;
}
main.jsx
var React = require('react');
var ReactDOM = require('react-dom');
var style = require('./app.css');

ReactDOM.render(
  <div>
    <h1 className={style.h1}>Hello World</h1>
    <h2 className="h2">Hello Webpack</h2>
  </div>,
  document.getElementById('example')
);
webpack.config.js
module.exports = {
  entry: './main.jsx',
  output: {
    filename: 'bundle.js'
  },
  module: {
    loaders:[
      {
        test: /\.js[x]?$/,
        exclude: /node_modules/,
        loader: 'babel-loader',
        query: {
          presets: ['es2015', 'react']
        }
      },
      {
        test: /\.css$/,
        loader: 'style-loader!css-loader?modules'
      }
    ]
  }
};
執行伺服器
$ webpack-dev-server瀏覽 http://127.0.0.1:8080
-
只有第二個 h1 是紅色,因為它的 CSS 為 local scoped -
兩個 h2 都是藍色,因為它的 CSS 是 global scoped
Demo07:UglifyJs Plugin(source)
var longVariableName = 'Hello';
longVariableName += ' World';
document.write('<h1>' + longVariableName + '</h1>');
Webpack 擁有 plugin 系統來擴增它的功能 例如,UglifyJs Plugin 會壓縮輸出的(bundle.js) JS 程式碼
main.js
<html>
<body>
  <script src="bundle.js"></script>
</boby>
</html>
index.html
webpack.config.js
var webpack = require('webpack');
var uglifyJsPlugin = webpack.optimize.UglifyJsPlugin;
module.exports = {
  entry: './main.js',
  output: {
    filename: 'bundle.js'
  },
  plugins: [
    new uglifyJsPlugin({
      compress: {
        warnings: false
      }
    })
  ]
};在執行伺服器之後,main.js 會被壓縮成這樣
var o="Hello";o+=" World",document.write("<h1>"+o+"</h1>")Demo08:HTML Webpack Plugin 及
Open Browser Webpack Plugin(source)
此 demo 為你展示如何載入第三方 plugins
-
html-webpack-plugin 會為你建立 index.html
-
open-browser-webpack-plugin 會在 Webpack 載入後
打開一個新的瀏覽器分頁
webpack.config.js
main.js
document.write('<h1>Hello World</h1>');var HtmlwebpackPlugin = require('html-webpack-plugin');
var OpenBrowserPlugin = require('open-browser-webpack-plugin');
module.exports = {
entry: './main.js',
output: {
filename: 'bundle.js'
},
plugins: [
new HtmlwebpackPlugin({
title: 'Webpack-demos'
}),
new OpenBrowserPlugin({
url: 'http://localhost:8080'
})
]
};執行 webpack-dev-server
$ webpack-dev-server現在你不必手動撰寫 index.html
也不必自己打開瀏覽器
Webpack 會為你做這些事
Demo09: 環境標記(flags)(source)
document.write('<h1>Hello World</h1>');

if (__DEV__) {
  document.write(new Date());
}
你可以透過環境標記,讓某些程式碼只在開發環境時啟用
main.js
<html>
<body>
  <script src="bundle.js"></script>
</body>
</html>
index.html
webpack.config.js
var webpack = require('webpack');

var devFlagPlugin = new webpack.DefinePlugin({
  __DEV__: JSON.stringify(JSON.parse(process.env.DEBUG || 'false'))
});

module.exports = {
  entry: './main.js',
  output: {
    filename: 'bundle.js'
  },
  plugins: [devFlagPlugin]
};
# Linux & Mac
$ env DEBUG=true webpack-dev-server
# Windows
$ DEBUG=true webpack-dev-server現在傳遞環境變數至 webpack
Demo16:React router(source)
此 demo 使用 webpack 來 build React-router 的官方範例
讓我們想像一個小型 app
它擁有 dashboard、inbox 及 calendar
+---------------------------------------------------------+
| +---------+ +-------+ +--------+                        |
| |Dashboard| | Inbox | |Calendar|      Logged in as Jane |
| +---------+ +-------+ +--------+                        |
+---------------------------------------------------------+
|                                                         |
|                        Dashboard                        |
|                                                         |
|                                                         |
|   +---------------------+    +----------------------+   |
|   |                     |    |                      |   |
|   | +              +    |    +--------->            |   |
|   | |              |    |    |                      |   |
|   | |   +          |    |    +------------->        |   |
|   | |   |    +     |    |    |                      |   |
|   | |   |    |     |    |    |                      |   |
|   +-+---+----+-----+----+    +----------------------+   |
|                                                         |
+---------------------------------------------------------+
$ webpack-dev-serverAny Question?
Thanks For Listening!
每18至24個月,前端都會難一倍
Webpack@Tcf2e
By jigsawye
Webpack@Tcf2e
- 2,199


