Working with Developers
How to make art and have a happy relationship with your developer
Create Transparent PNGs
Don't give them PSD files.
Create Art at 2x if possible.
Create vector art or @2x art assets if possible. If you make art too small, it won't look good on retina screens.
(also, it should be exactly 2x, not some weird multiple like 1.75x)
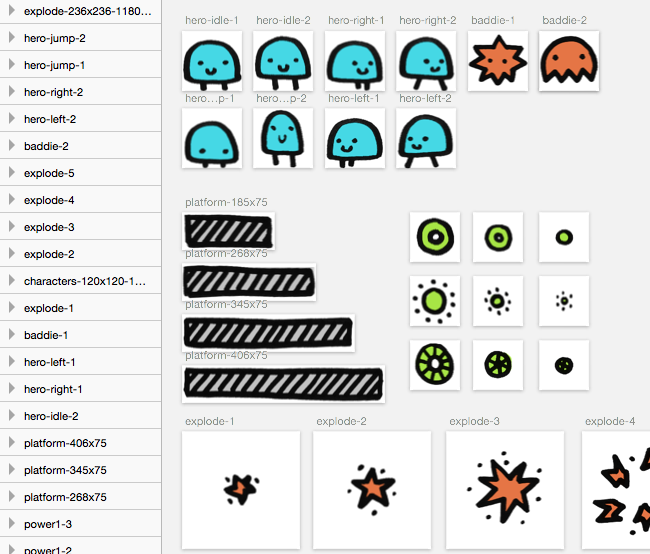
Name your files nicely.
hero-120x120-600x120.png
hero-walk-1.png
Not: image-23.png
hero-1-revised.png
Don't change the file name.
If you make updates to the art, send a new zipped folder. Don't rename stuff in the middle of the dev workflow.
Use a Consistent Grid
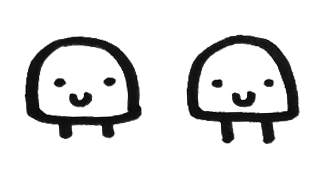
Every asset in an animated sequence should have the same PNG size.


2D Game Art
Line Art to Spritesheet Workflow
Goma Games
stem.gomagames.com
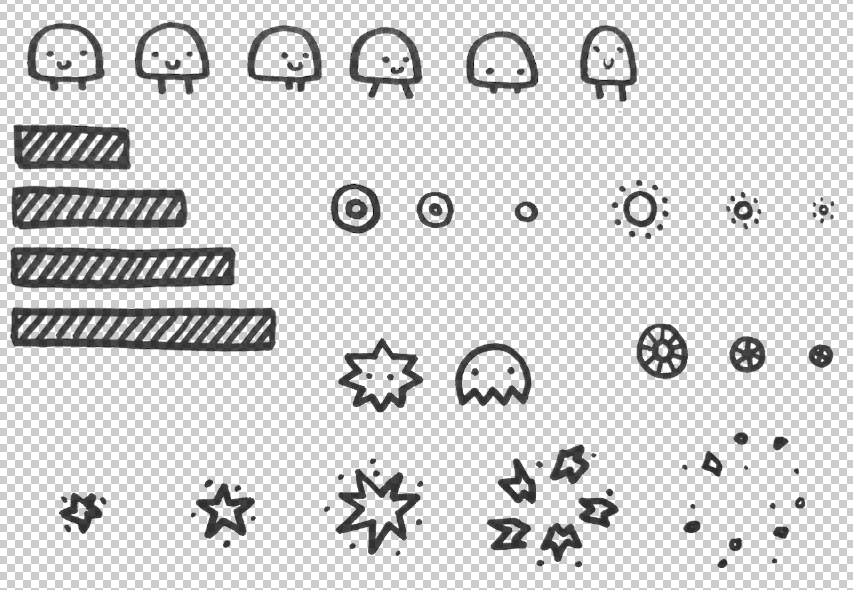
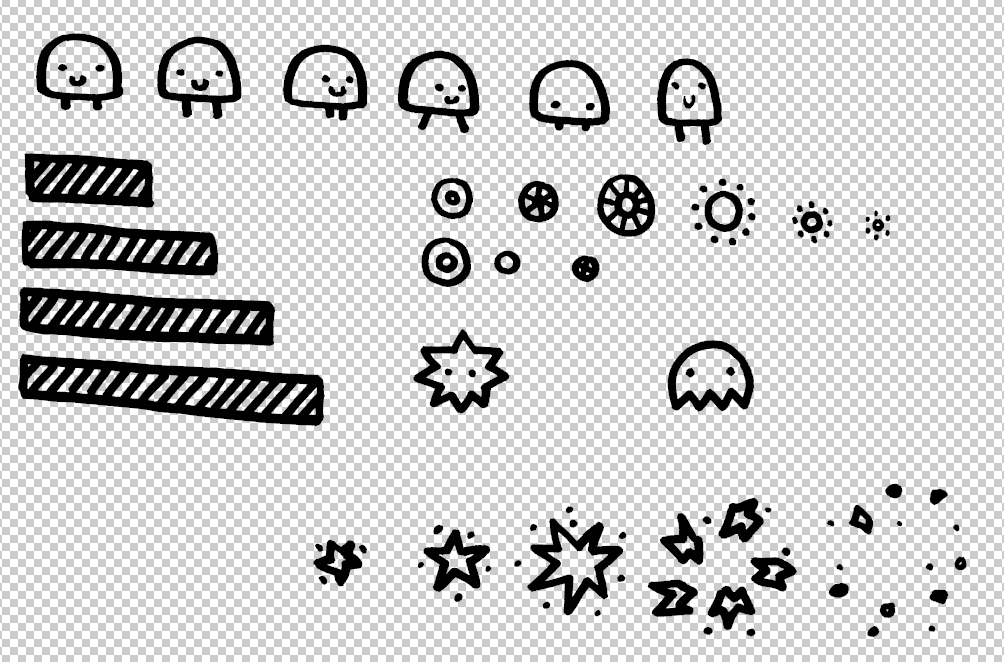
1. Draw Stuff
On Paper (or Other Media)
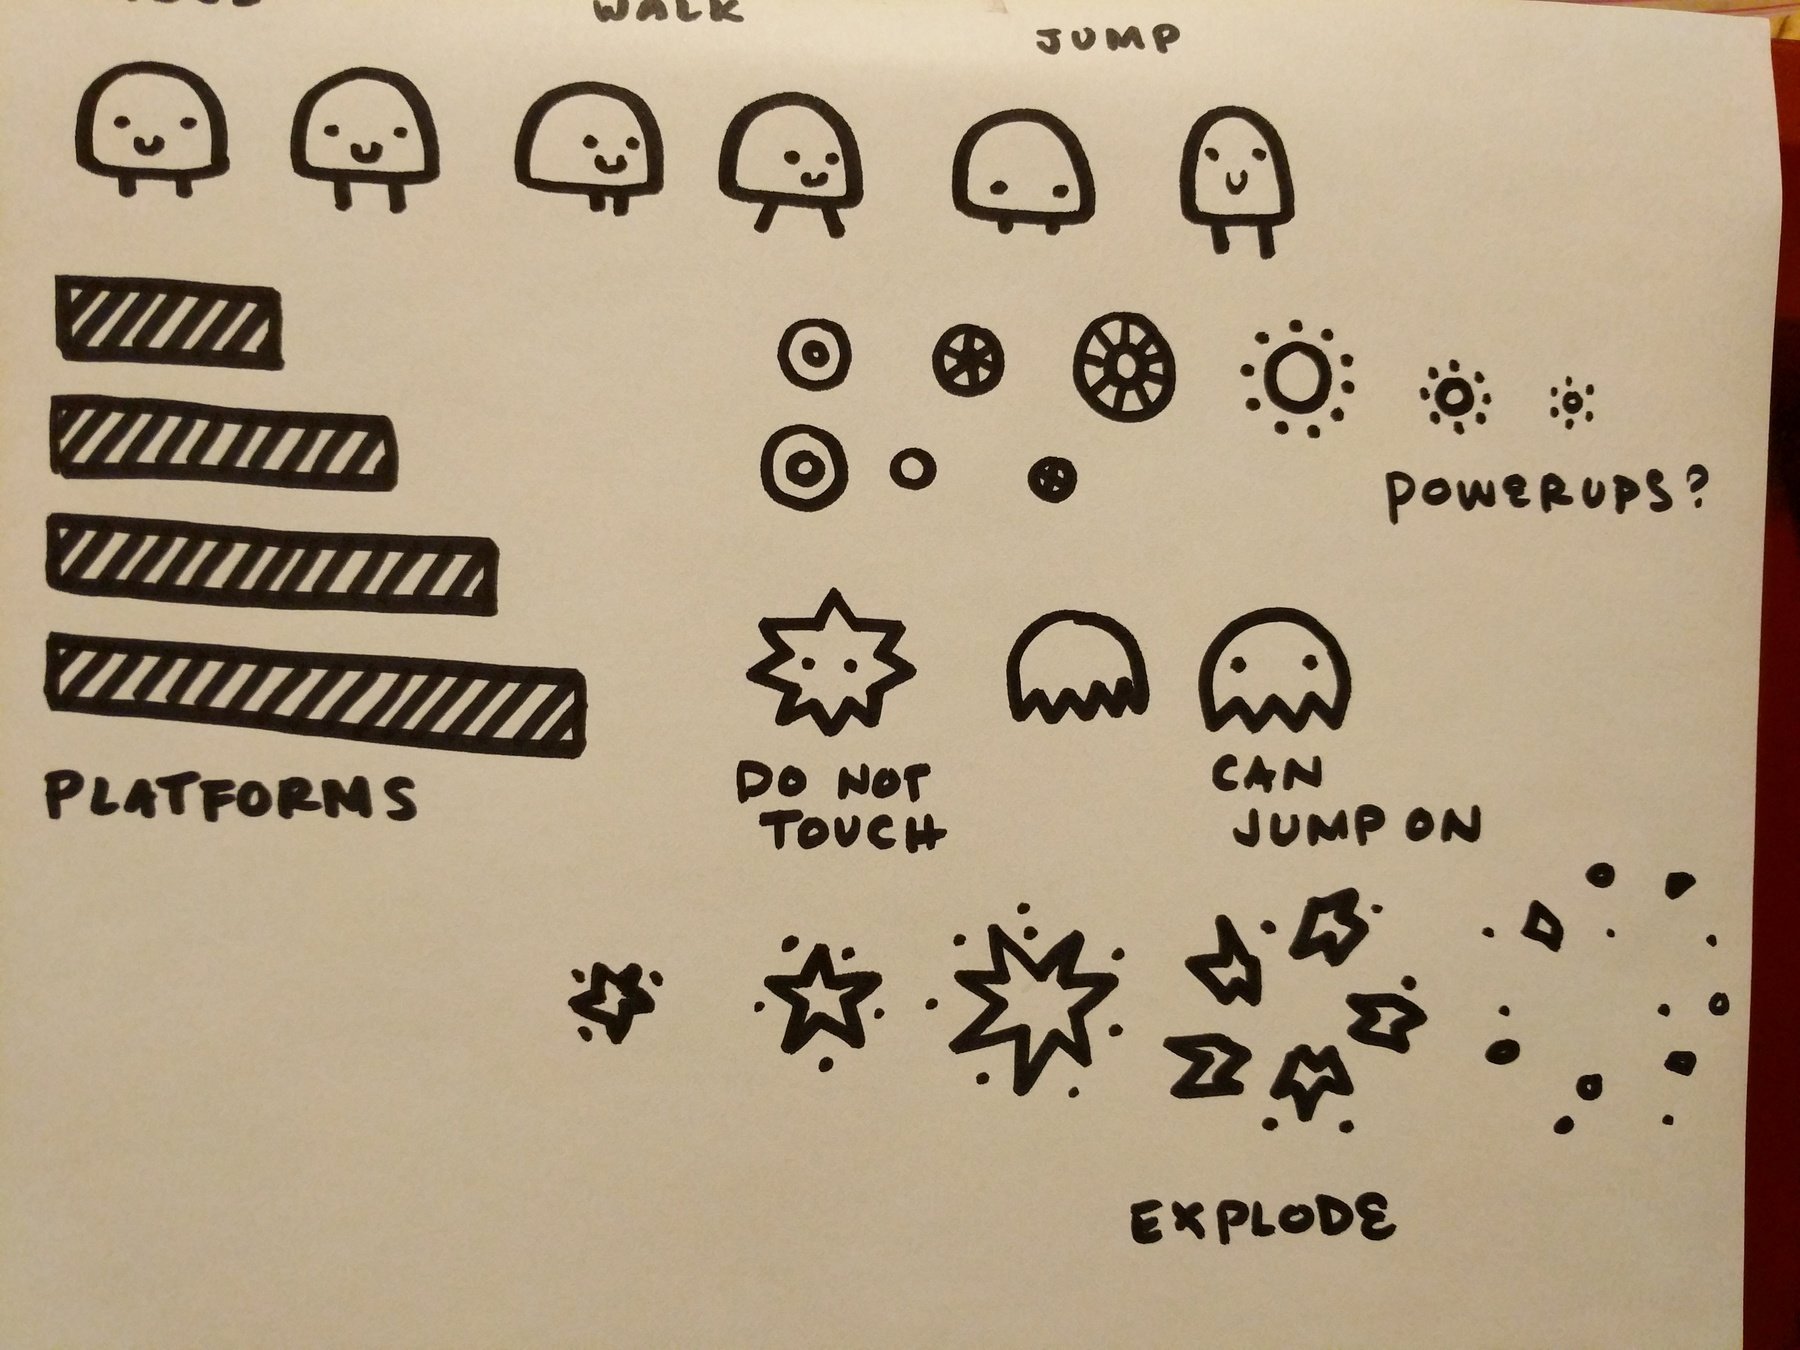
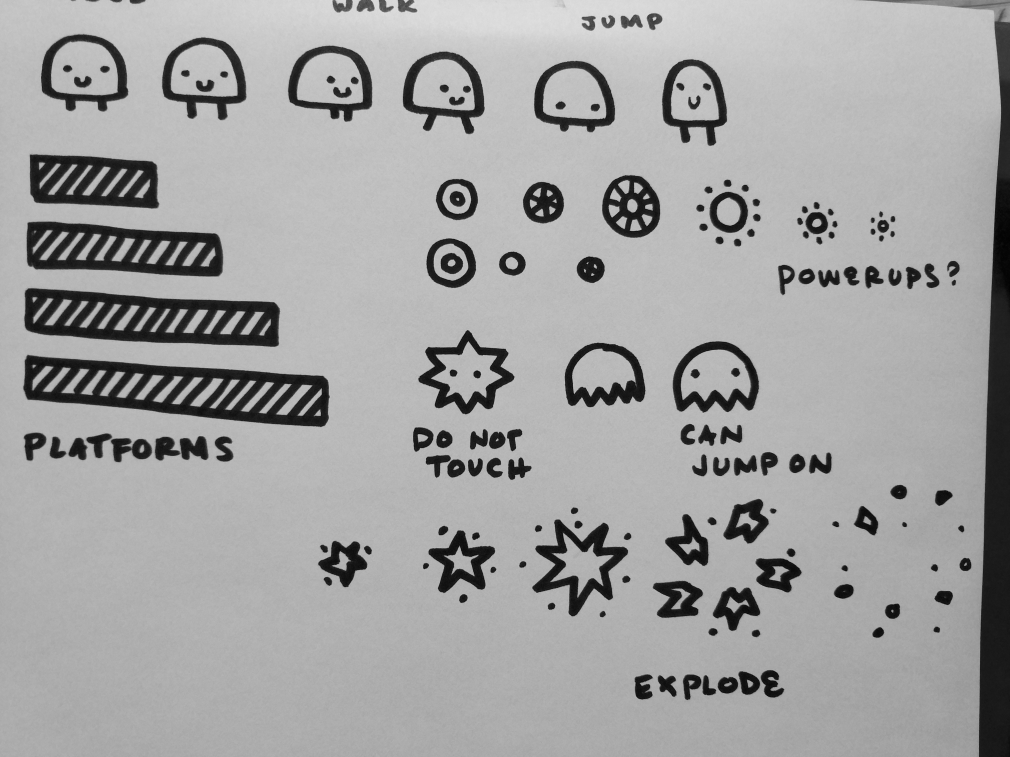
Brainstorm
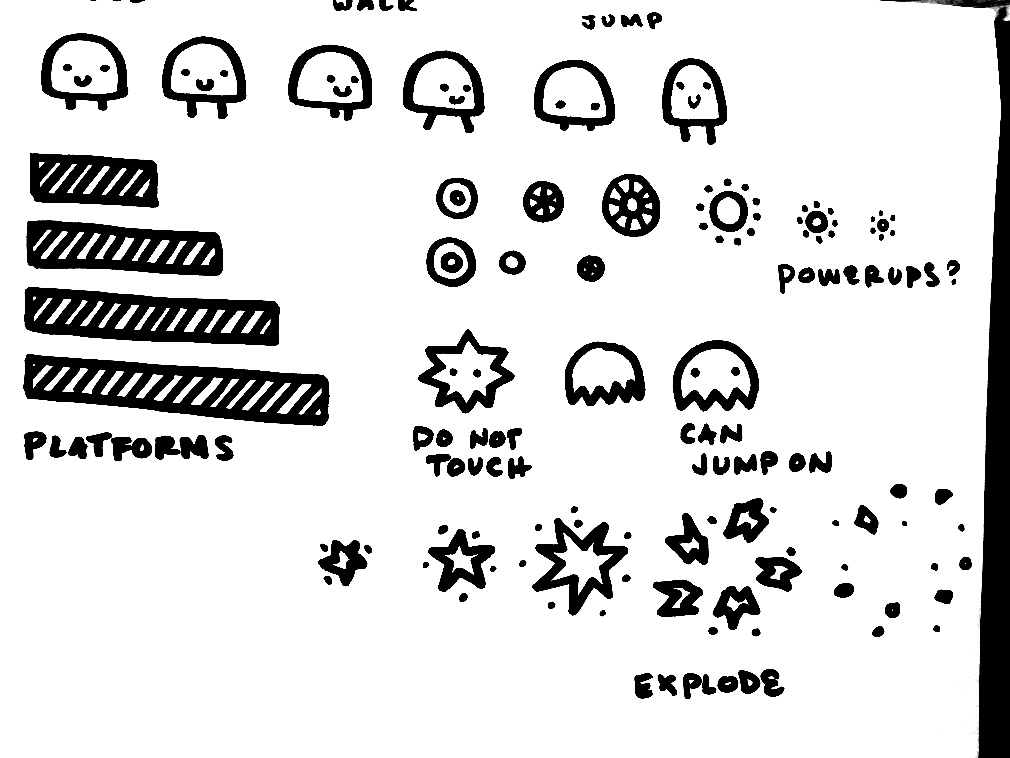
Brainstorm all the different animations for your characters & environment.
For an endless vertical platformer, we will need:
1. Idle Character
2. Jumping Character
3. Walking Left & Right
4. Baddies
5. Platforms
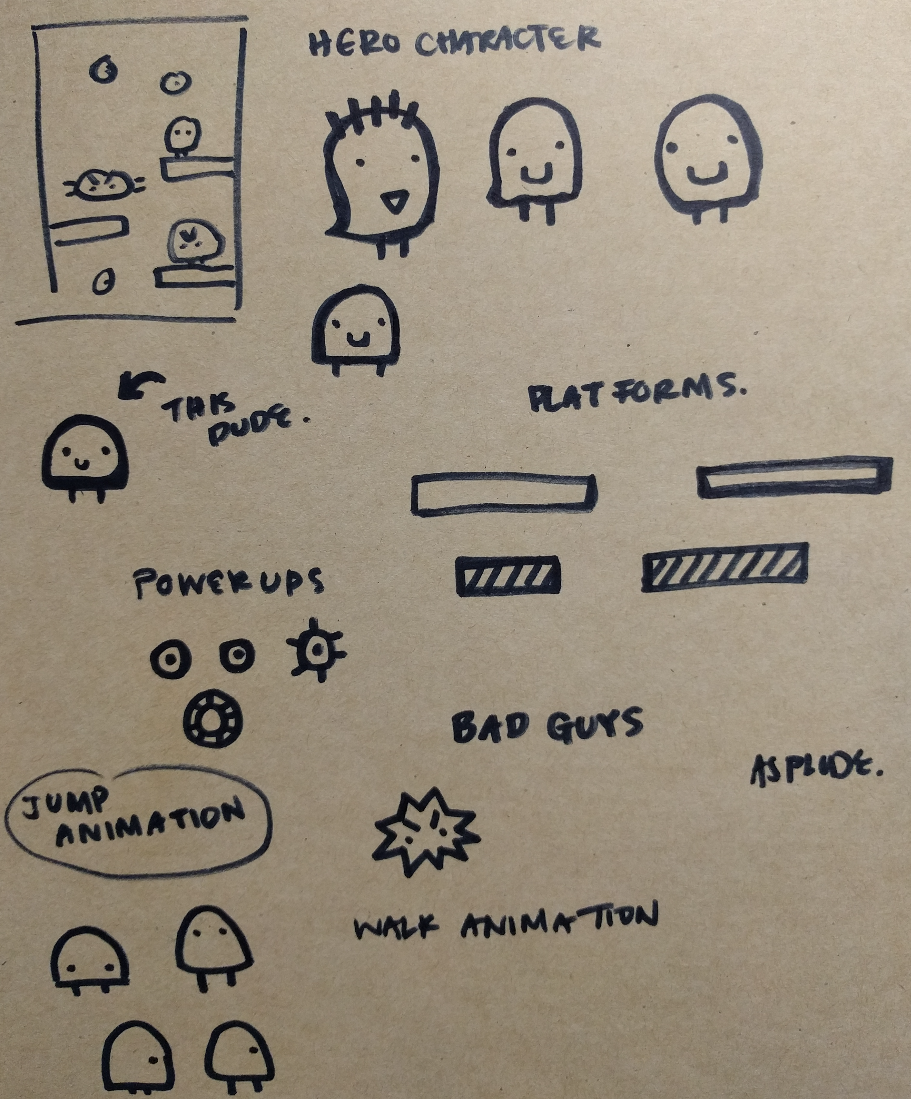
Draw on Paper
Draw each of the frames needed for hero animations.
Idle
- Character Up
- Character Down
Walking
- Legs Together & Short
- Legs Apart & Tall
Jumping
- Squished Flatter
- Squished Taller
Draw the Other Stuff
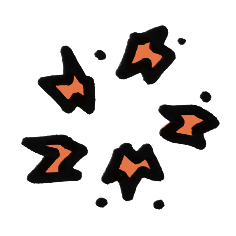
You can add animations for the baddies and other objects. In this example, only the Explode animation will have multiple frames.
Baddie 1
Baddie 2
Several Powerups
Platforms
Explosion Animation


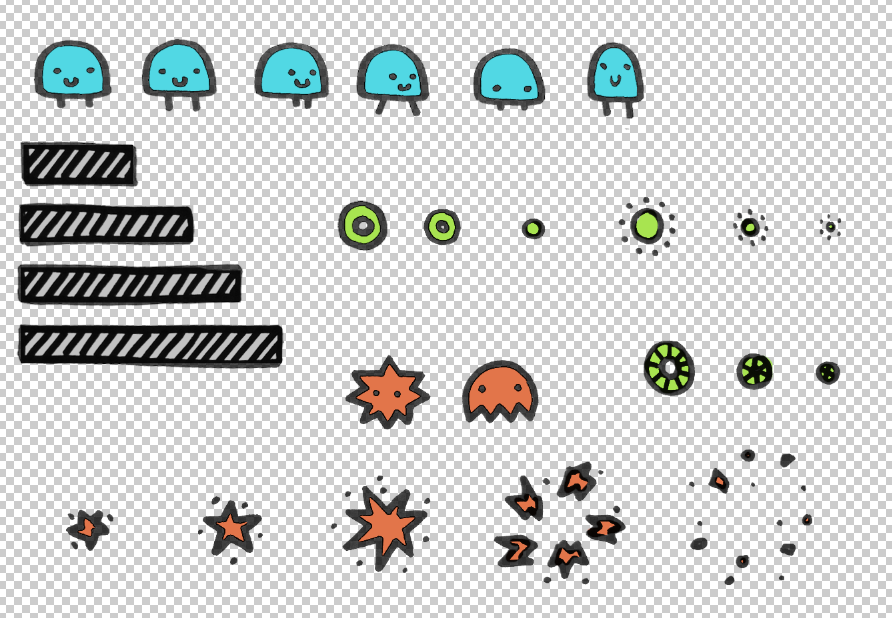
Color on Paper?
Optional. At this point, you can color your art for a "handmade" look. I decided to color my art later on the computer.


...or Draw Art
in an App
Draw on a Smartphone in an App & send to your computer.
Apps I Like:
- Draw ability in Google Keep
- Adobe Draw
I like these apps because they both use vector math for line art, which makes editing easier than some other popular tools. Everyone has a personal preference though, you might have other preferences if you have a brushier style. :)
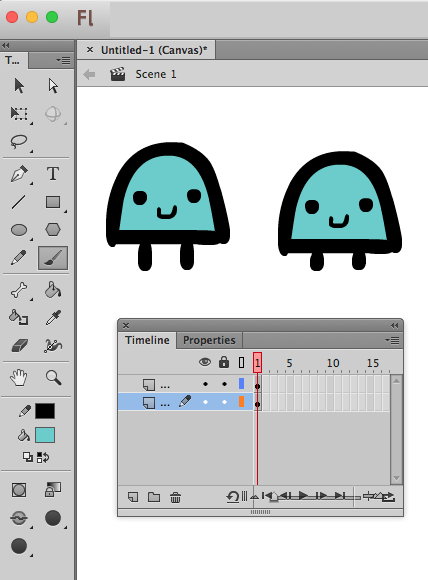
...or Draw Art in Flash 2015
1. Draw with the Brush tool.
2. Color your art.
3. Export as an SVG.
Flash CC 2016 and later is terrible for line art. :( Older versions of Flash (2015 and earlier) have a nice loose brushy "sharpie" look that I like for character art. If you have Adobe CC, you have free access to older versions of Flash (look it up). I don't even animate stuff in Flash most of the time. I just draw stuff.
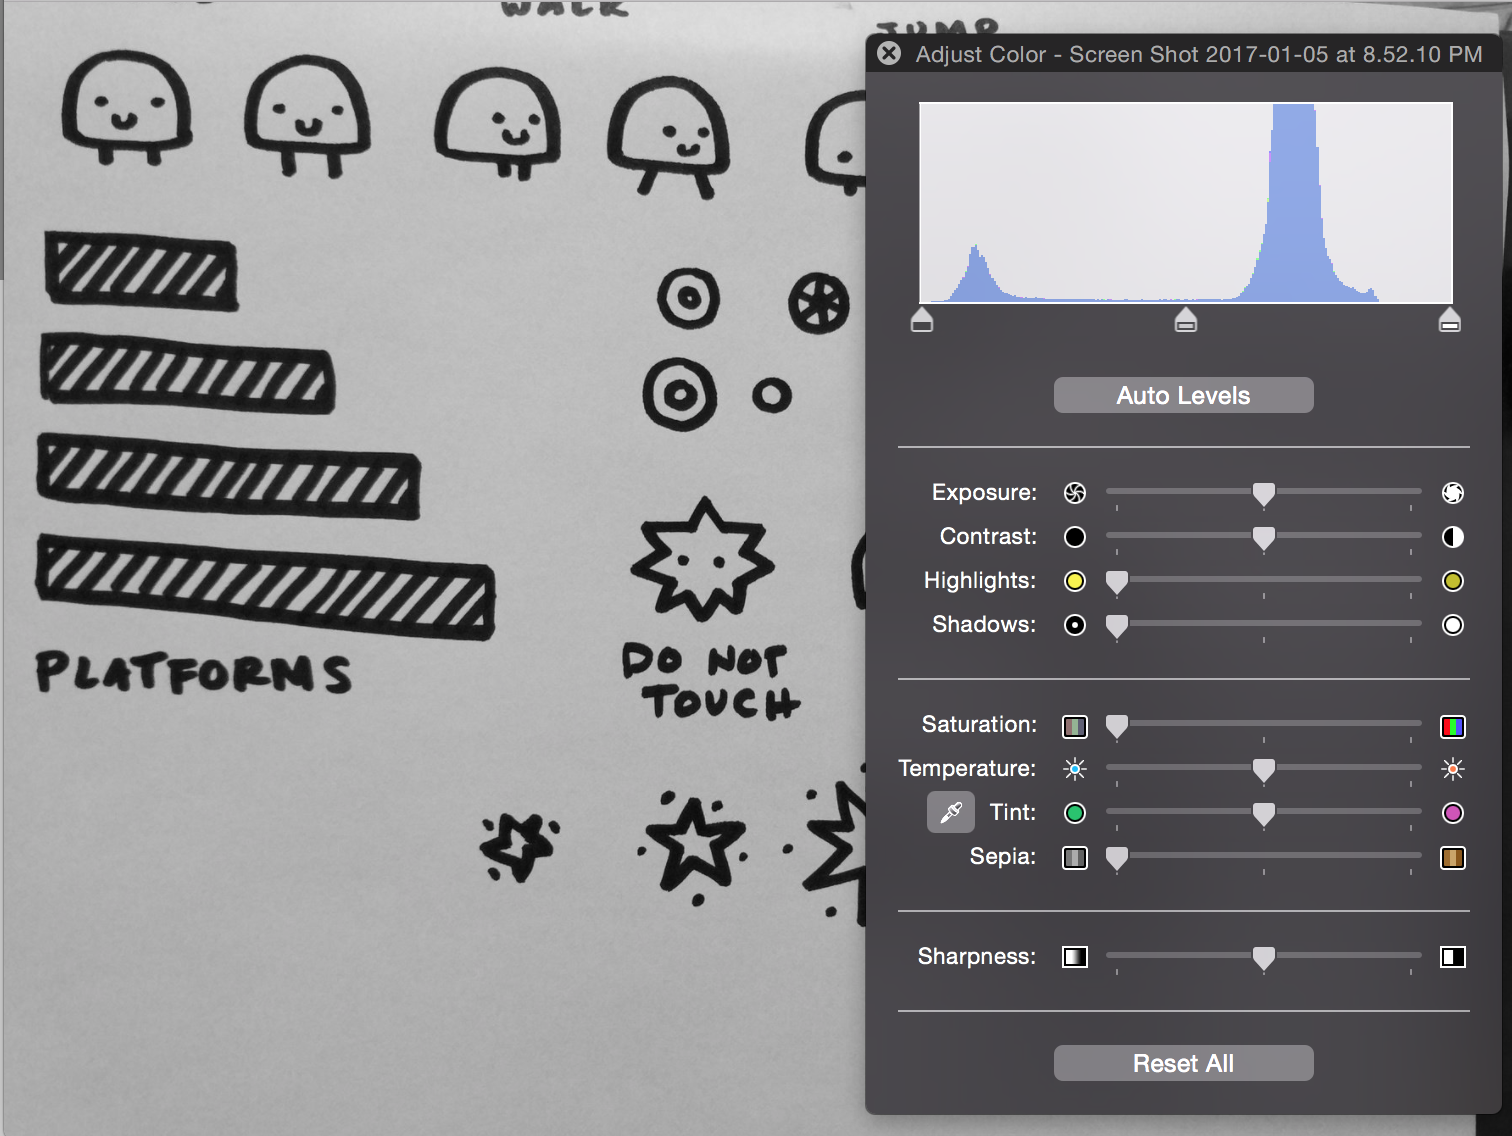
2. Take a Photo of Your Art
(and then clean up your photo)
Photograph
Your Art
Lean your artwork against a slanted surface so you don't cast a phone shadow.
Don't use your camera flash! We want a nice even background color, so instead, shine a lamp (or another phone flashlight) on your art and take a no-flash picture.
2. Clean Up & Transparency
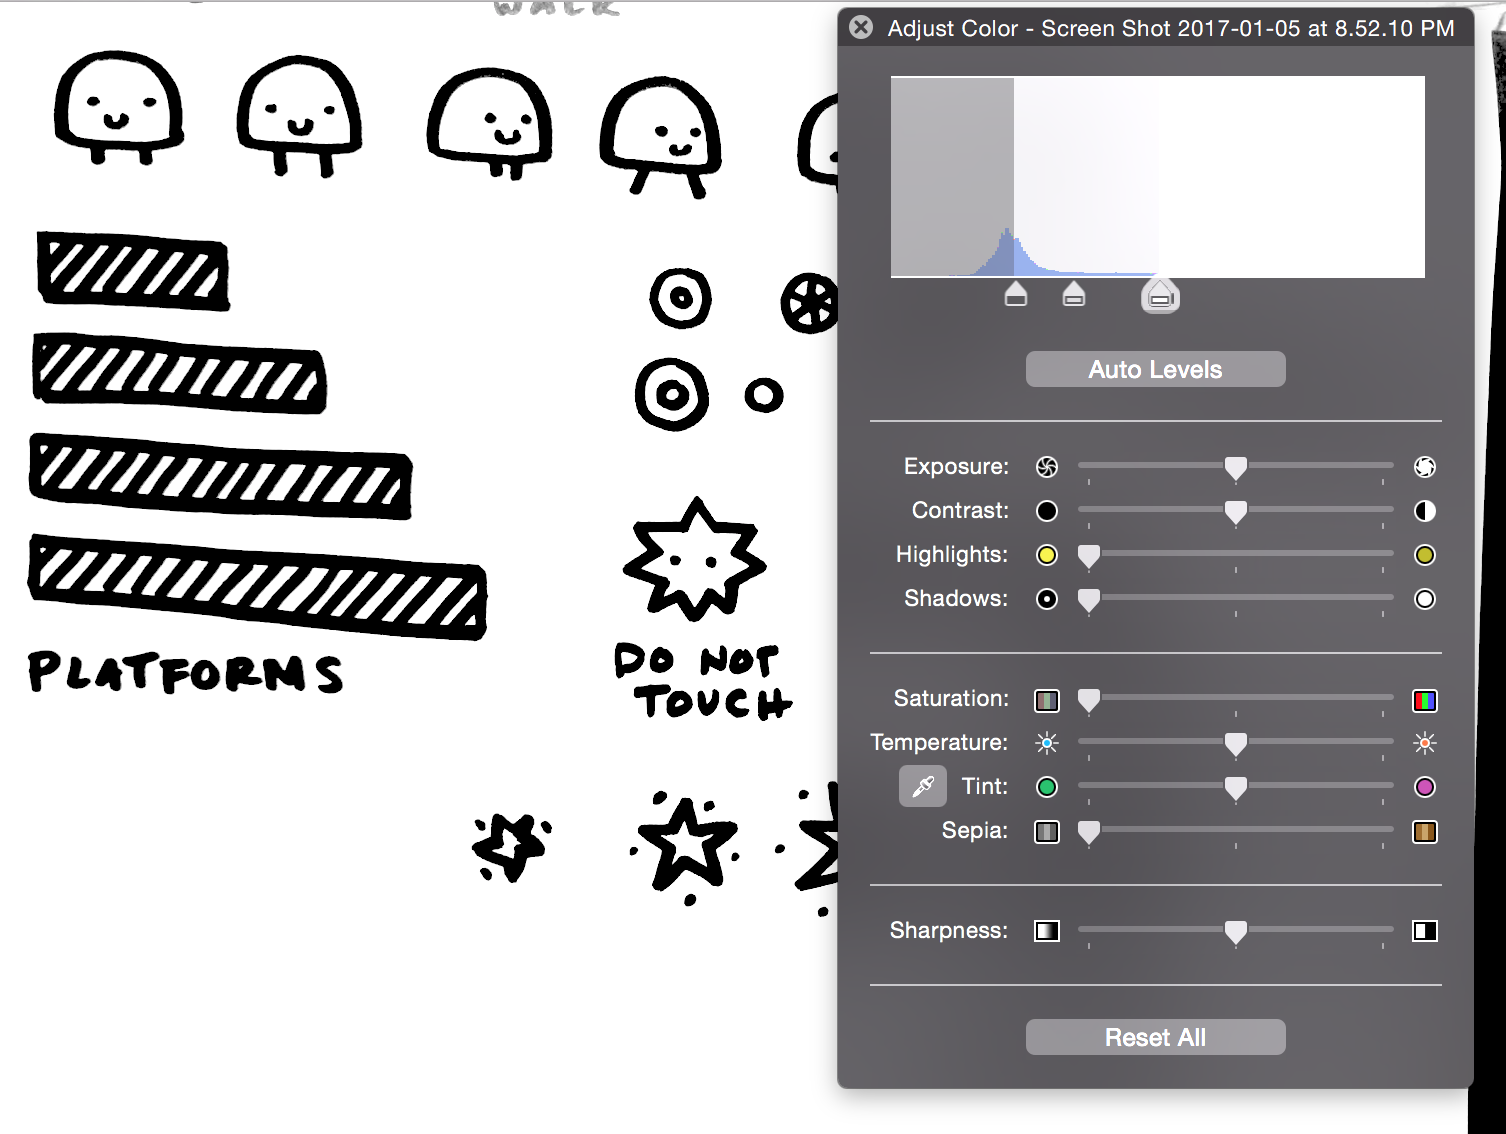
Using Photoshop
Import
Import your image into Photoshop.
Convert Image Mode to Greyscale, then back to RGB.

Clean Up
If your image is grey, you will need to clean it up.
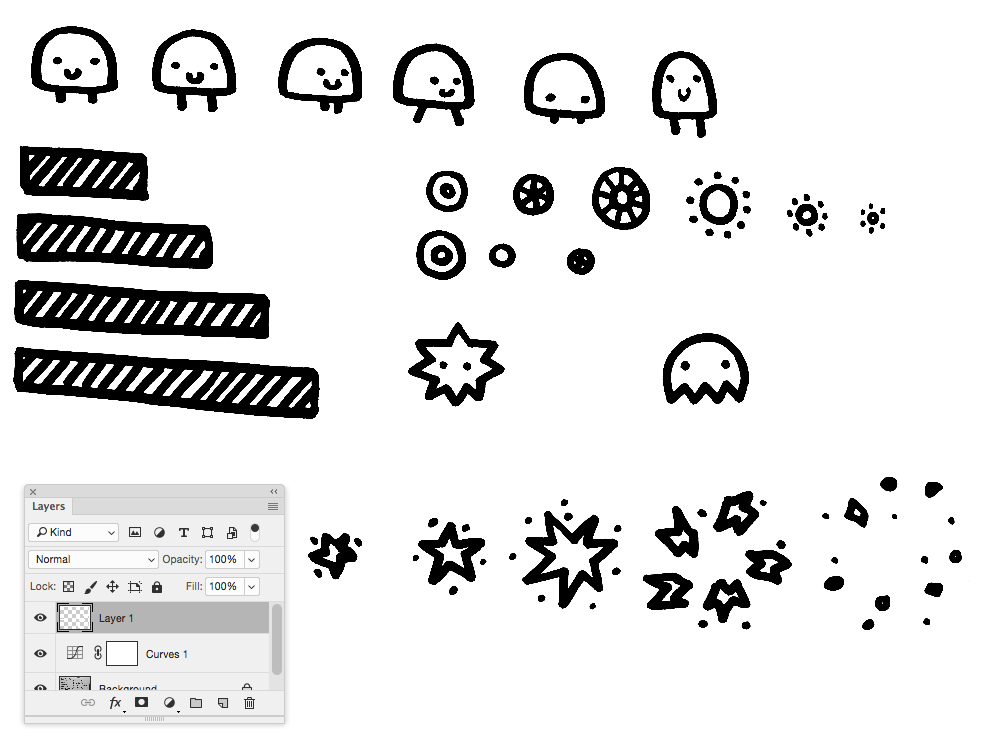
Add a Curves Adjustment Layer with an "S" curve. This will remove all the greys and convert the image to black and white. In this example, it's a really sharp "S".
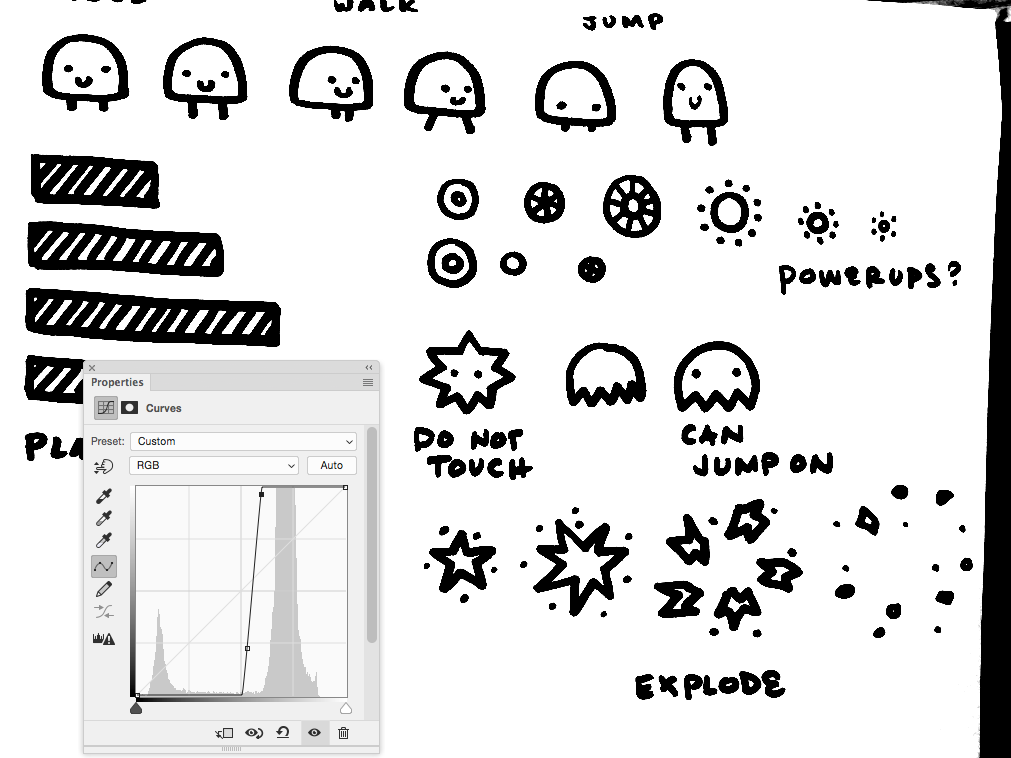
White Out Non-Image Areas
Make a new layer on top of your art later, and use a white brush to white-out the non-image areas (or, just use the eraser tool on your image area).

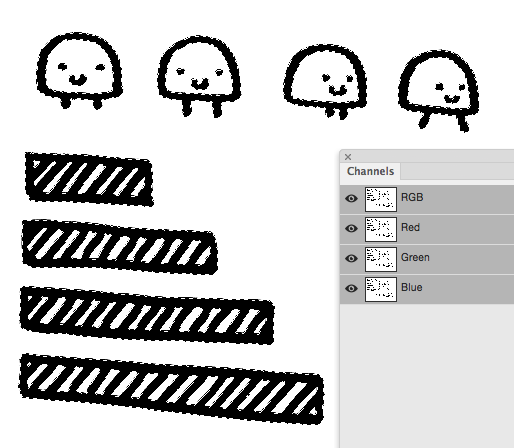
Select Lines with Channels
Go to the Channels Panel, and Command-Click on the RGB layer. This will select all the white areas of your image.
Hit Shift-Command-I to invert your selected and select the black areas of your image.
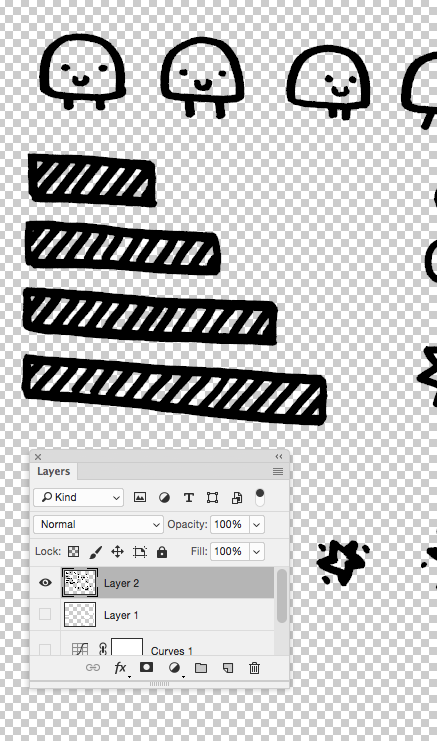
Transparent Line Art
Create a New Layer on top of everything, and fill your selection with black.
Turn off all the other layers, and you've got transparent line art!
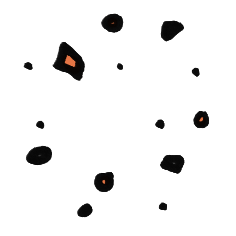
Make Spacing Adjustments
Adjust your images that are crooked.
Make sure there is A LOT of space between images. This will make tile-creation much easier in the next steps.
Color your Art
Set the blending mode of the line art layer to Multiply.
Add a new layer under the line art layer and use a brush to color your art.
When you are done, Export your art as a PNG
2. Clean Up & Transparency
Using Free Online Tools
Clean Up your Image
As best as you can, use the editing controls in your phone/computer/tablet to get really clean black & white art.
Example on a Mac
(other devices will have similar controls!)
1. Open Preview
2. Move Saturation bar to the extreme left
3. Play with the position of the 3 triangles in the top area. Find the position where the background turns white and the lines are really black. (Your arrows will look different)
4. Save
Convert to Transparent PNG
I searched for "Convert to Transparent PNG" online, and I ended up here: http://www194.lunapic.com/editor/?action=transparent
I used this tool to remove all the white in the image and downloaded the result.

Edit in Pixlr
You can make spacing adjustments and color the line art the same as the photoshop steps with Pixlr.
http://pixlr.com/editor/
Export your image as a PNG when you are done editing and coloring.
3. Preparing Grid Items
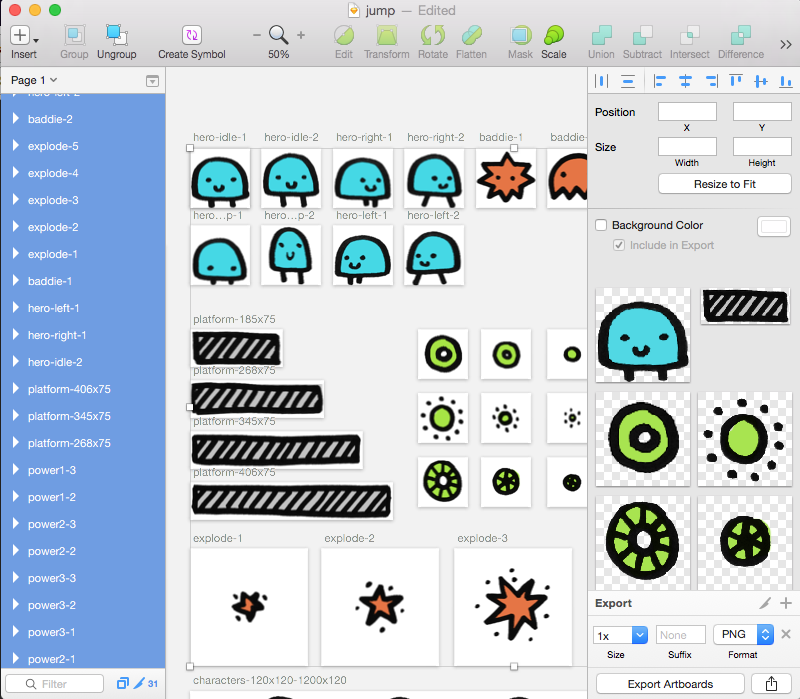
Using Sketch (Mac Only)
I don't think I've seen anyone use Sketch for Game Art...though I've found layout tools such as Sketch to be one of the most useful tools for art prep.
Import to Sketch
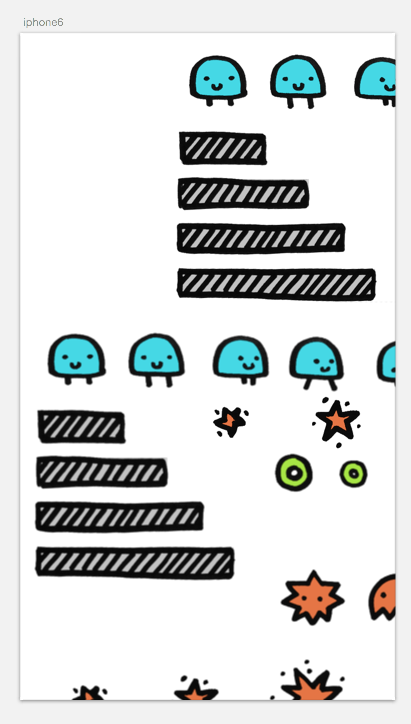
In Sketch, make an iPhone 6-sized Artboard (750 x 1334).
Plop your PNG art onto the art board. Does it look about right? If not, resize until it looks correct.
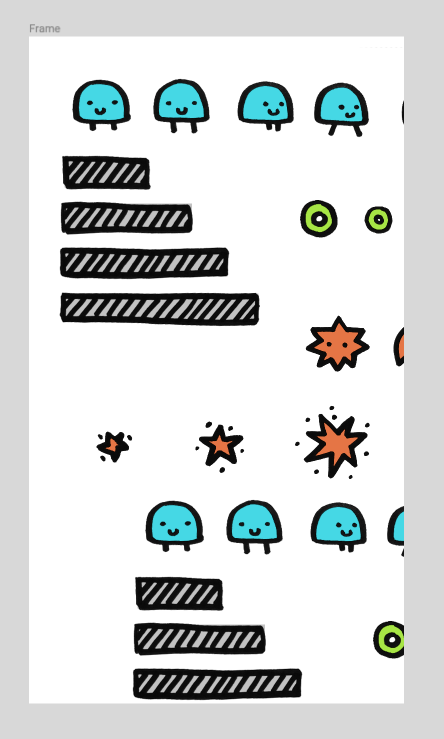
Create Artboards
Create an Artboard for each element in your collection.
Notice that:
- the hero character is always aligned on the same "floor"
- elements that are part of the same animation have the same grid (see the explode animation)
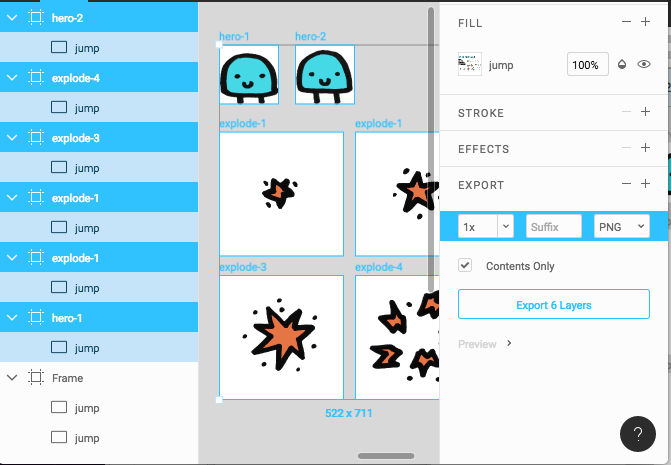
Export
Select all the Artboard layers. In the right side panel, click on the + next to Make Exportable. Settings for PNG export will display and previews for the exported images will appear.
Click Export Artboards.
3. Preparing Grid Items
Using Figma (Online Editor)
Figma is nearly identical to Sketch. It is a free online tool for collaborative application design, though we can use the robust Export tools for game art prep.
Import to Figma
In Figma, make an iPhone 6-sized Artboard (750 x 1334).
Plop your PNG art onto the art board. Does it look about right? If not, resize until it looks correct.
Create Artboards
Create an Artboard for each element in your collection.
Notice that:
- the hero character is always aligned on the same "floor"
- elements that are part of the same animation have the same grid (see the explode animation)
Export
Select all the Artboard layers.
In the right panel, be sure that Background is Unchecked.
Click on the + next to Export. Click Export Layers.
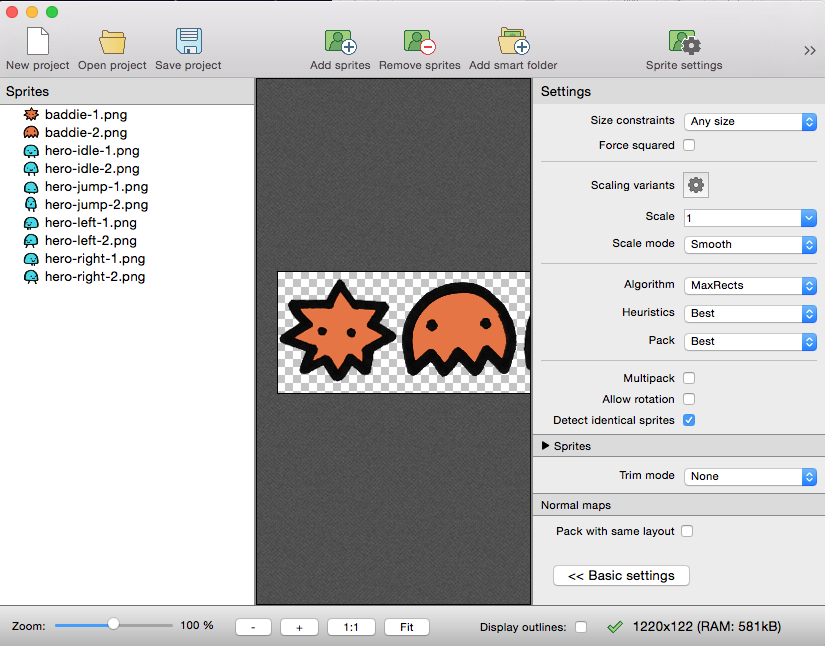
4. Creating a Texture Atlas
Using Texture Packer (Free)
Drop PNGs into Texture Packer
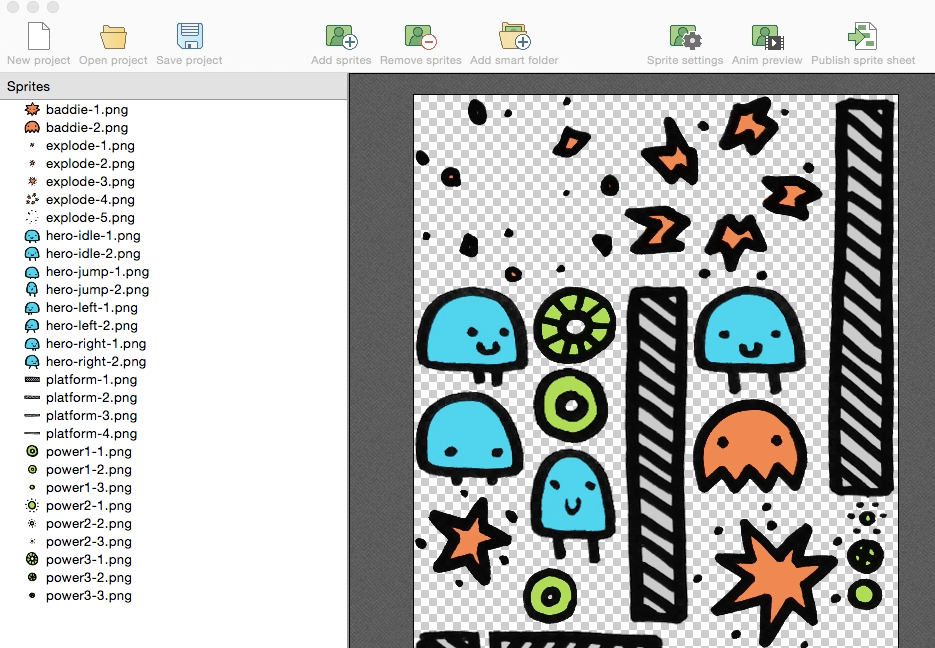
Create a new Texture Packer document. Drag all your PNG images into the sidebar.
Sprite Settings
Go to Advanced Settings
and Uncheck the Allow Rotation checkbox. (Phaser requires that images are not rotated).
Trim mode is Trim.
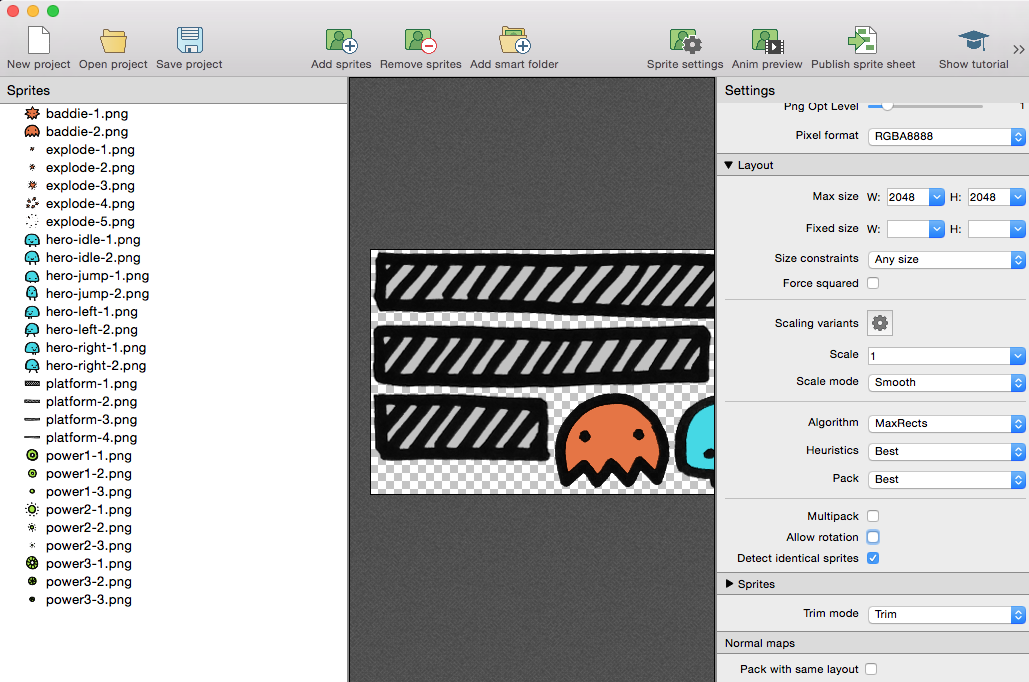
Uncheck "Allow rotation"
Publish
sprite sheet
Click "Publish sprite sheet"
Publish sprite sheet
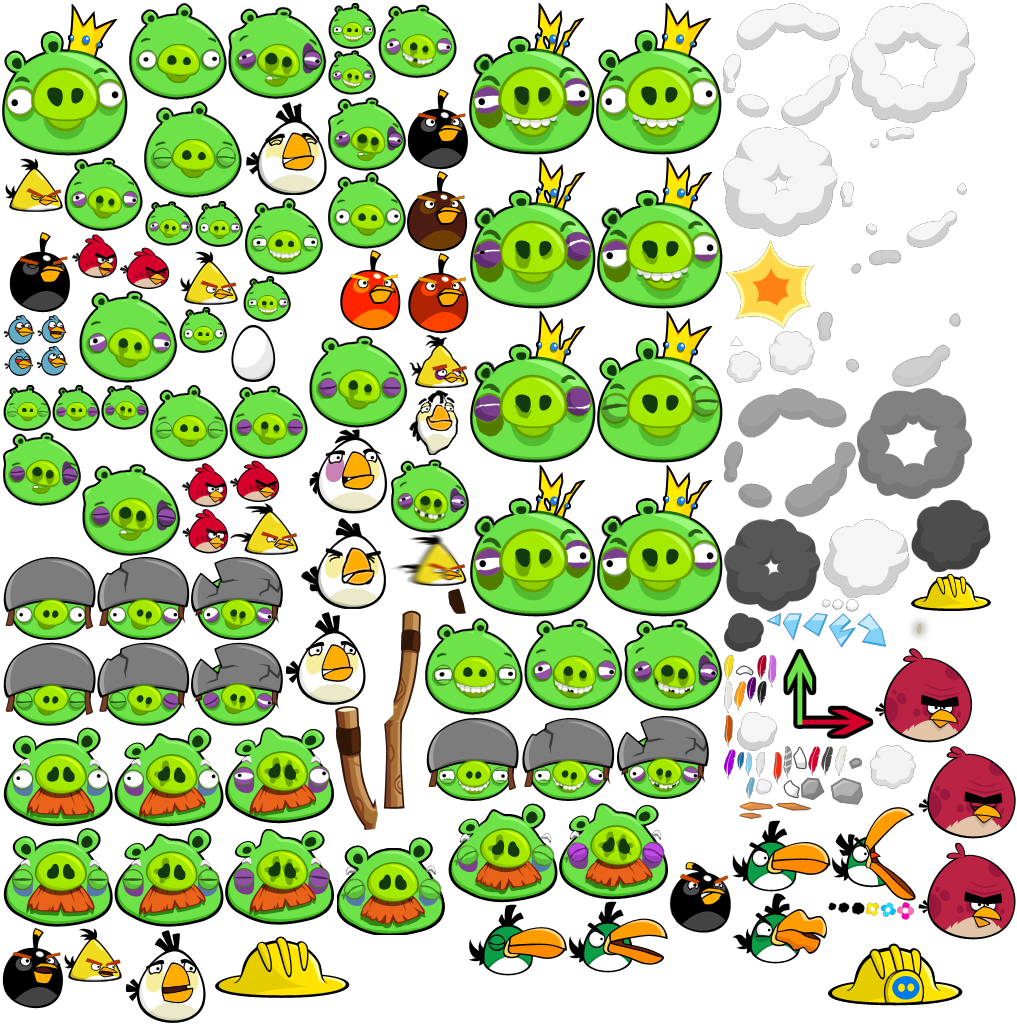
4. Creating a Even-Grid Spritesheet
Using Texture Packer (Free)
Drop in PNGs
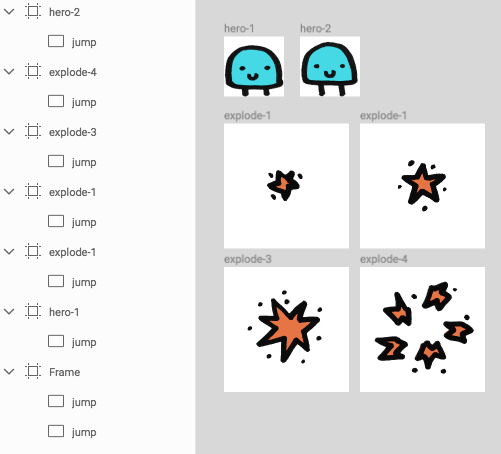
Only drop in images that belong to the same size grid.
You won't be able to re-order images, so be sure they are named well so they appear in an organized order.
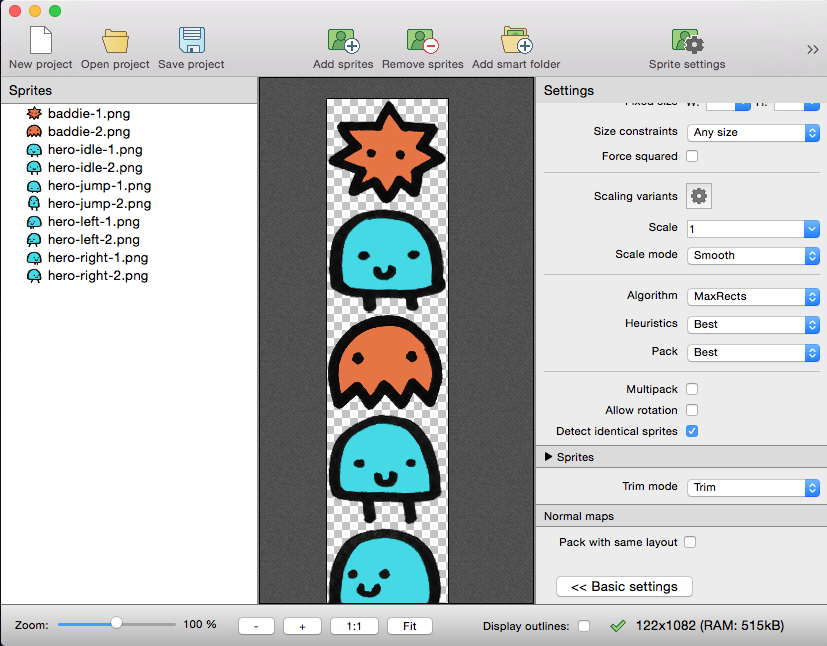
Adjust Settings
In Advanced Settings, Don't Allow Rotation and set the Trim mode to None.
Publish sprite sheet.
Example:
Video Demos
Photoshop, Sketch, & Texture Packer
Get Inspired!
www.gaimoria.com
fb.com/gaimoria
twitter.com/gaimoria
Motivation is a load of BS. Professionals aren't motivated, they're disciplined.
A lot of amateurs complain about "not being inspired" or having "no motivation." Professionals know that stuff is fleeting and just work anyways. Discipline to work trumps all.
Isaiah, EYUH Games
Motivation is a load of BS. Professionals aren't motivated, they're disciplined.
A lot of amateurs complain about "not being inspired" or having "no motivation." Professionals know that stuff is fleeting and just work anyways. Discipline to work trumps all.
Isaiah, EYUH Games
All Things Game Art:
http://polycount.com
More Resources
(I haven't used these myself, though they were recommended by the folks at Global Game Jam)
Editing
http://renderhjs.net/shoebox/
http://gimp.org
http://www.getpaint.net/
http://www.mapeditor.org/
http://colororacle.org
http://inkscape.org/
https://krita.org/
http://www.aseprite.org/
http://www.piskelapp.com/
https://goo.gl/drj1Xd
Assets
http://opengameart.com
http://www.cgtextures.com
http://www.openfootage.net
http://glitchthegame.com/public-domain-game-art/
http://lunar.lostgarden.com/labels/free%20game%20graphics.html
http://bit.ly/18avkmQ
2D Game ArtArt to Spritesheet Workflow
By Kelli Borgonia


