容器化生产分享
适用于中小型开发团队生产实践
Linux 部署实践
# PRESENTING CODE
| 类目 | 配置 |
|---|---|
| 云平台 | 阿里云 |
| 实例 | 4vCPU/32GiB/Intel 处理器 |
| 镜像 | CentOS 7.9 64 位 |
| 系统盘 | 100GB |
| 带宽峰值 | 100Mbps |
Linux 部署实践
# PRESENTING CODE
curl -O http://vip.pigx.top/os7init.sh

sh os7init.sh pig4cloud
#!/bin/bash
# init centos7 ./centos7-init.sh 主机名
# 检查是否为root用户,脚本必须在root权限下运行
if [[ "$(whoami)" != "root" ]]; then
echo "please run this script as root !" >&2
exit 1
fi
echo -e "\033[31m the script only Support CentOS_7 x86_64 \033[0m"
echo -e "\033[31m system initialization script, Please Seriously. press ctrl+C to cancel \033[0m"
# 检查是否为64位系统,这个脚本只支持64位脚本
platform=`uname -i`
if [ $platform != "x86_64" ];then
echo "this script is only for 64bit Operating System !"
exit 1
fi
if [ "$1" == "" ];then
echo "The host name is empty."
exit 1
else
hostnamectl --static set-hostname $1
hostnamectl set-hostname $1
fi
cat << EOF
+---------------------------------------+
| your system is CentOS 7 x86_64 |
| start optimizing |
+---------------------------------------+
EOF
sleep 1
# 安装必要支持工具及软件工具
yum_update(){
yum update -y
yum install -y nmap unzip wget vim lsof xz net-tools iptables-services ntpdate ntp-doc psmisc
}
# 设置时间同步 set time
zone_time(){
timedatectl set-timezone Asia/Shanghai
/usr/sbin/ntpdate 0.cn.pool.ntp.org > /dev/null 2>&1
/usr/sbin/hwclock --systohc
/usr/sbin/hwclock -w
cat > /var/spool/cron/root << EOF
10 0 * * * /usr/sbin/ntpdate 0.cn.pool.ntp.org > /dev/null 2>&1
* * * * */1 /usr/sbin/hwclock -w > /dev/null 2>&1
EOF
chmod 600 /var/spool/cron/root
/sbin/service crond restart
sleep 1
}
# 修改文件打开数 set the file limit
limits_config(){
cat > /etc/rc.d/rc.local << EOF
#!/bin/bash
touch /var/lock/subsys/local
ulimit -SHn 1024000
EOF
sed -i "/^ulimit -SHn.*/d" /etc/rc.d/rc.local
echo "ulimit -SHn 1024000" >> /etc/rc.d/rc.local
sed -i "/^ulimit -s.*/d" /etc/profile
sed -i "/^ulimit -c.*/d" /etc/profile
sed -i "/^ulimit -SHn.*/d" /etc/profile
cat >> /etc/profile << EOF
ulimit -c unlimited
ulimit -s unlimited
ulimit -SHn 1024000
EOF
source /etc/profile
ulimit -a
cat /etc/profile | grep ulimit
if [ ! -f "/etc/security/limits.conf.bak" ]; then
cp /etc/security/limits.conf /etc/security/limits.conf.bak
fi
cat > /etc/security/limits.conf << EOF
* soft nofile 1024000
* hard nofile 1024000
* soft nproc 1024000
* hard nproc 1024000
hive - nofile 1024000
hive - nproc 1024000
EOF
if [ ! -f "/etc/security/limits.d/20-nproc.conf.bak" ]; then
cp /etc/security/limits.d/20-nproc.conf /etc/security/limits.d/20-nproc.conf.bak
fi
cat > /etc/security/limits.d/20-nproc.conf << EOF
* soft nproc 409600
root soft nproc unlimited
EOF
sleep 1
}
# 优化内核参数 tune kernel parametres
sysctl_config(){
if [ ! -f "/etc/sysctl.conf.bak" ]; then
cp /etc/sysctl.conf /etc/sysctl.conf.bak
fi
#add
cat > /etc/sysctl.conf << EOF
net.ipv6.conf.all.disable_ipv6 = 1
net.ipv6.conf.default.disable_ipv6 = 1
net.ipv4.tcp_syn_retries = 1
net.ipv4.tcp_synack_retries = 1
net.ipv4.tcp_keepalive_time = 600
net.ipv4.tcp_keepalive_probes = 3
net.ipv4.tcp_keepalive_intvl =15
net.ipv4.tcp_retries1 = 3
net.ipv4.tcp_retries2 = 5
net.ipv4.tcp_fin_timeout = 10
net.ipv4.tcp_tw_recycle = 1
net.ipv4.tcp_tw_reuse = 1
net.ipv4.tcp_syncookies = 1
net.ipv4.tcp_window_scaling = 1
net.ipv4.tcp_max_tw_buckets = 60000
net.ipv4.tcp_max_orphans = 32768
net.ipv4.tcp_max_syn_backlog = 16384
net.ipv4.tcp_mem = 94500000 915000000 927000000
net.ipv4.tcp_wmem = 4096 16384 13107200
net.ipv4.tcp_rmem = 4096 87380 17476000
net.ipv4.ip_local_port_range = 1024 65000
net.ipv4.ip_forward = 1
net.ipv4.route.gc_timeout = 100
net.core.somaxconn = 32768
net.core.netdev_max_backlog = 32768
net.nf_conntrack_max = 6553500
net.netfilter.nf_conntrack_max = 6553500
net.netfilter.nf_conntrack_tcp_timeout_established = 180
vm.overcommit_memory = 1
vm.swappiness = 1
fs.file-max = 1024000
EOF
#reload sysctl
/sbin/sysctl -p
sleep 1
}
# 设置UTF-8 LANG="zh_CN.UTF-8"
LANG_config(){
echo "LANG=\"en_US.UTF-8\"">/etc/locale.conf
source /etc/locale.conf
}
#关闭SELINUX disable selinux
selinux_config(){
sed -i 's/SELINUX=enforcing/SELINUX=disabled/g' /etc/selinux/config
setenforce 0
sleep 1
}
#日志处理
log_config(){
setenforce 0
systemctl start systemd-journald
systemctl status systemd-journald
}
# 关闭防火墙
firewalld_config(){
/usr/bin/systemctl stop firewalld.service
/usr/bin/systemctl disable firewalld.service
}
# SSH配置优化 set sshd_config
sshd_config(){
if [ ! -f "/etc/ssh/sshd_config.bak" ]; then
cp /etc/ssh/sshd_config /etc/ssh/sshd_config.bak
fi
cat >/etc/ssh/sshd_config<<EOF
Port 22
AddressFamily inet
ListenAddress 0.0.0.0
Protocol 2
HostKey /etc/ssh/ssh_host_rsa_key
HostKey /etc/ssh/ssh_host_ecdsa_key
HostKey /etc/ssh/ssh_host_ed25519_key
SyslogFacility AUTHPRIV
PermitRootLogin yes
MaxAuthTries 6
RSAAuthentication yes
PubkeyAuthentication yes
AuthorizedKeysFile .ssh/authorized_keys
PasswordAuthentication yes
ChallengeResponseAuthentication no
UsePAM yes
UseDNS no
X11Forwarding yes
UsePrivilegeSeparation sandbox
AcceptEnv LANG LC_CTYPE LC_NUMERIC LC_TIME LC_COLLATE LC_MONETARY LC_MESSAGES
AcceptEnv LC_PAPER LC_NAME LC_ADDRESS LC_TELEPHONE LC_MEASUREMENT
AcceptEnv LC_IDENTIFICATION LC_ALL LANGUAGE
AcceptEnv XMODIFIERS
Subsystem sftp /usr/libexec/openssh/sftp-server
EOF
/sbin/service sshd restart
}
# 关闭ipv6 disable the ipv6
ipv6_config(){
echo "NETWORKING_IPV6=no">/etc/sysconfig/network
echo 1 > /proc/sys/net/ipv6/conf/all/disable_ipv6
echo 1 > /proc/sys/net/ipv6/conf/default/disable_ipv6
echo "127.0.0.1 localhost localhost.localdomain">/etc/hosts
#sed -i 's/IPV6INIT=yes/IPV6INIT=no/g' /etc/sysconfig/network-scripts/ifcfg-enp0s8
for line in $(ls -lh /etc/sysconfig/network-scripts/ifcfg-* | awk -F '[ ]+' '{print $9}')
do
if [ -f $line ]
then
sed -i 's/IPV6INIT=yes/IPV6INIT=no/g' $line
echo $i
fi
done
}
# 设置历史命令记录格式 history
history_config(){
export HISTFILESIZE=10000000
export HISTSIZE=1000000
export PROMPT_COMMAND="history -a"
export HISTTIMEFORMAT="%Y-%m-%d_%H:%M:%S "
##export HISTTIMEFORMAT="{\"TIME\":\"%F %T\",\"HOSTNAME\":\"\$HOSTNAME\",\"LI\":\"\$(who -u am i 2>/dev/null| awk '{print \$NF}'|sed -e 's/[()]//g')\",\"LU\":\"\$(who am i|awk '{print \$1}')\",\"NU\":\"\${USER}\",\"CMD\":\""
cat >>/etc/bashrc<<EOF
alias vi='vim'
HISTDIR='/var/log/command.log'
if [ ! -f \$HISTDIR ];then
touch \$HISTDIR
chmod 666 \$HISTDIR
fi
export HISTTIMEFORMAT="{\"TIME\":\"%F %T\",\"IP\":\"\$(ip a | grep -E '192.168|172' | head -1 | awk '{print \$2}' | cut -d/ -f1)\",\"LI\":\"\$(who -u am i 2>/dev/null| awk '{print \$NF}'|sed -e 's/[()]//g')\",\"LU\":\"\$(who am i|awk '{print \$1}')\",\"NU\":\"\${USER}\",\"CMD\":\""
export PROMPT_COMMAND='history 1|tail -1|sed "s/^[ ]\+[0-9]\+ //"|sed "s/$/\"}/">> /var/log/command.log'
EOF
source /etc/bashrc
}
# 服务优化设置
service_config(){
/usr/bin/systemctl enable NetworkManager-wait-online.service
/usr/bin/systemctl start NetworkManager-wait-online.service
/usr/bin/systemctl stop postfix.service
/usr/bin/systemctl disable postfix.service
chmod +x /etc/rc.local
chmod +x /etc/rc.d/rc.local
#ls -l /etc/rc.d/rc.local
}
# VIM设置
vim_config(){
cat > /root/.vimrc << EOF
set history=1000
EOF
#autocmd InsertLeave * se cul
#autocmd InsertLeave * se nocul
#set nu
#set bs=2
#syntax on
#set laststatus=2
#set tabstop=4
#set go=
#set ruler
#set showcmd
#set cmdheight=1
#hi CursorLine cterm=NONE ctermbg=blue ctermfg=white guibg=blue guifg=white
#set hls
#set cursorline
#set ignorecase
#set hlsearch
#set incsearch
#set helplang=cn
}
# done
done_ok(){
touch /var/log/init-ok
cat << EOF
+-------------------------------------------------+
| optimizer is done |
| it's recommond to restart this server ! |
| Please Reboot system |
+-------------------------------------------------+
EOF
}
# main
main(){
yum_update
zone_time
limits_config
sysctl_config
LANG_config
selinux_config
log_config
firewalld_config
sshd_config
ipv6_config
history_config
service_config
vim_config
done_ok
}
mainLinux 安全问题
# PRESENTING CODE
-
安全组限制策略
-
Swagger UI未授权访问漏洞
-
Spring Boot Actuator未授权访问漏洞
-
Spring Cloud Gateway远程代码执行漏洞
-
备份策略 (系统镜像、数据库备份)
# PRESENTING CODE
打包细节
# 微服务架构
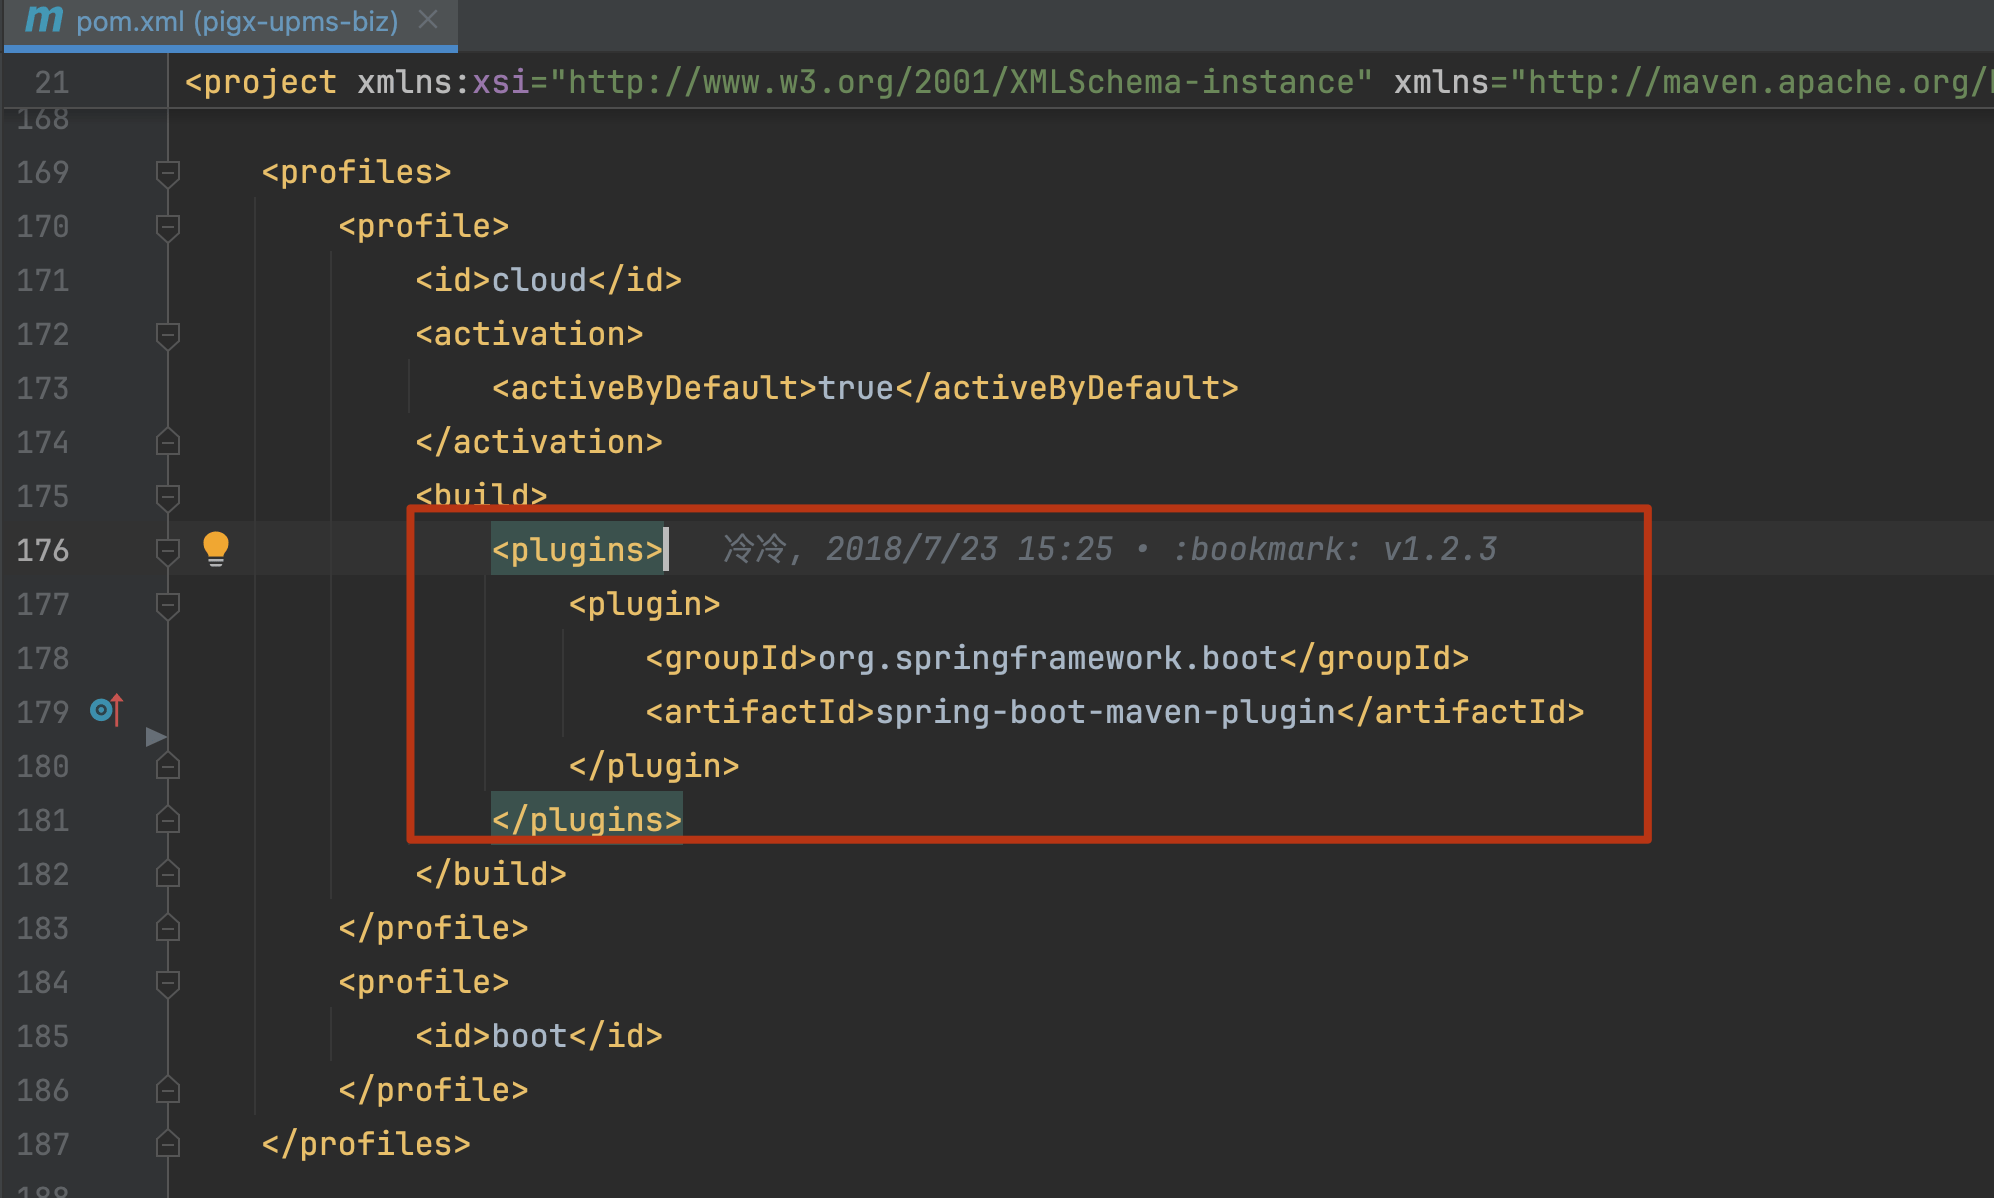
mvn clean install -T 4
# 单体架构
mvn clean install -Pboot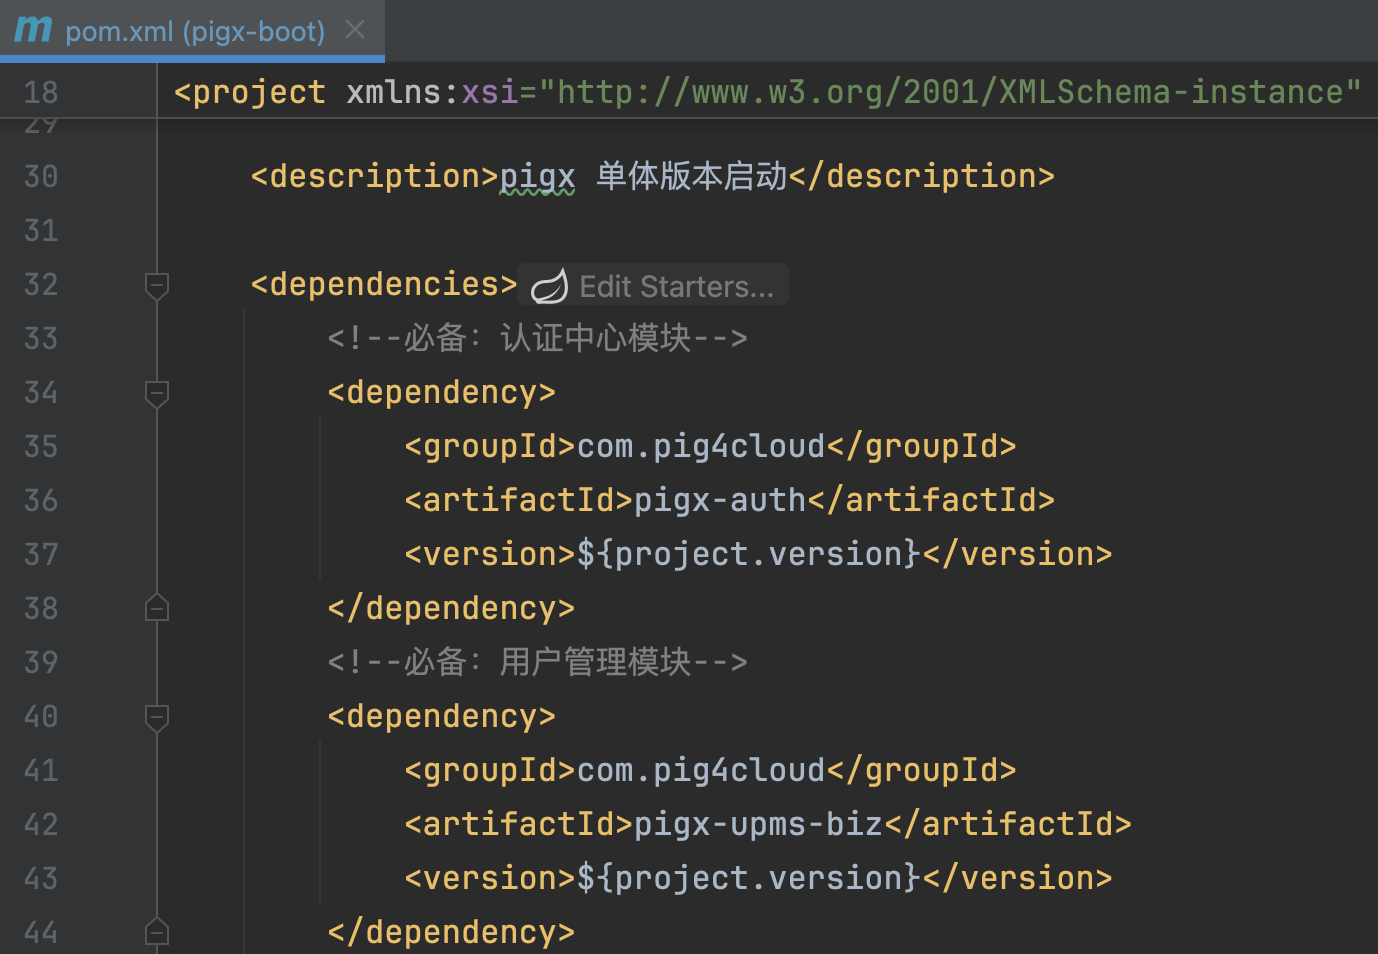
# PRESENTING CODE
打包细节
# 微服务架构

mvn clean install -T 4


# 单体架构

mvn clean install -Pboot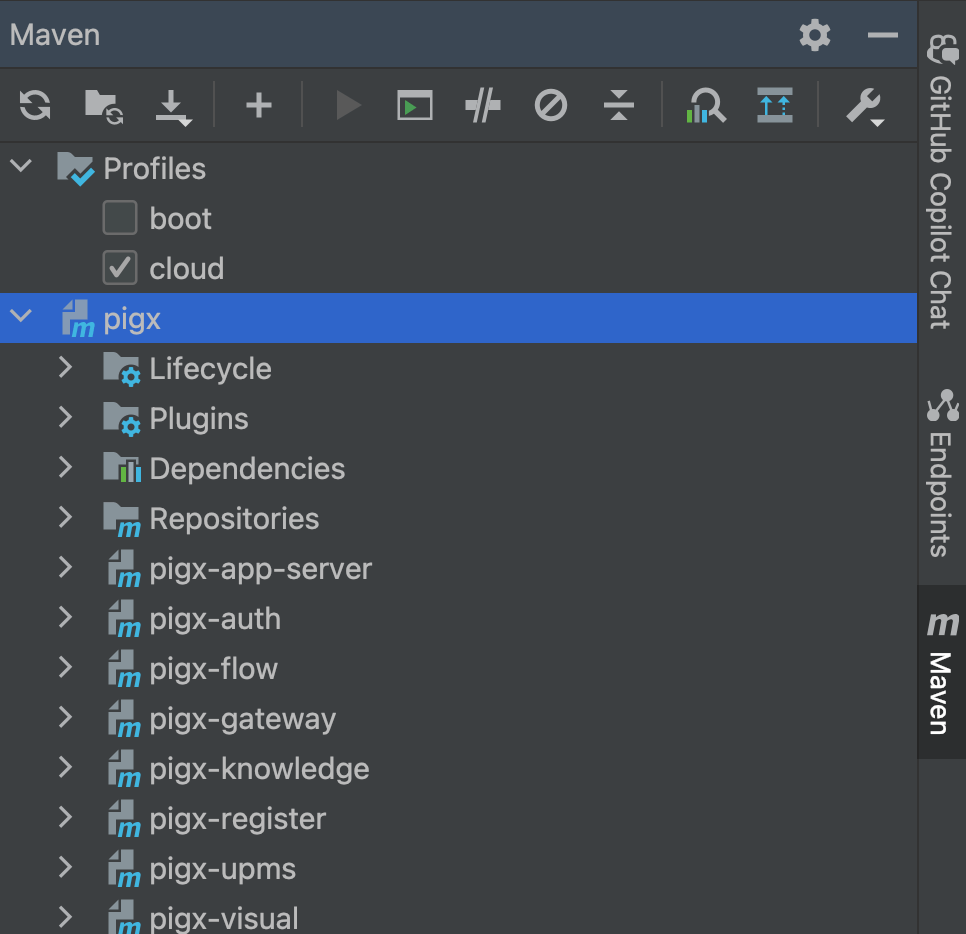
# PRESENTING CODE
# PRESENTING CODE
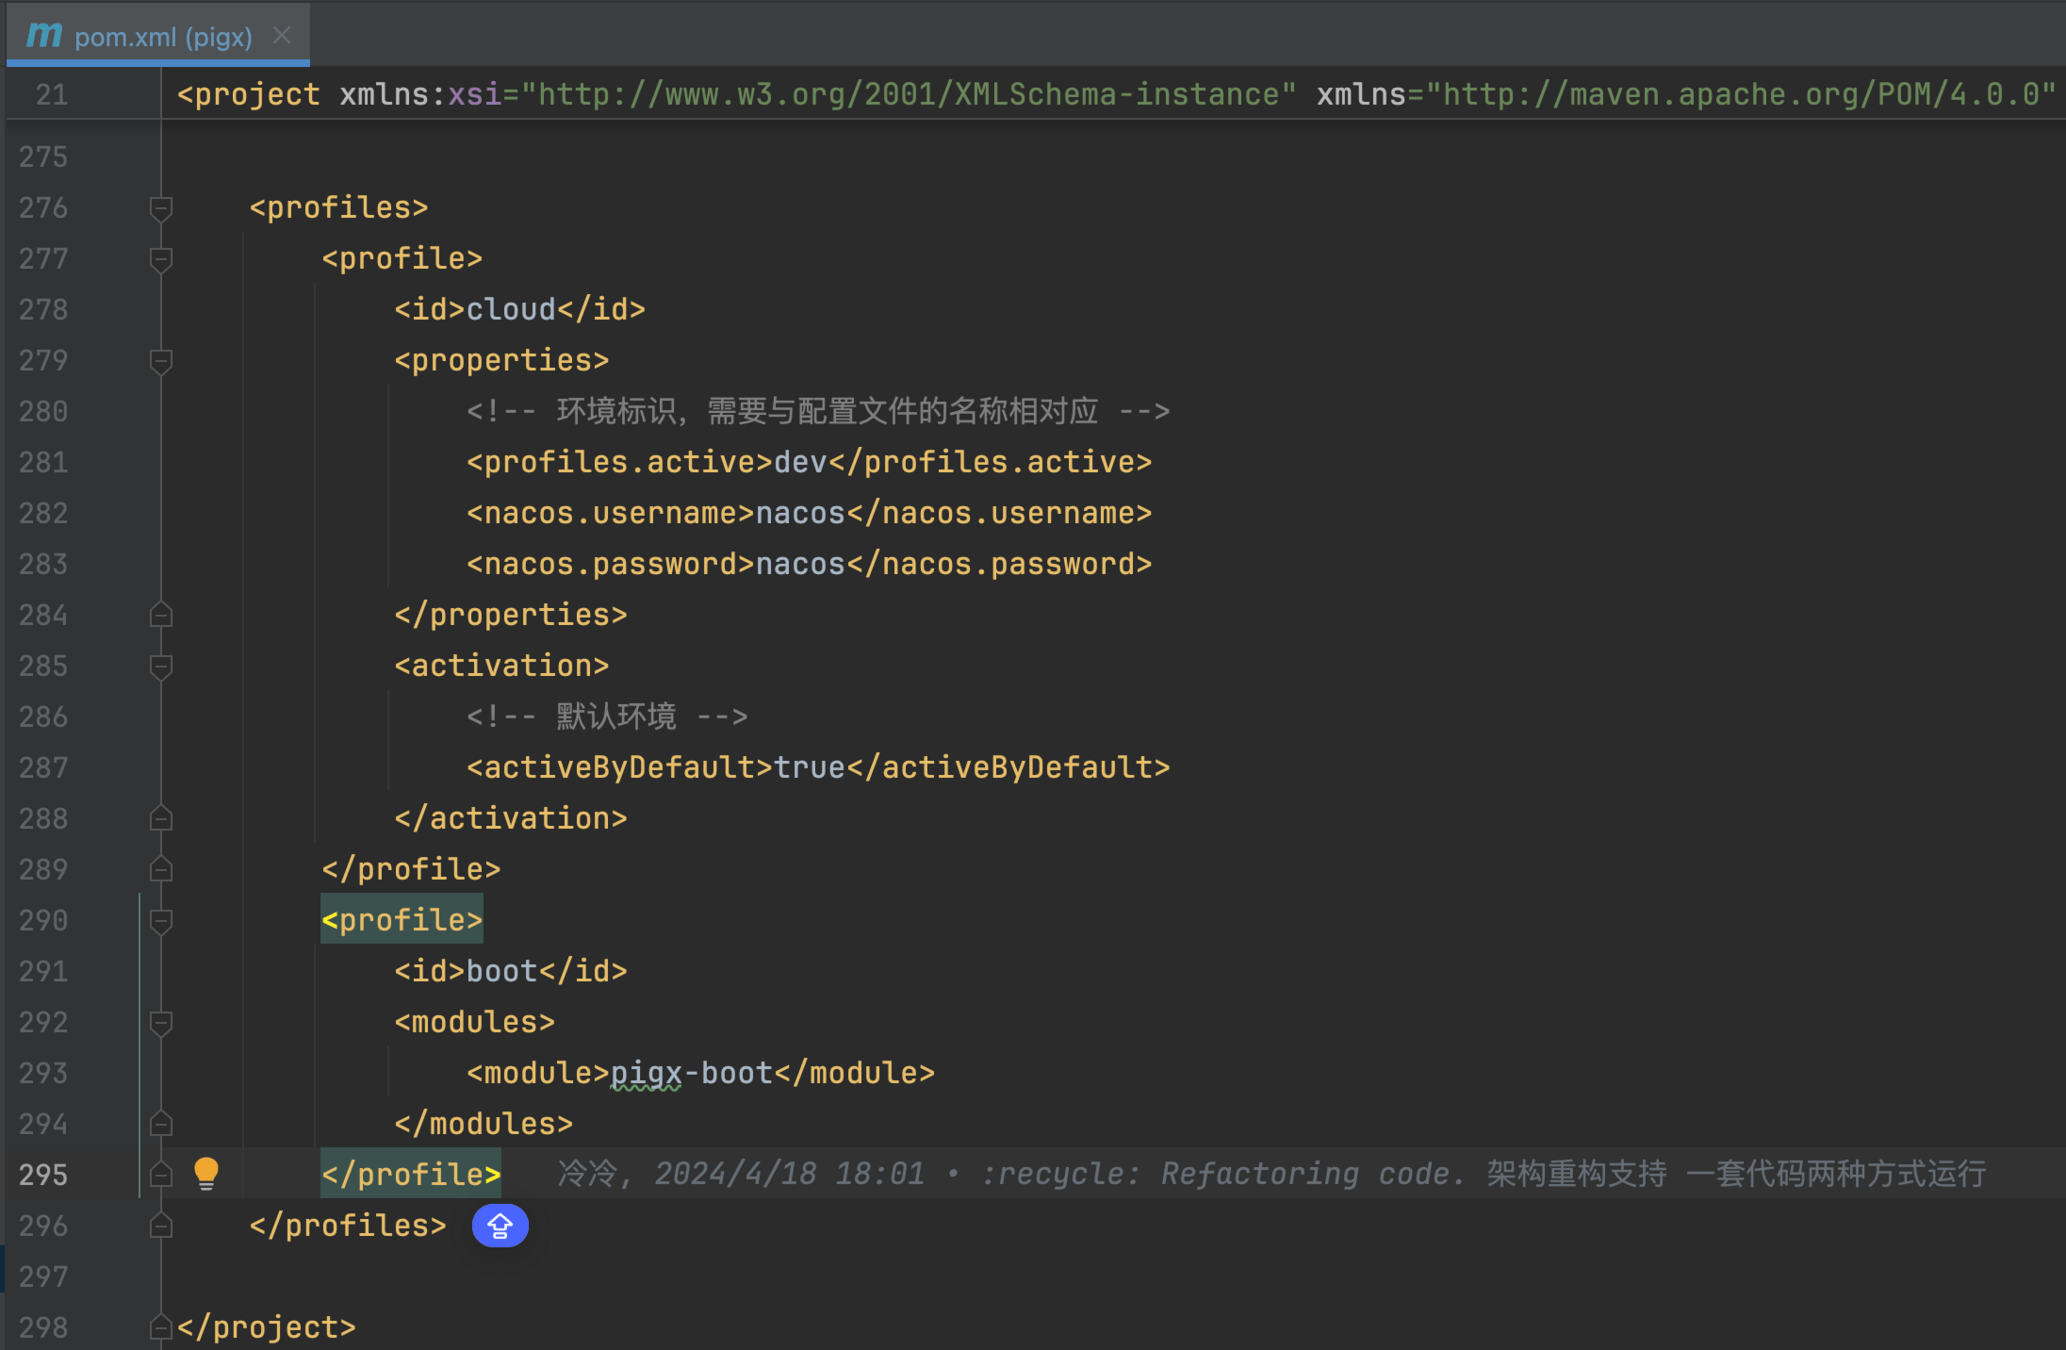
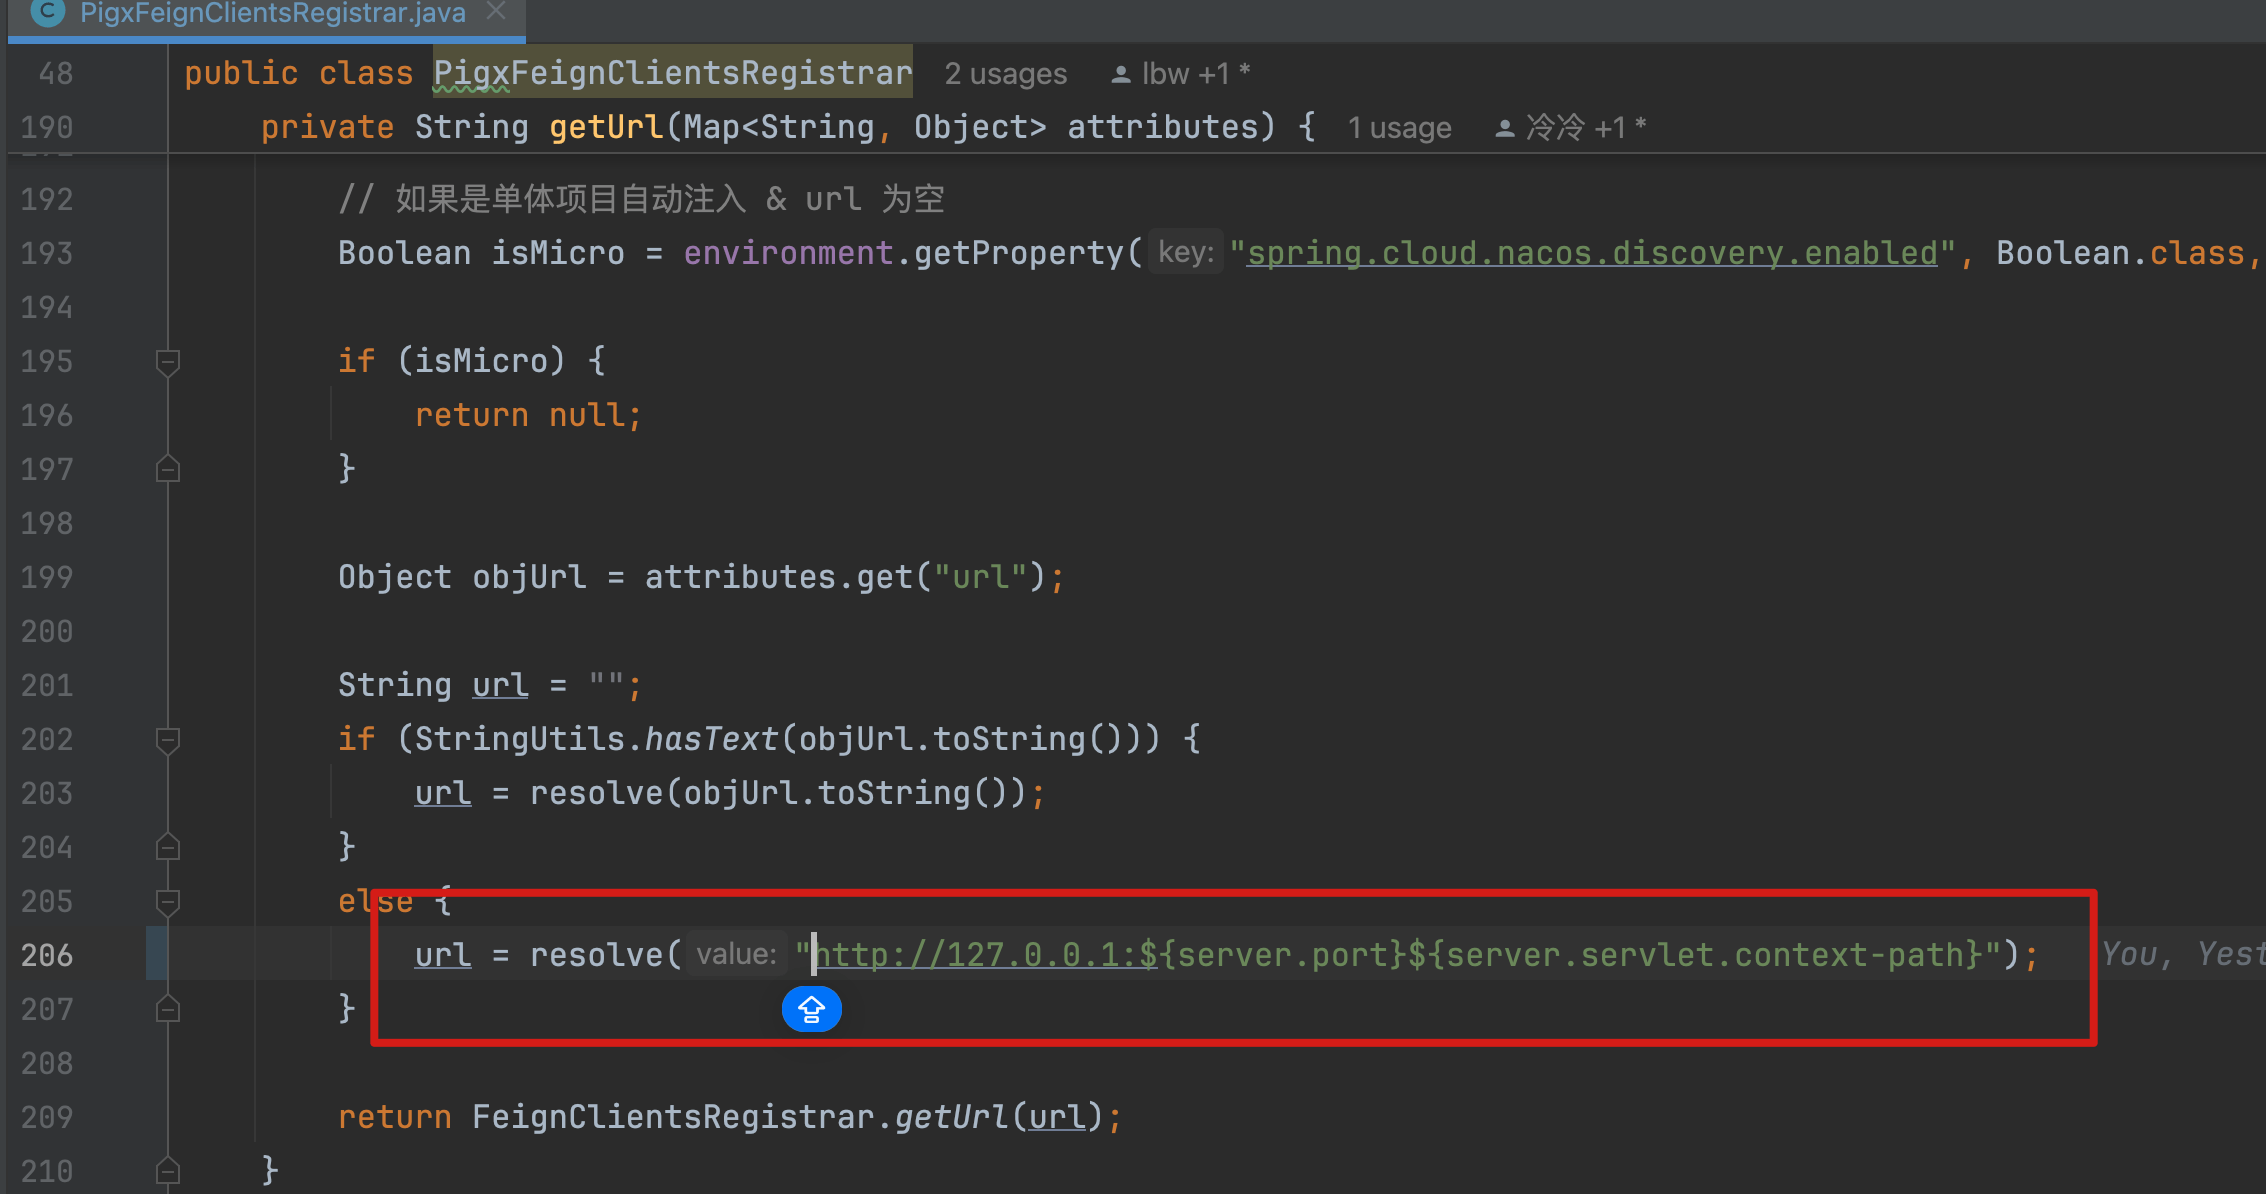
单体模式下,模块之间是如何访问的?
<?xml version="1.0" encoding="UTF-8"?>
<!--
    小技巧: 在根pom里面设置统一存放路径,统一管理方便维护
    <properties>
        <log-path>/Users/lengleng</log-path>
    </properties>
    1. 其他模块加日志输出,直接copy本文件放在resources 目录即可
    2. 注意修改为 <property name="log.path" value="${log-path}"/>
-->
<configuration debug="false" scan="false">
	<property name="log.path" value="${log-path}"/>

	<!-- Level: FATAL 0  ERROR 3  WARN 4  INFO 6  DEBUG 7 -->
	<root level="ERROR">
		<appender-ref ref="console"/>
		<appender-ref ref="debug"/>
		<appender-ref ref="error"/>
	</root>
</configuration>
# PRESENTING CODE
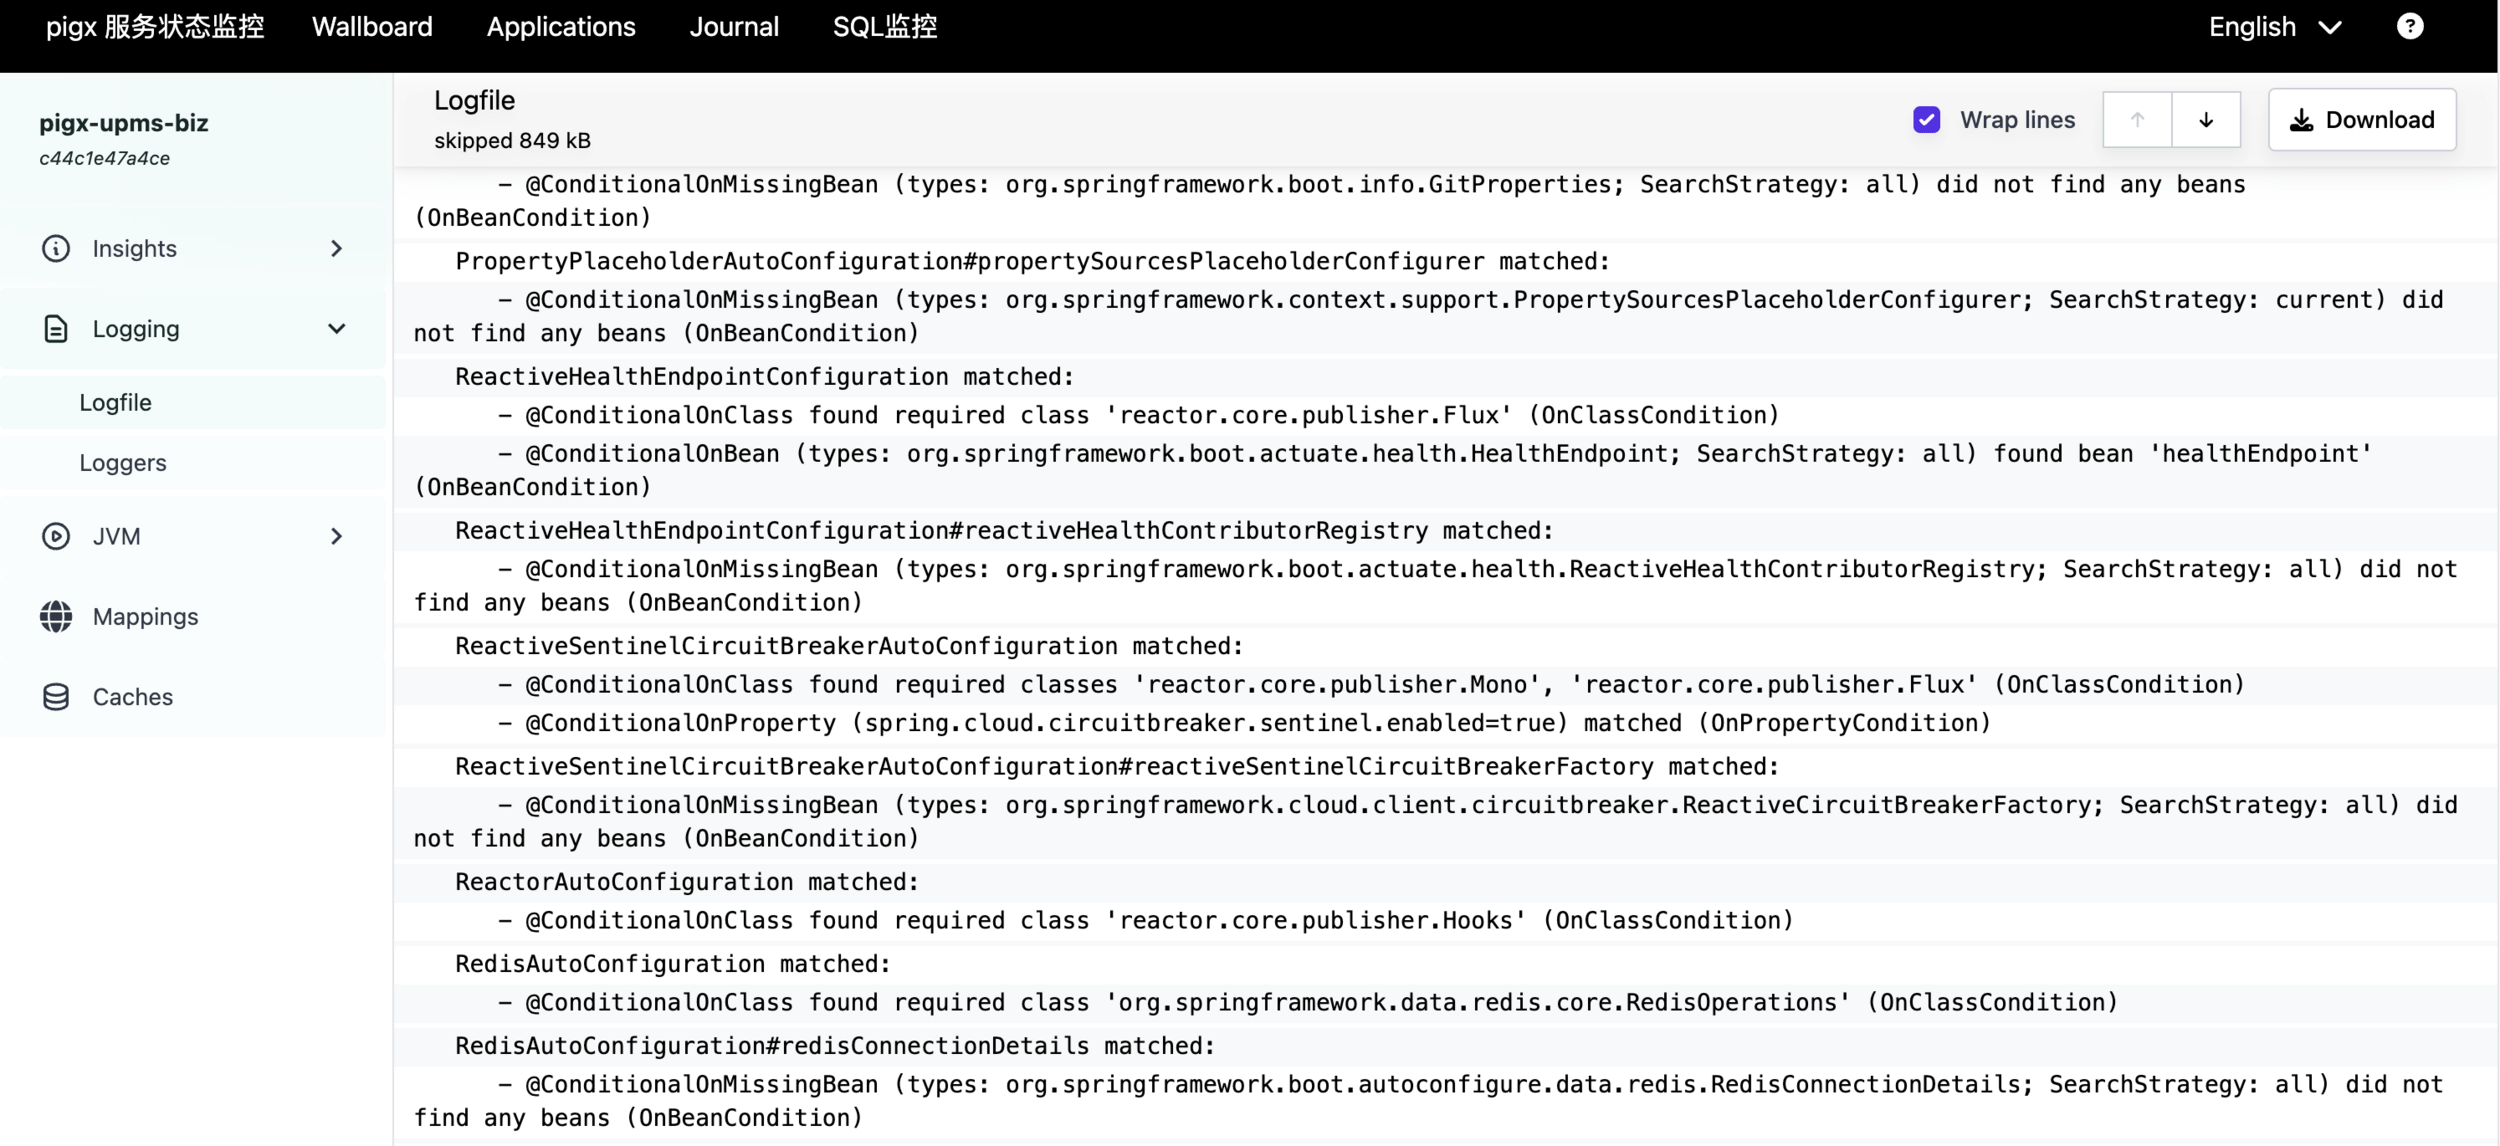
日志细节
# PRESENTING CODE
日志细节
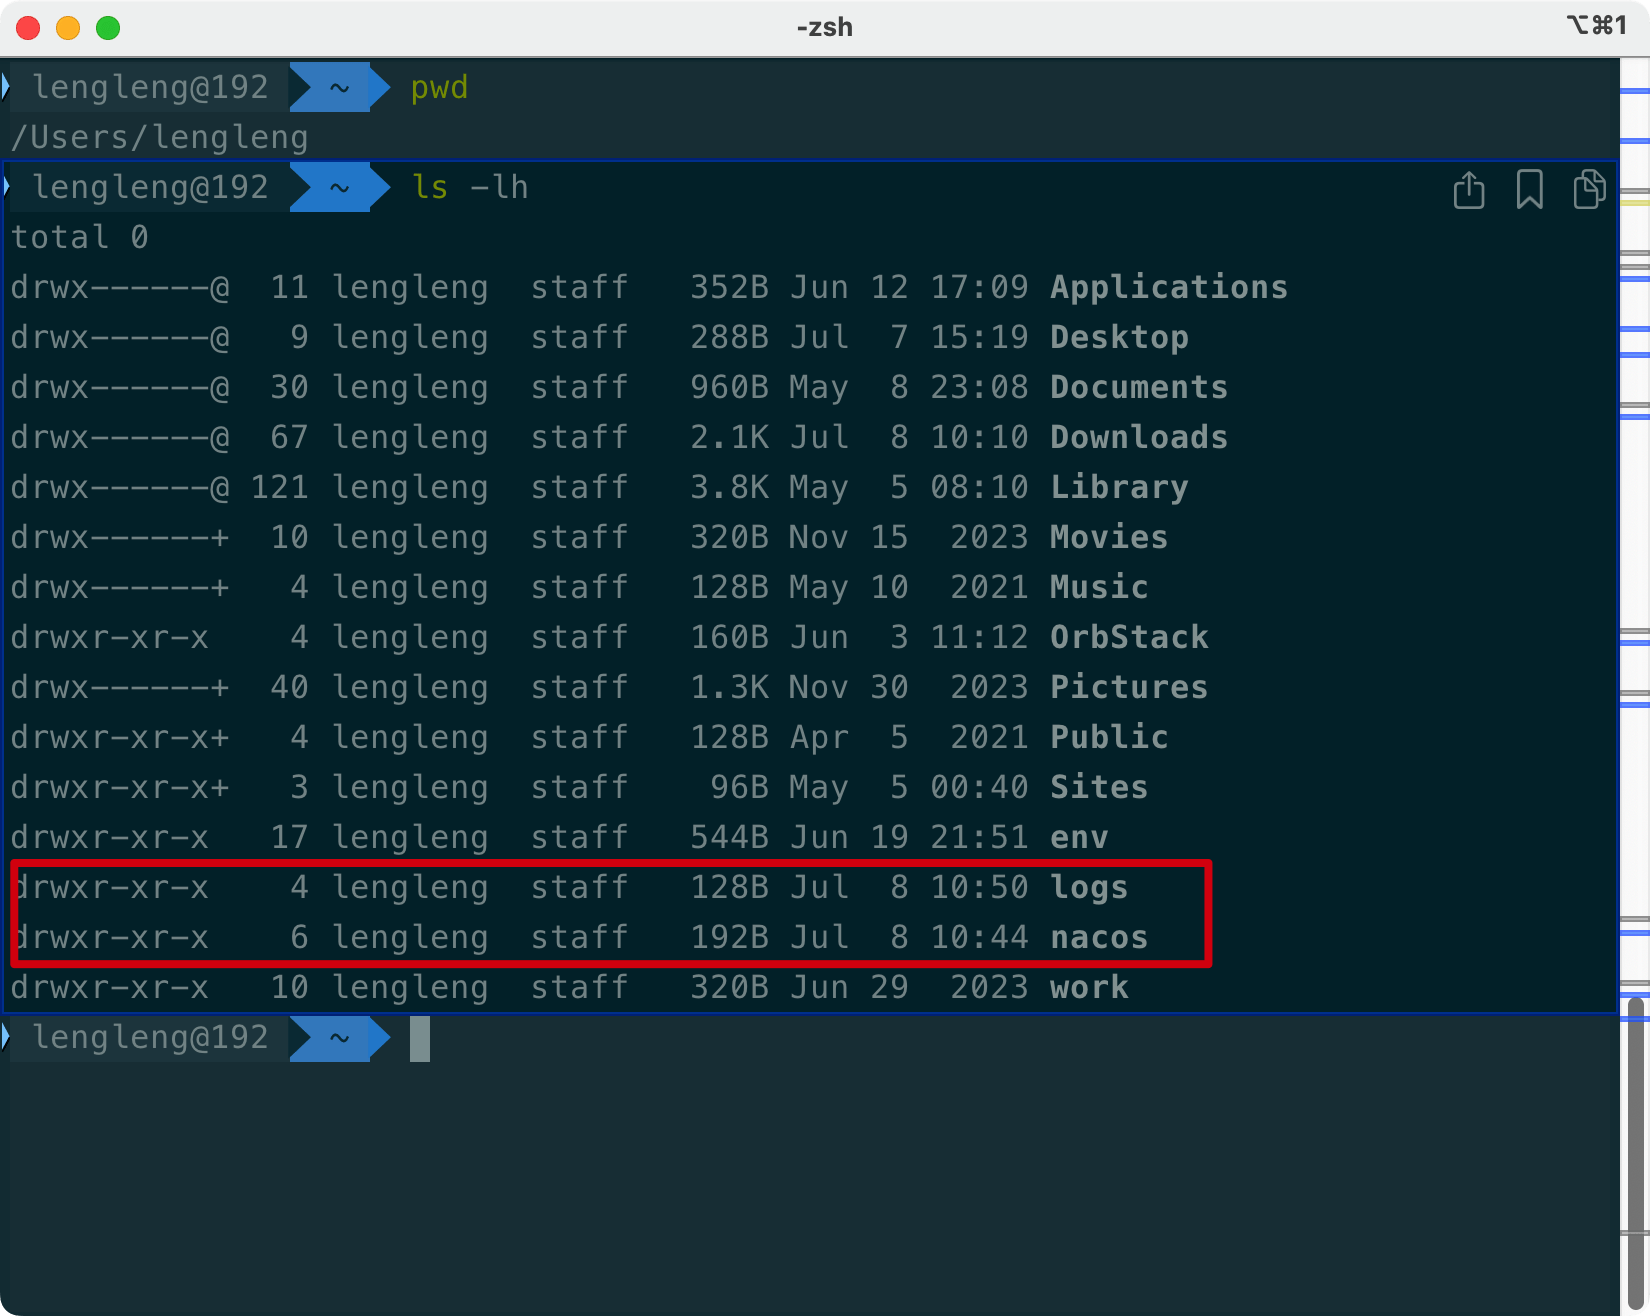
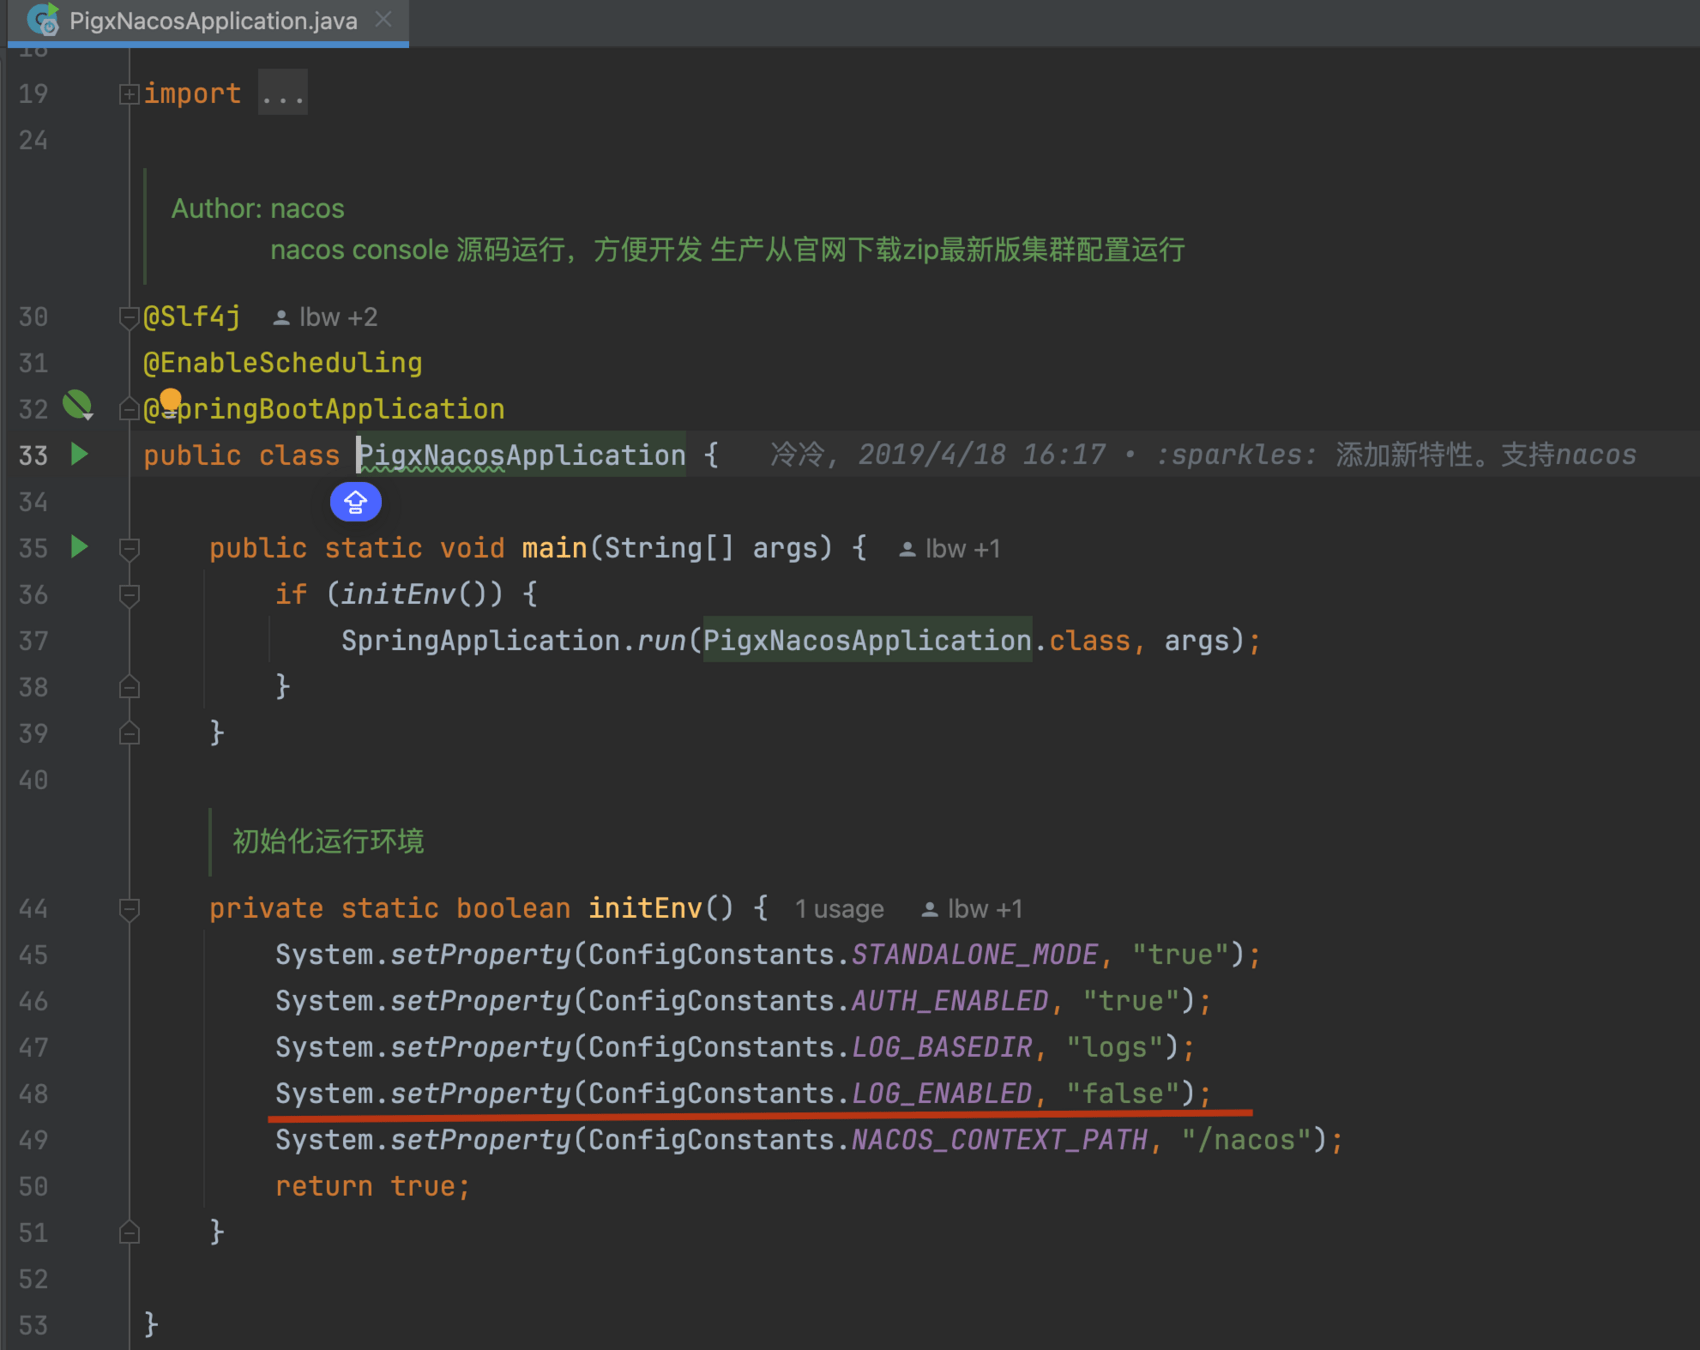
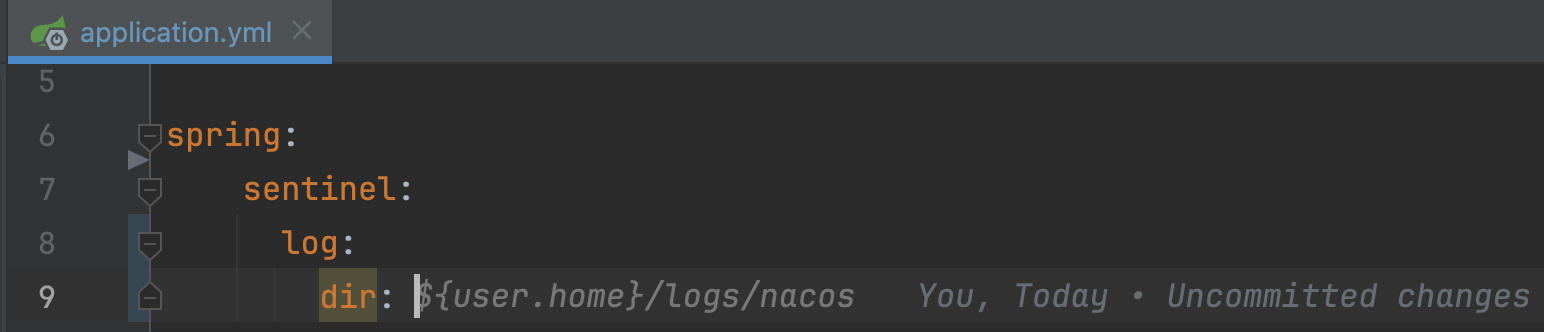
# PRESENTING CODE
日志细节
2024-07-08 22:40:36.255  INFO 37979 --- [         task-1] c.p.p.c.data.mybatis.DruidSqlLogFilter   :

======= Sql Logger ======================
select id, name, code, tenant_domain, website_name , logo, footer, mini_qr, background, start_time , end_time, status, menu_id, create_by, update_by , del_flag, create_time, update_time from sys_tenant where del_flag = '0'
======= Sql Execute Time: 4.329ms =======
pigx:
mybatis:
show-sql: true
skip-table:
- schema_version# PRESENTING CODE
日志细节
pigx:
  log:
    enabled: true
    exclude-fields:
      - password
    max-length: 2000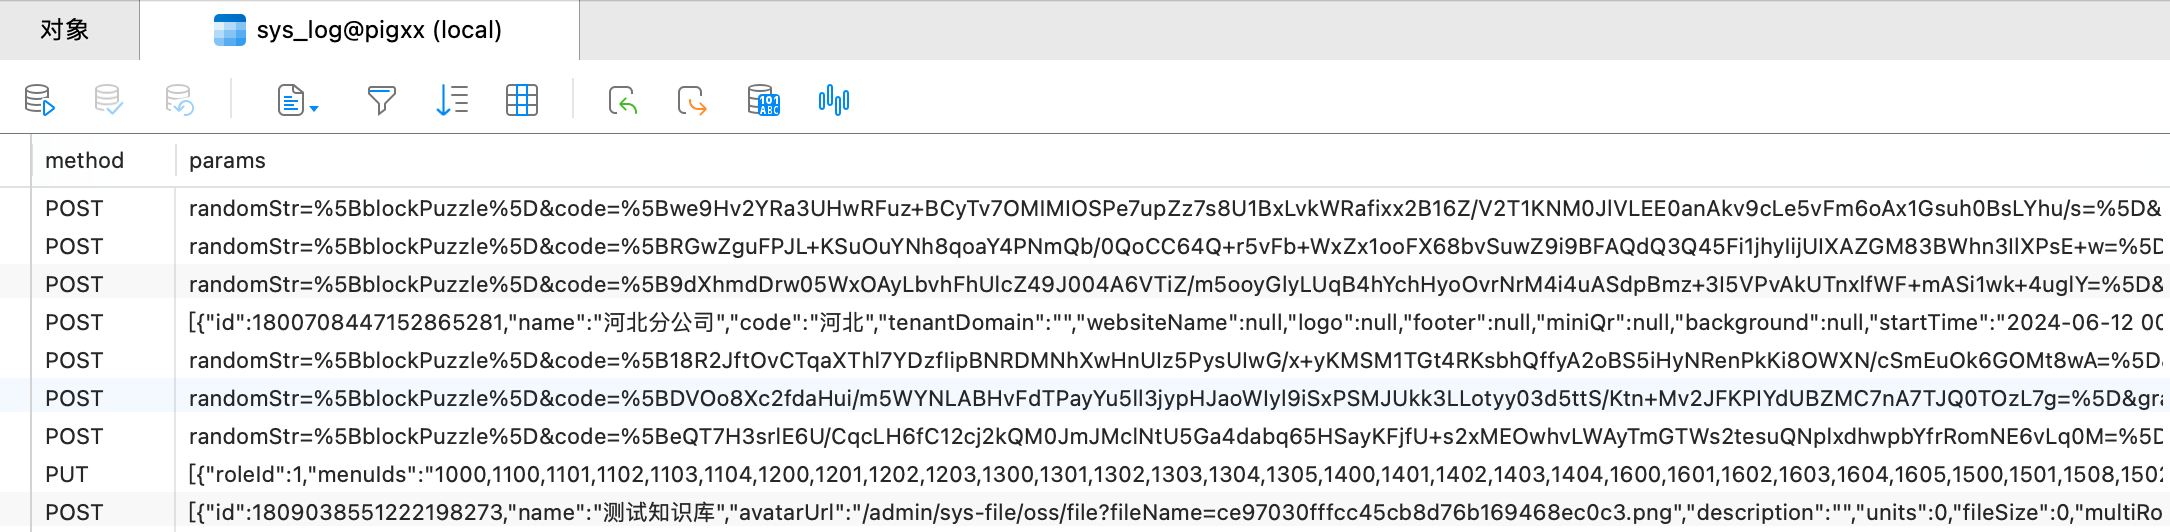
# PRESENTING CODE
日志细节

Docker 基础
# PRESENTING CODE
# step 1: 安装必要的一些系统工具
sudo yum install -y yum-utils device-mapper-persistent-data lvm2
# Step 2: 添加软件源信息
sudo yum-config-manager --add-repo https://mirrors.aliyun.com/docker-ce/linux/centos/docker-ce.repo
# Step 3
sudo sed -i 's+download.docker.com+mirrors.aliyun.com/docker-ce+' /etc/yum.repos.d/docker-ce.repo
# Step 4: 更新并安装Docker-CE
sudo yum makecache fast
sudo yum -y install docker-ce
# Step 4: 开启Docker服务
sudo service docker start
# 由于 pig v3 使用镜像分层技术,Docker 版本必须为 19.x+
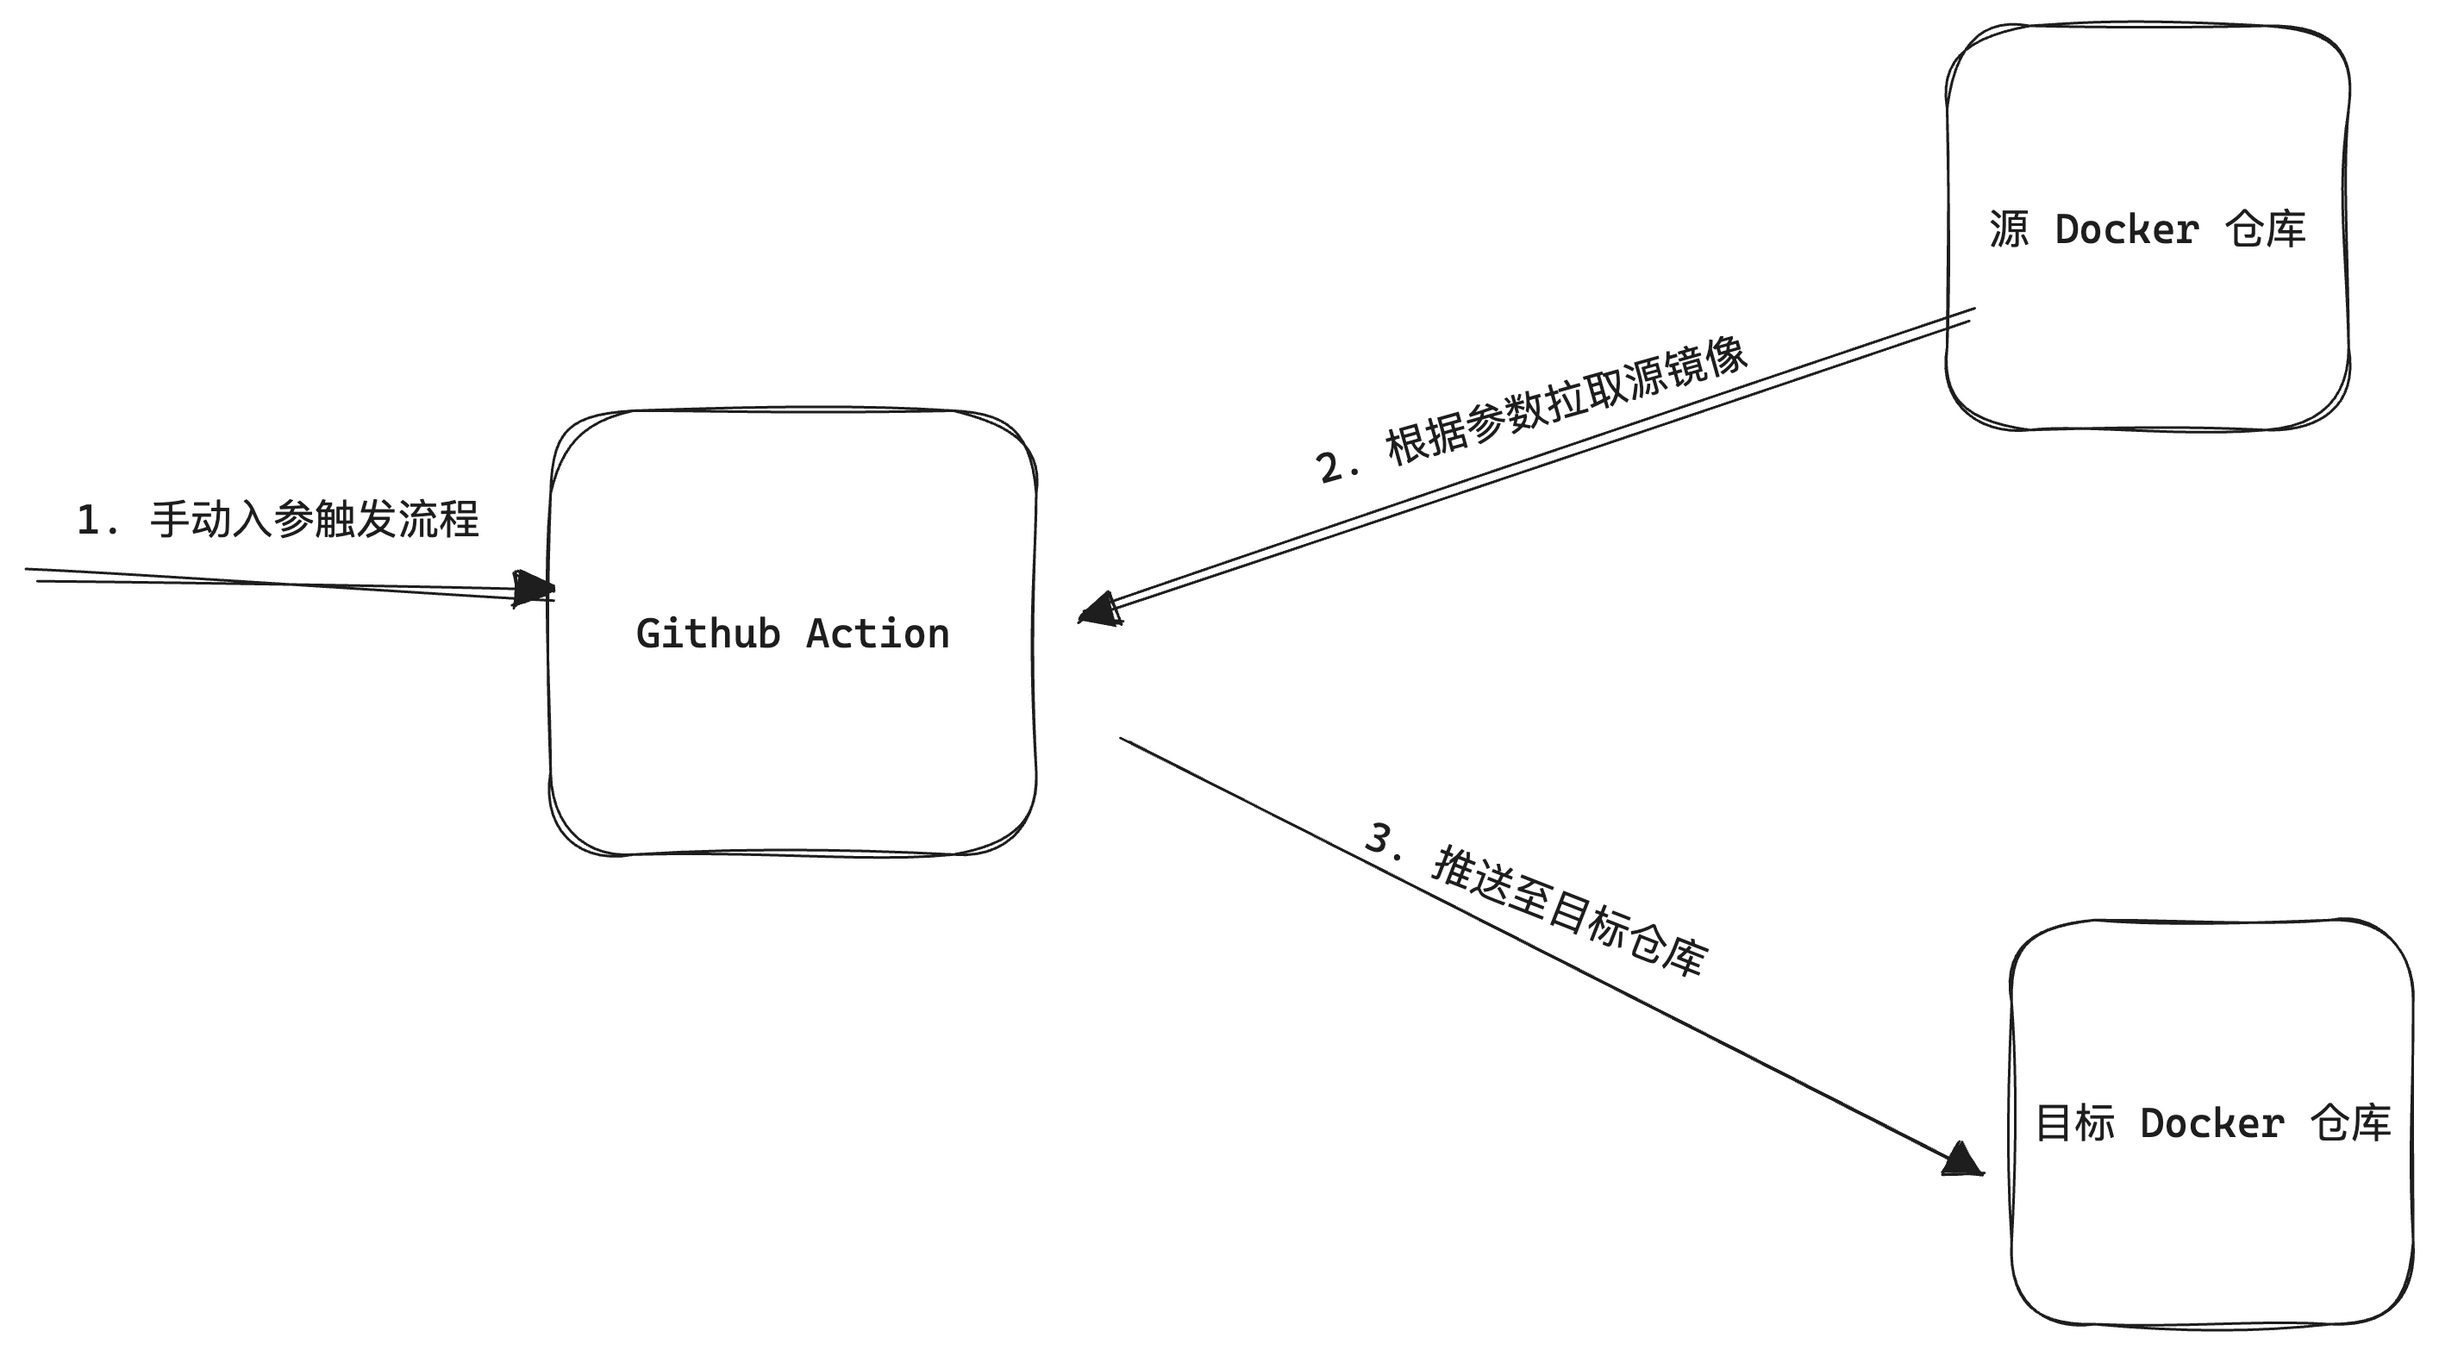
docker --version无法获取镜像?
# PRESENTING CODE
Dockerfile
FROM registry.cn-hangzhou.aliyuncs.com/dockerhub_mirror/java:21-anolis

MAINTAINER wangiegie@gmail.com

ENV TZ=Asia/Shanghai
ENV LANG C.UTF-8
ENV JAVA_OPTS="-Xms512m -Xmx1024m -Djava.security.egd=file:/dev/./urandom"

RUN ln -sf /usr/share/zoneinfo/$TZ /etc/localtime && echo $TZ > /etc/timezone

RUN mkdir -p /pigx-upms

WORKDIR /pigx-upms

EXPOSE 4000

ADD ./target/pigx-upms-biz.jar ./

CMD sleep 60;java $JAVA_OPTS -jar pigx-upms-biz.jar
# PRESENTING CODE
服务编排
# 服务端构建
mvn clean install
docker compose build && docker compose up

# 前端构建
pnpm install
npm run build:docker
cd docker && docker compose build && docker compose up
# PRESENTING CODE
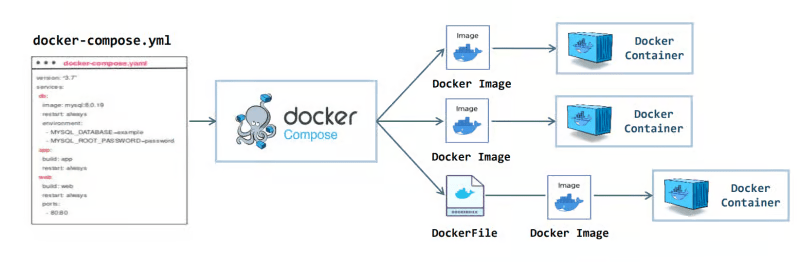
compose 网络模型
# PRESENTING CODE
version: '3'
services:
  pigx-mysql:
    build:
      context: ./db
    environment:
      MYSQL_ROOT_HOST: "%"
      MYSQL_ROOT_PASSWORD: root
    restart: always
    container_name: pigx-mysql
    image: pigx-mysql
    command: --lower_case_table_names=1
    networks:
      - spring_cloud_default

  pigx-upms:
    build:
      context: ./pigx-upms/pigx-upms-biz
    restart: always
    container_name: pigx-upms
    image: pigx-upms
    networks:
      - spring_cloud_default

networks:
  spring_cloud_default:
    name:  spring_cloud_default
    driver: bridge
compose 网络模型
# PRESENTING CODE
version: '3'
services:
  pigx-ui:
    build:
      context: .
    restart: always
    container_name: pigx-ui
    image: pigx-ui
    networks:
      - spring_cloud_default
    external_links:
      - pigx-gateway
    ports:
      - 80:80

# 加入到后端网络, 默认为 pigx_default  | docker network ls   查看
networks:
  spring_cloud_default:
    external: true
命令区别
# PRESENTING CODE
docker compose up


docker-compose up-
独立安装:不论是V1还是V2版本,指令都是docker-compose(中间是短横线)。
-
插件安装:在V2版本,指令是docker compose(中间是空格),最新版的docker安装时会自动以插件的形式安装docker compose。
# CHAPTER 2
# CHAPTER 2
为什么需要云效
1. 完全免费
# CHAPTER 2
2. 实用简单
3. 功能齐全
# PRESENTING CODE
简单易用
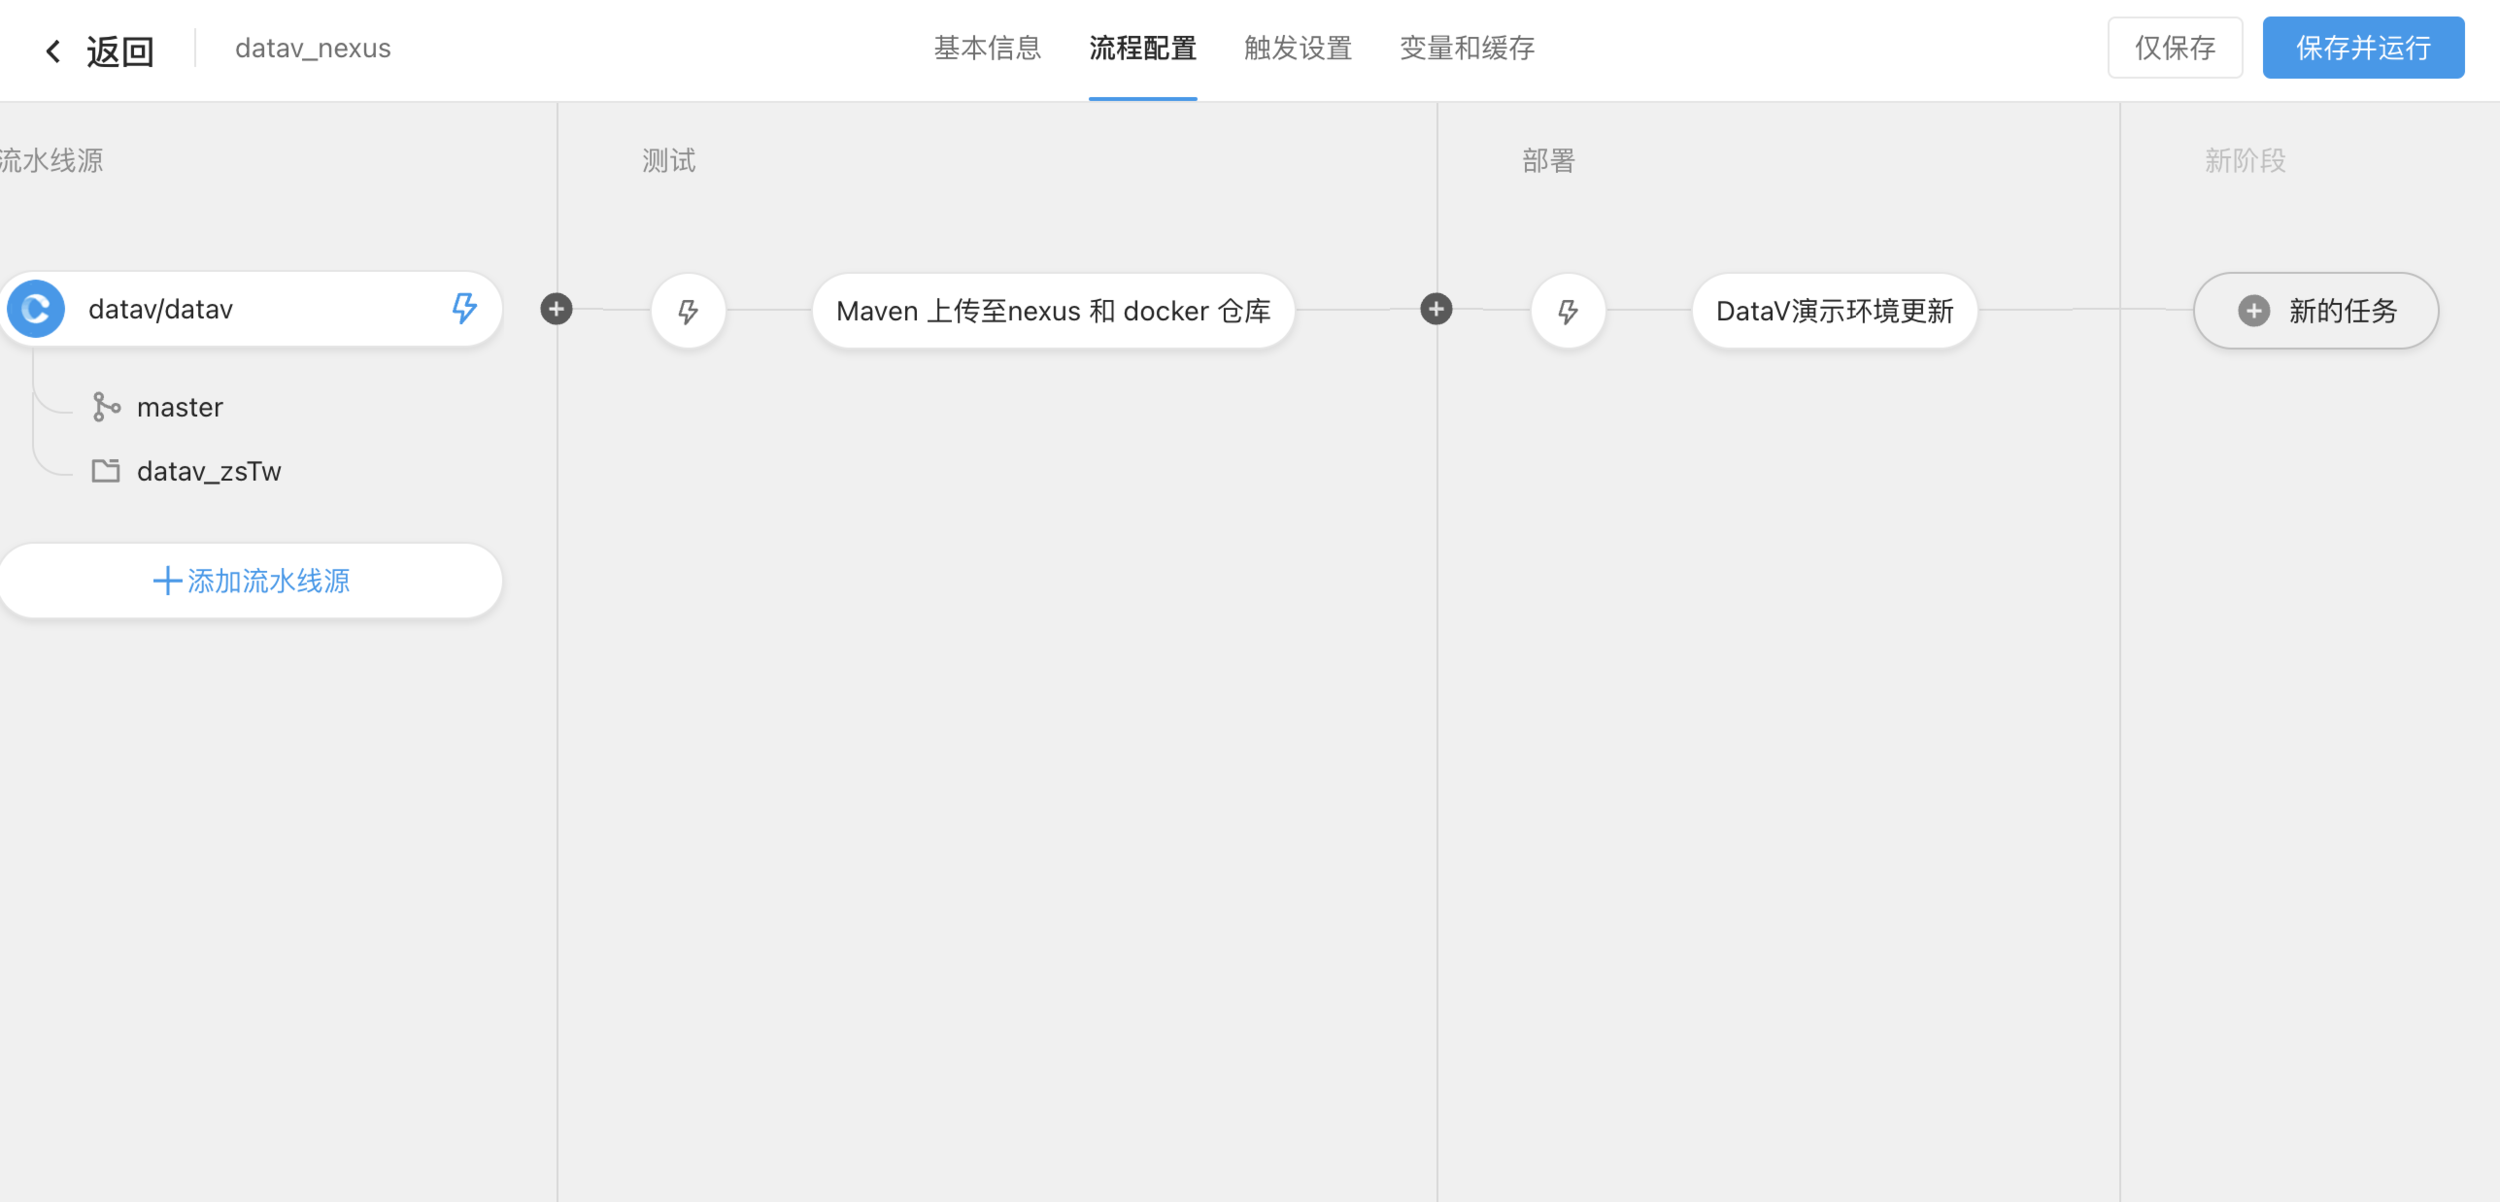
# PRESENTING CODE
功能齐全

# PRESENTING CODE
<!-- 上传配置 -->
<distributionManagement>
  <repository>
    <id>rdc-releases</id>
    <url>https://packages.aliyun.com/maven/repository/2480464-release-3Mn7W1</url>
  </repository>
  <snapshotRepository>
    <id>rdc-snapshots</id>
    <url>https://packages.aliyun.com/maven/repository/2480464-snapshot-rxMJz3</url>
  </snapshotRepository>
</distributionManagement>

<!-- 下载配置 -->
<repositories>
  <repository>
    <id>rdc-releases</id>
    <url>https://packages.aliyun.com/maven/repository/2480464-release-3Mn7W1</url>
    <releases>
      <enabled>true</enabled>
    </releases>
    <snapshots>
      <enabled>true</enabled>
    </snapshots>
  </repository>
</repositories>
# PRESENTING CODE
-
pigx/pom.xml
-
pigx/pigx-common/pigx-common-bom/pomx.xml
<!-- 密钥信息 -->
<server>
  <id>rdc-releases</id>
  <username>647d517d96bcb8c759a9fda5
  </username>
  <password>ZgDNKrbzu)Qb</password>
</server>
<server>
  <id>rdc-snapshots</id>
  <username>647d517d96bcb8c759a9fda5
  </username>
  <password>ZgDNKrbzu)Qb</password>
</server>
# PRESENTING CODE
maven/setting.xml
bom 模块
# PRESENTING CODE
一个中大型的 Java 基础框架项目往往包含许多 JAR 包,如果将这些 JAR 包单独发布给业务开发使用,这些不同版本 JAR 包间的兼容性维护将变得十分麻烦。为了解决这个问题,将一组 JAR 包兼容的版本号定义在这个模块中,对外发布时只发布这个特殊模块。这个特殊模块就是 BOM(Bill Of Materials)。
著名的 Spring Boot 就使用了这种方式来管理版本号,这个模块就是 spring-boot-dependencies,用户在使用 Spring Boot Starter 相关依赖时引入特定版本的 spring-boot-dependencies,然后在引入其它依赖时只需要声明 group 和 name 即可,不需要再指定版本号了。
<properties>
    # docker私服地址 推荐使用 Harbor
	<docker.registry>registry.cn-hangzhou.aliyuncs.com</docker.registry>
	# docker 主机的remoteAPI (远程操作docker 本机不需要安装)
	<docker.host>http://127.0.0.1:2375</docker.host>
	# docker 私服中 命名空间
	<docker.namespace>pigcloudx</docker.namespace>
	# docker 私服用户名
	<docker.username>佩小格科技</docker.username>
	# docker 私服密码
	<docker.password>qq123456</docker.password>
</properties>
# PRESENTING CODE
vim /etc/docker/daemon.json

{
  "hosts": ["tcp://0.0.0.0:2375", "unix:///var/run/docker.sock"]
}
镜像命名规则
registry.cn-hangzhou.aliyuncs.com/pigcloudx/pigx-gateway:5.5.0# PRESENTING CODE
- 仓库host(仓库访问地址)
- 仓库空间(文件夹)
- 镜像名称
- 镜像版本
# PRESENTING CODE

Kubernetes 是一个开源的多主机容器编排平台,用于自动化部署、扩展和管理容器化应用程序。它提供了强大的功能,如自动负载均衡、服务发现、自动伸缩和滚动升级。
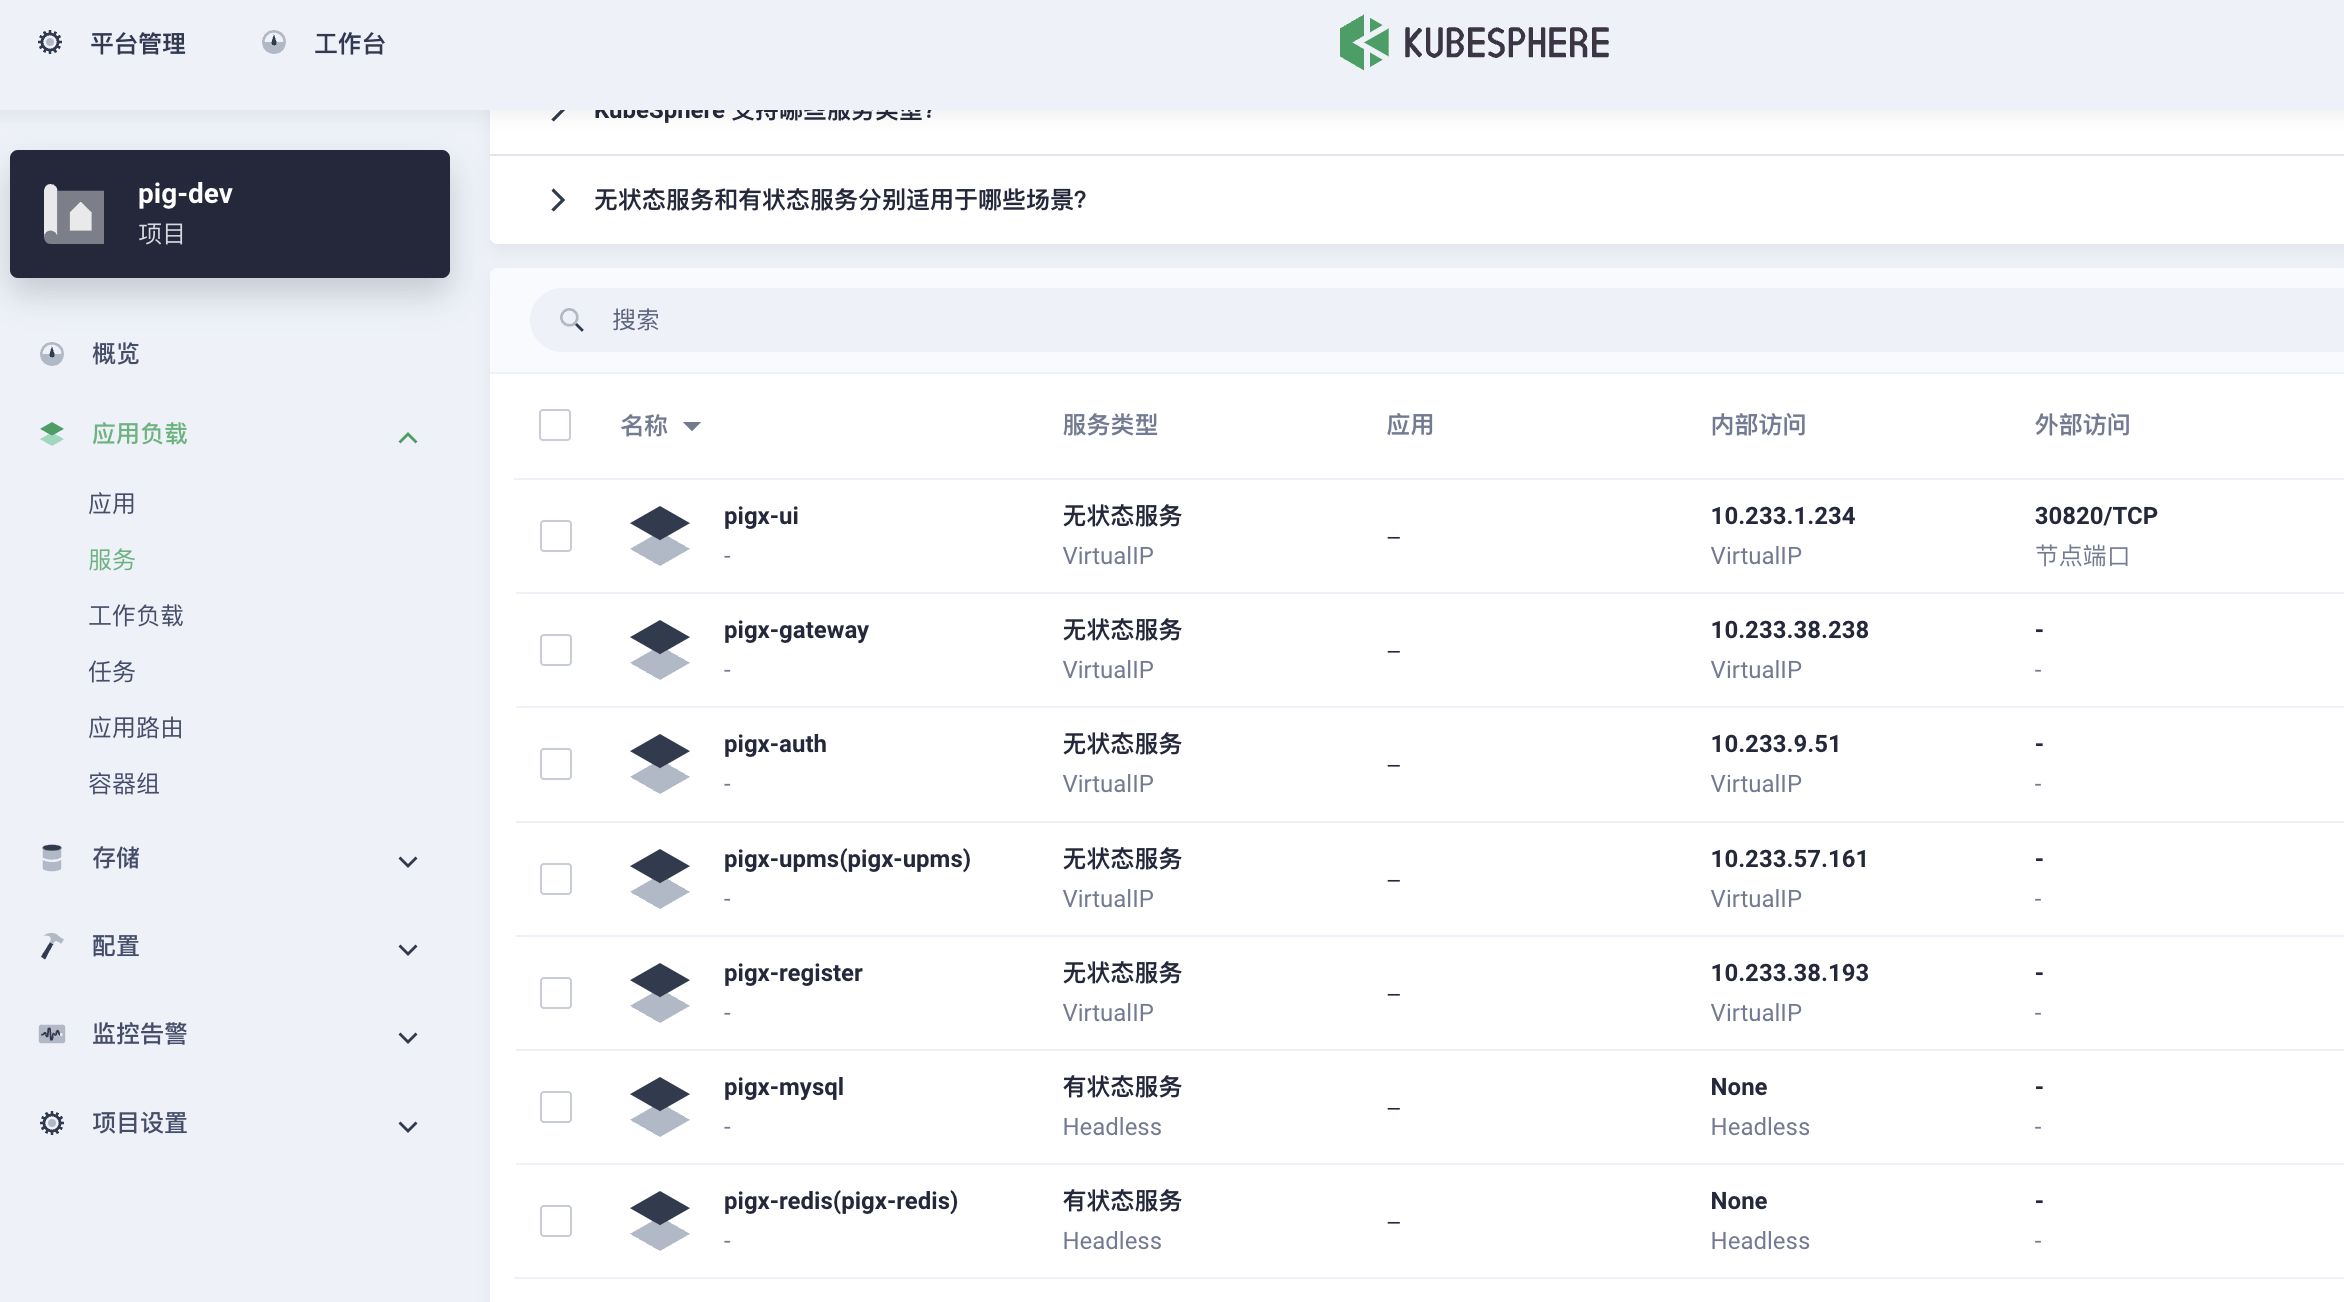
Kubesphere
# PRESENTING CODE
KubeSphere 是在 Kubernetes 之上构建的提供简单易用的操作界面以及向导式操作方式,降低用户使用容器调度平台学习成本。
安装 kubesphere
curl -O http://vip.pigx.top/os7init.sh
sh os7init.sh pig4cloud


sudo yum install -y yum-utils device-mapper-persistent-data lvm2
sudo yum-config-manager --add-repo https://mirrors.aliyun.com/docker-ce/linux/centos/docker-ce.repo
sudo sed -i 's+download.docker.com+mirrors.aliyun.com/docker-ce+' /etc/yum.repos.d/docker-ce.repo
sudo yum makecache fast
sudo yum -y install docker-ce
sudo service docker start
docker --version


sudo mkdir -p /etc/docker
sudo tee /etc/docker/daemon.json <<-'EOF'
{
  "registry-mirrors": [
    "https://docker.credclouds.com",
    "https://k8s.credclouds.com",
    "https://quay.credclouds.com",
    "https://gcr.credclouds.com",
    "https://k8s-gcr.credclouds.com",
    "https://ghcr.credclouds.com"
  ]
}
EOF
sudo systemctl daemon-reload
sudo systemctl restart docker


export KKZONE=cn
curl -sfL https://get-kk.kubesphere.io | VERSION=v3.0.13 sh -
./kk create cluster --with-kubernetes v1.22.12 --with-kubesphere v3.4.1
kubectl logs -n kubesphere-system $(kubectl get pod -n kubesphere-system -l 'app in (ks-install, ks-installer)' -o jsonpath='{.items[0].metadata.name}') -f
# PRESENTING CODE
Kubesphere
registry.cn-hangzhou.aliyuncs.com/pigcloudx/pigx-mysql:5.5.0

registry.cn-hangzhou.aliyuncs.com/dockerhub_mirror/redis

registry.cn-hangzhou.aliyuncs.com/pigcloudx/pigx-register:5.5.0

registry.cn-hangzhou.aliyuncs.com/pigcloudx/pigx-upms-biz:5.5.0

registry.cn-hangzhou.aliyuncs.com/pigcloudx/pigx-auth:5.5.0

registry.cn-hangzhou.aliyuncs.com/pigcloudx/pigx-gateway:5.5.0

registry.cn-hangzhou.aliyuncs.com/pigcloudx/pigx-ui
# PRESENTING CODE
Kubesphere
# PRESENTING CODE
-
服务创建
-
环境变量
-
pod管理
-
服务对外
PIGX 敏捷开发分享
By 冷冷


