Automate Your React Workflow
By: Monica Powell
@waterproofheart
ReactJS Girls Conf 2019
Hi, I'm Monica!
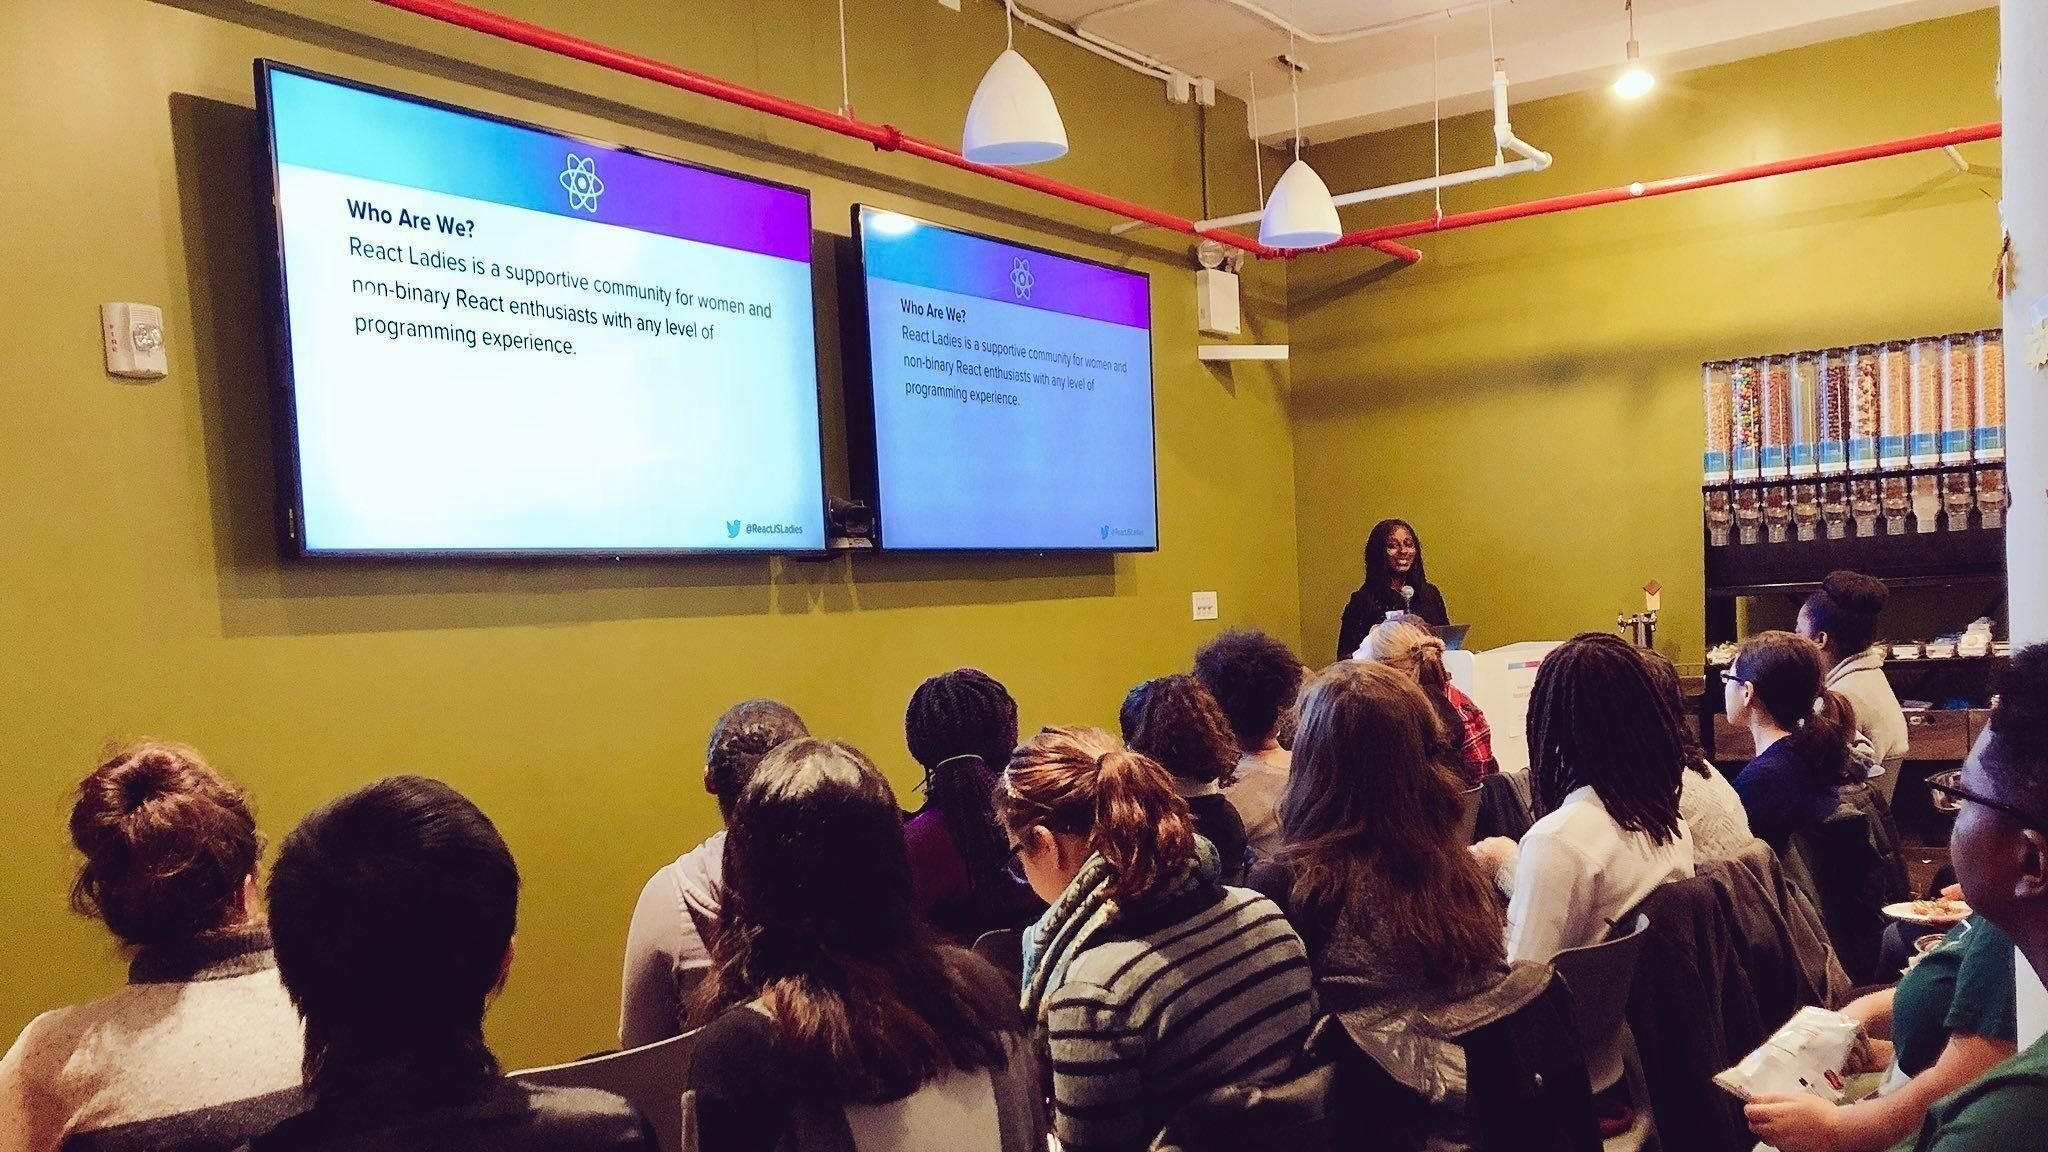
I'm a Full Stack Engineer at Meetup && organizer of the React Ladies Group in NYC
I’ve written about git and other tech adventures in publications such as FreeCodeCamp, Hacker Noon and Code Like A Girl.
@waterproofheart
Follow Along
@waterproofheart
|
1) Introduction |
2) React App Architecture |
|
|---|---|---|
|
3) What is Scaffolding? |
4) Scaffolding Options |
5) DIY Scaffolding |
Overview
@waterproofheart
What does a typical React app look like?
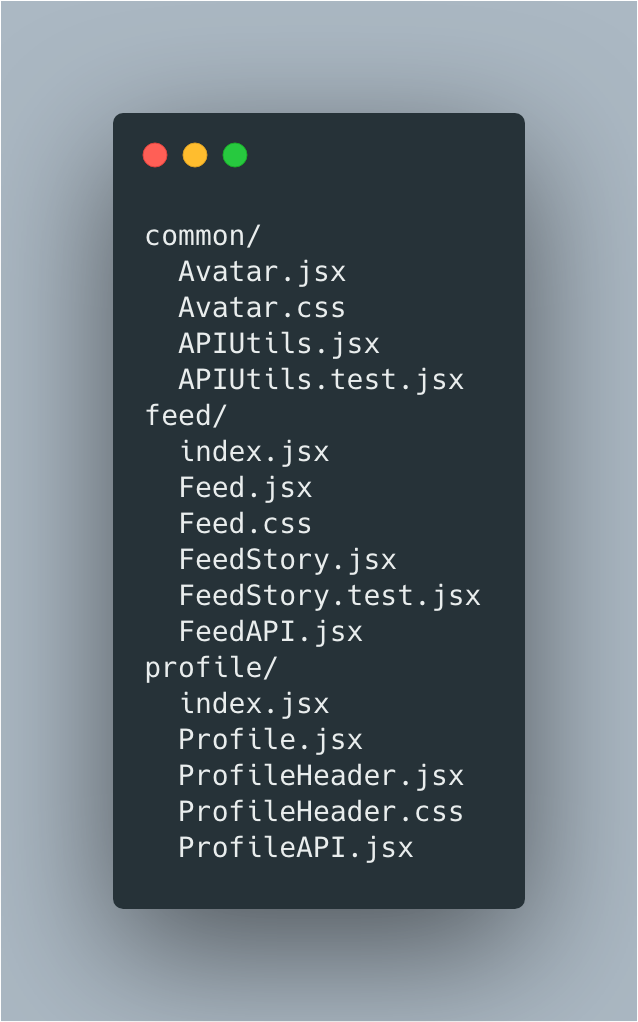
Example modifed from: https://reactjs.org/docs/
- UI components are the building blocks of React apps
- Multiple components require test, CSS, translation, etc. files locally scoped to each component
@waterproofheart
Adding components can be repetitive...

@waterproofheart
What if you want consistency across components without having to copy + paste + then manually change code between files?

@waterproofheart
The answer is
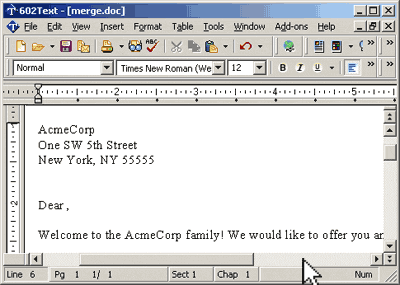
templates
mail merge
@waterproofheart
Is it worth the time?
@waterproofheart

Source: https://xkcd.com/1205/
Scaffolding
- Scaffolding software is the process of generating starter-code based on templates.
- The starter-code is compromised of boilerplate code that is shared between all code components that share the same conventions.
- Minimial Viable Component != ready for production.
@waterproofheart
Scaffolding
Some benefits of scaffolding are:
- Reduce time to generate new projects or components.
- less error-prone than copy & pasting & editing
- encourage consistency and implementation of design patterns

@waterproofheart
Scaffolding Can Improve Developer Experience
Having an efficient way to consistently implement standards minimizes certain questions about conventions and helps engineers have a more enjoyable onboarding experience when working with a new codebase.
@waterproofheart
Where can I find the translations for this component?
What's the current source of truth for our code standards?
Does every component go in the same folder?
How are components named?
What style should JavaScript components be written in?

Scaffolding Can Answer FAQs
@waterproofheart
Scaffolding Tools

@waterproofheart
React-Boilerplate
-
React-boilerplate reduces overhead for developing a React app optimized for production
-
One-size-fits-all approach can unecessarily increase complexity and dependencies
- Includes CLI tool to scaffold React components, containers, routes, selectors and sagas

@waterproofheart
React-Boilerplate
@waterproofheart
Separate Templates Based on Type of Component
import React, { Component } from 'react';

export class MyComponent extends Component {
  render() {
    return (
      <div></div>
    );
  }
}
const MyComponent = (props) => {
return (
<div></div>
);
}Class
Functional
@waterproofheart
Ignite

- React Ignite is similar to React-boilerplate but for React Native
- Includes various customizable tools to jump start the creation of React Native applications
- "Ignite speeds up your app development by over two weeks on average."
@waterproofheart
Should developer use existing React scaffolding tools?
The beauty of an effective scaffolding tool is that these tools are designed to be highly-customizable to fit your needs without having to compromise on your standards or best practices.
@waterproofheart
Code Generators
More lightweight scaffolding solutions than
React Boilerplate and React Ignite
@waterproofheart
PlopJS
-
PlopJS is a microgenerator, and is used under the hood in React-Boilerplate
-
It generates files based on user input via a Command Line Interace (CLI).
-
Minimal setup required
@waterproofheart
PlopJS
-
Handlebars templating language
-
(similar to Mustache)

+
-
Inquirer.JS is a a collection of common interactive command line user interfaces.
@waterproofheart
Let's generate Kawaii Components
@waterproofheart
Structure of Kawaii Components
@waterproofheart
import { Backpack } from 'react-kawaii';

const Example = () => <Backpack size={ 300 } mood="lovestruck" color="#EC4067" />;
Getting started with Plop
Now what do we want to do with the user input we collected?
/**
*
* {{properCase mood}}{{properCase kawaiiComponent}}
* Description: This component is a {{mood}} {{kawaiiComponent}}.
*/

import React from 'react';
import { {{kawaiiComponent}} } from 'react-kawaii'

function {{properCase mood}}{{properCase kawaiiComponent}}() {
return (
<{{kawaiiComponent}} size={ {{size}} } mood="{{mood}}" color="{{color}}" />

);
}

{{properCase mood}}{{properCase kawaiiComponent}}.propTypes = {};

export default {{properCase mood}}{{properCase kawaiiComponent}};
@waterproofheart
Getting started with Plop
Plop is essentially a node module that accesses the plop API through a plop object that is passed in as a parameter.
module.exports = function (plop) {
    // create your generators here
    plop.setGenerator('basics', {
        description: 'this is a skeleton plopfile',
        prompts: [], // array of inquirer prompts
        actions: []  // array of actions
    });
};
@waterproofheart
Which component should we import?
Let's add out first prompt to select which Kawaii component we want to import
{
        type: "list",
        name: "kawaiiComponent",
        message: "Which Kawaii component would you like to generate?:",
        choices: [
          "Backpack",
          "Browser",
          "Cat",
          "CreditCard",
          "File",
          "Ghost",
          "IceCream",
          "Mug",
          "Planet",
          "SpeechBubble"
        ]
      },
@waterproofheart
What color should component be?
Let's add out first prompt to select which color we want our component to be
  {
        type: "list",
        name: "color",
        message: "What color should the component be:",
        choices: ["eggplant", "mint", "bubblegum pink", "purple", "lime"],
        filter: colour =>
          ({
            "eggplant": "#2E294E",
            "mint": "#1B998B",
            "bubblegum pink": "#EC4067",
            "purple": "#9A39AB",
            "lime": "#C5D86D"
          }[colour])
      },
@waterproofheart
What size should our component be?
Let's create a prompt for what size our component should be
  {
        type: "list",
        name: "size",
        message: "What size should the component be:",
        choices: ["extra small", "small", "medium", "large", "extra large"],
        filter: val =>
          ({
            "extra small": 100,
            "small": 200,
            "medium": 300,
            "large": 500,
            "extra large": 800
          }[val])
      }
@waterproofheart
What mood should our component have?
Let's add a prompt to select which the mood we want our component to have
 {
        type: "list",
        name: "mood",
        message: "Mood:",
        choices: [
          "sad",
          "shocked",
          "happy",
          "blissful",
          "lovestruck",
          "excited",
          "ko"
        ]
      }
@waterproofheart
Getting started with Plop
Now what do we want to do with the user input we collected?
actions: [
      {
        type: "add",
        path: "src/{{properCase mood}}{{properCase kawaiiComponent}}.jsx",
        templateFile: "src/plop-templates/kawaii-component-template.hbs"
      },
      {
        type: "add",
        path: "src/{{properCase mood}}{{properCase kawaiiComponent}}.test.jsx",
        templateFile: "src/plop-templates/test.hbs"
      }
]
@waterproofheart
Finished Plop File
Now what do we want to do with the user input we collected?
module.exports = function(plop) {
  plop.setGenerator("Generate Kawaii Component", {
    description: "Templates from the React Kawaii library ",
    prompts: [
      {
        type: "list",
        name: "kawaiiComponent",
        message: "Which Kawaii component would you like to generate?:",
        choices: [
          "Backpack",
          "Browser",
          "Cat",
          "CreditCard",...
        ]
      }, // truncated for example...
    ],
    actions: [
      {
        type: "add",
        path: "src/{{properCase mood}}{{properCase kawaiiComponent}}.jsx",
        templateFile: "src/plop-templates/kawaii-component-template.hbs"
      },
      {
        type: "add",
        path: "src/{{properCase mood}}{{properCase kawaiiComponent}}.test.jsx",
        templateFile: "src/plop-templates/test.hbs"
      }
  ]
  });
};
@waterproofheart
Getting started with Plop
Now what do we want to do with the user input we collected?

@waterproofheart
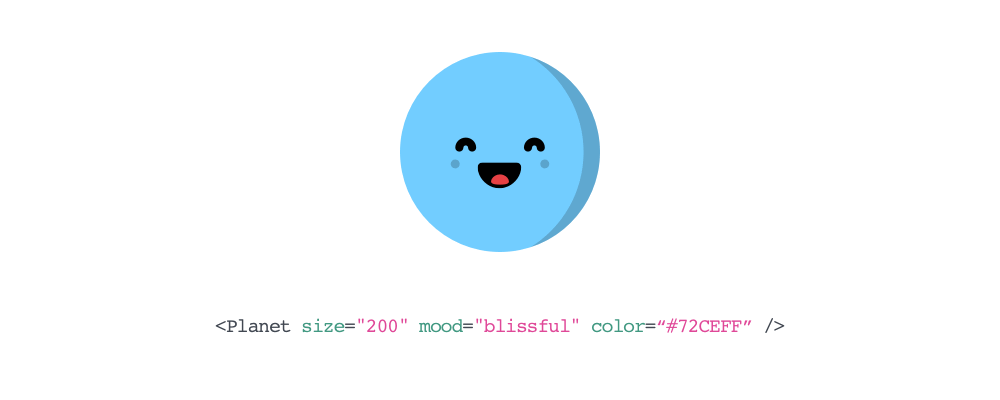
Getting started with Plop
Now what do we want to do with the user input we collected?
/**
*
* LovestruckBackpack
* Description: This component is a lovestruck Backpack.
*/

import React from 'react';
import { Backpack } from 'react-kawaii'

function LovestruckBackpack() {
return (
<Backpack size={ 200 } mood="lovestruck" color="#EC4067" />

);}

LovestruckBackpack.propTypes = {};

export default LovestruckBackpack;
@waterproofheart
Challenge
- Create a CLI tool that you can adapt to at least two different use cases.
- You can either use two seperate templates or one template with conditional logic.
Challenge
Some ideas:
- generate new Gatsby blog posts and pages
- generator components from a component library that you use regularly
Examples:
Thank You!
Twitter: @waterproofheart
aboutmonica.com || monica.dev
If you're in NYC come to a React Ladies Meetup:

Automate React Workflow at React Girls Conf
By m0nica
Automate React Workflow at React Girls Conf
Do you find yourself copying and pasting the same boilerplate React code in multiple files every time you create a new component? Imagine a world without copy and paste. How much time would that cost you? This talk will walk through how to create a command-line interface (CLI) tool that generates React component files and other ways to automate your workflow.

