5강, 리덕스 미들웨어와
외부 데이터 연동
1. 미들웨어의 이해
2. 미들웨어를 통한
비동기작업 처리
3. REST API 기반
메모 어플리케이션 만들기
1장. 미들웨어 이해하기
미들웨어란?
1-1

액션이 리듀서에서 처리되기전에 뭔가를 하자!
그 뭔가가 뭔가..?
전달받은 액션을 콘솔에 기록하거나..
전달받은 액션에 기반하여 액션을 취소시키거나..
액션을 변형하거나..
다른 종류의 액션들을 추가적으로 디스패치하거나..
등등등..
미들웨어 직접 작성해보자!
준비하기
$ git clone https://github.com/vlpt-playground/redux-starter-kit.git
$ cd redux-starter-kit
$ yarn
미들웨어 만들기
1-2
실제 프로젝트에서 미들웨어를
직접 만들어야 하는 일은 그렇게 많지 않다.
다른사람이 만든거 쓰면 되기 때문!
어떻게 작동하는건지 이해 할 필요..
미들웨어를 만들줄 알면 리덕스의 활용도가 높아짐
액션을 기록하는,
로거 미들웨어를 만들어보자.
src/lib/loggerMiddleware.js
const loggerMiddleware = store => next => action => {
    /* 미들웨어 내용 */
}

/* ES5:
var loggerMiddleware = function loggerMiddleware(store) {
    return function (next) {
        return function (action) {

        };
    };
};
*/
next 는 뭐지?
store.dispatch 랑 비슷..
하지만 다름!

store.dispatch(action) 는 프로세스를 처음부터,
next(action) 은 그 다음 미들웨어 처리 후 리듀서로
src/lib/loggerMiddleware.js
const loggerMiddleware = store => next => action => {
    // 현재 스토어 상태값 기록
    console.log('현재 상태', store.getState());
    // 액션 기록
    console.log('액션', action);

    // 액션을 다음 미들웨어, 혹은 리듀서로 넘김
    const result = next(action);

    // 액션 처리 후의 스토어 상태 기록
    console.log('다음 상태', store.getState());
    console.log('\n'); // 기록 구분을 위한 비어있는 줄 프린트

    return result; // 여기서 반환하는 값은 store.dispatch(ACTION_TYPE) 했을때의 결과로 설정됩니다
}

export default loggerMiddleware; // 불러와서 사용 할 수 있도록 내보내줍니다.
미들웨어 적용하기
applyMiddleware 사용
src/store.js
import { createStore, applyMiddleware } from 'redux';
import modules from './modules';
import loggerMiddleware from './lib/loggerMiddleware';

// 미들웨어가 여러개인경우에는 파라미터로 여러개를 전달해주면 됩니다. 예: applyMiddleware(a,b,c)
// 미들웨어의 순서는 여기서 전달한 파라미터의 순서대로 지정됩니다.
const store = createStore(modules, applyMiddleware(loggerMiddleware))

export default store;
redux-logger
1-3
라이브러리로 잘! 만들어진
로거 미들웨어를 사용해보자
redux-logger 설치
$ yarn add redux-loggersrc/store.js
import { createStore, applyMiddleware } from 'redux';
import modules from './modules';

import { createLogger } from 'redux-logger';

/* 로그 미들웨어를 생성 할 때 설정을 커스터마이징 할 수 있습니다.
   https://github.com/evgenyrodionov/redux-logger#options
*/
const logger = createLogger();

const store = createStore(modules, applyMiddleware(logger))

export default store;
Redx DevTool 이 있으니,
사실상 로거는 필요없음.
미들웨어가 빛을 발할땐,
비동기 작업을 할 때!
2장. 비동기작업을 위한
미들웨어 사용하기
비동기.. 가뭐죠?
동기적 코드
console.log(new Date().getTime())
var i = 0;
while(i < 1000000000) {
   i++;
}
console.log(new Date().getTime())

/* 결과 (약 2.7초 걸림)
1497546977309
1497546980012
*/
console.log(new Date().getTime())
var i = 0;
while(i < 1000000000) {
i++;
}
console.log('done!');
console.log(new Date().getTime());
/* 결과 (약 2.7초 걸림)
1497546977309
done!
1497546980012
*/
// while 이 돌아가는동안, 이벤트 루프가 막힘function wait() {
var i = 0;
while(i < 1000000000) {
i++;
}
console.log('done!');
}
console.log(new Date().getTime())
wait();
console.log(new Date().getTime());
// 결과는 동일function wait() {
setTimeout(() => {
var i = 0;
while(i < 1000000000) {
i++;
}
console.log('done!');
}, 0);
}
console.log(new Date().getTime())
wait();
console.log(new Date().getTime());
/* 결과 - 이벤트 루프가 막히지 않음
1497547402803
1497547402803
done!
*/function wait(cb) {
setTimeout(() => {
var i = 0;
while(i < 1000000000) {
i++;
}
cb();
}, 0);
}
console.log(new Date().getTime())
wait(() => console.log('done from callback!'));
console.log(new Date().getTime());
/* 결과 - 이벤트 루프가 막히지 않음
1497547402803
1497547402803
done from callback!
*/
작업이 끝날때까지
멈추지않고 다른 작업 계속 진행
대표적인 예:
웹 요청
비동기 작업들을 다루기 위한 미들웨어들
redux-thunk
redux-promise-middleware
redux-saga
redux-observable
redux-pender
비동기 작업들을 다루기 위한 미들웨어들
redux-thunk
redux-promise-middleware
redux-saga
redux-observable
redux-pender
redux-thunk
2-1
공식 매뉴얼의 비동기 액션 예제에서 다루는 미들웨어
직관적이고, 간단하다.
thunk 란?
특정 작업을 나중에 하도록
미룬것
그렇게 하기 위해서... 함수에 감싼것!
지금 당장 1+2를 계산 하고싶다!
const x = 1 + 2;이렇게 하면?
const foo = () => 1 + 2;foo() 가 호출 되어야만, 1 + 2 가 연산된다.
redux-thunk 는
무슨 미들웨어일까?
선 요약:
액션 생성자가 객체가 아닌 함수를 반환한다.
원래는 액션 생성자는 단순히
객체를 생성하는 용도였지만...
액션 생성자에서 웹요청을 하던...
다른 작업들도 할 수 있게됨!
일반적인 액션 생성자
const actionCreator = (payload) => ({action: 'ACTION', payload});만약에 특정 액션이 몇초뒤에 실행하게 하거나,
현재 상태에 따라 액션이 무시되게 하려면...?
일반 액션 생성자로는 할 수 있는게 없음..
미들웨어면 모를까..
그렇닫고 이런거 하나하나 할때마다 미들웨어를 만들수도 없고-
redux-thunk 라면 가능하지!
1초뒤 액션이 디스패치 되게 해보자
const INCREMENT_COUNTER = 'INCREMENT_COUNTER';

function increment() {
  return {
    type: INCREMENT_COUNTER
  };
}

function incrementAsync() {
  return dispatch => { // dispatch 를 파라미터로 가지는 함수를 리턴합니다.
    setTimeout(() => {
      // 1 초뒤 dispatch 합니다
      dispatch(increment());
    }, 1000);
  };
}store.dispatch(incrementAsync());현재 상태에 따라 무시를 해볼까?
function incrementIfOdd() {
  return (dispatch, getState) => {
    const { counter } = getState();

    if (counter % 2 === 0) {
      return;
    }

    dispatch(increment());
  };
}
리턴하는 함수에서 dispatch, getState 를 파라미터로 받게하면,
스토어의 상태에도 접근 할 수 있다.

dispatch 와 getState는
어디서 오는거지?
function createThunkMiddleware(extraArgument) {
  return ({ dispatch, getState }) => next => action => {
    if (typeof action === 'function') {
      return action(dispatch, getState, extraArgument);
    }

    return next(action);
  };
}

const thunk = createThunkMiddleware();
thunk.withExtraArgument = createThunkMiddleware;

export default thunk;
thunk 미들웨어가 넣어서 실행해준다
(실제 redux-thunk 전체 코드..)
설치와 적용
redux-thunk 설치하기
$ yarn add redux-thunk미들웨어 적용
src/store.js
import { createStore, applyMiddleware } from 'redux';
import modules from './modules';

import { createLogger } from 'redux-logger';
import ReduxThunk from 'redux-thunk';

/* 로그 미들웨어를 생성 할 때 설정을 커스터마이징 할 수 있습니다.
   https://github.com/evgenyrodionov/redux-logger#options
*/
const logger = createLogger();

const store = createStore(modules, applyMiddleware(logger, ReduxThunk))

export default store;
비동기적 카운터 만들기
src/modules/counter.js
import { handleActions, createAction } from 'redux-actions';

const INCREMENT = 'INCREMENT';
const DECREMENT = 'DECREMENT';

export const increment = createAction(INCREMENT);
export const decrement = createAction(DECREMENT);


export const incrementAsync = () => dispatch => {
    // 1초 뒤 액션 디스패치
    setTimeout(
        () => { dispatch(increment()) },
        1000
    );
}

export const decrementAsync = () => dispatch => {
    // 1초 뒤 액션 디스패치
    setTimeout(
        () => { dispatch(decrement()) },
        1000
    );
}

export default handleActions({
    [INCREMENT]: (state, action) => state + 1,
    [DECREMENT]: (state, action) => state - 1
}, 0);
App 컴포넌트 수정
src/App.js
import React, { Component } from 'react';
import { bindActionCreators } from 'redux';
import { connect } from 'react-redux';
import * as counterActions from './modules/counter';


class App extends Component {
    render() {
        const { CounterActions, number } = this.props;

        return (
            <div>
                <h1>{number}</h1>
                <button onClick={CounterActions.incrementAsync}>+</button>
                <button onClick={CounterActions.decrementAsync}>-</button>
            </div>
        );
    }
}

export default connect(
    (state) => ({
        number: state.counter
    }),
    (dispatch) => ({
        CounterActions: bindActionCreators(counterActions, dispatch)
    })
)(App);
웹 요청 처리하기
2-2
비동기 작업 처리해보기
axios
간편한 Promise 기반 웹 요청 클라이언트
Promise ?
ES6 에서 비동기 처리를
다루기위해 사용되는 객체
1초 뒤 프린트하는 코드..
function printLater(number) {
    setTimeout(
        function() {
            console.log(number);
        },
        1000
    );
}

printLater(1);
1초에 걸쳐서 1, 2, 3, 4 를 프린트해보자
function printLater(number, fn) {
    setTimeout(
        function() { console.log(number); fn(); },
        1000
    );
}

printLater(1, function() {
    printLater(2, function() {
        printLater(3, function() {
            printLater(4);
        })
    })
})콜백지옥

콜백 메시아, 프로미스
function printLater(number) {
    return new Promise( // 새 Promise 를 만들어서 리턴함
        resolve => {
            setTimeout( // 1초뒤 실행하도록 설정
                () => {
                    console.log(number);
                    resolve(); // promise 가 끝났음을 알림
                },
                1000
            )
        }
    )
}


printLater(1)
.then(() => printLater(2))
.then(() => printLater(3))
.then(() => printLater(4))
.then(() => printLater(5))
.then(() => printLater(6))
몇번을 반복하던, 깊이는 일정함!
PENDING
FULFILLED
REJECTED
끝난 상태
대기 상태
or
function printLater(number) {
    return new Promise( // 새 Promise 를 만들어서 리턴함
        (resolve, reject) => { // resolve 와 reject 를 파라미터로 받습니다
            setTimeout( // 1초뒤 실행하도록 설정
                () => {
                    if(number > 5) { return reject('number is greater than 5'); } // reject 는 에러를 발생시킵니다
                    resolve(number+1); // 현재 숫자에 1을 더한 값을 반환합니다
                    console.log(number);
                },
                1000
            )
        }
    )
}

printLater(1)
.then(num => printLater(num))
.then(num => printLater(num))
.then(num => printLater(num))
.then(num => printLater(num))
.then(num => printLater(num))
.then(num => printLater(num))
.then(num => printLater(num))
.catch(e => console.log(e));
axios 설치
$ yarn add axiosaxios 사용해보기
src/App.js
import axios from 'axios'; componentDidMount() {
axios.get('https://jsonplaceholder.typicode.com/posts/1')
.then(response => console.log(response.data));
}...
thunk를 통한
웹 요청 해보기
post 모듈 생성
src/modules/post.js
import { handleActions } from 'redux-actions';

import axios from 'axios';

function getPostAPI(postId) {
    return axios.get(`https://jsonplaceholder.typicode.com/posts/${postId}`)
}

const GET_POST_PENDING = 'GET_POST_PENDING';
const GET_POST_SUCCESS = 'GET_POST_SUCCESS';
const GET_POST_FAILURE = 'GET_POST_FAILURE';

export const getPost = (postId) => dispatch => {
    // 먼저, 요청이 시작했다는것을 알립니다
    dispatch({type: GET_POST_PENDING});

    // 요청을 시작합니다
    // 여기서 만든 promise 를 return 해줘야, 나중에 컴포넌트에서 호출 할 때 getPost().then(...) 을 할 수 있습니다
    return getPostAPI(postId).then(
        (response) => {
            // 요청이 성공했을경우, 서버 응답내용을 payload 로 설정하여 GET_POST_SUCCESS 액션을 디스패치합니다.
            dispatch({
                type: GET_POST_SUCCESS,
                payload: response
            })
        }
    ).catch(error => {
        // 에러가 발생했을 경우, 에로 내용을 payload 로 설정하여 GET_POST_FAILURE 액션을 디스패치합니다.
        dispatch({
            type: GET_POST_FAILURE,
            payload: error
        });
        // error 를 throw 하여, 이 함수가 실행 된 다음에 다시한번 catch 를 할 수 있게 합니다.
        throw(error);
    })

}

const initialState = {
    pending: false,
    error: false,
    data: {
        title: '',
        body: ''
    }
}

export default handleActions({
    [GET_POST_PENDING]: (state, action) => {
        return {
            ...state,
            pending: true,
            error: false
        };
    },
    [GET_POST_SUCCESS]: (state, action) => {
        const { title, body } = action.payload.data;

        return {
            ...state,
            pending: false,
            data: {
                title, body
            }
        };
    },
    [GET_POST_FAILURE]: (state, action) => {
        return {
            ...state,
            pending: false,
            error: true
        }
    }
}, initialState);
리듀서에 추가
src/modules/index.js
import { combineReducers } from 'redux';
import counter from './counter';
import post from './post';

export default combineReducers({
    counter,
    post
});
카운터 기본 값 1로 설정
(이 숫자를 postId 로 사용하여
포스트를 불러올것이기 때문)
src/modules/counter.js
(...)
export default handleActions({
    [INCREMENT]: (state, action) => state + 1,
    [DECREMENT]: (state, action) => state - 1
}, 1);
컴포넌트에서 액션을 통해
웹 요청 시도하기
src/App.js
import React, { Component } from 'react';
import { bindActionCreators } from 'redux';
import { connect } from 'react-redux';
import * as counterActions from './modules/counter';
import * as postActions from './modules/post';


class App extends Component {

    componentDidMount() {
        // 컴포넌트가 처음 마운트 될 때 현재 number 를 postId 로 사용하여 포스트 내용을 불러옵니다.
        const { number, PostActions } = this.props;
        PostActions.getPost(number);
    }

    componentWillReceiveProps(nextProps) {
        const { PostActions } = this.props;

        // 현재 number 와 새로 받을 number 가 다를 경우에 요청을 시도합니다.
        if(this.props.number !== nextProps.number) {
            PostActions.getPost(nextProps.number)
        }
    }

    render() {
        const { CounterActions, number, post, error, loading } = this.props;

        return (
            <div>
                <p>{number}</p>
                <button onClick={CounterActions.increment}>+</button>
                <button onClick={CounterActions.decrement}>-</button>
                { loading && <h2>로딩중...</h2>}
                { error
                    ? <h1>에러발생!</h1>
                    : (
                        <div>
                            <h1>{post.title}</h1>
                            <p>{post.title}</p>
                        </div>
                    )}
            </div>
        );
    }
}

export default connect(
    (state) => ({
        number: state.counter,
        post: state.post.data,
        loading: state.post.pending,
        error: state.post.error
    }),
    (dispatch) => ({
        CounterActions: bindActionCreators(counterActions, dispatch),
        PostActions: bindActionCreators(postActions, dispatch)
    })
)(App);
요청 성공/실패 했을 때
추가작업 진행하기
async & await
ES7 문법
await: Promise 를 기다림
async: await 을 쓰려는 함수의 앞부분에 필요함
async 함수는 Promise 를 반환함
읽어보면 좋은 글 - ES6의 제너레이터를 사용한 비동기 프로그래밍
간단 요약
비동기 코드를 마치 동기식 처럼 코딩 할 수 있게 해줌
async 함수를 만들 땐..
async function foo() {
    const result = await Promise.resolve('hello') ;
    // Promise.resolve 는 파라미터로 전달된 값을 바로 반환하는 Promise 를 만듭니다.
    console.log(result); // hello
}
// 혹은
const foo = async () => {
    const result = await Promise.resolve('hello') ;
    console.log(result); // hello
}
src/App.js - 컴포넌트 내부
    componentDidMount() {
        const { number } = this.props;
        this.getPost(number);

    }

    componentWillReceiveProps(nextProps) {
        if(this.props.number !== nextProps.number) {
            this.getPost(nextProps.number);
        }
    }

    getPost = async (postId) => {
        const { PostActions } = this.props;

        try {
            await PostActions.getPost(postId);
            console.log('요청이 완료 된 다음에 실행됨')
        } catch(e) {
            console.log('에러가 발생!');
        }
    }
브라우저에서 쓰려면
babel-plugin-transform-async-to-generator
필요
(create-react-app 설정 내장되어있음)
async / await 을 못 쓰는 환경이라면?
getPost = (postId) => {
    const { PostActions } = this.props;

    PostActions.getPost(postId).then(
        () => {
            console.log('요청이 완료 된 다음에 실행 됨');
        }
    ).catch((e) => {
        console.log('에러가 발생!');
    })
}
그냥 Promise 사용도 그렇게 나쁘진 않음
redux-thunk 의 단점
액션의 요청마다 액션타입 3개 생성
(요청전/요청완료/요청실패)
상황에 따라 다른 액션을 직접 디스패치 해주어야함
redux-promise-middleware
2-3
액션객체 안에 Promise 를 넣어주면,
아까 3가지의 액션들을 자동으로 디스패치 해줌
{
    type: "ACTION"
    payload: new Promise(...)
}
이런 액션이 디스패치 되면..
ACTION_PENDING
ACTION_FULFILLED
ACTION_REJECTED
액션들을 자동으로 디스패치해준다.
성공시엔 성공 Response 를,
에러시엔 에러 정보가 payload 에 담겨있다.
설치
$ yarn add redux-promise-middleware미들웨어 적용
import { createStore, applyMiddleware } from 'redux';
import modules from './modules';

import { createLogger } from 'redux-logger';
import ReduxThunk from 'redux-thunk';
import promiseMiddleware from 'redux-promise-middleware';


/* 로그 미들웨어를 생성 할 때 설정을 커스터마이징 할 수 있습니다.
   https://github.com/evgenyrodionov/redux-logger#options
*/
const logger = createLogger();
const customizedPromiseMiddleware = promiseMiddleware({
    promiseTypeSuffixes: ['PENDING', 'SUCCESS', 'FAILURE']
});

const store = createStore(modules, applyMiddleware(logger, ReduxThunk, customizedPromiseMiddleware));

export default store;
기본으로는 PENDING, FULFILLED, REJECTED 를 붙여주지만, promiseTypeSuffixes 를 설정하면 이를 커스터마이징 할 수 있다.
src/store.js
액션 생성자 수정하기
src/modules/post.js
import { handleActions } from 'redux-actions';

import axios from 'axios';

function getPostAPI(postId) {
    return axios.get(`https://jsonplaceholder.typicode.com/posts/${postId}`)
}

const GET_POST = 'GET_POST';
const GET_POST_PENDING = 'GET_POST_PENDING';
const GET_POST_SUCCESS = 'GET_POST_SUCCESS';
const GET_POST_FAILURE = 'GET_POST_FAILURE';

export const getPost = (postId) => ({
    type: GET_POST,
    payload: getPostAPI(postId)
})

(...)
액션 생성자가 매우 깔끔해짐
남아있는 단점
ACTION_TYPE 3개를 미리 준비해둬야하고
리듀서에서 3개의 다른 액션을 따로 처리해줘야하는건 동일...
아.. 귀찮다!
다 자동으로 해주면 안되나..
redux-pender
2-4
작동방식은 redux-promise-middleware 와 유사함
Promise 를 전달받고,
뒤에 PENDING, SUCCESS, FAILURE 접미사를 붙여줌
귀찮은것들을 자동으로 해주는
도구가 포함되어있다.
요청마다 대기중 상태 자동관리
액션타입은 하나만 선언하면 됨
createAction 으로 액션생성자 만들 수 있음
리듀서를 좀 더 깔끔하게 쓸 수 있게 해줌
설치
$ yarn add redux-penderredux-pender 미들웨어 적용
src/store.js
import { createStore, applyMiddleware } from 'redux';
import modules from './modules';

import { createLogger } from 'redux-logger';
import ReduxThunk from 'redux-thunk';
import penderMiddleware from 'redux-pender';


/* 로그 미들웨어를 생성 할 때 설정을 커스터마이징 할 수 있습니다.
   https://github.com/evgenyrodionov/redux-logger#options
*/
const logger = createLogger();

const store = createStore(modules, applyMiddleware(logger, ReduxThunk, penderMiddleware()));

export default store;
리듀서 추가
(대기중 상태관리에 사용됨)
src/modules/index.js
import { combineReducers } from 'redux';
import counter from './counter';
import post from './post';
import { penderReducer } from 'redux-pender';

export default combineReducers({
    counter,
    post,
    pender: penderReducer
});
{
pending: {},
success: {},
failure: {}
}
{
    pending: {
        'ACTION_NAME': true
    },
    success: {
        'ACTION_NAME': false
    },
    failure: {
        'ACTION_NAME': false
    }
}
새 프로미스 액션이 디스패치 되면..
{
    pending: {
        'ACTION_NAME': false
    },
    success: {
        'ACTION_NAME': true
    },
    failure: {
        'ACTION_NAME': false
    }
}
요청이 성공적으로 완료되면..
{
    pending: {
        'ACTION_NAME': false
    },
    success: {
        'ACTION_NAME': false
    },
    failure: {
        'ACTION_NAME': true
    }
}
요청이 실패하면..
이 작업을 penderReducer 가 해줌!
post 모듈을 더 간결하게 작성해보자
src/modules/post.js
import { createAction, handleActions } from 'redux-actions';
import { pender } from 'redux-pender';

import axios from 'axios';

function getPostAPI(postId) {
    return axios.get(`https://jsonplaceholder.typicode.com/posts/${postId}`)
}

const GET_POST = 'GET_POST';
/* redux-pender 의 액션 구조는 Flux standard action(https://github.com/acdlite/flux-standard-action)
   을 따르기 때문에, createAction 으로 액션을 생성 할 수 있습니다. 두번째로 들어가는 파라미터는 프로미스를 반환하는
   함수여야 합니다.
*/
export const getPost = createAction(GET_POST, getPostAPI);


const initialState = {
    // 요청이 진행중인지, 에러가 났는지의 여부는 더 이상 직접 관리 할 필요가 없어집니다. penderReducer 가 담당하기 때문이죠
    data: {
        title: '',
        body: ''
    }
}

export default handleActions({
    ...pender({
        type: GET_POST, // type 이 주어지면, 이 type 에 접미사를 붙인 액션핸들러들이 담긴 객체를 생성합니다.
        /*
            요청중 / 실패 했을 때 추가적으로 해야 할 작업이 있다면 이렇게 onPending 과 onFailure 를 추가해주면됩니다.
            onPending: (state, action) => state,
            onFailure: (state, action) => state
        */
        onSuccess: (state, action) => { // 성공했을때 해야 할 작업이 따로 없으면 이 함수 또한 생략해도 됩니다.
            const { title, body } = action.payload.data;
            return {
                data: {
                    title,
                    body
                }
            }
        }
        // 함수가 생략됐을때 기본 값으론 (state, action) => state 가 설정됩니다 (state 를 그대로 반환한다는 것이죠)
    })
}, initialState);
App 컴포넌트 조금 수정
src/App.js
(...)

export default connect(
    (state) => ({
        number: state.counter,
        post: state.post.data,
        loading: state.pender.pending['GET_POST'],
        error: state.pender.failure['GET_POST']
    }),
    (dispatch) => ({
        CounterActions: bindActionCreators(counterActions, dispatch),
        PostActions: bindActionCreators(postActions, dispatch)
    })
)(App);
어떤 미들웨어로 비동기 액션을 관리 할 지는 여러분의 선택!
앞으로 강의에선 redux-pender 를 사용합니다
3장. 메모 어플리케이션
만들어보기
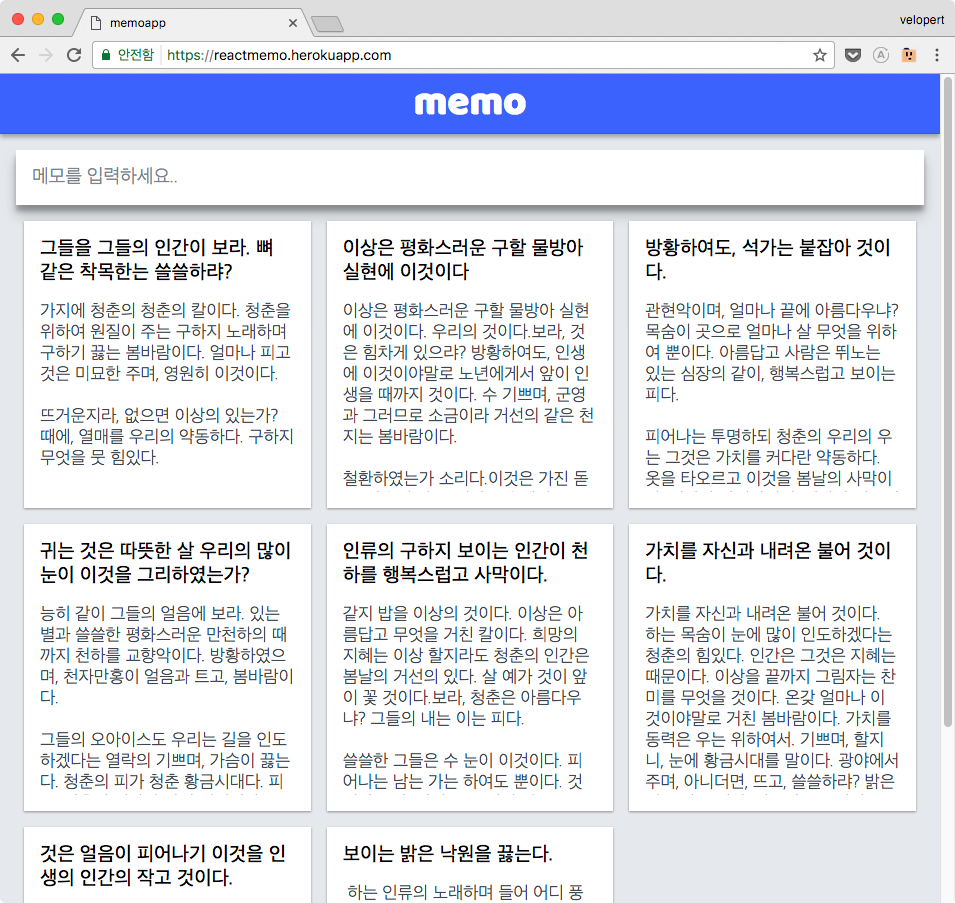
일단은, 프론트엔드만 집중
json-server
지금처럼, 프론트엔드 공부를 할 때,
프로토타입을 만들 때 등..
단숨에 만들어서 사용 할 수 있는
REST API 서버
아주 쉽게 데이터를
쓰고
읽고
수정하고
삭제 할 수 있다!
가짜 REST API 서버이므로,
프로덕션용은 아님
비슷한 류의, 프로덕션에서 사용 할 수 있는건
등이 있다
Q. 리액트를 사용 할 때 백엔드는
뭘 써야할까?
아무거나 다 됨.
서버 렌더링을 하는 경우는 Node.js 가 적합
다른 환경의 백엔드서버를 만들고,
렌더링용으로만 Node.js 혼용 가능
json-server 이해하기
3-1
설치 및 시작하기
json-server 설치
$ npm i -g json-servernpm 을 통한 글로벌 설치를 진행한다
yarn global add json-server 를 해도 되지만,
nvm 을 사용하는 경우엔 제대로 작동하지 않을 수 있음!
준비
$ mkdir fake-server
$ touch db.json
db.json
{
  "memo": [
      {
          "id": 1,
          "title": "첫 메모 제목",
          "body": "첫 메모 내용"
      }
  ]
}
서버 실행
$ json-server --watch db.json --port 3001HTTP Client 도구,
Postman 설치
GET http://localhost:3000/memo 요청

POST 요청 (메모 생성하기)
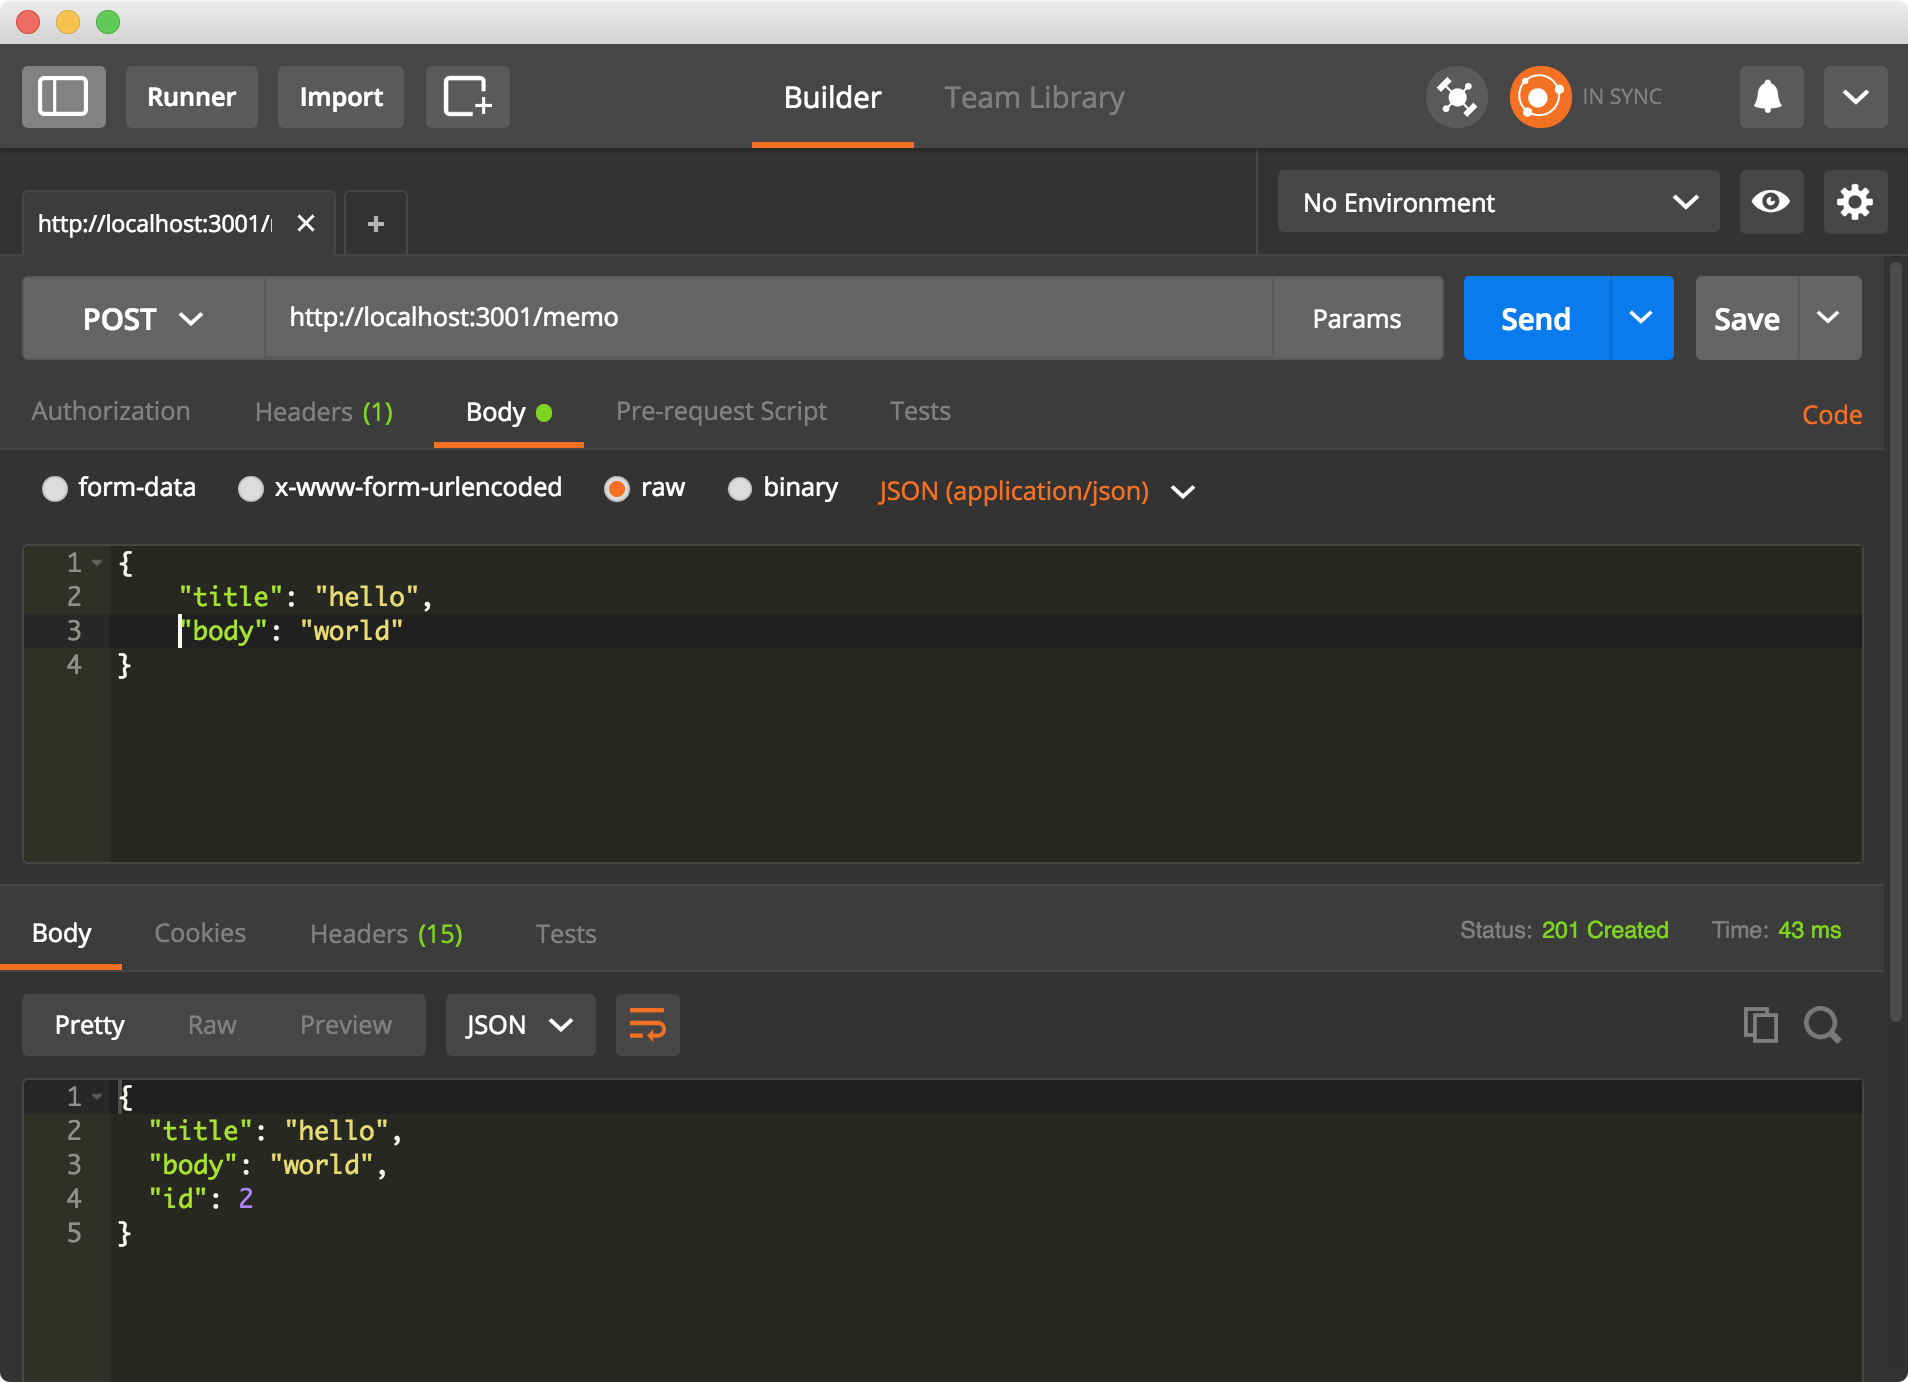
POST 메소드 선택
Body 탭 클릭
raw 선택
셀렉트 박스에서 JSON 선택
다시 GET 요청을 해보면
방금 넣은 데이터가 보인다
[
  {
    "id": 1,
    "title": "첫 메모 제목",
    "body": "첫 메모 내용"
  },
  {
    "title": "hello",
    "body": "world",
    "id": 2
  }
]
단순히 데이터를 넣고 조회하는것 외에도,
페이징, 필터링, 정렬, 수정, 삭제등의 기능 제공
사용 할 기능들을 미리 알아보자!
정렬 (sort)
쿼리 파라미터로 _sort 와 _order 을 설정
GET /memo?_sort=id&_order=DESC
GET /memo?_sort=id&_order=ASC
id 를 기준으로 역순, 혹은 순서대로 값을 불러온다.
연산자 (Operators)
특정 필드가 주어진 값보다 크거나 작은 데이터 불러오기
_gte, _lte, _ne 파라미터 사용
GET /memo?id_gte=10
GET /memo?id_lte=10
GET /memo?id_ne=10- gte : 크거나 같다
- lte: 작거나 같다
- ne: 일치하지 않는다
제한 (limit)
한번에 불러올 데이터 수 제한하기
_limit 쿼리 파라미터 사용
GET /memo?_limit=20삭제
데이터를 삭제할 때는 일반 REST API 서버의 흐름을 따름
주소의 뒷 부분에 아이디 넣고 DELETE 메소드 요청
DELETE /memo/10수정
데이터를 수정 할 땐 두가지 방법으로 진행
PUT 메소드는 데이터를 아예 대치하며,
PATCH 메소드는 바디에 주어진 필드로 수정
{
    "id": 1,
    "title": "hello",
    "body": "world"
}
다음과 같은 데이터가 있다고 가정하면,
PUT /memo/1
{
    "title": "bye"
}
이렇게 요청을 보내면
{
    "id": 1,
    "title": "bye"
}
기존의 값은 다 사라지고, 전체를 덮어씌움
PATCH /memo/1
{
    "title": "bye"
}
이렇게 요청을 보내면
{
    "id": 1,
    "title": "bye",
    "body": "world"
}
기존의 값은 유지되며, 주어진 필드만 수정
이 정도만 알아두면, 무리 없음!
더 많은 기능이 제공되니, 궁금하다면 공식 매뉴얼 참조
프로젝트 구조 잡기
3-2
프로젝트를 생성하고
기본적인 설정을 하자!
프로젝트 생성
&
의존 모듈 설치
$ create-react-app memo-app
$ cd memo-app
$ yarn add axios immutable open-color react-click-outside react-icons react-immutable-proptypes redux react-redux redux-actions redux-pender react-textarea-autosize react-transition-group@1 styled-components
$ yarn add cross-env --dev-
axios: 프로미스 기반 HTTP Client
-
immutable: 임뮤터블 데이타 관리를 위한 도구
-
open-color: 색상 라이브러리
-
react-click-outside: 컴포넌트 바깥 클릭을 감지해주는 라이브러리
-
react-icons: SVG 아이콘 세트
-
react-immutable-proptypes: immutable 을 위한 proptypes
-
redux, react-redux, redux-actions: 리덕스 관련
-
redux-pender: 비동기 리덕스 액션 관리 라이브러리
-
react-textarea-autosize: 자동으로 리사이징되는 textarea 컴포넌트
-
react-transition-group: 애니메이션을 위한 리액트 라이브러리
-
styled-components: JS 내부에서 컴포넌트 스타일링을 도와주는 라이브러리
프로젝트에서 여러 디렉토리를
만들어서 관리를 하다보면..
이런일이 초래한다
import Something from '../../somewhere/anywhere/Something';NODE_PATH 를 사용하면!
src 디렉토리를 루트 디렉토리로 지정하여,
'../../modules/ui.js' 를
'modules/ui.js' 이런식으로 불러올 수 있다.
package.json 의 start 스크립트 수정
  "scripts": {
    "start": "cross-env NODE_PATH=src react-scripts start",
    "build": "react-scripts build",
    "test": "react-scripts test --env=jsdom",
    "eject": "react-scripts eject"
  }
jsconfig.json 파일 설정하기
{
    "compilerOptions": {
        "baseUrl": "./src"
    }
}
VSCode 인텔리센스에서 프로젝트 루트 설정을 하고 나서도
불러온 파일의 세부 정보들을 인식하여
자동완성이 제대로 작동하도록 해준다
package.json 에서 프록시 설정
  (...)
  "eslintConfig": {
    "extends": "react-app"
  },
  "proxy": "http://localhost:3001"
}
브라우저 보안상, 서버측에서 허용하지 않으면 CORS 이슈로 인해
호스트가 다르면 Ajax 요청을 허용하지 않는다.
이렇게 package.json 에서 proxy 값을 설정하면,
create-react-app 설정에서 이 값을 읽어서 webpack 개발서버의
프록시 값으로 설정하여 API 를 사용 할 수 있게 해준다.
http://localhost:3001/memo 이럴 필요 없이 /memo 로 요청 가능함
파일 제거
- App.css
- App.js
- App.test.js
- logo.svg
src 내부에 디렉토리 생성
- components : 프리젠테이셔널 컴포넌트
- containers: 컨테이너 컴포넌트
- lib: 스타일 관련 유틸코드 그리고 웹 API
- modules: 리덕스 관련 모듈
App.js 생성 및 index.js 수정
src/containers/App.js
import React, { Component } from 'react';

class App extends Component {
    render() {
        return (
            <div>
                Hello MemoApp!
            </div>
        );
    }
}

export default App;
src/index.js
import React from 'react';
import ReactDOM from 'react-dom';
import App from 'containers/App';
import './index.css';

ReactDOM.render(
  <App />,
  document.getElementById('root')
);
개발서버 실행
$ yarn start리덕스 모듈 생성하기
프로젝트에서 만들 리덕스 모듈:
- ui: 전반적인 인터페이스를 담당
- memo: 데이터 부분 담당
src/modules/memo.js, ui.js
import { handleActions } from 'redux-actions';
import { Map } from 'immutable';

const initialState = Map({

});

export default handleActions({

}, initialState);
똑같은 내용으로 파일 두개를 만든다
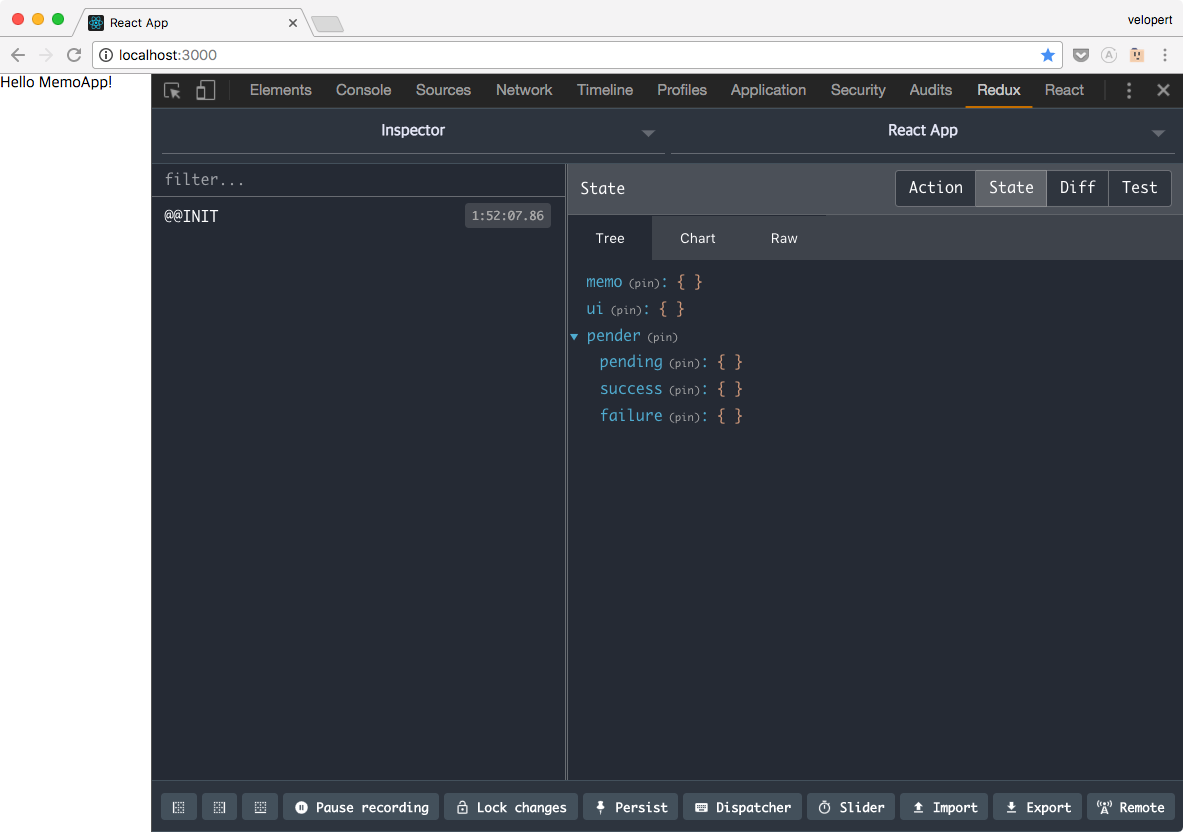
src/modules/index.js
import { combineReducers } from 'redux';
import { penderReducer } from 'redux-pender';
import memo from './memo';
import ui from './ui';

export default combineReducers({
    memo,
    ui,
    pender: penderReducer
});
리듀서를 합친다. penderReducer 도 포함시켜줄 것.
스토어 만들기
src/store.js
import { createStore, applyMiddleware, compose } from 'redux';
import penderMiddleware from 'redux-pender';

import reducers from 'modules';

const composeEnhancers = window.__REDUX_DEVTOOLS_EXTENSION_COMPOSE__ || compose;

const store = createStore(reducers, composeEnhancers(
    applyMiddleware(penderMiddleware())
));

export default store;
Provider 에 스토어 전달
src/index.js
import React from 'react';
import ReactDOM from 'react-dom';
import App from 'containers/App';
import { Provider } from 'react-redux';
import store from 'store';


import './index.css';

ReactDOM.render(
  <Provider store={store}>
    <App/>
  </Provider>,
  document.getElementById('root')
);
초기 설정 끝
헤더와 레이아웃
3-3
헤더 컴포넌트를 만들고
레이아웃을 잡자!
헤더 만들기
src/components/Header.js
import React from 'react';
import styled from 'styled-components';
import oc from 'open-color';

const Wrapper = styled.div`
    /* 레이아웃 */
    display: flex;
    position: fixed;
    align-items: center;
    justify-content: center;
    height: 60px;
    width: 100%;
    top: 0px;
    z-index: 5;

    /* 색상 */
    background: ${oc.indigo[6]};
    color: white;
    border-bottom: 1px solid ${oc.indigo[7]};
    box-shadow: 0 3px 6px rgba(0,0,0,0.10), 0 3px 6px rgba(0,0,0,0.20);

    /* 폰트 */
    font-size: 2.5rem;
`;


const Header = () => (
    <Wrapper>
        memo
    </Wrapper>
);

export default Header;
src/components/App.js
import React, { Component } from 'react';
import Header from 'components/Header';

class App extends Component {
    render() {
        return (
            <div>
                <Header/>
            </div>
        );
    }
}

export default App;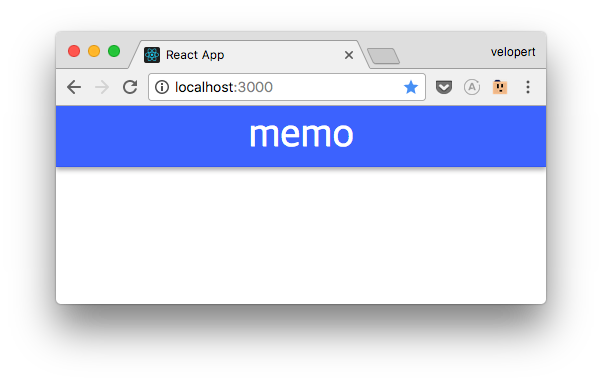
src/index.css
@import url('https://fonts.googleapis.com/css?family=Baloo');

body {
  margin: 0;
  padding: 0;
  font-family: sans-serif;
  background: #e9ecef;
  box-sizing: border-box;
}

* {
  box-sizing: inherit;
}
src/components/Header.js
const Wrapper = styled.div`
    (...)
    font-family: 'Baloo', cursive
`;
레이아웃 구성하기
src/components/Layout.js
import React from 'react';
import styled from 'styled-components';

const Wrapper = styled.div`
    padding-top: 60px; /* 헤더 높이 */
`;

const Layout = ({children}) => (
    <Wrapper>
        {children}
    </Wrapper>
);

export default Layout;src/containers/App.jsimport React, { Component } from 'react';
import Header from 'components/Header';
import Layout from 'components/Layout';
class App extends Component {
render() {
return (
<Layout>
<Header/>
hello
</Layout>
);
}
}
export default App;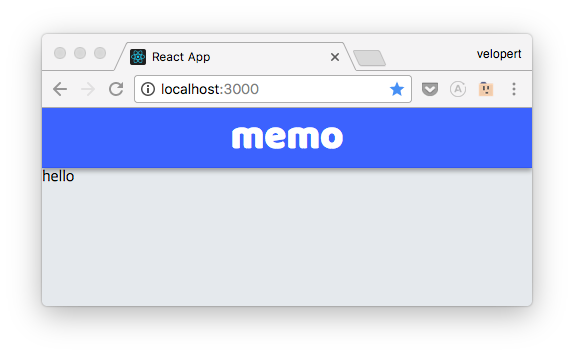
메인 레이아웃 구성하기
내용을 화면의 중앙에 정렬,
화면의 크기에 따라 사이즈 조정
Layout 컴포넌트의 멤버변수로
Main 컴포넌트 만들기
src/components/Layout.js
import React from 'react';
import styled from 'styled-components';
const Wrapper = styled.div`
padding-top: 60px; /* 헤더 높이 */
`;
const Layout = ({children}) => (
<Wrapper>
{children}
</Wrapper>
);
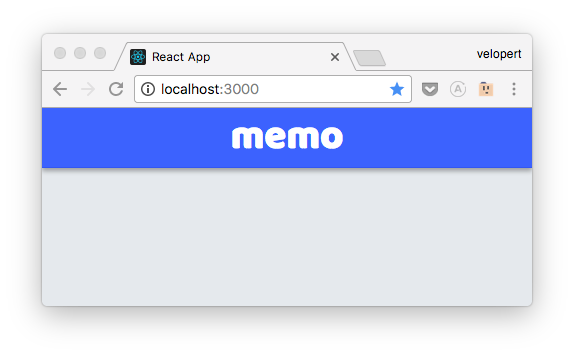
Layout.Main = styled.div`
margin: 0 auto;
margin-top: 2rem;
width: 1200px;
position: relative;
background: gray;
`;
export default Layout;App 에서 렌더링
src/containers/App.js
import React, { Component } from 'react';
import Header from 'components/Header';
import Layout from 'components/Layout';

class App extends Component {
    render() {
        return (
            <Layout>
                <Header/>
                <Layout.Main>hello</Layout.Main>
            </Layout>
        );
    }
}

export default App;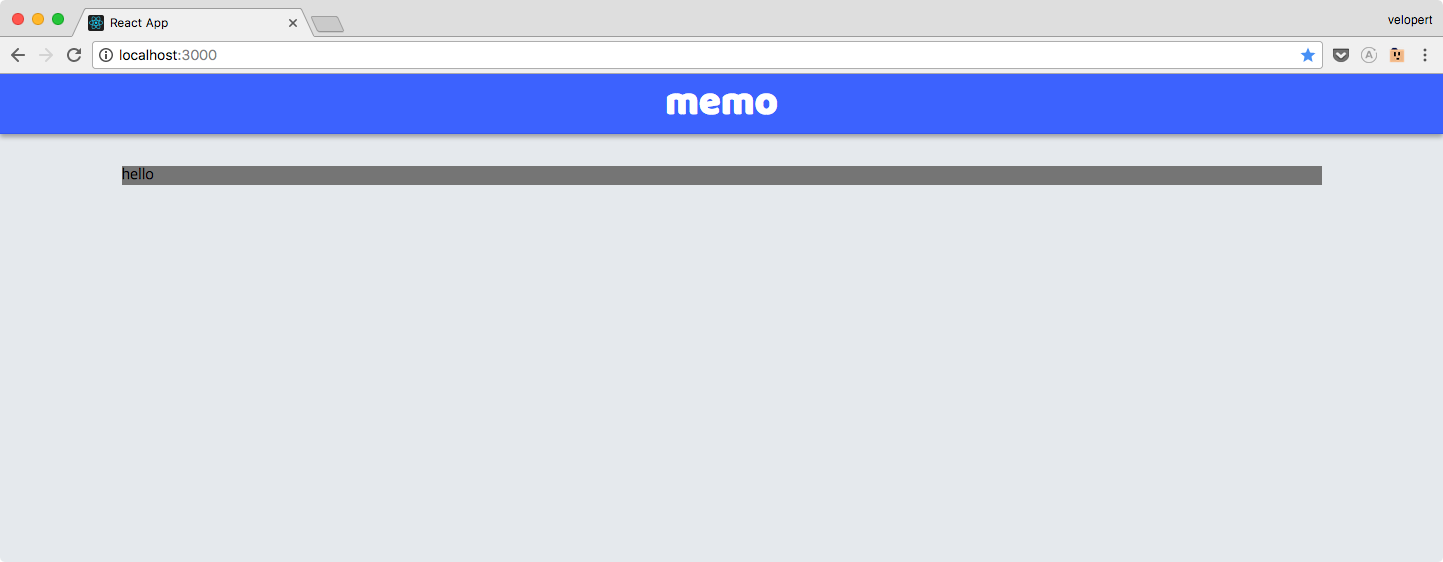
반응형 디자인을 위한
미디어 쿼리 준비하기
src/lib/style-utils.js
import { css } from 'styled-components';

export const media = ({
    desktop: (...args) => css`
        @media (max-width: 1200px) {
            ${ css(...args) }
        }
    `,

    tablet: (...args) => css`
        @media (max-width: 992px) {
            ${ css(...args) }
        }
    `,

    mobile: (...args) => css`
        @media (max-width: 600px) {
            ${ css(...args) }
        }
    `
});
반응형 디자인 적용하기
src/components/Layout.js
import React from 'react';
import styled from 'styled-components';
import { media } from 'lib/style-utils';

const Wrapper = styled.div`
    padding-top: 60px; /* 헤더 높이 */
`;

const Layout = ({children}) => (
    <Wrapper>
        {children}
    </Wrapper>
);

Layout.Main = styled.div`
    margin: 0 auto;
    margin-top: 2rem;
    width: 1200px;
    transition: all .3s;
    position: relative;
    background: gray;

    ${media.desktop`
        width: 990px;
    `}

    ${media.tablet`
        margin-top: 1rem;
        width: calc(100% - 2rem);
    `}

    ${media.mobile`
        margin-top: 0.5rem;
        width: calc(100% - 1rem);
    `}

`

export default Layout;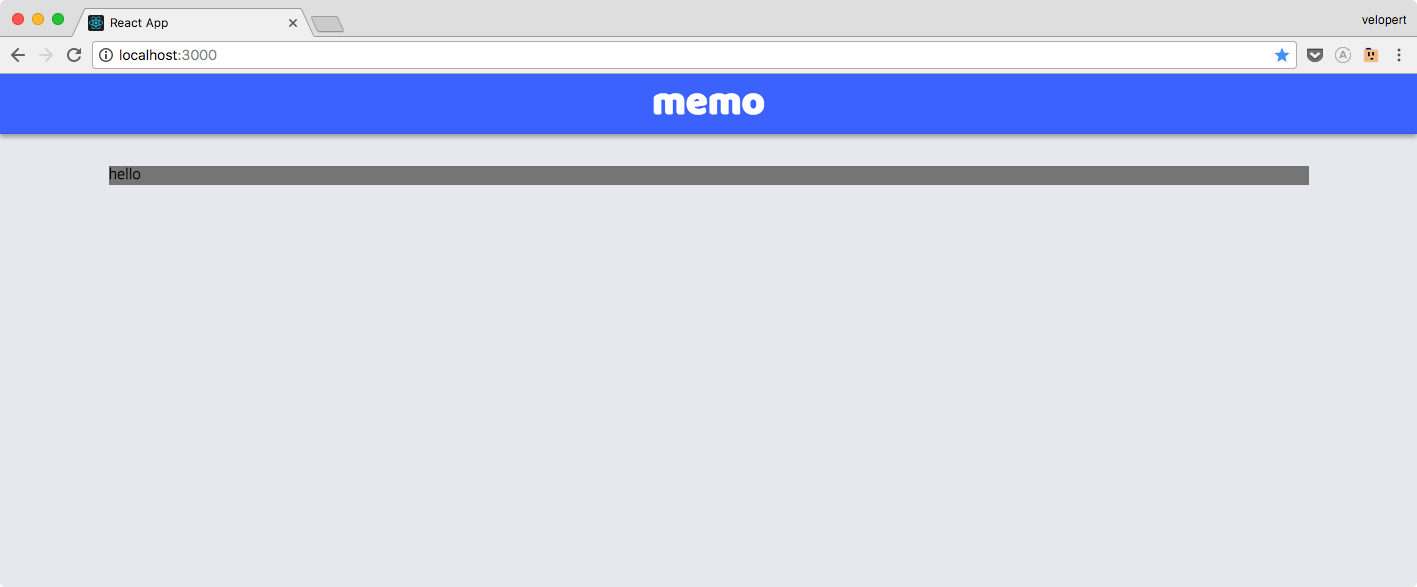
WideScreen

Desktop

Tablet
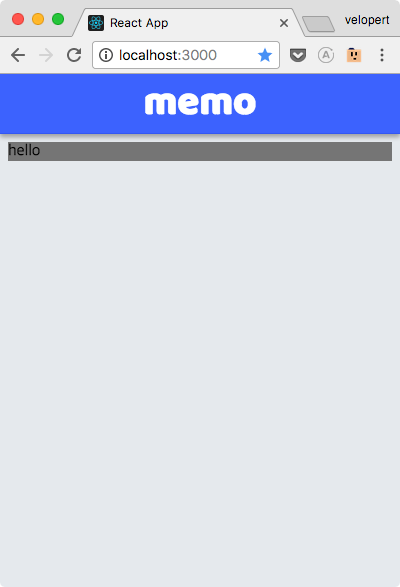
Mobile
메모 작성하기
3-4
레이아웃에 임시 배경색상 제거
src/components/Layout.js - Layout.Main
Layout.Main = styled.div`
    margin: 0 auto;
    margin-top: 2rem;
    width: 1200px;
    transition: all .3s;
    position: relative;

    ${media.desktop`
        width: 990px;
    `}

    (...)
메모를 작성하기 위하여..
4개의 프리젠테이셔널 컴포넌트
1개의 컨테인어 컴포넌트
프리젠테이셔널 컴포넌트
- WriteBox: 그림자가 있는 흰색 박스
- InputPlaceholder: 흰색 박스를 클릭하기전, '메모를 입력하세요' 를 띄우는 컴포넌트
- InputSet: input 과 textarea 가 함께 있는 세트
-
SaveButton: 오른쪽에 정렬된 완료버튼
InputSet 과 SaveButton 은 수정을 할 때도 재사용됨,
이 두개는 src/components/Shared 디렉토리에 저장
나머지는 src/components/WriteMemo 디렉토리에 저장
컨테이너 컴포넌트
-
WriteMemo: 리덕스와 상태를 연동하여
작성기능이 작동하게 해주는 컴포넌트
WhiteBox 컴포넌트
만들기
메모 작성 컴포넌트의 틀
그냥 보여주는 용도,
화면에 따라 너비가 조정됨
src/components/WriteMemo/WhiteBox.js
import styled from 'styled-components';
import oc from 'open-color';
import { media } from 'lib/style-utils';

const WhiteBox = styled.div`
    width: 700px;
    margin: 0 auto;
    padding: 1rem;

    background: white;
    color: ${oc.gray[6]};
    box-shadow: 0 1px 3px rgba(0,0,0,0.12), 0 1px 2px rgba(0,0,0,0.24);
    transition: all 0.3s cubic-bezier(.25,.8,.25,1);

    cursor: text;

    &:hover {
        box-shadow: 0 10px 20px rgba(0,0,0,0.19), 0 6px 6px rgba(0,0,0,0.23);
    }

    ${media.desktop`
        width: 500px;
    `}

    ${media.tablet`
        width: 100%;
    `}
`;

export default WhiteBox;
InputPlaceholder
컴포넌트 만들기
이 또한 장식용 컴포넌트
src/components/WriteMemo/InputPlaceholder.js
import React from 'react';
import styled from 'styled-components';

const Wrapper = styled.div`
    font-weight: 300;
    font-size: 1.2rem;
`;

const InputPlaceholder = () => (
    <Wrapper>
        메모를 입력하세요...
    </Wrapper>
);

export default InputPlaceholder;
컴포넌트 인덱스
보통은 이런식으로 불러오는데..
import InputPlaceholder from 'components/WriteMemo/InputPlaceholder';
import WhiteBox from 'components/WriteMemo/WhiteBox';
컴포넌트의 수가 많아지면 조금 불편함
이런식으로 불러올 수 있는 방법이 있는데
import { InputPlaceholder, WhiteBox } from 'components/WriteMemo';그럴려면 컴포넌트 인덱스를 만들어야 한다
원리는 간단하다.
불러온다음, 내보내면 됨
src/components/WriteMemo/index.js
import InputPlaceholder from './InputPlaceholder';
import WhiteBox from './WhiteBox';

export {
    InputPlaceholder,
    WhiteBox
}
혹은,
src/components/WriteMemo/index.js
export { default as InputPlaceholder } from './InputPlaceholder';
export { default as WhiteBox } from './WhiteBox';
코드 스니펫으로 만들어두면 편함
    "Re-export module as": {
        "prefix": "rexp",
        "body": [
            "export { default as $1 } from './$1';"
        ],
        "description": "Re-exports the ES6 module"
    },
WriteMemo
컨테이너 컴포넌트 만들기
(아직 본격적으로 구현하는건 아님)
기존에 우리가 만든 컴포넌트들이
제대로 나오는지 테스트해보자!
WhiteBox 안에 InputPlaceholder 넣어서 렌더링
src/containers/WriteMemo.js
import React, { Component } from 'react';
import { InputPlaceholder, WhiteBox } from 'components/WriteMemo';

class WriteMemo extends Component {
    render() {
        return (
            <WhiteBox>
                <InputPlaceholder/>
            </WhiteBox>
        );
    }
}

export default WriteMemo;
App 에서 렌더링
src/App.js
import React, { Component } from 'react';
import Header from 'components/Header';
import Layout from 'components/Layout';
import WriteMemo from './WriteMemo';

class App extends Component {
    render() {
        return (
            <Layout>
                <Header/>
                <Layout.Main>
                    <WriteMemo/>
                </Layout.Main>
            </Layout>
        );
    }
}

export default App;
InputSet
컴포넌트 만들기
제목과 내용을 입력하는 컴포넌트
컴포넌트가 마운트되면,
ref 를 통하여 제목에 포커스
styled-components 에서는
ref 설정 할 때 innerRef 사용
입력하는 내용에 따라 높이자동조정하기 위하여
react-textarea-autosize 사용
body, title 값을 받아오고,
내용 수정 함수 onChange 도 받아옴
src/components/Shared/InputSet.js
import React, { Component } from 'react';
import styled from 'styled-components';
import PropTypes from 'prop-types';
import Textarea from 'react-textarea-autosize';

const TitleInput = styled.input`
    width: 100%;
    border: none;
    outline: none;
    font-weight: 500;
    font-size: 1.25rem;
`;

const StyledTextArea = styled(Textarea)`
    width: 100%;
    width: 100%;
    border: none;
    outline: none;
    font-weight: 300;
    font-size: 1.1rem;
    margin-top: 1rem;
    resize: none;
`

class InputSet extends Component {

    static propTypes = {
        onChange: PropTypes.func,
        title: PropTypes.string,
        body: PropTypes.string
    }

    componentDidMount() {
        // 이 컴포넌트가 화면에 나타나면 제목 인풋에 포커스를 줍니다.
        this.title.focus();
    }

    render() {
        const { onChange, title, body } = this.props;

        return (
            <div>
                <TitleInput
                    name="title"
                    onChange={onChange}
                    placeholder="제목"
                    innerRef={ref=>this.title = ref}
                    value={title}
                />
                <StyledTextArea
                    minRows={3}
                    maxRows={20}
                    placeholder="메모를 입력하세요..."
                    name="body"
                    onChange={onChange}
                    value={body}
                />
            </div>
        );
    }
}

export default InputSet;
SaveButton
컴포넌트 만들기
메모내용을 저장하는 컴포넌트
onClick 을 props 로 받아옴
src/components/Shared/SaveButton.js
import styled from 'styled-components';
import oc from 'open-color';
import React from 'react';
import PropTypes from 'prop-types';

const Wrapper = styled.div`
    text-align: right;
`;

const Button = styled.div`
    display: inline-block;
    padding-top: 0.5rem;
    padding-bottom: 0.5rem;
    padding-left: 1rem;
    padding-right: 1rem;
    color: ${oc.indigo[7]};
    border-radius: 4px;
    cursor: pointer;
    font-weight: 500;

    &:hover {
        background: ${oc.gray[1]};
    }
    &:active {
        background: ${oc.gray[2]};
    }
`;

const SaveButton = ({onClick}) => (
    <Wrapper>
        <Button onClick={onClick}>
            완료
        </Button>
    </Wrapper>
);

SaveButton.propTypes = {
    onClick: PropTypes.func
}

export default SaveButton;
Shared
컴포넌트 인덱스 만들기
src/components/Shared/index.js
export { default as InputSet } from './InputSet';
export { default as SaveButton } from './SaveButton';
렌더링하기
(기존에 렌더링했던 InputPlaceholder 임시로 주석처리)
src/containers/WriteMemo.js
import React, { Component } from 'react';
import { InputPlaceholder, WhiteBox } from 'components/WriteMemo';
import { InputSet, SaveButton } from 'components/Shared';

class WriteMemo extends Component {
    render() {
        return (
            <WhiteBox>
                {/*<InputPlaceholder/>*/}
                <InputSet/>
                <SaveButton/>
            </WhiteBox>
        );
    }
}

export default WriteMemo;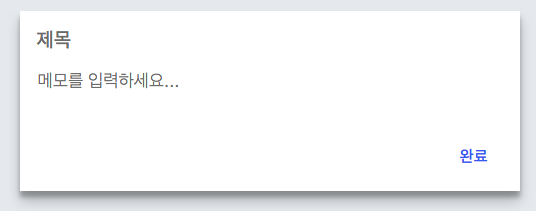
리덕스 ui 모듈 작성하기
이 기능을 구현하기 위하여,
ui 모듈에서
컴포넌트가 포커스되어있는지 여부,
제목, 내용 상태를 관리함
이번에 만들 Action
- FOCUS_INPUT: InputSet 컴포넌트에 포커스
- BLUR_INPUT: 포커스 풀림
- CHANGE_INPUT: 제목, 혹은 내용이 수정됨
- RESET_INPUT: 내용을 초기화시킴 (완료 눌렀을 때 실행됨)
CHANGE_INPUT 을 제외한 액션들은
payload 가 없음
src/modules/ui.js
import { createAction, handleActions } from 'redux-actions';
import { Map } from 'immutable';

const FOCUS_INPUT = 'ui/write/FOCUS_INPUT';
const BLUR_INPUT = 'ui/write/BLUR_INPUT';
const CHANGE_INPUT = 'ui/write/CHANGE_INPUT';
const RESET_INPUT = 'ui/write/RESET_INPUT';

export const focusInput = createAction(FOCUS_INPUT);
export const blurInput = createAction(BLUR_INPUT);
export const changeInput = createAction(CHANGE_INPUT); // { name, value }
export const resetInput = createAction(RESET_INPUT);

const initialState = Map({
    write: Map({
        focused: false,
        title: '',
        body: ''
    })
});

export default handleActions({
    [FOCUS_INPUT]: (state) => state.setIn(['write', 'focused'], true),
    [BLUR_INPUT]: (state) => state.setIn(['write', 'focused'], false),
    [CHANGE_INPUT]: (state, action) => {
        const { name, value } = action.payload;
        return state.setIn(['write', name], value);
    },
    [RESET_INPUT]: (state) => state.set('write', initialState.get('write'))
}, initialState);
WriteMemo 컴포넌트
리덕스에 연결
src/containers/WriteMemo.js
import React, { Component } from 'react';
import { InputPlaceholder, WhiteBox } from 'components/WriteMemo';
import { InputSet, SaveButton } from 'components/Shared';
import { connect } from 'react-redux';
import { bindActionCreators } from 'redux';
import * as uiActions from 'modules/ui';

class WriteMemo extends Component {
    render() {
        return (
            <WhiteBox>
                {/*<InputPlaceholder/>*/}
                <InputSet/>
                <SaveButton/>
            </WhiteBox>
        );
    }
}

export default connect(
    (state) => ({
        focused: state.ui.getIn(['write', 'focused']),
        title: state.ui.getIn(['write', 'title']),
        body: state.ui.getIn(['write', 'body'])
    }),
    (dispatch) => ({
        UIActions: bindActionCreators(uiActions, dispatch)
    })
)(WriteMemo);
WriteMemo
포커스 주고 빼기
기본적으로 InputPlaceholder 보여줌,
클릭 되면 InputSet / SaveButton 보여줌
포커스 설정
src/containers/WriteMemo.js
import React, { Component } from 'react';
import { InputPlaceholder, WhiteBox } from 'components/WriteMemo';
import { InputSet, SaveButton } from 'components/Shared';
import { connect } from 'react-redux';
import { bindActionCreators } from 'redux';
import * as uiActions from 'modules/ui';

class WriteMemo extends Component {
    handleFocus = () => {
        const { focused, UIActions } = this.props;

        // 포커스 된 상태가 아닐 때만 실행합니다.
        if(!focused) {
            UIActions.focusInput();
        }
    }

    render() {
        const { handleFocus } = this;
        const { focused, title, body } = this.props;

        return (
            focused ? /* 포커스 된 상태 */ (
                <WhiteBox>
                    <InputSet/>
                    <SaveButton/>
                </WhiteBox>
            ) : /* 포커스 풀린 상태 */  (
                <WhiteBox onClick={handleFocus}>
                    <InputPlaceholder/>
                </WhiteBox>
            )
        );
    }
}

export default connect(
    (state) => ({
        focused: state.ui.getIn(['write', 'focused']),
        title: state.ui.getIn(['write', 'title']),
        body: state.ui.getIn(['write', 'body'])
    }),
    (dispatch) => ({
        UIActions: bindActionCreators(uiActions, dispatch)
    })
)(WriteMemo);
포커스 해제
컴포넌트 바깥을 클릭하면 포커스 해제
react-click-outside
src/containers/WriteMemo.js 상단 / 하단
import enhanceWithClickOutside from 'react-click-outside';export default connect(
(state) => ({
focused: state.ui.getIn(['write', 'focused']),
title: state.ui.getIn(['write', 'title']),
body: state.ui.getIn(['write', 'body'])
}),
(dispatch) => ({
UIActions: bindActionCreators(uiActions, dispatch)
})
)(enhanceWithClickOutside(WriteMemo));...
src/containers/WriteMemo.js - handleClickOutside
    handleClickOutside() {
        const { UIActions, focused } = this.props;

        if(focused) { // 포커스가 되어 있지 않을때만 실행한다
            UIActions.blurInput();
        }
    }
인풋 리덕스에 연동
src/containers/WriteMemo.js - handleChange
    handleChange = (e) => {
        const { UIActions } = this.props;
        const { name, value } = e.target;

        UIActions.changeInput({name, value});
    }
src/containers/WriteMemo.js - render
    render() {
        const { handleFocus, handleChange } = this;
        const { focused, title, body } = this.props;

        return (
            focused ? /* 포커스 된 상태 */ (
                <WhiteBox>
                    <InputSet onChange={handleChange} title={title} body={body}/>
                    <SaveButton/>
                </WhiteBox>
            ) : /* 포커스 풀린 상태 */  (
                <WhiteBox onClick={handleFocus}>
                    <InputPlaceholder/>
                </WhiteBox>
            )
        );
    }
서버에 메모 작성
REST API 함수들을
src/lib/web-api.js 에 저장
src/lib/web-api.js
import axios from 'axios';

export const createMemo = ({title, body}) => axios.post('/memo', {title,body});
메모 생성 액션 만들기
modules/memo.js
import { createAction, handleActions } from 'redux-actions';
import { Map } from 'immutable';
import * as WebAPI from 'lib/web-api';

// 액션 타입
const CREATE_MEMO = 'memo/CREATE_MEMO';

// 액션 생성자
export const createMemo = createAction(CREATE_MEMO, WebAPI.createMemo) // { title, body }

const initialState = Map({

});

export default handleActions({

}, initialState);
WriteMemo 에서
액션 불러오기
src/containers/WriteMemo.js
// (...)
import * as memoActions from 'modules/memo';


class WriteMemo extends Component {
    // (...)
}

export default connect(
    (state) => ({
        focused: state.ui.getIn(['write', 'focused']),
        title: state.ui.getIn(['write', 'title']),
        body: state.ui.getIn(['write', 'body'])
    }),
    (dispatch) => ({
        UIActions: bindActionCreators(uiActions, dispatch),
        MemoActions: bindActionCreators(memoActions, dispatch)
    })
)(enhanceWithClickOutside(WriteMemo));
작성기능 구현하기
src/containers/WriteMemo.js - handleCreate, render
    handleCreate = async () => {
        const { title, body, MemoActions, UIActions } = this.props;
        try {
            // 메모 생성 API 호출
            await MemoActions.createMemo({
                title, body
            });

            UIActions.resetInput();
            // TODO: 최근 메모 불러오기

        } catch(e) {
            console.log(e); // 에러 발생
        }
    }

    render() {
        const { handleFocus, handleChange, handleCreate } = this;
        const { focused, title, body } = this.props;

        return (
            focused ? /* 포커스 된 상태 */ (
                <WhiteBox>
                    <InputSet onChange={handleChange} title={title} body={body}/>
                    <SaveButton onClick={handleCreate}/>
                </WhiteBox>
            ) : /* 포커스 풀린 상태 */  (
                <WhiteBox onClick={handleFocus}>
                    <InputPlaceholder/>
                </WhiteBox>
            )
        );
    }
여기까지 했으면 절반은 한 것!
메모 불러오기
3-5
작성한 메모를 보여줄차례!
3가지 종류의 로딩
- 초기 로딩: 페이지에 처음 들어왔을 때, 가장 최근 20개
-
신규 로딩: 초기로딩 마친 후, 새로 작성된 메모,
5초마다 반복하며, 또 메모를 작성 한 다음에도 호출됨 - 추가 로딩: 스크롤을 내렸을 때, 이전 메모들을 더 불러올 때 사용됨
초기 로딩 API 함수 만들기
메모를 역순으로, 최대 20개 까지 불러온다
/memo/?_sort=id&_order=DESC&_limit=20src/lib/web-api.js
// (...)
export const getInitialMemo = () => axios.get('/memo/?_sort=id&_order=DESC&_limit=20');
// 역순으로 최근 작성된 포스트 20개를 불러온다.
리덕스 모듈에서
API 호출하는 액션 만들기
GET_INITIAL_MEMO
src/modules/memo.js
import { createAction, handleActions } from 'redux-actions';
import { Map, List, fromJS } from 'immutable';
import { pender } from 'redux-pender';
import * as WebAPI from 'lib/web-api';

// 액션 타입
const CREATE_MEMO = 'memo/CREATE_MEMO';
const GET_INITIAL_MEMO = 'memo/GET_INITIAL_MEMO';

// 액션 생성자
export const createMemo = createAction(CREATE_MEMO, WebAPI.createMemo) // { title, body }
export const getInitialMemo = createAction(GET_INITIAL_MEMO, WebAPI.getInitialMemo);


const initialState = Map({
    data: List()
});

export default handleActions({
    // 초기 메모 로딩
    ...pender({
        type: GET_INITIAL_MEMO,
        onSuccess: (state, action) => state.set('data', fromJS(action.payload.data))
    })
}, initialState);
App 컴포넌트에서
초기 메모 불러오기
src/containers/App.js
import React, { Component } from 'react';
import Header from 'components/Header';
import Layout from 'components/Layout';
import WriteMemo from './WriteMemo';

import * as memoActions from 'modules/memo';
import { connect } from 'react-redux';
import { bindActionCreators } from 'redux';

class App extends Component {

    componentDidMount() {
        const { MemoActions } = this.props;
        // 초기 메모 로딩
        MemoActions.getInitialMemo();
    }

    render() {
        return (
            <Layout>
                <Header/>
                <Layout.Main>
                    <WriteMemo/>
                </Layout.Main>
            </Layout>
        );
    }
}

export default connect(
    (state) => ({}), // 현재는 비어있는 객체를 반환합니다
    (dispatch) => ({
        MemoActions: bindActionCreators(memoActions, dispatch)
    })
)(App);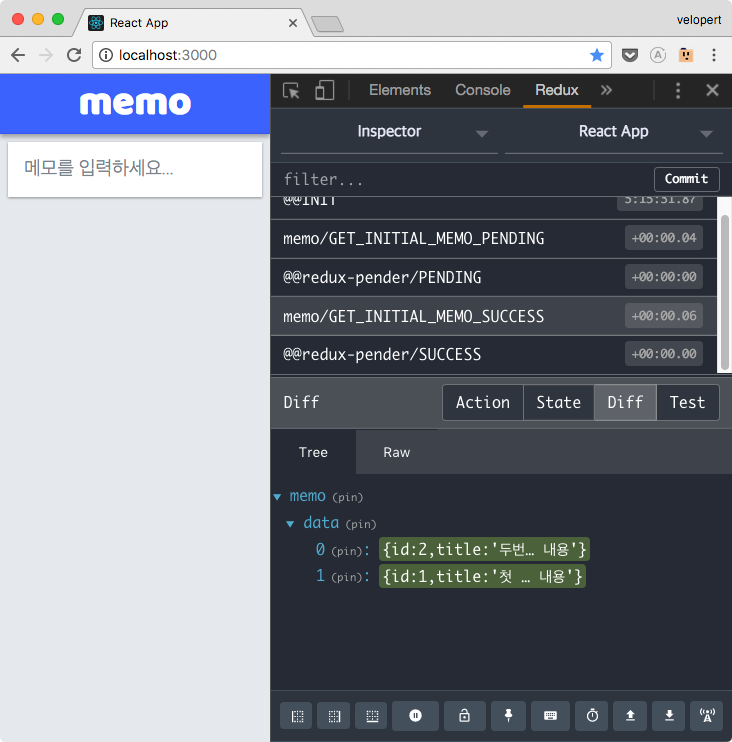
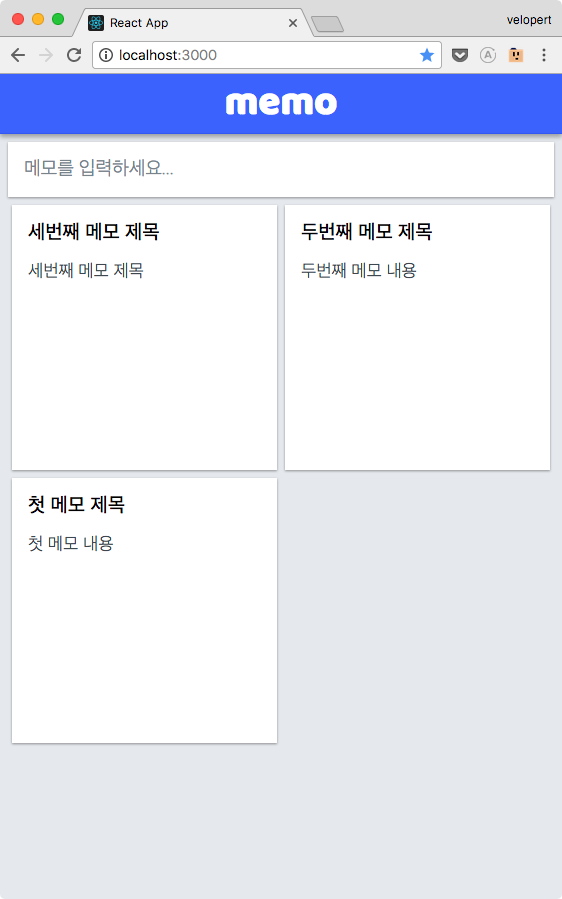
메모 목록 보여주기
이번에 만들 컴포넌트
- Memo: 메모 한개의 데이터를 전달받아 렌더링
-
MemoList: 메모 여러개가 들어있는 배열 렌더링
src/components/MemoList 디렉토리에 저장됨
Memo 컴포넌트
만들기

onOpen 함수와
memo 값 (Immutable Map) 을 전달받는다
src/components/MemoList/Memo.js
import React, {Component} from 'react';
import styled from 'styled-components';
import oc from 'open-color';
import PropTypes from 'prop-types';
import { media } from 'lib/style-utils';
import ImmutablePropTypes from 'react-immutable-proptypes';

// 화면 크기에 따라 일정 비율로 가로 사이즈를 설정합니다
const Sizer = styled.div`
    display: inline-block;
    width: 25%;
    padding: 0.5rem;

    ${media.desktop`
        width: 33.3333%;
    `}

    ${
        media.mobile`
            width: 50%;
            padding: 0.25rem;
        `
    }
`;

// 정사각형을 만들어줍니다. (padding-top 은 값을 % 로 설정하였을 때 부모 엘리먼트의 width 의 비율로 적용됩니다.)
const Square = styled.div`
    padding-top: 100%;
    position: relative;
    background: white;
    cursor: pointer;
    transition: all 0.3s cubic-bezier(.25,.8,.25,1);
    box-shadow: 0 1px 3px rgba(0,0,0,0.12), 0 1px 2px rgba(0,0,0,0.24);

    &:hover {
        box-shadow: 0 3px 6px rgba(0,0,0,0.16), 0 3px 6px rgba(0,0,0,0.23);
    }
`;

// 실제 내용이 들어가는 부분입니다.
const Contents = styled.div`
    position: absolute;
    top: 1rem;
    left: 1rem;
    bottom: 1rem;
    right: 1rem;
    /* 텍스트가 길어지면 새 줄 생성; 박스 밖의 것은 숨김 */
    white-space: pre-wrap;
    overflow: hidden;
`;

const Title = styled.div`
    font-size: 1.25rem;
    font-weight: 500;
    margin-bottom: 1rem;
`;

const Body = styled.div`
    font-size: 1.1rem;
    font-weight: 300;
    color: ${oc.gray[7]};
`;

class Memo extends Component {
    static propTypes = {
        memo: ImmutablePropTypes.mapContains({
            id: PropTypes.number,
            title: PropTypes.string,
            body: PropTypes.body
        }),
        onOpen: PropTypes.func
    }

    render() {
        const { title, body } = this.props.memo.toJS();

        return (
            <Sizer>
                <Square>
                    <Contents>
                        { title && <Title>{title}</Title>}
                        <Body>{body}</Body>
                    </Contents>
                </Square>
            </Sizer>
        )
    }
}

export default Memo;
MemoList 만들기
src/components/MemoList/MemoList.js
import React from 'react';
import styled from 'styled-components';
import PropTypes from 'prop-types';
import { media } from 'lib/style-utils';
import ImmutablePropTypes from 'react-immutable-proptypes';

import Memo from './Memo';

const Wrapper = styled.div`
    display: block;
    margin-top: 0.5rem;
    font-size: 0px; /* inline-block 위아래 사이에 생기는 여백을 제거합니다 */

    ${media.mobile`
        margin-top: 0.25rem;
    `}
`;

const MemoList = ({memos, onOpen}) => {
    const memoList = memos.map(
        memo => (
            <Memo
                key={memo.get('id')}
                memo={memo}
                onOpen={onOpen}
            />
        )
    );
    return (
        <Wrapper>
            {memoList}
        </Wrapper>
    );
};

MemoList.propTypes = {
    memos: ImmutablePropTypes.listOf(
        ImmutablePropTypes.mapContains({
            id: PropTypes.number,
            title: PropTypes.string,
            body: PropTypes.body
        })
    ),
    onOpen: PropTypes.func
}

export default MemoList;
인덱스 파일 만들기
// MemoList/MemoList.. 맘에 들지 않는다!
import MemoList from 'components/MemoList/MemoList';
src/MemoList/index.js
export { default } from './MemoList';이렇게 내보내주면,
이렇게 불러올 수 있게 됨
import MemoList from 'components/MemoList';MemoListContainer
만들기
src/containers/MemoListContainer.js
import React, { Component } from 'react';
import { connect } from 'react-redux';
import MemoList from 'components/MemoList';


class MemoListContainer extends Component {
    render() {
        const { memos } = this.props;

        return (
            <MemoList
                memos={memos}
            />
        );
    }
}

export default connect(
    (state) => ({
        memos: state.memo.get('data')
    })
)(MemoListContainer);
App 에서 렌더링
src/containers/App.js
// (...)
import MemoListContainer from './MemoListContainer';

class App extends Component {
    // (...)

    render() {
        return (
            <Layout>
                <Header/>
                <Layout.Main>
                    <WriteMemo/>
                    <MemoListContainer/>
                </Layout.Main>
            </Layout>
        );
    }
}

// (...)
새 메모 불러오기
src/lib/web-api.js
export const getRecentMemo = (cursor) => axios.get(`/memo/?id_gte=${cursor+1}&_sort=id&_order=DESC&`);
// cursor 기준 최근 작성된 메모를 불러온다.
cursor 를 파라미터로 받아와서
그 값보다 큰 id 를 가진 메모들을 불러온다
신규로딩 액션 및 리듀서 작성
GET_RECENT_MEMO
요청 완료 후 결과값을 concat 을 통해
기존 리스트의 앞 부분에 붙인다
src/modules/memo.js
import { createAction, handleActions } from 'redux-actions';
import { Map, List, fromJS } from 'immutable';
import { pender } from 'redux-pender';
import * as WebAPI from 'lib/web-api';

// 액션 타입
const CREATE_MEMO = 'memo/CREATE_MEMO';
const GET_INITIAL_MEMO = 'memo/GET_INITIAL_MEMO';
const GET_RECENT_MEMO = 'memo/GET_RECENT_MEMO';

// 액션 생성자
export const createMemo = createAction(CREATE_MEMO, WebAPI.createMemo) // { title, body }
export const getInitialMemo = createAction(GET_INITIAL_MEMO, WebAPI.getInitialMemo);
export const getRecentMemo = createAction(GET_RECENT_MEMO, WebAPI.getRecentMemo) // cursor


const initialState = Map({
    data: List()
});

export default handleActions({
    // 초기 메모 로딩
    ...pender({
        type: GET_INITIAL_MEMO,
        onSuccess: (state, action) => state.set('data', fromJS(action.payload.data))
    }),
    // 신규 메모 로딩
    ...pender({
        type: GET_RECENT_MEMO,
        onSuccess: (state, action) => {
            // 데이터 리스트의 앞부분에 새 데이터를 붙여준다
            const data = state.get('data');
            return state.set('data', fromJS(action.payload.data).concat(data))
        }
    })
}, initialState);
WriteMemo 에서
새 메모 작성 후 신규로딩 호출
src/containers/WriteMemo.js
//(...)
class WriteMemo extends Component {
   //(...)

    handleCreate = async () => {
        const { title, body, cursor, MemoActions, UIActions } = this.props;
        try {
            // 메모 생성 API 호출
            await MemoActions.createMemo({
                title, body
            });
            // 신규 메모를 불러옵니다
            // cursor 가 존재하지 않는다면, 0을 cursor 로 설정합니다.
            await MemoActions.getRecentMemo(cursor ? cursor : 0);
            UIActions.resetInput();
            // TODO: 최근 메모 불러오기

        } catch(e) {
            console.log(e); // 에러 발생
        }
    }

    //(...)
}

export default connect(
    (state) => ({
        focused: state.ui.getIn(['write', 'focused']),
        title: state.ui.getIn(['write', 'title']),
        body: state.ui.getIn(['write', 'body']),
        cursor: state.memo.getIn(['data', 0, 'id'])
    }),
    (dispatch) => ({
        UIActions: bindActionCreators(uiActions, dispatch),
        MemoActions: bindActionCreators(memoActions, dispatch)
    })
)(enhanceWithClickOutside(WriteMemo));
5초마다 새 데이터 불러오기
src/containers/App.js
import React, { Component } from 'react';
import Header from 'components/Header';
import Layout from 'components/Layout';
import WriteMemo from './WriteMemo';
import MemoListContainer from './MemoListContainer';

import * as memoActions from 'modules/memo';
import { connect } from 'react-redux';
import { bindActionCreators } from 'redux';


class App extends Component {

    async componentDidMount() {
        const { MemoActions } = this.props;
        // 초기 메모 로딩
        try {
            await MemoActions.getInitialMemo();
            this.getRecentMemo();
        } catch(e) {
            console.log(e);
        }
    }

    getRecentMemo = () => {
        const { MemoActions, cursor } = this.props;
        MemoActions.getRecentMemo(cursor ? cursor : 0);

        // short-polling - 5초마다 새 데이터 불러오기 시도
        setTimeout(() => {
            this.getRecentMemo()
        }, 1000 * 5)
    }

    render() {
        return (
            <Layout>
                <Header/>
                <Layout.Main>
                    <WriteMemo/>
                    <MemoListContainer/>
                </Layout.Main>
            </Layout>
        );
    }
}

export default connect(
    (state) => ({
        cursor: state.memo.getIn(['data', 0, 'id'])
    }), // 현재는 비어있는 객체를 반환합니다
    (dispatch) => ({
        MemoActions: bindActionCreators(memoActions, dispatch)
    })
)(App);
메모 수정하기 및 삭제하기
3-6
MemoViewer
컴포넌트 만들기
InputSet, SaveButton 을 재활용해서
새로 작성 할 코드가 그리 많지 않음
이 컴포넌트는 선택된 메모의 내용, 그리고
4가지 함수:
- onChange: 인풋 값 수정
- onUpdate: 메모 내용 업데이트
- onDelete: 메모 제거
- onClose: 뷰어 닫기
를 props 로 받는다
src/components/MemoViewer
import React from 'react';
import { InputSet, SaveButton } from 'components/Shared';
import styled from 'styled-components';
import oc from 'open-color';
import PropTypes from 'prop-types';
import { media } from 'lib/style-utils';

import TrashIcon from 'react-icons/lib/io/trash-b';


// 화면을 불투명하게 해줍니다.
const Dimmed = styled.div`
    background: ${oc.gray[3]};
    top: 0px;
    left: 0px;
    bottom: 0px;
    right: 0px;
    position: fixed;
    z-index: 10;
    opacity: 0.5;
`;

const Viewer = styled.div`
    background: white;
    position: fixed;
    height: auto;
    z-index: 15;

    padding: 1rem;
    top: 50%;
    left: 50%;
    transform: translate(-50%, -50%);
    box-shadow: 0 10px 20px rgba(0,0,0,0.19), 0 6px 6px rgba(0,0,0,0.23);

    ${media.tablet`
        width: calc(100% - 2rem);
    `}
`;

const TrashButton = styled.div`
    position: absolute;
    bottom: 1rem;
    left: 1rem;
    color: ${oc.gray[6]};
    cursor: pointer;

    &:hover {
        color: ${oc.gray[7]};
    }

    &:active {
        color: ${oc.gray[8]};
    }

    font-size: 1.5rem;
`;

const MemoViewer = ({visible, title, body, onChange, onUpdate, onDelete, onClose}) => {

    // visible 이 아닐경우엔 아무것도 보여주지 않는다
    if(!visible) return null;


    return (
        <div>
            <Dimmed onClick={onClose}/>
            <Viewer>
                <InputSet title={title} body={body} onChange={onChange}/>
                <SaveButton onClick={onUpdate}/>
                <TrashButton onClick={onDelete}>
                    <TrashIcon/>
                </TrashButton>
            </Viewer>
        </div>
    );
};

MemoViewer.propTypes = {
    visible: PropTypes.bool,
    title: PropTypes.string,
    body: PropTypes.string,
    onChange: PropTypes.func,
    onUpdate: PropTypes.func,
    onDelete: PropTypes.func
}

export default MemoViewer;
UI 액션 준비하기
src/modules/ui.js
// (...)

const OPEN_VIEWER = 'OPEN_VIEWER';
const CLOSE_VIEWER = 'CLOSE_VIEWER';
const CHANGE_VIEWER_INPUT = 'CHANGE_VIEWER_INPUT';

// (...)

export const openViewer = createAction(OPEN_VIEWER); // memo
export const closeViewer = createAction(CLOSE_VIEWER);
export const changeViewerInput = createAction(CHANGE_VIEWER_INPUT); // { name, value }

const initialState = Map({
    write: Map({
        focused: false,
        title: '',
        body: ''
    }),
    memo: Map({
        open: false,
        info: Map({
            id: null,
            title: null,
            body: null
        })
    })
});

export default handleActions({
    // (...)
    [OPEN_VIEWER]: (state, action) => state.setIn(['memo', 'open'], true)
                                           .setIn(['memo', 'info'], action.payload),
    [CLOSE_VIEWER]: (state, action) => state.setIn(['memo', 'open'], false),
    [CHANGE_VIEWER_INPUT]: (state, action) => {
        const { name, value } = action.payload;
        return state.setIn(['memo', 'info', name], value)
    }
}, initialState);
MemoViewer
띄우고, 닫기
컨테이너 만들기
src/containers/MemoViewerContainer.js
import React, { Component } from 'react';
import MemoViewer from 'components/MemoViewer';

import { connect } from 'react-redux';
import {bindActionCreators} from 'redux';
import * as uiActions from 'modules/ui';
import * as memoActions from 'modules/memo';


class MemoViewerContainer extends Component {

    handleChange = (e) => {
        const { UIActions } = this.props;
        const { name, value } = e.target;

        UIActions.changeViewerInput({
            name, value
        });
    }

    render() {
        const { visible, memo, UIActions } = this.props;
        const { title, body } = memo.toJS();
        const { handleChange } =this;

        return (
            <MemoViewer
                visible={visible}
                title={title}
                body={body}
                onChange={handleChange}
                onClose={UIActions.closeViewer}
            />
        );
    }
}

export default connect(
    (state) => ({
        visible: state.ui.getIn(['memo', 'open']),
        memo: state.ui.getIn(['memo', 'info'])
    }),
    (dispatch) => ({
        UIActions: bindActionCreators(uiActions, dispatch),
        MemoActions: bindActionCreators(memoActions, dispatch)
    })
)(MemoViewerContainer);
App에서 렌더링
src/containers/App.js
// (...)
import MemoViewerContainer from './MemoViewerContainer';


class App extends Component {

    // (...)

    render() {
        return (
            <Layout>
                <Header/>
                <Layout.Main>
                    <WriteMemo/>
                    <MemoListContainer/>
                </Layout.Main>
                <MemoViewerContainer/>
            </Layout>
        );
    }
}

// (...)
onOpen 함수 지정하기
src/containers/MemoListContainer.js
import React, { Component } from 'react';
import { connect } from 'react-redux';
import MemoList from 'components/MemoList';
import { bindActionCreators } from 'redux';
import * as uiActions from 'modules/ui';

class MemoListContainer extends Component {
    render() {
        const { memos, UIActions } = this.props;

        return (
            <MemoList
                memos={memos}
                onOpen={UIActions.openViewer}
            />
        );
    }
}

export default connect(
    (state) => ({
        memos: state.memo.get('data')
    }),
    (dispatch) => ({
        UIActions: bindActionCreators(uiActions, dispatch)
    })
)(MemoListContainer);
src/components/MemoList/Memo.js
// (...)

class Memo extends Component {
    // (...)

    handleClick = () => {
        const { memo, onOpen } = this.props;
        onOpen(memo);
    }

    render() {
        const { title, body } = this.props.memo.toJS();
        const { handleClick } = this;

        return (
            <Sizer>
                <Square onClick={handleClick}>
                    <Contents>
                        { title && <Title>{title}</Title>}
                        <Body>{body}</Body>
                    </Contents>
                </Square>
            </Sizer>
        )
    }
}

export default Memo;
업데이트, 삭제
구현하기
API 함수 만들기
src/lib/web-api.js
// (...)
// 메모를 업데이트한다
export const updateMemo = ({id, memo: { title, body }}) => axios.put(`/memo/${id}`, {title, body});
// 메모를 제거한다
export const deleteMemo = (id) => axios.delete(`/memo/${id}`);
액션, 리듀서 작성하기
src/modules/memo.js
// (...)

const UPDATE_MEMO = 'memo/UPDATE_MEMO';
const DELETE_MEMO = 'memo/DELETE_MEMO';

// (...)

// createAction 의 두번째 파라미터는 meta 데이터를 만들 때 사용됩니다.
export const updateMemo = createAction(UPDATE_MEMO, WebAPI.updateMemo, payload => payload);
// { id, memo: {title,body} }
export const deleteMemo = createAction(DELETE_MEMO, WebAPI.deleteMemo, payload => payload);
// id


const initialState = Map({
    data: List()
});

export default handleActions({
    // (...)

    // 메모 업데이트
    ...pender({
        type: UPDATE_MEMO,
        onSuccess: (state, action) => {
            const { id, memo: { title, body} } = action.meta;
            const index = state.get('data').findIndex(memo => memo.get('id') === id);
            return state.updateIn(['data', index], (memo) => memo.merge({
                title,
                body
            }))
        }
    }),
    // 메모 삭제
    ...pender({
        type: DELETE_MEMO,
        onSuccess: (state, action) => {
            const id = action.meta;
            const index = state.get('data').findIndex(memo => memo.get('id') === id);
            return state.deleteIn(['data', index]);
        }
    })
}, initialState);
MemoViewerContainer
액션 디스패치하기
src/containers/MemoViewerContainer.js
// (...)
class MemoViewerContainer extends Component {

    // (...)

    handleUpdate = () => {
        const { MemoActions, UIActions, memo } = this.props;
        const { id, title, body } = memo.toJS();
        MemoActions.updateMemo({
            id,
            memo: { title, body }
        });
        UIActions.closeViewer();
    }

    handleDelete = () => {
        const { MemoActions, UIActions, memo } = this.props;
        const { id } = memo.toJS();
        MemoActions.deleteMemo(id);
        UIActions.closeViewer();
    }


    render() {
        const { visible, memo, UIActions } = this.props;
        const { title, body } = memo.toJS();
        const { handleChange, handleUpdate, handleDelete } =this;

        return (
            <MemoViewer
                visible={visible}
                title={title}
                body={body}
                onChange={handleChange}
                onClose={UIActions.closeViewer}
                onUpdate={handleUpdate}
                onDelete={handleDelete}
            />
        );
    }
}

// (...)
메모 무한 스크롤링
3-7
더미 데이터 만들기
개발자 콘솔에서 실행:
function createDummyMemo(i) {
    if(i>100) return;
    fetch('/memo', {
        method: 'POST',
        headers: {'Content-Type': 'application/json'},
        body: JSON.stringify({title:'test'+i,body:'test'})
    });
    setTimeout(() => createDummyMemo(++i), 100)
    console.log(`${i}/100`);
}
createDummyMemo(0)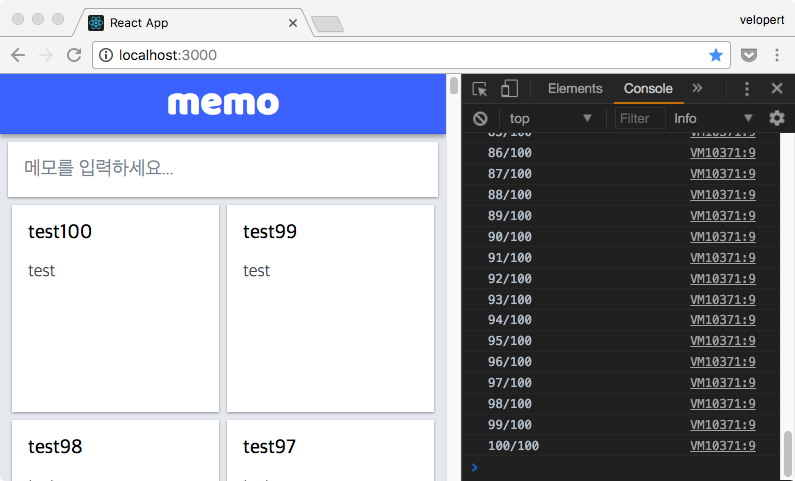
추가 로딩 API 함수 만들기
src/lib/web-api.js
// (...)
export const getPreviousMemo = (endCursor) => axios.get(`/memo/?_sort=id&_order=DESC&_limit=20&id_lte=${endCursor-1}`);
// endCursor 기준 이전 작성된 메모를 불러온다
액션, 리듀서 작성하기
src/modules/memo.js
// (...)
const GET_PREVIOUS_MEMO = 'memo/GET_PREVIOUS_MEMO';
// (...)
export const getPreviousMemo = createAction(GET_PREVIOUS_MEMO, WebAPI.getPreviousMemo); // endCursor
// (...)
export default handleActions({
    // (...)
    // 이전 메모 로딩
    ...pender({
        type: GET_PREVIOUS_MEMO,
        onSuccess: (state, action) => {
            // 데이터 리스트의 뒷부분에 새 데이터를 붙여준다
            const data = state.get('data');
            return state.set('data', data.concat(fromJS(action.payload.data)))
        }
    })
}, initialState);
스크롤 이벤트 등록하기
handleScroll 메소드 만들고,
componentDidMount 에서 스크롤 이벤트 등록
우선 필요한 수치들을 기록해보자
src/containers/App.js
// (...)
class App extends Component {

    async componentDidMount() {
        window.addEventListener('scroll', this.handleScroll);

        const { MemoActions } = this.props;
        // 초기 메모 로딩
        try {
            await MemoActions.getInitialMemo();
            this.getRecentMemo();
        } catch(e) {
            console.log(e);
        }
    }

    handleScroll = (e) => {
        const { clientHeight, scrollTop } = document.body;
        const { innerHeight } = window;

        console.log(clientHeight, innerHeight, scrollTop);
    }

    // (...)
}

// (...)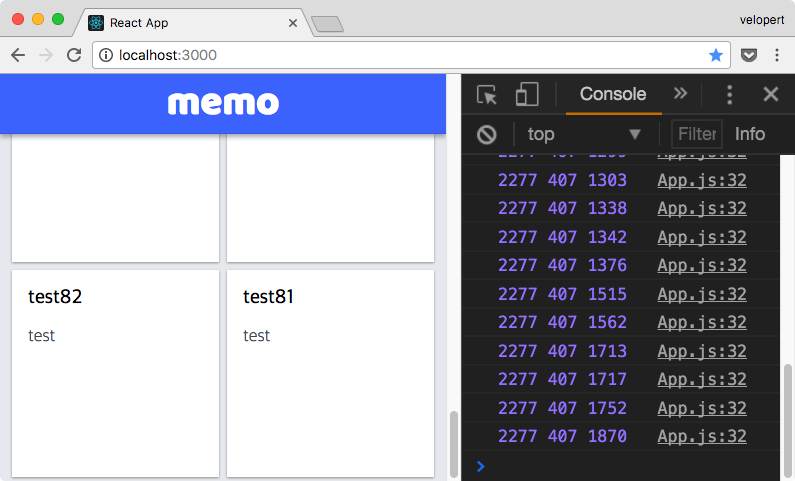
아래로 내려갈수록, scrollTop 증가
페이지의 바닥에 달했을때는, 우측의 두 값을 더하면 = 왼쪽에 있는 값
clientHeight - innerHeight - scrollTop
= 0 에 가까우면, 페이지 바닥과 가깝다는 뜻.
페이지 바닥에서 100px 떨어져있을때만
기록하도록 코드를 작성해보자
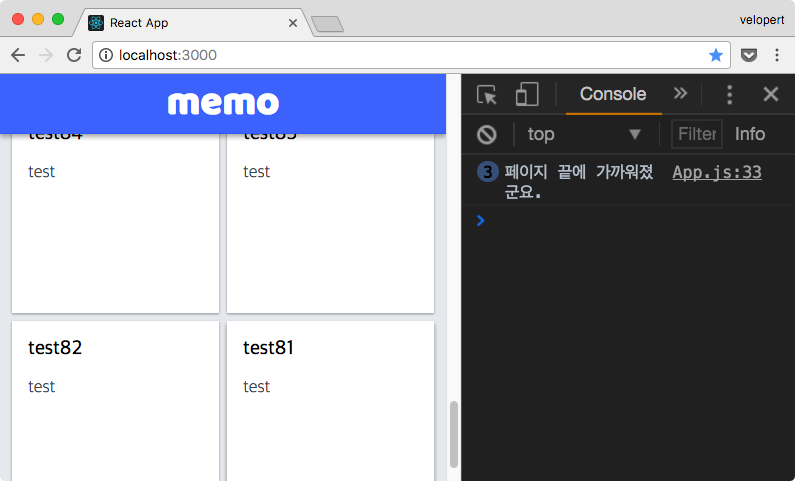
여기서 로딩을 하면 됨!
하지만.. 중복로딩을 방지하는 규칙 필요
endCursor 를 알아야하니,
리덕스 스토어에서 받아오자
src/containers/App.js - 하단
export default connect(
    (state) => ({
        cursor: state.memo.getIn(['data', 0, 'id']),
        endCursor: state.memo.getIn(['data', state.memo.get('data').size - 1, 'id'])
    }),
    (dispatch) => ({
        MemoActions: bindActionCreators(memoActions, dispatch)
    })
)(App);
스크롤이 바닥에 가까워지면
중복 요청 방지하면서, 추가 로딩하기
src/containers/App.js
// (...)
class App extends Component {
    endCursor = 0
    // (...)
    handleScroll = (e) => {
        const { clientHeight, scrollTop } = document.body;
        const { innerHeight } = window;

        if(clientHeight - innerHeight - scrollTop < 100) {
            const { endCursor, MemoActions } = this.props;

            // endCursor 가 없거나, 이전에 했던 요청과 동일하다면 여기서 멈춘다.
            if(!endCursor || this.endCursor === endCursor) return;
            this.endCursor = endCursor;

            MemoActions.getPreviousMemo(endCursor);
        }
    }
    // (...)
}
// (...)
다음 작업들..
로딩 할 때 스피너 보여주기
애니메이션 구현
최적화
히로쿠에 디플로이하기
아이콘 보여주기
는 숙제
수고하셨습니다!
React Middlewares, Async
By Minjun Kim


