Embroidery
Workshop

What is Embroidery?
Decorating fabric
with thread.
Needlework Types
- Cross Stitch
- Needlepoint
- Sashiko
- Embroidery
Cross Stitch
https://www.etsy.com/listing/292708607/pretty-little-los-angeles-modern-cross
Needlepoint
https://www.etsy.com/listing/221407671/needlepoint-cross-stitch-c3po-pattern
Sashiko
https://www.etsy.com/listing/237092948/sashiko-fabric-pattern-sampler-kit
Embroidery
https://www.etsy.com/listing/62855147/embroidery-patterns-festive-flock
Maptime Embroidery
Stitch Sampler
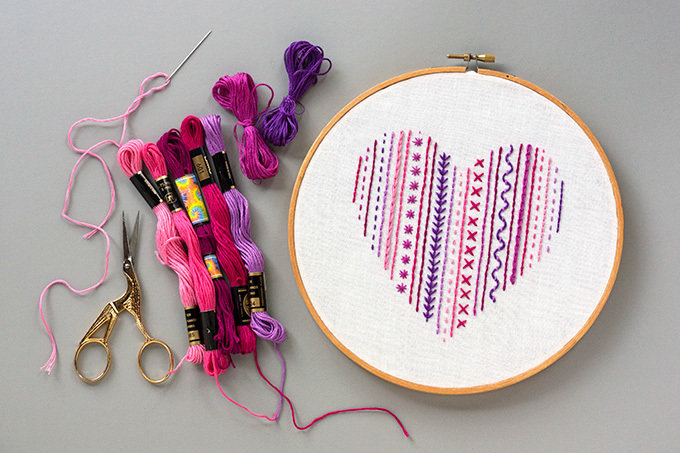
http://adventures-in-making.com/diy-heart-embroidery-sampler-for-beginners/
California
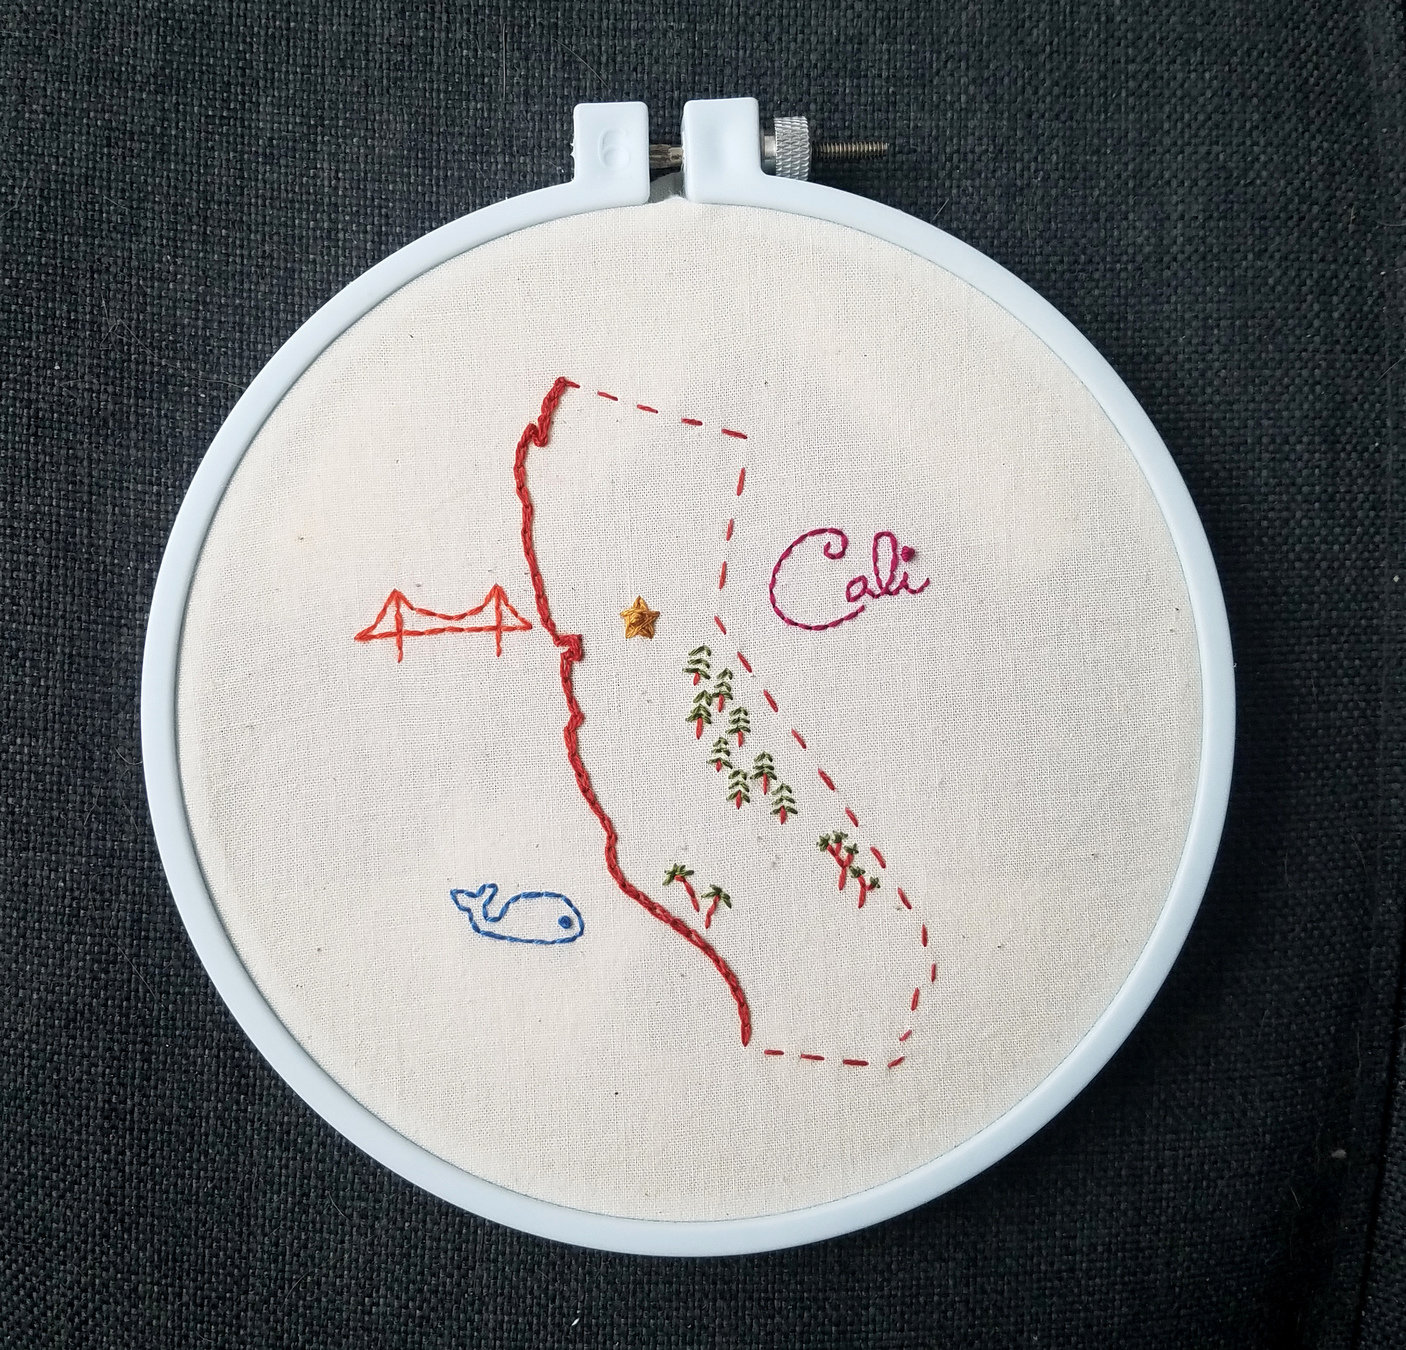
The Great
Los Angeles Quilt
Materials
Embroidery Floss
- Most common brand: DMC
- 6 strands, or "plies"
- Split up into fewer strands to vary thickness.
- Cross stitch commonly uses 2 strands.
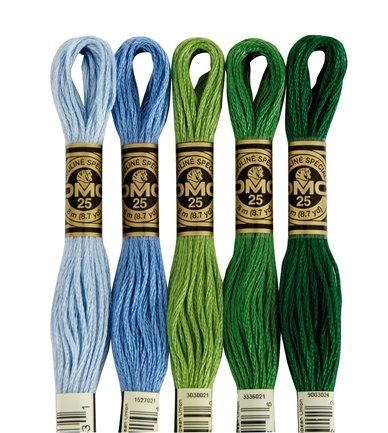
http://www.dmc-usa.com/Products/Needlework-Threads/Embroidery-Threads/Cotton-Embroidery-Floss.aspx
Needles
- Chenille Needles - sharp point
- Tapestry Needles - blunt point
- Sizes
- 1-12
- 18-28
- bigger number = smaller size
- What needle to use depends on thread/floss and fabric being used.
Fabric
- Fabrics that don't have too tight a weave.
- Use a woven fabric, not a knit fabric because it stretches.
- Cotton, Linen, Muslin, Aida
- Don't pick something too transparent.
Prep
Hoop
- Locate center of fabric.
- Loosen hoop and separate the rings.
- Center fabric over inner ring.
- Press outer ring over fabric.
- Alternate tightening the hoop and gently pulling the fabric taut until fabric is secure.
Transfer Pattern
- Methods
- Iron-on
- Trace
- Draw
- Tools
- Pencil
- Washable Pen/Marker
- Lightbox
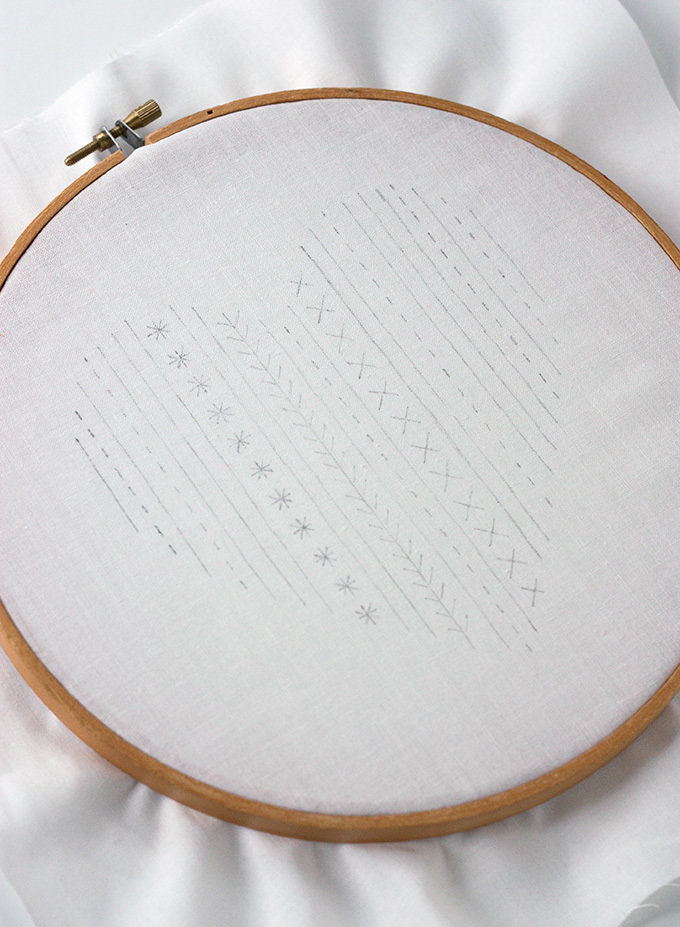
http://adventures-in-making.com/diy-heart-embroidery-sampler-for-beginners/
Embroidery Thread
- Cut a length of thread.
- Longer = more difficult to use
- Shorter = more frequent start/stop
- A good length to start with is to measure from your hand to elbow.
- Separate the floss by gently pulling out the number of threads being used.
Stitch!
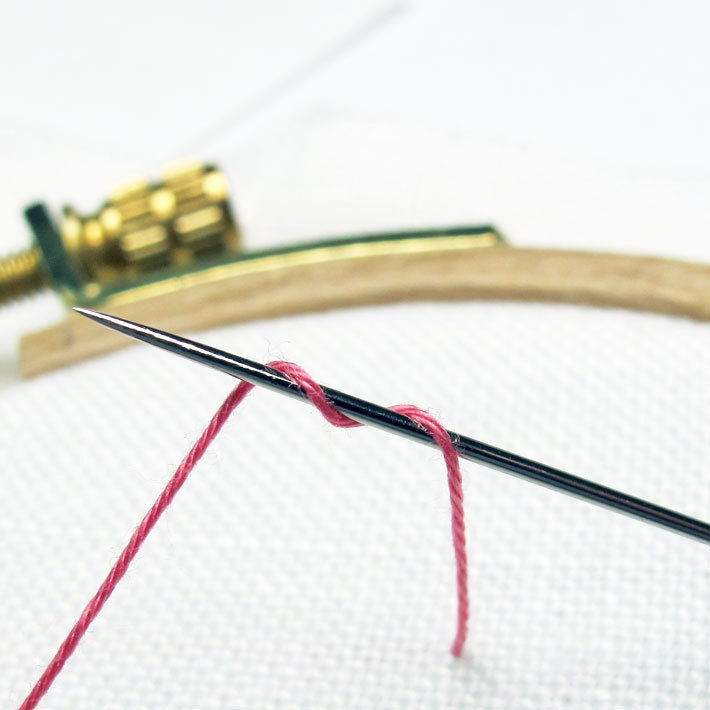
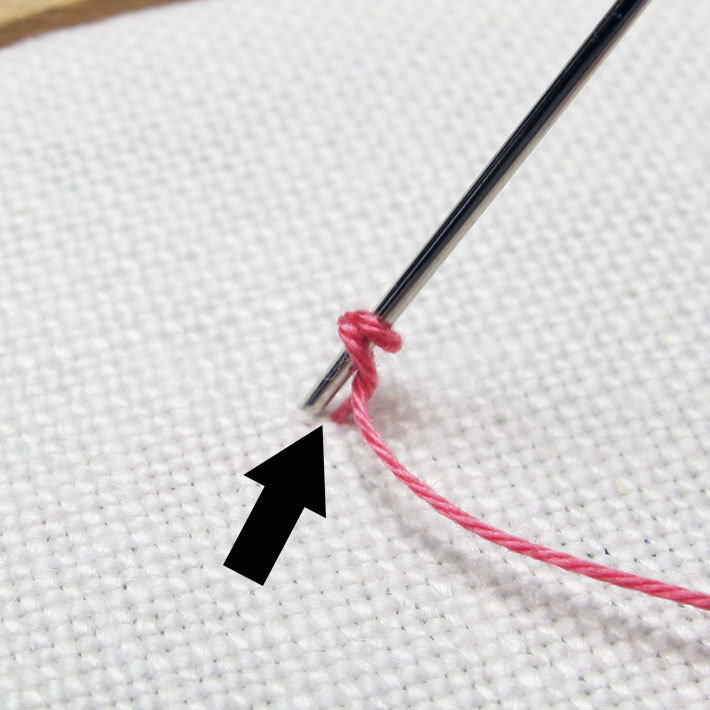
Start
- Knot
- Wrap thread tail 2-3 times around needle, pinch thread in place, then pull needle and thread all the way through.
- Stitch Over
- Leave a small tail and tuck the tail as you make stitches.
- Away Knot
- Make a knot and secure a few inches from the start. Start stitching. Later, cut knot and weave thread under stitches.
Running Stitch
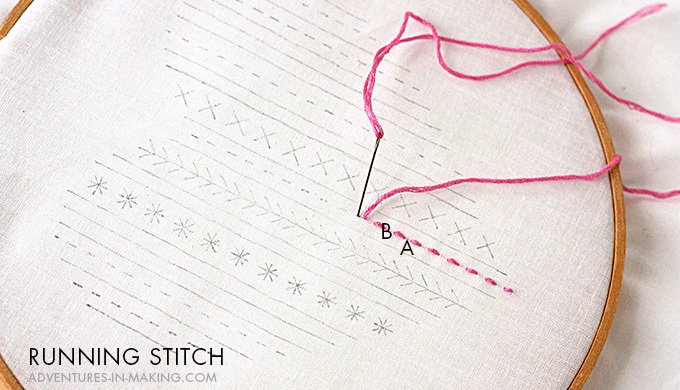
http://adventures-in-making.com/diy-heart-embroidery-sampler-for-beginners/
Threaded Running Stitch

http://adventures-in-making.com/diy-heart-embroidery-sampler-for-beginners/
Threaded Running Stitch
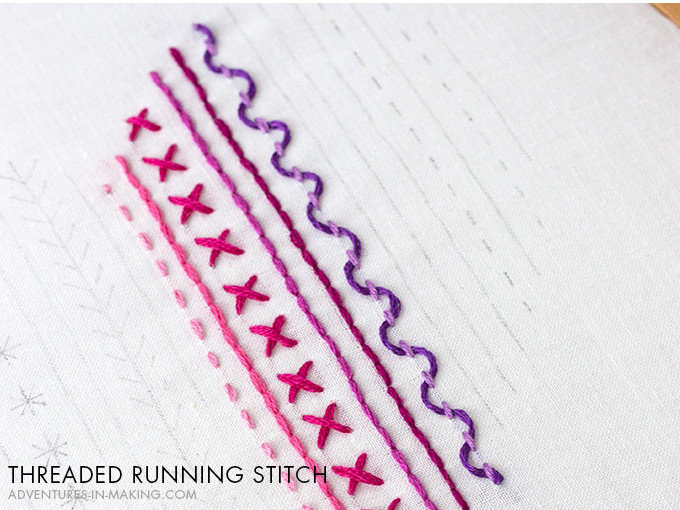
http://adventures-in-making.com/diy-heart-embroidery-sampler-for-beginners/
Backstitch
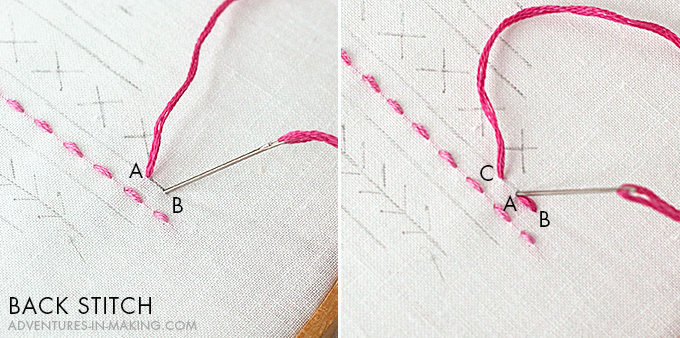
http://adventures-in-making.com/diy-heart-embroidery-sampler-for-beginners/
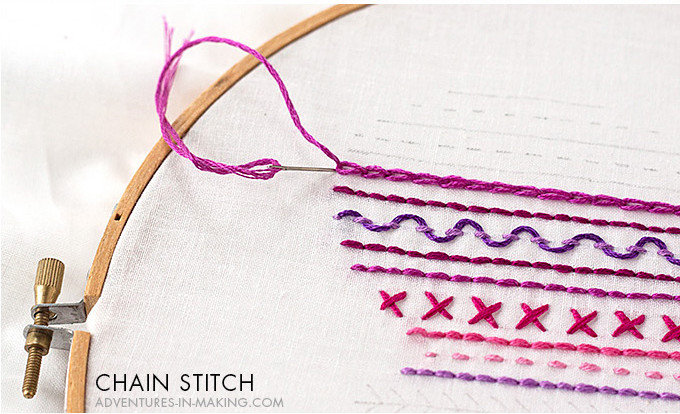
Chain Stitch
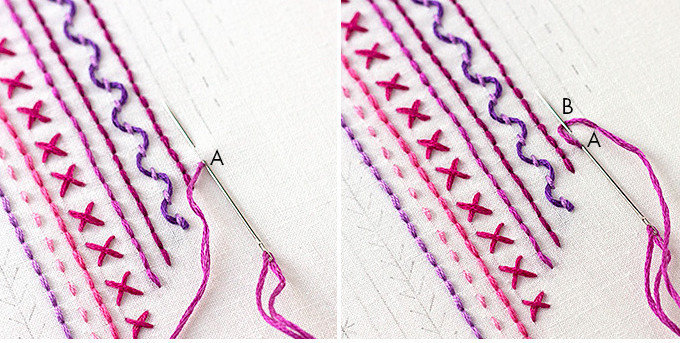
http://adventures-in-making.com/diy-heart-embroidery-sampler-for-beginners/
Chain Stitch
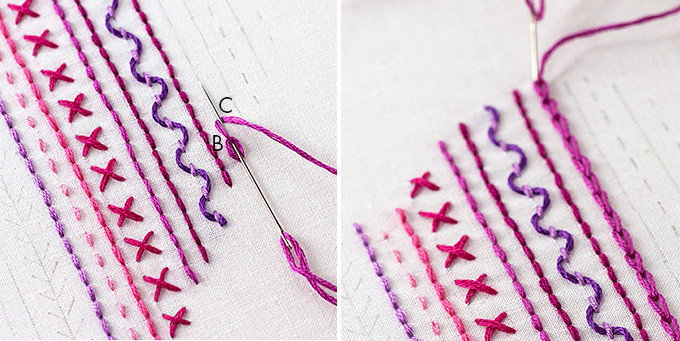
http://adventures-in-making.com/diy-heart-embroidery-sampler-for-beginners/
Chain Stitch
http://adventures-in-making.com/diy-heart-embroidery-sampler-for-beginners/
Fern Stitch
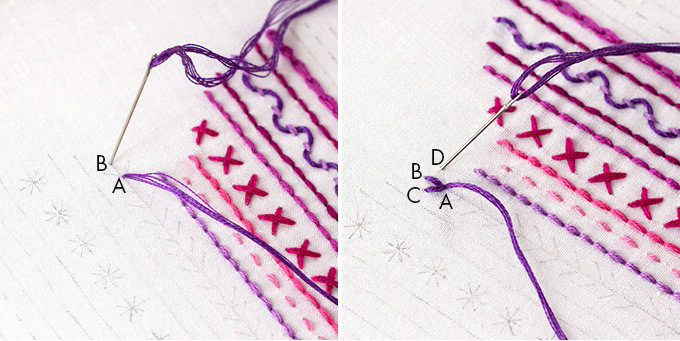
http://adventures-in-making.com/diy-heart-embroidery-sampler-for-beginners/
Fern Stitch

http://adventures-in-making.com/diy-heart-embroidery-sampler-for-beginners/
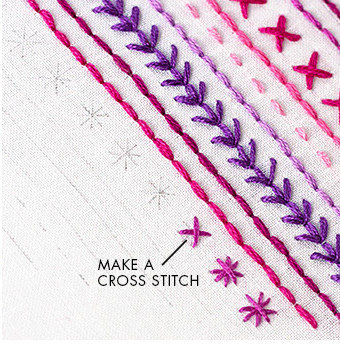
Cross Stitch
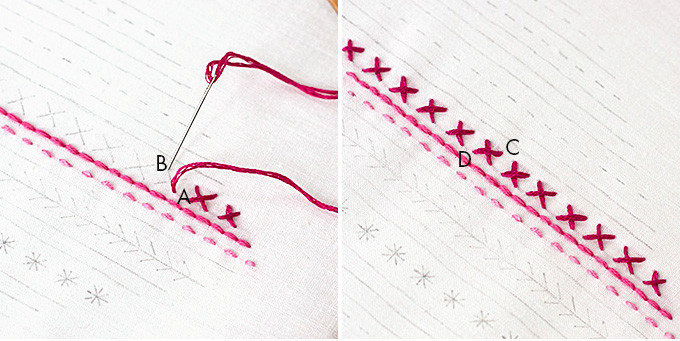
http://adventures-in-making.com/diy-heart-embroidery-sampler-for-beginners/
Star Stitch
http://adventures-in-making.com/diy-heart-embroidery-sampler-for-beginners/
Star Stitch
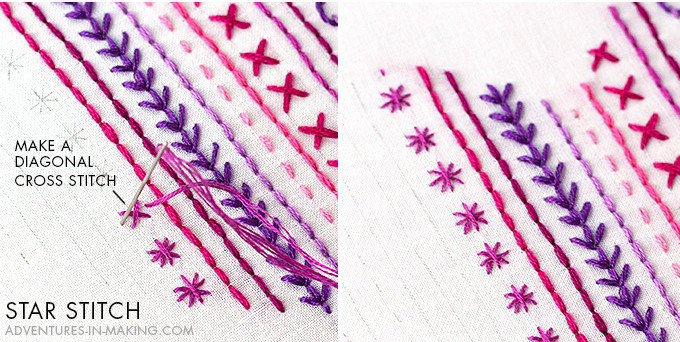
http://adventures-in-making.com/diy-heart-embroidery-sampler-for-beginners/
French Knot
https://www.craftsy.com/blog/2015/09/how-to-make-a-french-knot/
French Knot
https://www.craftsy.com/blog/2015/09/how-to-make-a-french-knot/
Satin Stitch
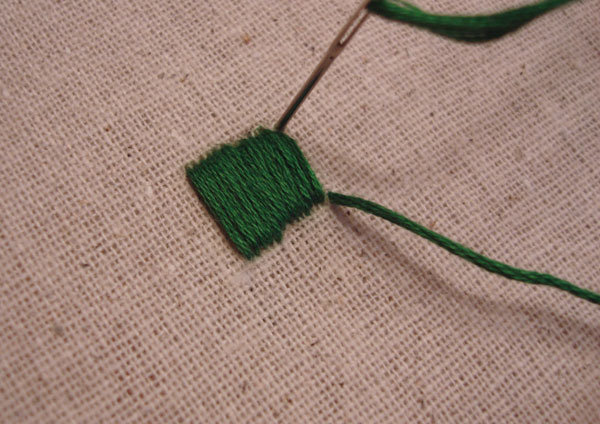
https://www.craftsy.com/blog/2014/04/hand-embroidery-stitches/
End
- Knot
- Make a knot (wrapping around the needle like before) against the back of the fabric.
- Weave
- Weave the tail end of your thread underneath stitches on the back side and trim the end.
Working Tips!
- Re-tighten your fabric occasionally because it will loosen as you work with it.
- If your pattern is too close to the edge of your hoop, you can re-position the fabric.
- Don't leave your fabric in the hoop for too many days because it will be hard to get the creases out.
- You may need to occasionally let the needle and thread hang and gently tug on it to untangle it and let it even out.
Finishing Tips!
- Use cold water (No Soap!) to wash out the washable markings.
- Use an iron to iron out wrinkles.
- Don't go too hot if your fabric has synthetic fiber (polyester, nylon, rayon, etc.)
- Don't directly iron on your stitches - iron the backside or put another fabric in between.
- Display your work in the hoop, mount it, frame it, sew it onto other things.
Resources
- DIY Heart Embroidery Sampler
http://adventures-in-making.com/diy-heart-embroidery-sampler-for-beginners/ - 10 Hand Embroidery Stitches
https://www.craftsy.com/blog/2014/04/hand-embroidery-stitches/ - How to Make a French Knot
https://www.craftsy.com/blog/2015/09/how-to-make-a-french-knot/ -
Etsy
https://www.etsy.com/ -
Craftsy
https://www.craftsy.com/
Embroidery Workshop
By Nina Kin
