Logic Pro X
How to prepare a new project
Week Two: DAW
Introduction to Music Production - Coursera.org
Nyk Cowham
Introduction to Music Production - Coursera.org
Nyk Cowham
Introduction

Hello, my name is Nyk Cowham. This is week two of the Introduction to Music Production coursera.org course by Berklee College of Music. Today I will be teaching how to setup a new audio recording project using Logic Pro X digital audio workstation (DAW).
Preproduction checklist
Before starting a new project in Logic Pro X we must have a "preflight plan". This is our preproduction checklist:
- Project folder: name & file location
- Bit depth, buffer, hardware I/O devices
- File type for recordings
- Sample rate
This checklist is based on the general checklist for DAW setup. It is specific to the workflows within Logic Pro X.
Project file creation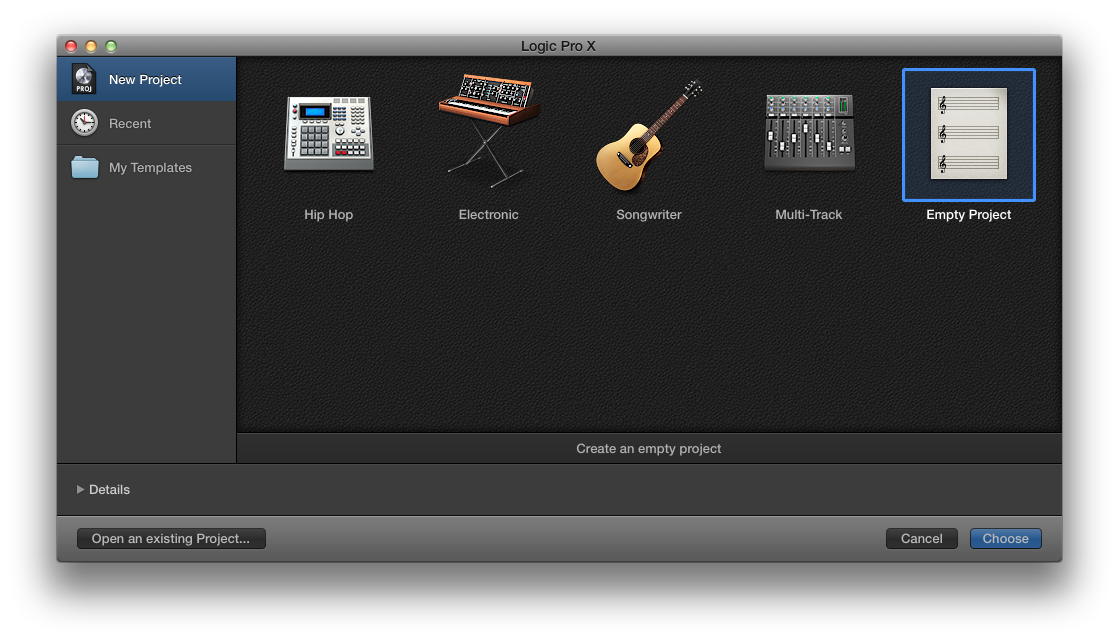
Select the type of project, then click "Choose"
Select Type of track

You must create the new project with at least one track.
Check 1 : project folder
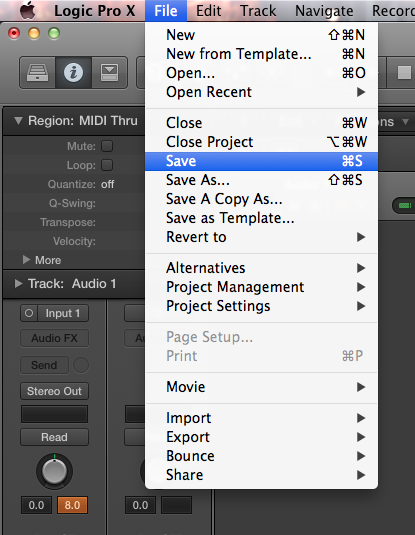
Check 1 : Project folder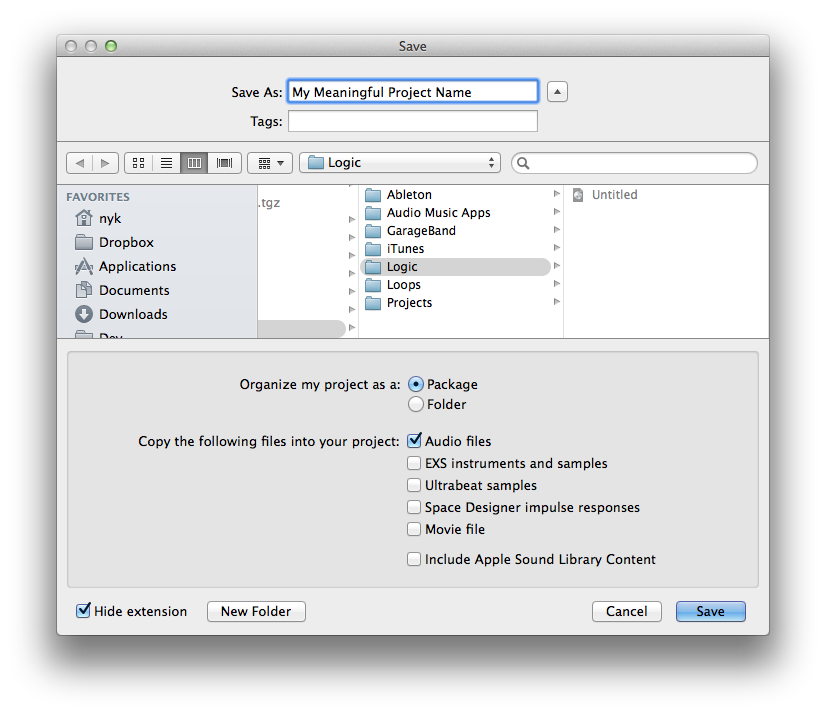
Select a meaningful name for the project.
In a location where you can find it.
The project can be saved in a regular folder or as an OS X package (single file).
Select other content to be stored in the project.
Check 2 : audio preferences
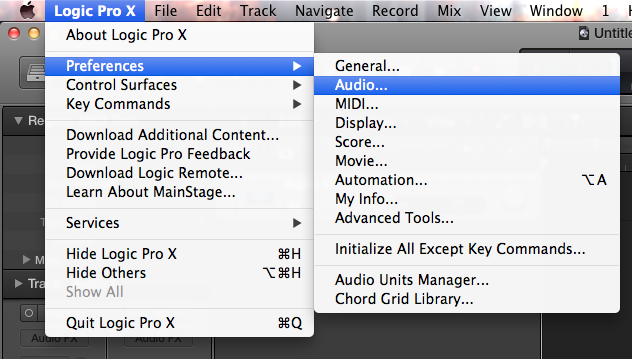
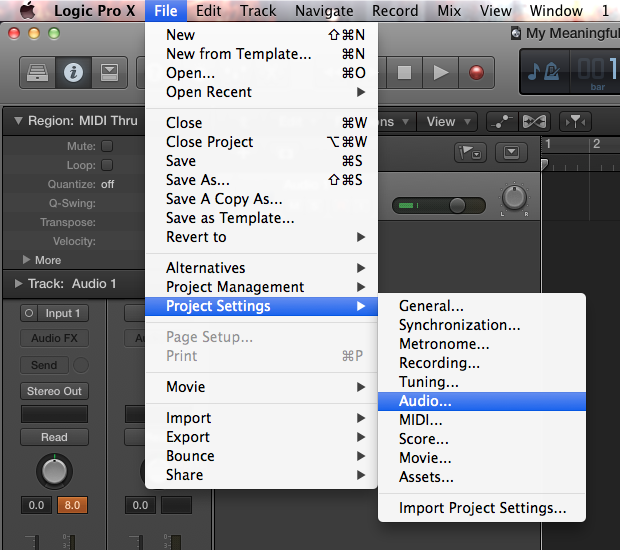
Logic Pro X > Preferences > Audio menu will open up the panel for our audio settings
bit depth, Buffer, hardware devices

Check 24-Bit recording (checked)
Set I/O Buffer Size to recommended
128 Samples
Set default Input/Output hardware
devices
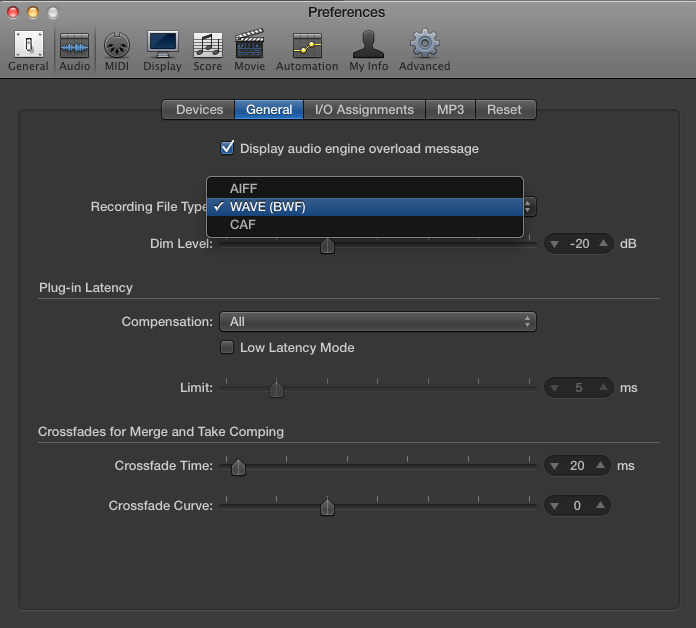
Check 3 : set file type
Click on "General" preferences tab.
Select the "Recording File Type".
Broadcast wav (bwf) is recommended.
check 4 : set sample rate
set sample rate
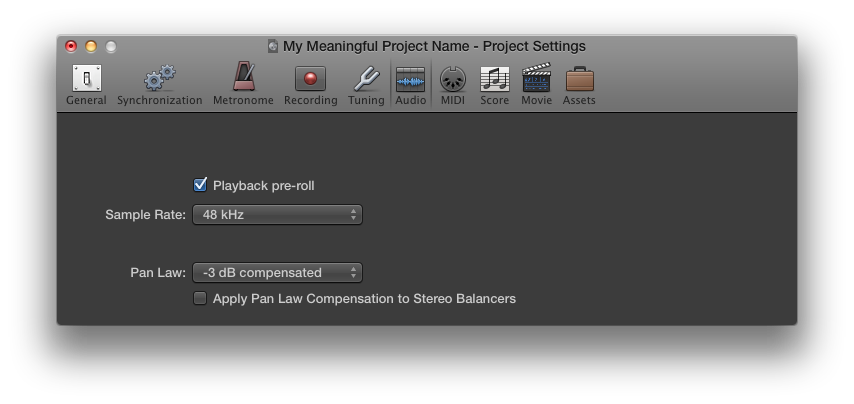
Set the sample rate to 48 kHz (recommended) or more.
Summary
- We created a new project
- Created the project type, folder and name.
- Set the digital audio settings: bit depth (24 bit),
buffer size (128 samples), and the hardware
devices. - Set the file type for recording (broadcast wav)
- Set the sample rate (48 kHz)
- The project is now configured ready for you to
start adding tracks, making recordings, add
effects, mix, master, etc.
Logic Pro X
By nyk
Logic Pro X
This is week 2 of Introduction to Music Production (coursera.org) and the project setup of a project using Logic Pro X is taught.


