Launch Volume
robustack.com
Configure New Volume
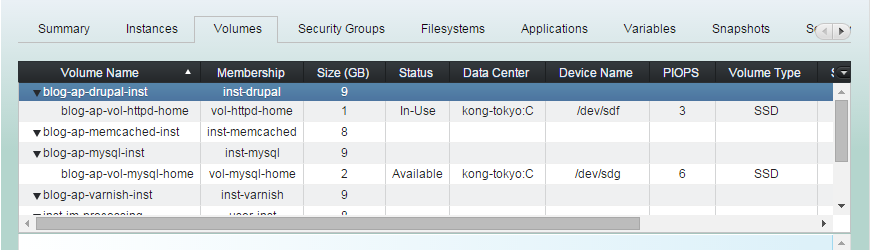
(1) Click "Volumes" tab in groupstack sub view. And select an instance on which you want to create and attach a volume.
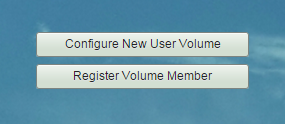
(2) Click "Configure New User Volume".
Enter 'New Volume Name'.
Resource name in robustack is important. The name must be unique in a resource pool.
Though you can modify the name while it is being configured, you cannot modify the name once it is launched.
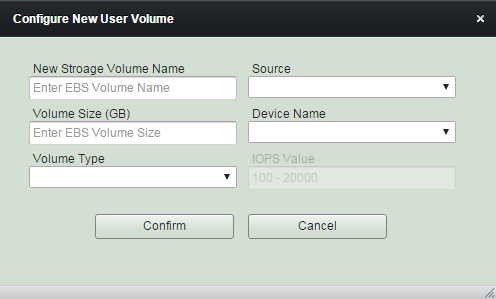
Select 'Source' snapshot.
You can select any snapshot in the resource pool, or a new volume.
Enter 'Volume Size' and select 'Device Name' to attach. And choose 'Volume Type'.
(3) Click "Confirm" to end volume configuration.
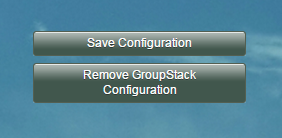
(4) Click "Save Configuration", then the status of the volume will be turned to "Ready to Launch".
Launch Volume
'Launch Volume' is the robustack terminology that creates volumes and attaches them to the instances.
(1) Click "Volumes" tab in groupstack sub table view. And select 'Ready to Launch' volumes you want to launch.
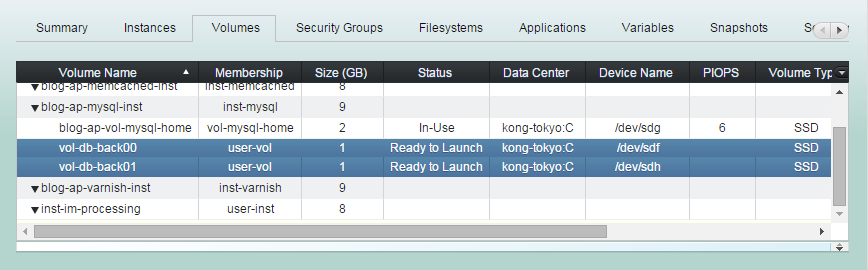
(2) Click "Launch Volume" button
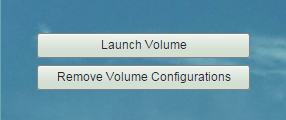
(3) Launch Volume workflow
1. Creates volumes as they are configured.
2. Attaches the volumes if the status of the instances are ready to do it.
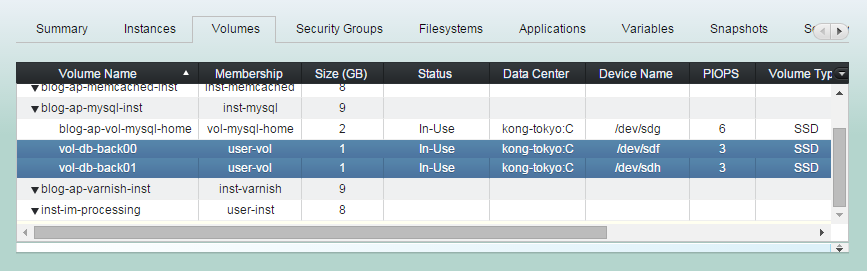
(4) Launch Volume completed.
The status are now "In-Use".
Managing Volume - Launch Volume
By robustack.com
Managing Volume - Launch Volume
Managing Volume - Launch Volume. Robustack is an Amazon EC2 Orchestration Platform. This slides shows how to launch volumes which are in 'ready to launch' state.