Module 3
Mirroring Mirrored


At Singapore's NAC
Arts x Tech Lab
The metaphor of the mirror is central to thinking about technology: machines reflect human inputs, yet always with slippages, distortions, or reconfigurations.
In Lacanian psychoanalysis, the “mirror stage” frames identity as relational; in media art, mirroring highlights how feedback loops entangle subject and system.
This module explores code and AI as mirrors that are never neutral but co-constructive.
Conceptual Framing
Module 3: Mirroring Mirrored
Over the course of 2 workshops we explore how bodily interactions are “mirrored” through machine generated reinterpretations.
By engaging with both literal and metaphorical mirrors, participants reflect on how humans and machines mutually constitute each other in a recursive, entangled loop.
Workshop Description
Module 3: Mirroring Mirrored
Workshop participants work with real-time computer vision and generative systems to create mirrored relationships between self and machine.
With ml5.js, a friendly Machine Learning library for the Web, they generate visual reflections of their movements in p5.js.
These reflections are then progressively manipulated into visual distortions, responsive oddities, or playful encounters.
p5js
Software rundown
ml5
p5.js is a friendly tool for learning to code and make art. It is a free and open-source JavaScript library built by an inclusive, nurturing community. p5.js welcomes artists, designers, beginners, educators, and anyone else!
p5js.org
editor.p5js.org
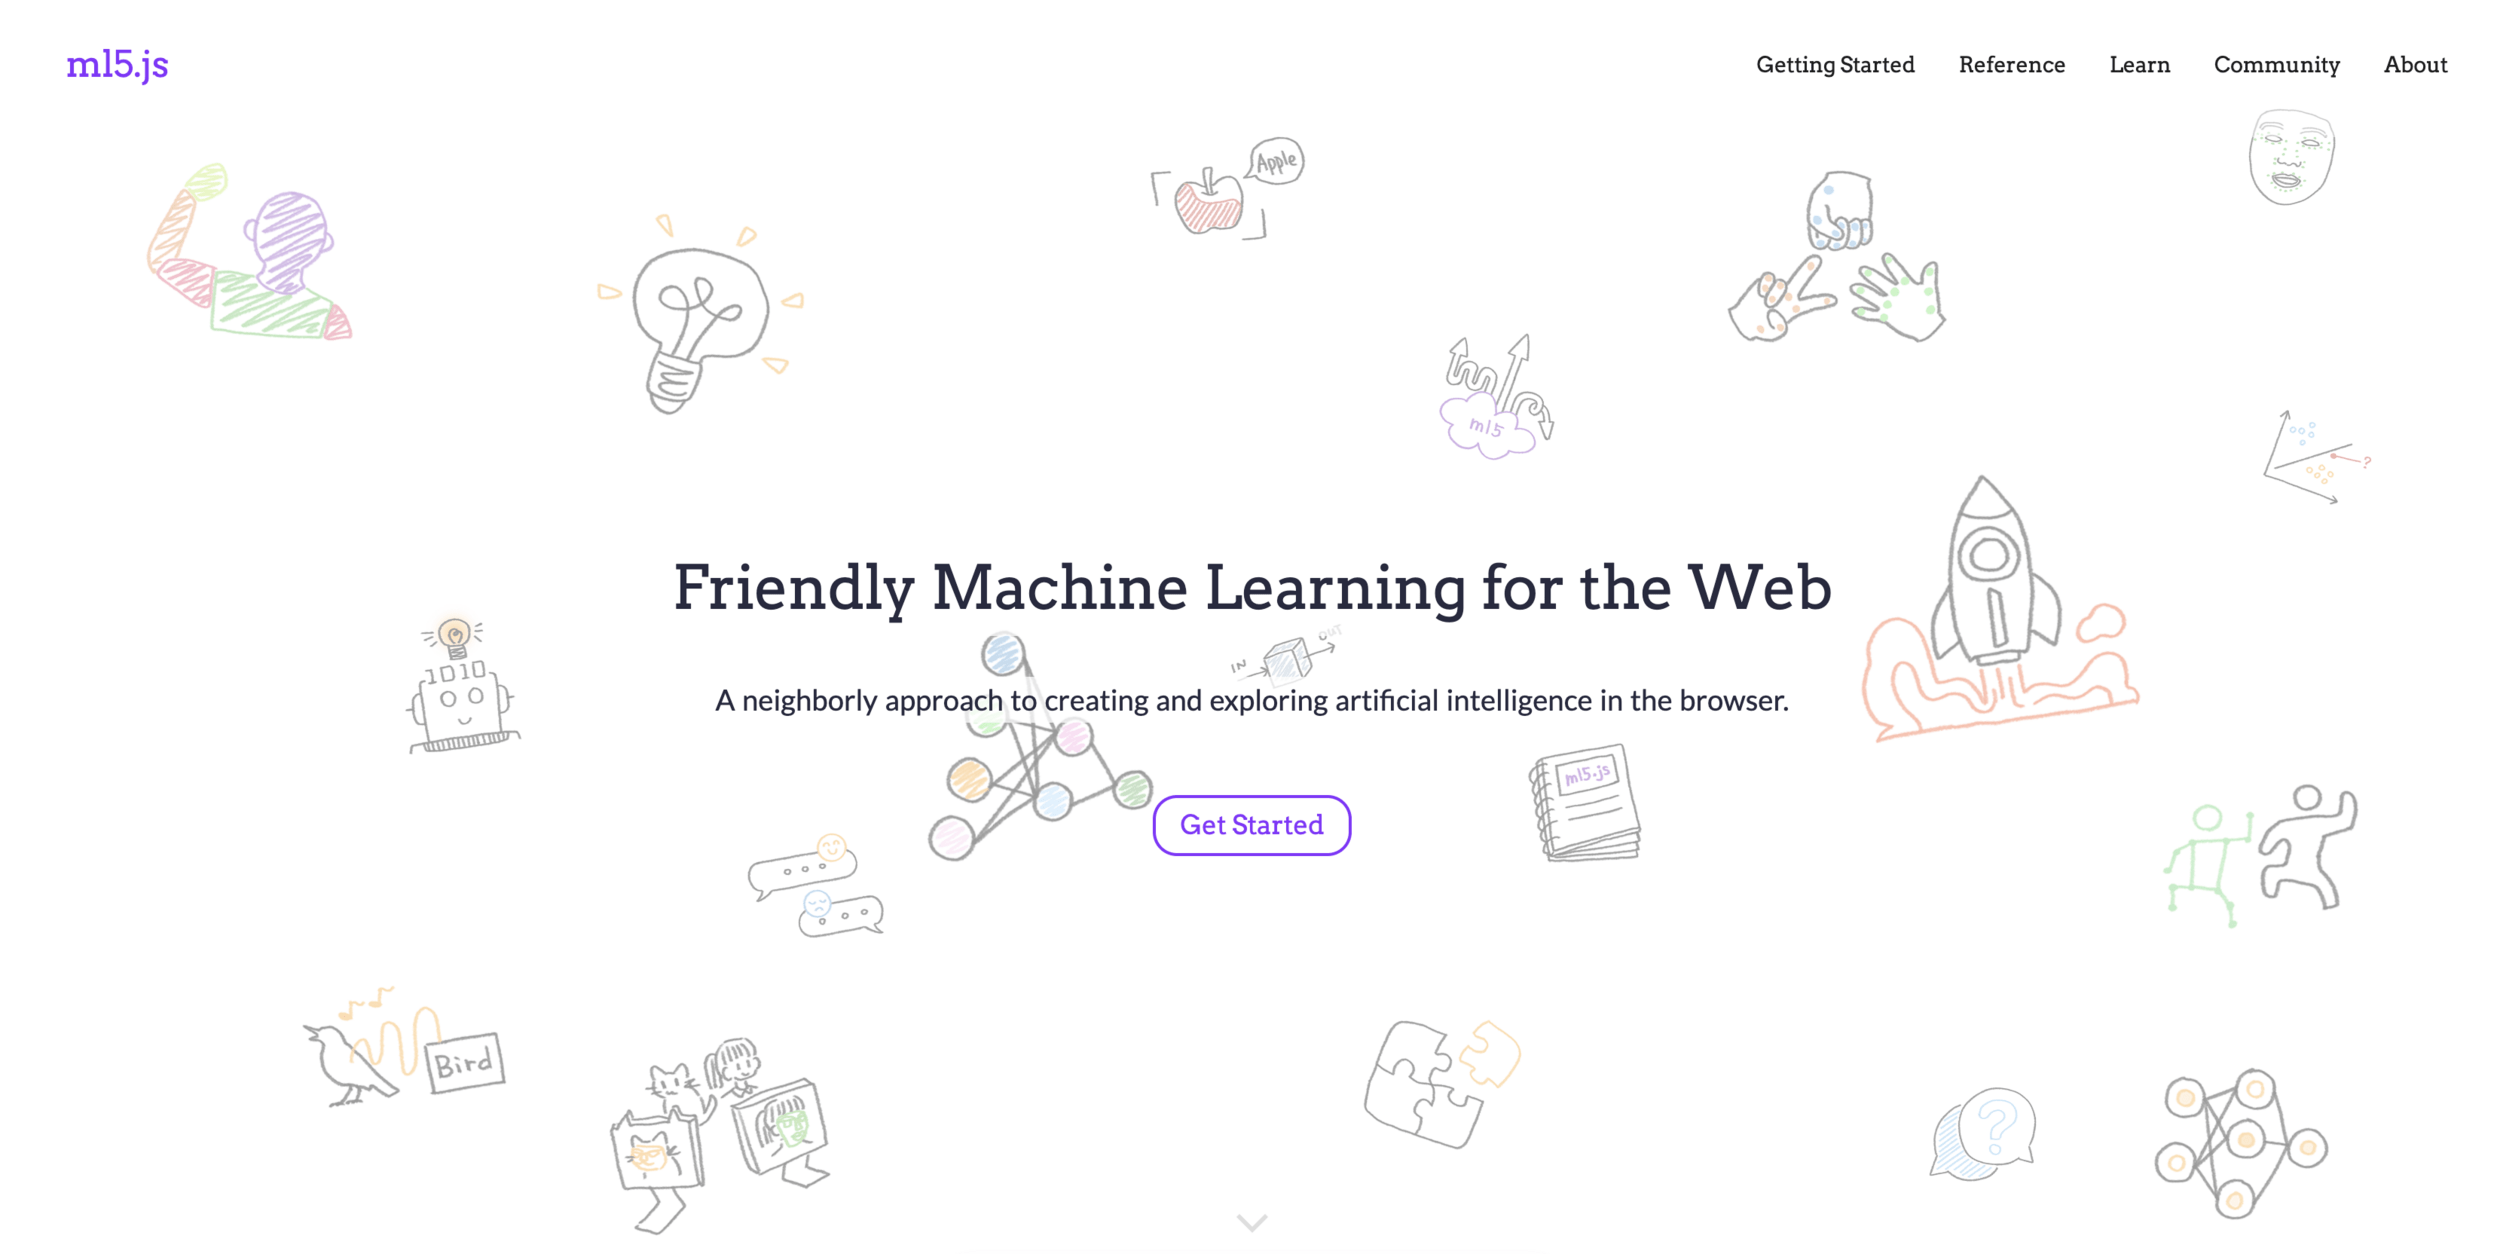
ml5.js aims to make machine learning approachable for a broad audience of artists, creative coders, and students. The library provides access to machine learning algorithms and models in the browser, building on top of TensorFlow.js with no other external dependencies.
ml5js.org
Session 1
Capture, Follow, Trigger
Session 1
In this first workshop we will look at the technical requirements to capture the user's In this first workshop we will explore the technical requirements to capture users' movements and generate visual reflections of their movements in p5.js.
This will provide a foundational understanding of how bodily movement is captured and reflected through code.
Participants will learn how to integrate AI-powered tracking using ml5.js, including body pose detection, hand keypoint tracking, and facial landmark detection.
Session 1
Core concepts:
Capture, Follow, Trigger.
-
Capture: Capture body, face and hand as input data to enable real world interactions to video streams
- Follow: Assign body features as keypoints received as data streams to control screen based visual elements
- Trigger: Interact with a screen based visual system triggered by captured body, face or hand keypoints
Capture
Download sample-videos folder
This folder contains sample videos of people moving that you can use without needing a webcam.
Capture
Video samples resource
In our first exercise, we will learn two methods to work with video in p5.js:
- loading video files from the sketch folder
- using the webcam as input or
Resources
Objectives
- to load and display a video in p5js
- to capture and display a video stream
Capture Exercise 1
Video file and stream
Slitscanning
Capture
Slitscan
Slitscan imaging techniques are used to create static images of time-based phenomena.
In traditional film photography, slit scan images are created by exposing film as it slides past a slit-shaped aperture.
In the digital realm, thin slices are extracted from a sequence of video frames, and concatenated into a new image with one axis being time.
visit an Informal Catalogue of Slit-Scan Video Artworks and Research compiled by Golan Levin

Capture Exercise 2
Slitscanning
In this second exercise, explore the example sketches and customize at least one of them. Then, create a static image and video from your modified version.
Objectives
- to customize example code
- to create screenshots and recordings
In this exercise we will use the mesh of a face capture via the webcam to paint by moving our head
Capture Exercise 3
Face mesh drawing
Objectives
- to create an face drawing or video
- to capture screenshots and recordings
This concludes section Capture, lets move on to section Follow
Capture
Follow
Follow
Machine Learning with ml5
Follow
Keypoints
Keypoints are specific points detected on a body, face, or hand.
Think of them like dots placed on important positions on the body, face and hand that can be tracked and used to detect poses, gestures, and movements.
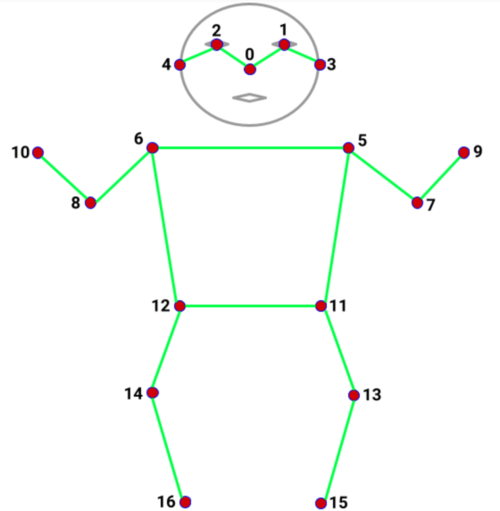

17 keypoints
nose, shoulders, elbows, wrists, hips, knees, ankles
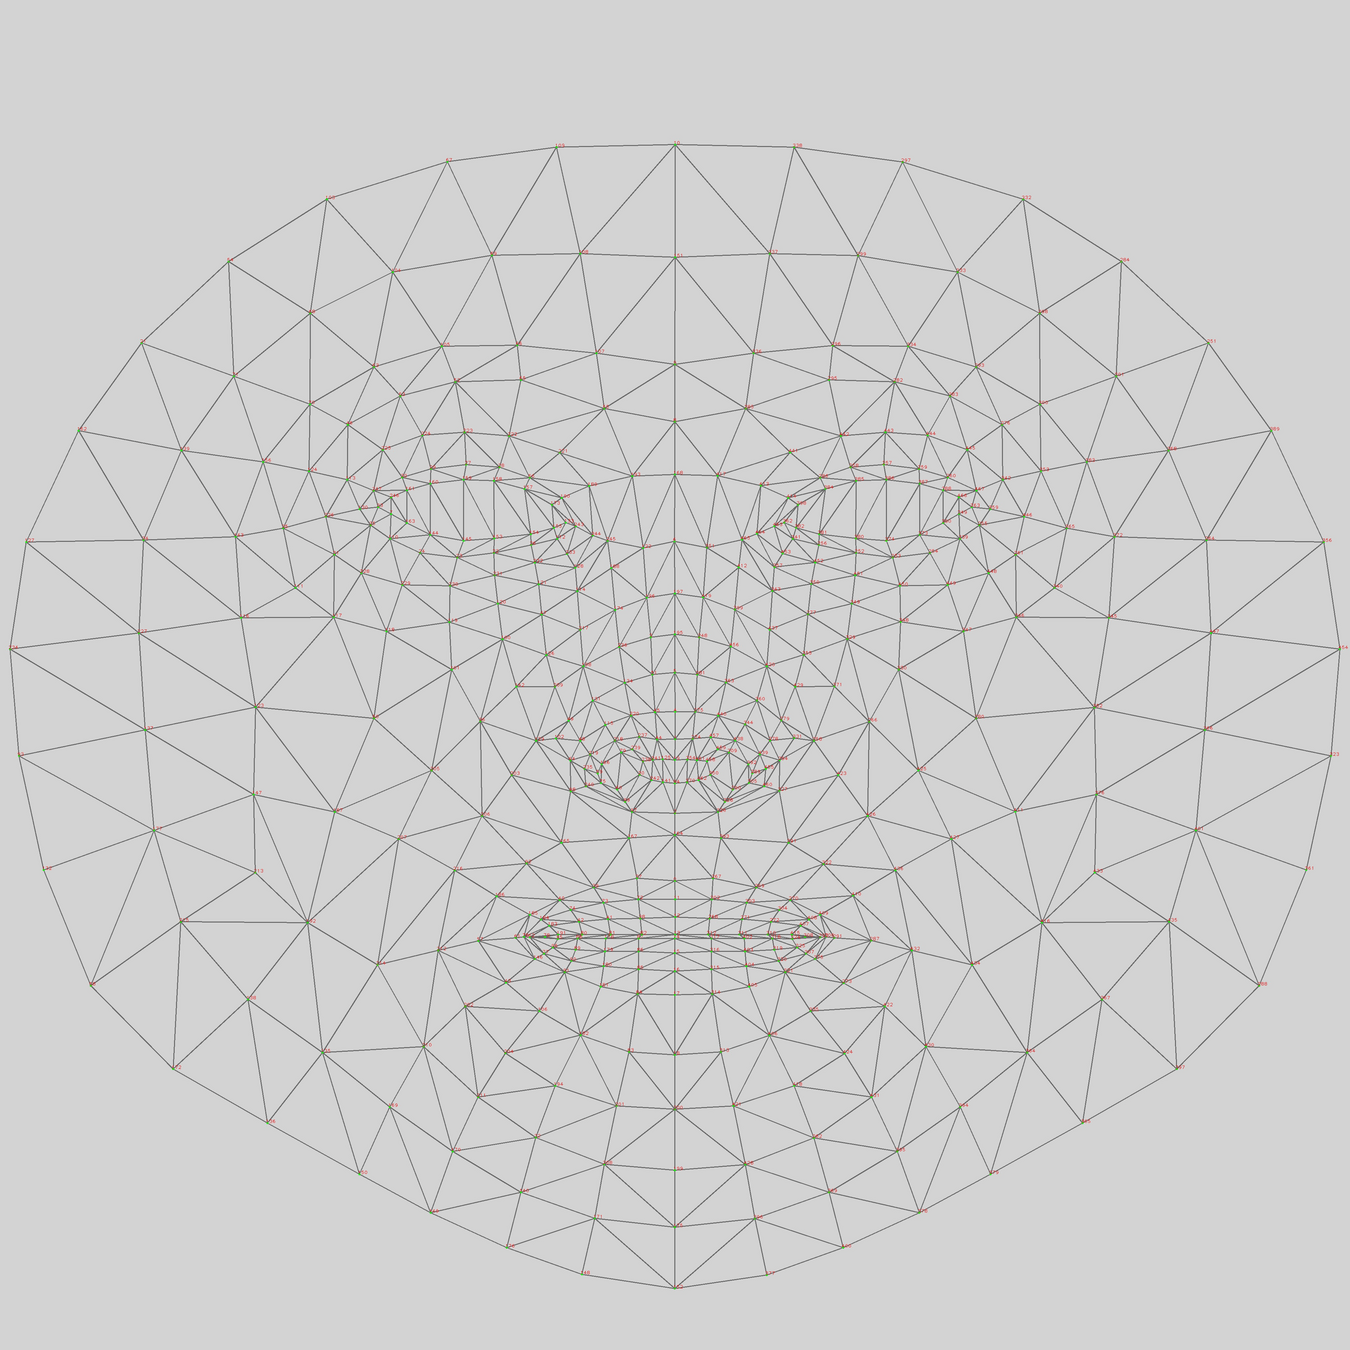
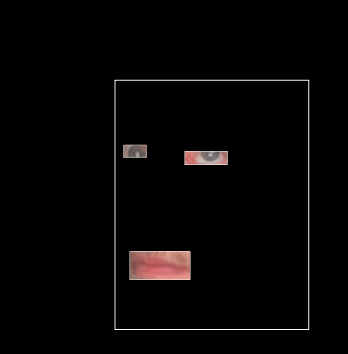
468 keypoints
eyes, nose tip, mouth corners, jawline
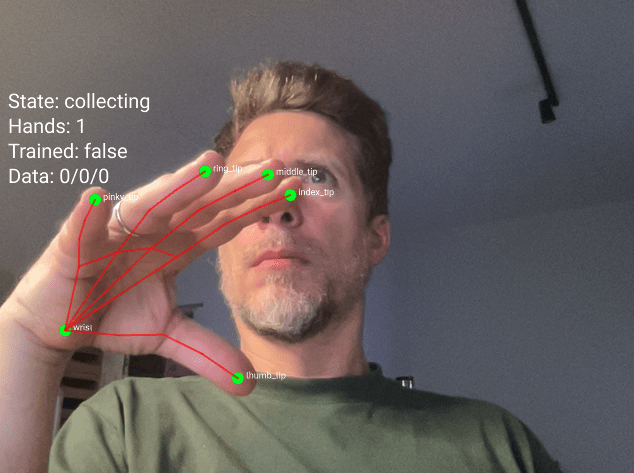
21 keypoints
thumb tip, finger tips, knuckles
Follow
Machine Learning with ml5
Body Pose
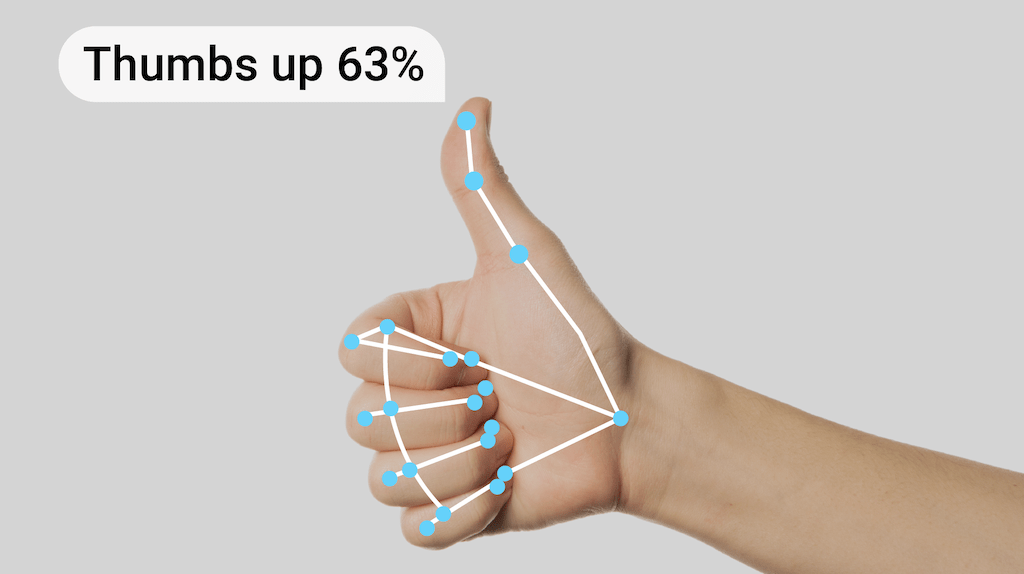
HandPose
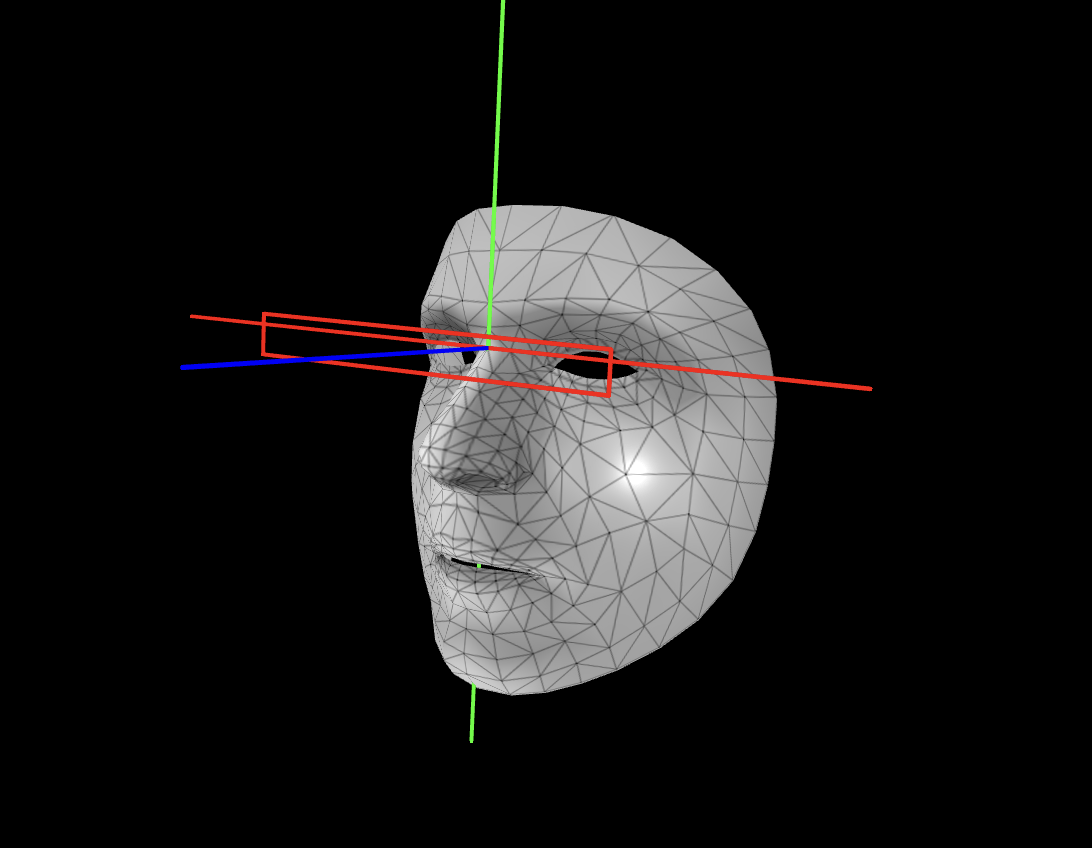
FaceMesh
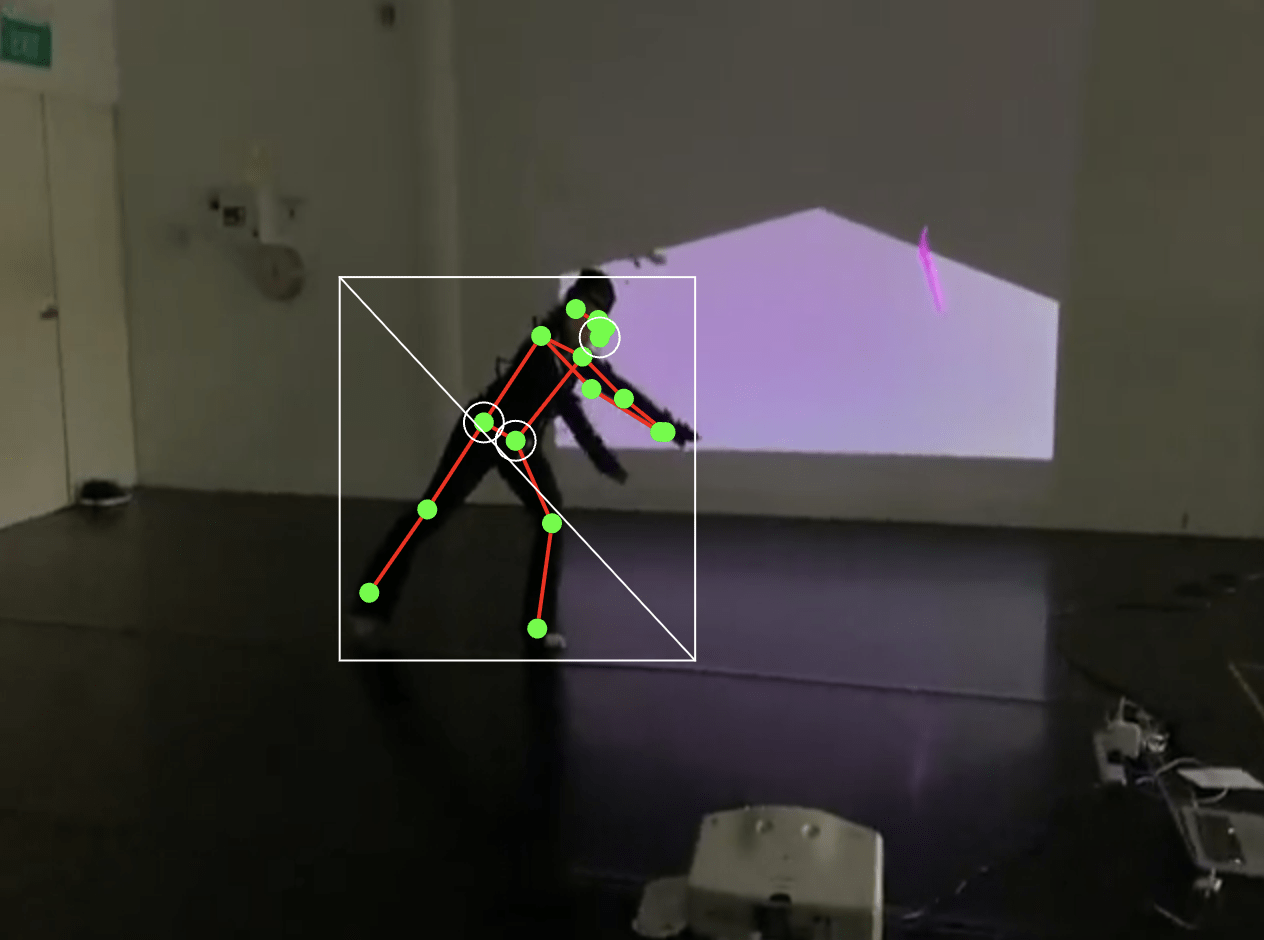
In this exercise, we will capture the skeletal information of a body and see how 17 keypoints are mapped onto the source video. You can then access individual keypoints and create your own visual interpretation.
Follow Exercise 1
Body Pose
Objectives
- to link visuals to skeletal landmarks
- to capture screenshots and recordings
In this hand tracking exercise, use the example code to control visual elements with your index finger and thumb. Then, replace the given circle with something more exciting.
Follow Exercise 2
Hand Pose
Objectives
- to to replace the given circle with a more exciting application
- to capture screenshots and recordings
In this hand tracking exercise, use the example code to control visual elements with your index finger and thumb. Then, replace the given circle with something more exciting.
Follow Exercise 3
Face Mesh
Objectives
- to to replace the given circle with a more exciting application
- to capture screenshots and recordings
This concludes section Follow, lets move on to section Trigger
Follow
Trigger
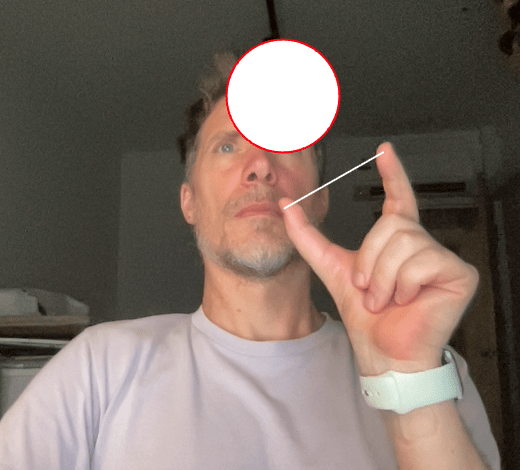
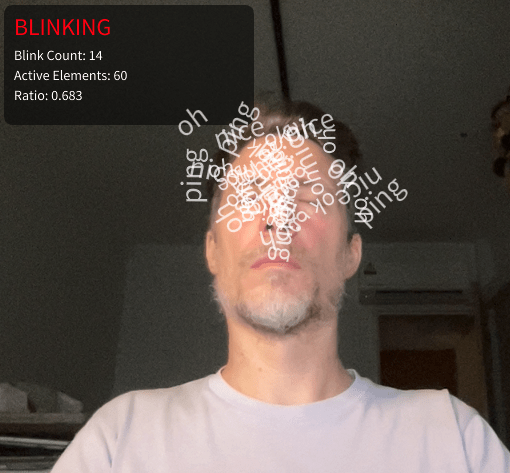
In this last exercise we look at how blinking can be used to trigger events.
Trigger Exercise 1
Blink
This concludes section Trigger, lets move on to the end of workshop 1
Trigger
Homework
From the screenshots and screen recordings you have recorded, create
- a selection of images that are meaningful to you and you want to share for the workshop documentation
- A short video compilation of recordings maybe accompanied by a self-made soundtrack? Use a standard video format with an aspect ratio of 9:16 or 16:9
Session 1 → Session 2
Session 2
Train
Respond
Train and Respond
Recap Examples Session 1
Slitscan
Hand Pose
Blink detection
Face Pose
Train and Respond
Recap Keypoints
Keypoints are specific points detected on a body, face, or hand.
Think of them like dots placed on important positions on the body, face and hand that can be tracked and used to detect poses, gestures, and movements.
17 keypoints
nose, shoulders, elbows, wrists, hips, knees, ankles
468 keypoints
eyes, nose tip, mouth corners, jawline
21 keypoints
thumb tip, finger tips, knuckles
Train and Respond
What are Classifiers?
A classifier is like a program that learns to recognize different poses or gestures.
It watches what you do and learns to tell the difference between different positions.
Think of it like teaching someone to recognize hand signals.
You show them a thumbs up many times, then a peace sign many times, then a fist many times.
After seeing enough examples, they learn to recognize each signal when you make it.
Train and Respond
How do Classifiers work?
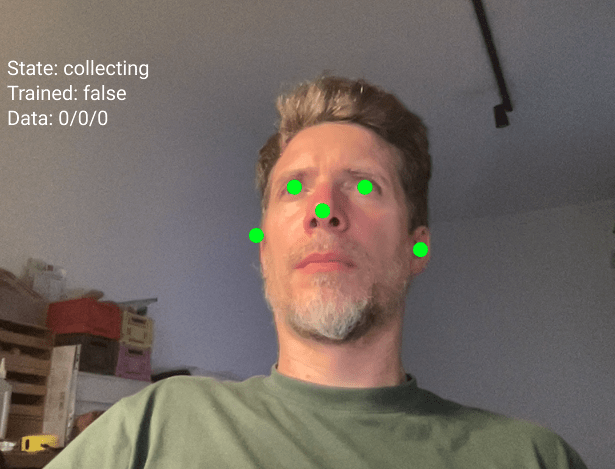
The classifier looks at the positions of certain keypoints on your body, face or hand
For face tracking, these points are your nose, eyes, and ears. The classifier measures where these points are in relation to each other.
When you tilt your head left, your eyes and nose form one pattern. When you tilt right, they form a different pattern. The classifier learns these patterns.
Train and Respond
Step 1: Collecting Training Data
This is when you teach the classifier.
You make a pose and press a number key to save that pose as a sample.
→Press key 1 while looking straight. Do this 20 times.
→ Press key 2 while looking left. Do this 20 times in slightly different positions.
→ Press key 3 while looking right. Do this 20 times.
The more samples you give, the better the classifier learns.
Train and Respond
Step 2: Training
Press the T key to train.
The computer takes all your examples and learns the patterns.
This takes a couple of moments. You will see a message when training is complete.
Train and Respond
Step 3: Predicting
Press the P key to start predicting, often the program switches into "predicting" mode automatically after training.
Now the classifier watches you in real time and tries to guess which class you are doing.
It will show you its guess and how confident it is.
If it says "class1 (75%)" that means it thinks you are doing class 1 and it is 75 percent sure of confident.
Train and Respond
Common Problems
Low Accuracy
If the classifier keeps getting it wrong, you probably need more training examples or your classes are too similar to each other.
Predictions Are Jumpy
This is normal.
The prediction changes every frame. If you want smoother results, you can average the last few predictions or only act when confidence is above 80 percent.
Train and Respond
Save and load process
When you press the S key after training your model, the program creates three separate files.
These files contain everything the classifier learned during training.
face-model.json
face-model_meta.json
face-model.weights.bin
This is the architecture file. It describes the structure of the neural network. Think of it like a blueprint that shows how many layers the network has and how they connect to each other.
It contains information about your training setup. It knows you used 10 inputs (5 keypoints times 2 for x and y coordinates). It knows you have 3 output classes called class1, class2, and class3.
This file contains all the learned information.
Train and Respond
Save and load process
Before you can save, you must train.
Collect examples for all three classes.
Press T to train.
Wait for the console message "Training complete".
Then you can save.
Press the S key on your keyboard.
You will see a console message "Model saved to Downloads".
Take all three files from your Downloads folder and move them into the models folder of your p5js sketch (if the folder doesnt exist, create it)
Run your sketch and press L to load the model from the models folder, your previously trained model is immediately available, no need to train again.
Train and Respond
Practice
Play
- entangled_train-respond_b (noise)
- entangled_train-respond_c (sound)
- entangled_train-respond_d (text)
Train and Respond
The second half of todays workshop is all about putting together documentation materials.
We have have looked at a number of examples and sketches to use the camera to interact with a p5js sketch.
I would like you to play around and take some time to adjust and change any of the examples given and make it your own.
Please document what you make, come up with, etc and safe to the following Google Drive
Thank you everyone.
Session 1
Getting Started
Follow Along!
- How to download and setup Arduino IDE software
- How to connect Arduino and the Grove Shield
- Open your first Arduino sketch
- Upload Arduino sketch to Arduino board
- Make changes to example Arduino sketches
- Make changes to example p5.js code
Links
45
Documenting
Documenting
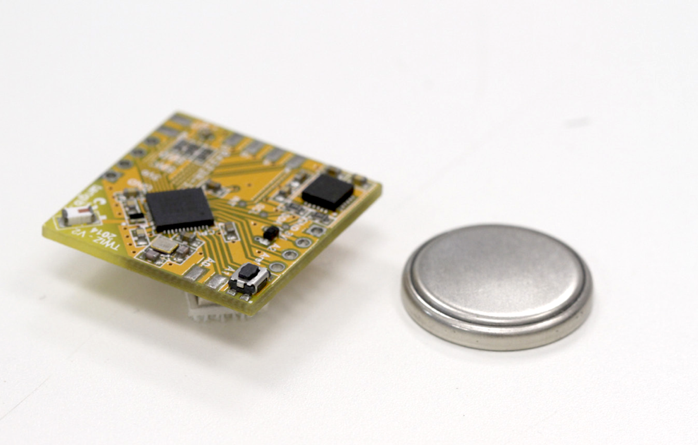
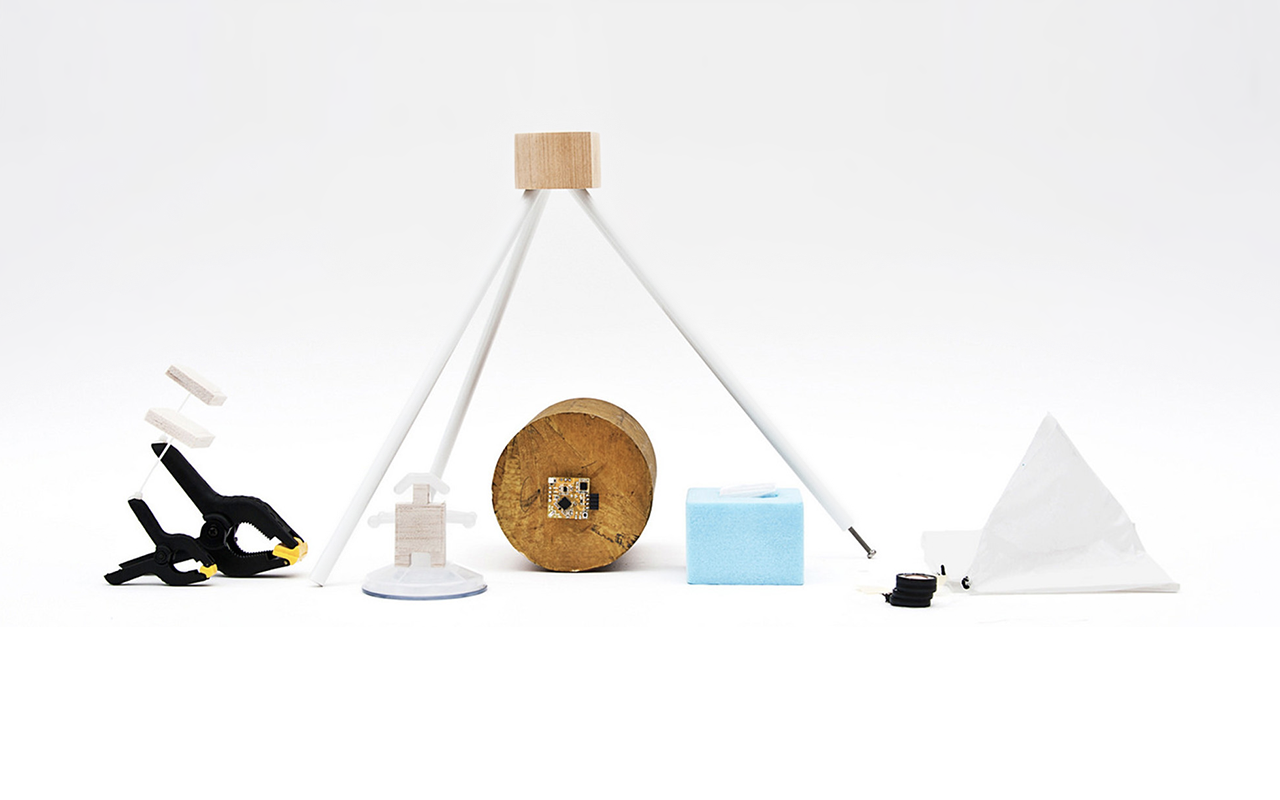
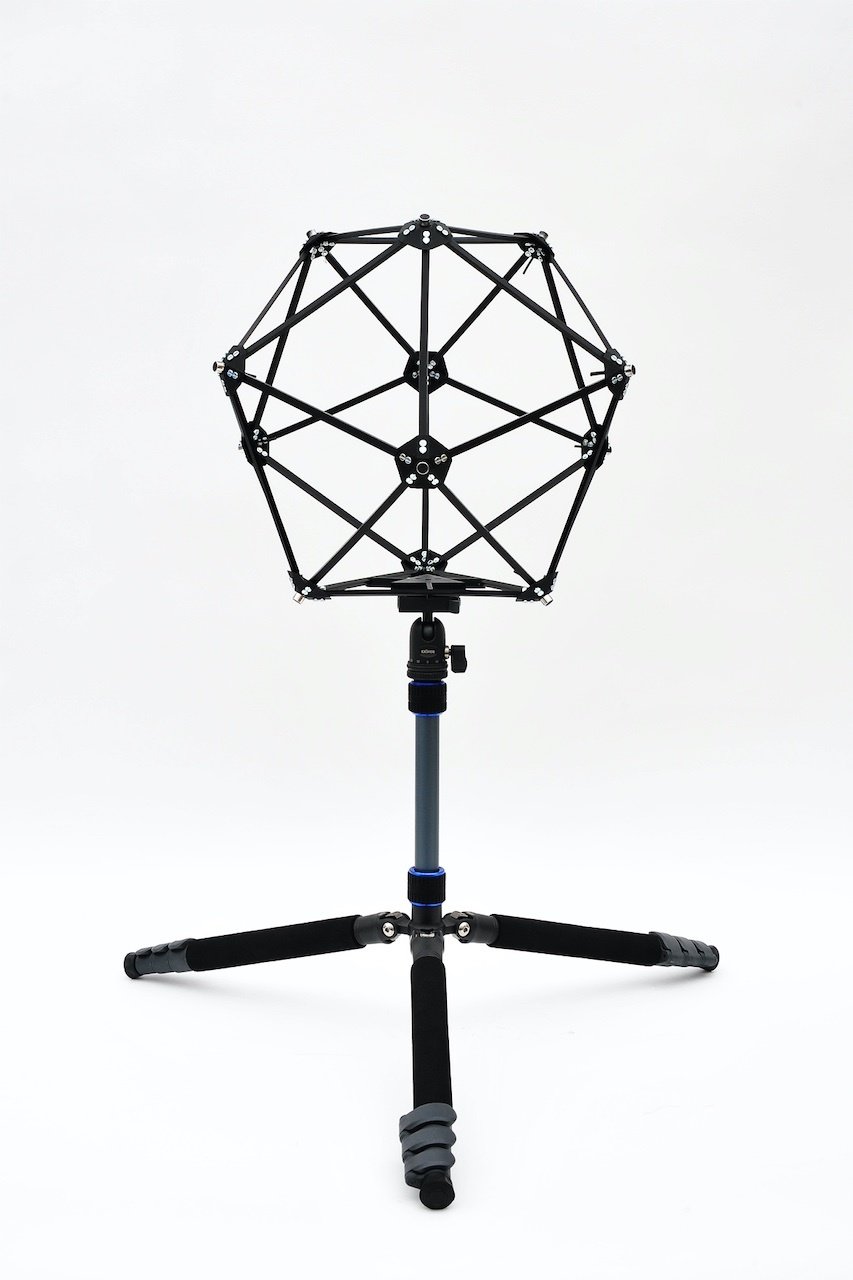
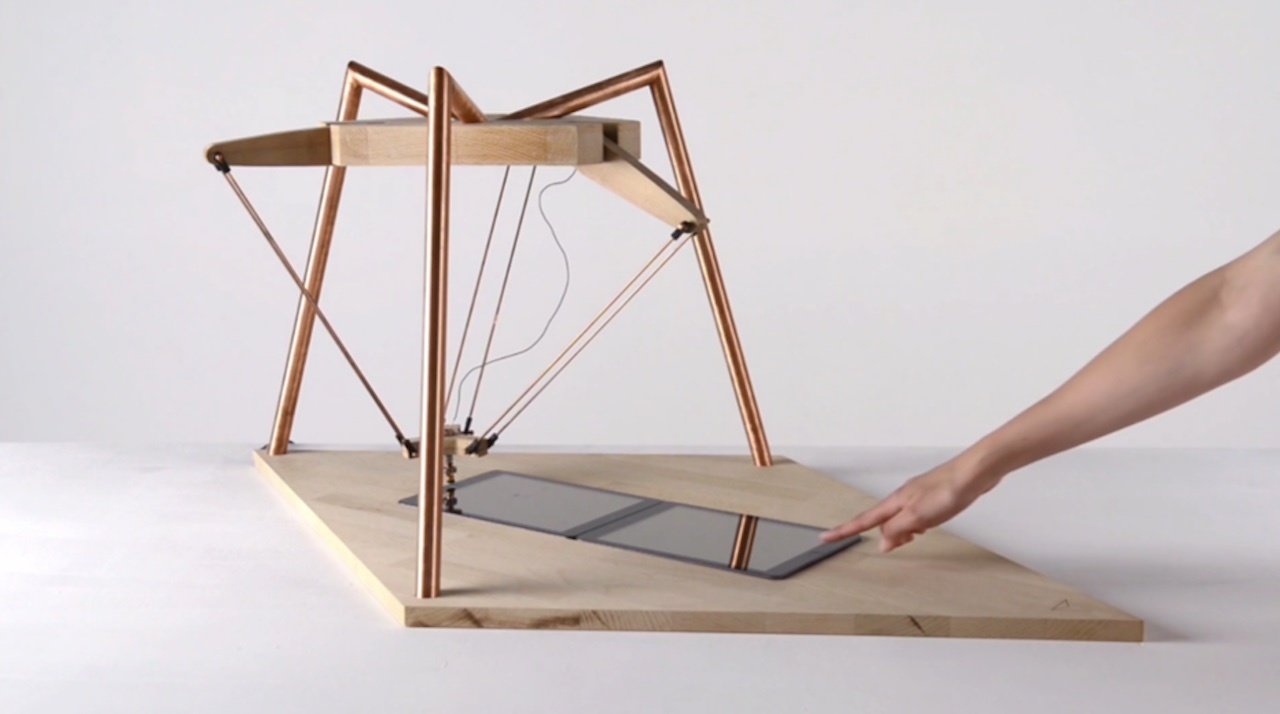
Product shots, clean background so that the focus is solely on the subject. Use a good camera, tripod if necessary, and appropriate lighting.
Documenting
Product shots, clean background so that the focus is solely on the subject. Use a good camera, tripod if necessary, and appropriate lighting.
Documenting
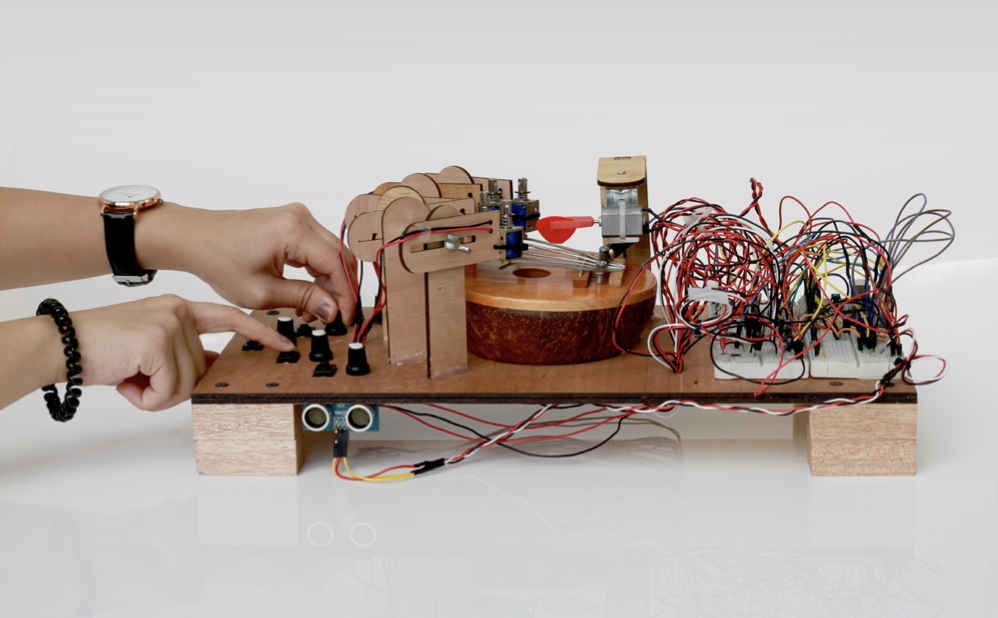
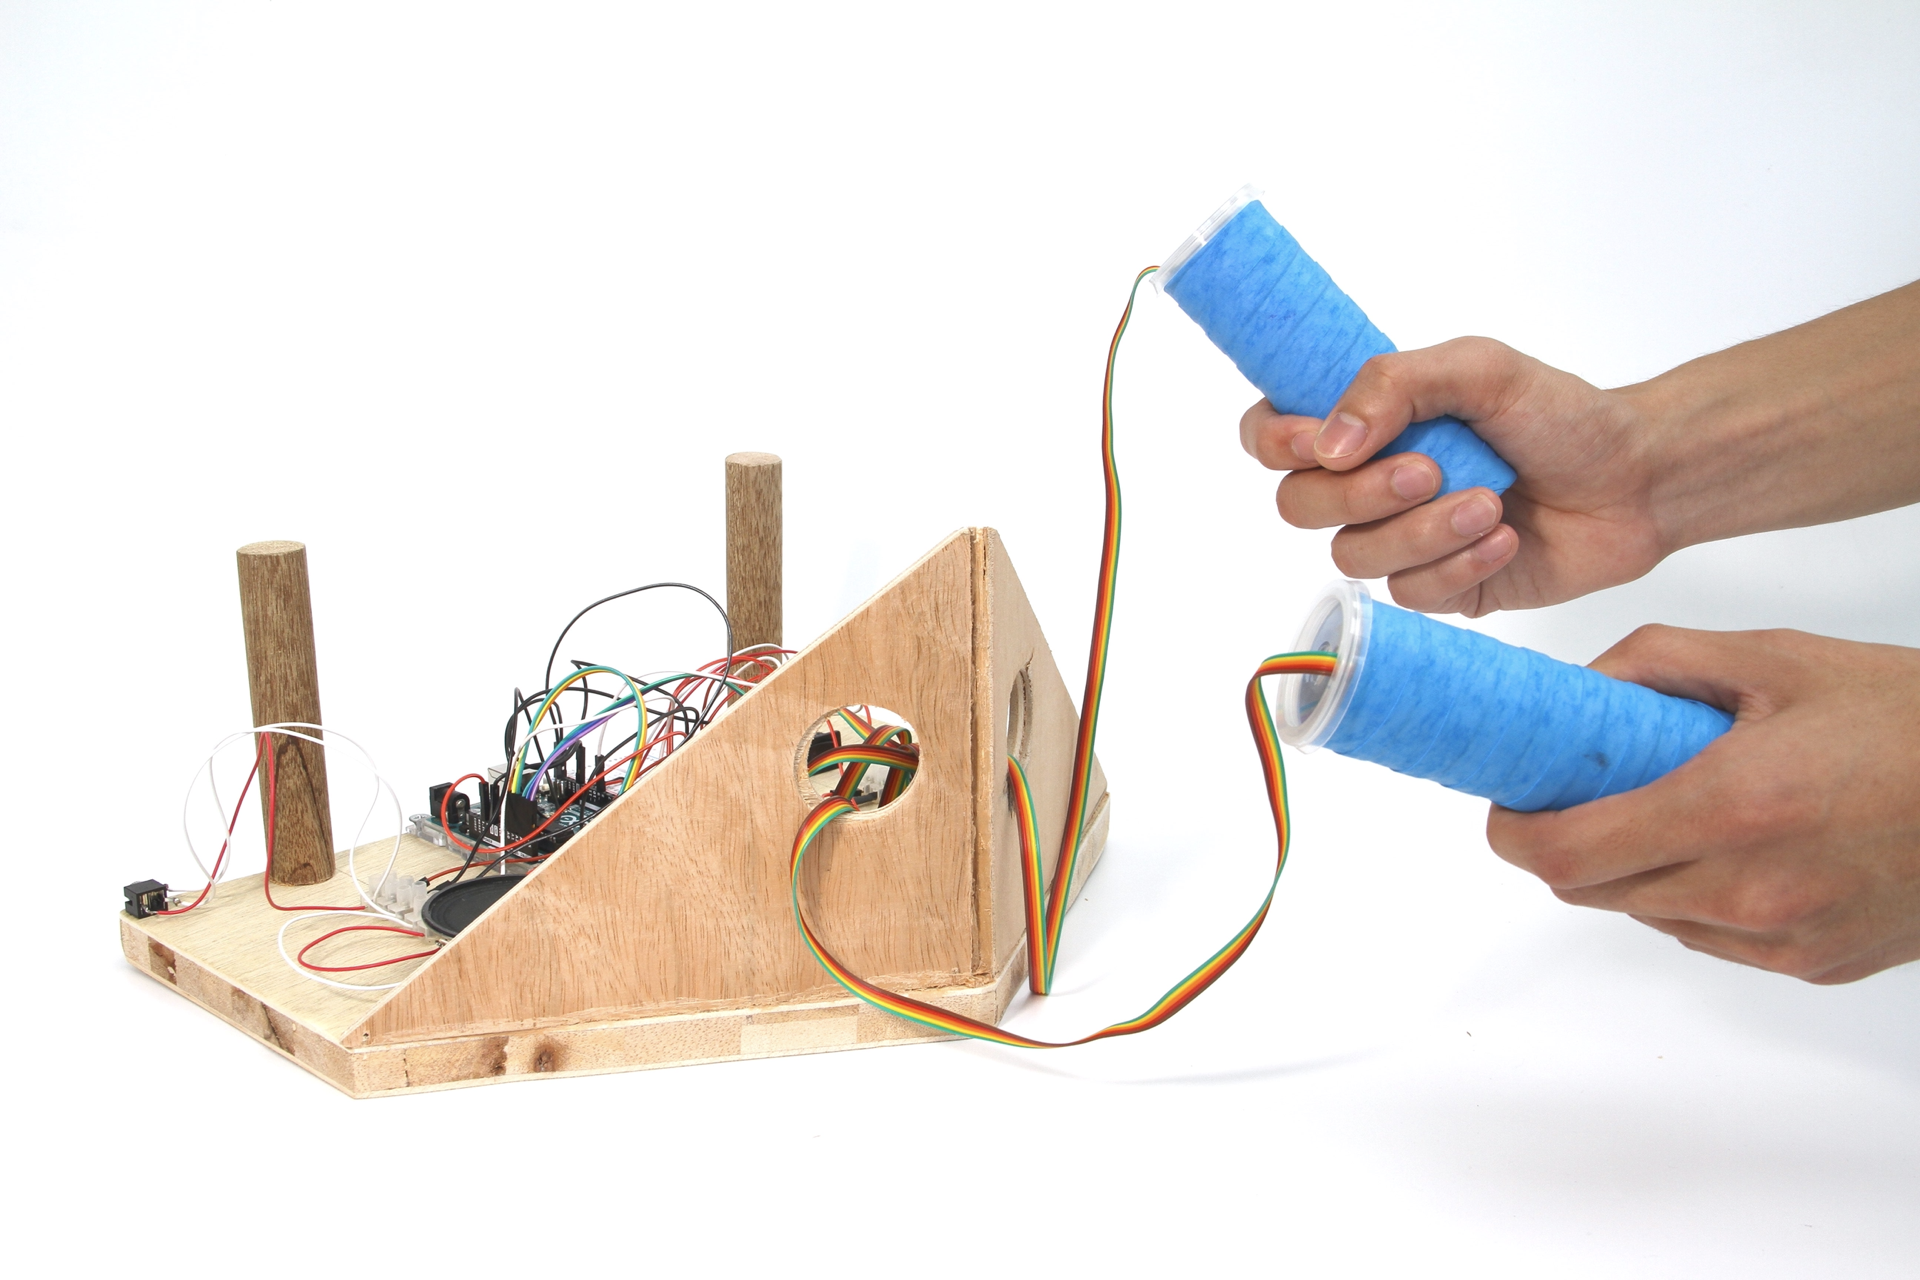
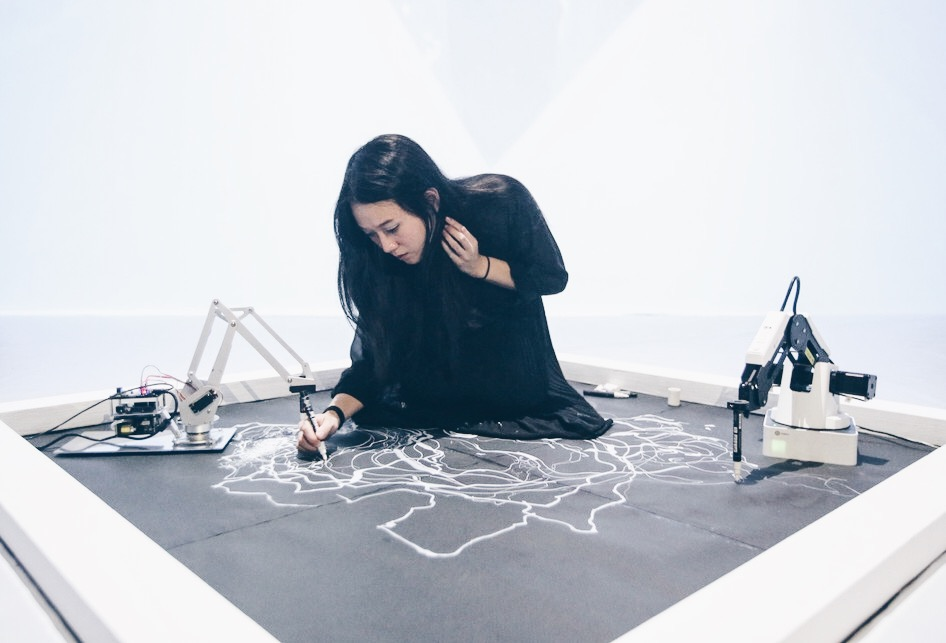
Product shots, clean background so that the focus is solely on the subject, add hands to show interactivity. Use a good camera, tripod if necessary, and appropriate lighting.
Documenting
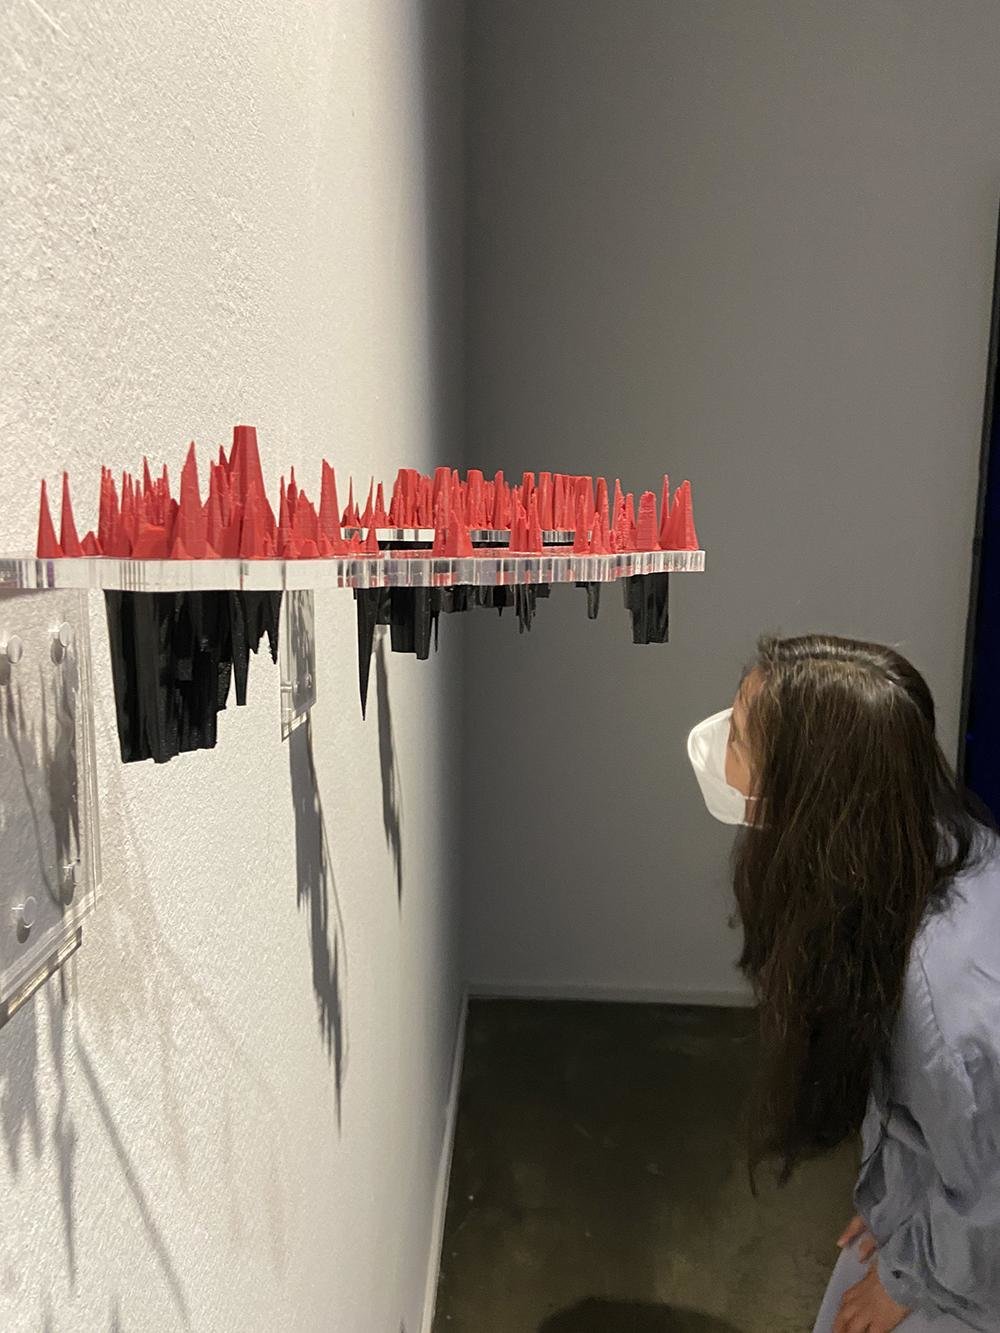
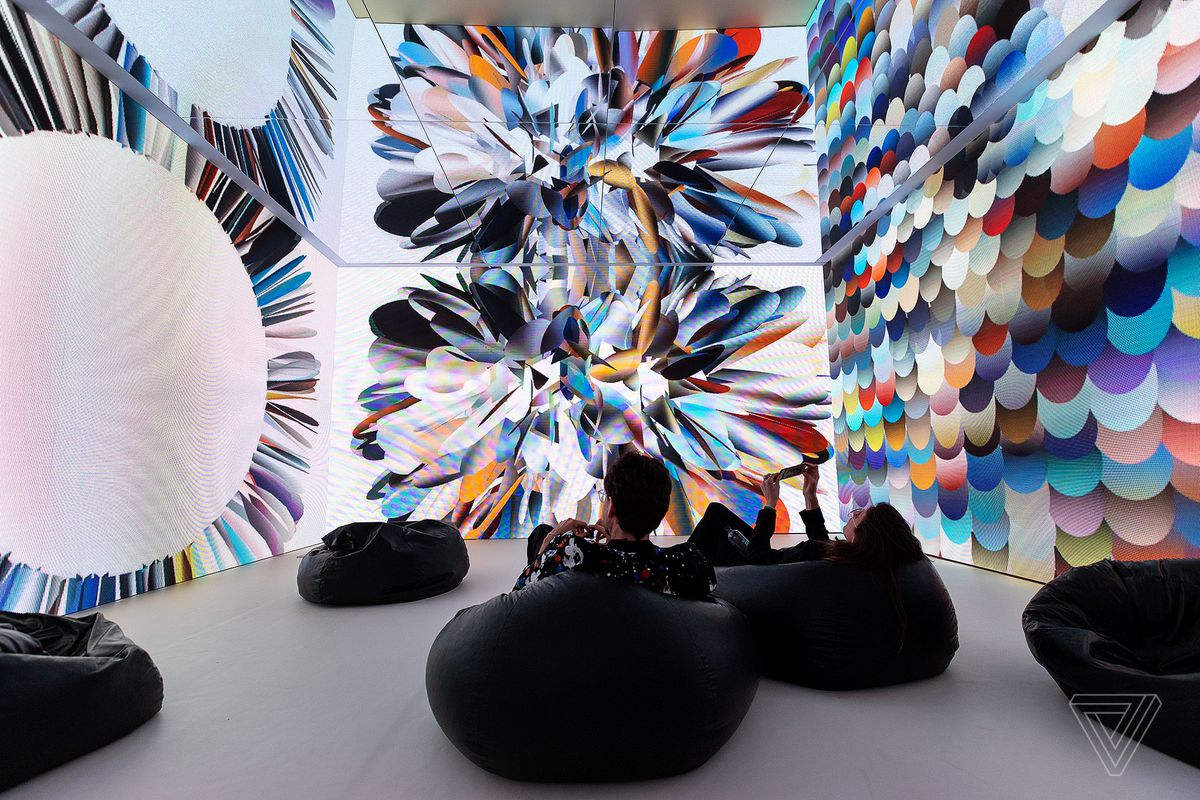
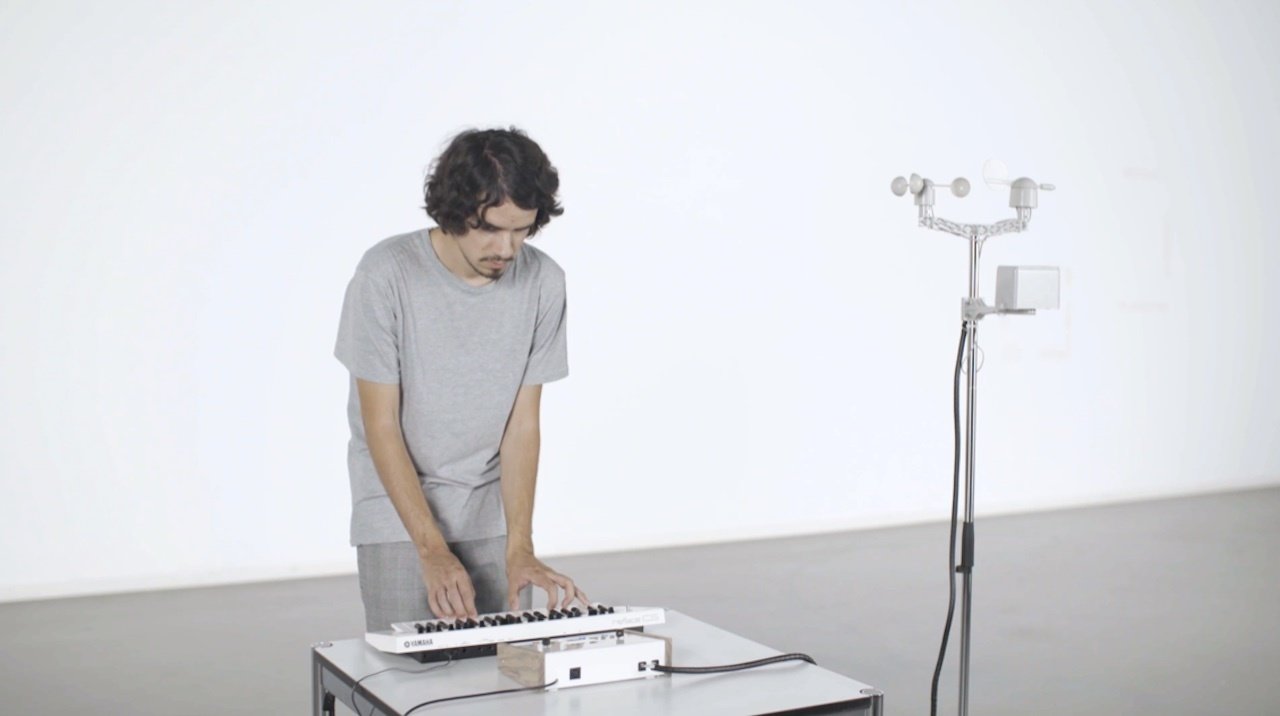
In action, in use: pictures of the work with people interacting or looking at the work. These photos can be staged and choreographed, or taken during a show and tell or exhibition with audience. Use a good camera, a tripod if necessary and adequate lighting.
Documenting
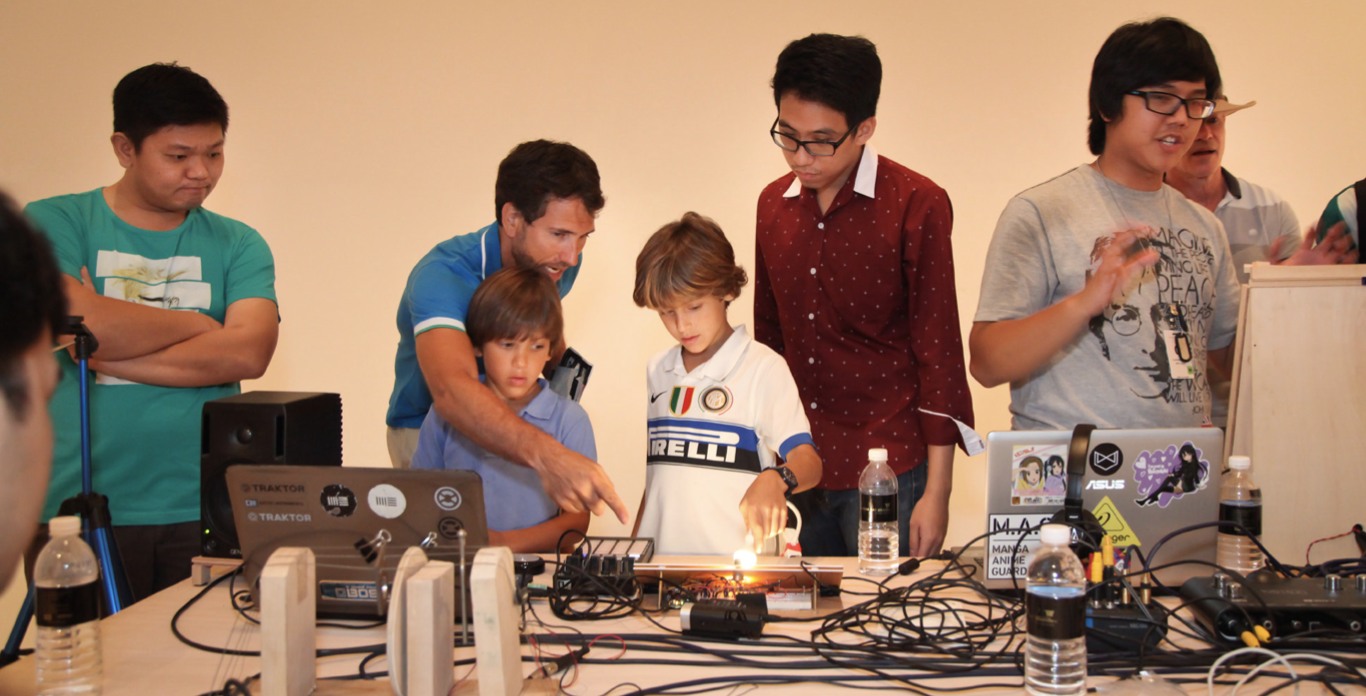
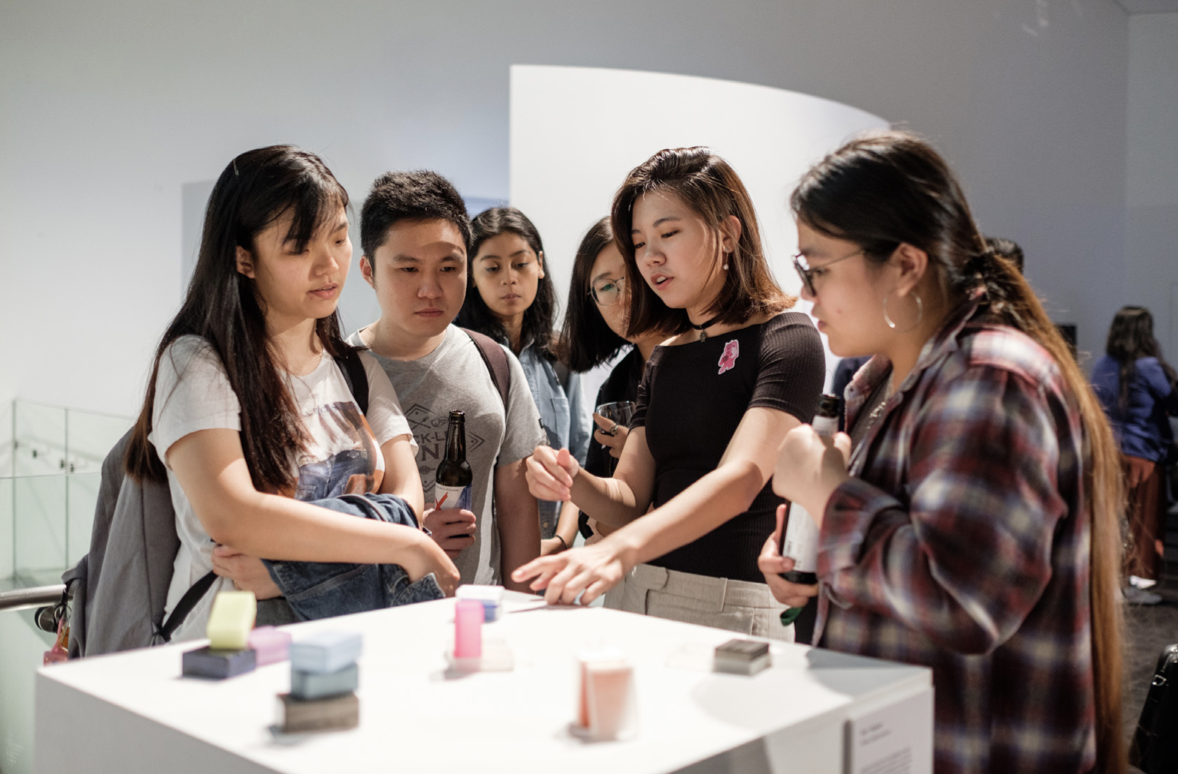

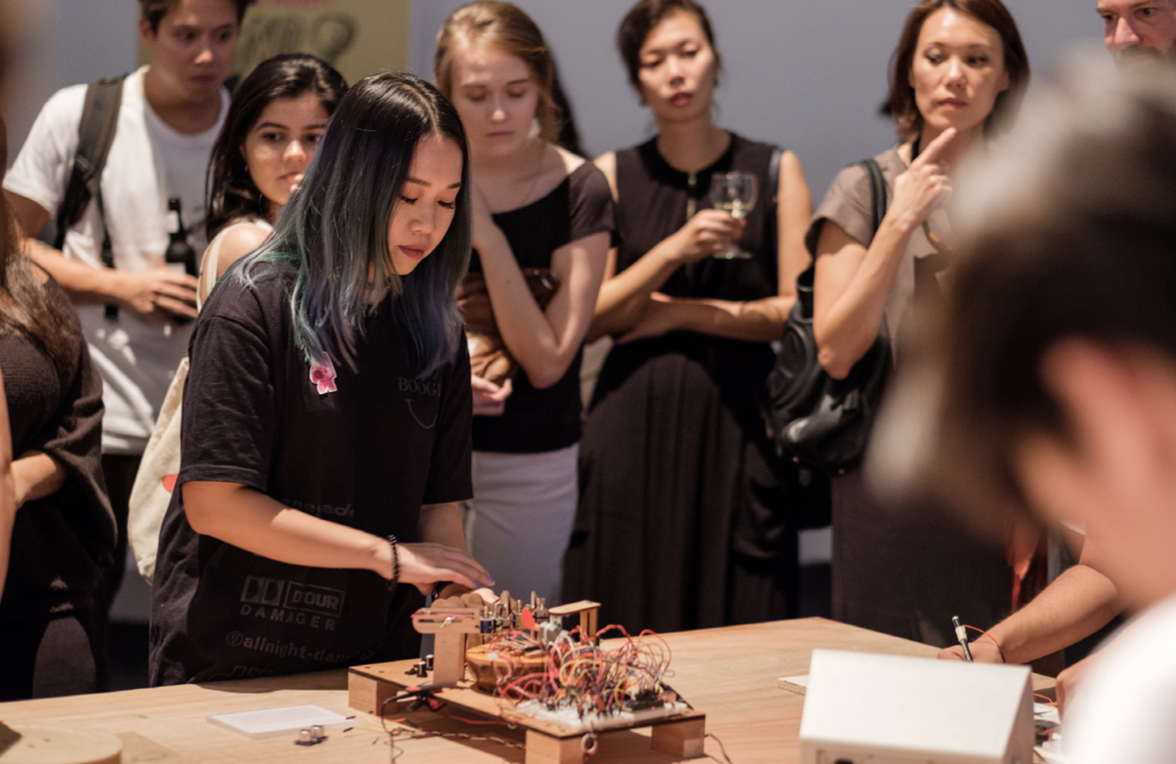
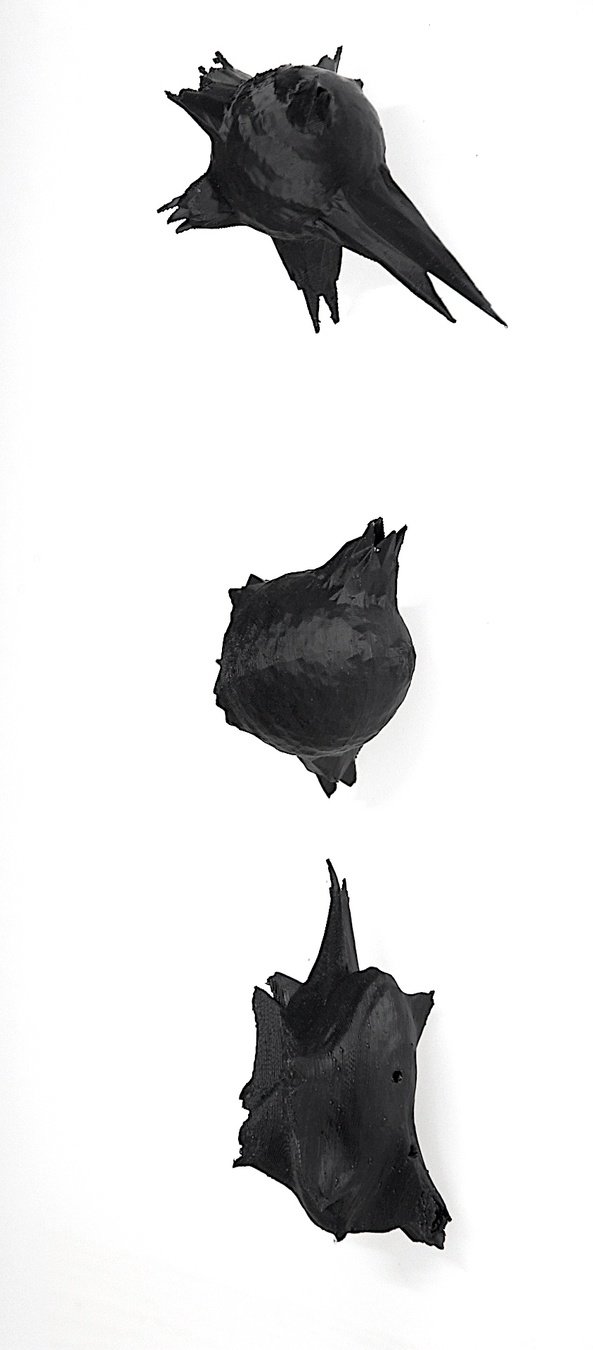
Avoid
In action, in use: pictures of the work with people interacting or looking at the work. These photos can be staged and choreographed, or taken during a show and tell or exhibition with audience. Use a good camera, a tripod if necessary and adequate lighting.
Session 2
Project Interaction
In class development
120
Session 2
Project Interaction
Return of Kits
Session 2
Project Interaction
- Test and demonstrate your outcome, how did others respond to your interactive object
- Take documentation of your outcome and take photos and videos of your peers interacting with it
Finalise
Session 1
Project Interaction
Deliverables, by the end of session 2
entangled-agencies_mirroring-mirrored_2026
By Andreas Schlegel


