遊戲設計
v0.18.1 - by 晴 | 2023 建北電資
簡報目錄
整學期只會有一份剪報,大概長這樣:
重要連結
重要的連結我整理了一下:
| Pico-8 Edu. Edition | |
| API Cheatsheet | |
| Lexaloffle BBS | |
| VS Code Plugin |
關於這堂課
一些關於這個章節的敘述

今日問題時間
你可以在這裡問一些關於課程的問題
會在下一堂課的「今日問題時間」回答
但因為是第一堂課,所以理論上不可能會有人問問題
那不然我幫你問:
這堂小社課在教什麼? 學期成績怎麼算?
關於這堂小社課
這堂課的官方的名字是「遊戲設計與開發」
其實是兩堂接在一起的課:Pico-8 & Unity
可以查看 我做到一半的 社網獲得更多資訊
Why not just teach Unity since it's more powerful?
While it is powerful, it is very complex
So it's difficult to learn without some prior knowledge
That' why we decided not to start with Unity
我的課表
大綱長這樣:
- 導論:遊戲的概念、認識 Pico-8 & Lexaloffle 線上論壇、創帳號
- 小專案:基礎 Lua 語法、關卡設計、製作迷宮遊戲、上傳到 BBS
- 製作簡單物理:實作重力、卡牆處理、單向橋
- 進階關卡布置:死亡尖刺、重生點系統、實作粒子效果、掉落方塊
- 細節:標題畫面、告示牌、簡單光影、音效 & 音樂設計
五節課上完?
沒可能
(This Slide is Hidden)
關於遊戲的基本常識
打電動時間

遊戲的定義
怎麼樣的東西才算是遊戲?
- 由玩家操控
- 讓玩家感到其中的樂趣
那……電腦遊戲?
- 電腦上的遊戲
好欸一堆廢話
動態
螢幕就是一個畫面,一堆像素,那為什麼看起來像是有東西在移動

因為有很多

看起來不連續 vs 卡住
首先,幀通常有兩種,更新幀 & 繪製幀
更新幀負責處理遊戲內容,更新角色位置等等
繪製幀負責把處理好的內容畫出來
更新幀變慢 → 整個遊戲、角色移動都變慢
繪製幀變慢 → 動畫看起來不連續
其實繪製幀只要有 60 FPS 看起來就會很絲滑了
但當然是越高越好
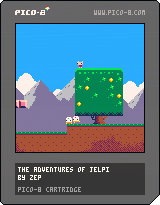
Pico-8
幻想控制台

什麼是 Pico-8?
根據 Lexaloffle 官方說明:
Pico-8 是一款用於製作、分享和遊玩小遊戲和其他電腦程式的奇幻遊戲機。它有自己的主機控制台,但它是在個人電腦上運行
當你打開它時,會看見命令列、一套遊戲製作工具和一個名為 Splore 的線上卡夾瀏覽器

根據我的解釋:
Pico-8 可以用來寫小遊戲
硬體受限,所以考驗創意!
硬體限制
Pico-8 有刻意限制過硬體規格
希望真正有趣、好玩的遊戲可以不被「其他遊戲比較華麗」所拘束
| 介面 | 128x128 像素,挑選過的 16 色 |
| 卡夾尺寸 | 32 KB |
| 聲軌 | 8-bit、4 通道 |
| 程式語言 | Pico-8 加強版的 Lua |
| CPU | 4M vm insts/sec |
| Sprite | 256 個 8x8 像素的拼合圖 |
| 地圖 | 128x32 瓦片 |
小遊戲 & 操作
話說,小遊戲的定義是什麼?
就是一些小巧的專案!
遊戲的檔案內容會以 .p8 儲存(內容是純文字)
一個小遊戲稱為 卡帶 Cartridge(簡稱 Cart)
卡帶聽起來很古老吧
就像早期遊戲主機,Pico-8 只有 6 個輸入:

[c]&[z]
[x]&[v]

   [↑]
[←][↓][→]
Lexaloffle BBS
- 玩別人做的遊戲
- 問問題
- 分享你的遊戲
Lexaloffle 是製作 Pico-8 的公司
他有自己的官方論壇
推薦的遊戲卡帶
- Mea's Castle 在地牢中蒐集各種能力並破關
- Pakpok 可以滑翔的瓢蟲,被橘色瓢蟲撞到會飛起來
- To a Starling 可以按鍵傳送到定點的一隻鳥
- Slimey, Jump! 史萊姆出門買蛋糕中途的經歷
- Celeste 經典作品。跑酷,玩家可以在空中「衝」一次
- Pico Tetris 就是俄羅斯方塊
- Dank Tomb 擁有超強光影的 Top-down 解謎遊戲
- Shift Trap 方塊分為 A、B 組,跳一次就會切換出現
- Terra 泰拉瑞亞重製。可以蓋房子、打 Boss
- Motion ●REC 可以記錄玩家的一段動作,並於稍後播放
其他不是遊戲的卡帶
- Shooting Stars 閃耀的流星
- Pico & Chill 看一個人在 Pico-8 裡面寫 Pico-8,音樂很讚
- Player Piano: Maple Leaf Rag 如題
使用編輯器
使用 Pico-8 製作遊戲吧

下載 Pico-8
Pico-8 是付費產品
但購買後可以無限更新
有興趣可以買一下!
但是有點貴……

奇異的文字
在提到編輯介面前,必須先看得懂 Pico-8 的文字
畢竟他只有 128 像素,所以每個字必須最精簡
特別注意 M、W、Q 等字的顯示方法
預設打出來的字都是大寫,比較不會糊成一團
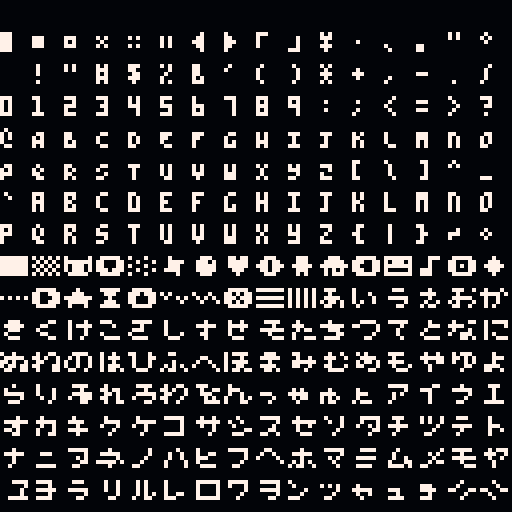
一個字元是 3 x 5 像素,字元之間空一像素
按著 Shift 會打出特殊符號(兩字元寬)
編輯介面
進到 Pico-8 應該會看到這個畫面 →
這就是 Pico-8 的 命令列 Console
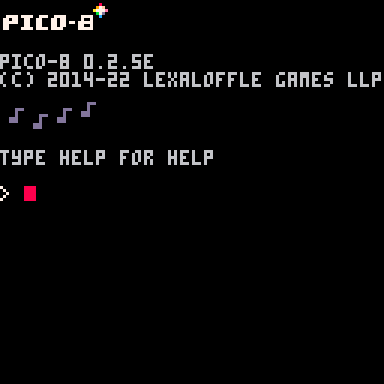
可以直接執行 Code,也可以打指令:
| save <name> | 將目前文件存檔 |
| load <name> | 讀取檔案 |
| run | 開始跑程式碼 |
| resume | 繼續(暫停後) |
| ls | 列出所有檔案 |
| reboot | 重啟 Pico-8 |
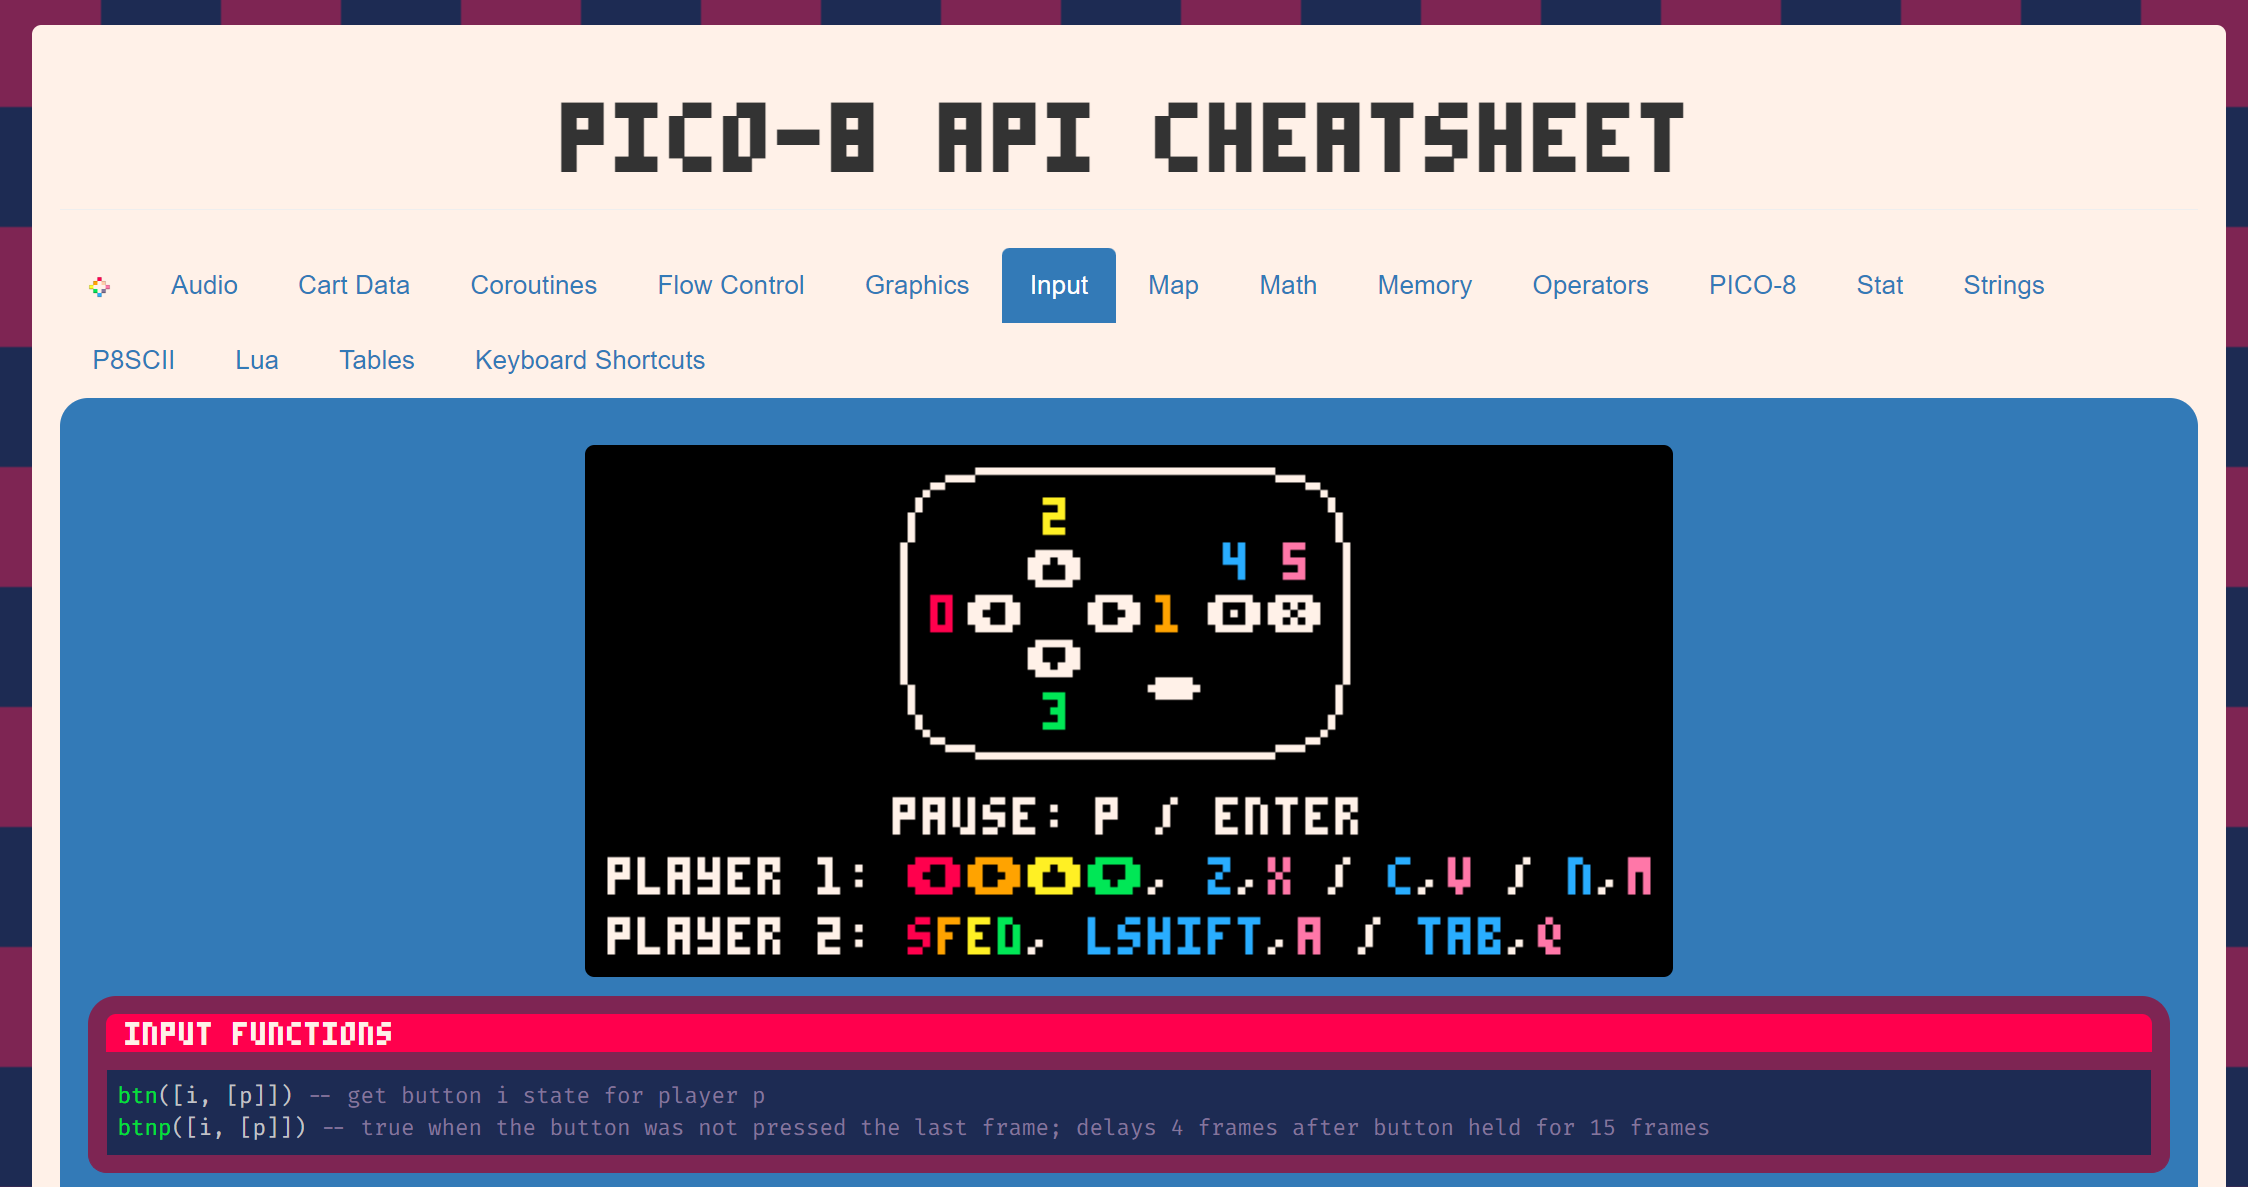
API Cheatsheet
好消息,有人幫我們整理好所有可以用的東西了:
External Editor
在 Pico-8 內建的文字編輯器寫 Code 不太方便
可以在 VSCode 寫完 Code 以後再貼到 Pico-8

另外有這個插件,會有額外的提示字
P.S. 記得把右下角的

改成

LUA
簡單的程式語言

Lua 語言
Lua 是一種程式語言:
一些基本的語法例子:
if hungry then
    eat()
end
while hungry do
eat()
end如果餓就吃
餓的話就一直吃
repeat
    eat()
until full
一直吃到飽為止
-
不用加分號
-
大部分東西用 end 結尾
-
用 -- 註解
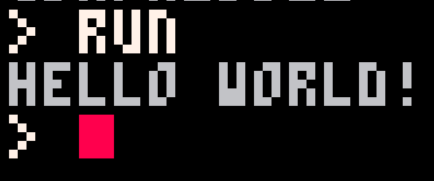
Hello World
我們來用 Lua 寫一個大家一定寫過的……
印出 "Hello World!" 吧
print("hello world!")首先按 Esc 來到編輯介面,然後輸入:
然後再按一次 Esc 回到 Console,輸入 run 來執行!
(或者直接按 Ctrl + R)
基礎型態
字串:一串字,用引號包起來,單引號 ' 和雙引號 " 都行
"hello world!"數字:就是數字,精細度到小數點後四位,範圍從 \(-32768 \sim 32767.9999\)
3.1416布林值:真的假的
trueNIL:啥都沒有
nilfalse-2""變數
東西存起來,就可以重複使用和修改
name = value舉個例子:
str = "hello world!"

print(str)
-- output: hello world!
→ 第四行是註解,不會被執行
語法長這樣:
註解
註解是給看程式碼的人(滿可能是未來的自己)
它不會被執行
單行註解:
print("hi") -- this line will call print()
-- it says hi
-- and it's cool
多行註解:
print("hi")
--[[
this line calls print()
will say hi!
]]
比較複雜的型態
陣列:一堆東西排成一排
words = { "hello", "world", "bye" }

print(words[1])
-- output: hello
物件:自己底下有各種屬性
person = { name = "john", age = 16 }

print(person.name)
-- output: john
更多用法
首先,陣列和物件都不一定要全部擠在同一行
table = {
  1,
  2,
  3
}
object = {
owner = "charlie",
weight = 20,
name = "a paper box"
}然後物件不一定要用字串當屬性名字
table = { [true] = "yes!", [false] = "no!" }

print(table[true])
-- output: yes!
這樣很像一個轉換表!
更多用法
首先,陣列和物件都不一定要全部擠在同一行
table = {
  1,
  2,
  3
}
object = {
owner = "charlie",
weight = 20,
name = "a paper box"
}然後物件不一定要用字串當屬性名字
table = { [true] = "yes!", [false] = "no!" }

print(table[true])
-- output: yes!
你可能會發現,其實陣列跟物件是一樣的東西:
table = {
  "banana",
  "apple",
  "grapes"
}
table = {
[1] = "banana",
[2] = "apple",
[3] = "grapes"
}print(table[2])
-- output: apple這樣很像一個轉換表!
函數
函數就是把一些東西(可能沒有)拿去做事,然後把結果(也可能沒有)傳回來
語法長這樣:
function name(param_1, param_2, param_3)
  -- do something
  return value -- optional
end
舉個例子:
function special_print(str)
  print("==========")
  print(str)
  print("==========")
end
special_print("the server is dead")
--[[
output:
==========
the server is dead
==========
]]數字運算
數字可以做 + - * / 運算,滿合理的吧
print(10 + 8 / 4)
-- output: 12
也可以用 % 取餘數
print(20 % 3)
-- output: 2
但是要注意範圍
print(32767 + 1)
-- output: -32768
字串運算
字串可以用 .. 接在一起
print("hello" .. "world")
-- output: helloworld
可以用 # 取得字串長度
print(#"hello")
-- output: 5
簡化
假設你今天要讓 a 改變 + 10,會長這樣:
a = a + 10很長,可以簡化成:
a += 10常常需要的「遞增」,也就是 + 1,可以寫成:
a++邏輯運算
a = true
b = false

print(not a)
-- output: false

print(a or b)
-- output: true

print(a and b)
-- output: false
← not: true → false, false → true
← or: true when any is true
← and: true when both are true
比較
a = 10.45
b = 10.45
c = 9.3

print(a == b)
-- output: true

print(a != c)
-- output: true

print(a <= c)
-- output: false
← true when they are equal
← true when they are not equal
← true when left <= right
>, >=, <, <=
陣列操作
整理一些常用的函數:
count(table)         -- returns number of elements in the table
add(table, value)    -- add value to table
del(table, value)    -- delete first instance of value in table
foreach(table, func) -- call func() for each value in table
rnd(table)           -- returns a random value from a table
table = { "lee", "la", "woo", "yo" }假設我們有一個陣列:
add(table, value) 把資料放進陣列後:
add(table, "yee")

print(table[5])
-- output: yee
print(table[5])
-- output: [nil]此時如果存取第 5 項:
使用 foreach(table, function) 遍歷:
function func(element)
print(element)
end
foreach(table, func)
--[[
output:
lee
la
woo
yo
]]陣列操作
table = { "lee", "la", "woo", "yo" }假設我們有一個陣列:
整理一些常用的函數:
count(table) -- returns number of elements in the table
add(table, value) -- add value to table
del(table, value) -- delete first instance of value in table
foreach(table, func) -- call func() for each value in table
rnd(table) -- returns a random value from a table陣列操作
add(table, value) 把資料放進陣列後:
add(table, "yee")
print(table[5])
-- output: yeetable = { "lee", "la", "woo", "yo" }假設我們有一個陣列:
print(table[5])
-- output: [nil]
此時如果存取第 5 項:
使用 foreach(table, function) 遍歷:
function func(element)
  print(element)
end

foreach(table, func)
--[[
output:
lee
la
woo
yo
]]使用 del(table, value) 刪除找到的第一個 value
del(table, "la")
foreach(table, print)
--[[
output:
lee
woo
yo
]]陣列操作
table = { "lee", "la", "woo", "yo" }假設我們有一個陣列:
使用 foreach(table, function) 遍歷:
function func(element)
  print(element)
end

foreach(table, func)
--[[
output:
lee
la
woo
yo
]]
使用 del(table, value) 刪除找到的第一個 value
del(table, "la")

foreach(table, print)
--[[
output:
lee
woo
yo
]]條件 & 邏輯
根據條件去做不一樣的事
if a then
  -- a is true
elseif b then
  -- a is false, and b is true
else
  -- a & b is both false
end
← 注意 elseif 中間沒有空格
While 迴圈
一直重複做一樣的事
while condition do
  -- do something
end
while true do
print("otter is dian")
print("807 is dian")
print("i'm weak")
end按一下 Esc 可以停止
do
  -- do something
until condition
do
print("otter is dian")
print("807 is dian")
print("i'm weak")
until falseFor 迴圈
套一個數字進去迭代
for variable = beginning, ending, step do

end
for i = 0, 10, 2 do
print(i)
end
--[[
output:
0
2
4
6
8
10
]]好像沒了
好欸 基礎語法講得差不多了

但看起來完全沒有任何遊戲的樣子啊?
那麼 進入下一章節 →
迷宮
第一個專案欸

座標
為什麼是從 0 開始數?
\(0\)
\(127\)
\(127\)
\(0\)
\(\text y\)
\(\text x\)
為什麼 y 軸正向是往下?
因為這樣比較方便取餘數
因為這樣跟文字是一樣的方向
更新幀
我們要定義三個函數
這三個函數會被 Pico-8 自動執行,所以名字不能改
function _init()
  -- do some init task
end

function _update()
  -- will do these every ticks
end

function _draw()
  -- draw after update
end
← 初始化:遊戲開始前會被執行一次
← 更新:每一幀要做的事
← 繪製:把東西畫出來
如果你的電腦不會卡住的話,正常都是 30 FPS,先更新再繪製
繪製
假設我們要在螢幕最外框畫個紅色框框
查 API:
-
紅色的代碼是 8 號
-
畫方形的語法是 rect(x0, y0, x1, y1, [col])
rect(0, 0, 127, 127, 8)放到 _draw 裡面
(rect = draw rectangle)
清除畫面
要先把上一次的東西清除,再繪製這一幀
function _draw()
    cls()
    rect(0, 0, 127, 127, 8)
end
(cls = clear screen)
這樣應該就可以完美的繪製一個紅色邊框了
但這跟迷宮有什麼關係?
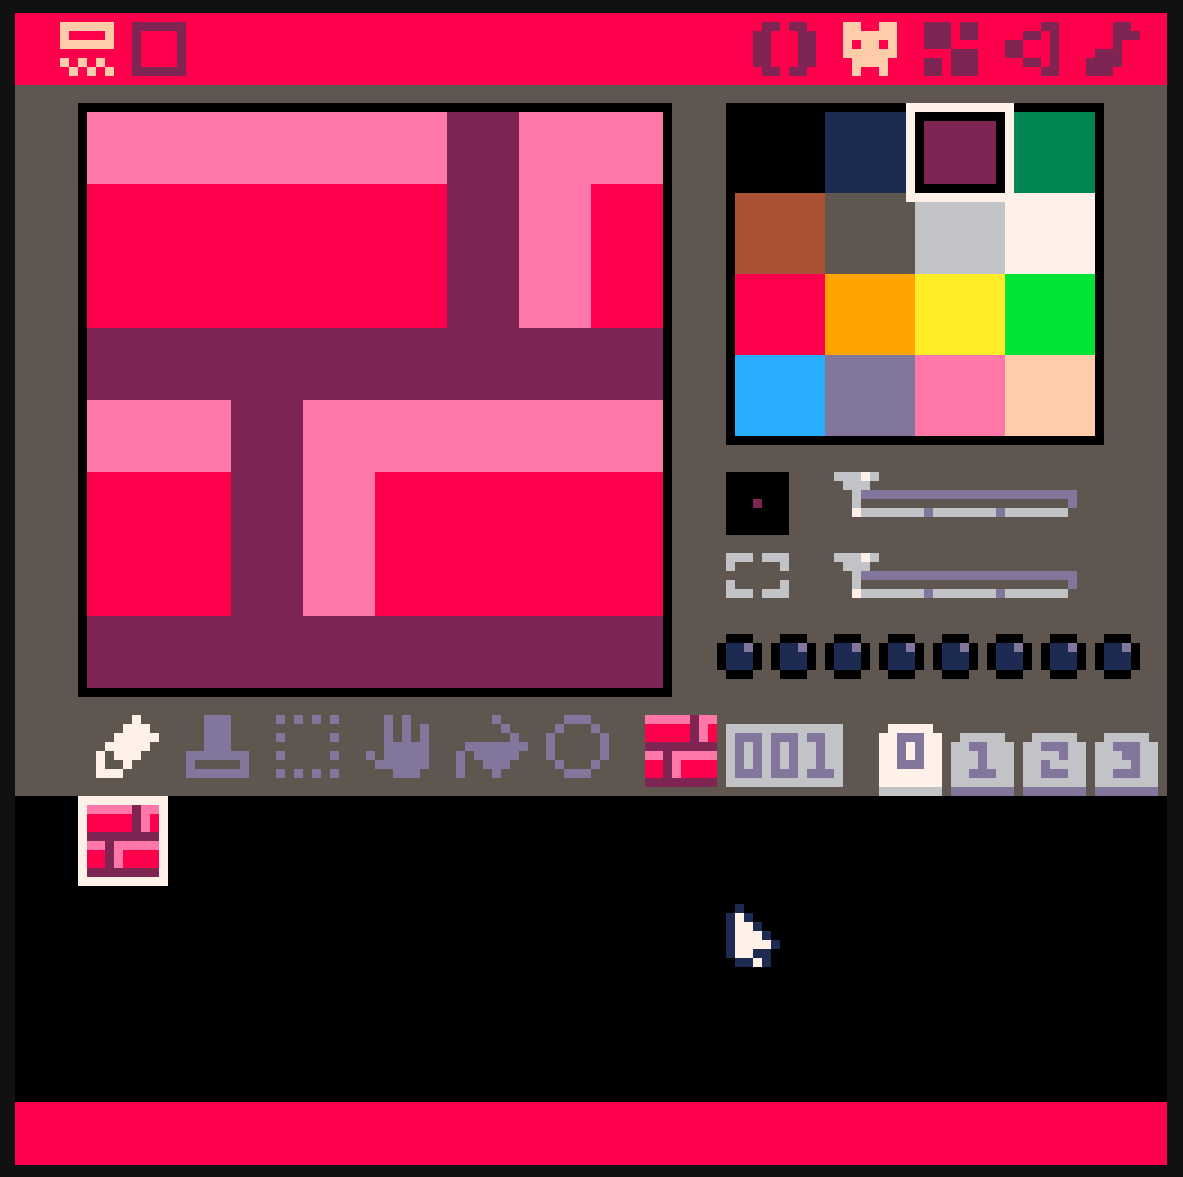
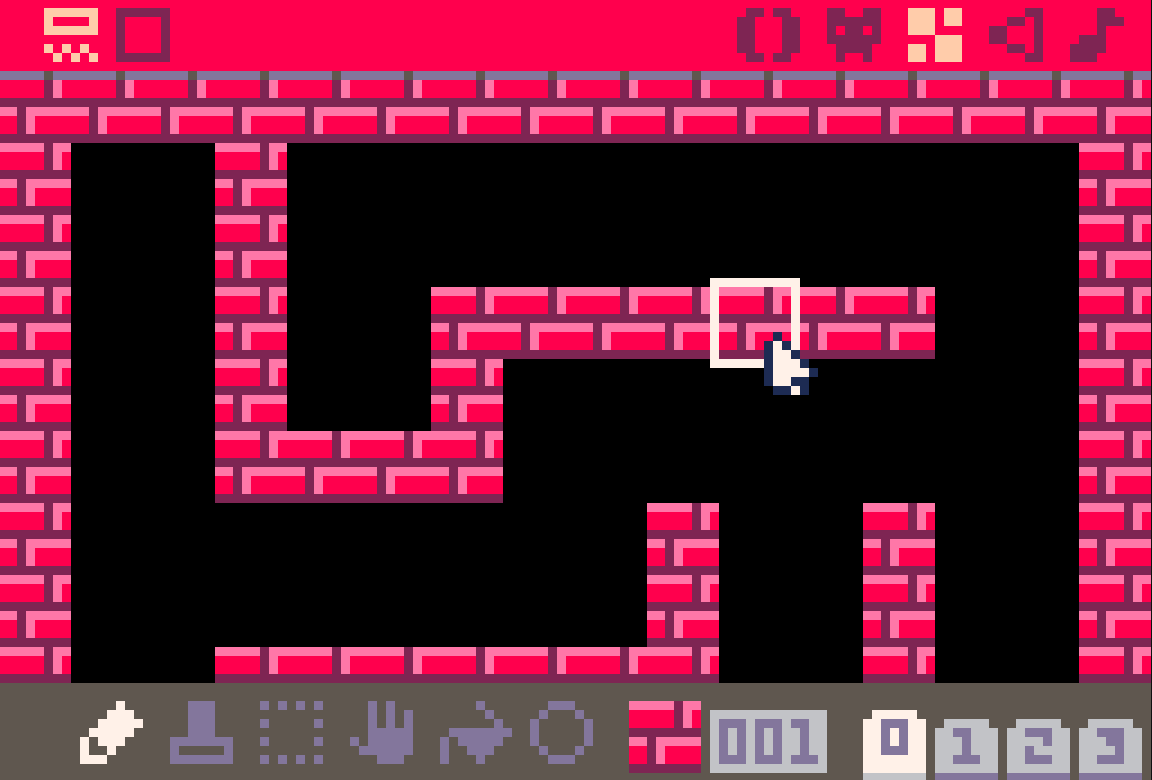
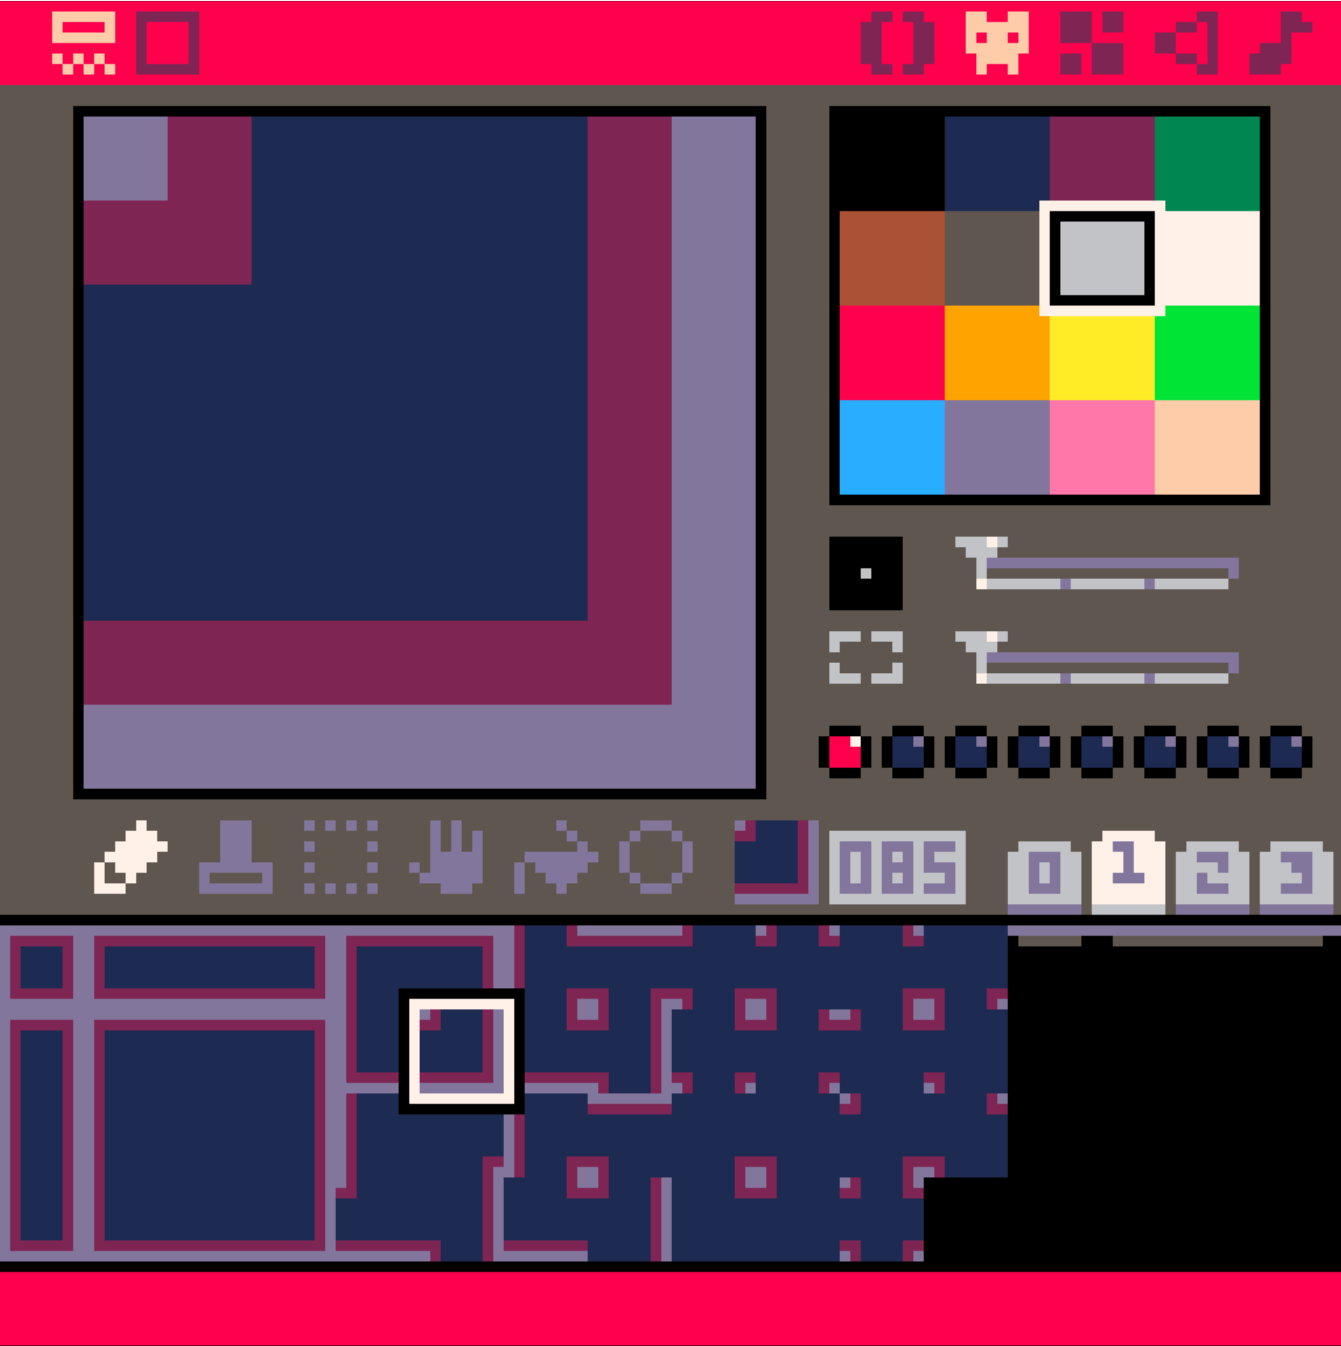
製圖
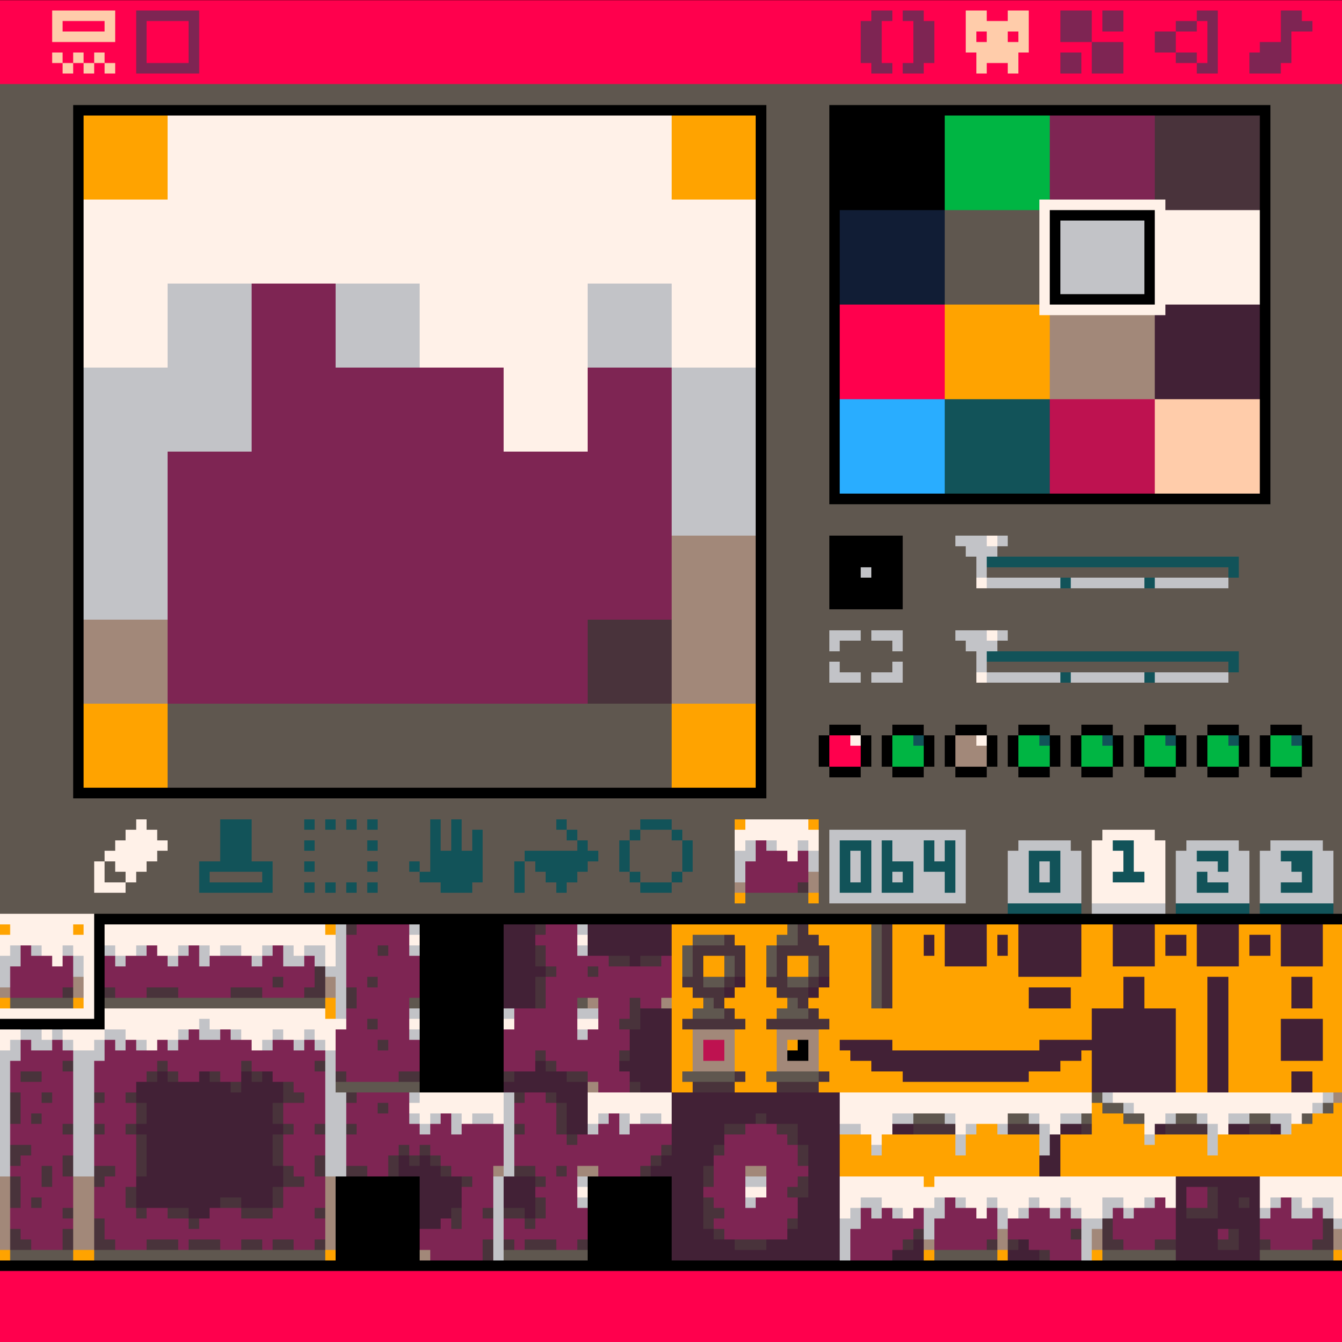
看到編輯介面的右上角

製圖
看到編輯介面的右上角
寫程式的地方
畫圖 Sprite,每格是 8x8
把畫好的圖拼成 128 x 64 格的大地圖
音效 SFX
把 SFX 接成 4 聲部的音樂
製圖
看到編輯介面的右上角

開始畫圖
Some Tips:
- 右鍵可以選取顏色
- 按住 Ctrl 點選可以 Replace Color
- 方向鍵可以在選取範圍內平移
拼成地圖
Sprite
Sprite 是一些拚在一起的圖,所以可以自由拼貼
而他們之間不一定要是連續的!
看到編輯介面的下半部,選取不同格編輯
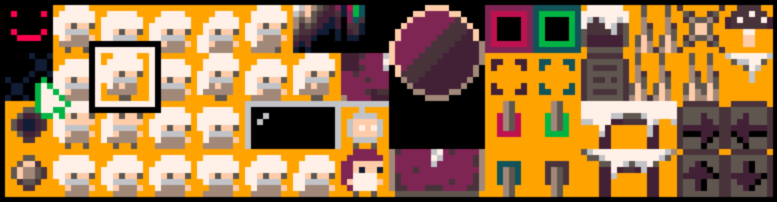
舉個例子:
拼成地圖
剛才畫的一格一格的圖叫做 Sprite

製圖
可以印出來當作一個角色
也可以拼成地圖 Tile Map
Some Tips:
- 右鍵可以選取地圖
- 按住 Ctrl 點選可以 Replace Tile
- 按住空格並拖曳可以移動 Camera
畫出地圖
查 API:
map(cel_x, cel_y, sx, sy, cel_w, cel_h, [layer]) map(0, 0, 0, 0, 128, 64) cel_x & cel_y 是地圖座標, 8 像素為 1 格,sx & sy 則是螢幕上的 1 像素
基本上是萬用的,會畫出整個 128×64 格地圖
像素座標 vs. 地圖座標
1 screen = 128 × 128 px
128px = 16 × (8 px)
1 screen = 16 x 16 tiles
px to tiles → ÷ 8
tiles to px → × 8
玩家
顯然玩家現在還不存在,我們要定義他:
-- init
pl = {
    x = 12,
    y = 12
}
畫出一個 Sprite:
spr(n, x, y, [w, h], [flip_x], [flip_y])spr(2, pl.x, pl.y)把 2 號 Sprite 畫在 (pl.x, pl.y)
2 號 Sprite?自己畫!
移動
偵測按鈕:
-- update
if (btn(0)) then
  pl.x -= 1;
end
if (btn(1)) then
  pl.x += 1;
end
if (btn(2)) then
  pl.y -= 1;
end
if (btn(3)) then
  pl.y += 1;
end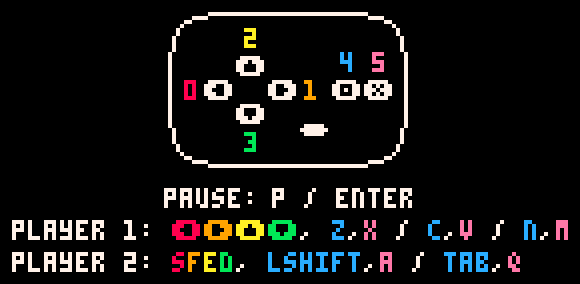
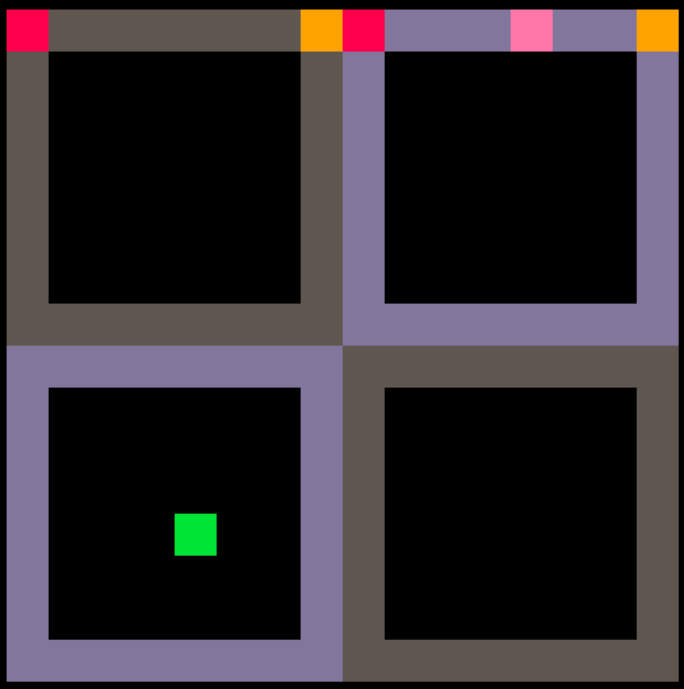
btn(n)牆壁判斷
偵測地圖:
mget(cel_x, cel_y)注意這裡是 Map 座標,螢幕上的要 ÷ 8
-- draw
print(mget(pl.x / 8, pl.y / 8))
你會注意到,這是代表玩家最左上角那一像素
Player
Wall
Wall
Player
Wall
Player
Wall
Player
只要判定四個角!
Wall
Player
除非你的牆壁比玩家還小啦
碰撞箱
function check_map(x, y, w, h, m)
  mx = x / 8
  my = y / 8
  mx2 = (x + w - 1) / 8
  my2 = (y + h - 1) / 8

  if mget(mx, my) == m then
    return true
  end
  if mget(mx, my2) == m then
    return true
  end
  if mget(mx2, my) == m then
    return true
  end
  if mget(mx2, my2) == m then
    return true
  end

  return false
end
定義一個函數:
碰到牆要停下來?
-- draw
print(check_map(pl.x, pl.y, 8, 8, 1))
讓我們繼續看下去 ↓
碰壁就停


Player
Player
Player
Wall
Player
Wall
把位置存起來
這樣寫:
old_x = pl.x
old_y = pl.y

-- the input part omitted

if check_map(pl.x, pl.y, 8, 8, 1) then
  pl.x = old_x
  pl.y = old_y
end
好欸下課
我講完了
pico-8 cartridge // http://www.pico-8.com
version 39
__lua__
function _init()
	pl = {
		x = 12,
		y = 12
	}
end

function _update()
	old_x = pl.x
	old_y = pl.y

	if (btn(0)) then
		pl.x -= 1
	end
	if (btn(1)) then
		pl.x += 1
	end
	if (btn(2)) then
		pl.y -= 1
	end
	if (btn(3)) then
		pl.y += 1
	end

	if check_map(pl.x, pl.y, 8, 8, 1) then
		pl.x = old_x
		pl.y = old_y
	end
end

function _draw()
	cls()
	map(0,0,0,0,128,64)
	spr(2, pl.x, pl.y)
end

function check_map(x, y, w, h, m)
  mx = x / 8
  my = y / 8
  mx2 = (x + w - 1) / 8
  my2 = (y + h - 1) / 8

  if mget(mx, my) == m then
    return true
  end
  if mget(mx, my2) == m then
    return true
  end
  if mget(mx2, my) == m then
    return true
  end
  if mget(mx2, my2) == m then
    return true
  end

  return false
end
__gfx__
00000000eeeee2ee0eeeeee000000000000000000000000000000000000000000000000000000000000000000000000000000000000000000000000000000000
00000000888882e8ee8ee8ee00000000000000000000000000000000000000000000000000000000000000000000000000000000000000000000000000000000
00700700888882e8ee8ee8ee00000000000000000000000000000000000000000000000000000000000000000000000000000000000000000000000000000000
0007700022222222eeeeeeee00000000000000000000000000000000000000000000000000000000000000000000000000000000000000000000000000000000
00077000ee2eeeeeee8888ee00000000000000000000000000000000000000000000000000000000000000000000000000000000000000000000000000000000
00700700882e8888ee8888ee00000000000000000000000000000000000000000000000000000000000000000000000000000000000000000000000000000000
00000000882e8888eee88eee00000000000000000000000000000000000000000000000000000000000000000000000000000000000000000000000000000000
00000000222222220eeeeee000000000000000000000000000000000000000000000000000000000000000000000000000000000000000000000000000000000
00000000bbbbb1bb0000000000000000000000000000000000000000000000000000000000000000000000000000000000000000000000000000000000000000
00000000333331b30000000000000000000000000000000000000000000000000000000000000000000000000000000000000000000000000000000000000000
00000000333331b30000000000000000000000000000000000000000000000000000000000000000000000000000000000000000000000000000000000000000
00000000111111110000000000000000000000000000000000000000000000000000000000000000000000000000000000000000000000000000000000000000
00000000bb1bbbbb0000000000000000000000000000000000000000000000000000000000000000000000000000000000000000000000000000000000000000
00000000331b33330000000000000000000000000000000000000000000000000000000000000000000000000000000000000000000000000000000000000000
00000000331b33330000000000000000000000000000000000000000000000000000000000000000000000000000000000000000000000000000000000000000
00000000111111110000000000000000000000000000000000000000000000000000000000000000000000000000000000000000000000000000000000000000
00000000aaaaa4aa0000000000000000000000000000000000000000000000000000000000000000000000000000000000000000000000000000000000000000
00000000999994a90000000000000000000000000000000000000000000000000000000000000000000000000000000000000000000000000000000000000000
00000000999994a90000000000000000000000000000000000000000000000000000000000000000000000000000000000000000000000000000000000000000
00000000444444440000000000000000000000000000000000000000000000000000000000000000000000000000000000000000000000000000000000000000
00000000aa4aaaaa0000000000000000000000000000000000000000000000000000000000000000000000000000000000000000000000000000000000000000
00000000994a99990000000000000000000000000000000000000000000000000000000000000000000000000000000000000000000000000000000000000000
00000000994a99990000000000000000000000000000000000000000000000000000000000000000000000000000000000000000000000000000000000000000
00000000444444440000000000000000000000000000000000000000000000000000000000000000000000000000000000000000000000000000000000000000
00000000777775770000000000000000000000000000000000000000000000000000000000000000000000000000000000000000000000000000000000000000
00000000666665760000000000000000000000000000000000000000000000000000000000000000000000000000000000000000000000000000000000000000
00000000666665760000000000000000000000000000000000000000000000000000000000000000000000000000000000000000000000000000000000000000
00000000555555550000000000000000000000000000000000000000000000000000000000000000000000000000000000000000000000000000000000000000
00000000775777770000000000000000000000000000000000000000000000000000000000000000000000000000000000000000000000000000000000000000
00000000665766660000000000000000000000000000000000000000000000000000000000000000000000000000000000000000000000000000000000000000
00000000665766660000000000000000000000000000000000000000000000000000000000000000000000000000000000000000000000000000000000000000
00000000555555550000000000000000000000000000000000000000000000000000000000000000000000000000000000000000000000000000000000000000
__map__
0101010101010101010101010101010100000000000000000000000000000000000000000000000000000000000000000000000000000000000000000000000000000000000000000000000000000000000000000000000000000000000000000000000000000000000000000000000000000000000000000000000000000000
0100000100000000000000000000000100000000000000000000000000000000000000000000000000000000000000000000000000000000000000000000000000000000000000000000000000000000000000000000000000000000000000000000000000000000000000000000000000000000000000000000000000000000
0100000100000000000000000000000100000000000000000000000000000000000000000000000000000000000000000000000000000000000000000000000000000000000000000000000000000000000000000000000000000000000000000000000000000000000000000000000000000000000000000000000000000000
0100000100000101010101010100000100000000000000000000000000000000000000000000000000000000000000000000000000000000000000000000000000000000000000000000000000000000000000000000000000000000000000000000000000000000000000000000000000000000000000000000000000000000
0100000100000100000000000000000100000000000000000000000000000000000000000000000000000000000000000000000000000000000000000000000000000000000000000000000000000000000000000000000000000000000000000000000000000000000000000000000000000000000000000000000000000000
0100000101010100000000000000000100000000000000000000000000000000000000000000000000000000000000000000000000000000000000000000000000000000000000000000000000000000000000000000000000000000000000000000000000000000000000000000000000000000000000000000000000000000
0100000000000000000100000100000100000000000000000000000000000000000000000000000000000000000000000000000000000000000000000000000000000000000000000000000000000000000000000000000000000000000000000000000000000000000000000000000000000000000000000000000000000000
0100000000000000000100000100000100000000000000000000000000000000000000000000000000000000000000000000000000000000000000000000000000000000000000000000000000000000000000000000000000000000000000000000000000000000000000000000000000000000000000000000000000000000
0100000101010101010100000100000100000000000000000000000000000000000000000000000000000000000000000000000000000000000000000000000000000000000000000000000000000000000000000000000000000000000000000000000000000000000000000000000000000000000000000000000000000000
0100000100000100000101010100000100000000000000000000000000000000000000000000000000000000000000000000000000000000000000000000000000000000000000000000000000000000000000000000000000000000000000000000000000000000000000000000000000000000000000000000000000000000
0100000100000100000100000000000100000000000000000000000000000000000000000000000000000000000000000000000000000000000000000000000000000000000000000000000000000000000000000000000000000000000000000000000000000000000000000000000000000000000000000000000000000000
0100000100000100000100000000000100000000000000000000000000000000000000000000000000000000000000000000000000000000000000000000000000000000000000000000000000000000000000000000000000000000000000000000000000000000000000000000000000000000000000000000000000000000
0100000000000100000100000101010100000000000000000000000000000000000000000000000000000000000000000000000000000000000000000000000000000000000000000000000000000000000000000000000000000000000000000000000000000000000000000000000000000000000000000000000000000000
0100000000000100000000000000000100000000000000000000000000000000000000000000000000000000000000000000000000000000000000000000000000000000000000000000000000000000000000000000000000000000000000000000000000000000000000000000000000000000000000000000000000000000
0100000000000100000000000000000100000000000000000000000000000000000000000000000000000000000000000000000000000000000000000000000000000000000000000000000000000000000000000000000000000000000000000000000000000000000000000000000000000000000000000000000000000000
0101010101010101010101010101010100000000000000000000000000000000000000000000000000000000000000000000000000000000000000000000000000000000000000000000000000000000000000000000000000000000000000000000000000000000000000000000000000000000000000000000000000000000
(存成文字檔 然後把副檔名改成 .p8 就可以了)
這份 Code 有很多問題和可以改得更好的地方
下禮拜預計:把今天的專案改得更好,然後繼續教新的東西
這是今天的 Code:
一些小修正
關於上禮拜的迷宮專案

不能磨墻欸
你很明顯地會發現有個 Bug
如果你按著 右 + 上,碰到右邊的牆
理論上應該要順著牆向上移動才對
但卻卡住了
不能磨墻欸
你很明顯地會發現有個 Bug
如果你按著 右 + 上,碰到右邊的牆
理論上應該要順著牆向上移動才對
但卻卡住了
Player
Wall
不能磨墻欸
你很明顯地會發現有個 Bug
如果你按著 右 + 上,碰到右邊的牆
理論上應該要順著牆向上移動才對
但卻卡住了
Player
Wall

不能磨墻欸
你很明顯地會發現有個 Bug
如果你按著 右 + 上,碰到右邊的牆
理論上應該要順著牆向上移動才對
但卻卡住了
Player
Wall
因為他每次向右上移動都直接被取消
不能磨墻欸
你很明顯地會發現有個 Bug
如果你按著 右 + 上,碰到右邊的牆
理論上應該要順著牆向上移動才對
但卻卡住了
Player
Wall
因為他每次向右上移動都直接被取消
但如果我們把這個力分成兩個方向
不能磨墻欸
你很明顯地會發現有個 Bug
如果你按著 右 + 上,碰到右邊的牆
理論上應該要順著牆向上移動才對
但卻卡住了
Player
Wall
因為他每次向右上移動都直接被取消

但如果我們把這個力分成兩個方向
碰撞也分開討論
不能磨墻欸
你很明顯地會發現有個 Bug
如果你按著 右 + 上,碰到右邊的牆
理論上應該要順著牆向上移動才對
但卻卡住了
Player
Wall
因為他每次向右上移動都直接被取消
但如果我們把這個力分成兩個方向
碰撞也分開討論
這樣就沒問題了
如何做到?
更新順序
寫成這樣:
-- update
old_x = pl.x

if (btn(0)) then
  pl.x -= 1
end
if (btn(1)) then
  pl.x += 1
end

if check_map(pl.x, pl.y, 8, 8, 1) then
  pl.x = old_x
end
-- update, after the move X part
old_y = pl.y
if (btn(2)) then
pl.y -= 1
end
if (btn(3)) then
pl.y += 1
end
if check_map(pl.x, pl.y, 8, 8, 1) then
pl.y = old_y
end加快移動速度
加入 pl.speed 變數
pl = {
  x = 12,
  y = 12,
  speed = 2
}
if (btn(0)) then
pl.x -= pl.speed;
end
if (btn(1)) then
pl.x += pl.speed;
endif btn(2) then
pl.y -= pl.speed
end
if btn(3) then
pl.y += pl.speed
end怎麼穿牆了
pl = {
  x = 16,
  y = 16,
  speed = 16
}
如果你把參數調成這樣:
他會直接穿牆!
But why?
怎麼穿牆了
pl = {
  x = 16,
  y = 16,
  speed = 16
}
如果你把參數調成這樣:
他會直接穿牆!
But why?
Player
Wall
Player
Wall
How to fix?
怎麼穿牆了
But why?
Player
Wall
Player
Wall
How to fix?
分割成很多段!
不會變慢嗎?
在同一幀,所以不會!
怎麼穿牆了
How to fix?
分割成很多段!
不會變慢嗎?
在同一幀,所以不會!
如何實作?
for i = 1, 16 do
  old_x = pl.x

  if btn(0) then
    pl.x -= pl.speed / 16
  end
  if btn(1) then
    pl.x += pl.speed / 16
  end

  if check_map(pl.x, pl.y, 8, 8, 1) then
    pl.x = old_x
  end

  -- y, too
end
新增更多關卡
你會發現,地圖顯然不只一個螢幕大小
我們可以加入其他頁
需要用到 camera
camera([x, y])試試看:
-- draw
camera(-16, -64)
新增更多關卡
camera([x, y])怎麼讓 camera 跟著玩家移動?
像這樣:
if player.x < 128 then
  camera.x = 0
elseif player.x < 256 then
  camera.x = 128
elseif -- ...
顯然超爛!
怎麼做?用除的!
你會發現,地圖顯然不只一個螢幕大小
我們可以加入其他頁
需要用到 camera
試試看:
-- draw
camera(-16, -64)
新增更多關卡
camera([x, y])怎麼讓 camera 跟著玩家移動?
像這樣:
if player.x < 128 then
  camera.x = 0
elseif player.x < 256 then
  camera.x = 128
elseif -- ...
怎麼做?用除的!
顯然超爛!
camera(
  128 * flr((pl.x + 3) / 128),
  128 * flr((pl.y + 3) / 128)
)
camera(
pl.x + 3 - (pl.x + 3) % 128,
pl.y + 3 - (pl.y + 3) % 128
)這個 +3 確實有點可悲
小裝飾
可以加入一些裝飾
我自己是會想加個圈圈:
function invcircfill(cx, cy, xx, yy, r, c)
  local r2 = r * r
  color(c)
  for j = cy - 4, cy + 131 do
    local y = yy - j
    local x = sqrt(max(r2 - y * y))
    rectfill(xx - 128, j, xx - x, j)
    rectfill(xx + x, j, xx + 128, j)
  end
end
-- draw
invcircfill(
pl.x + 3 - (pl.x + 3) % 128,
pl.y + 3 - (pl.y + 3) % 128,
pl.x + 3,
pl.y + 3,
30 + cos(time() * 0.5) * 2
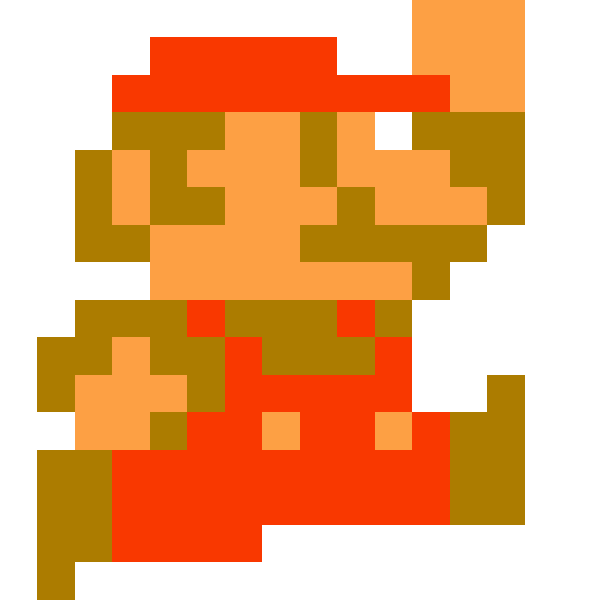
)橫向遊戲
其實不是要做瑪利歐啦
重力
重力 = 往下掉 = y 遞增?
function _init()
    pl = {
        x = 12,
        y = 12,
        xv = 0,
        yv = 0
    }
end

function _update()
    old_x = pl.x

    if (btn(0)) then
        pl.x -= 1;
    end
    if (btn(1)) then
        pl.x += 1;
    end

    if check_map(pl.x, pl.y, 8, 8, 1) then
    	pl.x = old_x
    end

    old_y = pl.y

    pl.y += 1

    if check_map(pl.x, pl.y, 8, 8, 1) then
    	pl.y = old_y
    end
end

function _draw()
    cls()
    map(0,0,0,0,128,64)
    spr(2, pl.x, pl.y)
end

function check_map(x, y, w, h, m)
    mx = x / 8
    my = y / 8
    mx2 = (x + w - 1) / 8
    my2 = (y + h - 1) / 8

    if mget(mx, my) == m then
        return true
    end
    if mget(mx, my2) == m then
        return true
    end
    if mget(mx2, my) == m then
        return true
    end
    if mget(mx2, my2) == m then
        return true
    end

    return false
end
顯然不是這樣
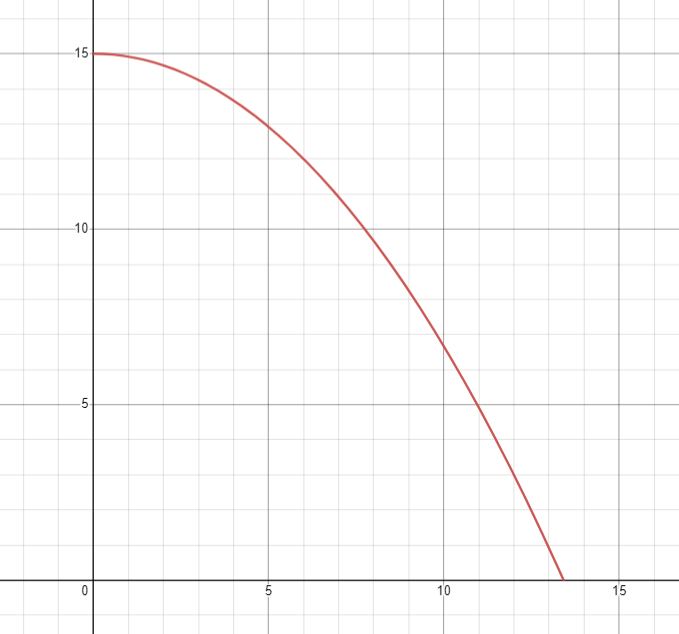
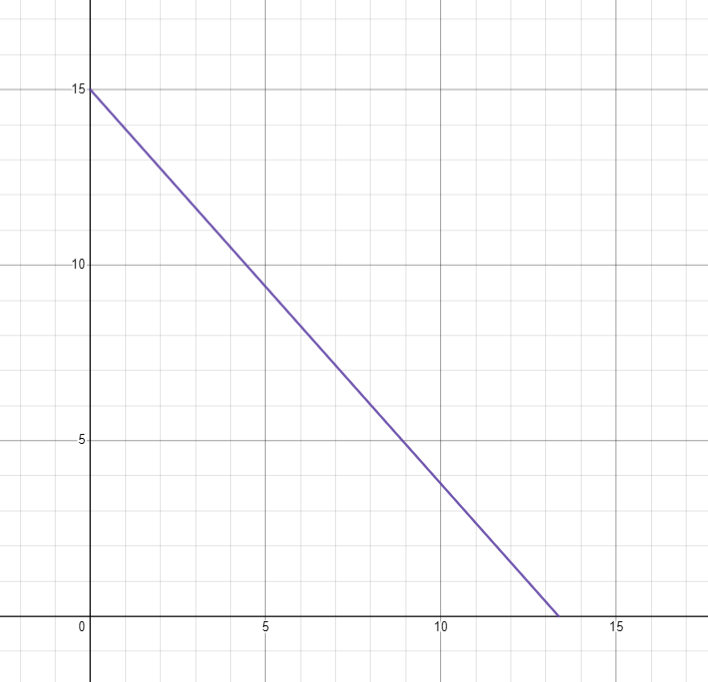


速度
顯然這個是等加速度運動
加速度固定,速度遞增(或遞減),位移是拋物線
怎麼做? 積分
v += a
x += v
速度
顯然這個是等加速度運動
加速度固定,速度遞增(或遞減),位移是拋物線
怎麼做? 積分
v += a
x += v
function _init()
pl = {
x = 12,
y = 12,
xv = 0,
yv = 0
}
end
function _update()
-- update player velocity
if (btn(0)) then
pl.xv -= 0.2
end
if (btn(1)) then
pl.xv += 0.2
end
pl.yv += 0.2
-- update player position
for i = 1, 16 do
old_x = pl.x
pl.x += pl.xv / 16
if check_map(pl.x, pl.y, 8, 8, 1) then
pl.x = old_x
end
end
for i = 1, 16 do
old_y = pl.y
pl.y += pl.yv / 16
if check_map(pl.x, pl.y, 8, 8, 1) then
pl.y = old_y
end
end
end
function _draw()
cls()
map(0,0,0,0,128,64)
spr(2, pl.x, pl.y)
end
function check_map(x, y, w, h, m)
mx = x / 8
my = y / 8
mx2 = (x + w - 1) / 8
my2 = (y + h - 1) / 8
if mget(mx, my) == m then
return true
end
if mget(mx, my2) == m then
return true
end
if mget(mx2, my) == m then
return true
end
if mget(mx2, my2) == m then
return true
end
return false
end
問題 0.他滑走了
因為他需要一點阻力
但我不會物理,所以我假設他一直是 10%
v *= 0.9pl.xv *= 0.9問題 1.他高速墜落
把 yv 印出來看看:
-- draw
print(pl.yv)
落地時重置 yv!
if check_map(pl.x, pl.y, 8, 8, 1) then
    pl.y = old_y

    if (pl.yv > 0) then
        pl.yv = 0
    end
end
跳躍
只會往下掉顯然不行

-- _init() 是 Pico-8 在遊戲開始時會呼叫的函數
-- 裡面放要初始化的變數等等
function _init()
  -- pl 變數是一個物件,代表我們的玩家
  -- 其中又有 x 座標、y 座標,x 方向速度 & y 方向速度
  pl = {
    x = 12,
    y = 12,
    xv = 0,
    yv = 0
  }
end

-- _update() 是 Pico-8 會在每一幀呼叫的函數
-- 每秒會執行 30 次
function _update()
  -----------------------------------------
  -- 首先先根據玩家的輸入 btn(id) 來改變速度
  -----------------------------------------

  -- 0 號按鈕是向左,1 號是向右
  -- 根據這兩個按鈕左右移動(改變 x 方向的速度)
  if (btn(0)) then
    pl.xv -= 0.5
  end
  if (btn(1)) then
    pl.xv += 0.5
  end

  -- x 方向的速度要有阻力,否則會無限滑走
  -- 假設阻力一直為速度的 20% 好了,那就要 * 80%
  pl.xv *= 0.8

  -- y 方向的速度就是一直遞增,畢竟在往下掉嘛
  pl.yv += 0.5

  ----------------------------------
  -- 接下來要根據速度來改變玩家的位置
  ----------------------------------

  -- 加一層 for 迴圈,就可以把很快的速度切割成很多段來更新,避免穿牆
  -- x 方向的更新:
  for i = 1, 16 do
    -- 把舊的位置存起來
    old_x = pl.x

    -- 把位置加上速度,記得 / 16 因為是切成 16 份的其中 1 份
    pl.x += pl.xv / 16

    -- 如果 check_map() 通過,代表有碰到牆(這是自己定義的函數,在最後面)
    if check_map(pl.x, pl.y, 8, 8, 0) then
      -- 那麼就回去剛才儲存的舊的位置
      pl.x = old_x
    end
  end

  -- y 方向也是一樣
  for i = 1, 16 do
    old_y = pl.y

    pl.y += pl.yv / 16

    if check_map(pl.x, pl.y, 8, 8, 0) then
      pl.y = old_y

      -- y 方向更新時碰到牆壁,代表是天花板或地板
      -- 判斷如果 y > 0 就是往下掉,意思就是碰到的是地板
      if (pl.yv > 0) then
        -- 那麼就重設 y 方向速度
        -- 否則之後到邊緣時會因為累積的速度而忽然高速下墜
        pl.yv = 0
      end
    end
  end
end

-- _draw() 函數是 Pico-8 會在每一幀更新後呼叫的函數
-- 這裡面寫的東西就是把更新好的東西畫出來到螢幕上
function _draw()
  -- 清空畫面,把上一次的東西清除
  cls()

  -- 畫出地圖
  -- 用法是 map(地圖上的 x, 地圖上的 y, 要畫到螢幕上的 x, 要畫到螢幕上的 y, 地圖上的寬度, 地圖上的高度)
  -- 地圖最大就是 128 * 64,所以這樣寫就會把整張地圖都畫出來
  map(0, 0, 0, 0, 128, 64)

  -- 畫出角色
  -- 用法是 spr(拼貼圖號碼, 要畫到螢幕上的 x, 要畫到螢幕上的 y)
  -- 所以這裡會把 2 號圖畫到 player 的位置
  -- 如果你使用其他塊作為玩家皮膚,記得改這裡
  spr(2, pl.x, pl.y)
end

-- 我們定義的函數,目的是確認玩家有沒有碰到牆壁(牆壁有 flag)
--[[
  傳入值是 check_map(
    x: 左上角 x 座標,
    y: 左上角 y 座標,
    w: 寬度,
    h: 高度,
    flag: 要檢查碰的 flag
  )
]]
-- 所以如果呼叫 check_map(pl.x, pl.y, 8, 8, 0)
-- 就是檢查在玩家座標,大小 8 * 8 的碰撞箱有沒有碰到有 0 號 flag 的圖
-- 當然如果你不是用 0 號 flag 來當作牆壁的話,就要改掉這個 0
function check_map(x, y, w, h, flag)
  ---------------------------------------
  -- 因為地圖座標每格是 8 像素,所以要 / 8
  ---------------------------------------

  -- 左邊的 x
  mx_left = x / 8
  -- 上邊的 y
  my_top = y / 8
  -- 右邊的 x
  mx_right = (x + w - 1) / 8
  -- 底邊的 y
  my_bottom = (y + h - 1) / 8

  -- mget(地圖座標 x, 地圖座標 y) 會回傳該格地圖的編號
  -- fget(地圖編號, flag 編號) 會回傳該編號的地圖有沒有指定的 flag
  -- 所以要確認指定地方的地圖有沒有 flag 就要把這兩個串起來
  -- fget( mget(x, y), flag )

  -- 左上角
  if fget( mget(mx_left, my_top), flag ) then
    return true
  end
  -- 右上角
  if fget( mget(mx_right, my_top), flag ) then
    return true
  end
  -- 左下角
  if fget( mget(mx_left, my_bottom), flag ) then
    return true
  end
  -- 右下角
  if fget( mget(mx_right, my_bottom), flag ) then
    return true
  end

  -- 上面四個都沒通過,那就是沒有碰到了
  return false
end
跳躍條件
假設我們沒有任何條件,只要玩家按 O 鍵就跳起來:
-- 按 O 鍵就跳起來
if btn(4) then
  pl.yv = -3
end
這顯然有問題嘛
我們需要判斷玩家是不是在地上!
判斷地板
更新的時候有這一段:
-- y 方向也是一樣
for i = 1, 16 do
  old_y = pl.y

  pl.y += pl.yv / 16

  if check_map(pl.x, pl.y, 8, 8, 0) then
    pl.y = old_y

    -- y 方向更新時碰到牆壁,代表是天花板或地板
    -- 判斷如果 y > 0 就是往下掉,意思就是碰到的是地板
    if (pl.yv > 0) then
      -- 那麼就重設 y 方向速度
      -- 否則之後到邊緣時會因為累積的速度而忽然高速下墜
      pl.yv = 0
    end
  end
end
判斷地板
-- 先預設是沒碰到地板
pl.ground = false

for i = 1, 16 do
  old_y = pl.y

  pl.y += pl.yv / 16

  if check_map(pl.x, pl.y, 8, 8, 0) then
    pl.y = old_y

    -- y 方向更新時碰到牆壁,代表是天花板或地板
    -- 判斷如果 y > 0 就是往下掉,意思就是碰到的是地板
    if (pl.yv > 0) then
      -- 那麼就重設 y 方向速度
      -- 否則之後到邊緣時會因為累積的速度而忽然高速下墜
      pl.yv = 0

      -- 標記玩家是在地上
      -- 這樣下一幀玩家就可以跳了
      pl.ground = true
    end
  end
end
加上這兩行:
pl = {
  x = 12,
  y = 12,
  xv = 0,
  yv = 0,
  ground = false
}
記得初始化也要加上:
然後跳起來的地方:
-- 在地上而且按 O 鍵就跳起來
if pl.ground and btn(4) then
  pl.yv = -3
end
就是在離開地面之後還有一點點寬容時間可以起跳
土狼時間
如何實作?
紀錄最後一次在地上的時間!
time()獲取時間的函數:
土狼時間
pl = {
  ...
  ground = false
}
last_ground_time = -20if pl.yv > 0 then
...
pl.ground = true
endpl.last_ground_time = time()初始化:
更新 y:
土狼時間
if time() - pl.last_ground_time < 0.3 and btn(4) then
  pl.yv = -4
  -- 記得一跳就重設
  pl.last_ground_time = -20
end
判斷可不可以跳:
按越久跳越高
直接看 Code 似乎比較快欸
-- 還沒開始跳 & 與上次在地上的時間差 < 0.3 & 按了 O 鍵,就開始跳
if pl.jump_state == 0 and time() - pl.last_ground_time < 0.3 and btn(4) then
  -- 使用 jump_state 紀錄玩家已經開始跳了
  pl.jump_state = 1;

  -- 記得一跳就重設 last_ground_time
  pl.last_ground_time = -20
end

-- 已經跳完了 / 根本沒按 O 就直接結束
if pl.jump_state >= 5 or ( pl.jump_state >= 1 and not btn(4) ) then
  -- 結束跳躍時把速度減半才不會有向上的慣性太大的感覺
  pl.yv /= 2
  -- 重設 jump_state
  pl.jump_state = 0
end

-- 如果已經開始跳
if pl.jump_state > 0 then
  -- 往上一跳一小部分
  pl.yv -= 1.6

  -- 遞增
  pl.jump_state += 1
end
兩個小問題
掉太快看起來還是滿奇怪的
-- y 方向的速度不斷遞增,畢竟有重力
pl.yv += 0.5

-- 最大下墜速度
if pl.yv > 6 then
  pl.yv = 6
end
有的時候頂到天花板會感覺吸在那邊
if check_map(pl.x, pl.y, 8, 8, 0) then
  pl.y = old_y

  if pl.yv > 0 then
    -- ...
  end

  -- 天花板
  if pl.yv < 0 then
    -- 設為一個極小,但會稍微往下掉的值
    pl.yv = 0.1
  end
end
橋 & 尖刺
好欸關卡終於有點東西了
橋的概念
往下掉時會被接住,但往上則會穿過去
橋的概念
往下掉時會被接住,但往上則會穿過去
橋的概念
往下掉時會被接住,但往上則會穿過去
橋的概念
往下掉時會被接住,但往上則會穿過去
但你只能判斷整個 Sprite……
橋的概念
往下掉時會被接住,但往上則會穿過去
條件:
- 正在往下掉
- 原本沒有碰到橋,後來才有碰到
橋的概念
往下掉時會被接住,但往上則會穿過去
因為如果原本就已經碰到,就應該要繼續往下掉!
條件:
- 正在往下掉
- 原本沒有碰到橋,後來才有碰到
實作橋
假設你代表是橋的 flag 是 1 號
修改程式碼原本就有的這一段:
for i = 1, 16 do
  old_y = pl.y

  pl.y += pl.yv / 16

  if check_map(pl.x, pl.y, 8, 8, 0) then
    pl.y = old_y

    -- y 方向更新時碰到牆壁,代表是天花板或地板
    -- 判斷如果 y > 0 就是往下掉,意思就是碰到的是地板
    if pl.yv > 0 then
      -- 那麼就重設 y 方向速度
      -- 否則之後到邊緣時會因為累積的速度而忽然高速下墜
      pl.yv = 0

      -- 儲存現在的時間到「最後在地上的時間」
      pl.last_ground_time = time()
    end
  end
end
實作橋
假設你代表是橋的 flag 是 1 號
for i = 1, 16 do
  -- 儲存在更新前有沒有碰到橋
  already_touched_bridge = check_map(pl.x, pl.y, 8, 8, 1)

  old_y = pl.y

  pl.y += pl.yv / 16

  if check_map(pl.x, pl.y, 8, 8, 0) then
    pl.y = old_y

    -- y 方向更新時碰到牆壁,代表是天花板或地板
    -- 判斷如果 y > 0 就是往下掉,意思就是碰到的是地板
    if pl.yv > 0 then
      -- 那麼就重設 y 方向速度
      -- 否則之後到邊緣時會因為累積的速度而忽然高速下墜
      pl.yv = 0

      -- 儲存現在的時間到「最後在地上的時間」
      pl.last_ground_time = time()
    end
  end

  -- 若是 原本沒有碰到 & 現在有碰到 & 正在往下掉
  if (not already_touched_bridge)
    and check_map(pl.x, pl.y, 8, 8, 1)
    and pl.yv > 0
  then
    -- 一樣是有被地板阻擋,回去原本位置並重設 yv
    pl.y = old_y
    pl.yv = 0
    pl.last_ground_time = time()
  end
end
改成這樣:
重生點 & 尖刺
基本上就是在玩家的一個屬性 spawn 紀錄重生點 x, y 座標
pl = {
  -- ...
  spawn = {
    x = 12,
    y = 12
  }
}
使用一個比較小的碰撞箱檢測有沒有碰到尖刺的地圖(假設 Flag 是 2 號)!
if check_map(pl.x + 1, pl.y + 1, 6, 6, 2) then
  pl.x = pl.spawn.x
  pl.y = pl.spawn.y
  pl.xv = 0
  pl.yv = 0
end
圖形修改
關於外觀圖形的一些東西

-- _init() 是 Pico-8 在遊戲開始時會呼叫的函數
-- 裡面放要初始化的變數等等
function _init()
  -- pl 變數是一個物件,代表我們的玩家
  pl = {
    -- x 座標、y 座標
    x = 12,
    y = 12,
    -- x 方向速度、y 方向速度
    xv = 0,
    yv = 0,
    -- 上次在地上的時間 & 跳躍的狀態
    last_ground_time = -20,
    jump_state = 0,

    -- 圖形參數
    width = 8,
    height = 8,
    skin = 1,

    -- 放所有會用到的常數,比較方便修改
    const = {
      walk_speed = 0.3,
      drag = 0.8,
      gravity = 0.1,
      max_yv = 3,
      coyote_time = 0.17,
      jump = {
        start_velocity = -0.8,
        multiplier = 0.6,
        end_drag = 0.6,
        duration = 12
      },
      update_steps = 16,
      map_flags = {
        obstacle = 0,
        bridge = 1
      },
    }
  }
end

-- _update() 是 Pico-8 會在每一幀呼叫的函數
-- 每秒會執行 30 次
-- 若使用 _update60() 則是一秒 60 次
-- 不過這樣很多參數都要調整,否則會太快
function _update60()
  -----------------------------------------
  -- 首先先根據玩家的輸入 btn(id) 來改變速度
  -----------------------------------------

  -- 0 號按鈕是向左,1 號是向右
  -- 根據這兩個按鈕左右移動(改變 x 方向的速度)
  if btn(0) then
    pl.xv -= pl.const.walk_speed
  end
  if btn(1) then
    pl.xv += pl.const.walk_speed
  end

  -- x 方向的速度要有阻力,否則會無限滑走
  -- 假設阻力一直為速度的 20% 好了,那就要 * 80%
  pl.xv *= pl.const.drag

  -- y 方向的速度不斷遞增,畢竟有重力
  pl.yv += pl.const.gravity

  -- 最大下墜速度
  if pl.yv > pl.const.max_yv then
    pl.yv = pl.const.max_yv
  end

  -- 還沒開始跳 & 與上次在地上的時間差 < coyote_time & 按了 O 鍵,就開始跳
  if pl.jump_state == 0
    and time() - pl.last_ground_time < pl.const.coyote_time
    and btn(4)
  then
    -- 使用 jump_state 紀錄玩家已經開始跳了
    pl.jump_state = 1

    -- 記得一跳就重設 last_ground_time
    pl.last_ground_time = -20

    -- 初始的向上速度
    pl.yv = -0.8
  end

  -- 已經跳完了 / 根本沒按 O 就直接結束
  if pl.jump_state >= pl.const.jump.duration or ( pl.jump_state > 0 and not btn(4) ) then
    -- 結束跳躍時把速度減少許多,才不會有向上的慣性太大的感覺
    pl.yv *= pl.const.jump.end_drag
    -- 重設 jump_state
    pl.jump_state = 0
  end

  -- 如果已經開始跳
  if pl.jump_state > 0 then
    -- 往上一跳一小部分
    pl.yv -= pl.const.jump.multiplier / pl.jump_state

    -- 遞增
    pl.jump_state += 1
  end

  ----------------------------------
  -- 接下來要根據速度來改變玩家的位置
  ----------------------------------

  -- 加一層 for 迴圈,就可以把很快的速度切割成很多段來更新,避免穿牆
  -- x 方向的更新:
  for i = 1, pl.const.update_steps do
    -- 把舊的位置存起來
    old_x = pl.x

    -- 把位置加上速度,記得 / 16 因為是切成 16 份的其中 1 份
    pl.x += pl.xv / pl.const.update_steps

    -- 若 check_map() 通過,就代表有被阻擋(這是自己定義的函數,在最後面)
    if check_map(pl.x, pl.y, pl.width, pl.height, pl.const.map_flags.obstacle) then
      -- 那麼就回去剛才儲存的舊的位置
      pl.x = old_x
    end
  end

  for i = 1, pl.const.update_steps do
    -- 儲存在更新前有沒有碰到橋
    already_touched_bridge = check_map(pl.x, pl.y, pl.width, pl.height, pl.const.map_flags.bridge)

    old_y = pl.y

    pl.y += pl.yv / pl.const.update_steps

    if check_map(pl.x, pl.y, pl.width, pl.height, pl.const.map_flags.obstacle) then
      pl.y = old_y

      -- y 方向更新時碰到牆壁,代表是天花板或地板
      -- 判斷如果 y > 0 就是往下掉,意思就是碰到的是地板
      if pl.yv > 0 then
        -- 那麼就重設 y 方向速度
        -- 否則之後到邊緣時會因為累積的速度而忽然高速下墜
        pl.yv = 0

        -- 儲存現在的時間到「最後在地上的時間」
        pl.last_ground_time = time()
      end

      -- 天花板
      if pl.yv < 0 then
        -- 設為一個極小,但會稍微往下掉的值
        pl.yv = 0.1
      end
    end

    -- 若是 原本沒有碰到 & 現在有碰到 & 正在往下掉
    if (not already_touched_bridge)
      and check_map(pl.x, pl.y, pl.width, pl.height, pl.const.map_flags.bridge)
      and pl.yv > 0
    then
      -- 一樣是有被地板阻擋,回去原本位置並重設 yv
      pl.y = old_y
      pl.yv = 0
      pl.last_ground_time = time()
    end
  end
end

-- _draw() 函數是 Pico-8 會在每一幀更新後呼叫的函數
-- 這裡面寫的東西就是把更新好的東西畫出來到螢幕上
function _draw()
  -- 清空畫面,把上一次的東西清除
  cls()

  -- 畫出地圖
  -- 用法是 map(地圖上的 x, 地圖上的 y, 要畫到螢幕上的 x, 要畫到螢幕上的 y, 地圖上的寬度, 地圖上的高度)
  -- 地圖最大就是 128 * 64,所以這樣寫就會把整張地圖都畫出來
  map(0, 0, 0, 0, 128, 64)

  -- 畫出角色
  -- 用法是 spr(拼貼圖號碼, 要畫到螢幕上的 x, 要畫到螢幕上的 y)
  -- 所以這裡會把 2 號圖畫到 player 的位置
  -- 如果你使用其他塊作為玩家皮膚,記得改這裡
  spr(pl.skin, pl.x, pl.y)
end

-- 我們定義的函數,目的是確認玩家有沒有碰到牆壁(牆壁有 flag)
--[[
  傳入值是 check_map(
    x: 左上角 x 座標,
    y: 左上角 y 座標,
    w: 寬度,
    h: 高度,
    flag: 要檢查碰的 flag
  )
]]
-- 所以如果呼叫 check_map(pl.x, pl.y, 8, 8, 0)
-- 就是檢查在玩家座標,大小 8 * 8 的碰撞箱有沒有碰到有 0 號 flag 的圖
-- 當然如果你不是用 0 號 flag 來當作牆壁的話,就要改掉這個 0
function check_map(x, y, w, h, flag)
  ---------------------------------------
  -- 因為地圖座標每格是 8 像素,所以要 / 8
  ---------------------------------------

  -- 左邊的 x
  mx_left = x / 8
  -- 上邊的 y
  my_top = y / 8
  -- 右邊的 x
  mx_right = (x + w - 1) / 8
  -- 底邊的 y
  my_bottom = (y + h - 1) / 8

  -- mget(地圖座標 x, 地圖座標 y) 會回傳該格地圖的編號
  -- fget(地圖編號, flag 編號) 會回傳該編號的地圖有沒有指定的 flag
  -- 所以要確認指定地方的地圖有沒有 flag 就要把這兩個串起來
  -- fget( mget(x, y), flag )

  -- 左上角
  if fget( mget(mx_left, my_top), flag ) then
    return true
  end
  -- 右上角
  if fget( mget(mx_right, my_top), flag ) then
    return true
  end
  -- 左下角
  if fget( mget(mx_left, my_bottom), flag ) then
    return true
  end
  -- 右下角
  if fget( mget(mx_right, my_bottom), flag ) then
    return true
  end

  -- 上面四個都沒通過,那就是沒有碰到了
  return false
end
function _init()
  pl = {
    x = 12,
    y = 12,
    xv = 0,
    yv = 0,
    last_ground_time = -20,
    jump_state = 0,

    width = 8,
    height = 8,
    skin = 1,

    const = {
      walk_speed = 0.3,
      drag = 0.8,
      gravity = 0.1,
      max_yv = 3,
      coyote_time = 0.17,
      jump = {
        start_velocity = -0.8,
        multiplier = 0.6,
        end_drag = 0.6,
        duration = 12
      },
      update_steps = 16,
      map_flags = {
        obstacle = 0,
        bridge = 1
      },
    }
  }
end

function _update60()
  if btn(0) then
    pl.xv -= pl.const.walk_speed
  end
  if btn(1) then
    pl.xv += pl.const.walk_speed
  end

  pl.xv *= pl.const.drag

  pl.yv += pl.const.gravity

  if pl.yv > pl.const.max_yv then
    pl.yv = pl.const.max_yv
  end

  if pl.jump_state == 0
    and time() - pl.last_ground_time < pl.const.coyote_time
    and btn(4)
  then
    pl.jump_state = 1

    pl.last_ground_time = -20

    pl.yv = -0.8
  end

  if pl.jump_state >= pl.const.jump.duration or ( pl.jump_state > 0 and not btn(4) ) then
    pl.yv *= pl.const.jump.end_drag
    pl.jump_state = 0
  end

  if pl.jump_state > 0 then
    pl.yv -= pl.const.jump.multiplier / pl.jump_state

    pl.jump_state += 1
  end


  for i = 1, pl.const.update_steps do
    old_x = pl.x

    pl.x += pl.xv / pl.const.update_steps

    if check_map(pl.x, pl.y, pl.width, pl.height, pl.const.map_flags.obstacle) then
      pl.x = old_x
    end
  end

  for i = 1, pl.const.update_steps do
    already_touched_bridge = check_map(pl.x, pl.y, pl.width, pl.height, pl.const.map_flags.bridge)

    old_y = pl.y

    pl.y += pl.yv / pl.const.update_steps

    if check_map(pl.x, pl.y, pl.width, pl.height, pl.const.map_flags.obstacle) then
      pl.y = old_y

      if pl.yv > 0 then
        pl.yv = 0

        pl.last_ground_time = time()
      end

      if pl.yv < 0 then
        pl.yv = 0.1
      end
    end

    if (not already_touched_bridge)
      and check_map(pl.x, pl.y, pl.width, pl.height, pl.const.map_flags.bridge)
      and pl.yv > 0
    then
      pl.y = old_y
      pl.yv = 0
      pl.last_ground_time = time()
    end
  end
end

function _draw()
  cls()
  map(0, 0, 0, 0, 128, 64)
  spr(pl.skin, pl.x, pl.y)
end

function check_map(x, y, w, h, flag)
  mx_left = x / 8
  my_top = y / 8
  mx_right = (x + w - 1) / 8
  my_bottom = (y + h - 1) / 8

  if fget( mget(mx_left, my_top), flag ) then
    return true
  end
  if fget( mget(mx_right, my_top), flag ) then
    return true
  end
  if fget( mget(mx_left, my_bottom), flag ) then
    return true
  end
  if fget( mget(mx_right, my_bottom), flag ) then
    return true
  end

  return false
end
再解釋一次座標系統
0
1
2 ...
7
15
0
15
0
1
2
3
...
地圖座標是每 8 像素為 1 單位
當像素座標 x = 12 (粉色點) 時
地圖座標為 12 / 8 = 1.5
而在綠點 (4, 12) 時,地圖座標則為 (0.5, 1.5)
CTM
CTM = Connected Textures Mod 是個 Minecraft 模組 就是連續的材質
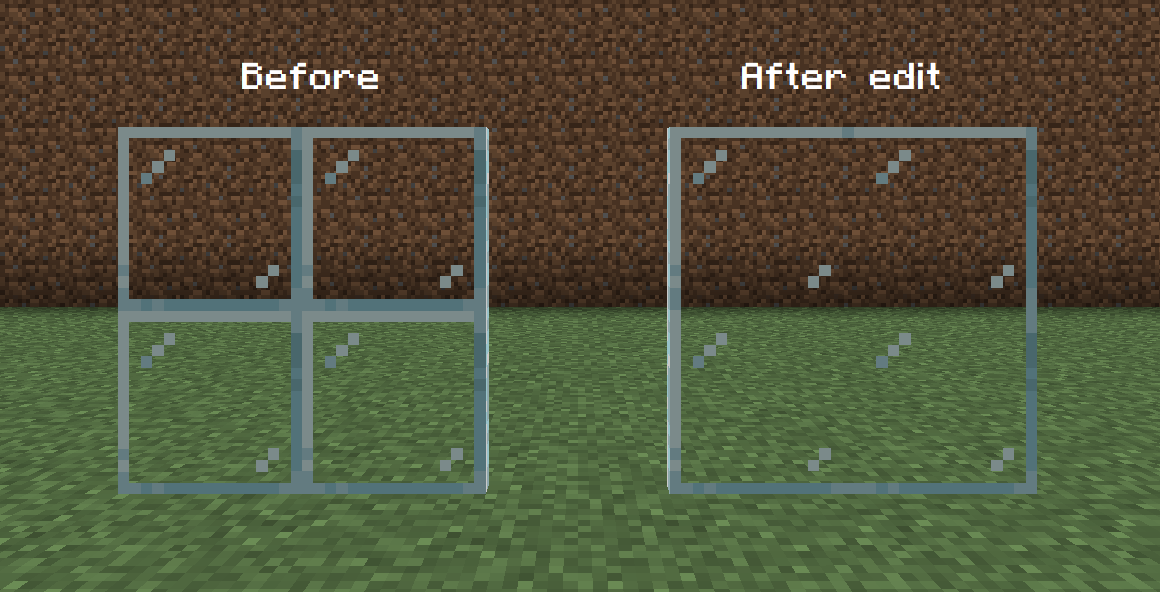
實作連續材質
稍微算一下,就會發現這些材質總共只有 46 種可能
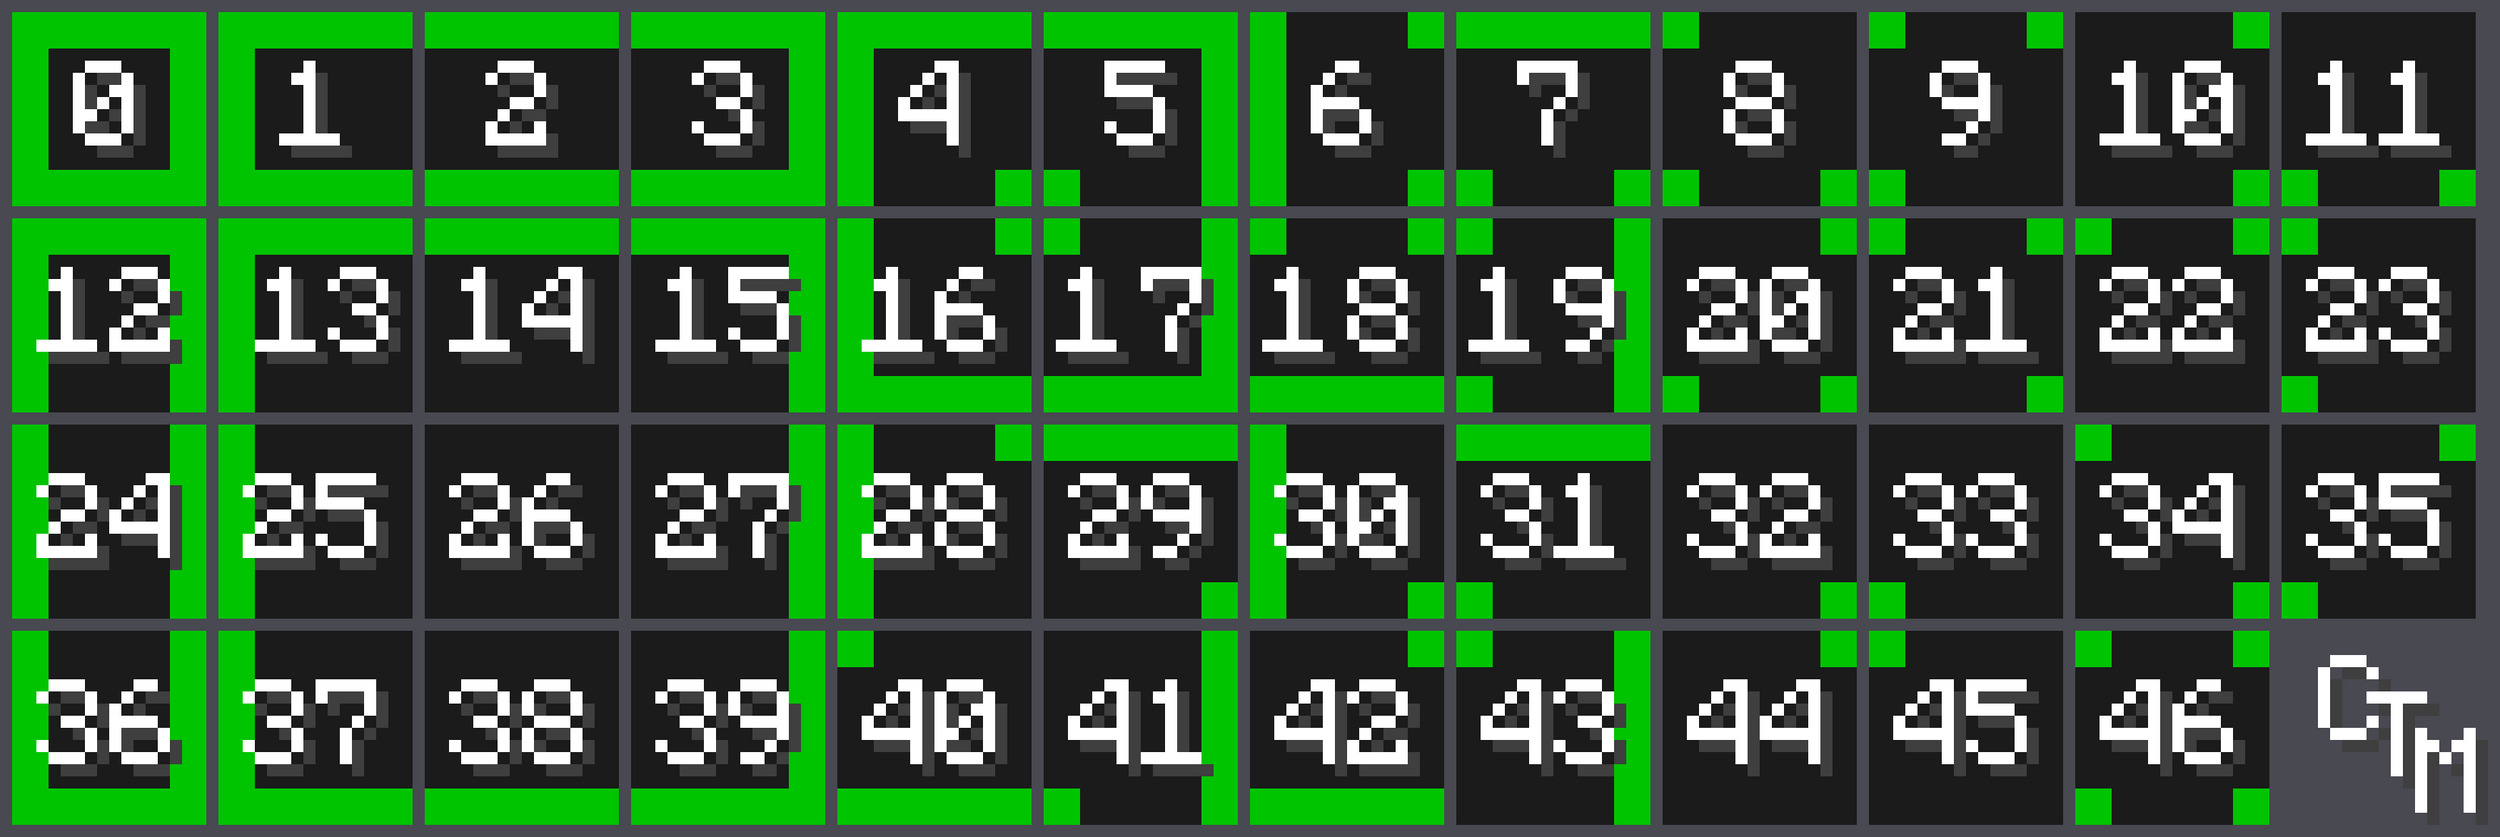
沒錯你得手畫這 46 張!
實作連續材質
稍微算一下,就會發現這些材質總共只有 46 種可能
沒錯你得手畫這 46 張!
但你畫圖的時候可以複製貼上按 R 鍵旋轉
真正需要手畫的只有 15 張,簡單的吧
Smooth Camera
就是你有一個 Camera Target 一直在玩家身上,然後真正的 Camera 去追他
-- 宣告攝影機物件
cam = {
  -- tx, ty 是目標座標
  tx = pl.x - 59,
  ty = pl.y- 59,
  -- x, y 是真正的座標
  x = pl.x - 59,
  y = pl.y - 59
}
放在 _init 最後面:
-- 攝影機的目標就是 玩家位置 + 玩家的寬度的一半 - 螢幕的一半
  cam.tx = pl.x - 59
  cam.ty = pl.y - 59
  -- 攝影機慢慢追上目標
  cam.x = cam.x + 0.3 * (cam.tx - cam.x)
  cam.y = cam.y + 0.3 * (cam.ty - cam.y)
放在 _update 最後面:
放在 _draw 最前面:
-- 使用 cam 作為攝影機座標
  camera(cam.x, cam.y)
Smooth Camera
-- 宣告攝影機物件
cam = {
  -- tx, ty 是目標座標
  tx = pl.x - 59,
  ty = pl.y- 59,
  -- x, y 是真正的座標
  x = pl.x - 59,
  y = pl.y - 59
}
放在 _init 最後面:
-- 攝影機的目標就是 玩家位置 + 玩家的寬度的一半 - 螢幕的一半
  cam.tx = pl.x - 59
  cam.ty = pl.y - 59
  -- 攝影機慢慢追上目標
  cam.x = cam.x + 0.3 * (cam.tx - cam.x)
  cam.y = cam.y + 0.3 * (cam.ty - cam.y)
放在 _update 最後面:
放在 _draw 最前面:
-- 使用 cam 作為攝影機座標
  camera(cam.x, cam.y)
但是這樣玩家會看起來一直抖動
需要平滑處理!
就是你有一個 Camera Target 一直在玩家身上,然後真正的 Camera 去追他
Smooth Camera
放在 _draw 最前面:
-- 使用 cam 作為攝影機座標
  camera(cam.x, cam.y)
但是這樣玩家會看起來一直抖動
需要平滑處理!
就是你有一個 Camera Target 一直在玩家身上,然後真正的 Camera 去追他
-- 使用 cam 作為攝影機座標
camera( flr(cam.x + 0.5), flr(cam.y + 0.5) )
Mirrored Skin
就是玩家在往左邊走的時候,應該要對稱過去,看著左邊才對
spr 函數內建就有這個功能
spr(n, x, y, [w, h], [flip_x], [flip_y])所以只要玩家初始化的時候加上 mirrored = false,
然後根據玩家的輸入改變 mirrored,往左就是 true,右則是 false
最後繪製玩家的地方改成:
spr(pl.skin, pl.x, pl.y, 1, 1, pl.mirror)
Animated Skin
如果你想要玩家動起來
你就要發揮強大的美術功力,畫幾格動畫
假設他們的 Sprite 編號是 1 ~ 10
那你可以 pl.skin = 1 + flr((time() * 8) % 10)
那個 8 調成其他數字的話會改變動畫速度
使用其他顏色
雖說 Pico-8 只有 16 種顏色
但你事實上可以從 32 種裡面選 16 種
-- lock color in editor
poke(0x5f2e, 1)
-- apoke: change palette A to B
function apoke(a, b)
  poke(0x5f10 + a, 128 + b - 16)
end
這個函數可以把第 a 個顏色換成第 b 個函數 (0 ~ 31)
Poke 就是戳,直接改記憶體裡面的東西,改掉 Pico-8 的設定
整理 Code
把玩家的部分整理成
function _init() {
  init_player()
  init_camera()
}

-- _update, _draw ...

function init_player() {
  -- ...
}

-- update_player, draw_player ...

function init_camera() {
  -- ...
}

-- ...-
init_player
-
update_player
-
draw_player
等函數
然後攝影機和其他東西也是
最後再從原本的 _init 等去呼叫他們
標題 & 破關畫面
要怎麼實作標題畫面?
首先會需要一個 scene 來區分現在的場景
例如 scene == "titlescreen" 或 scene == "playing"
然後更新時判斷:
function _update()
  if scene == "titlescreen" then
    update_titlescreen()
  end
  if scene == "playing" then
    update_player()
    update_camera()
  end
end
音效 & 音樂
那顯然也是需要一些素養

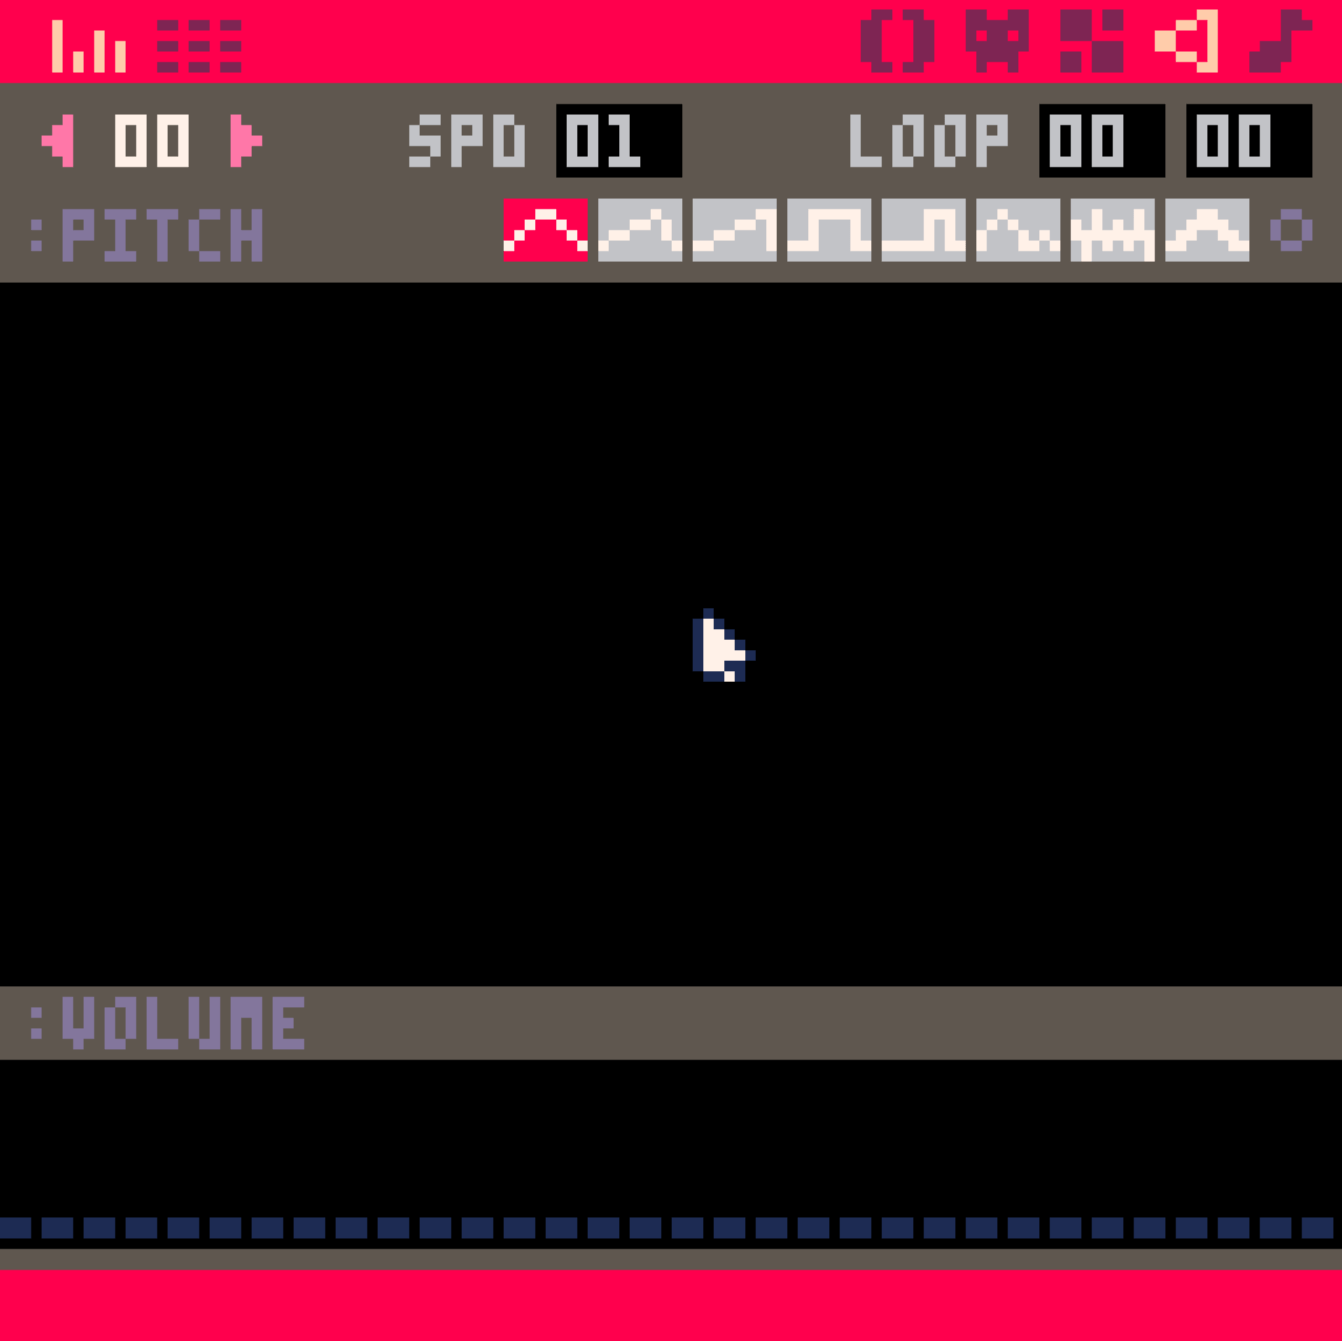
拉線條模式
符號模式
不同樂器
速度,左鍵 (,) 變慢,右鍵 (.) 變快
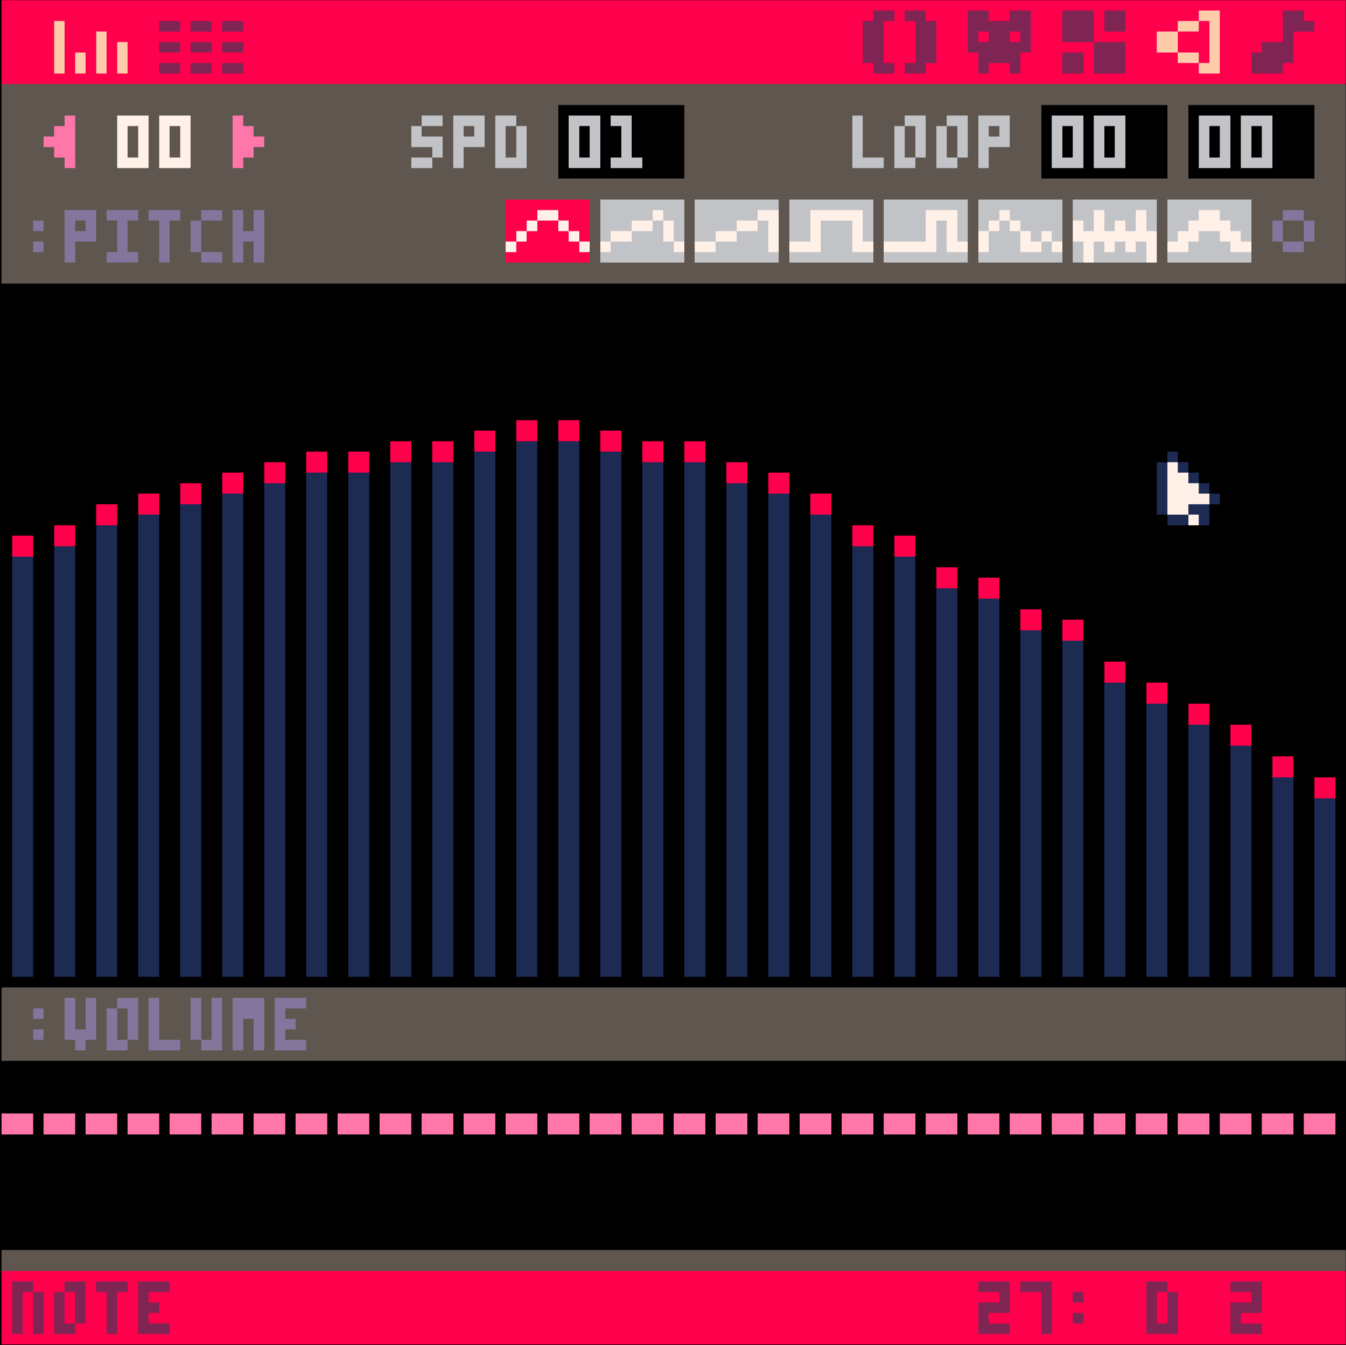
音量
要編輯的音樂片段編號
迴圈功能,不常用
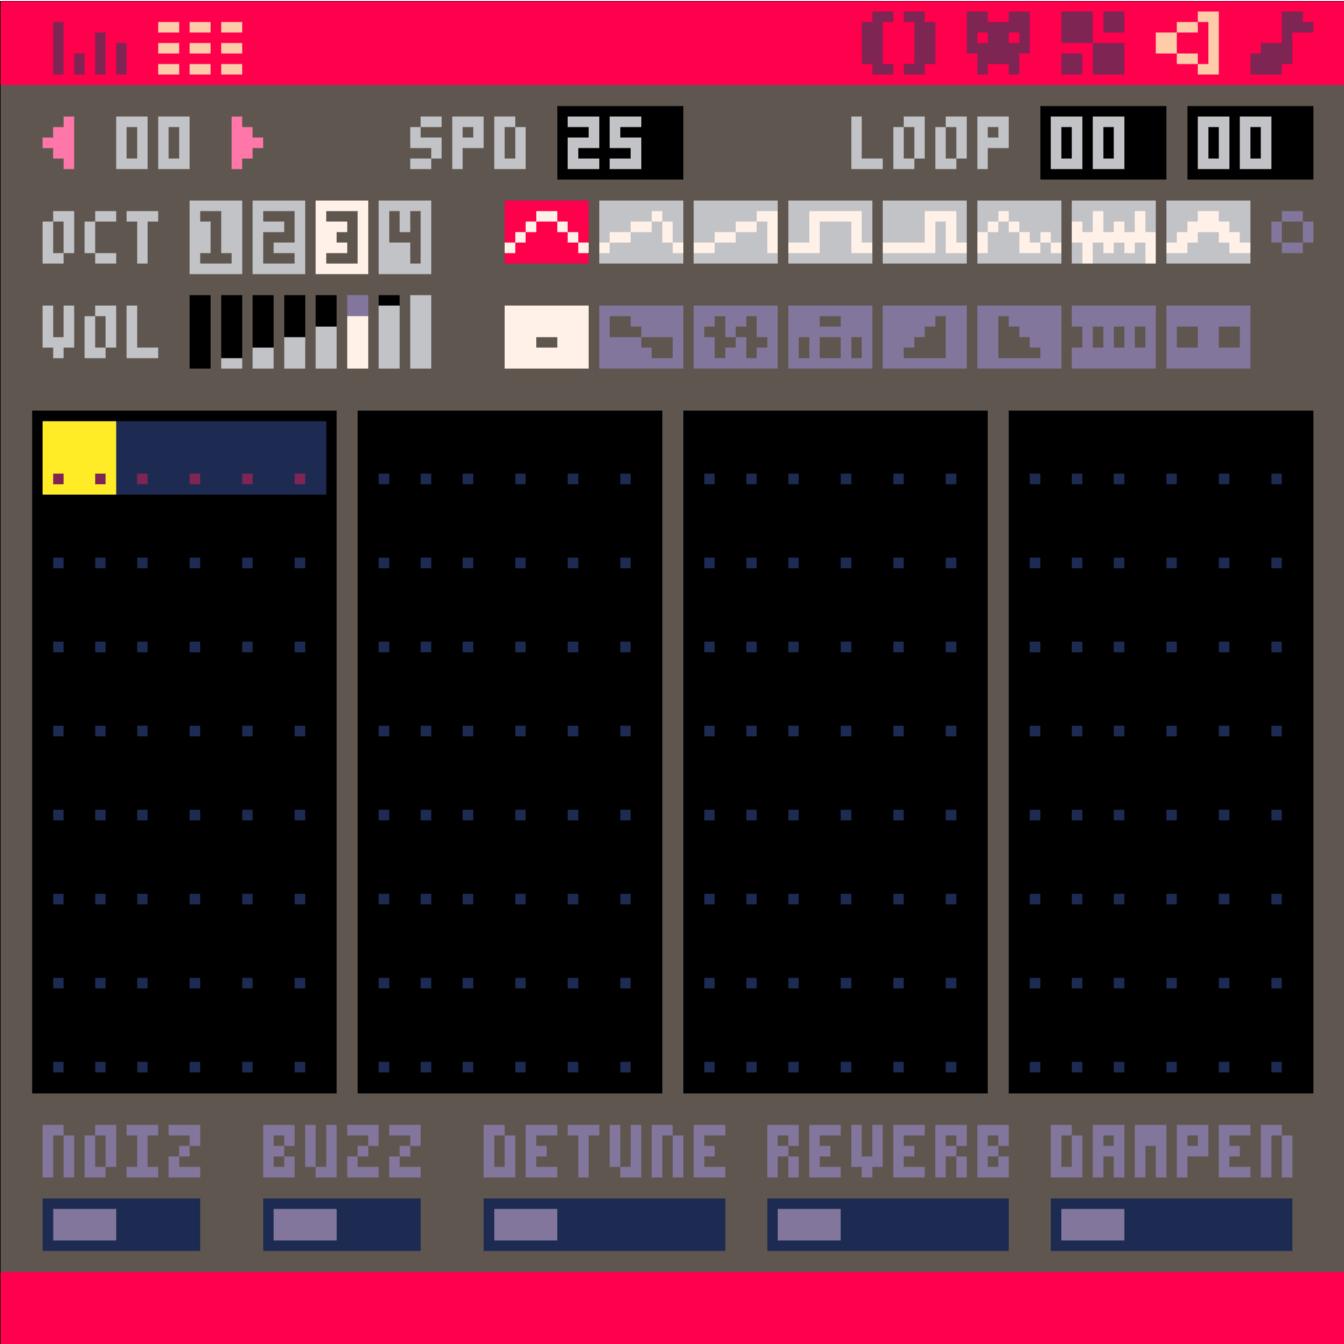
不同八度音高
音量
不同音符特效
整體特效,試試就知道了
針對要輸入的音符
不是用來改
已經輸入的
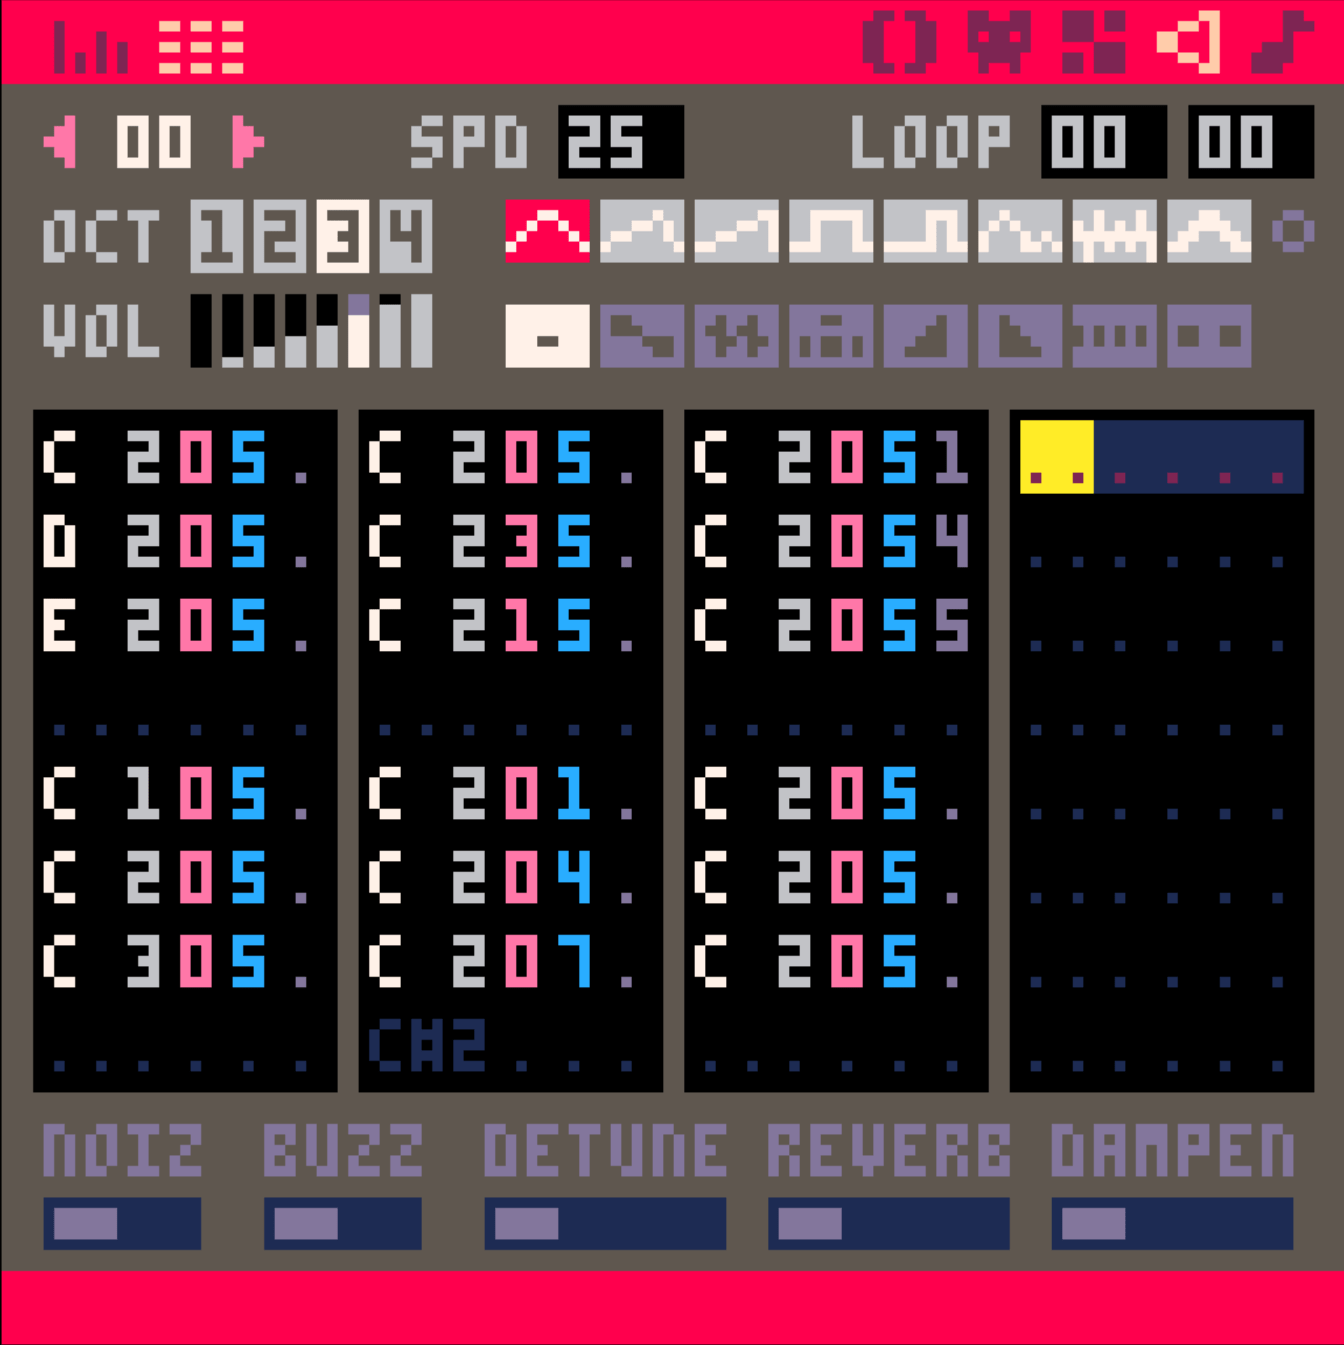
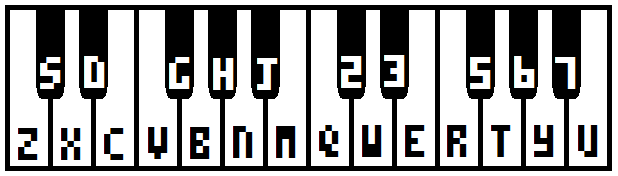
- 字母就音高
- 灰色數字是 8 度高低
- 粉色字是樂器
- 藍色字是音量
- 紫色字是效果
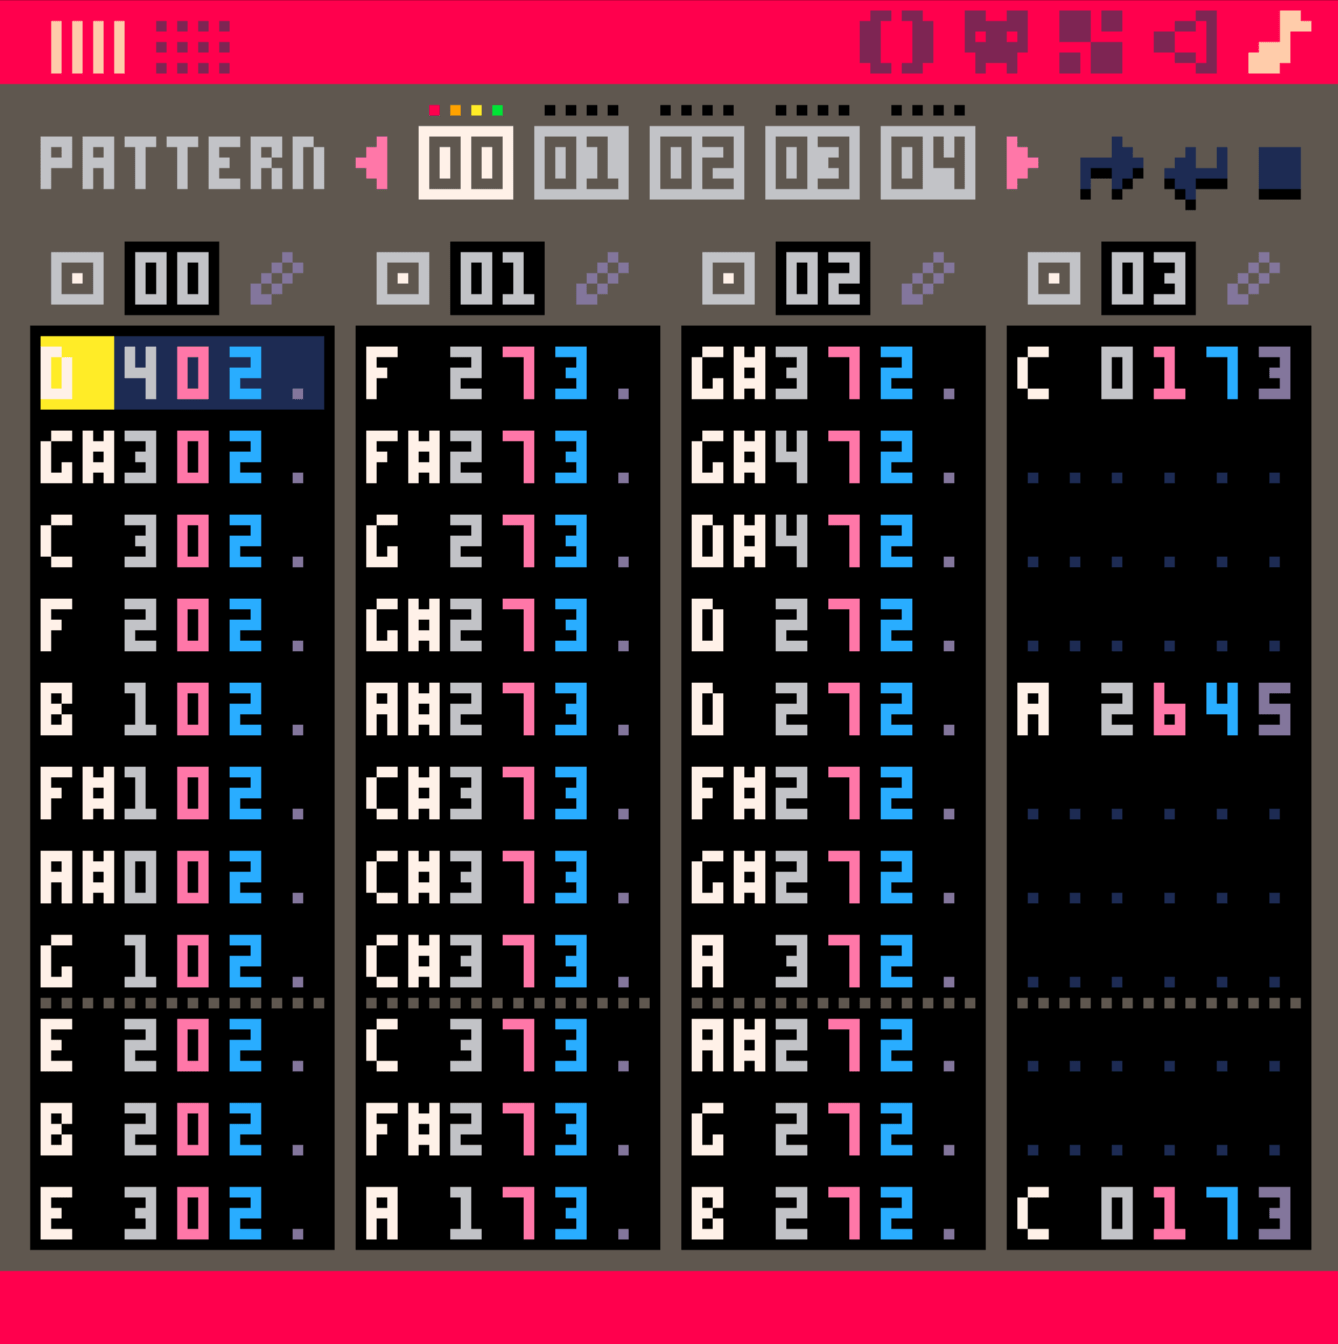
不同剛才的音樂片段
全部湊在一起
這三個分別是:
- 從此開始
- 到這邊要反覆
- 直接到這邊就停
加入遊戲中
把一段片段當作音效
sfx(音樂片段編號)播放音樂(千萬不要每一幀都使用,會爆開!)
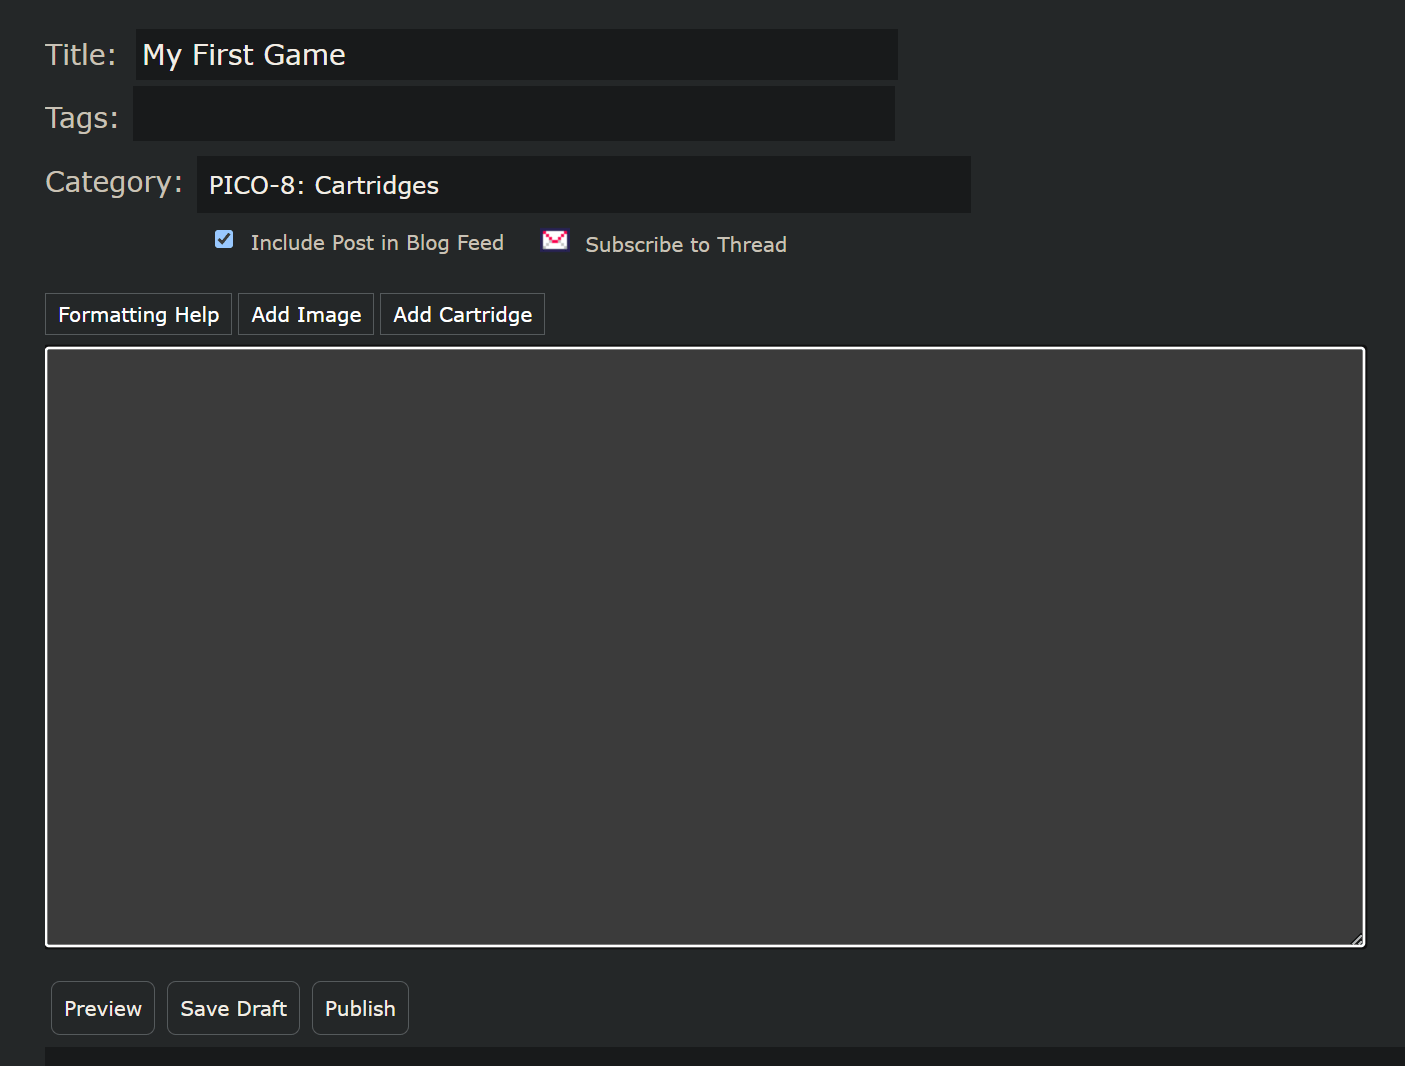
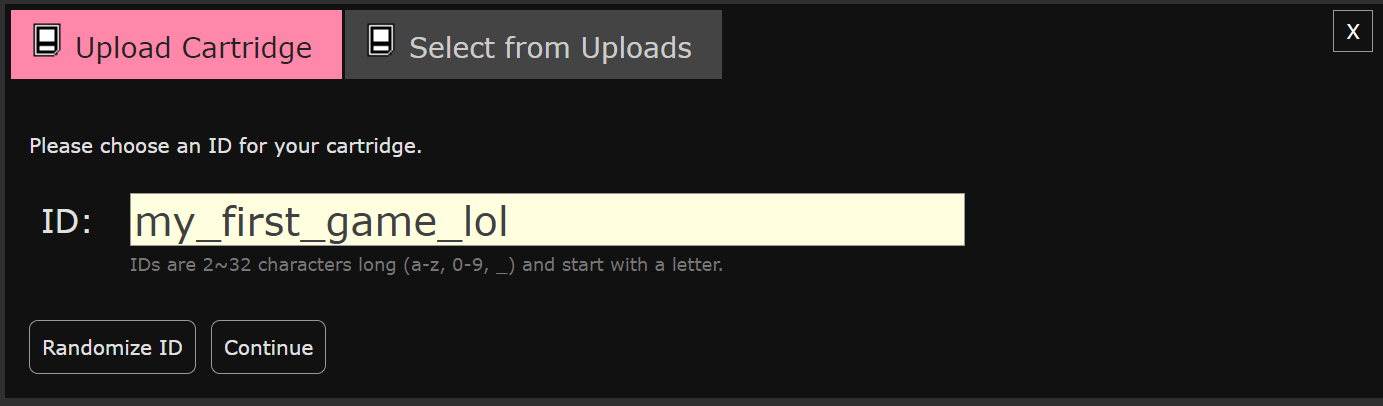
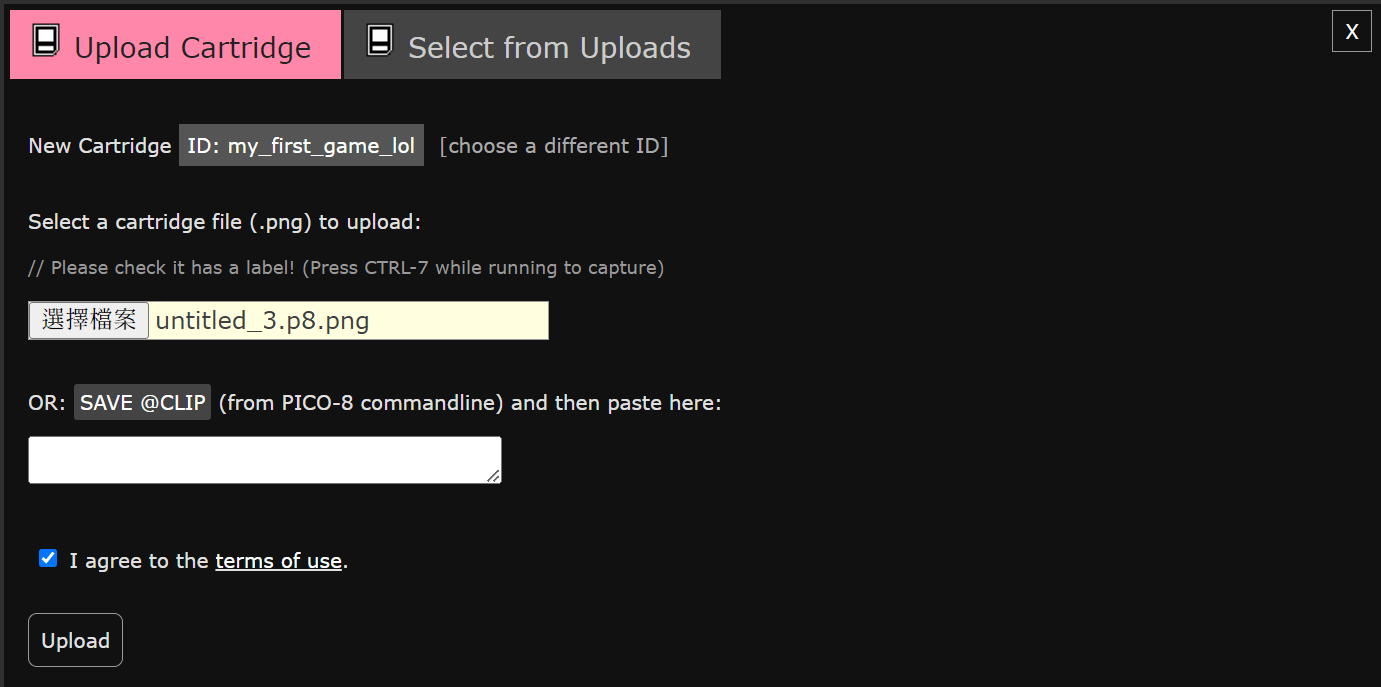
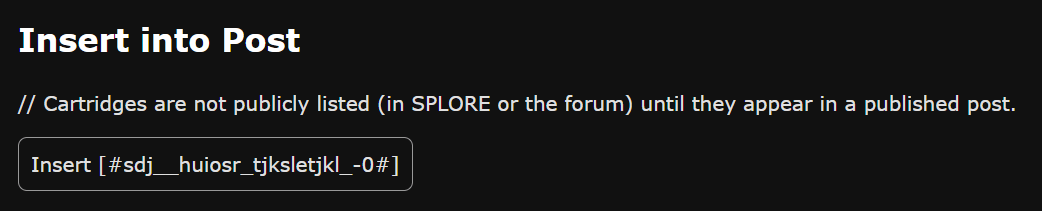
music(合成後的音樂的編號)Lexaloffle BBS
上傳你的遊戲吧

存成圖片
沒錯,你要把 Pico-8 卡帶 (.p8) 存成圖片 (.p8.png)
不過在那之前,記得先按 F7 截個代表遊戲的截圖
save mygame.p8.png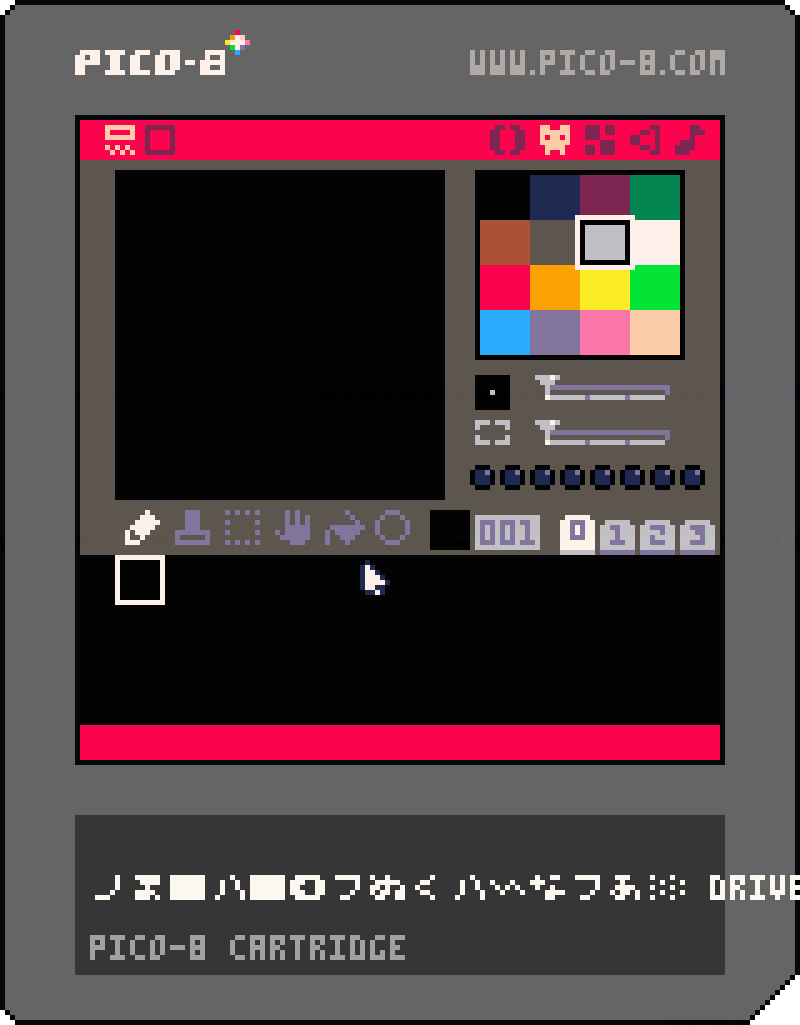
然後就可以準備上傳了!
它的運作原理是每個像素的顏色
都跟標準顏色有一點點差別
所以可以把資料存在裡面

踢墻跳
一些關於這個章節的敘述

判斷牆壁的碰撞箱
首先先新增兩個玩家的屬性
pl = {
  -- ...

  left_wall = false,
  right_wall = false
}
然後加上碰撞箱
-- 判斷牆壁
pl.left_wall = check_map(pl.x - 1, pl.y, 1, pl.height, pl.const.map_flags.obstacle)
pl.right_wall = check_map(pl.x + pl.width, pl.y, 1, pl.height, pl.const.map_flags.obstacle)
if btn(0) then
  pl.xv -= pl.const.walk_speed
  pl.mirror = true
  if pl.yv > 0 and pl.left_wall then
    pl.yv *= pl.const.wall_drag
  end
end
if btn(1) then
  pl.xv += pl.const.walk_speed
  pl.mirror = false
  if pl.yv > 0 and pl.right_wall then
    pl.yv *= pl.const.wall_drag
  end
end
如果摩擦牆壁,下落速度就會減緩
判斷牆壁的碰撞箱
if btn(0) then
  pl.xv -= pl.const.walk_speed
  pl.mirror = true
  if pl.yv > 0 and pl.left_wall then
    pl.yv *= pl.const.wall_drag
  end
end
if btn(1) then
  pl.xv += pl.const.walk_speed
  pl.mirror = false
  if pl.yv > 0 and pl.right_wall then
    pl.yv *= pl.const.wall_drag
  end
end
如果摩擦牆壁,下落速度就會減緩
首先先新增兩個玩家的屬性
pl = {
  -- ...

  left_wall = false,
  right_wall = false
}
然後加上碰撞箱
-- 判斷牆壁
pl.left_wall = check_map(pl.x - 1, pl.y, 1, pl.height, pl.const.map_flags.obstacle)
pl.right_wall = check_map(pl.x + pl.width, pl.y, 1, pl.height, pl.const.map_flags.obstacle)
踢牆跳
首先加上
pl = {
  -- ...
  wall_jump_state = 0,
  wall_jumo_direction = 1,
}
-- 踢牆跳
if
btn(4) and pl.wall_jump_state == 0
and pl.jump_state == 0 -- 判斷玩家不在地上
then
if pl.left_wall then
pl.wall_jump_state = 1
pl.wall_jump_direction = 1
end
if pl.right_wall then
pl.wall_jump_state = 1
pl.wall_jump_direction = -1
end
end
if
pl.wall_jump_state >= pl.const.jump.duration
or ( pl.wall_jump_state > 0 and not btn(4) )
then
pl.wall_jump_state = 0
end
if pl.wall_jump_state > 0 then
pl.yv = -1.4
pl.xv += 0.5 * pl.wall_jump_direction
pl.wall_jump_state += 1
end然後起跳的部分
-- _init() 是 Pico-8 在遊戲開始時會呼叫的函數
-- 裡面放要初始化的變數等等
function _init()
-- pl 變數是一個物件,代表我們的玩家
pl = {
-- x 座標、y 座標
x = 0,
y = 0,
-- x 方向速度、y 方向速度
xv = 0,
yv = 0,
-- 上次在地上的時間 & 跳躍的狀態
last_ground_time = -20,
jump_state = 0,
-- 牆壁
left_wall = false,
right_wall = false,
wall_jump_state = 0,
wall_jumo_direction = 1,
-- 圖形參數
width = 6,
height = 8,
skin = 1,
mirror = false,
-- 重生點
spawn = {
x = 12,
y = 12
},
-- 放所有會用到的常數,比較方便修改
const = {
walk_speed = 0.46,
drag = 0.7122,
wall_drag = 0.7854,
gravity = 0.1,
max_yv = 3,
coyote_time = 0.17,
jump = {
start_velocity = -0.5,
multiplier = 0.54,
end_drag = 0.6,
duration = 12
},
update_steps = 16,
map_flags = {
obstacle = 0,
bridge = 1,
spike = 2
}
}
}
-- 一開始就傳送到重生點
pl.x = pl.spawn.x
pl.y = pl.spawn.y
-- 宣告攝影機物件
cam = {
-- tx, ty 是目標座標
tx = pl.x - 59,
ty = pl.y- 59,
-- x, y 是真正的座標
x = pl.x - 59,
y = pl.y - 59
}
end
-- _update() 是 Pico-8 會在每一幀呼叫的函數
-- 每秒會執行 30 次
-- 若使用 _update60() 則是一秒 60 次
-- 不過這樣很多參數都要調整,否則會太快
function _update60()
-----------------------------------------
-- 首先先根據玩家的輸入 btn(id) 來改變速度
-----------------------------------------
-- 0 號按鈕是向左,1 號是向右
-- 根據這兩個按鈕左右移動(改變 x 方向的速度)
if pl.wall_jump_state == 0 then
if btn(0) then
pl.xv -= pl.const.walk_speed
pl.mirror = true
if pl.yv > 0 and pl.left_wall then
pl.yv *= pl.const.wall_drag
end
end
if btn(1) then
pl.xv += pl.const.walk_speed
pl.mirror = false
if pl.yv > 0 and pl.right_wall then
pl.yv *= pl.const.wall_drag
end
end
end
-- x 方向的速度要有阻力,否則會無限滑走
-- 假設阻力一直為速度的 20% 好了,那就要 * 80%
pl.xv *= pl.const.drag
-- y 方向的速度不斷遞增,畢竟有重力
pl.yv += pl.const.gravity
-- 最大下墜速度
if pl.yv > pl.const.max_yv then
pl.yv = pl.const.max_yv
end
-- 還沒開始跳 & 與上次在地上的時間差 < coyote_time & 按了 O 鍵,就開始跳
if pl.jump_state == 0
and time() - pl.last_ground_time < pl.const.coyote_time
and btn(4)
then
-- 使用 jump_state 紀錄玩家已經開始跳了
pl.jump_state = 1
-- 記得一跳就重設 last_ground_time
pl.last_ground_time = -20
-- 初始的向上速度
pl.yv = -0.8
end
-- 已經跳完了 / 根本沒按 O 就直接結束
if pl.jump_state >= pl.const.jump.duration or ( pl.jump_state > 0 and not btn(4) ) then
-- 結束跳躍時把速度減少許多,才不會有向上的慣性太大的感覺
pl.yv *= pl.const.jump.end_drag
-- 重設 jump_state
pl.jump_state = 0
end
-- 如果已經開始跳
if pl.jump_state > 0 then
-- 往上一跳一小部分
pl.yv -= pl.const.jump.multiplier / pl.jump_state
-- 遞增
pl.jump_state += 1
end
-- 踢牆跳
  if
    btn(4) and pl.wall_jump_state == 0
    and pl.jump_state == 0 -- 判斷玩家不在地上
  then
    if pl.left_wall then
      pl.wall_jump_state = 1
      pl.wall_jump_direction = 1
    end
    if pl.right_wall then
      pl.wall_jump_state = 1
      pl.wall_jump_direction = -1
    end
  end

  if
    pl.wall_jump_state >= pl.const.jump.duration
    or ( pl.wall_jump_state > 0 and not btn(4) )
  then
    pl.wall_jump_state = 0
  end

  if pl.wall_jump_state > 0 then
    pl.yv = -1.4
    pl.xv += 0.5 * pl.wall_jump_direction

    pl.wall_jump_state += 1
  end
----------------------------------
-- 接下來要根據速度來改變玩家的位置
----------------------------------
-- 加一層 for 迴圈,就可以把很快的速度切割成很多段來更新,避免穿牆
-- x 方向的更新:
for i = 1, pl.const.update_steps do
-- 把舊的位置存起來
old_x = pl.x
-- 把位置加上速度,記得 / 16 因為是切成 16 份的其中 1 份
pl.x += pl.xv / pl.const.update_steps
-- 若 check_map() 通過,就代表有被阻擋(這是自己定義的函數,在最後面)
if check_map(pl.x, pl.y, pl.width, pl.height, pl.const.map_flags.obstacle) then
-- 那麼就回去剛才儲存的舊的位置
pl.x = old_x
end
end
for i = 1, pl.const.update_steps do
-- 儲存在更新前有沒有碰到橋
already_touched_bridge = check_map(pl.x, pl.y, pl.width, pl.height, pl.const.map_flags.bridge)
old_y = pl.y
pl.y += pl.yv / pl.const.update_steps
if check_map(pl.x, pl.y, pl.width, pl.height, pl.const.map_flags.obstacle) then
pl.y = old_y
-- y 方向更新時碰到牆壁,代表是天花板或地板
-- 判斷如果 y > 0 就是往下掉,意思就是碰到的是地板
if pl.yv > 0 then
-- 那麼就重設 y 方向速度
-- 否則之後到邊緣時會因為累積的速度而忽然高速下墜
pl.yv = 0
-- 儲存現在的時間到「最後在地上的時間」
pl.last_ground_time = time()
end
-- 天花板
if pl.yv < 0 then
-- 設為一個極小,但會稍微往下掉的值
pl.yv = 0.1
end
end
-- 若是 原本沒有碰到 & 現在有碰到 & 正在往下掉
if (not already_touched_bridge)
and check_map(pl.x, pl.y, pl.width, pl.height, pl.const.map_flags.bridge)
and pl.yv > 0
then
-- 一樣是有被地板阻擋,回去原本位置並重設 yv
pl.y = old_y
pl.yv = 0
pl.last_ground_time = time()
end
end
-- 判斷牆壁
pl.left_wall = check_map(pl.x - 1, pl.y, 1, pl.height, pl.const.map_flags.obstacle)
pl.right_wall = check_map(pl.x + pl.width, pl.y, 1, pl.height, pl.const.map_flags.obstacle)
-- 判斷尖刺
if check_map(pl.x + 1, pl.y + 1, pl.width - 2, pl.height - 2, pl.const.map_flags.spike) then
-- 回到重生點
pl.x = pl.spawn.x
pl.y = pl.spawn.y
pl.xv = 0
pl.yv = 0
end
-- 玩家動畫
pl.skin = 1 + flr((time() * 10) % 4)
-- 攝影機的目標就是 玩家位置 + 玩家的寬度的一半 - 螢幕的一半
cam.tx = pl.x - 59
cam.ty = pl.y - 59
-- 攝影機慢慢追上目標
cam.x = cam.x + 0.1658 * (cam.tx - cam.x)
cam.y = cam.y + 0.1658 * (cam.ty - cam.y)
end
-- _draw() 函數是 Pico-8 會在每一幀更新後呼叫的函數
-- 這裡面寫的東西就是把更新好的東西畫出來到螢幕上
function _draw()
-- 清空畫面,把上一次的東西清除
cls()
-- 使用 cam 作為攝影機座標
camera( flr(cam.x + 0.5), flr(cam.y + 0.5) )
-- 畫出地圖
-- 用法是 map(地圖上的 x, 地圖上的 y, 要畫到螢幕上的 x, 要畫到螢幕上的 y, 地圖上的寬度, 地圖上的高度)
-- 地圖最大就是 128 * 64,所以這樣寫就會把整張地圖都畫出來
map(0, 0, 0, 0, 128, 64)
-- 畫出角色
-- 用法是 spr(拼貼圖號碼, 要畫到螢幕上的 x, 要畫到螢幕上的 y, Sprite 寬度, Sprite 高度, 水平翻轉, 垂直翻轉)
-- 所以這裡會把 2 號圖畫到 player 的位置
-- 如果你使用其他塊作為玩家皮膚,記得改這裡
spr(pl.skin, pl.x - 1, pl.y, 1, 1, pl.mirror, false)
end
-- 我們定義的函數,目的是確認玩家有沒有碰到牆壁(牆壁有 flag)
--[[
傳入值是 check_map(
x: 左上角 x 座標,
y: 左上角 y 座標,
w: 寬度,
h: 高度,
flag: 要檢查碰的 flag
)
]]
-- 所以如果呼叫 check_map(pl.x, pl.y, 8, 8, 0)
-- 就是檢查在玩家座標,大小 8 * 8 的碰撞箱有沒有碰到有 0 號 flag 的圖
-- 當然如果你不是用 0 號 flag 來當作牆壁的話,就要改掉這個 0
function check_map(x, y, w, h, flag)
---------------------------------------
-- 因為地圖座標每格是 8 像素,所以要 / 8
---------------------------------------
-- 左邊的 x
mx_left = x / 8
-- 上邊的 y
my_top = y / 8
-- 右邊的 x
mx_right = (x + w - 1) / 8
-- 底邊的 y
my_bottom = (y + h - 1) / 8
-- mget(地圖座標 x, 地圖座標 y) 會回傳該格地圖的編號
-- fget(地圖編號, flag 編號) 會回傳該編號的地圖有沒有指定的 flag
-- 所以要確認指定地方的地圖有沒有 flag 就要把這兩個串起來
-- fget( mget(x, y), flag )
-- 左上角
if fget( mget(mx_left, my_top), flag ) then
return true
end
-- 右上角
if fget( mget(mx_right, my_top), flag ) then
return true
end
-- 左下角
if fget( mget(mx_left, my_bottom), flag ) then
return true
end
-- 右下角
if fget( mget(mx_right, my_bottom), flag ) then
return true
end
-- 上面四個都沒通過,那就是沒有碰到了
return false
end
粒子效果
就是一堆圓形在亂跑

-- 一個簡單的 driver 程式

function _init()
  init_particles()
end

function _update60()
  -- 每幀隨便地新增一個隨機粒子
  add(particles, {
    x = rnd(128),
    y = rnd(128),
    size = 1 + rnd(4),
    xv = rnd(1.2) - 0.6,
    yv = rnd(1.2) - 0.6,
  })

  update_particles()
end

function _draw()
  cls(0)

  draw_particles()
end

-->8
-- particles 部分

function init_particles()
  particles = {}
end

function update_particles()
  foreach(particles, update_each_particle)
end

-- 自動傳入 p 當作 particles 中的單個粒子
function update_each_particle(p)
  p.x += p.xv
  p.y += p.yv

  p.size -= 0.1
  if p.size <= 0 then
    del(particles, p)
  end
end

function draw_particles()
  foreach(particles, draw_each_particle)
end

function draw_each_particle(p)
  circfill(p.x, p.y, p.size, 7)
end
什麼情況會用到粒子
- 起跳時
- 落地時
- 槍發射時
- 瞬間移動時
- 爆炸
- ……
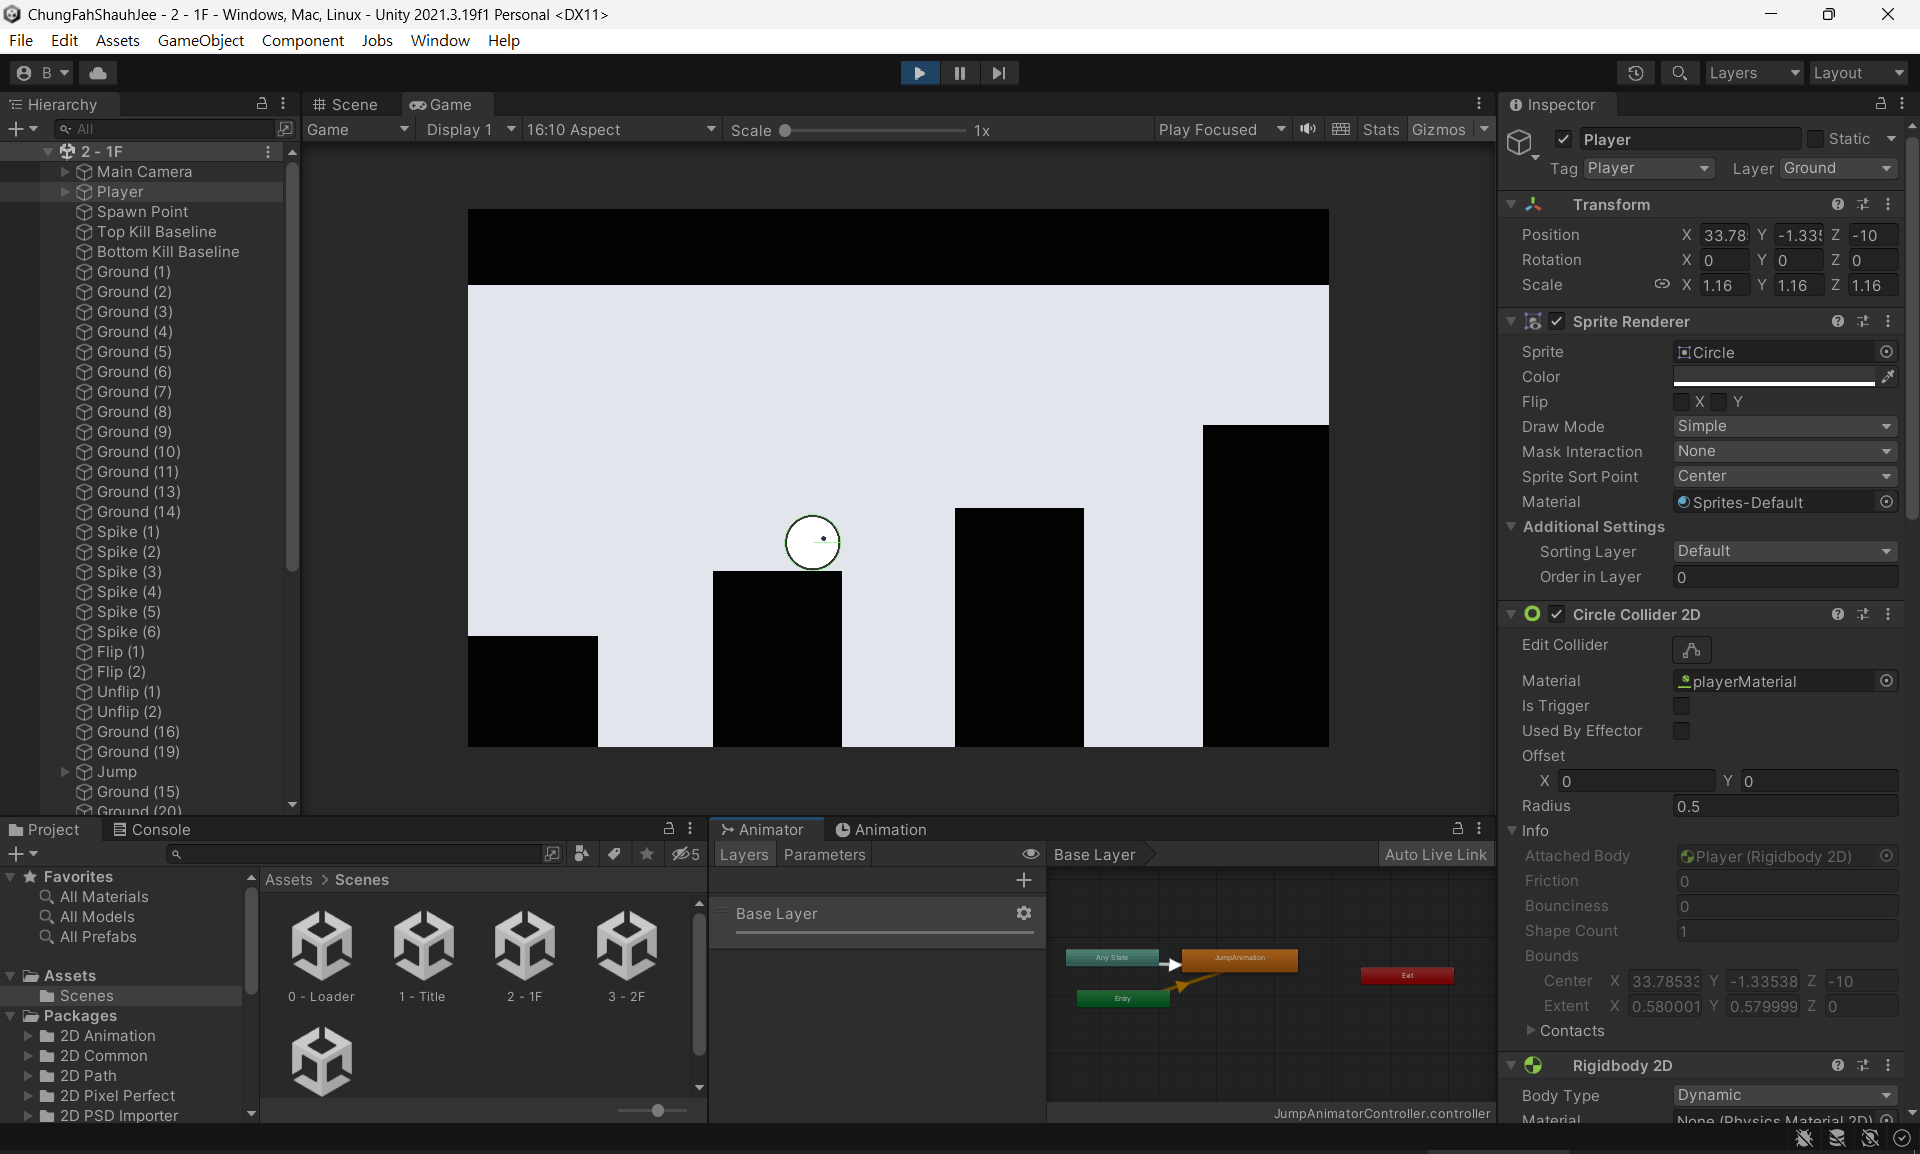
Unity...?
接下來你們要面對的東西

課程至此結束
這份簡報好像有一些小問題,真的有疑惑直接來問我啦!!
我又不會咬人 owo
課程至此結束
這份簡報好像有一些小問題,真的有疑惑直接來問我啦!!
我又不會咬人 owo
遊戲設計
By 晴☆


