Introduction to Game Development
Sunjay Varma
Link to slides:
slides.com/sunjay/learn-game-dev/fullscreen
Short URL: bit.ly/2P5lQoL
Lucio Franco
While you wait...
- Install Rust: rustup.rs
-
Install SDL2: github.com/Rust-SDL2/rust-sdl2#requirements
- You need SDL2, SDL2_Image, and SDL2_ttf
- Windows: should not need to do anything!
-
Mac: brew install sdl2 sdl2_image sdl2_ttf
Add export LIBRARY_PATH="$LIBRARY_PATH:/usr/local/lib" to ~/.bash_profile - Ubuntu: sudo apt-get install libsdl2-dev libsdl2-image-dev libsdl2-ttf-dev
-
Clone: github.com/sunjay/rust-game-dev-workshop
Go into each numbered directory and run "cargo run".
If you run into any compilation errors, please put up your hand. -
Introduce yourself to the people next to you (you will need groups of 2-4 people):
- What is your name?
- How did you start learning Rust?
- If you could have any fictional superpower, what would you choose?
Link to slides:
slides.com/sunjay/learn-game-dev/fullscreen
Short URL: bit.ly/2P5lQoL


These pictures are from ~10 years ago!
Sunjay Varma
Professional compiler enthusiast
developer
Lucio Franco
Professional .clone() caller
- Full Time Rust OSS on timberio/vector
- Core contributor to tokio/tower/hyper
- Board member of the Amethyst Foundation


Agenda
Link to slides:
slides.com/sunjay/learn-game-dev/fullscreen
Short URL: bit.ly/2P5lQoL
- Game Development Fundamentals
- Entity Component Systems
- Going Beyond This Workshop
- Survey
Logistics
Introduce yourself to the people around you
- How long have you been programming in Rust? How comfortable do you feel writing Rust?
- What are you hoping to get out of this workshop?
- If you could have any animal (real or fictional) as a pet, what would you choose? (feel free to make unrealistic assumptions)
How comfortable do you feel writing Rust code?
- Less comfortable
- Somewhat comfortable
- Very comfortable
- I write Rust in my sleep (don't tell my boss)
Who has written a game in any programming language?
Who has written a game in Rust?
Who has played video games before?
Developing Games in Rust
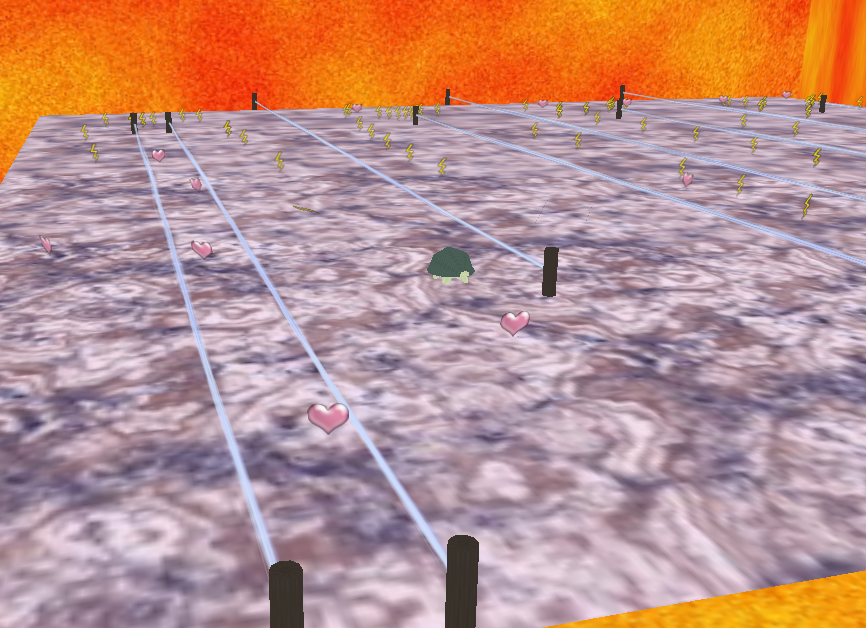
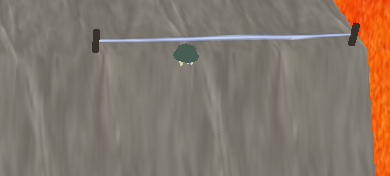
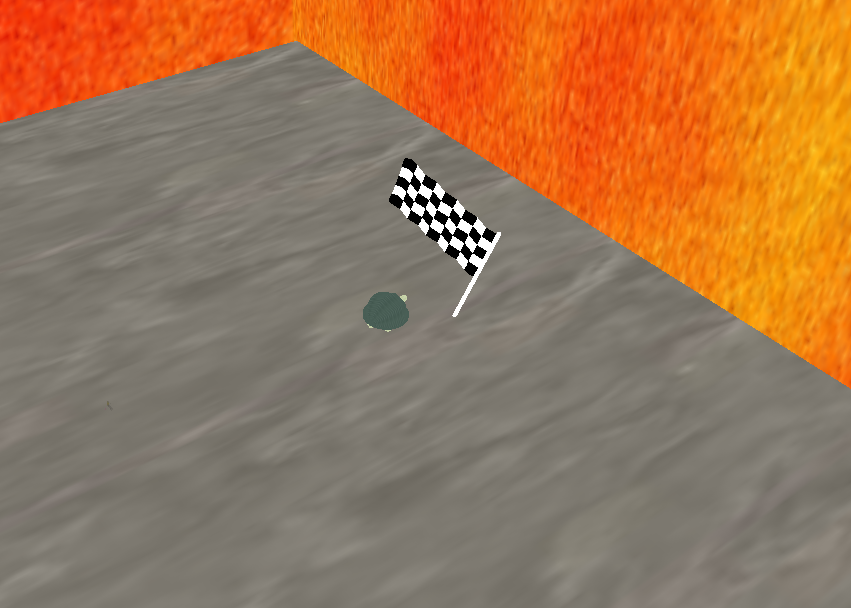
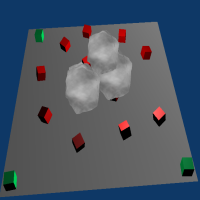
Our Workshop
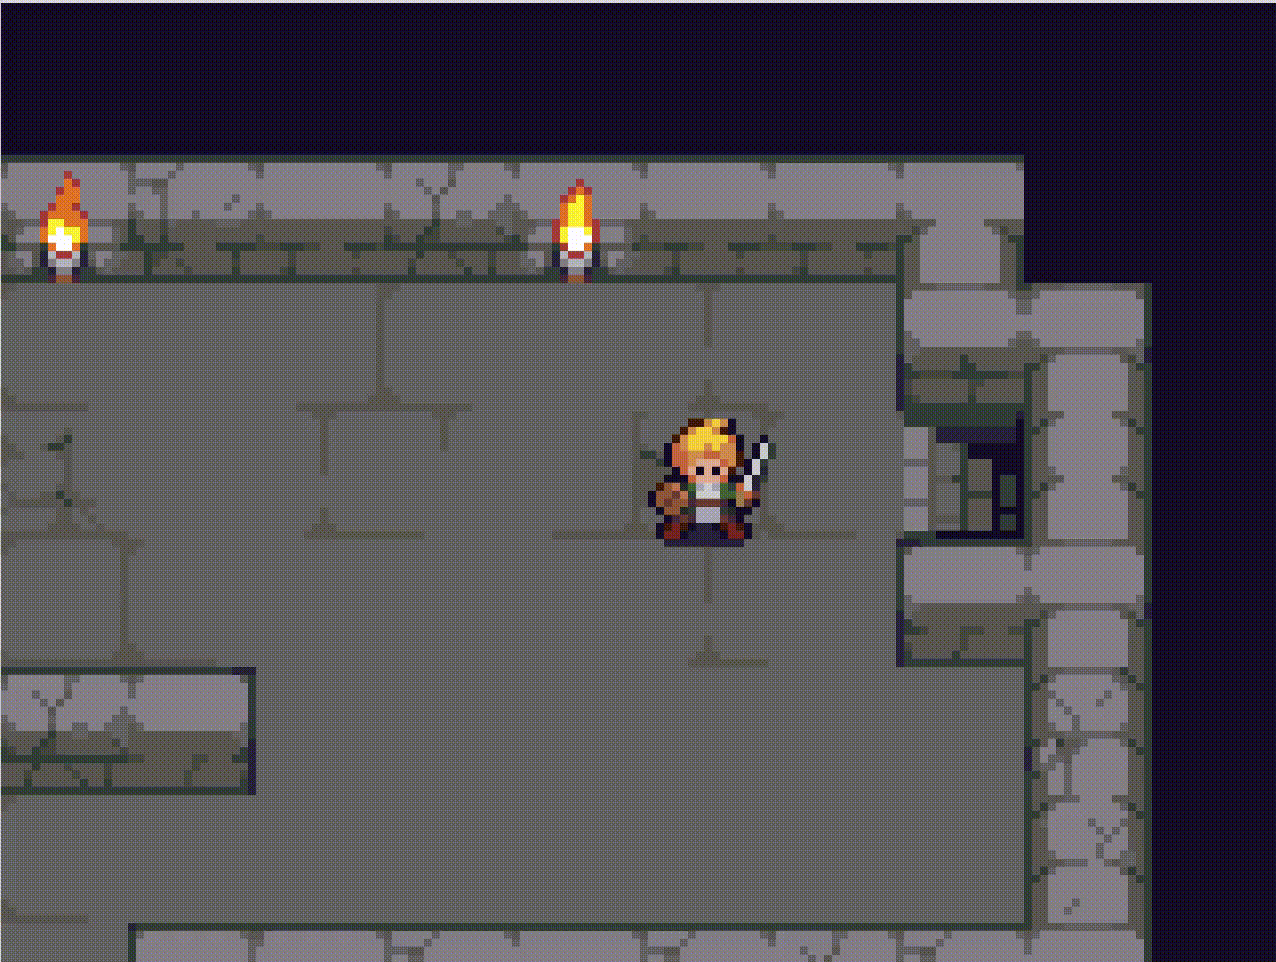
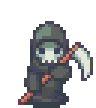
- Goal: Practice game development fundamentals by implementing key parts of the game shown below.
- Learn about the specs Entity-Component-System (ECS)
If you haven't already, clone this repo:
Game Development Fundamentals
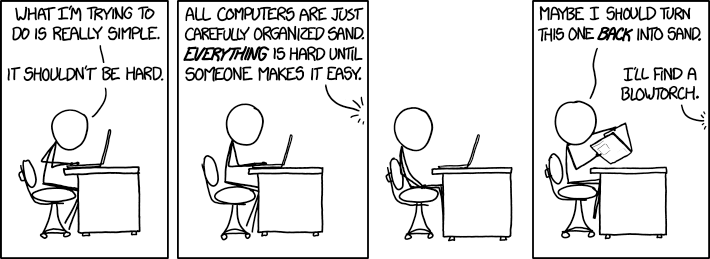
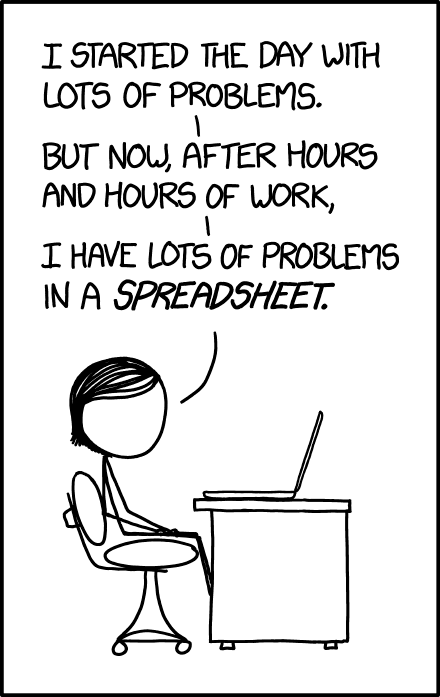
Image: xkcd.com/1349
What is a game?
- A game is a normal program like anything else you have written before
- It has input and output
- Examples of input: keyboard, mouse, game controller, touch screen, accelerometer, etc.
- Examples of output: text on the screen, 2D/3D graphics, VR, AR, etc.
The Game Loop
// Create a window, initialize game state, etc.
initialize();

// Run forever (or until the user exits)
loop {
  // Handle ALL the events that are available
  // **right now**, or just keep going
  handleEvents();

  // Update the state of players, enemies, etc.
  update();

  // Draw the entire current state of the game
  render();

  // Ensure that 1 second is always 1 second
  // regardless of the speed of the processor
  time_management();
}

// Save game state, clean up temporary files, etc.
cleanup();
Terminology
- Event (noun) - something that happened (e.g. mouse click, key pressed/released, timer elapsed, file changed, etc.)
- Game State (noun) - the data in your game and the variables that store it
- Render (verb) - to draw something, usually on the screen
- Texture (noun) - an image, but can be something more general (e.g. a function with signature fn(Point) -> Color)
SDL2 Event API
-
Event enum - defines the various types of input events that can occur
- EventPump - the struct responsible for giving us access to all the events available right now
SDL2 Event API
'running:
loop {
    for event in event_pump.poll_iter() {
        match event {
            // Quit the game if the window is closed or if the escape key is pressed
            Event::Quit {..} |
            Event::KeyDown { keycode: Some(Keycode::Escape), .. } => {
                break 'running
            },
            Event::KeyDown { keycode: Some(Keycode::Up), repeat: false, .. } => {
                println!("The up arrow key pressed down!");
            },
            Event::KeyUp { keycode: Some(Keycode::Up), repeat: false, .. } => {
                println!("The up arrow key released!");
            },
            _ => {},
        }
    }

    // Update, render, etc.
}
Exercise 1
Fill in the event handling section of the game loop. You will need to use methods on the Player struct. One of the cases is already filled out for you. When you are finished, you should be able to completely control the player's movement. The player should move in the direction of the arrow key you hold down and stop when you release the key.
Relevant Files:
- 0-with-ecs/src/main.rs
- 0-with-ecs/src/player.rs
Make sure you resolve all of the TODO(EX#1) comments.
Bounding Boxes
Basic Collision Detection
let player_bounds = Rect::new(0, 0, 5, 5);
let enemy_bounds = Rect::new(1, 1, 7, 6);
println!("{:?}", player_bounds.intersection(enemy_bounds));
Intersection
No Intersection
distance = speed * time
pixels = (pixels / μs) * μs
If you walk at a speed of 5 miles per hour for 2 hours, you will walk 10 miles.
Exercise 2
With the people sitting around you, go through the update method in the Player struct line by line and convince each other that the implementation is correct. You may ignore the code that has to do with the "frame" and "frame_timer" fields since that code has to do with animations. Make sure everyone understands the entire method and everything that is going on.
Relevant Files:
- 0-with-ecs/src/player.rs
Spritesheets
Sprite/Frame
Animation
Looks like walking
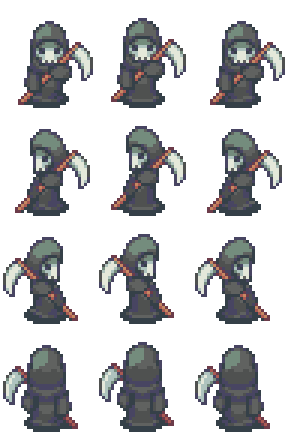
Down
Left
Right
Up
Frame 0
Frame 1
Frame 2
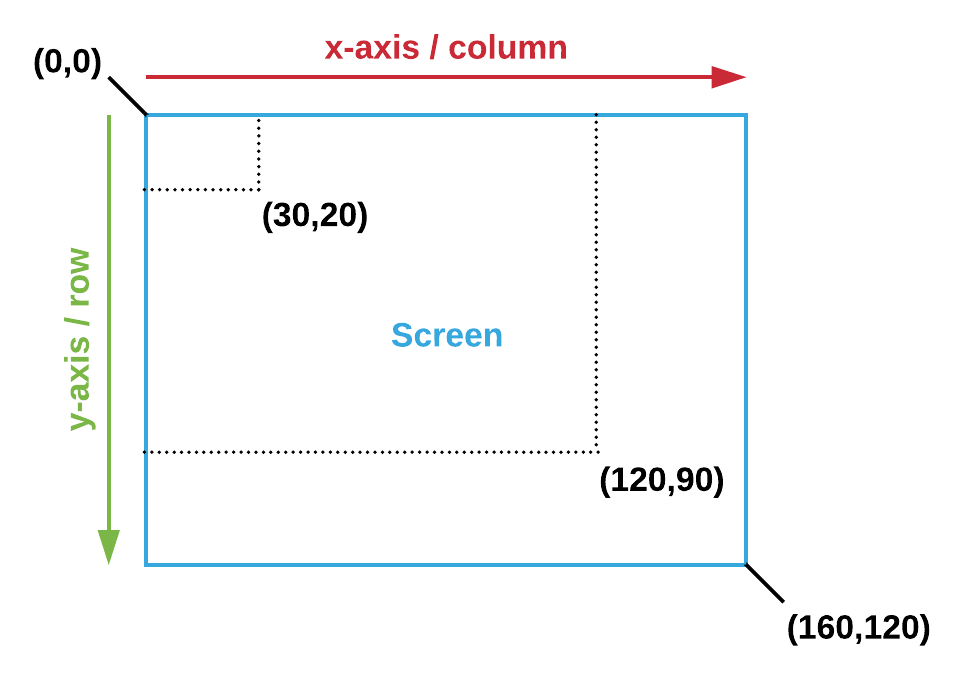
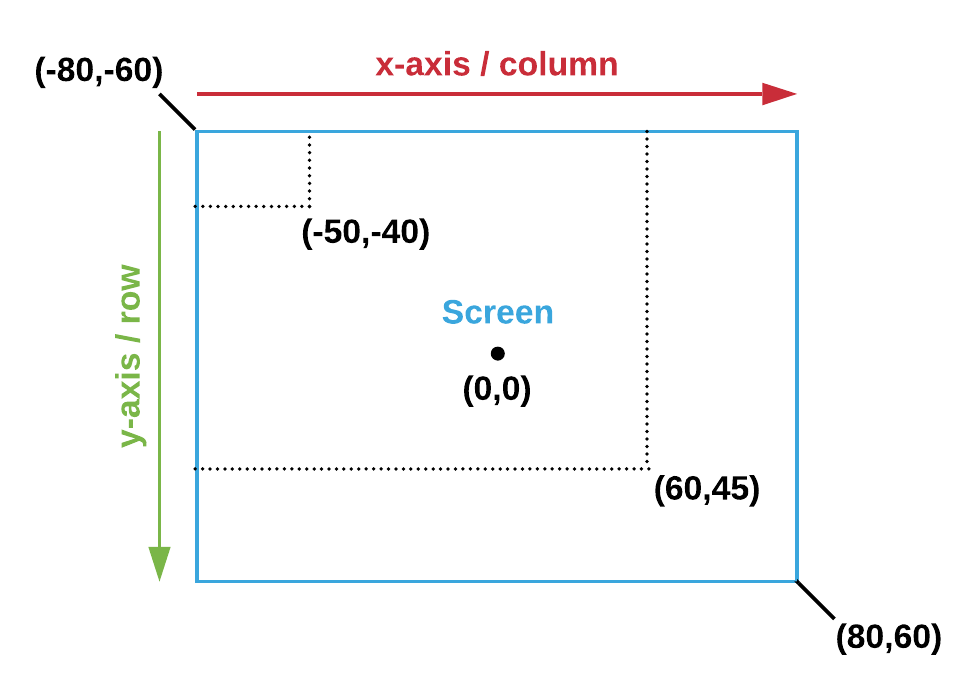
Screen Coordinates
World Coordinates
- Use coordinate systems to abstract away details like the window size, the rendering engine, and so on
- The main idea: define how positions and sizes in your game map to the other coordinate systems (e.g. the screen)
Coordinate Systems
cargo doc --open
SDL2 Canvas API
-
Canvas struct - provides an API for drawing in 2D
-
WindowCanvas type - alias for Canvas<Window>
-
clear() - clears the screen so you can draw from a blank state
-
fill_rect() - fills in a rectangular area of the screen
-
set_draw_color() - sets the color used to clear the screen or draw rectangles, lines, etc.
-
present() - puts everything you've drawn on the screen
-
-
Texture struct - represents an image
-
texture_creator - method on Canvas for fetching the TextureCreator struct
-
Exercise 3
- Measure the size of the goal sprite
- Convert from world coordinates to screen coordinates
- Pass the appropriate arguments to the copy() method to draw the goal on the screen
Relevant Files:
- 0-with-ecs/src/goal.rs
Make sure you resolve all of the TODO(EX#3) comments.
Game Development Fundamentals
- Game loop
- Event handling
- Update
- Render
- Sprites/Spritesheets/Animations
- Coordinate Systems
- Bounding boxes
- Collision Detection
Entity-Component-Systems
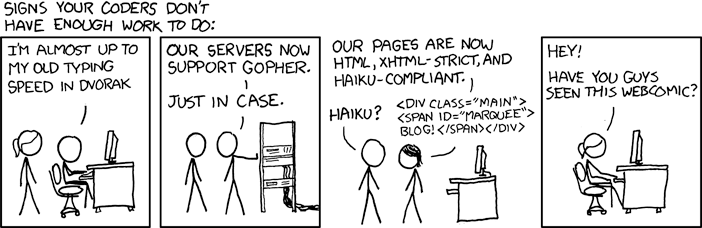
All of us in this workshop right now
Image source: xkcd.com/1906/ XKCD "Making Progress"
Entity-Component-Systems
(in one slide)
| ID | Position | Velocity | Sprite | Animation |
|---|---|---|---|---|
| 0 | (3,-4) | 1 Up | 0 | frame 1 |
| 1 | (-17,8) | -1 Left | 1 | |
| 2 | (-1,0) | 0 Right | ||
| ... | ... | ... | ... | ... |
Entities
Components
Created before game loop starts
Systems
Physics
Animator
Game AI
Keyboard
Called during "update" step
Each system processes only the columns it needs
Passed in
Updated
Executes in parallel
The specs World API
-
World struct - A container for all the data in our game
- WorldExt trait - adds specs-specific methods to World (e.g. new, create_entity, etc.)
- EntityBuilder struct - allows you to add components to a created entity
- The setup stage - used to initialize the storage for all components that are used in at least one system
use specs::{World, WorldExt, Builder};

let mut World = World::new();
dispatcher.setup(&mut world);

world.create_entity()
    .with(Player::Hero)
    .with(Position {x: 32, y: 21})
    .with(Velocity {x: -1, y: 0})
    .with(Health(32))
    .build();
Defining Components
- Component trait - defines the method for storing the component
- Any struct or enum can be a component
- Different storage types have different performance characteristics
- Reminder: component storages much be registered or setup before use
use specs::{Component, VecStorage};

#[derive(Component)]
#[storage(VecStorage)]
struct Position {
    x: i32,
    y: i32,
}

#[derive(Component)]
#[storage(VecStorage)]
struct Health(u32);

#[derive(Component)]
#[storage(VecStorage)]
enum Player {
    Hero,
    Sidekick,
}
Exercise 4
Create entities and components for the randomly generated enemies. When you start, there should only be a player and the goal on the screen. The player won't move yet (see the next exercise). Once this exercise is complete, the enemies will show up in random positions on the screen but they will not move (also a future exercise).
Relevant Files:
- 1-with-ecs/src/main.rs
Make sure you resolve all of the TODO(EX#4) comments.
Resources
- Systems have no input or output (other than components)
- Resources give us a way to pass data into and out of systems without having to put data into components unnecessarily
- Rule of thumb: if the data is associated with an entity, it is a component. Otherwise, it is a resource.
- Resources are the global variables of the ECS world
- Alternatives: pass a channel (e.g. crossbeam channel) or some shared memory (e.g. Mutex, RwLock, etc.) to the system when you create it
-
Resources in specs: world.insert, Read, Write,
ReadExpect, WriteExpect
Exercise 5
Use a resource to pass input to the Keyboard system. The resource you need to use is already defined in resources.rs. You will need to modify the event handling step of the game loop to send the appropriate value (or no value) to the system. When you are done, the player should move in response to pressing the arrow keys.
Relevant Files:
- 1-with-ecs/src/main.rs
- 1-with-ecs/src/systems/keyboard.rs
- 1-with-ecs/src/resources.rs
Make sure you resolve all of the TODO(EX#5) comments.
Systems, System Data & Dispatcher
use specs::{System, SystemData, WriteStorage, Join, World, prelude::ResourceId};

pub struct AI;

#[derive(SystemData)]
pub struct AIData<'a> {
    enemies: WriteStorage<'a, Enemy>,
    velocities: WriteStorage<'a, Velocity>,
}

impl<'a> System<'a> for AI {
    type SystemData = AIData<'a>;

    fn run(&mut self, data: Self::SystemData) {
        let AIData {mut enemies, mut velocities} = data;
        // TODO
    }
}

fn main() {
    let mut dispatcher = DispatcherBuilder::new()
        .with(systems::Keyboard, "Keyboard", &[])
        .with(systems::Movement {world_bounds}, "Movement", &["Keyboard"])
        .with(systems::WinLoseChecker, "WinLoseChecker", &["Movement"])
        .with(systems::Animator, "Animator", &["Keyboard"])
        .build();
}
System Data & Join
pub struct WinLoseChecker;

#[derive(SystemData)]
pub struct WinLoseCheckerData<'a> {
    players: ReadStorage<'a, Player>,
    enemies: ReadStorage<'a, Enemy>,
    bounding_boxes: ReadStorage<'a, BoundingBox>,
    game_status: WriteExpect<'a, GameStatus>,
}

impl<'a> System<'a> for WinLoseChecker {
    type SystemData = WinLoseCheckerData<'a>;
    fn run(&mut self, data: Self::SystemData) {
        let WinLoseCheckerData {players, enemies, goals, bounding_boxes, mut game_status} = data;

        for (_, BoundingBox(player_bounds)) in (&players, &bounding_boxes).join() {
            for (_, &BoundingBox(enemy_bounds)) in (&enemies, &bounding_boxes).join() {
                // If the player collides with any enemies, they lose
                if player_bounds.has_intersection(enemy_bounds) {
                    *game_status = GameStatus::Lose;
                    return;
                }
            }

            // ...
        }
    }
}
Relationships Between Systems
Keyboard
AI
Movement
Animator
WinLoseChecker
Renderer
This System Runs Before
A
This System Runs After
B
Legend
The Dispatcher struct
Exercise 6
Allow enemies to move on their own by implementing the AI system based on enemy.rs. You will need to add the system to the dispatcher, determine the system data you need, and use the Join trait. Once you are done, the enemies will move on their own and the entire game should be completely playable.
Relevant Files:
- 1-with-ecs/src/systems/ai.rs
- 1-with-ecs/src/main.rs
Make sure you resolve all of the TODO(EX#6) comments.
Why ECS?
Bonus Exercises
Image source: xkcd.com/554
These exercises are for when you finish early and need something to do
Bonus Exercises
There are bonus exercises in the code labelled with "BONUS". The next few slides provide even more bonus exercises in case you finish the ones below.
There is far less detail for these exercises. Please ask for help if anything is unclear or if you get stuck.
-
Bonus 1: (1-with-ecs) Implement the Renderer struct. Use the render method from the Player struct to start.
-
Bonus 2: (1-with-ecs) Implement the Keyboard system. Use the resource from one of the exercises to set the direction of the Player.
- Bonus 3: (1-with-ecs) Implement the Animator system.
Bonus Exercises
Please ask for help if anything is unclear about the exercises or if you get stuck.
- Remove the calls to "setup" in main.rs and look at the panic that occurs
- Remove all of the systems from the dispatcher and look at the panic that occurs
- For any single component, try making a system with multiple write storages, or one read and one write storage. Look at the panic that occurs.
- Make the game more interesting by using the tree sprites in the assets directory to add obstacles (need collision detection + need to avoid generating trees on top of other things)
- Continued on next slide...
Bonus Exercises
Please ask for help if anything is unclear about the exercises or if you get stuck.
- Make the enemies more interesting by allowing them to "seek" the player if the player is close enough and even jump at them with increased speed (hint: add an enum to the Enemy component to represent the enemy's current state: seeking, attacking, idle, etc.)
- Instead of immediately quitting the game and printing something out, stop all action and put some text on the screen that says "You Win" or "You Lose" depending on the game status (hint: add the "ttf" feature to SDL2 in Cargo.toml and look at the examples in the sdl2 repo)
- Continued on next slide...
Bonus Exercises
Please ask for help if anything is unclear about the exercises or if you get stuck.
- Add a keyboard shortcut for resetting the game (e.g. press "r" to randomly generate a new game)
- Instead of dying immediately, use one of the hit animations in the bardo spritesheet to freeze the player for a second. Let them be hit 3 times before losing.
- Add a "Heads Up Display" (HUD) to the game to show the number of lives left (find a heart icon online)
- Resolve some of the limitations of the game as it is currently programmed: github.com/sunjay/rust-game-dev-workshop/tree/solutions#limitations
WE DID IT!!!

Summary
- Game loops
- Event handling
- Update
- Render
- Sprites/Spritesheets/Animations
- Coordinate systems
- Bounding boxes
- Collision Detection
- Entity-Component-Systems (ECS)
- Entities, Components, Systems, Dispatchers, Resources
- and more!
Where do we go from here?
Game Milestones
- open a window
- render/draw an image
- draw a character
- move the character around
- animate the character's movement
- and so on....
Resources
- Examples: look for an "examples" folder in the Rust crate that you're using
- Documentation: look on docs.rs or see if they have a link in their README or on crates.io
- Ask in the users forum: users.rust-lang.org
Other Game Engines
- Amethyst
- Piston
- ggez
- tetra
- For even more resources: arewegameyet.com
Get Involved!
For further help on your game:
Rust Users Forum: users.rust-lang.org
Follow us on Twitter:
twitter.com/sunjay03
twitter.com/lucio_d_franco
Link to slides:
slides.com/sunjay/learn-game-dev/fullscreen
Short URL: bit.ly/2P5lQoL
Introduction to Game Development - 3 hrs
By Sunjay Varma


