Discord Bot
PY 小社課 12 / 4, 11
講師: 蘇西
Discord
Applications
Setup
Events
Deploy the Bot
Commands
Discord Bot
Discord 誕生於西元 2015 年,一開始是為了遊戲玩家而設計的免費網路即時通話軟體,經過多年來的發展,現今教育人士、學生、商業人士等等各式各樣的人都有在使用 Discord 作為辦公討論的工具。
Discord Bot 在 Discord 中扮演一個非常重要的角色,Bot 是機器人的意思,能夠自動化地幫助伺服器管理員執行繁忙瑣碎的任務,例如:歡迎新成員、自動分發身分組、點播音樂、管理伺服器秩序等等功能,最重要的是每位 Discord 使用者都能免費打造屬於自己獨一無二的機器人。
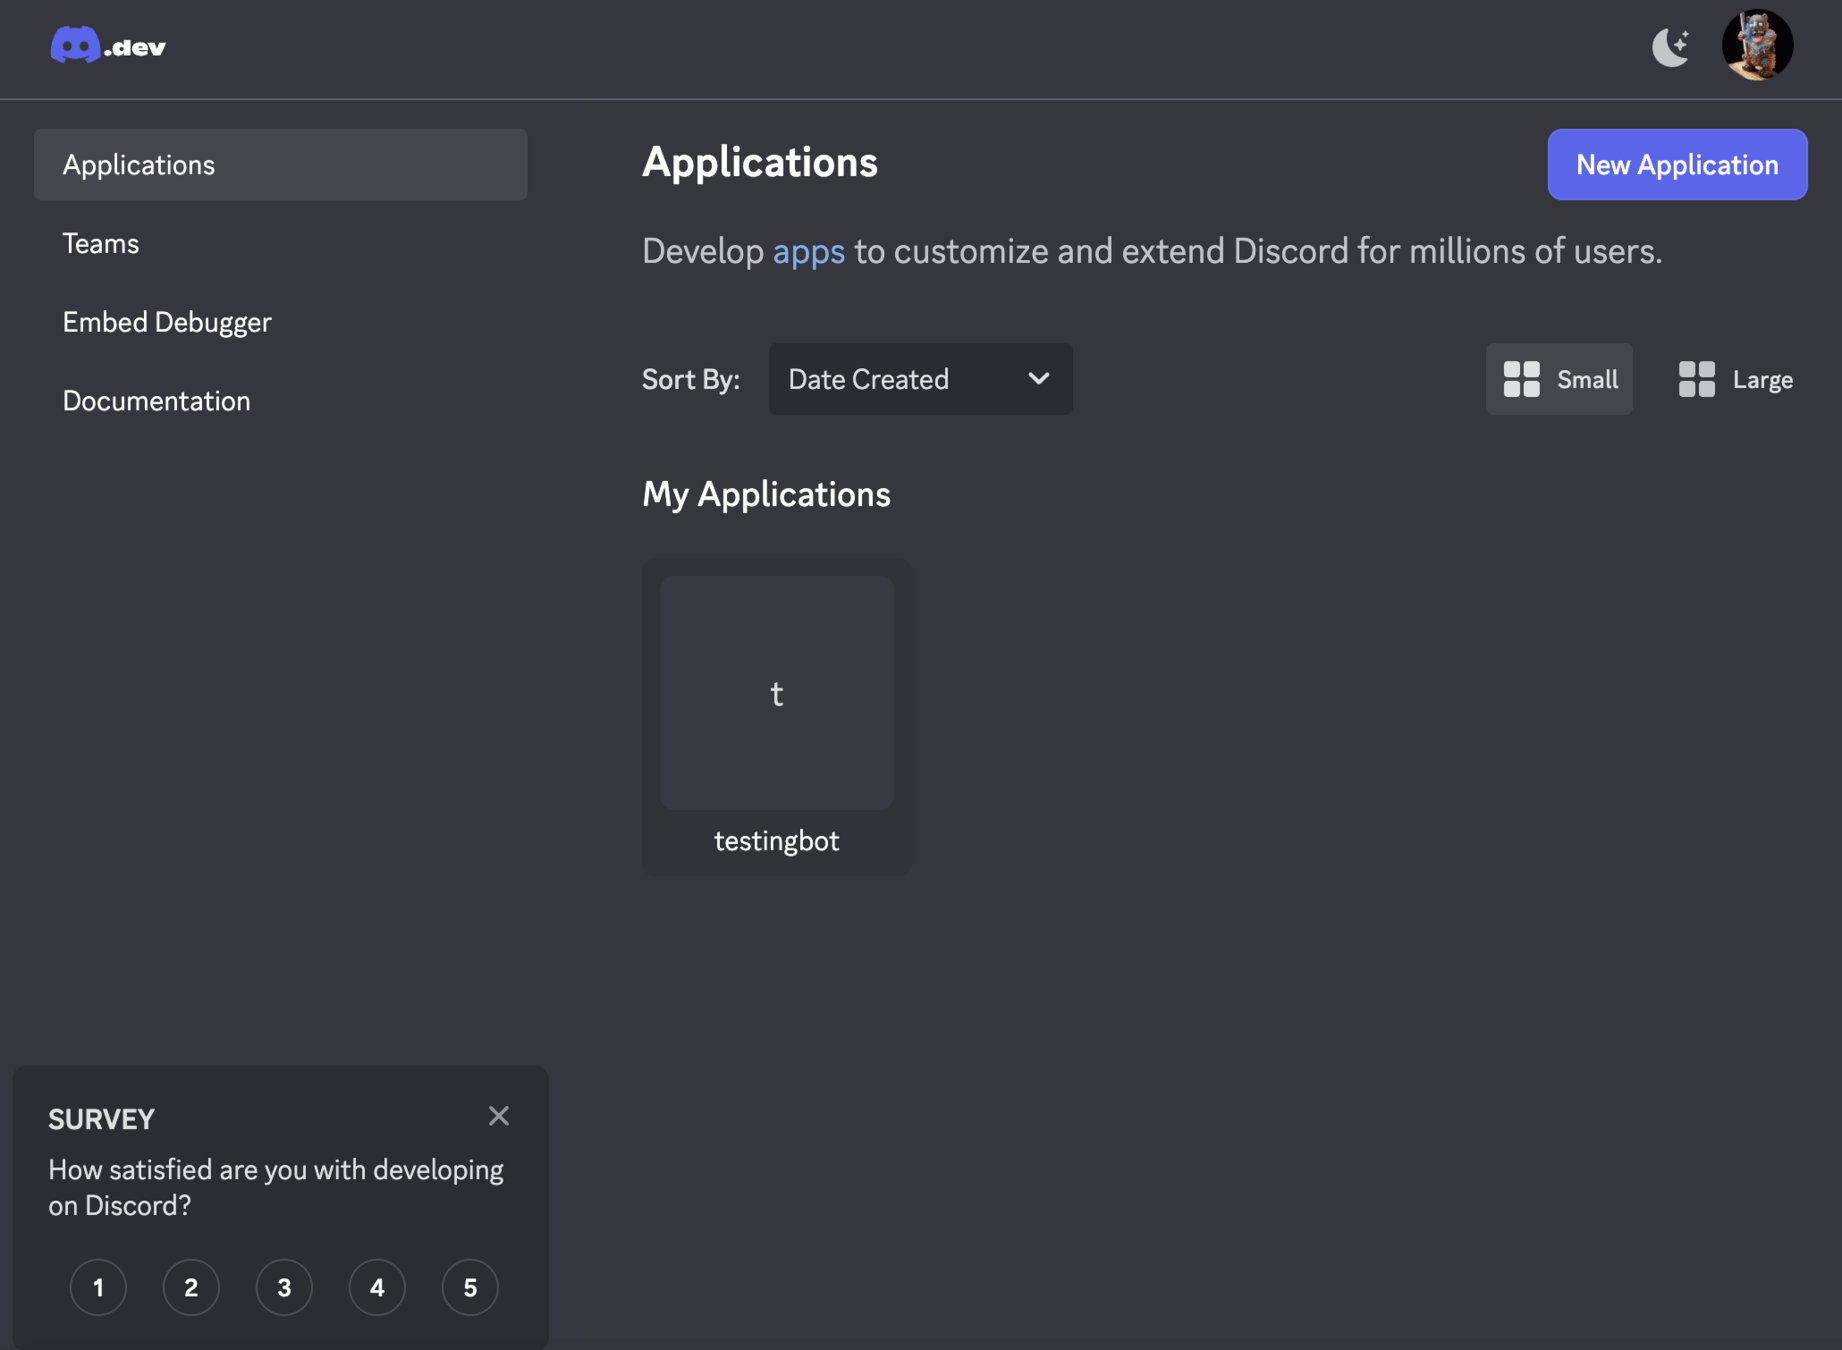
Discord Applications
沒伺服器的可以先建自己的伺服器
Discord 開發者專區
點選
Discord 開發者專區
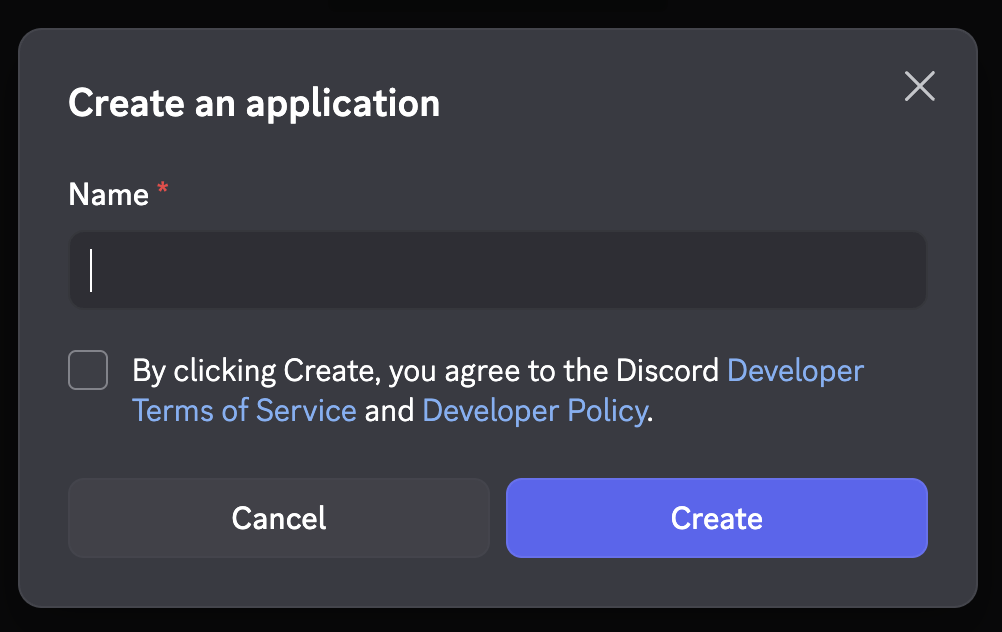
幫機器人取名字
Discord 開發者專區
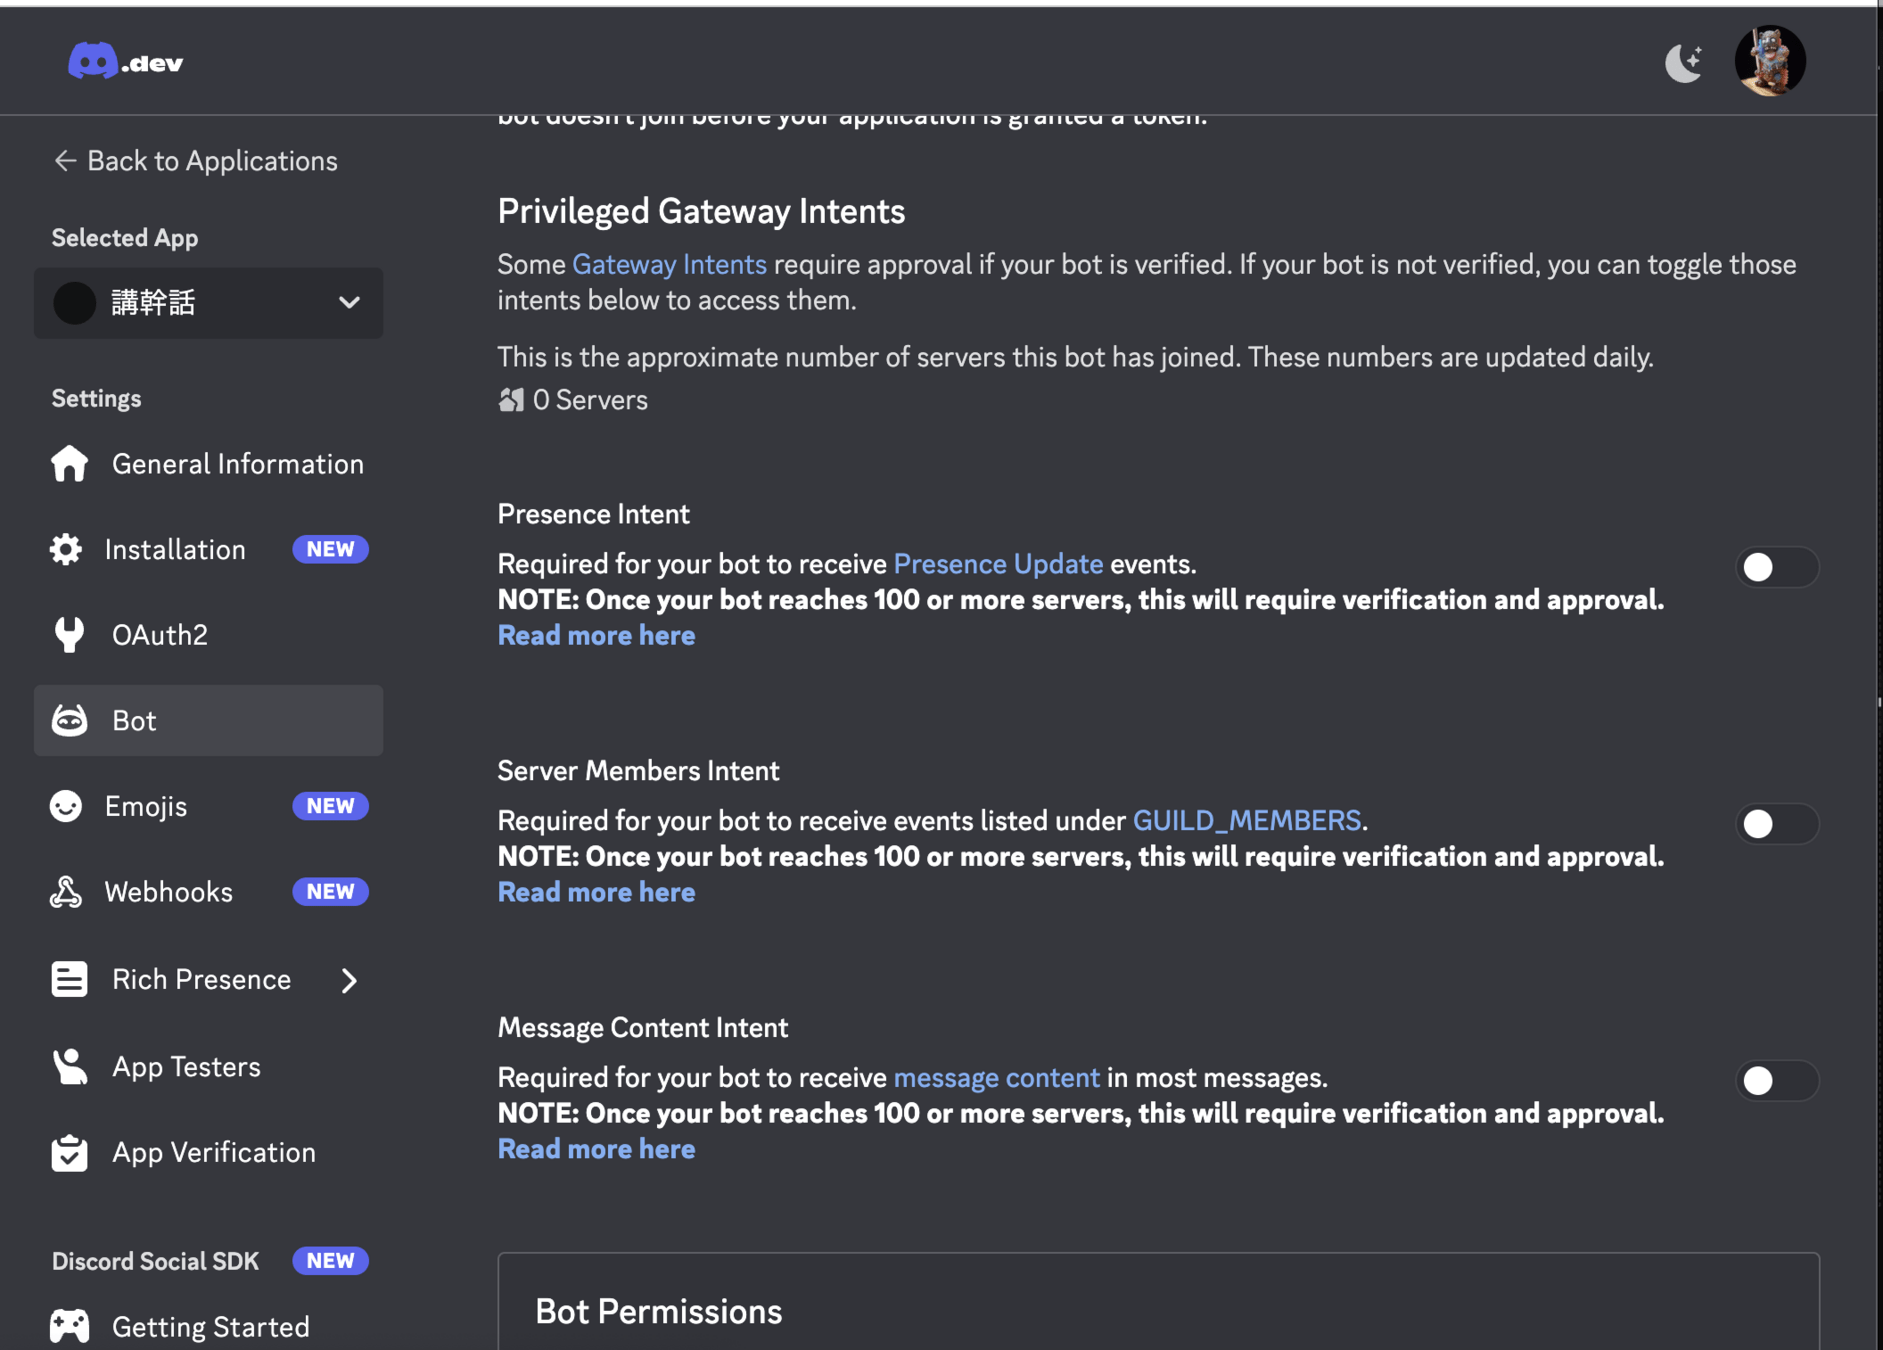
左邊選單 Bot -> Priviliged Gateway Intents 三個權限可以全開
Discord 開發者專區
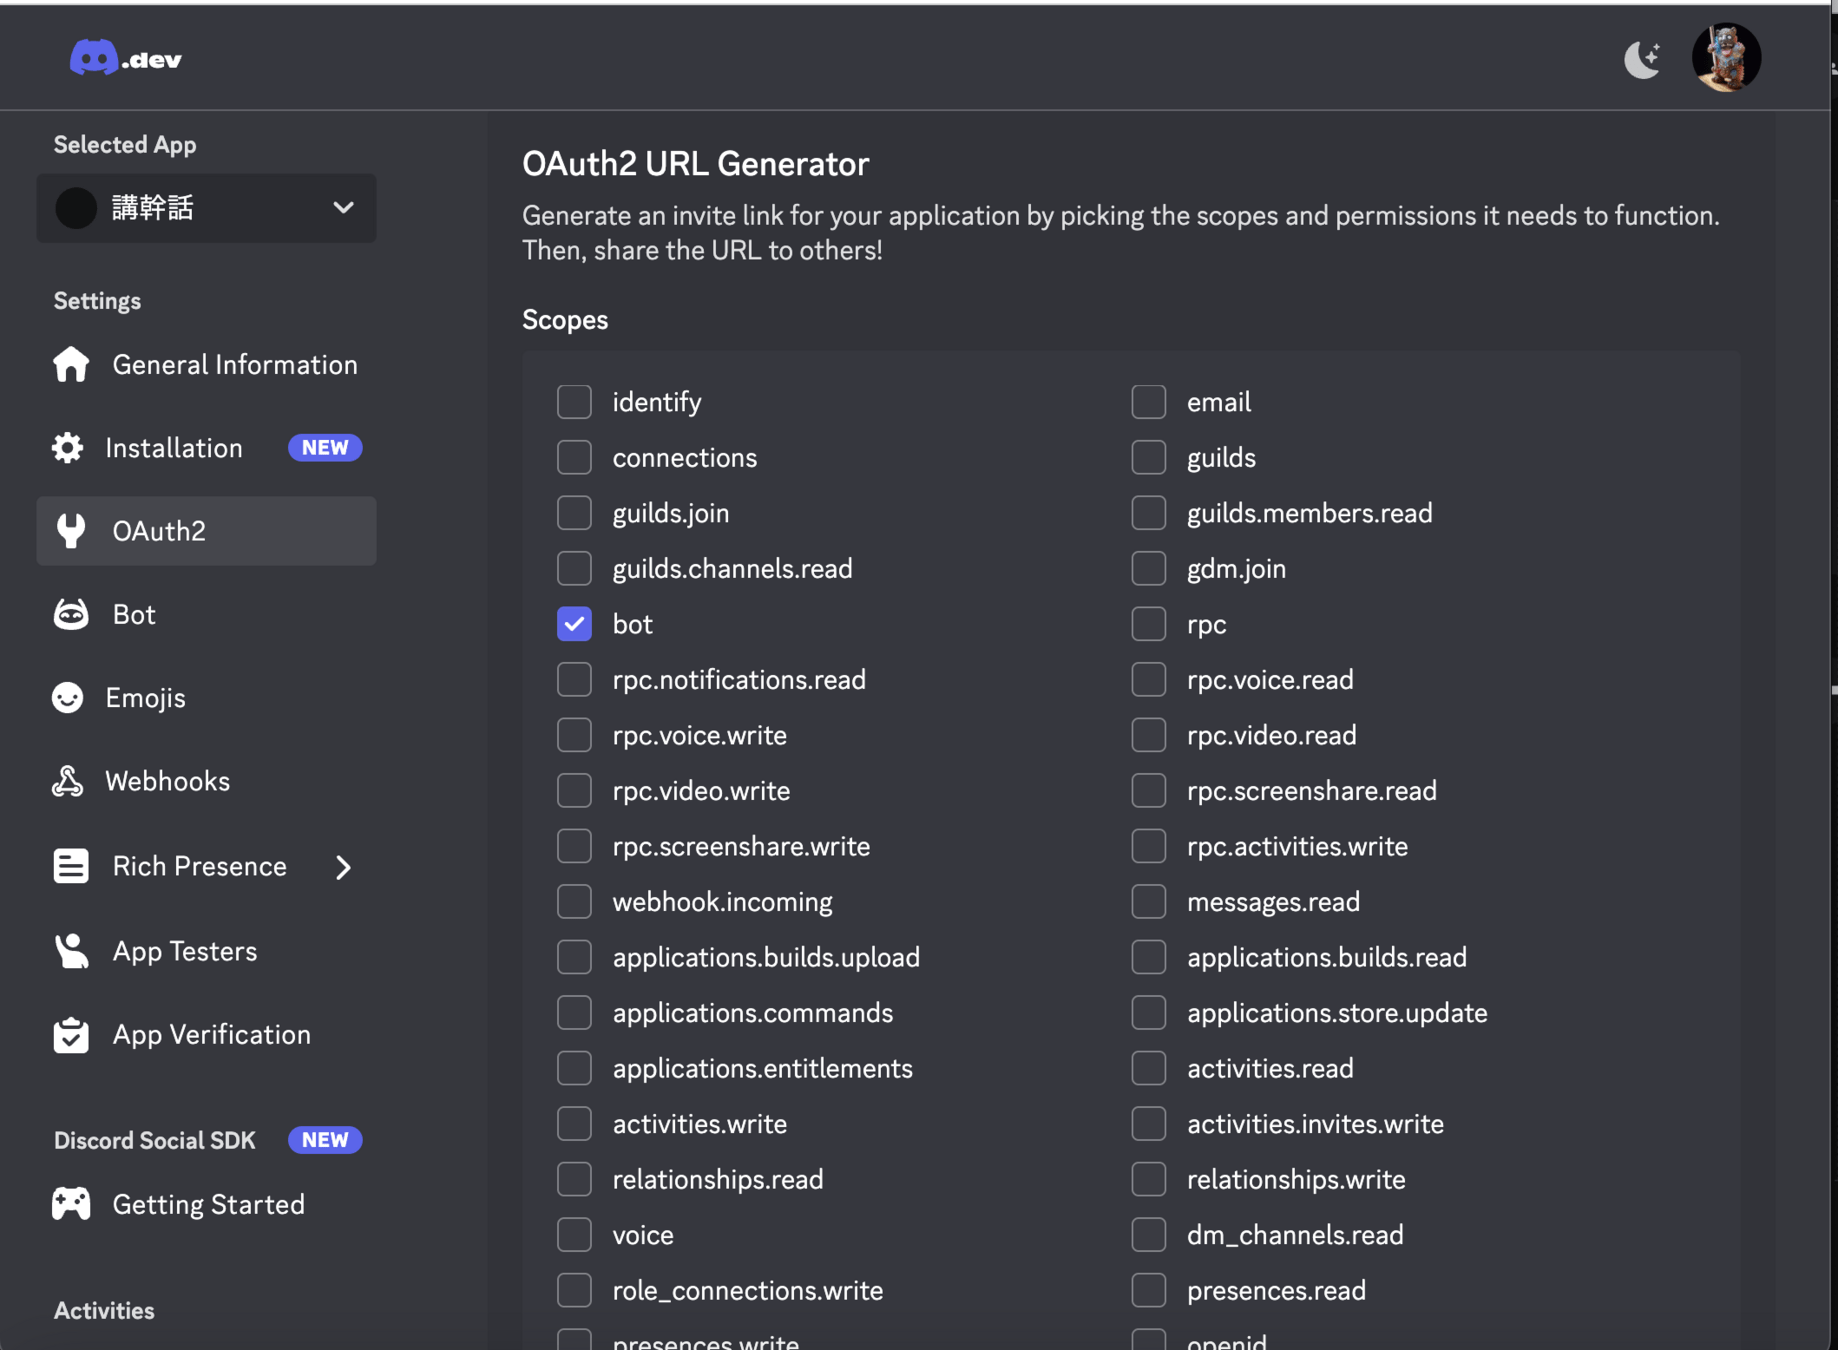
左邊選單 OAuth2
-> 勾選 Bot
-> 複製並開啟下方 URL
-> 開啟後就可以把機器人加入自己的伺服器囉

OAuth 2.0 是一個授權協議,它允許軟體應用代表(而不是充當)資源擁有者去訪問資源擁
有者的資源。應用向資源擁有者請求授權,然後取得令牌(token),並用它來訪問資源。這一切
都不需要應用去充當資源擁有者的身份,因為令牌明確表示了被授予的訪問權。
補充: OAuth 2.0 是什麼
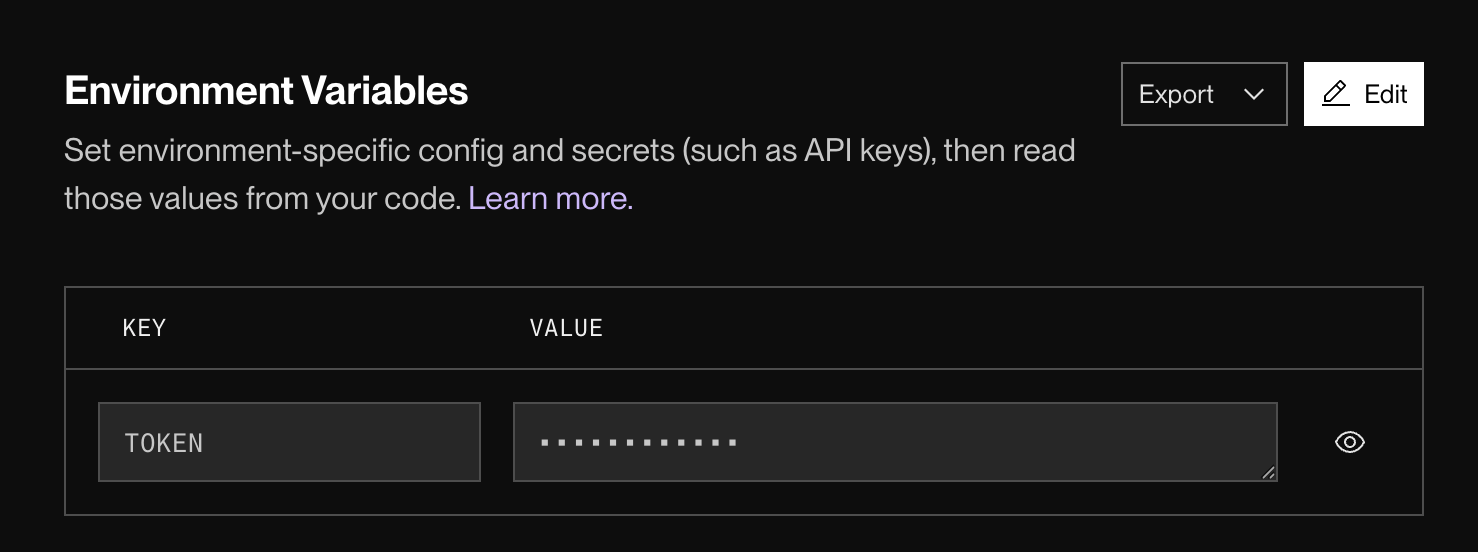
Setup
拿來存 token 用
指定需要下載的函式庫
discord.py
python-dotenv
requirements.txt
pip3 install -r requirements.txt python -m venv myenv #創虛擬環境
myenv\Scripts\activate #啟用它 (windows)
source myenv/bin/activate #啟用它 (mac/linux)Events
@bot.command()
async def fixsync(ctx):
    msg = await ctx.send("修理完畢")

    bot.tree.clear_commands(guild=None)
    await bot.tree.sync()

    for filename in os.listdir('./cogs'):
        if filename.endswith('.py'):
            await bot.reload_extension(f'cogs.{filename[:-3]}')

    bot.tree.copy_global_to(guild=ctx.guild)
    await bot.tree.sync(guild=ctx.guild)

    await msg.edit(content="ok")
import discord
from discord.ext import commands
import os
from dotenv import load_dotenv把需要用的 Library 匯入
intents = discord.Intents.default()
intents.message_content = True
把權限開啟
bot.run(token)讓 bot 開始跑
@bot.event
async def on_ready():
    print(f'We have logged in as {bot.user}')
跑成功時讓它說話
@bot.event
async def on_ready():
    print(f'We have logged in as {bot.user}')
"@" 是 Python 裝飾器 (Decorator)
是用於簡化語法的語法糖 (Syntax candy)
有點像是引用別人先寫好的 function 在自己的 function 外面
@bot.event
async def on_ready():
    print(f'We have logged in as {bot.user}')
async 是什麼?
asynchronous (非同步)就是讓 discord 在等待連線時,可以先去做別的事
@bot.event
async def on_ready():
    print(f'We have logged in as {bot.user}')
event 是什麼?
就是事件,有很多種不同的event 可以用
on_ready()
on_message(message) on_message_edit(before, after) on_message_delete(message) on_member_join(member) on_member_remove(member) on_member_update(before, after) on_guild_join(guild) on_guild_remove(guild) on_reaction_add(reaction, user) on_reaction_remove(reaction, user)
events:
@bot.event
async def on_message(message):
    if message.author.bot:
        return

    if "bot" in message.content.lower() and "hi" in message.content.lower():
        await message.channel.send(f"你好 {message.author.display_name}!")

    await bot.process_commands(message)
範例:關鍵字偵測
Prefix commands
第一種:前綴指令 (Prefix commands)
就是讓 bot 判斷看到你指定的特定前綴(例:!, #, $ 之類)
才會把接下來的文字視為指令
Discord Bot 有兩種類型的指令
bot = commands.Bot(command_prefix='$', intents=intents)先設定你想要什麼前綴
@bot.command()
async def hello(ctx):
await ctx.send{f"你好啊{ctx.author.mention}"}- 記得 @bot.command ()
- ctx 就是 context (前後文),會讓 bot 存取是誰發出指令等等資訊
- ctx.author.mention 是 ctx 的功能之一,可以讓 bot 去標發出指令的人
await ctx.reply("收到!") #直接回覆使用者

user_name = ctx.author.display_name #抓使用者顯示名稱

server_name = ctx.guild.name #抓伺服器名稱

await ctx.trigger_typing() #讓 bot 顯示「打字中」(約10秒 (?))
ctx 一些其他用法
import asyncio

@bot.command()
async def hello(ctx):
    async with ctx.typing():
        await asyncio.sleep(5)   #如果想要指定打字打多久
    await ctx.send("Hello!")
@bot.command()
async def hello(ctx):
    user = ctx.author.mention
    server = ctx.guild.name
    utc_time = ctx.message.created_at
    taiwan_time = utc_time.astimezone(timezone(timedelta(hours=8)))

    async with ctx.typing():
        await asyncio.sleep(1)
    await ctx.send(f"現在是 {taiwan_time}, {user} 跟 **{server}** 打招呼!")
ex:
@bot.command()
async def add(ctx, a: int, b: int):
    await ctx.send(a + b)
ctx 存取使用者發出的一些資訊
變數名稱
變數類型
@bot.command()
async def greet(ctx, receiver: discord.Member):
    sender = ctx.author
    await ctx.send(f"{sender.mention}向{receiver.mention}打招呼!")
另外有一些 discord 專用的變數型態
讓使用者可以在指令中標另一個人
@bot.command()
async def command(ctx, *members: discord.Member)
  for m in members:
      await ctx.send(f"Hello {m.mention}")
那如果想要一次標任意數量的人?
用 * args,會先自動把輸入的 members 變成一個 tuple
然後迴圈讓 bot 一個一個標人
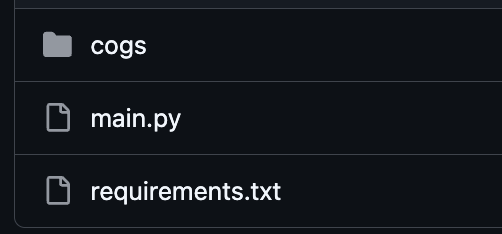
Cogs
Cog檔是一種將機器人指令和功能模組化的方式。
優點包含:
1. 模組化命令與功能
把相關的命令和功能寫在一個 Cog 類別中,比起全部堆在 main.py 中好管理很多。
2. 容易擴充與維護
可以「加載」與「下載」,且每個 Cog 都視為獨立的, 所以一個功能故障較不會影響到其他功能
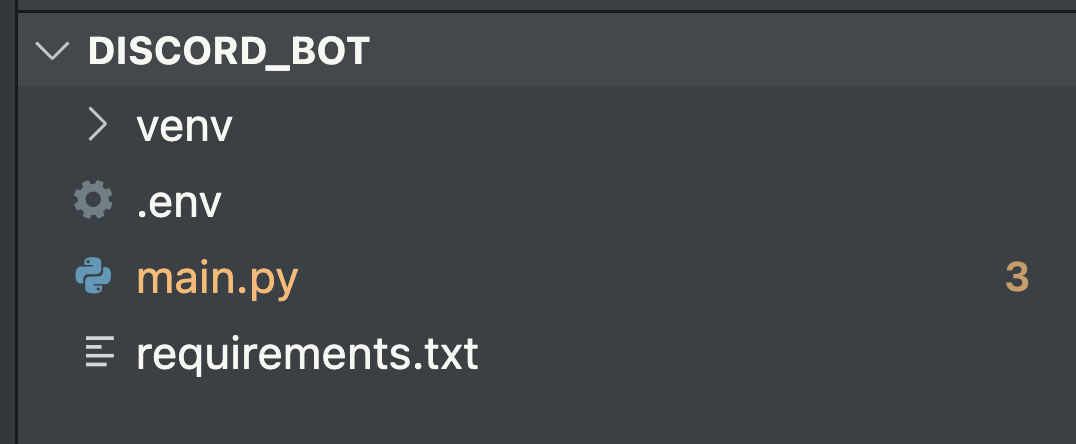
/資料夾
  ├── main.py              #主程式,啟動 bot
  ├── .env                 #存密碼(token)的地方
  └── /cogs                #把功能分類
       ├── moderation.py
       ├── commands.py
       ...
使用 Cog 之後的資料夾應該長這樣
import discord
import asyncio
import os
from discord.ext import commands
from dotenv import load_dotenv


load_dotenv()
token = os.getenv('TOKEN')

intents = discord.Intents.default()
intents.message_content = True
intents.guild_messages = True

bot = commands.Bot(command_prefix='$', intents=intents)
main.py
(原本的初始化)
async def load_extensions():
    for filename in os.listdir('./cogs'):
        if filename.endswith('.py'):
            await bot.load_extension(f'cogs.{filename[:-3]}')
#跑一個迴圈把 cogs 資料夾裡面的 .py 都抓出來,然後變成 cogs

@bot.event
async def on_ready():
    print(f"{bot.user} logged in!")
main.py
load cogs 資料夾裡面的東西
然後 log in
async def main():
    async with bot:
        await load_extensions()
        await bot.start(token)

if __name__ == '__main__':
    asyncio.run(main())
main.py
啟動
import discord
from discord.ext import commands
from discord import app_commands

class OnMessage(commands.Cog):
    def __init__(self, bot):
        self.bot = bot

  	# cog 裡面的 decorator 改成這個
    @commands.Cog.listener()
    async def on_message(self, message): #要把 self 給放進去

        # 後面這邊都是一樣的

        if message.author.bot:
            return

        if "bot" in message.content.lower() and "hi" in message.content.lower():
            await message.channel.send(f"你好 {message.author.display_name}!")

async def setup(bot):
  	await bot.add_cog(OnMessage(bot))
可以在 cog 裡面建立一個 msg.py
把 OnMessage 寫進去
await bot.process_commands(message)注意如果寫進 cogs 裡就不用寫這段了
因為 @commands.Cogs.listener() 會自動在背景偵測關鍵字,不會影響到其他功能運行
Slash commands
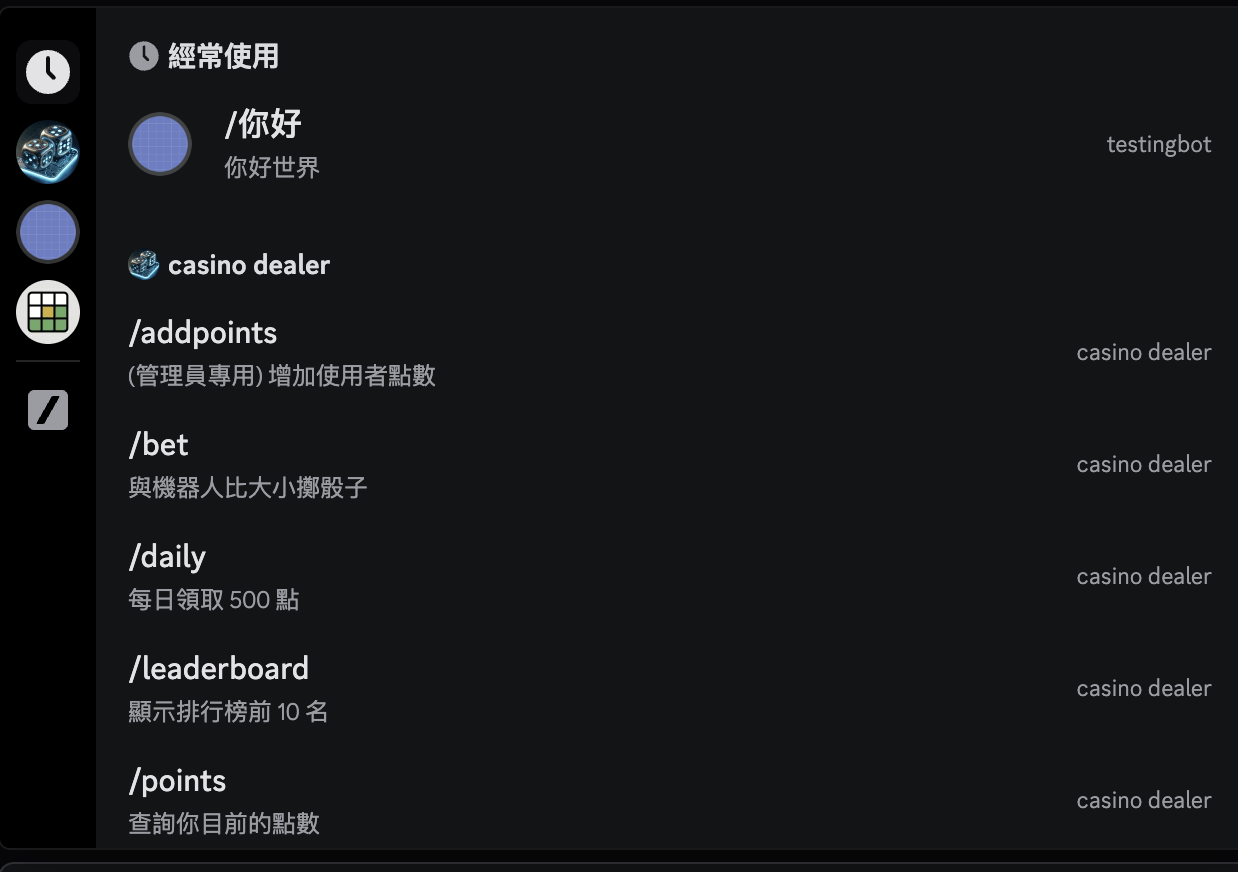
如何製作像這樣的斜線提示呢(?
import discord
from discord.ext import commands
from discord import app_commands

class GeneralCommands(commands.Cog):
    def __init__(self, bot):
        self.bot = bot

    @app_commands.command(name="你好", description="打招呼")
    async def hello(self, interaction: discord.Interaction):
        await interaction.response.send_message("你好,世界")

async def setup(bot):
    await bot.add_cog(GeneralCommands(bot))
一樣在 cogs 裡面建立一個 .py 檔案
注意是用 interaction 不是 context
寫在 cogs 裡面的時候都要有一個 self 喔
@commands.command(name="你好", help="說你好")
    async def hello(self, ctx):
        await ctx.send("你好,世界")

async def setup(bot):
    await bot.add_cog(GeneralCommands(bot))
/ 選單
前綴指令
@app_commands.command(name="你好", description="打招呼")
async def hello(self, interaction: discord.Interaction):
	await interaction.response.send_message("你好,世界")
差在哪
Embed messages
Discord Embed 是 Discord Bot 中一個可以嵌入內容的訊息,讓訊息能夠以卡片的方式呈現更豐富的內容,像是添加標題、敘述、顏色、連結、時間戳等等。
Discord Embed 本身分為好幾個區塊,每個區塊都有相對應的函式,而這些函式是要拿來設定該區塊的內容和格式
@commands.command()
async def sendembed(self, ctx):
    msg = discord.Embed(title = "標題", description = "說明", color = discord.Color.red())
    msg.add_field(name="名字", value = "數值", inline = True)
    msg.add_field(name="名字", value = "數值", inline = True)
    await ctx.send(embed=msg)
顏色可以替換成 HEX 代碼
增加一個區域
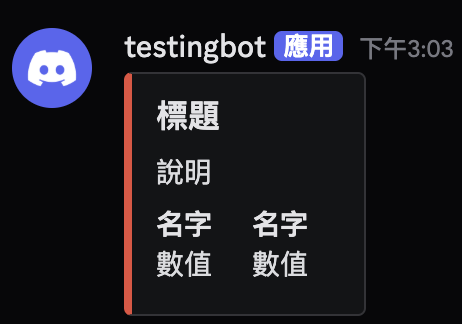
inline 的意思是會這樣並排
import discord
from discord.ext import commands

class EmbedCommands(commands.Cog):
    def __init__(self, bot):
        self.bot = bot

    @commands.command()
    async def sendembed(self, ctx):
        msg = discord.Embed(title="標題", description="說明", color=discord.Color.red())
        msg.add_field(name="名字", value="數值", inline=True)
        msg.add_field(name="名字", value="數值", inline=True)

        if ctx.author.avatar:
            msg.set_image(url=ctx.author.avatar.url)

        msg.set_thumbnail(url="https://cdn.discordapp.com/embed/avatars/0.png")
        msg.set_footer(text="文字", icon_url="https://cdn.discordapp.com/embed/avatars/0.png")

        await ctx.send(embed=msg)

    @commands.command()
    async def embed_with_emoji(self, ctx):
        emoji = "<:MyCustomEmoji:123456789012345678>"

        msg = discord.Embed(
            title=f"表符 {emoji}",
            description="這是表符",
            color=discord.Color.blue()
        )
        await ctx.send(embed=msg)

async def setup(bot):
    await bot.add_cog(EmbedCommands(bot))
一些其他範例
Moderation
Commands
Moderation = 管理
就是一些拿來管理伺服器的指令
例如踢人、禁言等等
我們需要先確認
1) 發送訊息使用者有管理權限
2) 機器人有管理權限
伺服器設定 > 身份組
注意如果是要踢人的話,機器人只能踢身份比自己低階的人
可以在 cogs 裡面建立一個 moderation.py
import discord
from discord.ext import commands
from discord import app_commands

class Moderation(commands.Cog):
    def __init__(self, bot):
        self.bot = bot

# 中間塞主程式

async def setup(bot):
    await bot.add_cog(Moderation(bot))
@app_commands.command(name="clear", description="指定要刪除幾則訊息")
@app_commands.checks.has_permissions(manage_messages=True)
async def delete_msg(self, interaction: discord.Interaction, amount: int):
if amount < 1:
await interaction.response.send_message("重新輸入數量", ephemeral=True)
return
await interaction.response.defer(ephemeral=True)
deleted = await interaction.channel.purge(limit=amount)
await interaction.followup.send(f"已刪除 {len(deleted)} 則訊息", ephemeral=True)
刪除訊息
ephermal = 短暫的,讓機器人的確認訊息只有發送指令者可以看到
defer 和 purge 是為了避免因為跑太久而 crash
@app_commands.command(name="kick", description="踢人")
    @app_commands.checks.has_permissions(kick_members=True)
    async def kick_member(self, interaction: discord.Interaction, member: discord.Member):
        await member.kick()
        await interaction.response.send_message(f"踢掉 {member.mention}了", ephemeral=True)
踢人
@app_commands.command(name="ban", description="叫他閉嘴")
@app_commands.checks.has_permissions(ban_members=True)
async def ban_member(self, interaction: discord.Interaction, member: discord.Member, reason: str = "沒理由"):
	await member.ban(reason=reason)
    await interaction.response.send_message(f"已禁言 **{member}**", ephemeral=True)

@app_commands.command(name="unban", description="讓他說話")
@app_commands.checks.has_permissions(ban_members=True)
async def unban_member(self, interaction: discord.Interaction, user: discord.User, reason: str = "沒理由"):
    await interaction.guild.unban(user, reason=reason)
    await interaction.response.send_message(f" **{user}**回來了", ephemeral=True)
永久禁言
@app_commands.command(name="timeout", description="暫停發言")
    @app_commands.checks.has_permissions(moderate_members=True)
    @app_commands.describe(minutes="幾分鐘", reason="原因")
    async def timeout_member(self, interaction: discord.Interaction, member: discord.Member, minutes: int, reason: str = None):
        if member == interaction.user:
            return await interaction.response.send_message("無法禁言自己", ephemeral=True)

        if member.top_role >= interaction.guild.me.top_role:
            return await interaction.response.send_message("身份組等級不夠", ephemeral=True)

        if minutes > 40320: # 28 days
            return await interaction.response.send_message("dc 規定不能禁言超過 28 天", ephemeral=True)

        try:
            duration = timedelta(minutes=minutes)
            await member.timeout(duration, reason=reason)
            await interaction.response.send_message(
                f"⏳ {member.mention} 已經被禁言 {minutes} 分鐘.\n**Reason:** {reason or '原因不明(?)'}",
                ephemeral=True
            )
        except discord.Forbidden:
            await interaction.response.send_message("沒權限", ephemeral=True)
        except Exception as e:
            await interaction.response.send_message(f"錯誤: {e}", ephemeral=True)
timeout
    @app_commands.command(name="untimeout", description="取消禁言")
    @app_commands.checks.has_permissions(moderate_members=True)
    async def untimeout_member(self, interaction: discord.Interaction, member: discord.Member):
        await member.timeout(None)
        await interaction.response.send_message(f"恭喜 {member.mention}重獲言論自由。", ephemeral=True)
untimeout
Deploy the Bot
有個問題
一旦關掉電腦
bot 就沒辦法運作了
這時候我們需要把程式碼部署到網路上
# 放結尾
app = Flask('')

@app.route('/')
def home():
    return "上線了"

def run_flask():

    port = int(os.environ.get("PORT", 10000))
    app.run(host='0.0.0.0', port=port, debug=False)

async def main():

    t = Thread(target=run_flask)
    t.daemon = True
    t.start()


    async with bot:
        await load_extensions()
        await bot.start(token)

if __name__ == '__main__':
  	asyncio.run(main())
#放開頭
from flask import Flask
from threading import Thread
main.py 要加上 Flask
requirements.txt
discord.py
flask
python-dotenv
Github repo 裡應該要有這些
render
build command
pip install -r requirements.txtstart command
python main.pyrender
token 要設定好
render
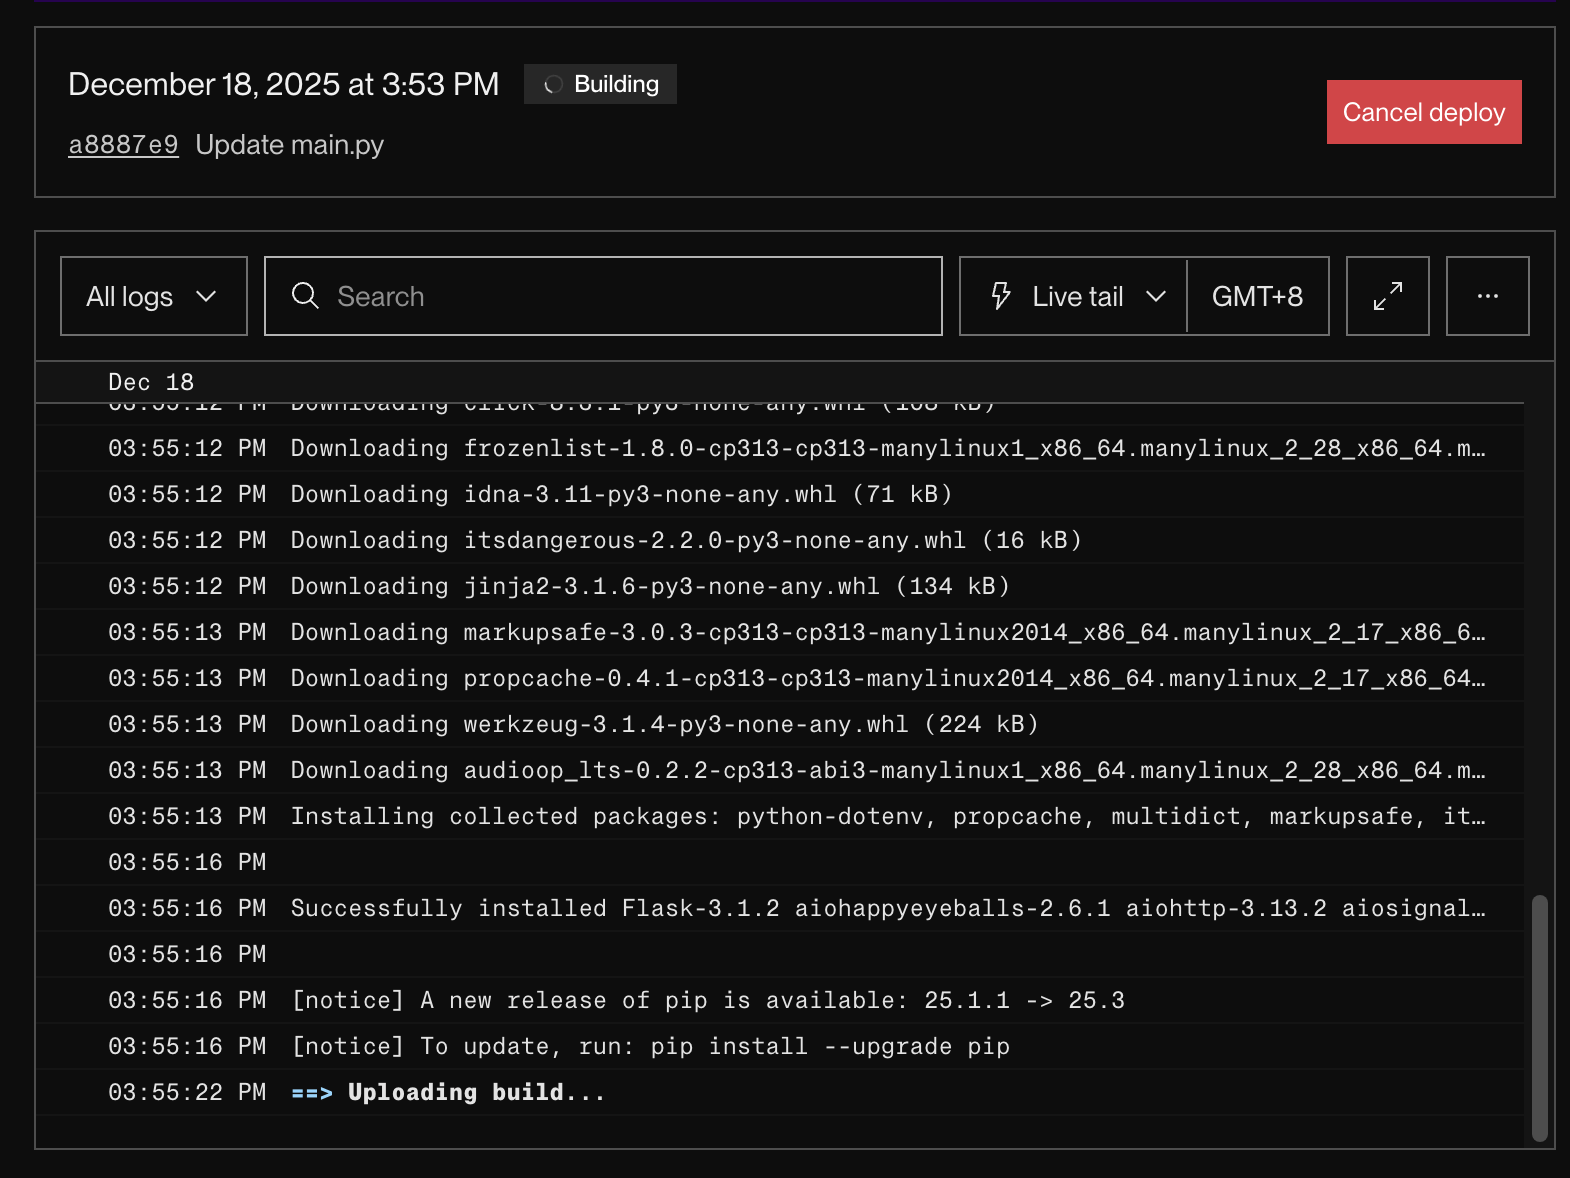
開始跑之後應該可以看到 deploy status
還有個問題
render 的免費版若是過一陣子沒有流量就會自動關掉服務
所以我們可以用一個工具定期去敲它 給它流量
Discord Bot
By Suzy Huang


