Web Server
LAMP
LAMP
- Linux
- Apache
- Mysql
- PHP


Linux
with VirtualBox

Distributions





And so on...
Install VirtualBox

Download Ubuntu
桌面版本 > 18.04 LTS > 64位元

Create Virtual Machine

Create Virtual Machine

Create Virtual Machine


Create Disk


Create Disk


Install

Install

Select file you just download
Install
Import

Command Line
Terminal
Basic Commands
- cd
- ls
- mv
- cp
- rm
- mkdir
cd & ls
- cd : Change Directory
- ls : List Segment
- ls -alh
- -a : all files (include file start with .)
- -l : long list
- -h : human readable
Absolute Path
- C:\Users\user\Desktop\style.css
- /var/www/html/logo.png
Relative Path
- ./path/to/file
./ : Current Folder
current/
└── path/
└── to/
└── file
- ../path/to/file
../ : Parent Folder
../
├── current/
└── path/
└── to/
└── file
Home directory
[t510599@INFOR-II ~]$ cd ~
[t510599@INFOR-II ~]$ pwd
/home/t510599
~ : /home/{username}
mv & cp
- mv : Move
- cp : Copy
Usage: mv [OPTION]... SOURCE... DIRECTORY
# move file to parent directory
mv some.file ../

# move file and rename
mv some.file ../rename.file

# cp work as the same
cp some.file ../

cp some.file ../rename.file
mkdir
Make Directory
Usage: mkdir [OPTION]... DIRECTORY...
# make a new directory
mkdir mydir
rm
Remove
Usage: rm [OPTION]... [FILE]...
# remove a file
rm file

# remove files
rm file1 file2 file3

# remove directory
rm -rf mydir/- -r : remove directories and their contents recursively
- -f : ignore nonexistent files and arguments
rm
sudo rm -rf --no-preserve-root /Never Do This!!!!!!!
This will destroy your system.
Practice
Remote Access
SSH + PuTTY
Get IP Address
ip: 192.168.xxx.xxx
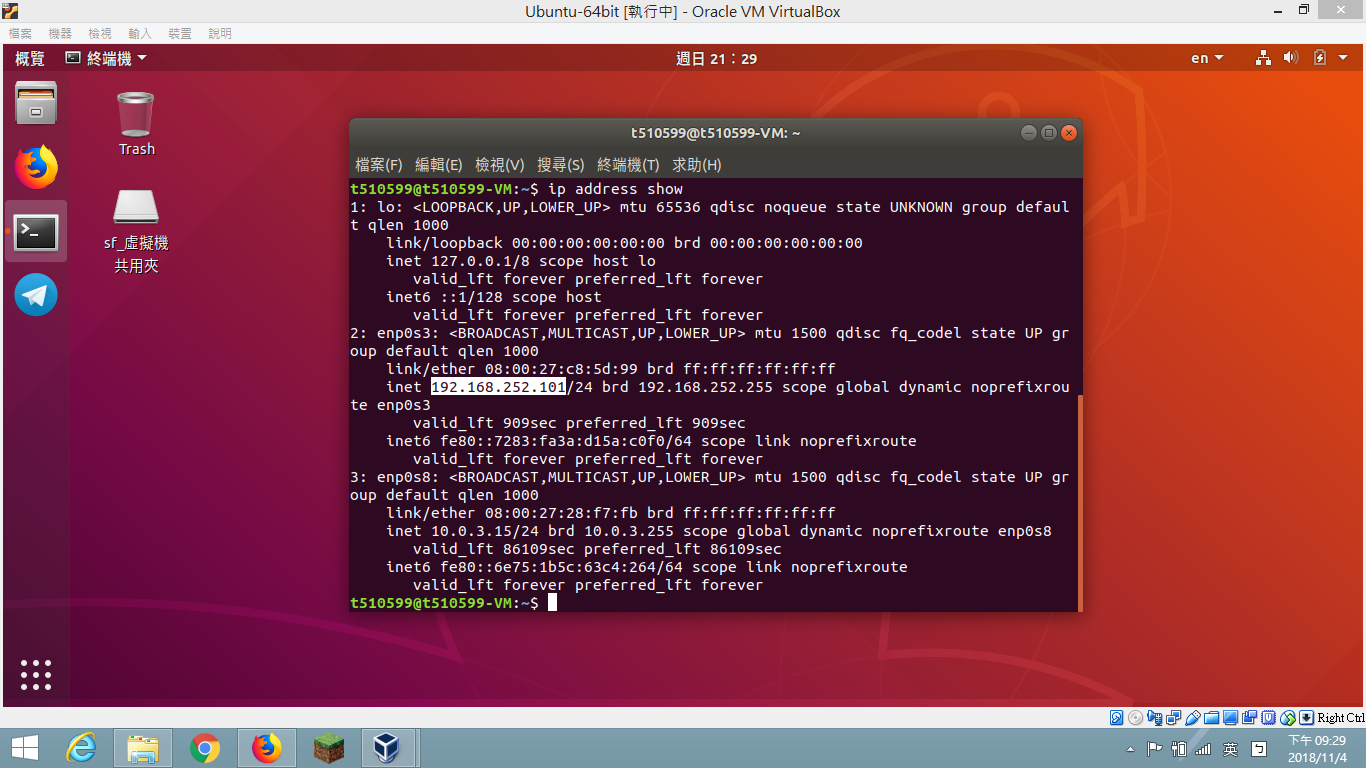
ip address showcommand:
Install SSH Server
sudo apt-get install openssh-serverConnect with PuTTY

Connect with PuTTY

default user/password : fs/fs
Connect with PuTTY

Server Utilities
nano -- file editor
nano index.phpwget -- file downloader
wget https://wordpress.org/latest.zip

wget ftp://ftp.tc.edu.tw/iso/Ubuntu/bionic/ubuntu-18.04.1-desktop-amd64.iso
grep -- string filter
sudo apt-cache search python | grep pipapt -- package manager
sudo apt-get update
sudo apt-get install apache2 php7.2 php7.2-mysql mariadb-server
update everytime before you install
systemctl -- service manager
sudo systemctl start apache2
sudo systemctl stop apache2
sudo systemctl restart apache2
sudo -- root permission
# run command with root permission
sudo apt-get install sl

# login as root
sudo -i
Setup Web Server
Install Apache
sudo apt-get install apache2Test Apache
- In VM
- connect: 127.0.0.1
- In Host (your computer)
- connect: 192.168.xxx.xxx
Manage web pages
Files are stored at /var/www/html
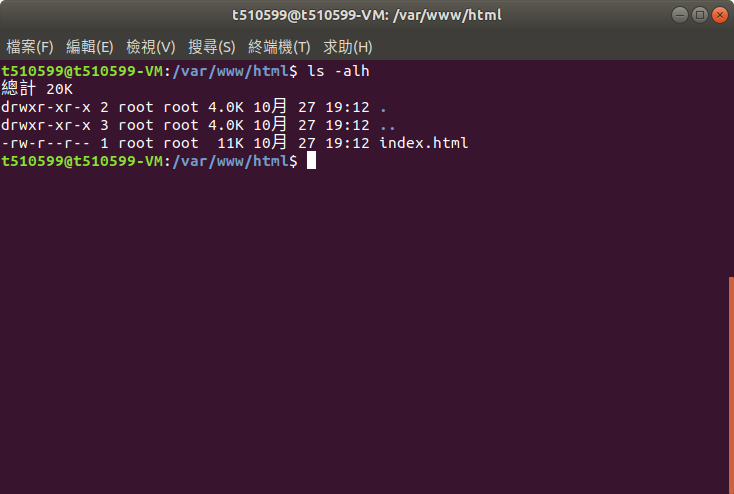
Install PHP
sudo apt-get install phpTest PHP
cd /var/www/html

nano index.php
<?php phpinfo(); ?>Create index.php with:
connect : localhost/index.php
Install Mysql
sudo apt-get install mariadb-server php-mysqlsudo systemctl restart apache2Then restart Apache
Configure Mysql
sudo mysql_secure_installationEnter current password for root (enter for none):
Set root password? [Y/n] y
New password:
Re-enter new password:
Remove anonymous users? [Y/n] y
Disallow root login remotely? [Y/n] y
Reload privilege tables now? [Y/n] yFTP Server
File management
Introduction
File Transfer Protocol
檔案傳輸協定是用於在網路上進行檔案傳輸的一套標準協定,使用客戶/伺服器模式。它屬於網路傳輸協定的應用層。檔案傳送(file transfer)和檔案存取(file access)之間的區別在於:前者由FTP提供,後者由如NFS等應用系統提供。
Install Proftpd
sudo apt-get install proftpdConnect to FTP

Connect to FTP

FTP Commands
- ls
- cd
- put
- get
- mput
- mget
Wordpress
自己的 blog 自己架
Download and Extract files
# clean up all files in the directory
cd /var/www/html/
sudo rm *

# download file
sudo wget http://wordpress.org/latest.tar.gz
# extract file
sudo tar xzf latest.tar.gz

# move the contents of the extracted wordpress directory to the current directory
sudo mv wordpress/* .

# clean up
sudo rm -rf wordpress latest.tar.gz

# change owner to Apache's user
sudo chown -R www-data: .
Setup wordpress database
sudo mysql -u root -pLogin to mysql shell:
-- create a database for wordpress
CREATE DATABASE `wordpress`;

-- create an user for wordpress
CREATE USER 'wordpress'@'localhost' IDENTIFIED BY 'password';

-- grant all privileges of "wordpress" database to "wordpress" user
GRANT ALL PRIVILEGES ON wordpress.* TO 'wordpress'@'localhost';

FLUSH PRIVILEGES;

quit;
Run SQL queries:
Configure wordpress
Connect to localhost or 192.168.xxx.xxx.

Configure wordpress
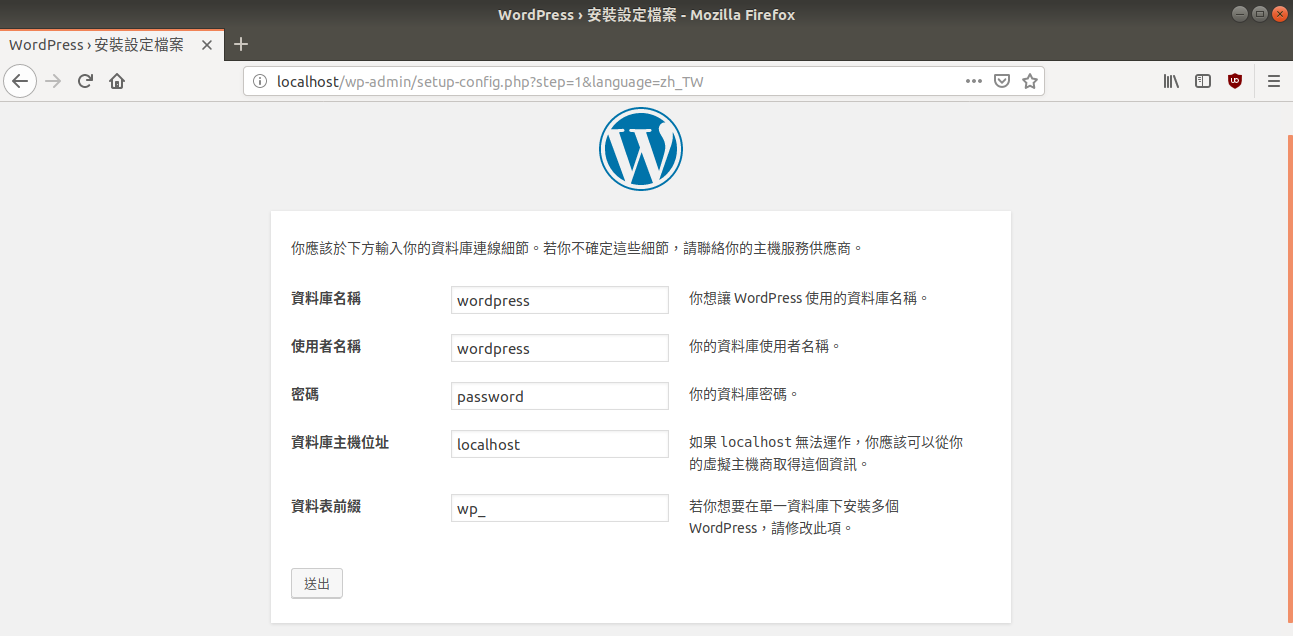
Fill the field with your own settings
Configure wordpress
Fill the field with your own settings
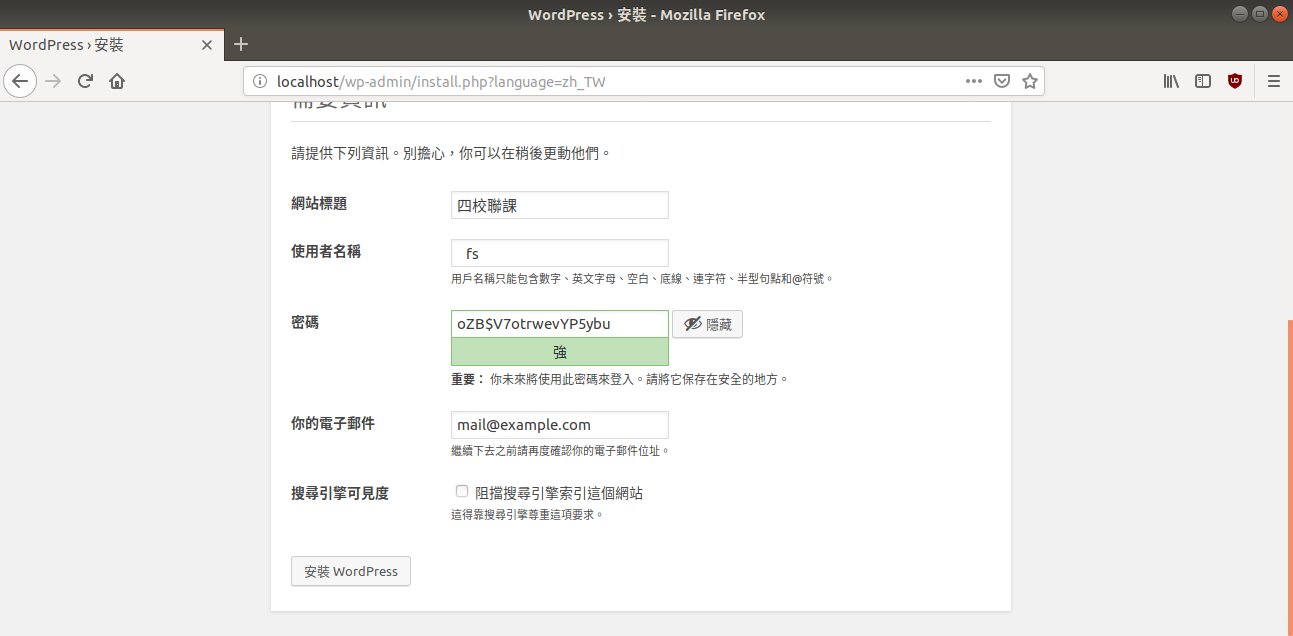
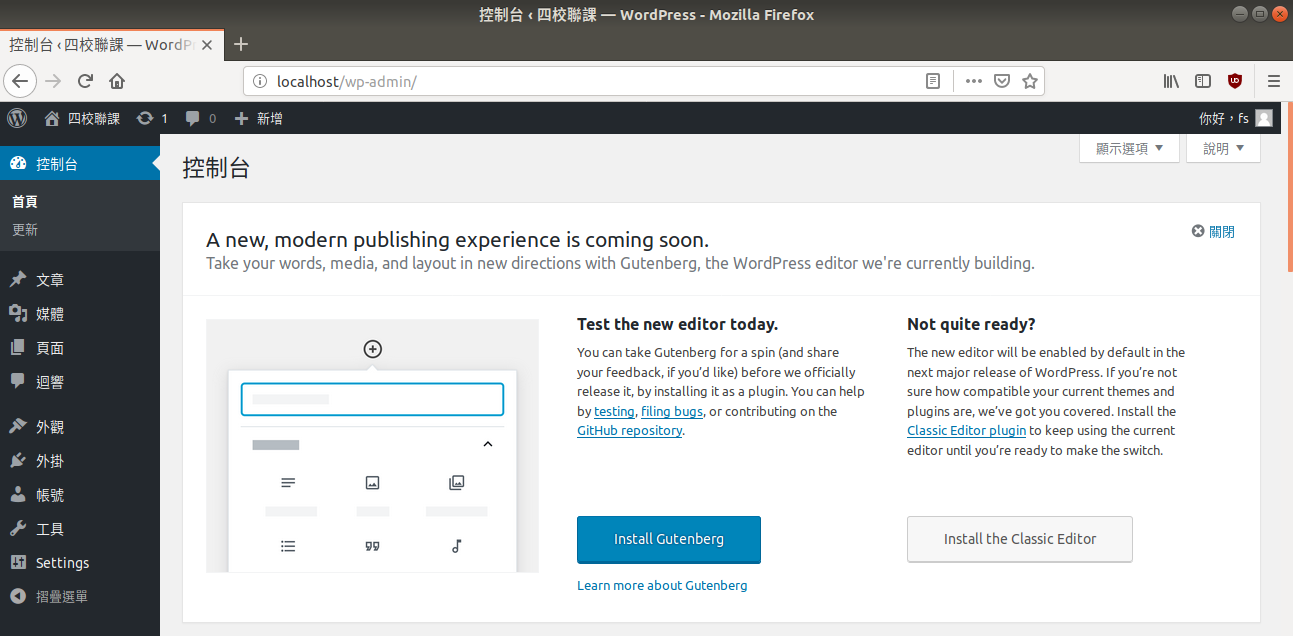
Done!
Backup Wordpress
All-in-One WP Migration
Introduction
Wordpress 以強大的外掛系統著稱。
其中不乏各種功能的外掛,有些能新增回饋表單,而其中甚至還能夠將 wordpress 直接打造成購物車。
若是平常要將部落格搬到其他主機上,會有許多繁複的動作,而透過這個外掛,你能輕鬆自在的備份所有東西並且上傳到其他站點。
Resource
Virtual Private Server

Virtual Private Server

Thanks for Listening
Web Server
By Tony Yang
Web Server
四校聯課
- 487


