Dimitri James Tsiflitzis
CocoaHeads SKG #41
Sign in with Apple: Swift + Node.js
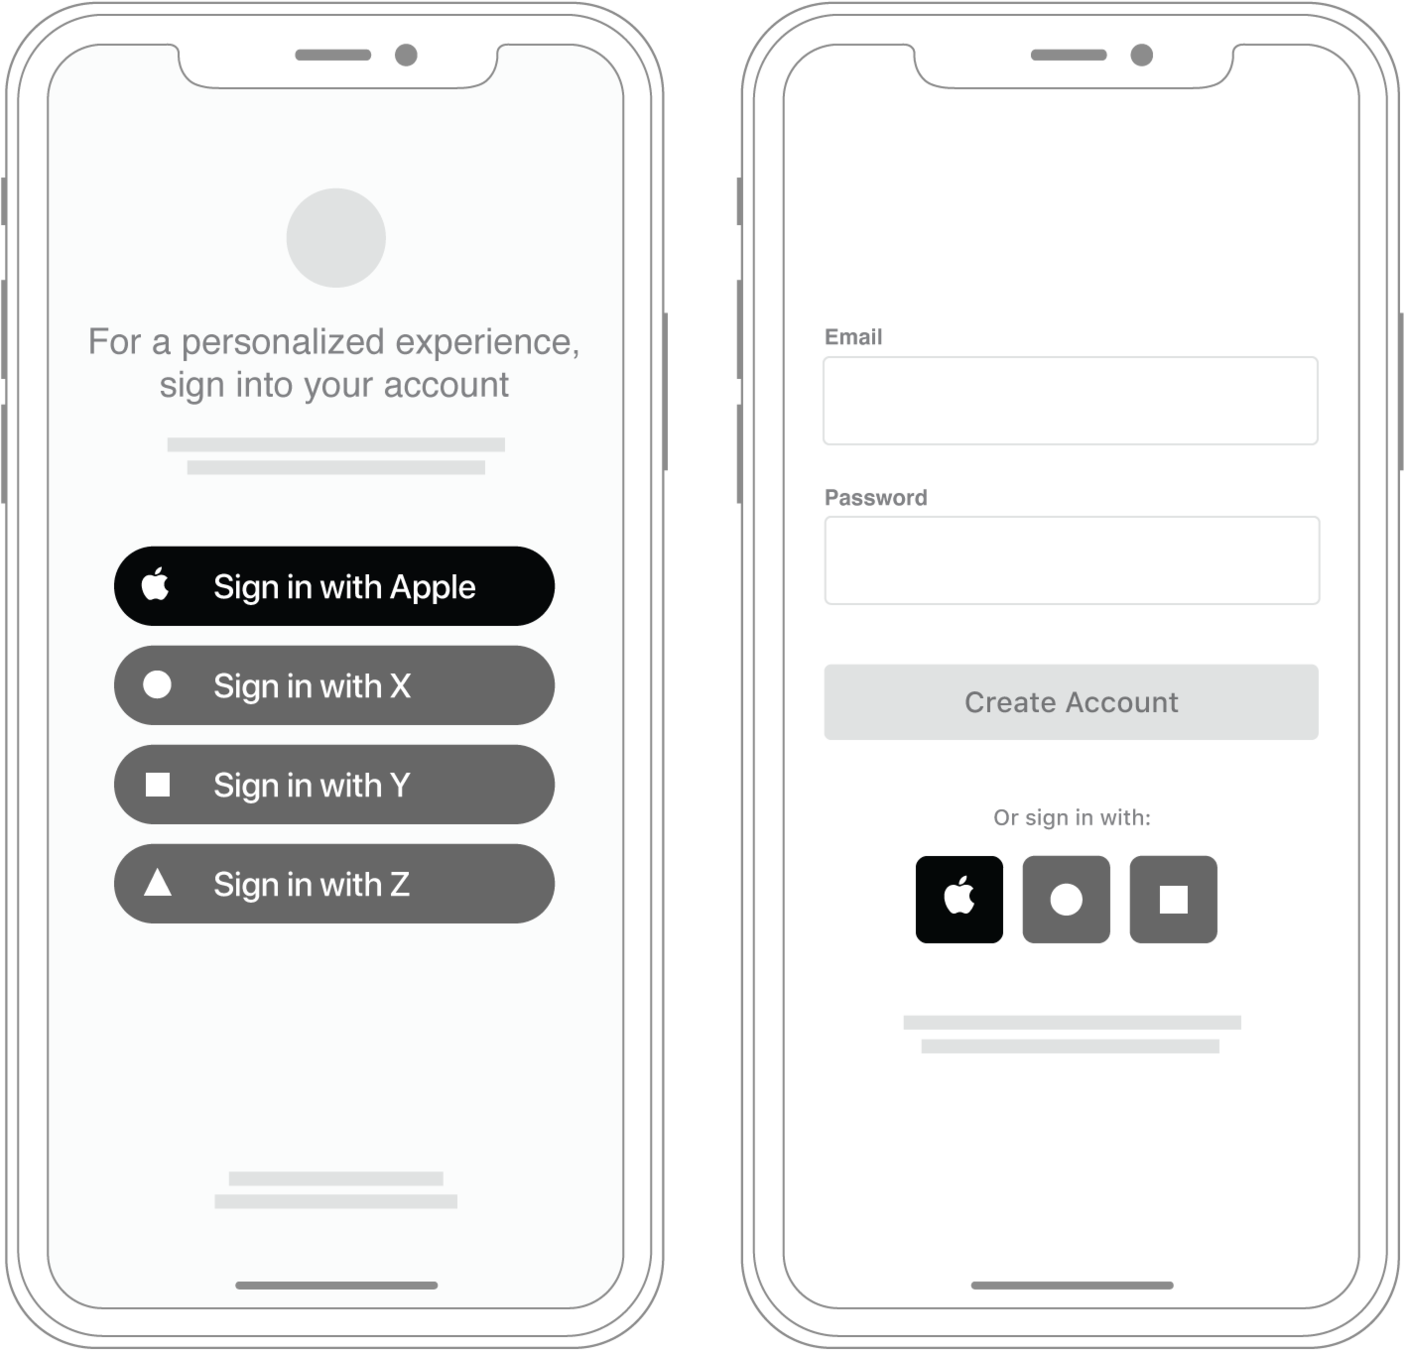
What is Sign in with Apple?
- A more "private" way to sign in to third-party apps and websites using your Apple ID.

- When you see a Sign in with Apple button on a participating app or website, it means you can set up an account using your Apple ID.
- No need to use a social media account, fill out forms or choose another new password.
What is Sign in with Apple?
Privacy and security
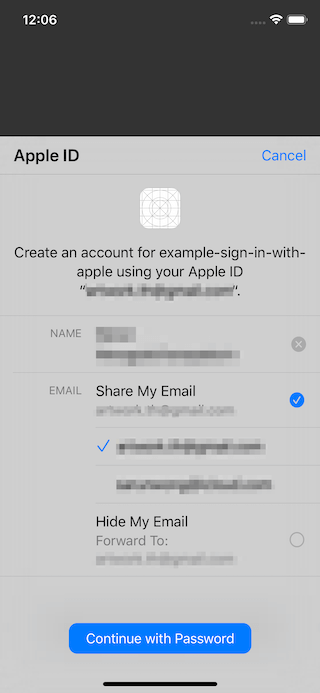
- On your first sign-in, apps and websites can ask only for your name and email address to set up an account for you.
- You can use Hide My Email to create a random email address that forwards to your Apple ID email.
- Apple claims Sign in with Apple won’t track or profile you, and only retains the information required to authenticate you. Third parties definately only receive a name and email.
- Sign in with Apple uses two-factor authentication. You can sign in and re-authenticate with Face ID or Touch ID anytime.
If you choose TO Hide YOUR Email
A random email address is created, and your personal email isn't shared with the app or website developer during the account setup.
<unique-string>@privaterelay.appleid.com
This unique relay address can only be used for communication from the specific app or website developer you created the account with. It can't be reused for other apps or services. (You set this up in the developer portal)
Part one: Client SIDE
swift
Getting Started
Add Capabilities:
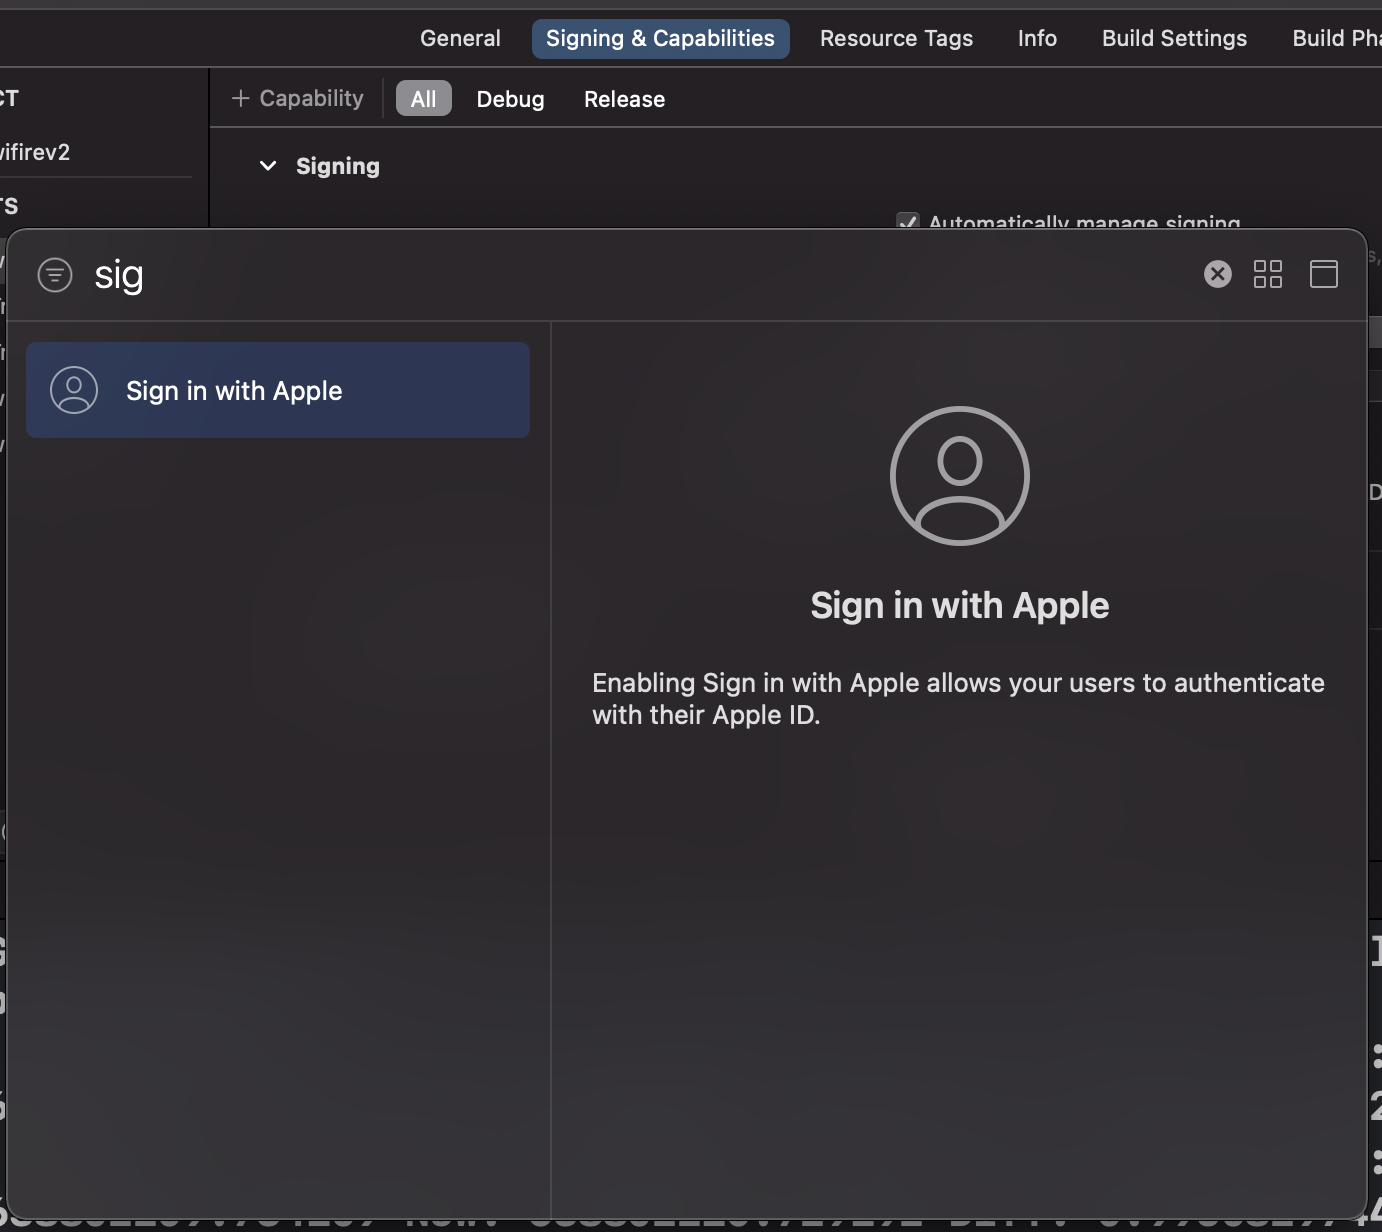
Getting Started
Add a sign in button - SwiftUI:
/*
 */

import SwiftUI
import AuthenticationServices

class SignInWithApple: UIViewRepresentable {

  // No customisation, so we return the view directly
  func makeUIView(context: Context) -> ASAuthorizationAppleIDButton {
      ASAuthorizationAppleIDButton()
  }

  // No state change, so do nothing
  func updateUIView(_ uiView: ASAuthorizationAppleIDButton,
                    context: Context) {
  }
}
Getting Started
Add a sign in button - UIKit:
/*
 */

import UIKit

func addAppleSignInButton() {

  let button = ASAuthorizationAppleIDButton()
  button.center = view.center

  view.addSubview(button)
}
Getting Started
Button customizations:
- Frame size
- Corner radius
- Enum for various appearance styles:
.black, .whiteOutline, .white
ACTIONS
/*
 */

import UIKit

func addAppleSignInButton() {

  let button = ASAuthorizationAppleIDButton()
  button.center = view.center

  view.addSubview(button)

  button.addTarget(self, action: #selector(handleAuthorizationAppleIDButtonPress),
                   for: .touchUpInside)

}
Add an action the usual way - addTarget:
ACTIONS
/*
 */

import UIKit

@objc func handleAuthorizationAppleIDButtonPress() {
    let appleIDProvider = ASAuthorizationAppleIDProvider()
    let request = appleIDProvider.createRequest()
    request.requestedScopes = [.fullName, .email]

    let authorizationController = ASAuthorizationController(authorizationRequests: [request])
    authorizationController.delegate = self
    authorizationController.presentationContextProvider = self
    authorizationController.performRequests()
}- ASAuthorizationController takes care of the UI and presentation logic.
- ASAuthorizationAppleIDRequest requests the info we require on our behalf.
ACTIONS
/*
 */

import UIKit

// MARK: - ASAuthorizationControllerPresentationContextProviding

func presentationAnchor(for controller: ASAuthorizationController) -> ASPresentationAnchor {

  guard
    let window = self.window
  else {
    return nil
  }

  return window
}
We need to specify from where we will present the UI though.
Delegate methods
// MARK: - ASAuthorizationControllerDelegate
func authorizationController(controller: ASAuthorizationController,
                             didCompleteWithAuthorization authorization: ASAuthorization) {
    if let appleIDCredential = authorization.credential as? ASAuthorizationAppleIDCredential {

        guard let appleIDToken = appleIDCredential.identityToken else {
            print("Unable to fetch identity token")
            return
        }

        guard let idTokenString = String(data: appleIDToken, encoding: .utf8) else {
            print("Unable to serialize token string from data: \(appleIDToken.debugDescription)")
            return
        }

        let userIdentifier = appleIDCredential.user
        let fullName = appleIDCredential.fullName
        let email = appleIDCredential.email
        ...
    }
}
ASAuthorizationControllerDelegate has two methods that are called.

One for success:
Delegate methods
func authorizationController(controller: ASAuthorizationController,
                             didCompleteWithError error: Error) {
    // Handle error.
    guard let error = error as? ASAuthorizationError else {
        return
    }

    switch error.code {
    case .canceled: print("Canceled")
    case .unknown: print("Unknown")
    case .invalidResponse: print("Invalid Respone")
    case .notHandled: print("Not handled")
    case .failed: print("Failed")
    @unknown default: print("Default")
    }
}
One for failure:

error cases
No Apple ID
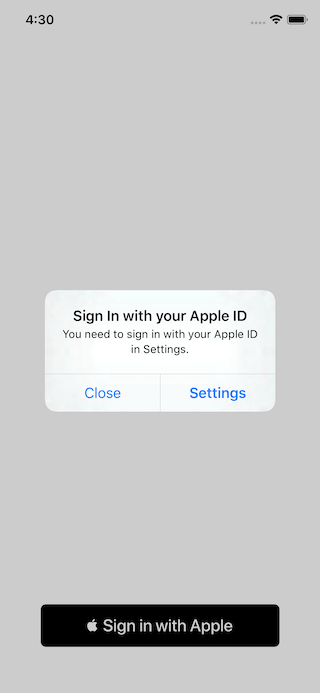

No 2FA Enabled
No iCloud Enabled
No Problem
UI Nuance
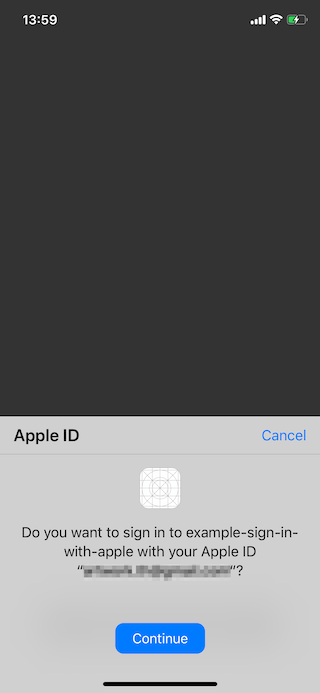
First time:
All subsequent times:
You get the works
"Apple id"
Identity Token
WHY?
Apple staff says:


SO...
- Save a full name and email since you can't retrieve it later, e.g., save it in the key chain
- Create an account in your system
- On fail, recover full name and email from the keychain and retry registration
Like this
Testing
Reset like it's the first time:
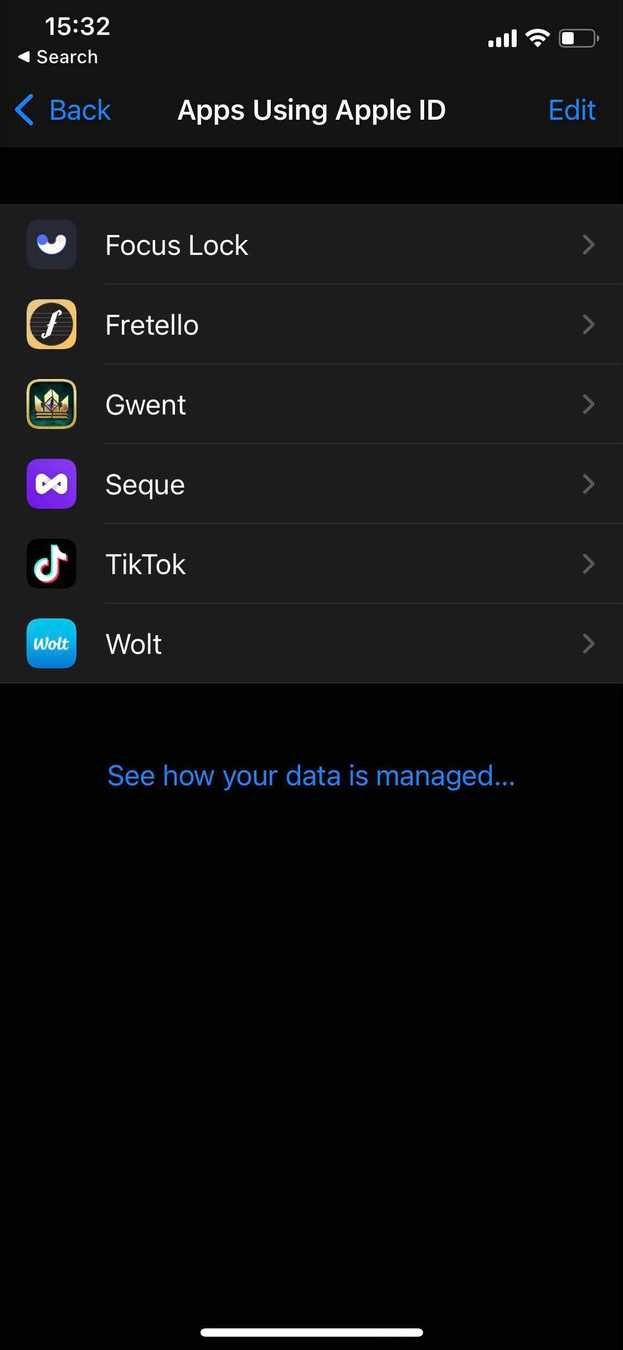
Settings >
Apple ID >
Password & Security >
Apple ID Logins/App Using Your Apple ID >
Your app name >
Stop using Apple ID
Interlude: JWT
BEFORE we HEAD ONLINE
One of the fields Apple gives us at "Sign in", is the identity token, which is a JWT (JSON Web Token).
The identity token lets us verify that that user string came from Apple, not a malicious third party. We verify by decoding and looking at the identity token's subject field and comparing that against the user string.
We can trust the identity token from Apple because the JWT is signed.
BEFORE we HEAD ONLINE

For instance, if can decode this token at jwt.io
BEFORE we HEAD ONLINE
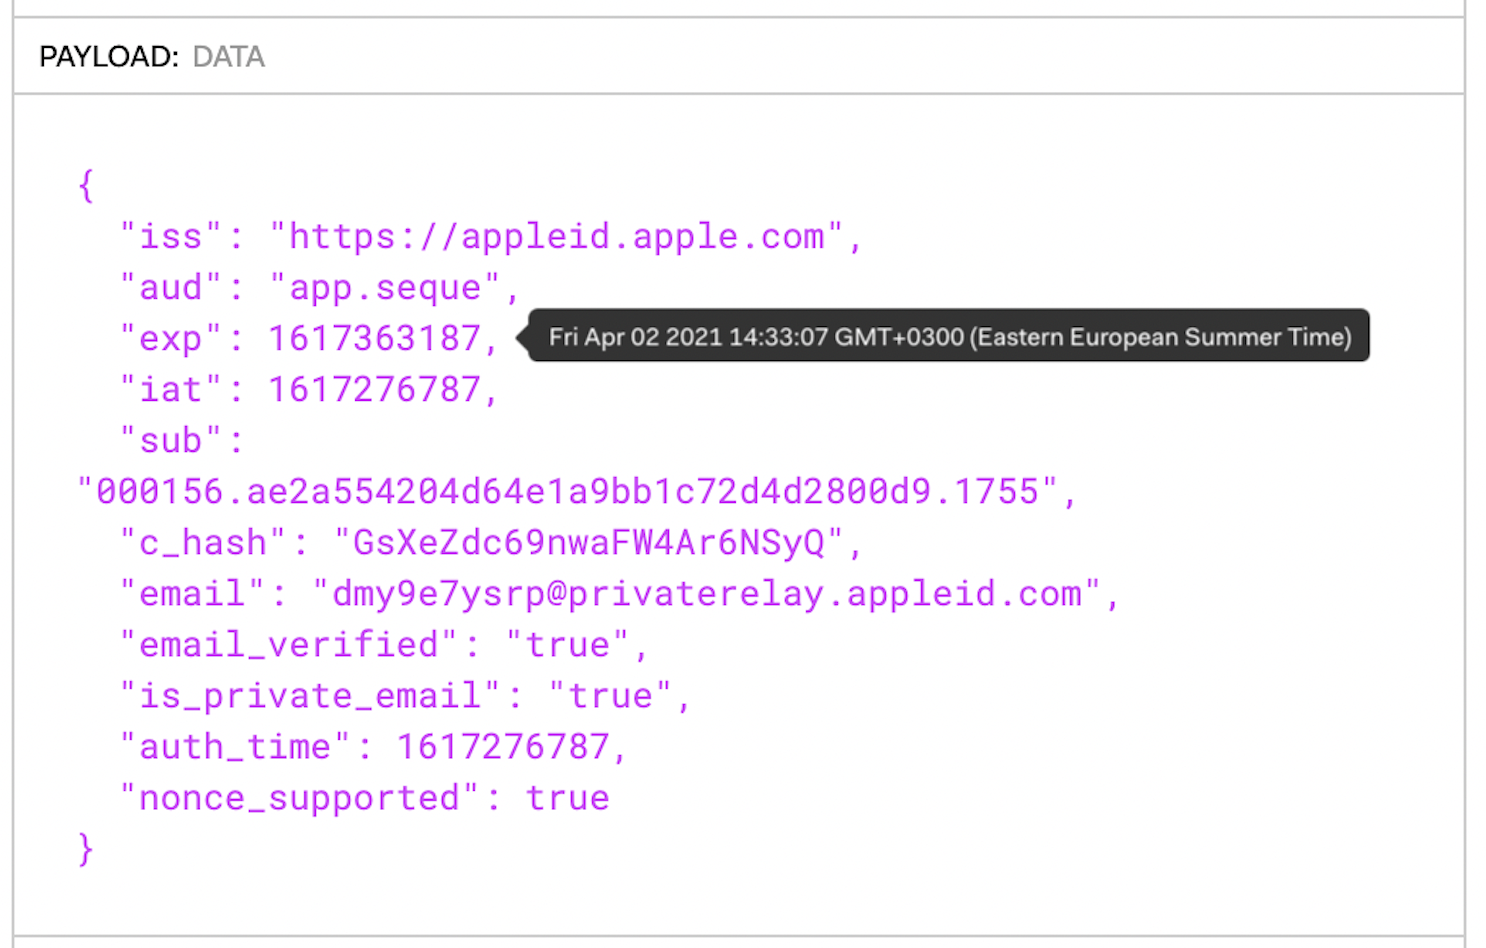
Let's have a closer look

BEFORE we HEAD ONLINE
If we pass along both the identity token and the user string to our server, it can verify that the credentials are in fact valid and from Apple.
However, the token expires very soon after its generation.
This means that we can only verify their identity at that point in time.
Which is good enough in order to transition them into our own sytem.
Part TWO: SERVER SIDE
nodejs
the basics
Our Node.js back-end will be responsible for two things:
- Receive an identity token and send it to Apple to verify it
- Use that verification information to sign in, or create an account
How to verify the Identity token
So before we use the token (idenityToken), we need to make sure that it was signed by Apple's private key.
To do that, we need Apple's public key to verify the signature portion of the JWT.
You can get the public key from the following endpoint:
GET https://appleid.apple.com/auth/keys

How to verify the IDENTITY token
{
  "keys": [
    {
      "kty": "RSA",
      "kid": "AIDOPK1",
      "use": "sig",
      "alg": "RS256",
      "n": "lxrwmuYSAsTfn-lUu4goZSXBD9ackM9OJuwUVQHmbZo6GW4
      Fu_auUdN5zI7Y1dEDfgt7m7QXWbHuMD01HLnD4eRtY-RNwCWdjNfE
      aY_esUPY3OVMrNDI15Ns13xspWS3q-13kdGv9jHI28P87RvMpjz_J
      CpQ5IM44oSyRnYtVJO-320SB8E2Bw92pmrenbp67KRUzTEVfGU4-o
      bP5RZ09OxvCr1io4KJvEOjDJuuoClF66AT72WymtoMdwzUmhINjR0
      XSqK6H0MdWsjw7ysyd_JhmqX5CAaT9Pgi0J8lU_pcl215oANqjy7O
      b-VMhug9eGyxAWVfu_1u6QJKePlE-w",
      "e": "AQAB"
    }
  ]
}
The response would look like this:
How to verify the IDENTITY token
The response would look like this:
This JSON is a JSON Web Key Set (JWKS)
{
  "keys": [
    {
      "kty": "RSA",
      "kid": "AIDOPK1",
      "use": "sig",
      "alg": "RS256",
      "n": "lxrwmuYSAsTfn...u6QJKePlE-w",
      "e": "AQAB"
    }
  ]
}
It is a set of keys containing the public keys that use to verify JWT. In this case, it is a set of one key (Apple might add a new one in the future, so don't hard code it).
MINI Interlude: JSON Web Key Set Properties
| Property name | Description |
|---|---|
| alg | The specific cryptographic algorithm used with the key. |
| kty | The family of cryptographic algorithms used with the key. |
| use | How the key was meant to be used; sig represents the signature. |
| x5c | The x.509 certificate chain. The first entry in the array is the certificate to use for token verification; the other certificates can be used to verify this first certificate. |
| n | The modulus for the RSA public key. |
| e | The exponent for the RSA public key. |
| kid | The unique identifier for the key. |
| x5t | The thumbprint of the x.509 cert (SHA-1 thumbprint). |
Get the apple public key in node.js
import * as jwksClient from 'jwks-rsa';

export const APPLE_BASE_URL = 'https://appleid.apple.com';
export const JWKS_APPLE_URI = '/auth/keys';

export const getApplePublicKey = async (kid) => {
    const client = jwksClient({
        cache: true,
        jwksUri: `${APPLE_BASE_URL}${JWKS_APPLE_URI}`,
    });
    const key: any = await new Promise((resolve, reject) => {
        client.getSigningKey(kid, (error, result) => {
            if (error) {
                return reject(error);
            }
            return resolve(result);
        });
    });
    return key.publicKey as jwksClient.CertSigningKey ||
           key.rsaPublicKey as jwksClient.RsaSigningKey;
};
As a JSON web key set
VERIFY the identity TOKEN in node.js
import * as jwt from 'jsonwebtoken';

export const APPLE_BASE_URL = 'https://appleid.apple.com';

export interface VerifyAppleIdTokenParams {
    idToken: string;
    clientId: string;
    nonce?: string;
}

export default async (params: VerifyAppleIdTokenParams) => {
    const decoded = jwt.decode(params.idToken, { complete: true });
    const { kid, alg } = decoded.header;
    const applePublicKey = await getApplePublicKey(kid);
    const jwtClaims = jwt.verify(params.idToken, applePublicKey, {
        algorithms: [alg],
        nonce: params.nonce,
    });
    if (!jwtClaims.iss ||
         jwtClaims.iss !== APPLE_BASE_URL) {

        throw new Error(`The iss does not match the Apple URL - iss: ${jwtClaims.iss} |
                        expected: ${APPLE_BASE_URL}`);
    }

    if (jwtClaims.aud !== params.clientId) {
        throw new Error(`The aud parameter does not include this client - is: ${jwtClaims.aud} |
                        expected: ${params.clientId}`);
    }

    return jwtClaims;
};
tonights most important slide
It's not surprising at all to consider the user field as our "username" and our identity token as our "password" in our Swift code (ASAuthorizationAppleIDCredential).
In the identity token the expiry field (exp) is 10 minutes after its issue date (iat).
Not so fast.
Sorry
That means Apple is telling us not to consider the identity token valid for more than 10 minutes.

DIVORCE APPLE AUTHENTICATION FROM YOUR own AUTHENTICATION
Apple returns just enough information to verify users at the time of login and registration.
How we continue to trust them after that, without Apple's credentials is completely up to us.
A successful verification is trustworthy enough, for us to log our users in, or create them.
In my case it was JSON web tokens.
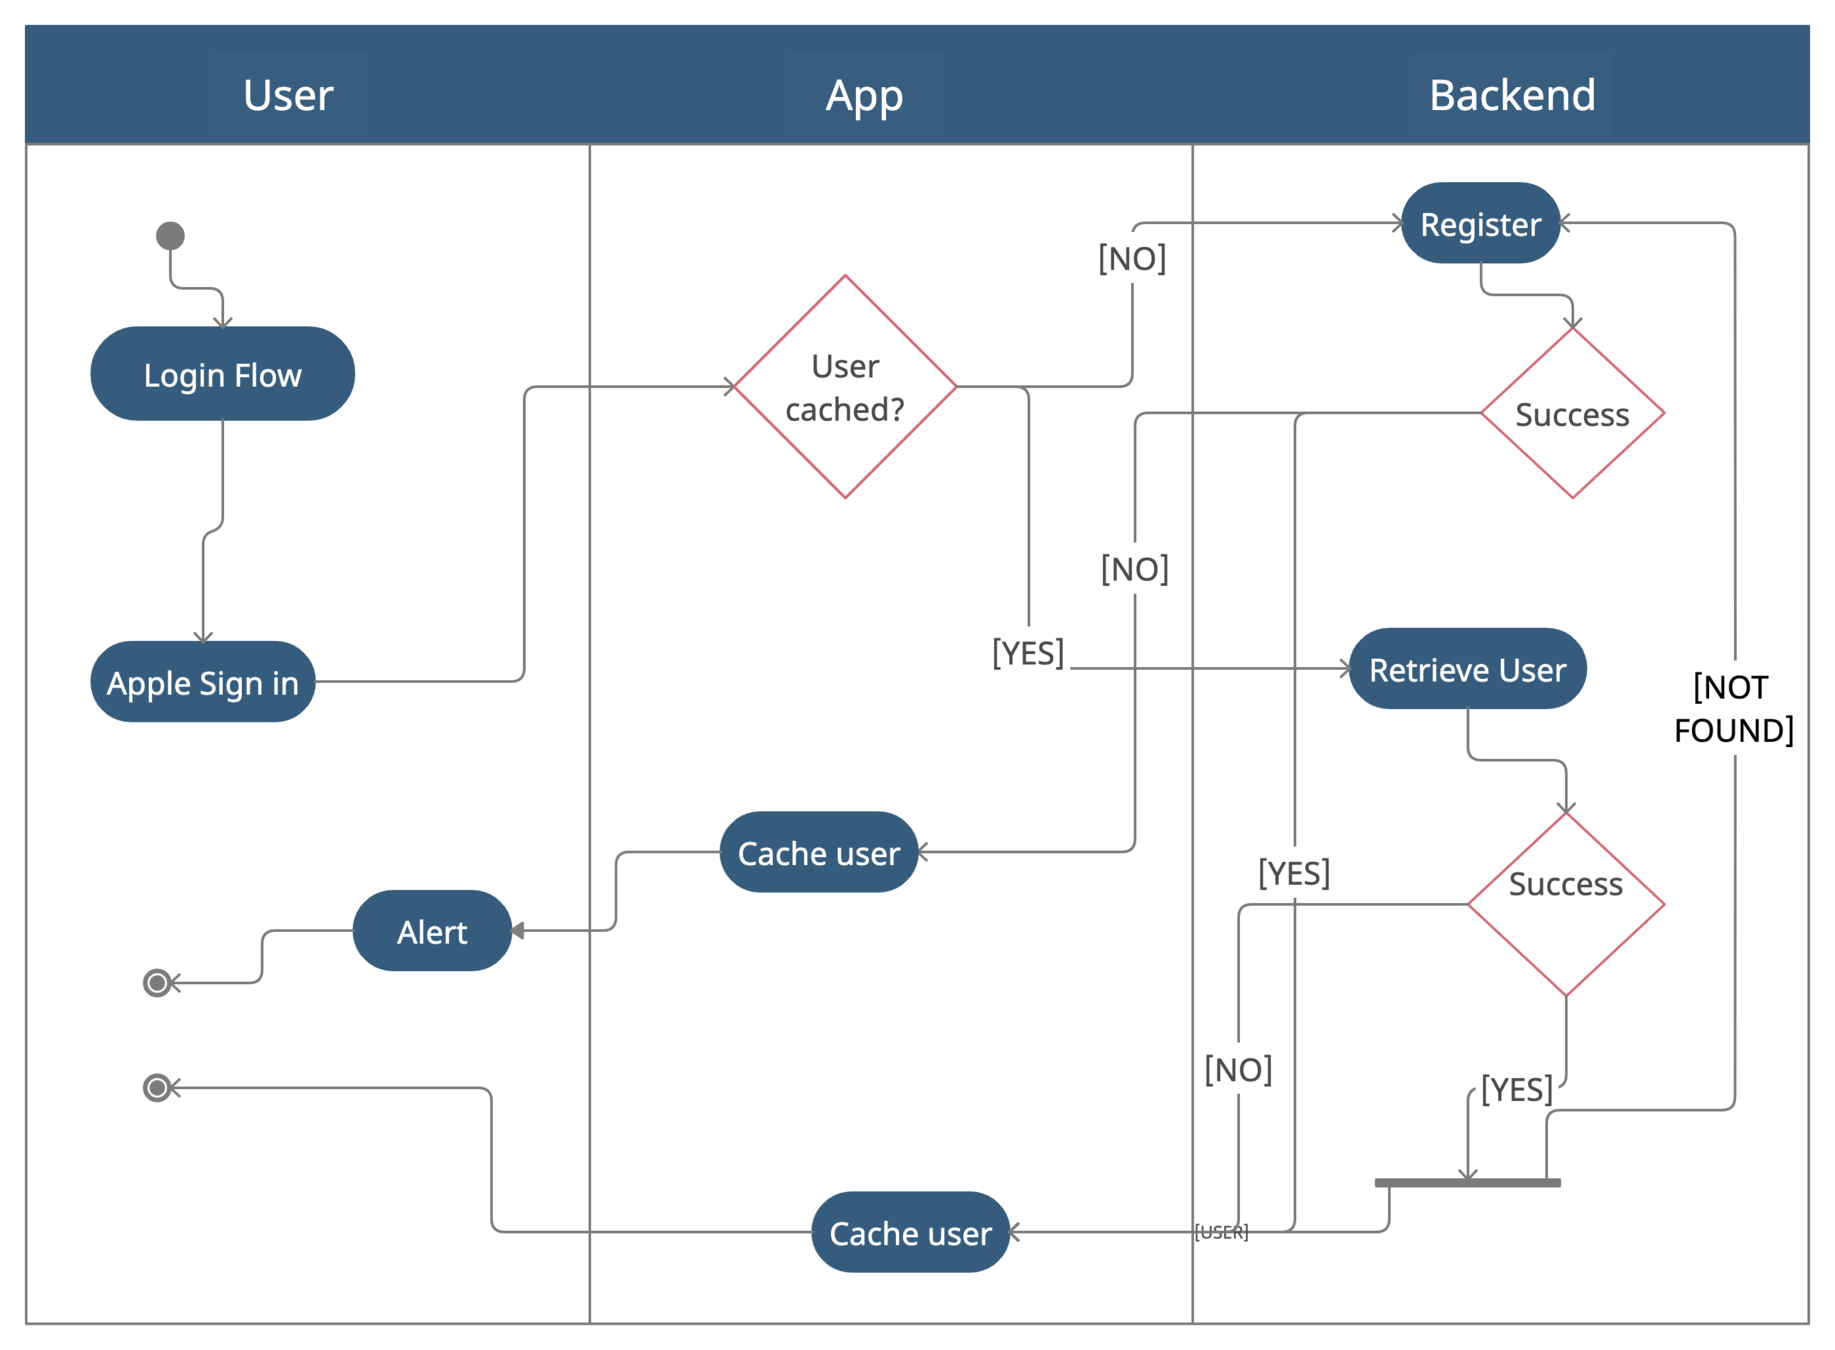
Login flow in node.js
const { siwa_token, email, apple_id, first_name, last_name } = req.body;

const user = await User.findOne({ apple_id: apple_id });

if (user) {
  if (email && email !== user.email) {
    try {
      await User.update({apple_id: apple_id}, { email: email,  apple_id: apple_id })
    } catch(error) {
      res.status(400).send({ error: `${error}`});
    }

    user.email = req.body.email;
  }

  tokenService.verify(req.body, (response) => {
    if (response && response.message) {
      res.status(401).send(response.message);

    } else {
      let webToken = genToken(user)
      res.status(200).send({ id: user._id, token: webToken  });
    }
  })
}
registration flow IN NODE.JS
else { //!user

  tokenService.verify(req.body, (error) => {

  if (error) {
    res.status(401).send(error);

  } else {

    let newUser = User({
      email: email,
      apple_id: apple_id
    })

    let webToken = genToken(newUser)

    newUser.save()
      .then(() => {

        res.status(200).json({
          id: newUser._id,
          token: webToken
          });
        })
      .catch( error => {

        res.status(400).json({ error: `${error}`});
      })
    }
  })
}
in summary
Swift Client
Users are directed to providers, e.g., Apple, Google, Facebook, Twitter, Microsoft, Amazon (sigh). Users grant/deny permissions that the application requested. Providers direct users back to the application along with a token. The application then uses this token to sign in (or create an account).
NodeJS Backend
Use the token from the client to retrieve information from the provider, e.g., id, email. Use that information to sign in, or create an account if this is the first time.
Personal note: Implement JWT's on your backend so you can safely add new platforms in the future (web, android for instance)
ευχαριστουμε
🎈
Sign in with Apple
By tsif


