Android Platform Development Introduction
Day 3
Android 100
Hello World!
I am Alex Rodriguez

I work at Integrity as a Project and Engineering Lead
I've been doing mobile development for 5 years
iOS
Android
HTML5,CSS3,JS
I Love Rock Climbing

And this guy...

Log.i("Introduce Yourself",Person.info);
What is your name?
What do you do?
What kind of programming experience do you have?
What is your favorite app?
Quiz Time!
Question 1
What is the AVD and how do we use it?
Load up the AVD Manager and startup an AVD
Question 2
What is an Activity?
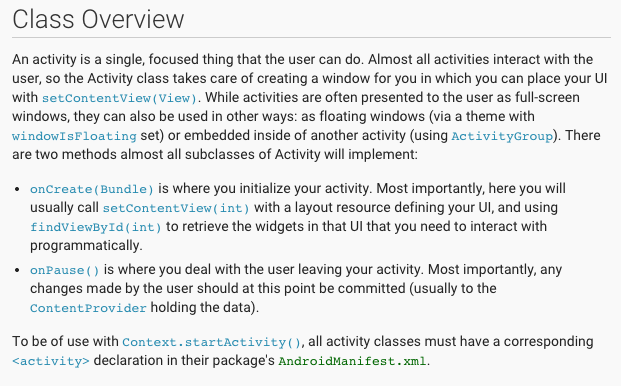
Lets add a new Activity to our HelloWorld App
Question 3
What is the res/ folder and how do we use it?
Lets add a new layout to our app
Question 4
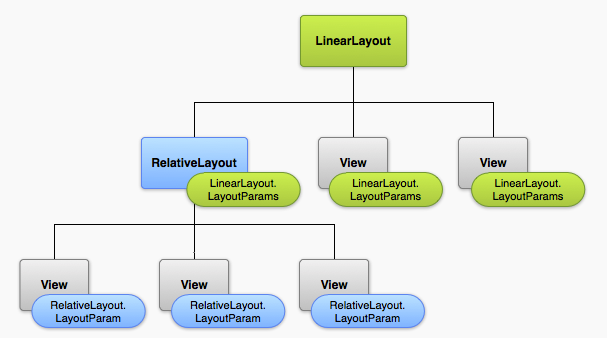
What are ViewGroups and Views?
Lets construct this view in XML
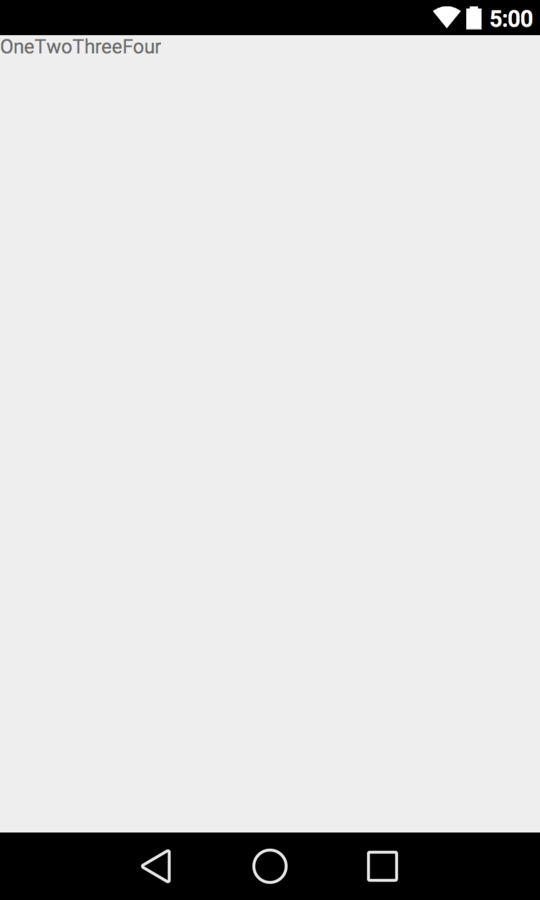
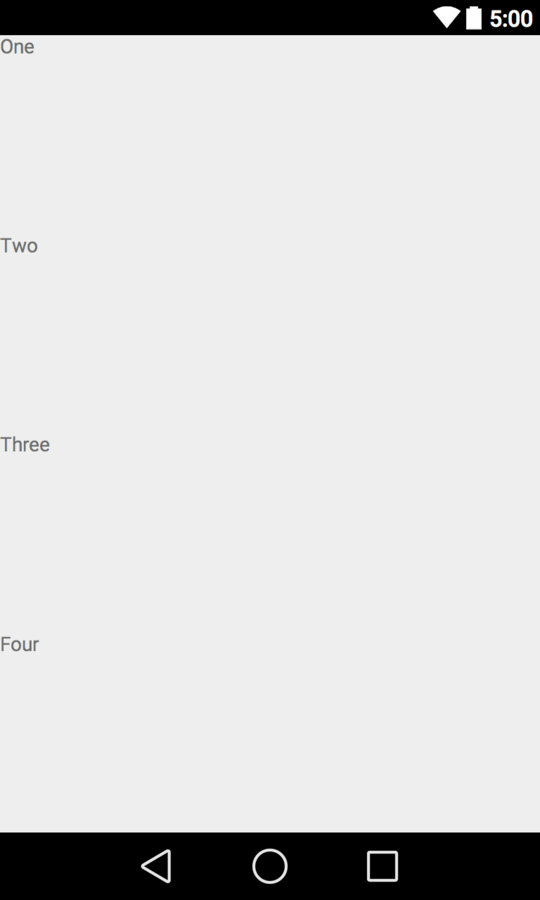
Layout Review
Turn this...
In to this...
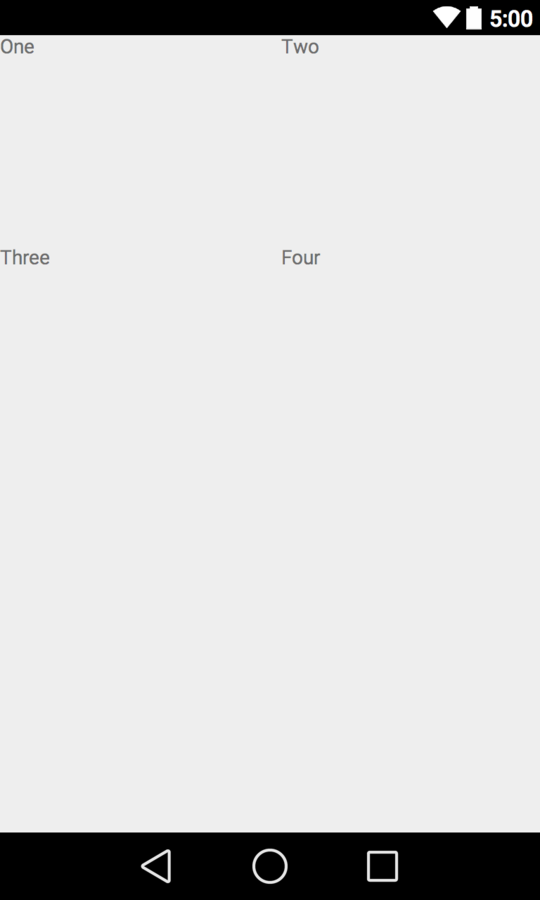
Linear Layouts
Turn this...
In to this...
Relative Layouts
Turn this...
In to this...
Relative Layouts Cont.
Handling Button Clicks
Lets make a simple app...
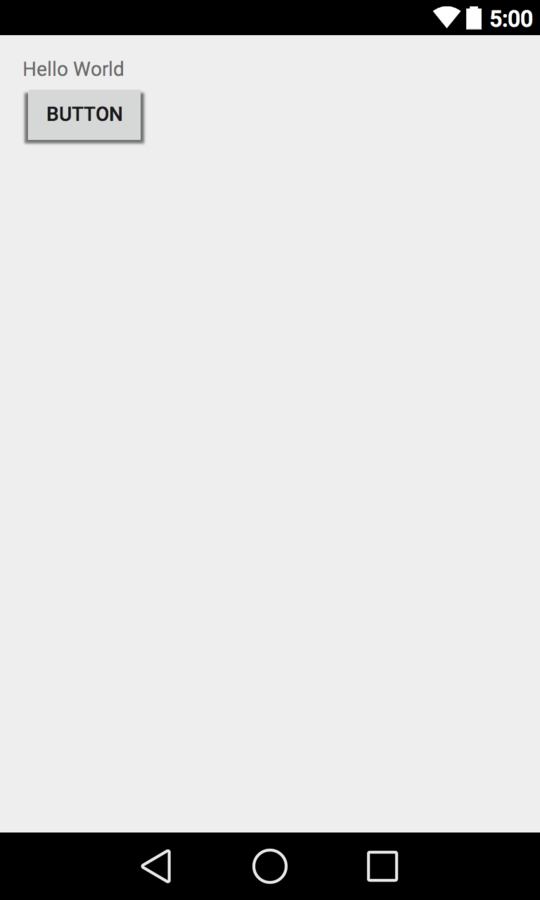
android:onClick="buttonClicked"

By adding an "onClick" handler to our UI we can now programmatically trigger a function whenever a use clicks a button
Updating UI Programmatically
- The id of our label is textView1.
- The method that we’d like to use is available from the Activity class and is called findViewById.
- The method will return a View object, which we can then cast to a TextView.
public void buttonClicked(View view) {

    Log.i("LOG","Button was clicked!");

    TextView output = (TextView) findViewById(R.id.textView1);
    output.setText("You Pressed the button!");

}
Common Controls
ImageButton
<ImageButton
        android:id="@+id/button1"
        android:layout_width="wrap_content"
        android:layout_height="wrap_content"
        android:layout_alignLeft="@id/textView1"
        android:layout_below="@id/textView1"
        android:src="@drawable/abc_ic_go_search_api_mtrl_alpha"
android:onClick="buttonClicked" />- An ImageButton is a Button which allows an image to be shown as well.
- You can’t show text; if you need to show a text and an image, you should use a regular button but make the size larger and use an image for the button’s background.
ImageView
 <ImageView
        android:layout_width="wrap_content"
        android:layout_height="wrap_content"
android:src="@drawable/ic_launcher" />- If an ImageButton shows an image on a button, the passive equivalent of it would be the ImageView, which just shows an Image.
EditText
 <TextView
        android:layout_width="wrap_content"
        android:layout_height="wrap_content"
        android:text="Name:"
        android:id="@+id/textView" />

    <EditText
        android:id="@+id/editText1"
        android:layout_width="300dp"
        android:layout_height="wrap_content"
        android:layout_toRightOf="@id/textView"
android:hint="Enter name here..." />- An EditText control allows the user to enter values.
- In the AVD, we can type in the values directly with the keyboard.
- The hint attribute provides a text hint of what the user should enter in the control.
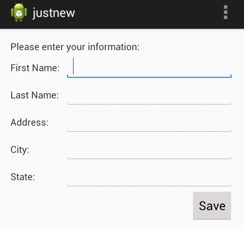
Challenge!
Setup Exercise 1 to collect a users information and print it to the screen when they hit the "Save" button
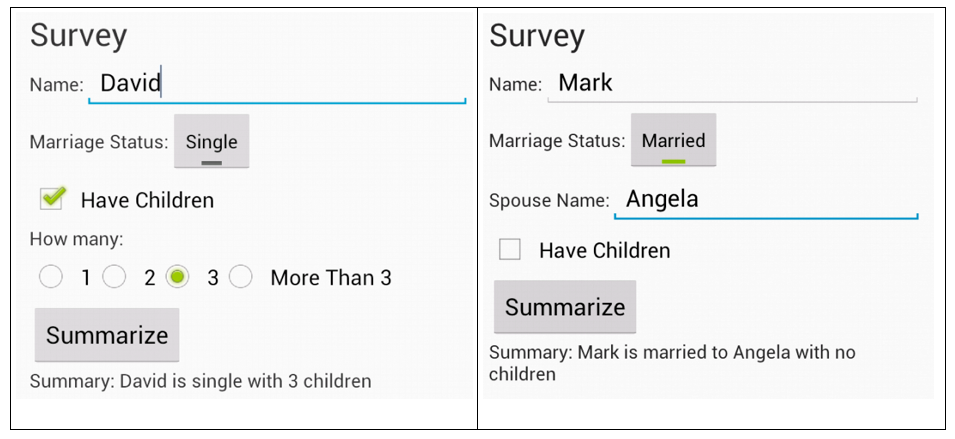
Checkbox
<CheckBox
        android:layout_width="wrap_content"
        android:layout_height="wrap_content"
        android:onClick="checkboxClicked"
        android:text="Check here"
        />
    public void checkboxClicked(View view) {
    	CheckBox cb = (CheckBox) view;

    	TextView tv = (TextView) findViewById(R.id.textView1);
    	tv.setText("Checkbox is " + (cb.isChecked() ? "checked" : "not checked"));
    }
ToggleButton
    <ToggleButton
        android:layout_width="wrap_content"
        android:layout_height="wrap_content"
        android:textOn="Yes"
        android:textOff="No"
        />
    public void toggleboxClicked(View view) {
    	ToggleButton tb = (ToggleButton) view;

        TextView tv = (TextView) findViewById(R.id.textView1);
        tv.setText("toggle is " + (tb.isChecked() ? "checked" : "not checked"));
}
RadioButton
    <TextView
        android:layout_width="wrap_content"
        android:layout_height="wrap_content"
        android:text="Which are better, Pirates or Ninjas?"
        />

    <RadioGroup
        android:id="@+id/radioGroup1"
        android:layout_width="wrap_content"
        android:layout_height="wrap_content"
        android:orientation="horizontal"
        >
        <RadioButton android:id="@+id/radio_pirates"
            android:layout_width="wrap_content"
            android:layout_height="wrap_content"
            android:text="@string/pirates"
            android:onClick="favClicked"/>
        <RadioButton android:id="@+id/radio_ninjas"
            android:layout_width="wrap_content"
            android:layout_height="wrap_content"
            android:text="@string/ninjas"
            android:onClick="favClicked"/>
    </RadioGroup>
RadioButton Continued
    public void favClicked(View view) {
        // Is the button now checked?
        boolean checked = ((RadioButton) view).isChecked();

        // Check which radio button was clicked
        switch (view.getId()) {
            case R.id.radio_pirates:
                if (checked)
                    Log.i("TEST", "Pirates are the best");
                    break;
            case R.id.radio_ninjas:
                if (checked)
                    Log.i("TEST", "Ninjas are the best");
                break;
        }
    }
Step 1
Build the UI in XML
Step 2
Wire up your view in the Activity
Step 3
Add logic to handle use cases
AND100 Day 3
By Alex Rodriguez


