Android 200
Android Development - Intermediate
Android 100 Review
Question 1
What is an Activity?
Answer
An activity is a single, focused thing that the user can do. Almost all activities interact with the user, so the Activity class takes care of creating a window for you in which you can place your UI with setContentView(View).
Question 2
What is the "res" folder and all of its subdirectories used for?
Answer
-
drawable - contains images and UI elements that can we drawn onto the screen
-
layout - contains our main UI views
-
menu - contains all menu UI views
-
mipmap - contains our application launcher icons
-
values: dimens - lets us specify global spacial dimensions for application UI
-
values: strings - lets us specify global string reources that can be used all across our applicaiton
-
values: styles - lets us tweak the default android UI theme and styles for a hyper custom application UI
Question 3
What is happening in this code?
public void buttonClicked(View view) {

    TextView output = (TextView) findViewById(R.id.myOutputTextview);
    output.setText("You Pressed the button!");

}
Answer
When the "buttonClicked" method is called, we find the view object in our UI that has the id of "myOutputTextView" and set its "text" property equal to "You Pressed the button!"
public void buttonClicked(View view) {

    TextView output = (TextView) findViewById(R.id.myOutputTextview);
    output.setText("You Pressed the button!");

}
Toasts
Generic Toasts
public void buttonClicked(View view) {
    Toast t = Toast.makeText(this, "Notification Text Here", Toast.LENGTH_LONG);
    t.show();
}
- A toast provides simple feedback about an operation in a small popup. It only fills the amount of space required for the message and the current activity remains visible and interactive.

Custom Toasts
LayoutInflater inflater = getLayoutInflater();

View layout = inflater.inflate(R.layout.toast_layout,
    (ViewGroup) findViewById(R.id.toast_layout_root));

TextView text = (TextView) layout.findViewById(R.id.text);
text.setText(summary);

Toast toast = new Toast(getApplicationContext());
toast.setGravity(Gravity.CENTER_VERTICAL, 0, 0);
toast.setDuration(Toast.LENGTH_LONG);
toast.setView(layout);
toast.show();
Implement standard and custom Toasts
AlertDialogs
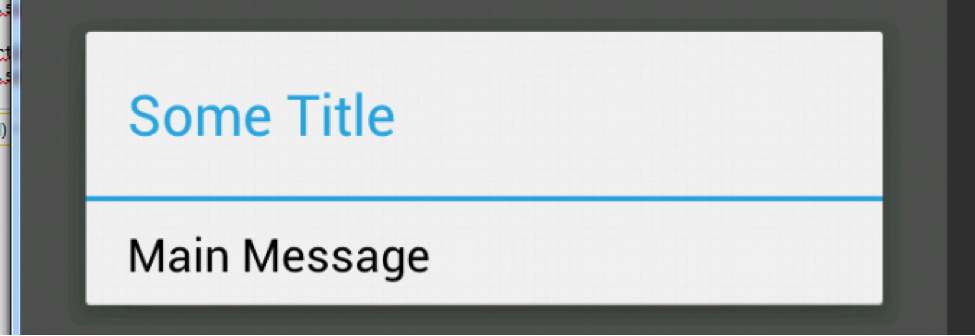
AlertDialog
    public void buttonClicked(View view) {
        AlertDialog.Builder adb = new AlertDialog.Builder(this);
        adb.setTitle("Some Title");
        adb.setMessage("Main Message");

        AlertDialog dlg = adb.create();
        dlg.show();
    }
AlertDialog Buttons
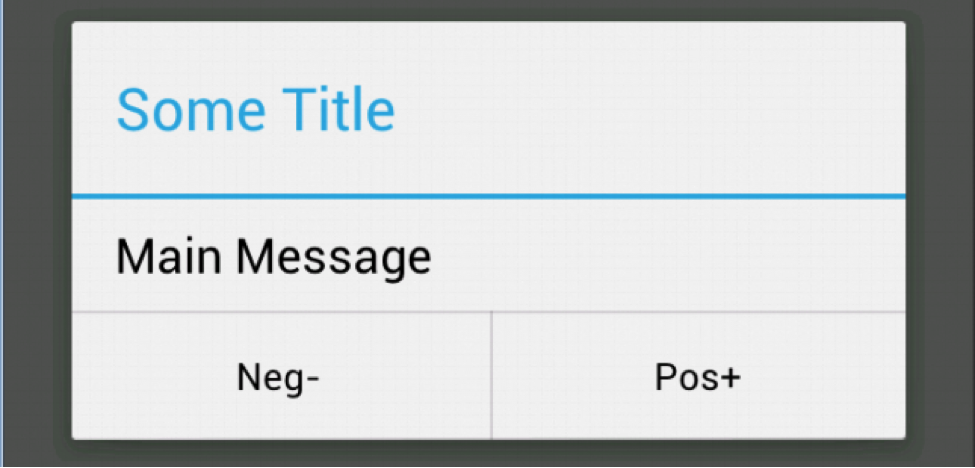
public void buttonClicked(View view) {

        AlertDialog.Builder adb = new AlertDialog.Builder(this);
        adb.setTitle("Some Title");
        adb.setMessage("Main Message");

        OnClickListener ocl = new OnClickListener() {

            @Override
            public void onClick(DialogInterface dialog, int which) {

                TextView tv = (TextView) findViewById(R.id.textViewTop);

                if (which == AlertDialog.BUTTON_POSITIVE)
                    tv.setText("Positive button clicked");
                else
                    tv.setText("Clicked was the Negative button");
            }

        };

        adb.setPositiveButton("Pos+", ocl);
        adb.setNegativeButton("Neg-", ocl);

        AlertDialog dlg = adb.create();
        dlg.show();

    }
AlertDialog w/ Selections
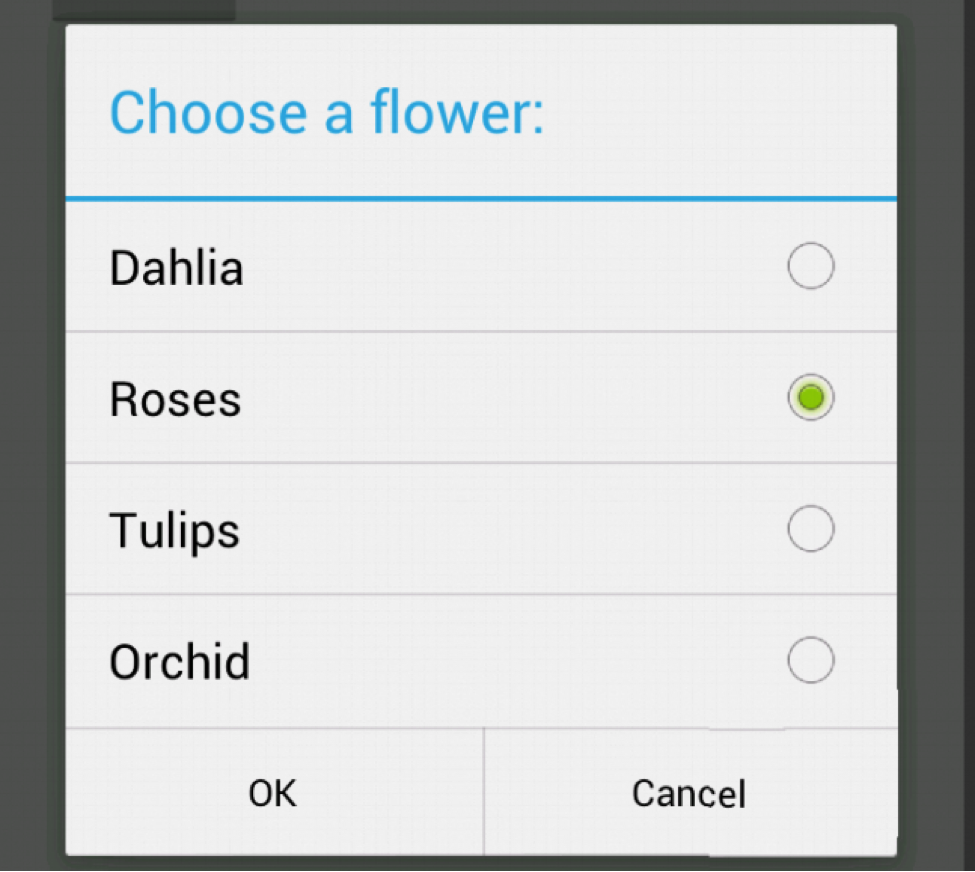
public void buttonClicked(View view) {

        AlertDialog.Builder adb = new AlertDialog.Builder(this);
        adb.setTitle("Choose a flower:");

        OnClickListener ocl = new OnClickListener() {
            @Override
            public void onClick(DialogInterface dialog, int which) {
                TextView tv = (TextView) findViewById(R.id.textViewTop);
                tv.setText(String.format("which is %d", which));
            }
        };

        String[] flowers = { "Dahlia", "Roses", "Tulips", "Orchid" };
        adb.setSingleChoiceItems(flowers, -1, ocl);

        adb.setPositiveButton("Cancel", ocl);
        adb.setNegativeButton("OK", ocl);

        AlertDialog dlg = adb.create();
        dlg.show();
    }
AlertDialog w/ Multiple Selections
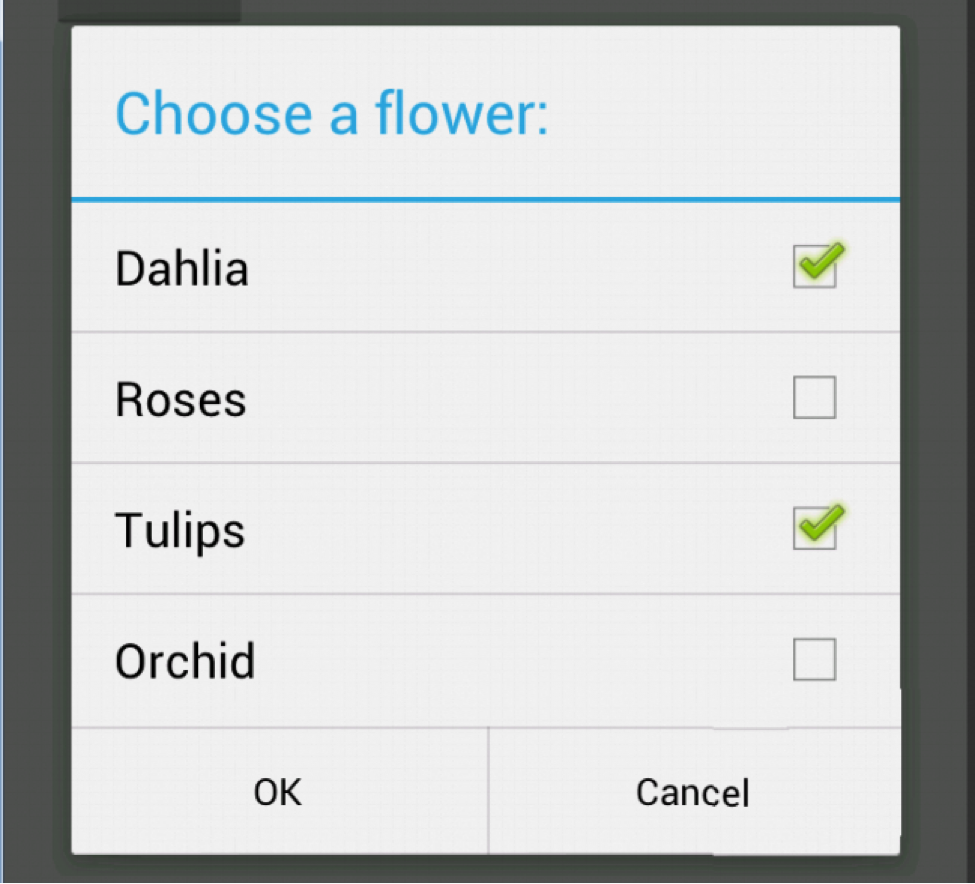
public void buttonClicked(View view) {

        AlertDialog.Builder adb = new AlertDialog.Builder(this);
        adb.setTitle("Choose a flower:");

        OnMultiChoiceClickListener omccl = new OnMultiChoiceClickListener() {

            @Override
            public void onClick(DialogInterface dialog, int which, boolean isChecked) {
                TextView tv = (TextView) findViewById(R.id.textViewTop);
                tv.setText(String.format("which is %d and isChecked is %s", which, isChecked ? "True" : "False"));
            }
        };

        OnClickListener ocl = new OnClickListener() {
            @Override
            public void onClick(DialogInterface dialog, int which) {
                TextView tv = (TextView) findViewById(R.id.textViewTop);
                if (which == AlertDialog.BUTTON_POSITIVE)
                    tv.setText("Positive button clicked");
                else
                    tv.setText("Clicked was the Negative button");
            }
        };

        String[] flowers = { "Dahlia", "Roses", "Tulips", "Orchid" };
        adb.setMultiChoiceItems(flowers, null, omccl);

        adb.setPositiveButton("Cancel", ocl);
        adb.setNegativeButton("OK", ocl);

        AlertDialog dlg = adb.create();
        dlg.show();
    }
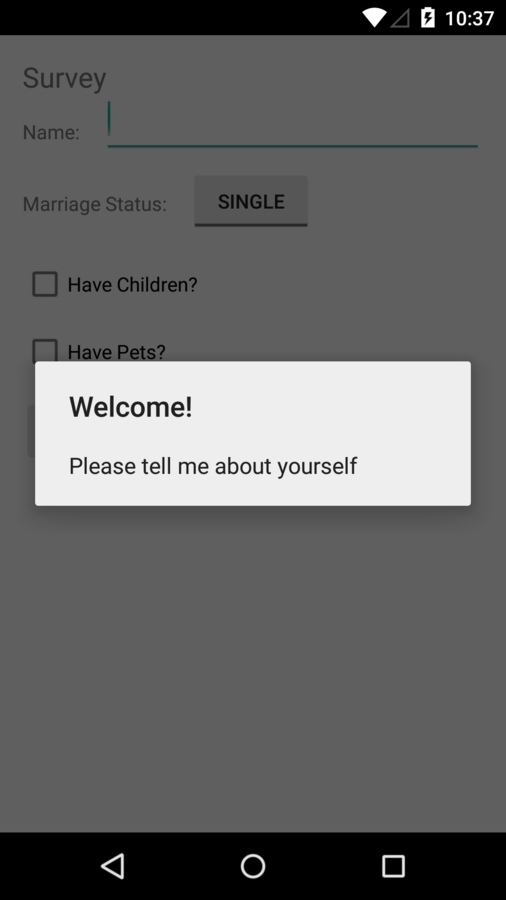
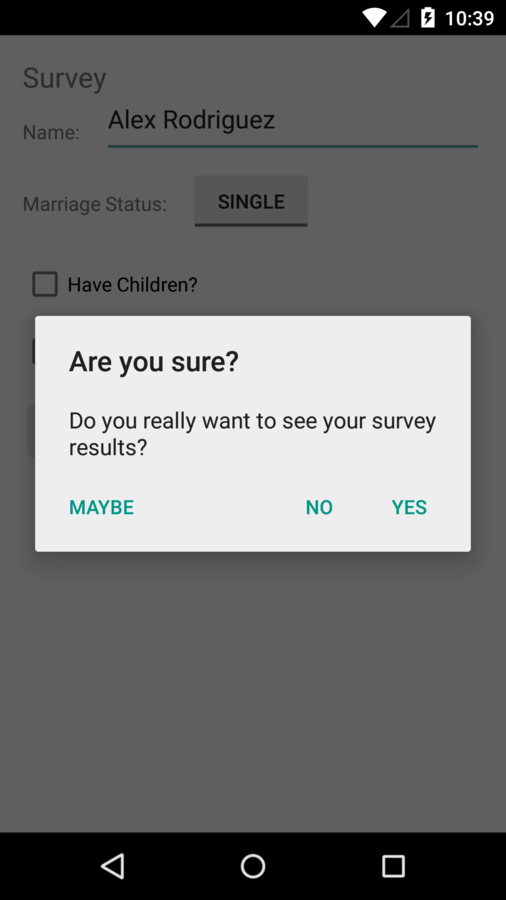
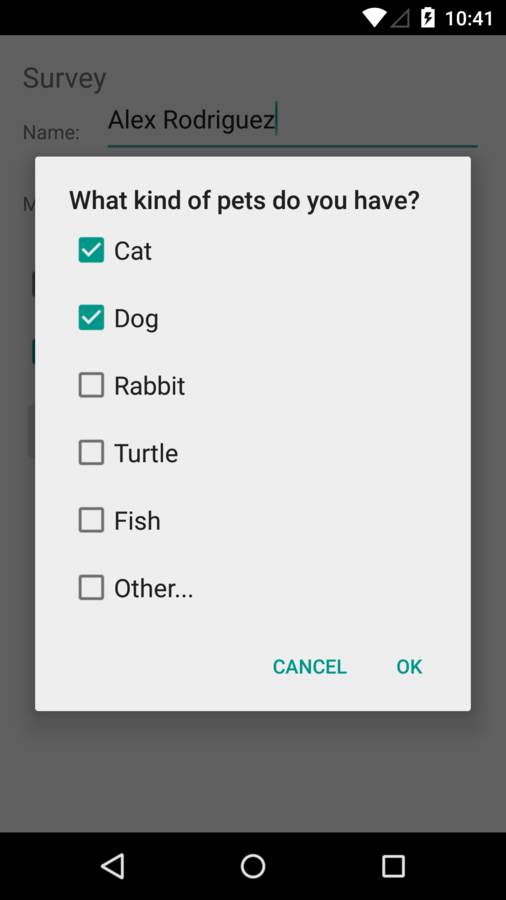
Implementing AlertDialogs
Custom Welcome Message
"Are you sure?" Confirmation
Have Pets?

Saving User Data
SharedPreferences
    public void buttonSaveClicked(View view) {
        SharedPreferences sp = getPreferences(MODE_PRIVATE);
        Editor ed = sp.edit();

        ed.putBoolean("IsCustomApp", true);
        ed.putString("SomeInfo", "Testing");
        ed.apply();
    }
    public void buttonLoadClicked(View view) {
        SharedPreferences sp = getPreferences(MODE_PRIVATE);
        boolean customApp = sp.getBoolean("IsCustomApp", false);
        String info = sp.getString("SomeInfo", "");

        Log.i("Output", info);
    }
- In the above code, we see that we’re calling getPreferences method that will return a SharedPreferences object. This SharedPreferences object essentially behaves like a dictionary, providing developers a way to put in key-value pair information. As depicted in the code, to actually put values in (or edit values), you have to call its edit method which will return an SharedPreferences.Editor object which allows registering the values and saving it
SharedPreferences Cont.
- Loading the values from this SharedPreferences object is easy as well – just call the various get* methods to retrieve the values.
- One advantage to this approach is this, the values are automatically saved whenever we call apply().
- However, keep in mind the getPreferences method that we call is part of the Activity class – this means that the preferences are actually saved on a per-activity basis. If you have a multi-activity application, the values won’t be shared across activities.
- To have a SP values that are saved and accessible against multiple activities, we would call the getSharedPreferences method.
SharedPreferences Cont.
    public void buttonSaveClicked(View view) {
        SharedPreferences sp = getSharedPreferences("AppWideSP", MODE_PRIVATE);
        Editor ed = sp.edit();

        ed.putBoolean("IsCustomApp", true);
        ed.putString("SomeInfo", "Testing");

        ed.apply();
    }

    public void buttonLoadClicked(View view) {
        SharedPreferences sp = getSharedPreferences("AppWideSP", MODE_PRIVATE);
        boolean customApp = sp.getBoolean("IsCustomApp", false);
        String info = sp.getString("SomeInfo", "");

       Log.i("Output", info);
    }
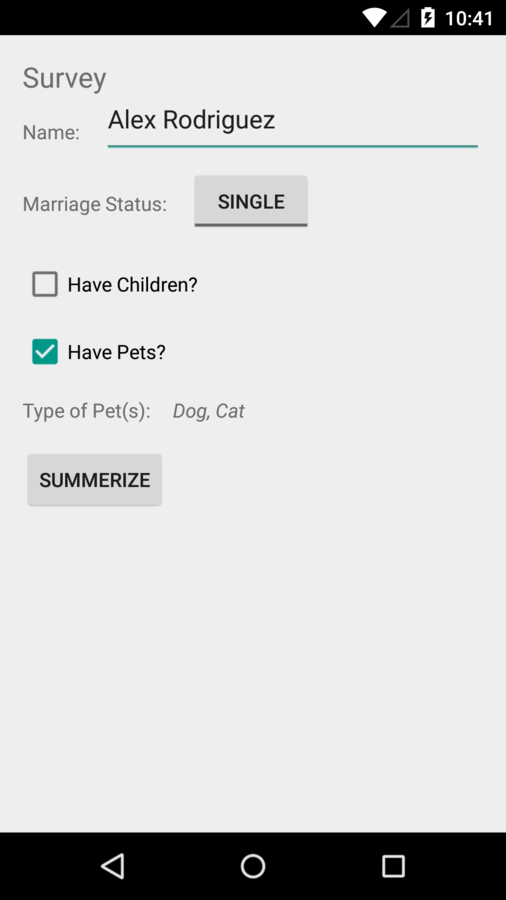
Implementing Shared Preferences
Previous Survey Results
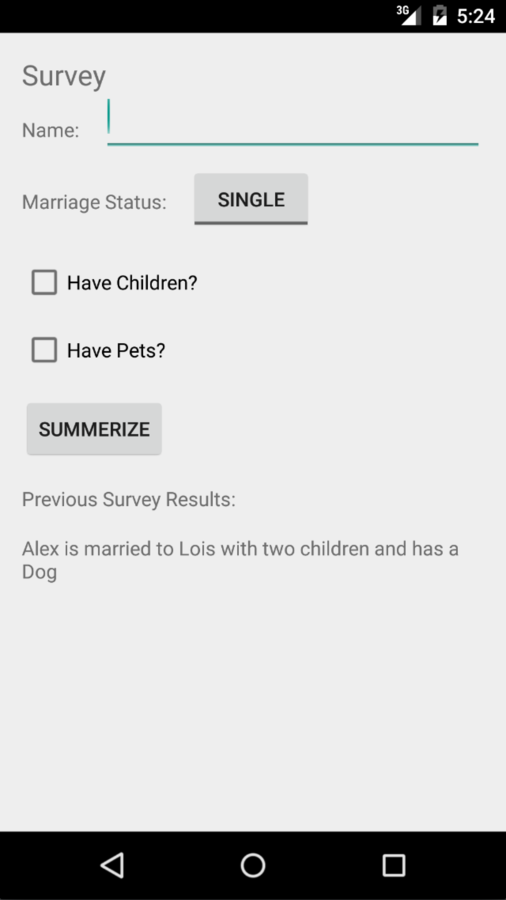
- Add a "Previous Survey Results" lable to the UI.
- Add a TextView to show the previous survey results.
- Store the users summary string to shared preferences whenever the summarize button is clicked.
- Load the shared preferences summary string everytime the app starts.
Serialization and Storing Objects
Serialization
- The process to take an object and its constituents and convert it into a format that can easily be stored (which usually ends up being strings or byte arrays).
- In Java, to do serialization all you have to do is have your object implement the Serializable interface.
- Once the object implements that, we just use the ObjectOutputStream class to save the object and the OIS class to read the content to get the object back.
import java.io.Serializable;

public class Employee implements Serializable {

    private String _name;
    private int _age;
    private String _cityOfBirth;

    public String getName() {
        return _name;
    }
    public void setName(String name) {
        this._name = name;
    }
    public int getAge() {
        return _age;
    }
    public void setAge(int age) {
        this._age = age;
    }
    public String getCityOfBirth() {
        return _cityOfBirth;
    }
    public void setCityOfBirth(String cityOfBirth) {
        this._cityOfBirth = cityOfBirth;
    }
}
    public void saveButtonClicked(View view) {

        Employee emp = new Employee();
        emp.setName("John Doe");
        emp.setAge(27);
        emp.setCityOfBirth("St. Louis");

        try {
            FileOutputStream fos = openFileOutput("Employee.bin", MODE_PRIVATE);
            ObjectOutputStream oos = new ObjectOutputStream(fos);
            oos.writeObject(emp);
            oos.close();
            fos.close();
        } catch (Exception e) {
            e.printStackTrace();
        }
    }
Saving a Serialized Object
    public void loadButtonClicked(View view) {
        Employee emp;

        try {
            FileInputStream fis = openFileInput("Employee.bin");
            ObjectInputStream ois = new ObjectInputStream(fis);
            emp = (Employee)ois.readObject();
            ois.close();
            fis.close();
        } catch (Exception e) {
            e.printStackTrace();
        }
    }
Loading a Serialized Object
Serializing Objects
Prefill Form
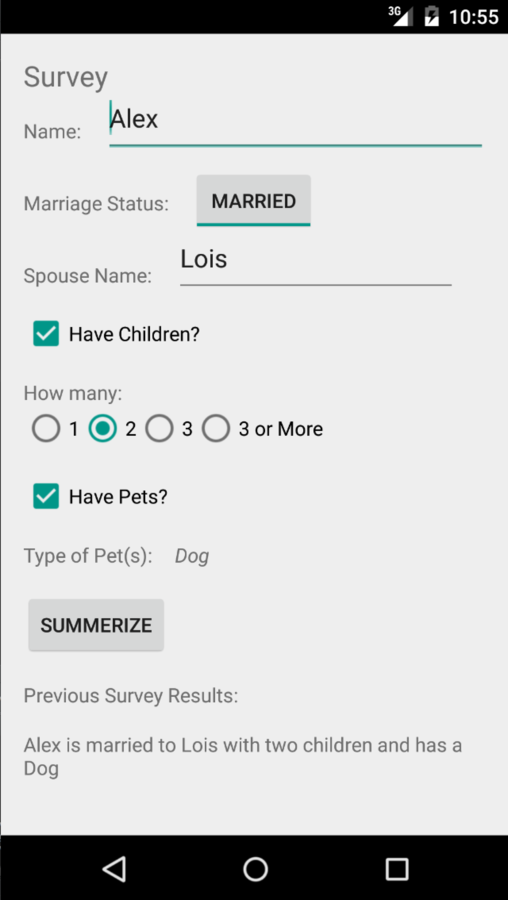
- Create a User model object that has a name, spouseName, numberOfKids and petType properties.
- Modify the "saveUserData" function to store the summarized form data into the user model and store it in a serialized format
- Add logic so that when the app opens the stored serialized object data is used to prefill the form based on what the last user submitted
Intents
What is an Intent?
    public void goToNewActivity(View view) {

        Intent intent = new Intent(this, SecondaryActivity.class);
        startActivity(intent);

    }
- An Intent provides a facility for performing late runtime binding between the code in different applications.
- Its most significant use is in the launching of activities, where it can be thought of as the glue between activities.
- It is basically a passive data structure holding an abstract description of an action to be performed.
Using Intents
- An Intent is a messaging object you can use to request an action from another app or app component.
- Although intents facilitate communication between components in several ways, there are three fundamental use-cases:
- To start an activity
- To start a service
- To deliver a broadcast:
Using Intents to Start an Activity
- An Activity represents a single screen in an app. You can start a new instance of an Activity by passing an Intent to startActivity().
- The Intent describes the activity to start and carries any necessary data.
- If you want to receive a result from the activity when it finishes, call startActivityForResult(). Your activity receives the result as a separate Intent object in your activity's onActivityResult() callback.
Using Intents to Start a Service
- A Service is a component that performs operations in the background without a user interface.
- You can start a service to perform a one-time operation (such as download a file) by passing an Intent to startService().
- The Intent describes the service to start and carries any necessary data.
- If the service is designed with a client-server interface, you can bind to the service from another component by passing an Intent to bindService().
Using Intents to Start a Broadcast
- A broadcast is a message that any app can receive.
- The system delivers various broadcasts for system events, such as when the system boots up or the device starts charging.
- You can deliver a broadcast to other apps by passing an Intent to sendBroadcast(), sendOrderedBroadcast(), or sendStickyBroadcast().
There are two types of intents...
Explicit Intents
- Specify the component to start by name (the fully-qualified class name).
- You'll typically use an explicit intent to start a component in your own app, because you know the class name of the activity or service you want to start.
- For example, start a new activity in response to a user action or start a service to download a file in the background.
- When you create an explicit intent to start an activity or service, the system immediately starts the app component specified in the Intent object.
Implicit Intents
-
Do not name a specific component, but instead declare a general action to perform, which allows a component from another app to handle it.
- For example, if you want to show the user a location on a map, you can use an implicit intent to request that another capable app show a specified location on a map.
-
When you create an implicit intent, the Android system finds the appropriate component to start by comparing the contents of the intent to the intent filters declared in the manifest file of other apps on the device.
- If the intent matches an intent filter, the system starts that component and delivers it the Intent object.
- If multiple intent filters are compatible, the system displays a dialog so the user can pick which app to use.
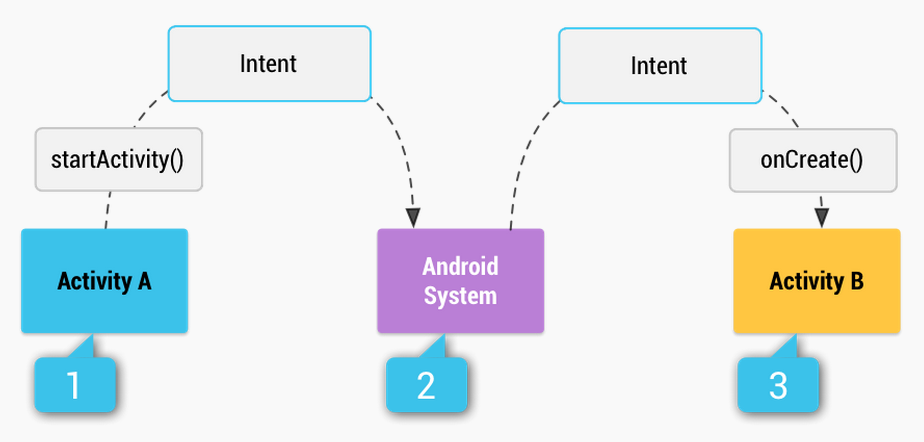
Illustration of how an implicit intent is delivered through the system to start another activity: [1] Activity A creates an Intent with an action description and passes it to startActivity(). [2] The Android System searches all apps for an intent filter that matches the intent. When a match is found, [3] the system starts the matching activity (Activity B) by invoking its onCreate() method and passing it the Intent.
Implementing Intents
Results Activity Part 1

- Add a new ResultsActivity class to your app.
- Update your Survey Activity to call an explicit intent and pass the "summary" string to ResultsActivty.
- When ResultActivity loads, receive the intent and display the "summary" string
Results Activity Part 2
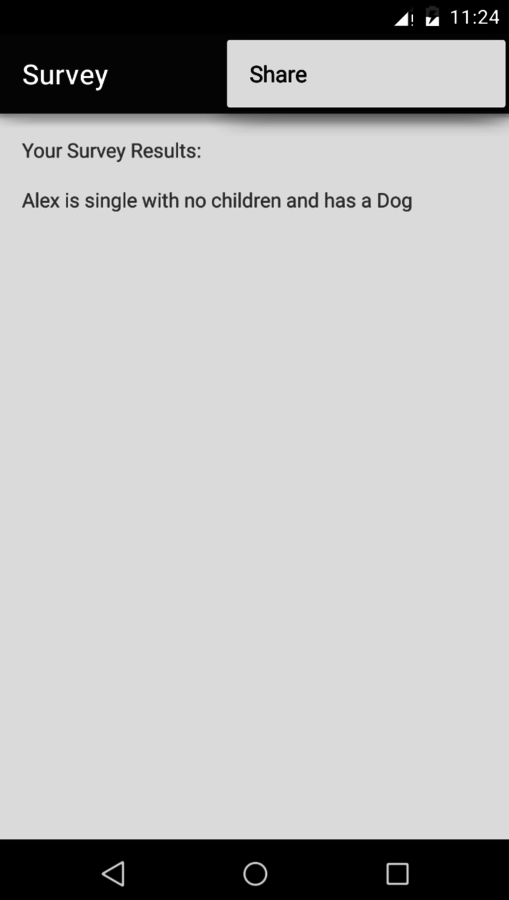
- Add a new menu_results.xml to your res/menu folder.
- Add a menu item with the id "menu_item_share" to the menu.
- When ResultActivity loads, inflate the menu and setup a ShareActionProvider
- When the "Share" menu option is selected start an implicit ShareIntent that allows the user to share their summary text in another app
Android 200
By Alex Rodriguez


